TR-01 DIY Rotary Engine Compression Tester
by TwistedRotors in Circuits > Tools
24058 Views, 36 Favorites, 0 Comments
TR-01 DIY Rotary Engine Compression Tester
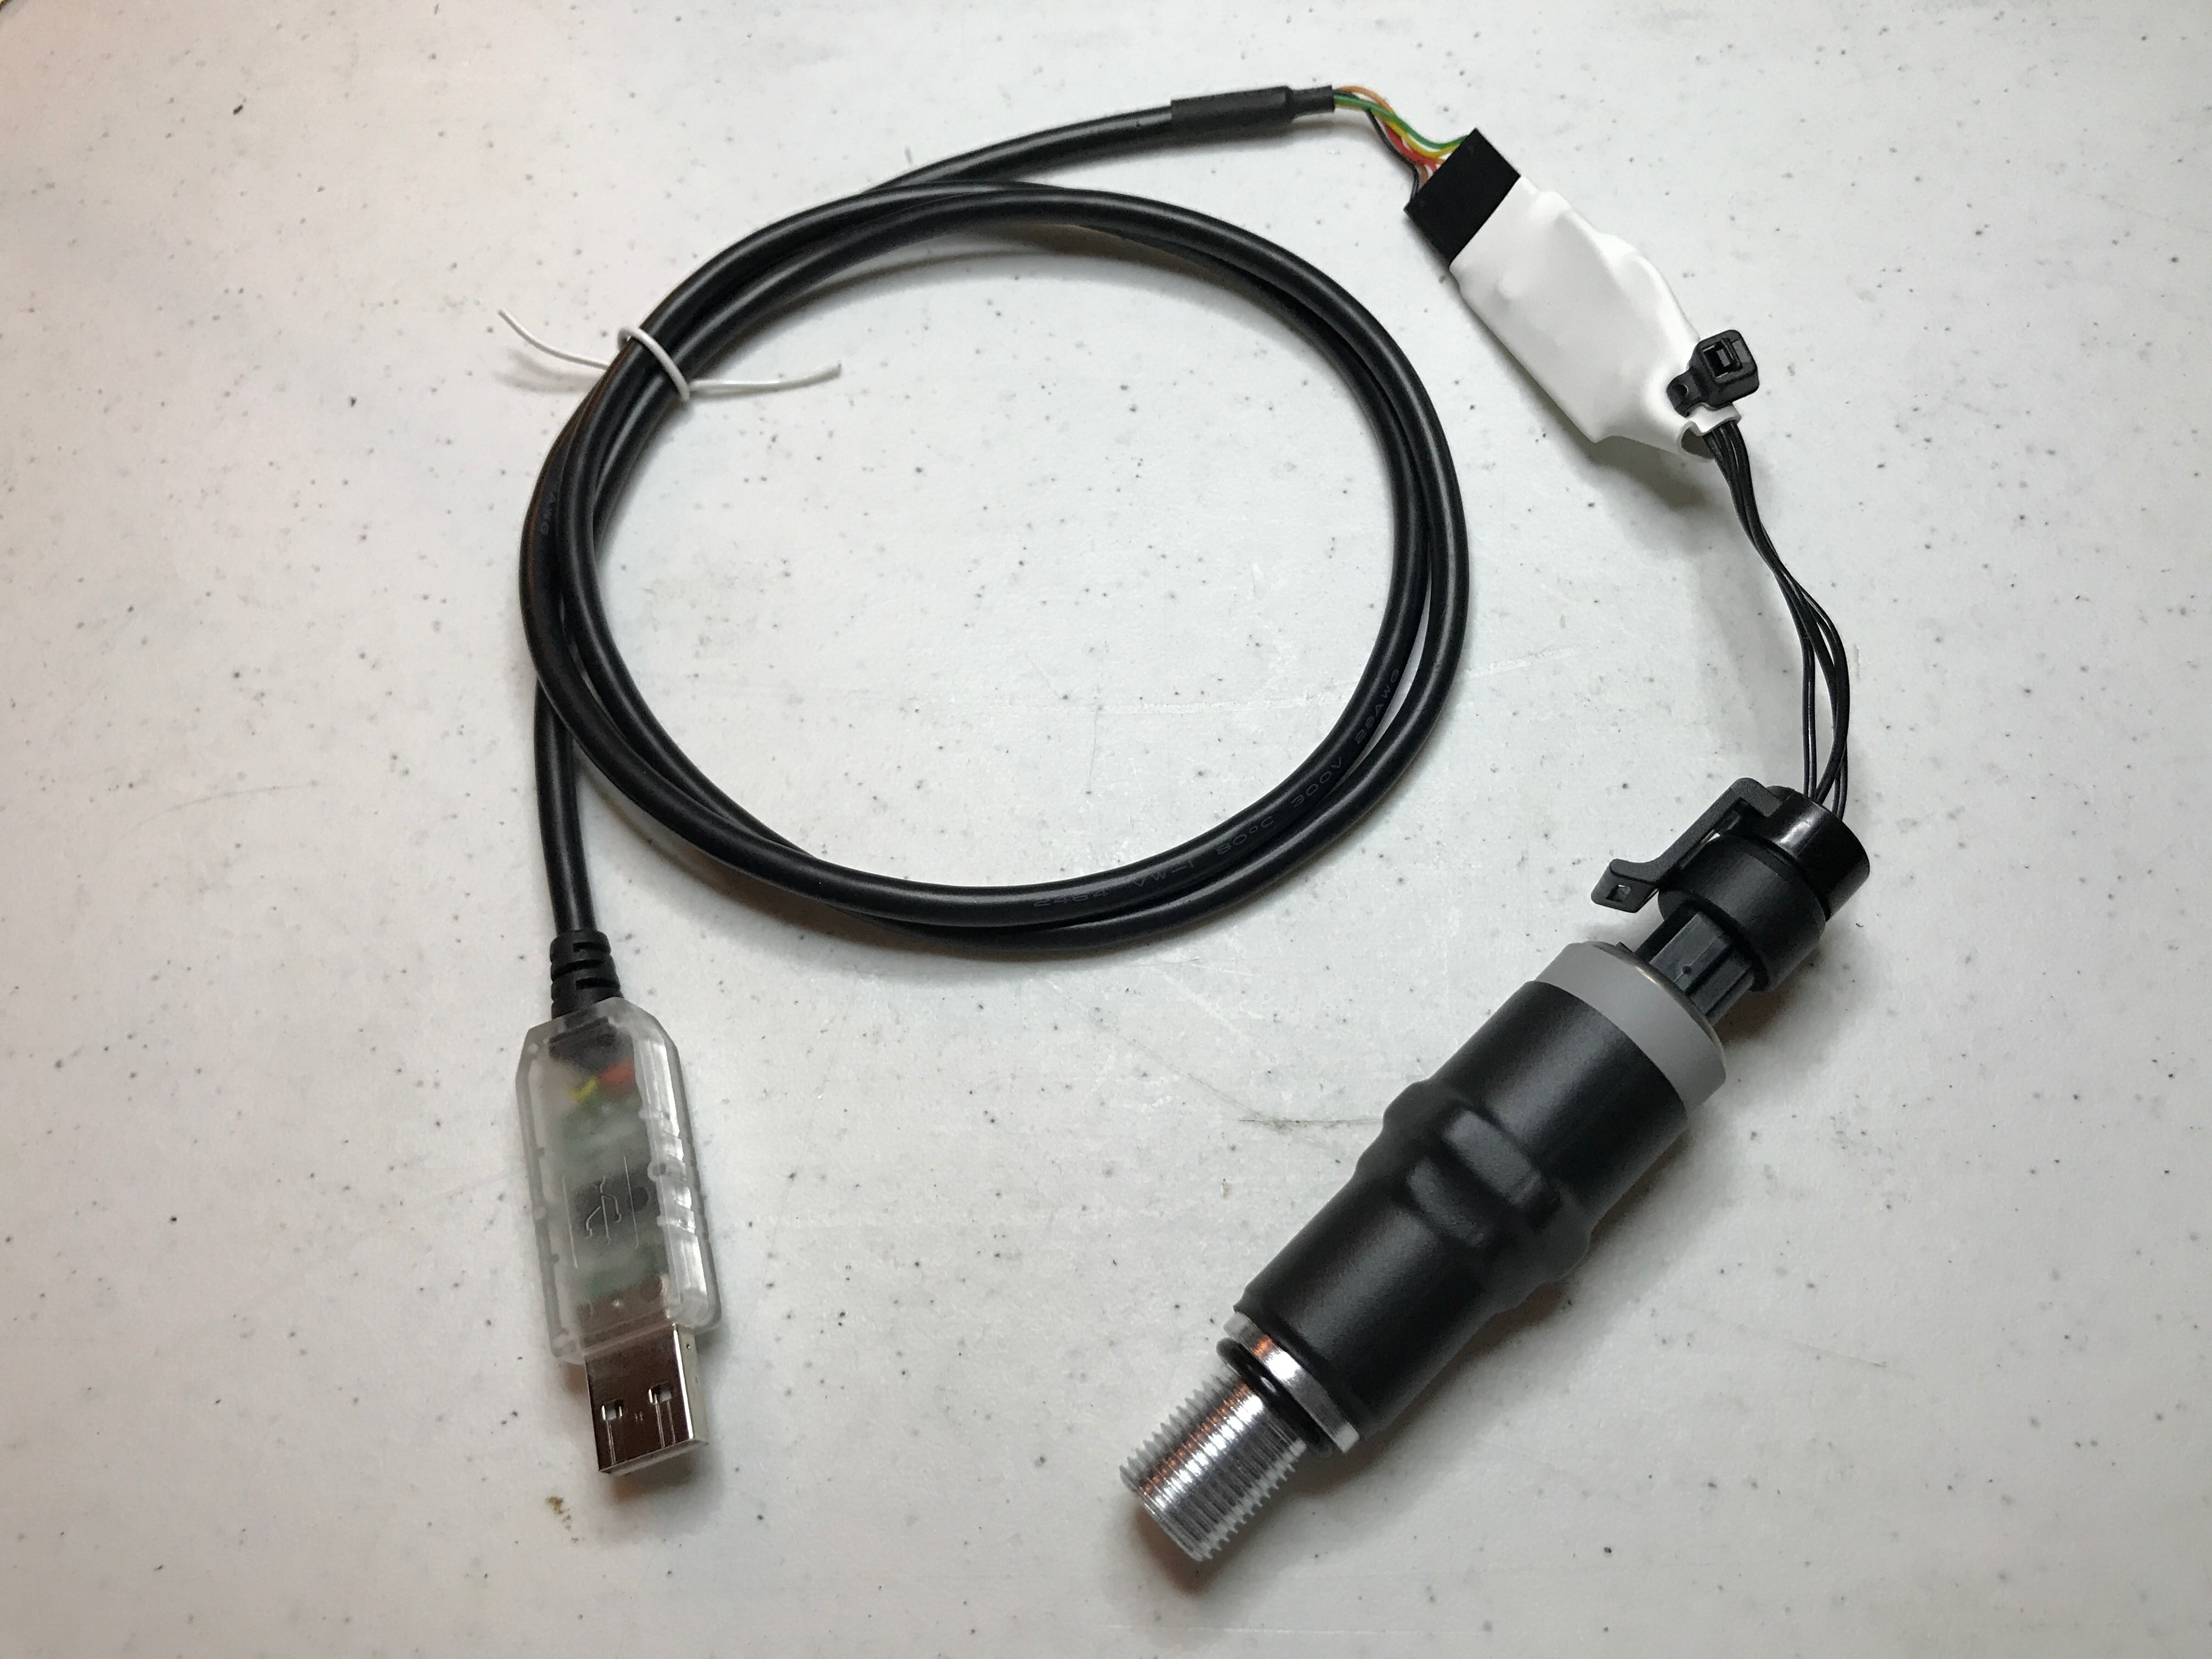
Starting in 2009, the original TR-01 v1.0, v2.0 and v2.0 Baro from TwistedRotors set the standard for hand-held, digital, rotary engine compression testers. And now you can build your own!
For 2017, in honor of the 50th Anniversary of Mazdas Rotary Engine and 20th year of SevenStock, I am releasing a DIY version of the TR-01. It's based on the massively popular Arduino line of micro-controller boards and super easy to build. There is also a broad price range of supported pressure transducers so you can make this tester as affordable as you like.
To program your tester you'll be using the Arduino IDE. I'm providing the code here completely free of any licensing or charge. Enjoy! Feel free to add features and modify it in any way you'd like. The only thing I ask is that you share your code and ideas with the community.
Tools
- Soldering iron
- Solder
- Wrenches
- RTV
- Teflon pipe tape
- Computer with Arduino IDE installed (Arduino - Software)
Parts
Here is a list of the parts you will need. These are my personal recommendations but I also list more affordable options as well. You do not have to use the links I provide, you may purchase these items from anywhere.
Arduino
- Recommended:
- Cheap:
Pressure Transducer (5v supply, 0.5v-4.5v -> 0-200psi scale) and Spark Plug Adapter
- Recommended:
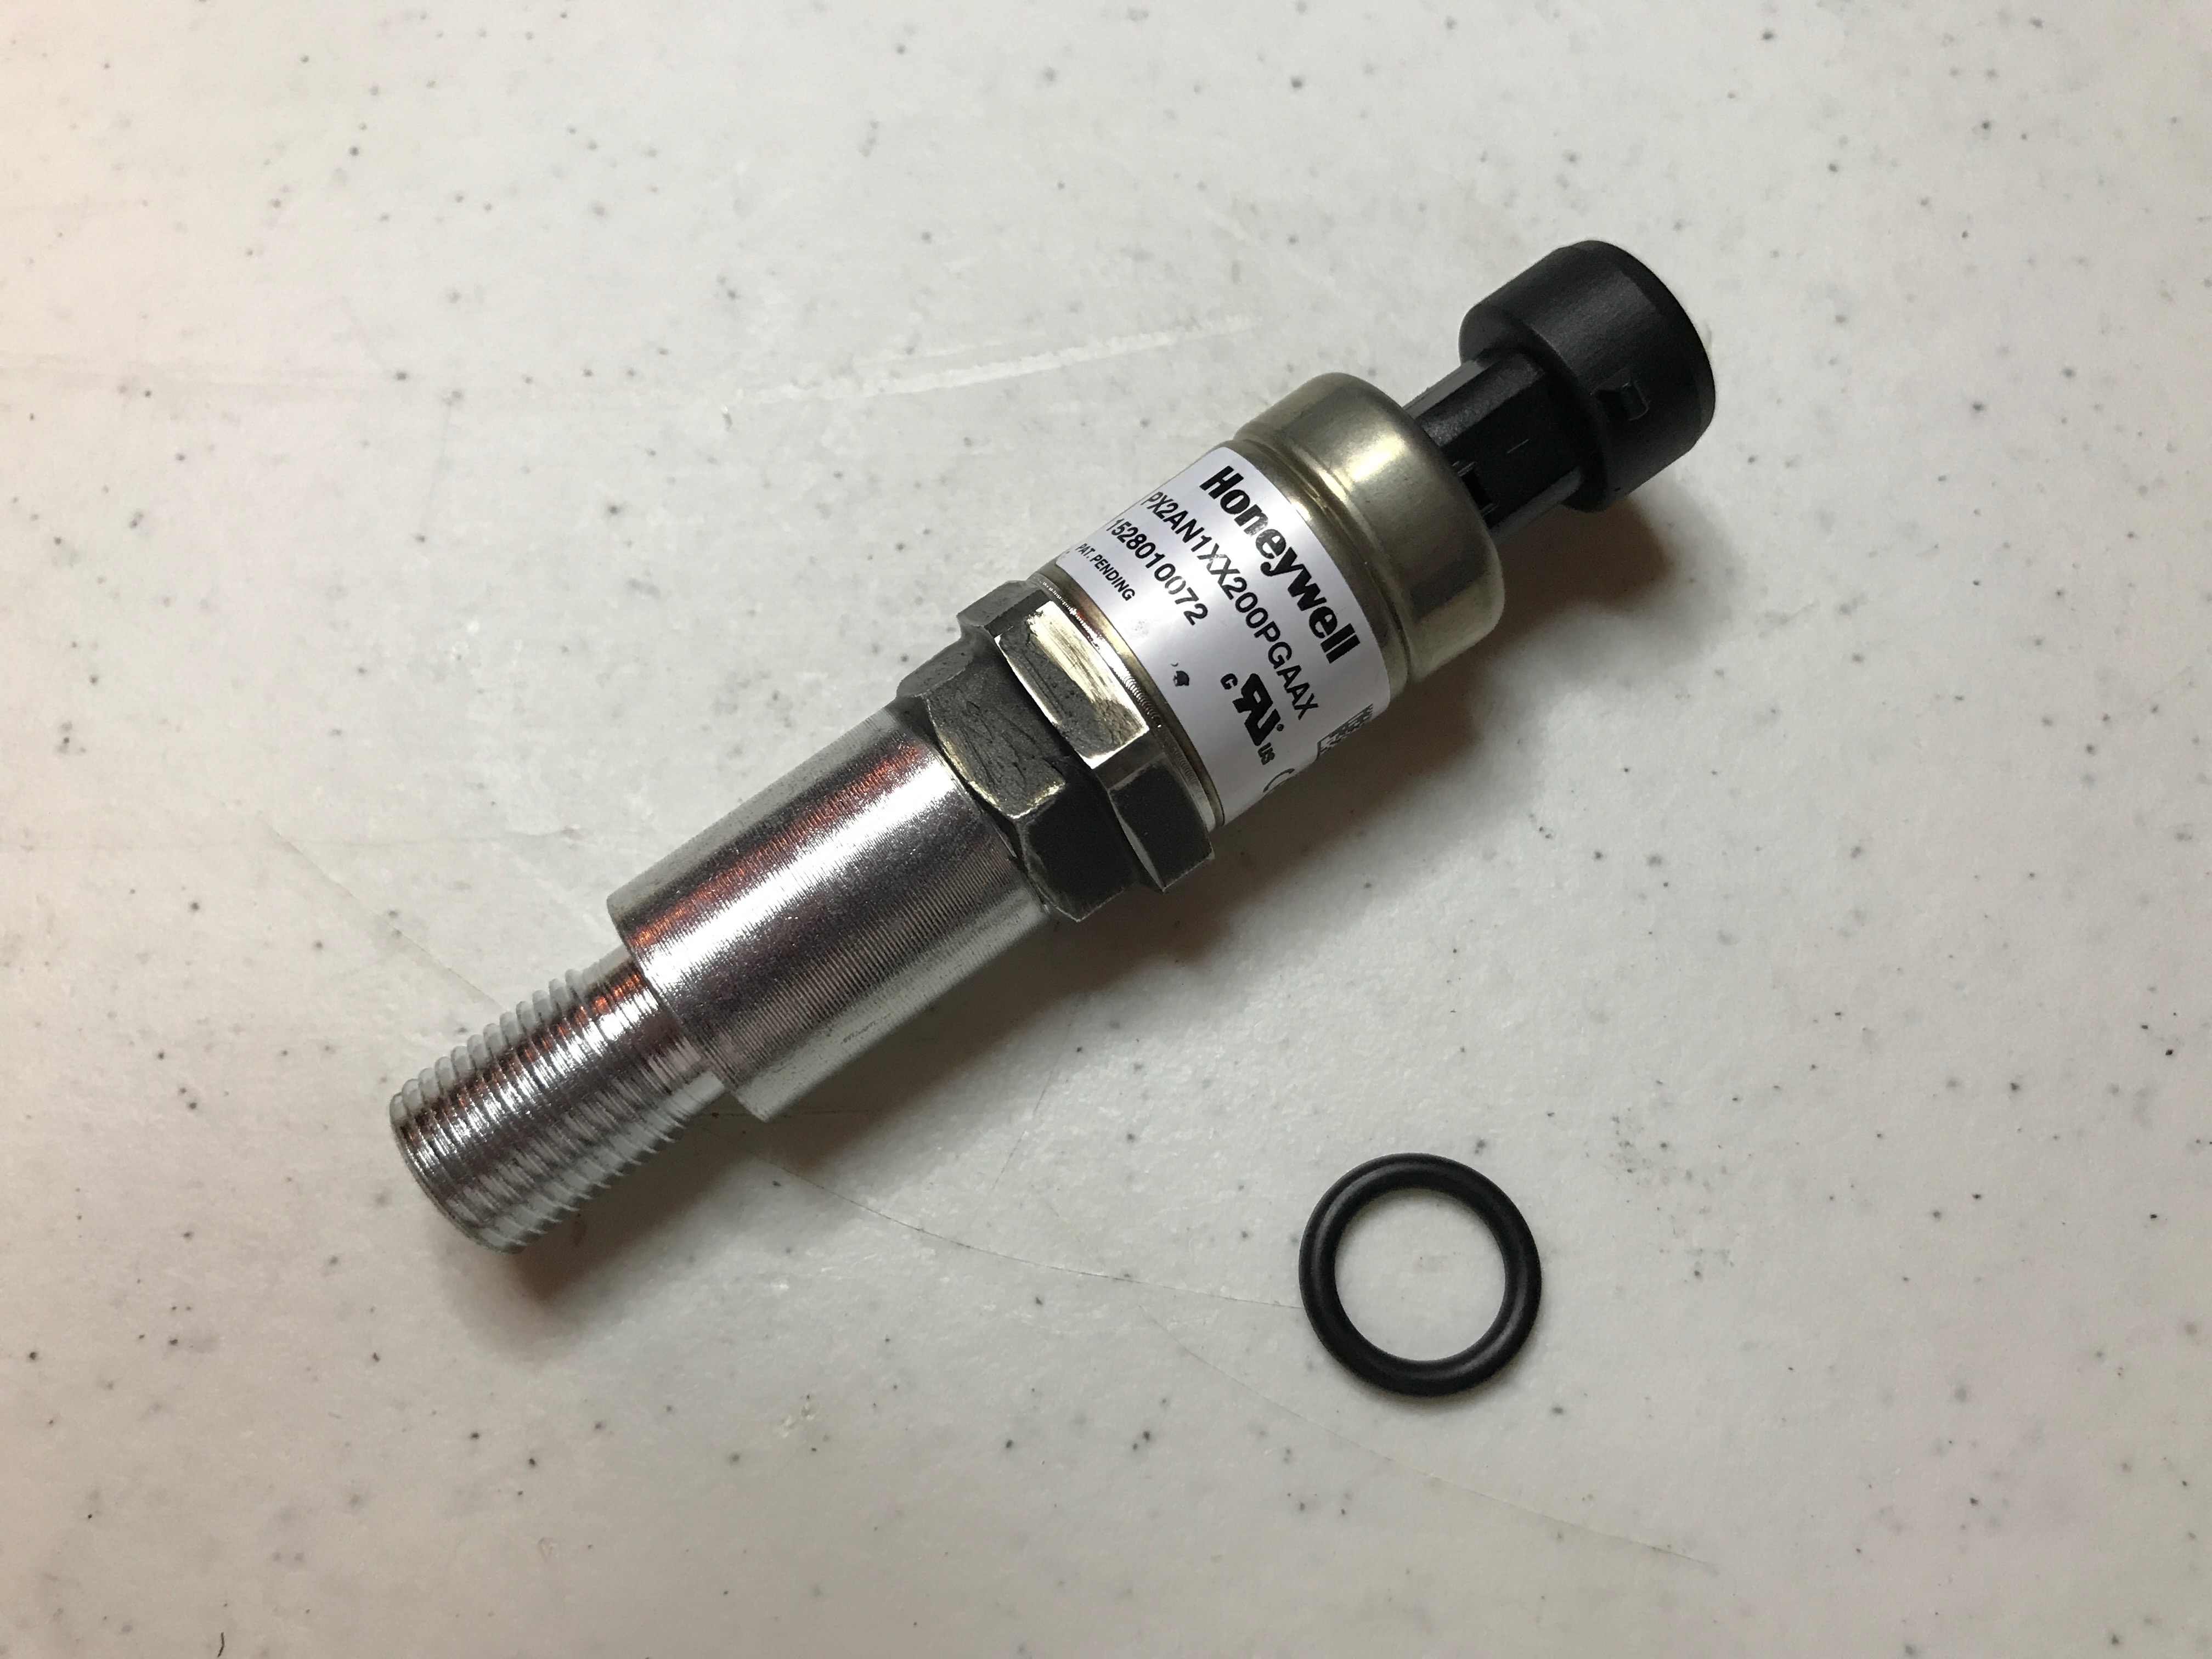
- Honeywell PX2 Series Sensor - Mouser
- Connector Pigtail - Ballenger Motorsports
- Spark Plug Non-fouler 14mm Gasket Seat Long Reach (Dorman HELP! Part Number 42004) - Amazon
- O-ring 2.4mm Wide, 11.3mm ID, 16.1mm OD - McMaster-Carr
- Cheap:
- Sensor and Connector Pigtail - Ebay
- 1/4” NPT Male to 1/8” NPT Female Adapter - Amazon
- Spark Plug Non-fouler 14mm Gasket Seat (Dorman HELP! Part Number 42000) - Amazon
- O-Ring Assortment - Harbor Freight
Build It!
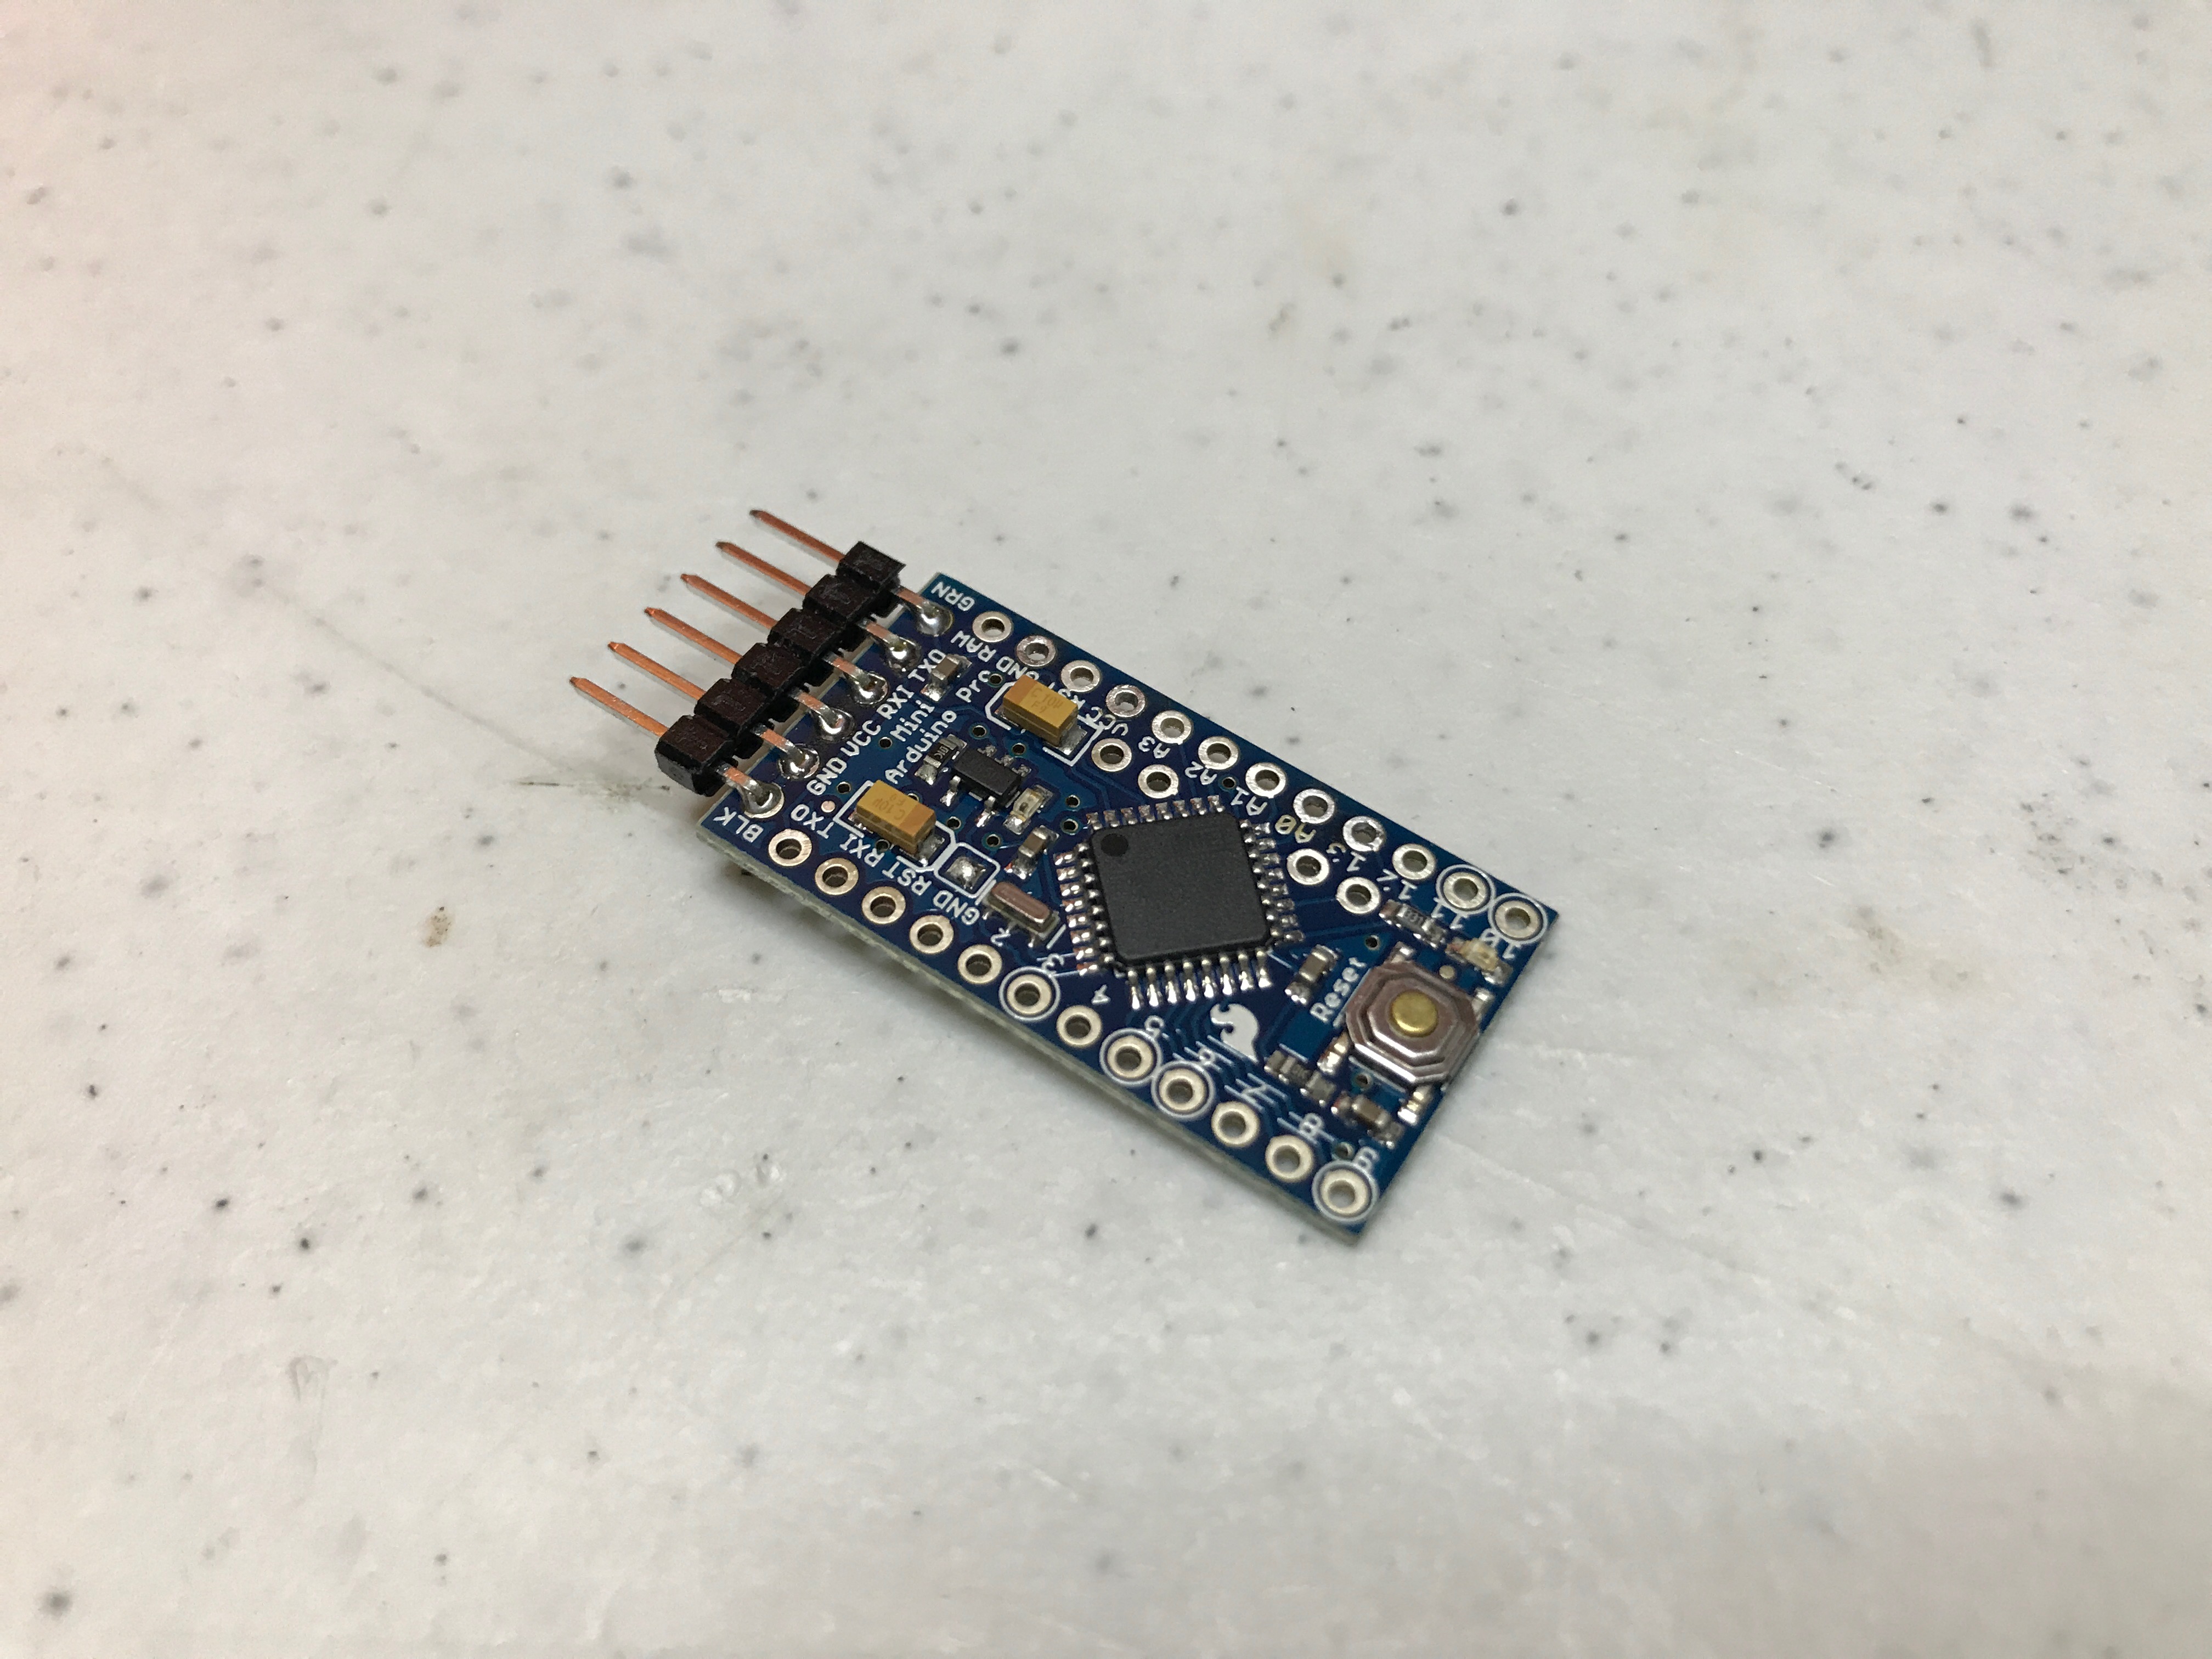

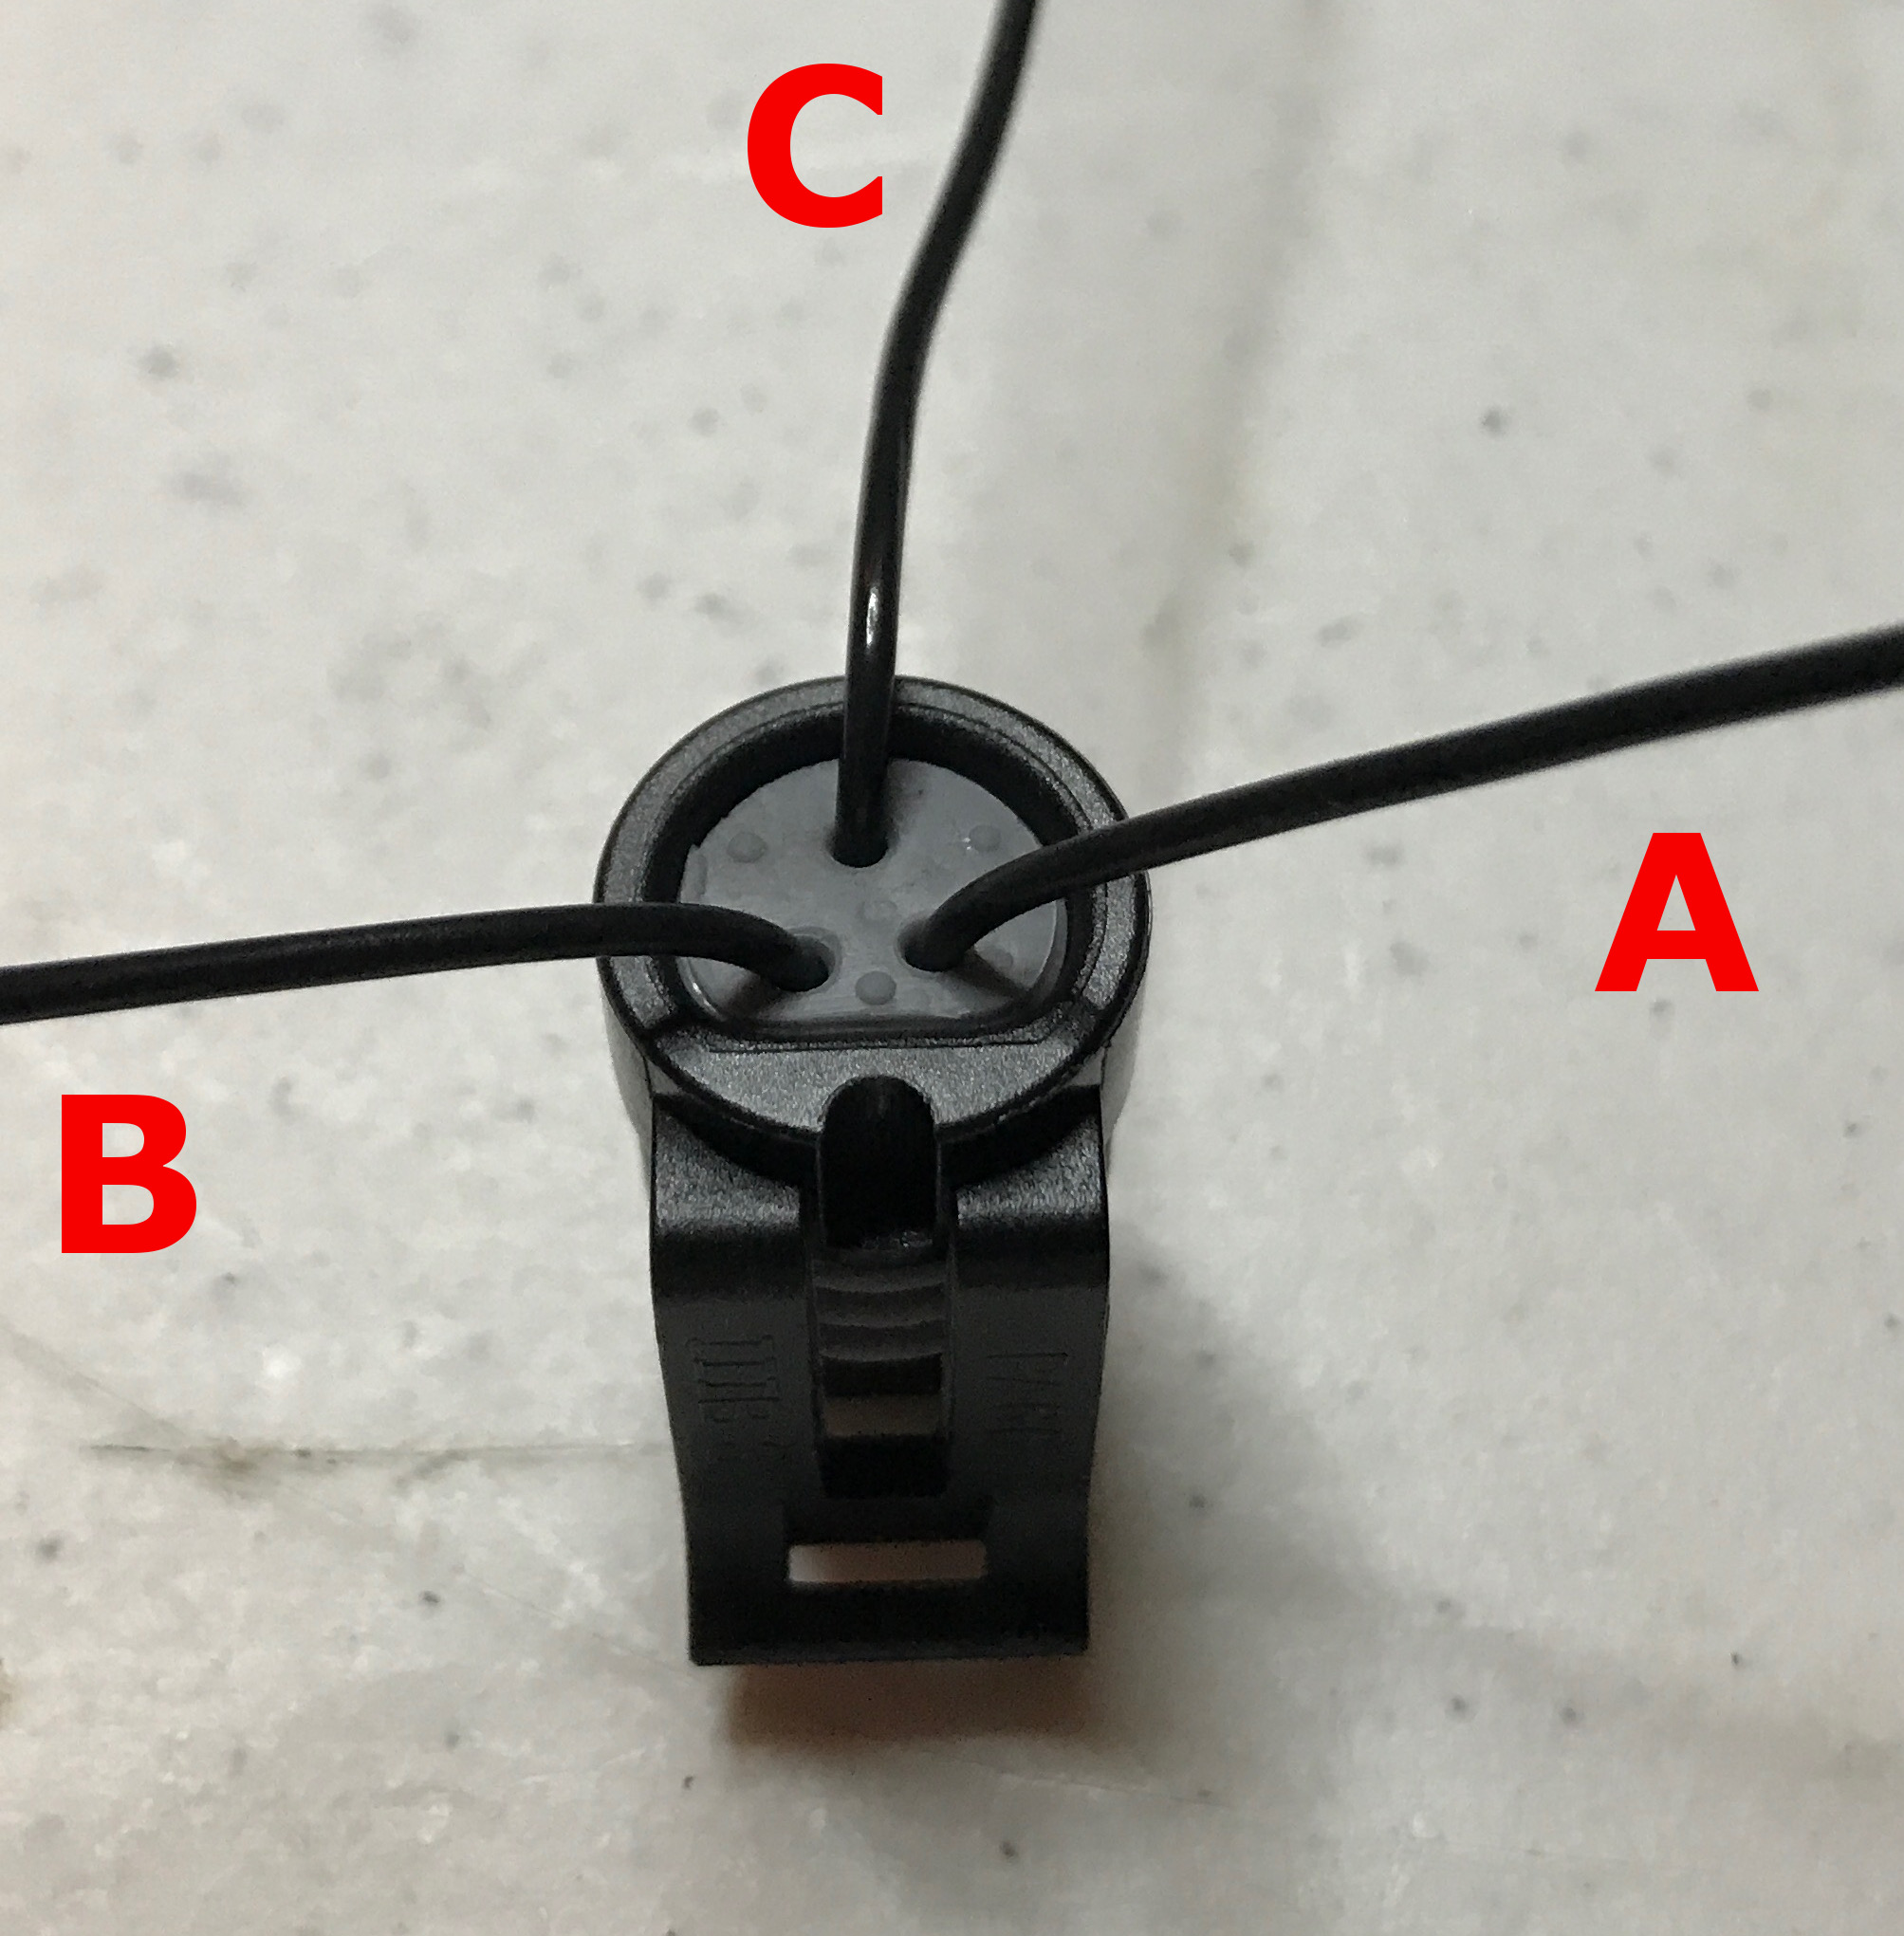
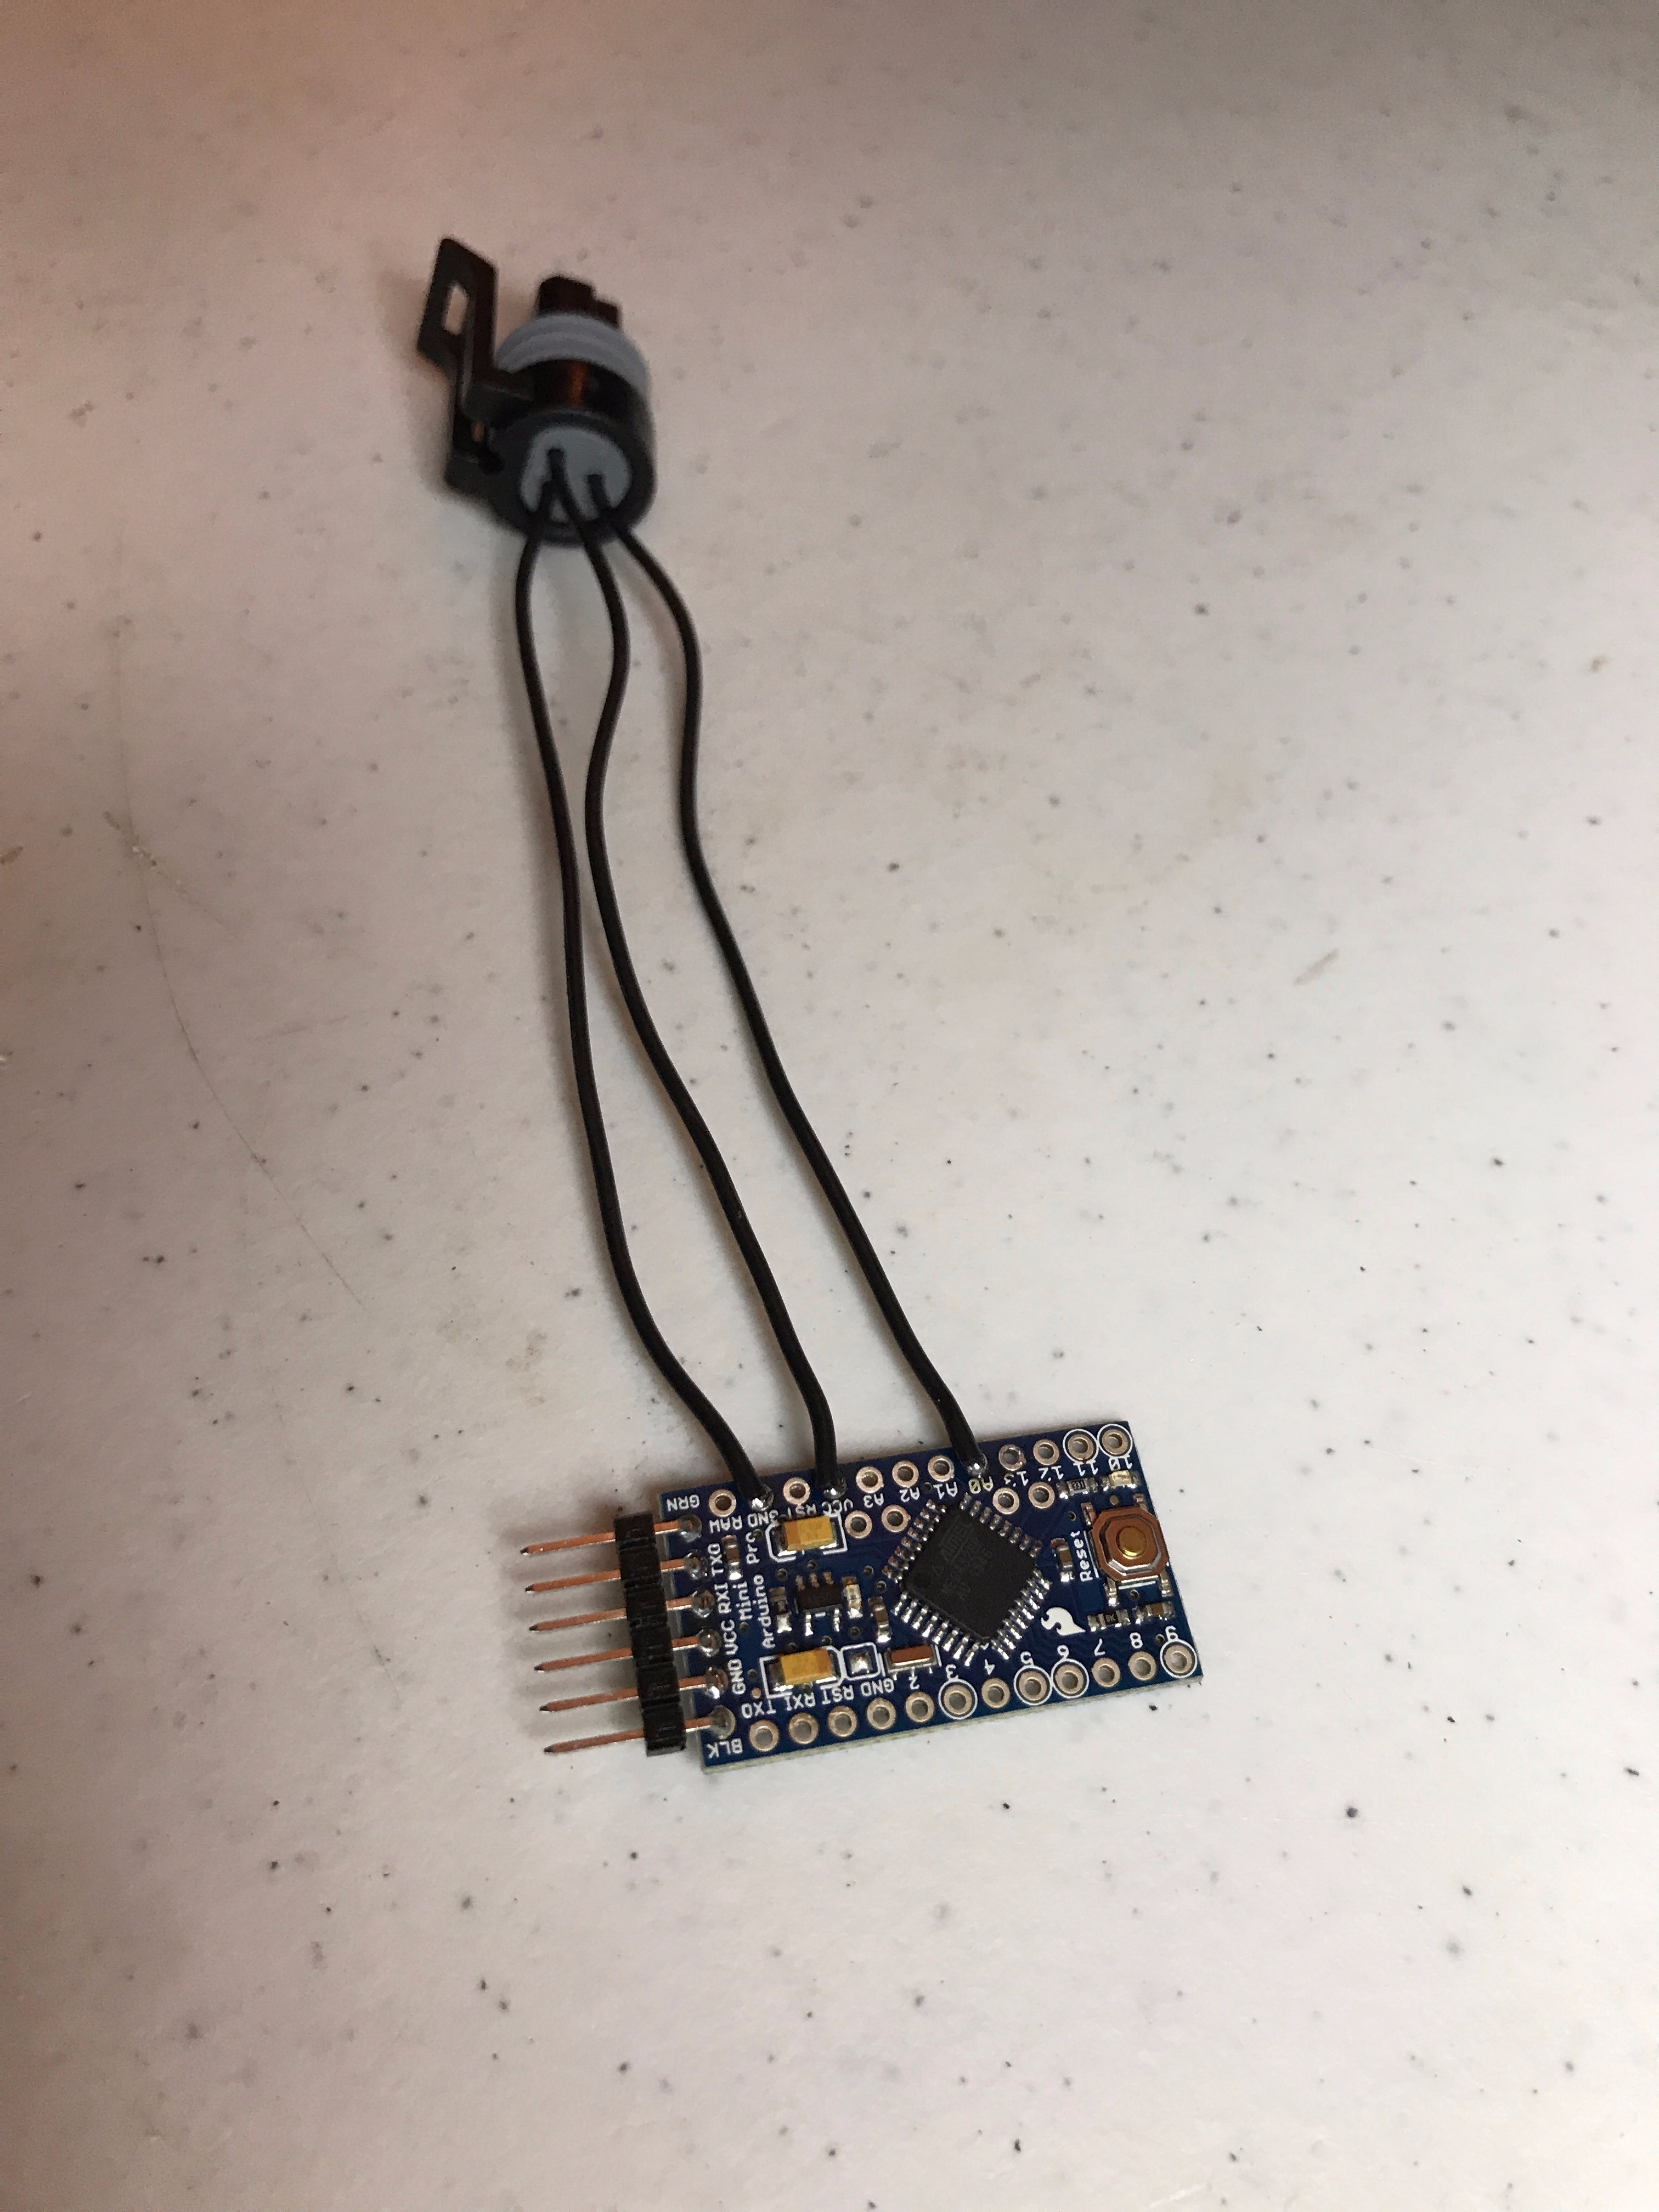
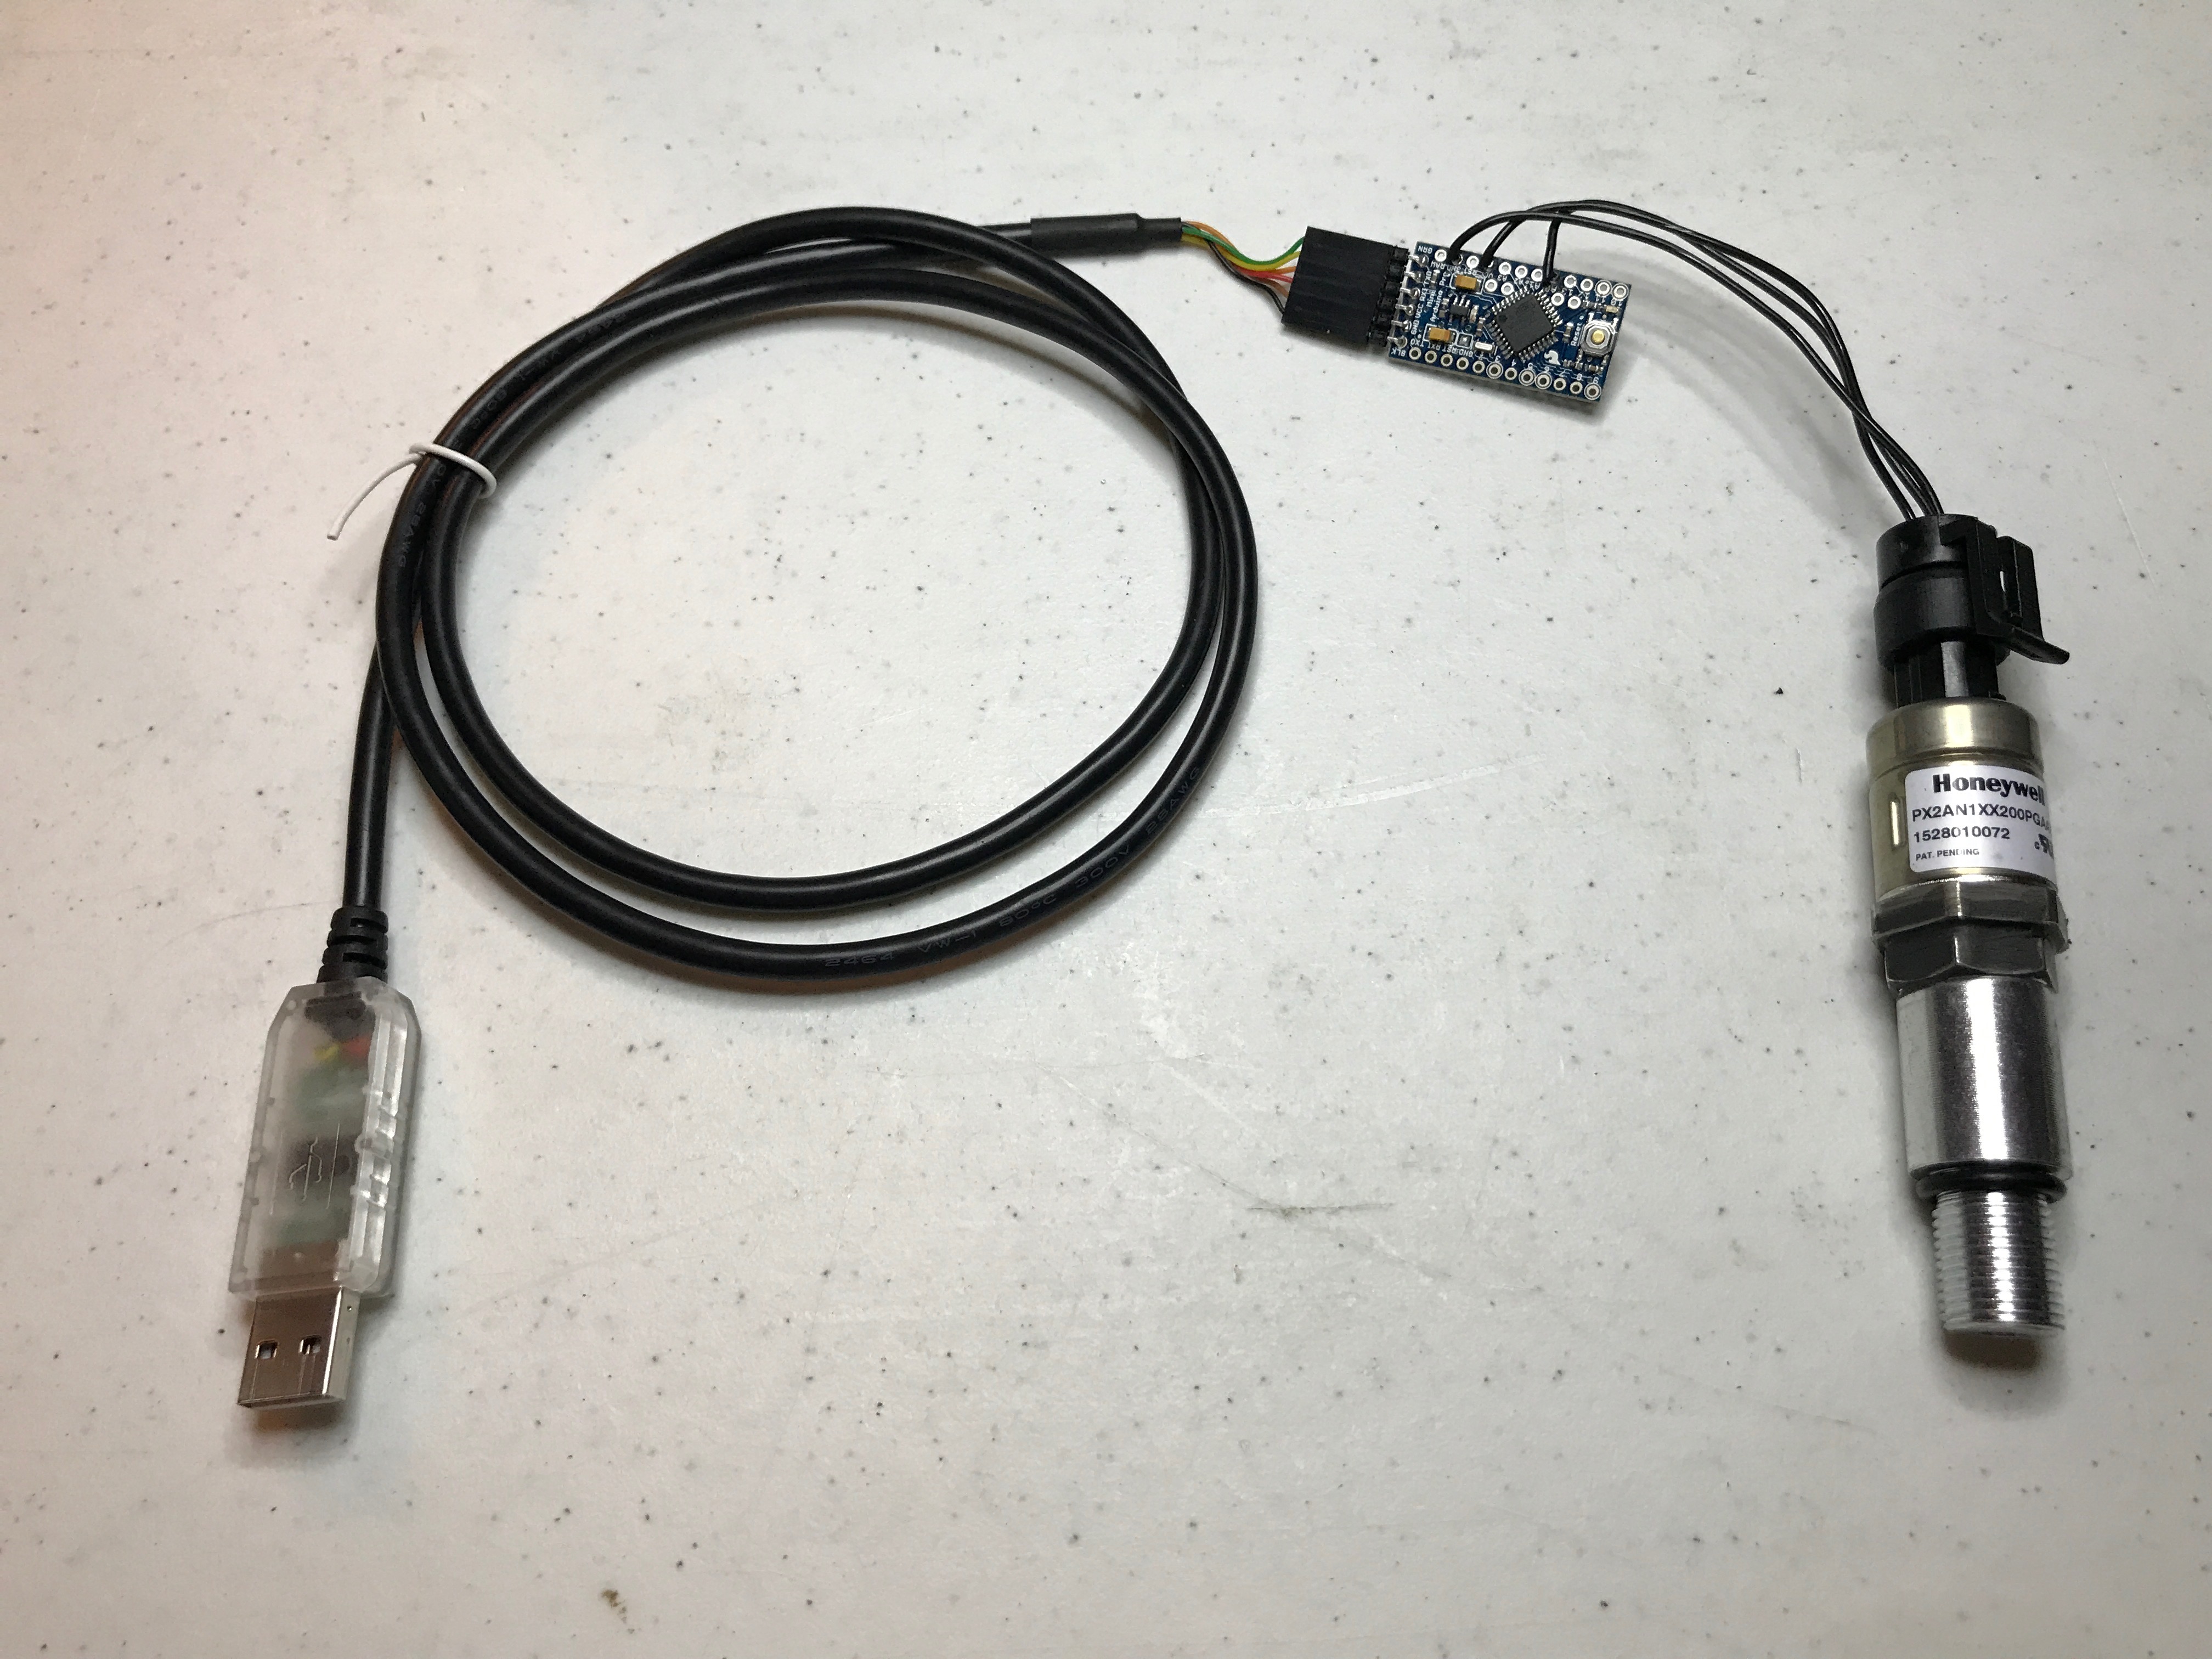
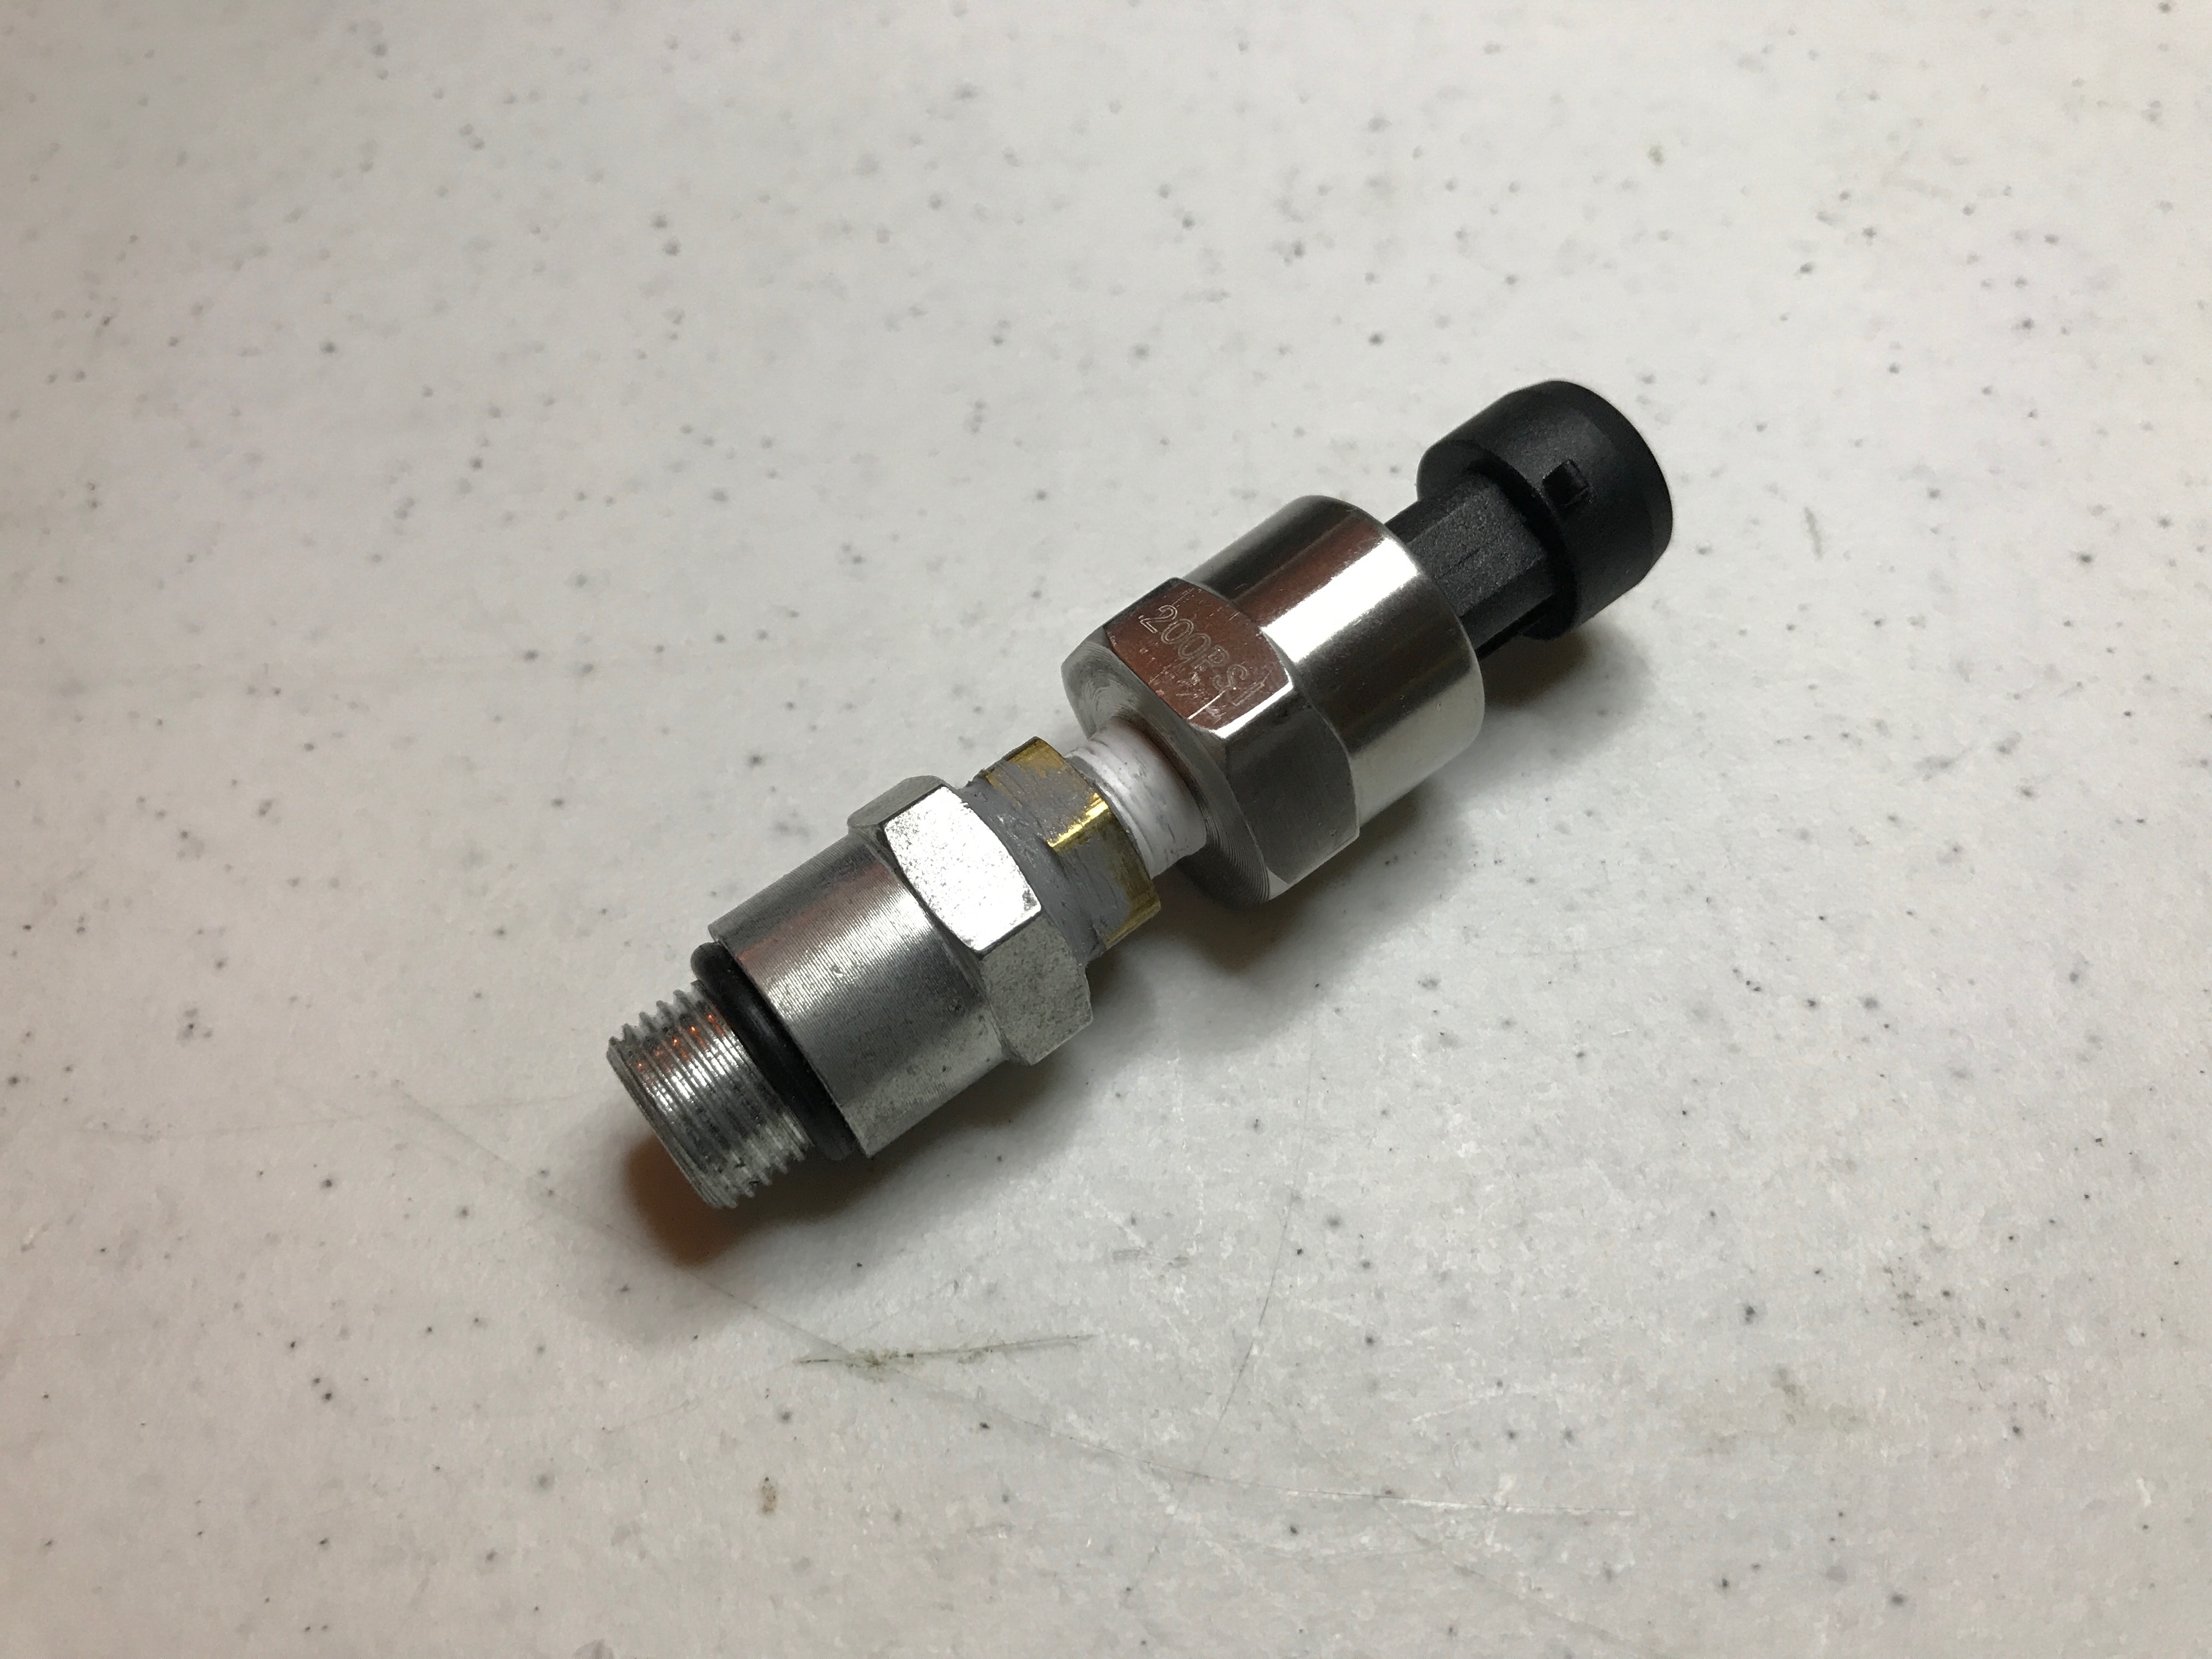
Now it's time to do a little electronics soldering. I think that this is a fantastic project for beginners but if you've never soldered anything then you might want to take a look at this tutorial from the great people at Sparkfun.
First you're going to build the tester. You'll start by soldering the right-angle header pins to your Arduino Pro Mini. This is how the FTDI Serial USB cable connects. Now solder the sensor connector to the Arduino. Use the pictures (sensor pinout and connector) to determine the wiring. The wire marked as "A" should be connected to the Arduino's "GND" (ground) pin, "B" is connected to "VCC" (5v) and "C" will be connected to "A0" (analog input 0, that's a zero).
Next you'll build the sensor module itself. If you're using the recommended Honeywell sensor then it's as simple as putting a bead of RTV sealant all the way around the threads of the sensor and then threading it into the Spark Plug Non-fouler. Tighten the two together with your wrenches and then wipe off the excess RTV that squeezed out. Set aside and let it cure for at least 24 hours.
If you're using the "more affordable" eBay sensor (or any other sensor with a 1/8" NPT end) then you'll need to thread the 1/4” NPT Male to 1/8” NPT Female Adapter onto the sensor with teflon tape and then RTV the short Spark Plug Non-fouler to the 1/4" end.
Add the o-ring and maybe some heatshrink tubing and you're done!
Program It!
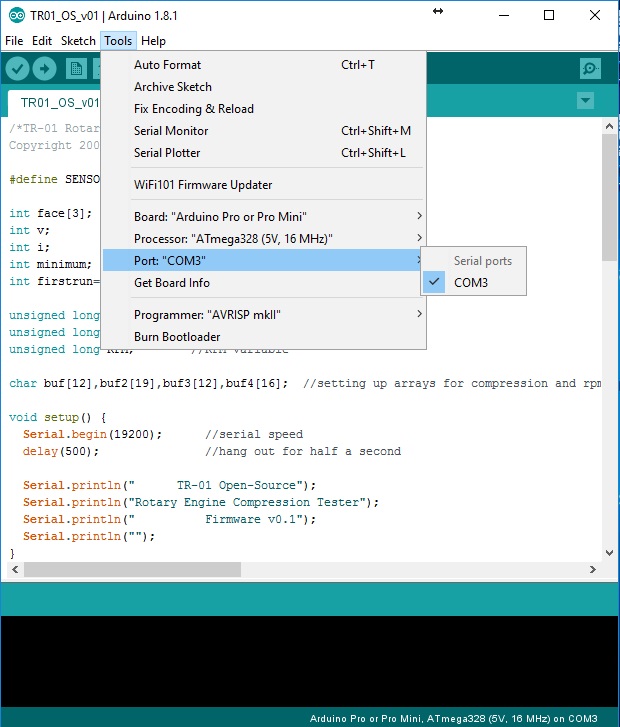
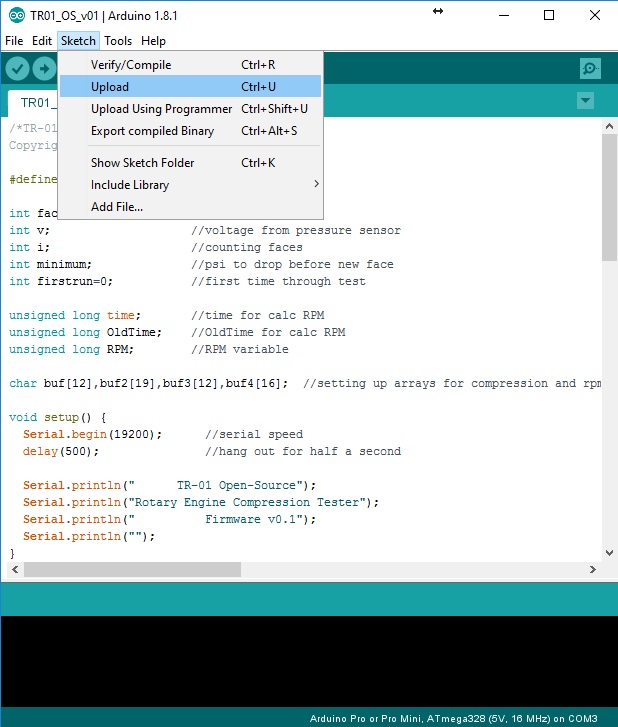
Connect the Arduino board to your computer using the FTDI cable.
Download the attached TR01_OS_v01.ino file and open it using your Arduino IDE.
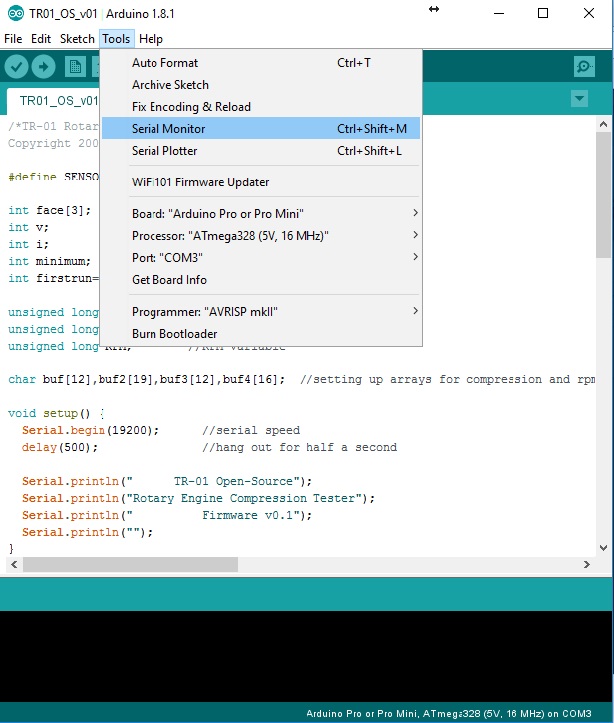
In the "Tools" menu make sure you have the correct board, processor and port selected. If you're using an Arduino Pro Mini then my example picture will work for you except that your port may be different.
Open the "Sketch" menu and choose "Upload".
Downloads
Use It!
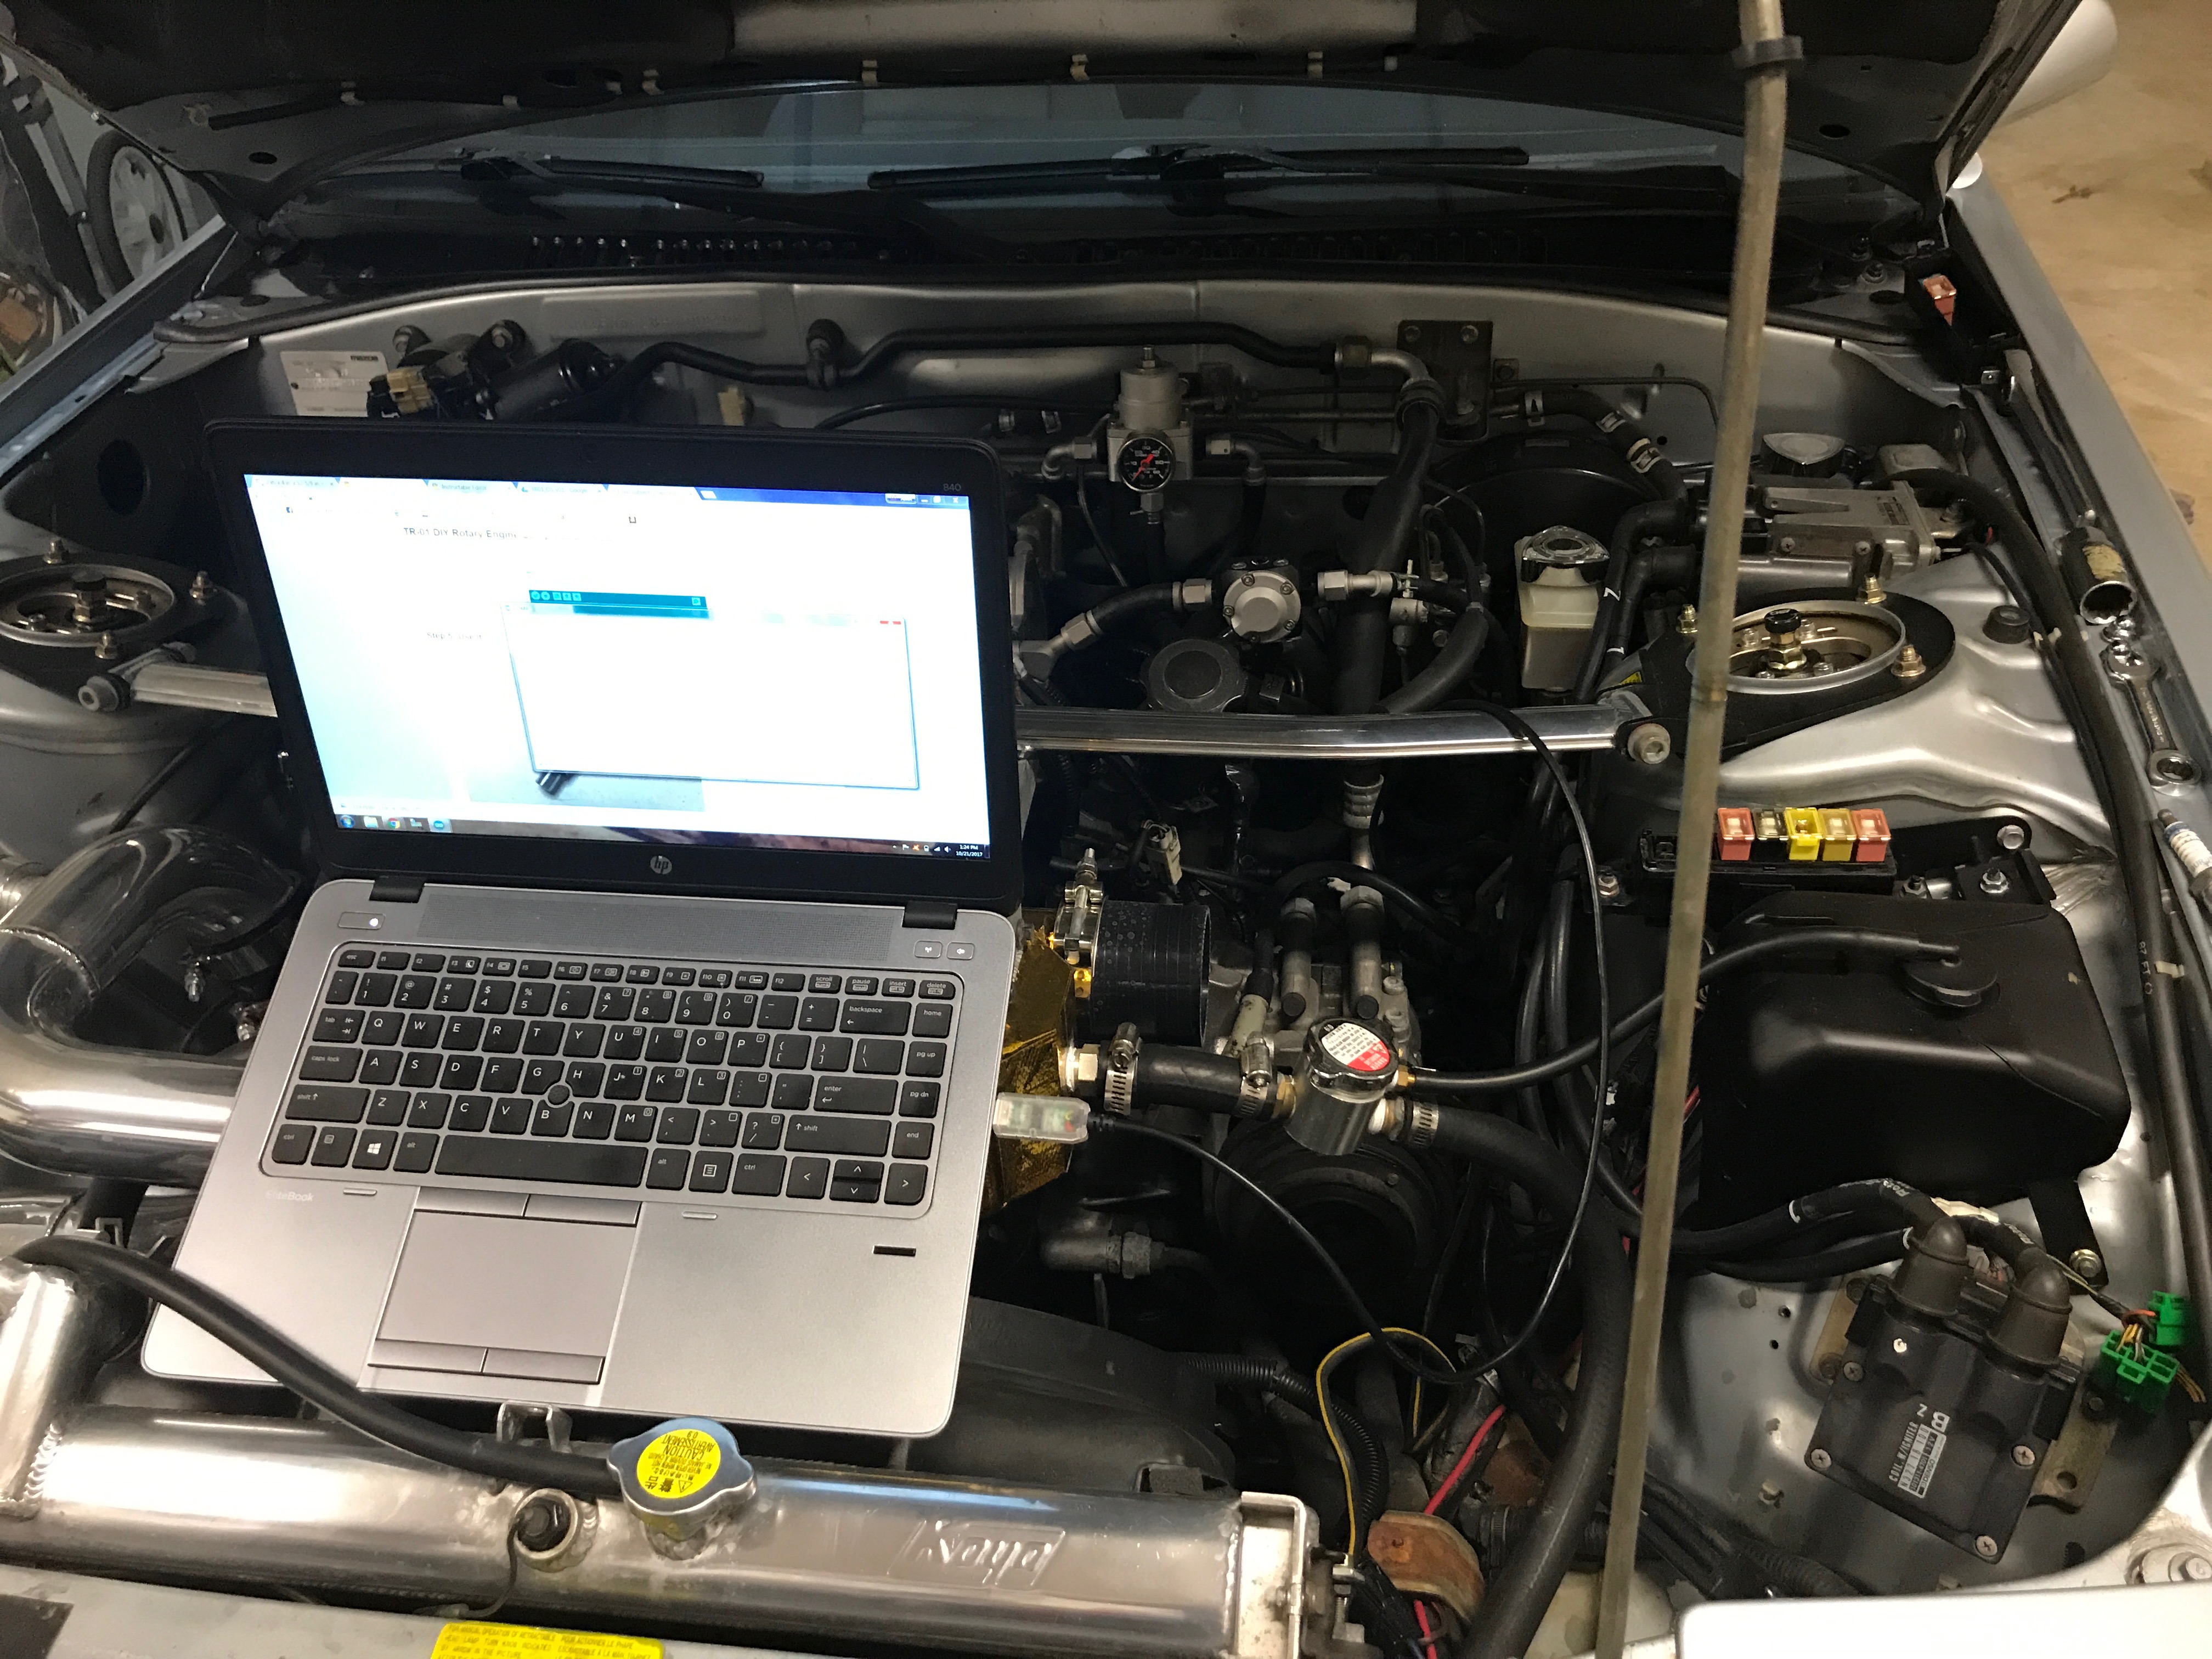
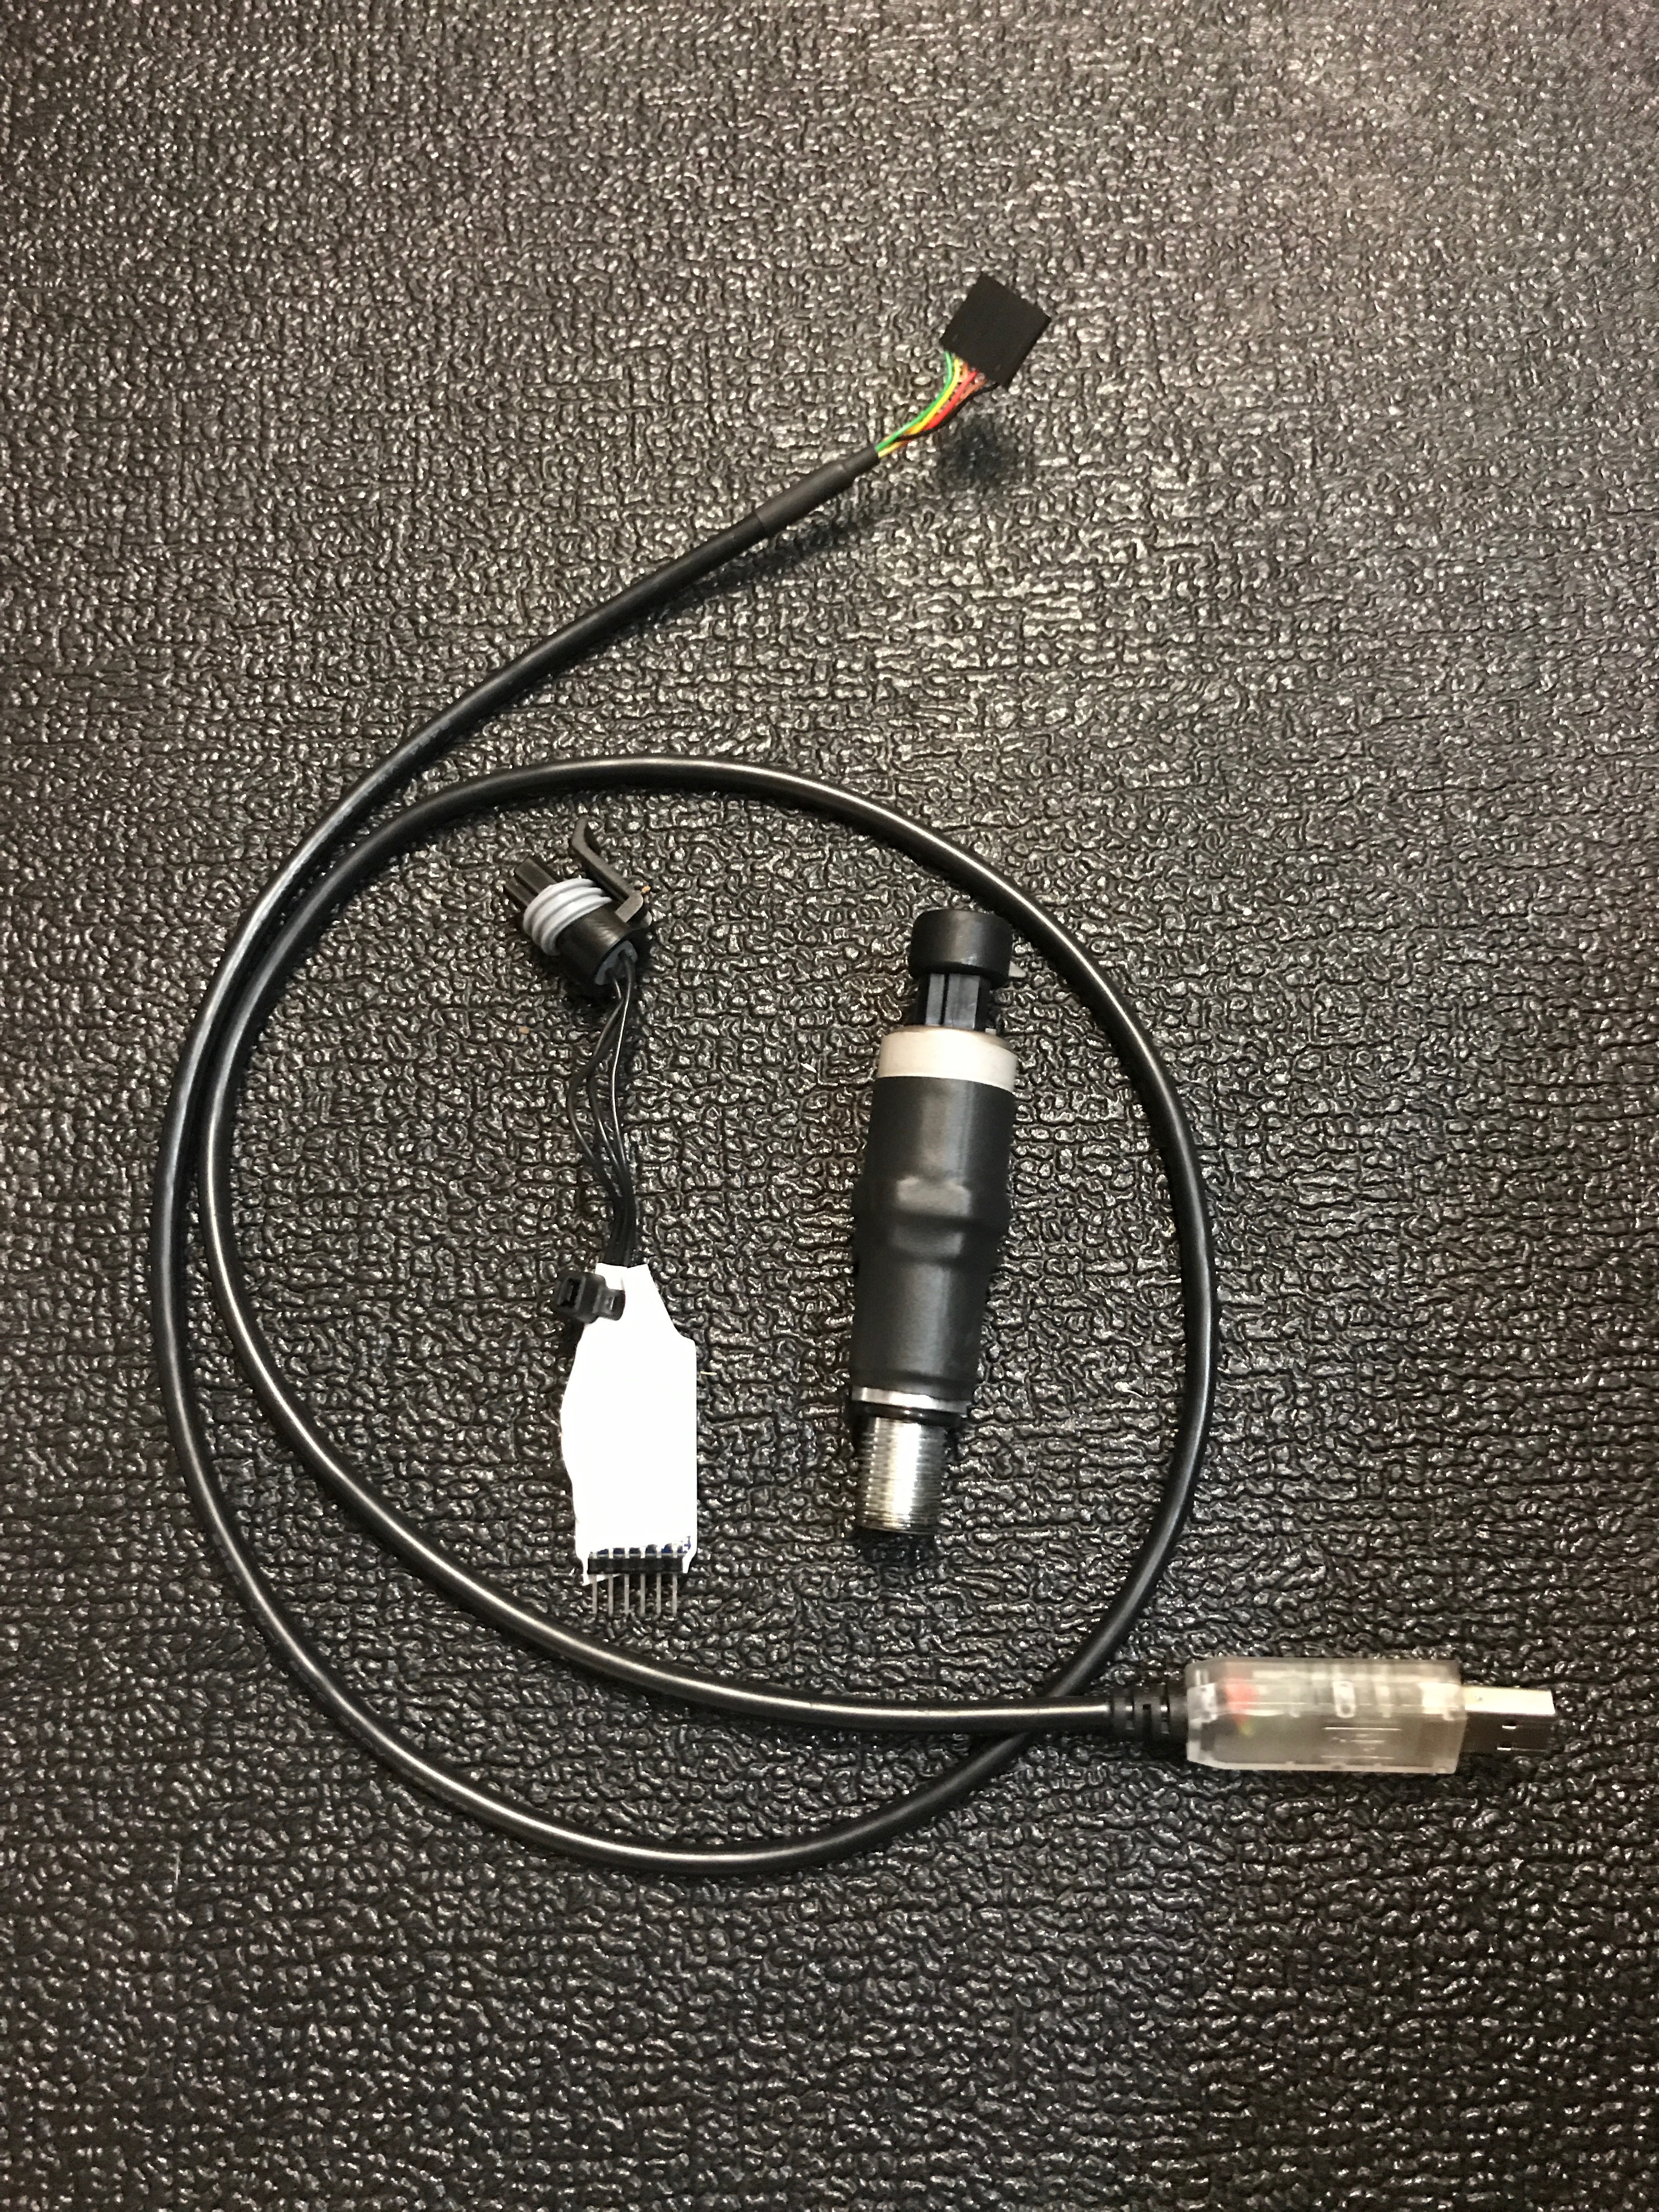
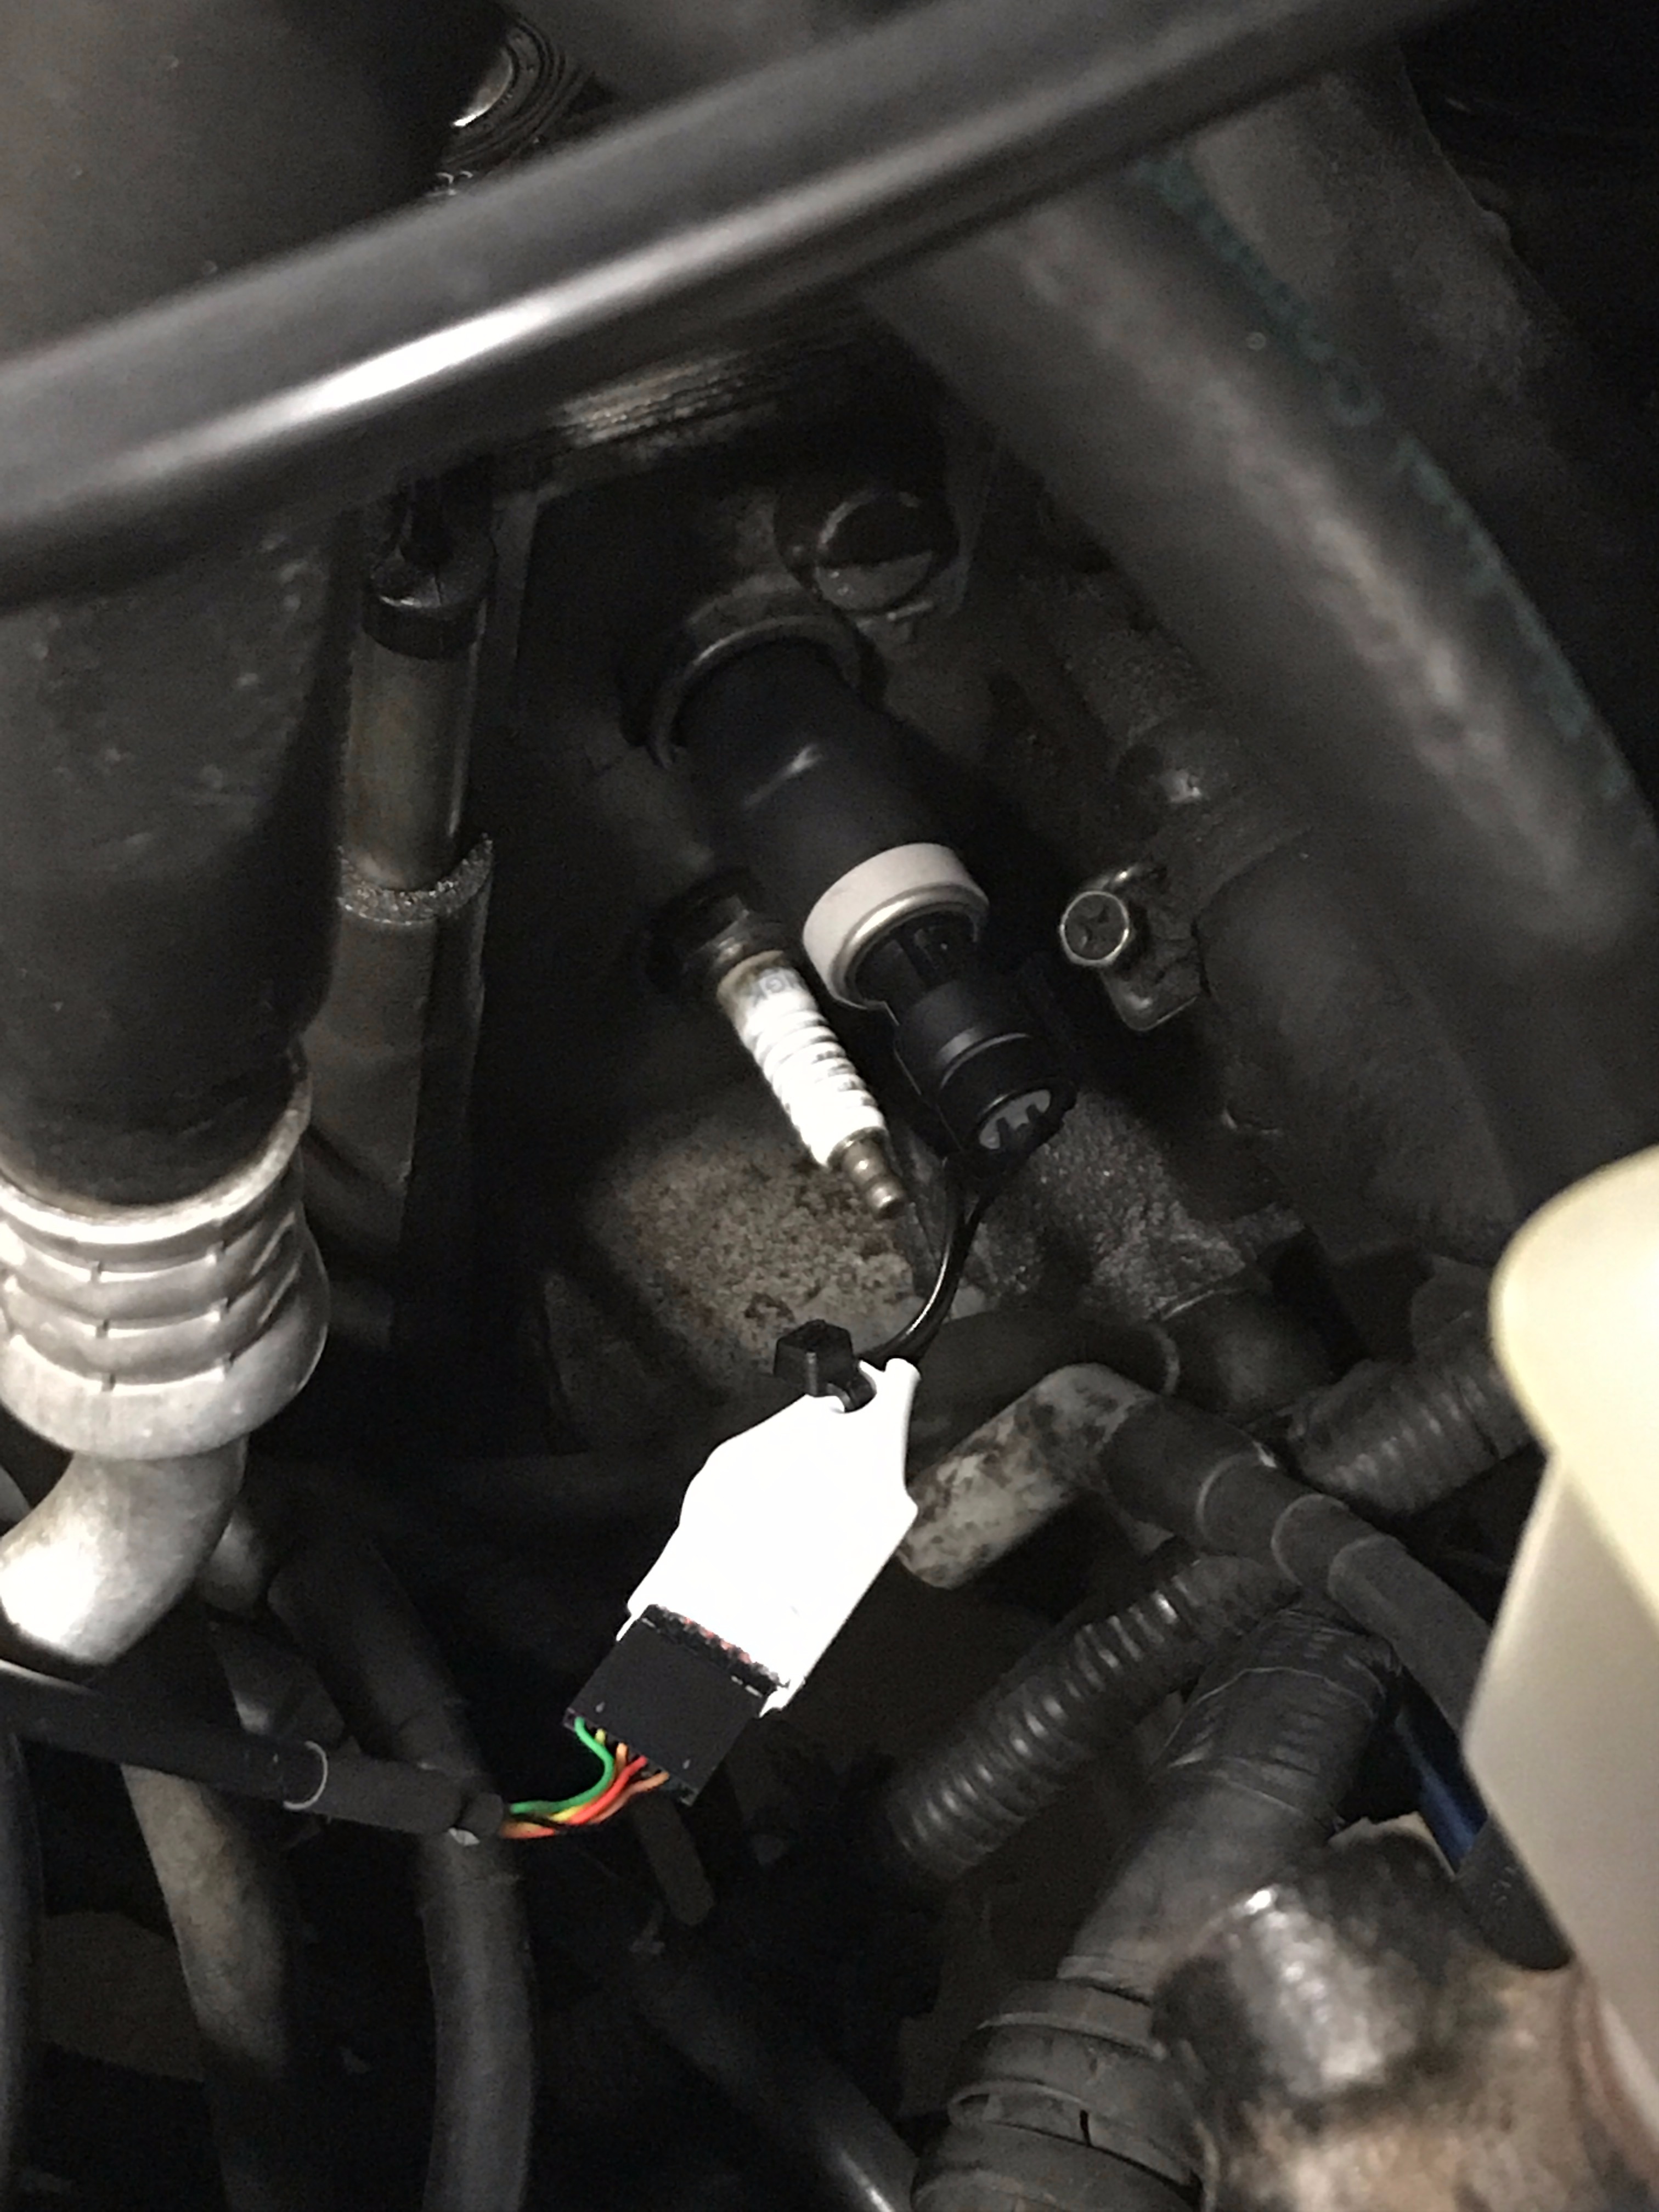
You'll want to refer to the FSM for your specific car to find instructions on how to perform a compression test. Generally though, you'll need to disable your ignition and fuel system, remove all trailing spark plugs and then insert pressure sensor module into the trailing spark plug hole of the rotor housing to be tested.
Once you've got the sensor installed then you'll plug the tester into it and then connect the tester to your computer using the FTDI cable.
Open the Arduino IDE and in the "Tools" menu double check that the "Port" option is correct and then click on the "Serial Monitor" option.
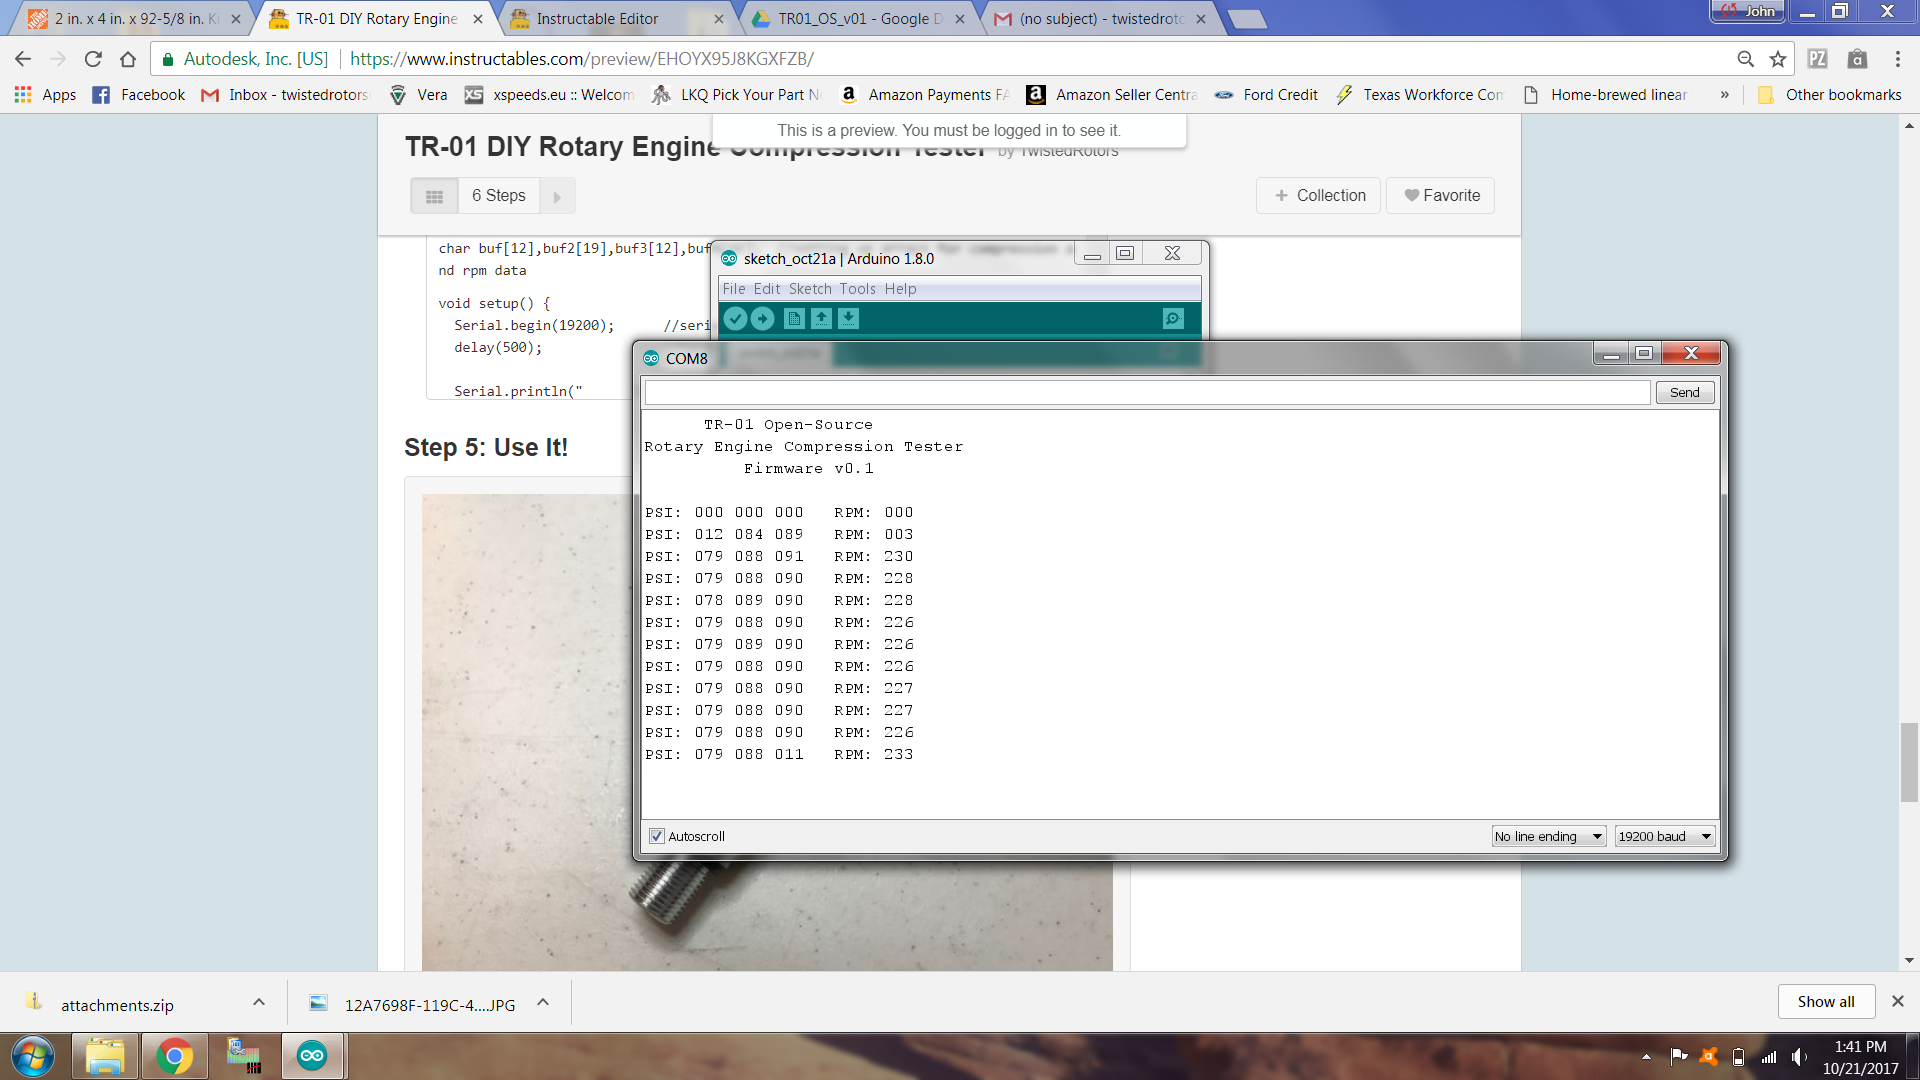
When the monitor opens you'll need to set the baud rate (lower left corner) to 19200 baud. Once that's done you should see the "TR-01 Open Source" splash text and then you are ready to begin the test.
Crank the engine over and your TR-01 will display the compression test results and calculated RPM in the "Serial Monitor" window.
Bonus!
Here are some tips, recommendations and ideas:
- I prefer the Arduino Pro Mini paired with a legit "FTDI Serial TTL-232 USB" cable (Sparkfun or Adafruit) because FTDI has an app that will allow you to connect the tester to your Android phone using an USB OTG adapter. If that's not a priority for you then any Arduino could be used.
- The Adafruit FTDI Serial TTL cable is the better choice because it's connector has LED's built in so you can see active serial communication. I linked to the Sparkfun in the parts section so you can save shipping.
- You should be able to find the Spark Plug Non-foulers at any auto parts store that carries the Dorman HELP! line of parts. Here in the U.S. O'Reillys, Autozone and Advance Auto Parts all carry them.
- Some features you could add:
- Bluetooth
- WiFi
- LCD Screen
- Case
- Printer
- I plan to continue to update this Instructable and code as time goes on. I'll probably add support for an LCD screen first.
- If you'd rather just purchase a complete, high quality, rotary engine compression tester then you can still get the TR-01 v2.0 Baro from my site. www.TwistedRotors.com