Syncthing Backup Server Using Brainypi
by aaditya04gupta in Circuits > Electronics
683 Views, 2 Favorites, 0 Comments
Syncthing Backup Server Using Brainypi

Have you ever come across a situation where you have to save data but at the same time you cannot take risk of a privacy breach? Let's take an example of a guy who is a photographer, travels to different places, and clicks photographs for clients, now if loses his memory card or faced any technical issue what he will do, also he cannot upload his photos on the third-party cloud services due to privacy issue.
let me solve this problem for you in such a situation we can use Syncthing.
Syncthing is an open-source software that allows to securely synchronize folders between two or more devices in the background automatically completely securely and privately without going to the third-party cloud in the sky, so it's a really great way for people who want privacy, and do not use a third-party cloud like iCloud or dropbox but do want to sync the folders across multiple machines. It even works with android devices.
Supplies

You only require a few supplies to set up your private backup server
1) Brainy PI/Raspberry PI} You can access it remotely also
2) Ethernet/wifi
3) SD card or hard drive
Update the System Software's
Before installing any on PI we should first update the system
Terminal $
sudo apt update
sudo apt full-upgrade
Installing Apt-transport-https
This package allows the package manager to handle sources that operate over the HTTPS protocol. By default, this is not supported.
sudo apt install apt-transport-https
Store the Syncthing GPG Keys in Our Keyrings Directory.
This will ensure that the packages we are installing have been correctly signed and aren’t coming from an unexpected source.
curl -s https://syncthing.net/release-key.txt | gpg --dearmor | sudo tee /usr/share/keyrings/syncthing- archive-keyring.gpg >/dev/null
Add the Repository to Our Sources List
With the key added, we can now add the repository itself.
echo "deb [signed-by=/usr/share/keyrings/syncthing-archive-keyring.gpg] https://apt.syncthing.net/ syncthing stable" | sudo tee /etc/apt/sources.list.d/syncthing.list
Update System
Before installing any new software make sure you update the system
sudo apt update
Install the Syncthing Software
you can install the syncthing using following command
sudo apt install syncthing
Running the Syncthing
Before moving forward make sure you run the service so that syncthing once to generate config files
syncthing
- This will create all the configuration files we need.
- This configuration file will only work as long as we run the Syncthing software with our pi user.
Editing the Required Config File
we can edit the required config file using the nano text editor by using the command below
nano ~/.config/syncthing/config.xml
- Within this file, you need to find the following line.
- Use CTRL + W to shortcut search
- FIND >
<address>127.0.0.1:8384</address>
- REPLACE WITH >
<address>"YOUR IP ADRRESSS":8384</address>
- By using the local IP address, we are restricting access to the web interface only to users on the same local network this will ensure your privacy
- Alternatively, if you want to allow access to any address, use the IP “0.0.0.0“.
- Once you have changed the IP, save the file by pressing CTRL + X, followed by Y, then ENTER.
Setting Up Syncthing As a Service on the Brainy Pi
This task is to create and enable a service for the software. The service will allow Syncthing to start at boot and let it be easily stopped and started
- Run the following command in the terminal
sudo nano /lib/systemd/system/syncthing.service
- Within this file, save the following file
[Unit]
Description=Syncthing - Open Source Continuous File Synchronization
Documentation=man:syncthing(1)
After=network.target

[Service]
User=pi
ExecStart=/usr/bin/syncthing -no-browser -no-restart -logflags=0
Restart=on-failure
RestartSec=5
SuccessExitStatus=3 4
RestartForceExitStatus=3 4

# Hardening
ProtectSystem=full
PrivateTmp=true
SystemCallArchitectures=native
MemoryDenyWriteExecute=true
NoNewPrivileges=true

[Install]
WantedBy=multi-user.target
- With all the lines entered, save the file by pressing CTRL + X, then Y, followed by the ENTER key.
Enable It to Start at Boot.
You can enable by using the following command
sudo systemctl enable syncthing
Starting Service
we have to start the service so that we can begin accessing the Syncthing web interface.
- you can start the service using following
sudo systemctl start syncthing
- To verify that our Syncthing service started on our PI we can use
sudo systemctl status syncthing
- If you get the output like this
Active: active (running)
If you are not getting this then you might have not followed the steps properly. So please crosscheck all the steps you did
Using Syncthing Web Interface
To use the web interface, you have to get IP address of your PI
- To get the IP address use command
hostname -I
- There are chances that you get more than one ip address, don't worry this means you have not set the static IP address you can any IP address displayed on the terminal
NOW
- With the IP in hand, you can go to the following web address in a web browser of your choice.
- go to
http://[PIIPADDRESS]:8384
- Here 8384 is port number
- Upon going to the web address, you will be introduced to the Syncthing web interface.
Web Interface
- Finally, we can now access the web interface
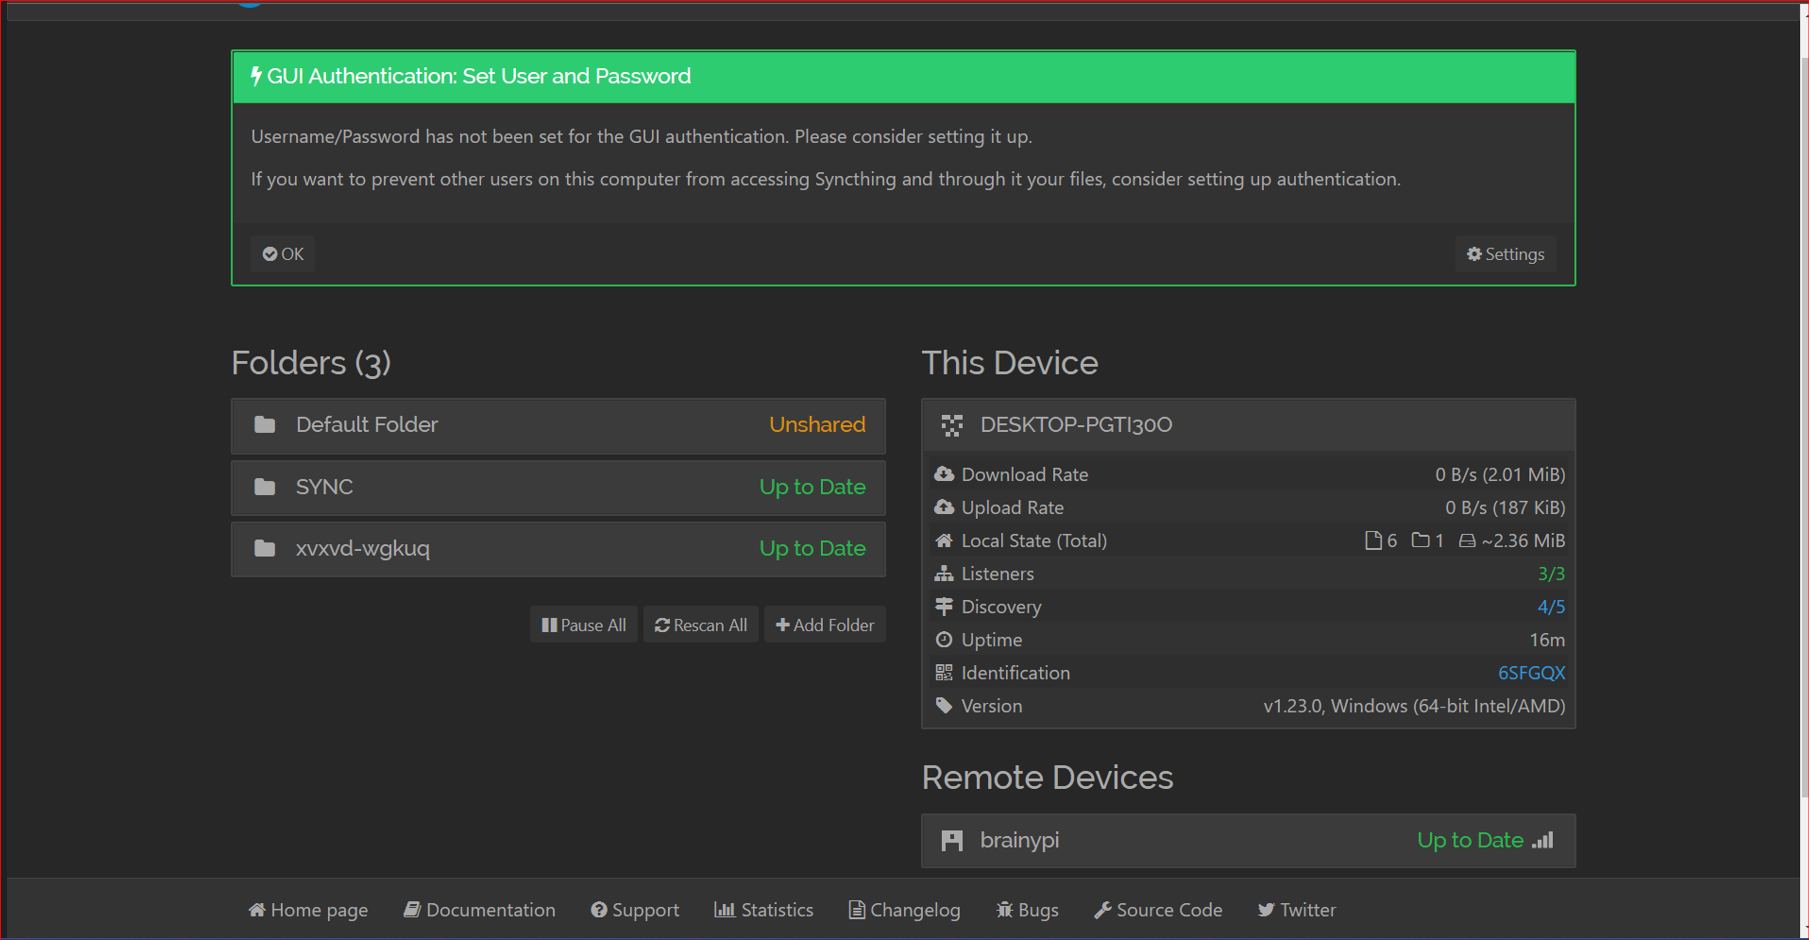
- By default, Syncthing comes with no username or password defined. What this means is that any user can access the interface and adjust your settings.
- If you haven’t set the username and password before, you will see a message warning you of the dangers. so please set the password
- note that you will be required to login before seeing the following screen once you set up a username and password.
ADDING Folder
.png)
- Click on the add folder you
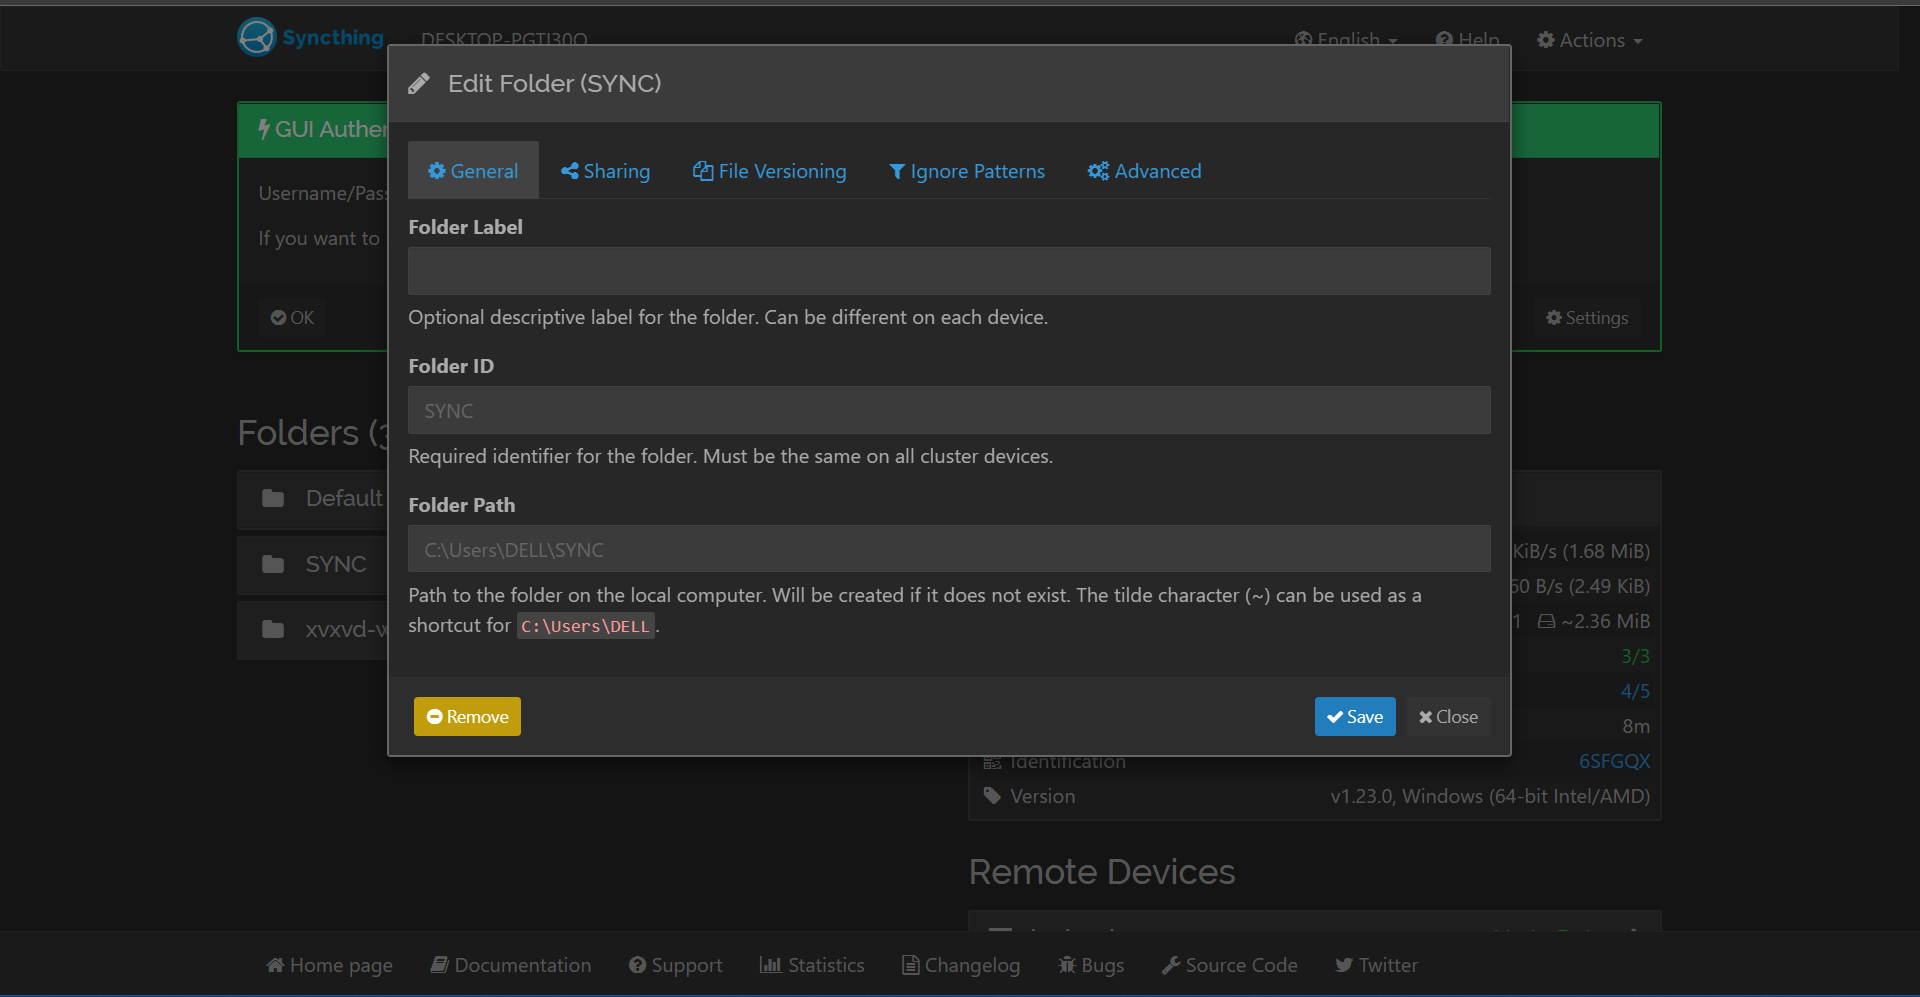
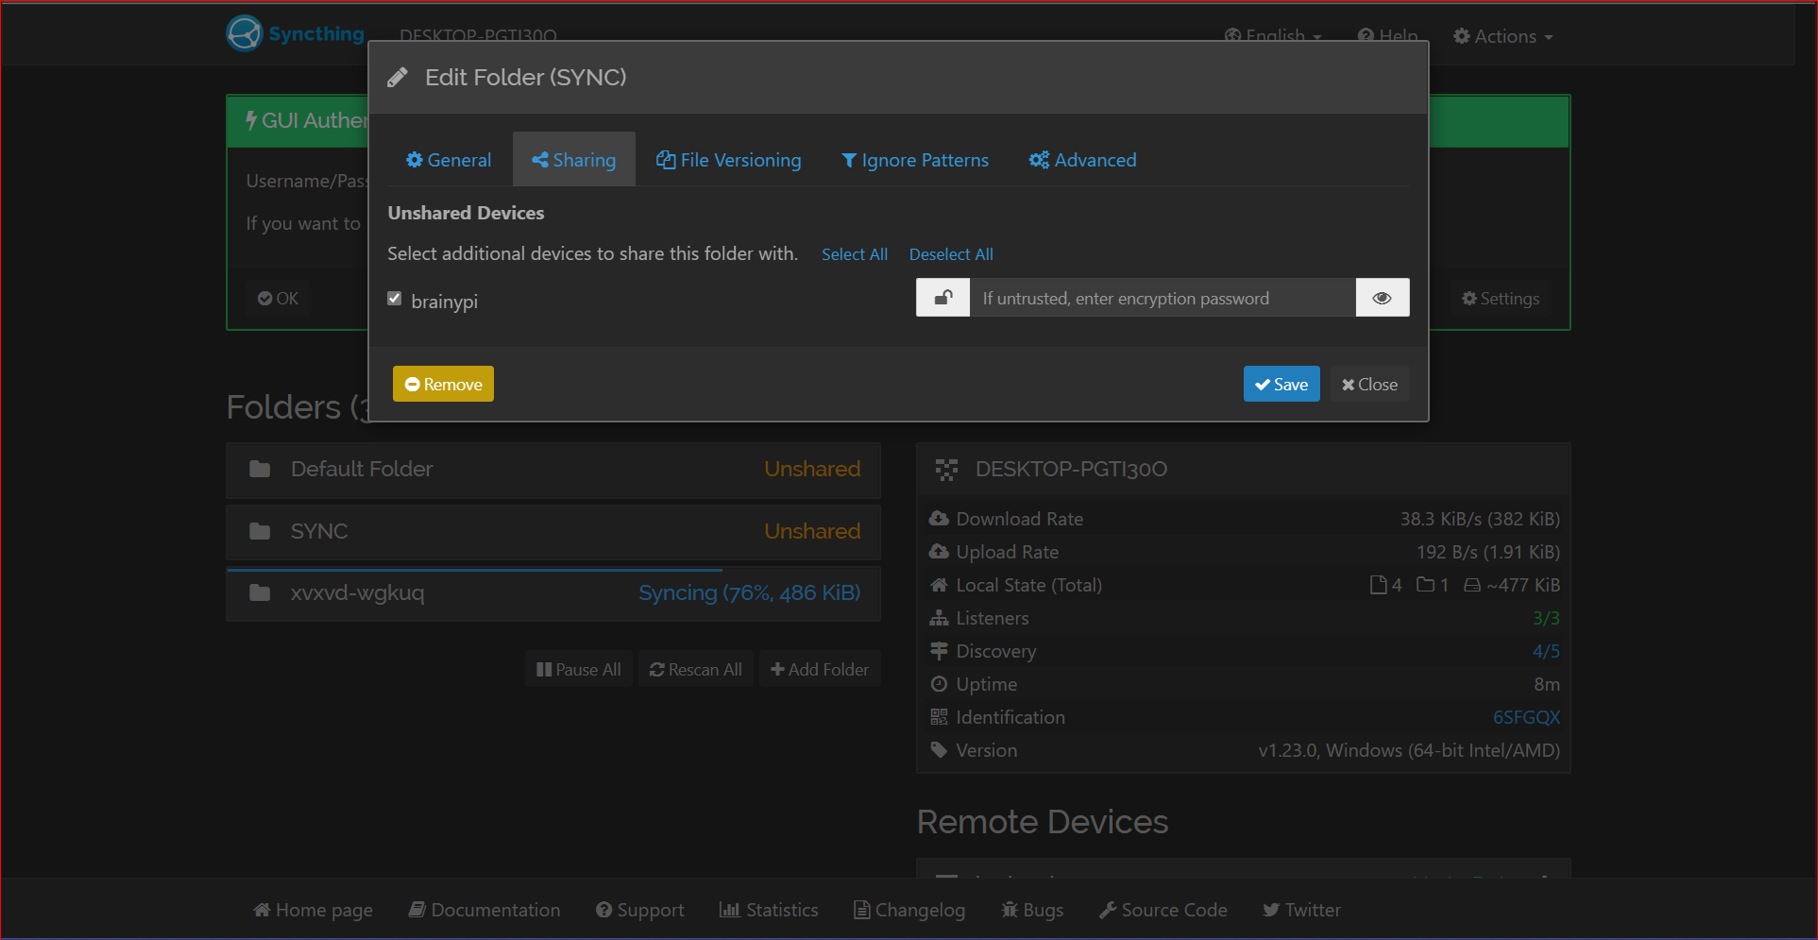
- this creates a folder on your PI device that you can access and you can edit it accordingly make sure you enable to share
- so whenever you have to take a backup of anything you just have to paste your files into the folder you have created and the software will automatically take the backup
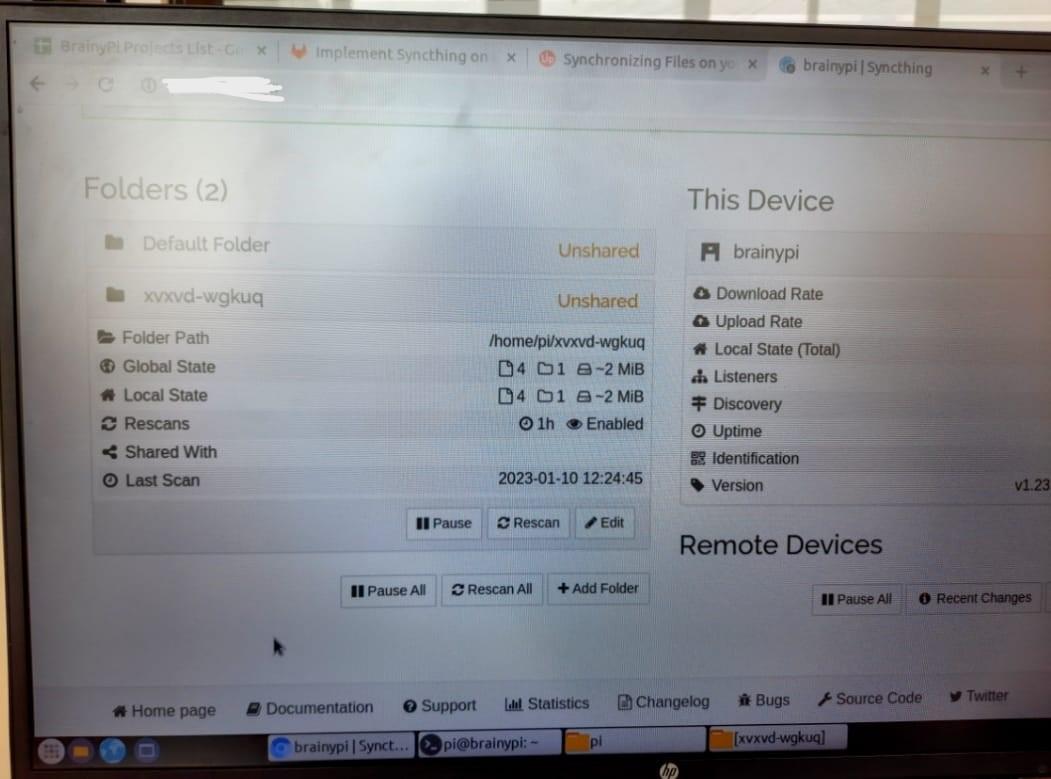
Adding Remote Devices
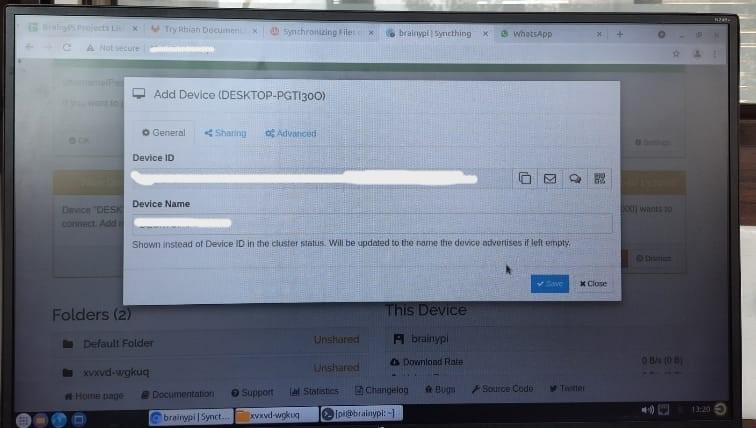
- To add the remote device, you have to install the syncthing on the remote device also. I have used windows in my case
- Now open syncthing
- Go to the action menu and click on the show device ID
- Copy the device ID and past it in the section
- you can explore more options and there
After sharing the folders you can access the same files from different devices
Final Conclusion
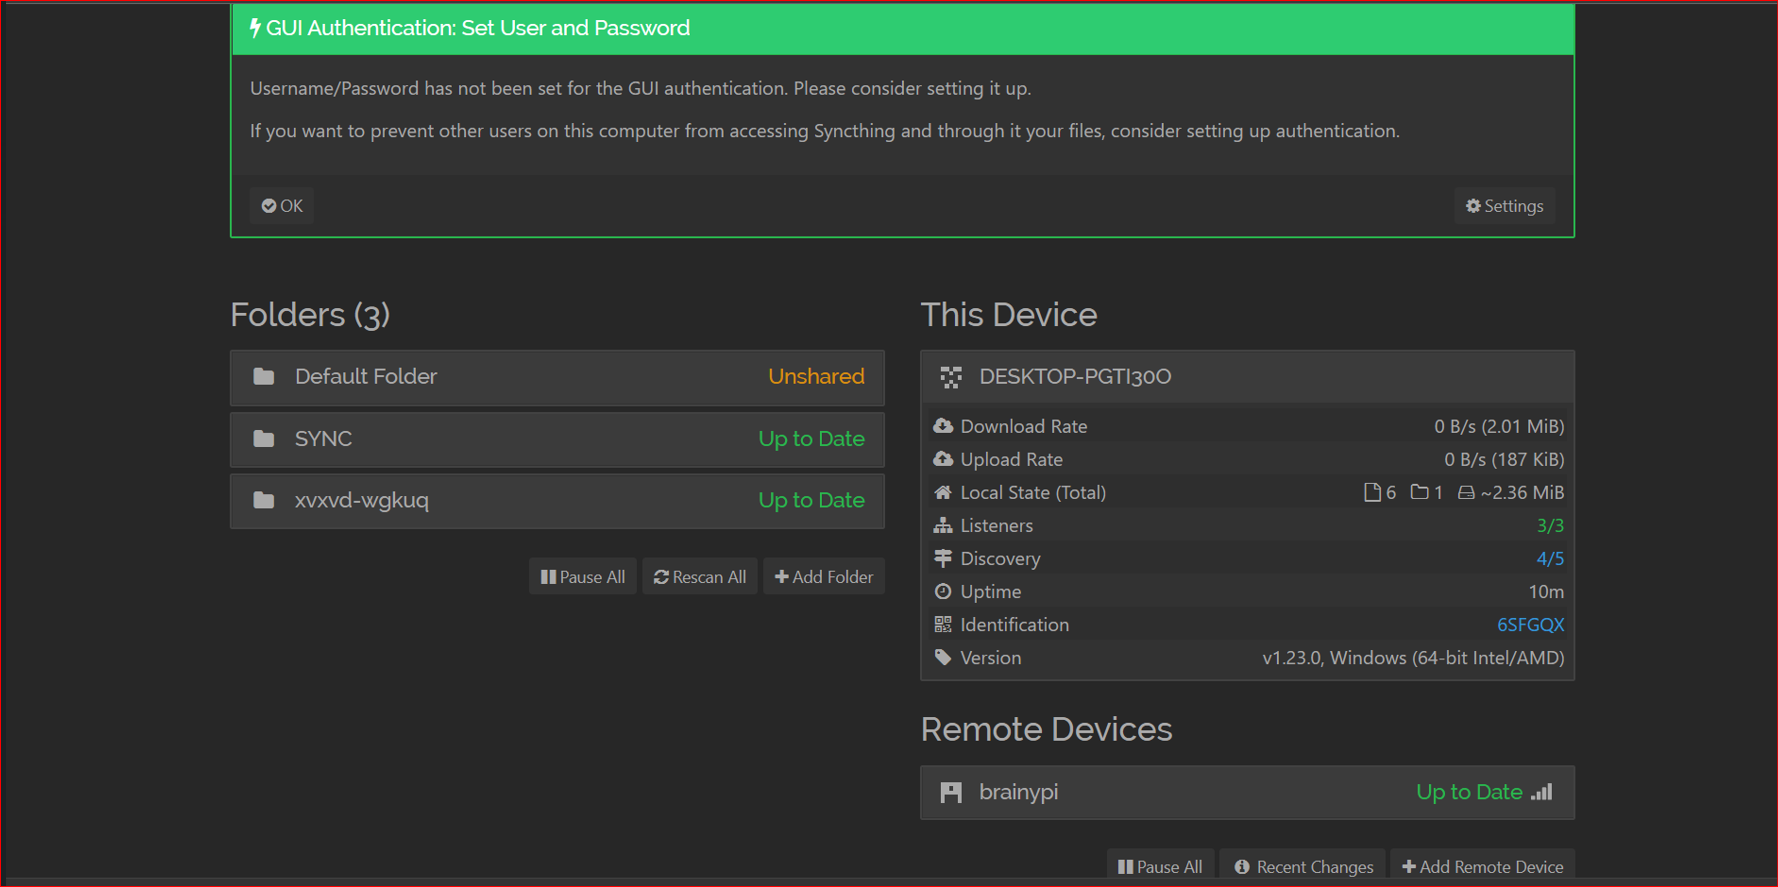
Now you can access shared folders from the different devices
You can explore the website on your own and you will see that there are N numbers of customization options you can do and add layers of security and make as personalized as you want
Syncthing is one of the best options to create our own fully secured personalized backup server along