Superhero LED Wearables


Inspired by the wearables class from push_reset, I wanted to come up with a simple, engaging project on soft circuitry to hold at UMakers, a makerspace in Claremont, CA. I knew that the project should target any age group, from younger children to full-grown adults, and thought that classic comic book superheroes would do the trick. The project would have to be simple enough for high schoolers to handle, but complex enough that people can actually learn about combining electrical circuits and fabric. Cost shouldn't be prohibitive (so $10 and under range) so that people could make their own in their free time, and the concept should be adaptable for any other designs that the maker wished.
With those restrictions/guidelines, I came up with a simple wearable patches that light up. Conductive thread connects homemade LED sequins that glow behind layers of felt, which are supported by a harder layer of leather. A coin battery breakout board is used for housing the battery, though simpler sew-on holders are available (just used breakout board since it had a nice on/off switch.
Materials
- CR2032 breakout board (or just a simple sew on battery pack, though the files will be slightly different for these since the circuit layout is different)
- CR2032 (just typical 3V coin cell battery or battery with similar power -- just make sure you have the appropriate battery holder for that)
- conductive thread (I used 3 ply since it's more for general use, plus it's for heavy duty applications compared to the 2 ply thread)
- felt or fleece
- needle (make sure that the eye is big enough to insert the conductive thread through)
- leather (or hard-yet-flexible material of some sort. This is used as a support base to sew the circuit onto before adding the fleece superhero details.)
- laser cutter (not required but really handy for cutting out the different pieces, especially the leather since I added some guidance holes for people who have trouble sewing straight)
- glue
- surface mount LEDS (I used 5050 surface mounts, but similar LEDs will work. Just make sure that they're big enough for you to easily handle and solder extra wire to the sides to make sequins. You can also just buy Adafruit's LED sequins, but they're ~$4 for 5 whereas I got 100 SMD LEDs for $5)
- butterfly pin backs and nails (if you want this to be a pin-on patch)
Table of Contents
Attached to this step is a compressed folder of the superhero designs (Superman, Green Lantern, Wonder Woman, Batman, Ironman, Flash) that I've vectorized in Adobe Illustrator, but the next steps 3-6 outline the process that I went through to vectorize and color-separate them (the step title gives a hint at the technique used for patch design). Use those steps as inspiration on how to design your own patterns. Then steps 7 to 9 walk through the circuit design and graphics details on rastering the path so you can have a guide for sewing, and the actual sewing and gluing goes from step 10 to 17.
Batman: Using Silhouette Image Tracing


image source: http://www.vectortemplates.com/raster/batman-logo...
Sometimes you just want the outline of an object/shape, but you can't seem to isolate it from the other vector paths. The Silhouette image tracing option makes this easier.
See the notes in each picture above for step-by-step instructions on how I used this technique.
Wonder Woman: Similifying Multiple Layers


image source: http://www.topironons.com/images/Wonder_woman_iron...
Having many concentric circles or just layers in general is not a good idea for these patches since having more layers means that the patch is thicker and thus more awkward. To compromise between having multiply color changes (see the red, white, and blue border for the Wonder Woman crest?), we can trim some layers to be less bulky. This was used in the Captain America design that you see in the intro page image.
See the notes in each picture above for step-by-step instructions on how I used this technique.
Captain America: Minimizing Your Number of Layers (part 2)


https://s-media-cache-ak0.pinimg.com/564x/03/2f/ce...
Sometimes you want to minimize the amount of layers you have, as I mentioned earlier in the Wonder Woman design. For this case, I had a lot of circles so I wanted to cut only a stroke outline of the white one instead of overlaying more circles on top.
When making the design, I wanted to minimize the amount of layers so instead of another white circle behind the blue one, I wanted to cut just a band. So I just make a circle, increased its stroke to desirable size, and went to image > expand to vectorize the path outline.
See the notes in each picture above for step-by-step instructions on how I used this technique.
Spiderman: Clever Uses for the White Arrow and Shape Builder Tools


image source: http://www.freelogovectors.net/wp-content/uploads...
The white arrow tool is very helpful for getting rid of specific paths; in spiderman's case, I used it to get the black outline behind the red parts. I also used the shape builder tool to capture the correct and exact shape of the eyes.
See the notes in each picture above for step-by-step instructions on how I used this technique.
Creating a Pattern Brush for Making Sewing Holes


In order to make the sewing process simpler and reproducible with guidelines, I rastered the holes onto the leather that supports the back of the patch. I began with designing the circuit: this just means connecting all the positive and negative ends of the LEDs together without crossing any of the paths.
After the circuit is designed, I go to Adobe Illustrator to draw those paths. To make the brush that I used for holes, I used the new pattern brush (or scatter brush, though pattern is better) option. See the notes in the pictures above to see how I did this.
Designing Circuits: Simple Circle Example


This example is the circular ring of LEDs featured in the Captain America patch. Designing the circuitry just means that you need to find a path to connect all the positive and negative ends of the LEDs together without crossing any of the paths.
You might be wondering: no resister?? What if your LEDs get burnt out? Well, I relied on the intrinsic resistance of my sewn circuit: the conductive thread has resistance of its own, and since my strip is quite long the resistance is low but works for my circuit (~10 ohms per foot, and I used about 2-3 feet). I could calculate with Ohm's law, but my electrical engineering class is over and I'm not worried about hitting specific values.
Naive?
Perhaps.
But am I selling this as a product and worried about perfection? Not really. If you are worried though, simply hook up a resistor (330 ohm or lower should do) in series with your LEDs (so right before of after the conductive thread is sewn to your positive or negative terminal on the battery holder).
See the notes in the pictures above for step-by-step instructions. You'll need to skip to step 10 really quick at the second image above to see how to find where your negative and positive terminals should end.
More Advanced Circuits


This example is for the y-shaped LED pattern for the Iron Man patch. To get to the LED in the center, I had to reroute the path into a strange upside-down 7 shape. Again, designing the circuitry just means that you need to find a path to connect all the positive and negative ends of the LEDs together without crossing any of the paths, so there are multiple ways to accomplish this! I just happened to think of this one.
See the notes in the pictures above for step-by-step instructions. You'll need to skip to step 10 really quick at the third image above to see how to find where your negative and positive terminals should end.
Adding More Holes for Battery Holder


To sew on your battery holder, take notes on the geometry of the design and where you'll need the holes. My breakout board was 1.25" square, so I drew a square with those dimension on Illustrator and placed attachment holes to sew through the battery holder, using guidelines for positioning the holes properly. See the notes in the pictures above for step-by-step instructions.
Homemade LED Sequins


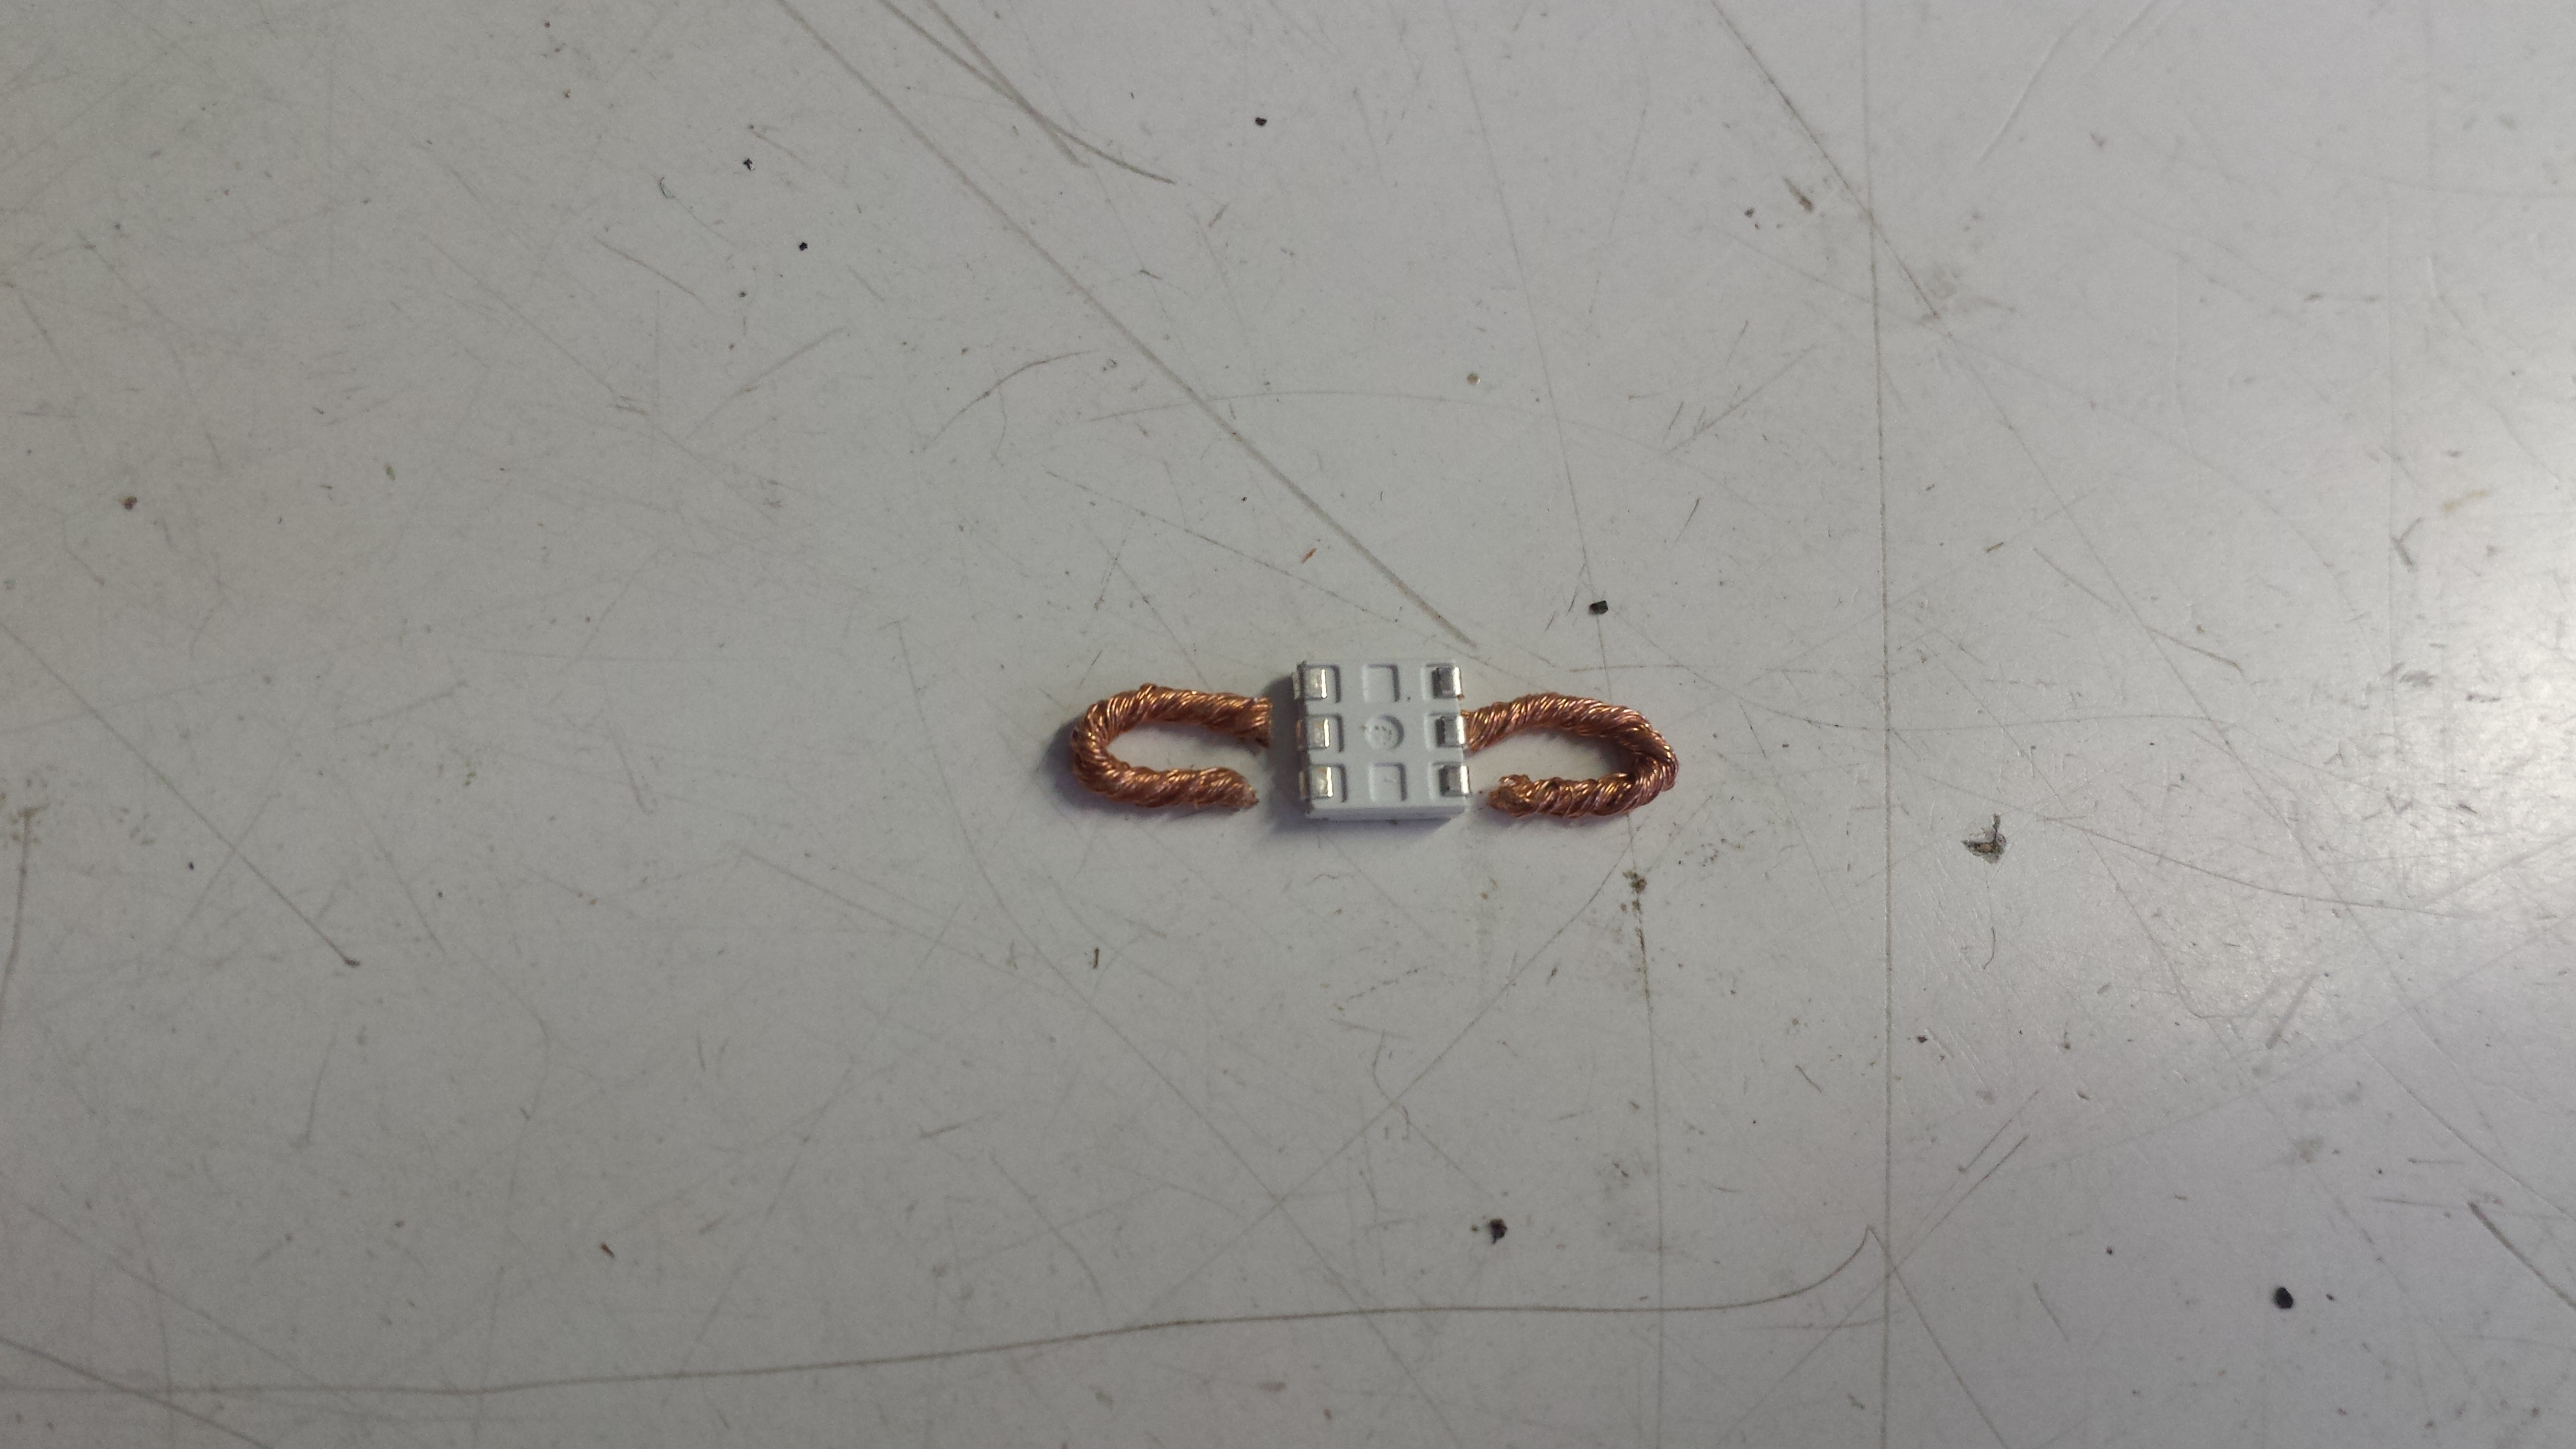
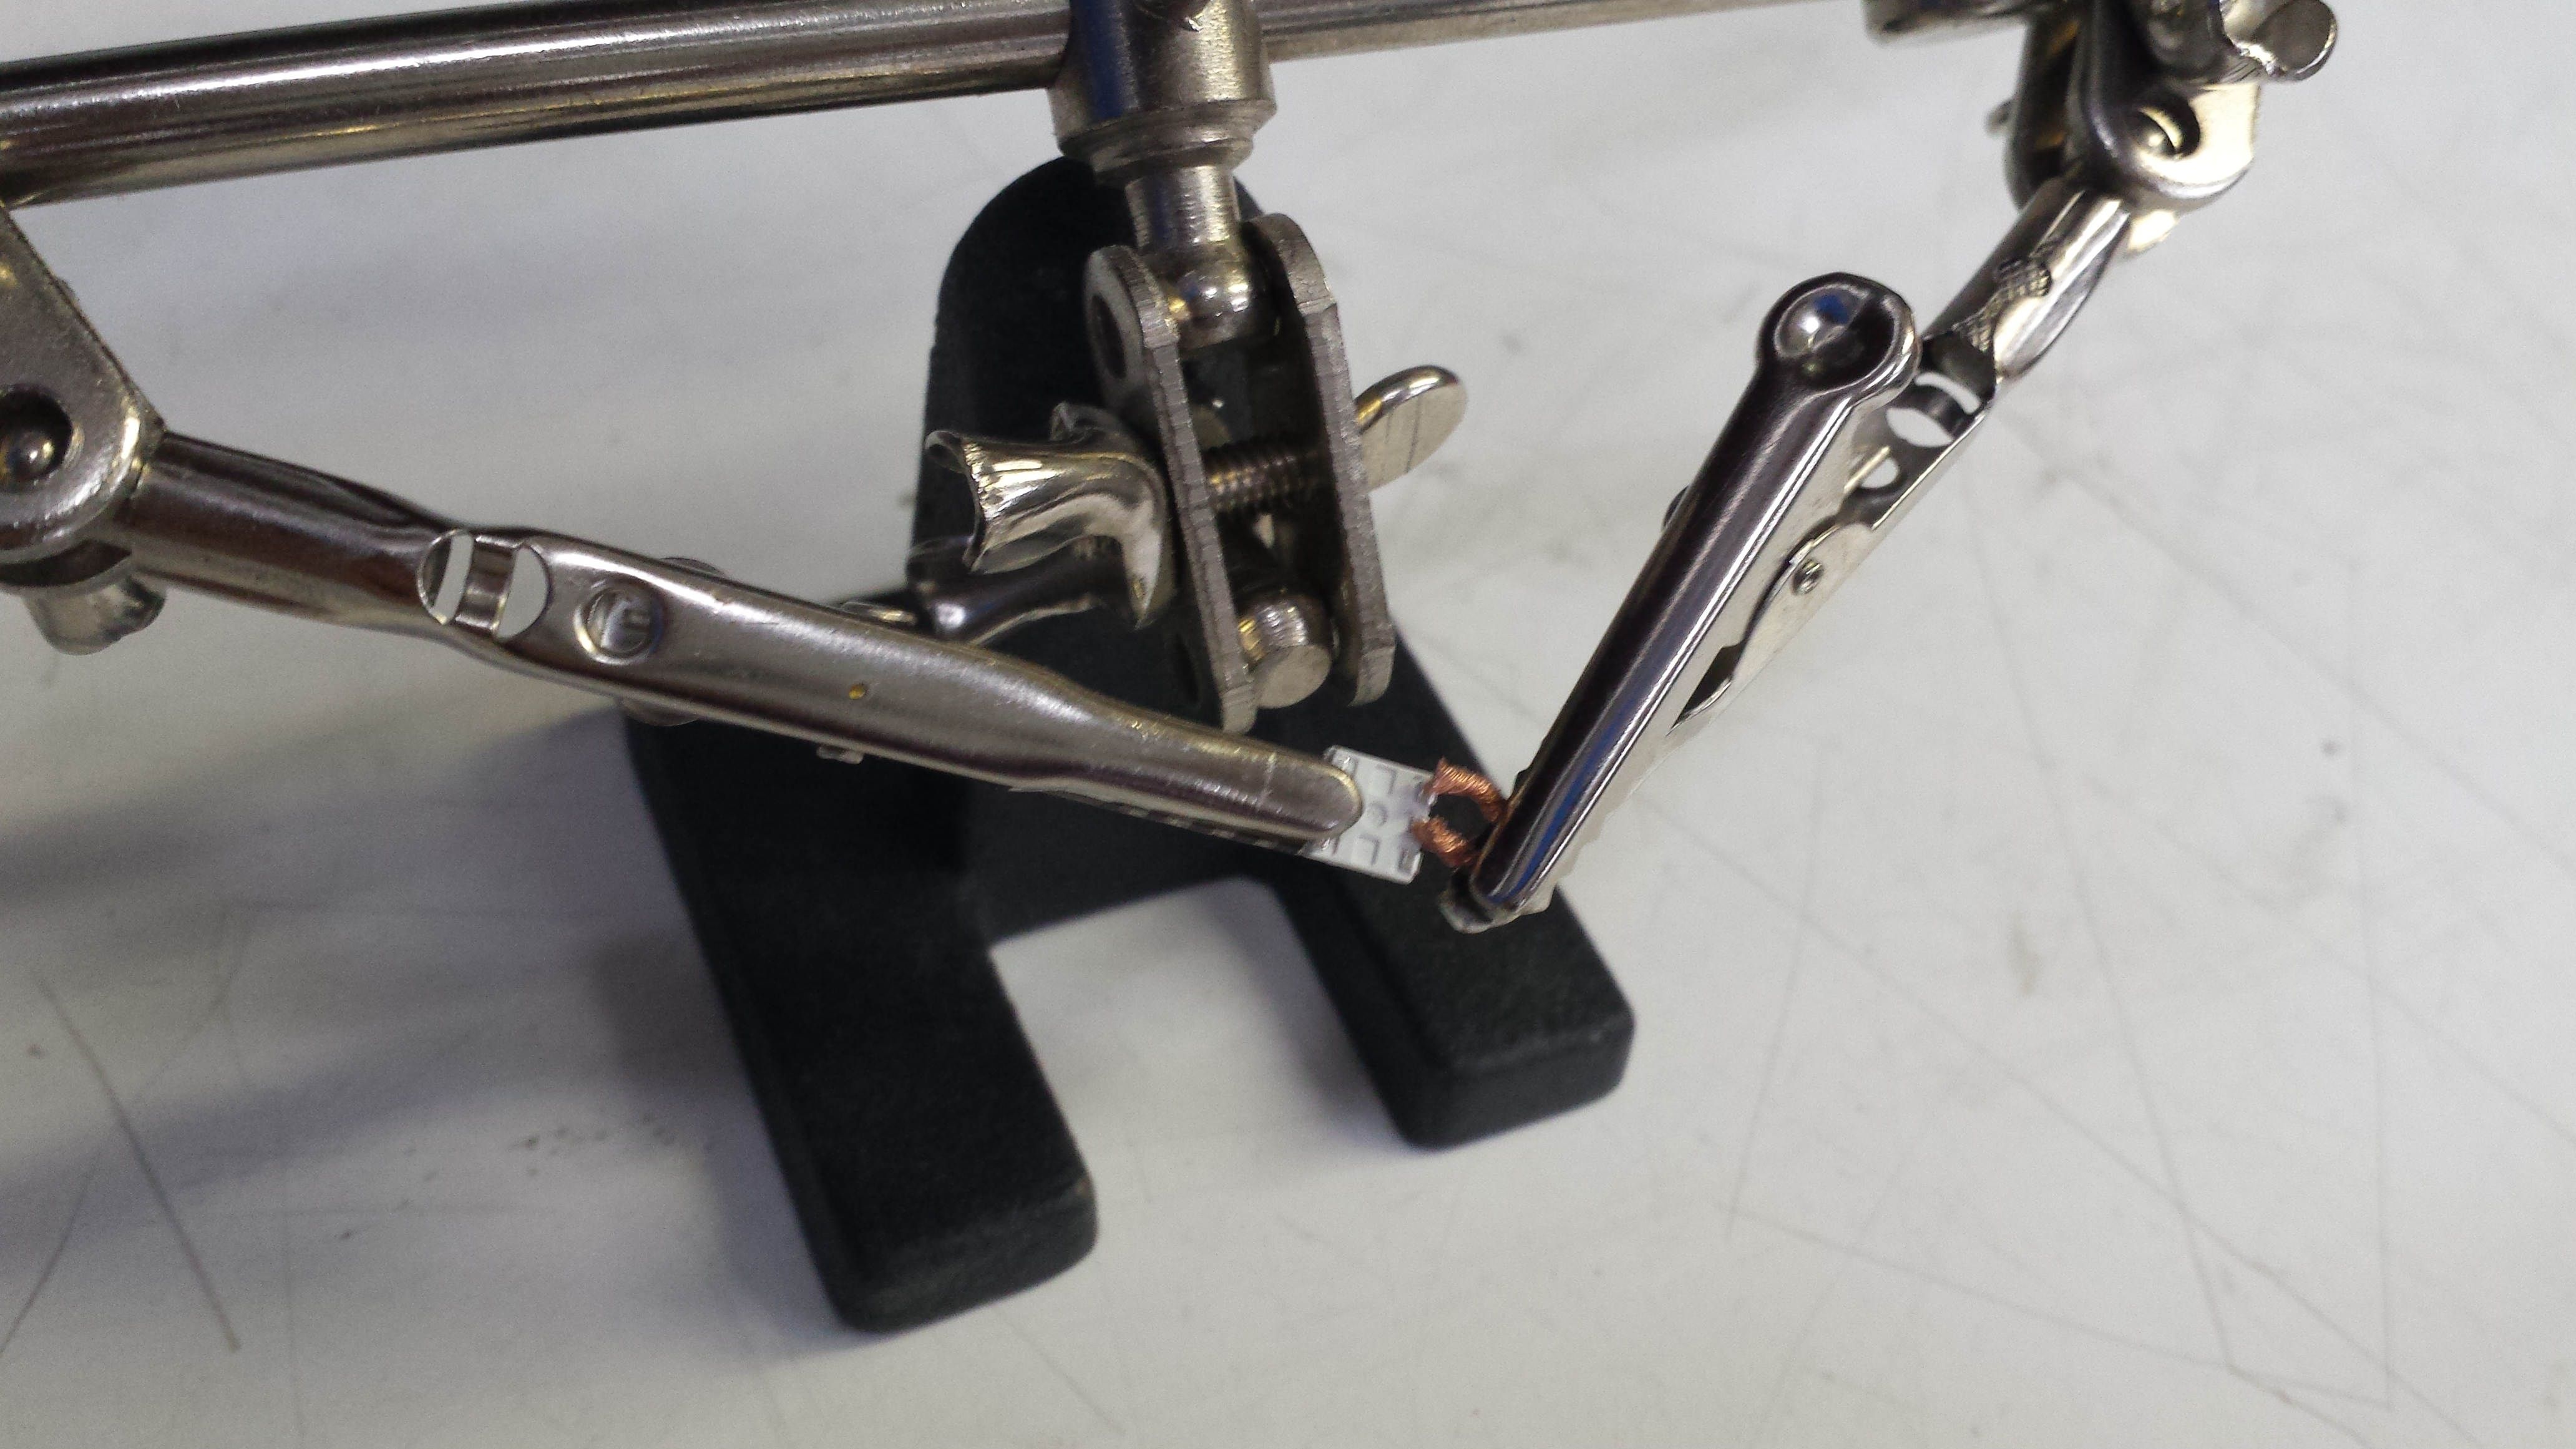
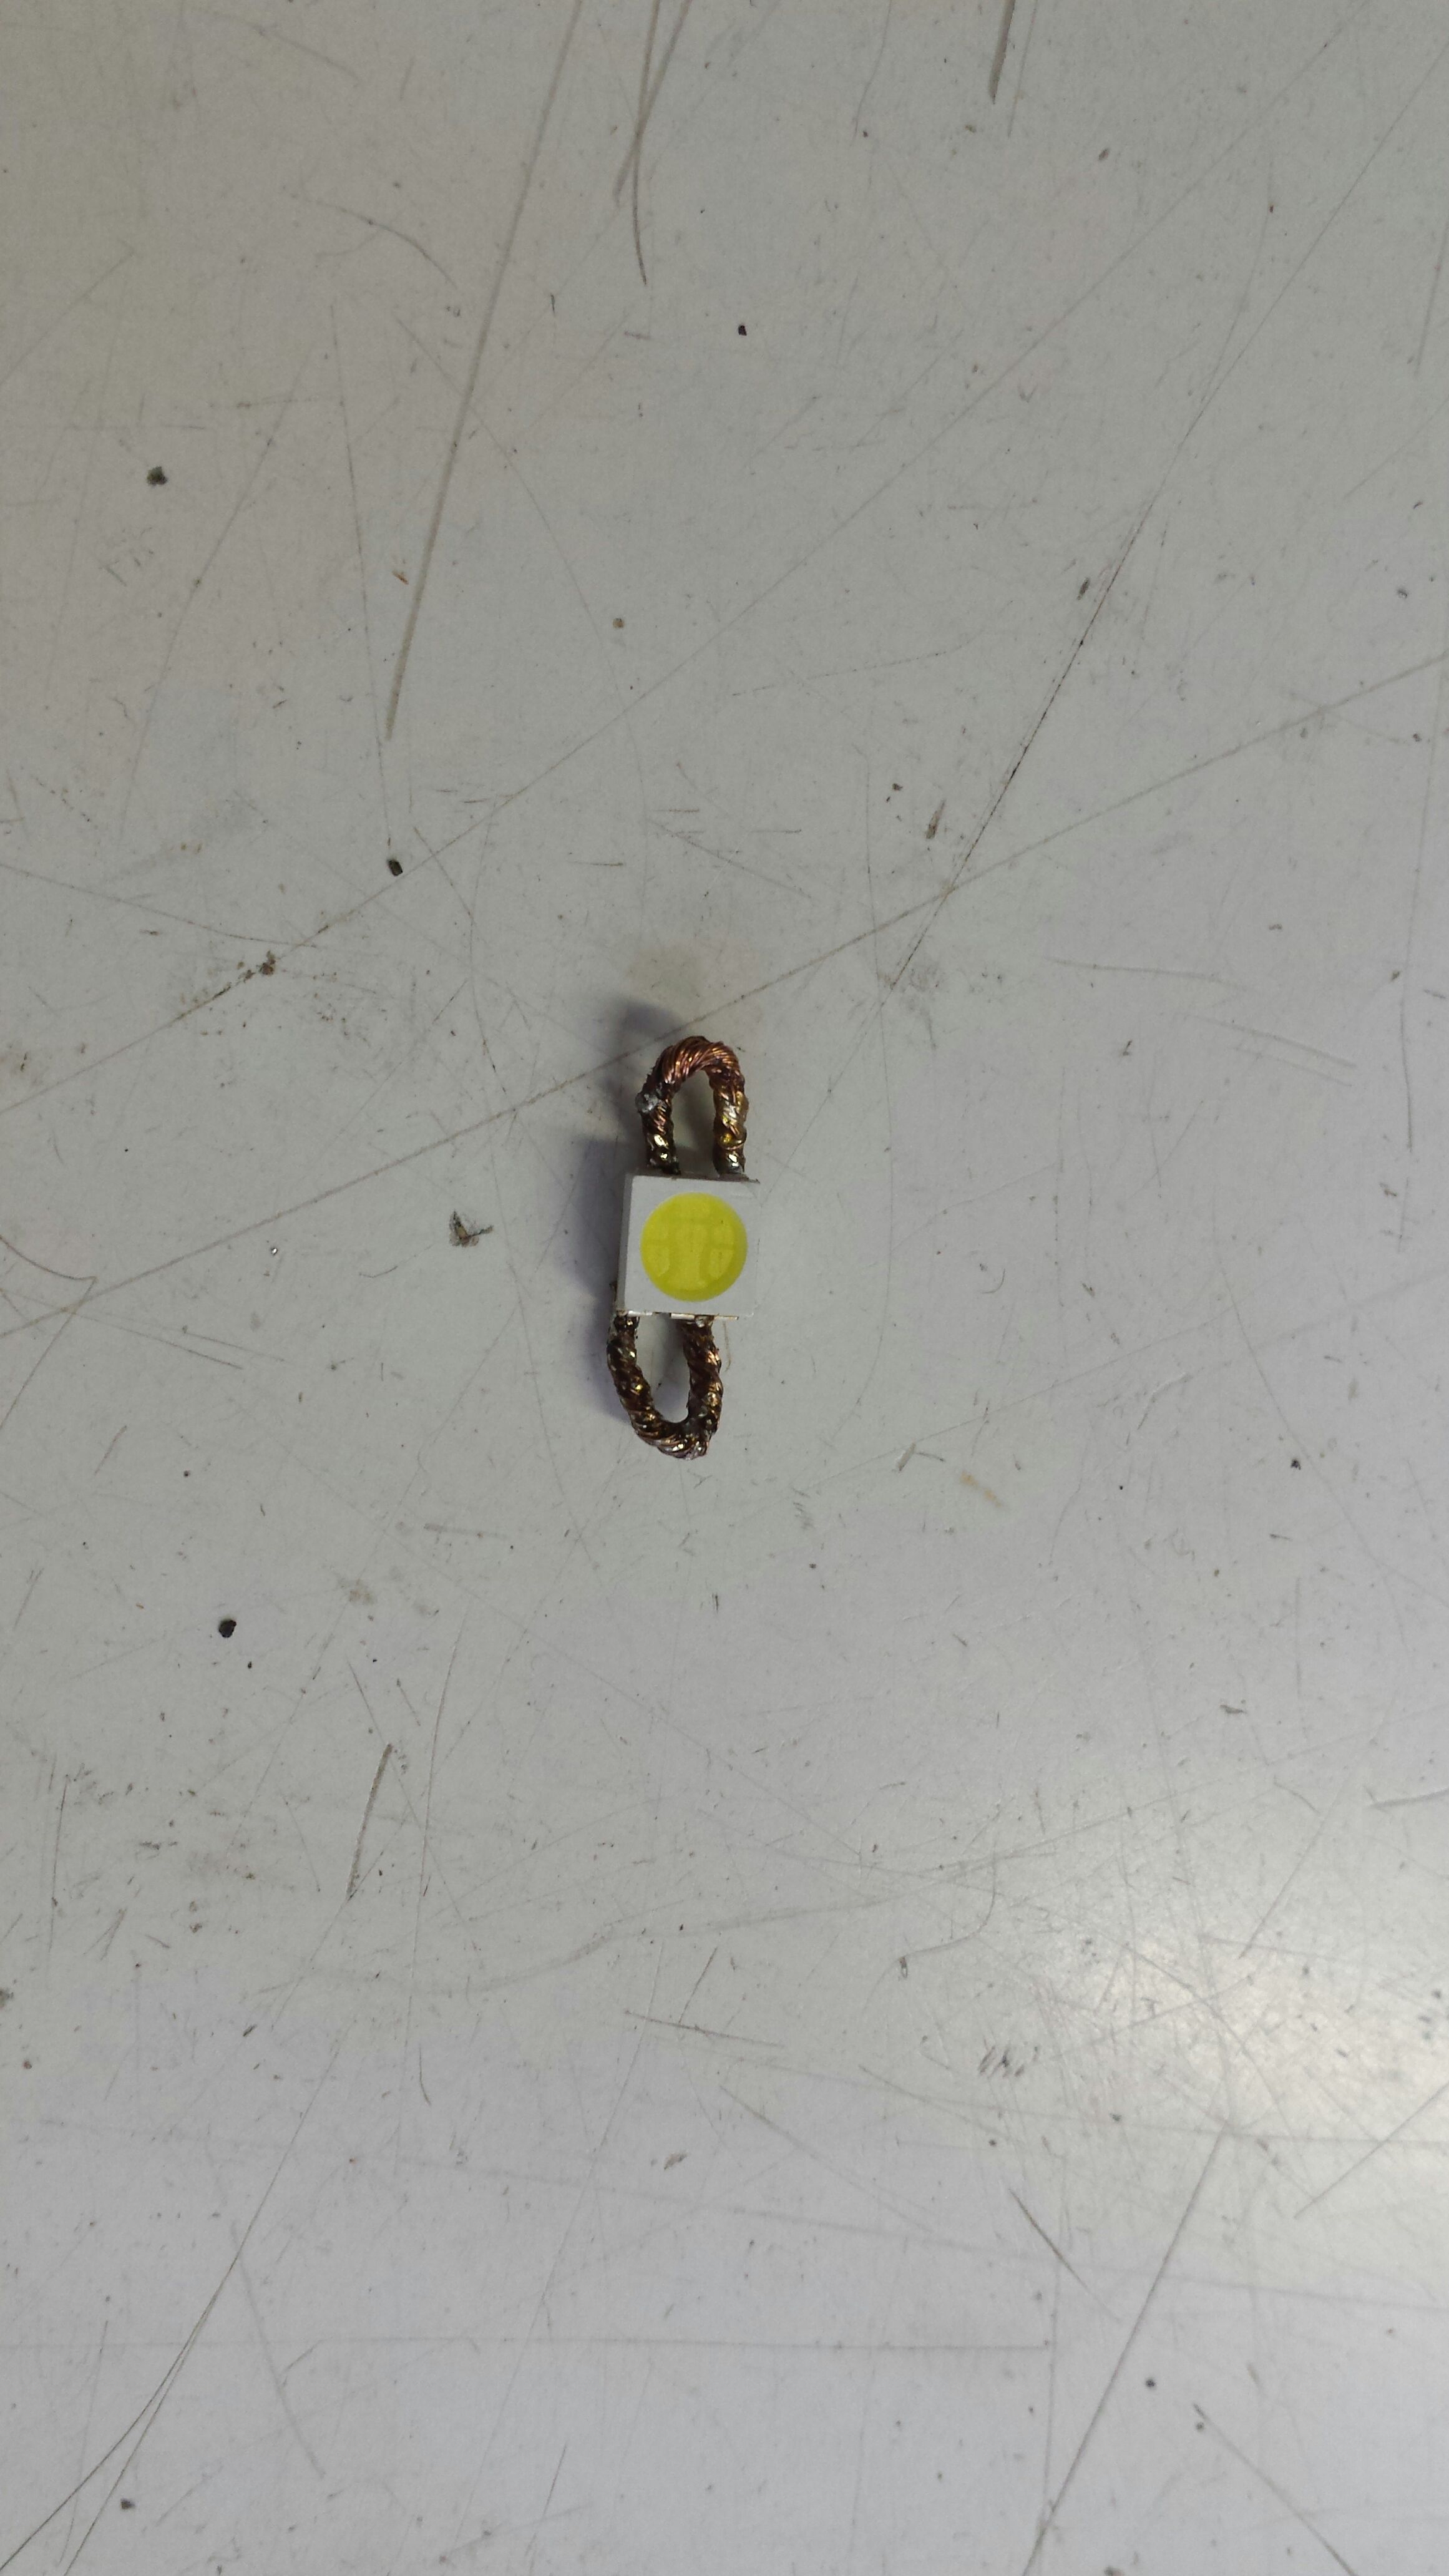
Begin by cutting off two loops of solder wick (I suggest twisting it like you see in the first picture above to make it a more compact round wire rather than a flat braid). These will then be soldered onto either side of the surface mount LED as shown in the third picture above. Make as many as you think you'll need.
Test the connection of each with a multimeter (voltage drop should exist when you put the multimeter probes on either solder wick loop) so that you're sure your LED will work.
Cutting Leather


For the pattern, you'l want to make sure that your holes are rastered all the way down for thicker leather so that you can easily run your needle through the holes. With thicker leathers your fingers will hate you if you don't.
To cut the leather, use settings that work for your specific leather. You can run cutting tests (serial decreasing of power and speed settings to see what cuts and rasters fully through. For the__ thick leather that I used, 25-30% speed and 95% power cut fully through and 1% speed and 95% power rastered the holes fully through. I know, 1% speed is a drag but I haven't had time to fully optimize the parameters. Raster cuts could get the result much faster, so change the holes to smaller raster cuts if you'd like to save on time.
Cutting Felt/fabric


Same as for the leather, use settings to see what cuts and rasters fully through. For the craft fleece and felt that I used, 95% speed with 10-15% power went all the way through, but run through your laser's cutting tests (serial decrease in speed and power) to see what works with minimal scorch marks.
Of course, you can go the laser-free method and just cut the felt by hand -- just print out the template and cut that out with the fabric beneath.
Adjustments


Be careful with thin lines in your design, as your laser might burn your fabric so much that your shape doesn't turn out as you'd like. For my Iron Man design, the lines in the original image was too thin so I manually went back in Illustrator to change the shape paths. See the notes in image 2-3 above to sew how I did this.
Sewing Your Circuit: Batman


Once you have all your layers, it's time to sew!
To sew your circuit, I simply used a running stitch and several stitches at the LEDs to tack them down. See the notes in the pictures above for step-by-step instructions.
Layer to Cover LEDs


I didn't want my LEDs exposed so I hid them behind layers of the pattern. For batman, the bat symbol and yellow oval went on top of the black oval that the LEDs were sewn on top, so I just glued those together. I realized that two layers of fleece was a bit too much diffusion for the LEDs so they were faint, so in the future I'd sew the LEDs on top of the yellow layer and just glue the bat on top to cover them.
Then turn your battery holder on, and the LEDs should glow!
Funky Circuit Designs: Iron Man


For the Iron Man design, I knew that I wanted each LED to have only one layer of felt covering it. Thus, the center LED would be covered by the blue triangle layer, and the other three on the side would be covered by the white felt. This means that the other three will be sewn on top of the leather, and the center one will be sewn on top of the white felt. See the notes in the pictures above for step-by-step instructions of how I accomplished this.
Finished and Future Work

Even superheros need the occasional power up, and there are lots of ways to bring these wearable patches from just an LED to more complex, interesting designs. Consider:
- Use microcontrollers like Gemma and Flora from adafruit to control the color and intensity of your LEDs, and thus make blinking, color changing designs.
- How many LEDs can you fit on your patch?
- Attach sensors to the circuit to control how you power on and off: perhaps a motion detector?
In any case, feel free to leave any questions or comments below. Enjoy!