Sunglasses Holder
![IMG_4360.jpg](/proxy/?url=https://content.instructables.com/F3C/ZYS5/LIIV46AI/F3CZYS5LIIV46AI.jpg&filename=IMG_4360.jpg)
this is a sunglasses holder, for the 3D printing contest. School: Pacific High School, Oregon
Downloads
Supplies
fusion 360
First Sketch
![p1.png](/proxy/?url=https://content.instructables.com/F4O/XLW7/LIIV3VBG/F4OXLW7LIIV3VBG.png&filename=p1.png)
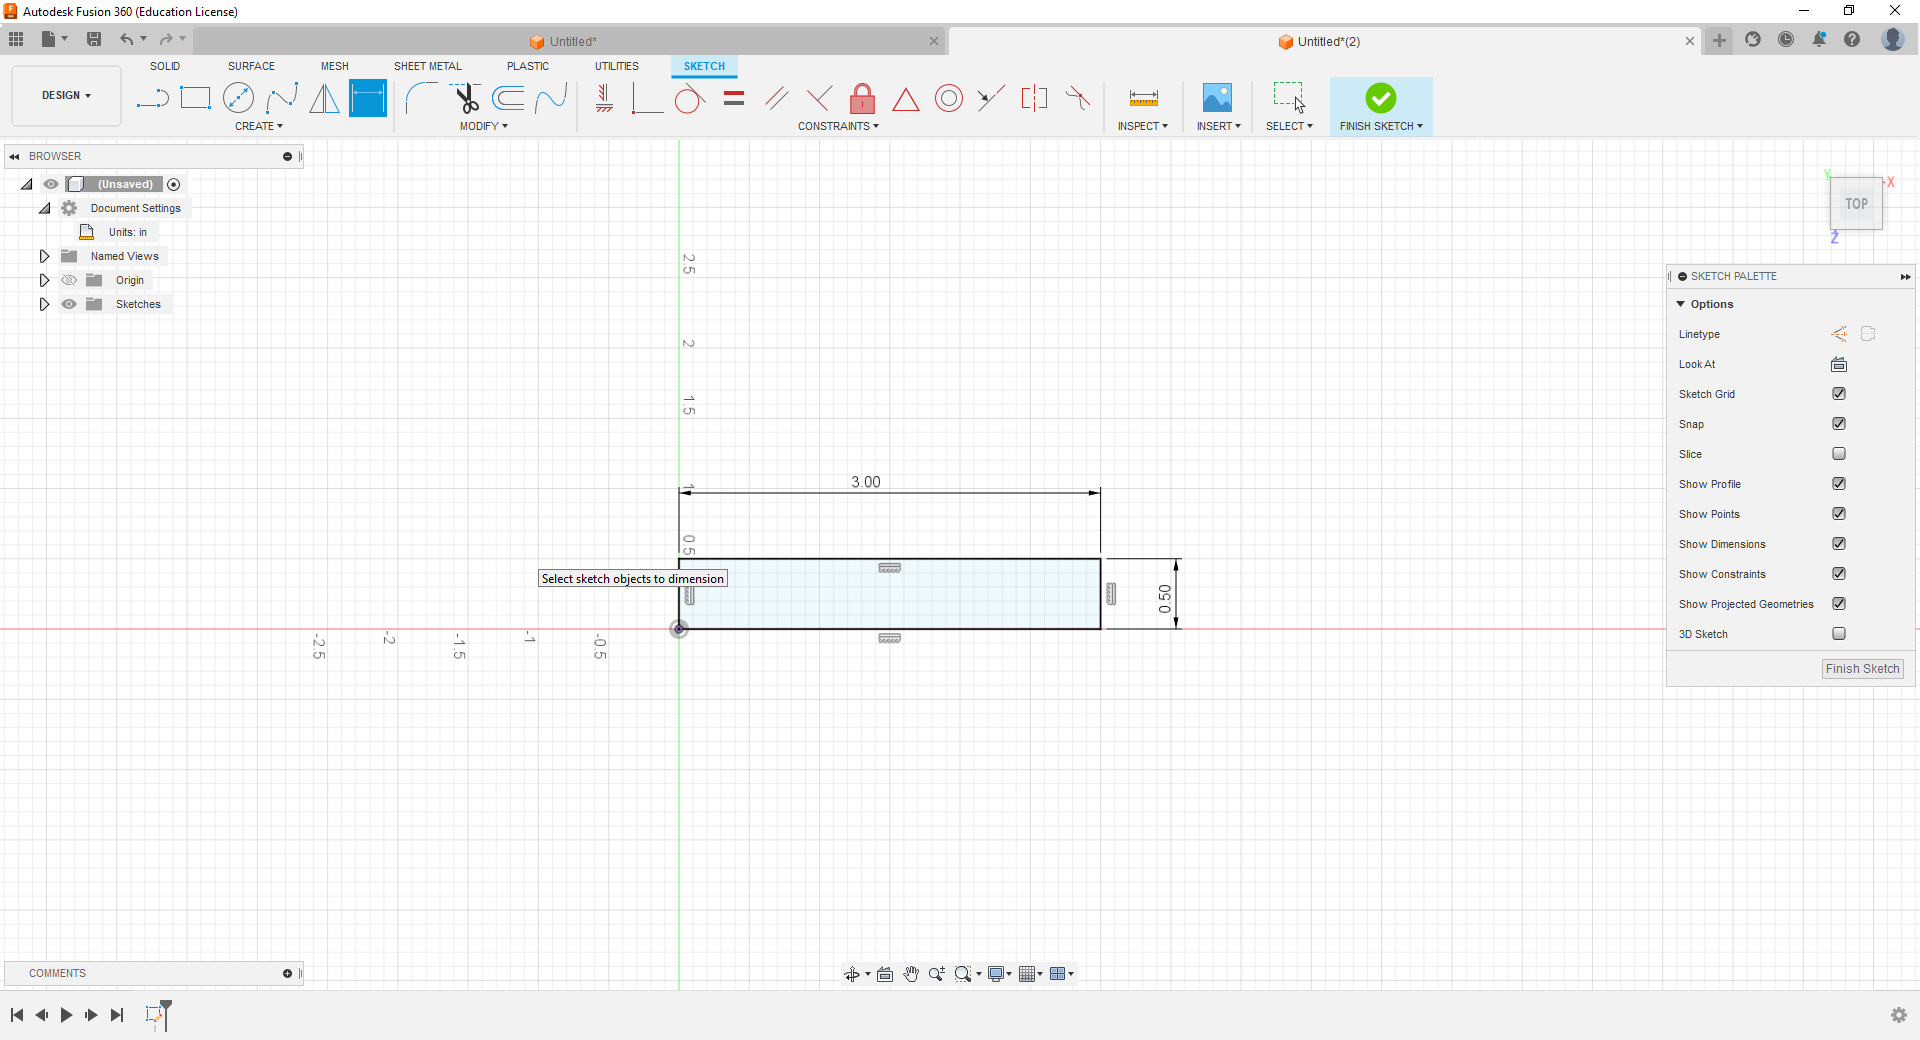
First you create a sketch on any face, then you click on the rectangle option on the tool bar. create the drawing as shown.
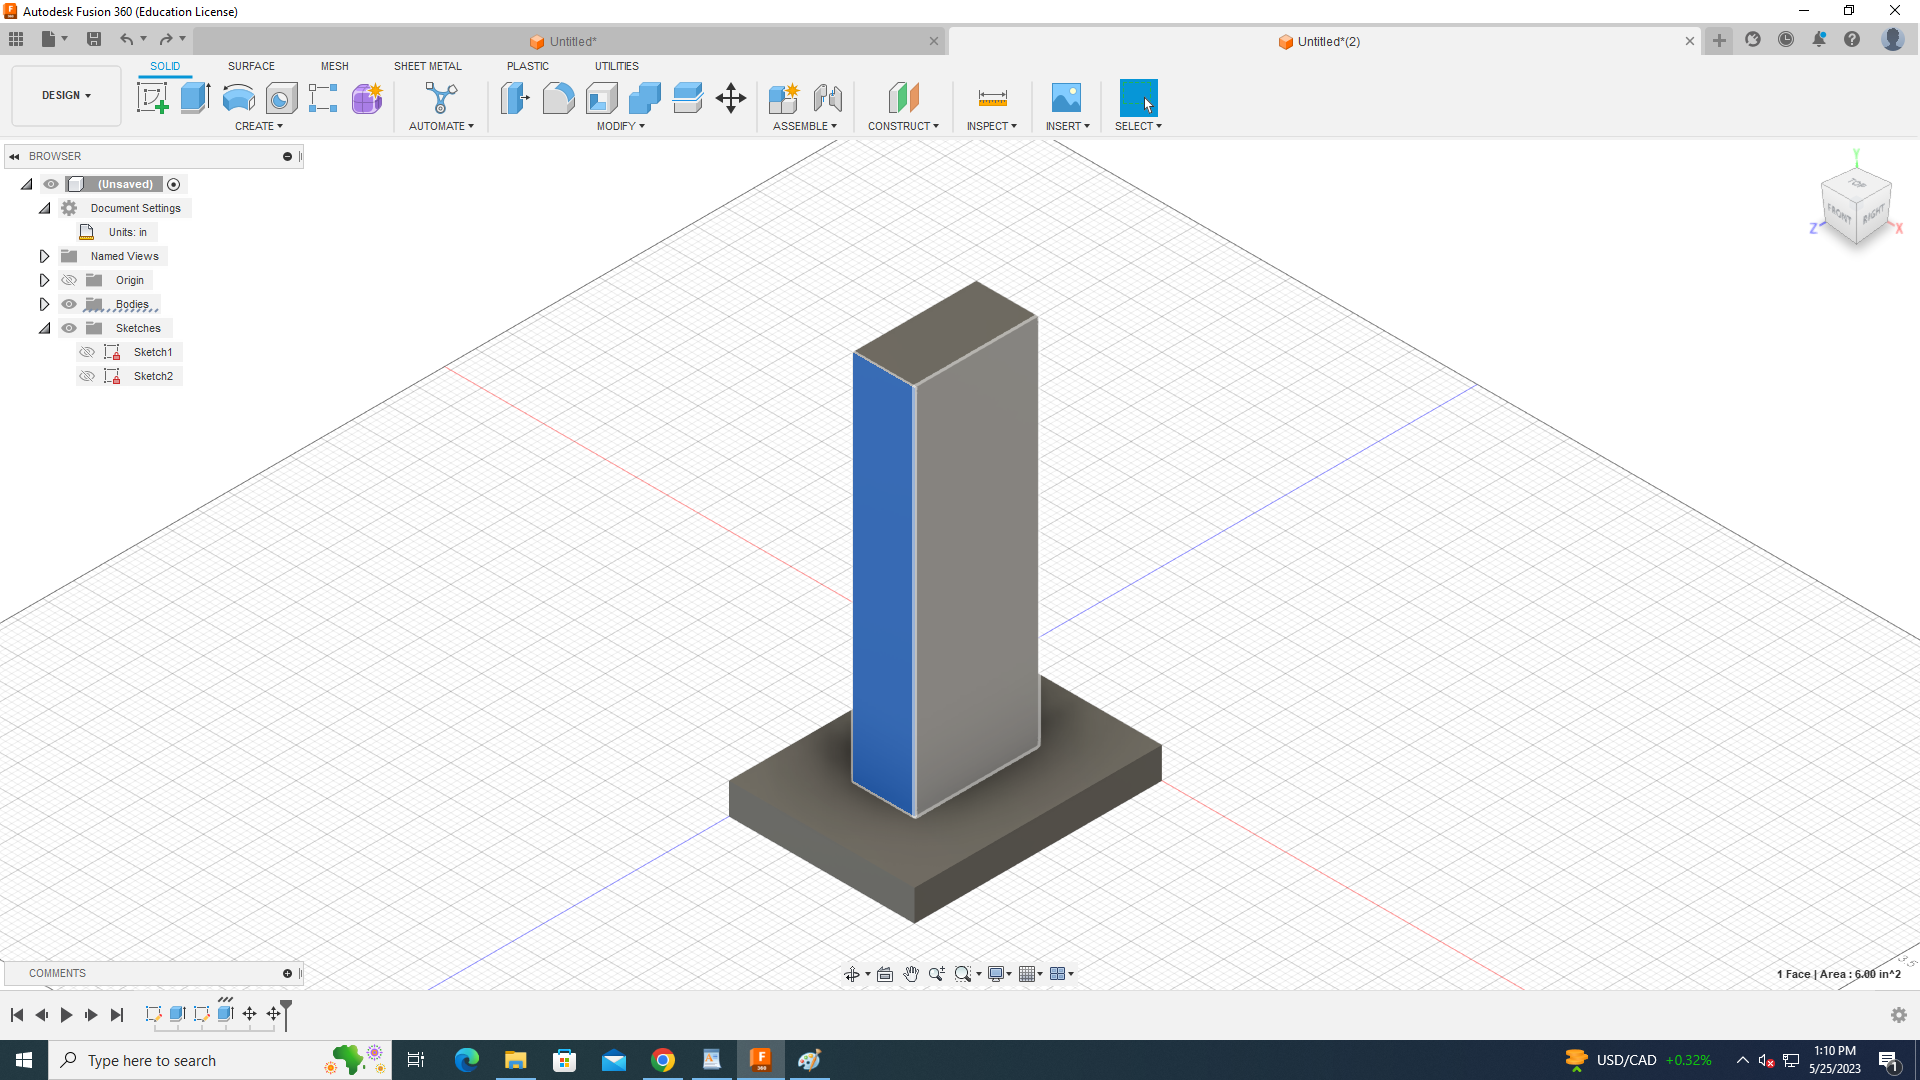
Base Extrude
![p2.png](/proxy/?url=https://content.instructables.com/FQG/VCFH/LIIV3VBM/FQGVCFHLIIV3VBM.png&filename=p2.png)
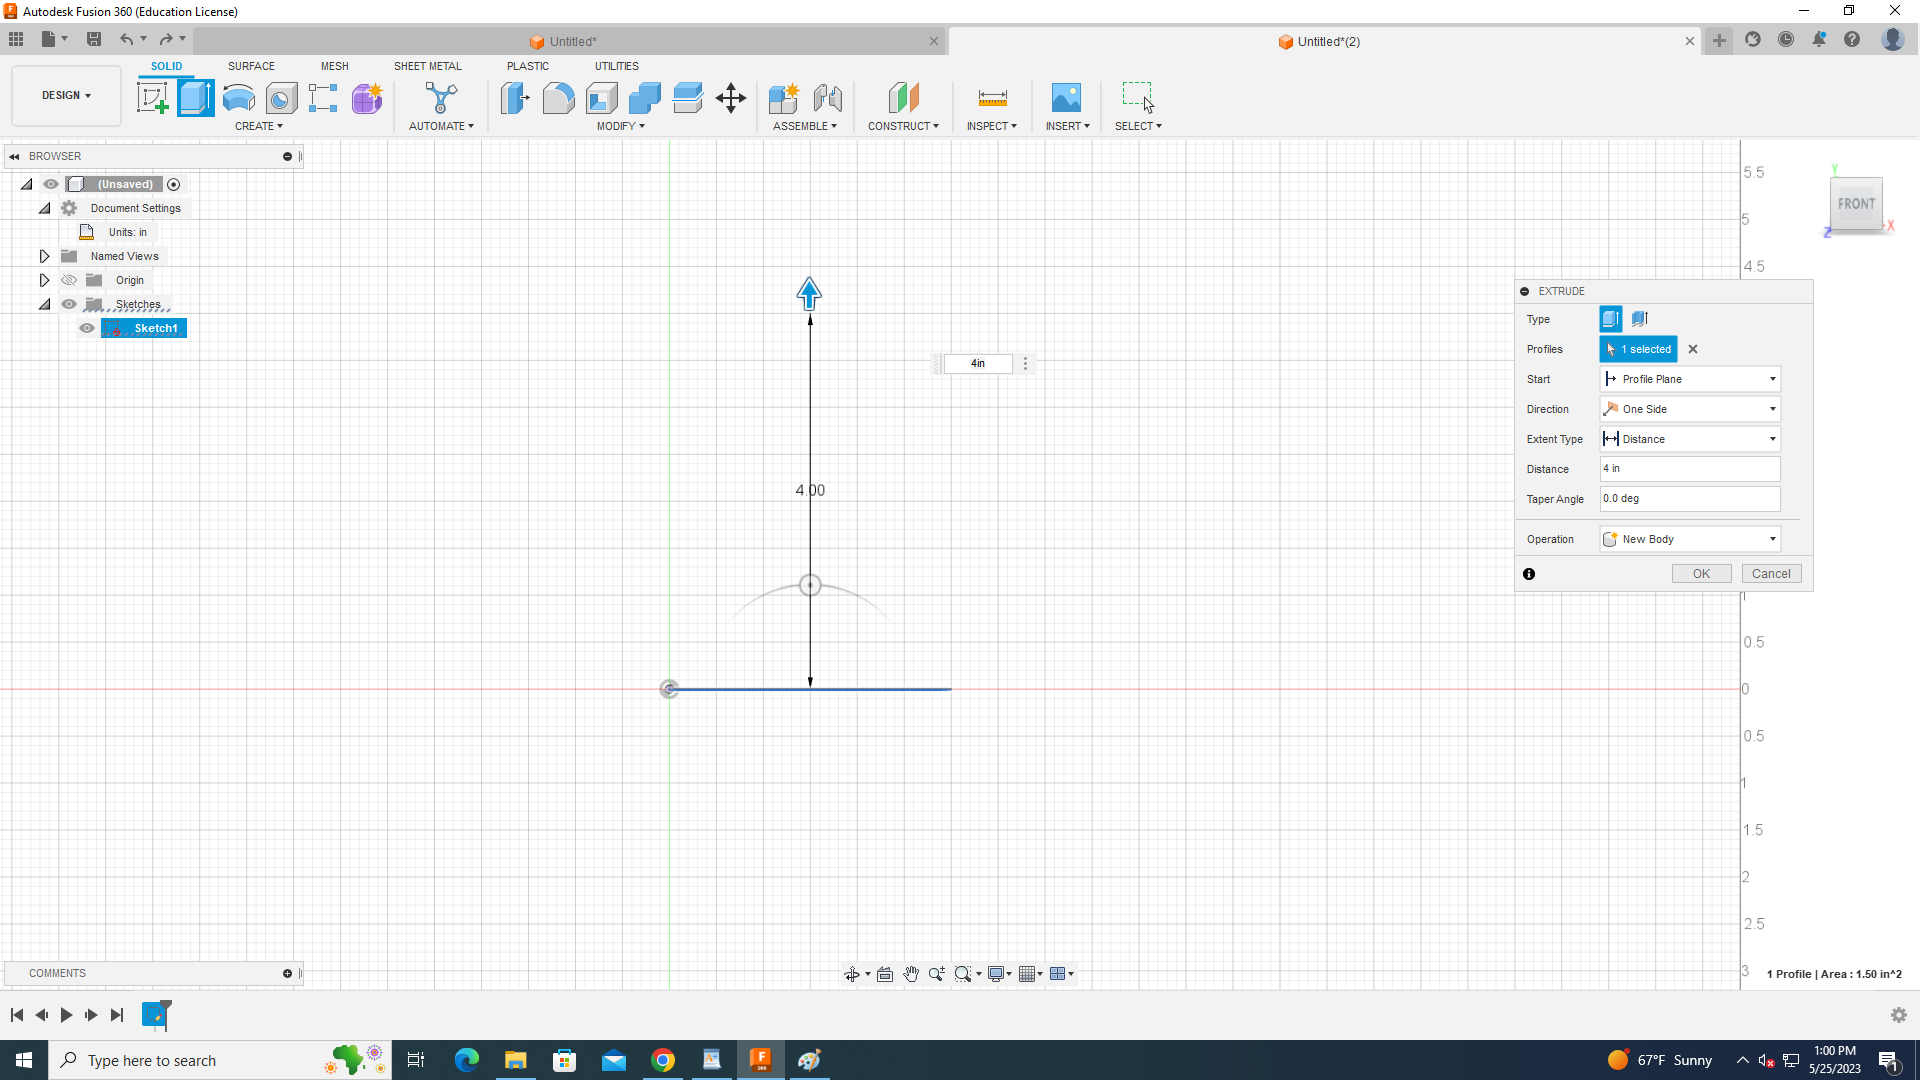
Once complete with last step click the E key on your keyboard. select the sketch and extrude 4 inches.
Secondary Base Sketch
![p3v2.png](/proxy/?url=https://content.instructables.com/FH9/04JD/LIIV3VBV/FH904JDLIIV3VBV.png&filename=p3v2.png)
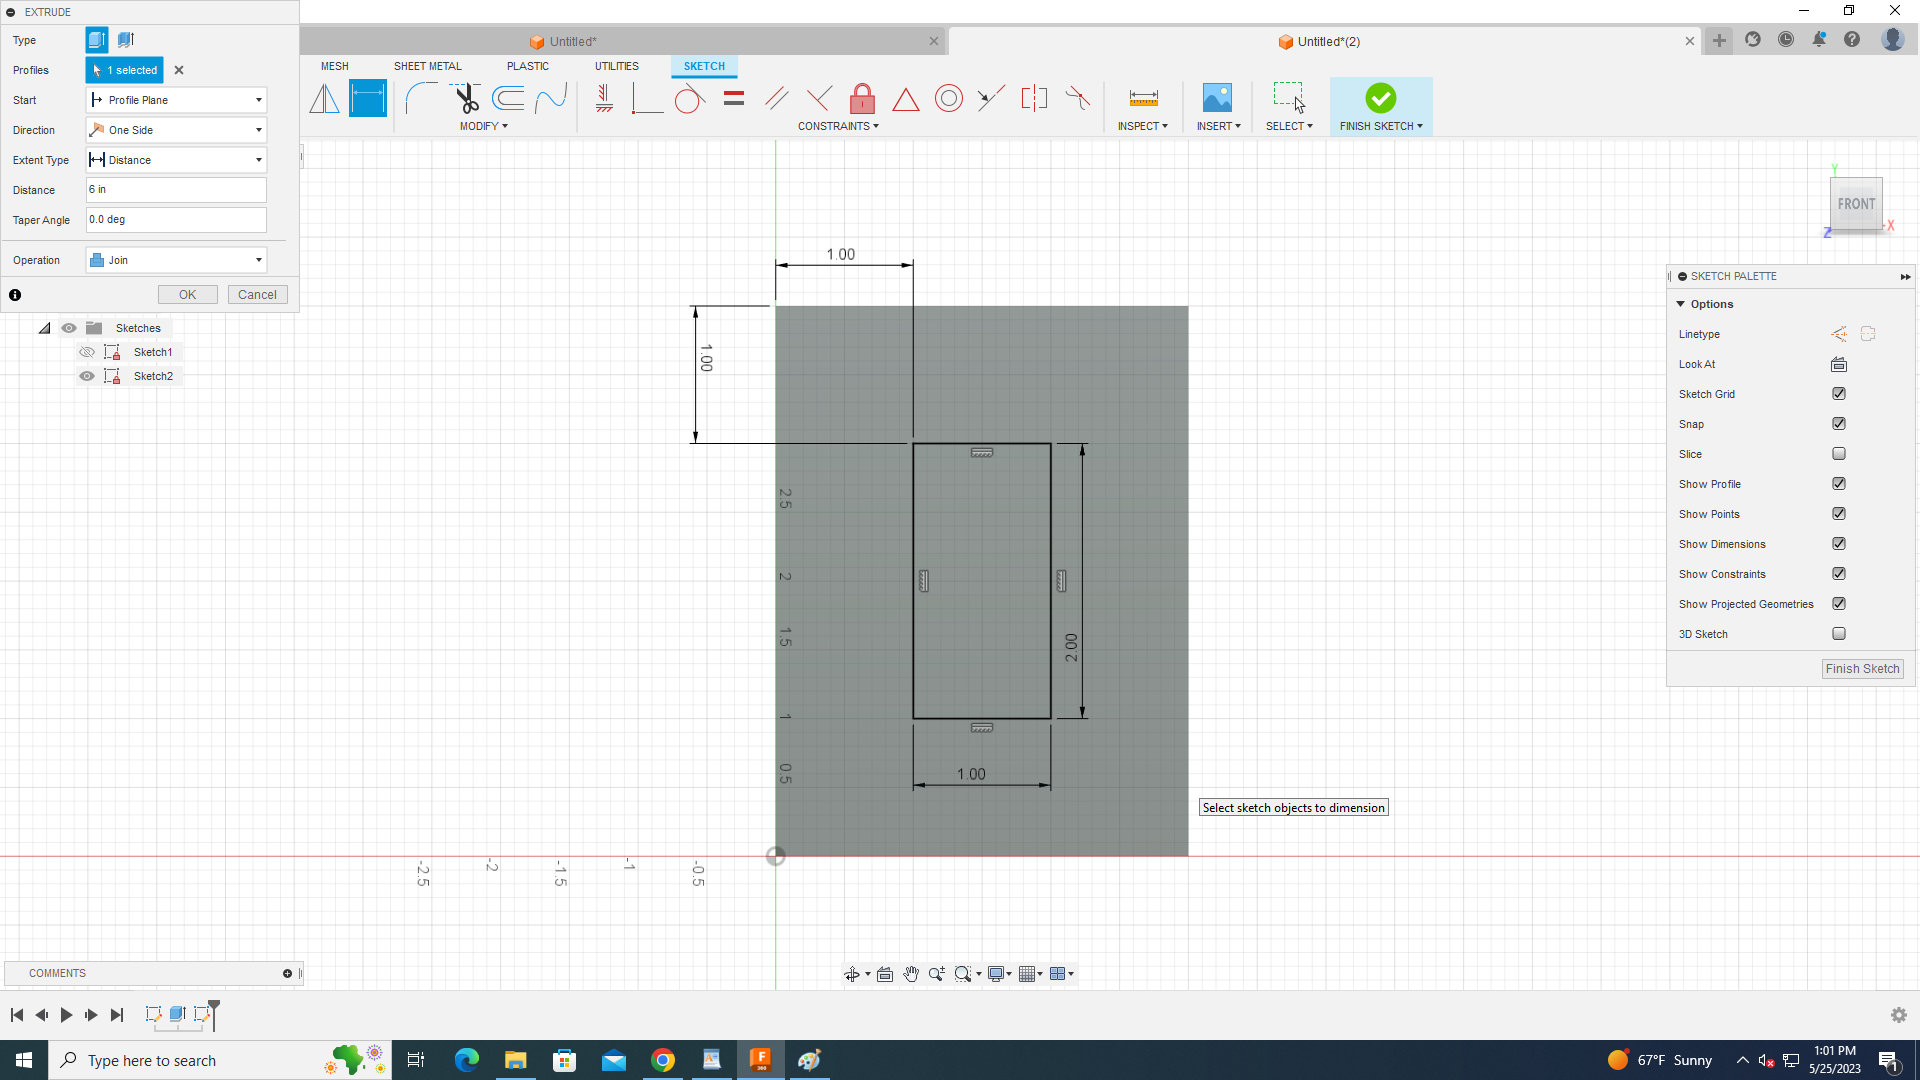
click on the top face of the new body and create sketch as show with the rectangle tool located in the top tool bar.
Secondary Extrude
![p4.png](/proxy/?url=https://content.instructables.com/FLR/BZHB/LIIV3VC7/FLRBZHBLIIV3VC7.png&filename=p4.png)
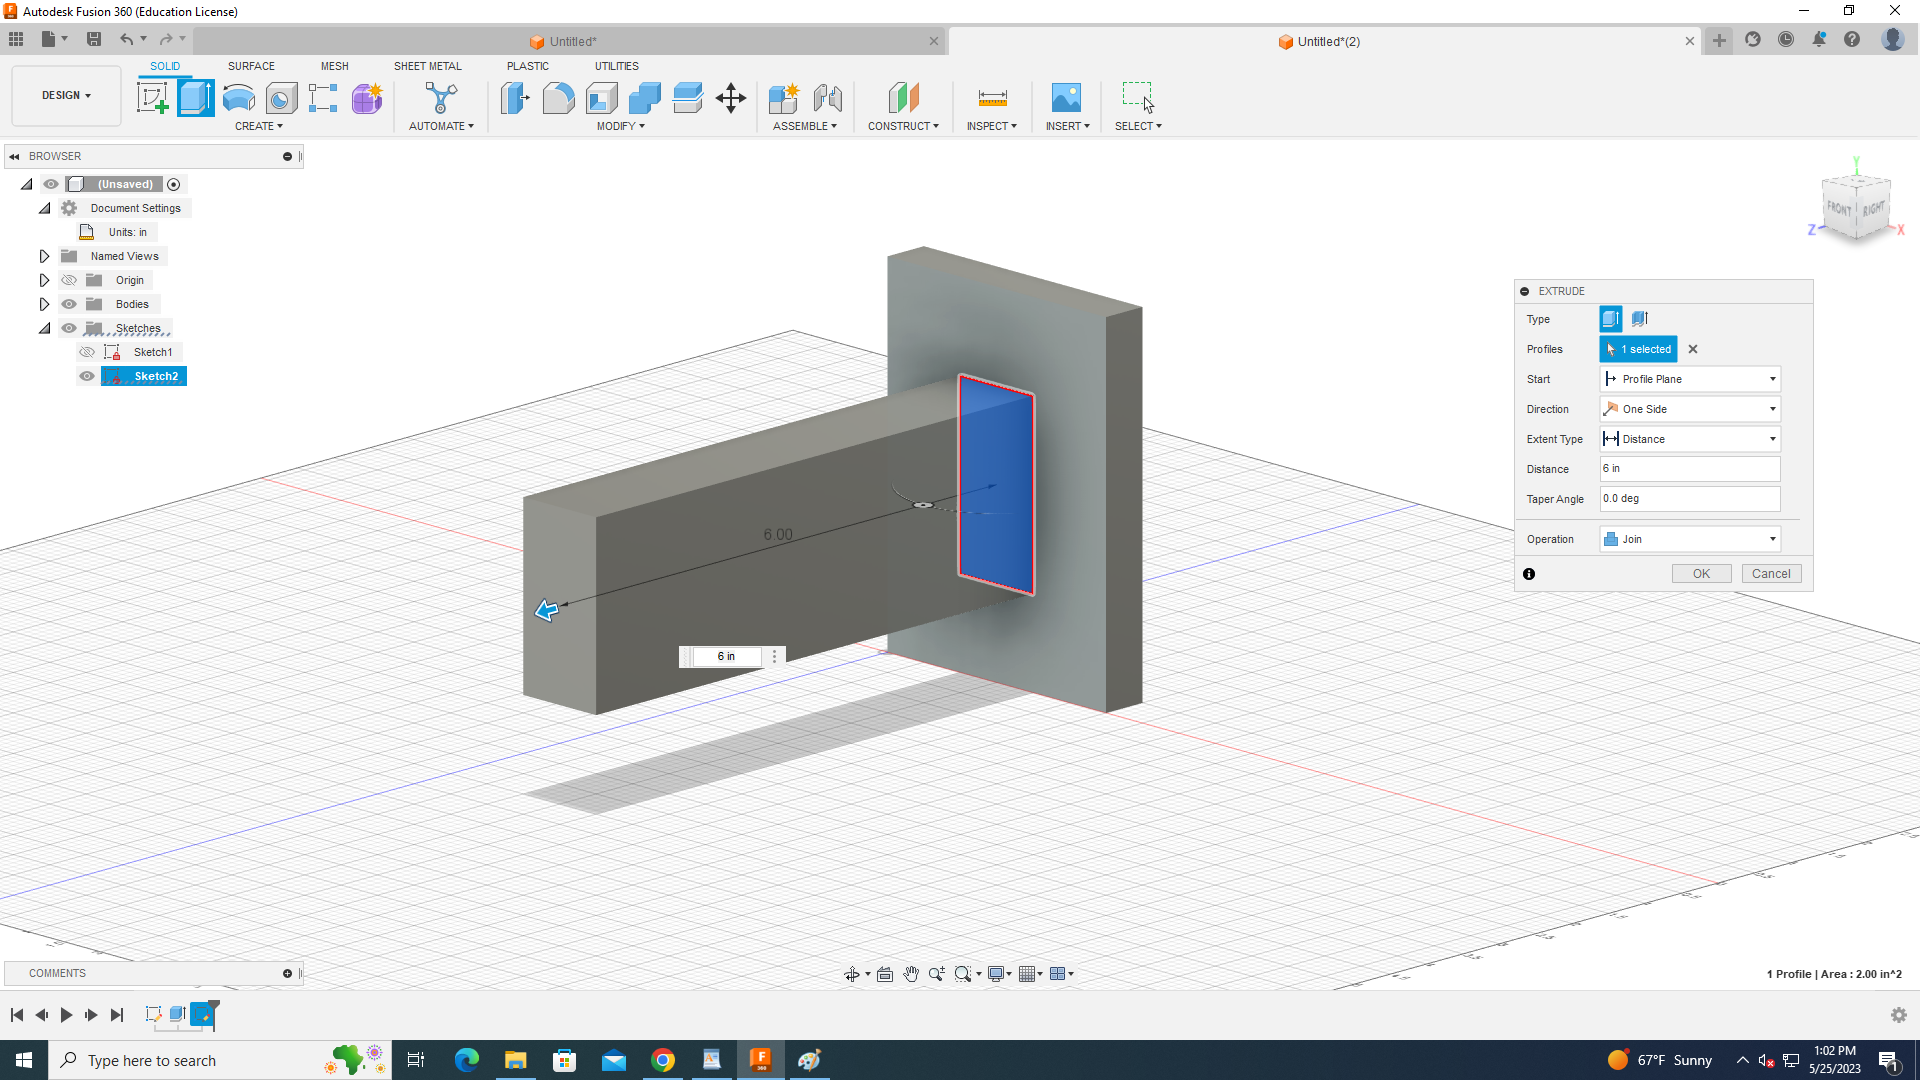
click on the newly created sketch and press E for extrude, then type in the little box that pops up 6 inches.
Slot Cut Out Sketch Part 1
![p5.png](/proxy/?url=https://content.instructables.com/FFR/Q0YD/LIIV3VCM/FFRQ0YDLIIV3VCM.png&filename=p5.png)
select the side of the new body and create a sketch on the face.
Slot Cut Out Sketch Part 2
![p6v2.png](/proxy/?url=https://content.instructables.com/FHA/3SVJ/LIIV3VD4/FHA3SVJLIIV3VD4.png&filename=p6v2.png)
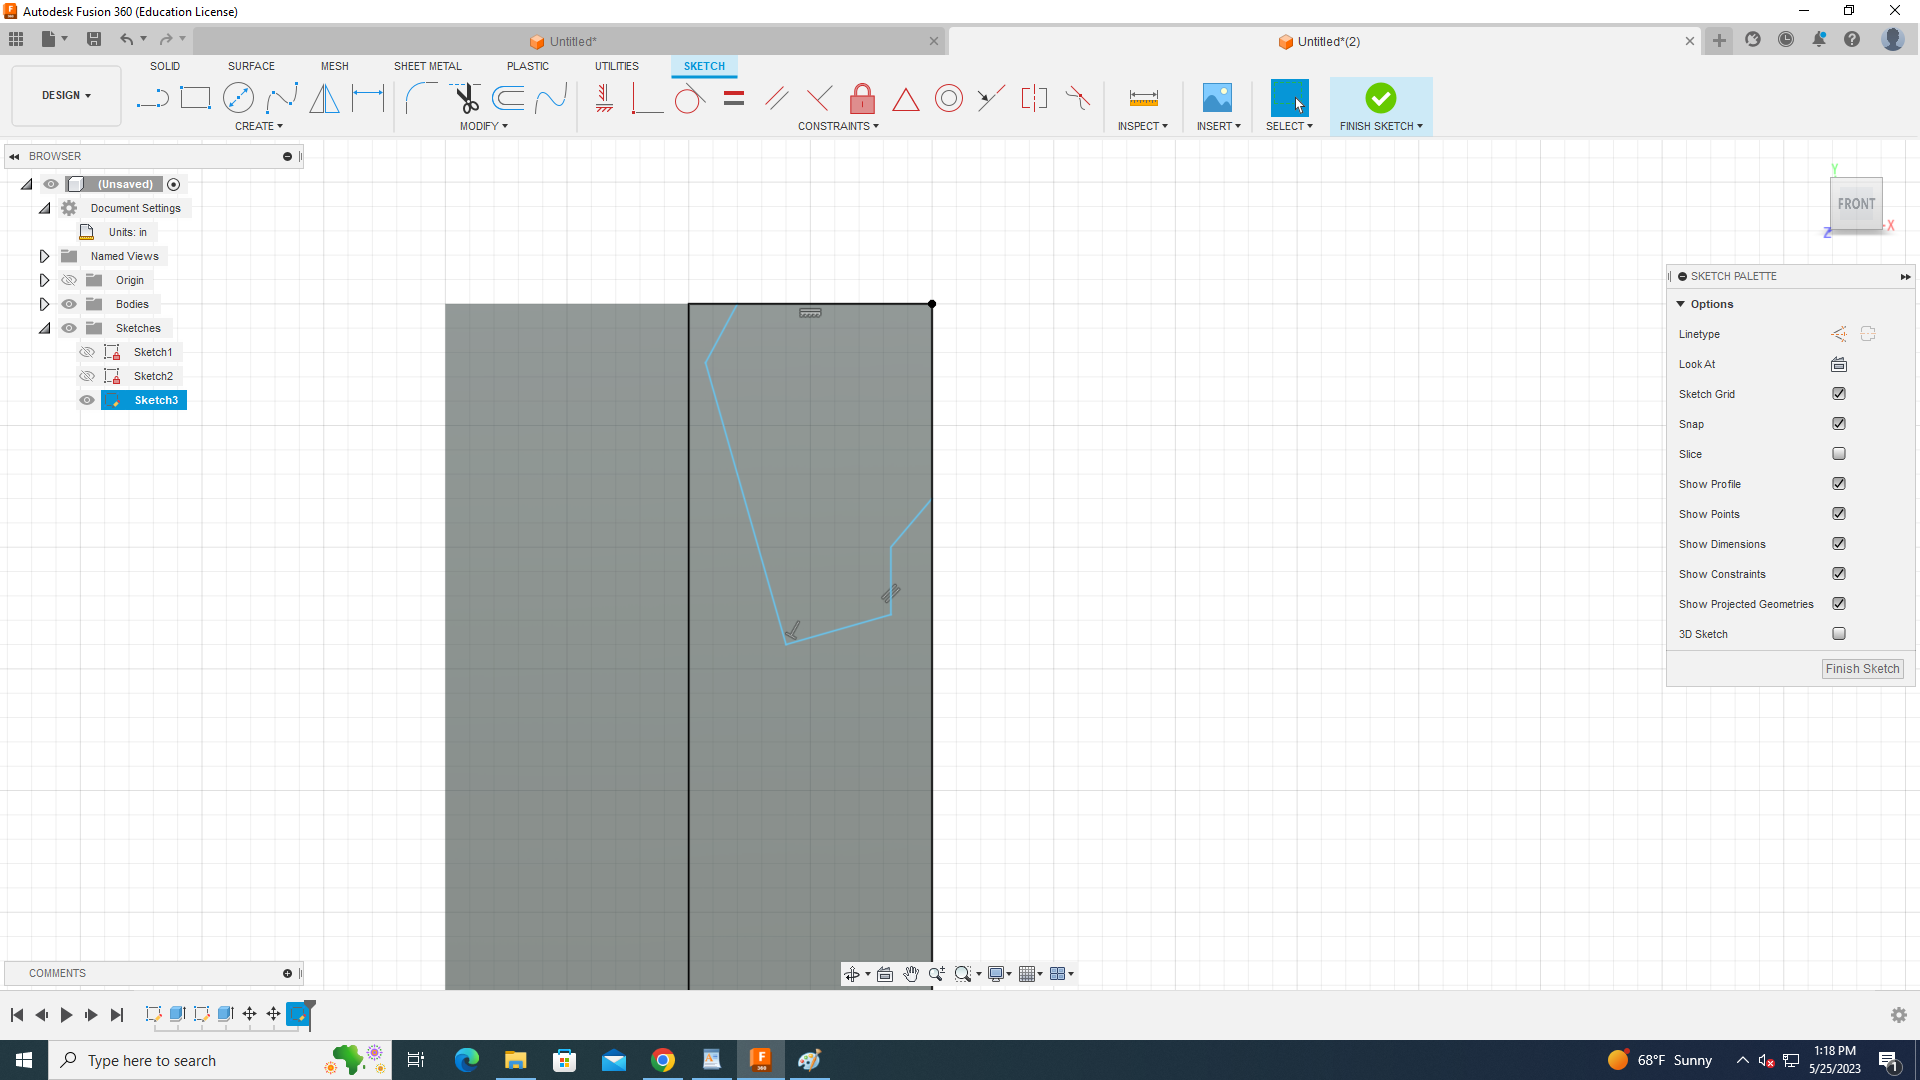
create the sketch as shown.
Slot Cut Out Sketch Part 3
![p7.png](/proxy/?url=https://content.instructables.com/FJV/7CJX/LIIV3VDP/FJV7CJXLIIV3VDP.png&filename=p7.png)
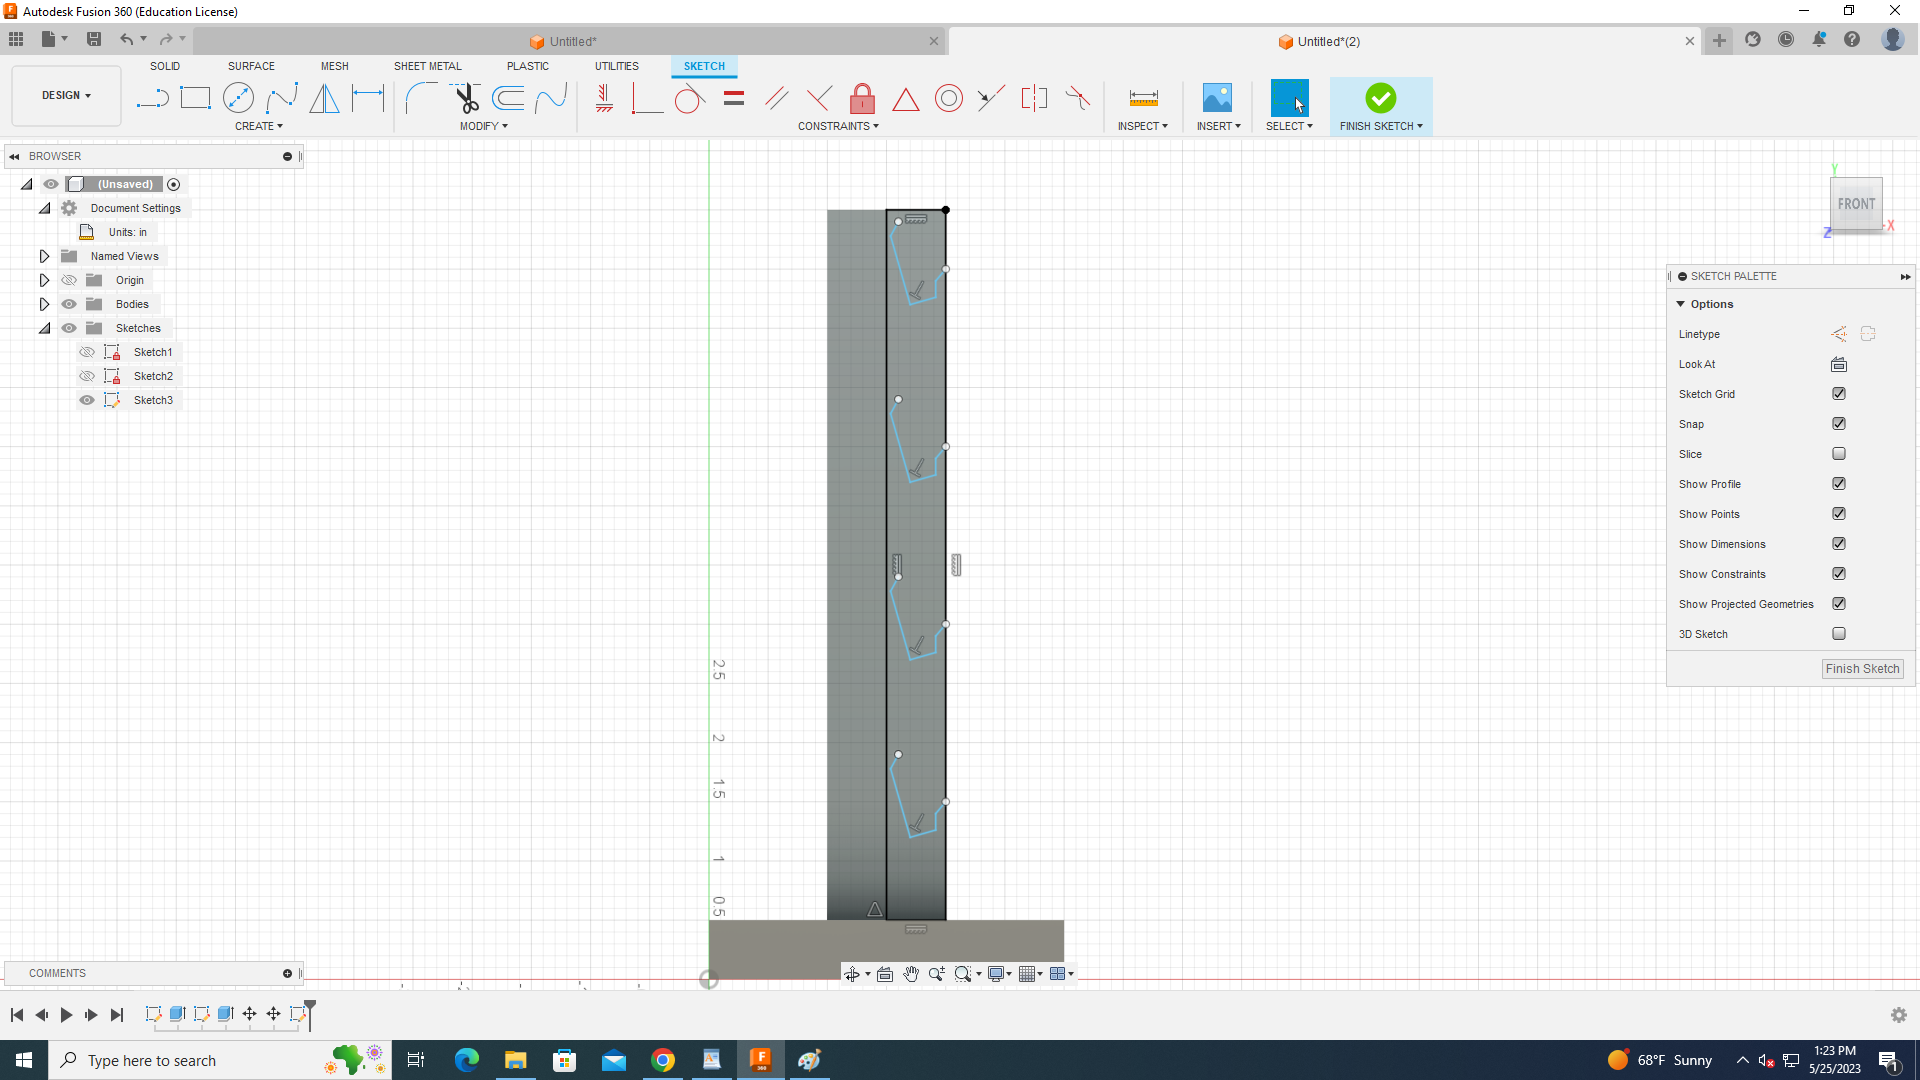
Once completed select the move/copy option then select the lines of the new sketch repeat as much as you like.
Final Shape of the Tower
![p9.png](/proxy/?url=https://content.instructables.com/FWW/1F3G/LIIV3VF7/FWW1F3GLIIV3VF7.png&filename=p9.png)
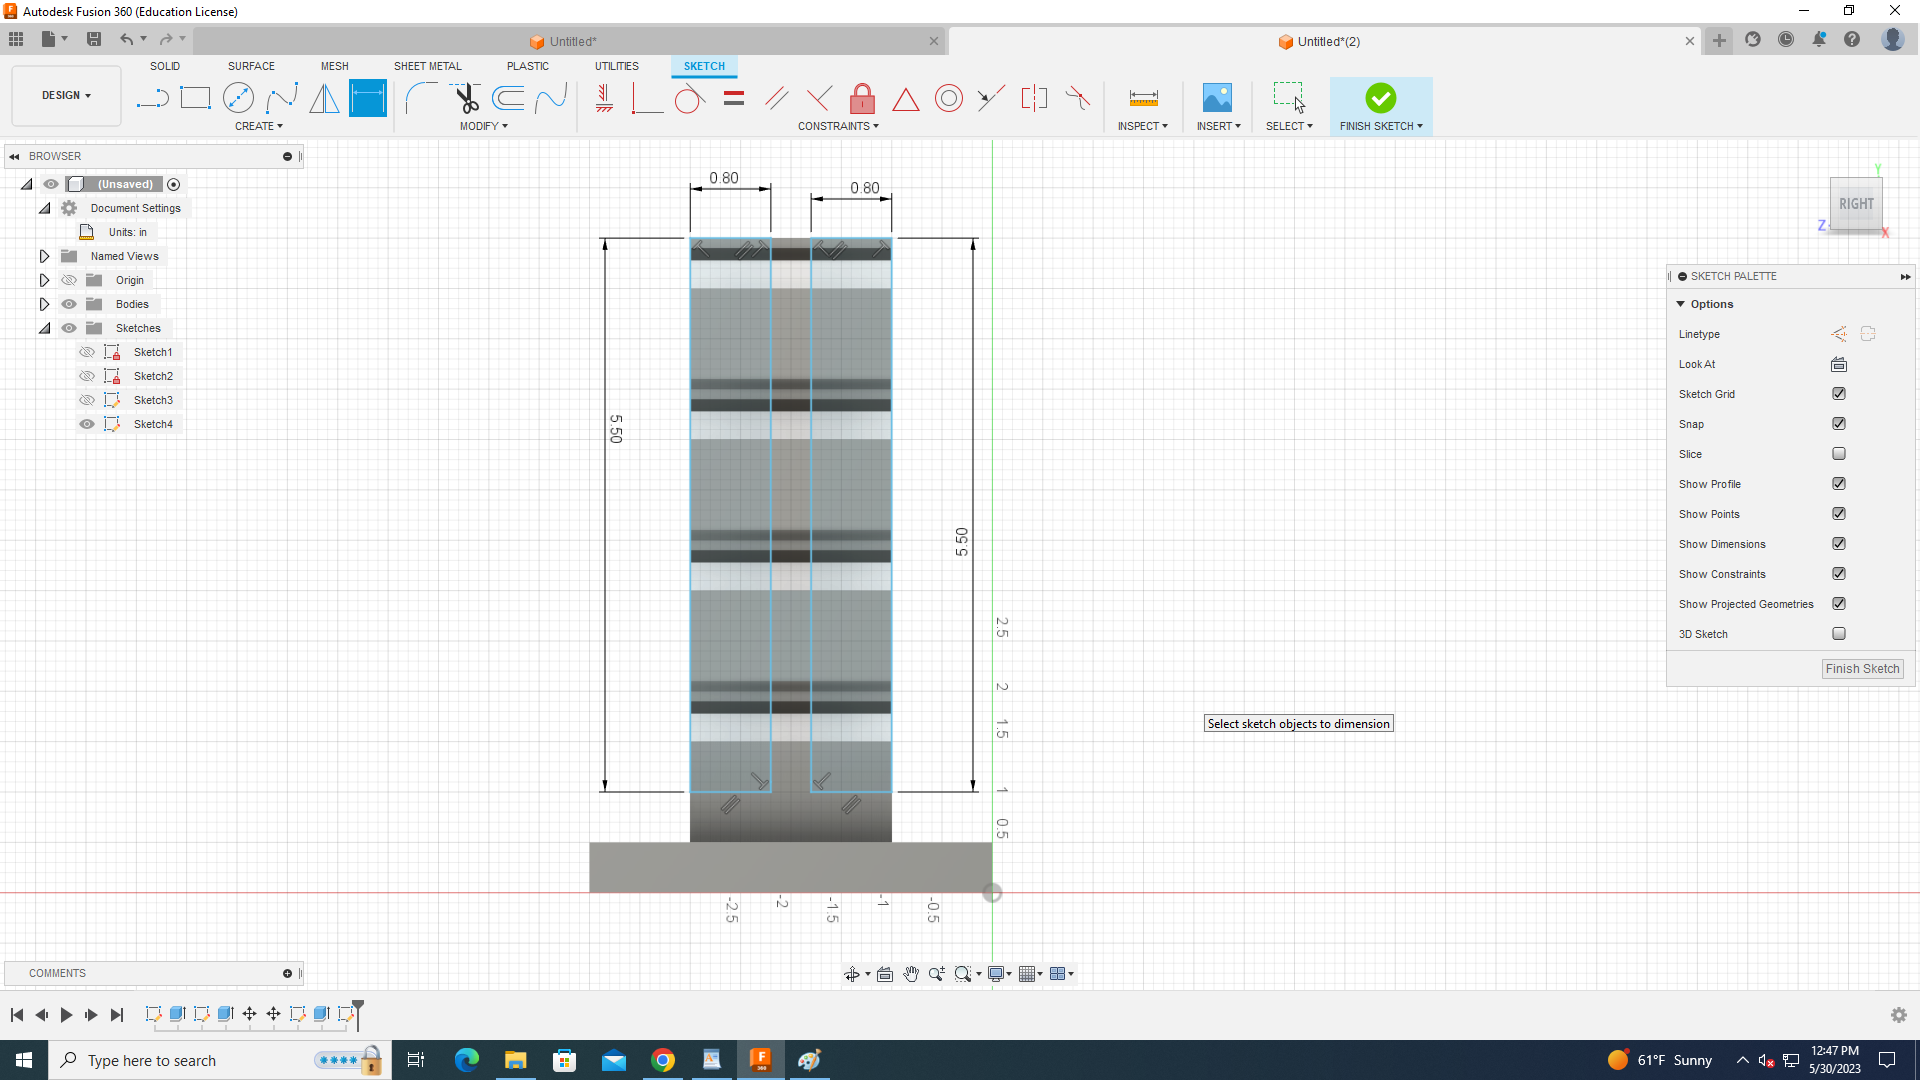
create two rectangles as shown then dimension them if needed.
Final Shape of the Tower Part 2
![p10.png](/proxy/?url=https://content.instructables.com/FWV/FQ2T/LIIV3VG1/FWVFQ2TLIIV3VG1.png&filename=p10.png)
select the sketch and extrude backwards to cut.
Adjusting the Sharp Corners
![p11.png](/proxy/?url=https://content.instructables.com/F7X/JJ4Z/LIIV3VH1/F7XJJ4ZLIIV3VH1.png&filename=p11.png)
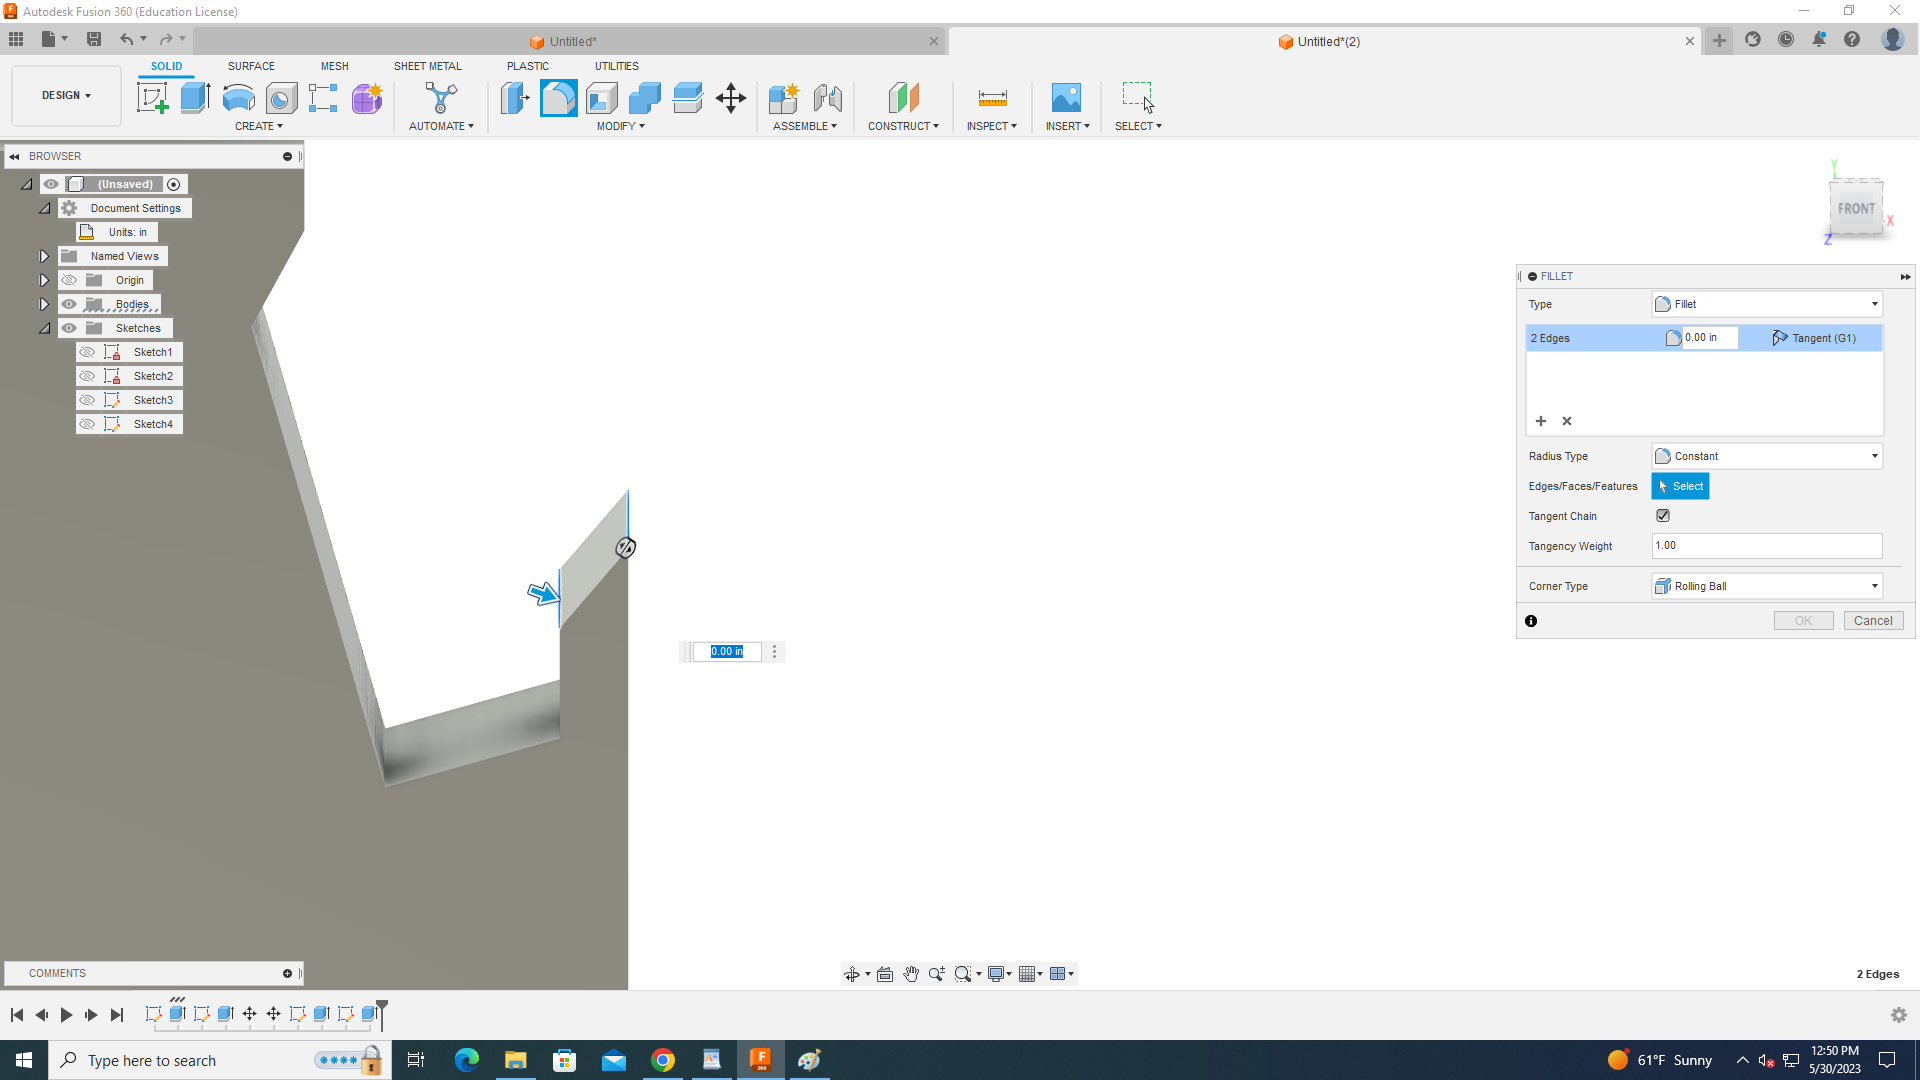
You can select sharp corners of the holder and round them as shown in next step
Adjusting the Sharp Corners Part 2
![p12.png](/proxy/?url=https://content.instructables.com/FCW/L6KK/LIIV3VI1/FCWL6KKLIIV3VI1.png&filename=p12.png)
Adjusting the Sharp Corners Part 3
![p13.png](/proxy/?url=https://content.instructables.com/FSP/V6Y2/LIIV3VJ4/FSPV6Y2LIIV3VJ4.png&filename=p13.png)
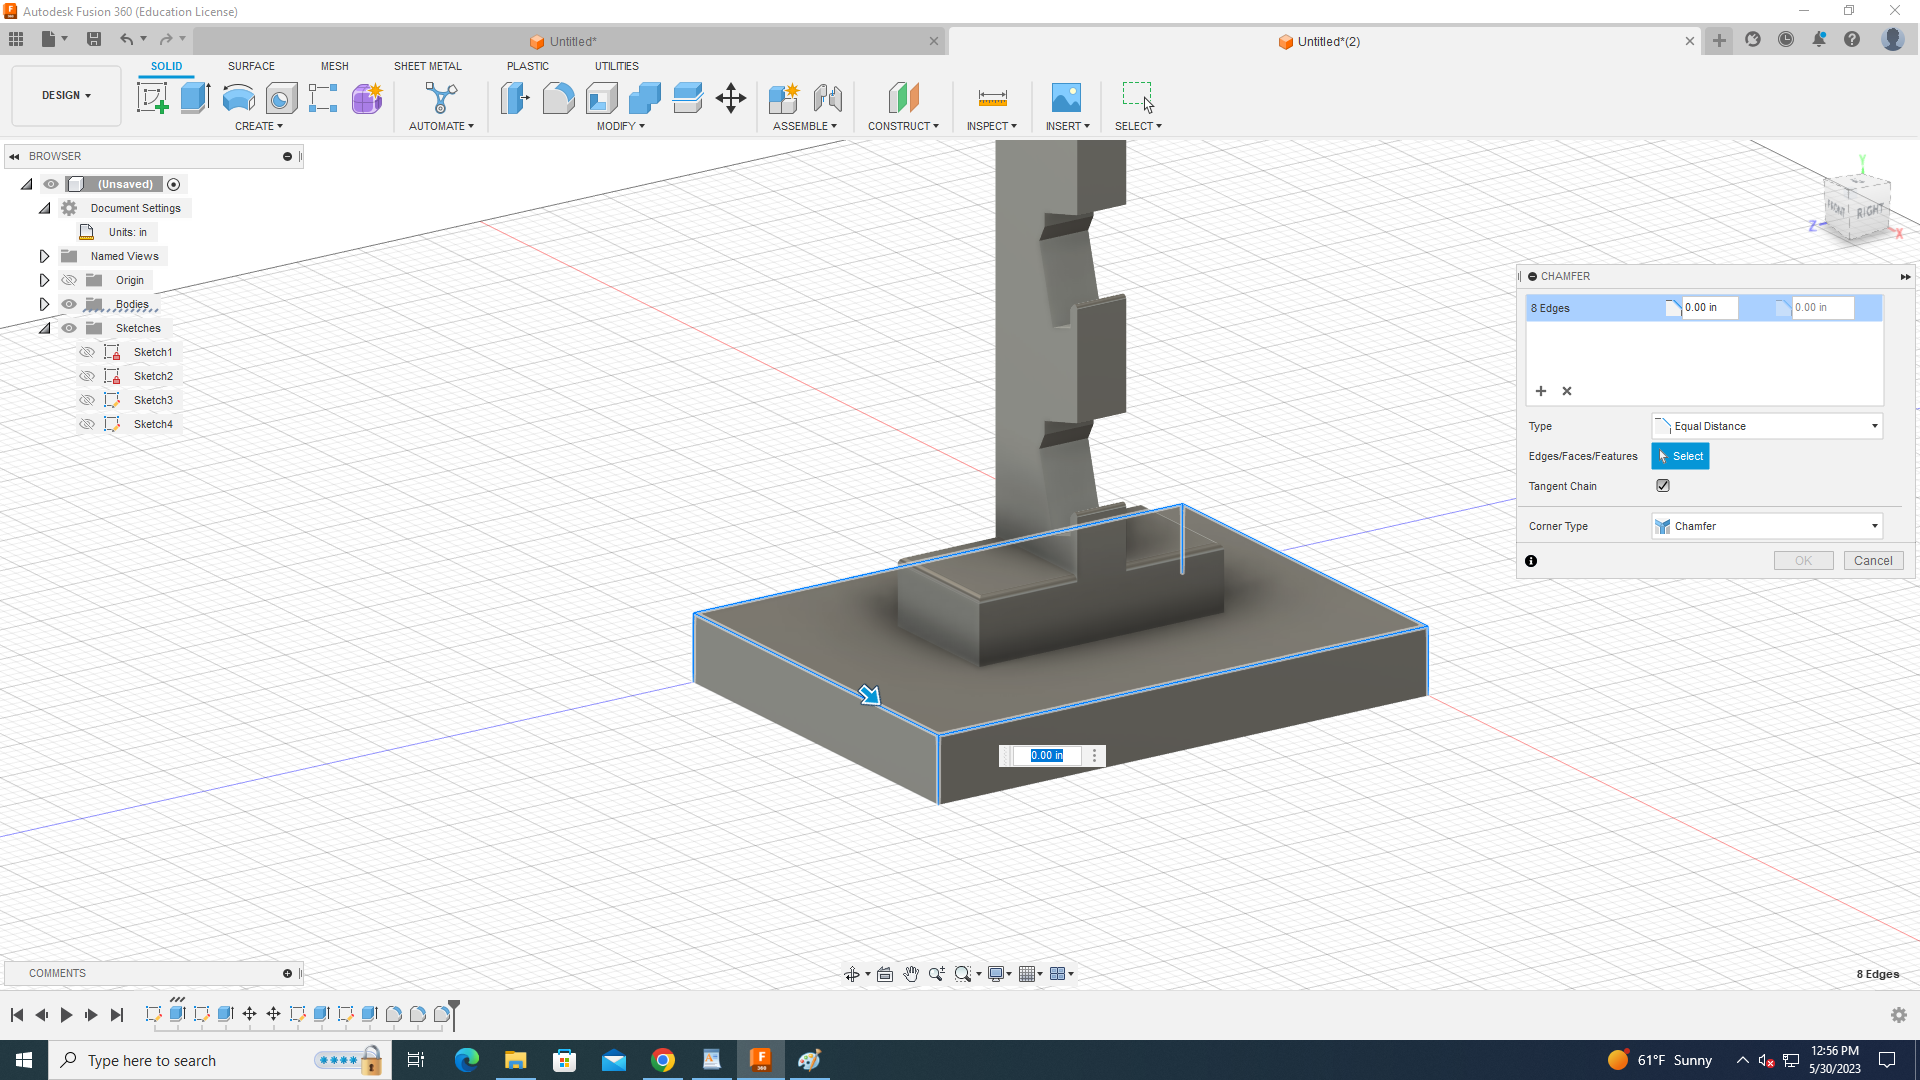
click the chamfer tool in the toolbar and click the sides of the base as shown
Adjusting the Sharp Corners Part 4
![p14.png](/proxy/?url=https://content.instructables.com/FZF/KIPO/LIIV3VKA/FZFKIPOLIIV3VKA.png&filename=p14.png)
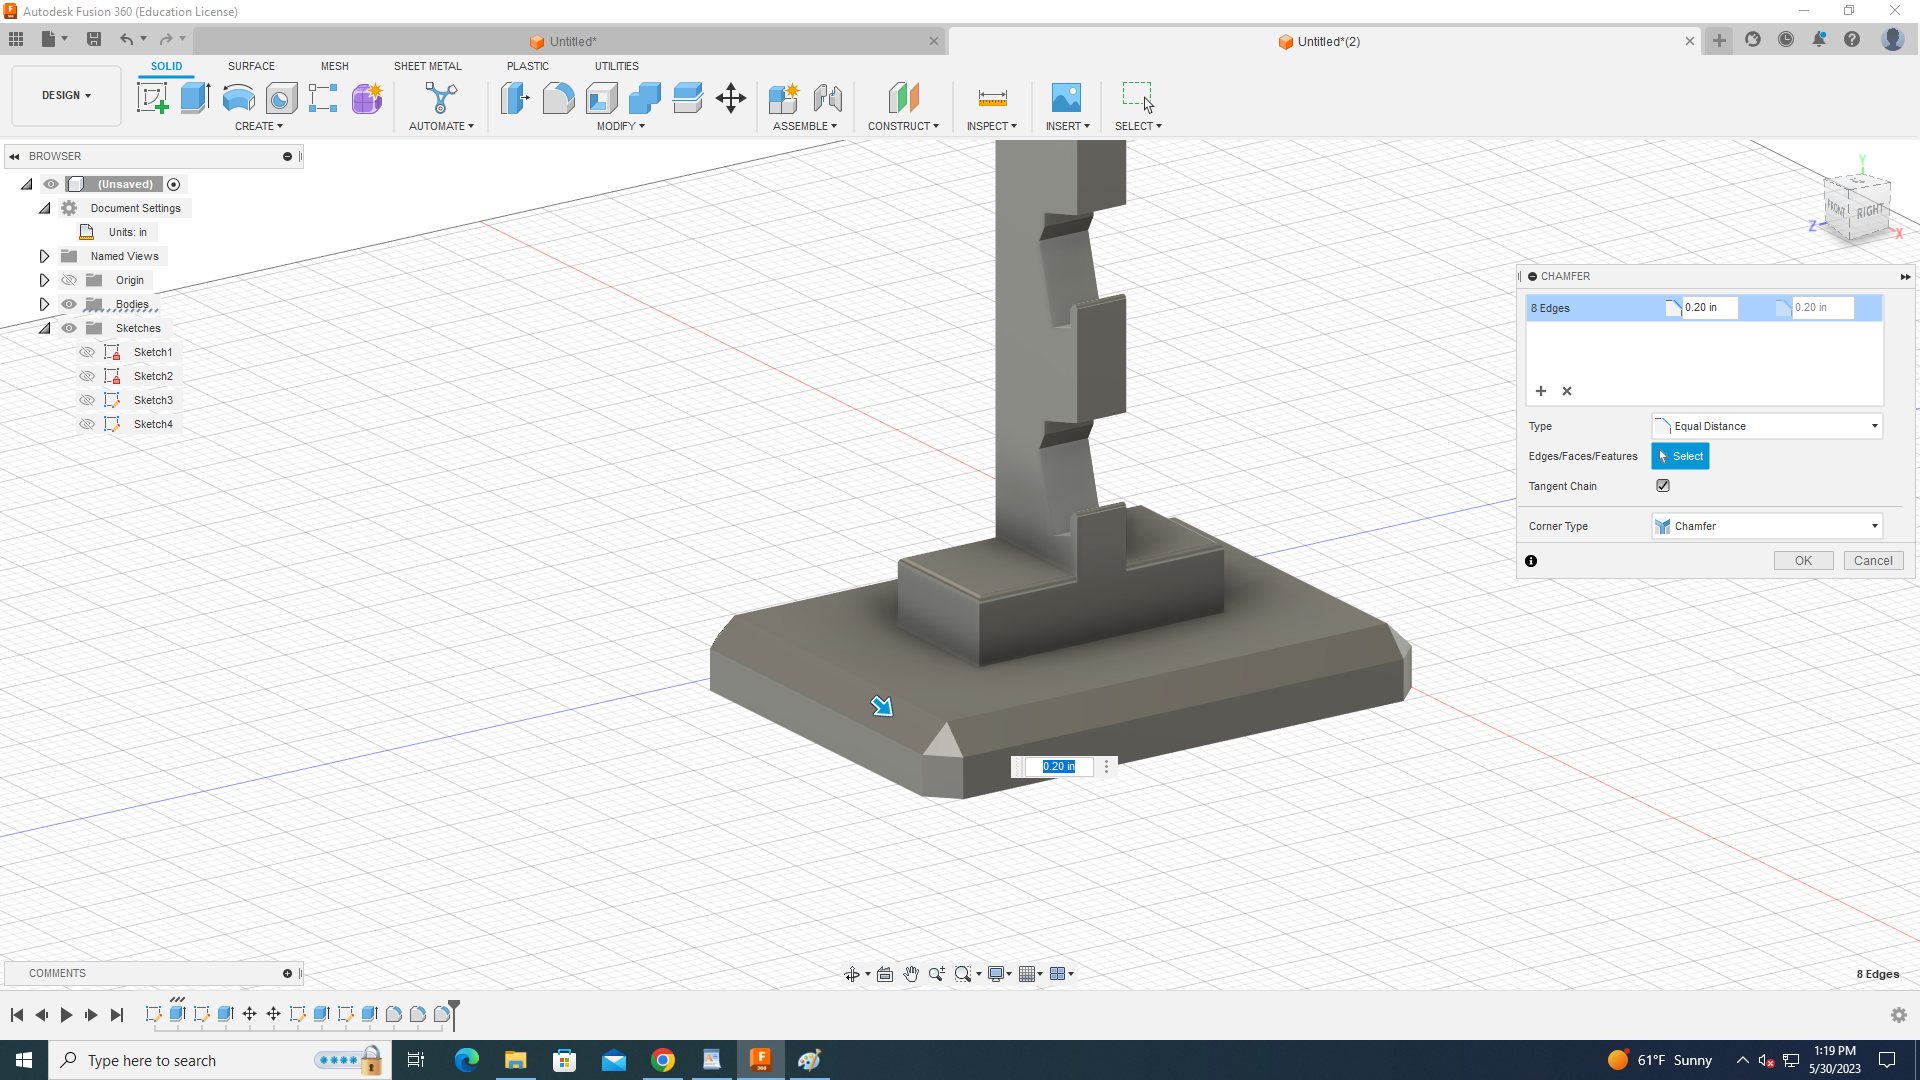
you can change this measurement to make it how you want.