Sump Pump Basin Water Level Monitor
by Mike520 in Circuits > Raspberry Pi
1314 Views, 5 Favorites, 0 Comments
Sump Pump Basin Water Level Monitor

The cost of cleaning up the damage from a flooded basement can be enormous. Typically costs are in the range of $3,000 to $10,000 and sometimes much higher with larger finished basements. Insurance companies will often cover the cost if the flooding is determined to be accidental but there is still the time and effort of getting bids from contractors and overseeing the work. Basement sump pump systems have a lot of components that can fail including primary pump, float switches, one-way check valves, frozen discharge pipes, etc.
I wanted a sump basin water level monitoring system that would log the water levels and send an alert when the water level exceeded a threshold. Multiple projects have used a low-cost ultrasonic range finder to measure the water level. There were numerous comments on how difficult it was to use the ultrasonic sensor in the basin due to all the equipment and plumbing inside the basin. I first tried the ultrasonic approach outside the basin in a laundry tub where it performed well, but inside the sump basin was another story. After many attempts, even using a separate PVC pipe to channel the ultrasonic sound, I came to the same conclusion as others. It would work for a while but then the echo measurements would go wild. It seemed like false echoes were everywhere inside the basin with all the equipment. An alternative sensor was needed.
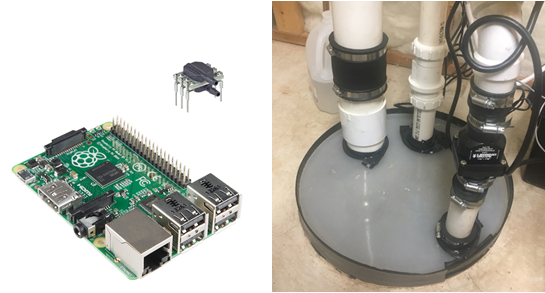
This is an open source DIY Raspberry Pi project written in Python for monitoring, logging, and sending email alerts for water level in a basement sump basin. It supports the ultrasonic range finder as an option but the recommended approach is a low-cost Honeywell Amplified Basic Pressure (ABP) sensor to measure the water depth. A small plastic tube is placed in the sump basin. The tube has an air column that measures the water pressure at the bottom of the tube. The program will send alerts when the water level exceeds a threshold. You can also monitor and log the water depth.
Supplies
If you have an RPi, you will need only the following components:
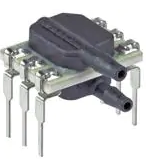
1. Pressure sensor (one of the following ABP pressure sensors available from Digikey, Mouser, Arrow, Newark, and others.)
- ABPMAND001PG2A3 (Digikey 480-6250-ND, I2C interface)
- ABPMRRV060MG2A3 (Mouser 785-ABPMRRV060MG2A3, I2C interface)
- ABPDRRV001PDSA3 (Mouser 785-ABPDRRV001PDSA3, DIP package SPI interface)
2. Silicon or plastic tube 1.5 mm inside diameter to connect pressure sensor to the radon mitigation pipe
3. RPi compatible relay
4. Low-cost (<$10) aquarium air bubbler pump with check valve
Wiring and Sensor Install

It is recommended to keep the wires fairly short. I kept the wires to a couple of feet in length. If using the I2C pressure sensor there are 4-wires to connect the pressure sensor to the Raspberry Pi:
RPI 40-pin => Honeywell ABP pressure sensor
- Pin 1 (+3.3 VDC) => Pin 2 (Vsupply)
- Pin 3 (SDA1) => Pin 5 (SDA)
- Pin 5 (SCL1) => Pin 6 (SCL)
- Pin 6 (GND) => Pin 1 (GND)
If using the SPI pressure sensor there are 5-wires to connect the pressure sensor to the Raspberry Pi:
RPI 40-pin => Honeywell ABP pressure sensor
- Pin 17 (+3.3 VDC) => Pin 2 (+3.3 Vsupply)
- Pin 21 (SPI_MISO) => Pin 5 (MISO)
- Pin 23 (SPI_CLK) => Pin 6 (SCLK)
- Pin 24 (SPI_CE0_N) => Pin 3 (SS)
- Pin 25 (GND) => Pin 1 (GND)
For the relay that controls the aquarium air bubbler. Make sure and follow the instructions that come with the RPi relay you purchased. For the one that I used:
RPI 40-pin => Relay driver
- Pin 12 (GPIO18) => Trigger
- Pin 14 (GND) => Driver- / Gnd
- Pin 2 (5Vdc) => Driver+ / Power
The relay controls the power to the aquarium bubbler. Connect the air supply hose from the aquarium bubbler pump to the one-way check valve that was included with the bubbler, then a "tee" with one side going to the ABP pressure sensor P1 port and the other side down into the sump basin. The relay is used to turn the pump on and off. Prior to measurement, the pump pressurizes the air line. The pump is off during measurement.
Software Installation
First, install the Raspberry Pi operating system. Next, make sure your operating system has been updated with the latest updates:
sudo apt-get update
sudo apt-get upgrade
sudo reboot now
Download the basinMaster software source code from GitHub.
git clone https://github.com/BrucesHobbies/basinMaster
If using a Honeywell I2C pressure sensor you will need this library.
sudo apt-get install python3-smbus
Software Configuration
Enable the I2C and SPI buses.
sudo raspi-config
sudo reboot now
If using an I2C pressure sensor, verify it can be seen as address 0x28:
sudo i2cdetect -y 1
Edit basinMaster.py to configure the pressure sensor you picked. For example change the following lines:
ENABLE_HC_SR04 = 0           # Ultra-sonic range finder option
ENABLE_HNY_ABP = 1           # Honeywell ABP pressure sensor option
sensor = sensorHnyAbp.SensorHnyAbp("001PG2")
# sensor = sensorHnyAbp.SensorHnyAbp("060MG2")
# sensor = sensorHnyAbp.SensorHnyAbp("001PDS")
#
# --- User Email Alerts Configuration ---
#
# First time program starts, it will ask you for the sender's email
# this should be an email that you have established for sending alerts from this program
# gmail is suggested with "Less Secure App Access" turned on. This is required for Python on the RPI.
# If you change passwords, delete cfgData.json so that this program will again ask for the password.
#
statusMsgEnabled = 1                # non zero enables sending of email / SMS text messages
statusMsgHHMM    = [12, 0]          # Status message time to send [hh, mm]
alertMsgEnabled  = 1                # non zero enables sending of email / SMS text messages
WATER_DEPTH_ALERT         = 9       # Send alert when water depth greater than this many inches
WATER_DEPTH_ALERT_ENABLE  = 1       # Enable sending alerts
minIntervalBtwWaterEmails = 24*3600 # seconds
Email Configuration
There is additional information on GitHub basinMaster on the gmail settings that are needed to operate with the RPi. It is recommended to have a separate email account to send the email alerts from. The alerts can then go to your primary email or to a gateway to become an SMS text to your cell phone.
Carrier: Email Format
AT&T: number@txt.att.net
Verizon: number@vtext.com
Sprint PCS: number@messaging.sprintpcs.com
T-Mobile: number@tmomail.net
VirginMobile: number@vmobl.com
Operation From Terminal Window
Start the program and enter the email account information or just hit enter if you are not using alerts. You can always delete cfgData.json and the program will ask for the information. There is additional information on GitHub on the gmail settings that are needed to operate with the RPi. It is recommended to have a separate email account to send the email alerts from. The alerts can then go to your primary email or to a gateway to become an SMS text to your cell phone.
python3 basinMaster.py

Enter sender’s device email userid (sending_userid@gmail.com):
sending_userid@gmail.com

Enter password:
gmailpassword

Enter recipient’s device email userid (receiving_userid@something.com):
Receiving_userid@something.com
Program Startup at Boot
Use "sudo crontab –e" and then select the type of editor you are familiar with. Add the following line at the end of the file. If using nano, press ctrl+O to write the file and ctrl+X to exit the nano editor.
@reboot sleep 60 && cd basinMaster && python3 basinMaster.py
Water Depth Plots
You can use a spreadsheet program to plot the Comma Separated Variable (CSV) log file of water depth or by using the Python package MatPlotLib. To install MatPlotLib:
sudo pip3 install matplotlib
To run the plotting script:
python3 plotBasinMaster.py
Enjoy!