Stream AUX and Bluetooth Through Raspberry Pi to Wireless Speakers Like Sonos
by rpmohn in Circuits > Raspberry Pi
2213 Views, 1 Favorites, 0 Comments
Stream AUX and Bluetooth Through Raspberry Pi to Wireless Speakers Like Sonos

This project provides the ability to play Bluetooth sources and AUX inputs like vinyl records, cassette tapes, and CDs, through a wireless speaker system such as Sonos. It makes AUX and Bluetooth available through a URL hosted on a Raspberry Pi, and this URL is then added to your wireless speaker system as a My Radio Station on the TuneIn service. The URL stream can also be played directly from any web browser or a media player such as VLC.
This project updates and combines two older projects, Add Aux to Sonos Using Raspberry Pi and Play Bluetooth on Sonos Using Raspberry Pi, by replayreb. It is updated to use PulseAudio on the current Raspbian Bullseye operating system. It works just as well if you only want to play from Bluetooth sources, or only want to play through RCA jack inputs. It also works for sources that use USB connections instead of RCA jacks, such as USB turntables.
All audio is merged together so it is up to you to have only one source playing at a time. There is about 3-4 seconds of latency through the system, so this project should not be used for watching video because the sound will be out of sync.
Supplies
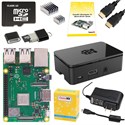

- Raspberry Pi 3 with MicroSD card and power cord. I'm sure any model is fine, I used the CanaKit Raspberry Pi 3 Model B+ Starter Kit, about $110 USD from Amazon.
- Behringer U-Phono UFO202, about $25 USD from Amazon.
- This is not needed if you want to plug a USB turntable directly into the Raspberry Pi
- This is also not needed if you only want to play audio from Bluetooth sources
- You also need a desktop or laptop computer on which to prepare the MicroSD card
Prepare MicroSD Card With Raspberry Pi OS


Mic
- On your desktop or laptop computer, browse to https://www.raspberrypi.com/software. Download and install Raspberry Pi Imager application for your computer's OS.
- Insert the microSD card into your computer
- Launch the rpi-imager application
- Choose Raspberry Pi Device: Raspberry Pi 3
- Choose Operating System (OS): Raspberry Pi OS (Legacy, 32-bit) (Recommended)
- Choose Storage: (select your microSD card, which should be automatically included in the list)
- Next
- Would you like to apply OS customisation settings?: No
- All existing data will be erased. Are you sure you want to continue?: Yes
- Writing... 100%
- Verifying... 100%
- You can now remove the SD card from the reader: Continue
Power Up Raspberry Pi


- Remove the MicroSD card from your desktop or laptop computer and insert it into the Raspberry Pi
- Make connections to the Raspberry Pi for initial configuration
- keyboard and mouse USB cables or Bluetooth dongles
- HDMI cable
- USB cable from the U-Phono UFO202
- Lastly, connect the power cable and power on the Raspberry Pi
Initial Configuration of Raspberry Pi


- Welcome to the Raspberry Pi Desktop! Before you start using it, there are a few things to set up. Press 'Next' to get started.
- Set Country, Language, Timezone
- Create default username and password
- Set Up Screen, if needed (probably not needed)
- Select WiFi Network, Enter WiFi Password, and wait until Connected to WiFi network
- Update Software--do not Skip!--and wait until System is up to date
- Setup Complete, press 'Restart' to restart your Pi so the new settings will take effect
Connectivity Configuration of Raspberry Pi


You need the Raspberry Pi to have a static IP address on your network so that you know how to access it. Assign a static IP address using your network router's DHCP IP reservation feature. You'll probably need the MAC address of the Raspberry Pi, which you can get by opening a terminal window and typing the command ifconfig wlan0 for the WiFi interface, or ifconfig eth0 for a wired ethernet connection (the MAC address is different for each type of connection!). In either case, the MAC address is the set of 6 hexadecimal number pairs following the word 'ether' in the output, for example: 'ether 0a:1b:2c:3d:4e:5f'. Make a note of the static IP address you assign because you'll need to use it in several later steps! As an example, mine is set to 192.168.0.114.
Now configure the Raspberry Pi so that you can connect to it from your desktop or laptop computer without having to have the keyboard, mouse, and monitor directly connected. Connecting in this way also allows you to copy and paste commands and file contents from this project page directly into the Raspberry Pi during configuration steps. On the Raspberry Pi desktop, click on the Raspberry icon in the upper left corner to open the applications menu. Select Preferences > Raspberry Pi Configuration and make the following changes:
Hostname: Choose a unique hostname rather than leaving it as the default of 'raspberrypi'. On the System tab click Change Hostname..., enter new hostname 'darkicecast', and press OK,
SSH: On the Interfaces tab enable the SSH button.
VNC: On the Interfaces tab enable the VNC button.
Press OK > The changes you have made require the Raspberry Pi to be rebooted to take effect. Would you like to reboot now?: Yes
Connect to Pi From Your Desktop or Laptop Computer


The rest of the configuration is performed through a VNC connection from the desktop or laptop computer, so you can now remove the keyboard, mouse, and HDMI cables. When the Raspberry Pi finishes rebooting, move to your desktop or laptop computer and run a VNC client from there to connect to the static IP address of your Raspberry Pi. I found that installing and using a RealVNC® Viewer client works best.
- Create a new connection
- File > New connection...
- In the VNC Server field enter the static IP address you configured for your Raspberrry Pi
- Optionally, enter a name in the Name field
- Press OK to save this connection
- Double click on the connection icon to launch it
- Enter your Username and Password
- Optionally click the Remember password field
- Press OK to connect
Now that you are connected to the Raspberry Pi desktop, click on the Terminal icon to launch a terminal for the remaining steps of this project.
If you'd prefer to use SSH, and you know what you're doing, you can also perform the following steps through a terminal connection from your desktop or laptop computer. Just substitute the CLI editor of your choice, probably 'vi' or 'nano', for the GUI editor 'mousepad' in the commands below. You probably also want to configure the Raspberry Pi to accept your SSH key for passwordless login by running something like this command from your desktop or laptop computer:
ssh-copy-id -i ~/.ssh/id_ed25519.pub <STATIC IP>
Disable IPv6

Unless you know that you need IPv6 (you probably don't!), disabling it provides more consistent network connectivity.
In a terminal type this command:
sudo mousepad /etc/sysctl.conf
The mousepad editor window includes a red warning at the top of the window, "Warning: you are using the root account. You may harm your system." This is expected when using the 'sudo' command.
Scroll to the bottom of the file and add this line:
net.ipv6.conf.all.disable_ipv6 = 1
Save and Quit.
Configure PulseAudio

In this step you create a PulseAudio loopback sink and set it to be the default so that all audio inputs are made available to darkice by default. It would be great to be able to request a latency_msec of 1, as many tutorials suggest, but I found that this causes a cascade of data underruns while the system tries to automatically adjust to a more appropriate latency. This results in brief audio pauses as the system waits each time for the buffer to catch up, which makes for an unpleasant listening experience. Setting the initial latency_msec request to 200 eliminates this adjustment period. Since the overall latency is about 3-4 seconds anyway, adding 200ms doesn't make a big difference and it's so much nicer to listen without random audio hiccups.
In a terminal type this command:
sudo mousepad /etc/pulse/default.pa
scroll to the bottom of the file and paste these three lines:
load-module module-null-sink sink_name=darkicecast sink_properties="device.description='Home Audio'"
load-module module-loopback latency_msec=200 sink=darkicecast sink_dont_move=true
set-default-sink darkicecast
Save and Quit.
Install and Configure Icecast2


Icecast2 is the service that streams audio to connections from a URL. Install icecast2 and at the prompts enter the hostname 'localhost' and password(s) of your choice. Make a note of your password(s) because you'll need to use the 'source password' when you configure darkice below! Many people accept the default password of 'hackme' (I personally choose a different password and record it in my password manager!). The passwords can all be the same or different.
In a terminal type this command:
sudo apt install icecast2
then respond to the questions as shown. It is important that you use 'localhost' as the hostname!
Configure Icecast2? Yes
Icecast2 hostname: localhost
Icecast2 source password: ********
Icecast2 relay password: ********
Icecast2 administration password: ********
The Icecast2 service runs automatically on the system.
Install and Configure Darkice


The Darkice application takes audio from the PulseAudio loopback sink you configured above and provides it to the Icecast2 service for streaming.
In a terminal type this command:
sudo apt install darkice
Now create a darkice.cfg configuration file. Note that we are not using the 'sudo' command here because darkice runs from your user account, not the root account. In a terminal type this command:
mousepad ~/darkice.cfg
Copy and paste this text, then edit the line with password to use your actual 'source password' from Icecast2 configuration above instead of '********'. Leave the quality setting commented out.
[general]
duration        = 0         # duration in s, 0 forever
bufferSecs      = 1         # buffer, in seconds

[input]
device          = pulseaudio
paSourceName    = darkicecast.monitor
sampleRate      = 44100     # sample rate 11025, 22050 or 44100
bitsPerSample   = 16        # bits per sample
channel         = 2         # 2 = stereo

[icecast2-0]
bitrateMode     = cbr       # constant bit rate ('cbr' constant, 'abr' average)
#quality         = 1.0       # 1.0 is best quality (use only with vbr)
format          = mp3       # format. Choose 'vorbis' for OGG Vorbis
bitrate         = 320       # bitrate
server          = localhost # or IP
port            = 8000      # port for IceCast2 access
password        = ********  # source password for the IceCast2 server
mountPoint      = icecast   # mount point of this stream on the IceCast2 server
name            = Home Audio System
description     = Feed from home audio recevier and Bluetooth sources
The darkice service does not automatically run on its own the way Icecast2 does so you need to create a shell script to launch darkice and then schedule it to run automatically from your user account after every reboot.
In a terminal type this command:
mousepad ~/darkice.sh
Copy and paste this text:
#!/bin/bash
/usr/bin/darkice -c ~/darkice.cfg
Save and Quit.
Make the shell script executable by typing this command in a terminal:
chmod 755 ~/darkice.sh
Now schedule the script to run automatically from your user account after each time the Raspberry Pi reboots. In a terminal type this command:
crontab -e
You're asked to select an text editor. If you're not already comfortable with 'vi' then 'nano' is probably easiest. Move to the bottom of the file and add this line, which mean: after each reboot ('@reboot') wait 15 seconds for the system to stabilize ('sleep 15'), then set up your user id's runtime environment ('XDG_RUNTIME_DIR=/run/user/$(id -u)') and run the darkice.sh shell script ('~/darkice.sh'):
@reboot sleep 15 && XDG_RUNTIME_DIR=/run/user/$(id -u) ~/darkice.sh
From nano, press Ctrl-O to Write Out the file, and accept the default File Name to Write, then press Ctrl-X to Exit. (If using vi you know what to do!)
Configure RT Scheduling


The darkice application wants to access Realtime (RT) scheduling, which is not allowed by default. This step configures that permission for the group named 'audio', and then confirms that your default user is a member of that gorup.
In a terminal type this command:
sudo mousepad /etc/security/limits.d/audio.conf
The file is probaby a new, empty file. Either way, add these two lines:
@audio  - rtprio    95
@audio  - memlock   unlimited
Save and Quit.
Now confirm that your default user id is in the audio group by running the command 'groups' and looking for the word 'audio' in the list output:
rpmohn@darkicecast:~ $ groups
rpmohn adm dialout cdrom sudo audio video plugdev games users input render netdev lpadmin gpio i2c spi
If it is not there then run these two commands, substituting your actual user id for <USER ID>.
sudo groupadd audio
sudo usermod -a -G audio <USER ID>
Now reboot the Raspberry Pi to have all settings and automations take effect. Click on the Raspberry > Logout > Reboot
Pair Phone to Bluetooth


Put the Raspberry Pi's Bluetooth service in discovery mode and then pair to it from your phone, or other Bluetooth source device. It is important to pair from the audio source device, not from the Raspberry Pi! You may pair as many source devices as you'd like to use.
- Click on the Bluetooth icon in upper right of the Raspberry Pi desktop
- Select Make Discoverable
- The Bluetooth icon blinks green and blue while in Discoverable mode
- On your phone, or other Bluetooth source device
- in Bluetooth settings, select to Pair new device
- Select the 'darkicecast' device.
- Confirm that both the phone and the Raspberry Pi show the same six digit code.
- Pair with darkicecast?: Pair
- On the Raspberry Pi desktop, Please confirm: OK
- Connection successful
AUX IN Connections


For input to the UFO202 you have options. You can plug a vinyl record turntable directly into the UFO202 INPUT RCA jacks, in which case set the INPUT switch to PHONO. Most turntables also have a ground cable that must be connected to the ground thumb screw connector on the UFO202.
If you are using any input other than a turntable to the UFO202 then set the INPUT switch to LINE. For a stereo receiver, which is what I use, it is convenient to connect its TAPE OUT RCA jacks to the UFO202 INPUT RCA jacks. Most receivers independently control which of their inputs is sent to the tape output, so it can be a little tricky to set it up correctly at first. When you get it right you'll have a great deal of flexibility in the use of your receiver and wireless speaker system!
If you're using a device that has a USB connection instead of RCA jacks, such as some modern vinyl turntables, you don't need the UFO202 at all--just plug the device directly into one of the USB ports on the Raspberry Pi. PulseAudio will find it and send its audio to darkice by default.
Test


In order to confirm that the Icecast2 service is running properly, use a web browser and type in this URL address, substituting your actual static IP address for <STATIC IP>:
http://<STATIC IP>:8000/
for example, my own static IP is set to 192.168.0.114, so I use the URL address:
http://192.168.0.114:8000/
Confirm that you see the Icecast2 Status web page. You should also see a section for Mount Point /icecast. This confirms that the darkice service is also running properly.
Now play some audio to the Raspberry Pi from either the AUX input or one of the Bluetooth connections so that you can test the streaming service. There are two options for this test: first you can click the M3U link on the Icecast2 Status web page to open the streaming service in your computer's default music player and play the audio from there. Alternatively, type this URL address into your web browser, again substituting your actual static IP address for <STATIC IP>:
http://<STATIC IP>:8000/icecast
This plays the streaming audio directly in your browser's built-in audio player.
Connect to Wireless Speaker System
Wireless speaker systems, such as Sonos, offer TuneIn as a service. Using this you can add your darkicecast system as a custom URL to your My Radio Stations list.
TuneIn > My Radio Stations > Add New Radio Station
- Streaming URL: http://<STATIC IP>:8000/icecast (substitute your actual static IP address for <STATIC IP>)
- Station Name: Home Audio System
Play Audio!
- Turn on your darkicecast Raspberry Pi
- On your wireless speaker app, such as Sonos, select to play Home Audio System from your TuneIn My Radio Stations list
- If playing audio through Bluetooth
- On the phone, or other source device, go to Bluetooth settings and connect to darkicecast
- Make sure the phone's Bluetooth volume is set to the maximum
- All sound from the AUX input or Bluetooth source now plays on the wireless speaker(s)!
System Maintenance


Periodically check for system updates. From the VNC desktop look in the upper right Task Bar for an icon with a large down arrow indicating "Updates are available - click to install". Click and either preview the updates by clicking on "Show Updates..." or begin the updates right away by clicking on "Install Updates".
- Updating package data - please wait...
- Comparing versions - please wait...
- Installing updates - please wait...
- Downloading packages - please wait...
- Installing packages - please wait...
- System is up to date > OK
When the updates are complete, the Updates icon is no longer displayed.
You can also perform updates from a terminal command line using these three commands:
sudo apt update
sudo apt upgrade
sudo apt autoremove