Stopmotion Video Making Guide
by DTaco in Living > Toys & Games
12150 Views, 22 Favorites, 0 Comments
Stopmotion Video Making Guide
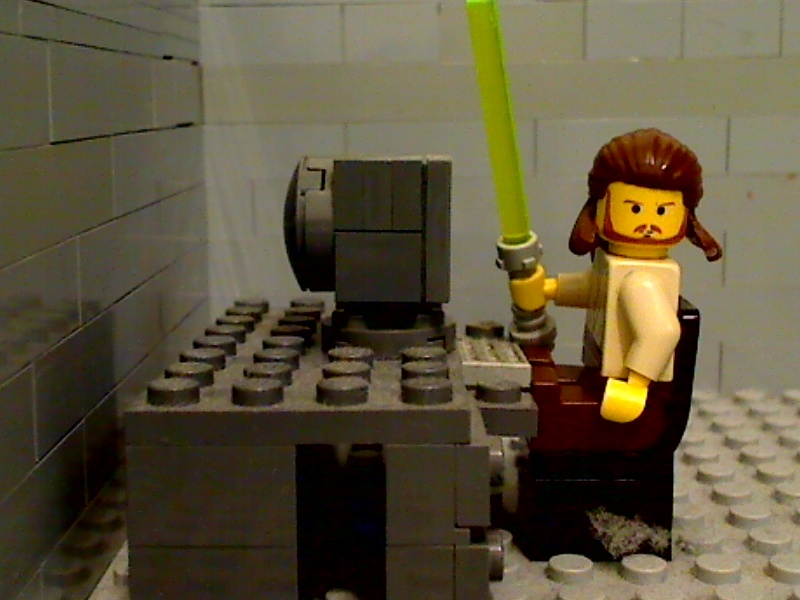
As a child I was always interested into making stop motion projects.
It is a fun and very creative process, and even the long work is really worth it.
Want to impress your friends on your next school project? Do you want to teach your child
how Stop motion videos are made? Here is a step to step guide into how to make a successful
stop motion film with extra tricks that will sure impress your family and your friends.
You will need:
a computer
Trickflim cam ( a great stopmotion software, highly recommanded for beginners)
img2avi (this freeware "moves" the pictures)
a web cam ( one that can change sharpness is preferred)
Some things you want to animate (I like legos)
STEP 1 Plug in Your Webcam
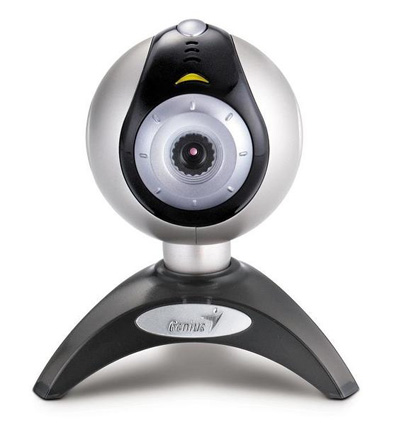
Make sure you plug in your webcam before loading the trickfilm cam becasue it won't show anything.
I use the logitech webcam for my stopmotion videos.
I use the logitech webcam for my stopmotion videos.
Use Trickfilm Cam
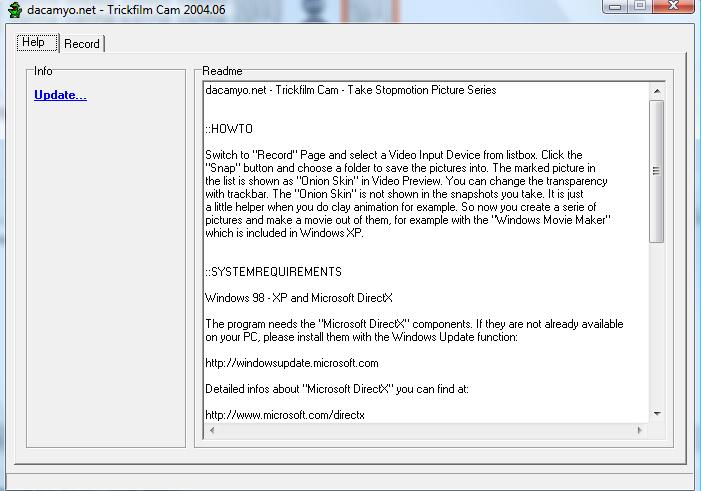
Google "Trickfilm cam" (it's free!) and open it
it should look like this:
Click "record"
Ten go to the next step
it should look like this:
Click "record"
Ten go to the next step
Trickfim Cam Step 2
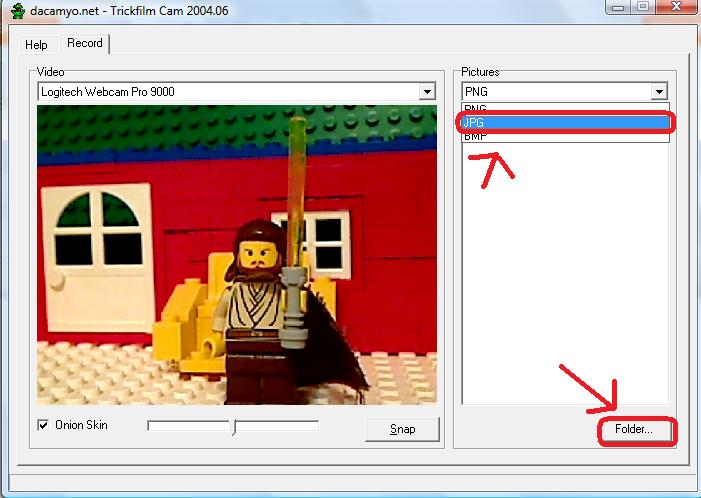
BE SURE TO pick a folder to save all your project and change the "Pictures" part
to JPG
If you don't all your hard work will be nothing.
to JPG
If you don't all your hard work will be nothing.
NOW Start Taking Pictures!
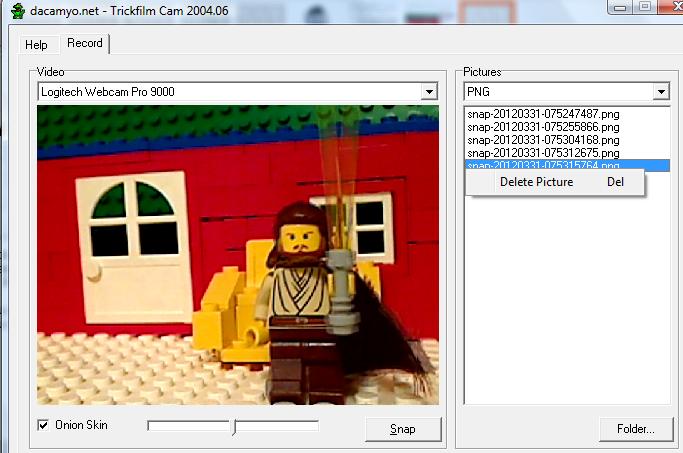
Click "snap" and take your first image.
Then move and take your next image.
Do it until you're satisfied.
You can put on the onion screen that will help you animate smoother.
You can delete images if you're unsure you should use the image for your stopmotion film.
Then move and take your next image.
Do it until you're satisfied.
You can put on the onion screen that will help you animate smoother.
You can delete images if you're unsure you should use the image for your stopmotion film.
Img2avi
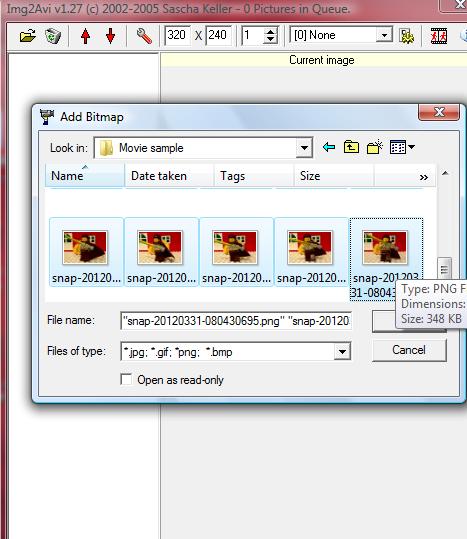
After done taking the pictures, close the window and open img2avi.
If you haven't download the software. Its free!
Click the folder opening icon on the top left corner, open your folder, and do shift-click
to select all pictures and import it.
If you haven't download the software. Its free!
Click the folder opening icon on the top left corner, open your folder, and do shift-click
to select all pictures and import it.
Lets Move It!
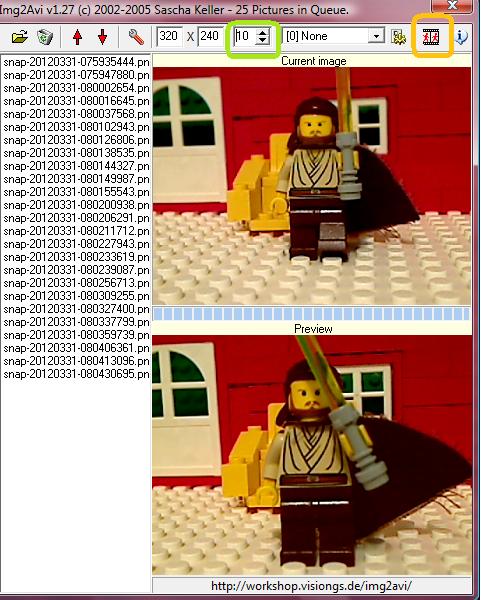
Now, lets "move" the pictures!
Change the icon that is surrounded by green to change the framerate
and click the icon surrounded by orange to make the movie file.
A preview should pop up.
You're done! you made a movie!
Now, you could export your project to a movie editing software like windows movie maker!
Change the icon that is surrounded by green to change the framerate
and click the icon surrounded by orange to make the movie file.
A preview should pop up.
You're done! you made a movie!
Now, you could export your project to a movie editing software like windows movie maker!
Add Sound for Free!

Want to add sounds of laser beams, exlosions, and more?
Go to
http://www.findsounds.com/
and add cool sound effects using your video editing porgram!
You could pick your own quality and file type you want to have!
Go to
http://www.findsounds.com/
and add cool sound effects using your video editing porgram!
You could pick your own quality and file type you want to have!
Lightsaber Effects
Yes. That Qui-gon minifigure had a unreal lightsaber that looked like a crystal more than a lightsabre.
This is really unbearable for many lego starwars enthusiasts. So there is a program that makes lightsaber effects.
Its called LS maker
Download LS maker (again, its free)
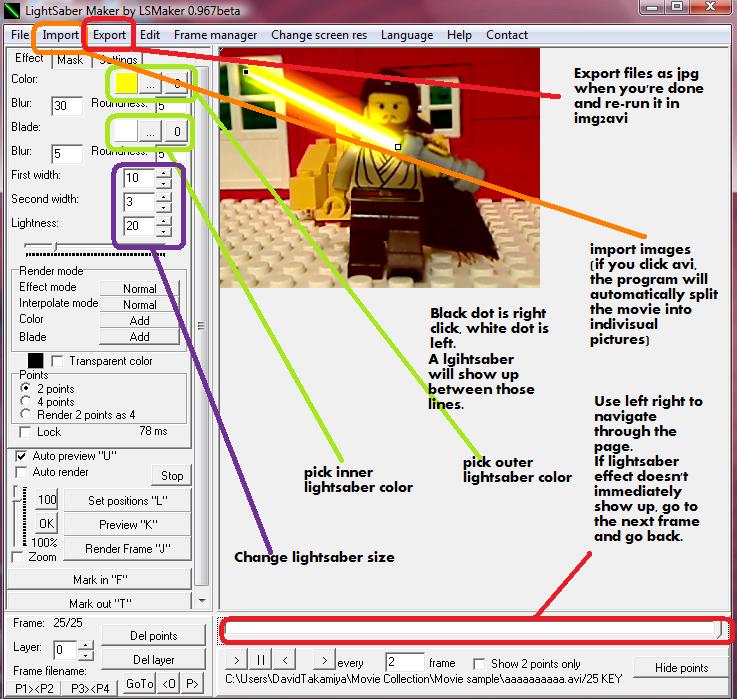
First, import all your pictures by clicking the import button and going to the file.
If the file only shoes the avi file, just click on it and it will automatically split the frames for you.
Click on the areas surrounded by green to pick inner and outer lightsaber color.
The area in purple will help change lightsaber size.
Use the left-right key to do transitions between images.
Lightsaber effect will show up between left click and right click dots.
If effect doesn't immediately show up, go to the next frame and go back.
After you're done, click the "export" button and save it as jpg.
go back to imag2avi to re-animate the movie and there you should see the lightsaber effect!
Jumping Using Photoshop or Gimp
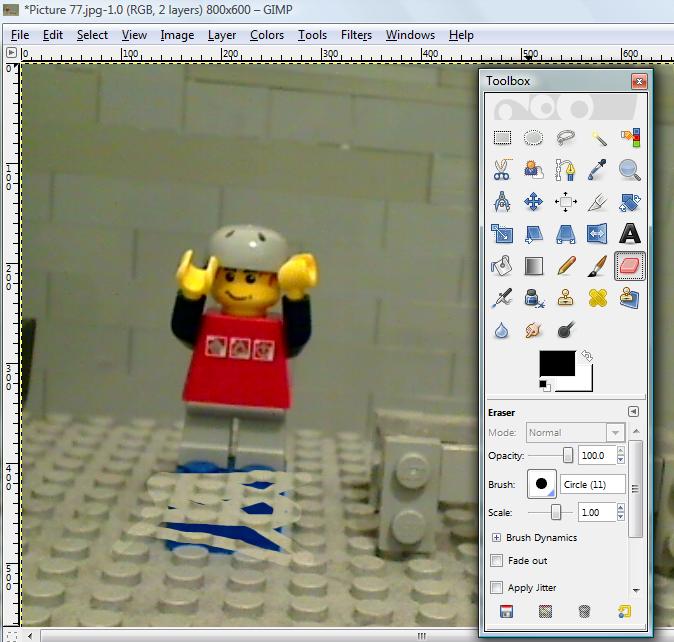
Making a jumping effects is not easy, but it looks very professional.
In order to do that, first you'll have to have a background image without any minifigure.
Next you'll have to have a image that will have the minifigure and the "thing" that you use to make it go aboveground.
Next, download GIMP (a free image editing software) and click "open" to open your background image.
Next, click "Open as layers" and open the 2nd image with the minifigure.
Then right click on the 2nd image and click layer - transparency- and then click add alpha channel.
Then use the eraser tool to remove the "thingymagig" that holds up your minifigure.
Save the image and again, put it into img2avi to incorporate it in your movie.