Stemma Moisture and Temperature Sensor
by Julie210 in Circuits > Microcontrollers
1427 Views, 2 Favorites, 0 Comments
Stemma Moisture and Temperature Sensor
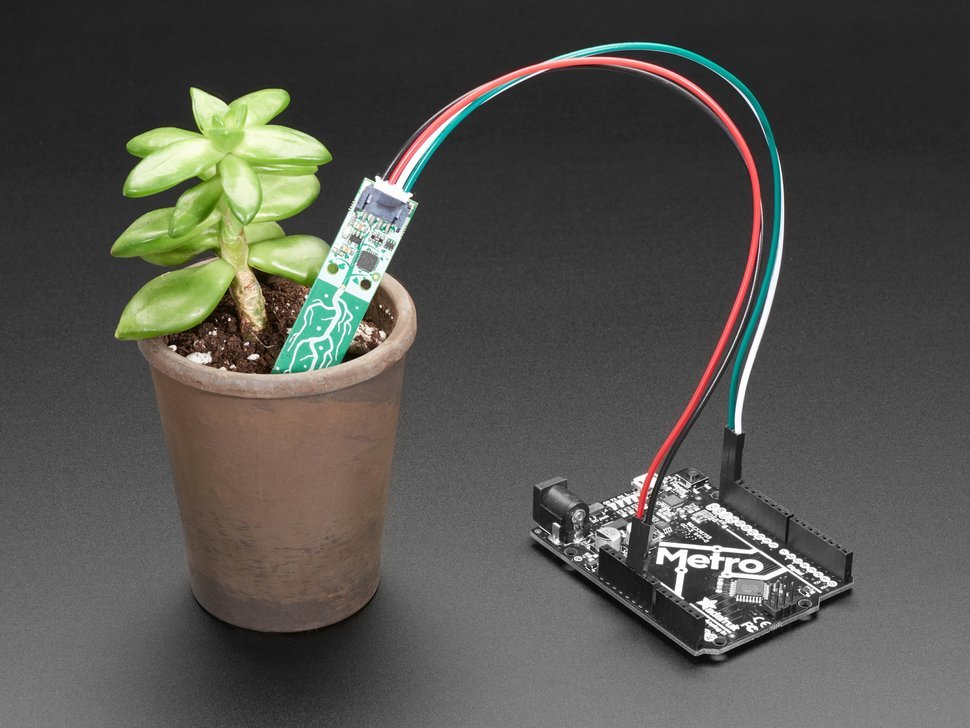
The Stemma Soil Sensor uses one probe to detect the moisture levels in plants. It can also detect the ambient temperature from the internal temperature sensor on the microcontroller. This device does not require soldering.
Supplies
Stemma Soil Sensor
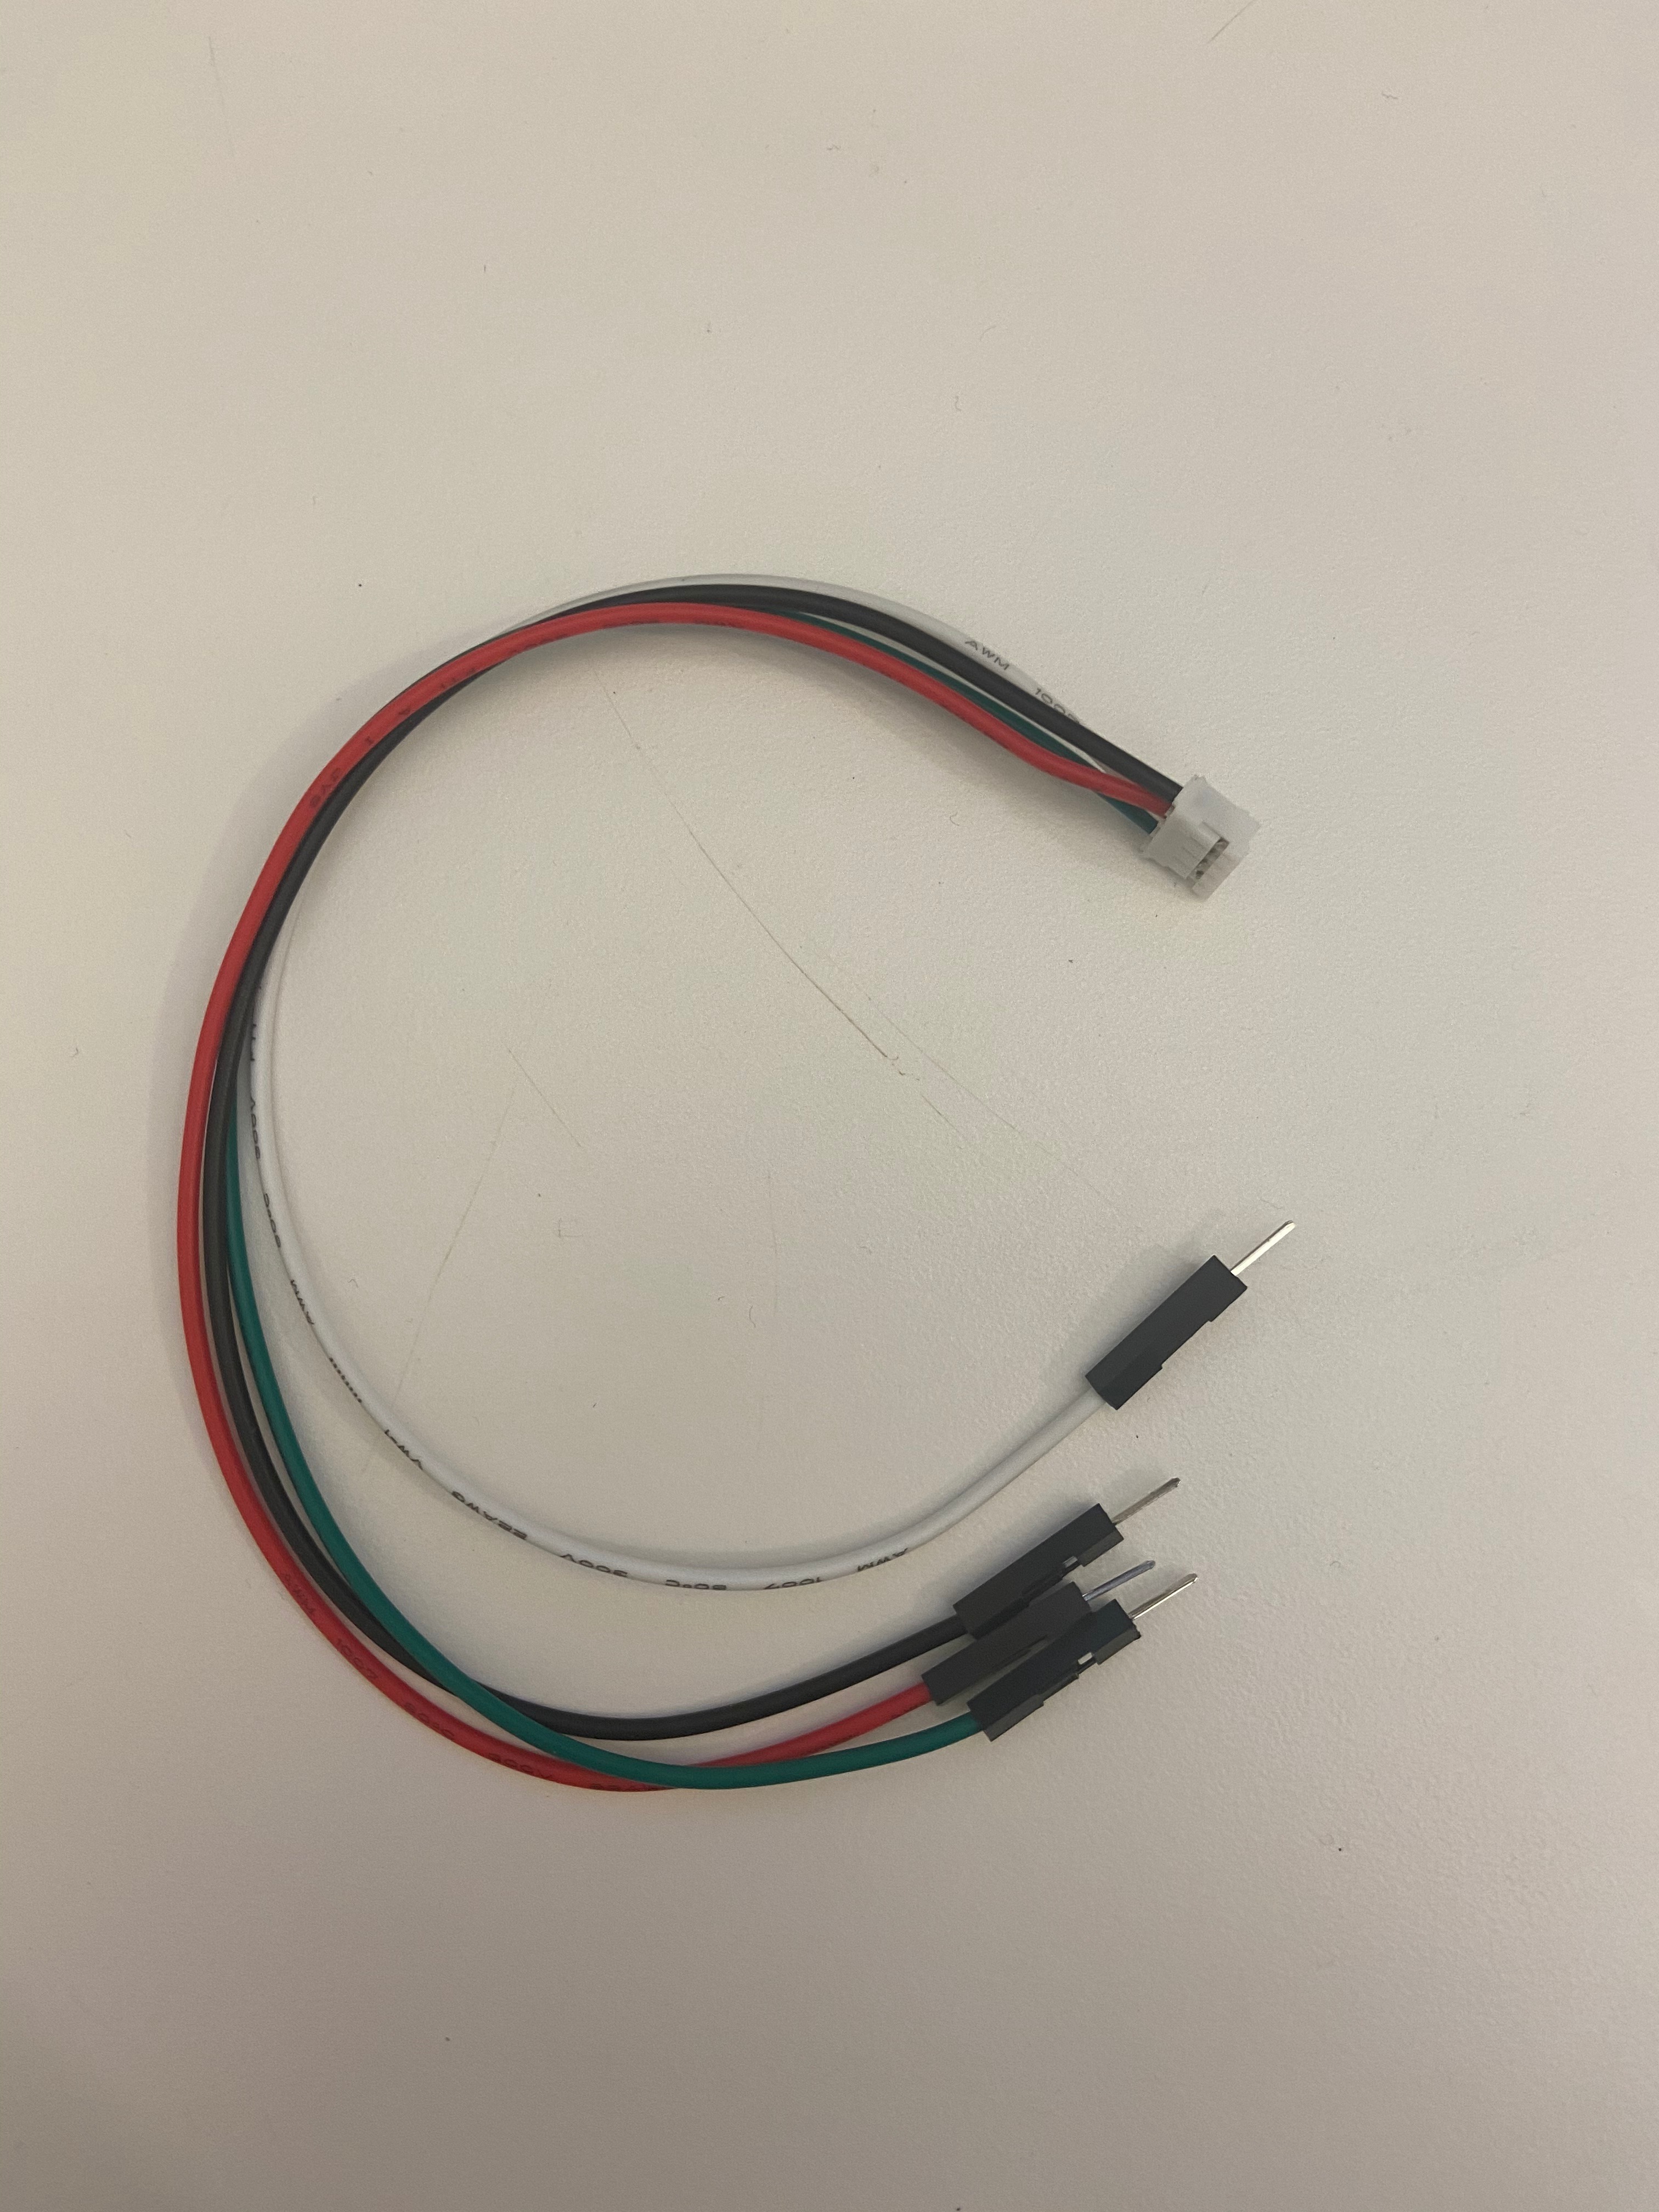
JST PH 4-Pin to Male Header Cable - I2C STEMMA Cable - 200mm
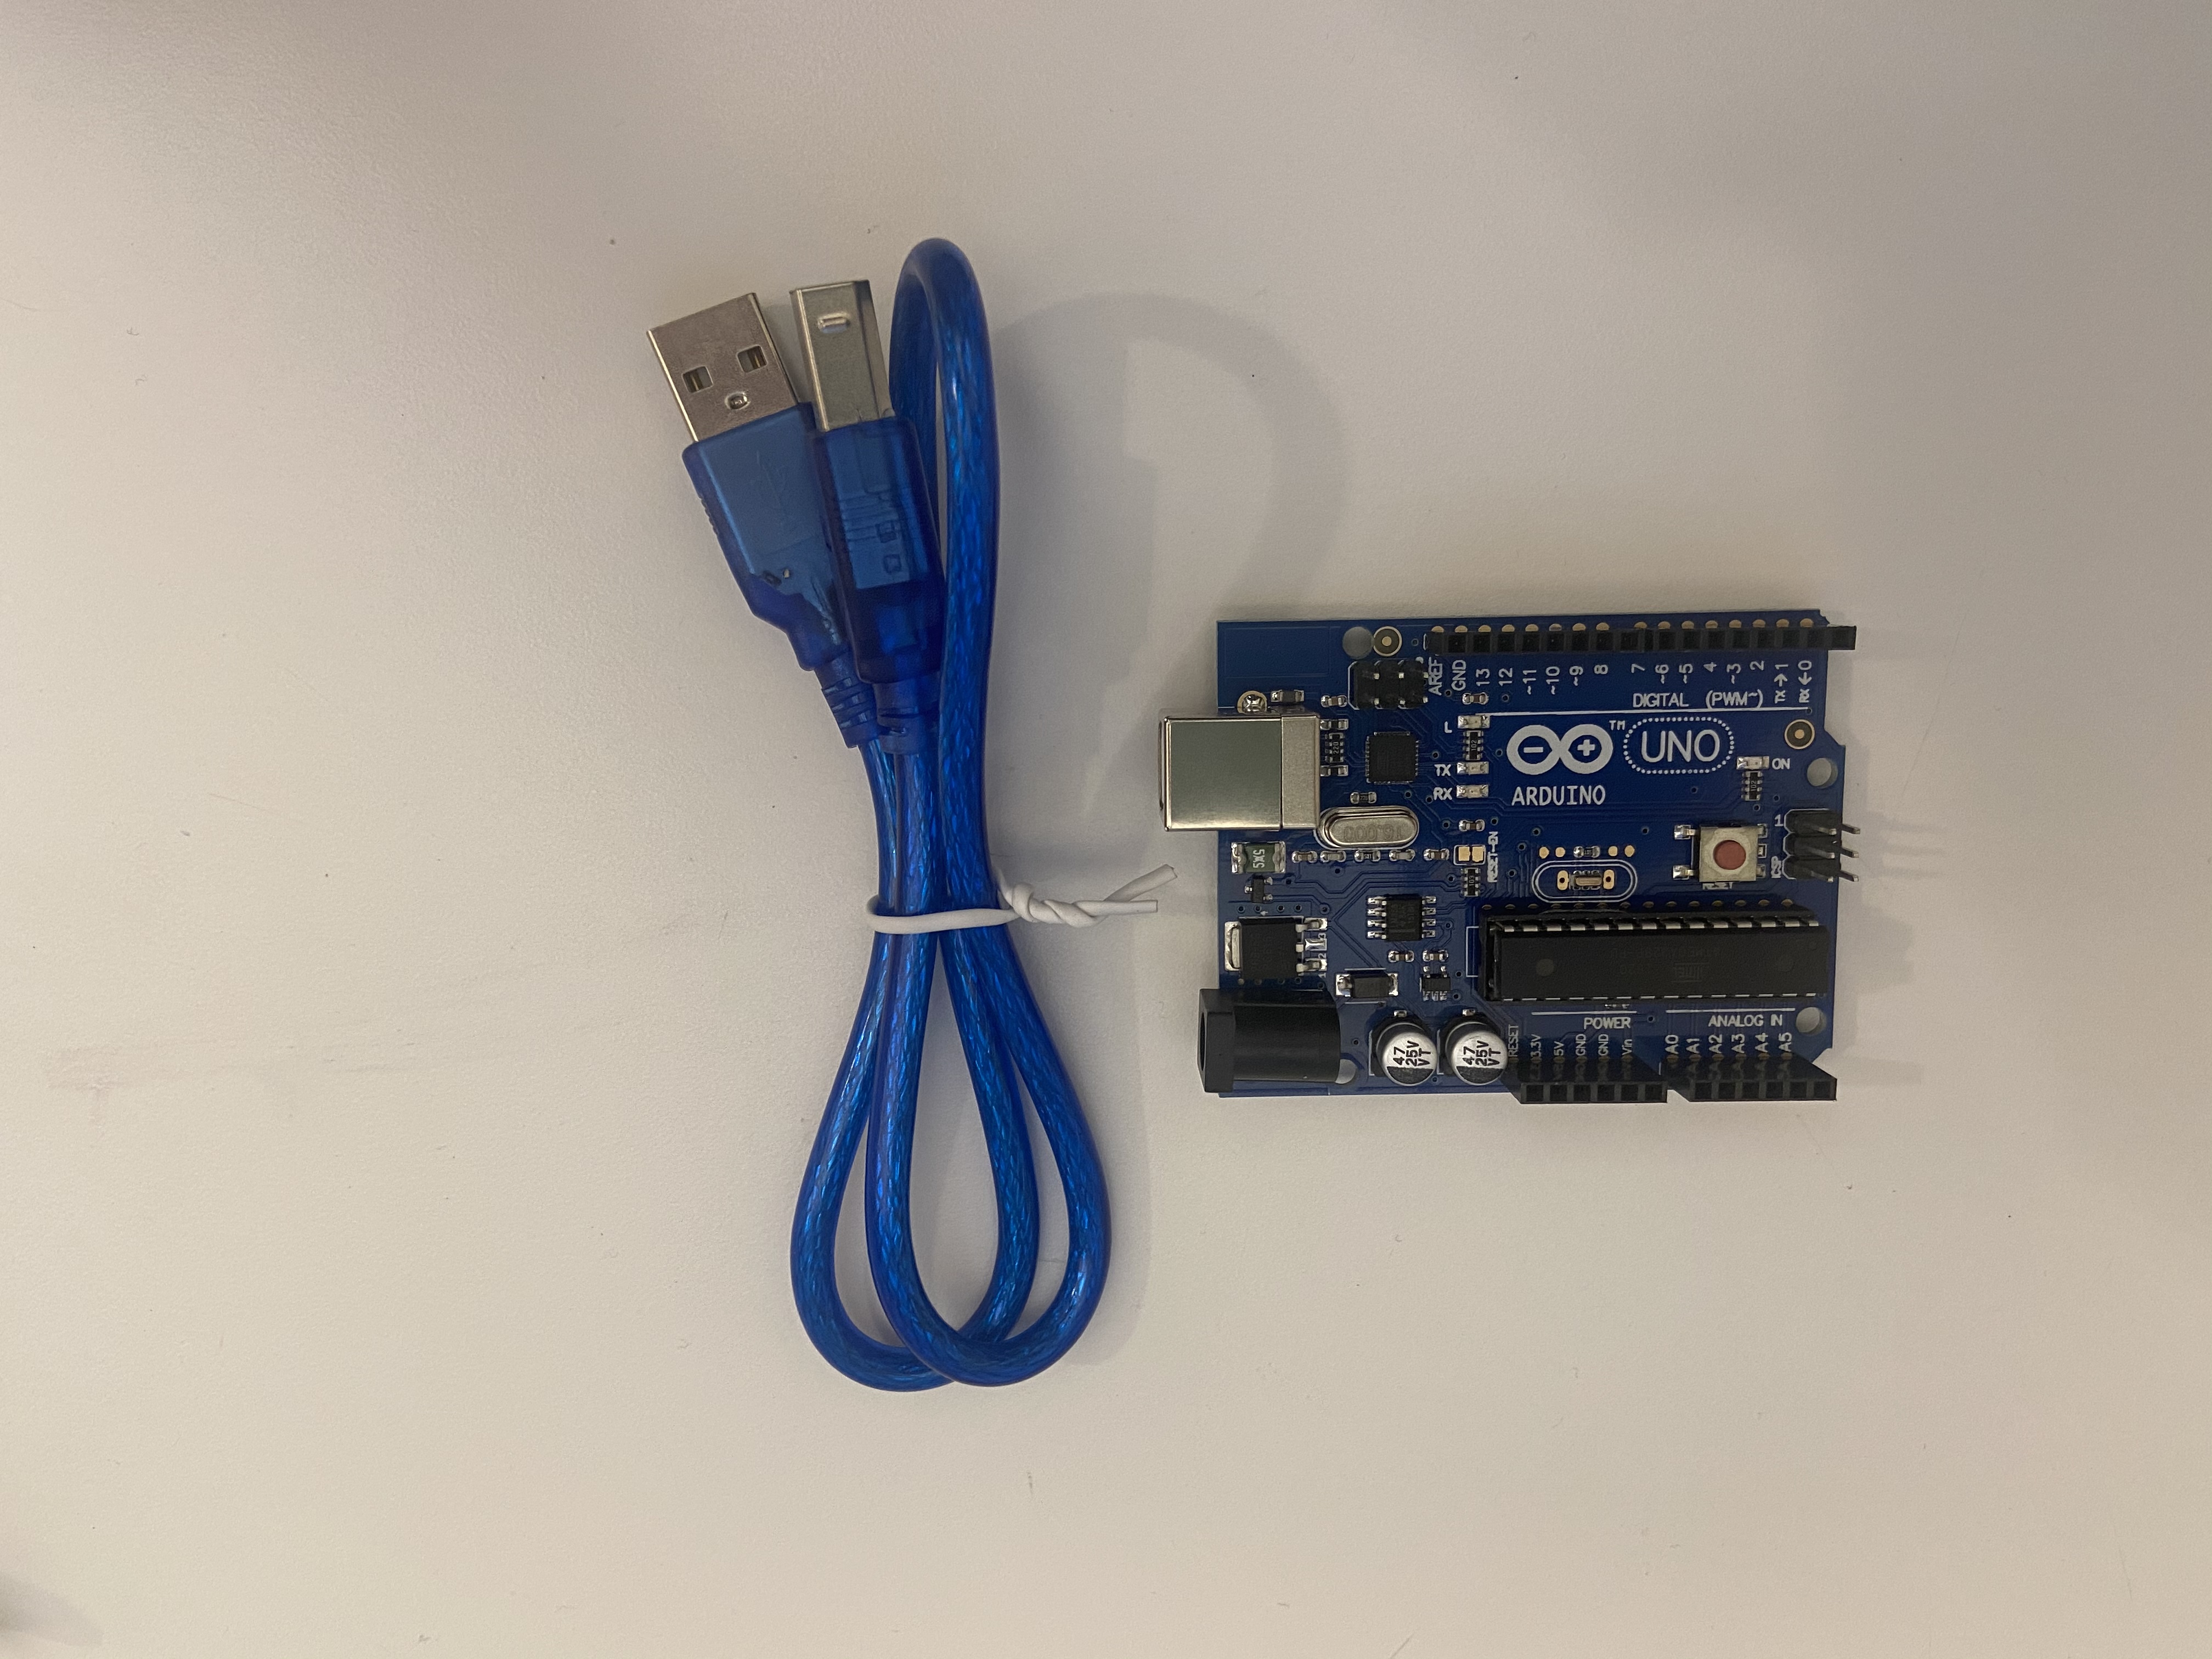
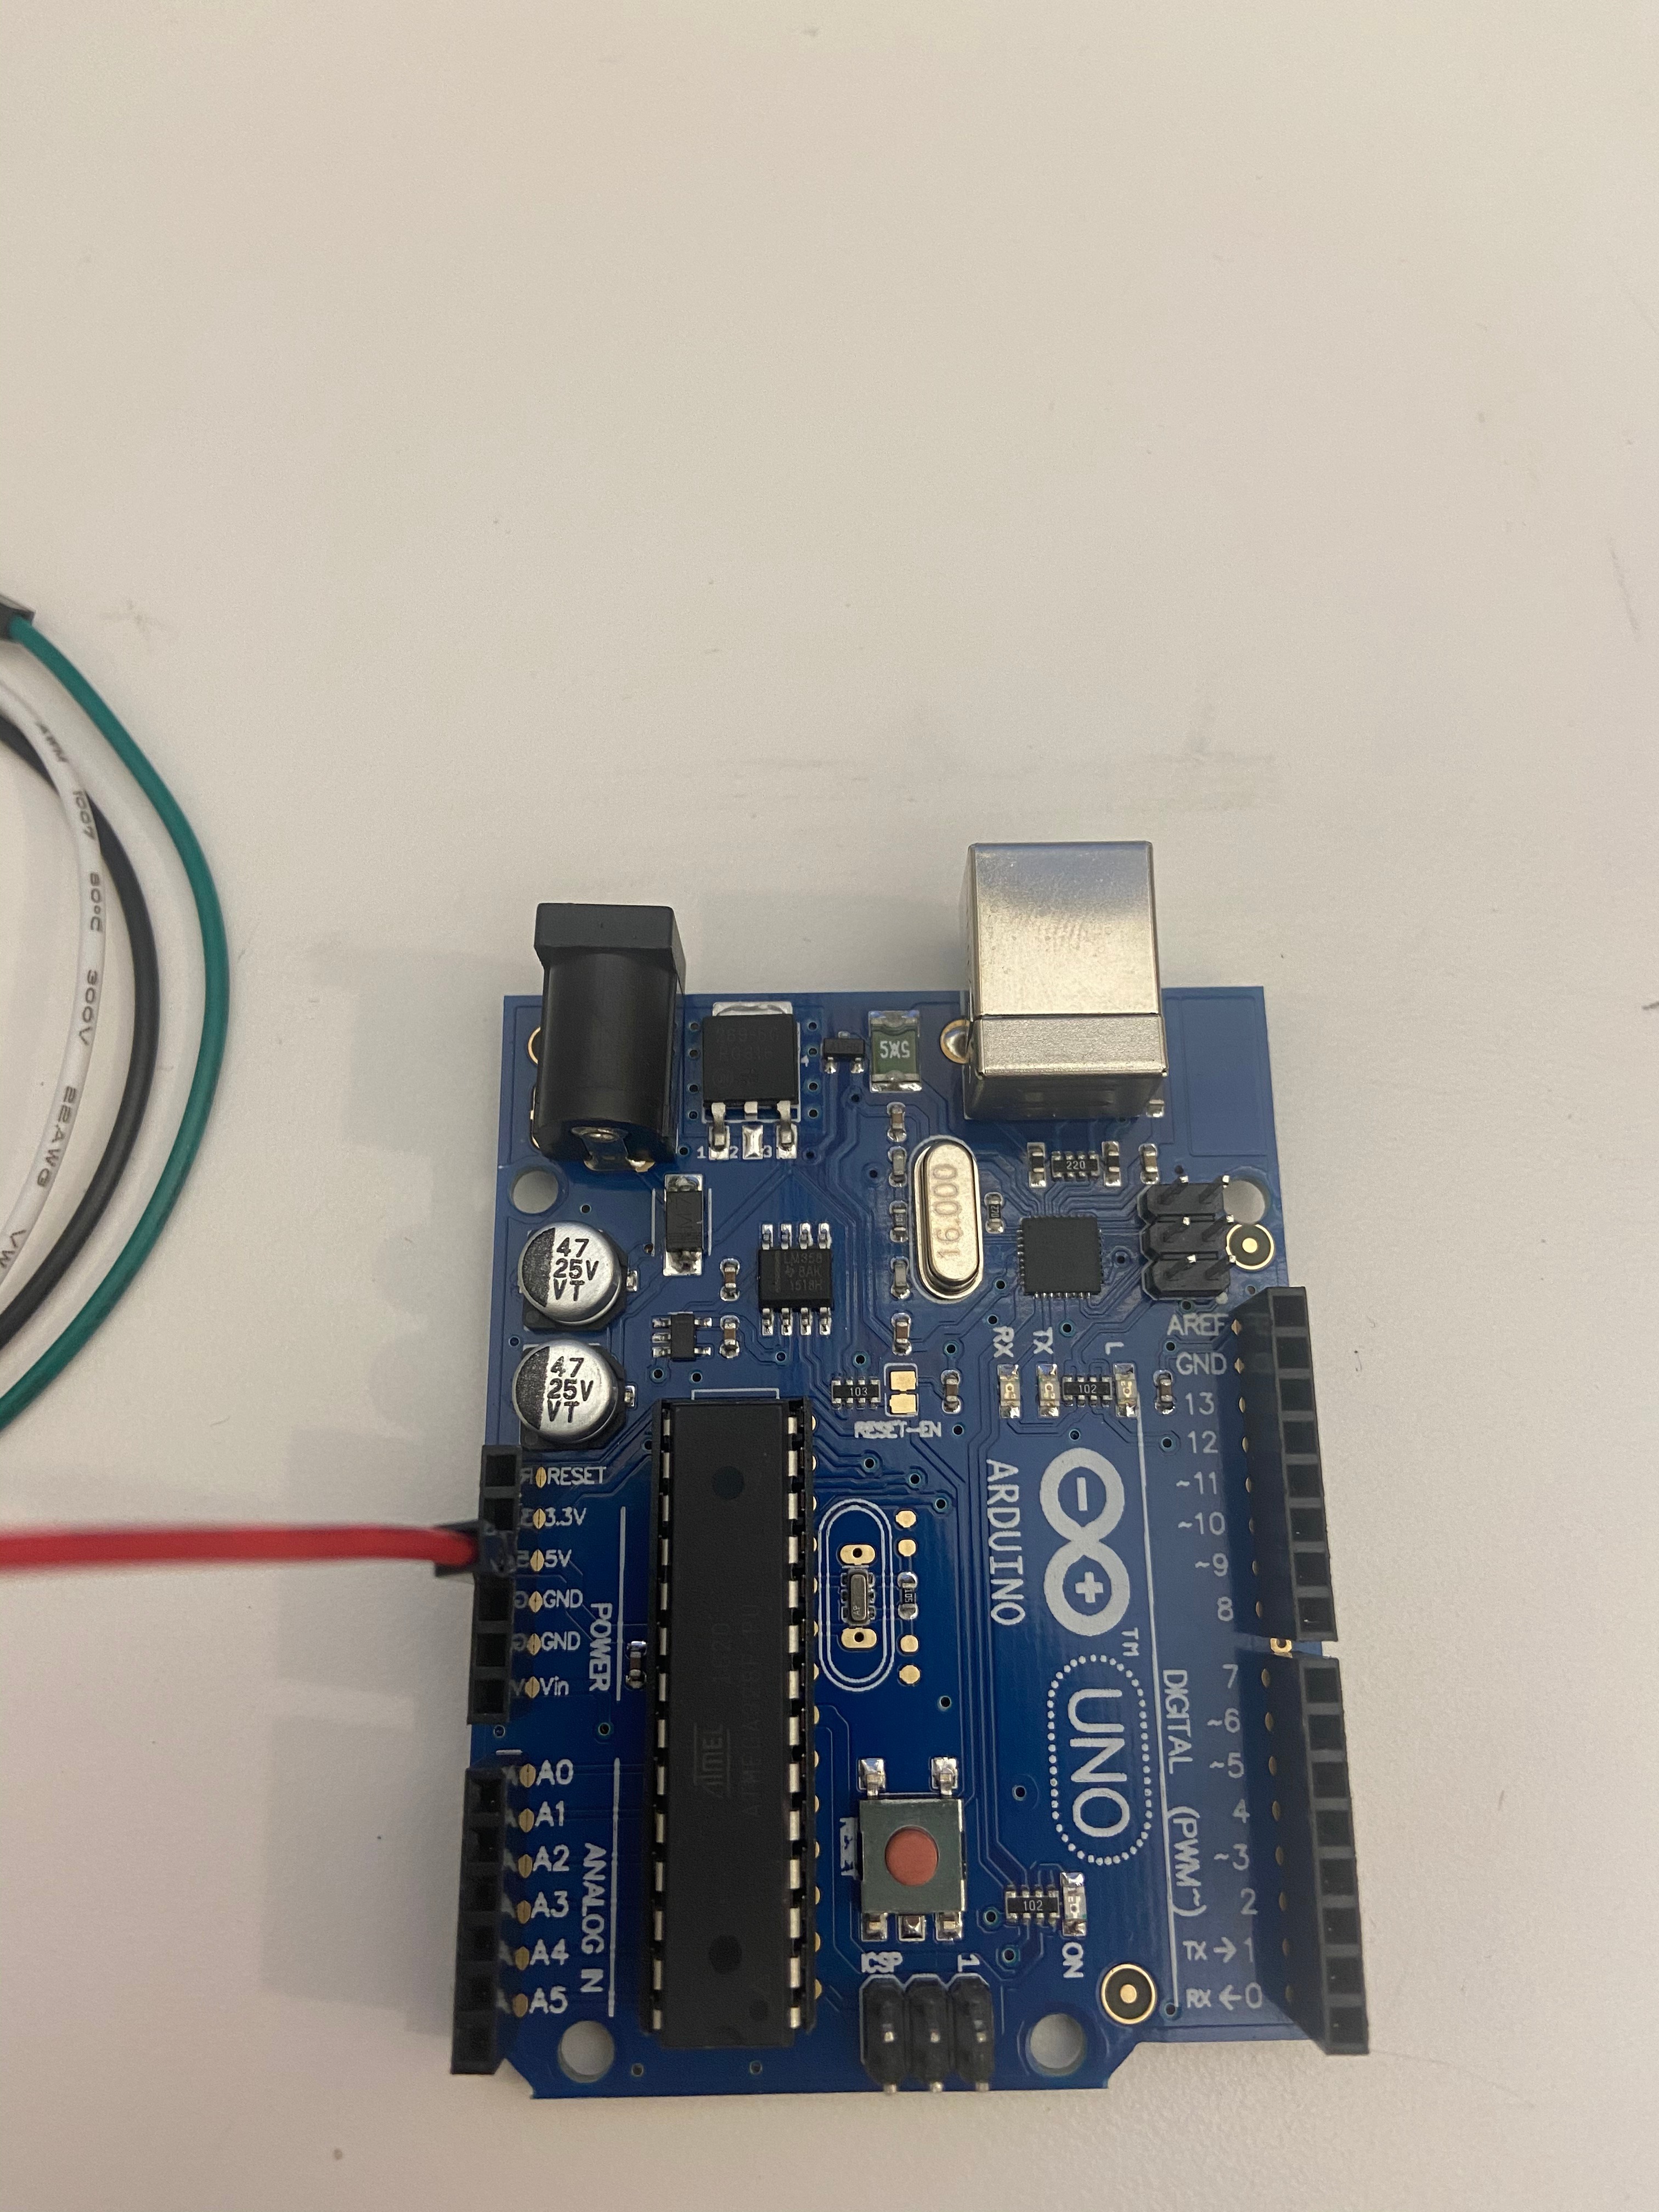
Arduino Uno
Power Source
Where to Buy Your Supplies


In order to operate the moisture sensor, you must have:
Stemma Soil Sensor (https://www.adafruit.com/product/4026)
Arduino (I chose to use an Uno but this can be interchanged) (https://www.mouser.com/ProductDetail/Arduino/A0000...)
JST PH 4-Pin to Male Header Cable - I2C STEMMA Cable - 200mm (https://www.adafruit.com/product/3955)
Powering device (I use a Macbook Pro but this can be interchanged with any power device) (https://www.apple.com/macbook-pro/?afid=p238%7Cskx...)
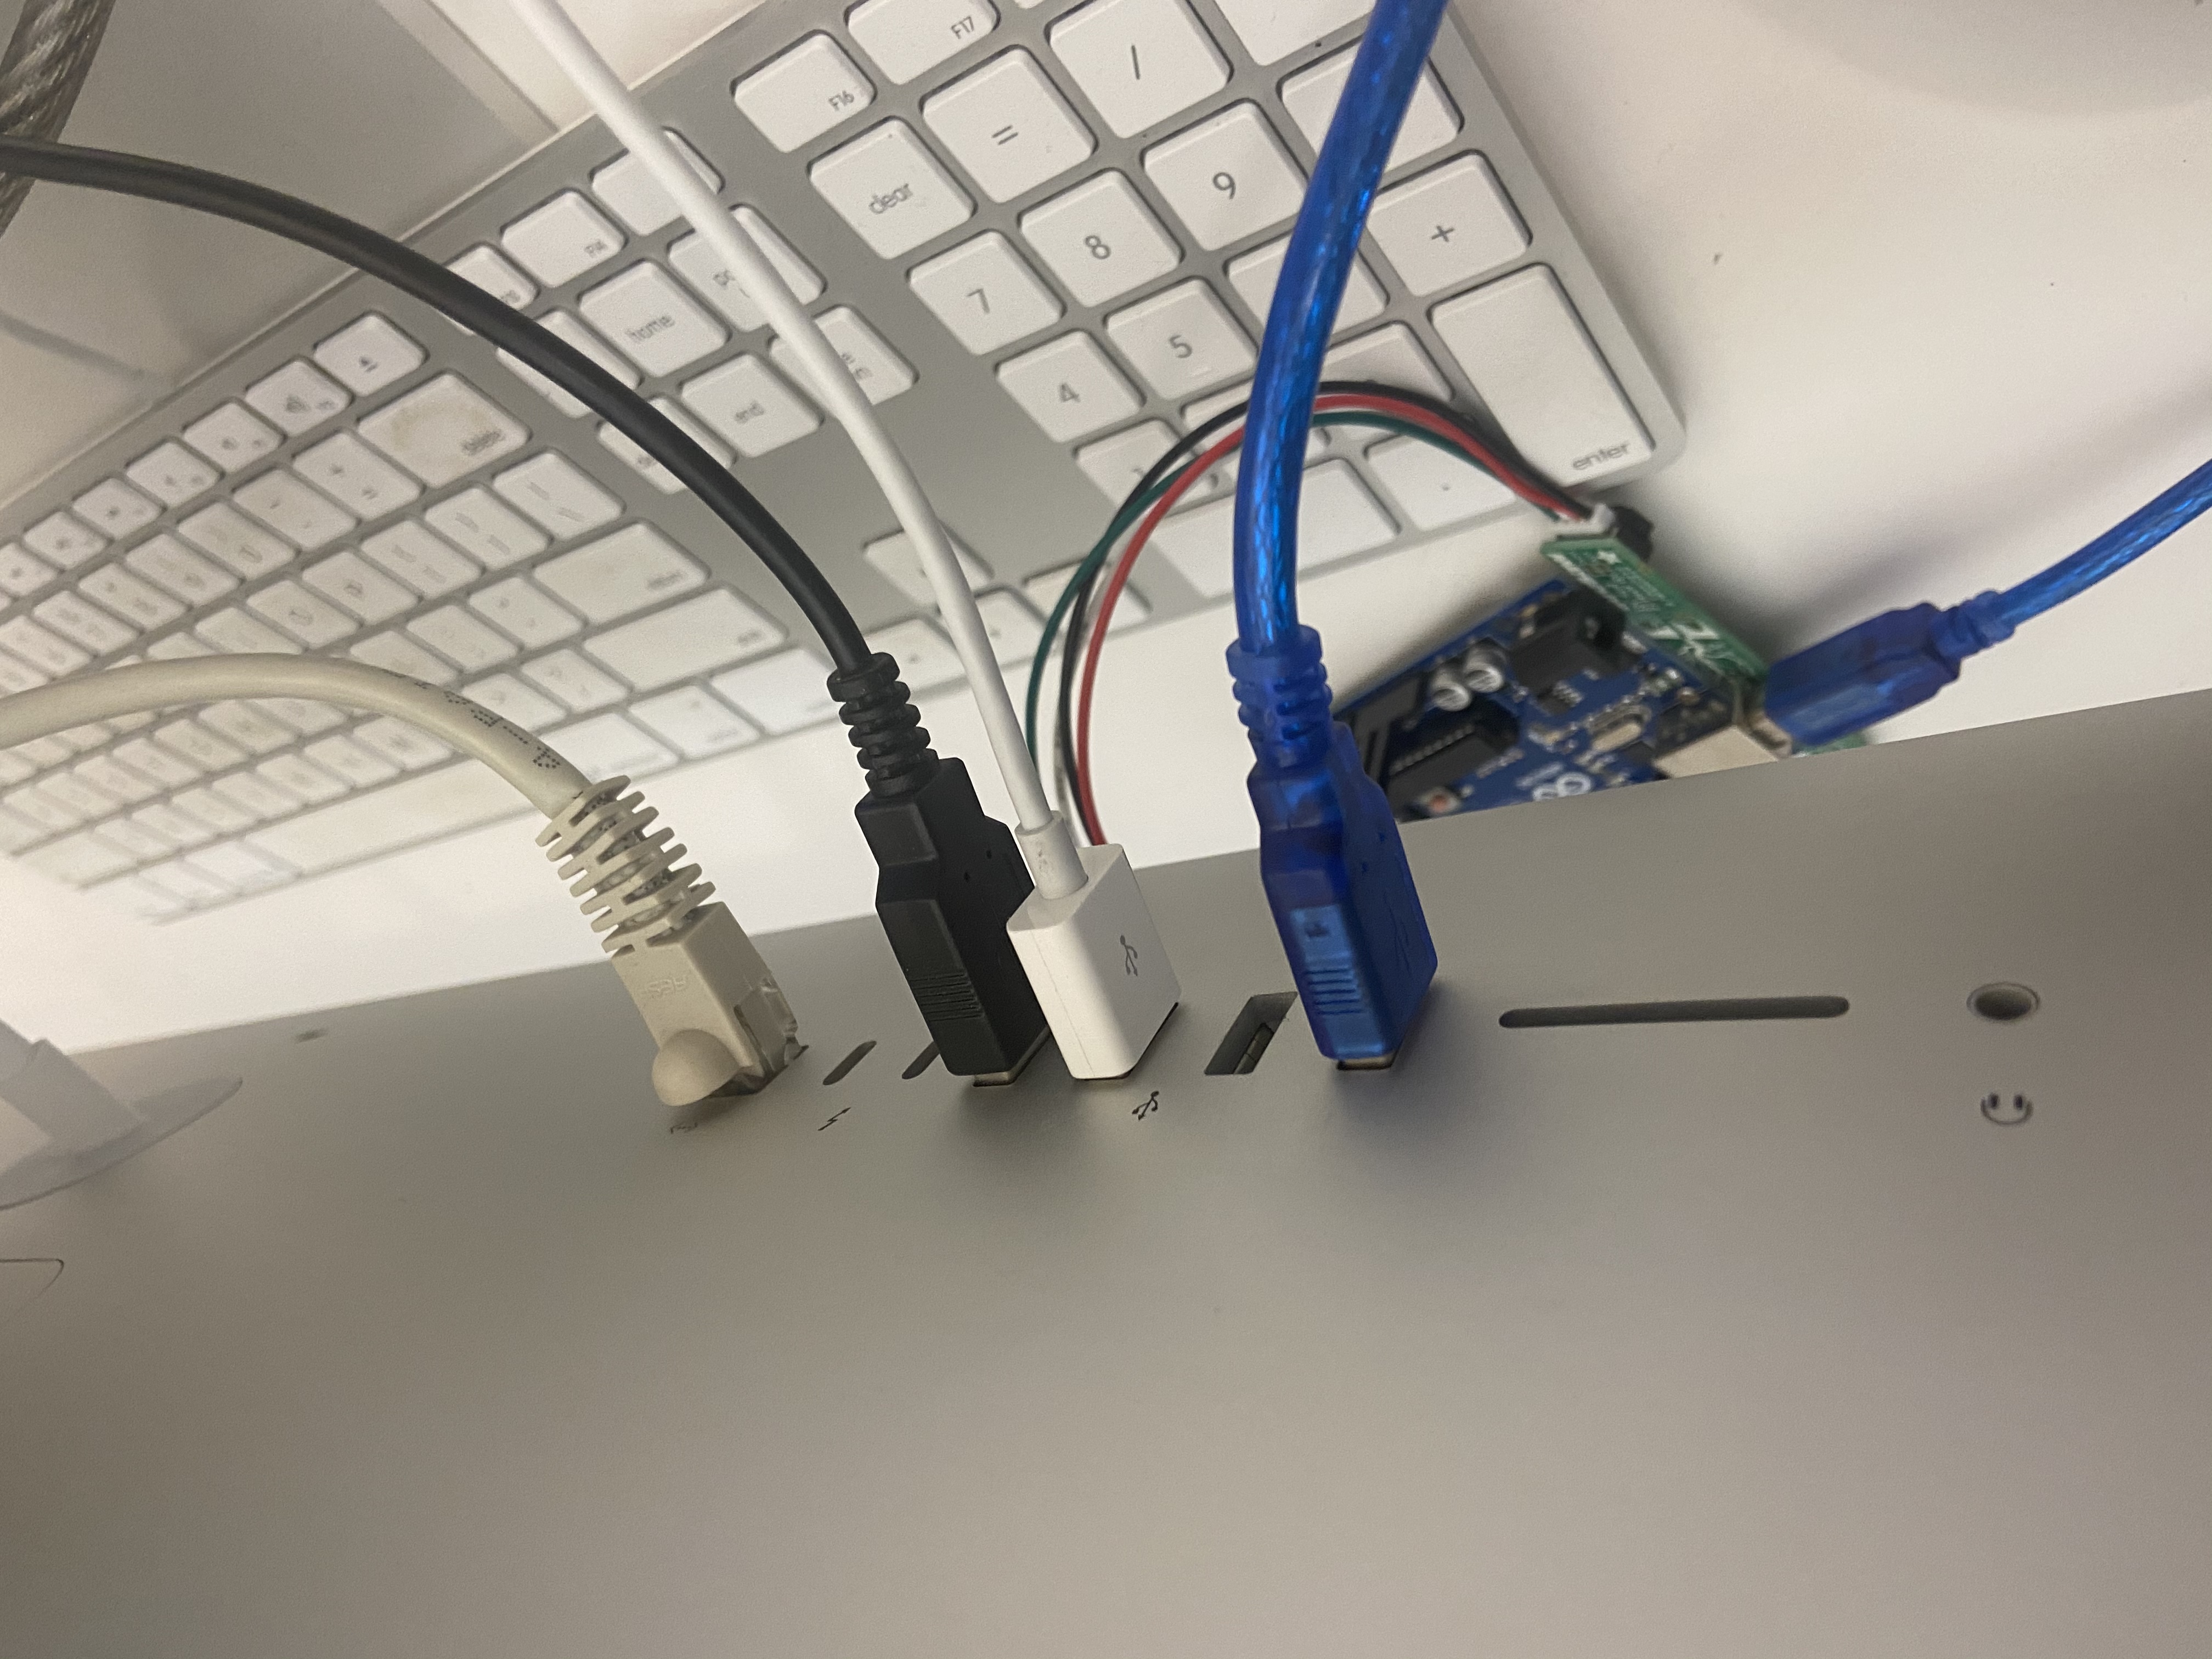
The Stemma Sensor

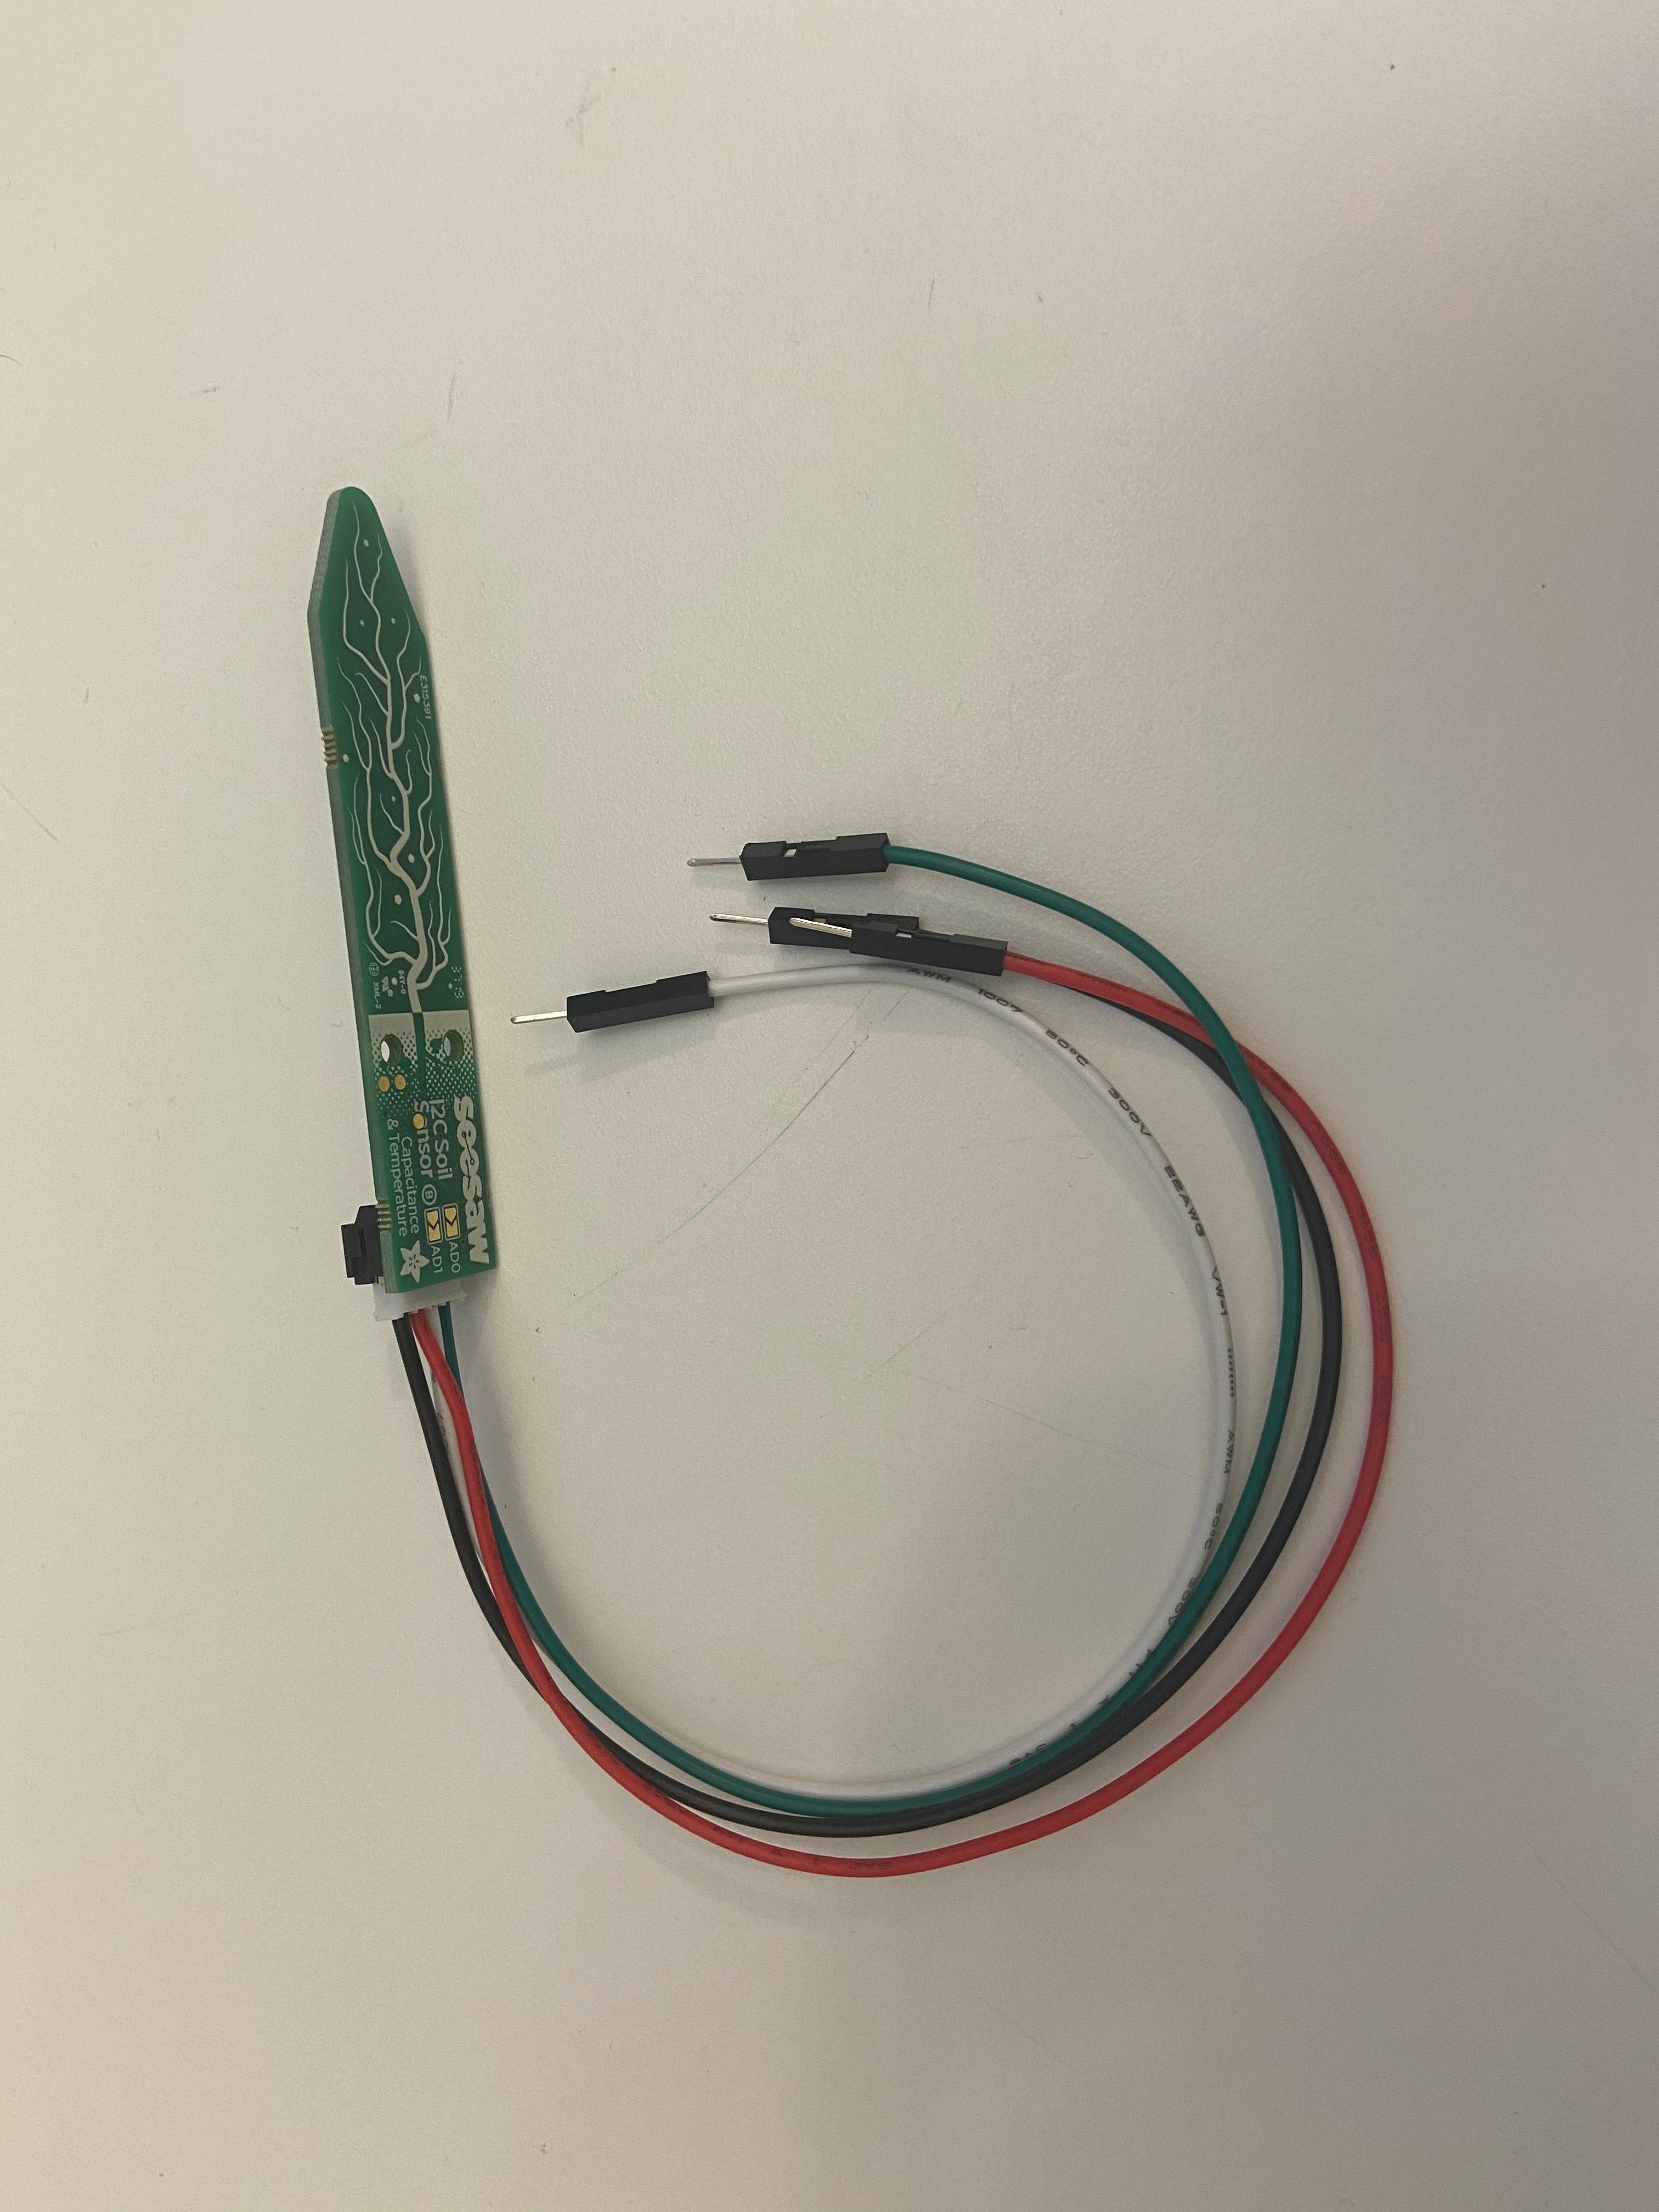
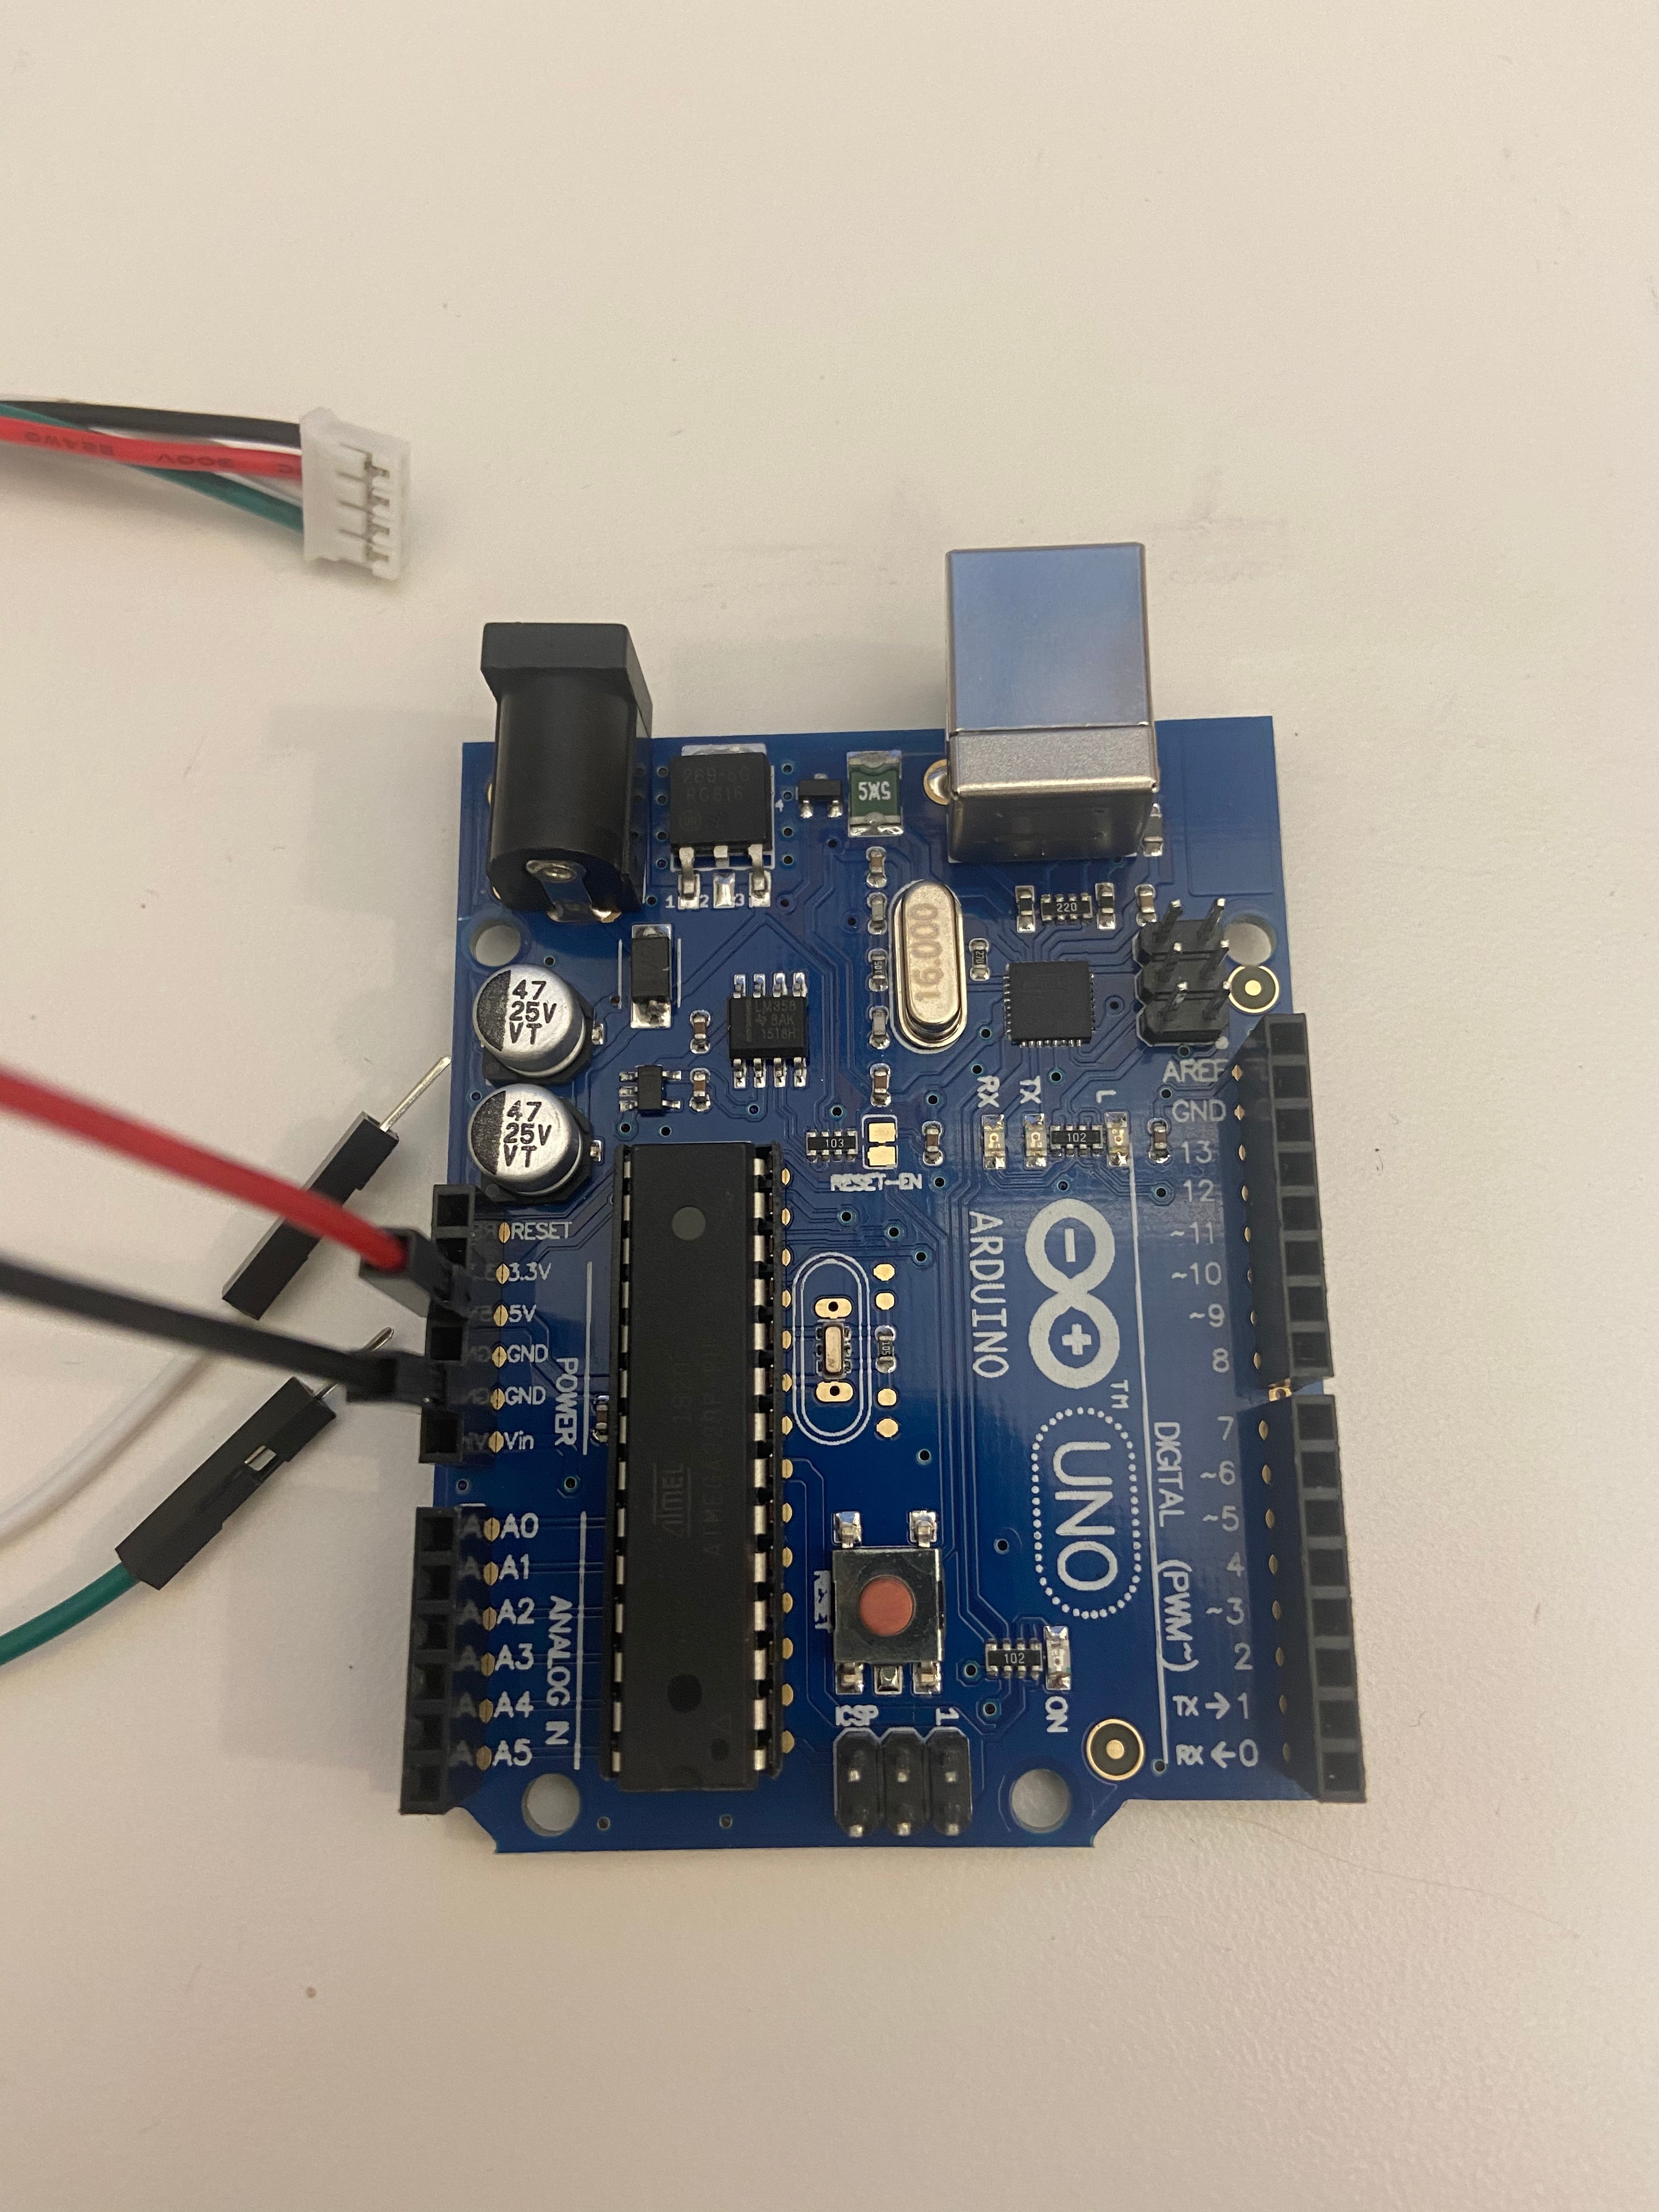

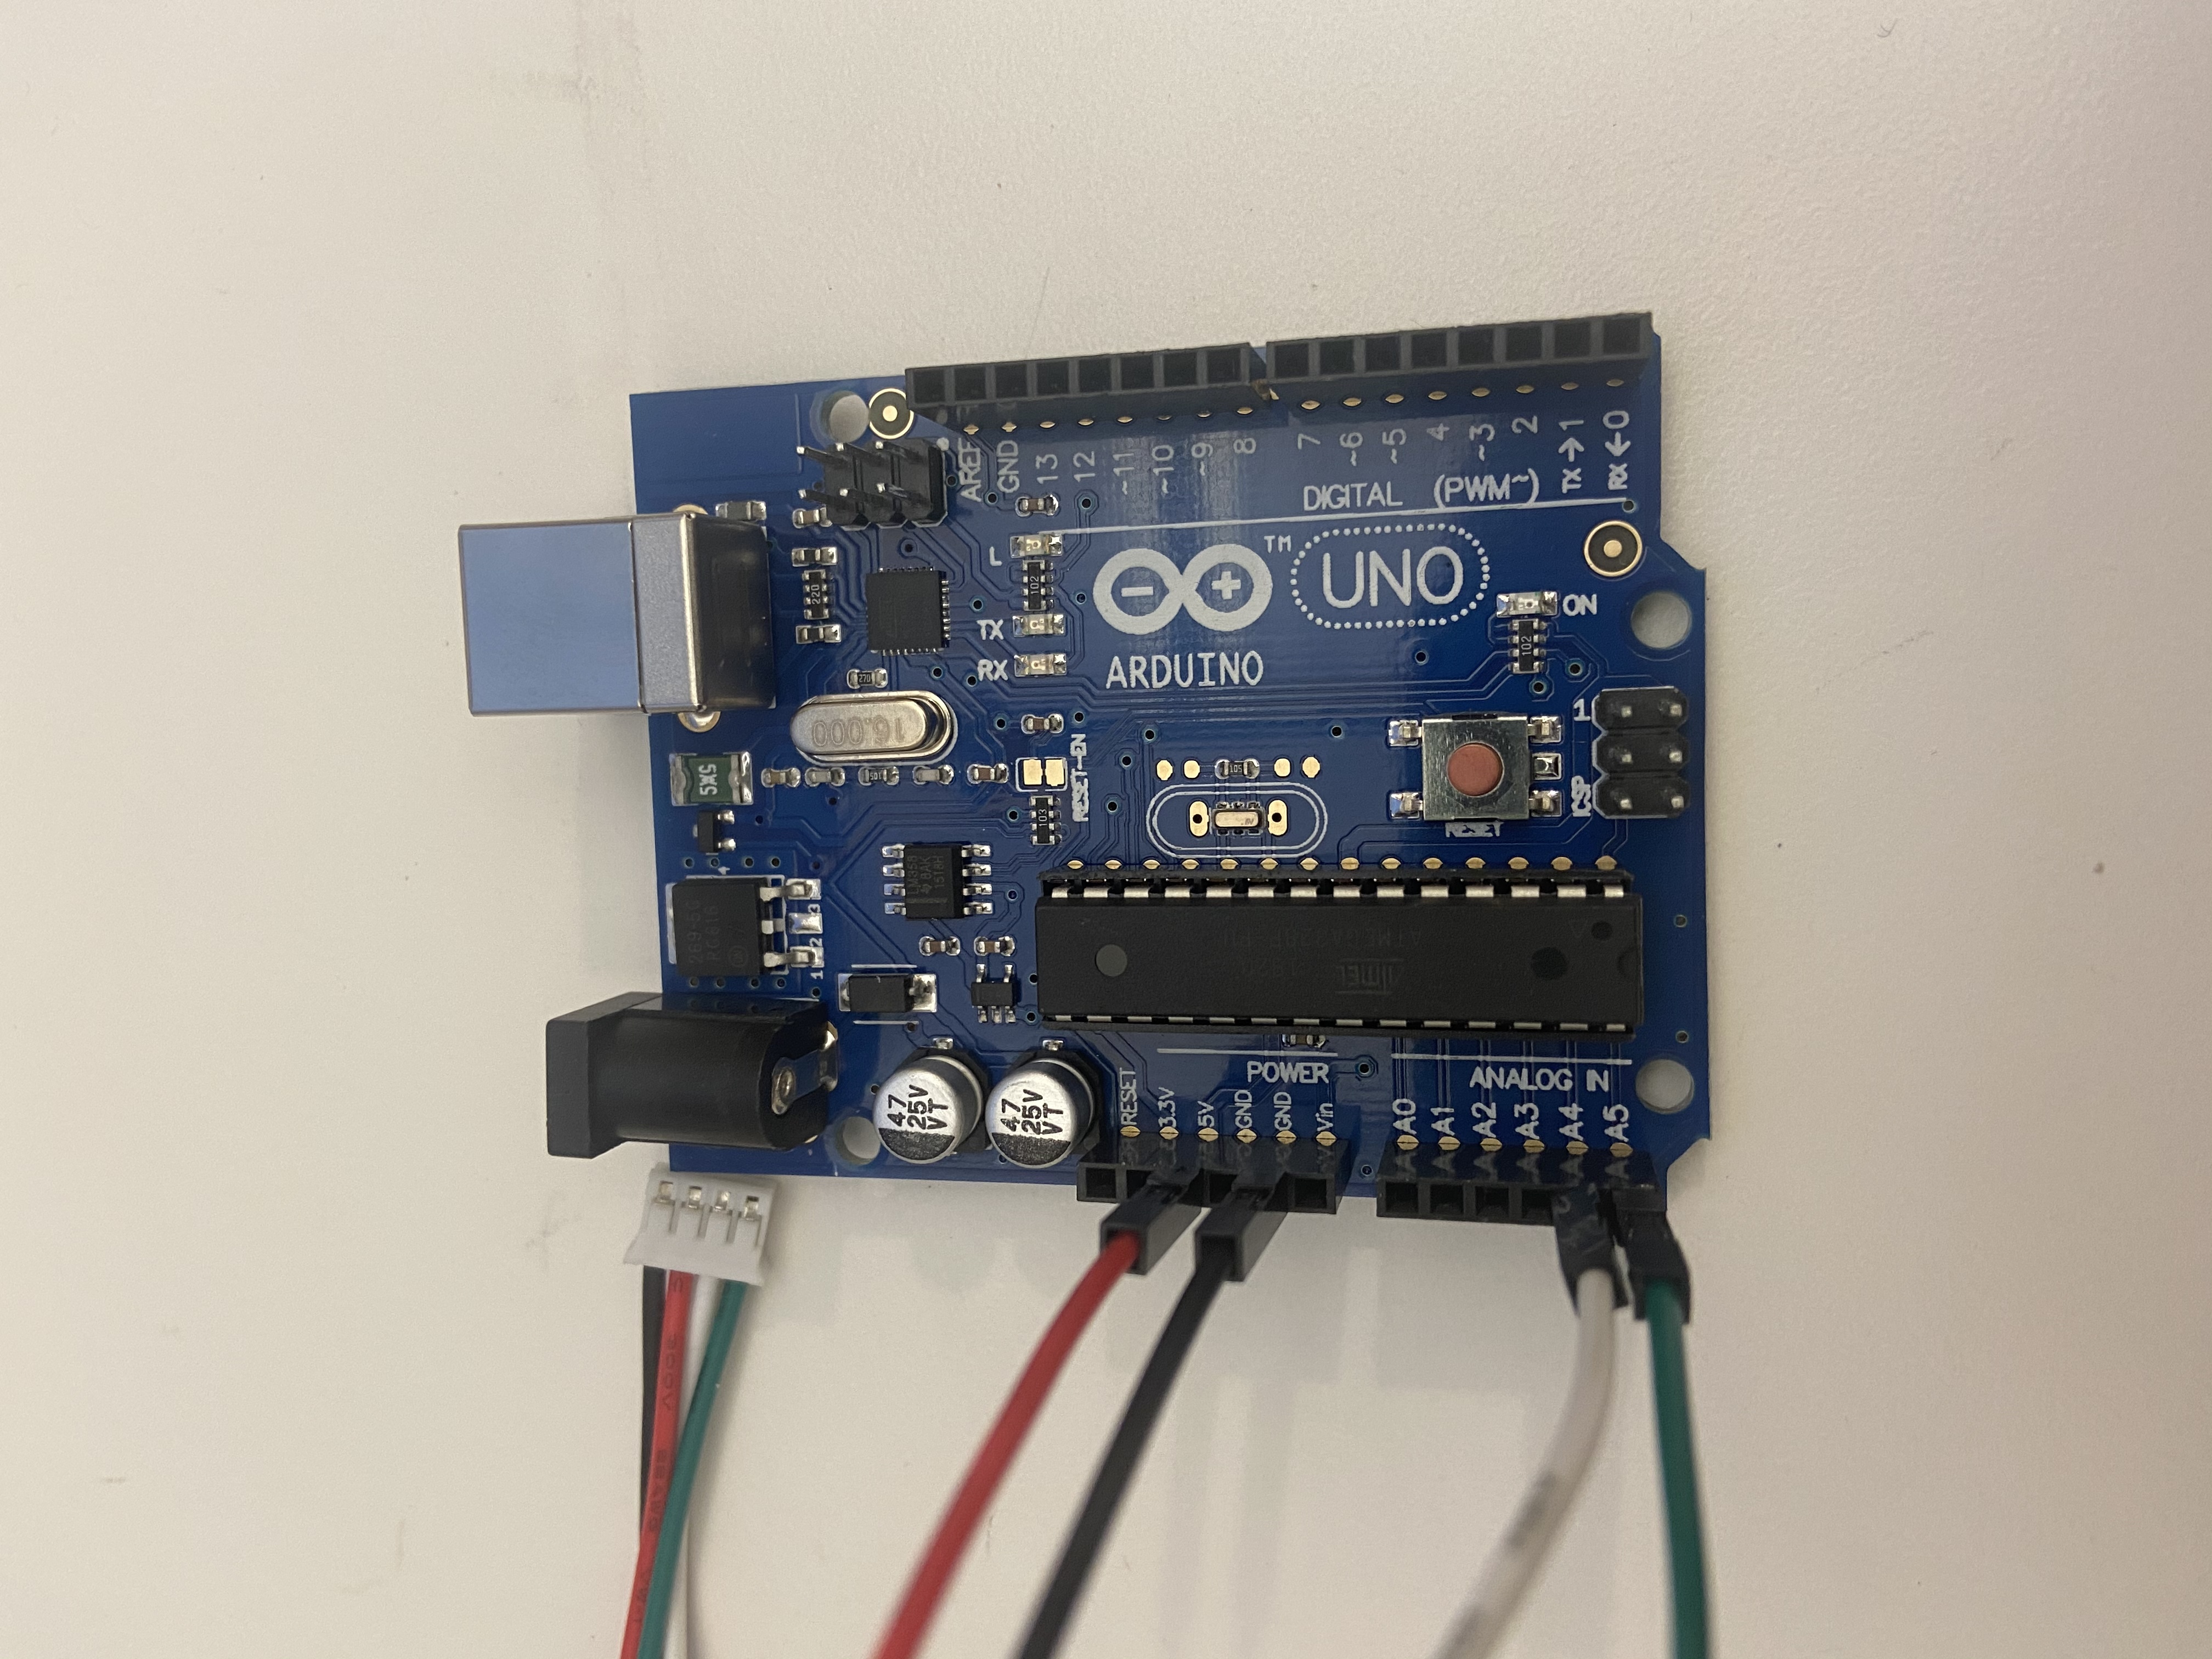
As you begin attaching components, start with the Stemma Sensor and the JST PH 4-Pin to Male Header Cable. Plug these together before you attach any wires to the Arduino.
Step 1:
Connect the red wire to the power supply. Make sure you use the same voltage that the microcontroller logic is based off of. For most Arduino's, that is the 5V. If you have 3.3V logic, use 3V.
Step 2:
Connect the black wire to the power/data ground.
Step 3:
Connect the green wire to A5.
Step 4:
Connect the white wire to A4.
Setting Up Arduino
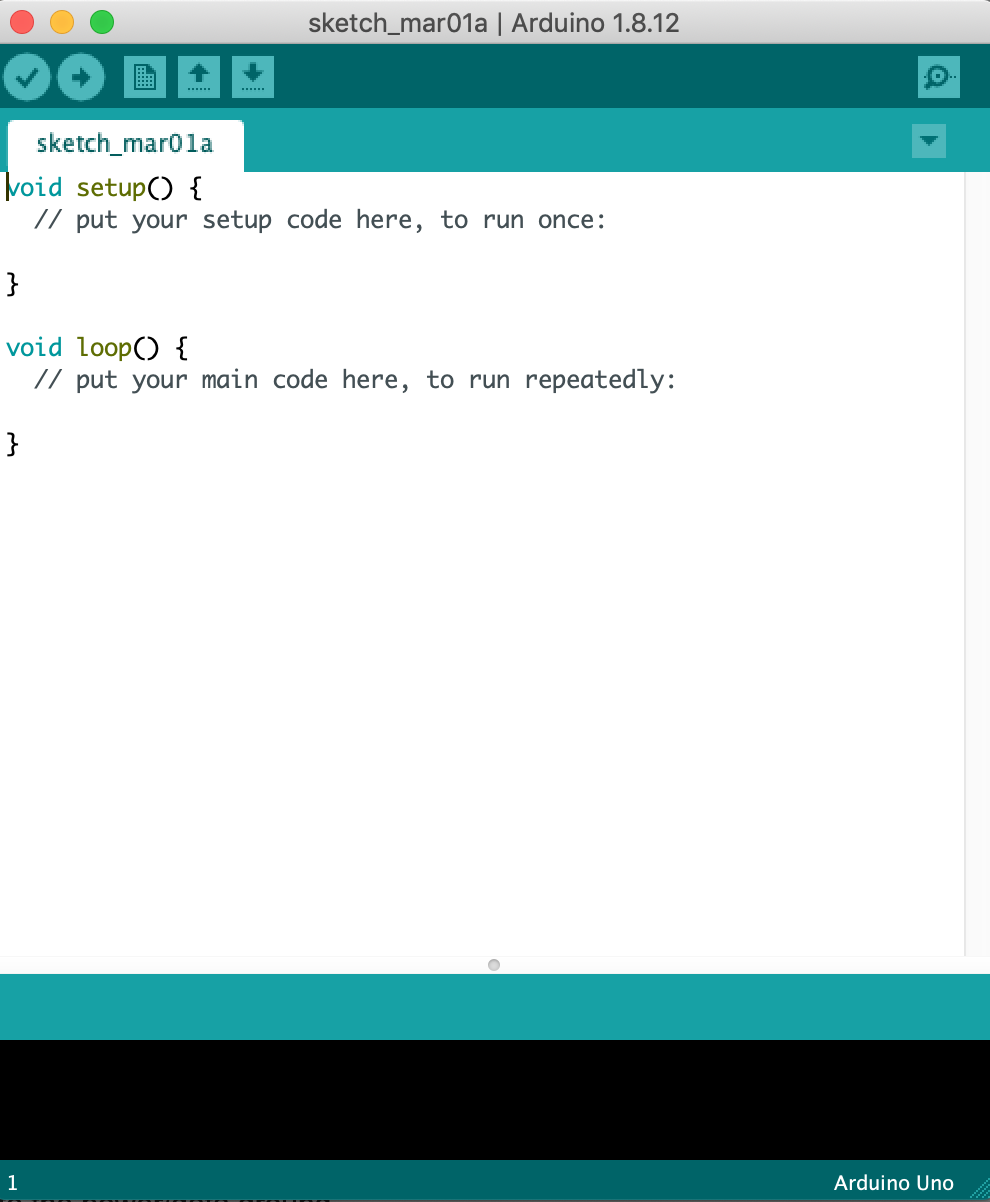
It is essential to have access to Arduino software. If you do not have it on your computer, I have attached a link for download (https://www.arduino.cc/en/main/software).
After you have successfully downloaded the software, you will need to adjust your settings based on your Arduino.
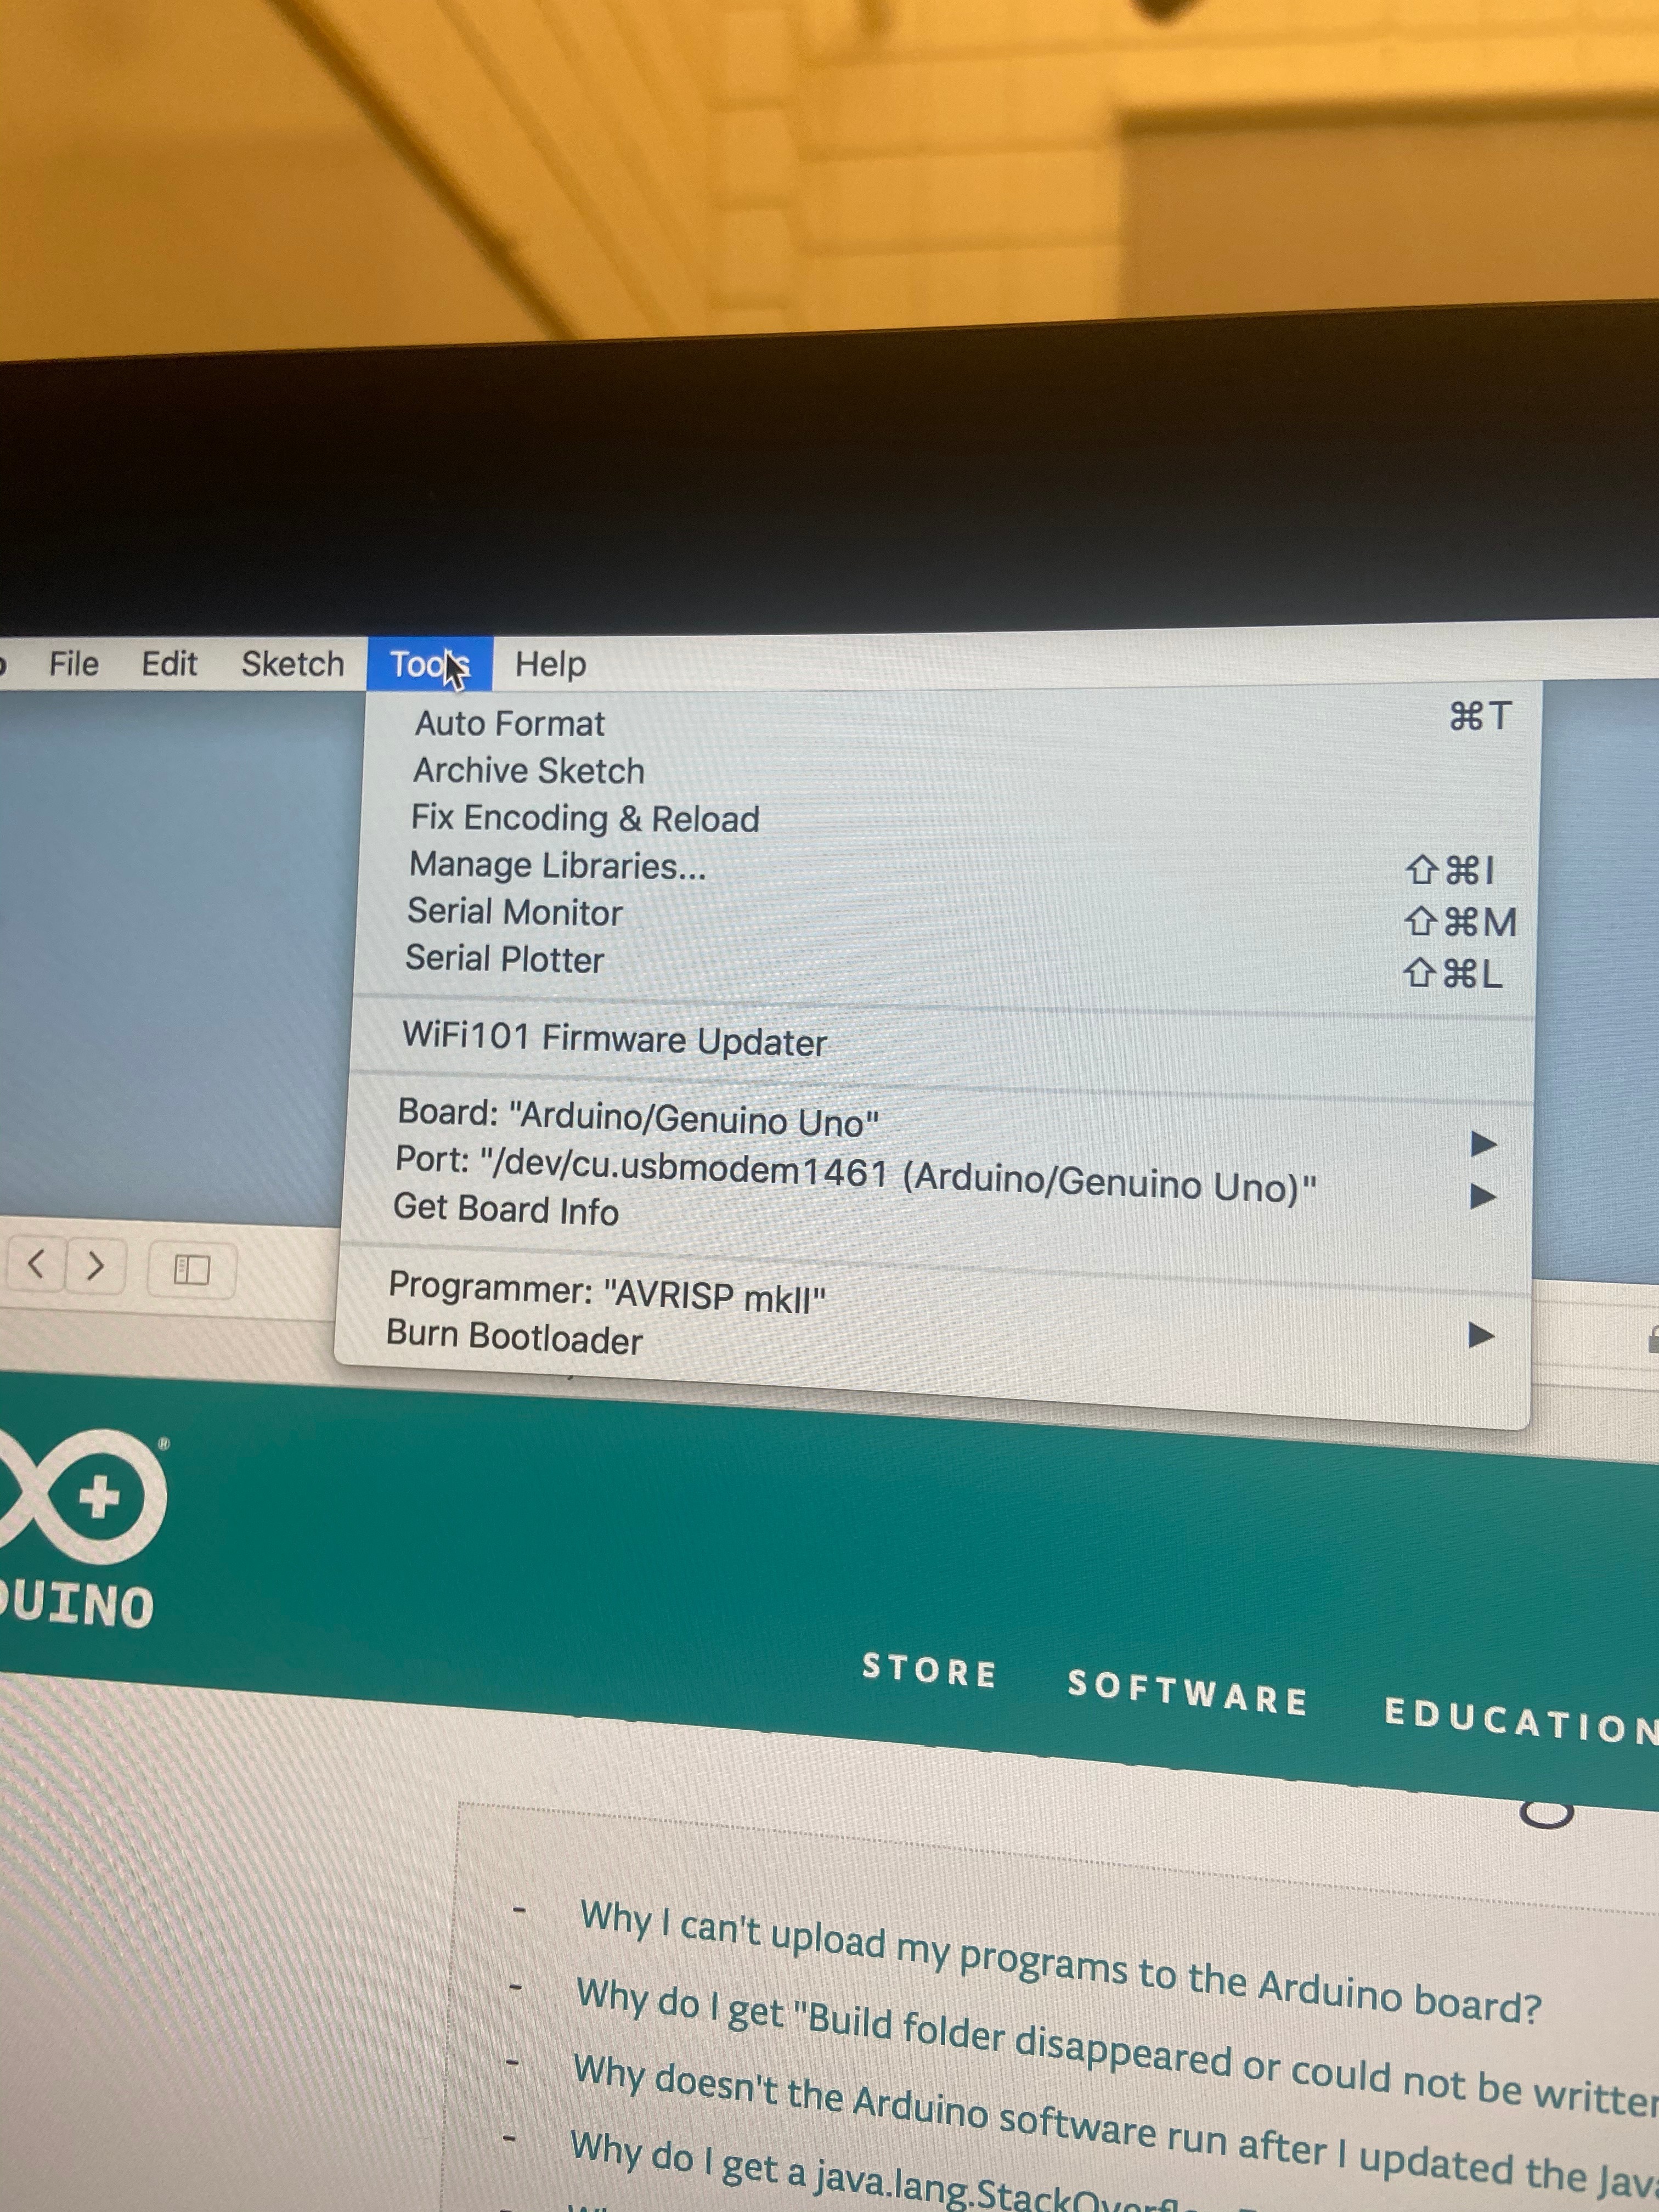
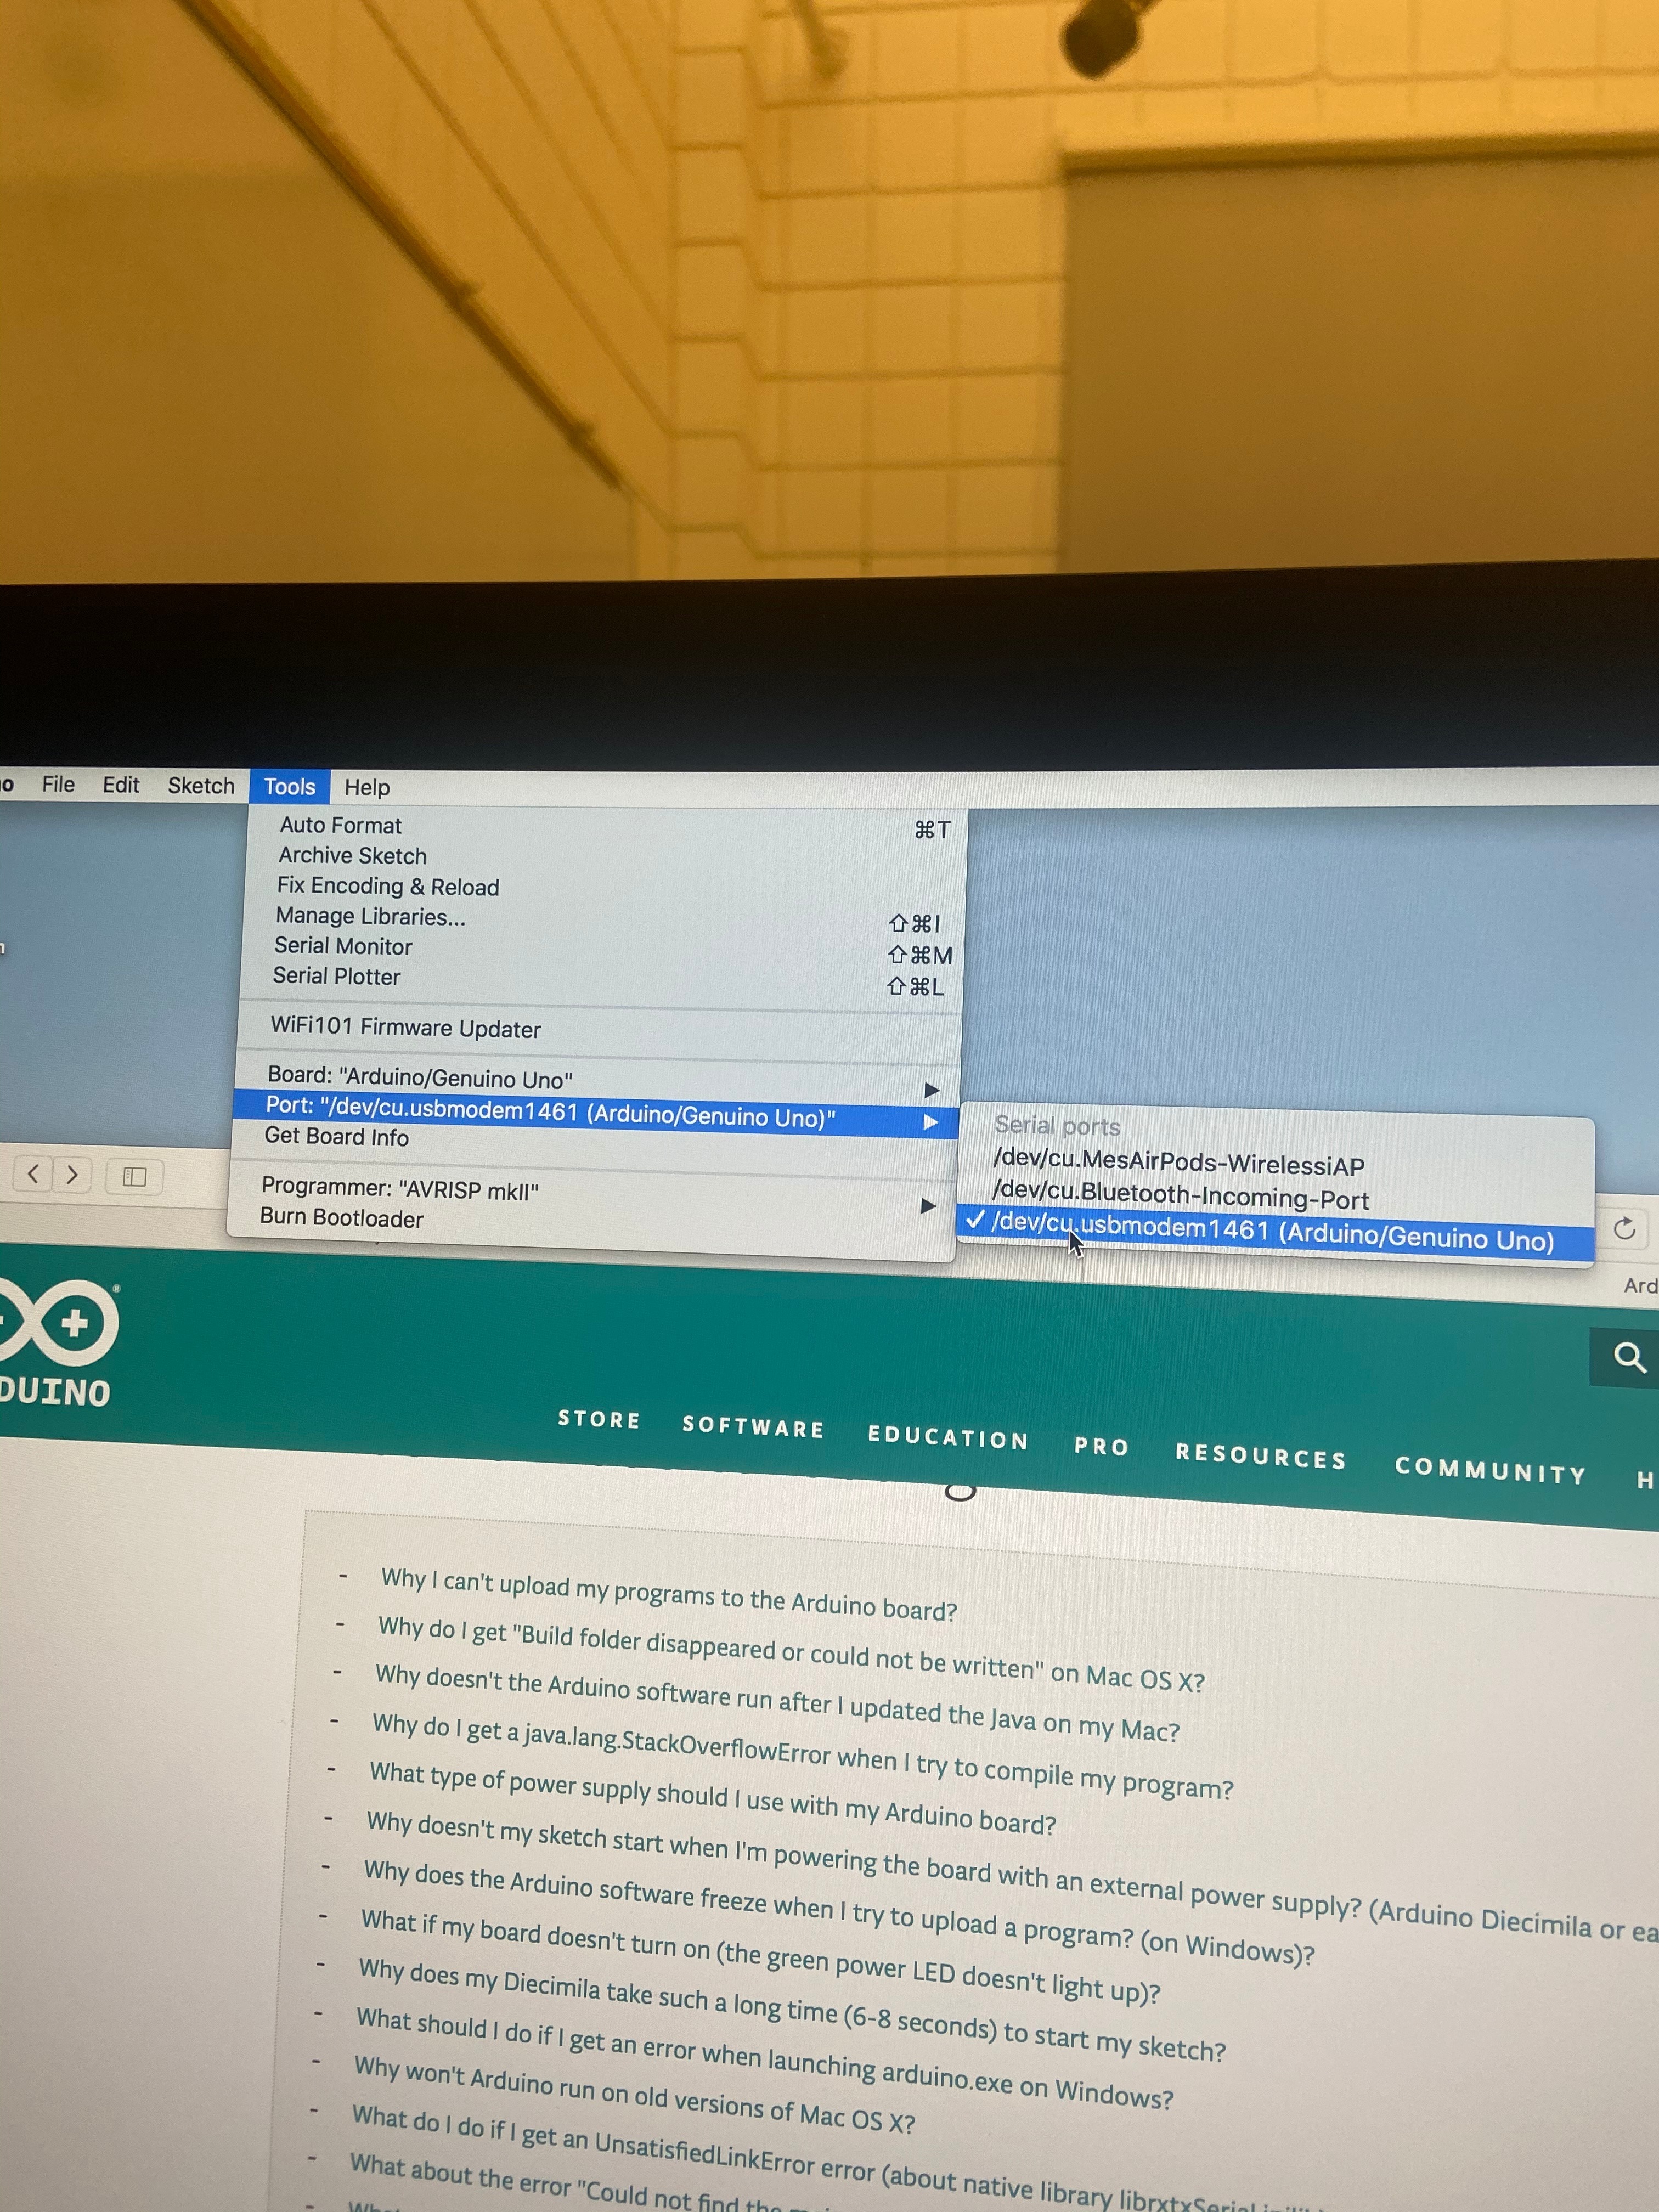
Step 1:
Select the tools menu and select port. Make sure Arduino/Gunuino Uno is selected (If this is the Arduino you are using).
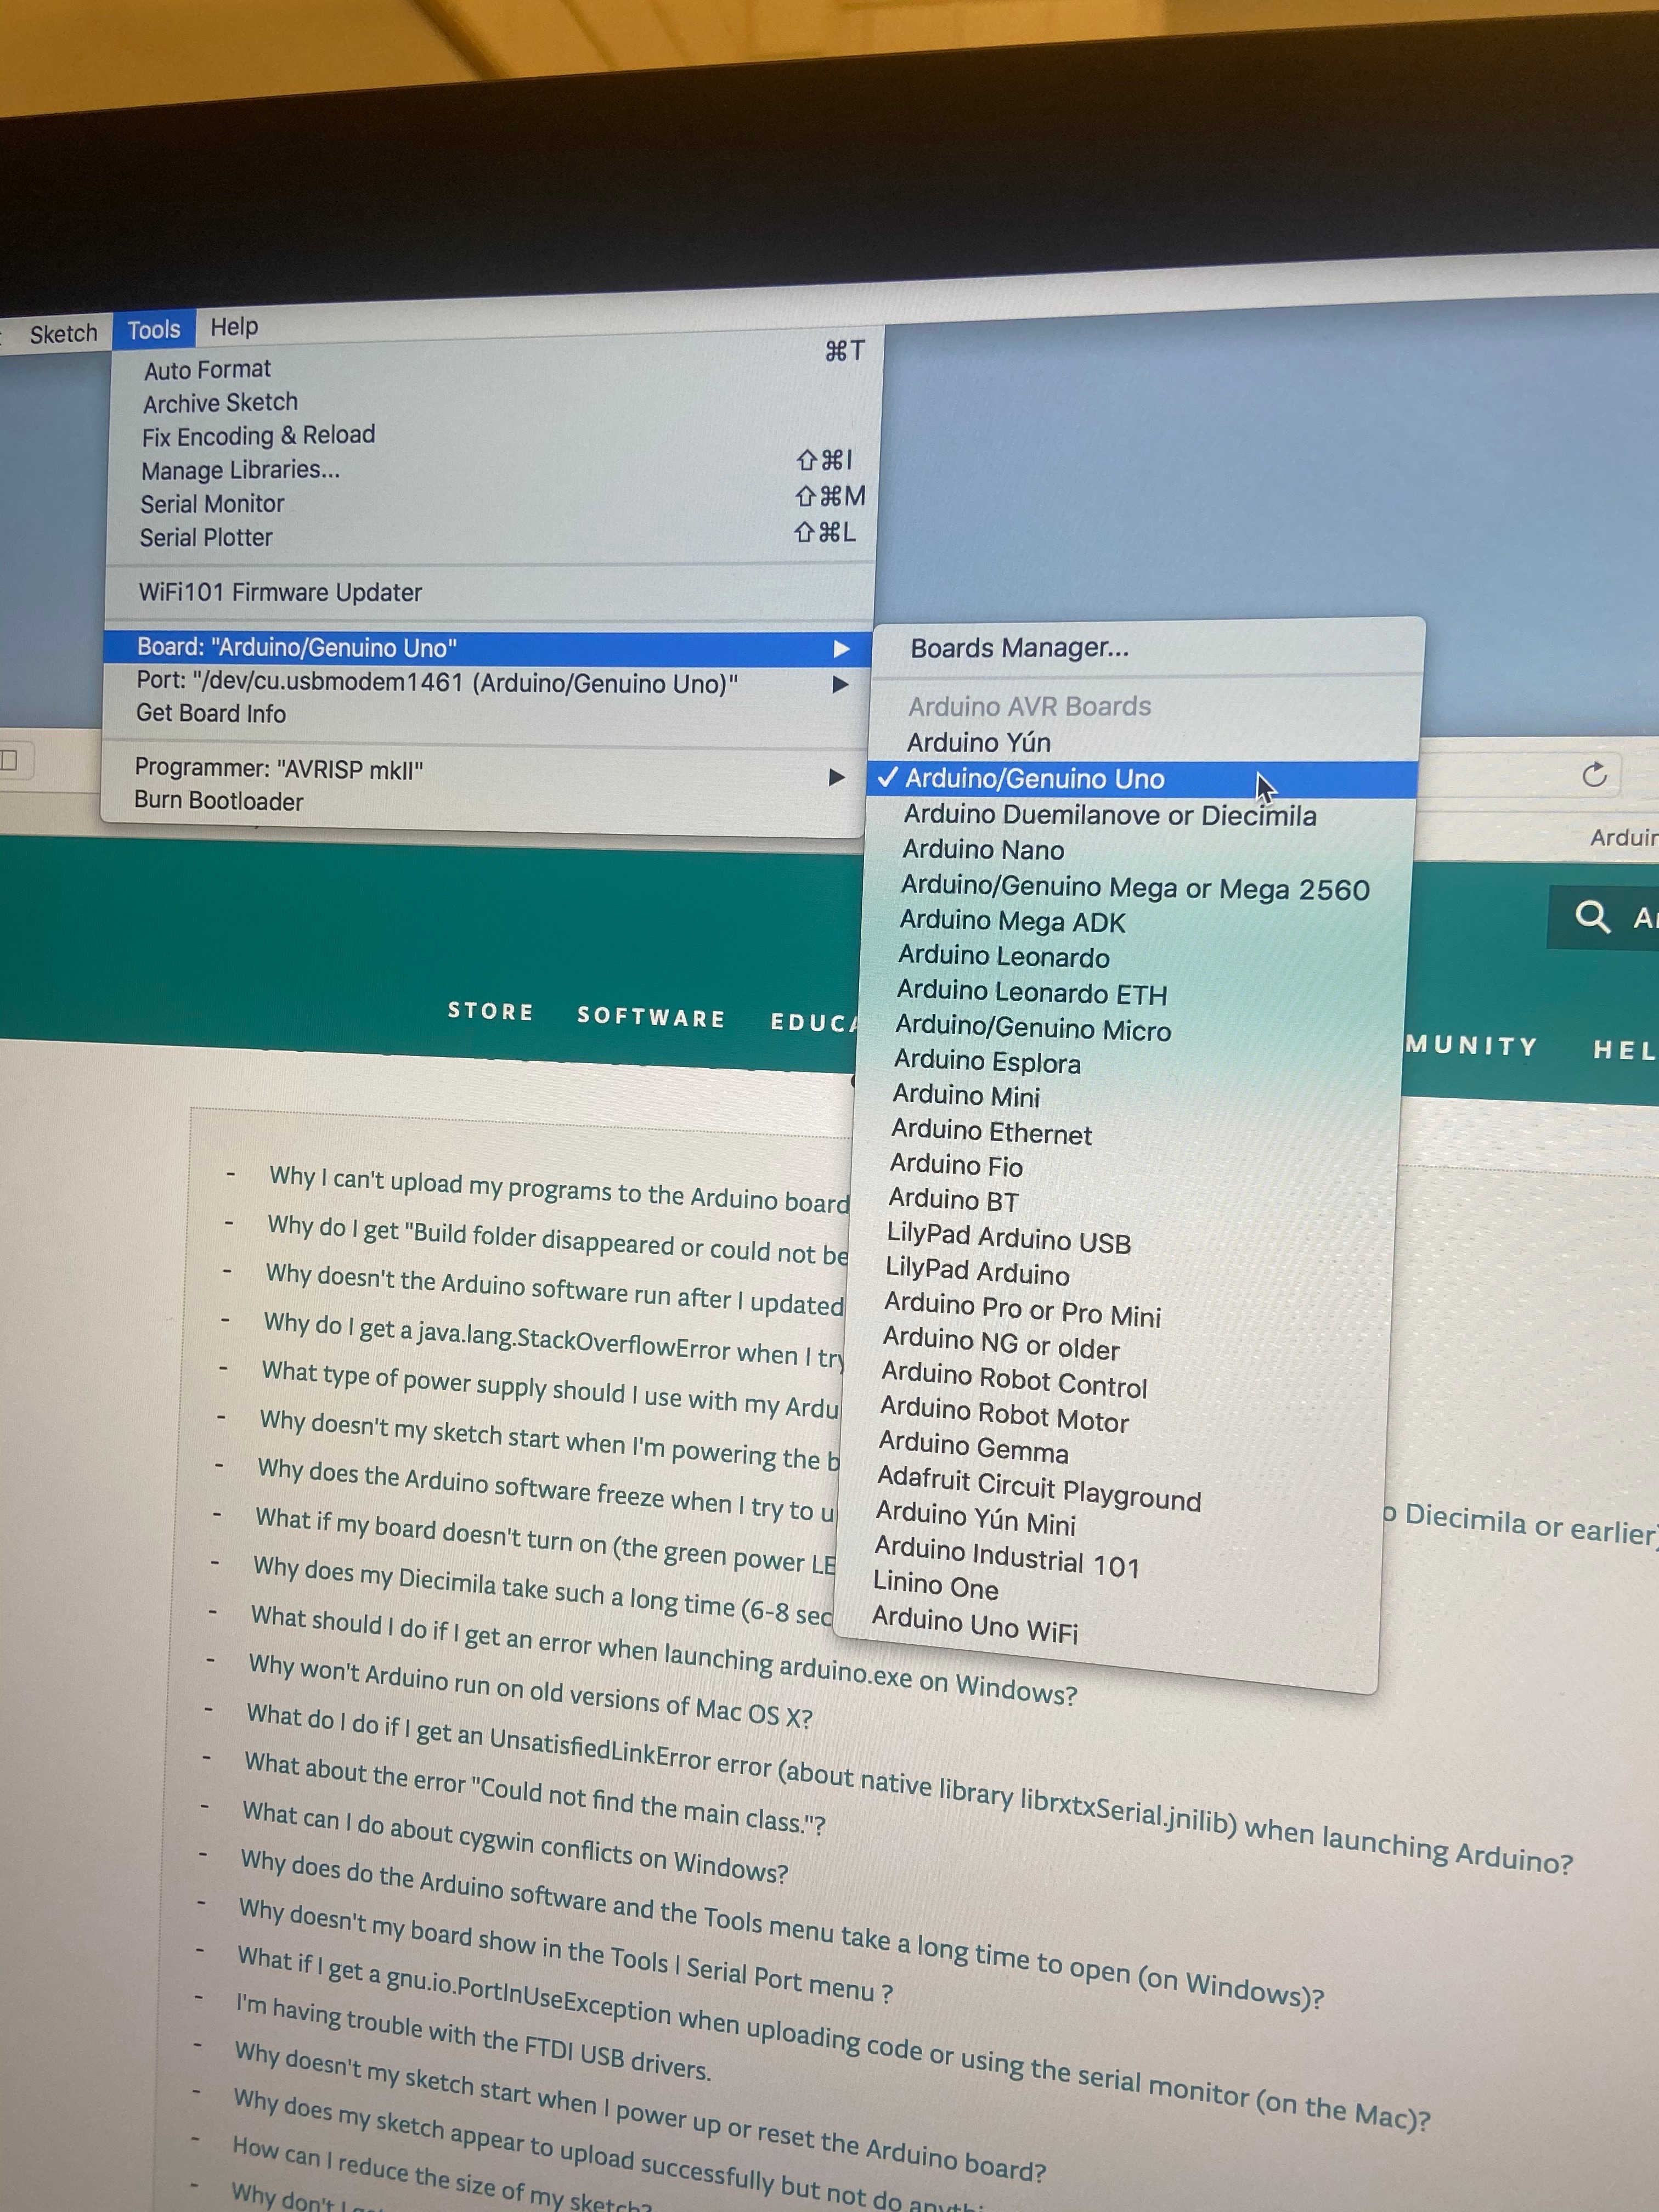
Step 2:
Stay in the tools menu and select board. Arduino.Genuino Uno should be checked.
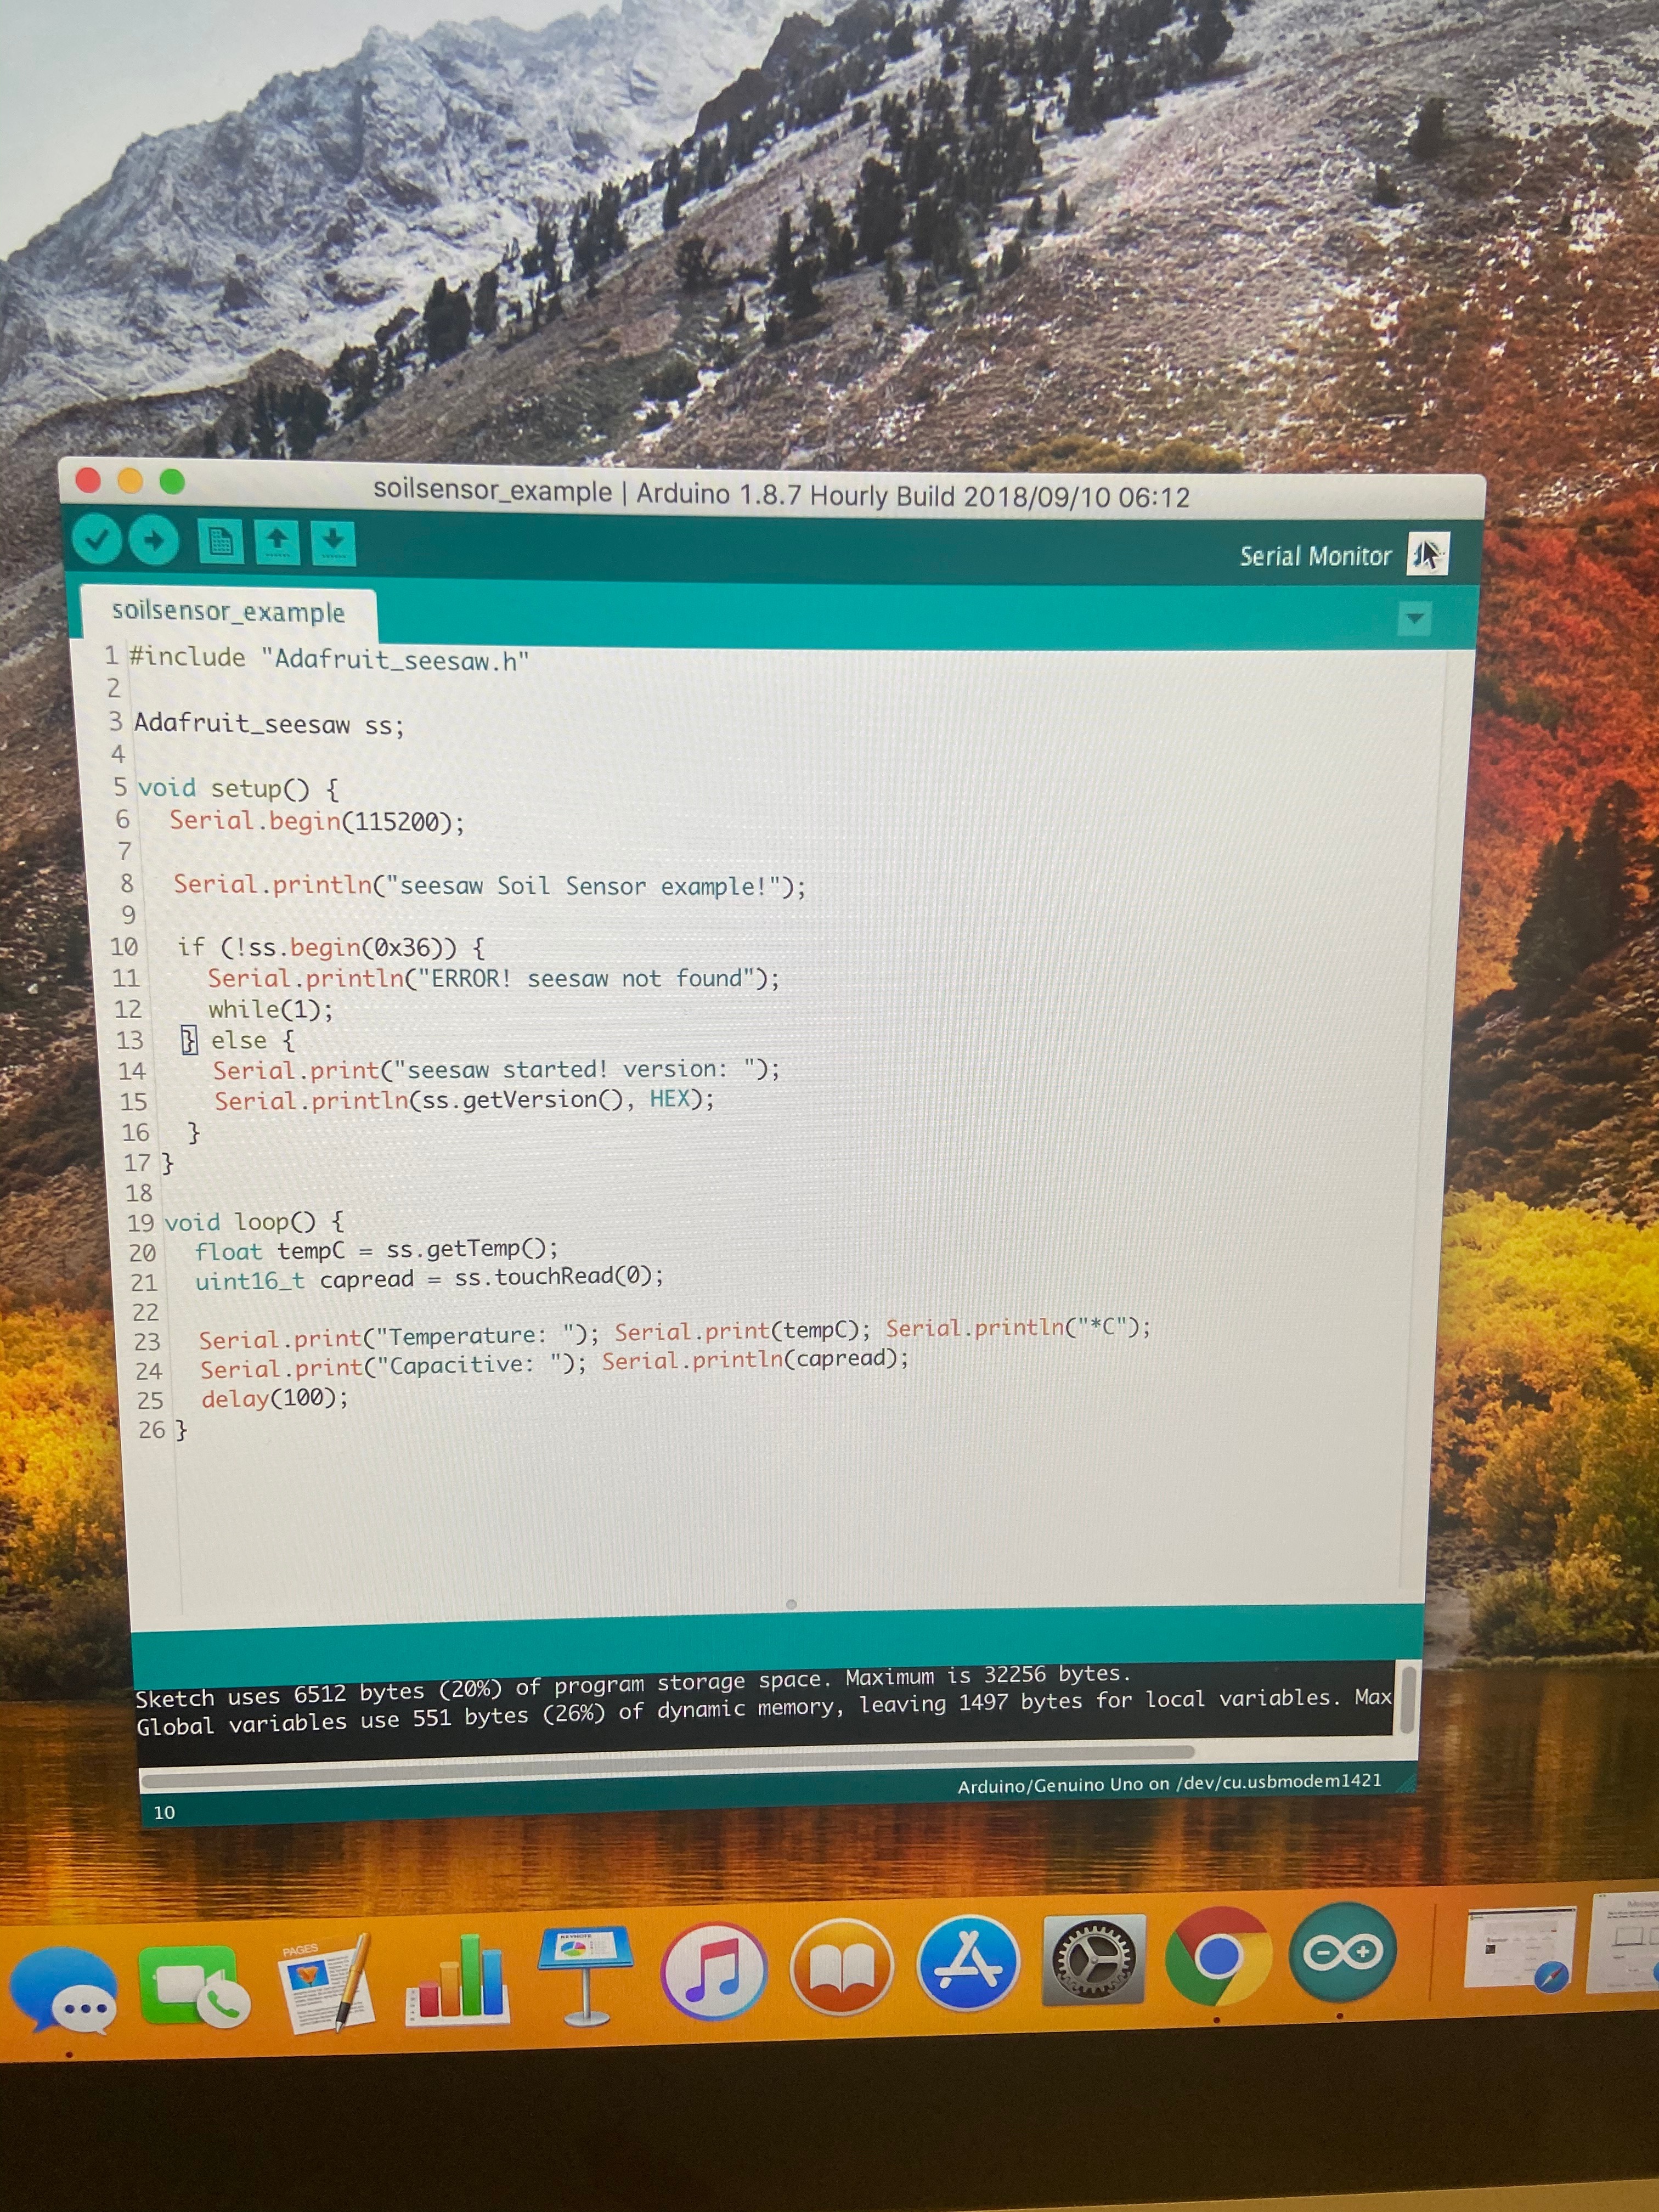
Adding and Using New Libraries
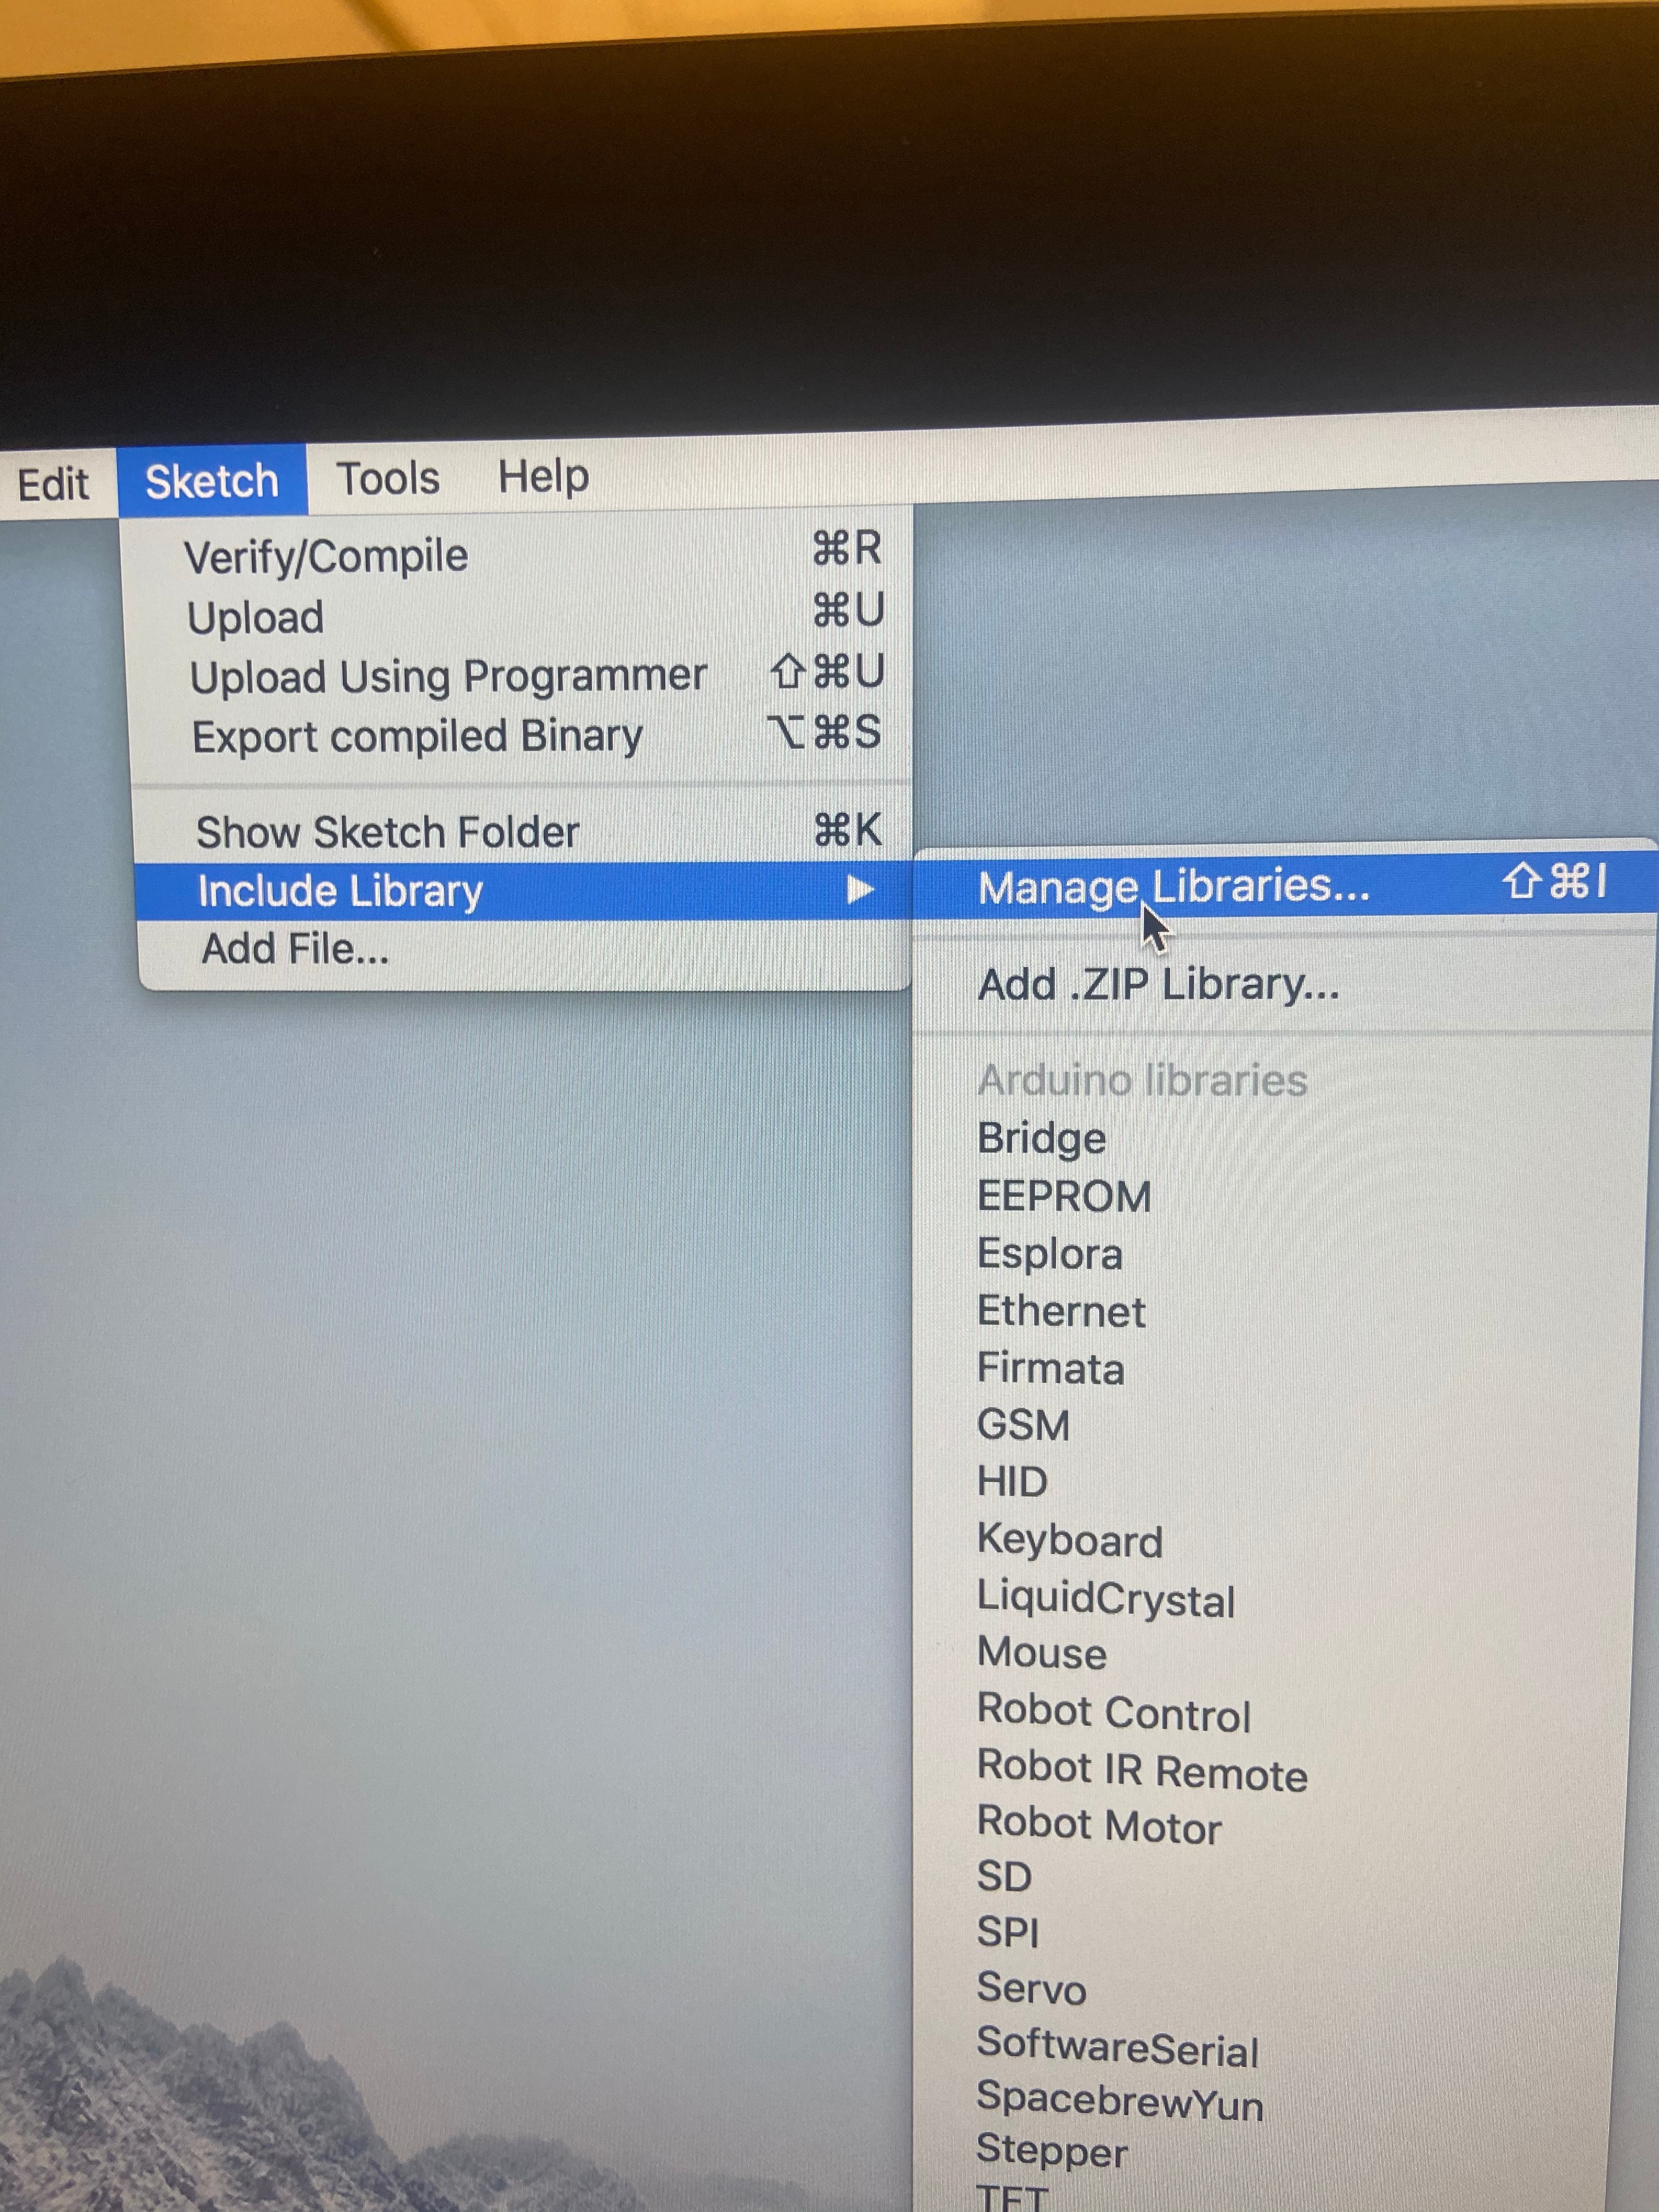

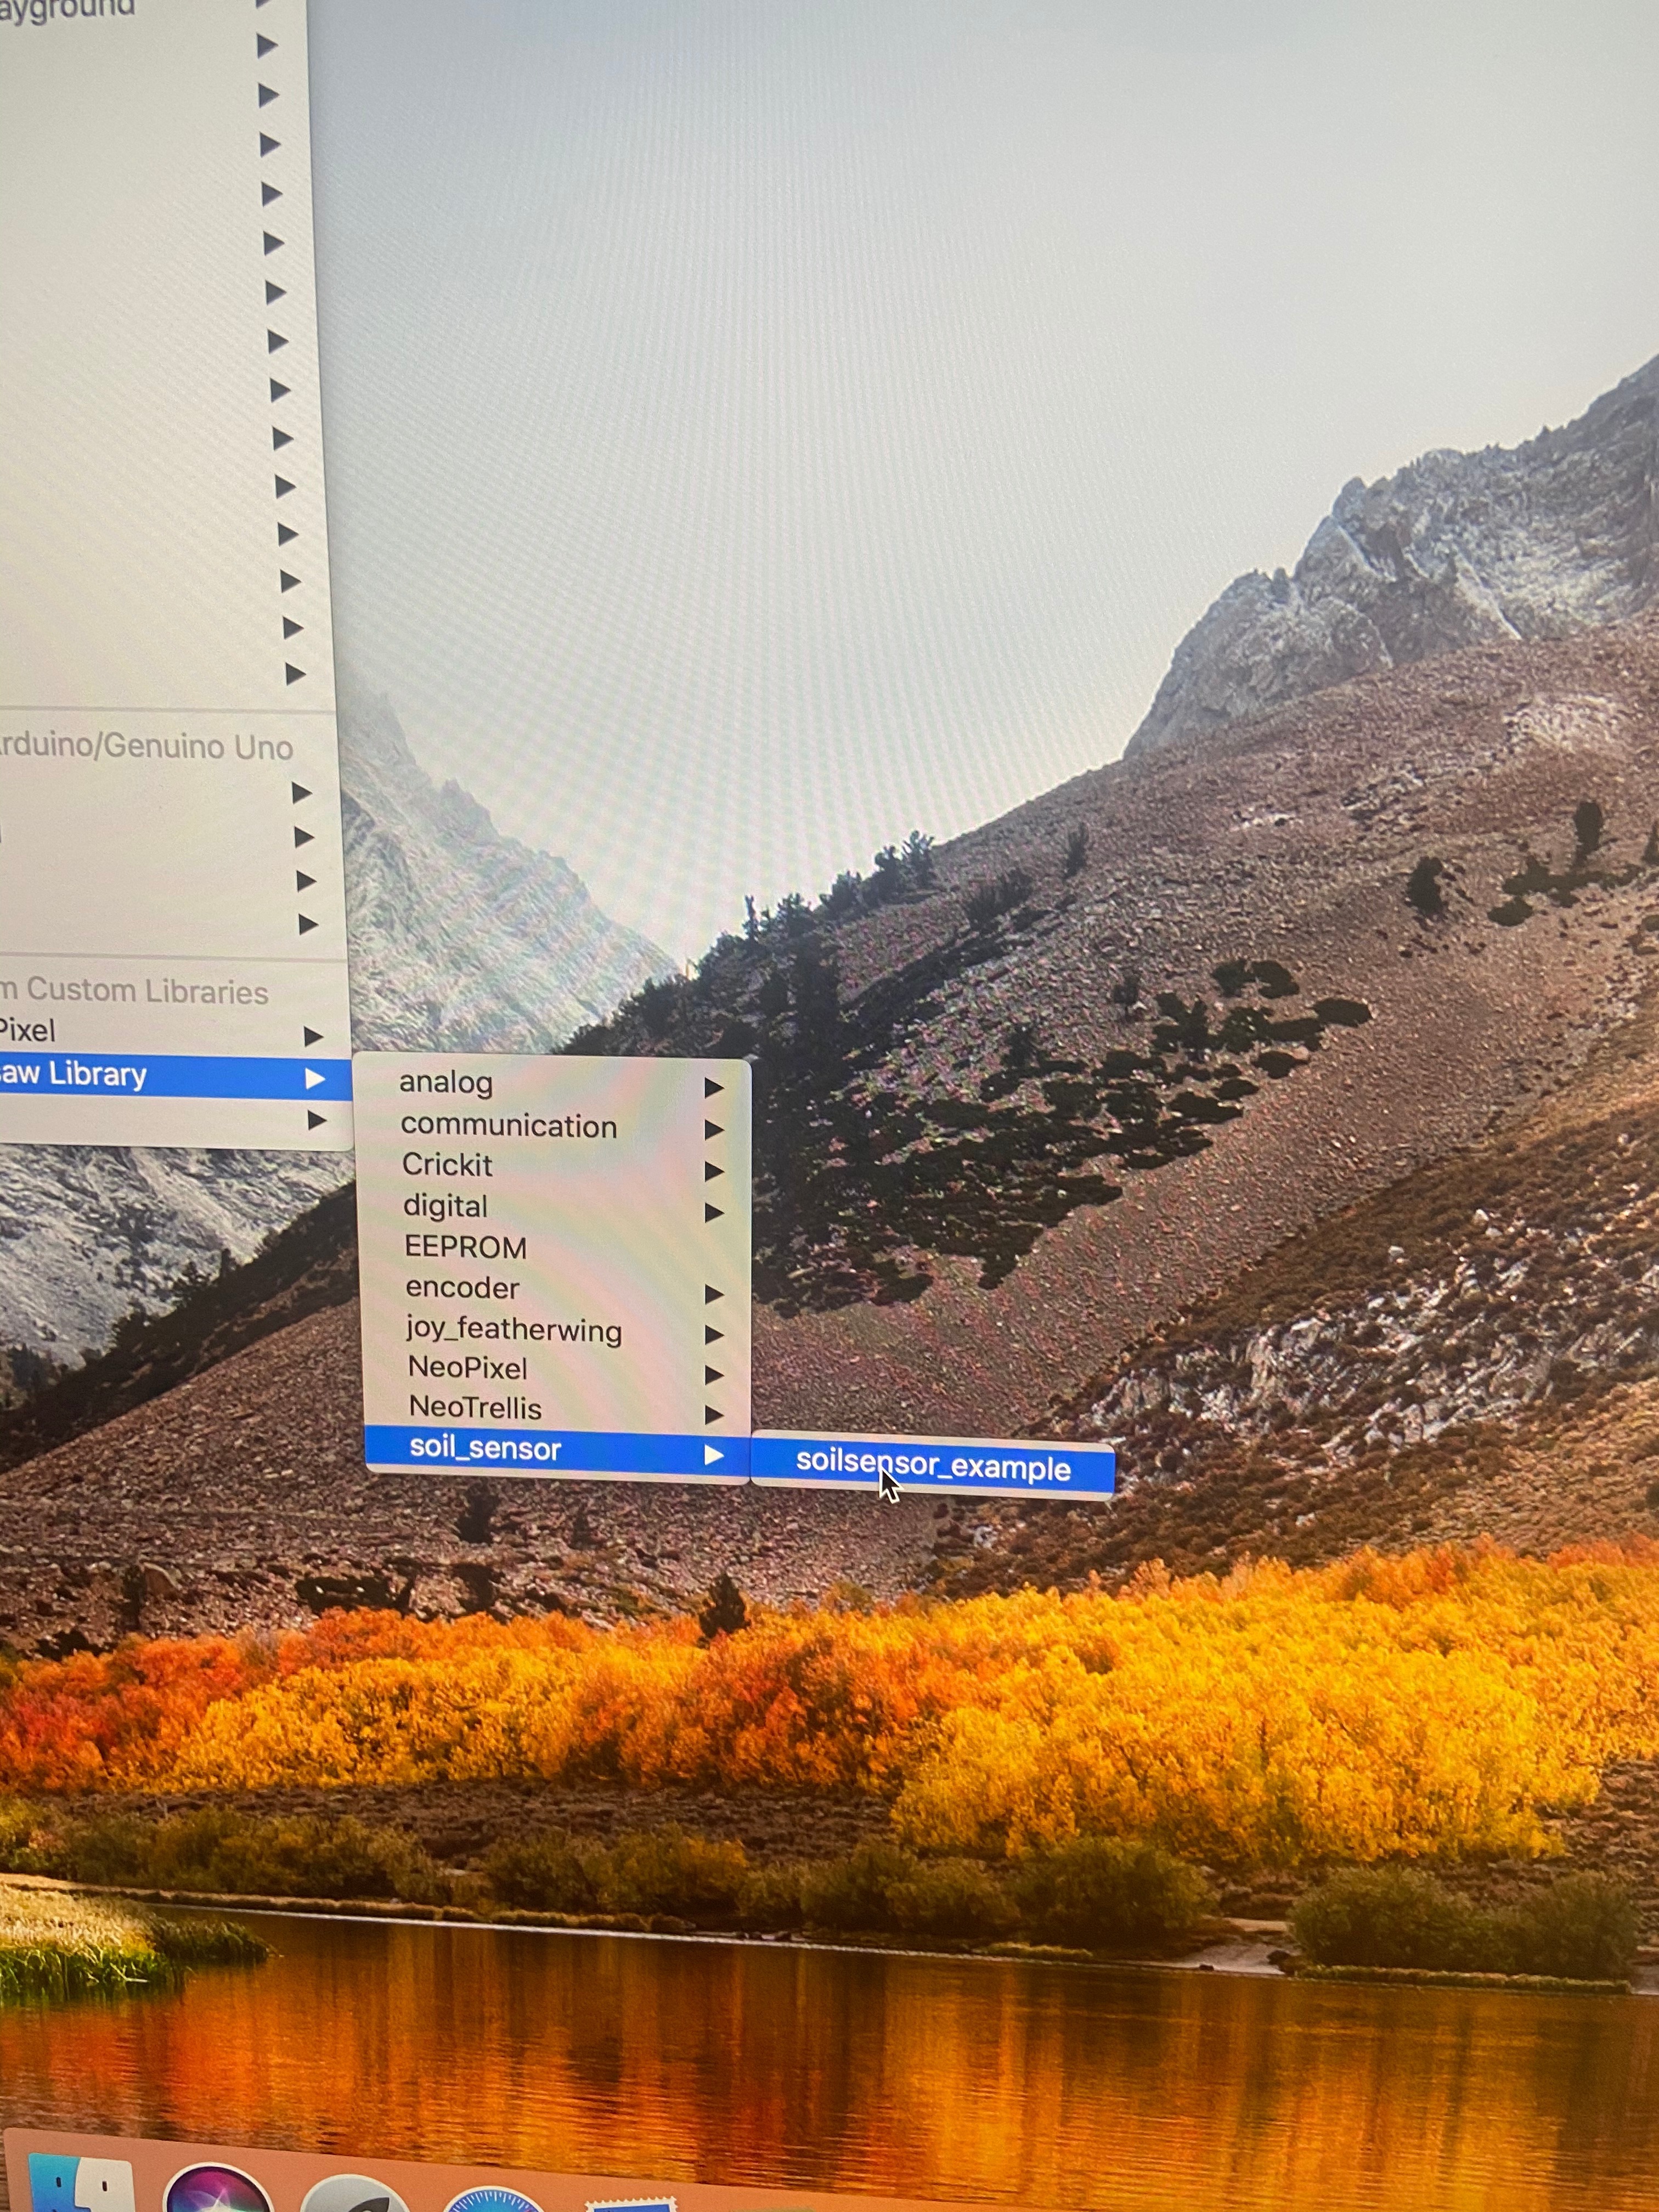
In order to test the Stemma Moisture Sensor, you must have the Adafruit seesaw Library.
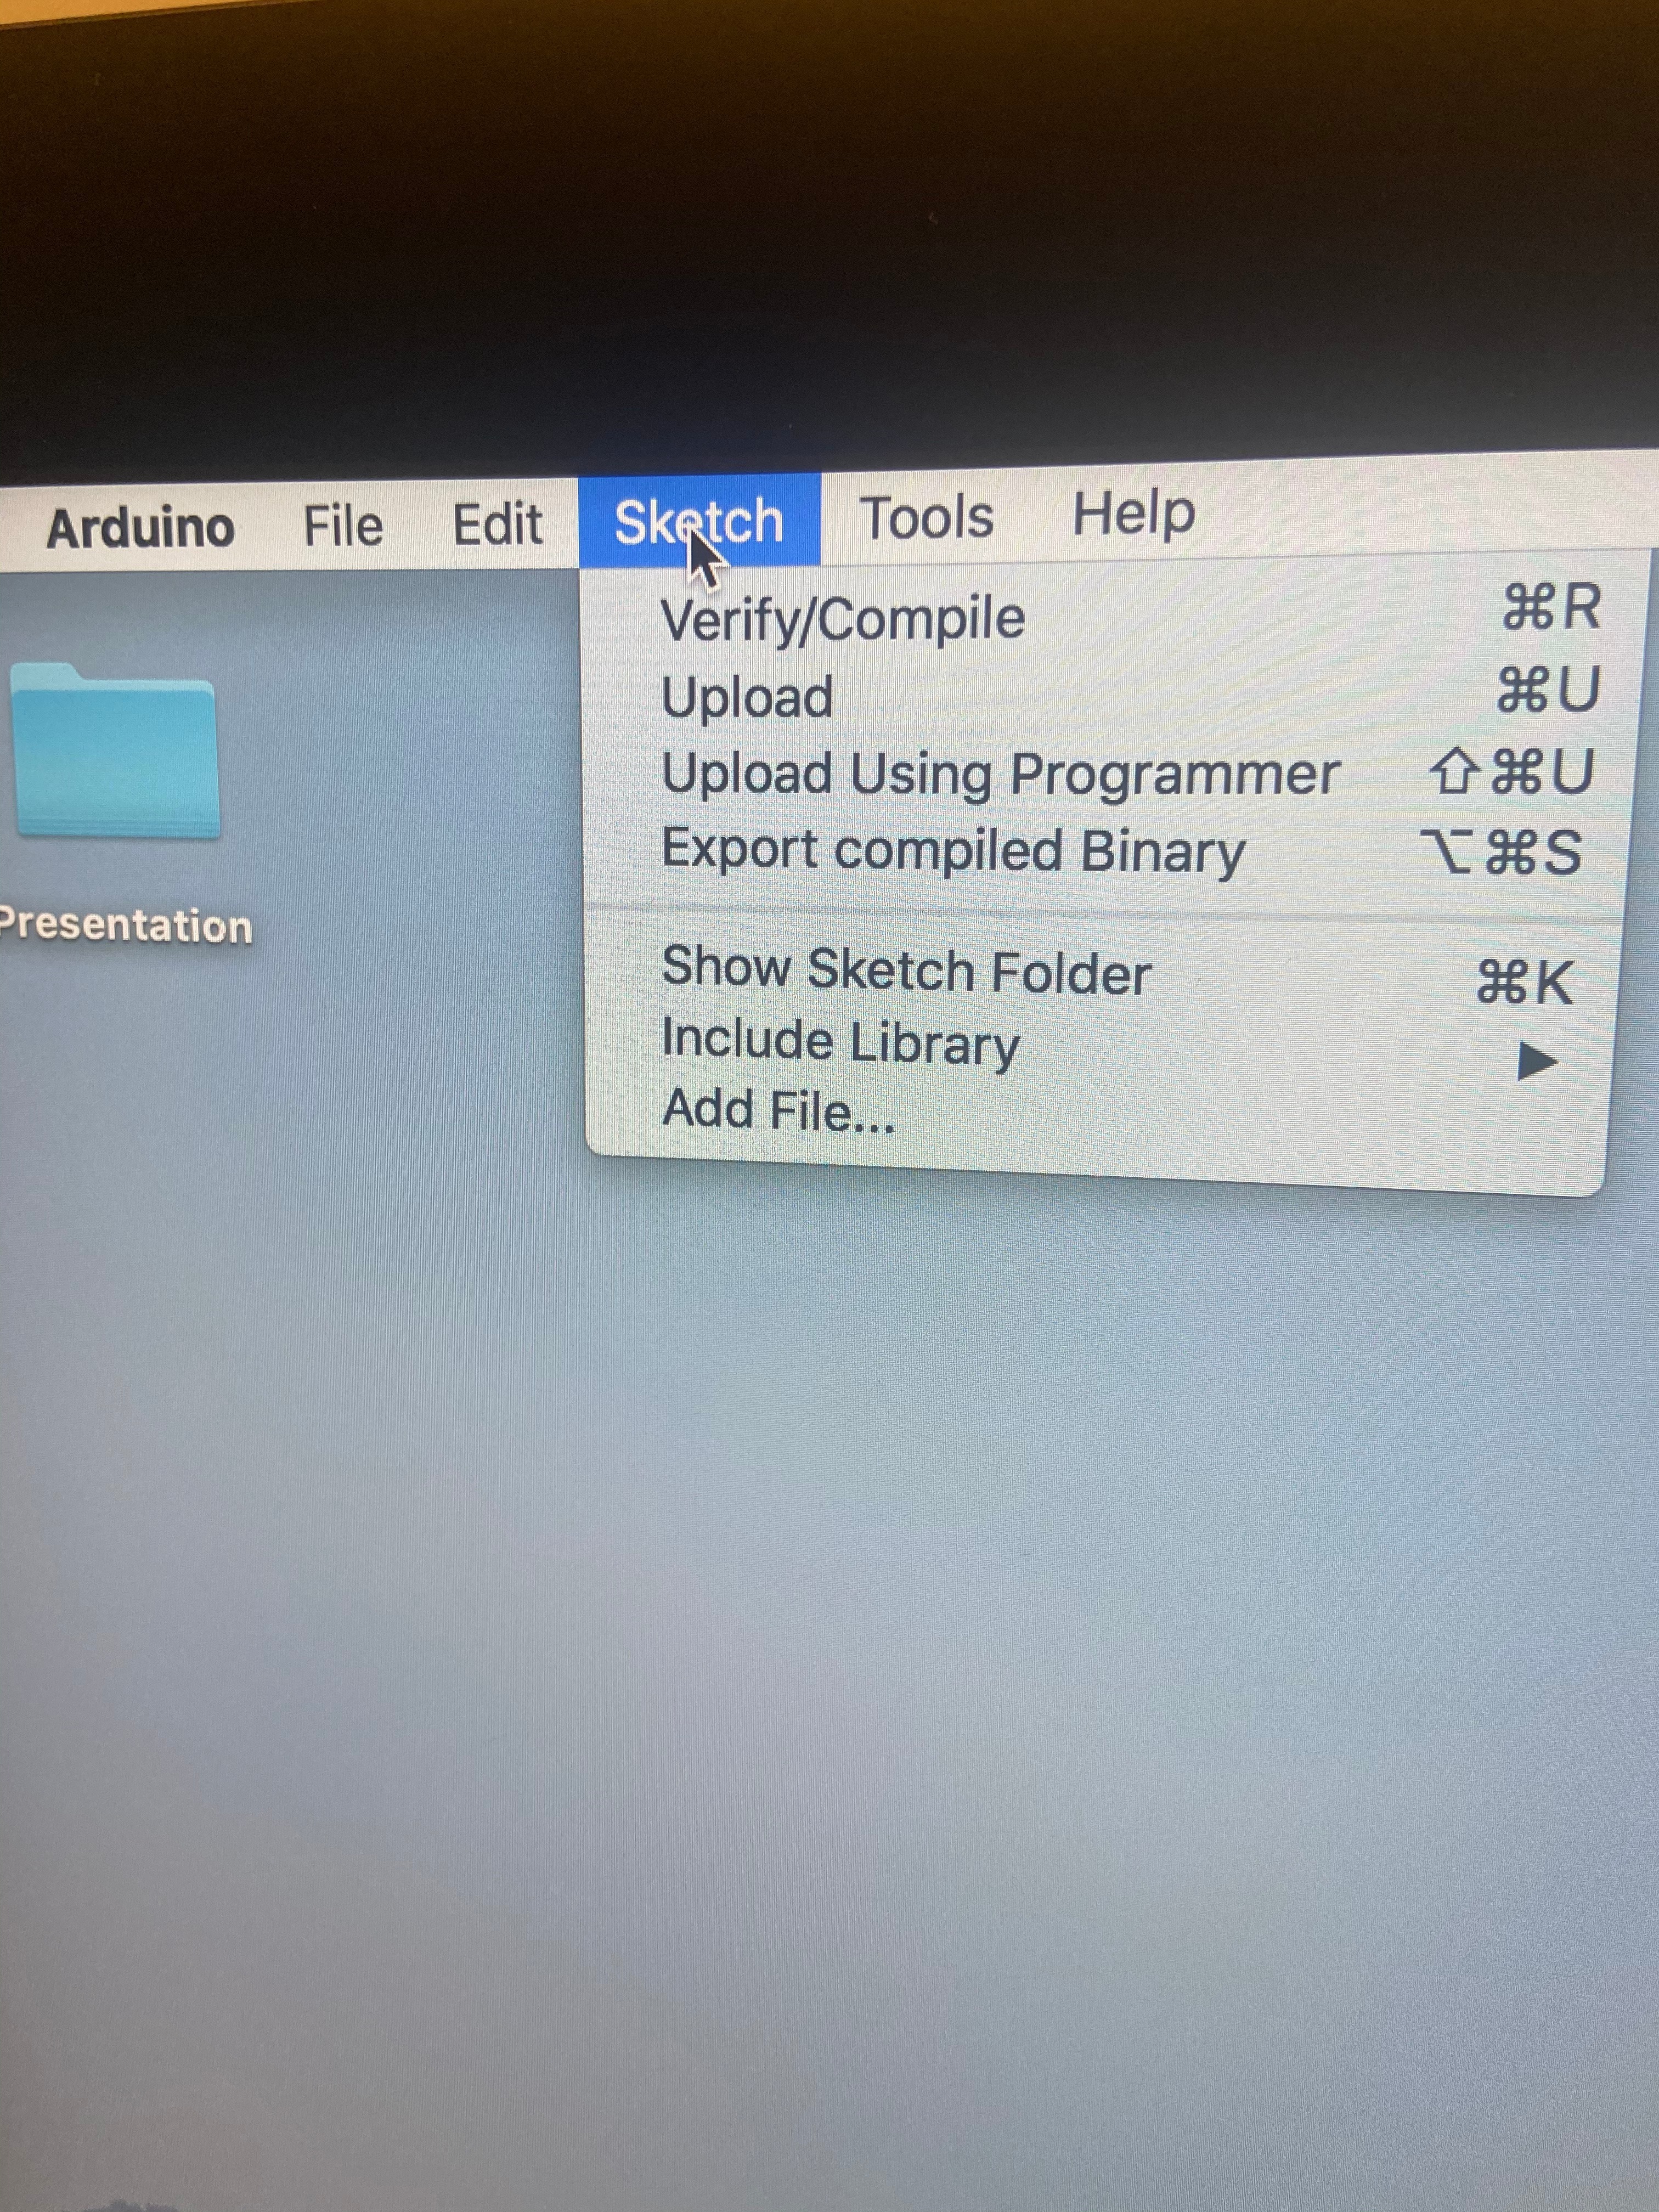
Step 1:
Select the Sketch tab on the menu bar. Scroll down to include Library and choose Manage Libraries.
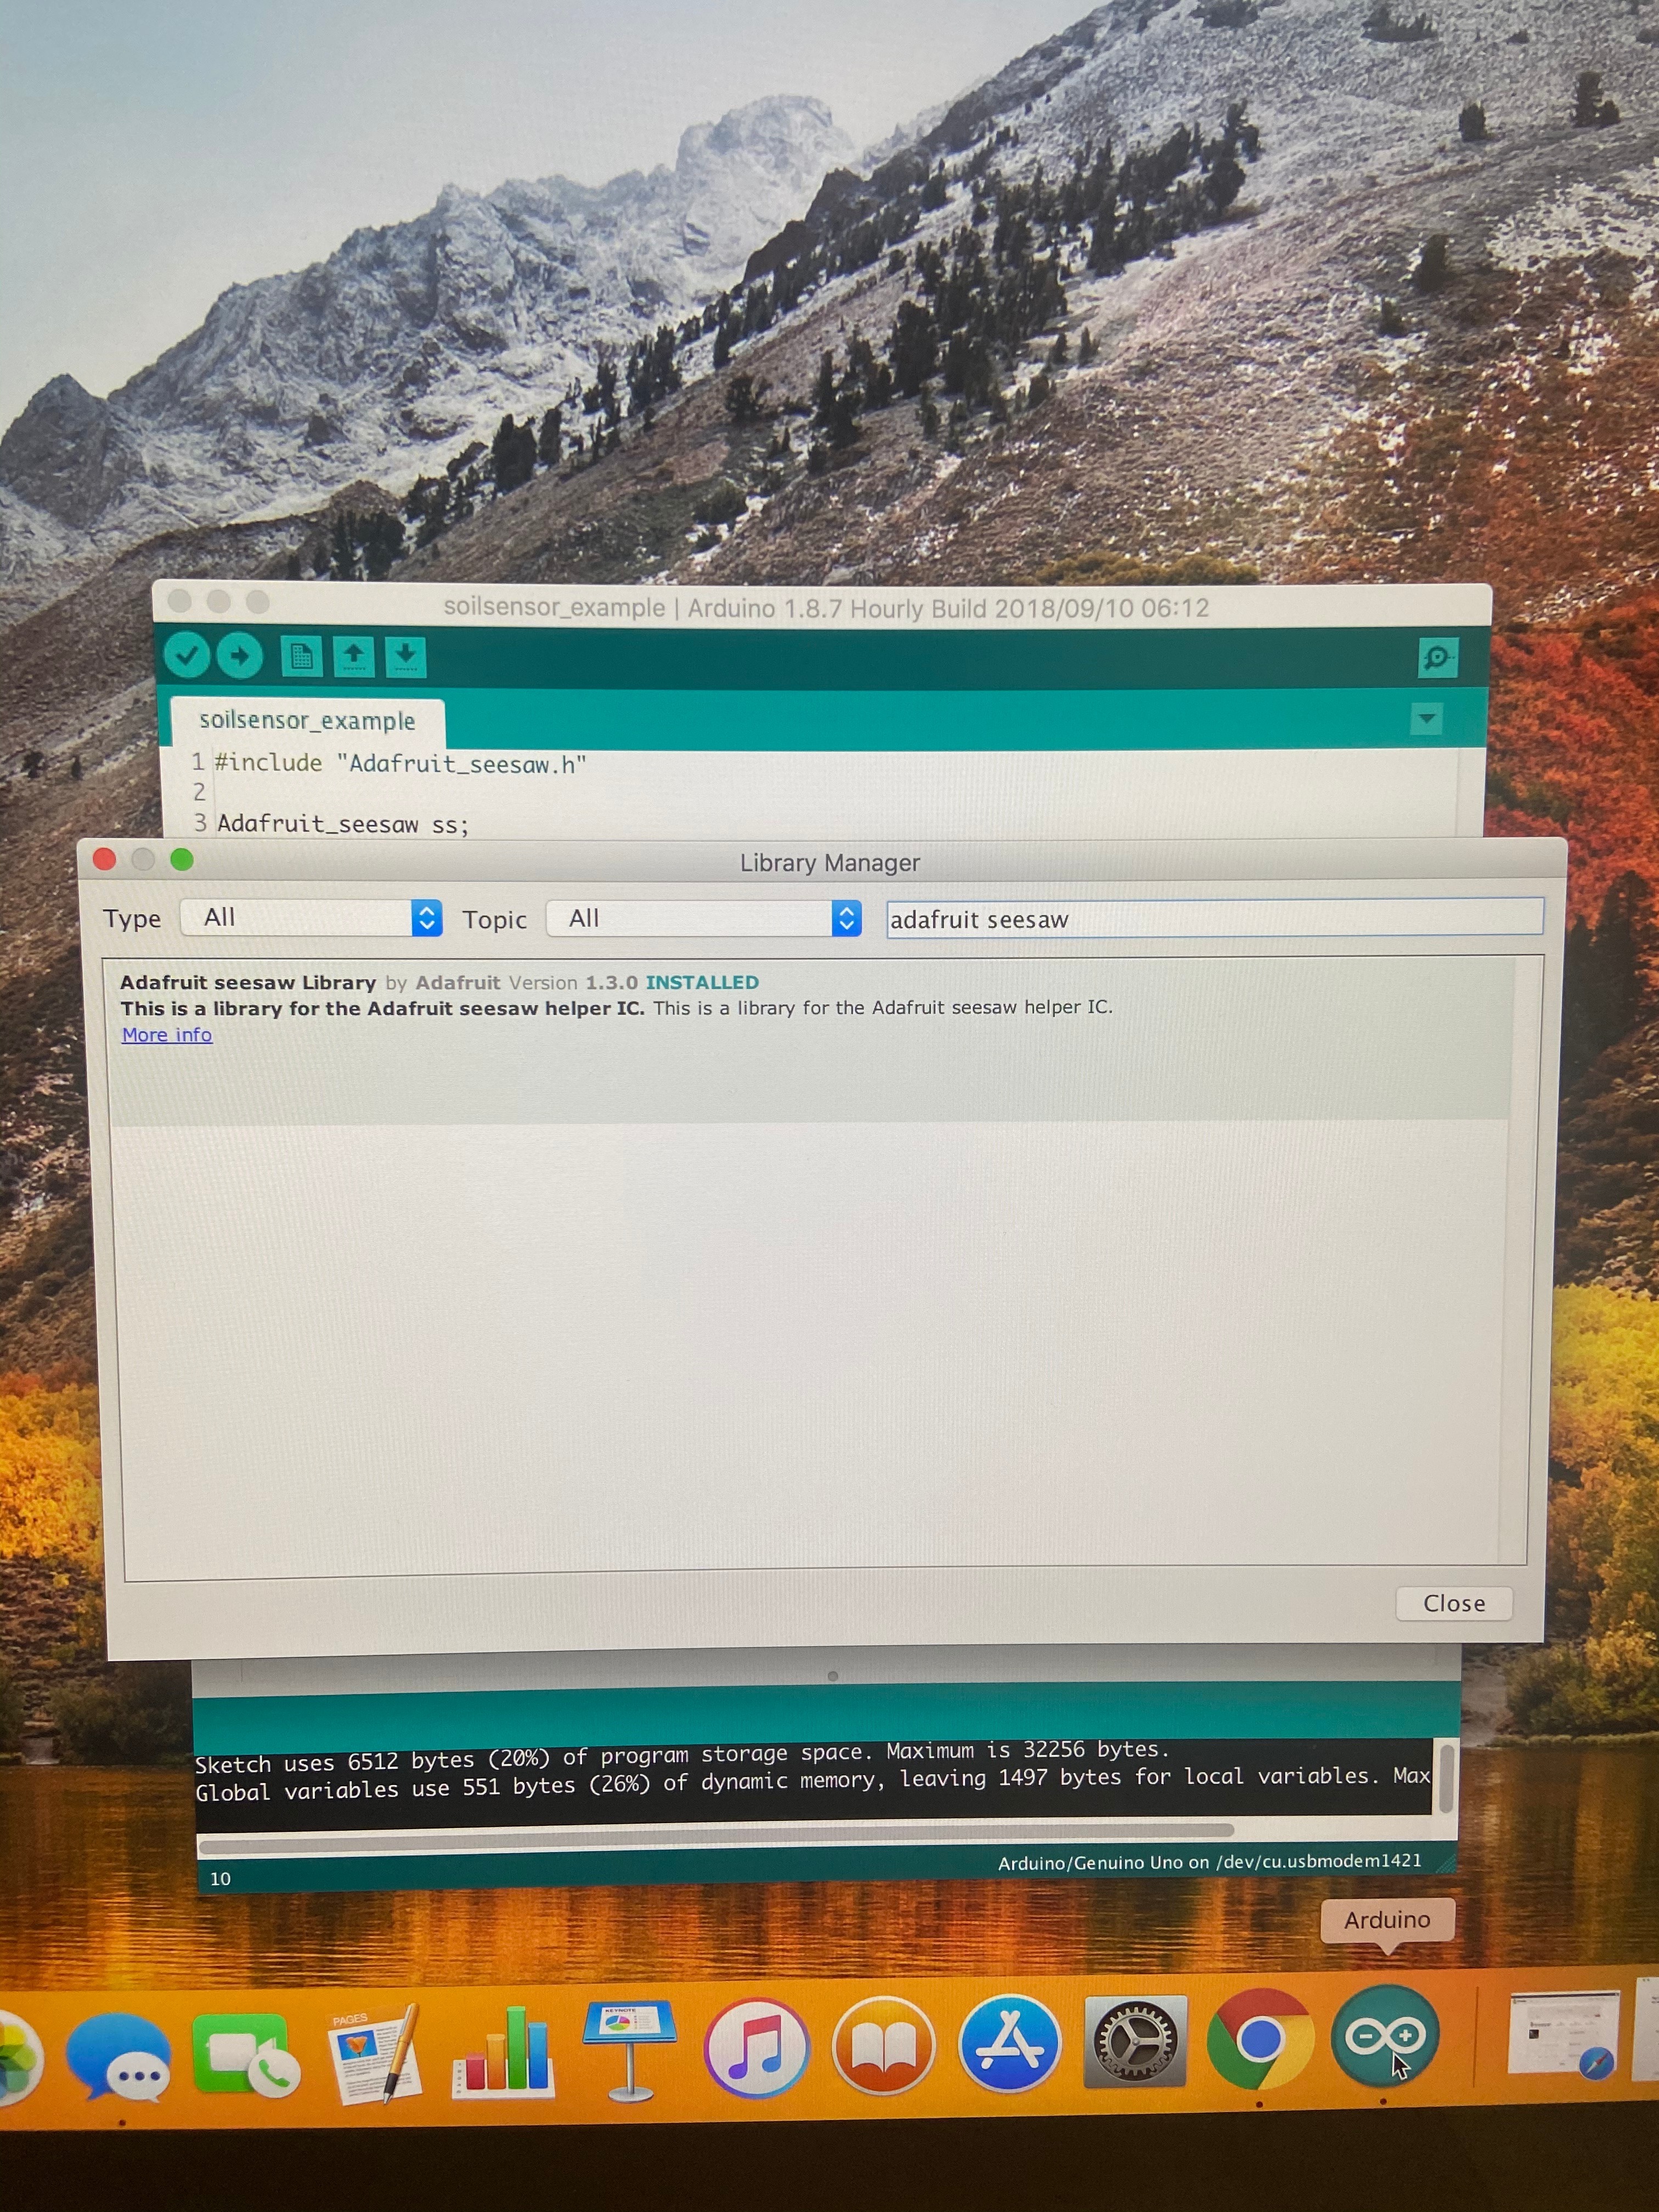
Step 2:
Type in Adafruit seesaw Library. Only one item should appear. Download the latest version.
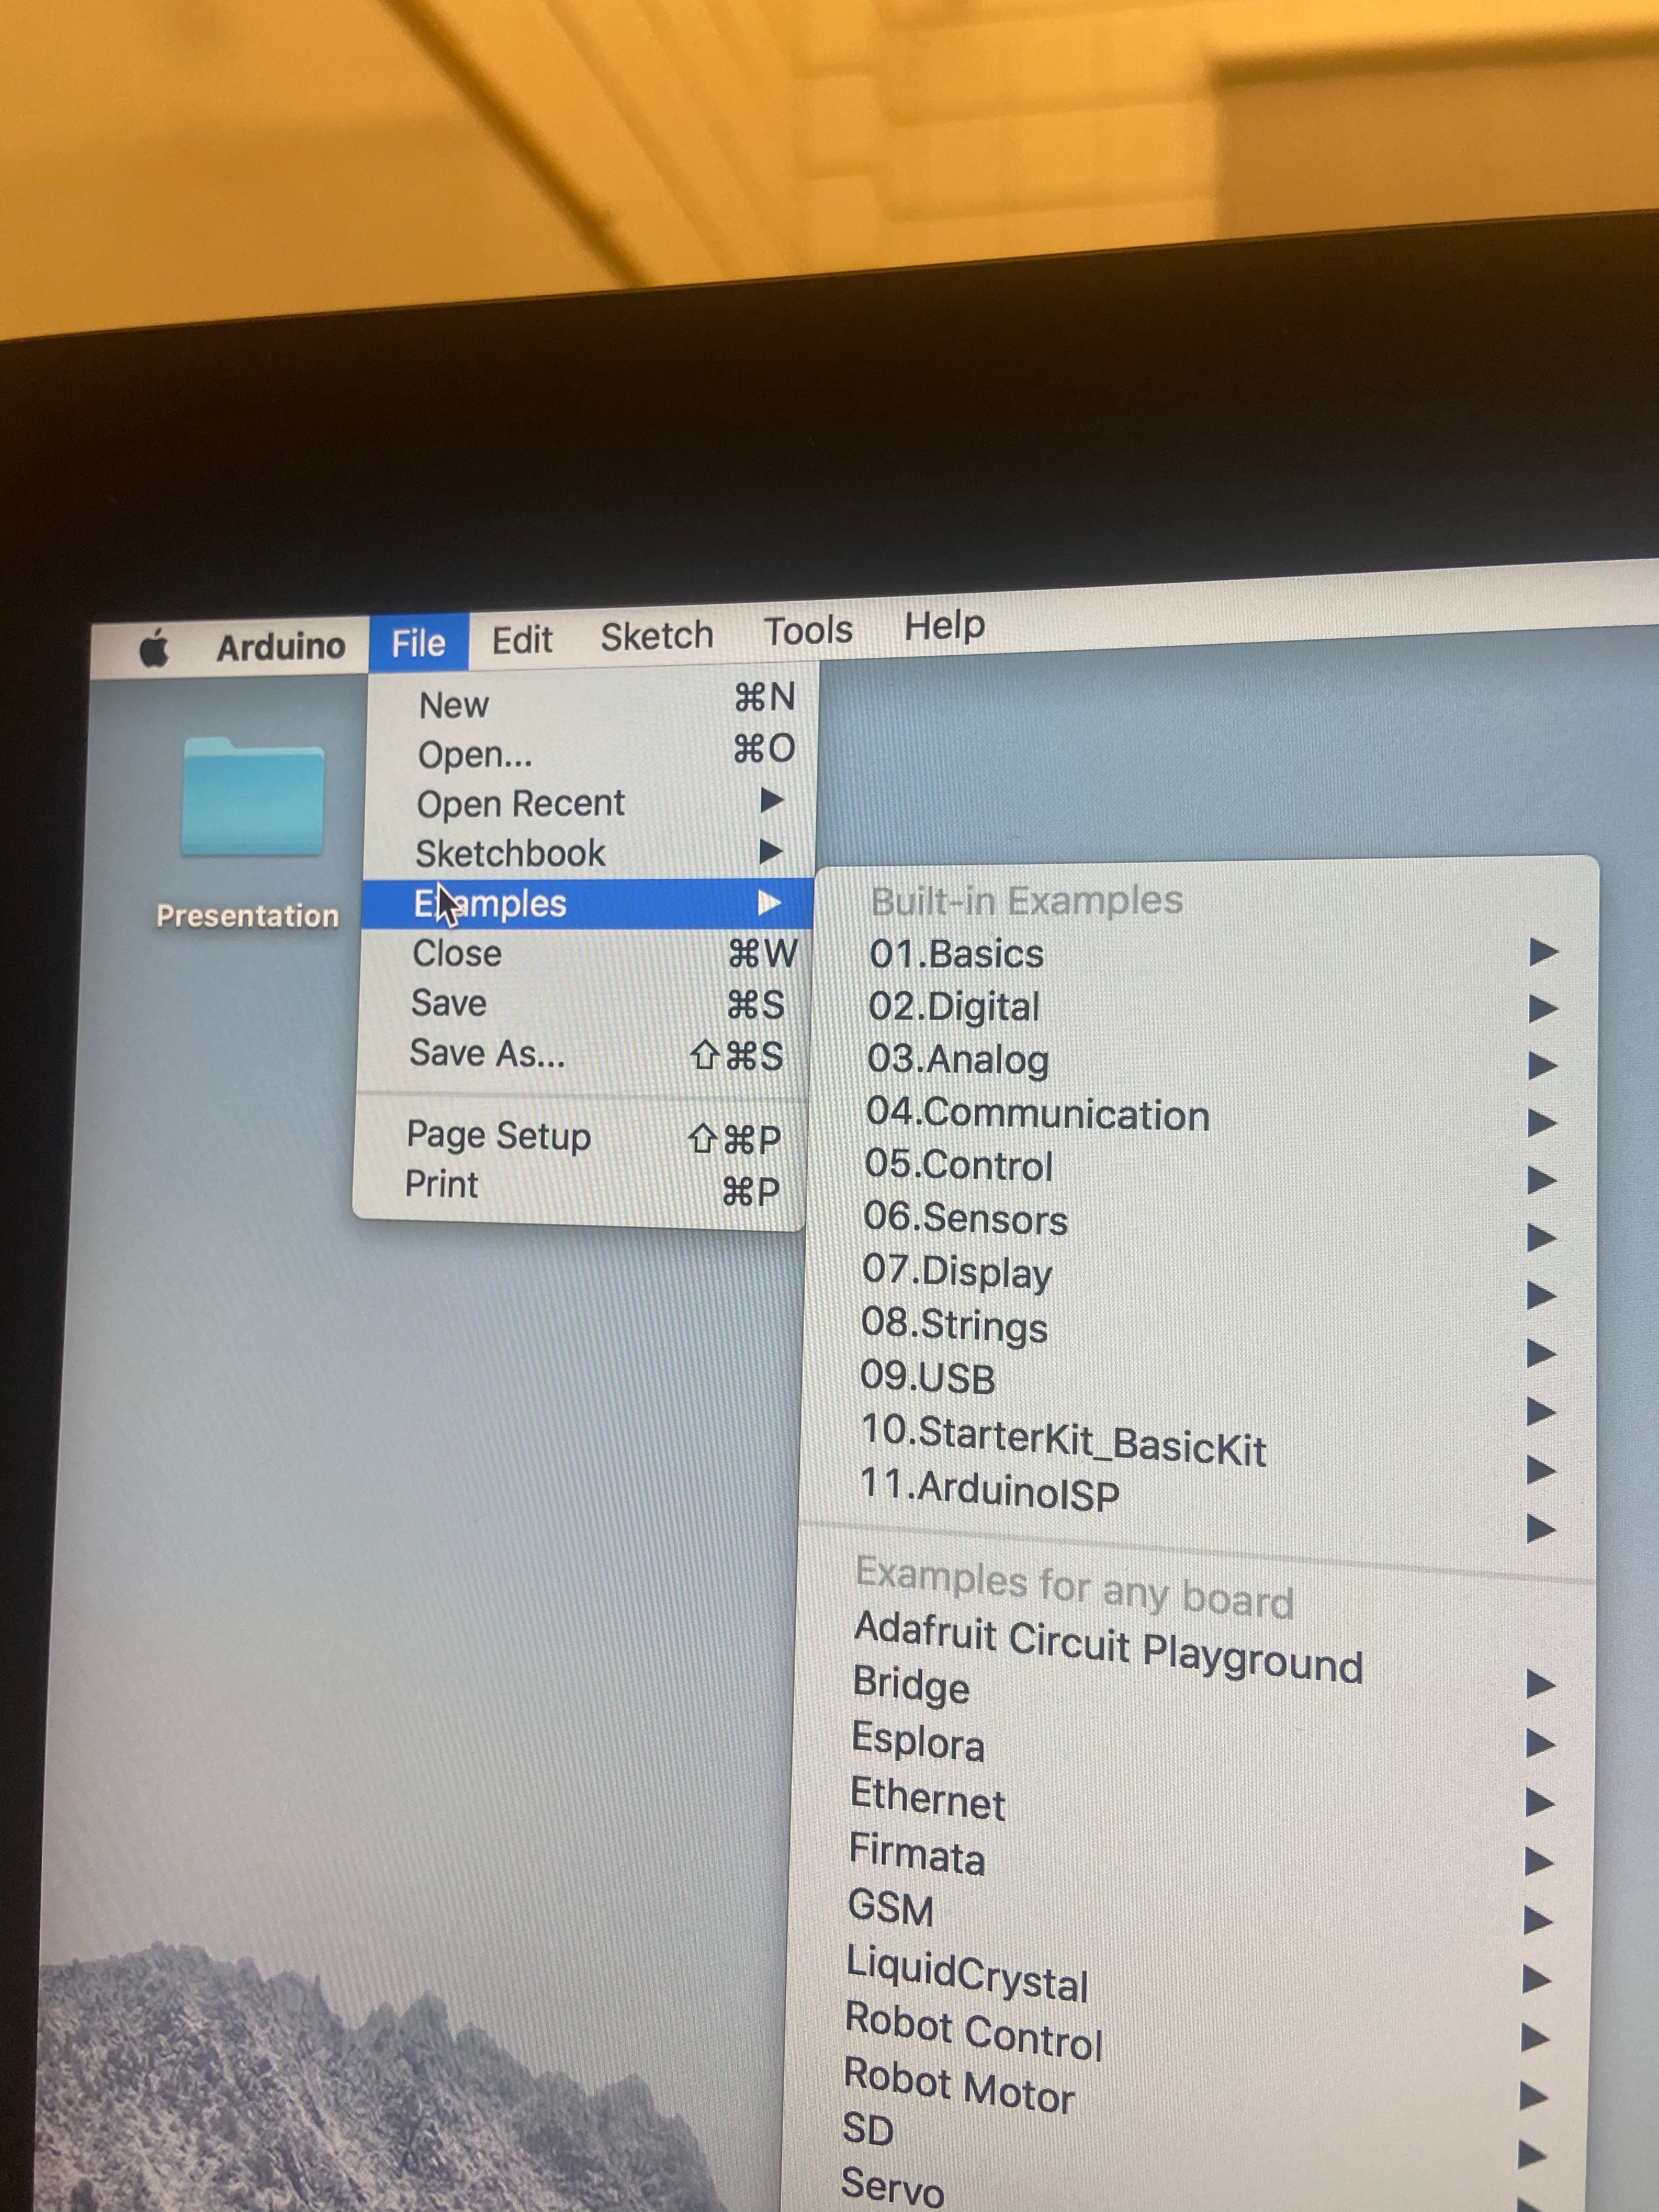
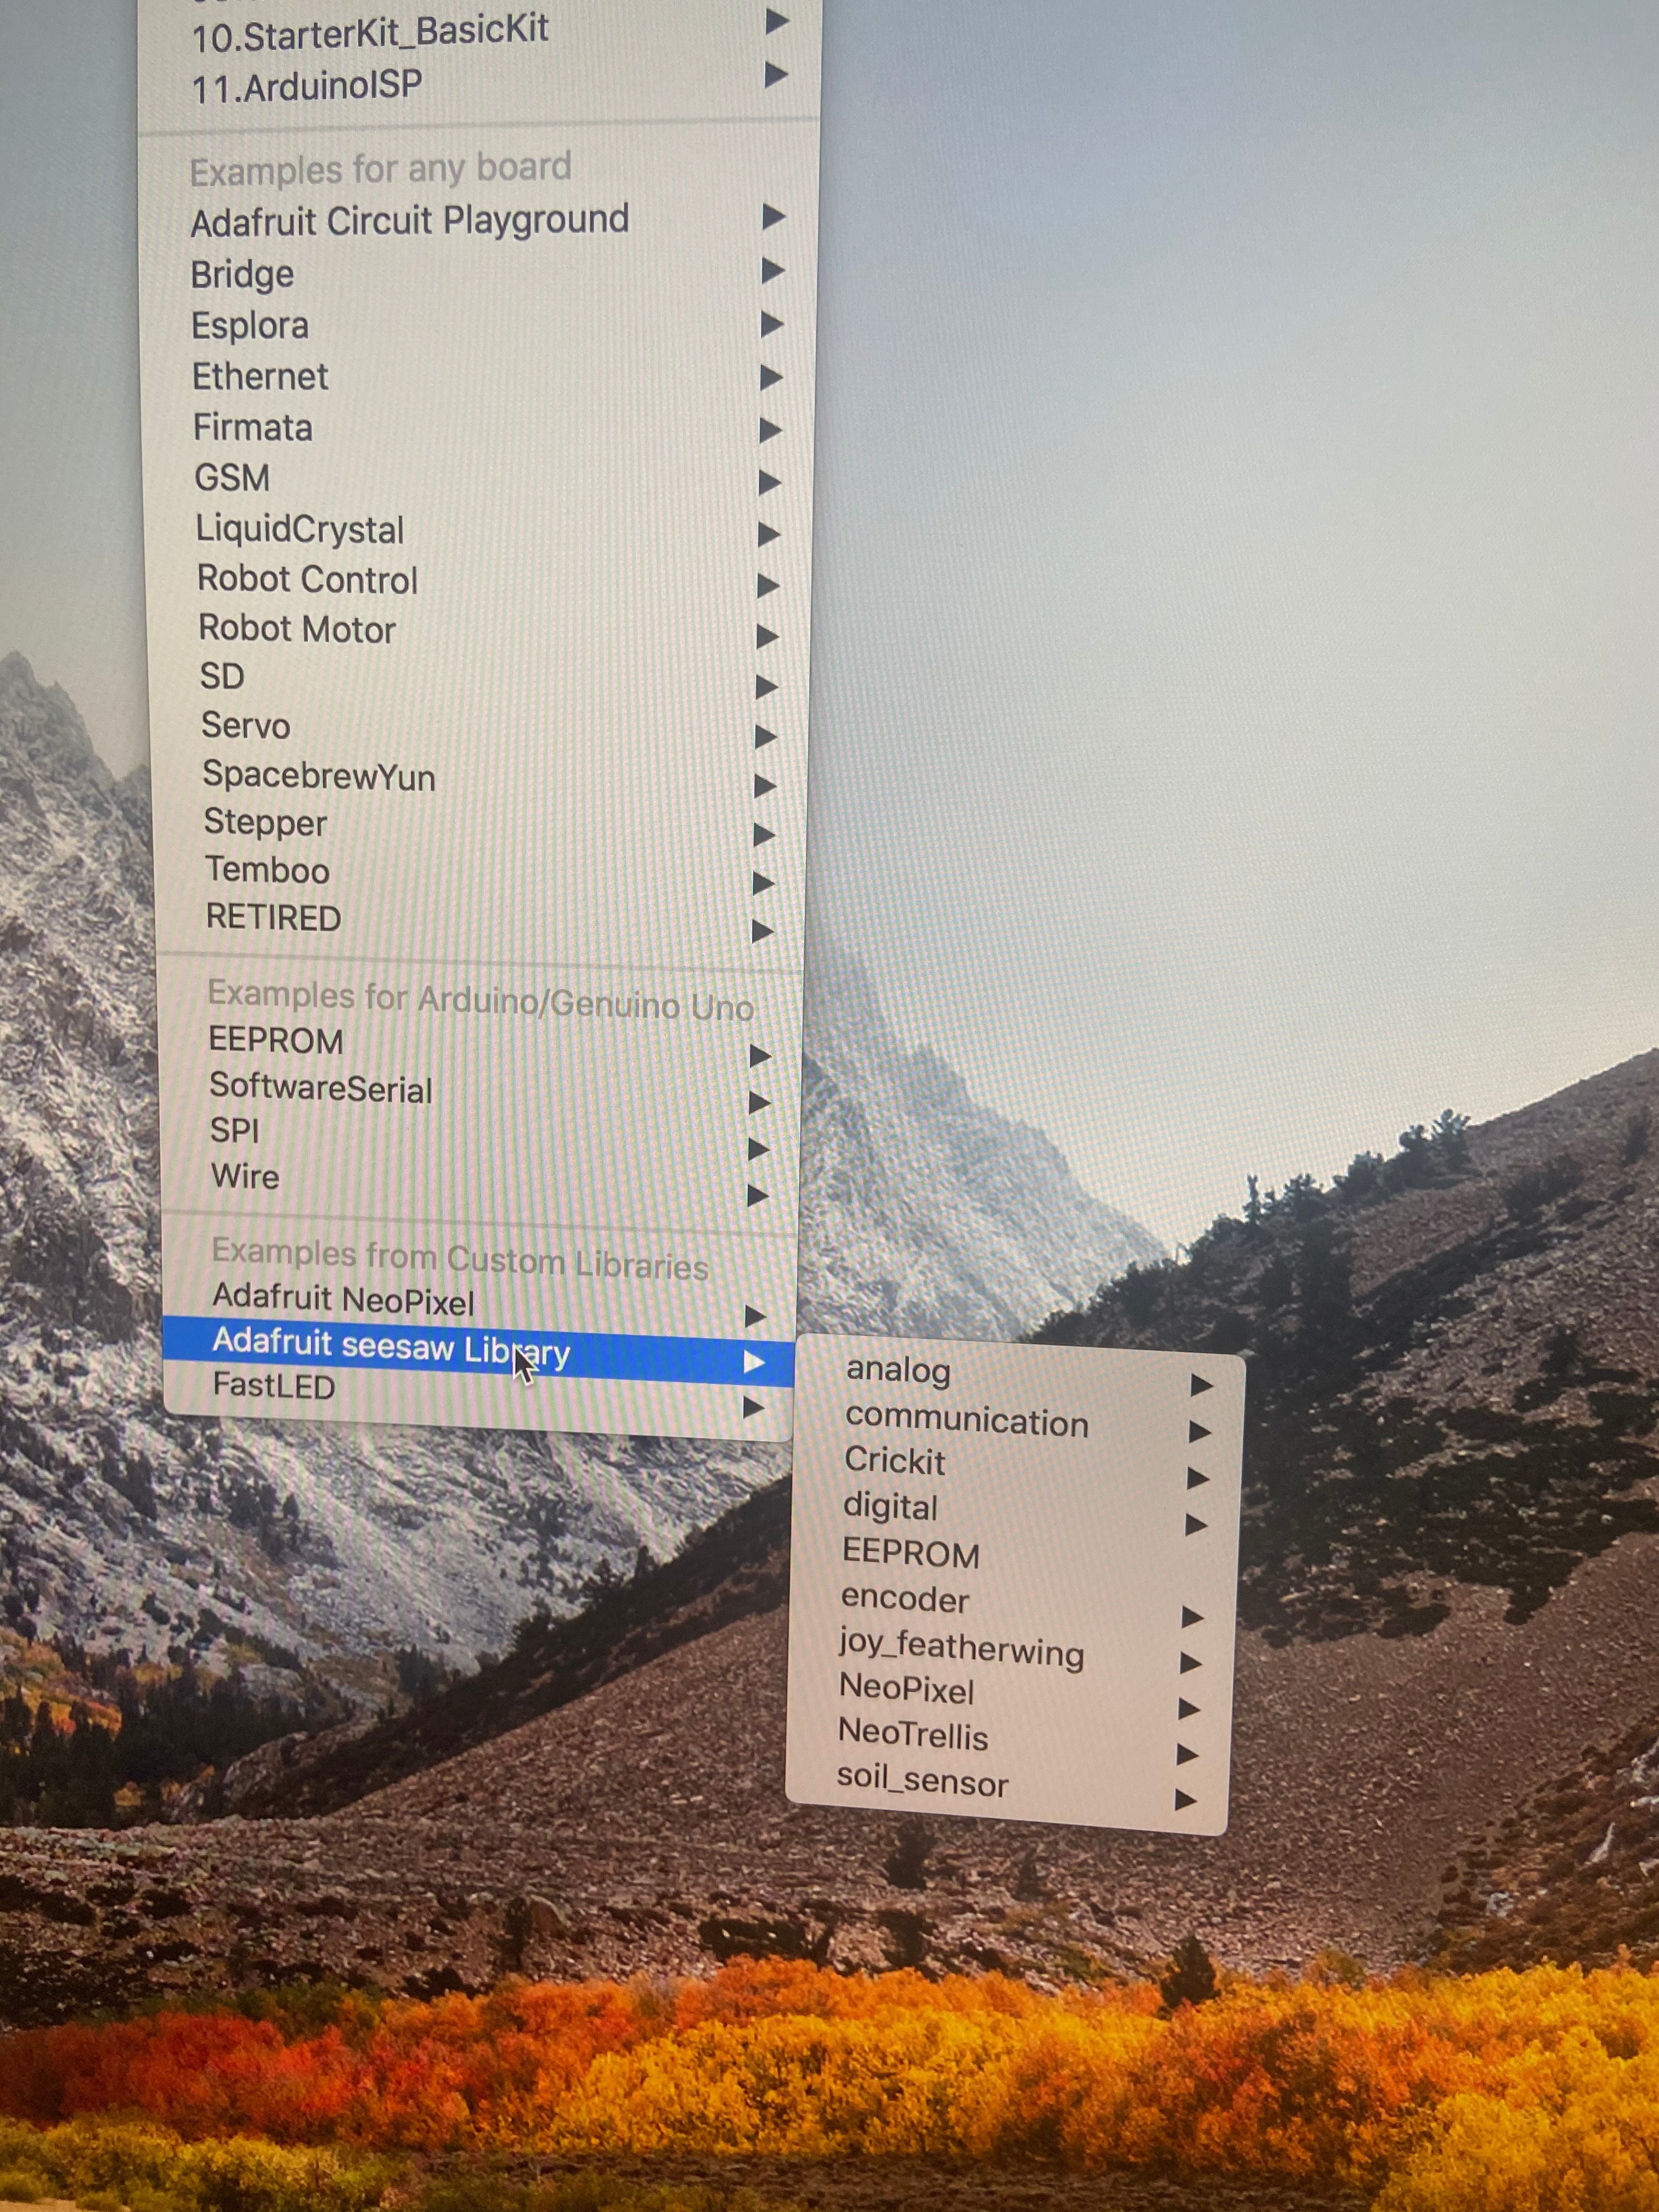
Step 3:
Once the download is complete, Select the file tab on the menu bar. Scroll down to Examples. Choose Adafruit seesaw Library. Then choose soil_sensor. Lastly, choose soil sensor_example.
This will open a code that you can use to test your sensor.
Testing
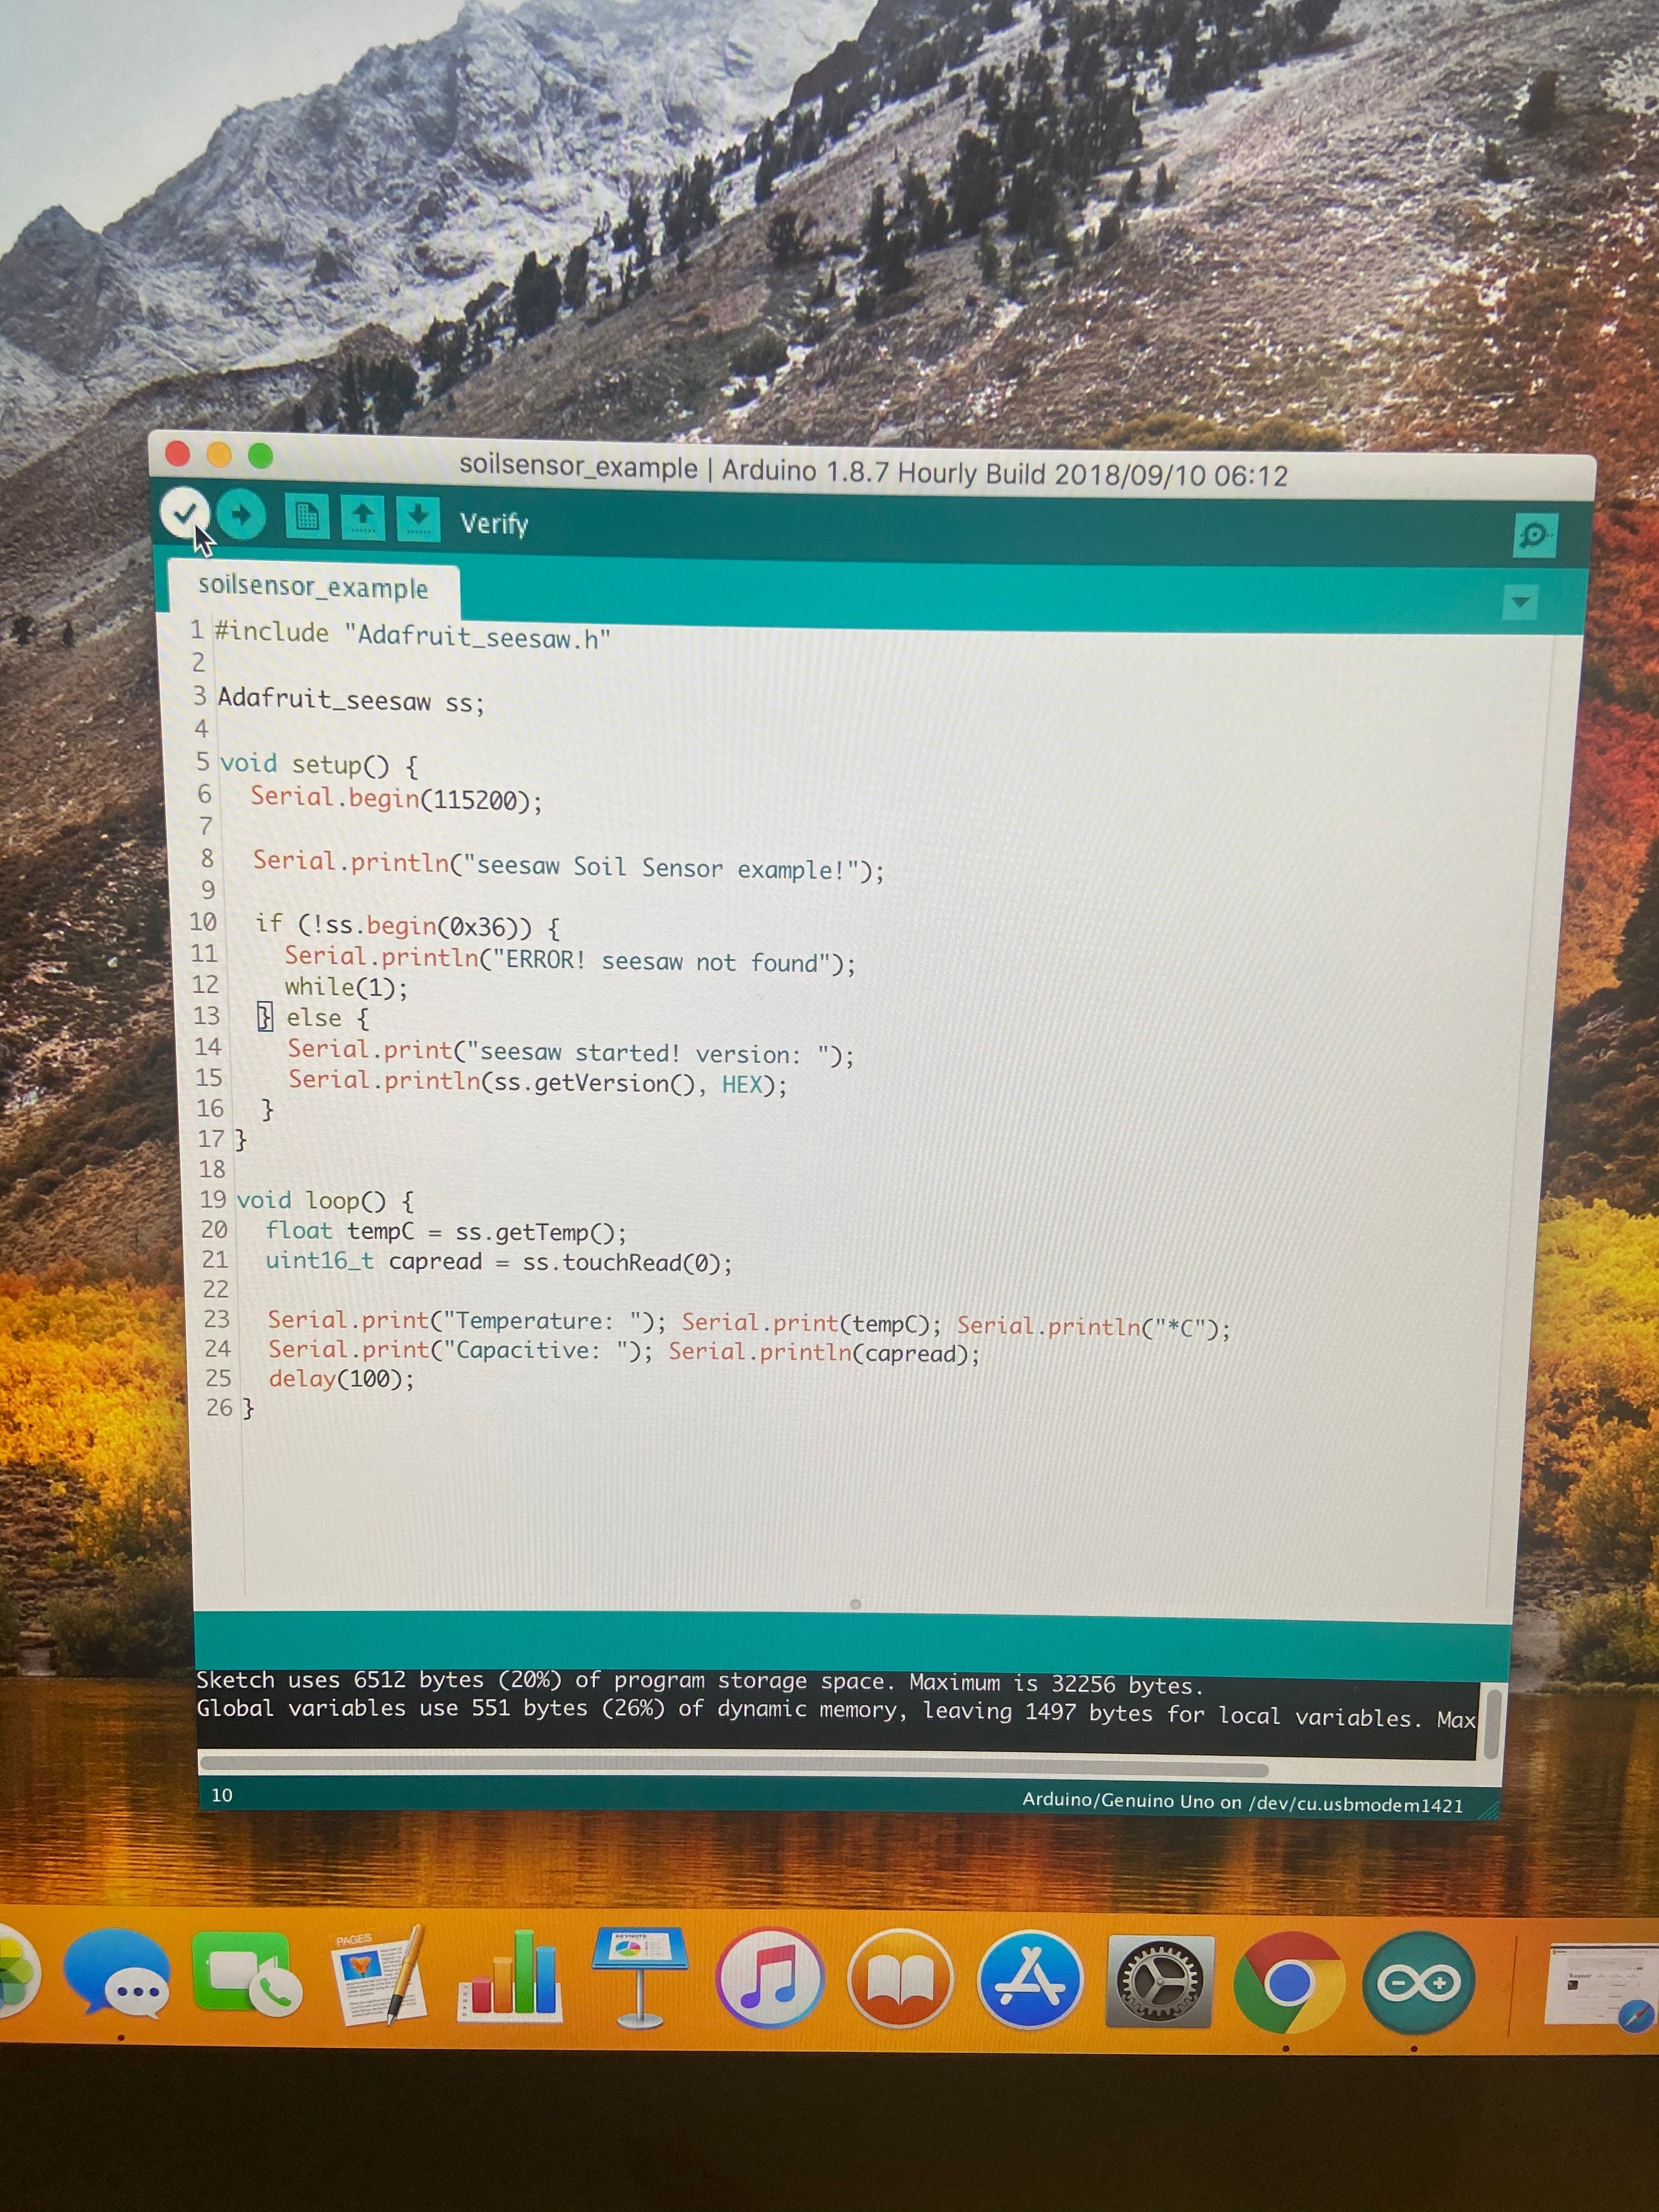
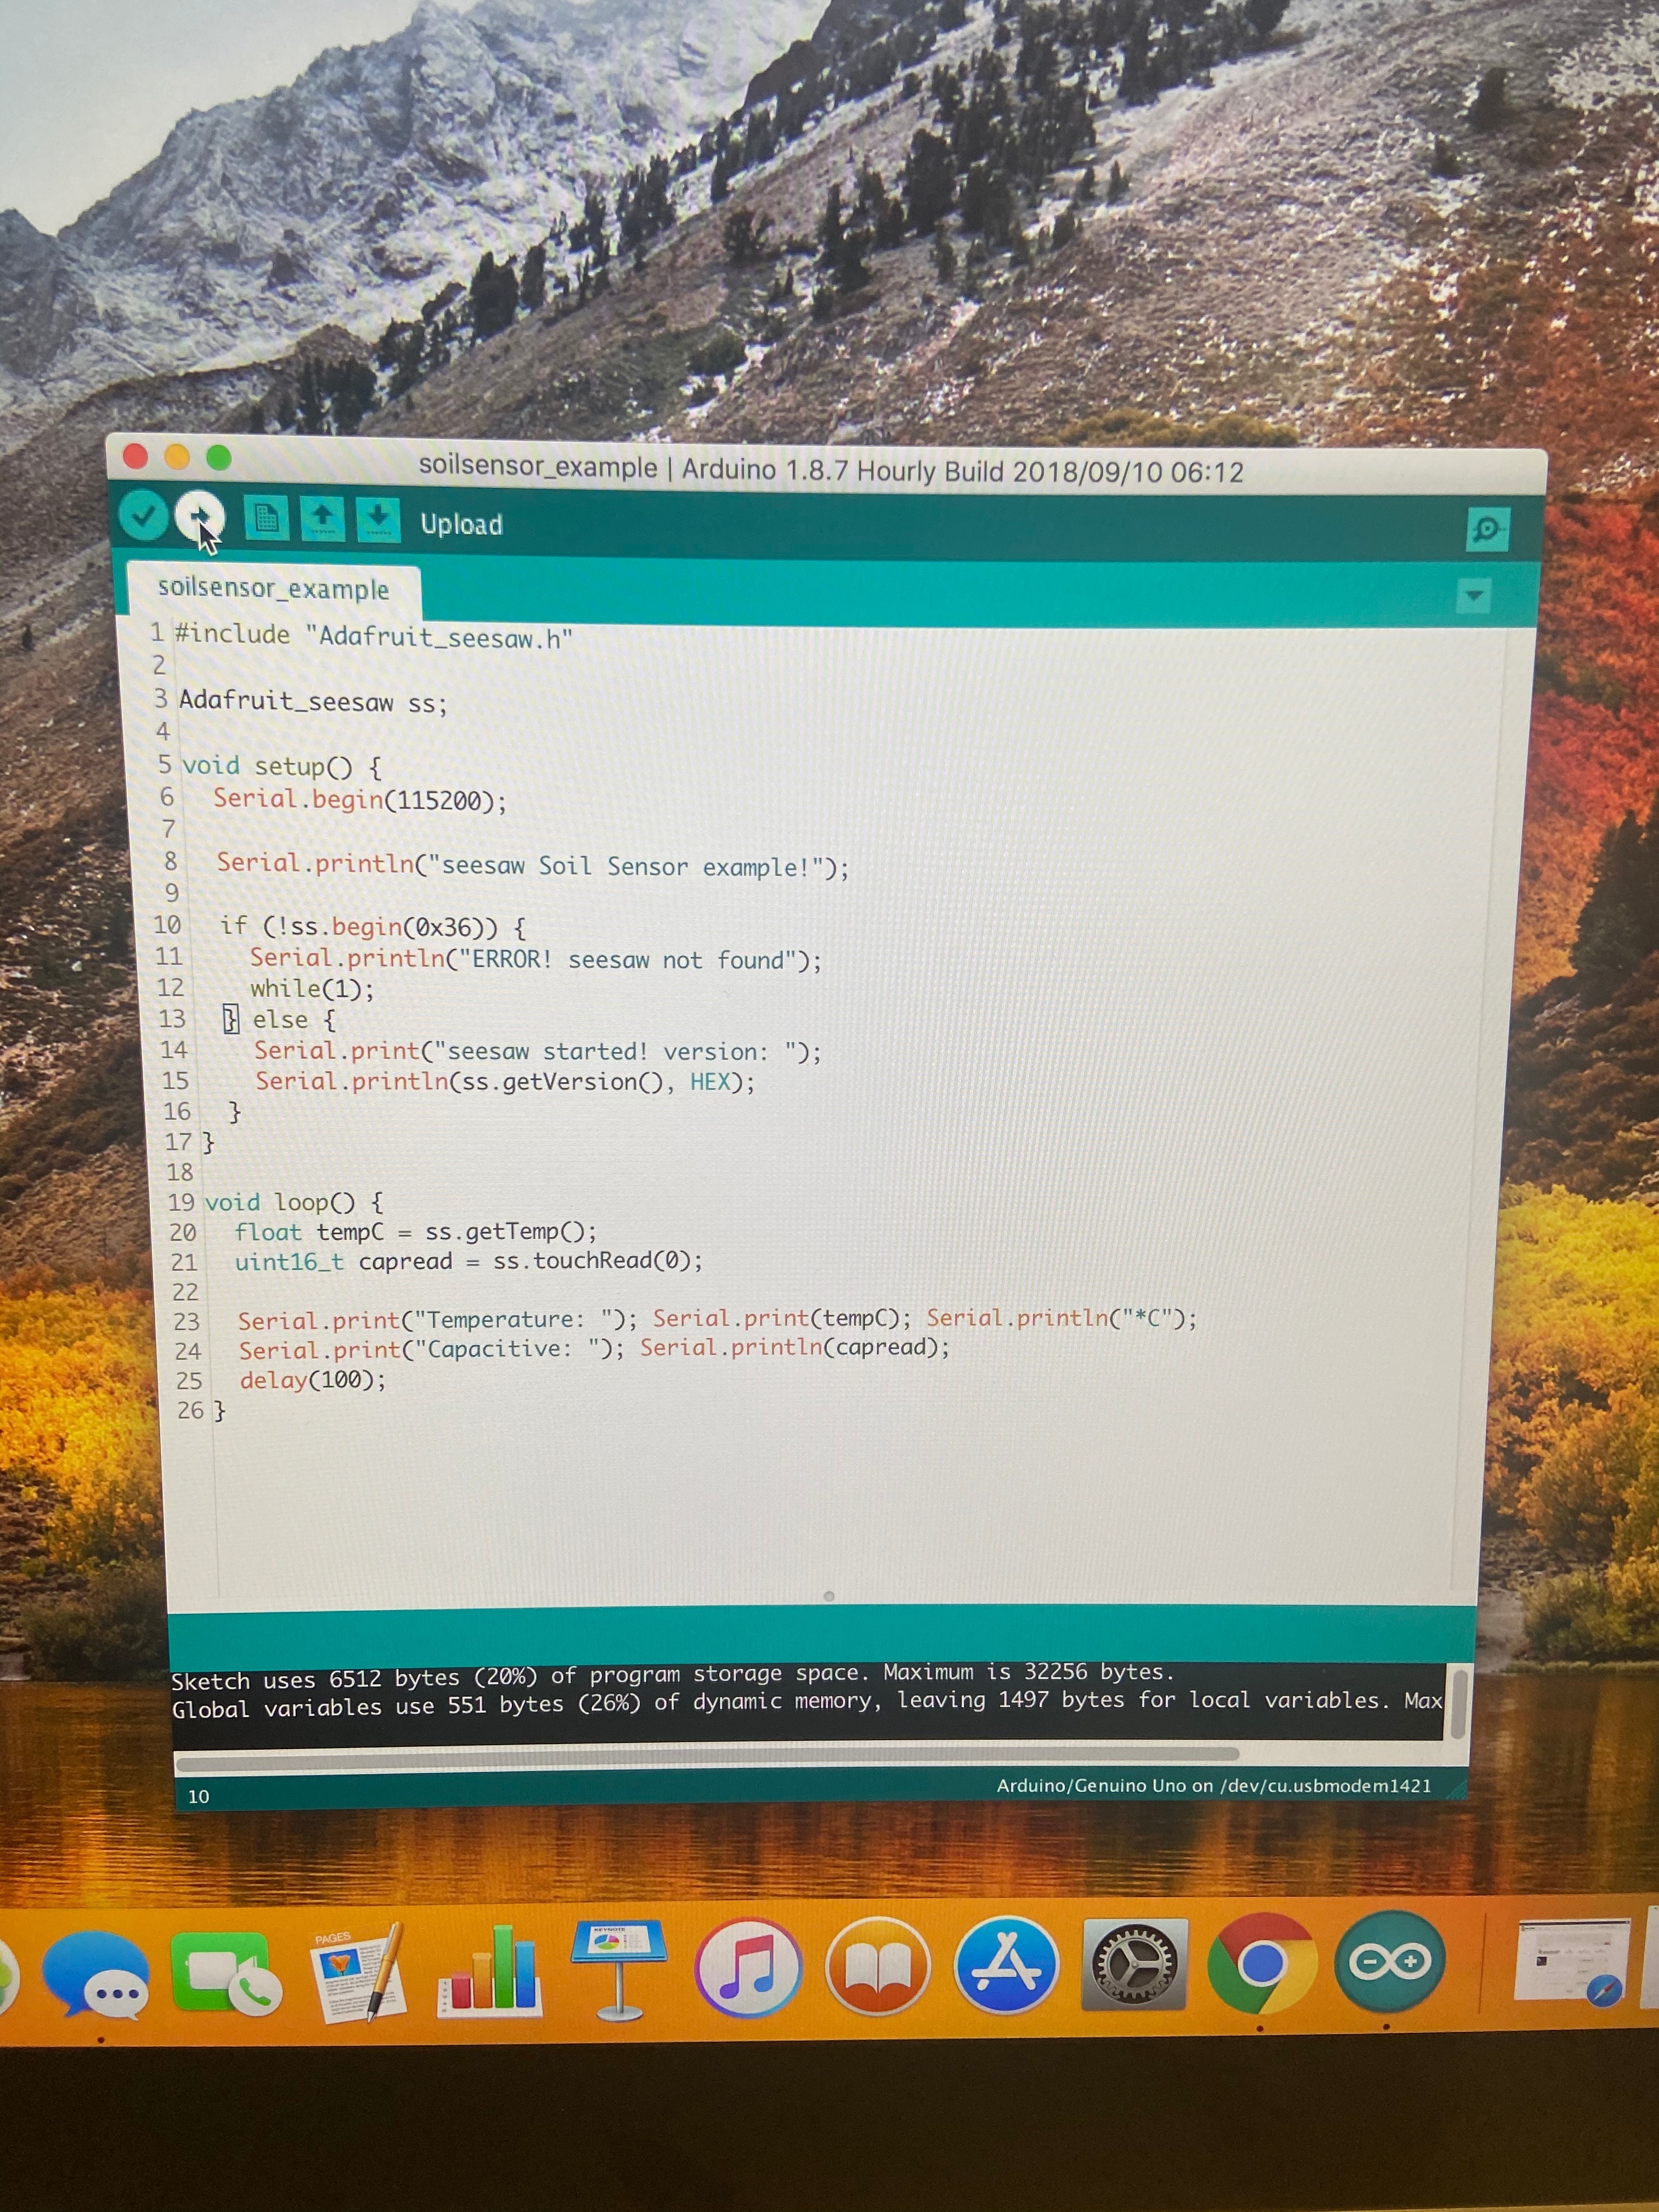
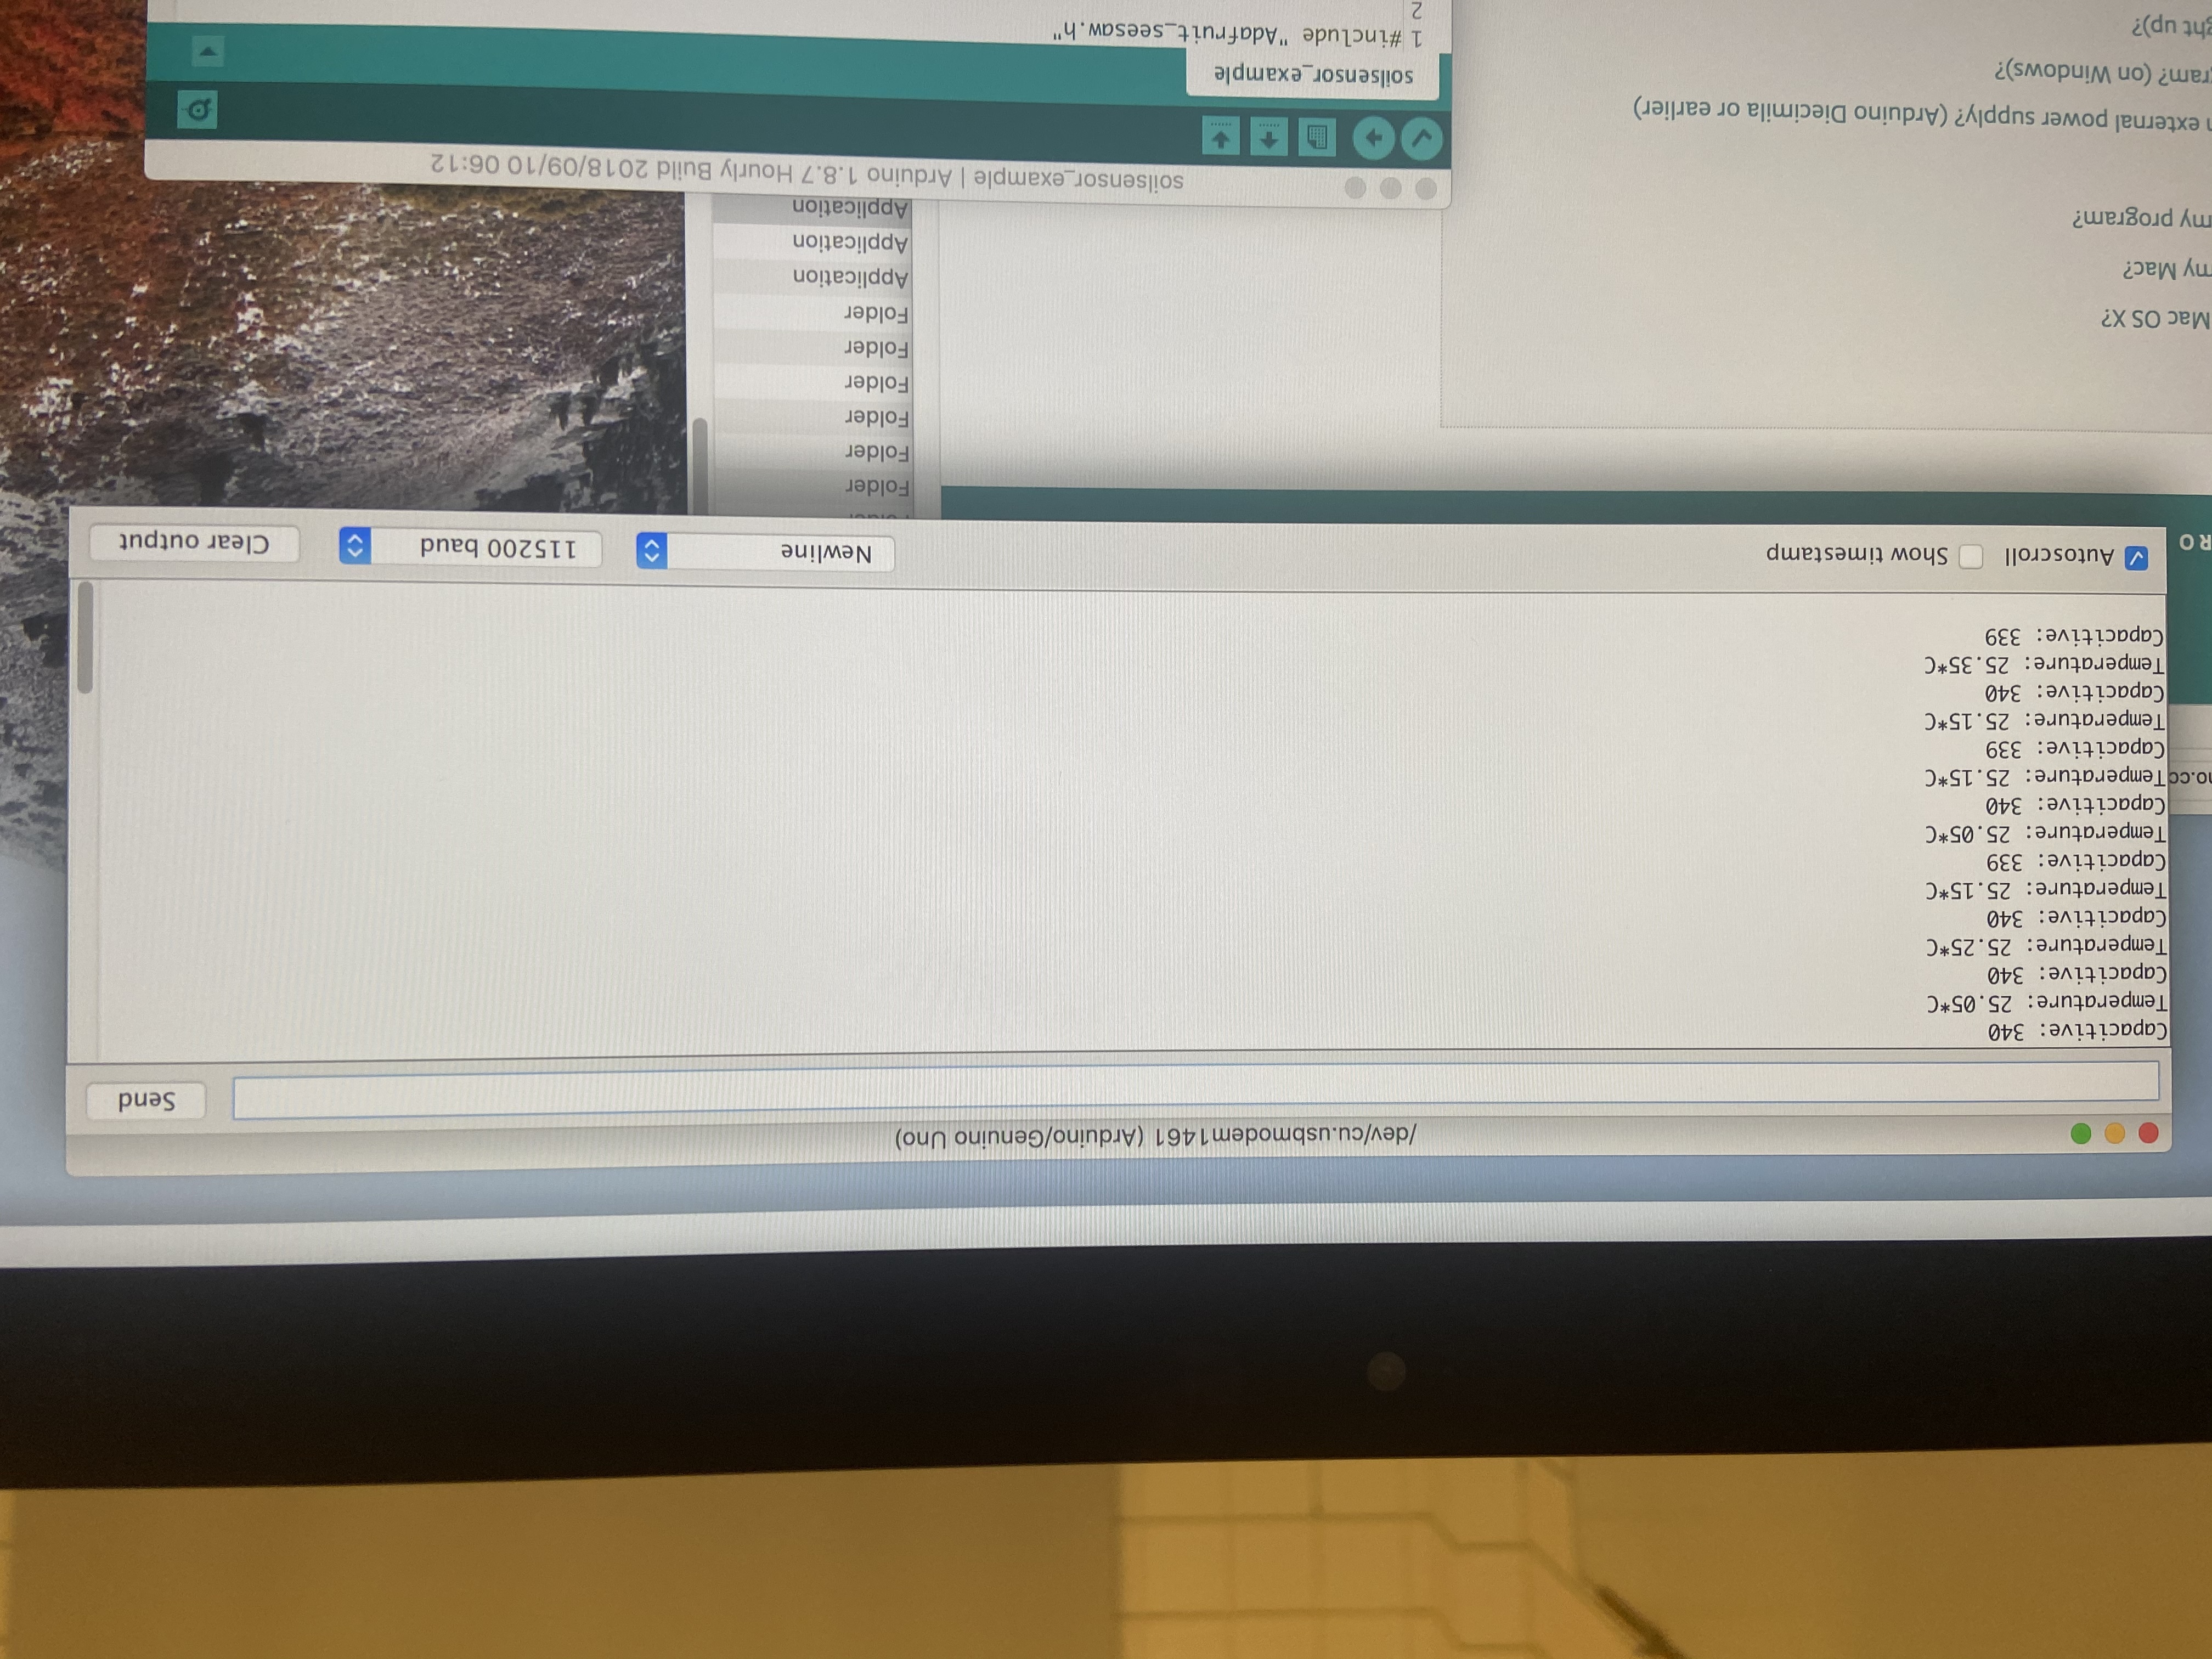
Once you have completed all of the previous steps, you will now be able to test your Stemma Moisture Sensor with the Arduino and the Arduino software.
In order to run your program, you will need to plug in the Arduino to your computer.
You should have your sample code loaded onto the Arduino software.
Select the verify button. Once this is complete, select the upload button. After you have uploaded the Arduino, choose the magnifying glass on the top righthand side. This will open the data information.
To test if the data is changing properly, put your hands on the sensor. If it is running correctly, the information on the screen will change.
You have successfully installed and tested your sensor.