Starting Photography: a Beginner's Guide
by AlexT306 in Design > Photography
70442 Views, 302 Favorites, 0 Comments
Starting Photography: a Beginner's Guide


.JPG)
Photography is a very popular hobby. At first glance it seems like an easy way to create art, a way of capturing a breathtaking scene with the click of a button.
But when you start delving into photography, you slowly start learning more and more about its little quirks - those things that can make a picture very right, and those that will make one very wrong. Often it can take years for a photographer to get good, and so called "beginner's guides" are often full of technical details and hard-to-understand concepts.
So where does Instructables come in? I've been photographing for a couple of years now as a hobby, and I wanted to share my knowledge with the world. I've researched for countless hours, and I have lots of experience getting out there and simply photographing things, learning from my mistakes in the process.
I wouldn't say I am an expert photographer, and I wouldn't say that my advice is the best out there. However, in my opinion this makes me more qualified to write a beginner's guide to photography. I can distinctly remember a time when I had no idea about any of the rules governing the subject, and I can recall my struggles and (eventual) successes when starting out. As such, I know the things that most beginners need to know, those nitty-gritty details that make or break a photographer, which all too often are overlooked amidst the technicalities.
So will this Instructable be perfect? No. But I hope that you walk out of here with a better understanding and appreciation of the world of photography.
Cameras


.JPG)
There are a wide variety of cameras in today's world. You should choose which one you are going to use before delving into the details of this Instructable. I would recommend choosing a camera suited to your purposes and price point. Here are the main types of cameras on the market:
1) Smartphones should be any photographer's secret weapon. Smartphones today boast cameras that are better than most cameras were a long time ago. They automatically adjust most of the settings for you and allow you to enjoy that vacation without having to lug around a heavy camera.
2) Point-and-shoot cameras are meant for the aspiring photographer. They are really compact (hence their other name, compact cameras) and can be put in one's pocket. They are often incredibly cheap, and they have a surprising number of features as such. These are great for people aspiring to try out photography without any kind of commitment. Note that if you ever want to take your photography professional, you are going to want to move on from point-and-shoots relatively quickly. Nevertheless, they are great for carrying around on vacations and to other places when you really don't want to be lugging around all of your equipment.
3) Bridge Cameras bridge the gap between DSLRs and point-and-shoots. These cameras are cheaper and require you to buy fewer parts (lenses are often built in). However, this comes at the cost of quality, and today DSLRs are so cheap, it makes sense to spend a few hundred dollars on a camera you can use for life, rather than trying to make a cheaper camera work.
4) Mirrorless Cameras were made to take away all of the confusion behind DSLRs. Instead of having a viewfinder that you look through, mirrorless cameras show you what the camera's sensor sees instead. This redesign allows mirrorless cameras to be compact. They are also easier to use, since you can see the exposure settings of your camera in real-time. There are still a few downsides to these cameras, but as time goes by they are getting better and better.
5) DSLRs are those large, heavy, and expensive cameras you see professional photographers hauling around. They offer the best of the photography world, but pay the price in convenience and affordability. They also require you to buy a lot of other things, such as lenses and filters, to use them to their full advantage.
6) Full-Frame Cameras are a type of DSLR that have a larger sensor than most others. This is because the sensor inside the average DSLR is actually a crop sensor. Having a full size sensor enables one to take better quality photos. They are very expensive, so you might want to do some research before buying one.
This Instructable will mostly focus on photography using DSLRs, simply because most of the information translates pretty nicely to other devices. People even make miniature lenses and tripods and such for phones, so it can't hurt to learn about them.
Lenses


Lenses help change how the camera "sees" the environment around it. There are a lot of different ways to categorize lenses, which we will discuss in this step.
One huge factor that influences buying decisions is convenience. Instead of having to own a dozen lenses that all have different focal lengths, you can own a single lens that can zoom in or out. However, this might not be the bargain it seems to be.
| Name | Description |
| Zoom Lenses | Zoom lenses allow you to change how close or far away something looks. These are perfect for beginners who want to dabble with various focal lengths. However, as they say, "a jack of all trades is a master of none." Zoom lenses pay for their convenience with reduced quality because of all of the moving parts inside that may or may not coordinate as well as a prime lens. |
| Prime Lenses | Prime lenses have a fixed focal length. This means that it can't zoom in or out. It also means that whoever designed the lens made it so it perfectly works at the exact focal length it was made for, instead of having to make it work for an entire range of focal lengths. |
Personally, I use a zoom lens simply for the convenience. But if you want to specialize in, say, portrait photography, you might want to invest in a single prime lens that will work for that purpose.
Lenses can be further sorted by their focal length. Focal length essentially determines how zoomed in or out an image looks to our eye.
| Name | Focal Length | Description |
| Fisheye Lens | 5 - 15 mm | A fisheye lens makes photos look like what a fish can see - a "bowl" that bulges in the center. This is because of how the lens is shaped - fisheye lenses are just very extreme wide angle lenses. |
| Wide Angle Lens | 10 - 42 mm | A wide angle lens takes in more of the surrounding environment by having a shorter focal length. These are great for landscape shots, especially because they allow you to get closer and avoid objects cluttering the foreground. They are also frequently used indoors, where there isn't much space to begin with. |
| Normal Lens | 43 - 50 mm | A normal lens lets you take photos pretty much the same as the human eye can see. This lens is commonly known as the "nifty fifty", since they traditionally come at 50mm and are very versatile. |
| Telephoto Lens | > 100 mm | A telephoto lens lets you photograph things from far away by having a longer focal length. These are especially great for wildlife photography, so you don't have to approach anything potentially dangerous or risk aggravating it. People use these at sporting events or concerts, too (if they allow you to do so), since it can be hard to get a good seat. |
Note that the focal lengths for these lenses are approximate. The exact classification is based on the sensor of the camera a lens is on, also. Make sure to do some research for the exact camera you plan on purchasing so you get what you want.
There are also a handful of lenses that are designed for some specific purpose or feature. These can be used to achieve special effects or just make it easier to take certain types of pictures.
| Name | Description |
| Macro Lens | A macro lens is a lens that is able to focus on things very close up (generally inches away from your camera). These are used to take pictures of everything from insects to flowers to textures of various things. |
| Image Stabilization Lens | An image stabilization lens has sensors and servo motors inside that help it stabilize your shot even if your hand shakes. These don't eliminate movement, but they help tremendously, especially when at higher focal lengths or slower shutter speeds. Many lenses nowadays have this feature. |
| Tilt-Shift Lens | A tilt-shift lens is very self-explanatory. It enables you to shift the lens physically left / right and up / down. It also lets you tilt the lens up or down without moving the camera body. The purpose of this lens is to minimize distortions, especially in architecture. It can also be used for a miniature effect, where things (especially people) look smaller than they really are. Often people describe it as the subjects looking like game pieces on a game board. |
When purchasing lenses, make sure that they are specifically designed for your camera. Otherwise, they might not even fit on your camera or might produce photos at a reduced quality. Make sure that your gear is all of the same brand (Canon, Nikon, etc) and even of the same line (Canon Rebel, etc) unless it is directly stated that it will work with another camera.
Often the best thing for a beginner is a starter's kit which comes with a camera and lenses, batteries, etc. all specifically designed for a certain camera. These are often at a reasonable price point and contain enough for you to experiment with before you spend any substantial amount of money.
Filters

Filters change the way a photo looks. Filters can have a variety of purposes, from protecting your camera to allowing you to take certain types of shots to improving the aesthetic appearance of your photos.
The good thing is most filters are cheap, so you can afford to experiment with them. Here are some of the most common filters that you should try out:
| Name | Purpose | Description |
| UV Filter | Protection from UV light and from the environment | A UV filter protects your camera from harmful UV light when shooting outdoors. However, an additional benefit is that since they don't change how the photo turns out much, you can keep it on your camera anytime you are using it to protect your more expensive lenses from dirt, dust, water, etc. |
| Polarizing Filter | Used for reducing glare from reflections and regulates color saturation | A polarizing filter regulates color saturation and reduce glare from reflections. These are great when shooting through a glass window of some sort also because they reduce the window glare. |
| Neutral Density Filter | Used for long exposures and bright environments | A neutral density filter darkens your photo so you can lengthen the exposure time you use, especially when shooting in bright lighting outdoors. These come in various strengths. |
| Graduated Neutral Density Filter | Used for balancing exposure throughout a photo | While neutral density filters affect the entire shot, graduated filters only affect the top half of a photo. This is primarily used to help darken the sky to balance with the foreground. |
| Tinted Filter | Used for special effects | You can also find various tinted filters that are for changing the tint of your photos. I prefer to do this in post processing just in case I change my mind about a particular tint. |
Note that some filters screw on to the end of your lens, and some filters are simply square sheets that require you to use some sort of holder to keep them in place. While filters are more universal than lenses, make sure that you get the right size filter, so you don't see any distortions in the final image.
Stabilizers


When you are taking a photo, you want to hold your camera as steady as possible. This is to avoid blur. It is also very important in that it lets you position your camera upfront instead of having to re-adjust after every shot. This is where stabilizers come in.
There are a lot of great products on the market that are used to stabilize your camera and hence improve the quality of your photos. Here are 3 of the most common ones.
| Name | Description |
| Tripods | Tripods are the most common form of stabilizers. They have 3 legs, which makes the camera very stable, especially for long exposures. They help a photographer keep the camera in the same position, so you don't have to re-adjust how you hold your camera for every shot. |
| Monopods | Monopods are tripods with one leg. These are better than tripods when in dynamic situations because they are easy to move around. |
| Flexible, Portable Tripods | These tripods are less common than regular tripods. They are small and have bendable legs. This means that in addition to using them like a normal tripod, you can also wrap the legs around things like tree branches and lamp posts for a quick solution. |
If you don't have any of these, you can also use the things around you. If you are sitting down, prop your camera on your legs. If you are in a blind, maybe rest your camera on a rock or on the ground. If you are in a public area, you could even rest your camera against railings.
When all else fails, pull your camera towards you to stabilize it with your body, stand as still as possible, and lightly press the shutter. Adaptability means you will have more opportunities than those who rely on external equipment to get their photos.
Using Your DSLR


It can be fairly easy to figure out how to use less advanced cameras, like phone cameras and point-and-shoot cameras. DSLRs are a bit trickier, and they have some additional things you need to know about them.
These skills might translate over to some other types of cameras, but they are often most commonly found in DSLRs.

The main modes you need to know how to use are Automatic, Program, Aperture Priority, Shutter Priority, and Manual modes. While some of the terms used below might not make much sense to you just yet, we will discuss them in detail in the "Exposure" section of this Instructable.
| Mode | Description |
| Automatic | Everything is fully automatic in this mode. Your camera will determine what it thinks is best for the environment around you, and all you have to do is aim your camera and press the shutter. |
| Program | In program mode, the camera will automatically calculate the right exposure by evaluating how much light is entering the sensor and then adjusting for the ISO (which can be manually set). In this mode you can also control things like flash. |
| Aperture Priority | This mode is like program mode, except the only value the camera will calculate is the shutter speed, based on the aperture and ISO you are using. |
| Shutter Priority | This mode is like program mode, except the only value the camera will calculate is the aperture, based on the shutter speed and ISO you are using. This is what I use the most, since shutter speed can make a huge difference when photographing different things. |
| Manual | In this mode, everything is set by you, the user. This can be good and bad - if you happen to see something cool and want to quickly photograph it, you might not have gotten the settings right and the moment is gone. What you can do in these situations is take a photo in manual if you have the time and switch over to automatic and take a shot just in case. |
When first starting out I would recommend using automatic mode. However, after taking a lot of photos, you will be able to see what your camera does wrong. You might realize that it shouldn't have turned on flash or shouldn't have used such a slow shutter speed. Then you can slowly start experimenting with other modes.

You obviously want to take the best pictures possible.This means that you want to save your files at the largest size possible so the least amount of information is lost. If this means you have to buy another $15 SD card, so be it. It will be well worth it.
The next question people always have is if they should be shooting in RAW. When light hits a camera's sensor, the camera has to convert this information into a JPEG. But then the camera discards all of that sensor information to save storage space. What if you were to instead keep the information so you could choose how to process your photo?
That is the essence of a RAW file. When you put a RAW file into a software like Adobe® Photoshop® software, you can edit the file to your liking and then save it as a JPEG.
Initially, you should be shooting in JPEG form, as you might not have the time or will to process every single photo you take. As you start getting better and better at photography, you should start using RAW more and more to truly unlock its capabilities.

Auto focus should be your friend. Most lenses have an auto focus feature, which lets your camera decide when it thinks the image is as sharp as possible. This can be more reliable than trying to manually focus yourself.
The reason people use manual focus is when the camera chooses the wrong thing to focus on. Say there is a really prominent foreground in your photo. The camera might choose to focus on that instead of the subject.
Another thing is cameras don't do too well at the extremes when it comes to auto focus. If you are photographing something that is closer or farther away than your lenses' range, you might want to use manual focus to get better results. When there is a lot of depth to your photo, your camera might not know which "layer" to focus on. Also, if your camera moves, it might try to re-focus, losing time in the process.

Flash helps illuminate your subject with a quick burst of light from your camera. I use flash whenever it is too dark and I don't want to worry about exposure settings or whenever I need to light up some element of my photo (such as texture).
There isn't really any hard-and-fast guide to when to use flash. After you really start practicing photography a lot, you will get a feel for when to use flash and when to just adjust your exposure settings.
One thing to be weary of is that many places don't let you use flash, since they don't want you to distract the audience or performers. In these cases, you should switch over to program mode, so your camera doesn't accidentally choose to use flash.
Lighting

At a very generic level, photography is all about recording light in the form of photos. If you don't have enough light, your photos won't turn out very well. Luckily, there are many different light sources you can use to make your photos brighter.
In this step, I will also teach you how to make a light box and a reflector, so you can take photos regardless of your surroundings.


Lighting is incredibly important. I always tell people that if they just can't make it work inside, take it outside, where the lighting is more ambient and the temperature is more neutral.
The two images above show how evenly the ambient light from the sun is on the surface of complicated textures.
One other cool side effect of photographing outdoors is that it can be pretty easy to work with your settings. Often your photos will turn out great in-camera and at a great quality, too (since you can easily lower your ISO on a bright day).

There is only one main light source outdoors: the Sun. The sun lights up everything, and it is the reason why outdoor photos always turn out so well. Even when you can't see the sun directly, it is still there behind the clouds, providing an infinite source of light.
One thing to be careful about is that the sun isn't too bright. As we discussed in the "Filters" section, you can always put on a UV filter to protect your camera from the elements.


When you can't take a photo outdoors, you should use a light box. A light box diffuses the light entering the box, allowing you to take a pristine photo of a product without any hard shadows.
In the photo above, I was able to get a really great shot of a camera with even lighting throughout, which would have been pretty hard to achieve in any other location.
Building A Light Box
| Step 1: Crate | Step 2: Adding Backdrop | |
 Start off by getting a large crate. Crates are great for making light boxes because they are sturdy, just the right size, and have holes which flashlights (and other lamps) can fit in. | 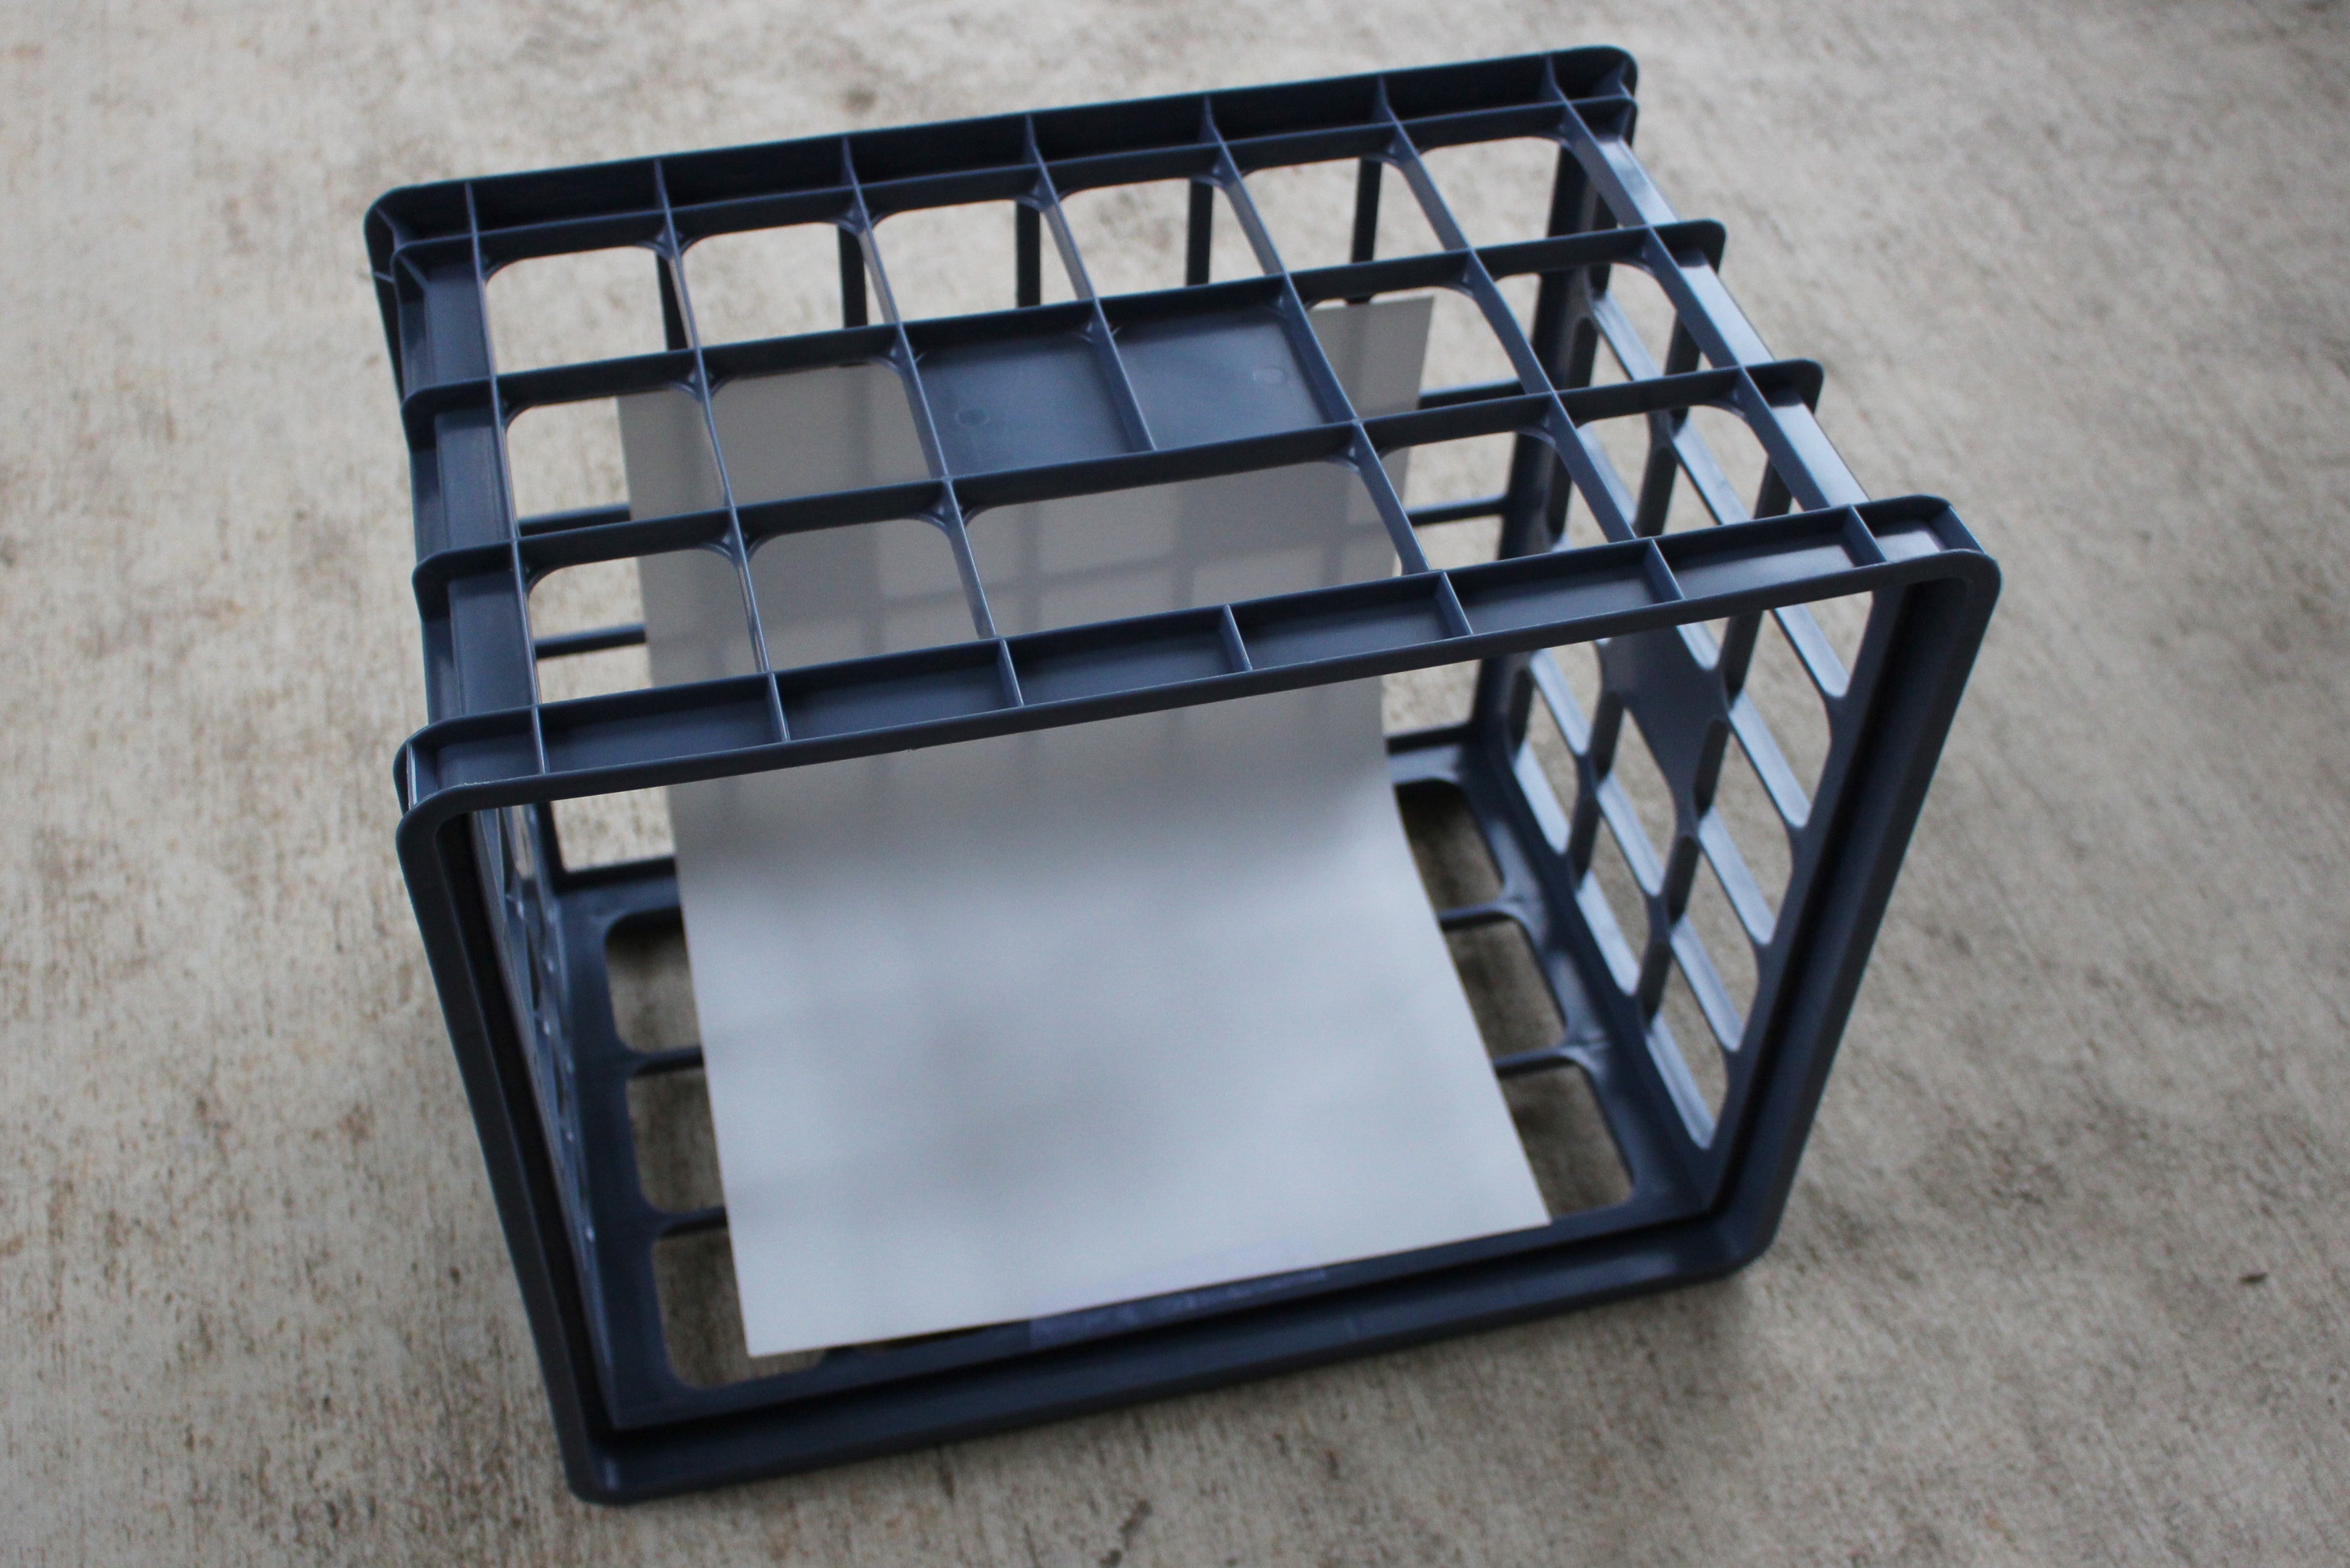 Tilt the crate on its side. Attach a poster board to the inside of the crate using tape. Lightly bend the poster board at the seam so no crease is visible. This will be the backdrop for your photos. | |
| Step 3: Adding Flashlights | Step 4: Finish! | |
 Use tissues to diffuse flashlights, as described under "Light Sources: Indoors: Flashlights." Then take the flashlights and put them in the holes of the crate, facing inwards. | You have finished making a quick and simple light box! These are great for taking clean, bright photos. You can even take these light boxes outdoors to get more light in the photo. |
I generally use my light box setup and a tripod to take photos of products. In my opinion, it works way better than any other place indoors and consistently provides a clean place to photograph, regardless of time of day.


You don't necessarily need a light box to take good photos indoors. The photos above were just taken on a table in a room with good lighting.
Here are some other ways you can get the light you need anytime you are indoors.

Windows are perfect diffusers. They always seem to let in the perfect amount of light, not too dark or too bright. Windows can also be very interesting points in a photo, bridging the gap between the indoors and the outdoors.


Using lamps and other sources of artificial lighting can really help set a mood in your photo. They are also very convenient, since you don't have to build your photos around a single window, but you can rather take a photo anywhere where there is a lightbulb nearby.
Keep in mind that most artificial lighting has either a warm or a cool temperature that you need to know about. We will talk about this in depth in the "Color" section.


Most people try using flashlights as a light source initially. After trying them out for a while, you will most likely end up being unsatisfied because they result in very bright highlights and very dark shadows.
Try attaching a tissue to the end of a flashlight using a rubber band. This will result in a much more even lighting, similar to the ambiance of the sun.

In the photo above, light bounced off of the reflective surface. This was a great source of light, since I didn't want any of the lighting to be too harsh. The light also resulted in a warm reflection below the desk.
You can also use a store-bought or homemade reflector like a mirror, to reflect light in the direction you want it to go.
Making A Reflector
| Step 1: Folder | Step 2: Cutting Folder | |
 I made my reflector using a manila folder. This makes it easy to store (simply fold it in half) and helps you control how you reflect the light. |  I cut off the edges of the folder to make it a rectangle. This makes it easier to fit your reflector inside a camera bag. | |
| Step 3: Adding Aluminum Foil | Step 4: Finish! | |
 I then cut aluminum foil to the right size and taped it inside the folder, with the shiny side facing out. You can also use glue for a more permanent solution. Try to avoid too many creases in the foil. |  You are now done with your reflector! You can use this reflector to better achieve a proper front / back lighting balance, both indoors and outdoors. The above is an image of the reflector in use. |
Reflectors are a great way of regulating light, regardless of your location. Many photographers use store-bought reflectors for portrait photography in order to better light up a person's face, without having to point a million lamps at them.
Exposure

As we learned in the previous step, there are many different sources of lighting - however, not all of them are equal. Depending on the environment you are in, the brightness of your photos will vary.
However, there is something you can do about this without compromising photo quality. Our eyes can adjust to different levels of lighting, and a camera is no different. You can fine tune exposure (or how bright a photo turns out) by adjusting three settings: shutter speed, aperture size, and ISO. We represent this visually using the exposure triangle.

The 3 sides of the triangle are shutter speed, aperture, and ISO, as shown above. These are what they mean:
1) Shutter speed refers to how long the shutter is open for. The longer the shutter is open, the more light over time enters the sensor. However, too long shutter speeds often result in blur, either from the movement of the object you are photographing or from the movement of your camera itself.
2) Aperture size refers to how much the aperture opens. The wider it is, the more light enters at a time. If your aperture is too wide, however, you will find you have a very shallow depth of field. Depth of field refers to how blurred an object is when it is at a different depth (distance from your camera) than something that is in focus. A shallow depth of field often results in a blurred background or foreground.
3) ISO refers to how sensitive the sensor is to light. If the sensor is more sensitive, it takes less light before your photo will be well exposed. The disadvantage is that the higher the ISO, the grainier your photo will turn out.
You should learn to vary each of these 3 settings according to the environment you are in. If you are taking a photo of a fast-moving subject, use a higher shutter speed. If you are taking a photo of a landscape, where everything should be in focus, use a smaller aperture. If you are taking a photo and can't afford to compromise shutter speed or aperture size, increase the ISO.
Most cameras also have a light meter. This light meter refers to how exposed a photo will be when you take it. For a DSLR, if you press down the shutter button halfway, your camera will update the light meter. You should aim to be right in the middle, at 0, for proper exposure. Anything over 0 will be overexposed, and anything under 0 will be underexposed.


The photo to the left is an example of bad exposure management. This photo was taken in the late afternoon, but that still doesn't explain how dark the photo is. I had very low ISO and a high shutter speed, which negatively affected how bright it looked.
The photo to the right has been overexposed. This is because I had adjusted the settings for a scene facing the ground, and when I took a photo with the sky in the background the sky turned out too bright.


The photo to the left is an example showing how exposure doesn't determine how well a photo turns out. I had to use a high shutter speed to capture the rain, but I also like how dark and dramatic the photo looks.
The photo to the right was slightly overexposed, but it just adds to the effect. The overexposed background just contrasts the subject better.
Color

Color is how our eyes perceive light, and it is essential in almost every photo. Color helps make subjects stand out, can introduce tension, set a mood, and a whole lot more.
As such, it is essential you learn the basics of the color wheel. You don't need to memorize any rules or color schemes, but it helps to at least know about them.

The most basic photography color wheel can be broken down into 12 slices, as shown above. The color wheel is meant to help people decide which colors work best with others. More specifically, the colors you use in relation to each other can determine the mood of the photo and how other people react to it. I would group these into 2 main categories: similar color schemes and contrasting color schemes.
These color groups work whenever you want colors to mesh into each other / fit in with each other. Images with similar colors often feel very calm and relaxed. Similar colors are great at setting a mood or tone. There are 3 main ways to include similar color schemes in your photo:
| Name | Description | Example |
| This is the simplest color scheme, where a single color (and its shades) are featured prominently. Black and white photos are a great example of a monochromatic scene. |  |
| Pick two or three adjacent colors and feature them in your photo for an analogous color scheme. These work when a monochromatic color scheme simply won't work because you don't have enough colors to play with. |  |
| Choose two colors that are spaced out by one color in the middle. This color scheme results in a slight amount of contrast due to the color you skipped, but don't contrast so much as complementary colors. |  |


When you want certain elements of your photo to stick out, you need to use contrasting colors. Contrasting colors are great when you have more than one subject or when your subject has multiple parts that you want the viewer to notice. There are 5 main ways to include contrasting color schemes in your photo:
| Name | Description | Example |
| Use two colors that are opposite each other for a complementary color scheme. This works so well because the colors contrast sufficiently without sticking out too much. |  |
| Instead of picking two opposite colors, we are going to choose a color pair (specifically a diadic color scheme) opposite the main color. For example, in the photo to the right there are red buildings contrasting with green trees and blue water. |  |
| All you have to do is choose three colors that are evenly spaced out on the color wheel, and you will have a traidic color scheme. This is great for when you have multiple subjects and you want them to stand out individually. |  |
| This color scheme involves picking four colors that are evenly spaced out. Use these to convey mood by showing the viewer a very vibrant and vivid scene. |  |
| Select two opposite diadic pairs for a more subtle color scheme that still contrasts nicely. In the photo to the right, I created tension by sandwiching one diadic pair (blue and green) between another (purple and red). |  |


Warm colors are colors like red, orange, and yellow. Cool colors are colors like green, blue, and violet. Warm colors are always more prominent, or dominant, than cool colors. The way I like to remember this is that a flame (warm) will always melt an ice cube (cool).
You can use this to your advantage by having cooler colors around the subject and warmer colors for the subject. This also helps accentuate your depth of field, since the warm colors seem to pop forward and the cool colors seem to fade backward.
Notice how in the photo to the left, the leaves don't really stick out against the blue background. The branches almost fade into the sky. However, in the middle photo and right photo, the bold, warm colors practically leap forward. The colors stand out sharply against the cooler background.


Something seems wrong about the leftmost photo. The colors just look unrealistic and strange, and they look very warm. The photo to the right looks strange too - the greens stray way too much towards blue and the pinks look purple, making the photo very cool. However, the photo in the middle looks natural. Why is this?
Photos naturally have a temperature. This temperature refers to how hot or cold (orange or blue) a photo is. Our cameras naturally try to counteract too much temperature through a process called white balance. Even if a photo doesn't contain any white, it can be painfully obvious when things aren't balanced right, such as in the first two photos above.
Luckily, our cameras can come to the rescue. Here are the most common presets your camera will have for white balance:
| Name | Description |
| Auto | In this mode your camera will attempt to figure things out for you. Whenever there are many cool or warm things in your photo, your camera might not be able to differentiate these from white, so it might get things wrong. For example, in a photo where the sky is prominent, the camera might try to go for a warmer white balance to "counteract" the cool sky. |
| Tungsten | This setting is for shooting indoors under tungsten lighting (warm lighting). Your camera will counteract this by cooling down the photo slightly. |
| Fluorescent | This mode is for shooting indoors under fluorescent lighting (cooler lighting). Your camera will warm the photo slightly to counteract this. |
| Daylight | This mode is fairly normal, which is used when taking photos outdoors. I turn it on when I don't want auto white balance to disrupt things, especially when I know I don't need much white balance. |
| Cloudy | This mode is for when there are many clouds about. It warms up your photos to counteract the absence of sunlight (since the sun is likely behind the clouds). |
| Flash | This mode helps the camera adjust to low light conditions, especially when using flash (which is very cool) by warming up the photo. |
| Shade | This mode will warm up your photo when there are lots of shadows around, since shadows tend to be dark blues, rather than dark oranges. |
| Manual | This mode allows you to choose your white balance. This is great when photographing very warm or very cool things that might confuse your camera. It also allows you to tailor the white balance to your surroundings. |
But really, auto white balance is great. You can always go back in and change the temperature slightly in post-processing if needed.


If you are taking your photos in RAW (and even otherwise, to an extent), you can also easily manipulate temperature in post processing, so you shouldn't get too hung up on getting it perfect initially. Keeping your camera on auto white balance is more than enough for a beginner to get acquainted with their camera, since you will get good practice tweaking temperature using software.
When I was trying to take a good photo for the "Filters" step, one of the worst shots I got was the photo to the left. For some reason, my camera thought it was perfectly fine to make everything heavily tinted blue. However, it wasn't too much for Adobe® Photoshop® software to handle, and soon I was able to get the image on the right.
Location

Most people talk about how you are supposed to take photos so they look good. I completely agree with this, but I also think that where you take them can be almost as important.
Most people just whip out their cameras and take a shot wherever they need to. However, investing some time in finding a good location (when viable, of course) can be the difference between good and perfect.


First things first - remove EVERYTHING that isn't intended to be in your shot. Make sure that there isn't any visible clutter (especially with product photography) and avoid things in the foreground that are in front of the subject. This doesn't mean that your photos have to be perfectly clean, just that if they aren't make sure it is intentional.
In the example above, the photo to the left is extremely cluttered. The one to the right is a lot less cluttered. I also used some photo editing to clean up the shot and accentuate the pumpkin.
You can also get a clean photo of the same location by waiting. This is especially true of tourist spots, where there will be swarms by day and few by night.


Not only should you find a background that looks nice, you should find one that makes sense for your product. For example, a computer probably won't look good perched precariously on a tree branch, but a bird feeder would look great in the same environment. The pumpkin photo in the previous part was still a bad photo, for a Halloween pumpkin has no business being on a granite counter-top.
In the photos above, the photo to the left demonstrates an example of a bad background. The metal the planter is on just doesn't go well with it, and the holes you see throughout just distract the viewer. Finally, this desk was located in an area without good lighting, so I had to use flash, which messed up the texture of the planter.
The photo to the right is a really good photo. The castle planter is in a location that makes sense (on a desk, since it is a paperweight, next to a window, since it is a planter and needs sunlight) and the environment doesn't distract from the subject.


This part is two-fold. First of all, make sure the entire subject is visible. This is especially important in product photography, where you essentially have to sell someone on a product in a handful of images. How many times have you been intrigued by an Instructable but didn't take the time to read it because of a terrible cover image?
The second part of this is that you have to be taking your photo in the right location. Trying to take a photo of a car in a small garage won't work out. Taking a photo of one on a driveway or in a parking lot will work a lot better, and if you take a picture of a car on an open road, you pretty much can't go wrong.
This also ties into clutter. The key word of this section is open spaces - you need to give your subject room so the audience isn't distracted by other things in the shot.
Timing

You've set up your shot perfectly; you've chosen a good location, you've accounted for lighting, and you've even taken the time to work out the settings. But when you snap a shot, it looks terrible. Dark, deep shadows fill the scene and nothing looks right.
You most likely have a problem with timing. Timing refers to when you take your photo. Often, if you don't like how your photo turned out, you can come back at a later time of day (or even later in the year!) to take it again.


It matters when you take your photo. Obviously a photo in the dead of night will look a lot worse than a photo at golden hour. There are several different "slots" of time to know:
Golden hour refers to the hour after the sun rises and the hour before it sets, when the sky is filled with all sorts of oranges and yellows and reds. Golden hour results in very beautiful photos, since the sun isn't harsh enough yet to create any deep shadows. It also happens to be when a lot of wildlife are out and about.
Blue hour is the hour before the sun rises and the hour after it sets. This is very similar to gold hour, except instead of a golden tone to your photo, you will have a more bluish tone.


Afternoon is an okay time to photograph things. While some people can pull off afternoon photos phenomenally, it can be quite hard to counteract hard shadows and bright highlights. For example, in the photo to the left, the grass is a lot brighter than it would be normally because the sun is directly overhead. I could lower the exposure, but then there would be darker splotches of grass instead.
Night is also a generally a very hard time to photograph most things. You are going to have to mess with exposures a lot, and you will most likely have to use flash or another lighting source. For example, in the photo to the right, it is very hard to see the grass because of how dark it is.
That being said, a lot of night photos are simply stunning. Since there is so little light entering the camera, you can also lower your shutter speed to capture the motion of the stars, among other things.

When there are moving elements in your photo, timing is key. Often if you wait a split second too long, the moment will be gone and your hard work will be lost. This is why people spend days in a blind - they are waiting for that perfect moment when an animal crosses in front of them.
In the above photo, the only reason I was able to get a good shot of the squirrel was because I took the shot right as he had climbed up to that section of the branch. Seconds after I released the shutter, he was darting from branch to branch, soon far out of sight.


When you start introducing seasons into the mix, things get tough. You can take good photos regardless of season, so most people never really think about it much. Plus, you don't want to have to plan, say, vacations around your photography schedule.
Season helps set the mood for your photo. The weather conditions are different, the animals out and about are different, and even people act differently.
For example, in the photo to the left, it looks like it was taken sometime in winter. The trees have a darker green tint, and the sky is more overcast. In the photo to the right, the sky is far more blue, the trees are fuller, thicker, and greener, and even the castle structure looks better.
Both of the photos are technically good photos, but one is clearly better than the other.
Composition

Composition refers to how you take your photograph. Photographers use composition to distinguish their photo from everyone else's shot, especially when they are in a location commonly visited and photographed. It is how, even when taken at the same exact location, photos can look so different from each other.
Composition "rules" are very loose. Often people break them on purpose (or on accident!) for a perfectly acceptable reason. This also means that sometimes rules directly contradict each other. Pick and choose which ones you want to apply and which ones you don't.

The most common composition rule is the rule of thirds - it basically says the prominent parts of your photograph should be along the lines of a 3x3 grid, namely at the intersection of the lines.

One of my favorite styles of composition is blurring the background and/or foreground. Blur tells people that a particular part of your photo isn't important, so the audience will naturally be drawn to the crystal clear, in focus subject. In this image, the face of the lizard is razor sharp and the tail blurred. In this context the blur also serves as an artistic effect, showing how similar the reptile's skin and the tree look.

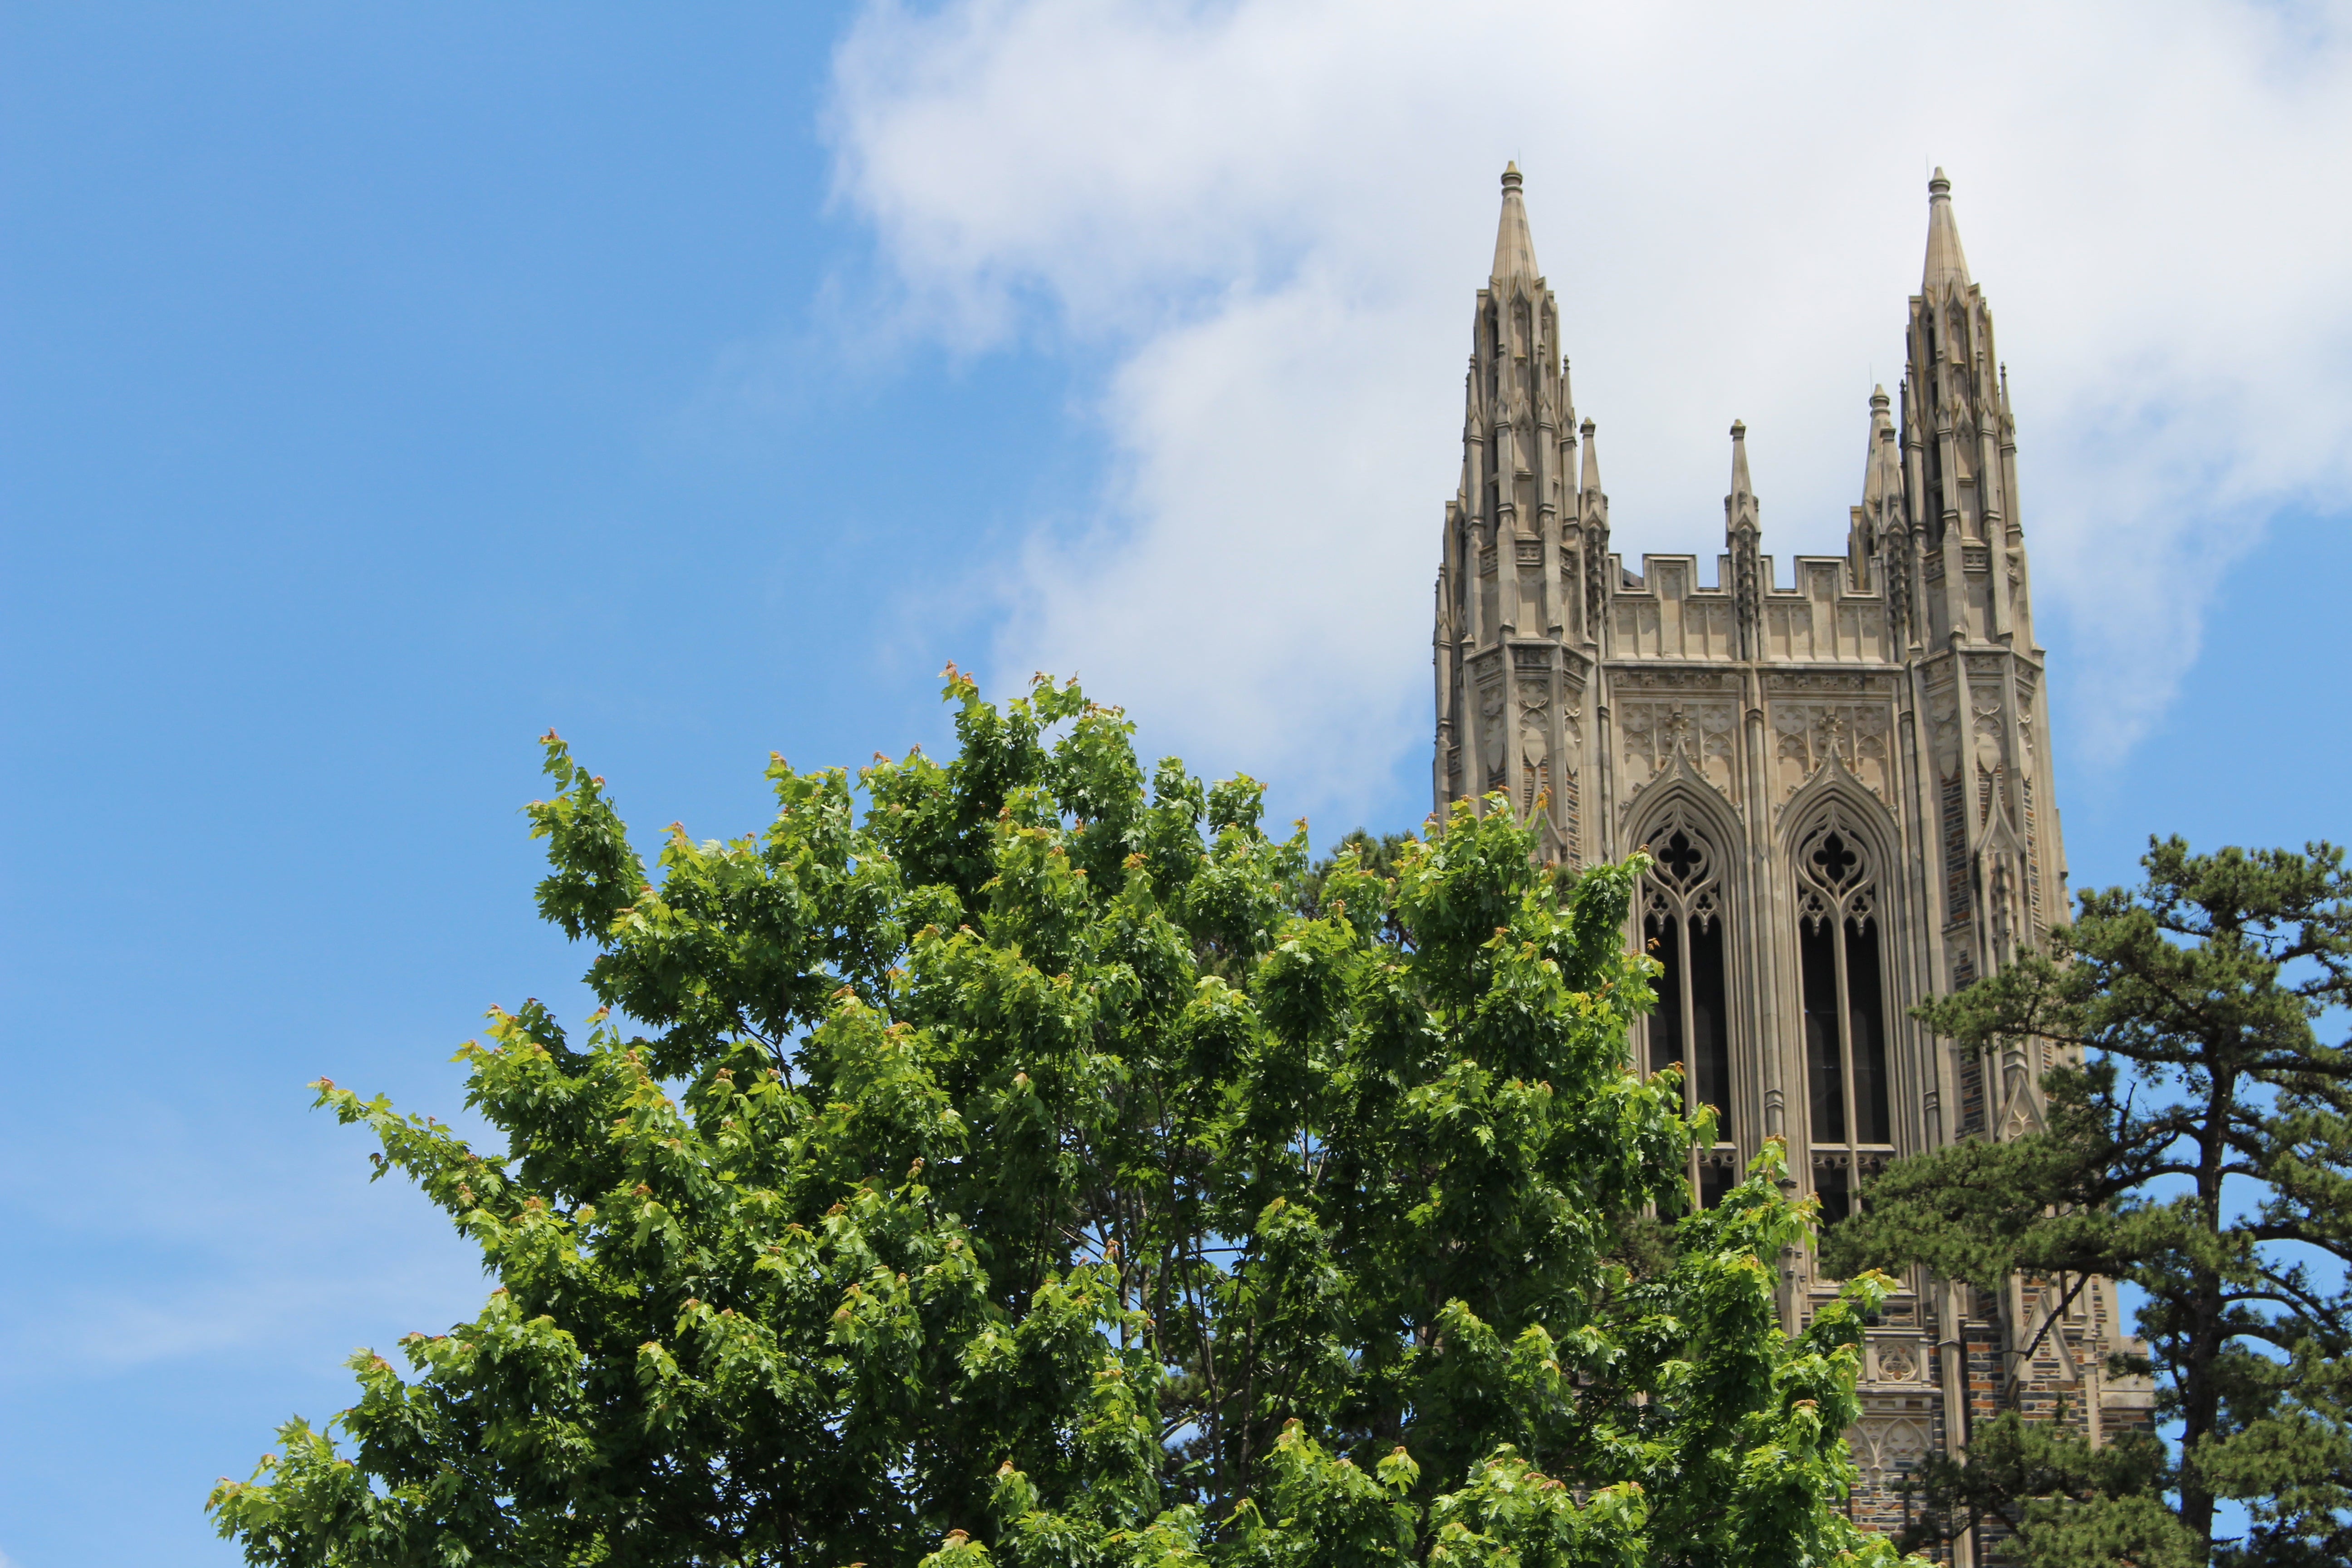
Leading lines are more subtle - they are included in the photograph and guide the viewers to where you want them to look. If you take a photo of a tall building, the viewer's eyes will naturally be drawn up along the sides (which narrow to a point), emphasizing the height and prominence of the building, such as in the photo above. The sides of the tower draw the reader's eyes up to the top.


The perspective from which you take your photo also matters. Getting down low makes your subject larger than life, important, powerful, and prominent. Looking down on something diminishes the subject. Taking a photo at eye level results in a more personal shot, like you are looking through the photographer's eyes at the subject.
For example, the photo to the left shows a view looking down at the castle. This shows it as a quaint little planter, a small little trinket you might put on your desk. The middle photo shows the castle head on, showing a more personal outlook. The photo on the right shows the castle from lower down, transforming it from a planter into a huge, towering castle.

Generally speaking, every photo should have some shadows and some highlights. Otherwise everything ends up looking very bland. The amount of shadows and highlights you have in your photo affects contrast, which is when your subject stands out against the background and the rest of the photo.
In the photo above, not only do the lizard and the tree contrast against the white background, the sharpness of the lizard contrasts with the blur of the tree.

You can tell a lot about something by the space surrounding a subject. It can even define the scene by providing a foundation that the subject builds upon. For example, in the photo to the left the tall tower is surrounded by a beautiful white (or rather, blue) space that shows how much it stands out against the environment it is in.
In the image to the right, the chess pieces have white space above them. This also relates to our rule of contrast - the white background helps the chess pieces stick out.

Framing shows depth and also implies setting, similar to space. in the photo above, it isn't immediately obvious what the scene is of. The small amount of wall to the left shows that this shot was taken inside facing outwards and helps the reader realize that this is a picture of a balcony.

Another way to make your subject stand out is to make it a different color (or more colorful in general) than the rest of the image. In the above photo, see how the photo is filled with dull greens and grays, and the red of the car draws immediate attention to it.
Also notice how, even though it is a lot more subtle, the yellow of the tractor stands out in the background. I did this on purpose. I thought the main car looked very old and vintage, so I wanted to take a photo that would show how out of place it looks by including the tractor.

Texture refers to how the surface of something looks. Examples of various textures include rough, grainy, smooth, etc. Textures help add depth and meaning to a photo. You will often see a lot of texture in black and white photography, for the removal of color forces the viewer to focus on the texture of an image.
In the above photo, there are a lot of different textures. This texture helps transform what would be an ordinary image into a beautiful composition.

Symmetry results in very strong compositions. It occurs when something is mirrored across the center, either left / right or top / bottom. It also breaks the rule of threes, because the subject is generally in the center. However, this is okay - not all of these "rules" have to be followed.

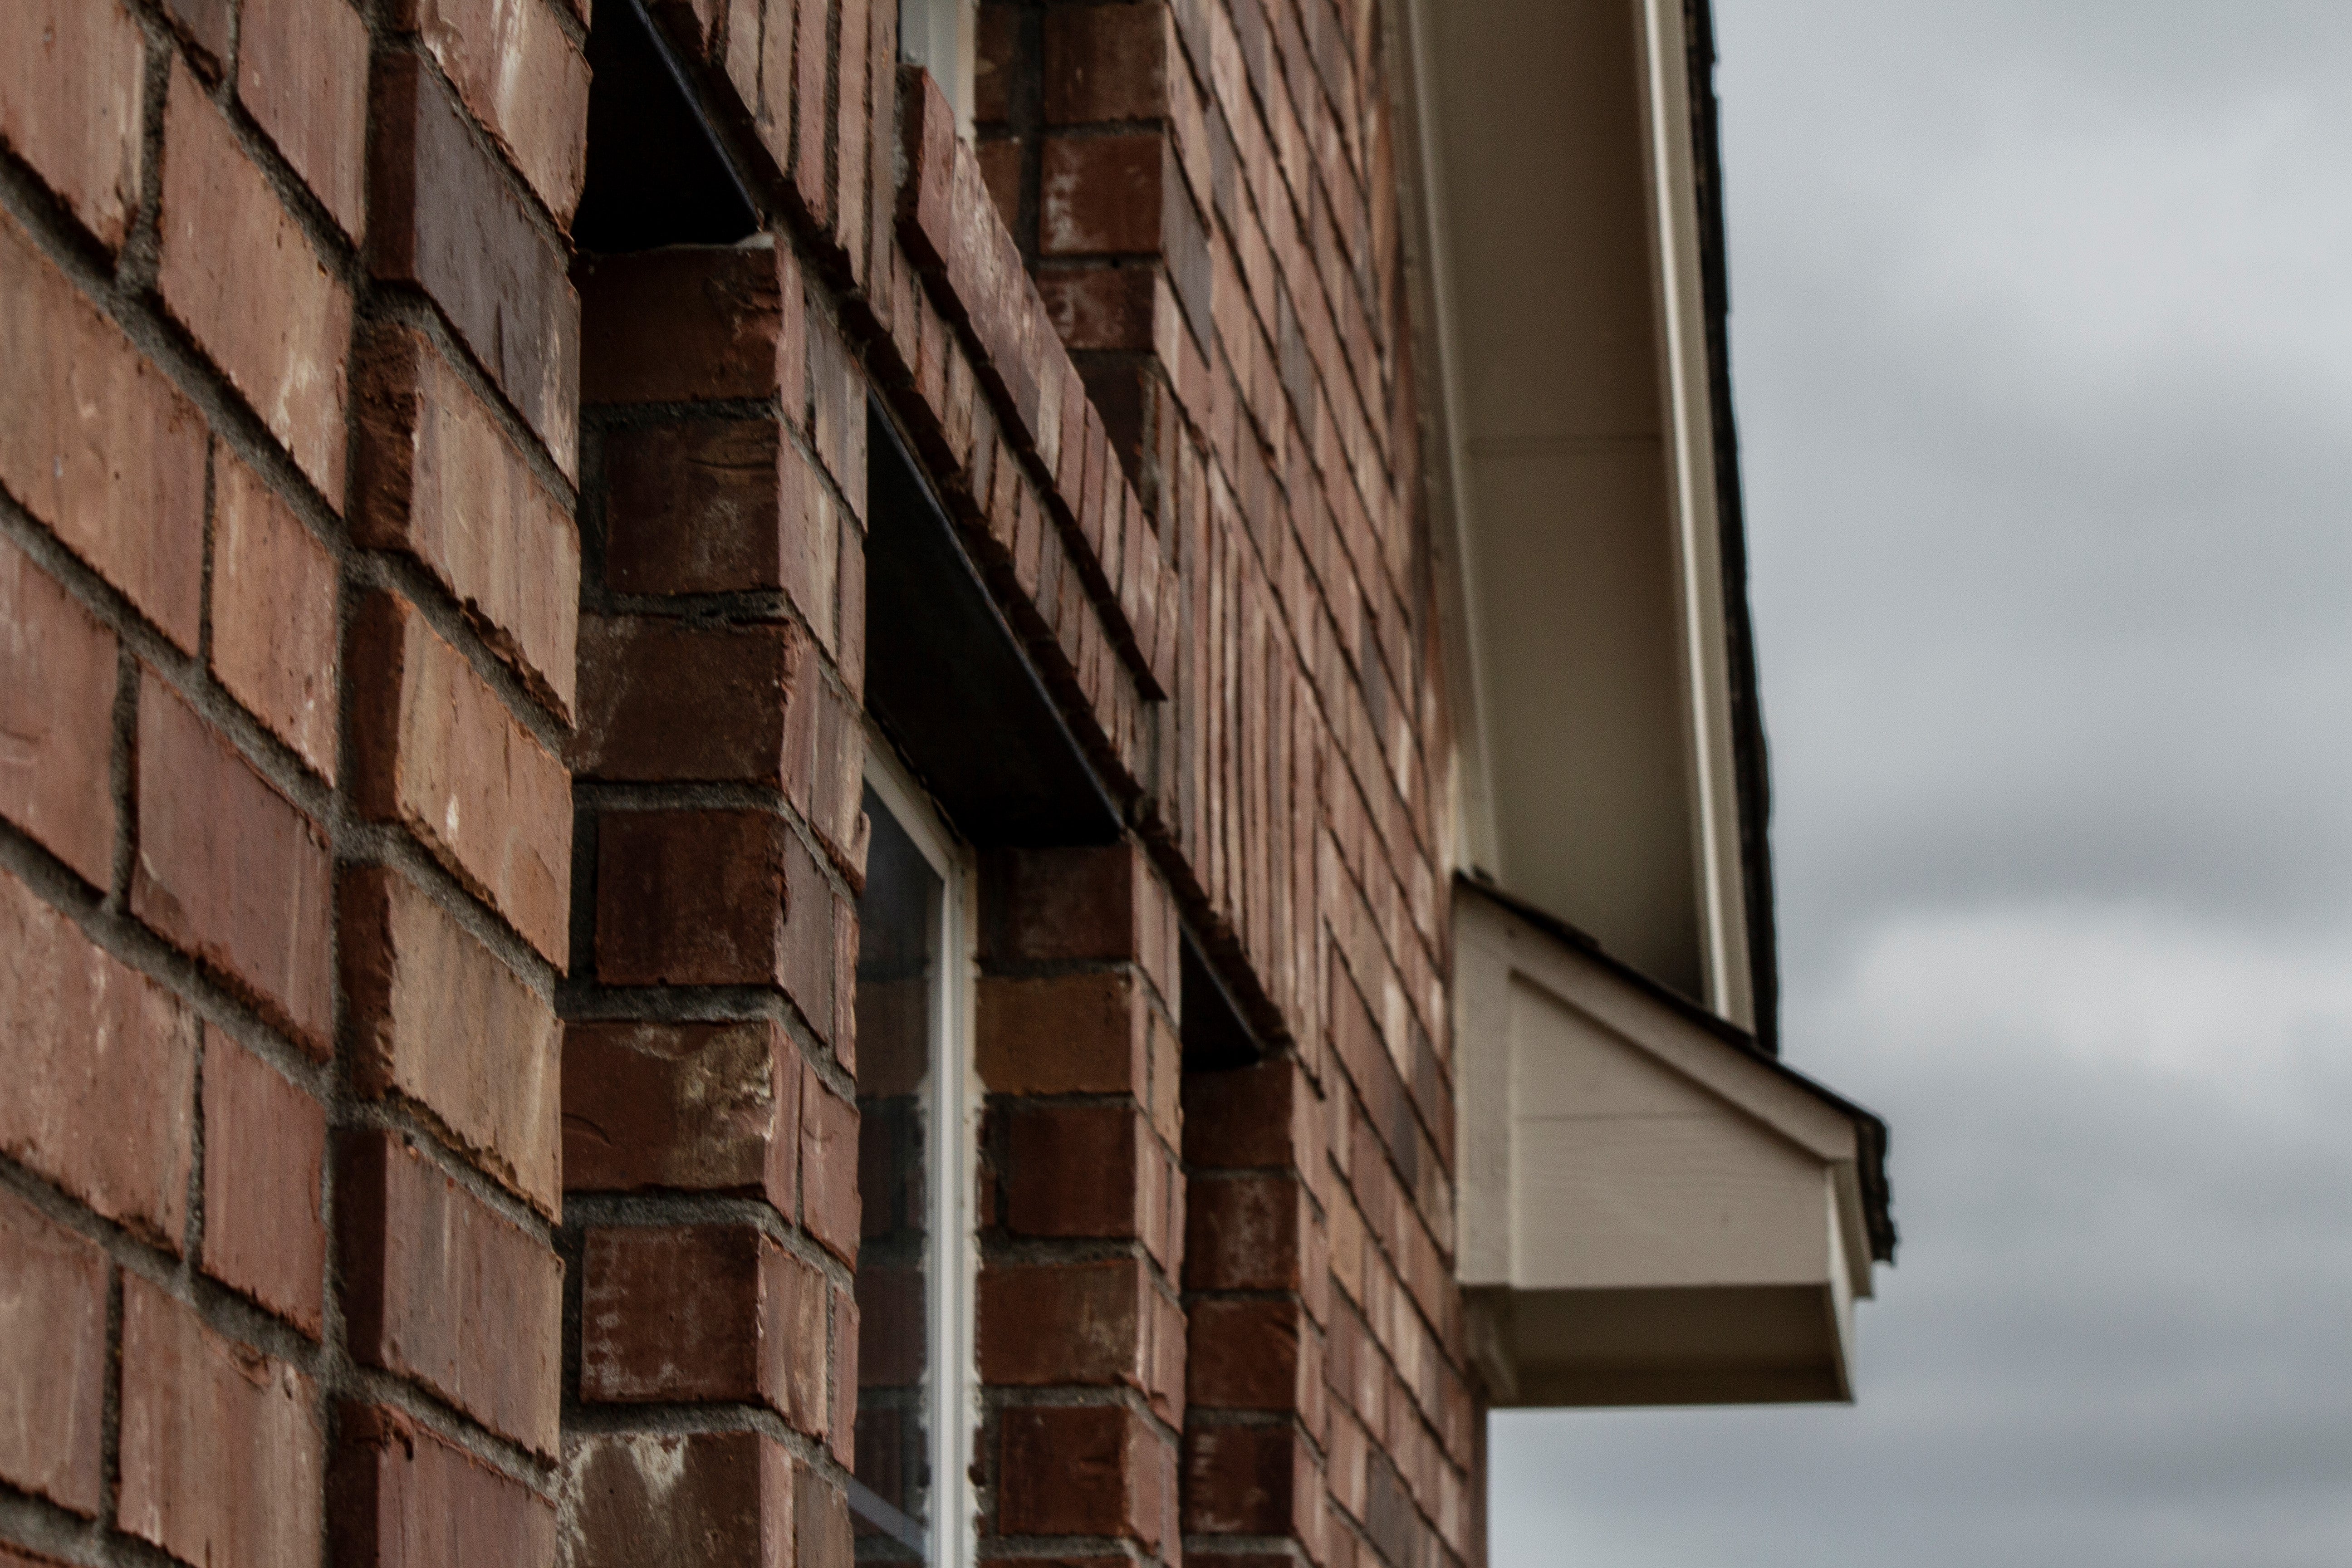
Patterns can add a lot to a photo. Patterns can come in many forms, from repeating elements (such as the wood planks in the photo to the left or the bricks in the photo to the right) to fancy swirls to patterns in nature.
Humans are naturally drawn to things such as symmetry and pattern. You can use this to your advantage by including it, or "break" a pattern to create tension, such as how in the photo to the right the brick pattern is interrupted by windows and the roof.

One mistake a lot of photographers make when starting out is trying to put too much into a photo. Photography isn't just about how many textures or patterns you can cram into a single photo. Sometimes, even the simplest of photos can be eye-catching to your audience.
Post-Processing

.png)

Used with permission from Microsoft. | Adobe product screenshot(s) reprinted with permission from Adobe.
Post processing is something every photographer needs to learn. No, post processing isn't cheating - it simply allows one to gain a firmer control over their photos.
The two big names people always think of when they are editing photos are Adobe® Photoshop® software and Adobe® Lightroom® software. These softwares are incredibly sophisticated and have pretty much every tool you could want when editing photos.
For those who don't want to invest money in a good software, Microsoft Photos software is a surprisingly advanced photo editing software for Windows. It has all of the necessary tools to turn good photos into great ones without the learning curve or cost of other applications.

Used with permission from Microsoft.
Cropping is probably the most used form of post processing. It is something everyone with a computer knows how to do. It is used mainly to cut out extraneous details and change the subject of the image when necessary

Used with permission from Microsoft.
Straightening can be used when you accidentally took a photo at a slight angle and want to correct it in post-processing. You can rotate a photo and crop it to make it a rectangle again very easily - Microsoft Photos software will automatically do this using the straighten tool.

You can also of course make slight changes to exposure, white balance, highlights, shadows, contrast, and other brightness related issues after taking a photo. A lot of photographers will take photos normally and then mess with the exposure later so they gain more control over the process.
I generally increase brightness and mess with shadows / highlights so they look closer to what the scene looks like in real life. I also try to leave contrast alone, so the image doesn't look overly dark or overly light.

Saturation is how much the colors of a photo pop. I almost never like to increase saturation, as resulting images look like a hot rainbow mess. People will be able to tell if your photo is unrealistic, so be careful! You might even want to consider reducing saturation to set a mood. When you take out all of the colors from a photo for black and white photography, the audience pays more attention to texture, mood, contrast, and other important elements. Use Photoshop and other specialized programs to control how your image is converted to black and white - high contrast, silvery grays, etc.

Temperature relates to how warm or cold something looks - a room with cold, whitewashed walls will look more intimidating than a warm, luxurious room that invites you to unload your troubles around a fireplace. This helps set the mood of your scene.
Temperature is also related to white balance. White balance refers to trying to get your photos to look as natural as possible by adjusting how the camera processes the image in different lighting conditions - certain environments take on a bluish tone, and others take on a orangish tone, so the camera learns to compensate. While temperature can help with abstract shots, realism requires the strictest adherence to reality. You can tweak temperature in post processing to help achieve white balance if you don't do so upfront.


Sepia is a form of monochromatic photography. Similarly to how black and white photography only uses shades of gray, sepia only uses shades of brown. The difference is that black and white looks like something from the past, whereas sepia looks like it was taken in the past. I generally convert to sepia by first converting to black and white, and then converting to sepia, as seen above.


Vignettes used to be a problem with cameras, where the center of the sensor received more light than the edges. After a while, this started being considered an effect rather than a problem, and now many people add vignettes to their photos in post-processing. The photo to the left doesn't have a vignette, and the photo to the right does. The purpose of a vignette is to draw the reader into the photo, as subtly shown above.


You can also apply a white vignette to give your photos a more dreamy look, or to add a unique element to your image. The photo to the left looks much harsher than the photo to the right, which has a white vignette.
Don't go overboard with vignettes, but a light one can go a long way to improving your photos.


You can apply a surrounding blur for similar purposes as a vignette - blur helps draw people towards the subject.
The purpose of selective blur is that you can take crystal clear images and add blur in later.The idea is that if your initial image is blurred, you can only sharpen it up to a point, but if it is very sharp throughout, you can blur it in post processing as much (or as little) as you want.
I generally try to simply use wider apertures to get blur instead, since it generally looks more realistic. However, this might not be possible depending on the camera you have.
Notice how in the image to the left, the tree is very sharp. This is a problem - a viewer will naturally start moving their eyes left because of the blurred background to the right, and we don't want them to skip over the butterflies. In the photo to the right, the tree is slightly blurred, so the viewer knows exactly where to look.


Raw files are necessary for good photography. What normally happens is the camera you own processes the information it receives from the sensors and exports them as a JPEG. But if you export as a RAW file, the camera will store all of the data it receives.
You can then use software to process these RAW files. The above photo to the left is the original file, and the above photo to the right is the edited file. Just to show you how powerful RAW is, I changed the color of the leaves from green to yellowish-orange. I was able to lighten most of the branches to show texture, which would normally be very hard if I had saved it as a JPEG.
Adobe® Photoshop® software offers my favorite selection of RAW processing. It lets you do pretty much all of the other post-processing techniques discussed above almost instantly, with no learning curve.
Reviewing Your Photos

Up until this point, the information I've given you is about how to take the perfect photo, taking into account gear, timing, lighting conditions, composition rules, etc. This is rarely possible in real life, so every photographer worth their salt has to at least be able to sort out the bad photos from the good ones. Luckily for you, most of this stuff is pretty easy and builds on the previous information.

What are you taking photos for? If you plan on printing out your photos, they need to be of very high quality and technically perfect, as any blemishes will be enlarged. This is especially true if you want to print your photos on a canvas - Prints should have at least 300 ppi (pixels per inch) in order to be of high enough quality.
If you are using your photos for the web, you can get away with lower quality photos, since web is only 72 ppi.
This is important because it means a photo on your blog doesn't have to be as high quality as a photo you would put on your mantelpiece. This should in turn affect how picky you are with yourself when narrowing down your photos. Sure, you can sharpen your images in post-processing, but often this sharpening won't hold up once you print it.
Another thing you need to keep in mind is what kind of photography you are taking. Landscape photography, for example, needs to


Instantly discard any photos which are very blurry or very grainy. I often take a good mix of shots, so usually when I do have a blurry photo, I also have another that isn't. If you only have a couple of photos that didn't turn out too well, I would recommend not using them at all. For example, the photo to the left is pretty much useless because of how heavily it is blurred.
Take out any photos which have bad exposure to an extent that they are not able to be fixed. Often photos which are way too dark or way too bright can't be fixed, simply because they don't have enough contrast to make a photo or because if you brighten them or darken, them they will have grain. The photo in the middle doesn't have that bad exposure, but because of the combination of light and dark background, it would take longer than just retaking the photo.
Eliminate any photos which don't adequately show the subject. This means that if the subject is really far away or so close you can't see it well, the photo likely won't turn out well. Note that this has varying meanings depending on your purpose - macro photos should be really close up, while city skyline photos should be really far away. For example, the photo to the right is a perfectly fine photo, but it is a little too far away to really show off the building.


Often the "best" photo simply comes down to selecting the one which was closest to your vision. A dark, moody photo won't look good as a cover image for your Instructable. A beautiful landscape would look perfect on the cover of a magazine. A photo that is bright and cheery, rather like a stock photo, would do just fine on a blog.
I also look at which photos that purposely follow or break the rules of composition. This means that you didn't just stumble upon it by accident. Maybe you intended to break the rule of symmetry to create tension, or you used color to make your subject stand out. Whatever the case, you didn't take a photo your way because it was the easiest way; you did it to convey meaning and purpose.

It's time to enjoy your hard work. Now that you have great photos, you can use them. Here are some of the fun things you can do with your photos:
1) Print them out - You can print photos for a variety of purposes. You can make a photo album to store all of your good memories. You can print a photo out on a large canvas and hang it somewhere. You could even put your photo on a greeting card and send it to your friends.
2) Use them on the web - This is the easiest and most common way of using photos. For example, I used a lot of photos as demonstration in this Instructable. You could also put your photos on your own website or blog if you have one. A lot of photographers get well-known simply by frequently posting photos on social media.
3) Sell them - This one might seem a bit cheap at first - photography should be a passion, not a business! However, selling your photos can result in extra cash, which you can put to use buying new gear or saving up for a large photography trip. Plus, if people use your photos, it can help spread the word about your talent and looks great on a resume.
The most common ways of selling photos are by selling the license or by selling the rights to use that photo. However, lots of people also sell canvas prints of their photos or sell products with their photos on them (such as t-shirts or hats).
4) Enter contests - This method is a lot of fun. If you don't win, it isn't a big deal, since you didn't lose anything. If you do win, you get accolades, awards, and even money (or other great prizes). The main thing I would be careful of is to make sure that the contest you are entering doesn't require you to give them a license. Often these are scams to help the owners of the contest get lots of free photos.
I would also suggest not paying to enter contests unless you are sure you have an absolutely outstanding photo. Since often only a handful of people actually win, everyone else will end up paying a lot of money and won't see any gain.

I don't delete many of the photos I take. I can almost always find a use for a photo later on, and if I delete it, I can't ever get it back. What I prefer to do is, every so often, move all of my photos from my SD cards to a heavy-duty storage drive. This helps me keep all of my photos in one place, so I don't have to keep track of a million SD cards.
I then move all of the photos I really like and put them in another folder. This way I don't have to comb through thousands of photos just to find one I like, but I don't have to get rid of those thousands of other photos, either.
I also try to keep a copy of every photo before and after post-processing, just in case I ever change my mind about how I've processed it. For example, if I convert a photo to black and white, I won't ever be able to convert it back to color without investing some serious time (and even then it wouldn't turn out that well).
I would also suggest having a backup (or several backups!) of your main storage unit, preferably in different locations. This way you don't lose all of your photos if the drive gets corrupted or destroyed.
What's Next?
.jpg)
.jpg)


So, what to do now? Information about photography is endless, and I've worked incredibly hard to include the things I felt were important for a beginner's guide. It would be pointless to try to cram too much into one Instructable, so instead I'll just leave you with some next steps to take.
1) Research - Some topics I would suggest researching now that you know the basics are more advanced photography techniques (bokeh, HDR, zoom burst, etc.) and photography disciplines (portrait photography, street photography, long exposure photography, etc.) Google should be your best friend in your pursuit of knowledge, as there are thousands of people who have taken the time to share their photography knowledge with the world.
2) Discover - Take a look at other people's photographs. Don't feel like you have to reinvent the wheel every time you take a photo - learn from other people's successes and failures and use it to improve your own photography. Eventually you will start to develop your own style.
3) Practice - One of the most important things about starting photography is to just get out there and do it. As said by Henri Cartier-Bresson, "Your first 10,000 photographs are your worst." If you finished reading this Instructable, go out today, take a photograph of something using your newfound photography skills (no matter how good or bad it might be), and post it as an "I made it!".
I generally name the last step of my Instructables "Finish", but photography isn't something you can ever truly finish. Instead, I hope I have encouraged some of you to start your career in photography or at least taught you something about it.
I took all of the photos in this Instructable with my DSLR or my smartphone. I also designed all of the graphics solely for the purpose of using them in this Instructable. As such, I greatly appreciate you taking the time to read this.