Start Your First Project With Raspberry : Blinking LED
by Smart Technology in Circuits > Raspberry Pi
1281 Views, 10 Favorites, 0 Comments
Start Your First Project With Raspberry : Blinking LED

In this project I am going to show you how to program Raspberry Pi to make an LED blink,If you have nearly bought a Raspberry pi and you don't know anything where to start,this tutorial it fits in.
In addition to your Raspberry Pi running Raspbian, you will need :
1. 330 Ohms resistor
2. LED
3. Breadboard
4. Some wires
Install Operating System in Pi

You can skip this step if you have installed the OS already in the Pi.If yes then go to step 2 or else look the complete OS installing instructions in this link that I uploaded.
https://www.instructables.com/id/Build-Your-Own-PC-With-Raspberry/
Schematic of the Circuit
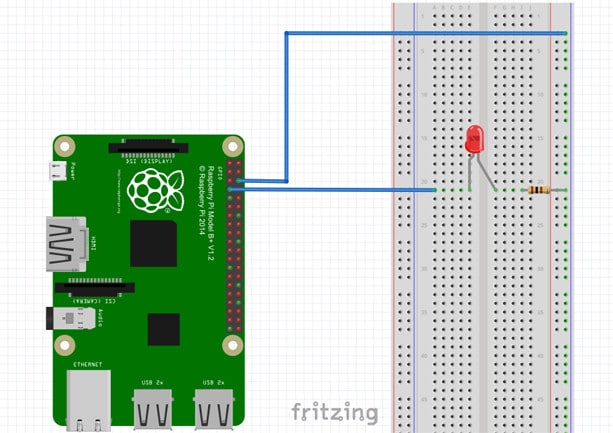

Kindly follow the steps bellow :
1. Connect a 220Ω resistor to the anode of the LED,then the resistor to 5 V.
2. Connect the cathode of the LED to GPIO (See the picture above).
Watch the Video for More Details

Python Code
You are now ready to write some code to switch the LED on.
NOTE : All following steps are explained in the video.
1. Turn on your Pi and Create a new text file “BLINK.py” .
=====================================================================================
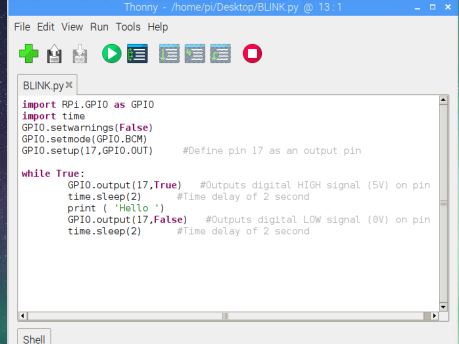
2. Type in the following code:
import RPi.GPIO as GPIO
import time
GPIO.setwarnings(False)
GPIO.setmode(GPIO.BCM)
GPIO.setup(17,GPIO.OUT) #Define pin 17 as an output pin
while True:
GPIO.output(17,True) #Outputs digital HIGH signal (5V) on pin 3
time.sleep(2) #Time delay of 2 second
print( ' Hello ' ) #Print when the LED turn ON
GPIO.output(17,False) #Outputs digital LOW signal (0V) on pin 3
time.sleep(2) #Time delay of 2 second
=====================================================================================
3. Once you have typed all the code checked save it.
=====================================================================================
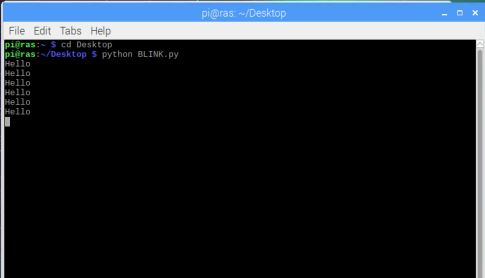
4. Run the python code by typing the following code in the terminal:
- cd Desktop and press Enter( I type Desktop because I have saved the file in the pi's Desktop).
- python BLINK.py and press Enter.
=====================================================================================
You will see the LED turn on for two seconds and then turn off for two seconds too.
I hope you enjoy with this project.