Star Trails Photography and Night Sky Time Lapse
by jmandell42 in Circuits > Cameras
132819 Views, 703 Favorites, 0 Comments
Star Trails Photography and Night Sky Time Lapse
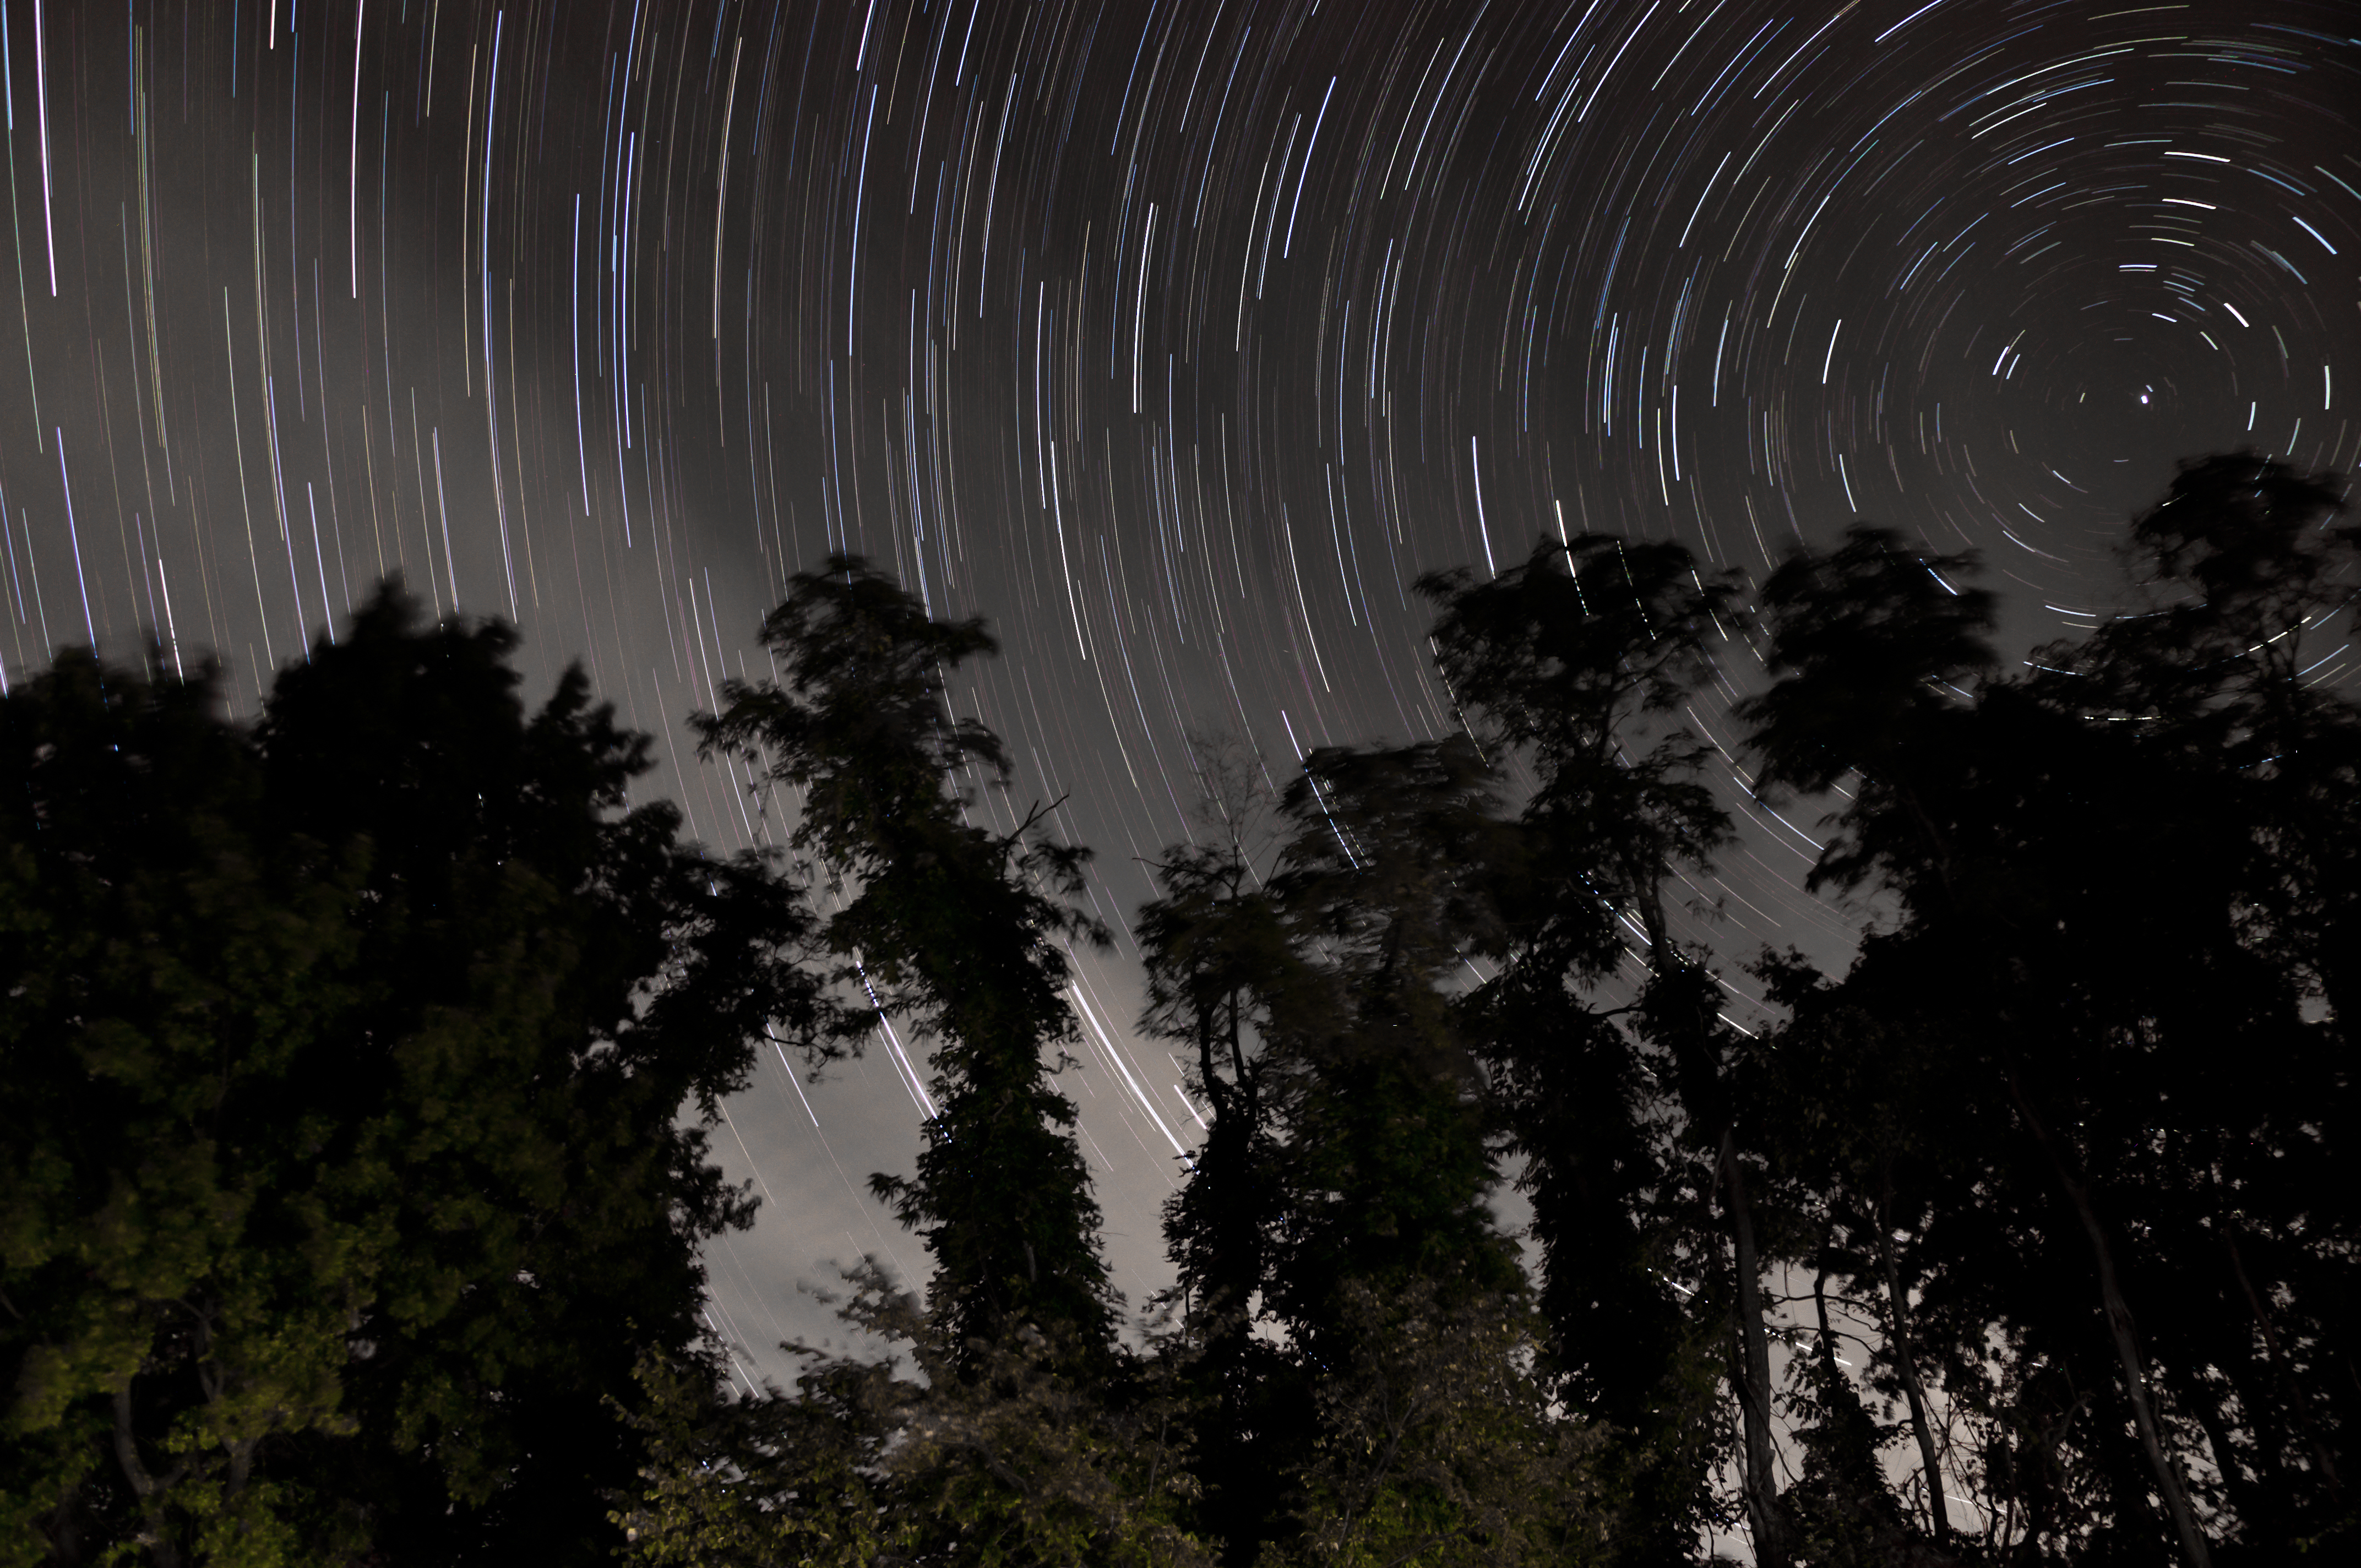
Two of my favorite hobbies are photography and astronomy, and it only gets better when the two are combined. I've had a few people ask for a tutorial on how I do my star trail and time lapse, so here it is.
Star trail images show the motion of the stars over a long period of time, making beautiful arcs. Back in the film ages the method for making these images was to open the shutter and let it go for hours, but that method doesn't work too well with digital cameras. When the shutter is left open for a long time on digital cameras all kinds of thermal noise, exposure issues, etc. can arise. The best method with digital is the take a series of short (~20-30 seconds) exposures then stack them in specialized software to make the arcs.
This method is also the general idea behind the creation of astro time lapses. Instead of stacking the images one atop each other, as seen in the making of star trails, the images are displayed one after another to make a movie of the stars moving. Below is an example:
StarLapse from jmandell42 on Vimeo.
My preferred software for making star trails and time lapses is the free Startrails application - http://www.startrails.de/html/software.html. I find this program to be the most user friendly and easiest way of making high quality star trails / time lapses. It will be this application that I will use in this tutorial.
Most of the techniques apply to both projects (setup, composition, technical details), and I will cover those first. After those I will address some of the nuances to be aware of for each project.
Materials
There are just a few things you need to get started with shooting star trails and time lapse, most of which you probably have sitting around at home:
A DSLR Camera
A Stable Tripod for your camera to sit on. It needs to be able to keep the camera perfectly still for long periods of time.
A cable intervalometer - used to set the exposure length and interval of the images. This is probably the one thing you don't have, but they can be found cheap on the web. Not necessarily needed if your camera has one built in, but I still prefer to have a remote.
A computer - used to process the images.
A program to stack the images - I like to use the Startrails application for making the images. http://www.startrails.de/html/software.html This can also be done in Photoshop, but in my opinion, Startrails is easier.
A program to make the time lapse - There are numerous, but Startrails does time lapse as well, so it is my one-stop-shop to make star trails and time lapse
The setup for this is fairly simple - All you have to do is attach (or setup the in-camera) intervalometer, setup the tripod and camera, then point it at the part of the sky you want to shoot.
You may ask "What part of the sky do I want to shoot?", well the next step is for you.
Composition
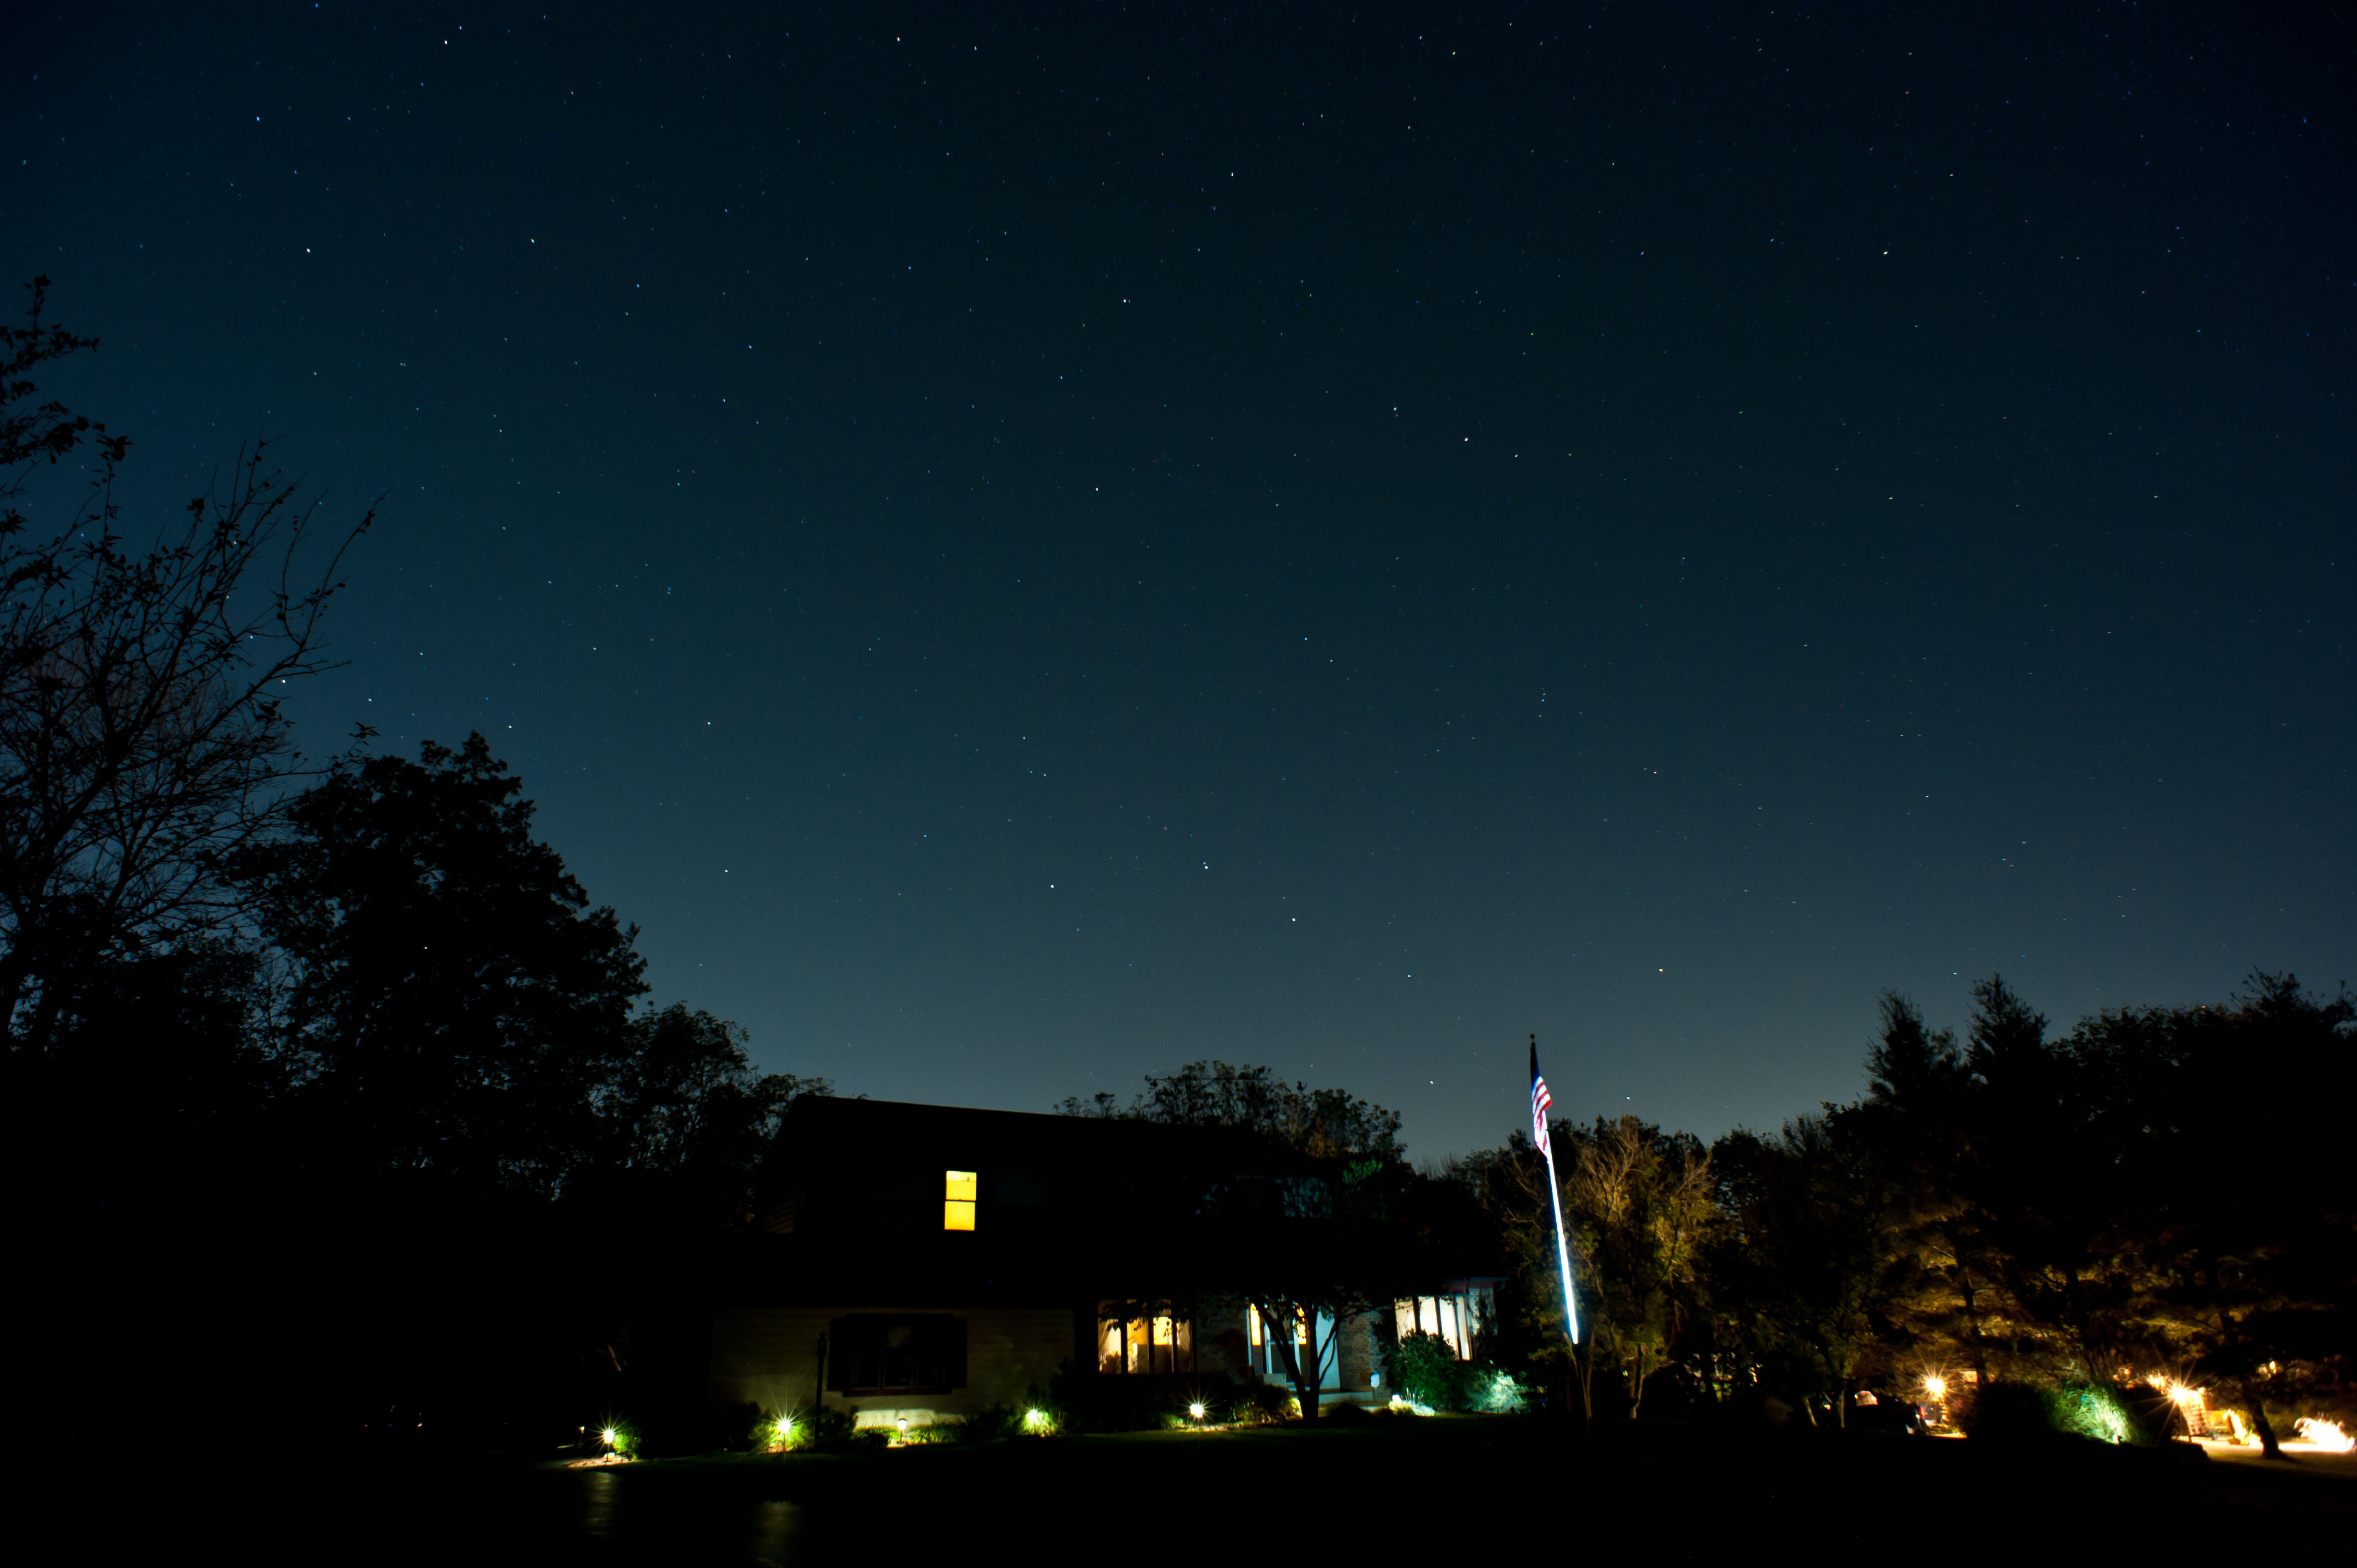
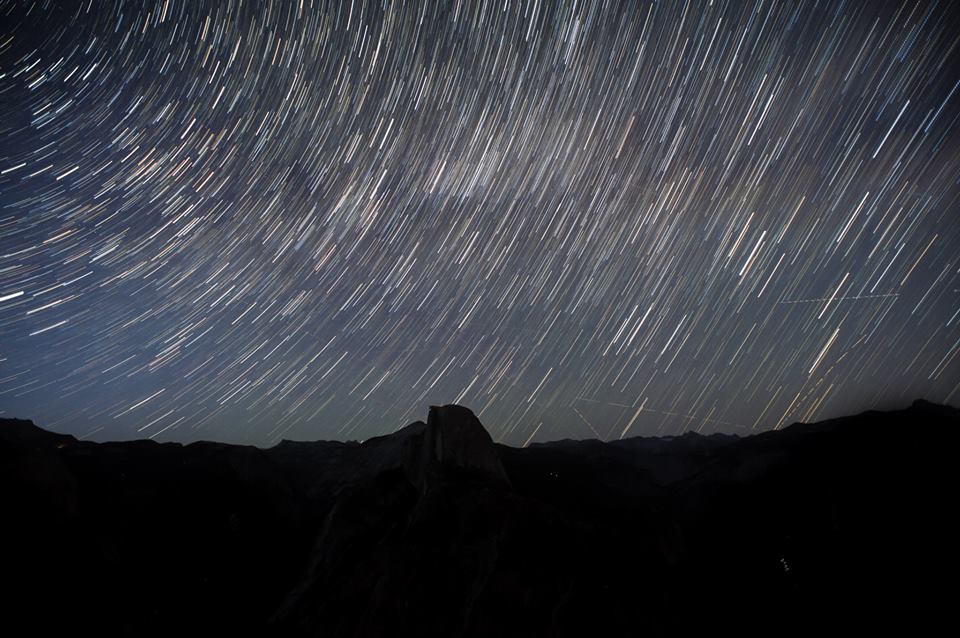
One of the most important things to consider is the composition of the shot. You can have a technically perfect shot, but it won't be any good if the composition is not interesting. Overall composition is important for all photography, but there is another aspect to night photography.
Just a few tips on General Composition:
1. Make sure there are interesting aspects in the foreground. You could just shot straight up, but having an interesting foreground makes for a more powerful and compelling image.
2. While you need to make sure there are interesting objects in the foreground, make sure that there is plenty of sky visible. You are shooting the stars after all!
Considerations about the sky itself:
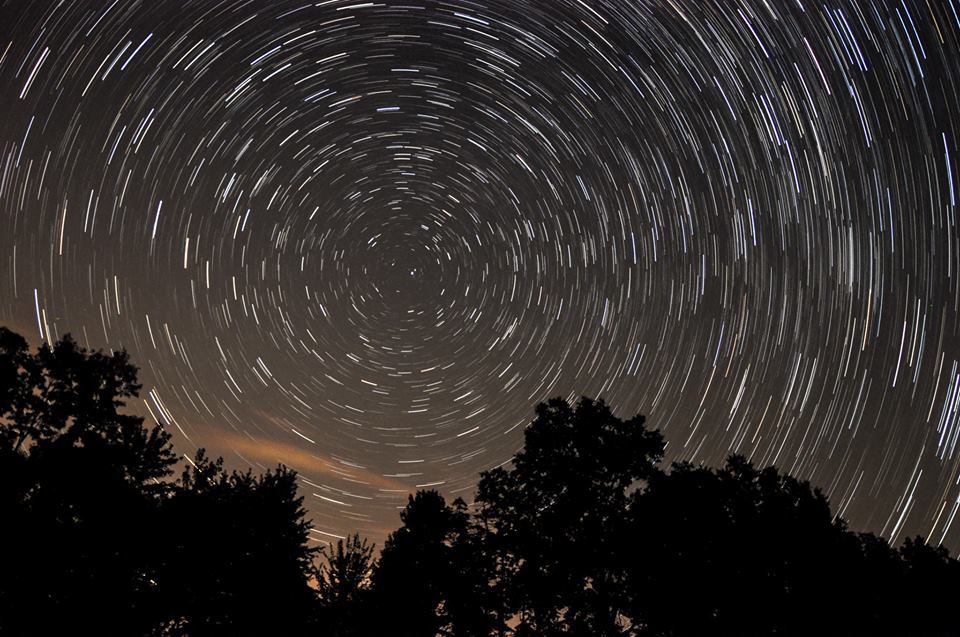
1. Know which direction you are shooting, as it will help you figure out what the final result will look like. If you shoot towards the poles you will get the classic circular trails. If shooting East or West then you can get the cool effect of having areas where the stars are going straight, curving up, and curving down.
2. Watch out for clouds if doing star trails. They leave nasty streaks in the final images, but clouds can add a really nice extra element to time lapses.
3. The Milky Way! There is nothing better when shooting a time lapse than to have the Milky Way making its nightly journey across the sky.
4. Light Pollution can ruin shots by limiting exposure time, casting orange hues on objects and the sky, LP can destroy detail in the stars and especially the Milky Way.
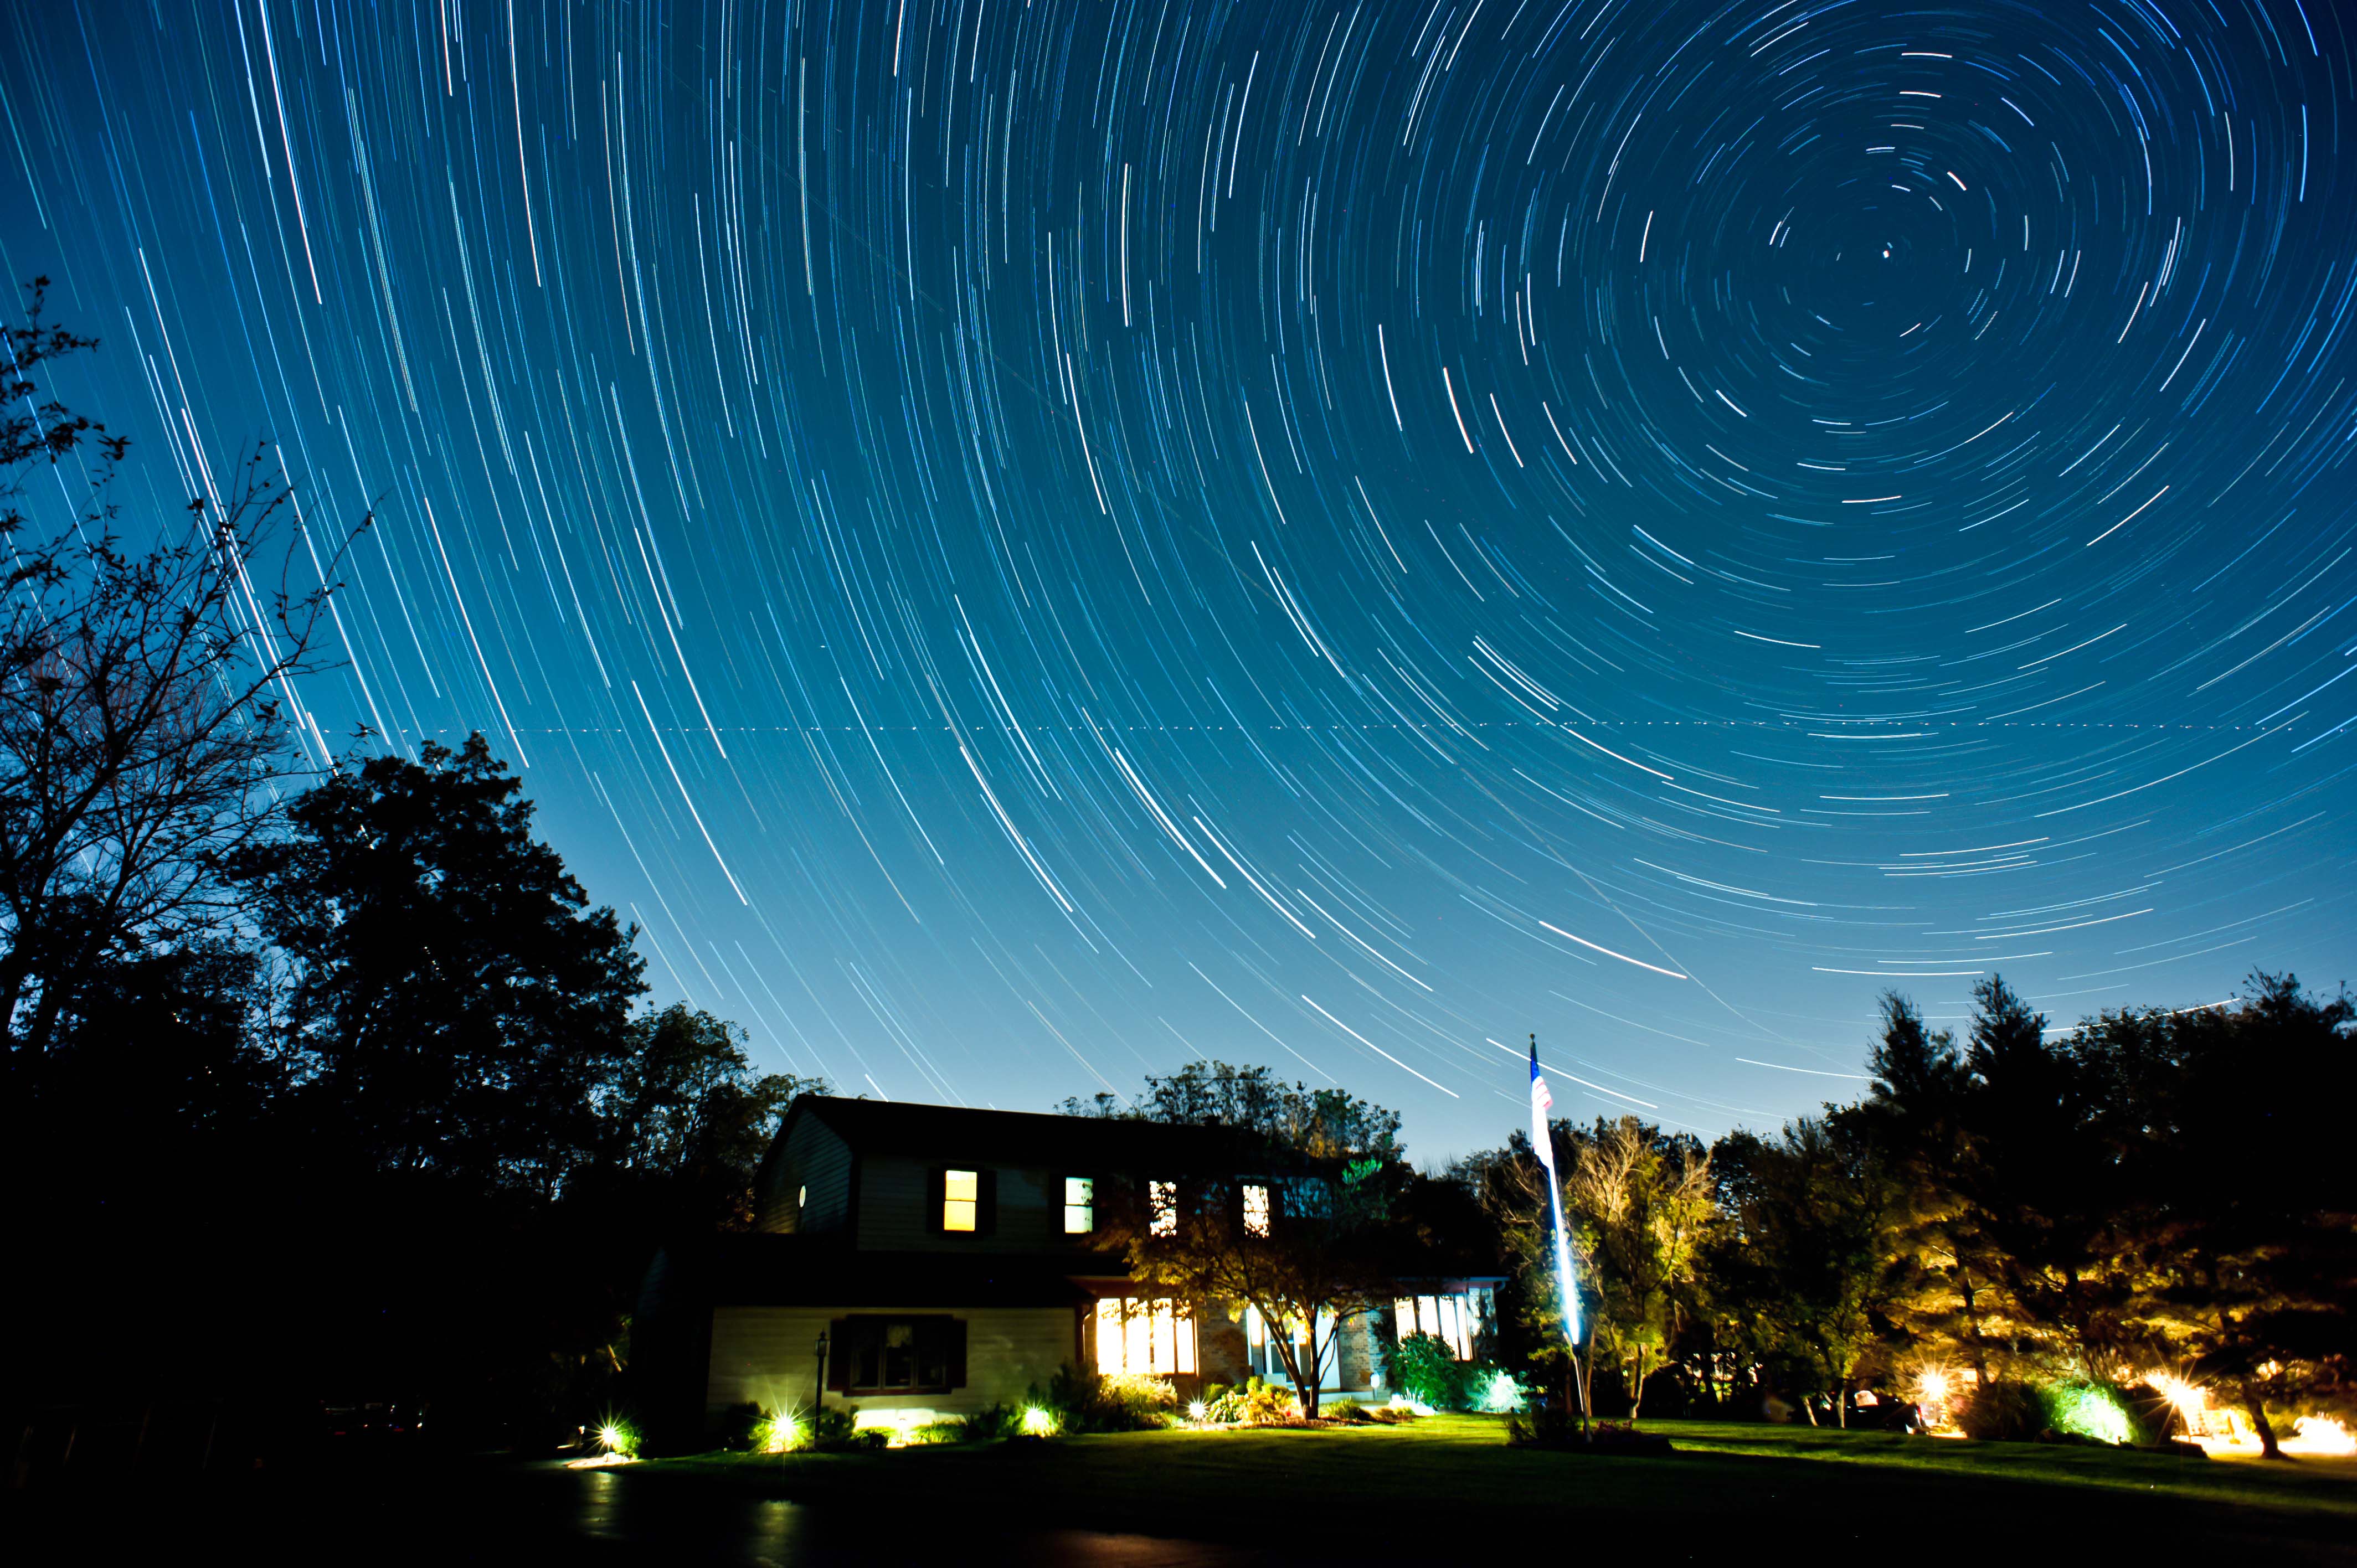
In the image above I chose to shoot over our house looking towards the relatively non-light polluted North, which will show the circular pattern.
In the second image looking East over Half-Dome in Yosemite shows the stars going in opposite directions.
Camera Settings
Another of the most important things is the settings of the camera. These are just general suggestions, so experiment to find what works best for your equipment and goals.
- A good rule of thumb to determine the maximum exposure time that you can shoot before there are streaks in the images = divide 600 by the focal length of the lens, so for a 20mm lens 600/20 = 30 second exposure
- I set my camera to BULB mode and use the intervalometer to set my exposure time.
- Don't use the widest aperture of your lens, stop it down a stop or two (My 20mm is a F2.8 and I usually shoot at F5.6). By stopping down you can eliminate distracting light falloff in the corners.
- Start out at ISO800, but change as necessary depending on the sky conditions and your camera's noise levels.
- SHOOT IN RAW! This will give you a lot more power when editing the images later.
Experimentation is the best way to find out the best settings for your gear, so spend a few hours just trying different settings to see what gives the best results.
Shooting the Actual Images
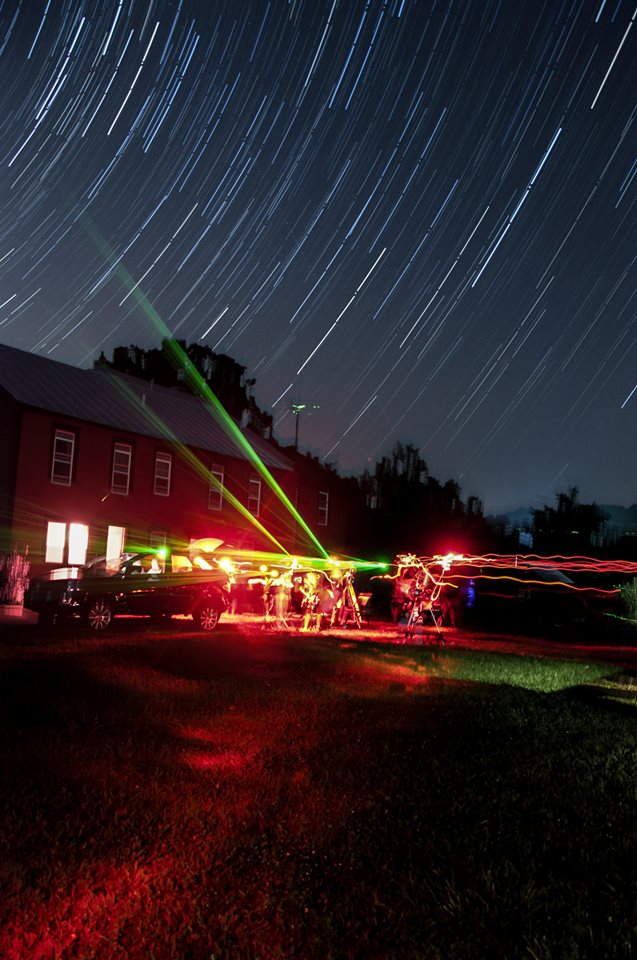
Well, you've got you your camera all setup and pointed at an incredibly compelling composition. Lets actually take some images!
There's not much to it but to start the intervalometer going on its way, sit back, and listen to the periodic clicking of the shutter while gazing upon the stars. All you have to do is have some patience and wait. There a couple of warnings for this step:
- DO NOT, UNDER ANY CIRCUMSTANCE, MOVE THE TRIPOD!!! - This will totally ruin the sequence because when you stack the images the stars will not follow a smooth arc anymore, and that doesn't make for a good photo.
- AS TEMPTING AS IT MAY BE, RESIST THE URGE TO STOP THE SEQUENCE AND CHECK THE PHOTOS! - When you stop taking photos the stars don't stop! They will keep on moving and you don't have an image of that point, and when you stack the images there will be a nasty gap, as seen in the image above
Making the Star Trail
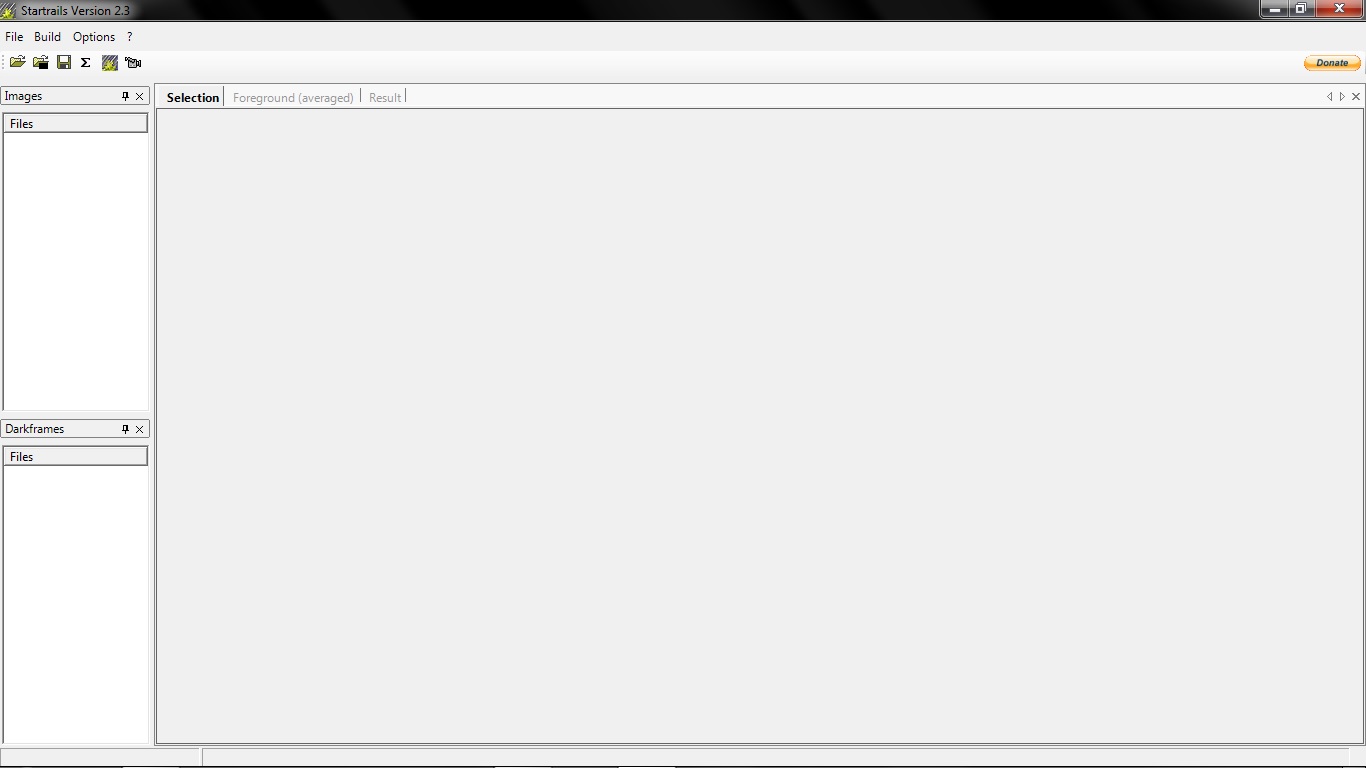
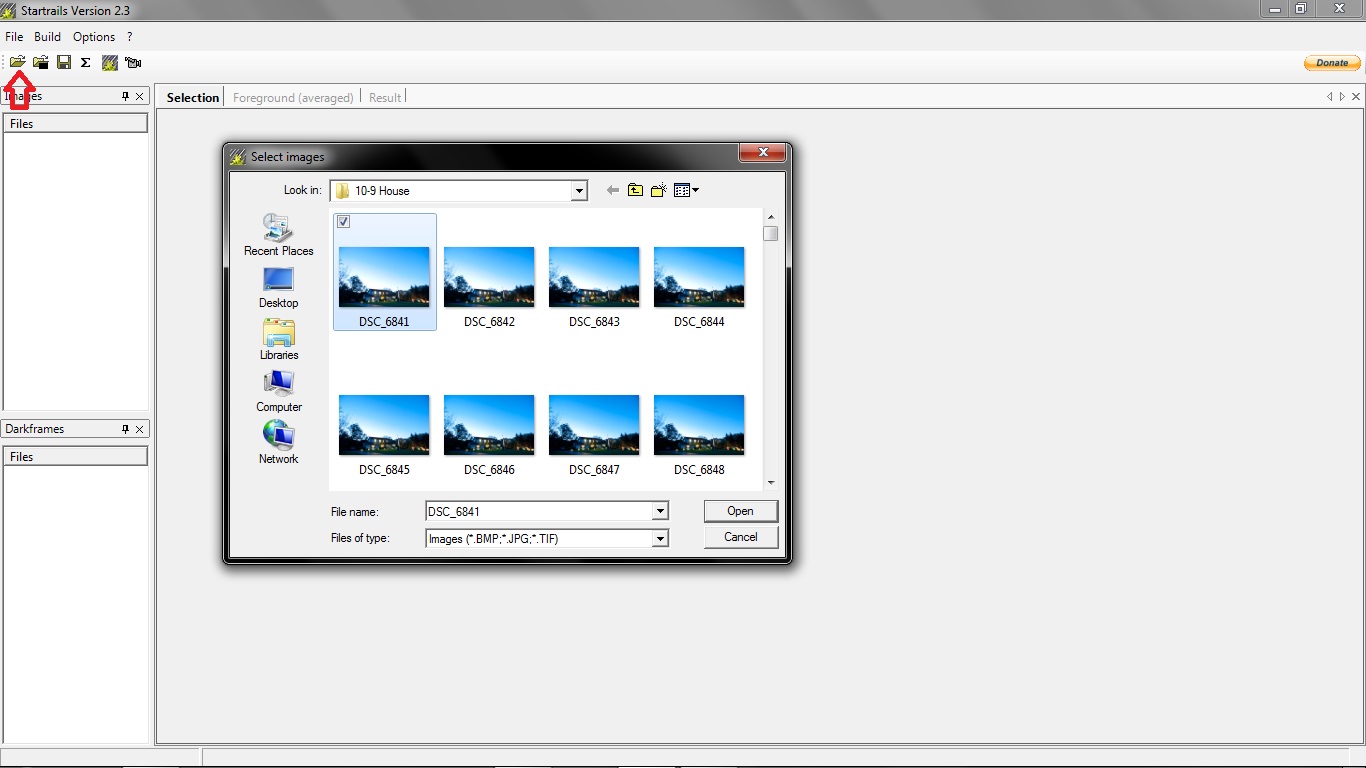
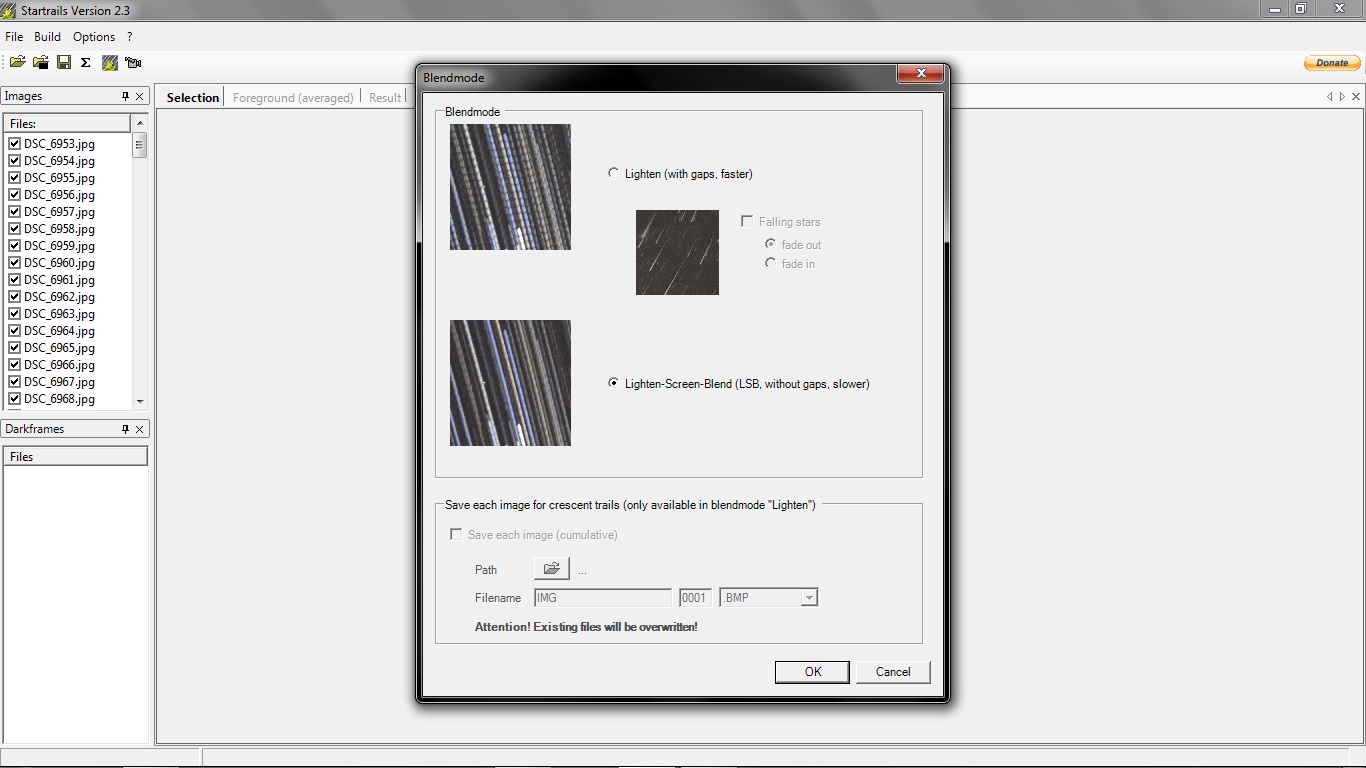
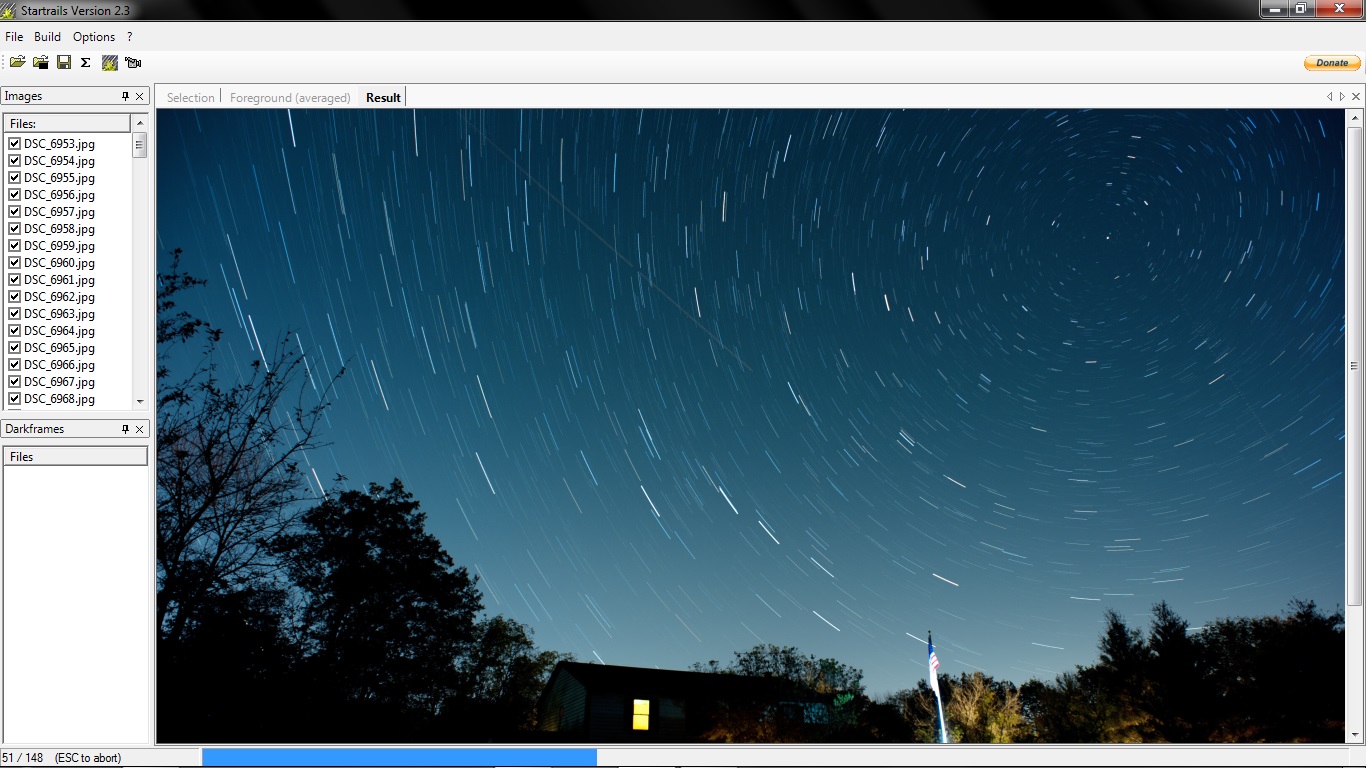
Okay. You have your images! Star Trails only accepts JPG and TIFF files, so I recommend shooting in RAW, doing some batch pre-processing in Lightroom or the editor of choice then exporting the images as JPGs for stacking.
When you open the application you will be greeted by a nice blank screen, as seen in image 1
- Click the 'open' folder and select your images to stack
- Click the 'Build' button, then the 'Star Trails' option, it will bring up a screen with a couple of options. I generally use the default, but experiment with other options. Click 'start'.
- Now the fun begins -- Waiting. The program is now stacking the images into a new image. You can see this live as it goes, as seen in the 4th image.
- After the blue bar is all the way across your final image is done! Go to 'File' "Save" and save your newly created star trail!
- Take this into your editor of choice and do some final touches.
That's it. Your done! That wasn't very hard! Now to time lapse movies!
Making the Time Lapse
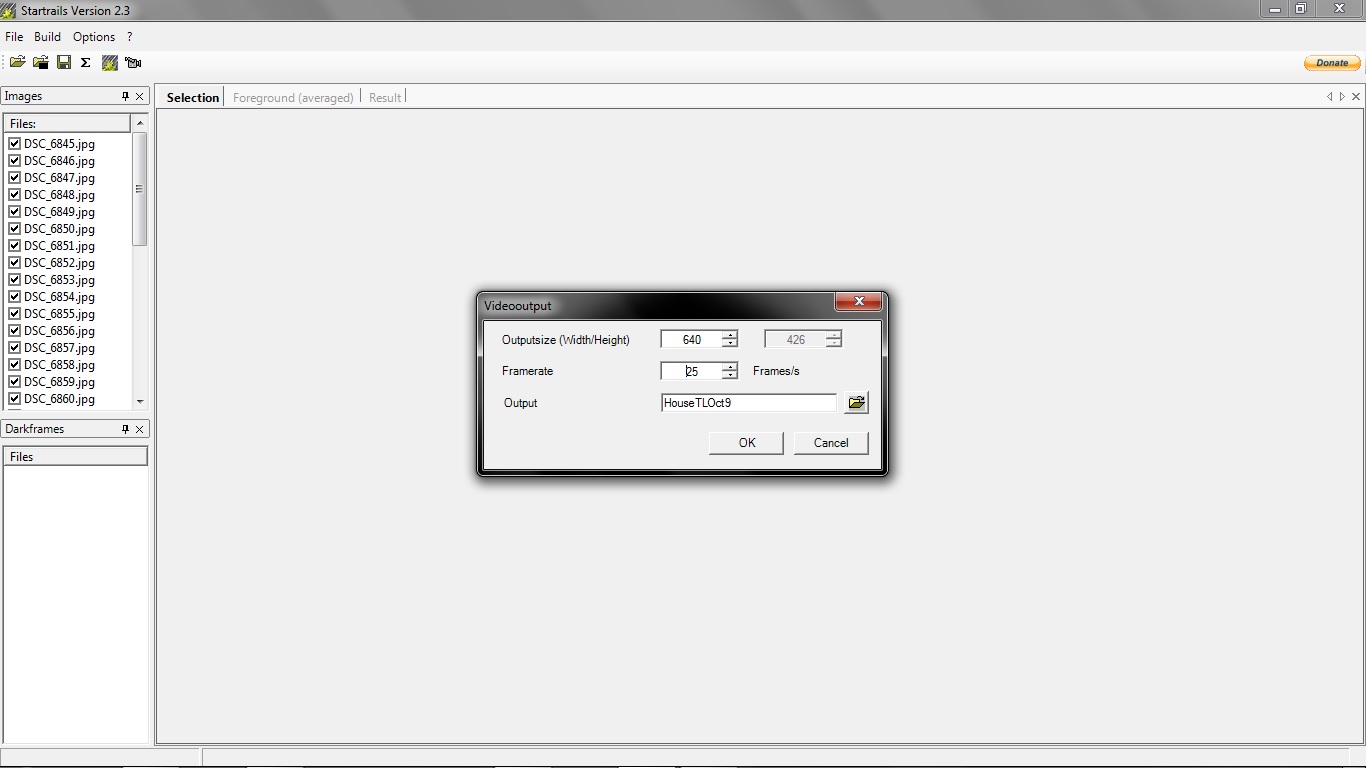
Making a time lapse is very similar to the making of a star trail image.
- The process of opening images is the same as before but instead of clicking Build Star Trail, we're going to click Build Movie
- Next is the kinda strange part of the process. A dialogue box opens prompting you to input the name, resolution you want the final movie to be, and what frame rate to use. Enter your desired parameters and click Okay.
- Unlike the star trail, you can't see the movie being made live, just a little process bar. After it is done It will say "Movie File ___ Created"
That's all for time lapse. Now you can view your masterpiece!
Conclusion


I hope this tutorial has given you the knowledge necessary to begin work with the amazingly beautiful and surprisingly easy projects of time lapse and star trail imaging. There are many more avenues of this type of photography that you can go down, and I hope this has given you the skills necessary to go further. If you try this out I would love to see your results! Feel free to leave questions in the comments and I will try to answer them.