Star Map Dresser
.JPG)
Have you heard of Star MAPS?
A Star Map is a Map of the night sky! Mapping of the night sky is old, like over 30,000 years old. The fantastic thing about star mapping in the present is that you can easily get one downloaded and printed in a matter of minutes. There is no need to carve it into a Mammoth tusk or paint it on a cave wall, although that does sound pretty fun.
Now the really cool part is that you can get a Star Map of an exact time and date, maybe to celebrate something special, an Anniversary, Birth, Wedding, First Kiss, etc.... the list goes on. I decided to make a Star Map dresser for my son with a Star Map depicting the night sky on the night he was born. It was a "traumatic" birth night, or scary at the time, I was rushed into an emergency cesarean since they thought I was suffering from Preeclampsia and the babies heart beat was slowing down. They rushed me in 5 minutes to midnight and my son Nik was born 5 minutes after midnight, just a mere 10 minutes to knock me out, cut me open and drag him out! Sadly a couple of hours later after getting to only hold him once he was rushed off to a larger hospital for some health issues, but he is fine now, in fact he is 13 and almost 6 feet tall!!!
Enough of that crazy birth story, let's get back to making a Star Map Dresser!
Finding and Downloading
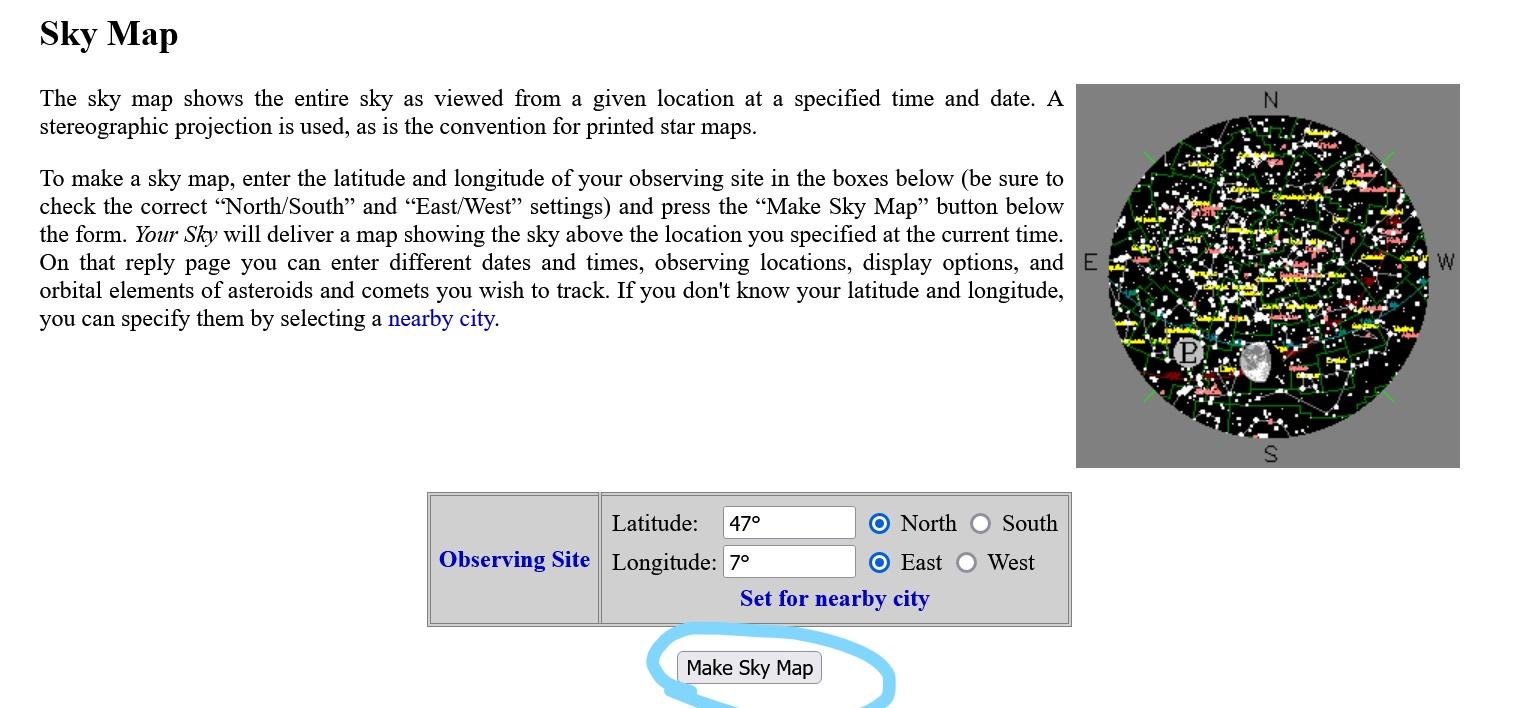

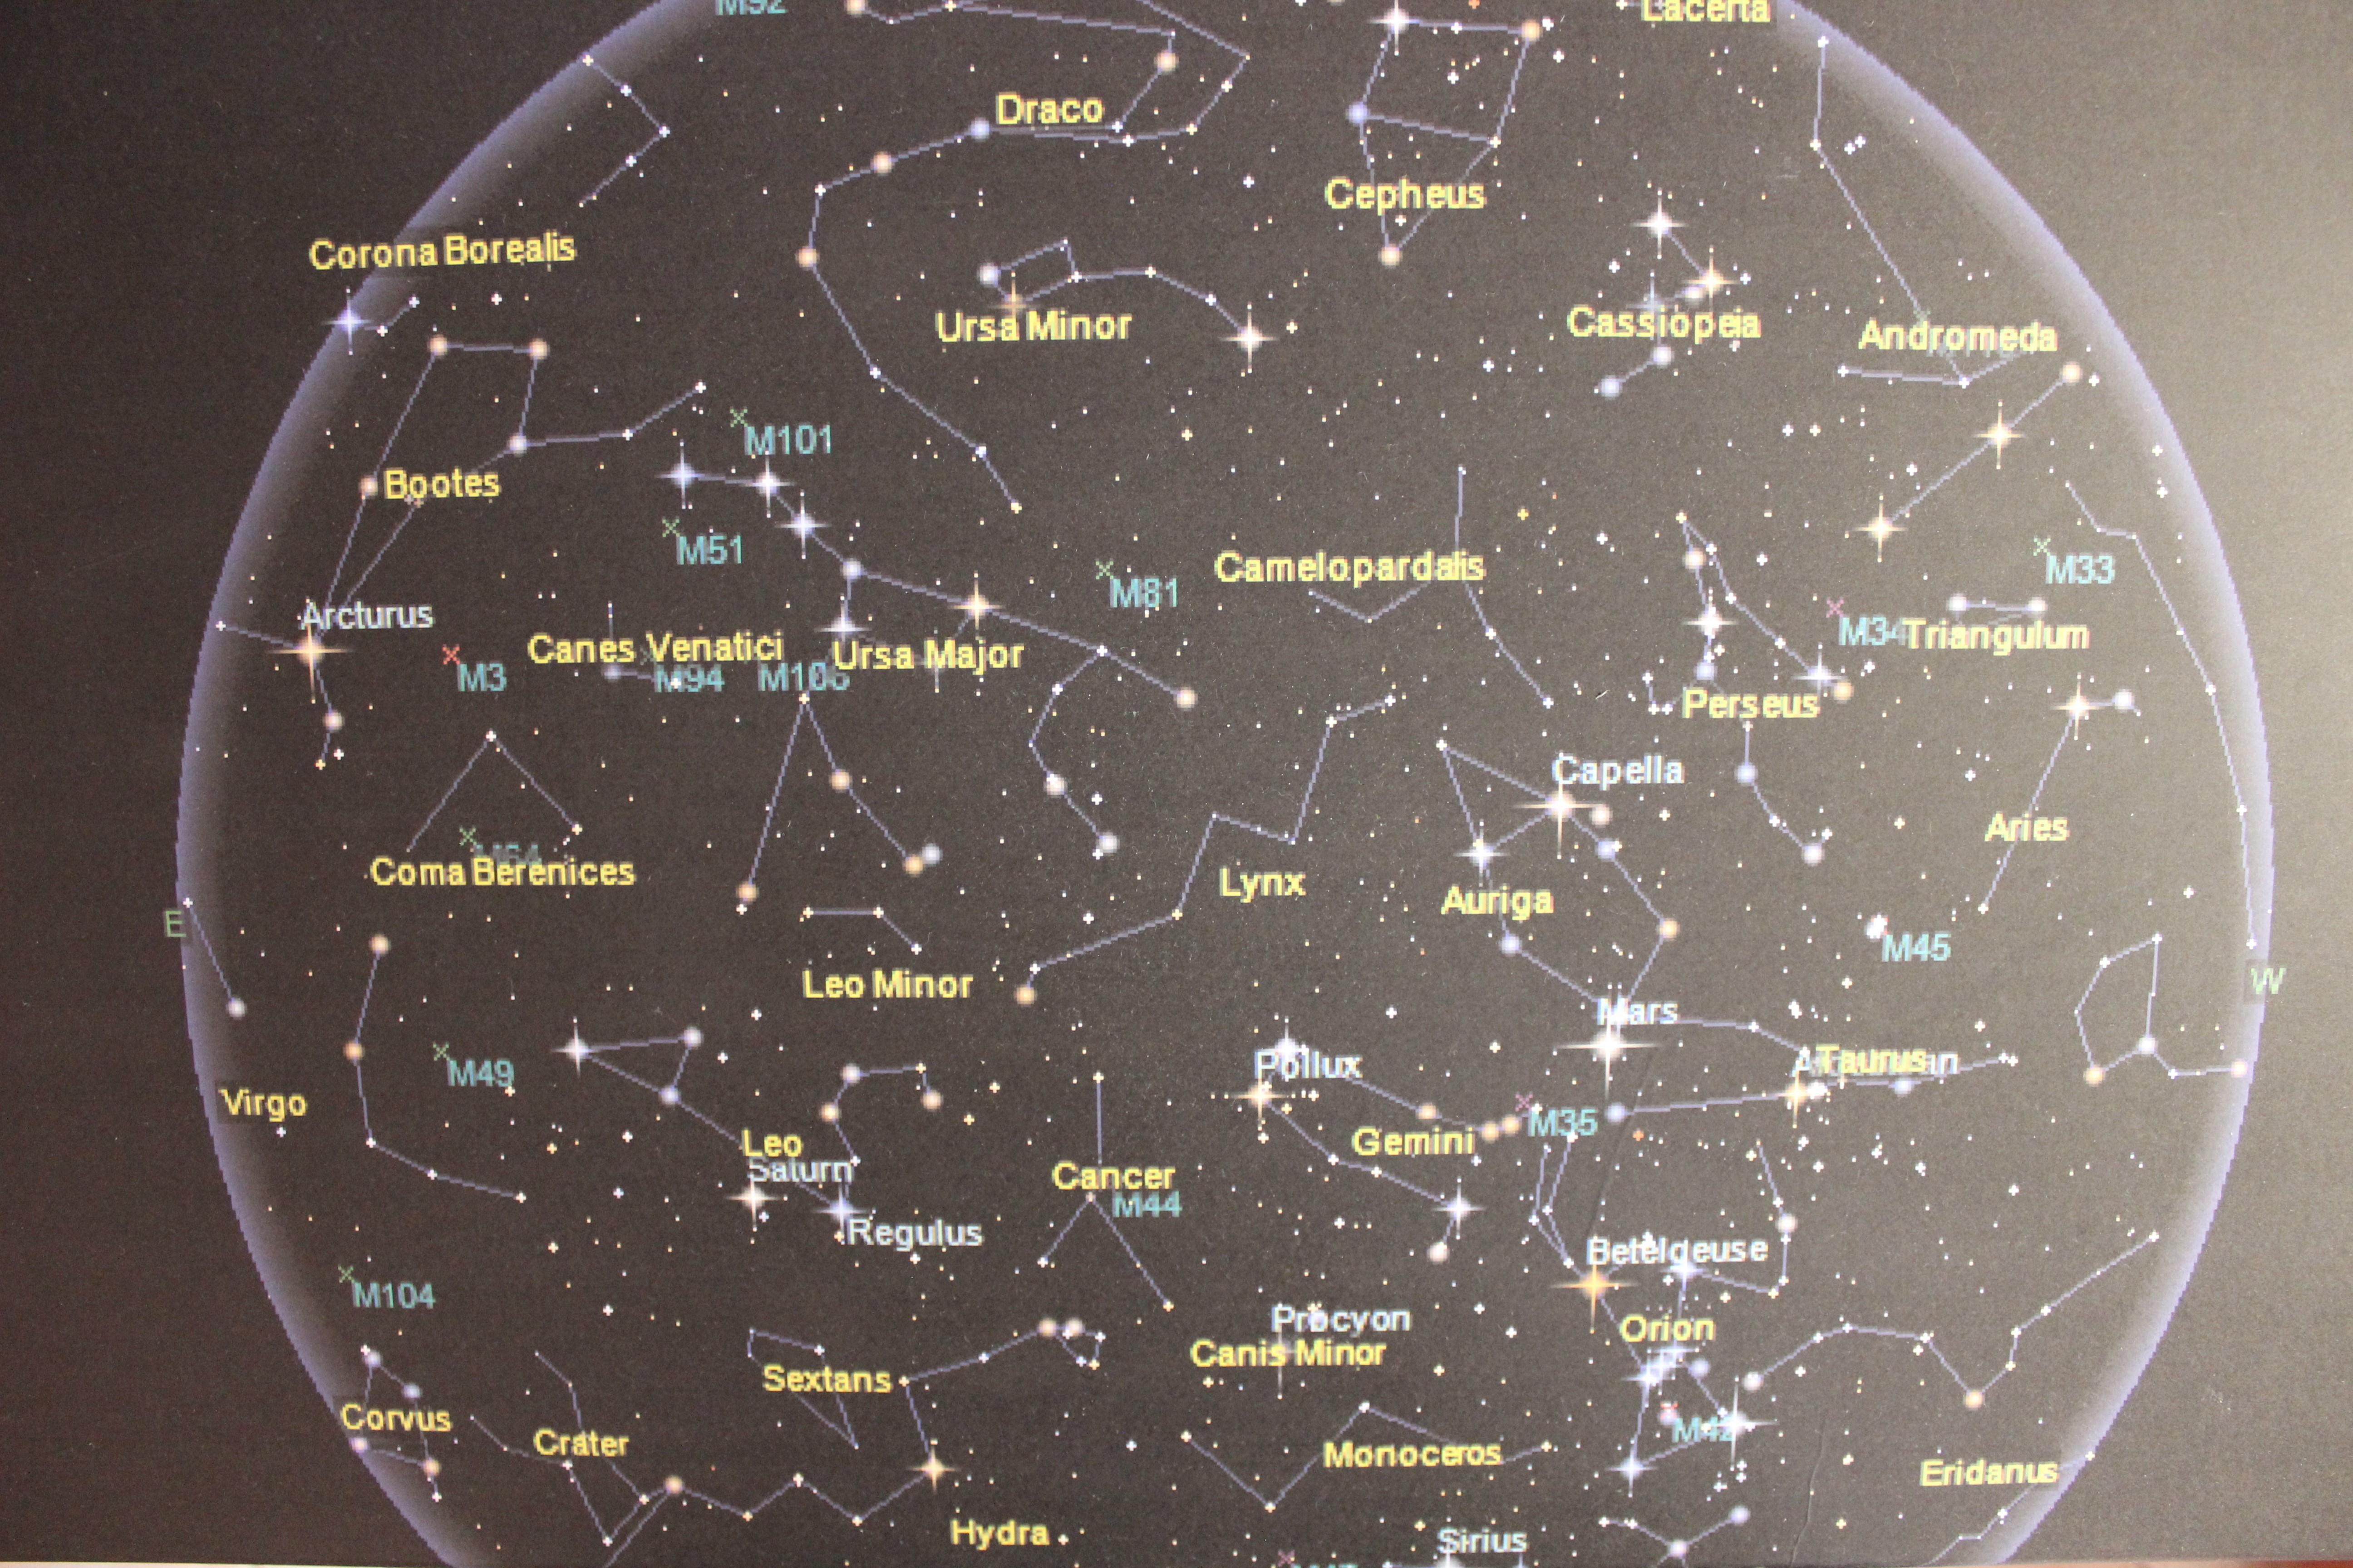
To get your Sky Map type YOUR SKY into google (google chrome browser works best) you will find the fourmilab website
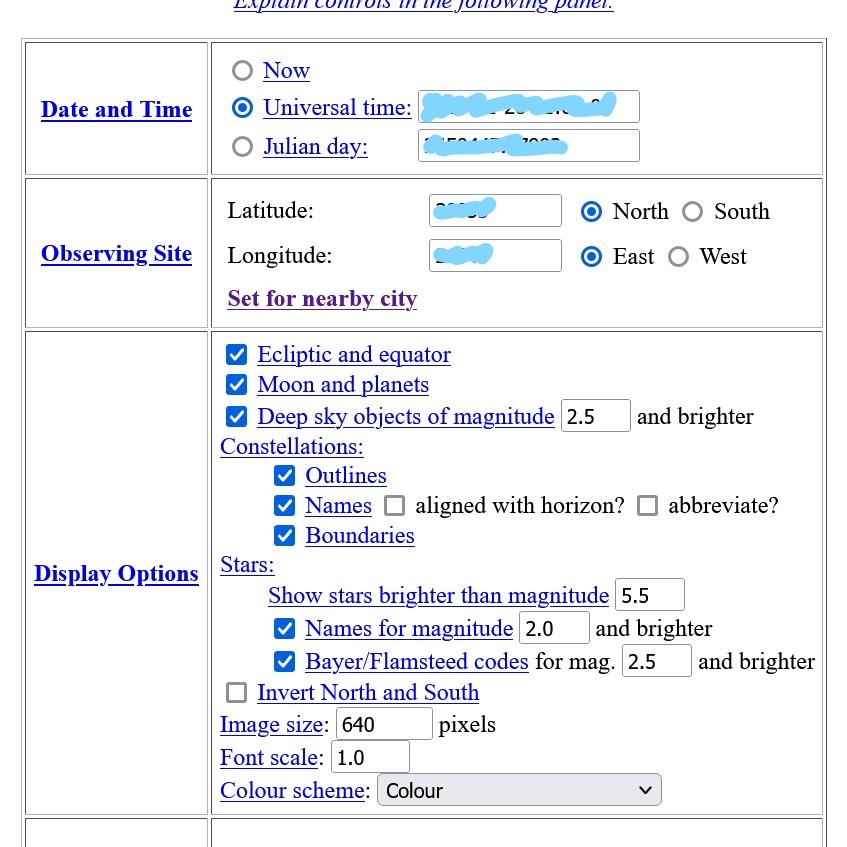
- Under Sky Map, enter your Observing Site, Latitude and Longitude of the place where your special moment happened. I used Wikipedia to find mine, by entering the town name of where my son was born. Click Make Sky Map(first picture)
- It takes you to a new window, here enter the date and time under Universal Time, if you need to look this up, check out the website WorldTimeBuddy to translate the UTC time from your time zone.(second picture)
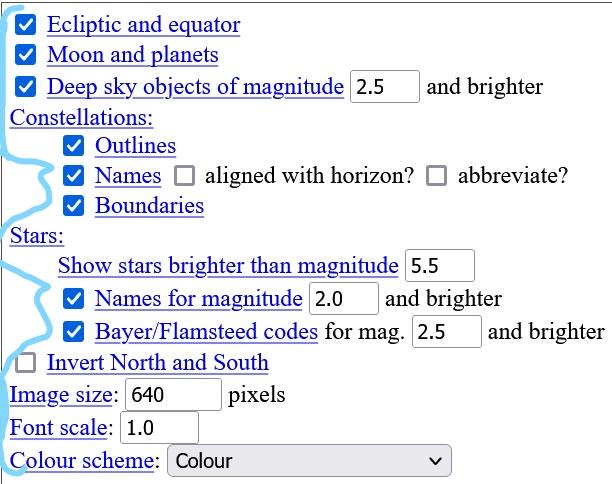
- Display Options is the next section, have fun with this one and pick and choose what you would like to see in your Sky Map, hit the update button under the sky map at the top to see what each choice looks like. (third picture)
- For more information on each choice go to Explain Controls in the Following Panel
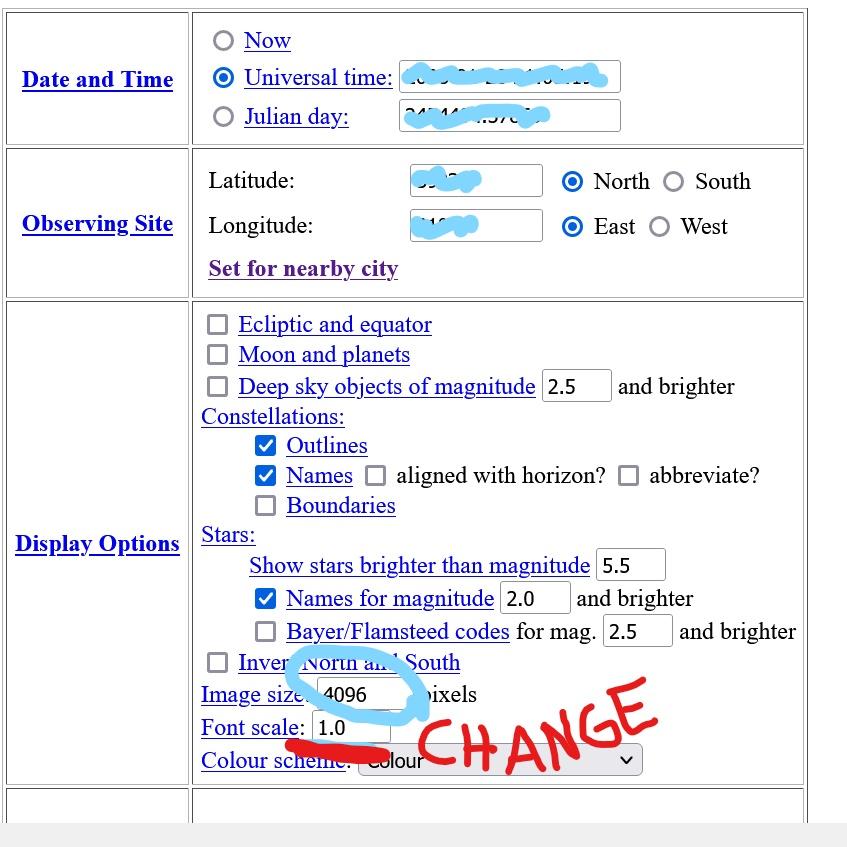
- When you find the look you like the most, change the Image size to 4096 and Font size to 2.0 or 3.0 Only do this if you plan on printing the sky map in large scale, like I did for my dresser. Press update to check it out and see how it looks. If printing on a regular printer at home, they suggest the largest size to be 1024 and not to change the font size.(fifth picture)
- Right Click on the enlarged Image and left click on Save Image As.. and save the GIF to your favorite place to Download things too.
Note: If having troubles right clicking and finding the Save Image As section you may need to change browsers (trust me I spent an hour trying to figure out why I couldn't save my Sky Map, when it worked perfectly fine a few months ago)
Getting It Printed
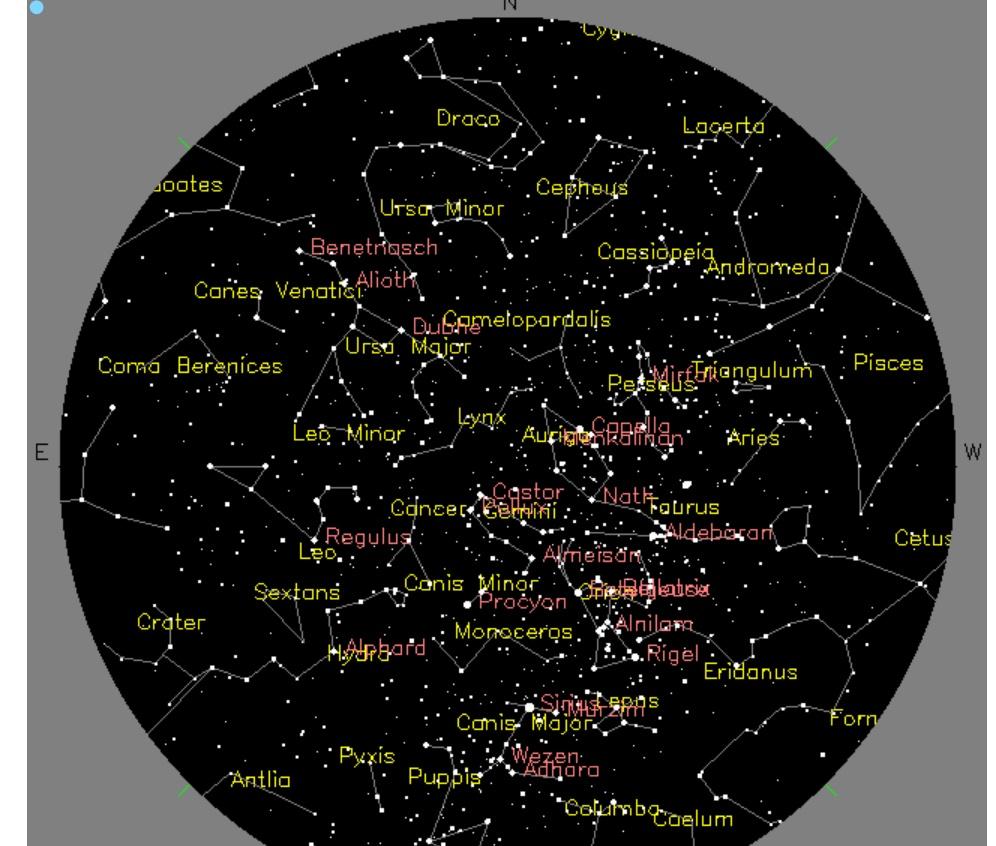
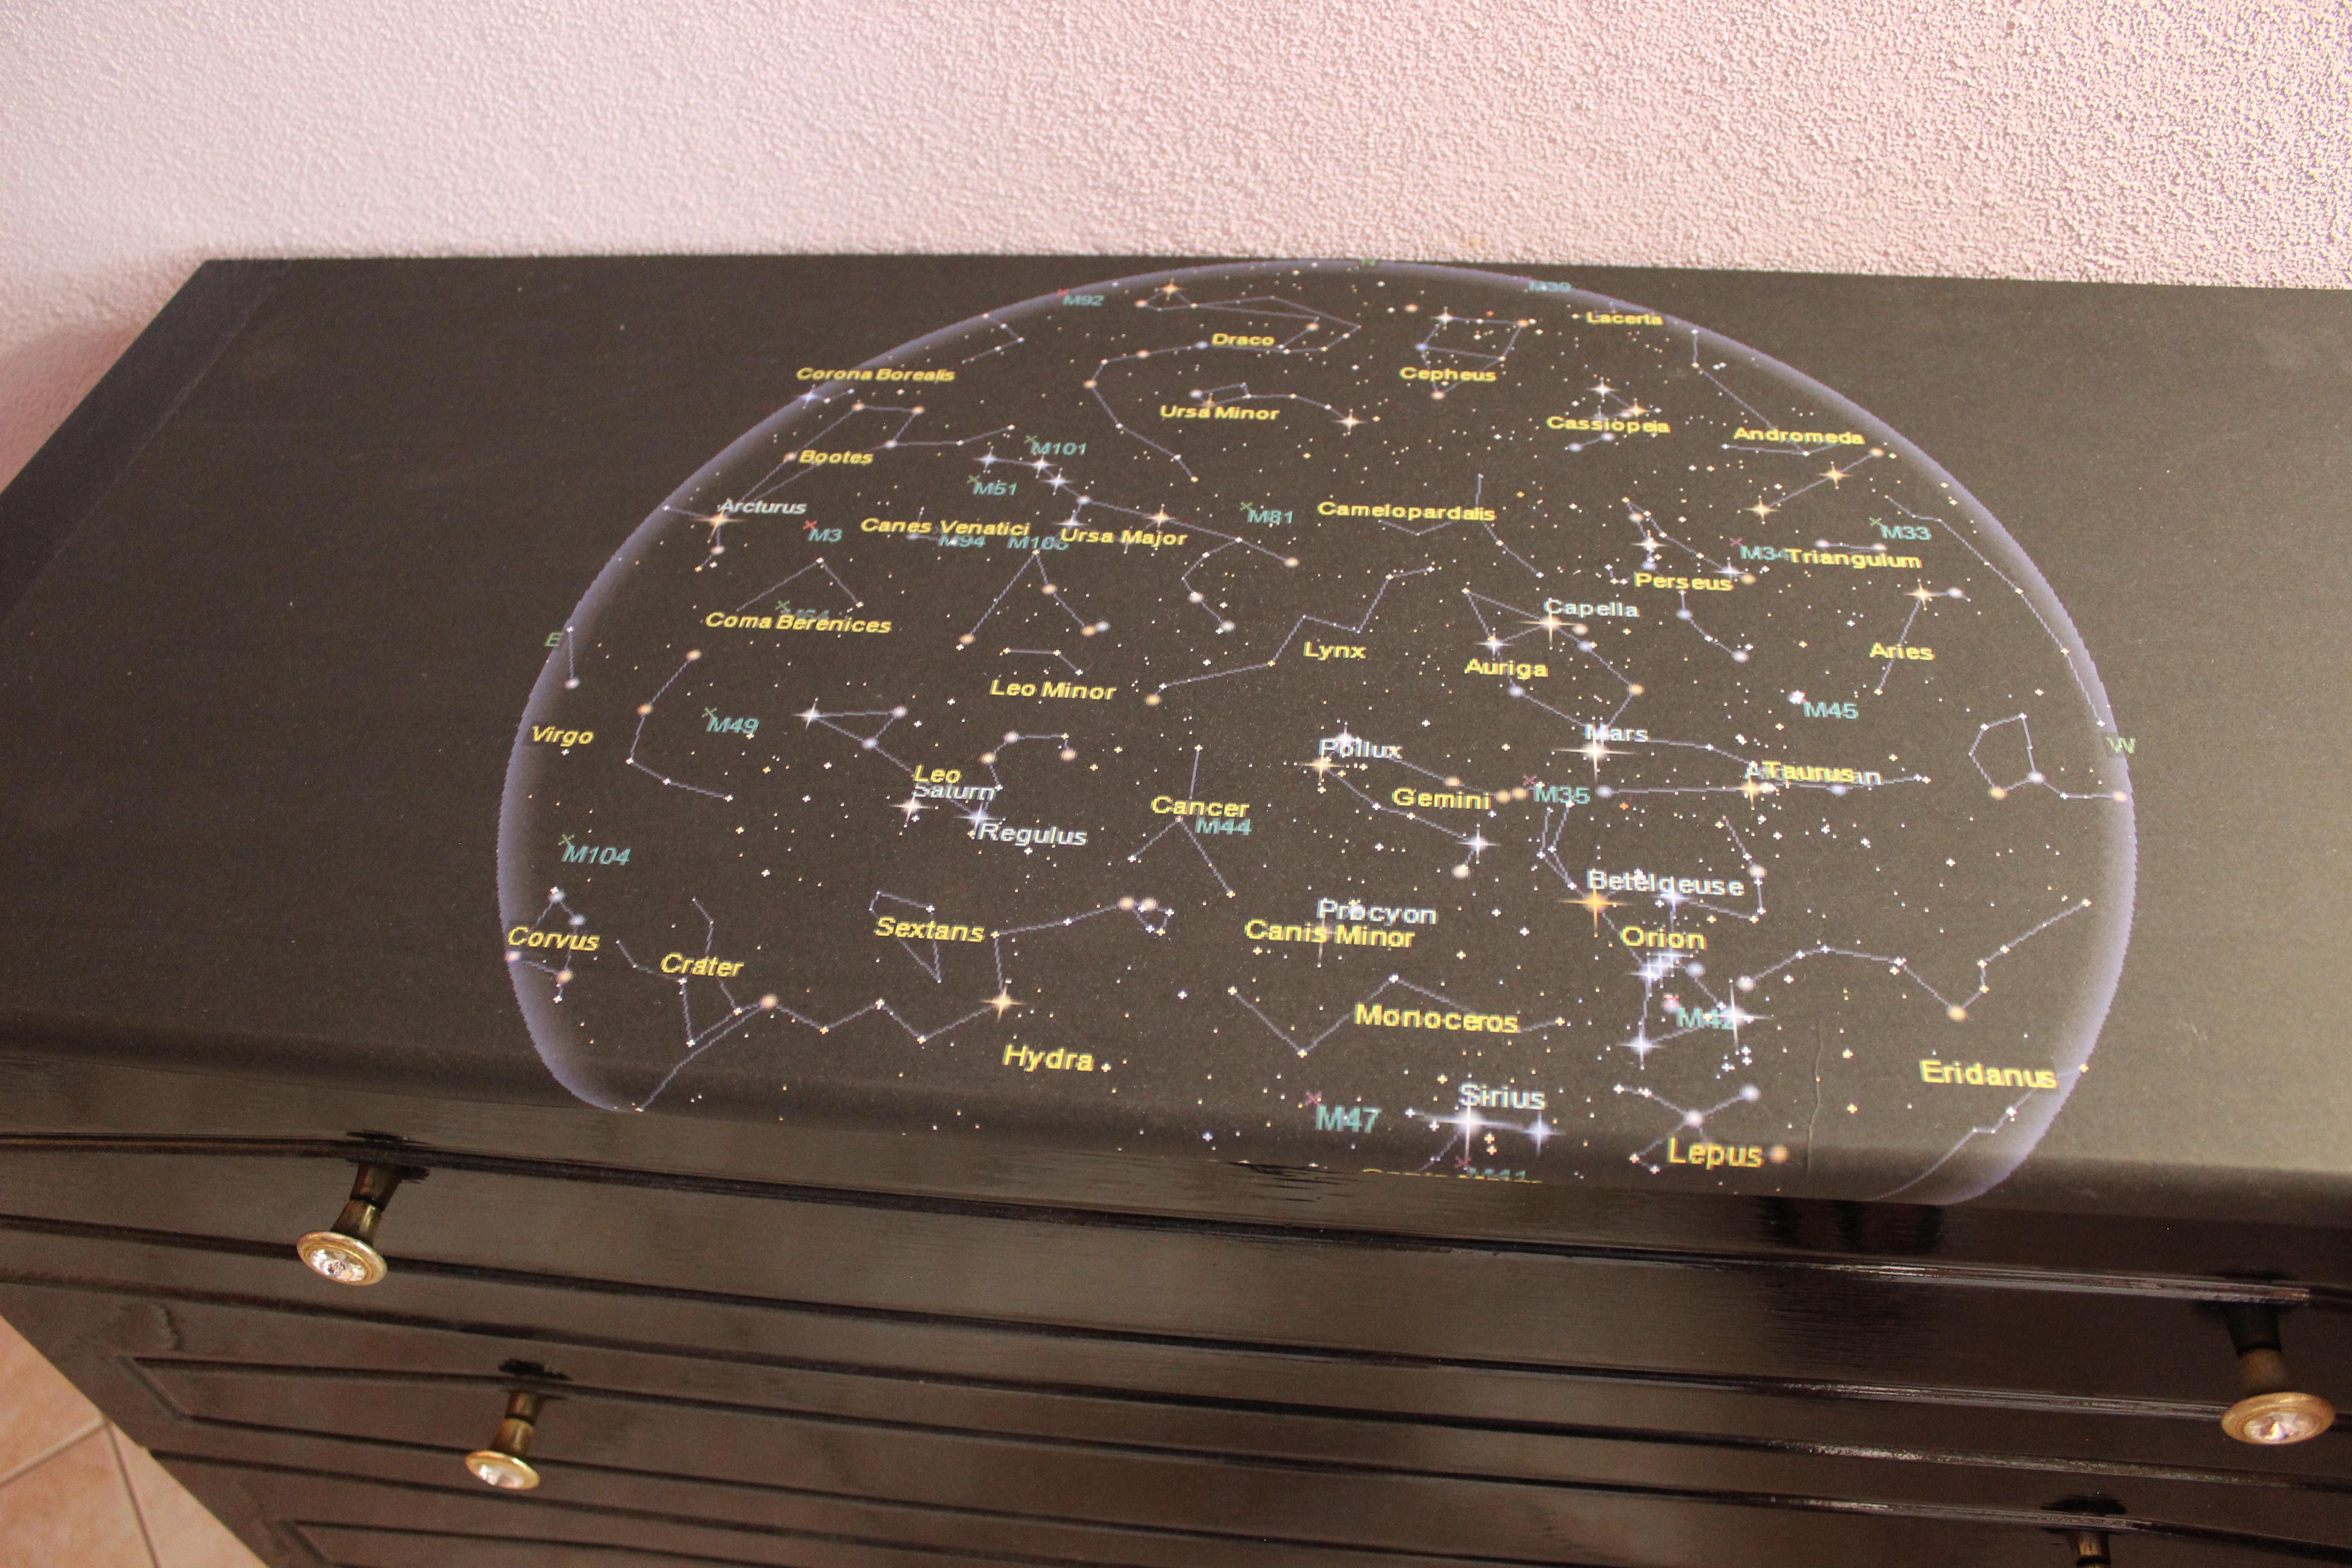
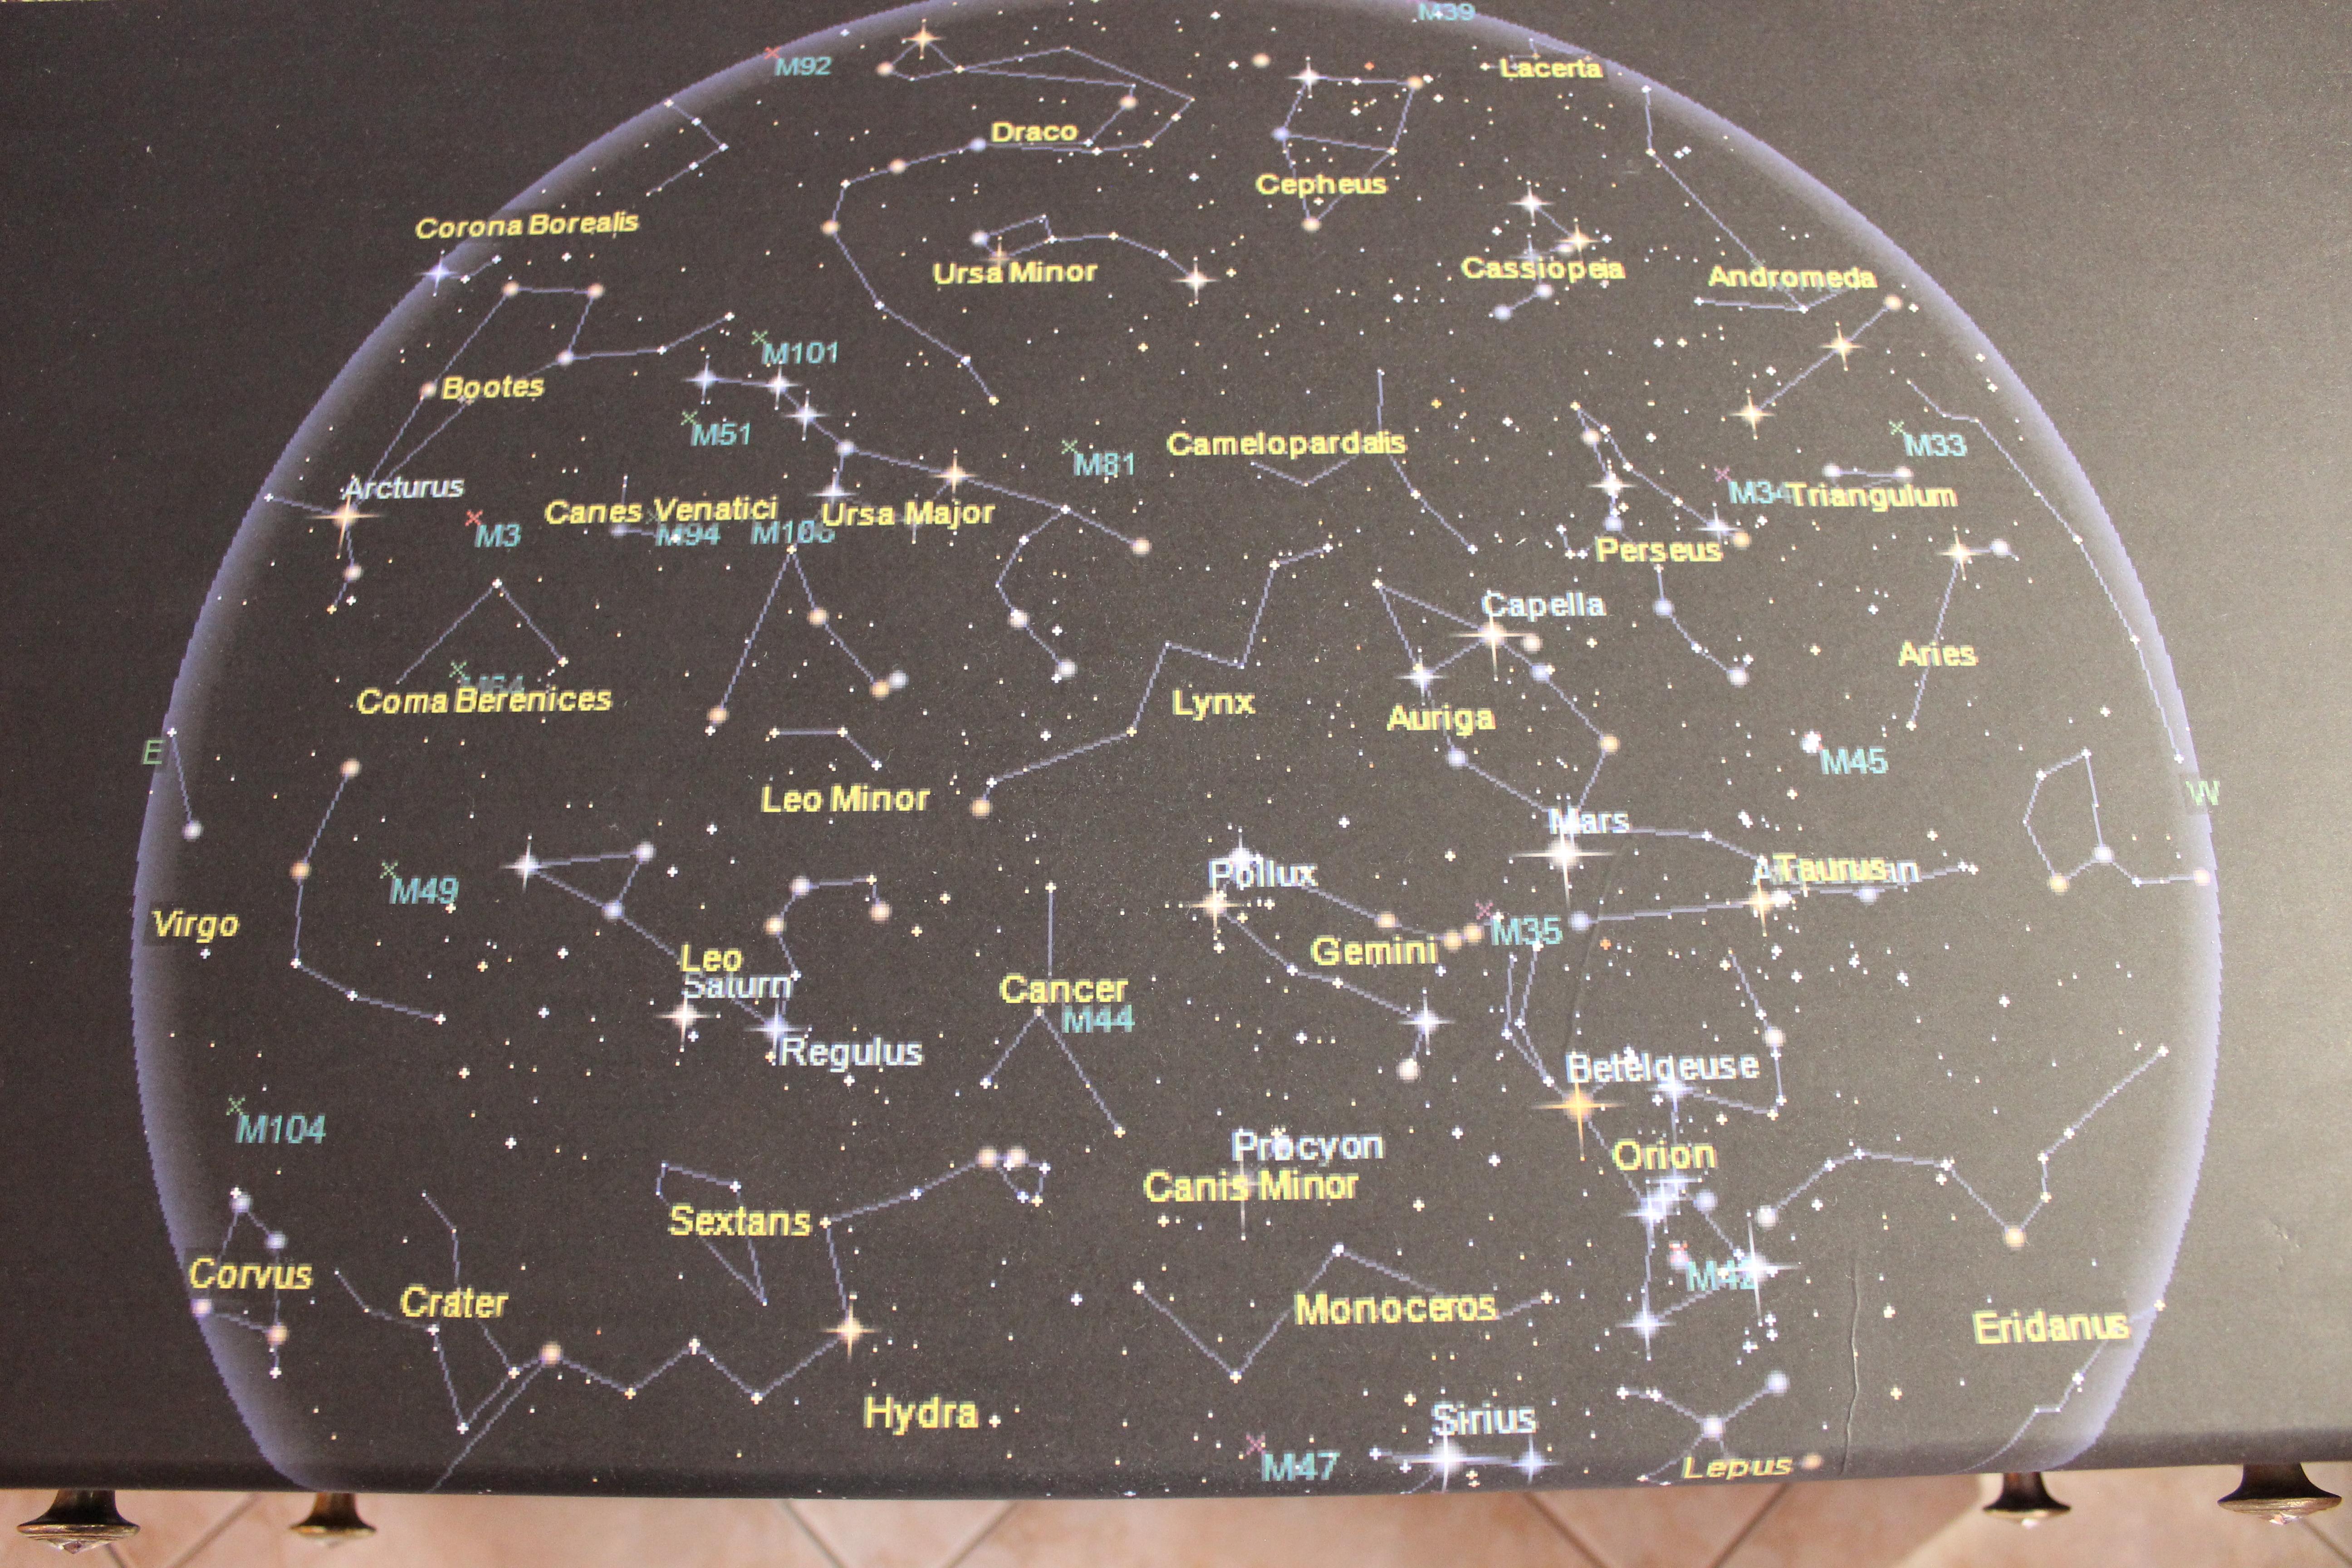
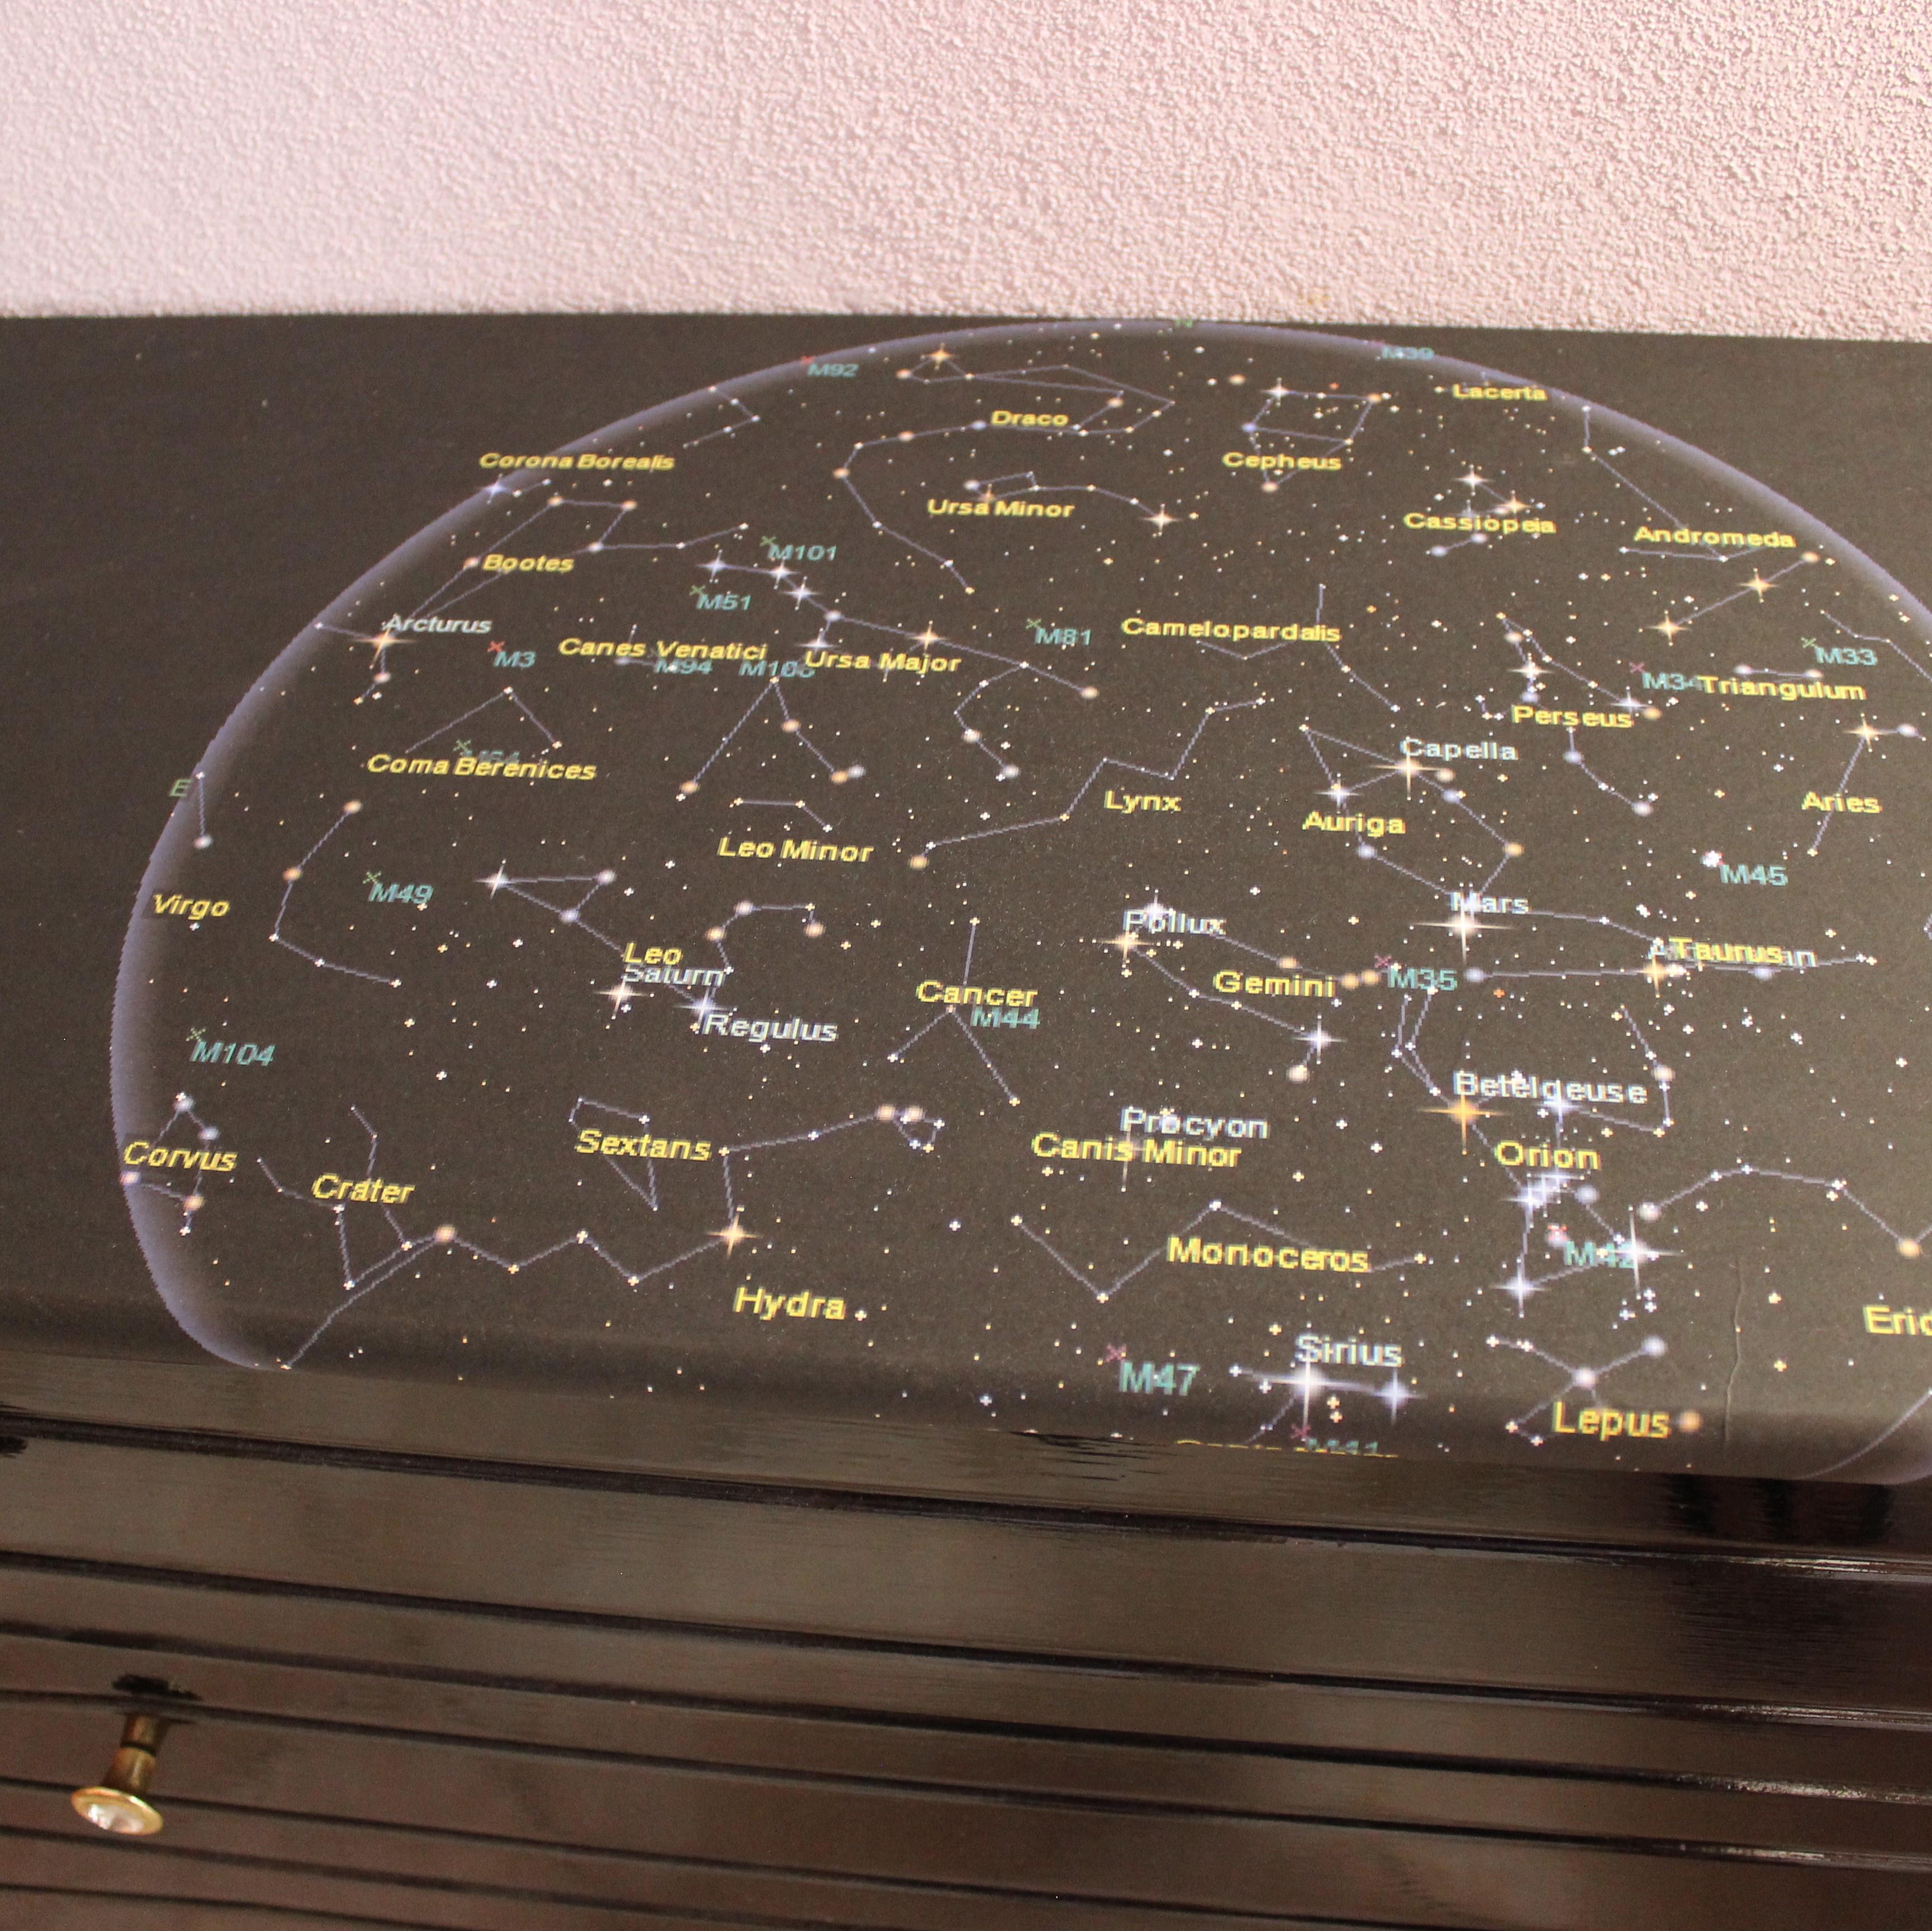
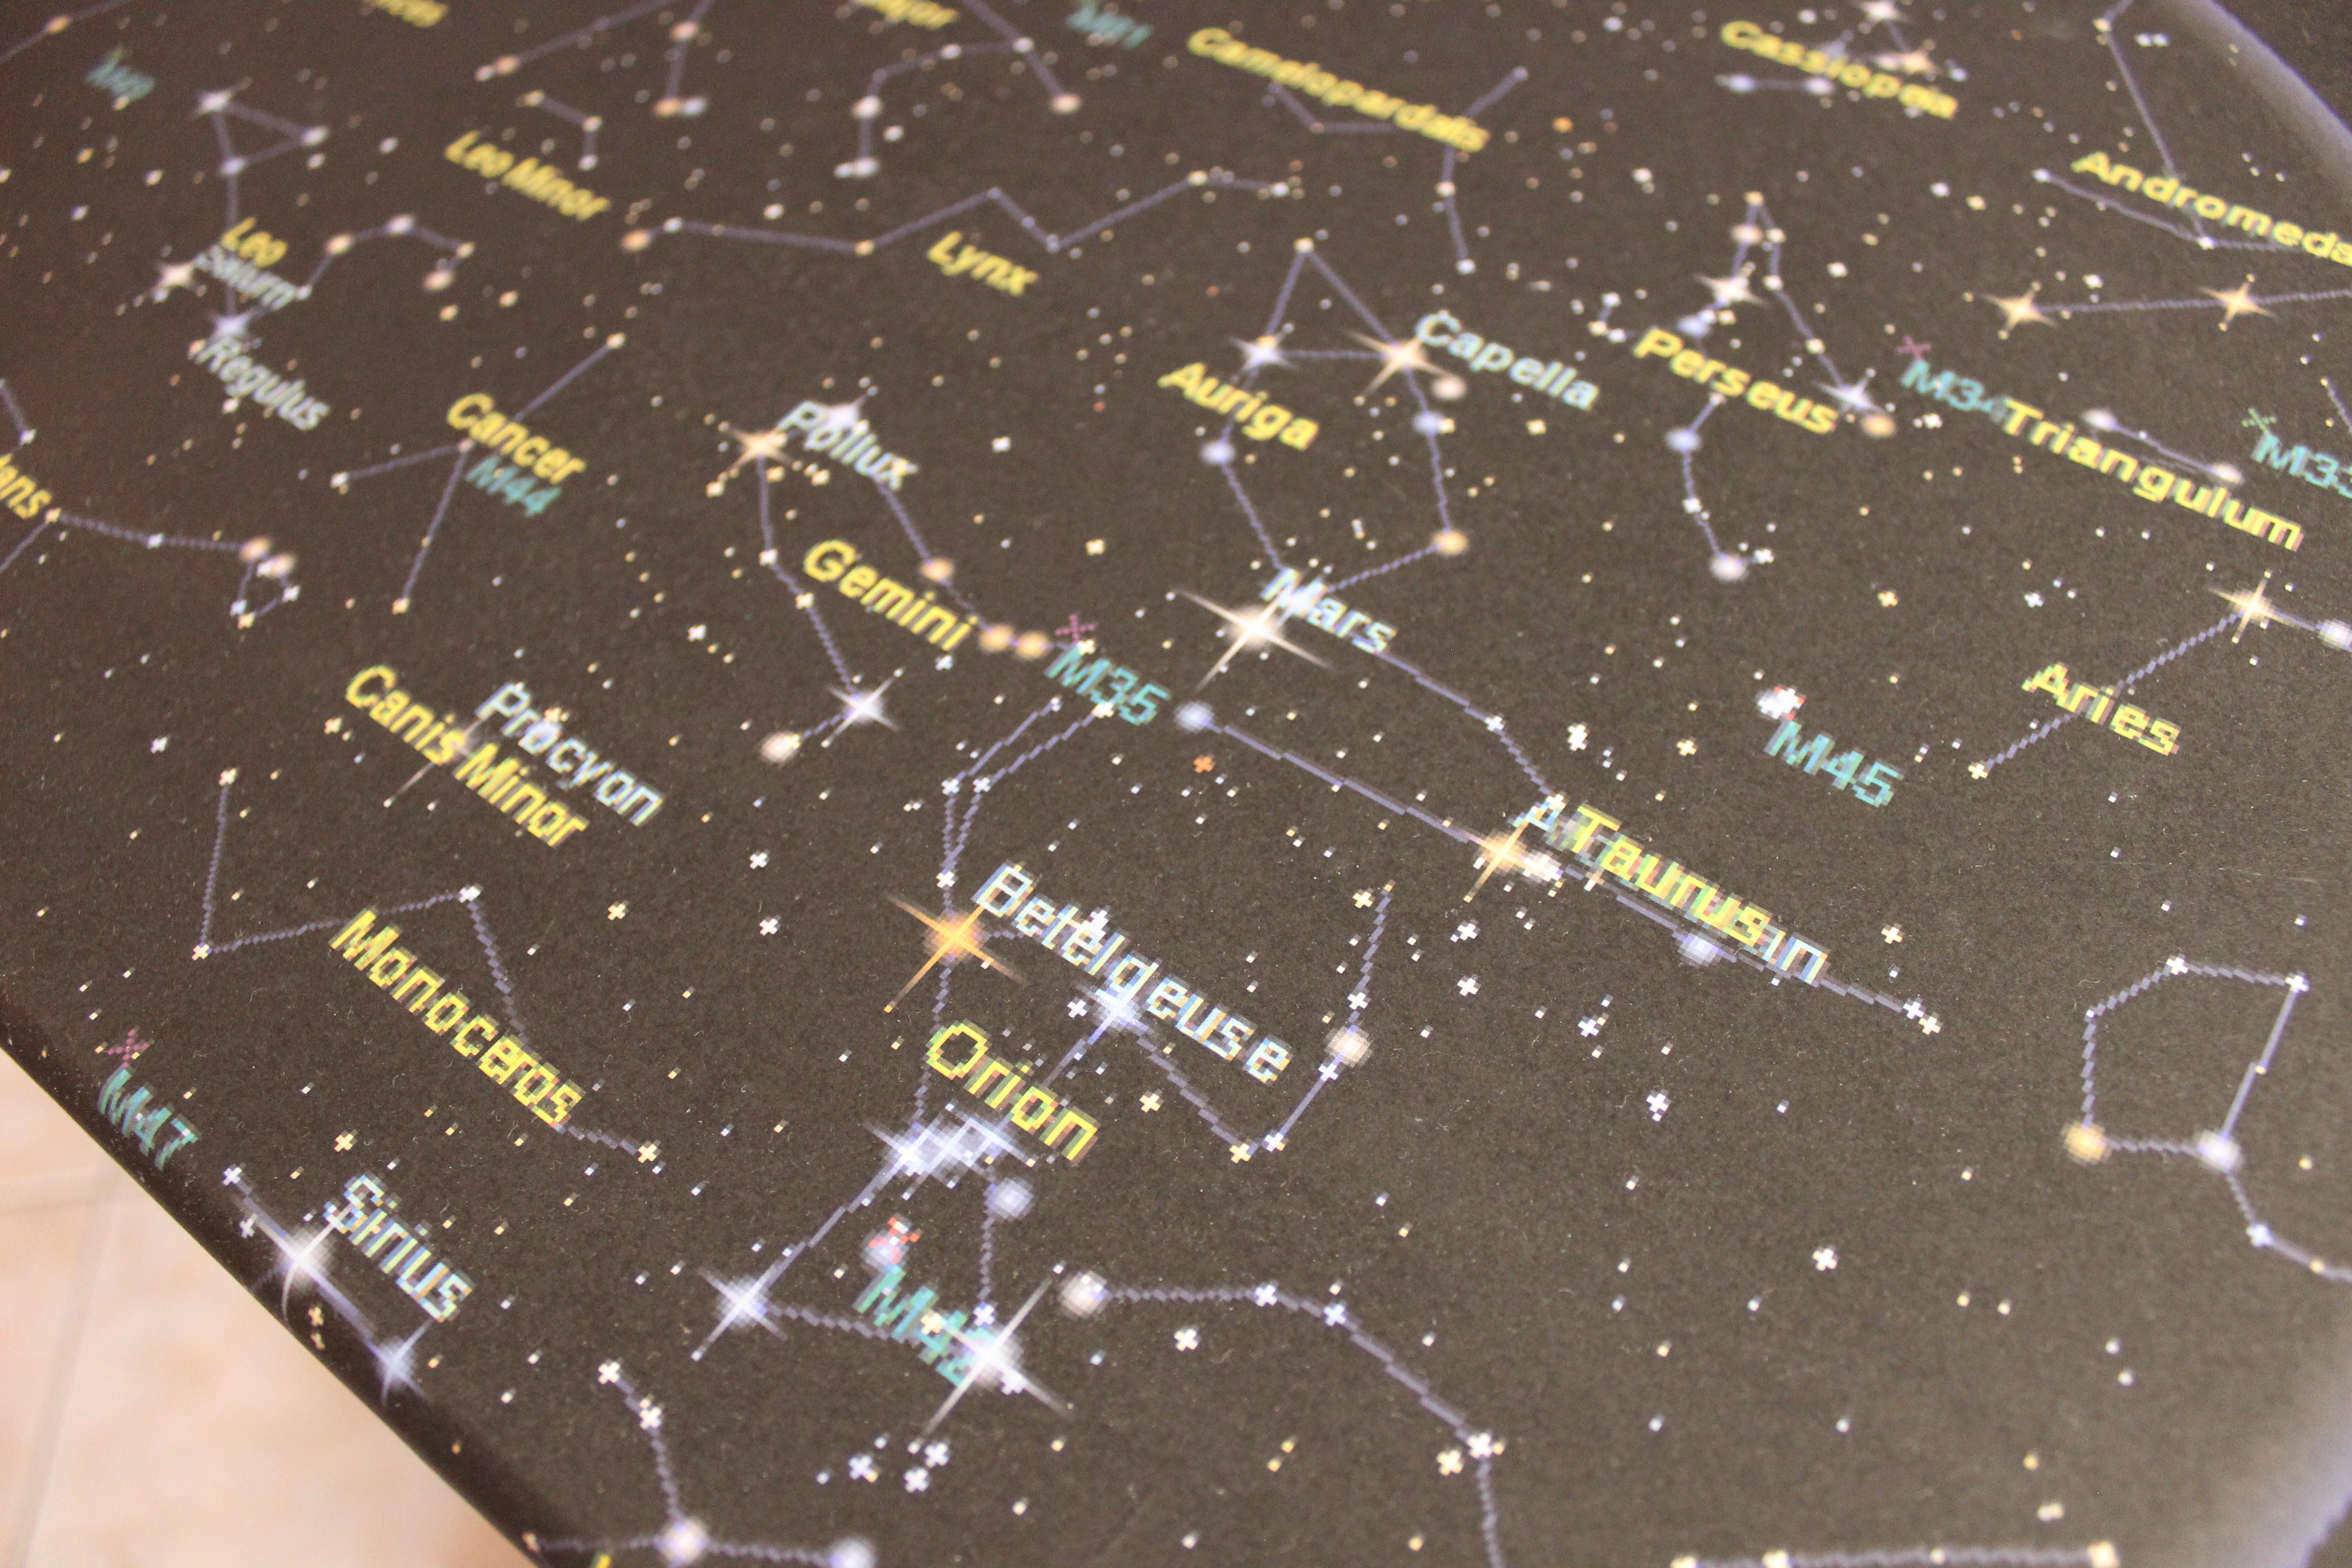
See the pictures above, the first one is a smaller size with more in it, I cleaned it up by leaving some stuff out in the Display Options Section and enlarged the size and font to get the second picture.
If you are printing at home, then I don't need to tell you how to use your printer.
I would suggest if you want to print it up larger than a standard size of paper to take it to a Print shop. My favorite print shop is the one that all of the Architects go to in our town, they have large printers!
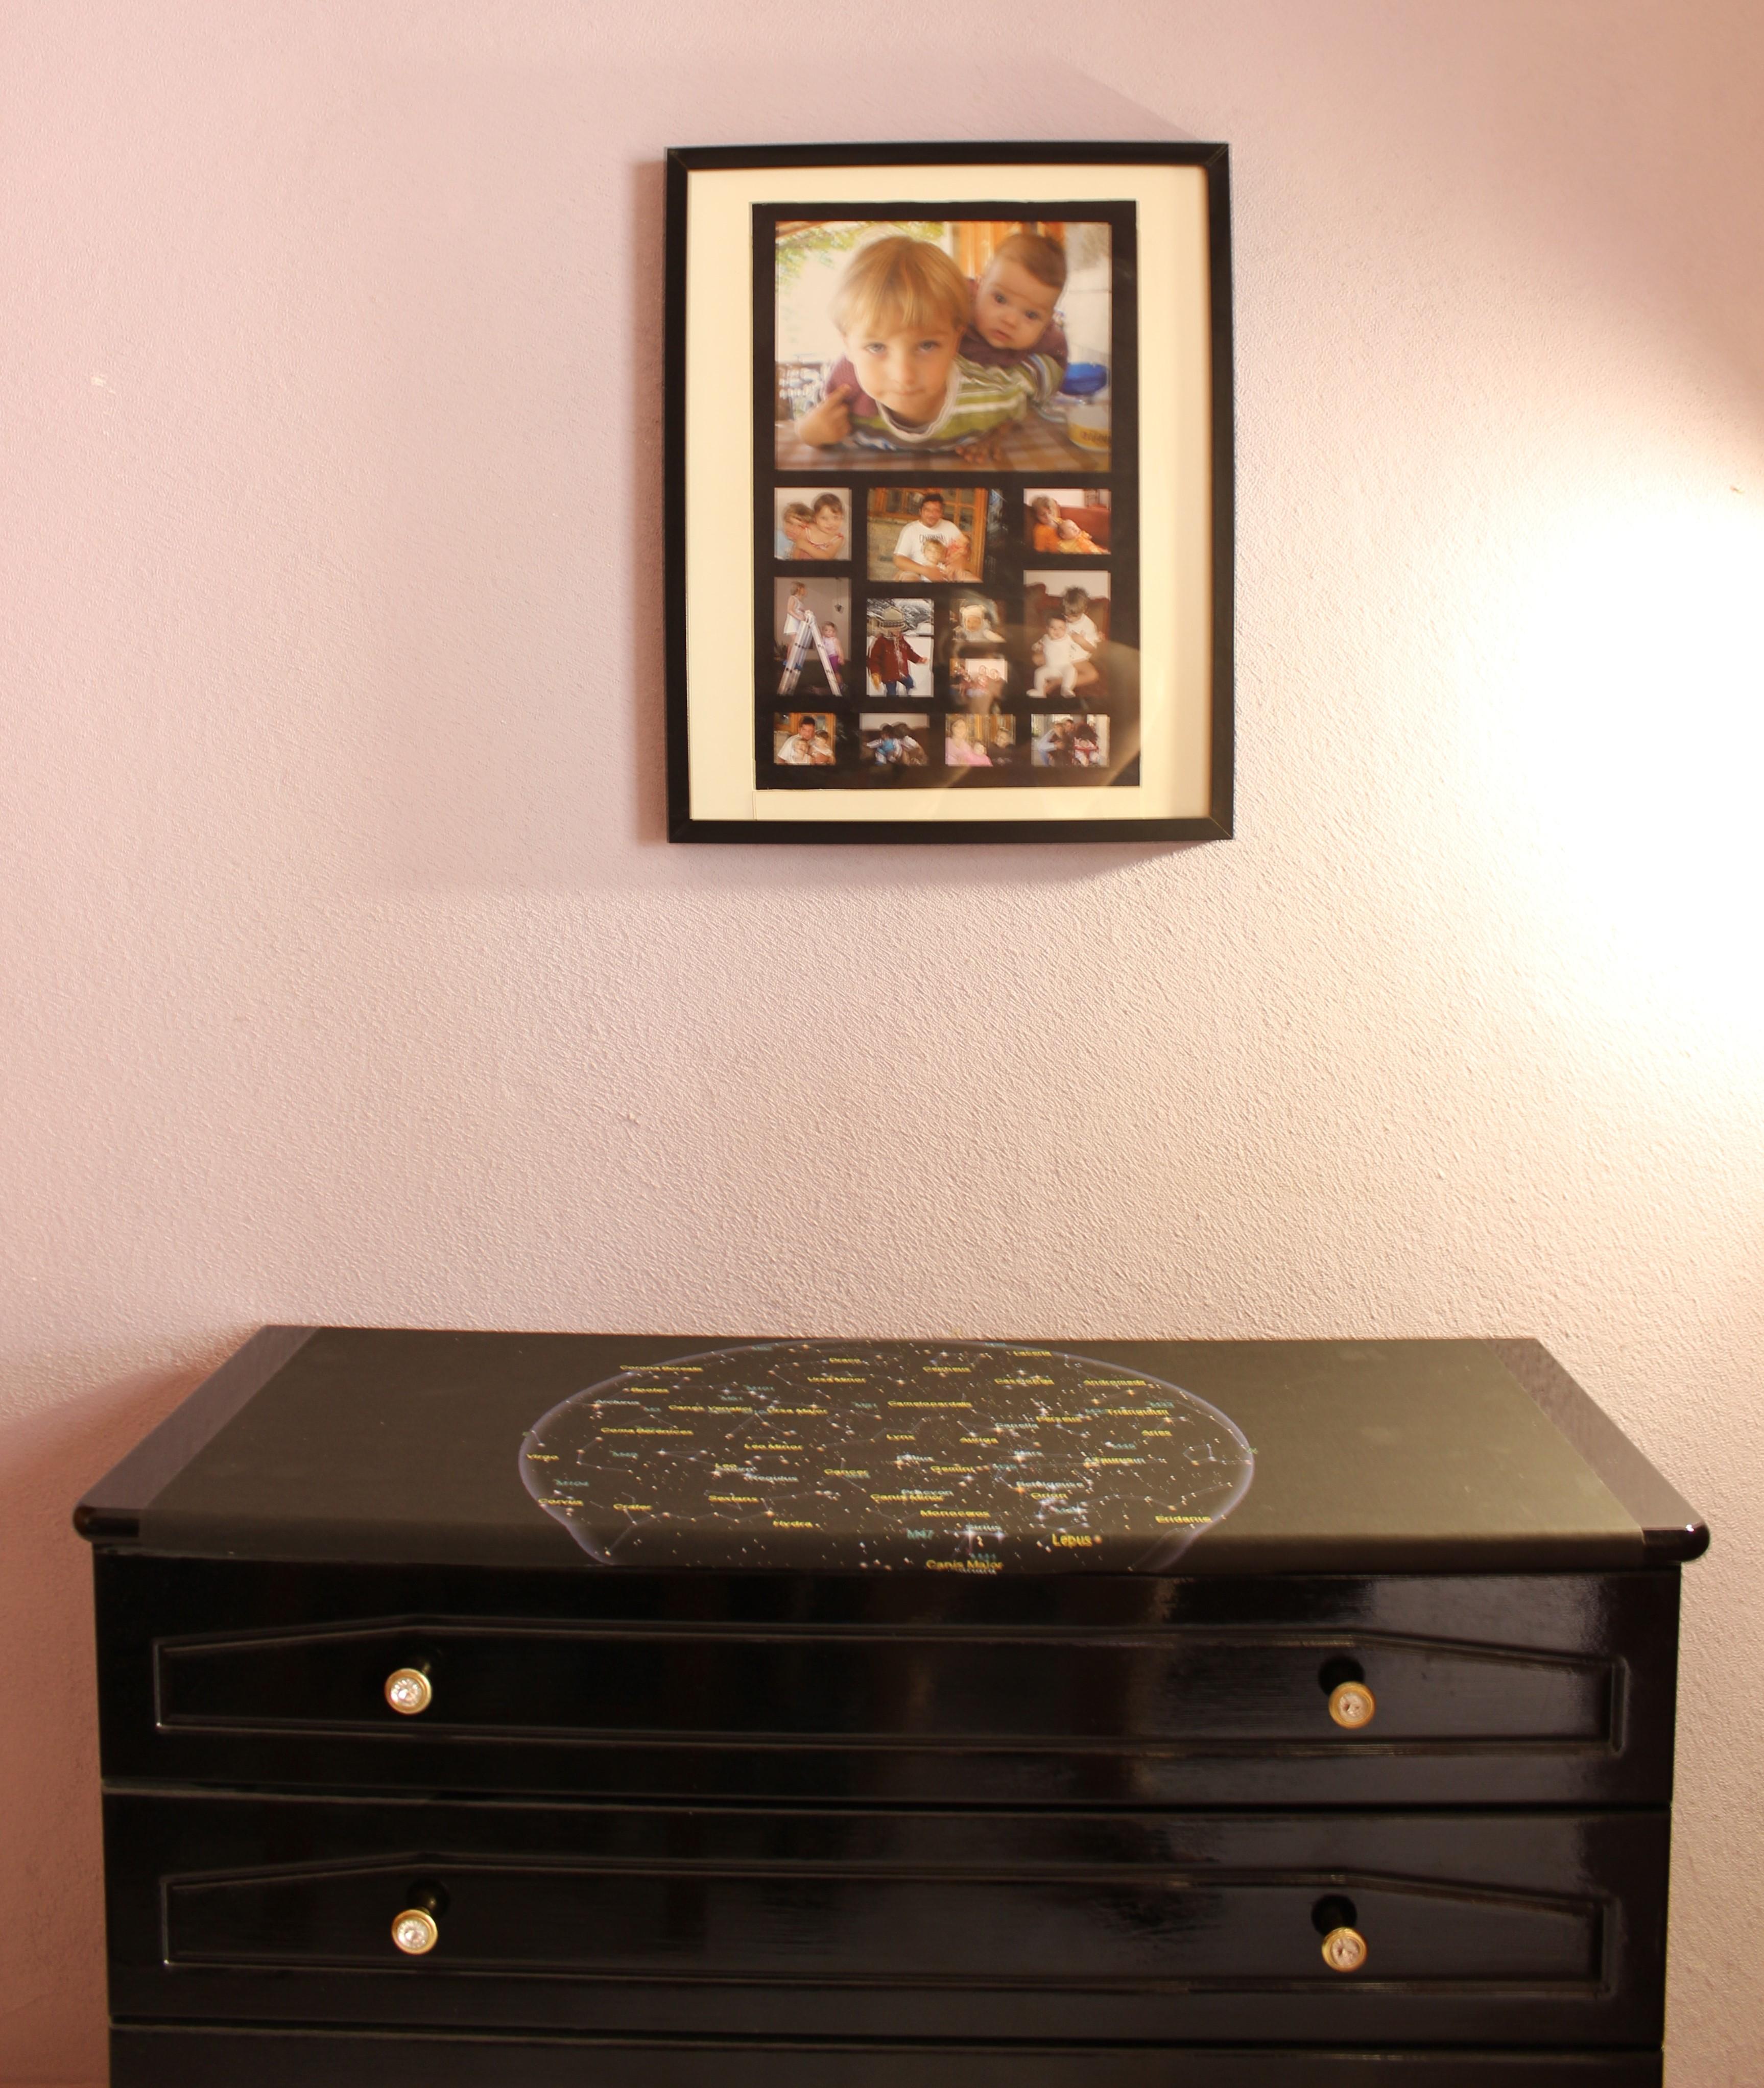
My print is on a 18" x 35" (46cm x 90cm) but a 18" x 24" (46x61) would have worked just as well.
Now that you have your Sky Map, let's put it somewhere!! And if you want to be cool like me, then follow the next step for placing it on your dresser.
Other things you can do with a Sky Map
- Frame and Hang -large size
- Decoupage onto a Canvas -large size
- For Wall Paper -large size
- Make a Lamp Shade -medium/large size
- On a card to announce a birth/wedding/anniversary -small size
- For gift wrapping -small size
Making the Dresser
I need to apologize, my SD disk with my images for when I was fixing the dresser got corrupted, so I only have the finished pic's.
Supplies:
- Old Dresser
- Sky Map
- Sandpaper
- Tack Cloth
- Painter's Tape
- Painter's Plastic (or garbage bags opened up)
- Paint Brush/Roller (or if you have a spray gun, lucky you ;)
- Primer
- Paint
- Spray Glue (I used Morris Glue Spray)
- Sealer
Steps if painting:
- Clean the dresser if dusty
- Sand it down with 150 grit sandpaper
- Wipe the furniture down really well
- Find where you will place the SKY MAP and mark the area off with Painters tape.
- then paint or prime the area that you won't be placing the Sky Map in, let dry.
- then sand and wipe it down again
- AND PAINT again, let dry
- and sand and wipe AGAIN
- AND PAINT one last time! allow to dry 24 hours.
Sky Map Placement Time:
- Make sure the unpainted area that you left alone is Dry and Clean of any dust.
- Tape off the freshly painted areas and cover with plastic
- Read the directions of your Spray Glue, for mine it was to Spray the Dresser and Spray the Map and allow to get tacky dry and then stick together!
- Place Map on dresser, allow to dry for the specified time that is on the Spray Glue canister.
- Seal the Painted dresser and the Map (as you can see in the photos I have not done this yet, but plan to soon)
And you are FINISHED!
More Pictures