Star Keychain


I created this star keychain because I thought that my backpack could use some keychains. I mostly based this on my school's logo. Below is the .stl file if you wish to print it out for yourself.
Downloads
Supplies
- Onshape, the application to design the keychain
- Create a new document, with the workspace units as inches
- A 3D Printer with filament to print out the design
- A flash drive to transport the .stl file to the printer
Sketch 1 - Base Shapes
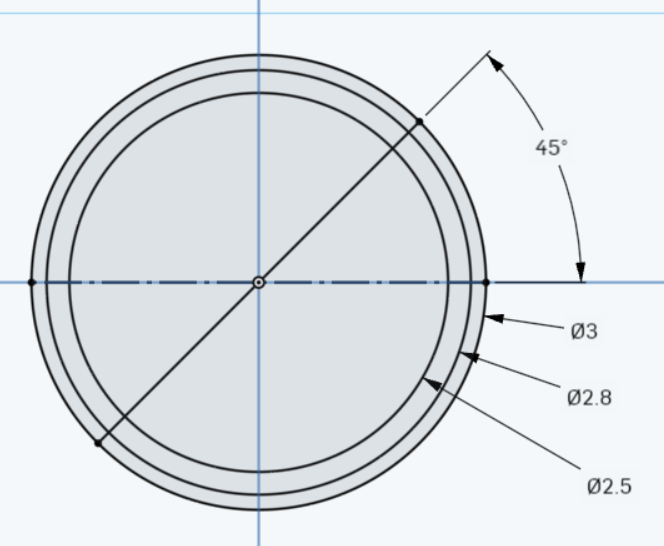
Make a new sketch on the front plane. Create 3 circles around the origin point, and dimension: one with a diameter of 3 inches, one with a diameter of 2.8 inches, and one with a diameter of 2.5 inches.
Create a horizontal construction line through the largest circle, and use the midpoint constraint to center it on the origin point. After that, create a normal line through the same circle that is dimensioned 45° counter-clockwise from the construction line.
Sketch 1 - Trimming
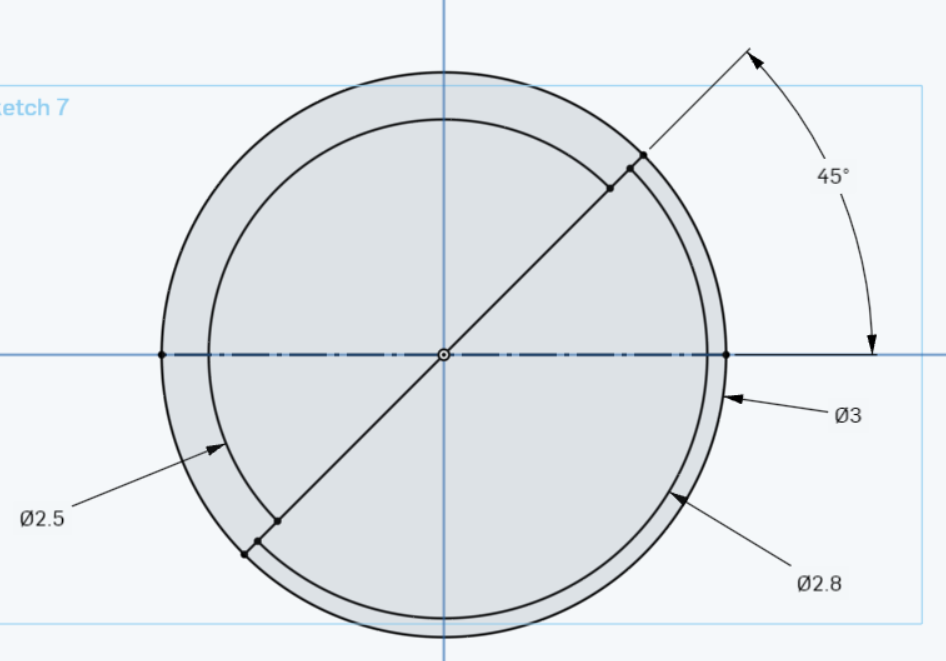
With what was created in the previous step, use the trim tool to delete the upper half of the Ø2.8 inches circle and the lower half of the Ø2.5 inches circle.
Extrude 1 - Extruding the Base
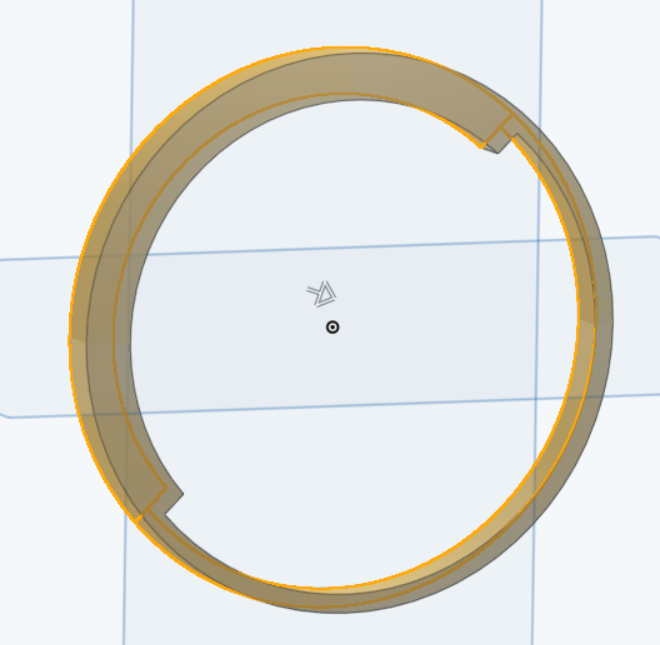
Extrude the circle outlines that were made in the previous step forward by 0.25 inches. The base of the keychain is complete.
Sketch 2 - Star Hole Base
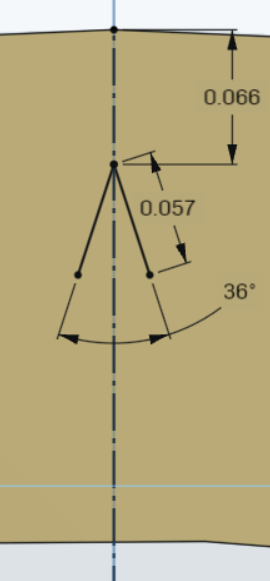
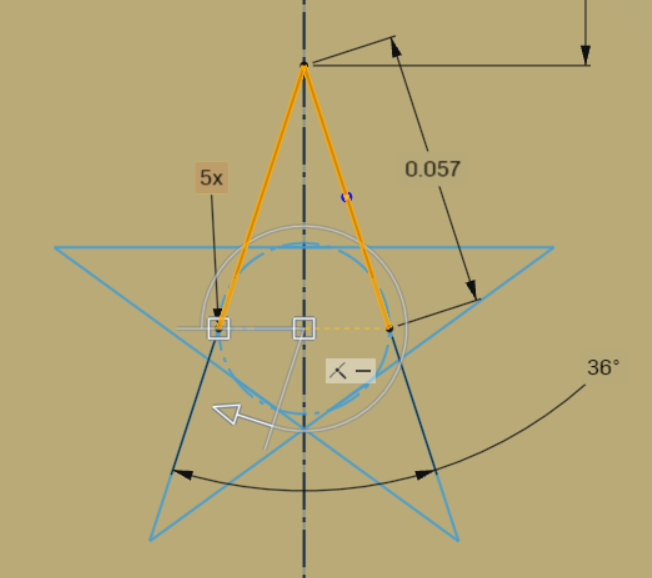
Create a new sketch on Extrude 1. Create a construction line that is vertical from the origin that reaches the top of the base. Draw a new line originating from the construction line slanted down to the right and dimension it to be 0.057 inches long. Take the top point of this line, and dimension it to be 0.066 inches away from the top of the base.
Mirror the slanted line. Use the vertical construction line as the mirror line. Dimension the mirrored line to have an angle of 36° with the old line.
Sketch 2 - Circular Pattern #1
Select the two lines that were made in step 4 and make a circular pattern that repeats 5 times. Have the center of the pattern be in the middle of the two lower points. This should make a star shape.
Sketch 2 - Circular Pattern #2
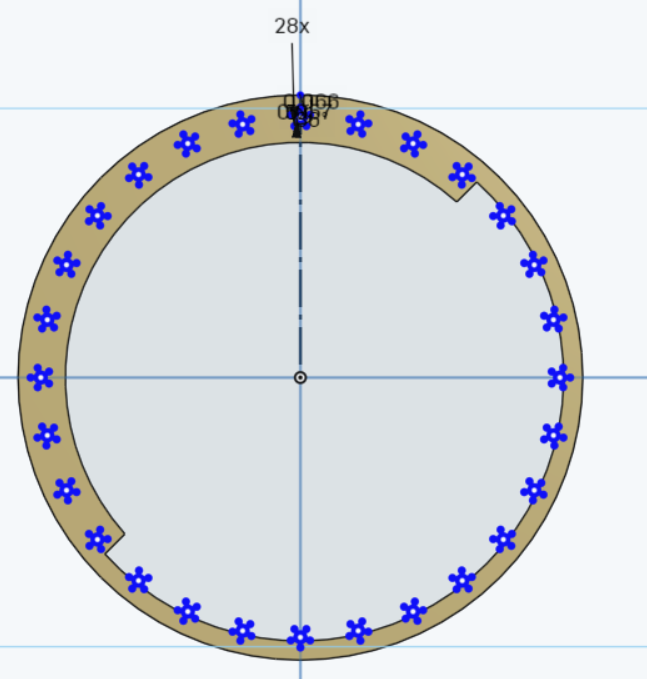
Select the entire star that was created in step 5. Make another circular pattern around the entire base that repeats 28 times.
Sketch #2 - Copy & Paste
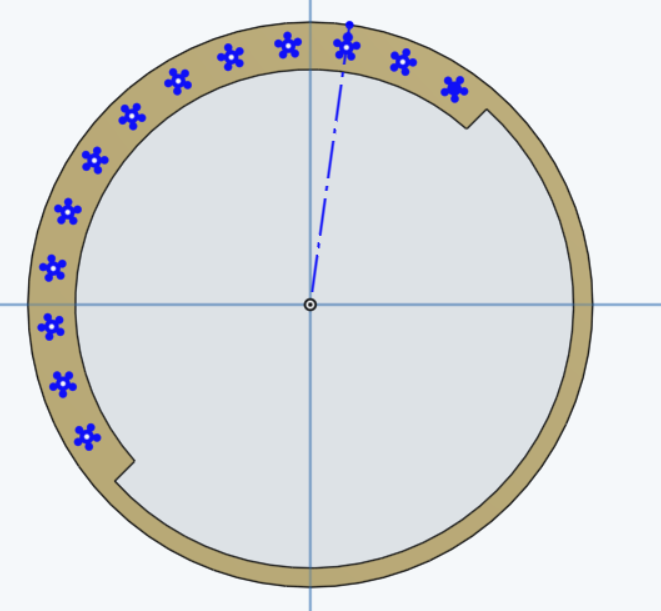
Copy the pattern in the previous step and paste it. Correctly place the center point in the right position, and re-center it on the base. Rotate it by 8° clockwise, and place it down.
Delete any star that is not completely on the thick part of the base, and sketch 2 is complete.
Extrude 2 - Star Holes
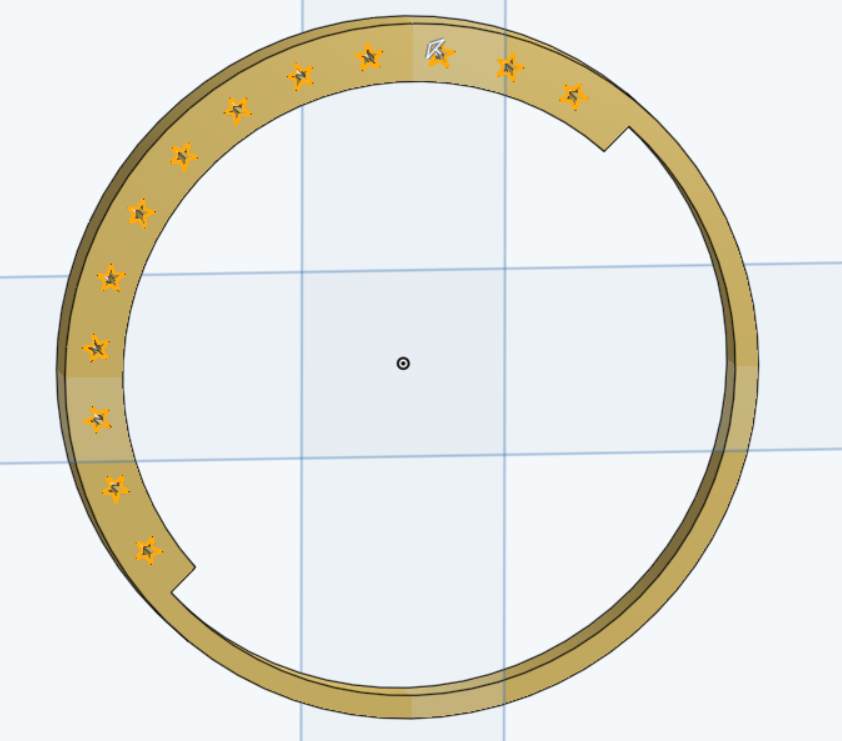
Extrude the stars that were created in step 7, but instead of extruding out, select extrude remove. Make it go through all, in the direction of the base. The star-shaped holes are complete.
Sketch 3 - Giant Star
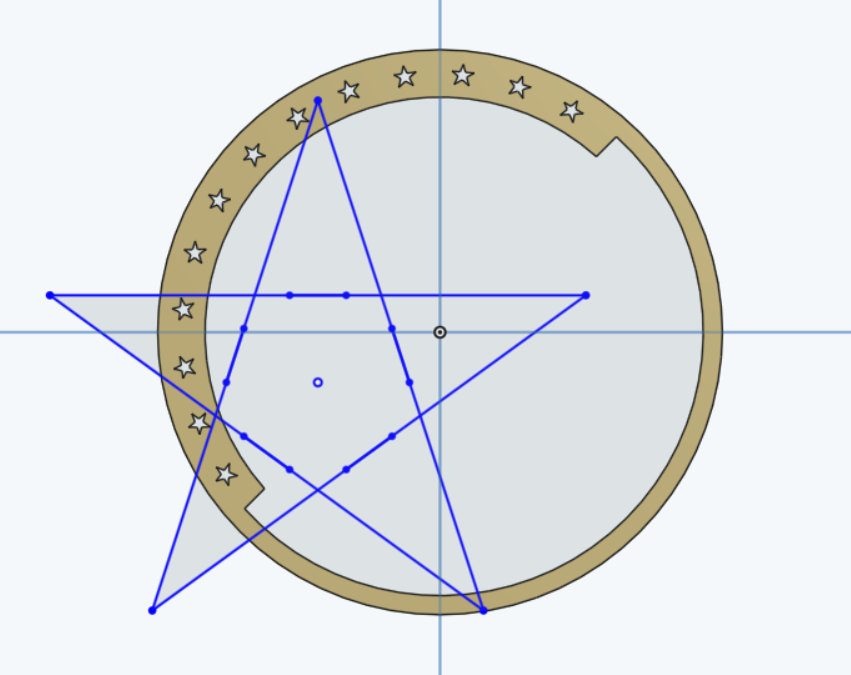
Make a new sketch on the front plane again, but go back to sketch 2 and copy a star. Paste this star in sketch 3, and straighten it out. Then, scale it with a scale factor of 27.63.
Place it in the position that is shown in the image, where the top horizontal line almost touches the top of the fourth star from the bottom, and the top point is near the eighth star from the bottom.
Sketch 3 - Trimming
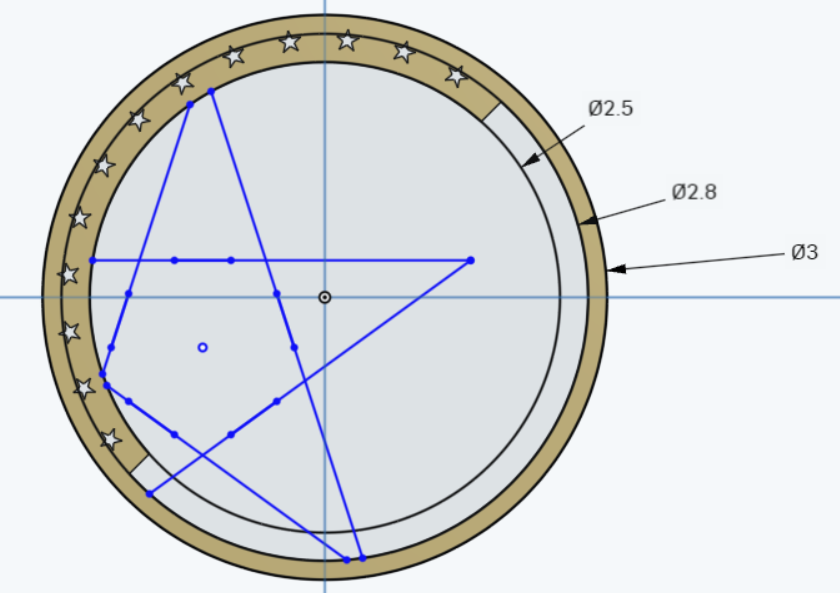
Draw the base circles again (3 circles around the center point, dimensioned with diameters of Ø2.5 inches, Ø2.8 inches, and Ø3 inches). Use the trimming tool to delete any part of the star that goes on the base or beyond the base.
Extrude 3 - Giant Star
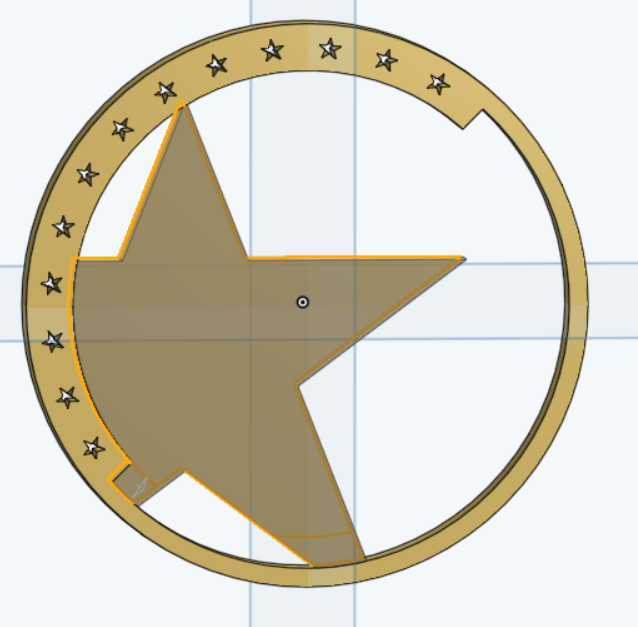
Extrude the star that was made in the previous step forward by 0.25 inches.
Shell 1 - Style
On the extrude that was made in the previous step, select the shell tool and remove the front face of the star. Make it have a shell thickness of 0.15 inches. The star design is complete.
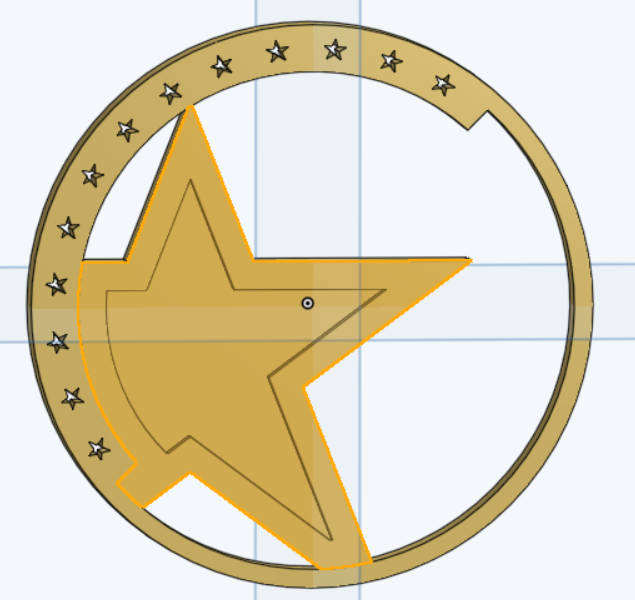
Sketch 4 - Making Lines
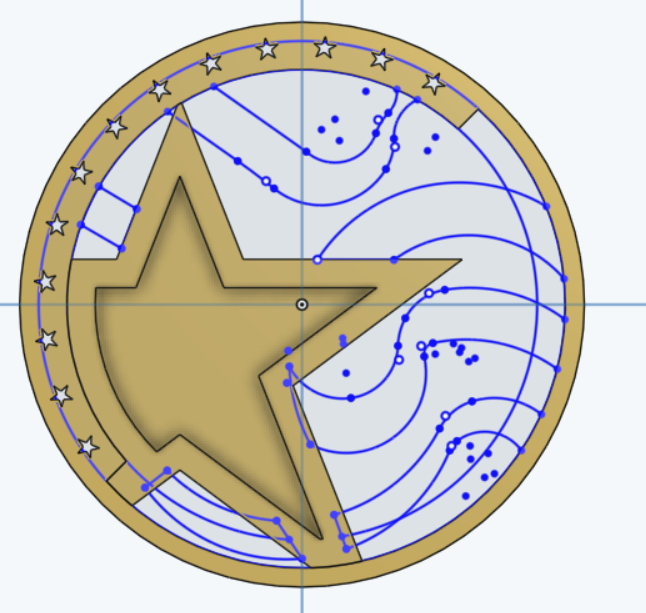
With a combination of lines, 3-point arcs, and sketch fillets, I created the line designs of the keychain. I did not use any measurements, but I did base it on my school's logo, so base it on the image.
Extrude 4 - Line Design
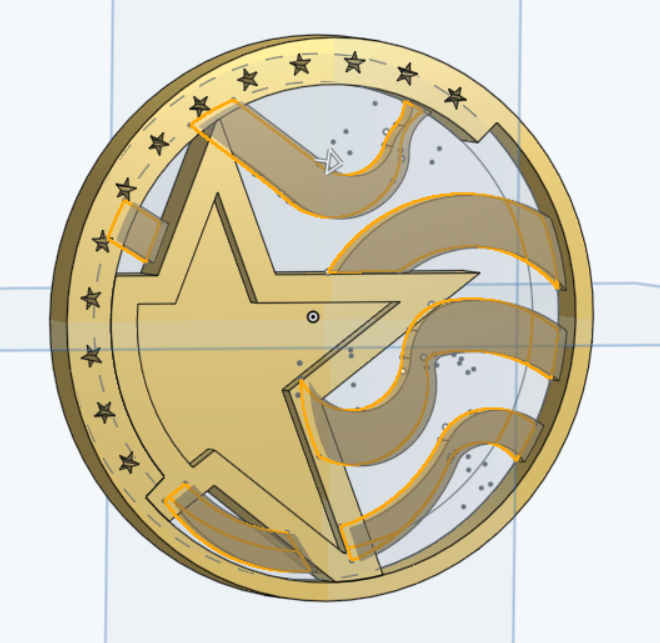
Extrude the line designs that were made in the previous step forward by 0.125 inches. The additional line designs are complete, and the entire keychain is finished.
Finished - 3D Print!
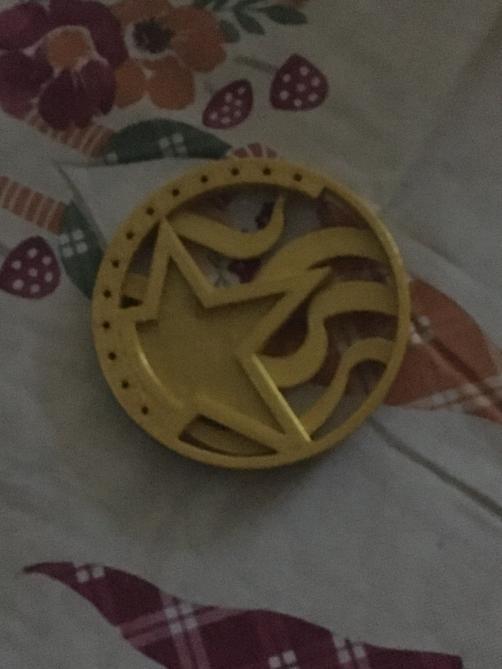
The design is completed! Export it as a .stl file, put it into a flash drive, and put it into a 3D printer to print. Make sure your filament is your desired color before printing!
I printed it out, and I think it came out great!