Spooky Cemetery Lightbox Card

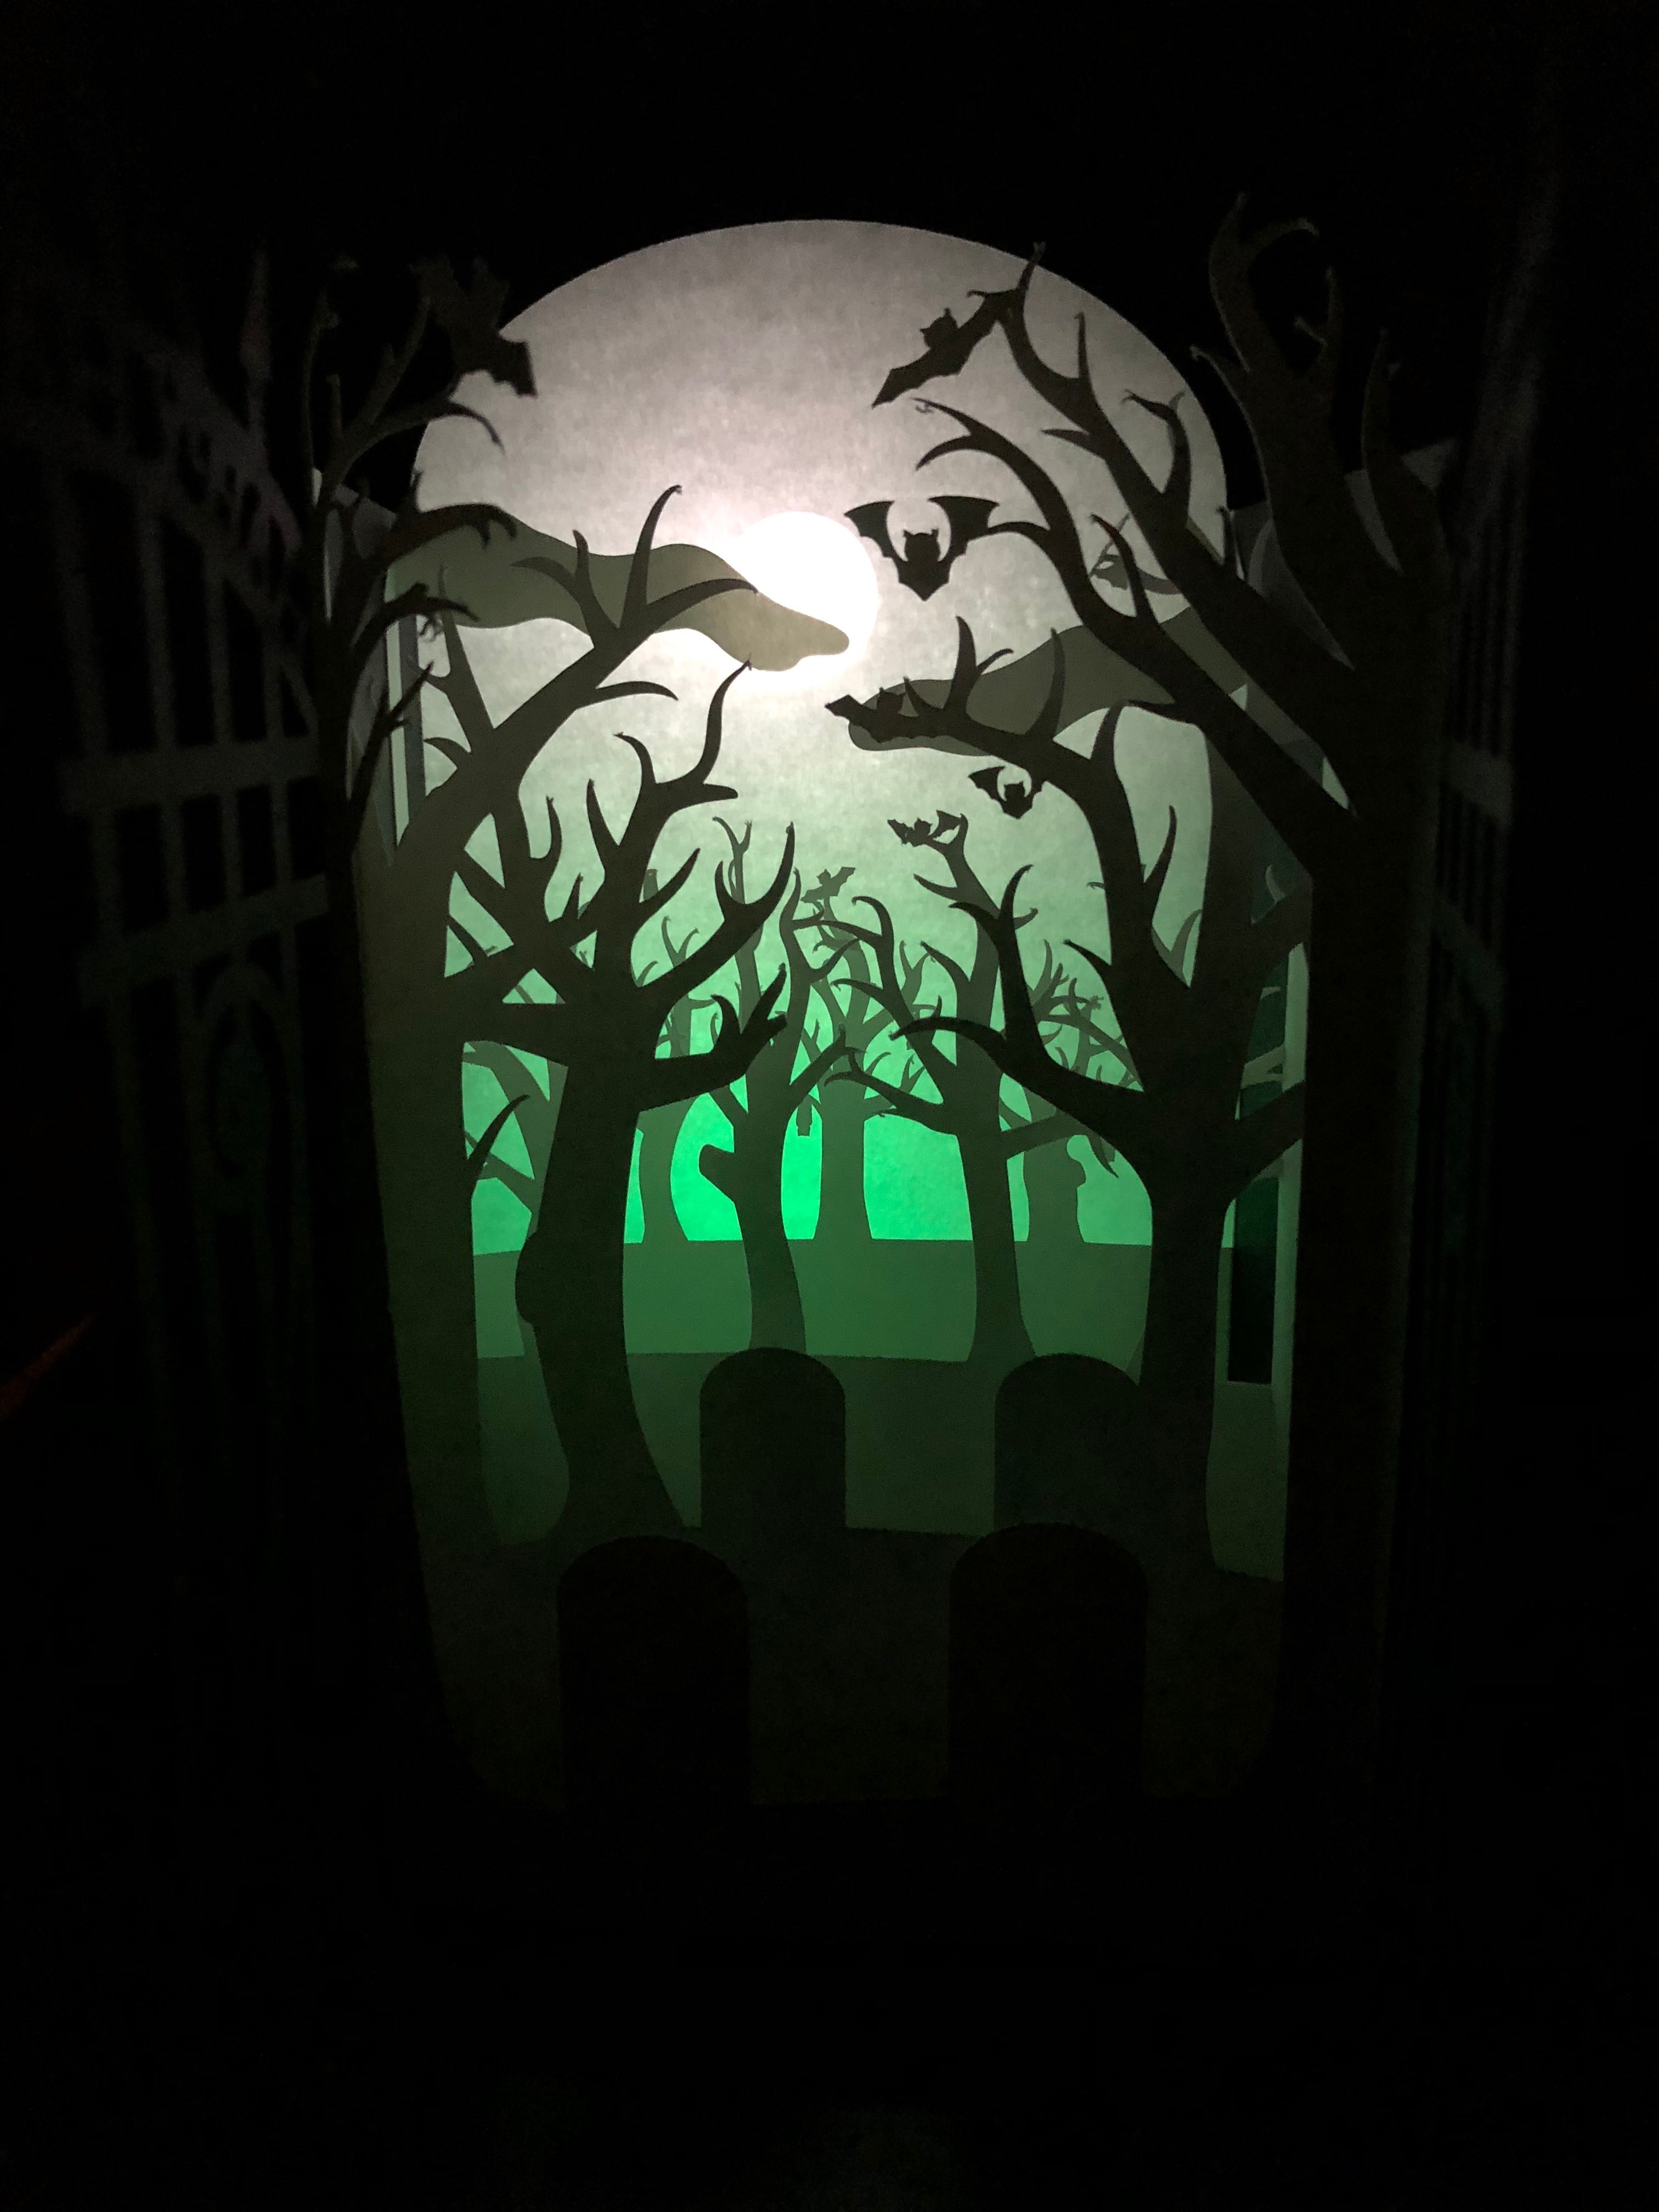
I've always been really into paper crafts and paper engineering - namely making pop up cards - so it's kind of strange my Instructables don't reflect that. My paper engineering hobby really ramped up when I began using a Cricut at my local Makerspace, and then even more so when I got a Cricut of my very own. Sometime in the last year, I saw Chibitronics sticker LEDs on Instagram. I did not wait long before buying a set in each color and lots of copper tape and batteries to really make my cards special. In the meantime, I received a Hallmark Paper Wonder card from a friend (same card structure with illustrations but no lights), and started seeing paper cut light boxes popping up in different Cricut social media groups. I realized the Chibi lights would enable me to combine both items into a really cool card. Halloween is the perfect subject matter and is just around the corner, so I made this cemetery scene.
I like to use an older (non-subscription) version of Adobe Illustrator to draft out my designs, but you could make this or a similar card in Inkscape (free). If you do not have a cutter plotter, you could even draft your design by hand and cut it out the old fashion way with an x-acto or olfa knife. The lights are optional and the card will still look fabulous and amaze anyone who receives it, but I really think they give it that extra wow factor.
Check my card out in action on my Instagram. I couldn't get the video to embed :-(.
Let me know in the comments if you made one! I know I'm planning to design another one soon.
Supplies
Tools:
- Vector design software (Adobe Illustrator, Inkscape, etc.) or paper and pencil (this tutorial will use Adobe Illustrator)
- A cutter plotter machine (blade, pens, scoring accessory) or a few x-acto knives and a whole lot of patience (this tutorial will use a Cricut machine)
- Cutting mats
- Scissors
Materials:
- Adhesive runner
- Scotch tape
- Copper tape (with conductive adhesive)
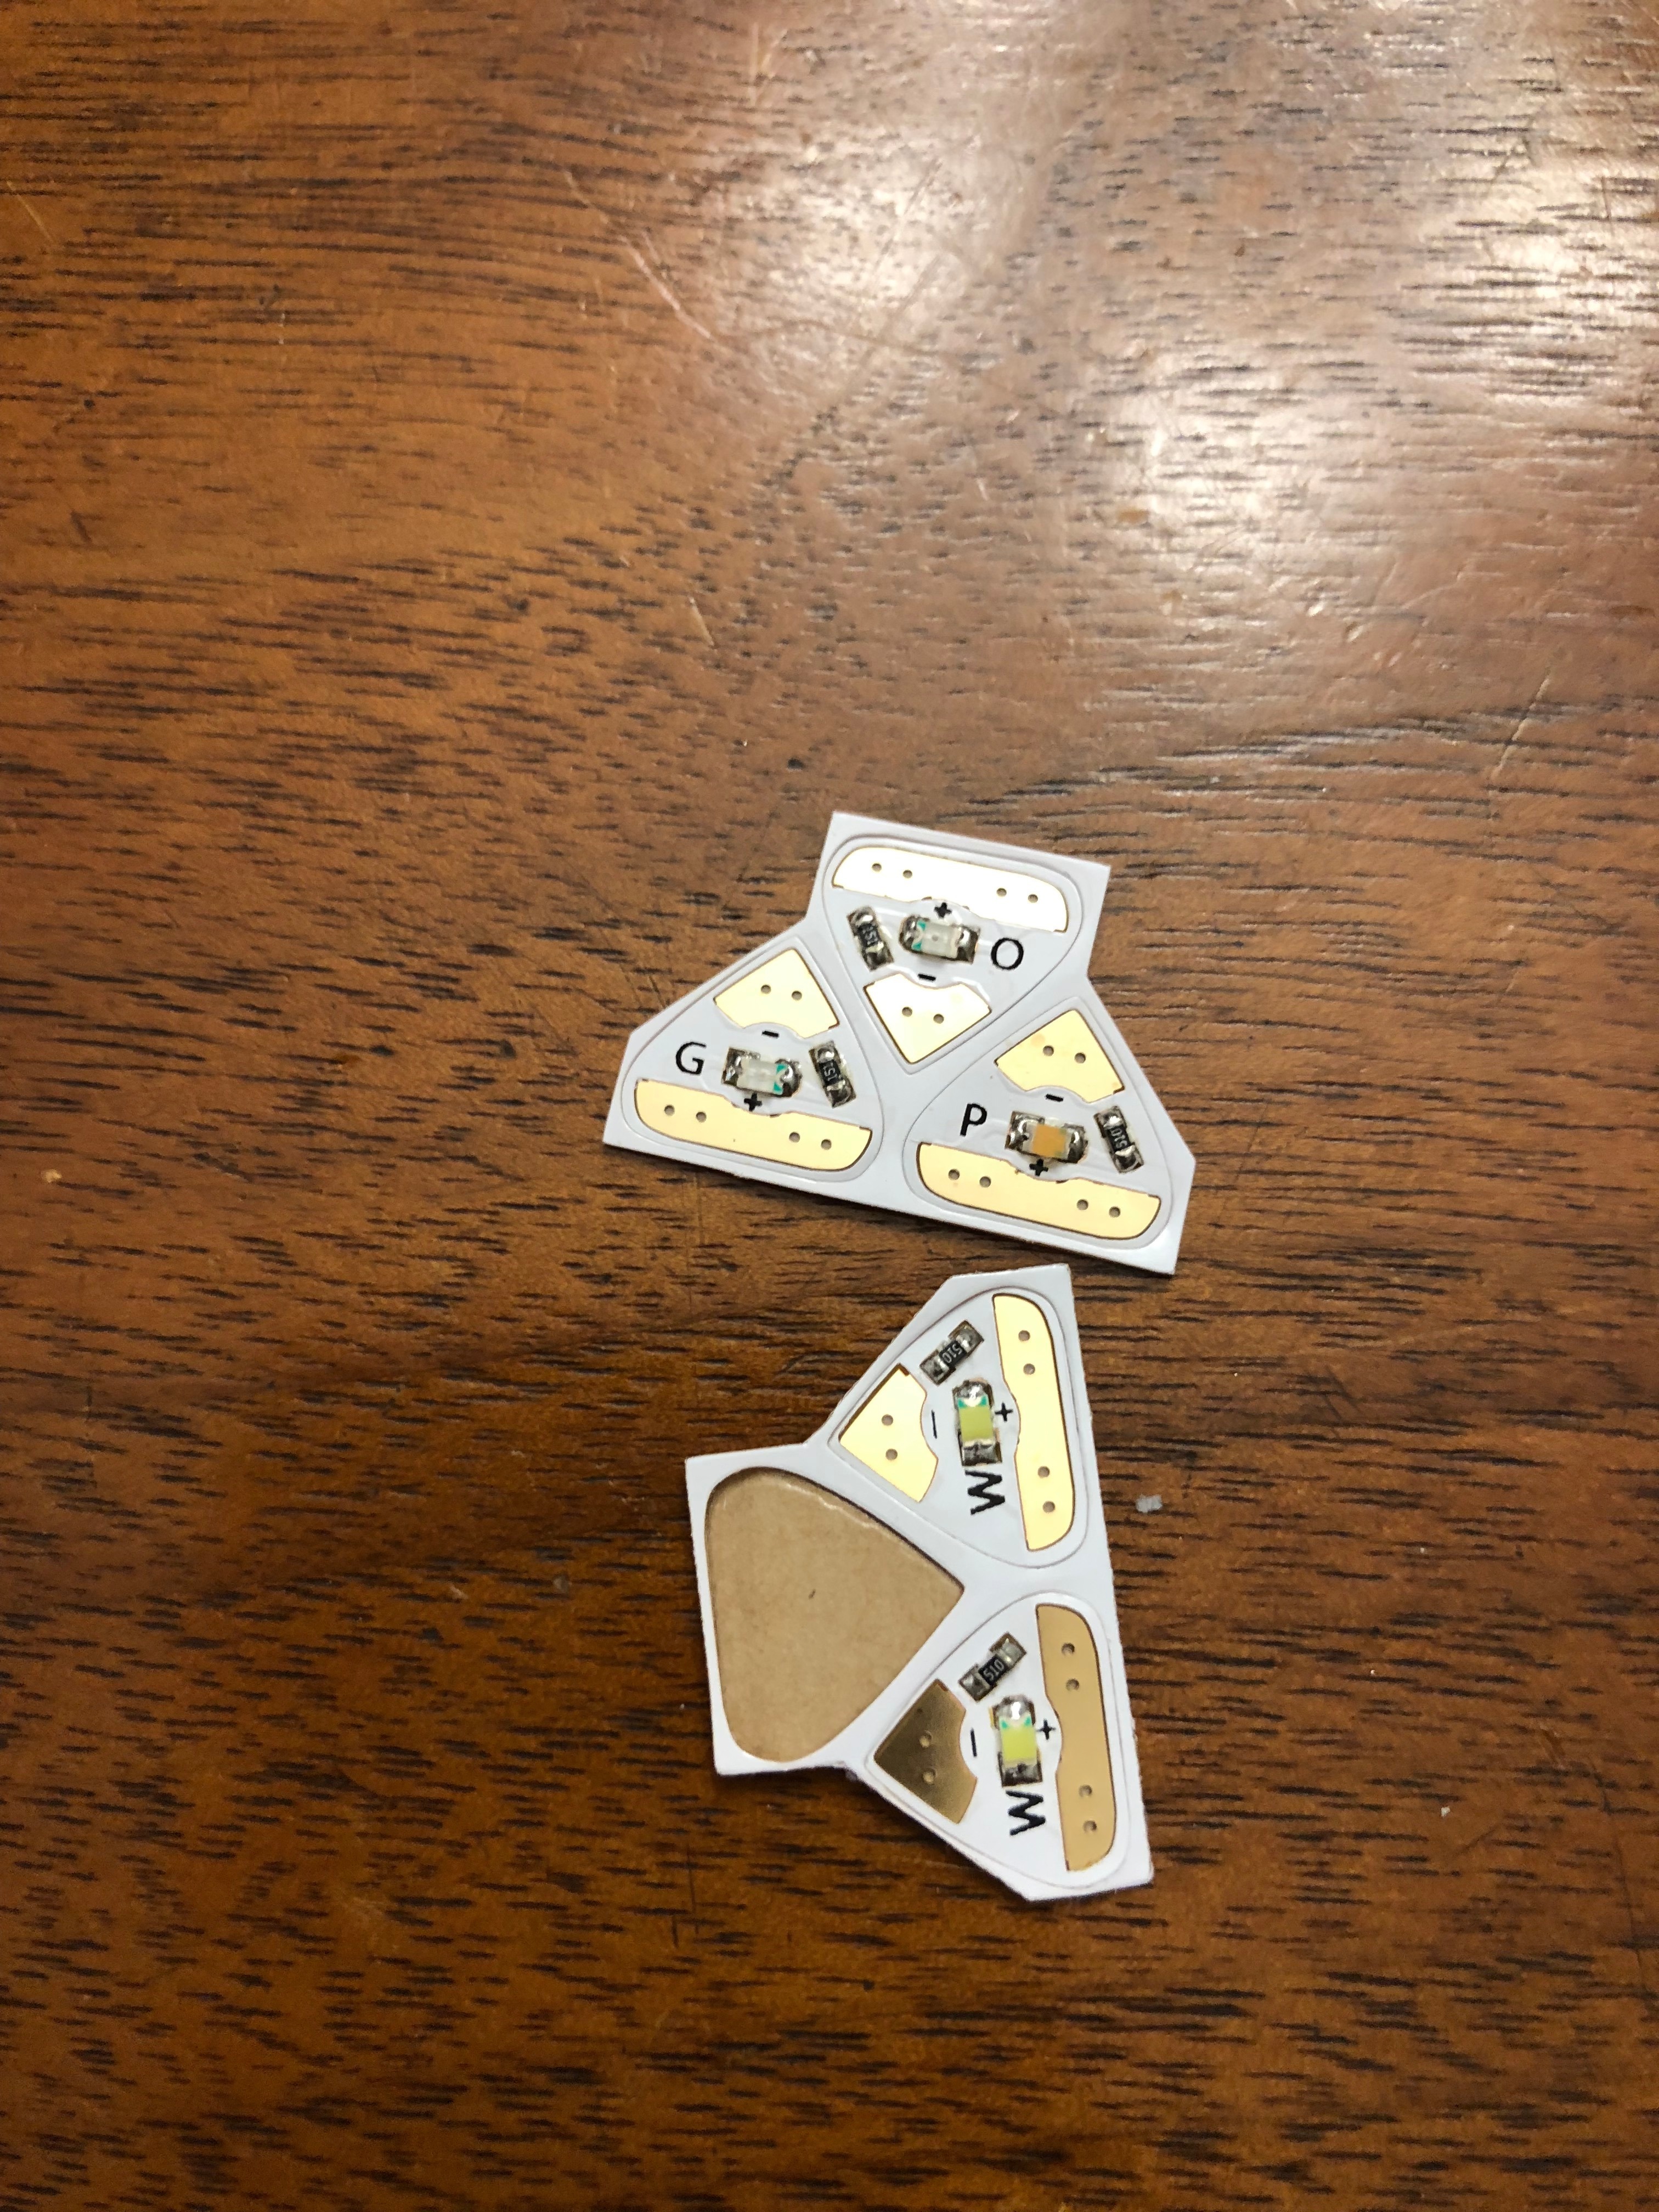
- Chibitronics LEDs
- CR2032 3V Battery
- 65 lb Cardstock in black and white
- Copy paper
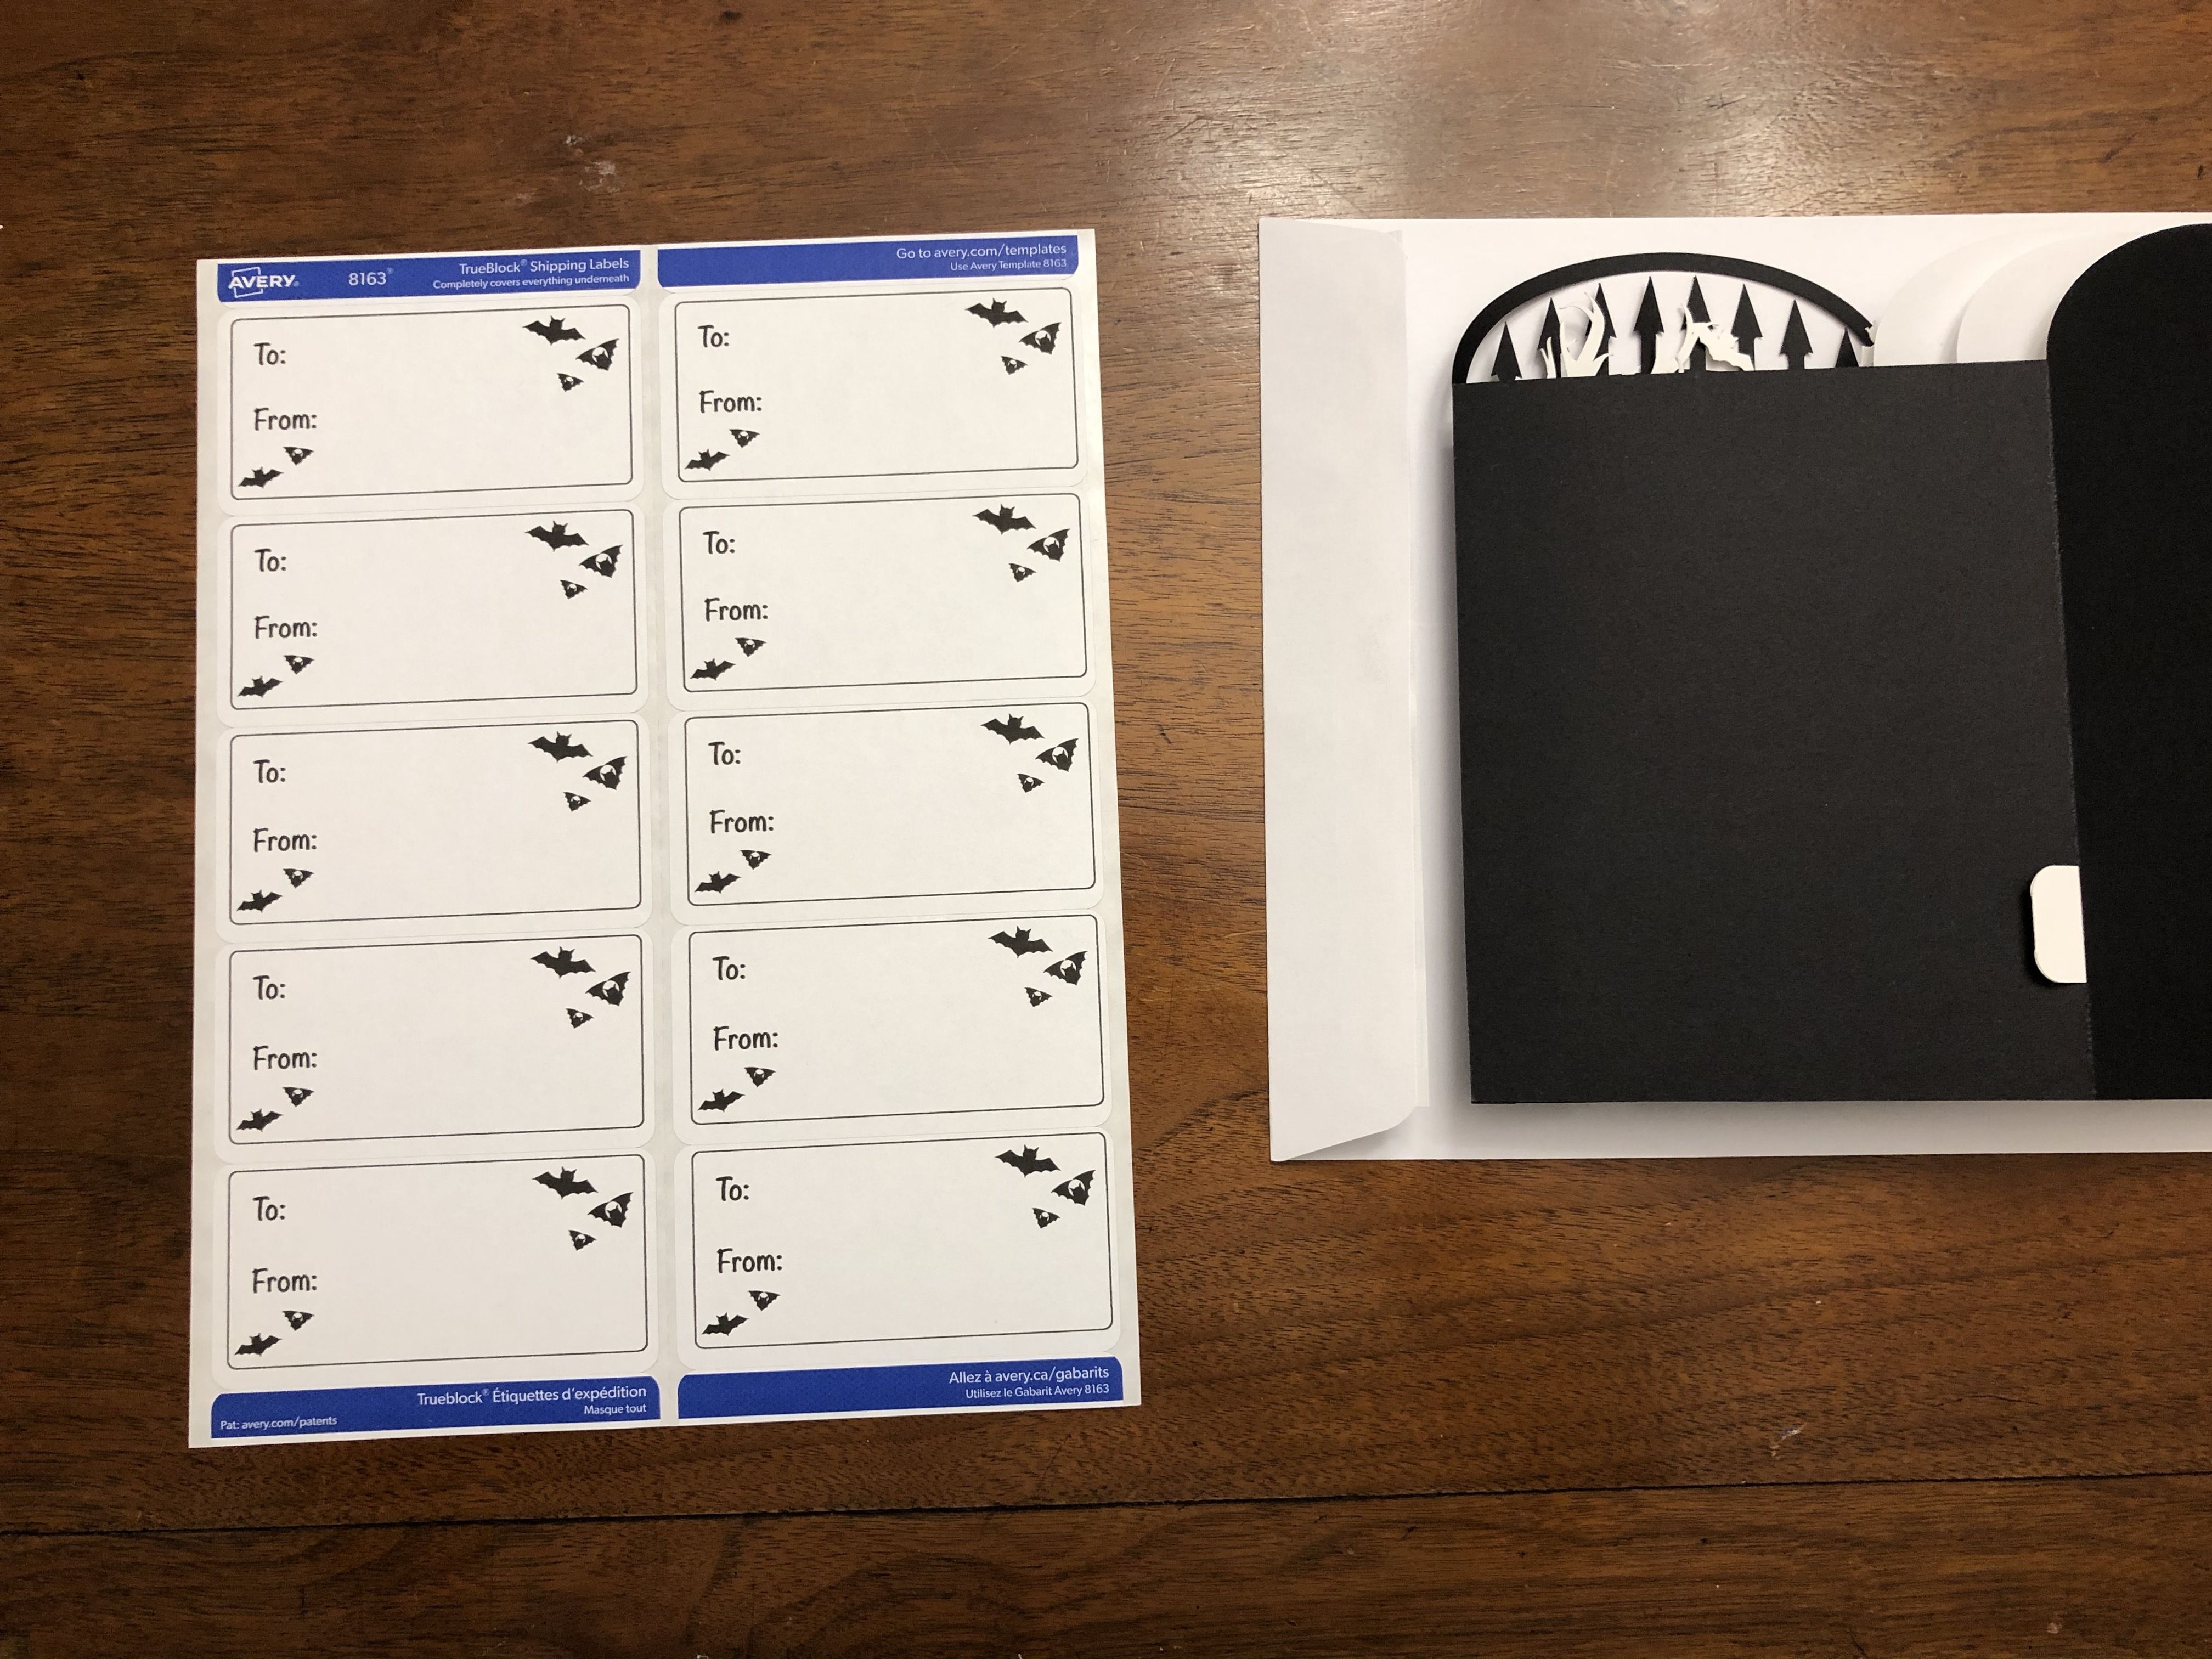
- Shipping label (optional)
- Envelope (optional)
Planning and Creating Your Design
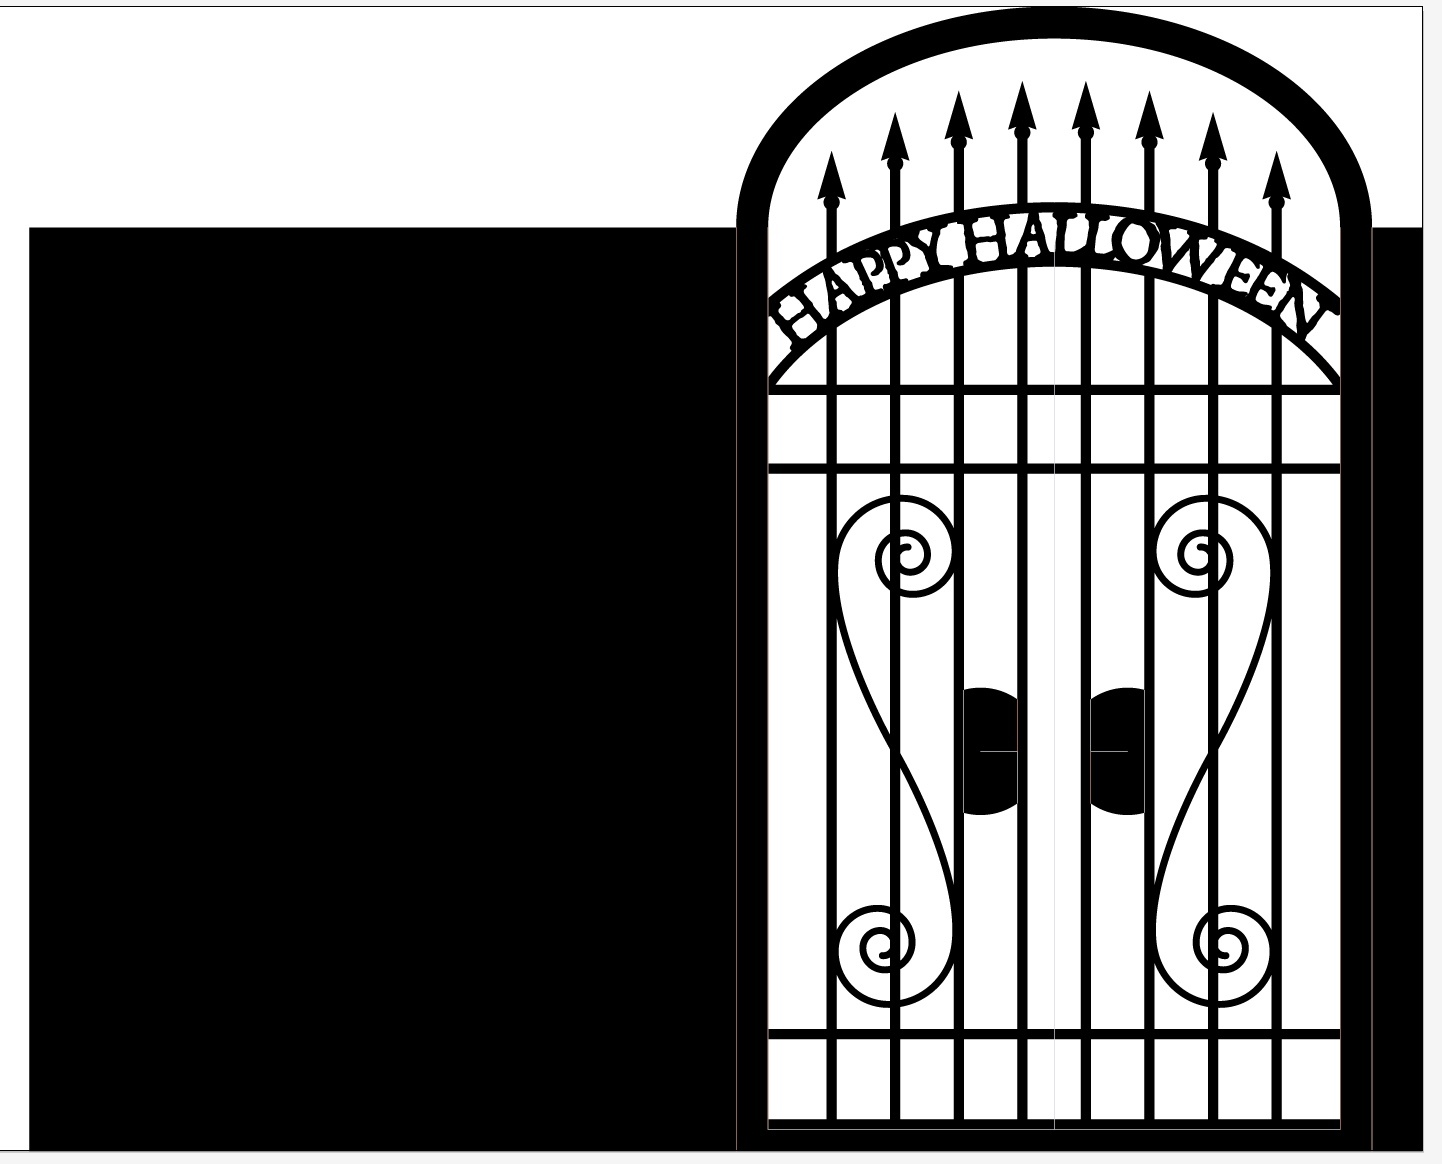


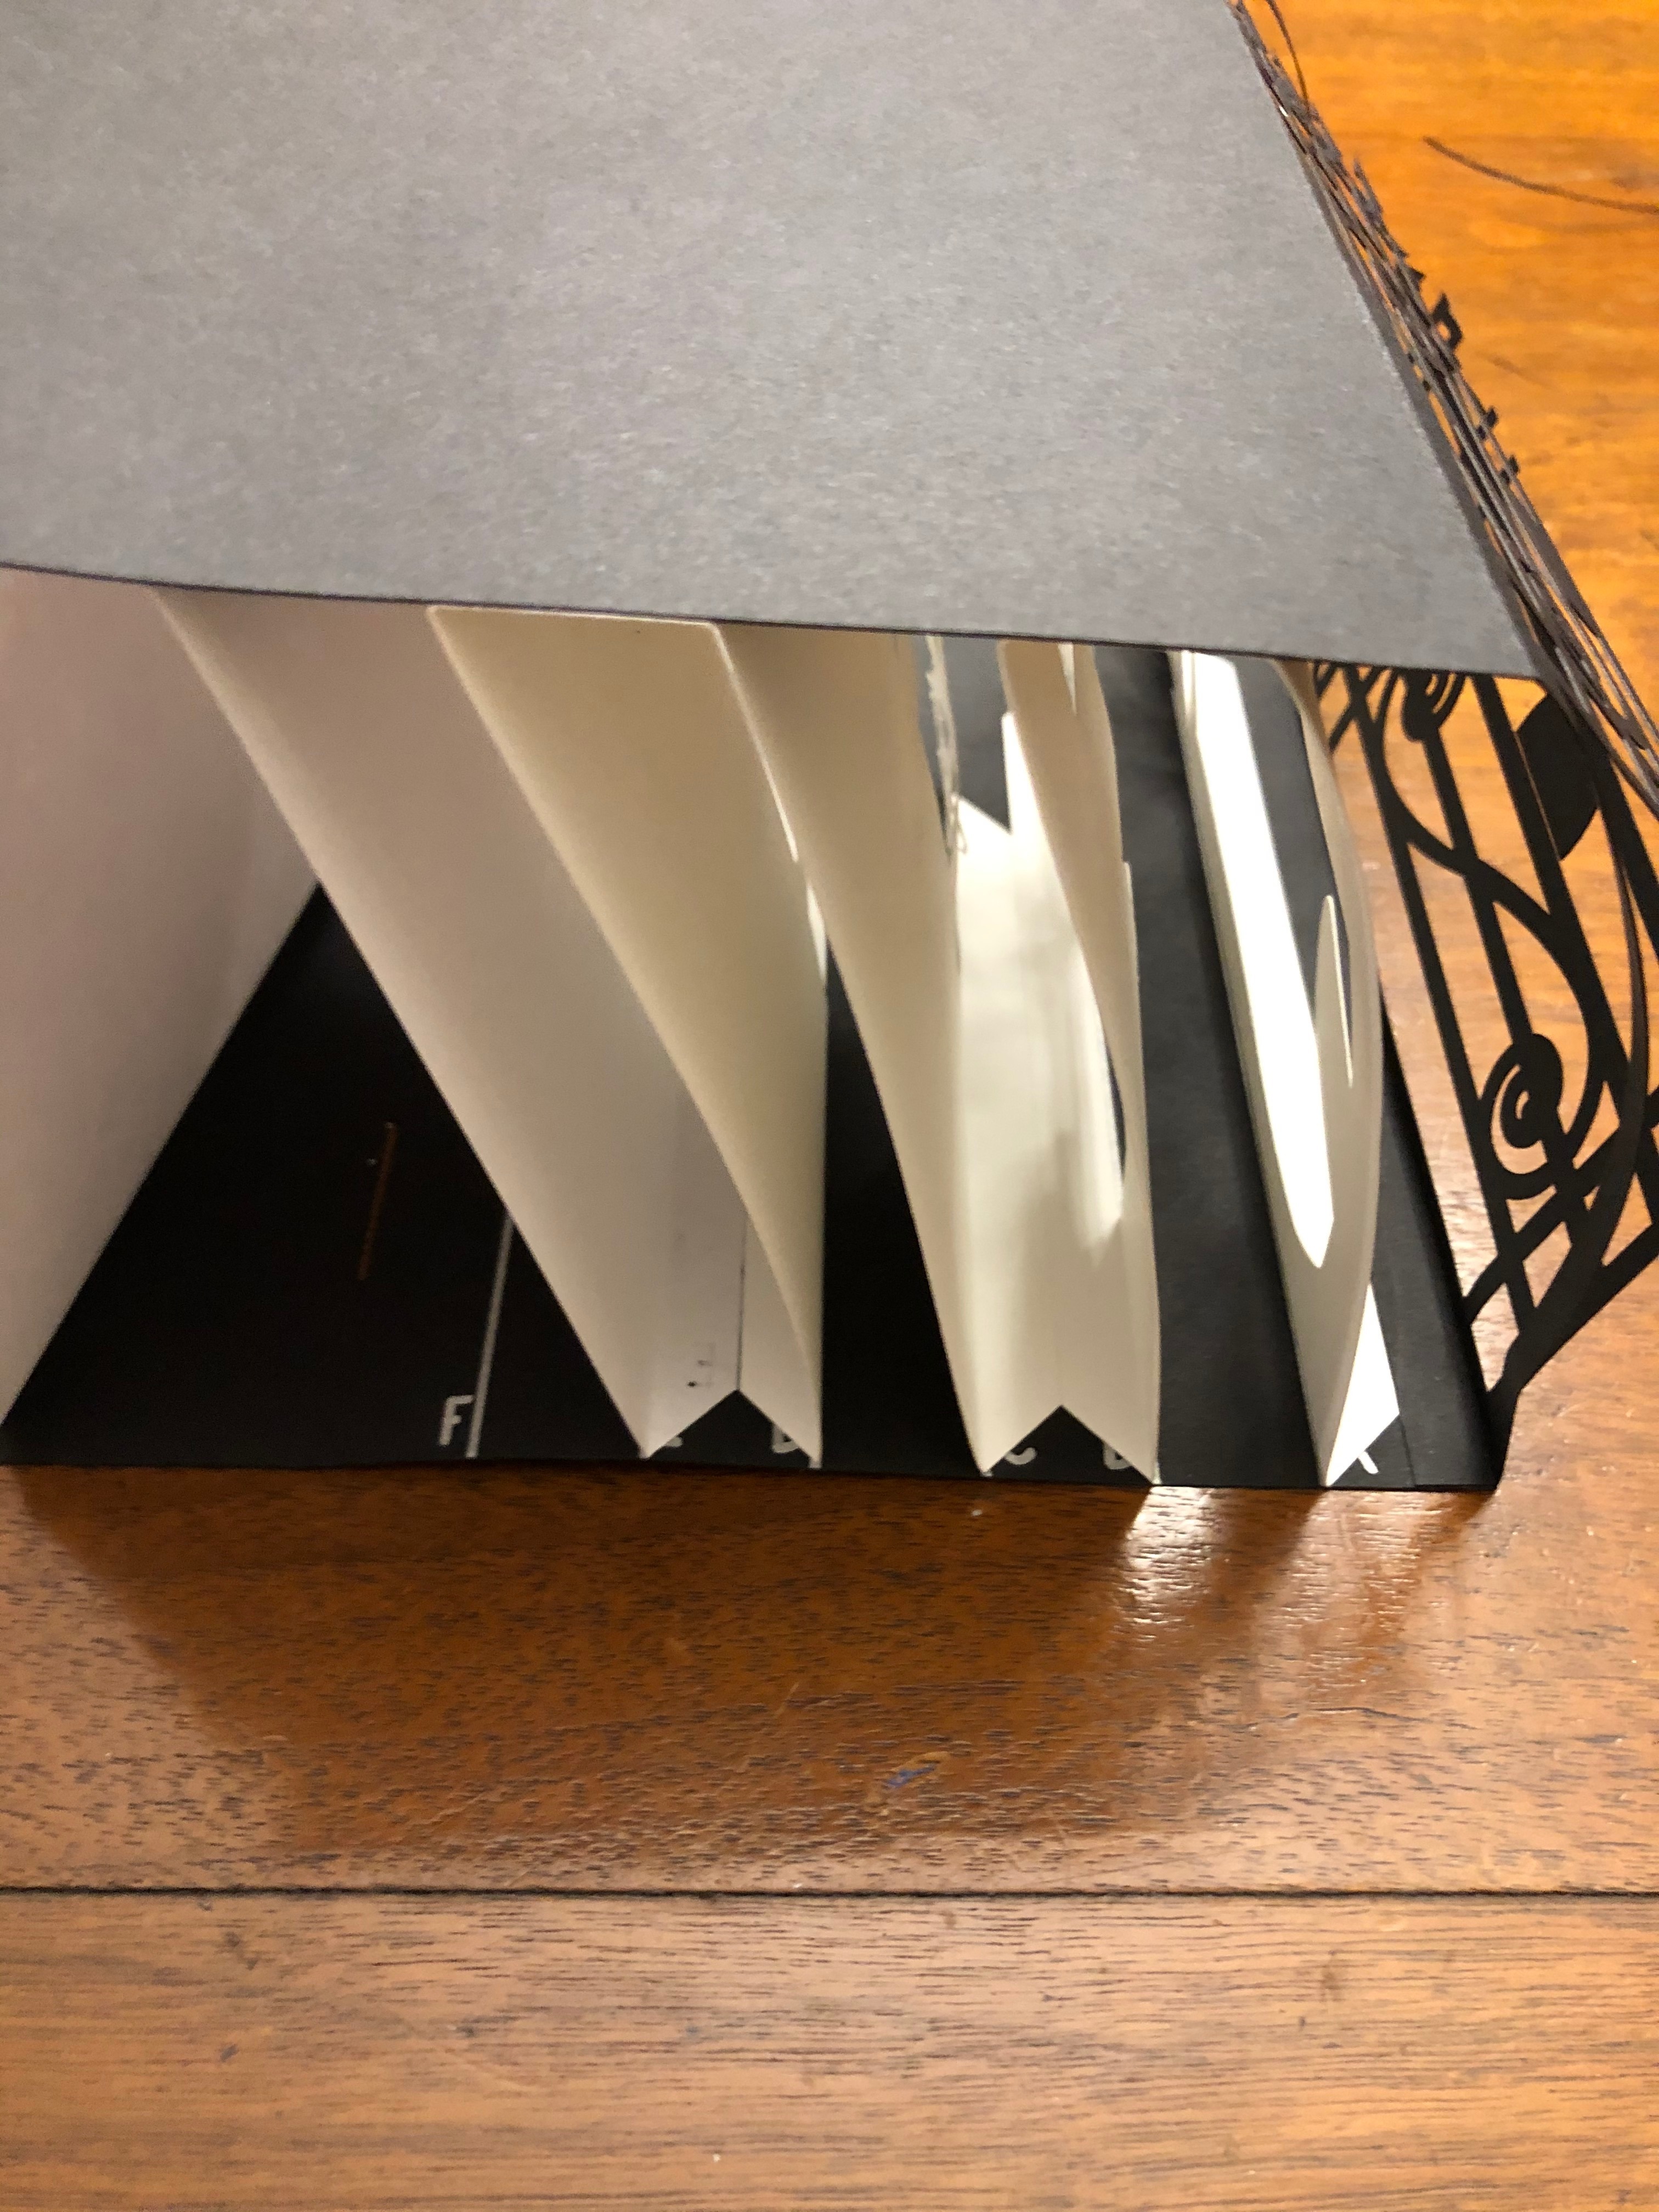
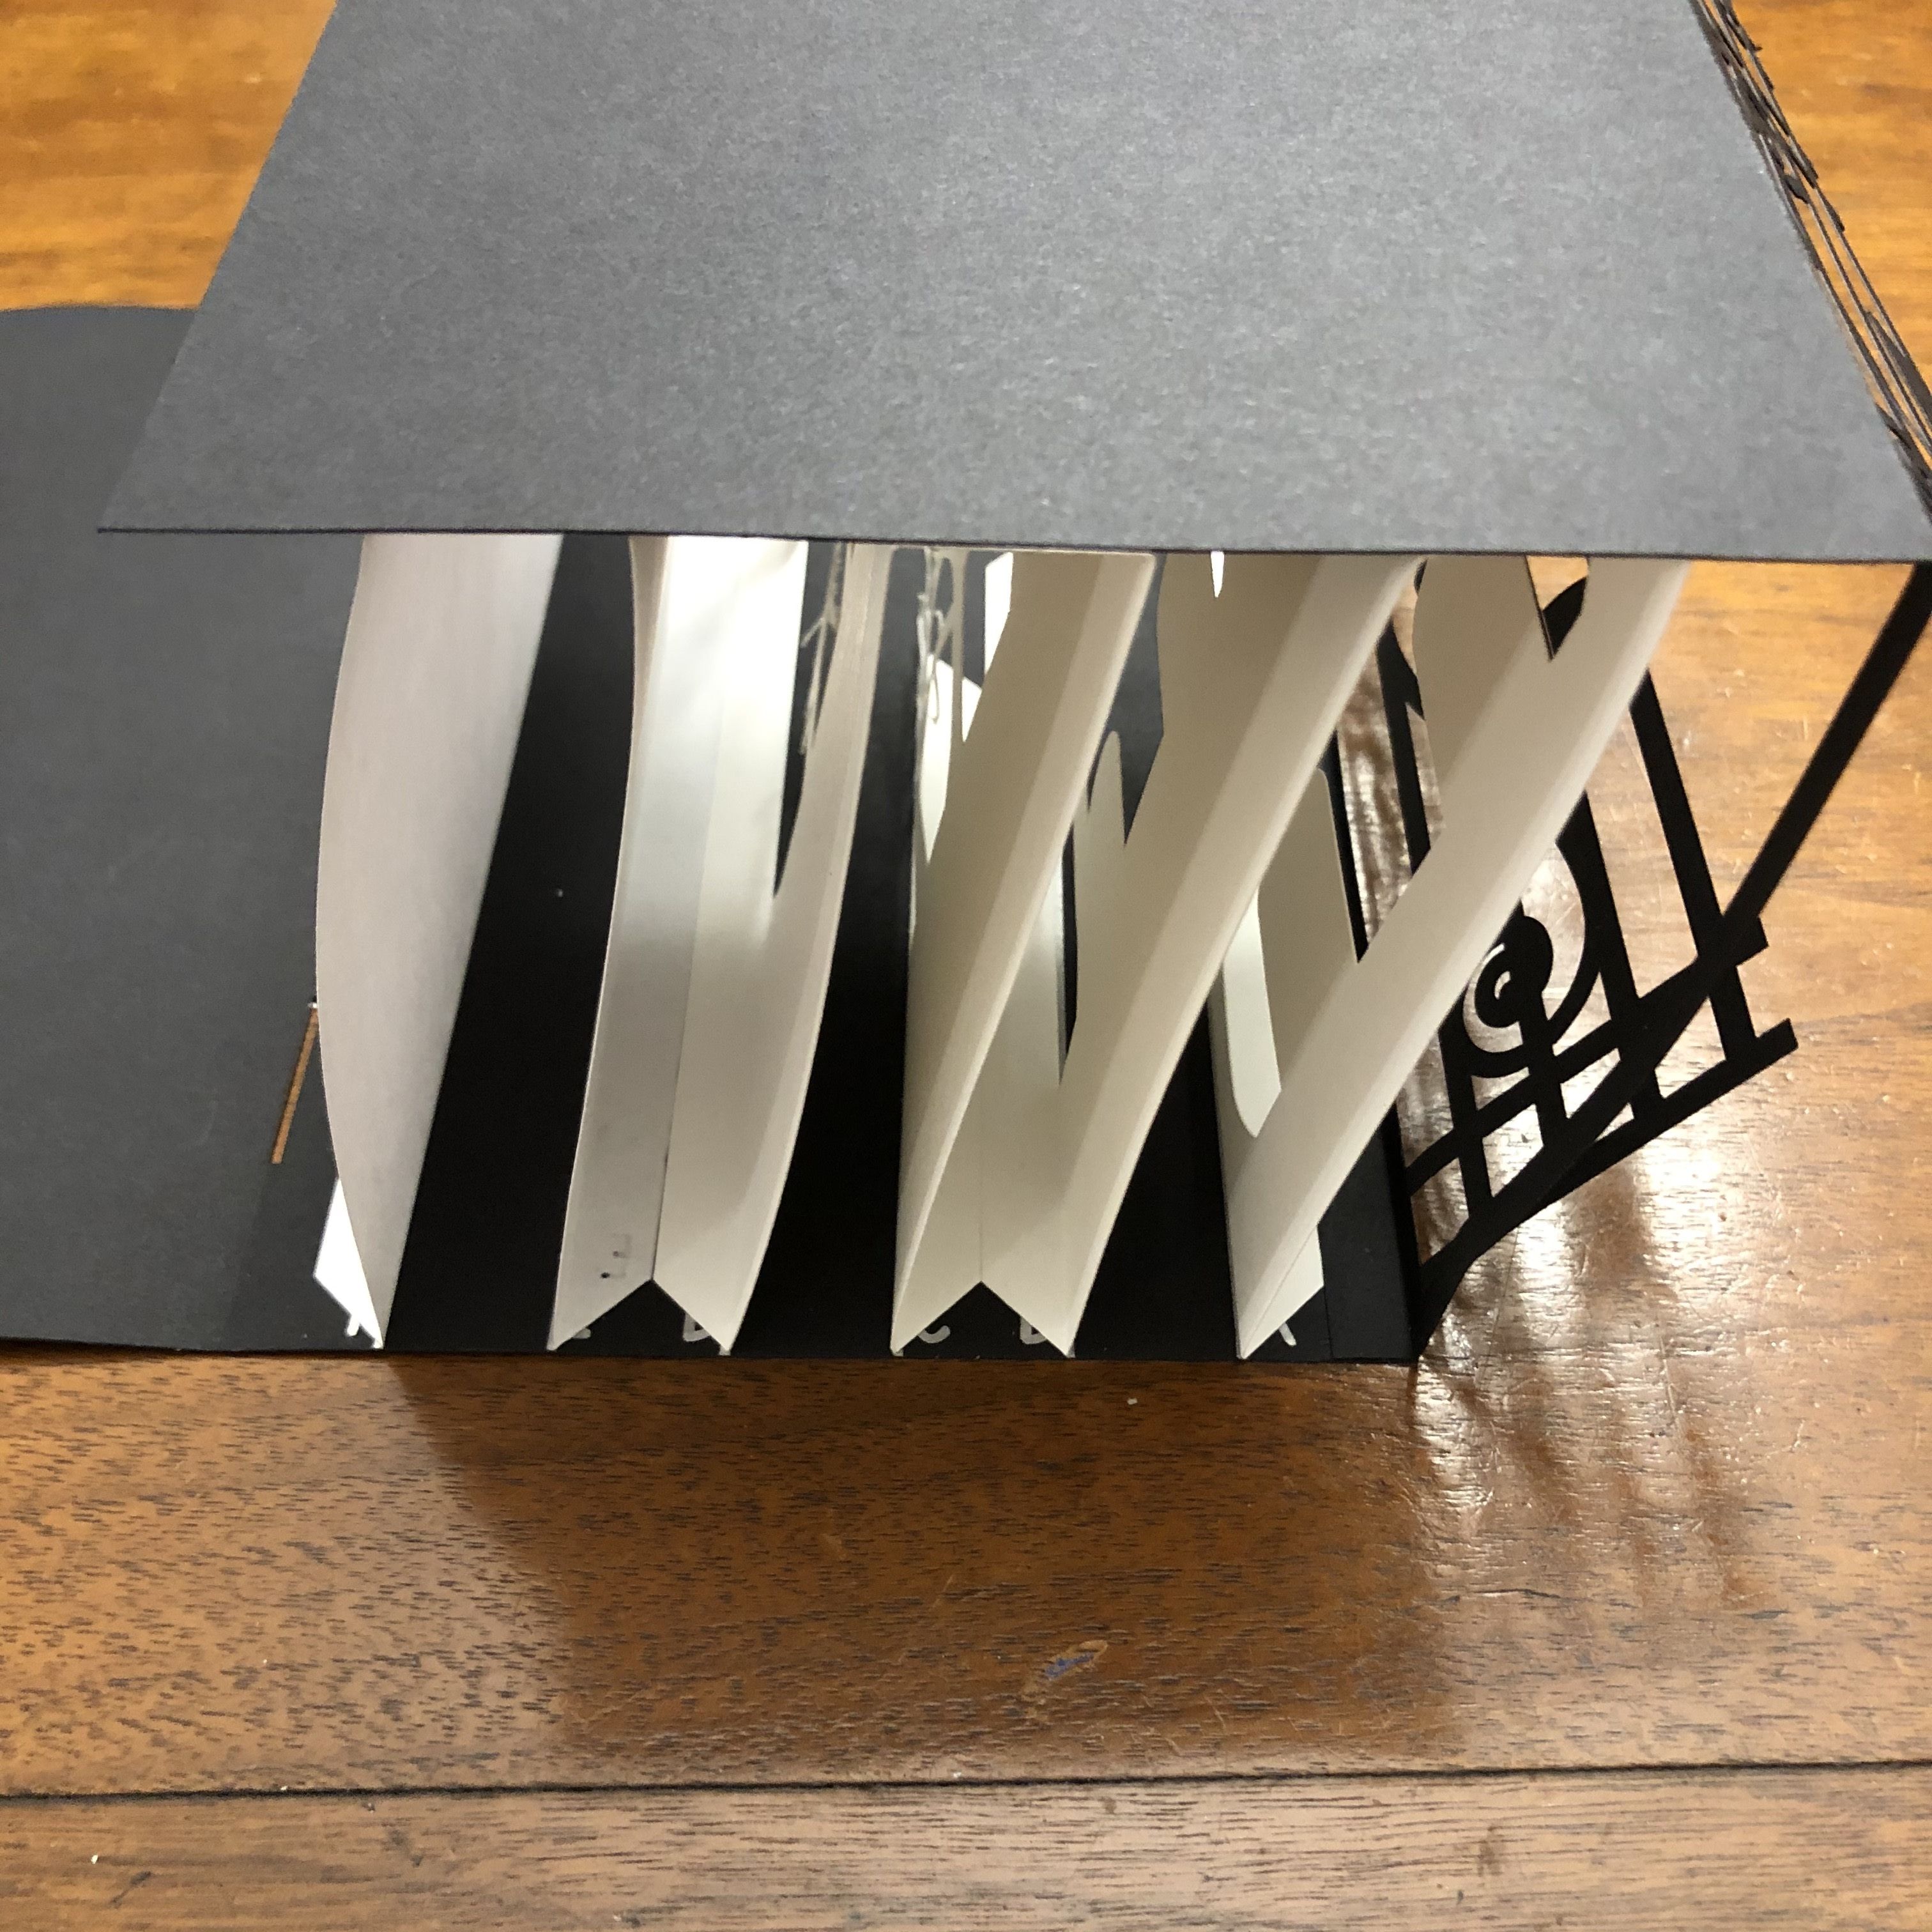
In my opinion, the best starting point is working out your dimensions. For cardstock projects, I like to use an adhesive runner that has a tape width of 0.375". This sets my tab width. I also only had letter size (8.5" x 11") cardstock in my stash, so I knew I needed to design to that. This means a max part size of 8" x 10.5" in Cricut land. I eventually settled on spacing my layers by 2 x the tab width, so 0.75". A good proportion seemed to be 6 internal layers, resulting in a popped up depth of 5.25" and a width of 4.5". This makes for an unflattened half perimeter width, plus a 0.375" tab, of 10.125". We need two sheets total, a side, front, and tab on one sheet, and a side, back, and tab on the other sheet. Using a letter sized sheet in landscape, we are limited to an 8" height. This means the designable area of the inner layers is 4.5" x 8" tall. We will also need 0.375" tabs on each side of each internal layer. We can fit two internal layers on one sheet, so we might as well connect two adjacent tabs, but first, we'll use 6 layers of 4.5" x 8" to draw out our design. I used Adobe Illustrator.
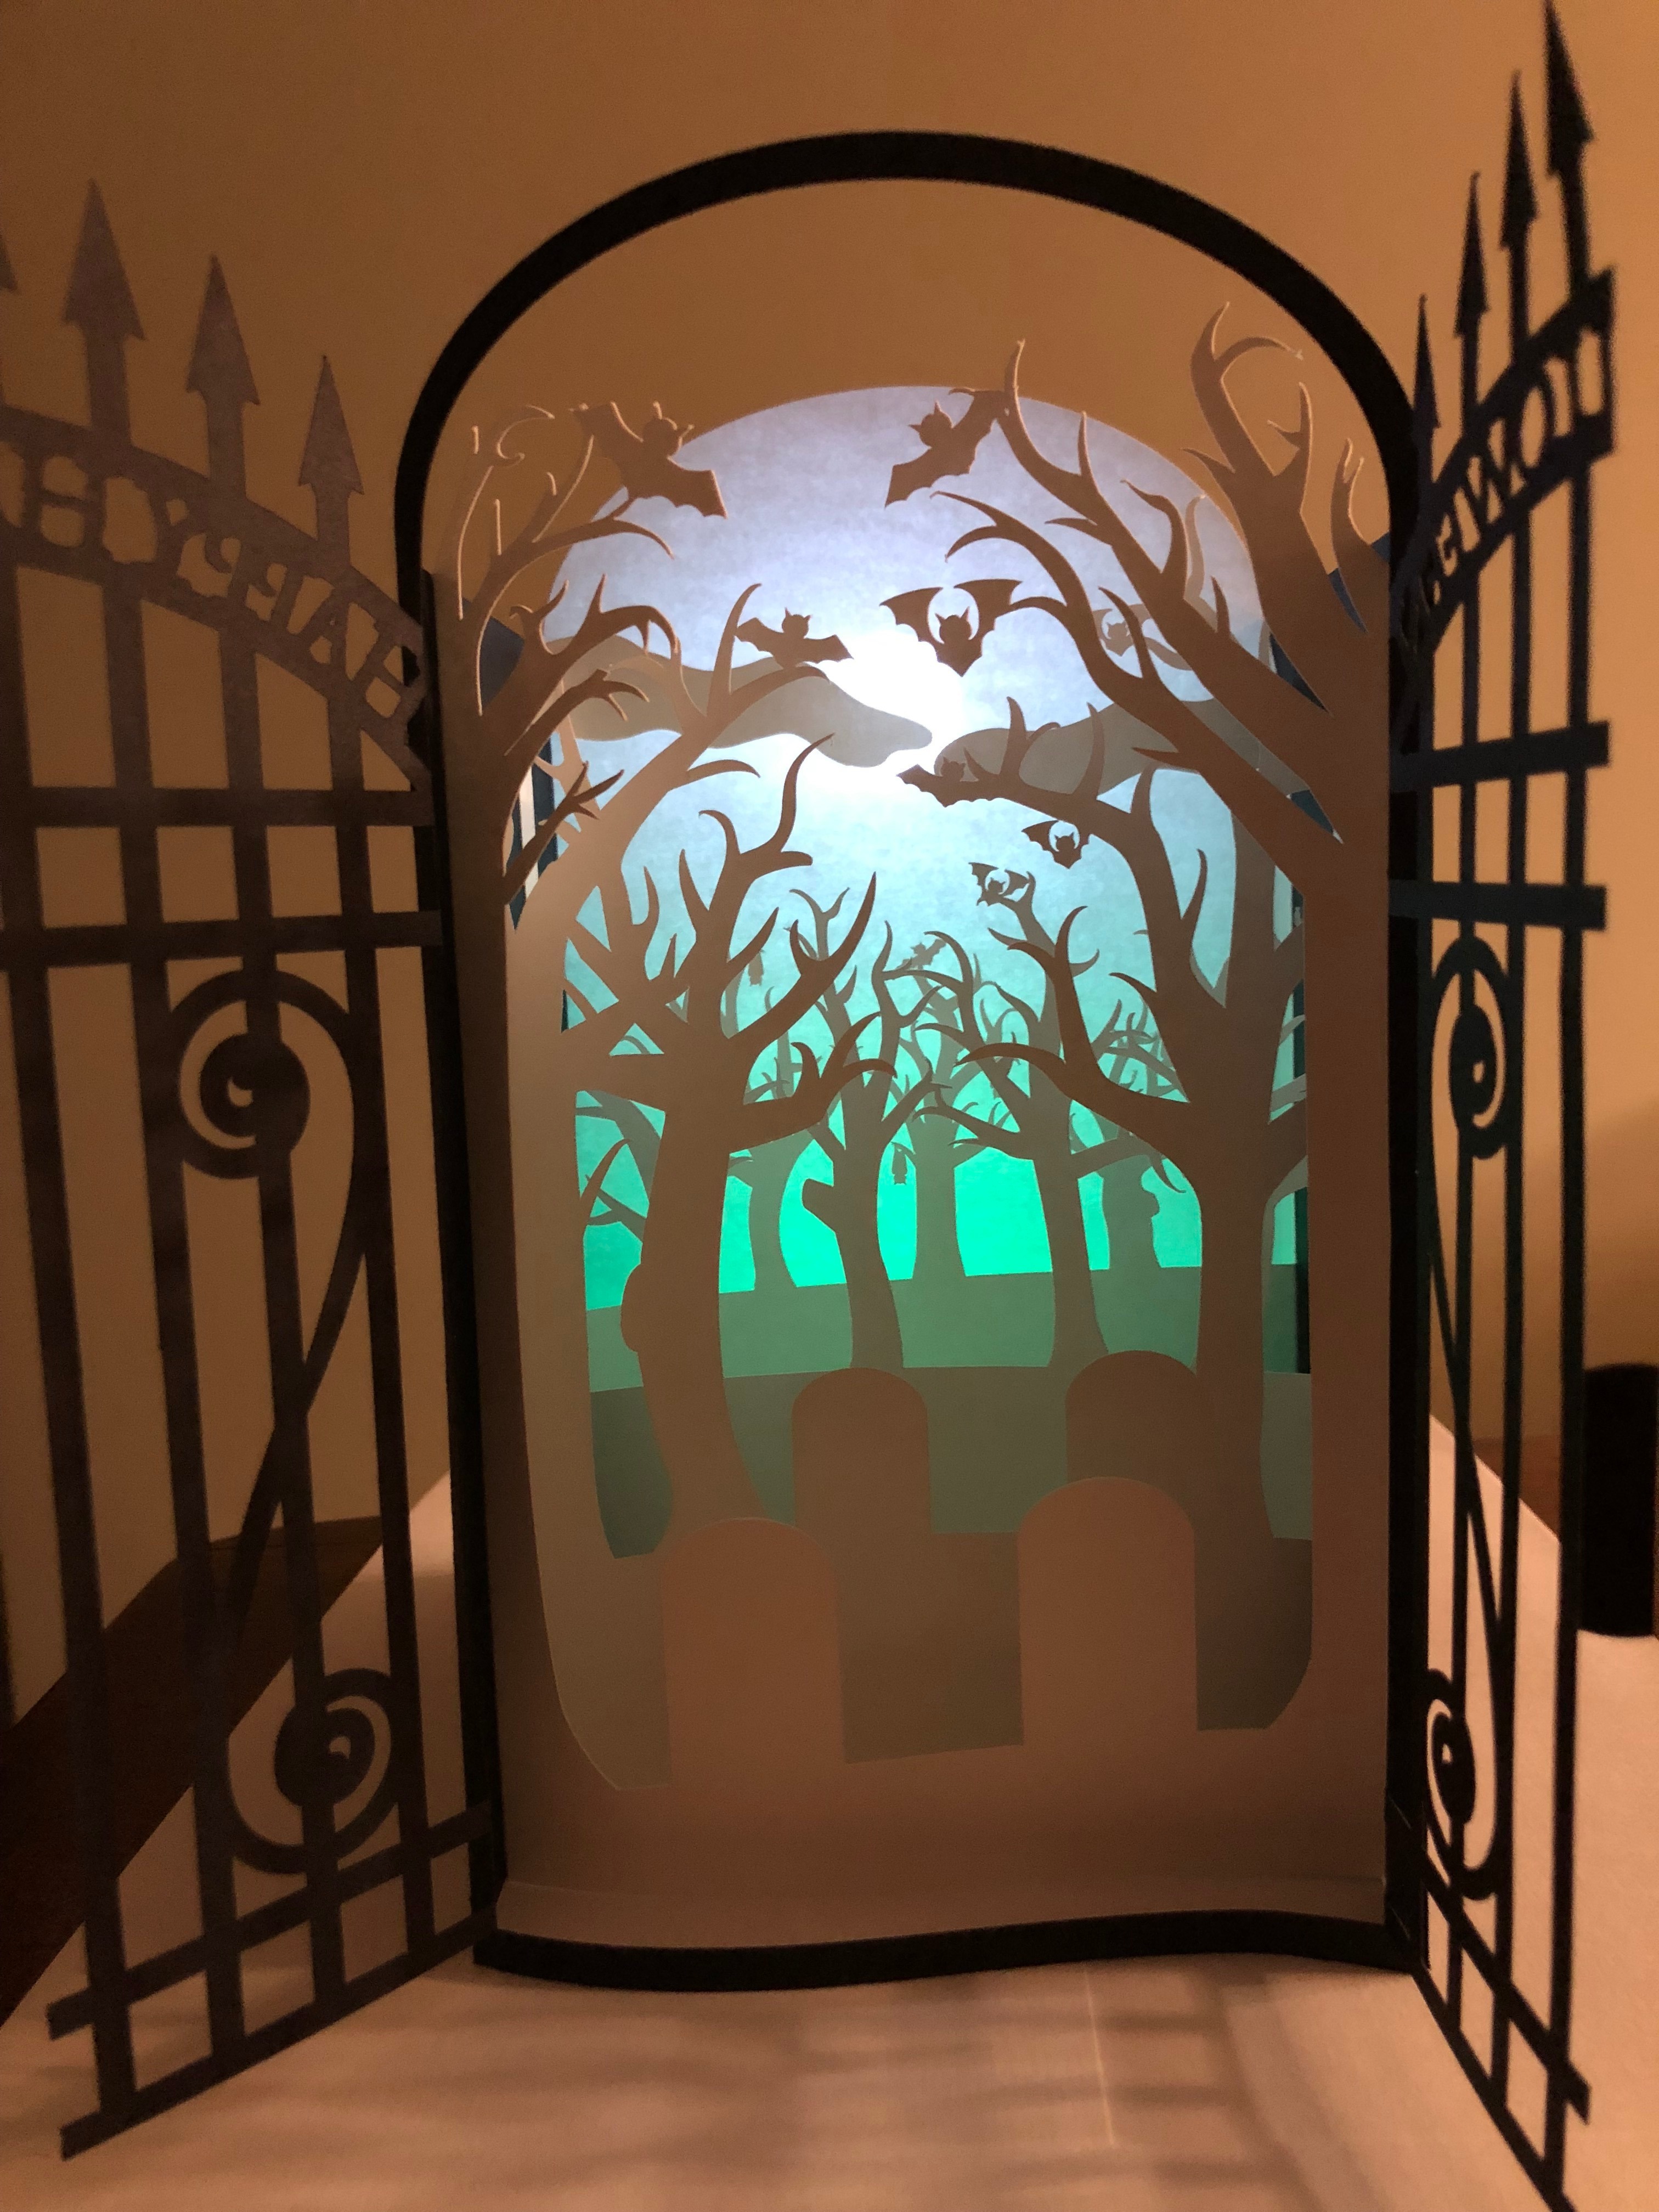
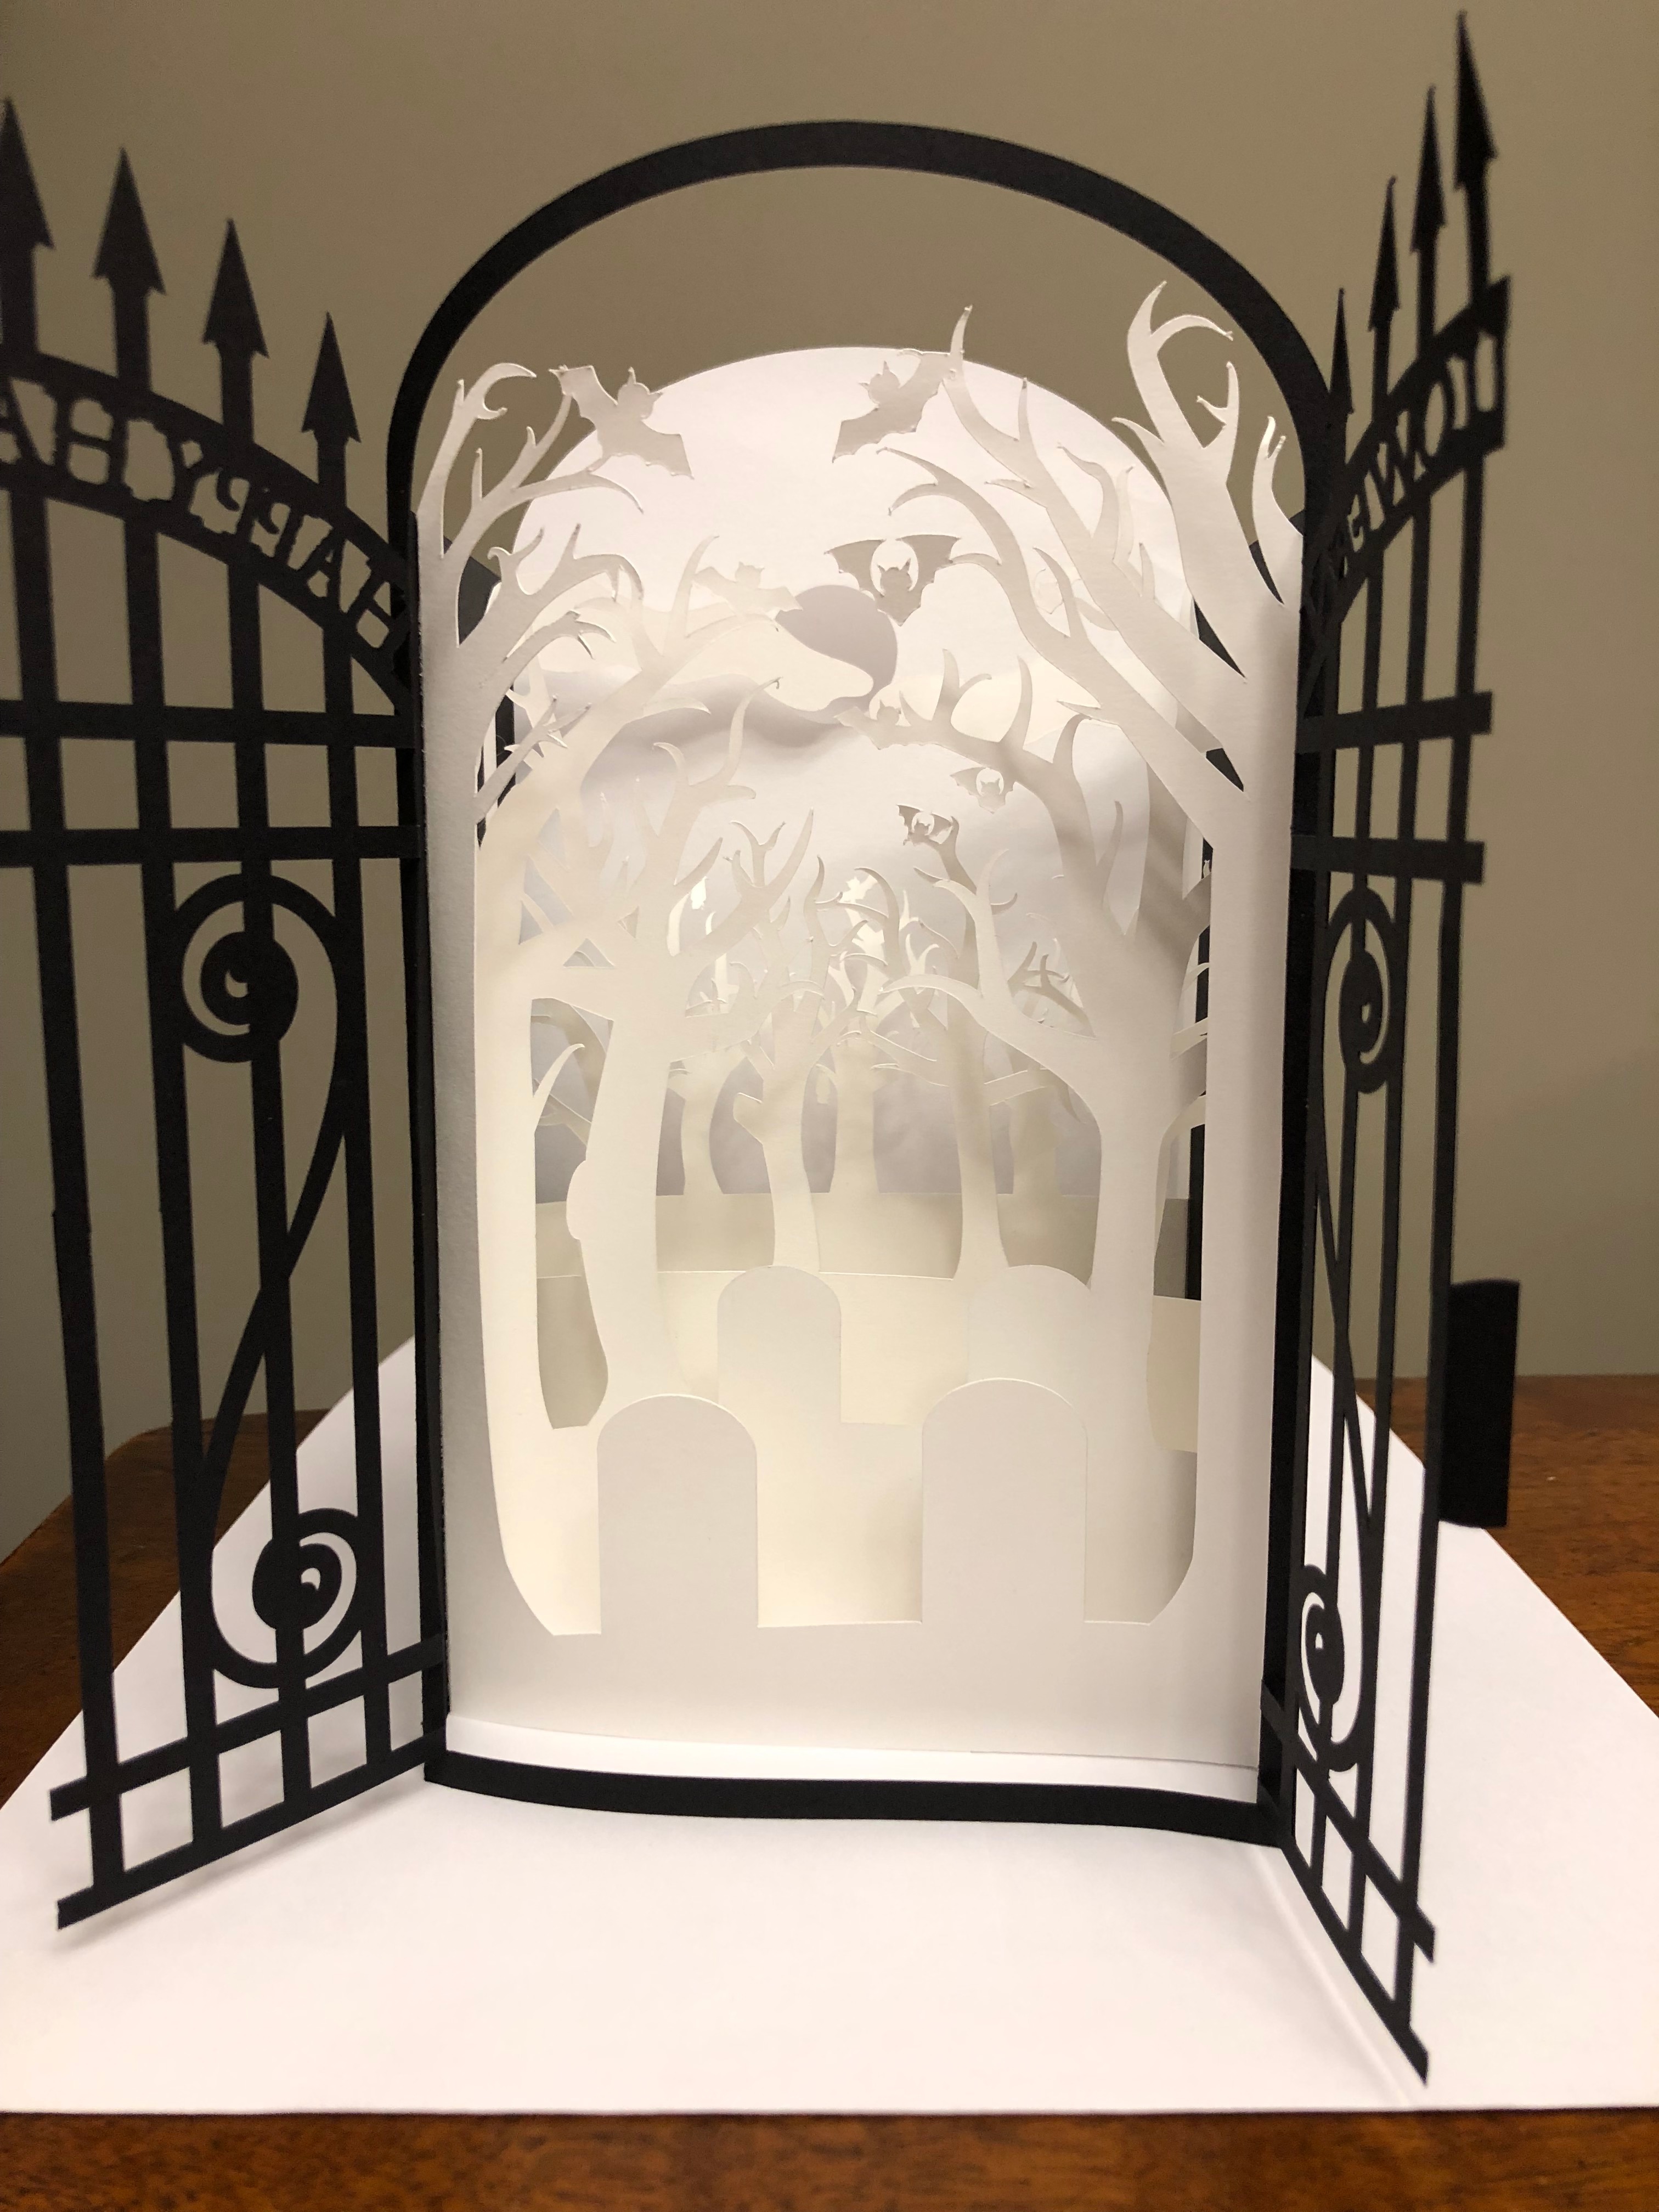
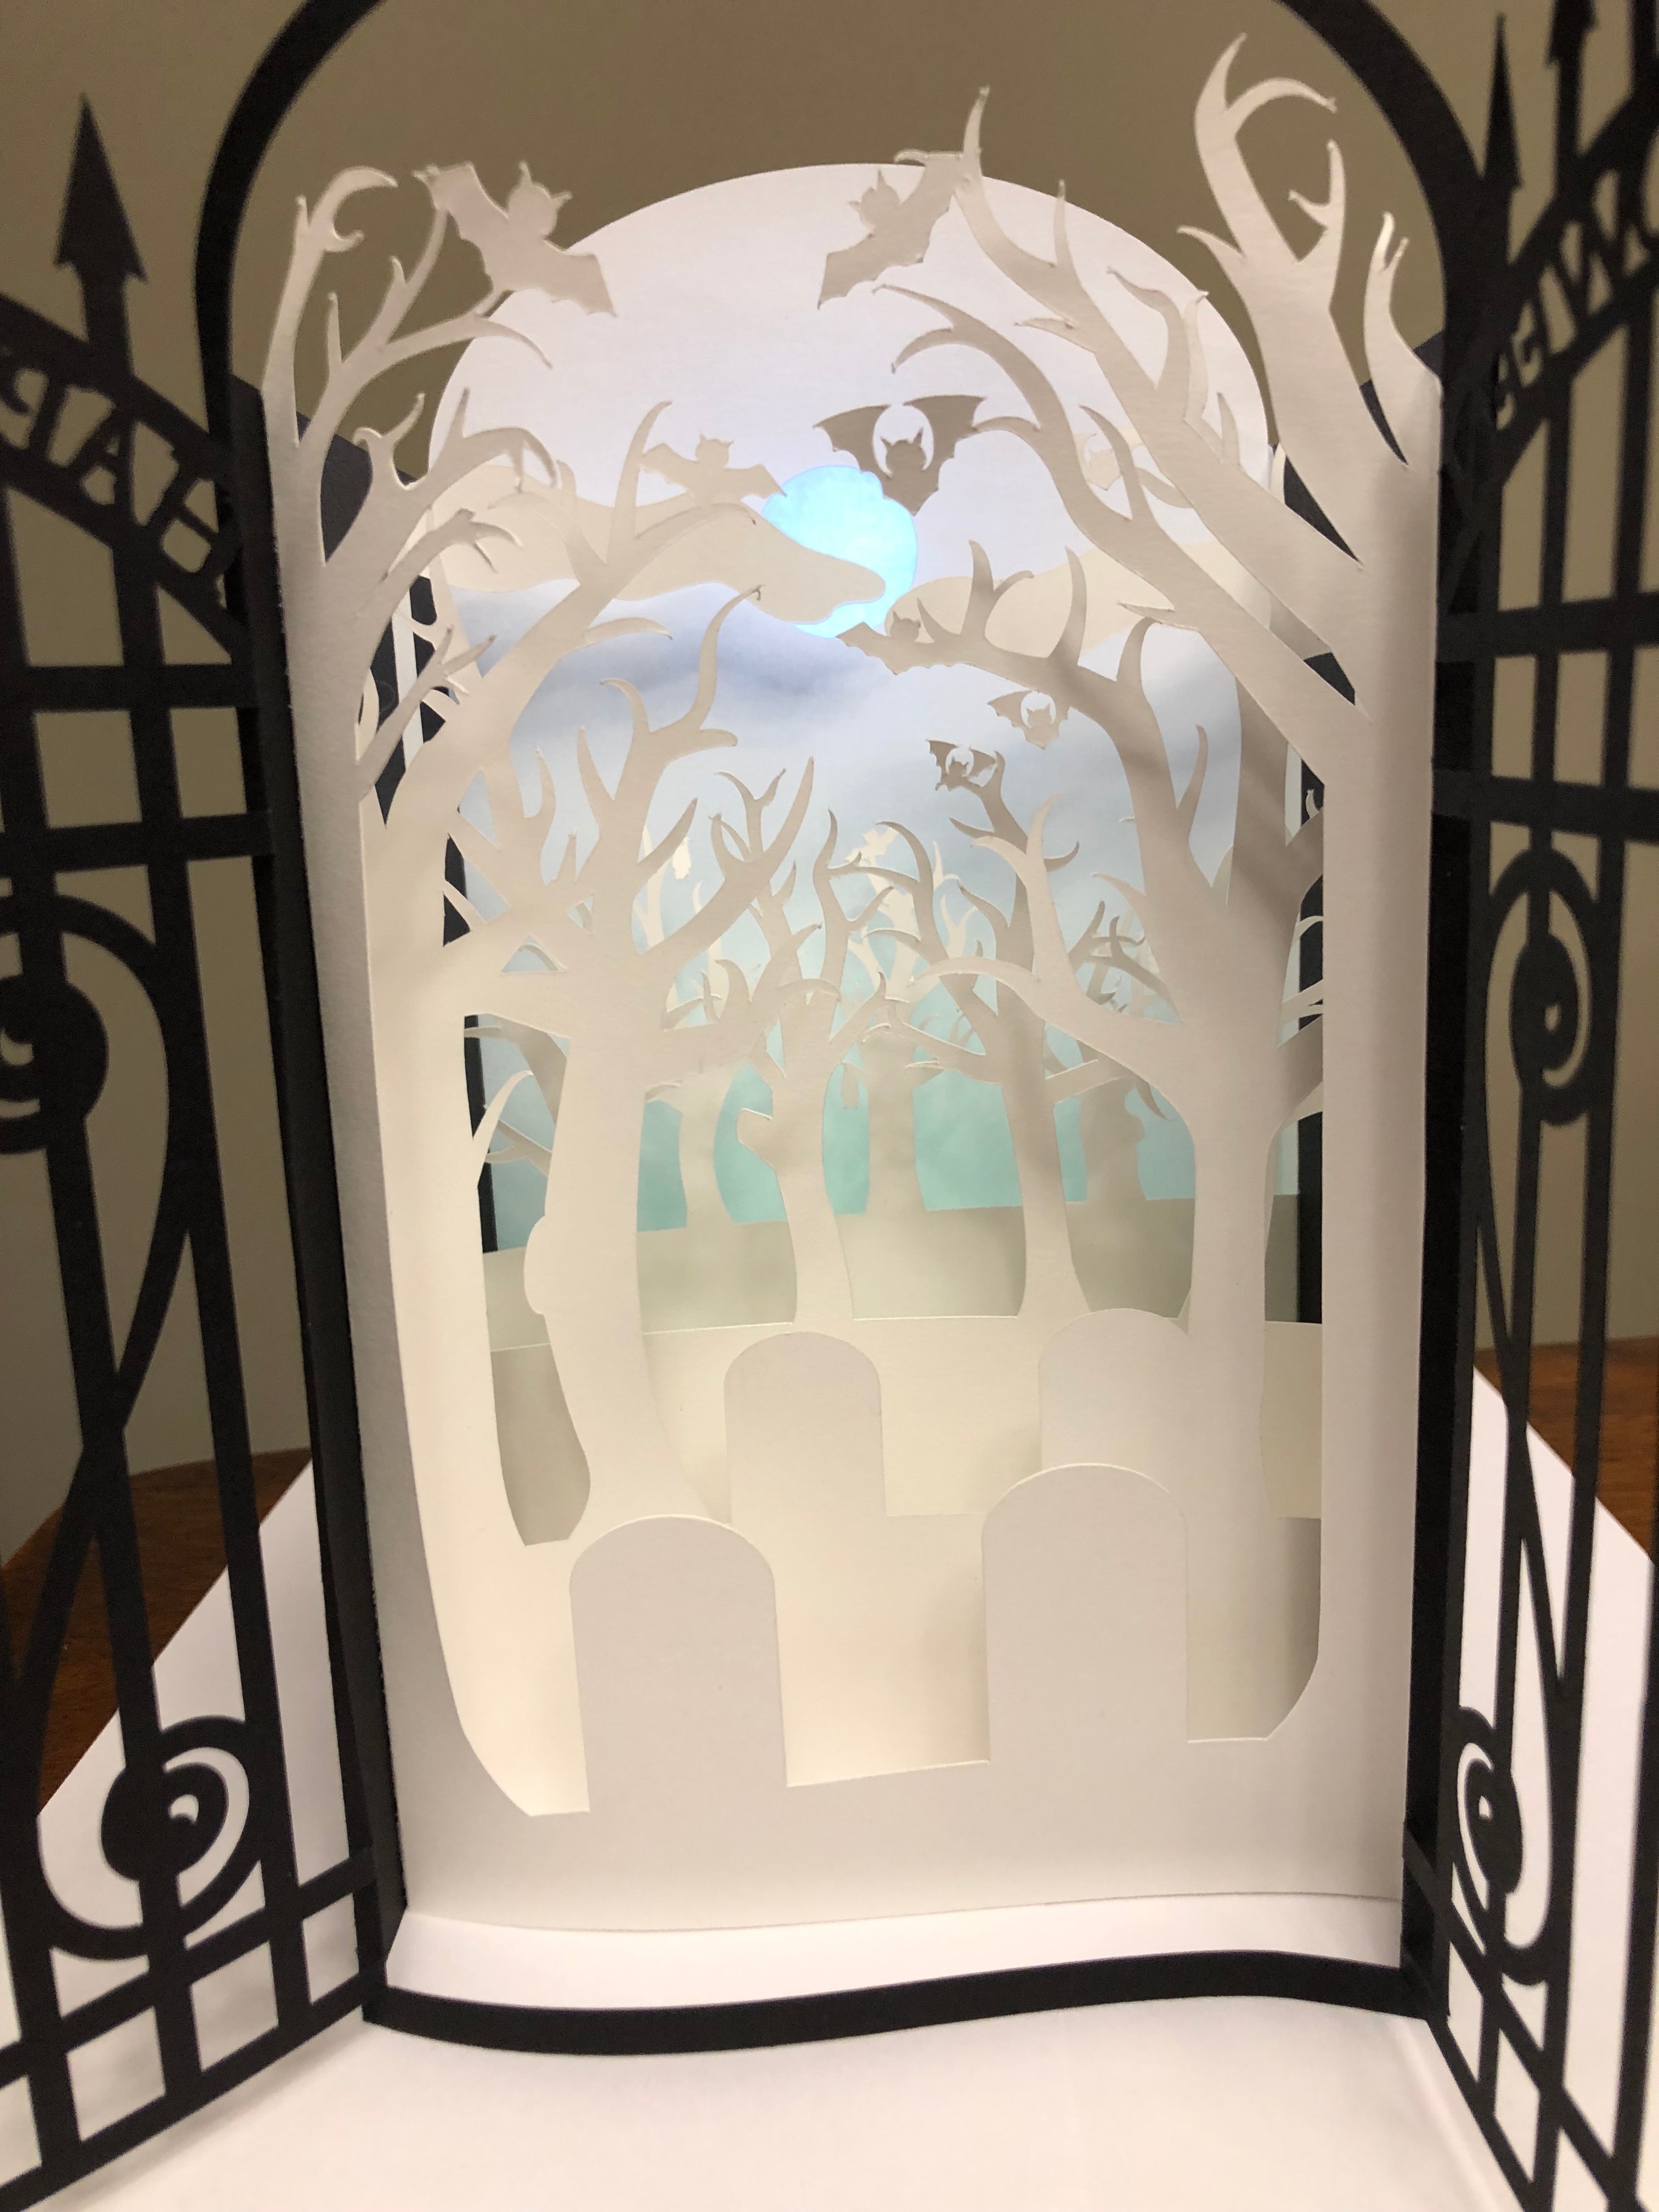
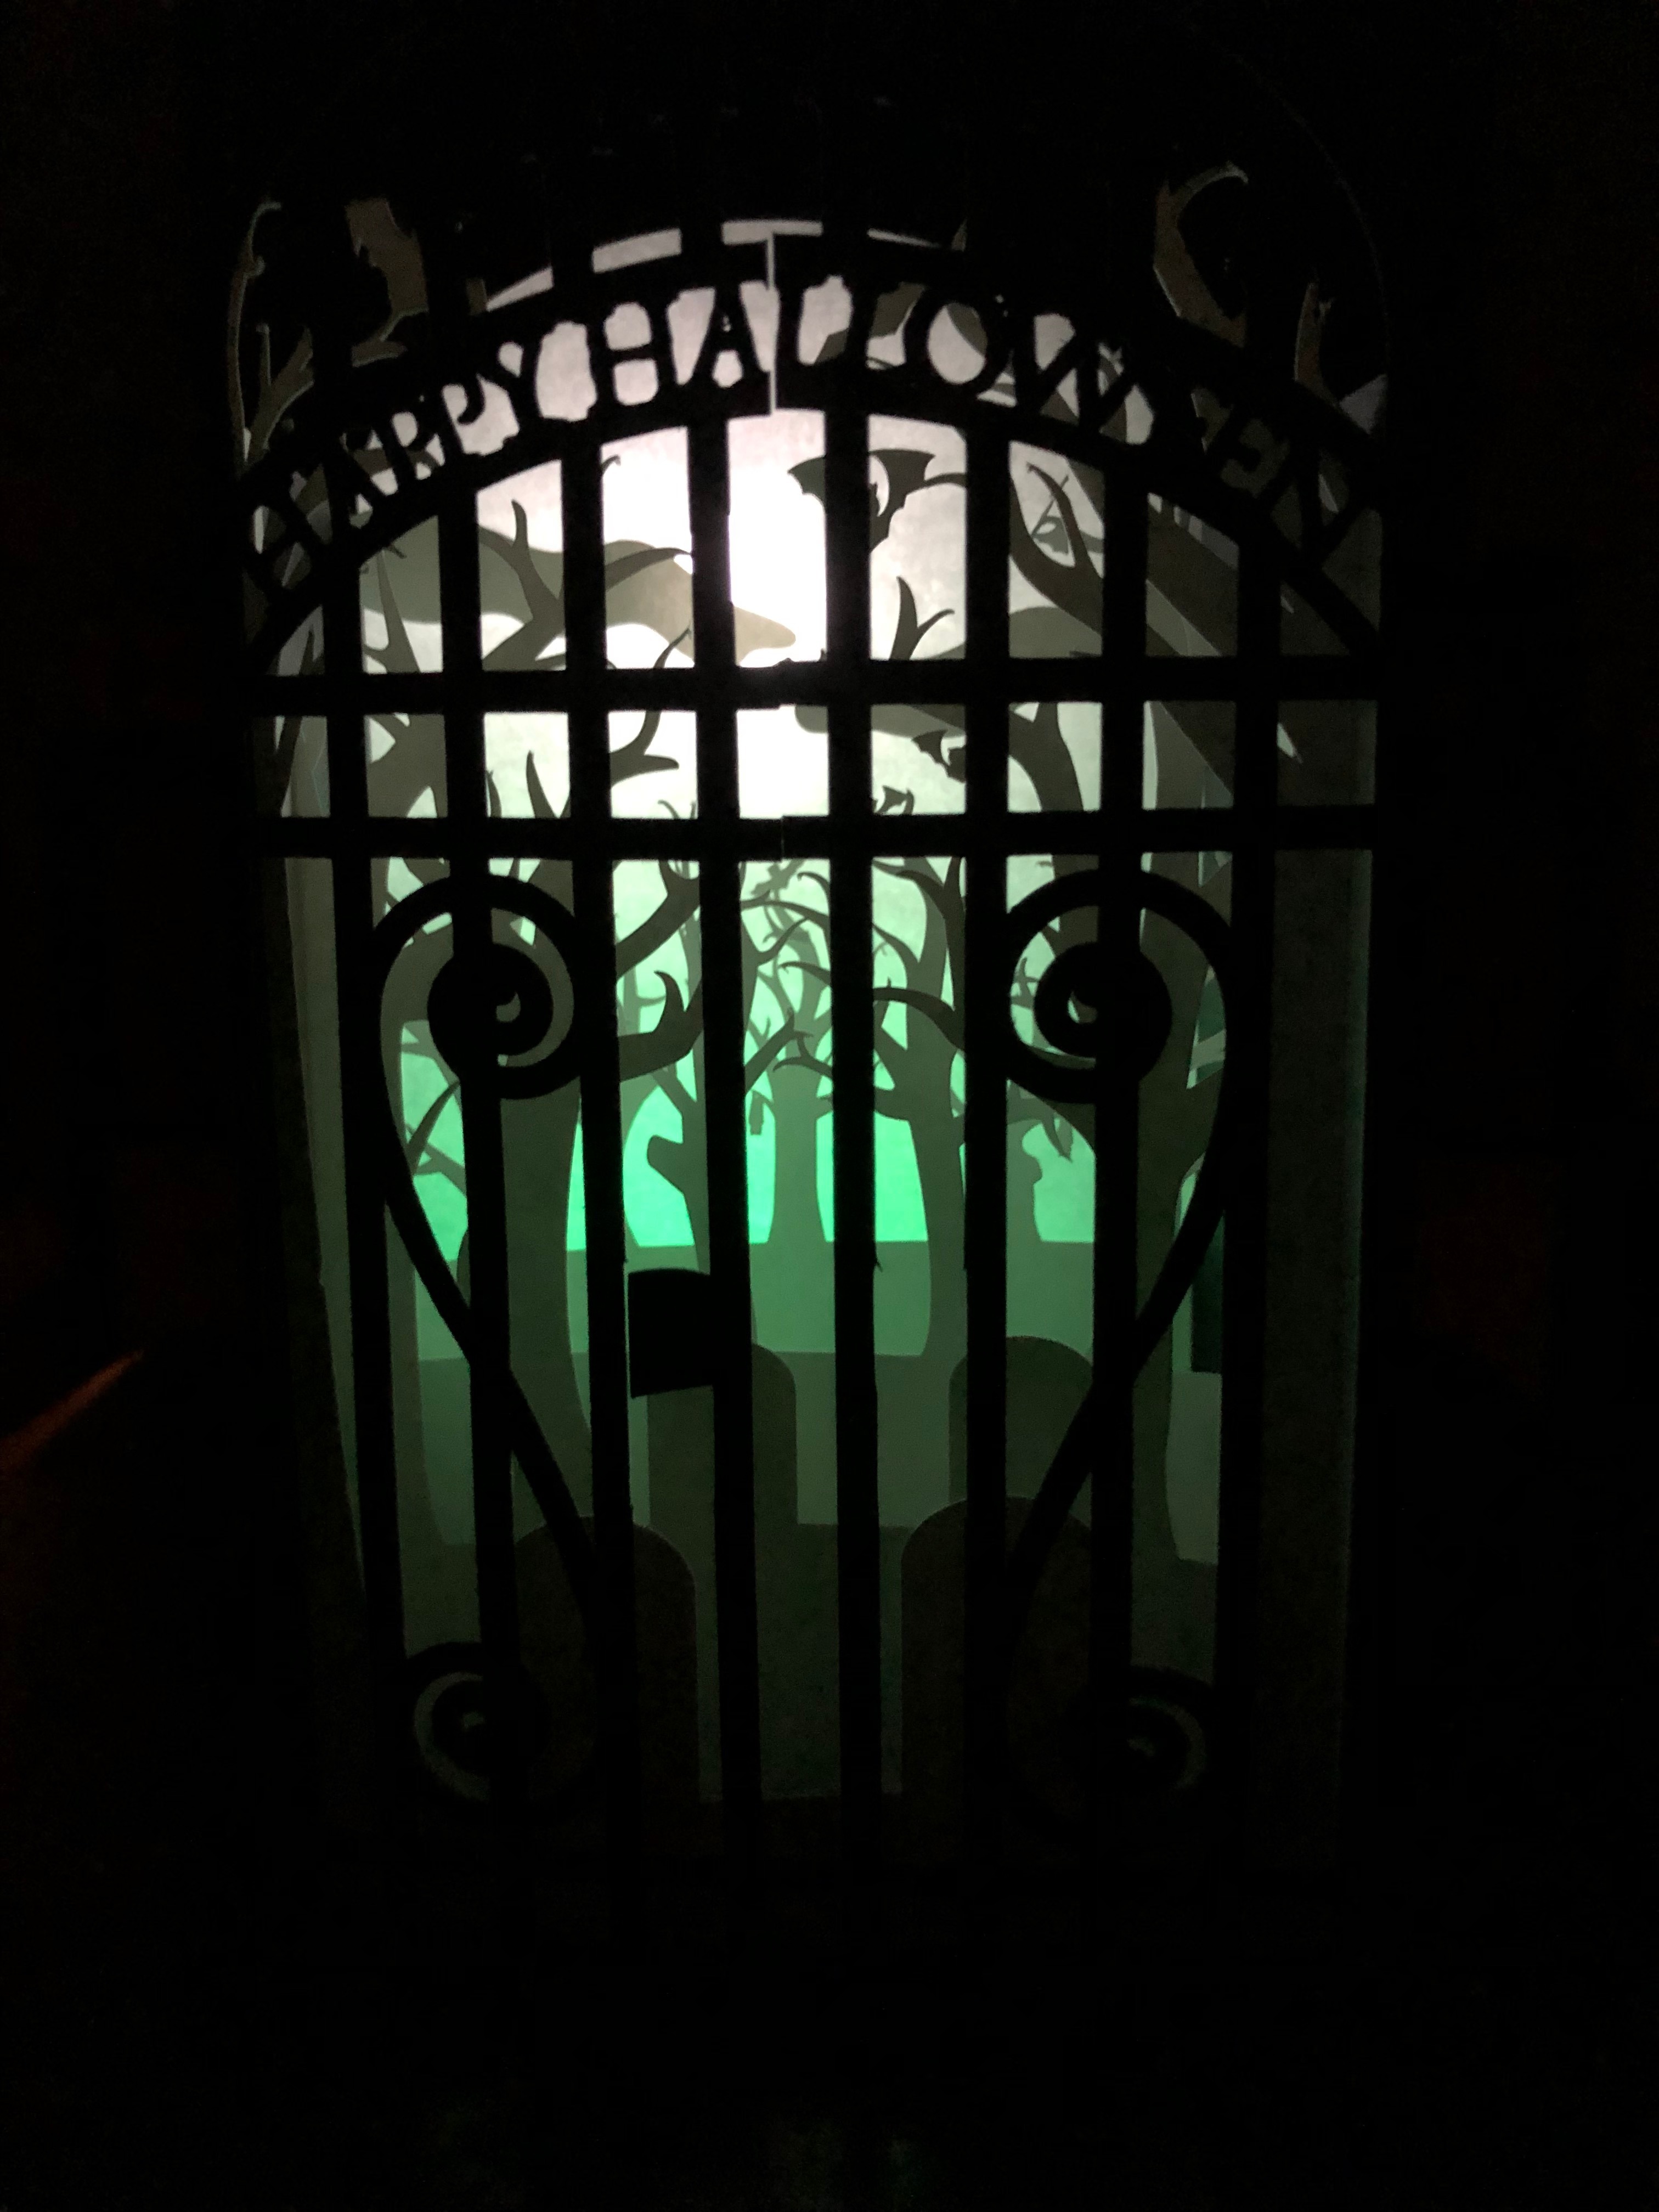
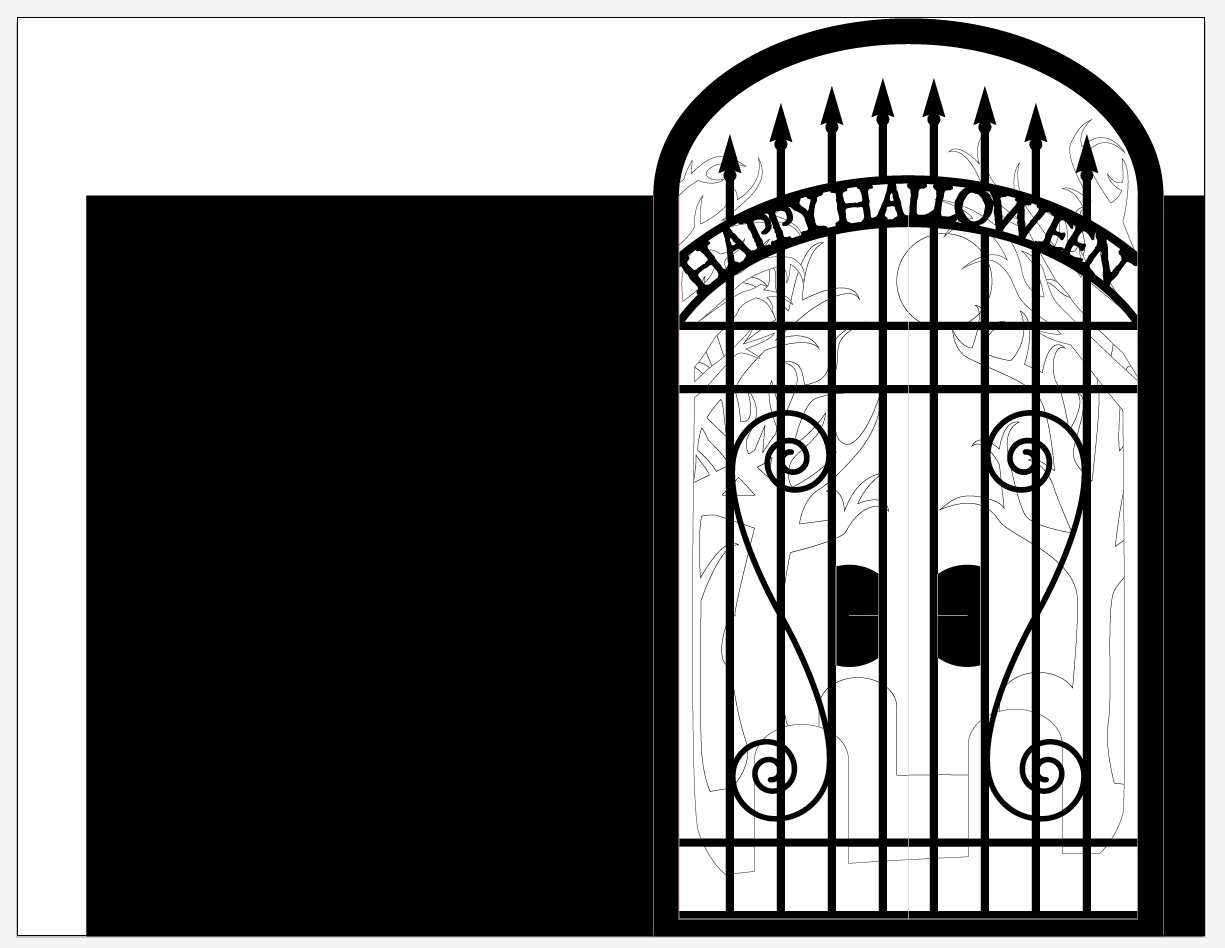
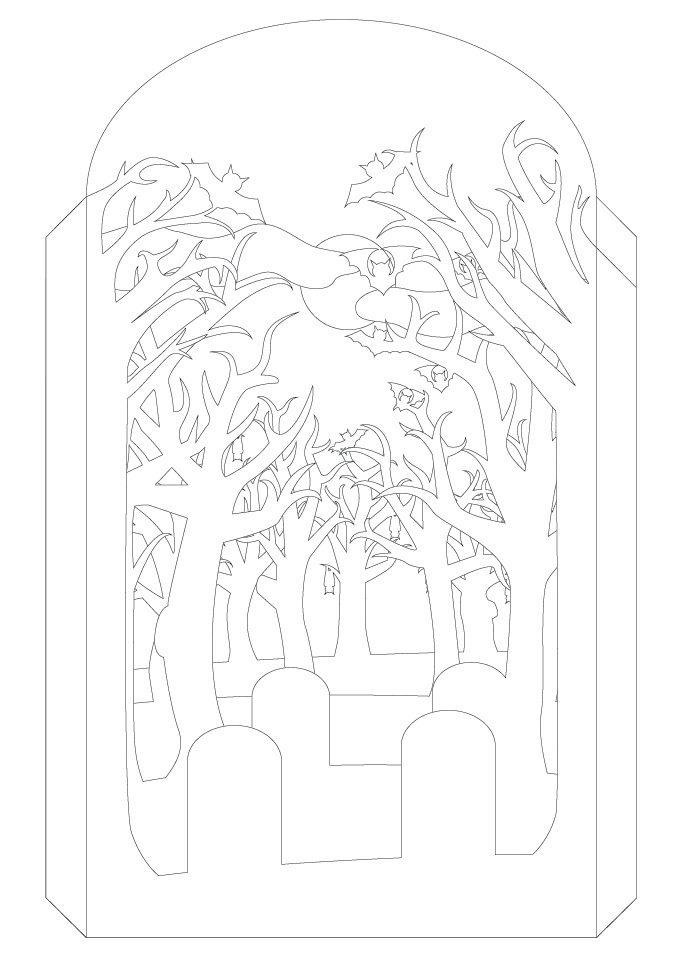
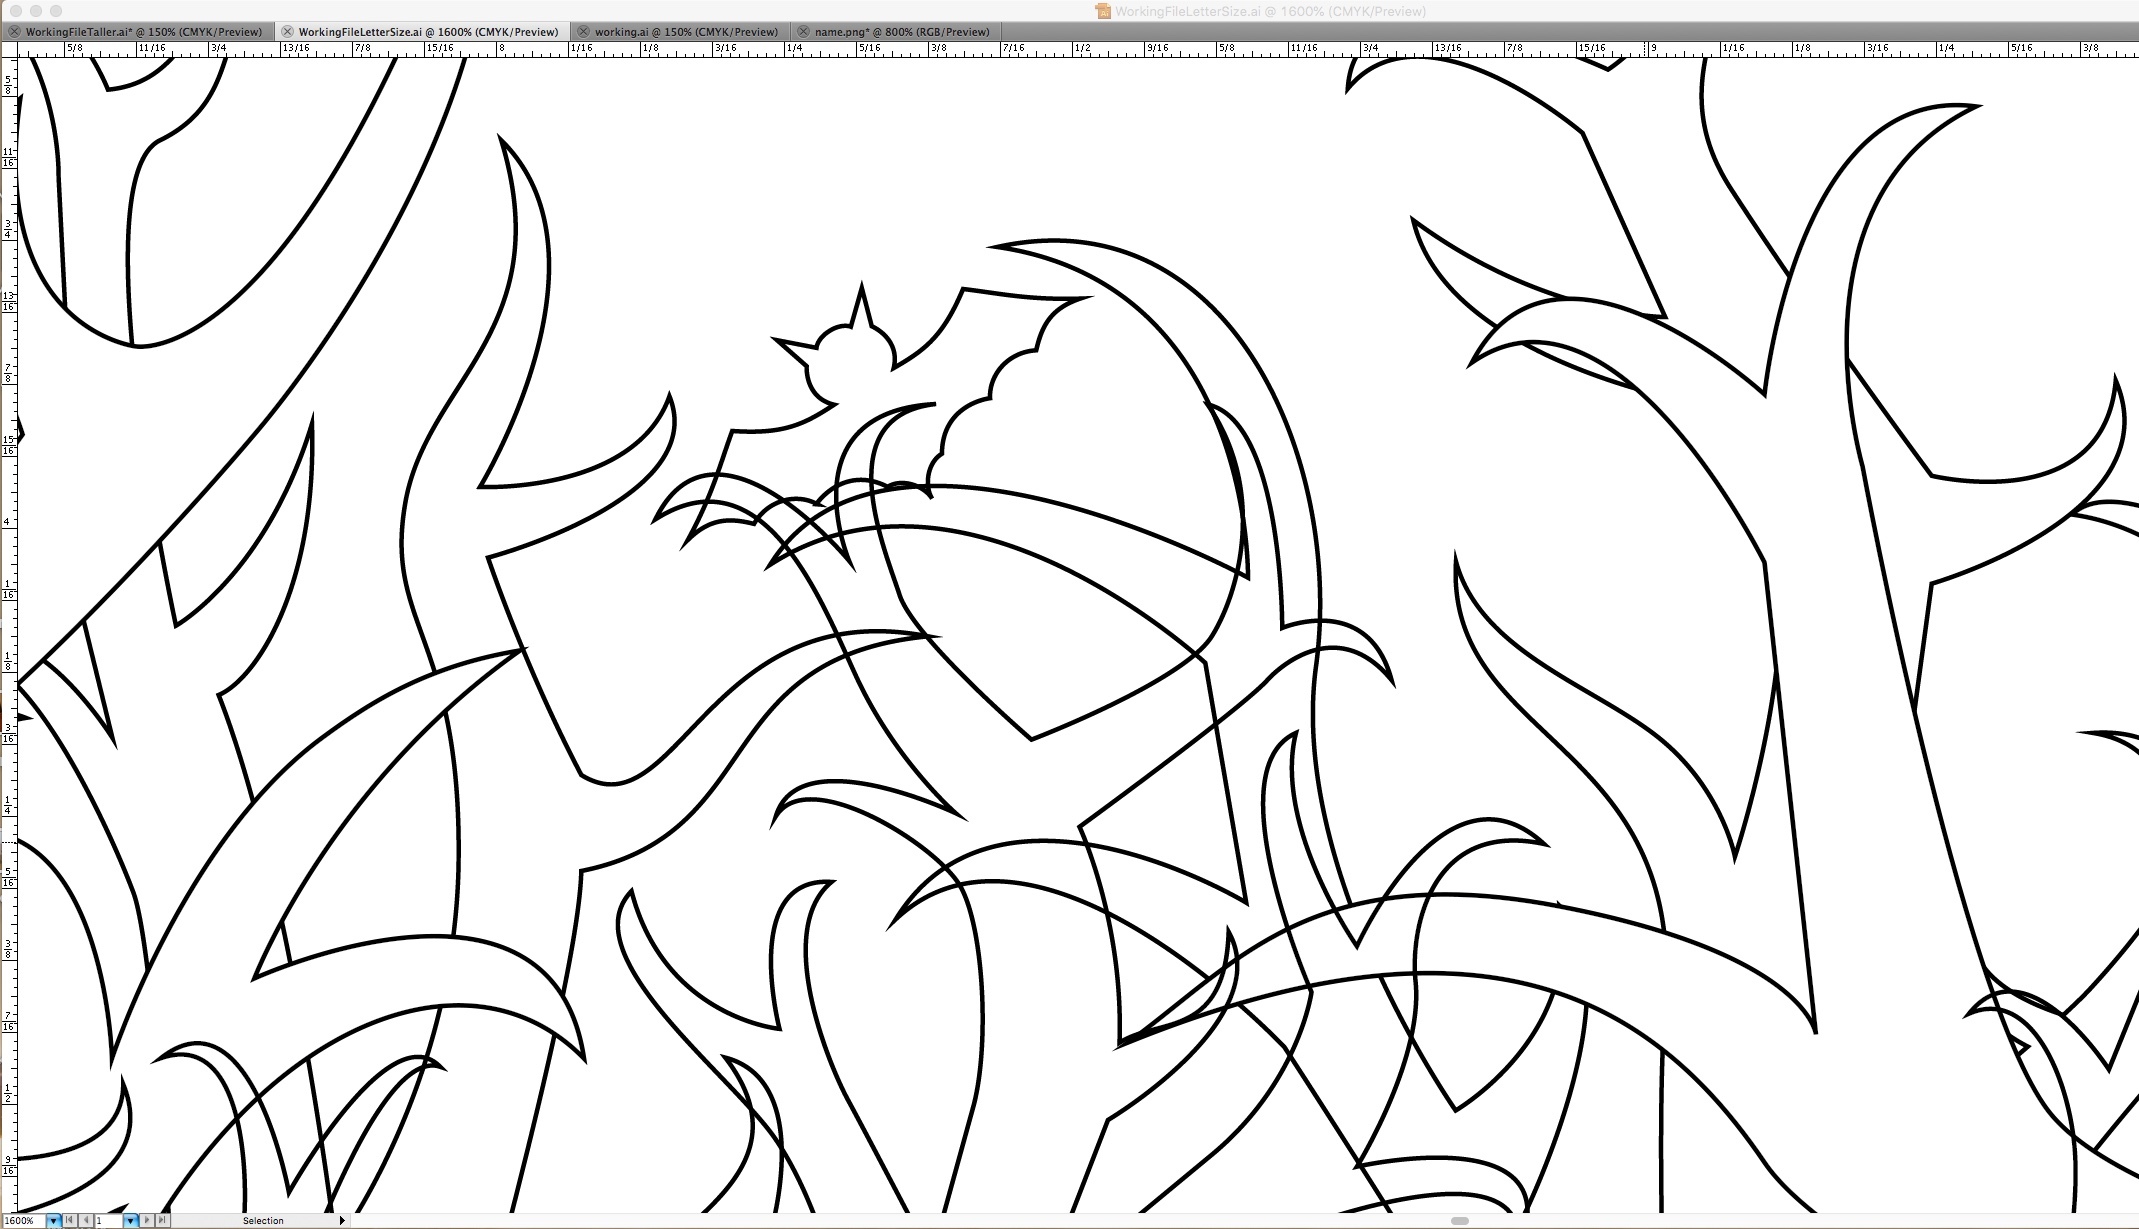
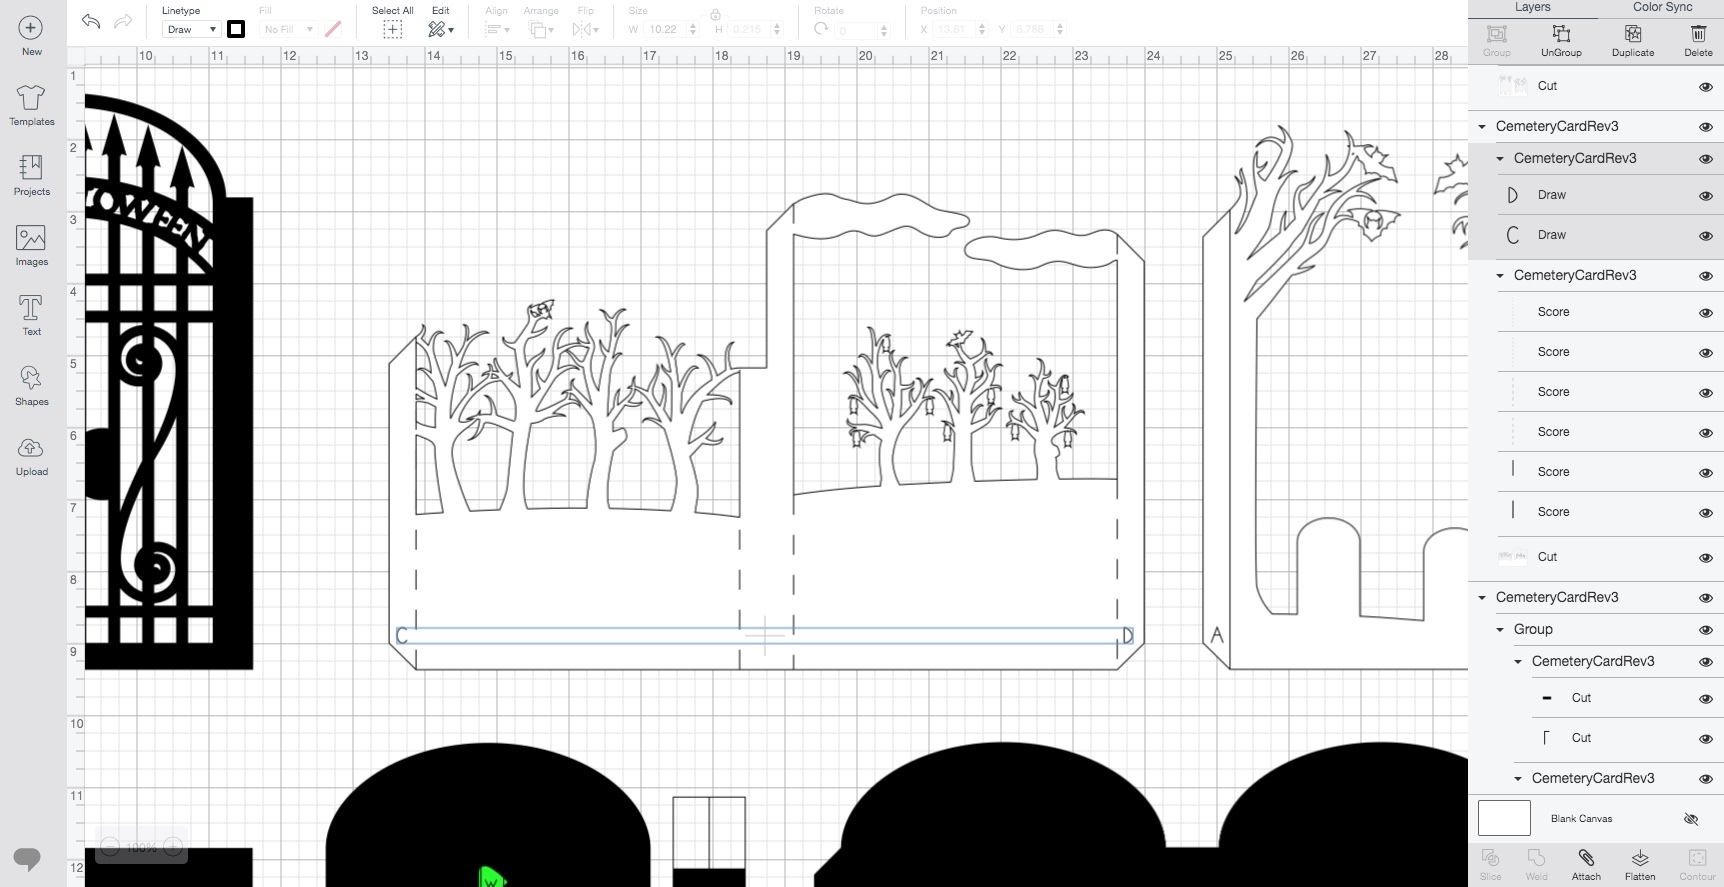
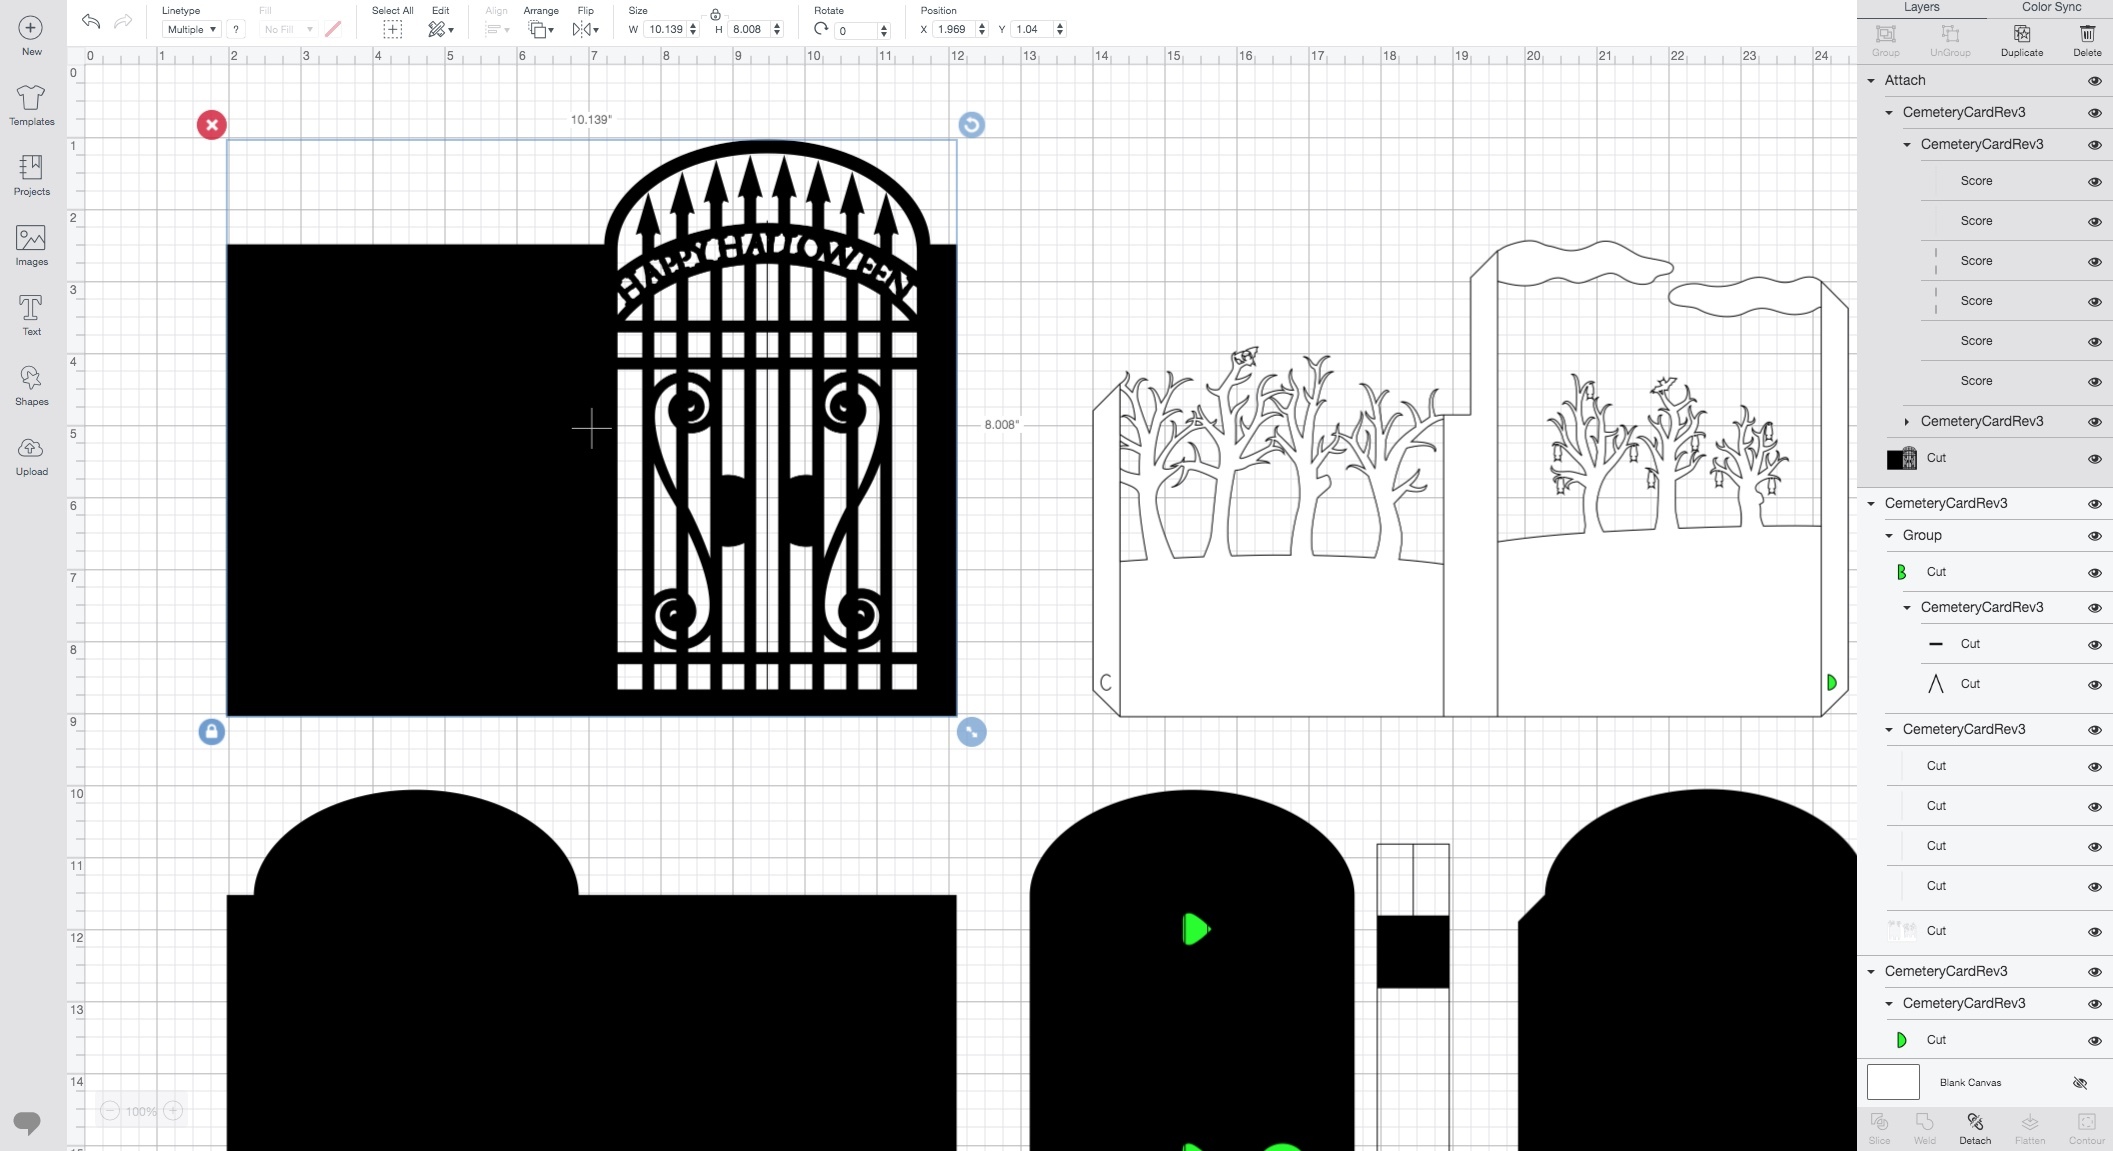
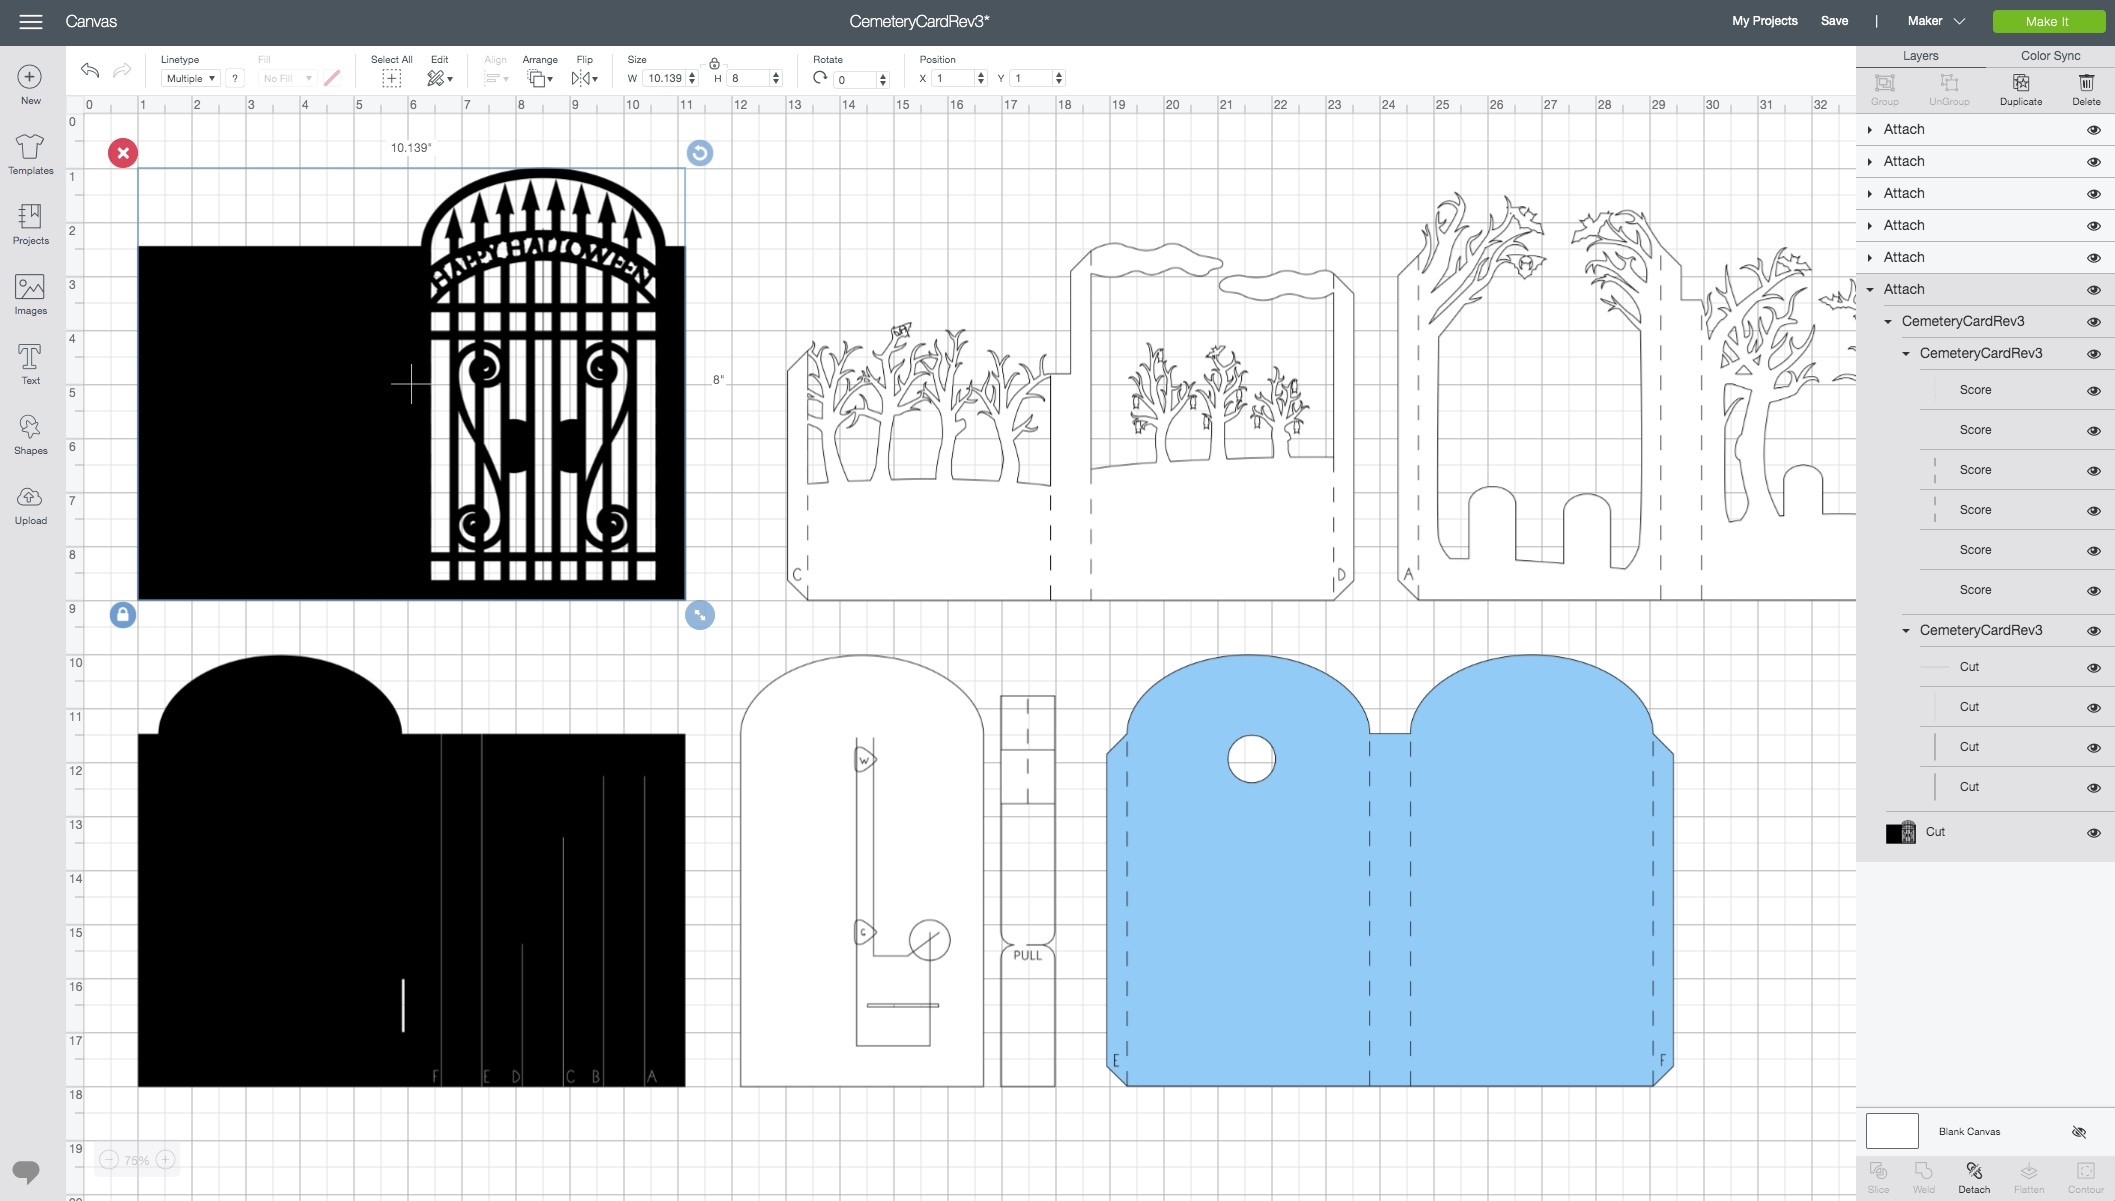
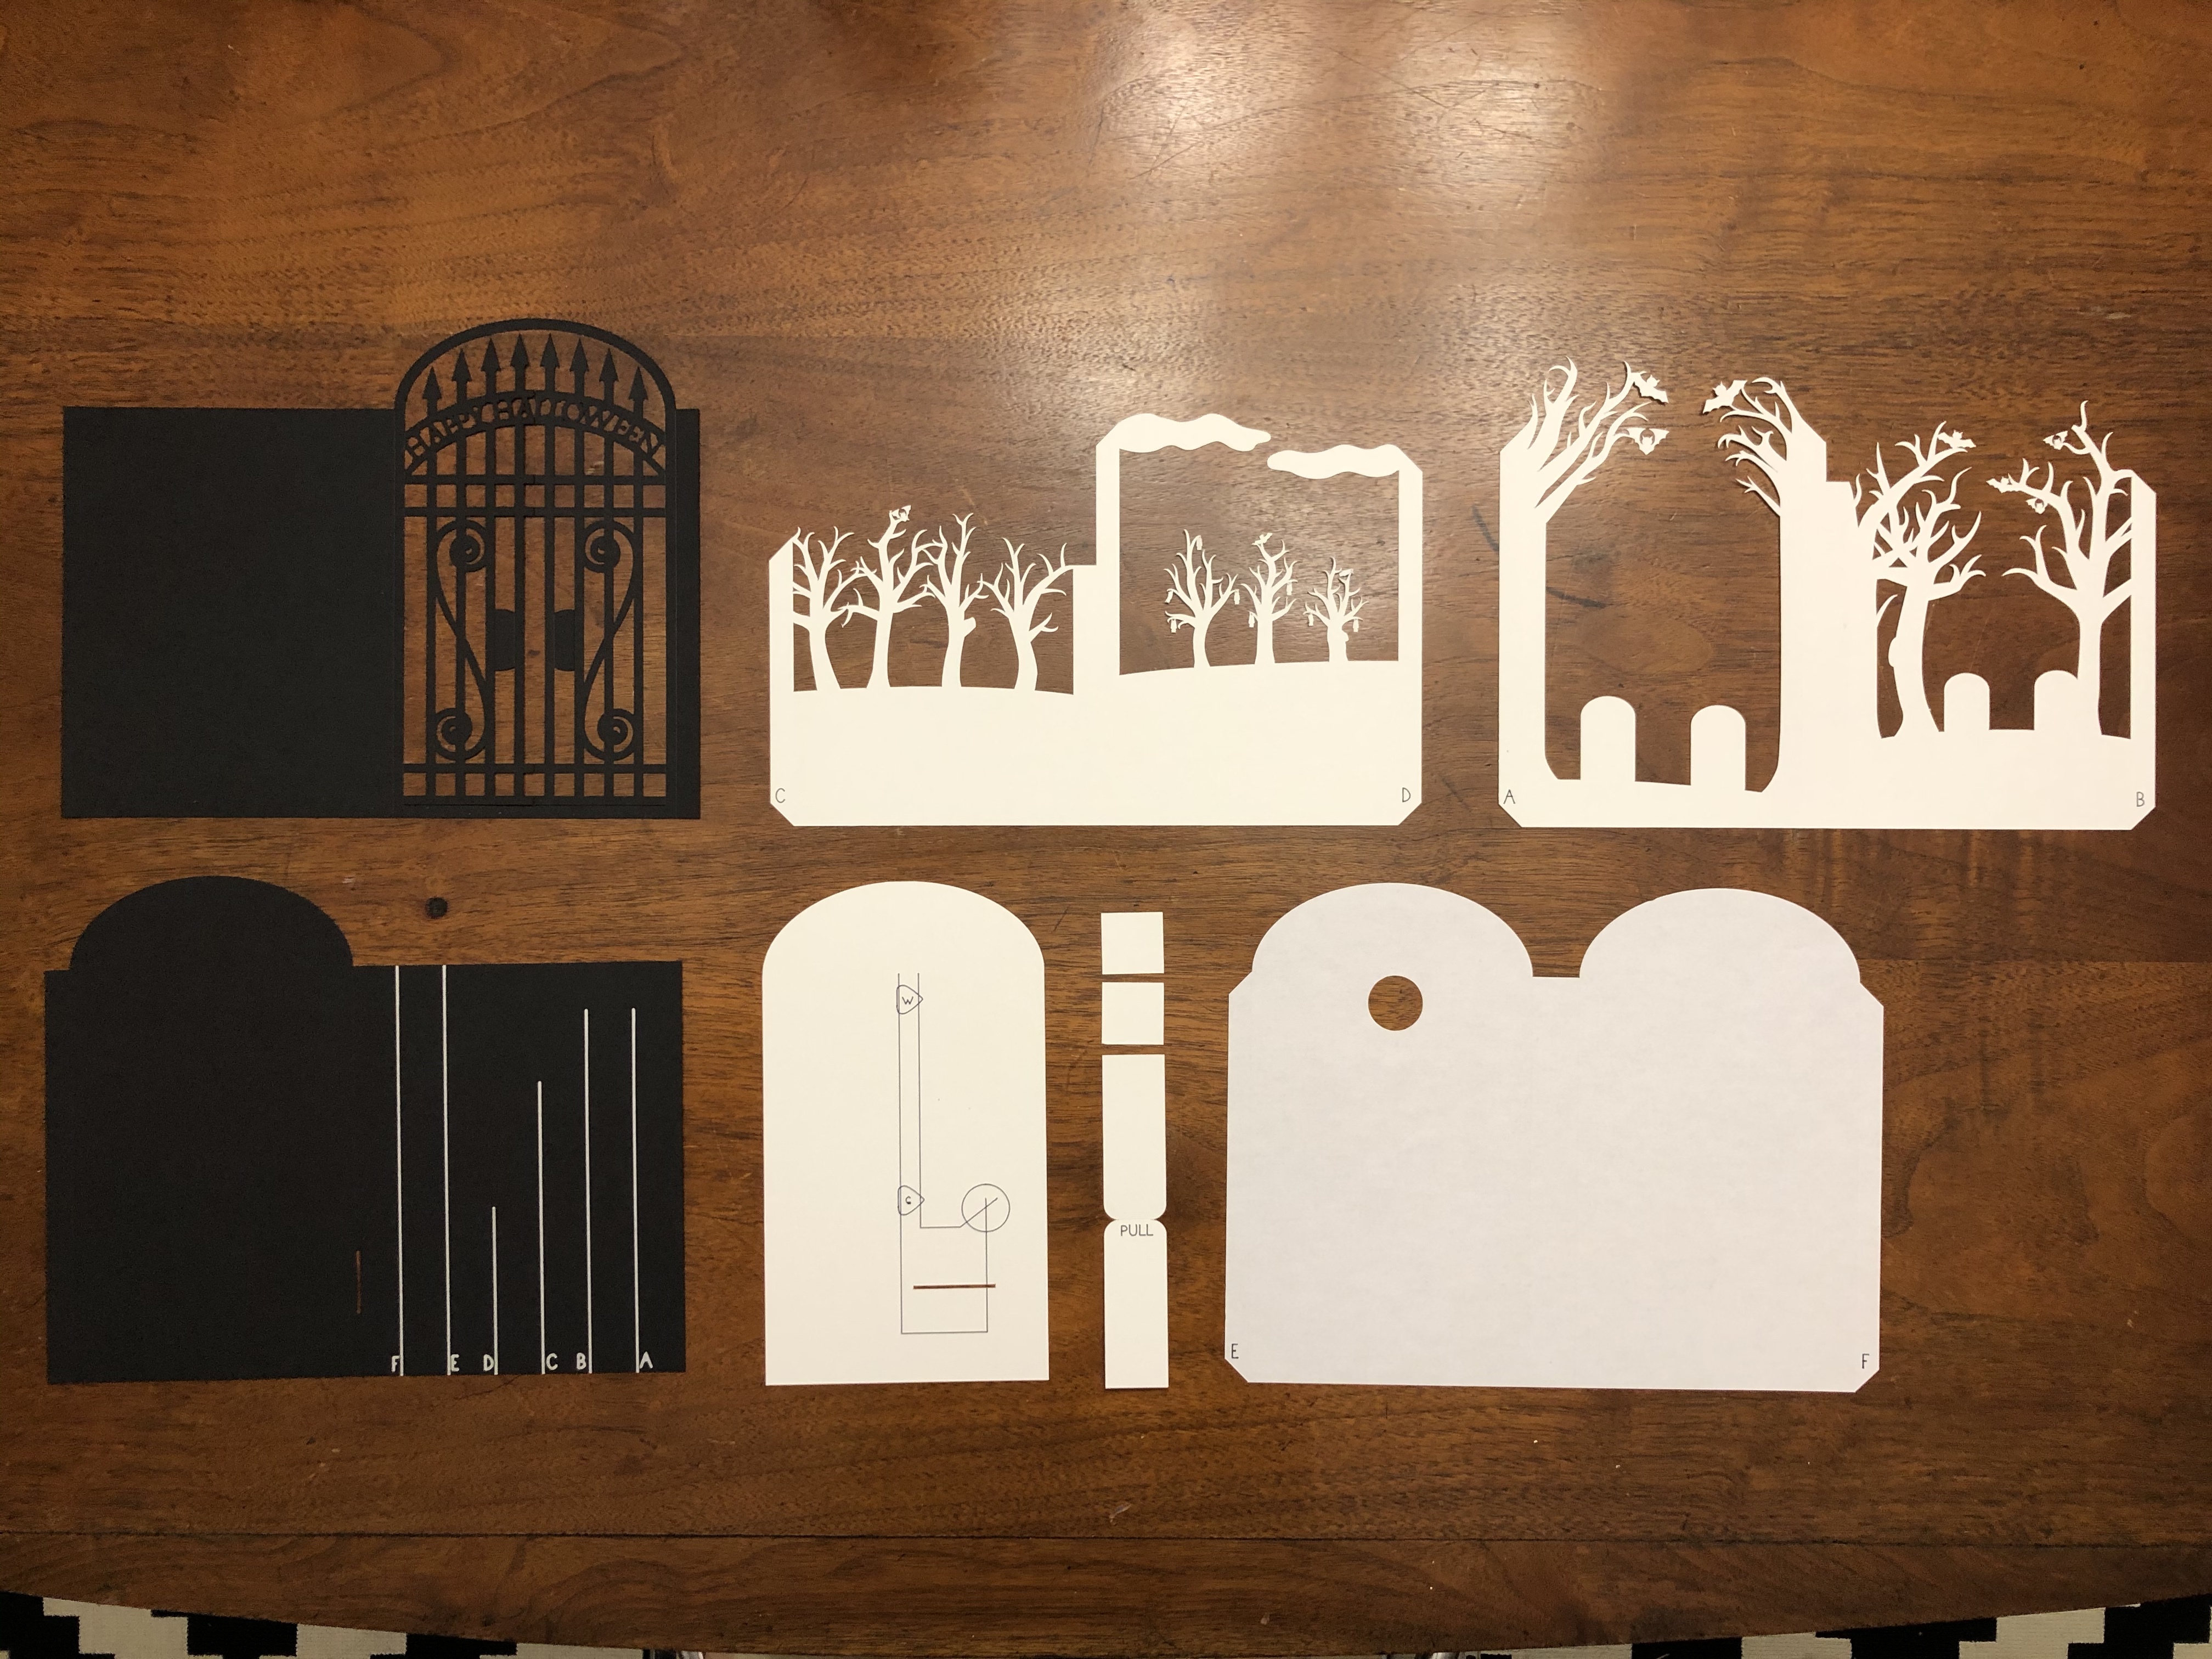
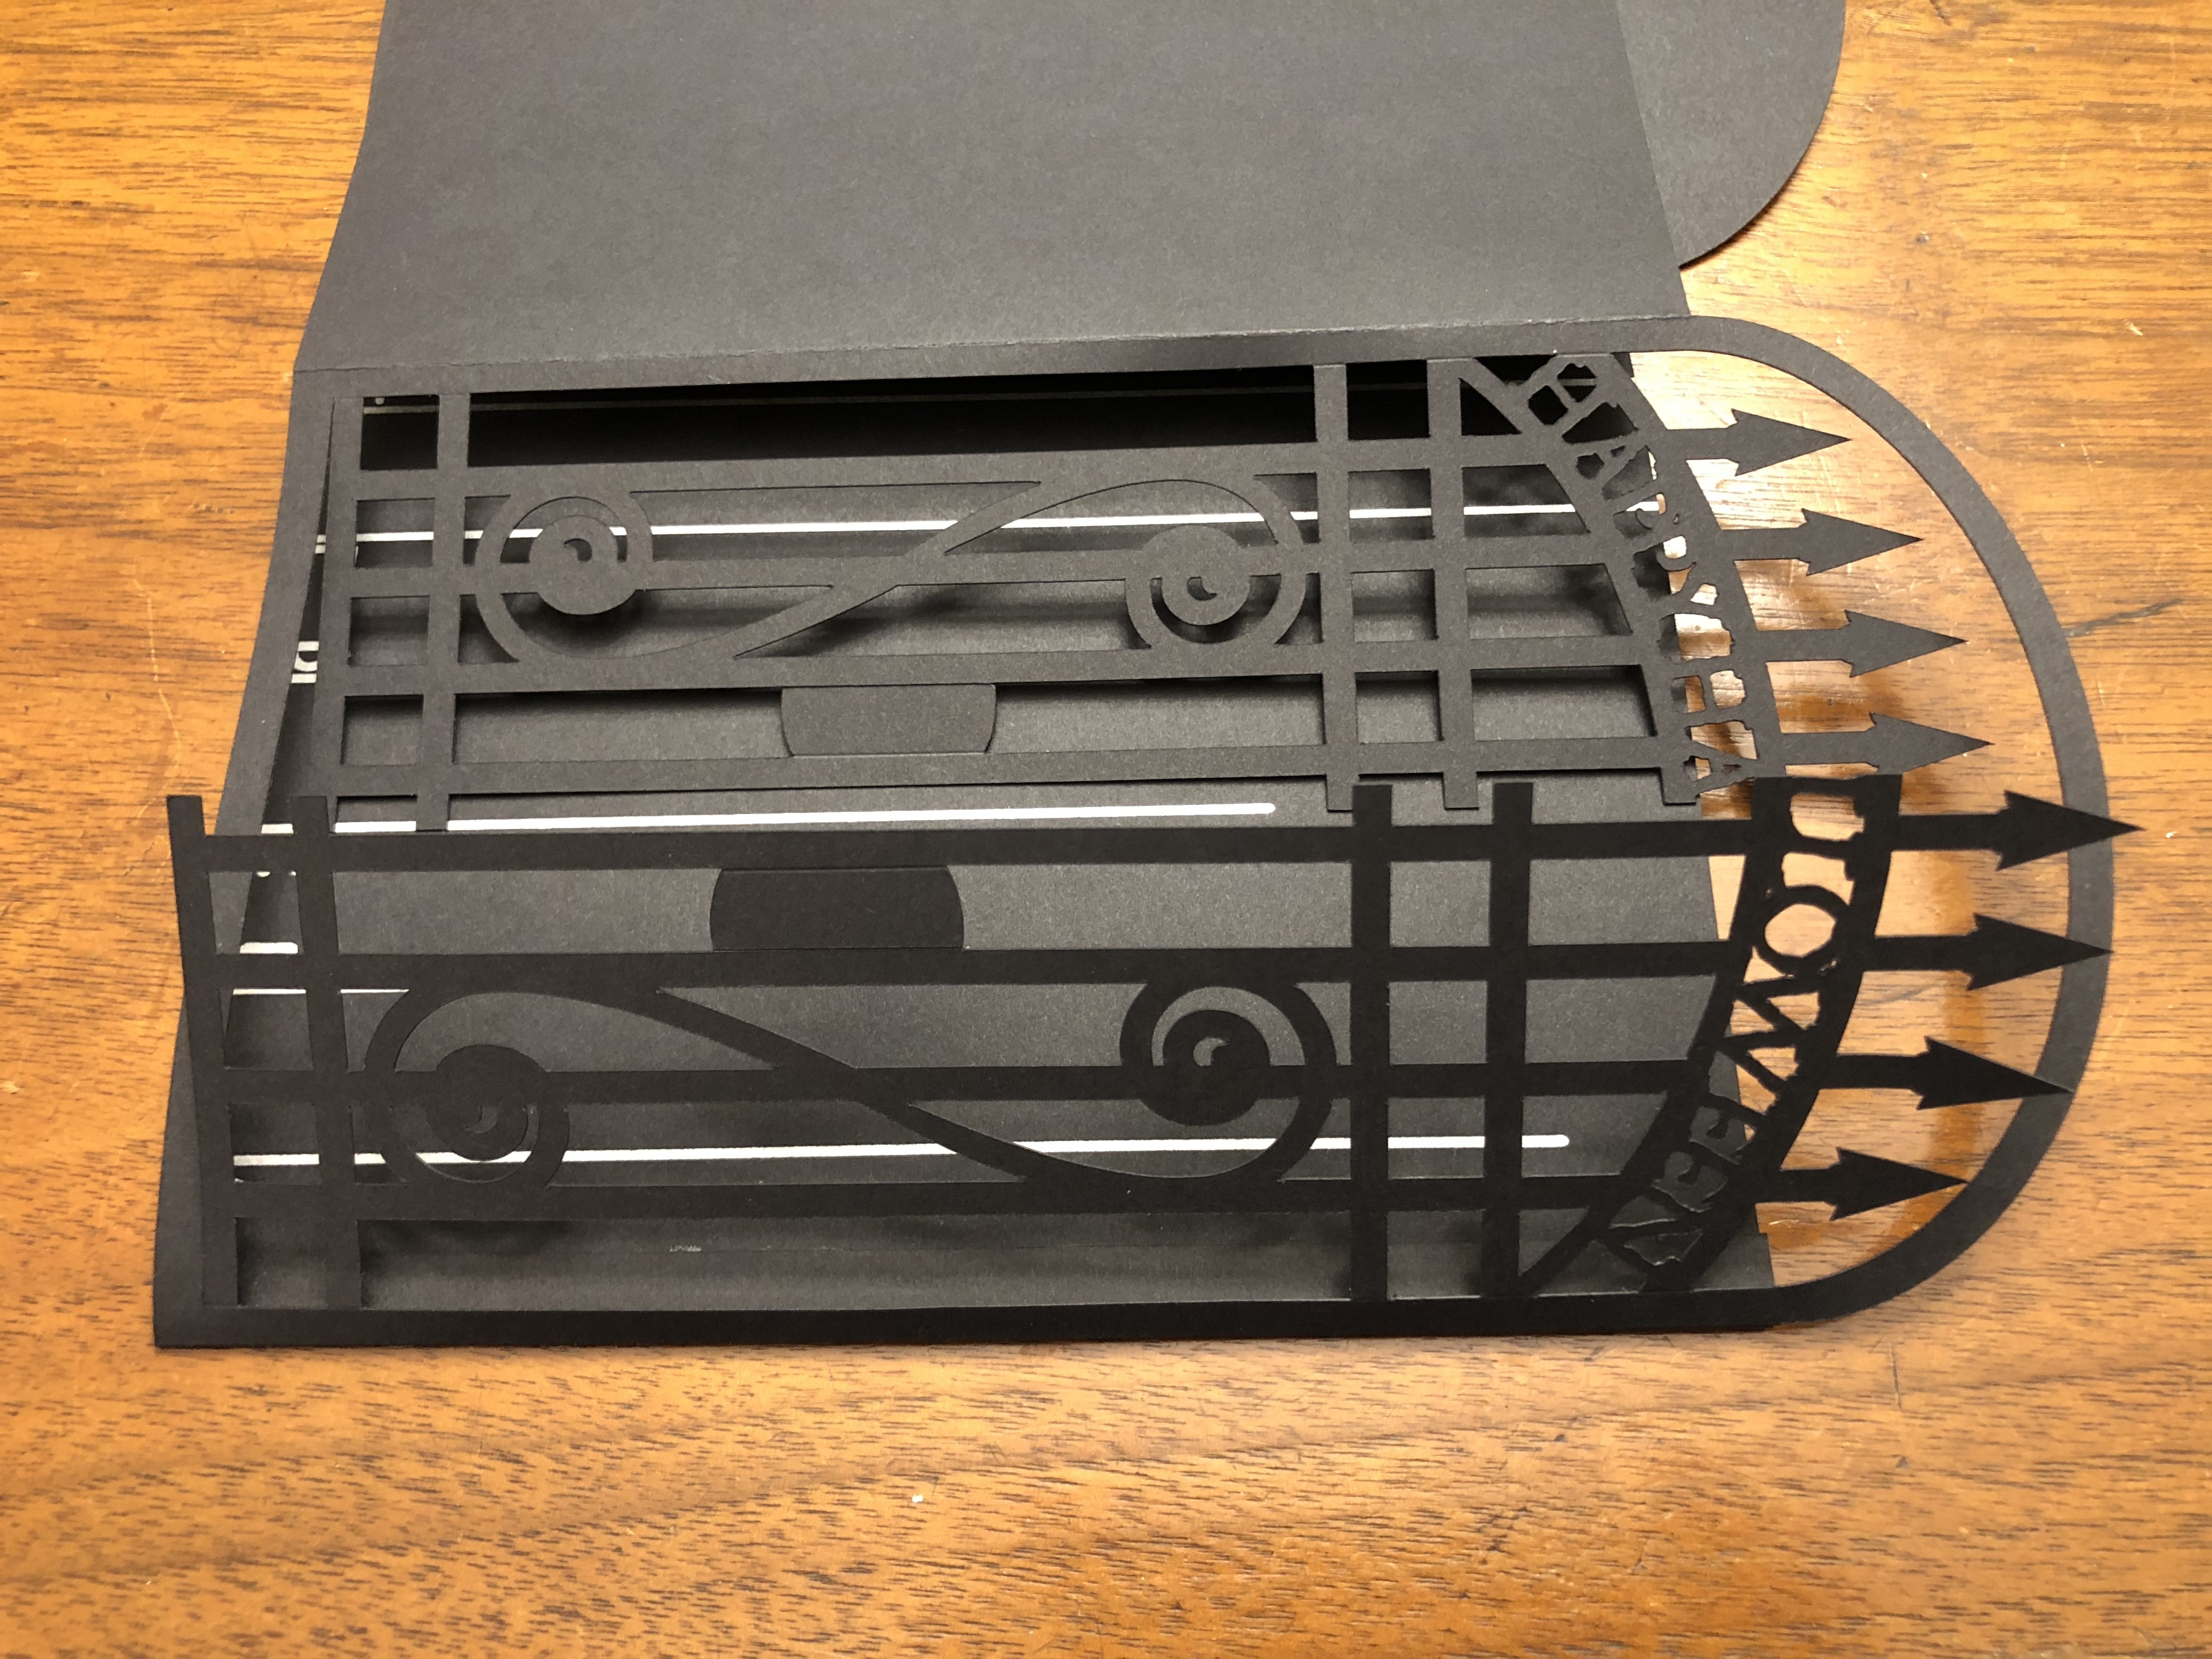
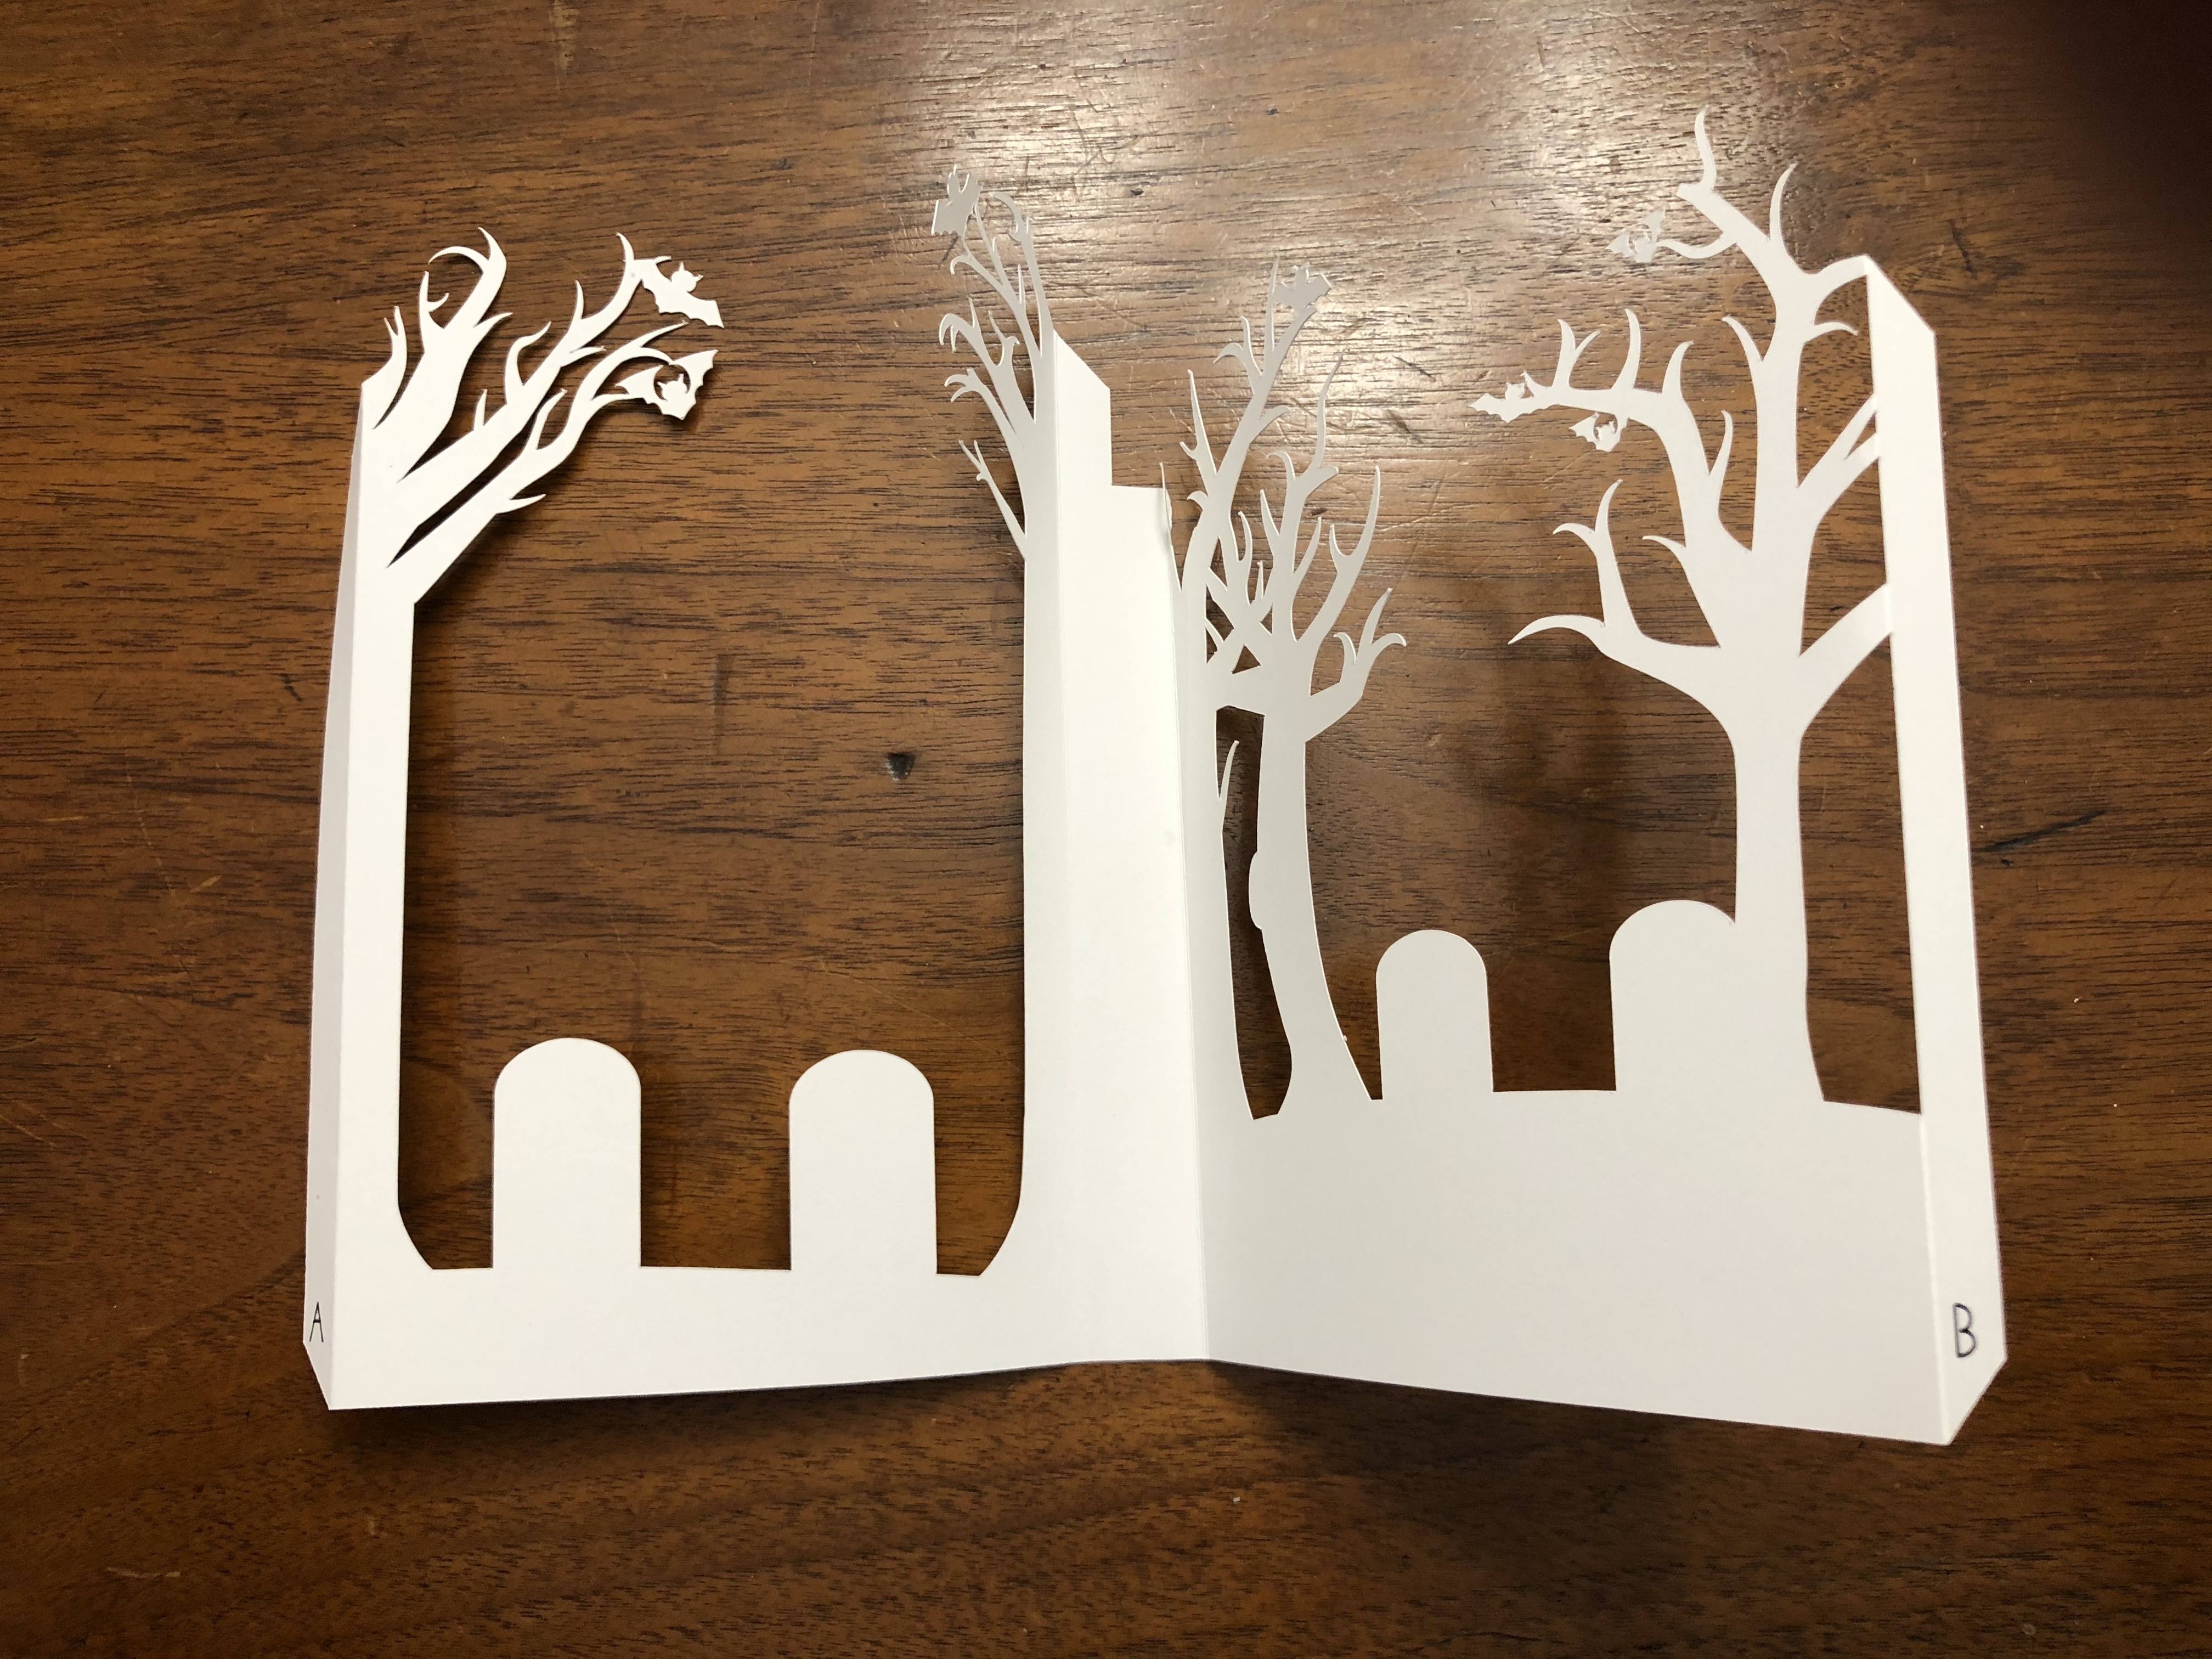
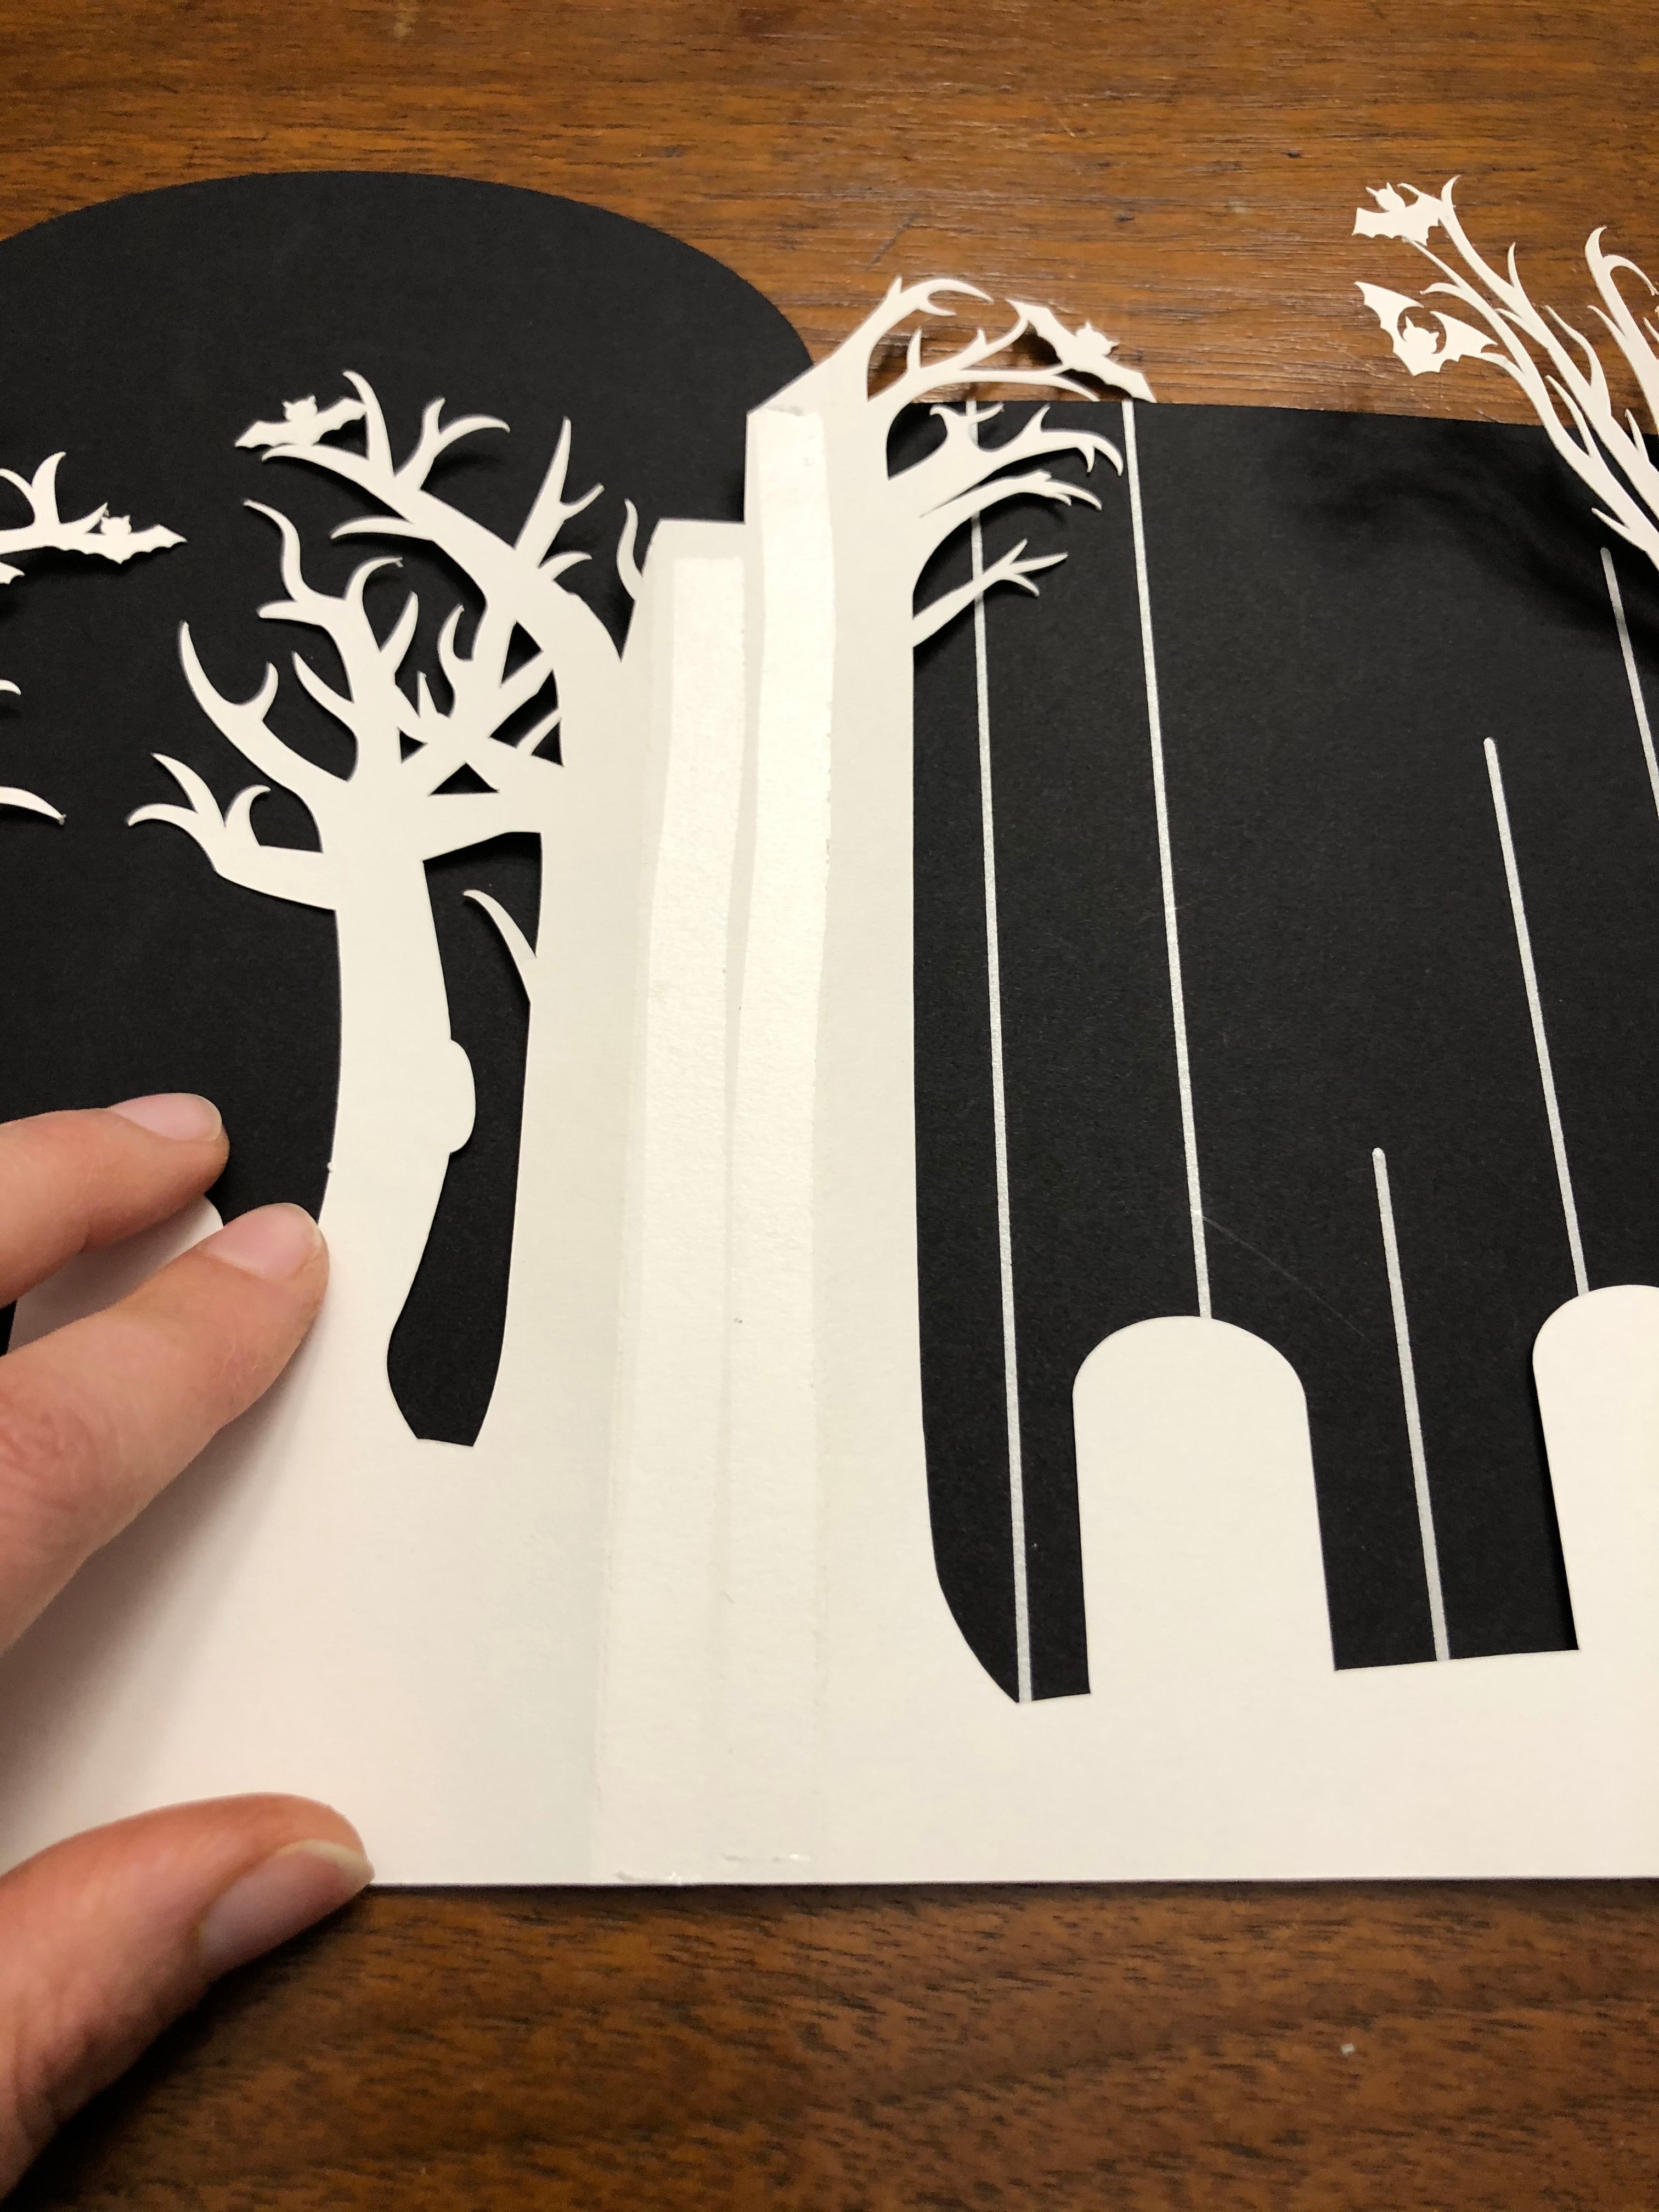
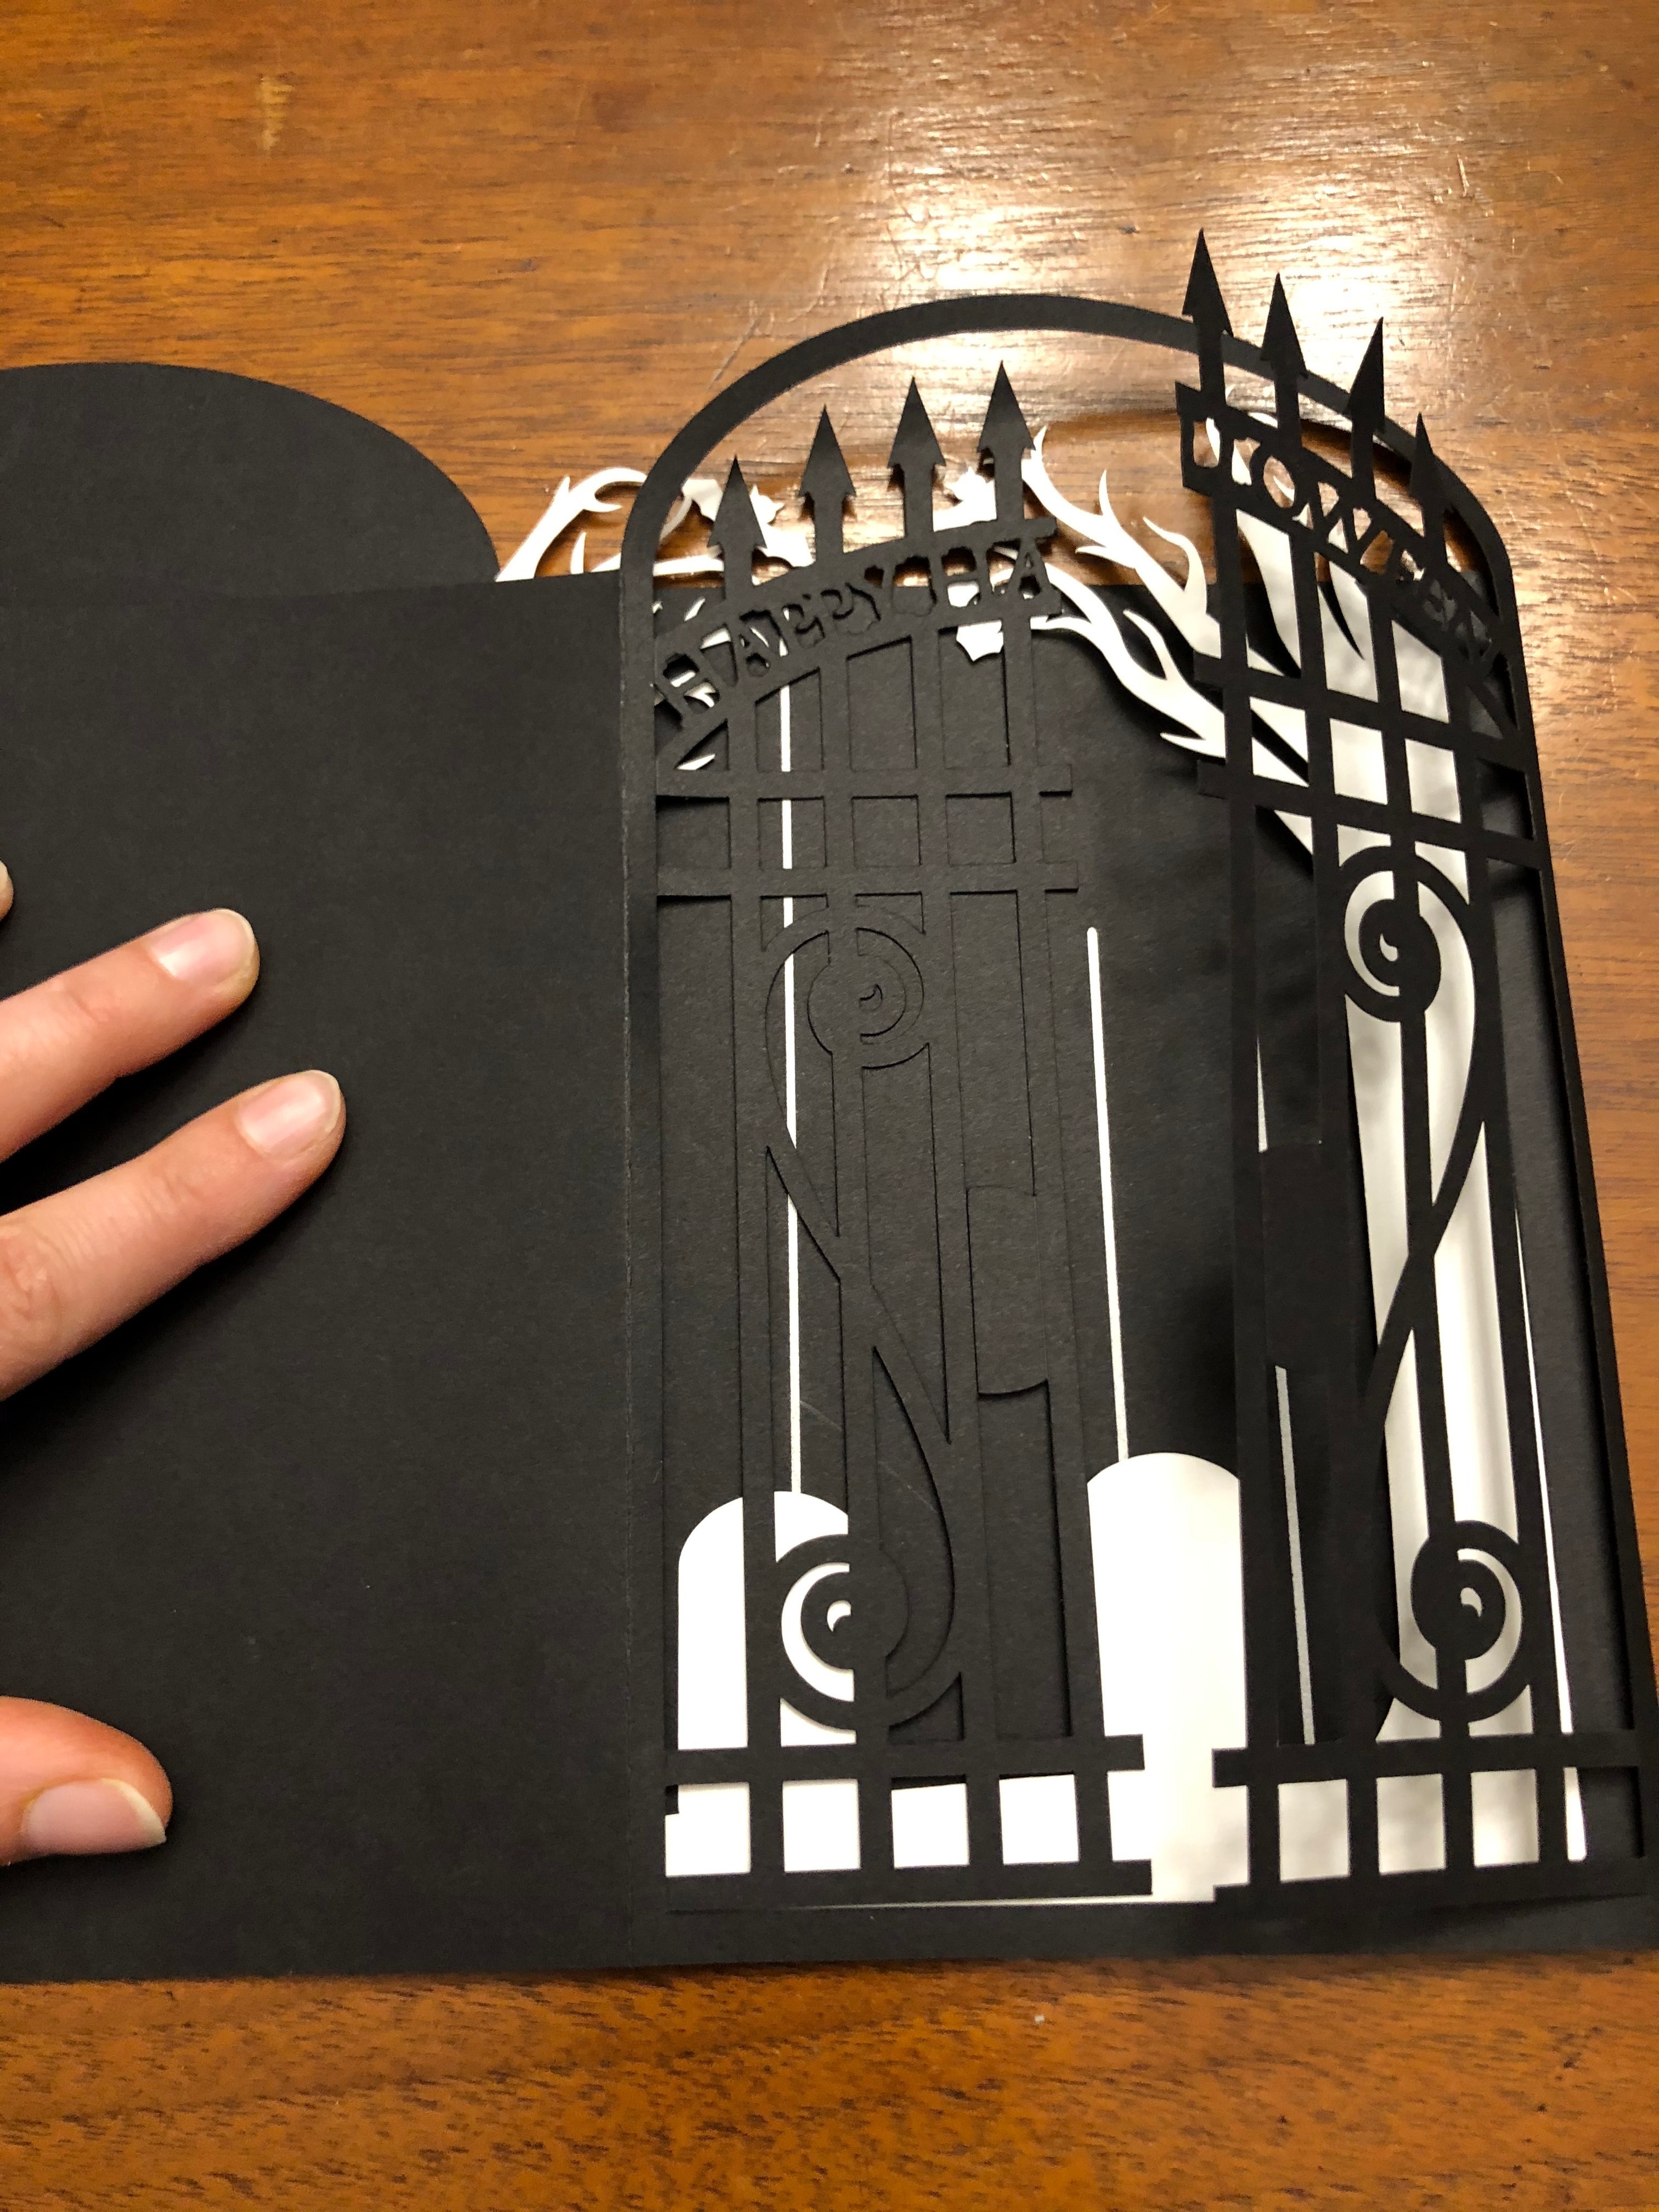
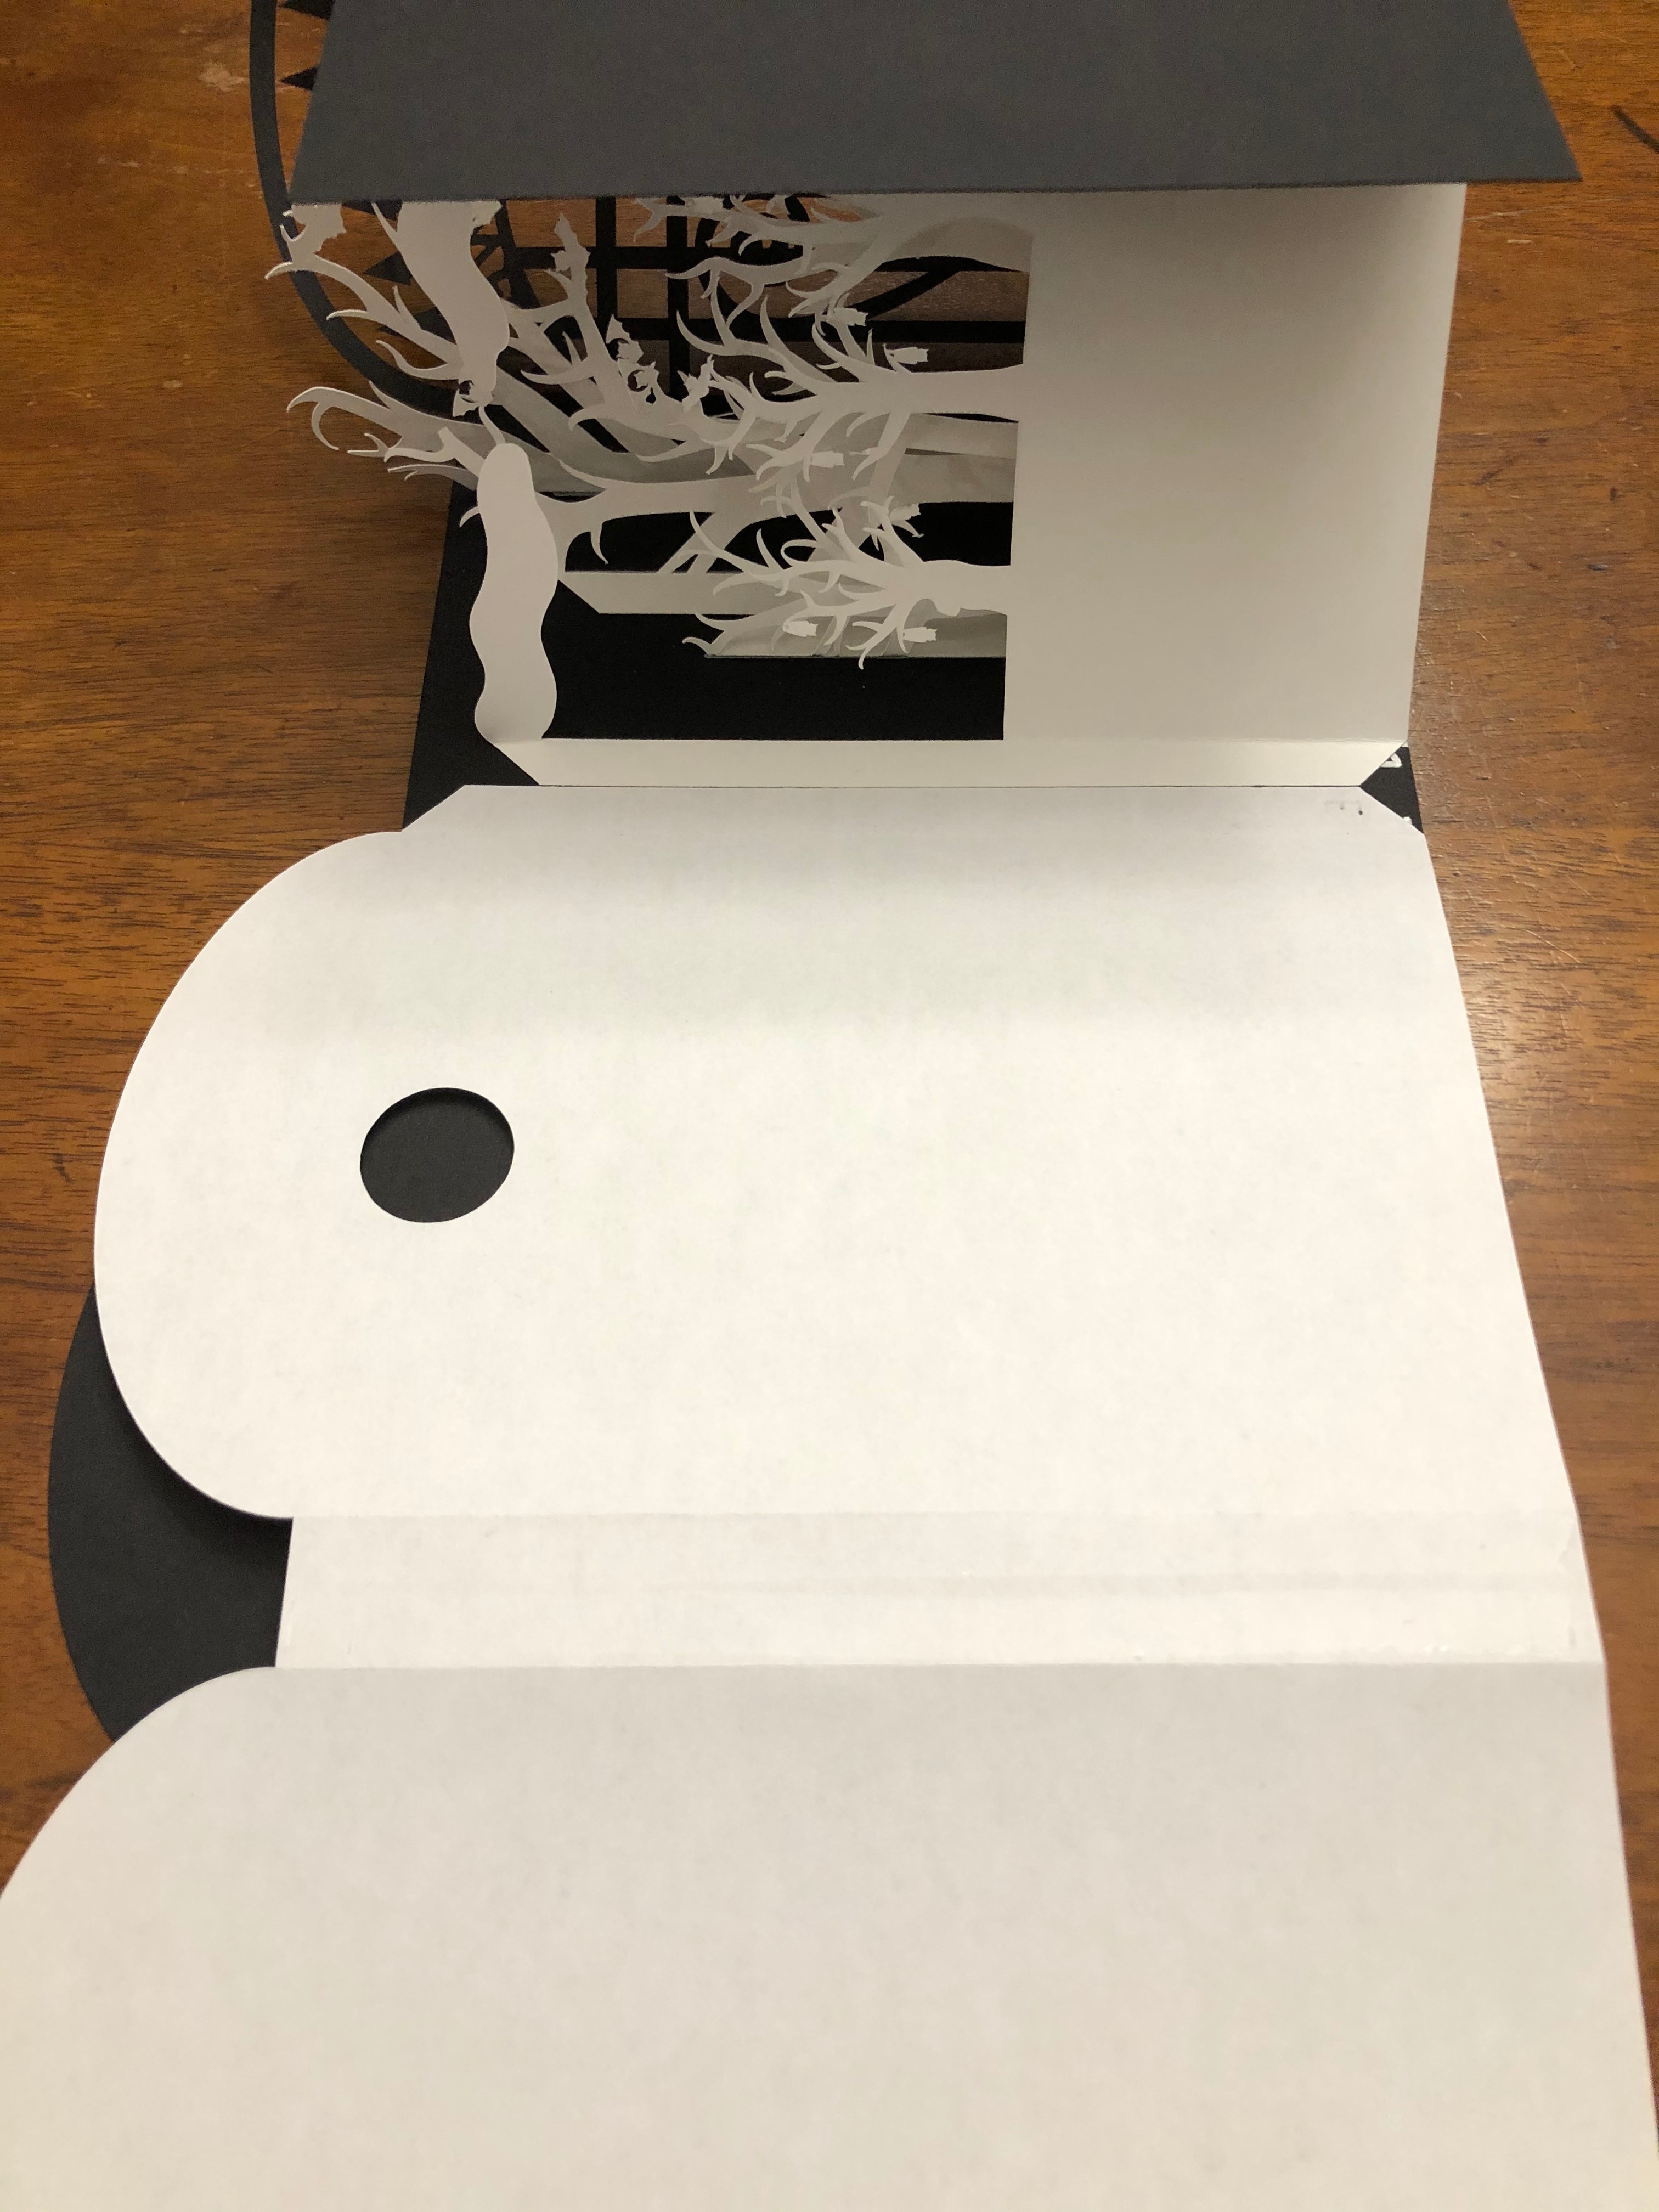
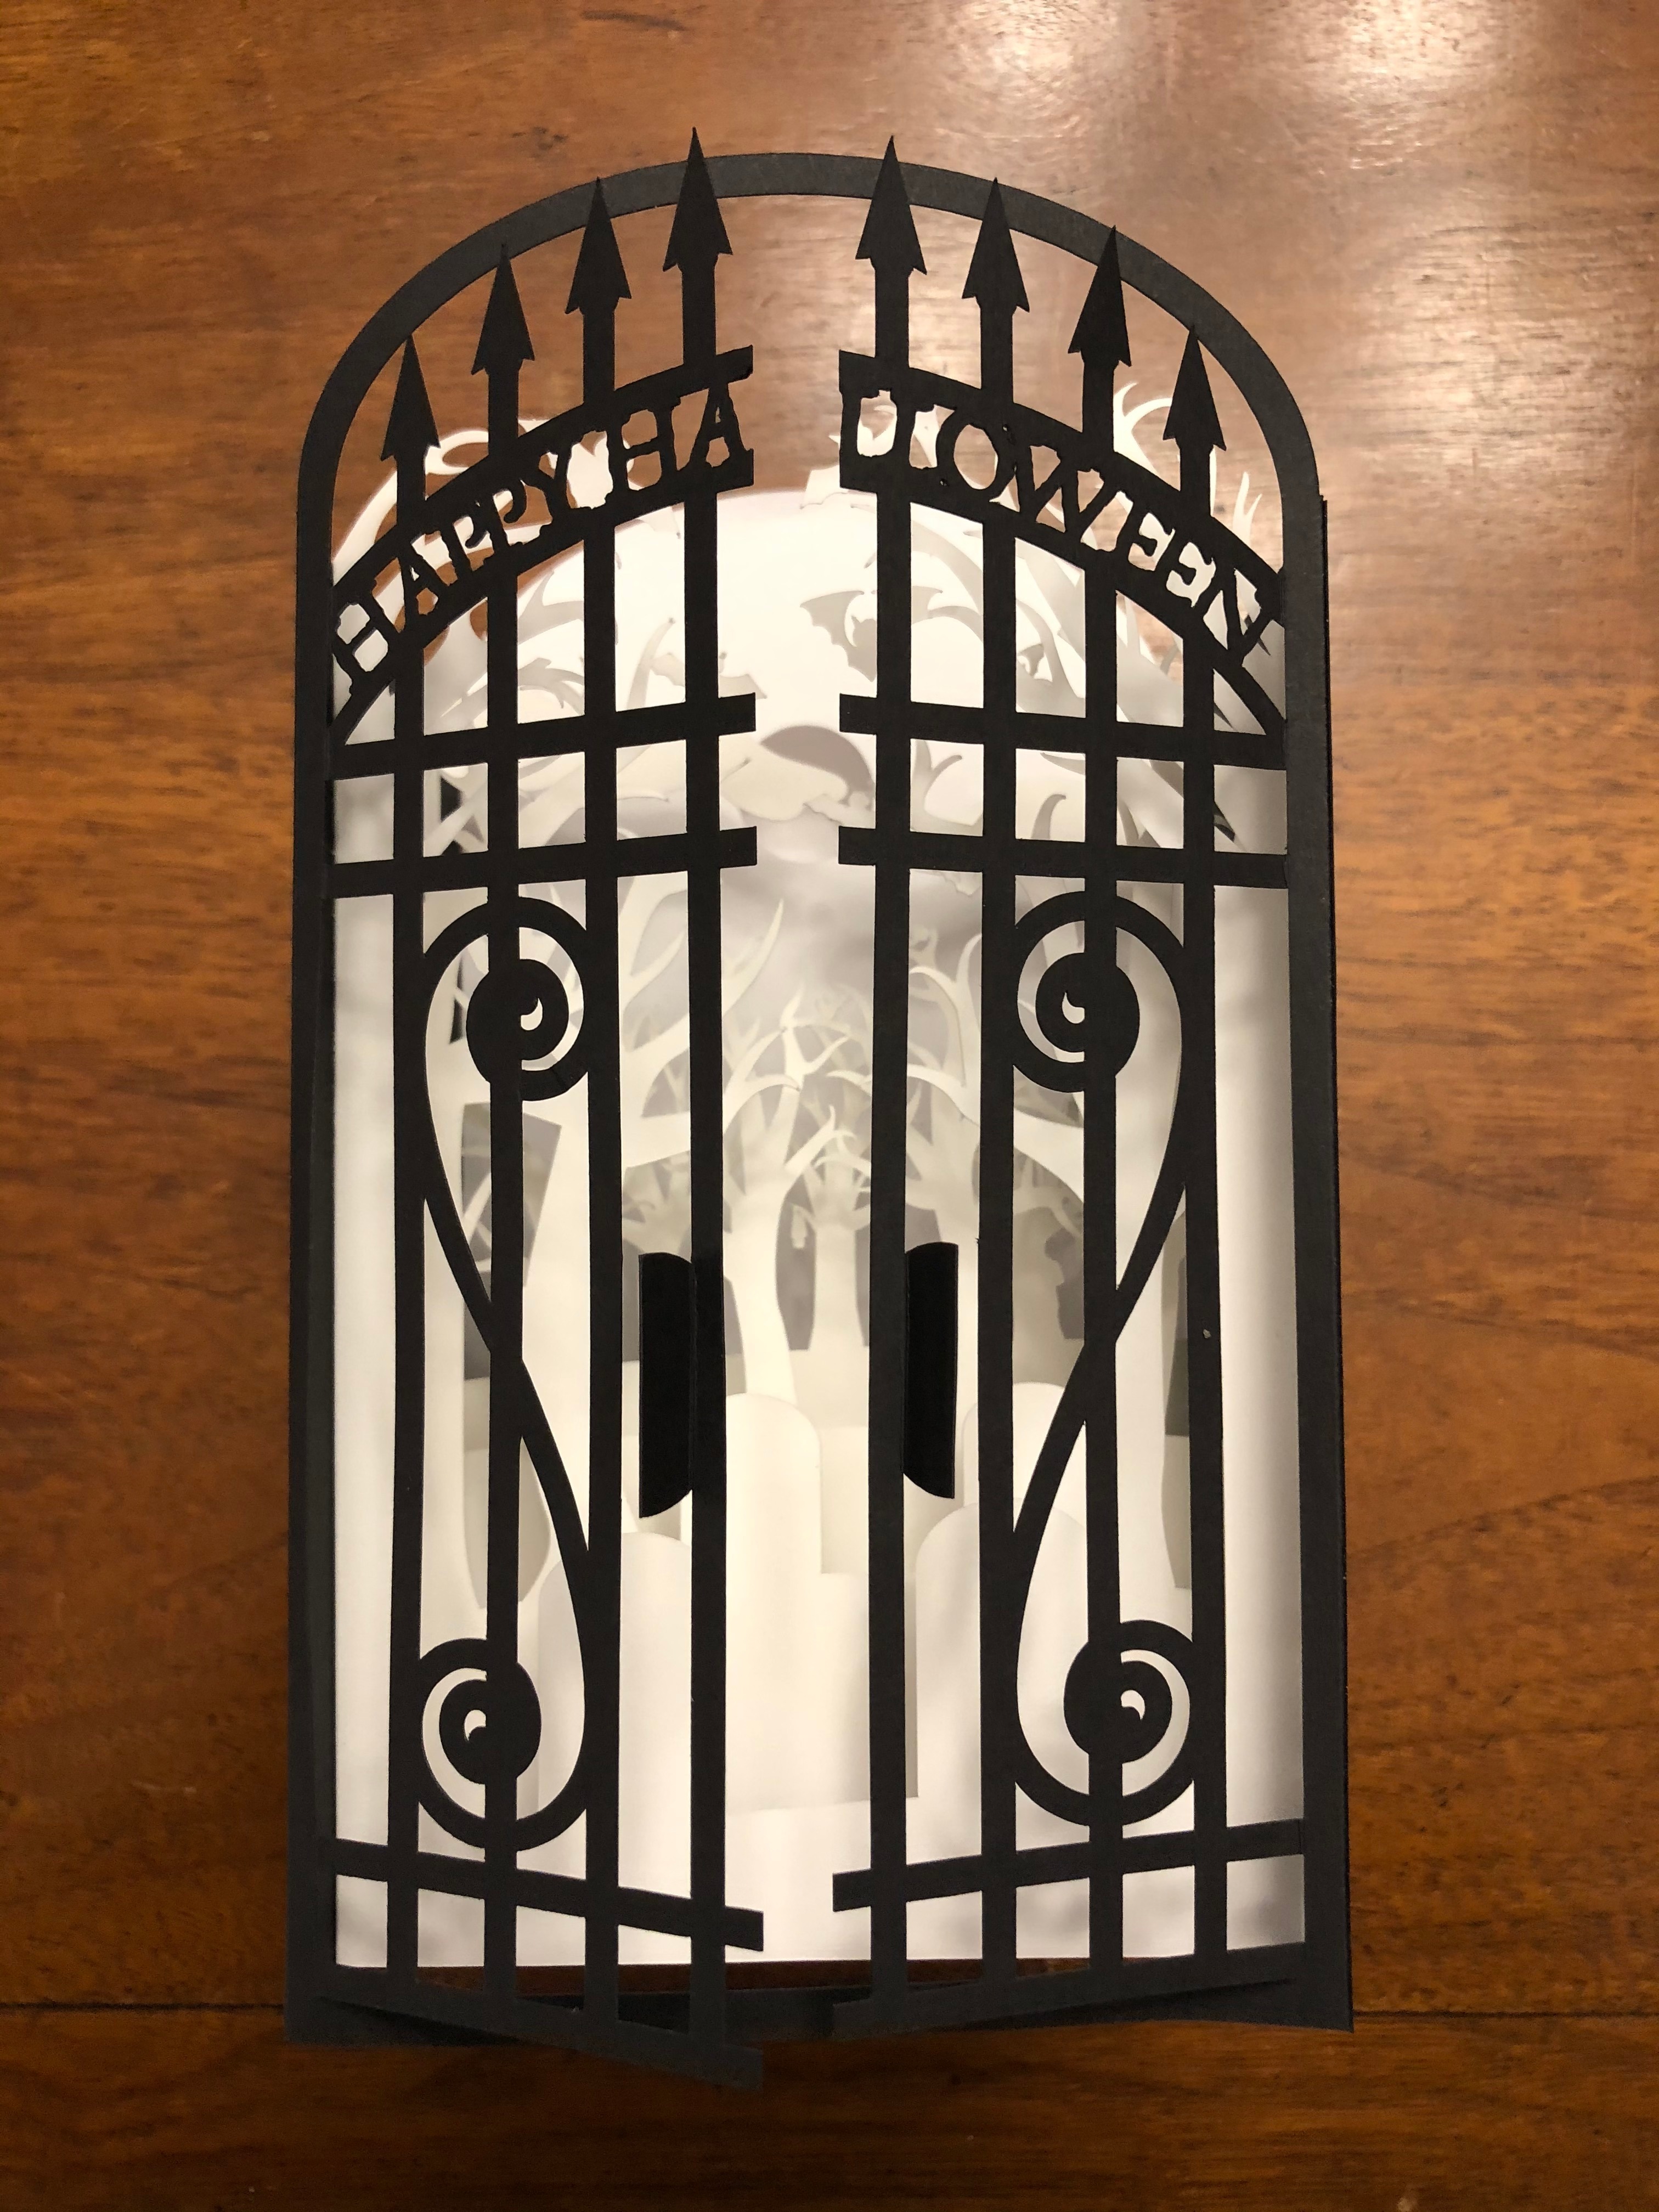
I drew a spooky cemetery with bare trees, bats, a couple clouds, and a moon. I also designed some wrought iron gates with my sentiment into the front of the card. As I work out the design, I make each item that will be cut from a single sheet a layer. I group scores, drawing/writing, and extra cut lines into their respective groups and color the strokes differently to help me identify them in Cricut Design Space (DS).
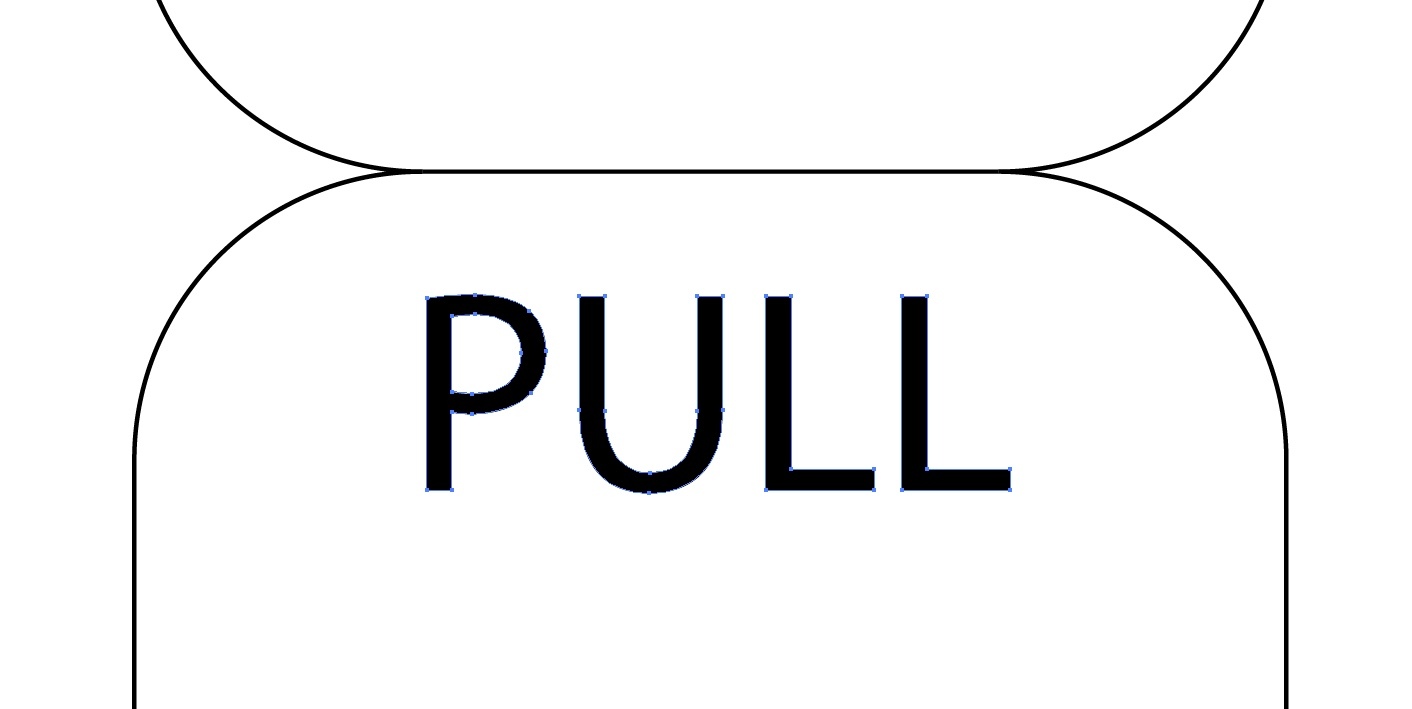
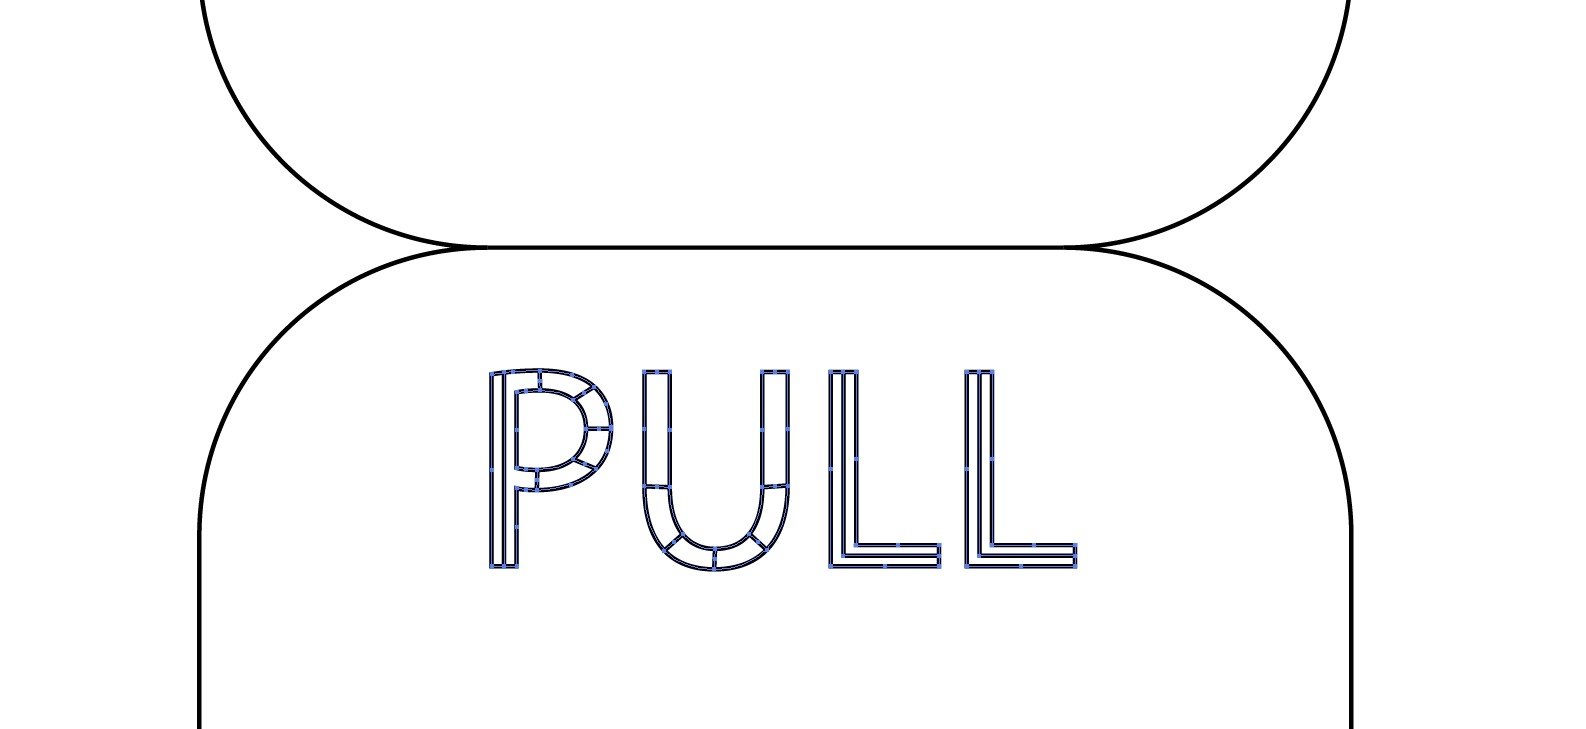
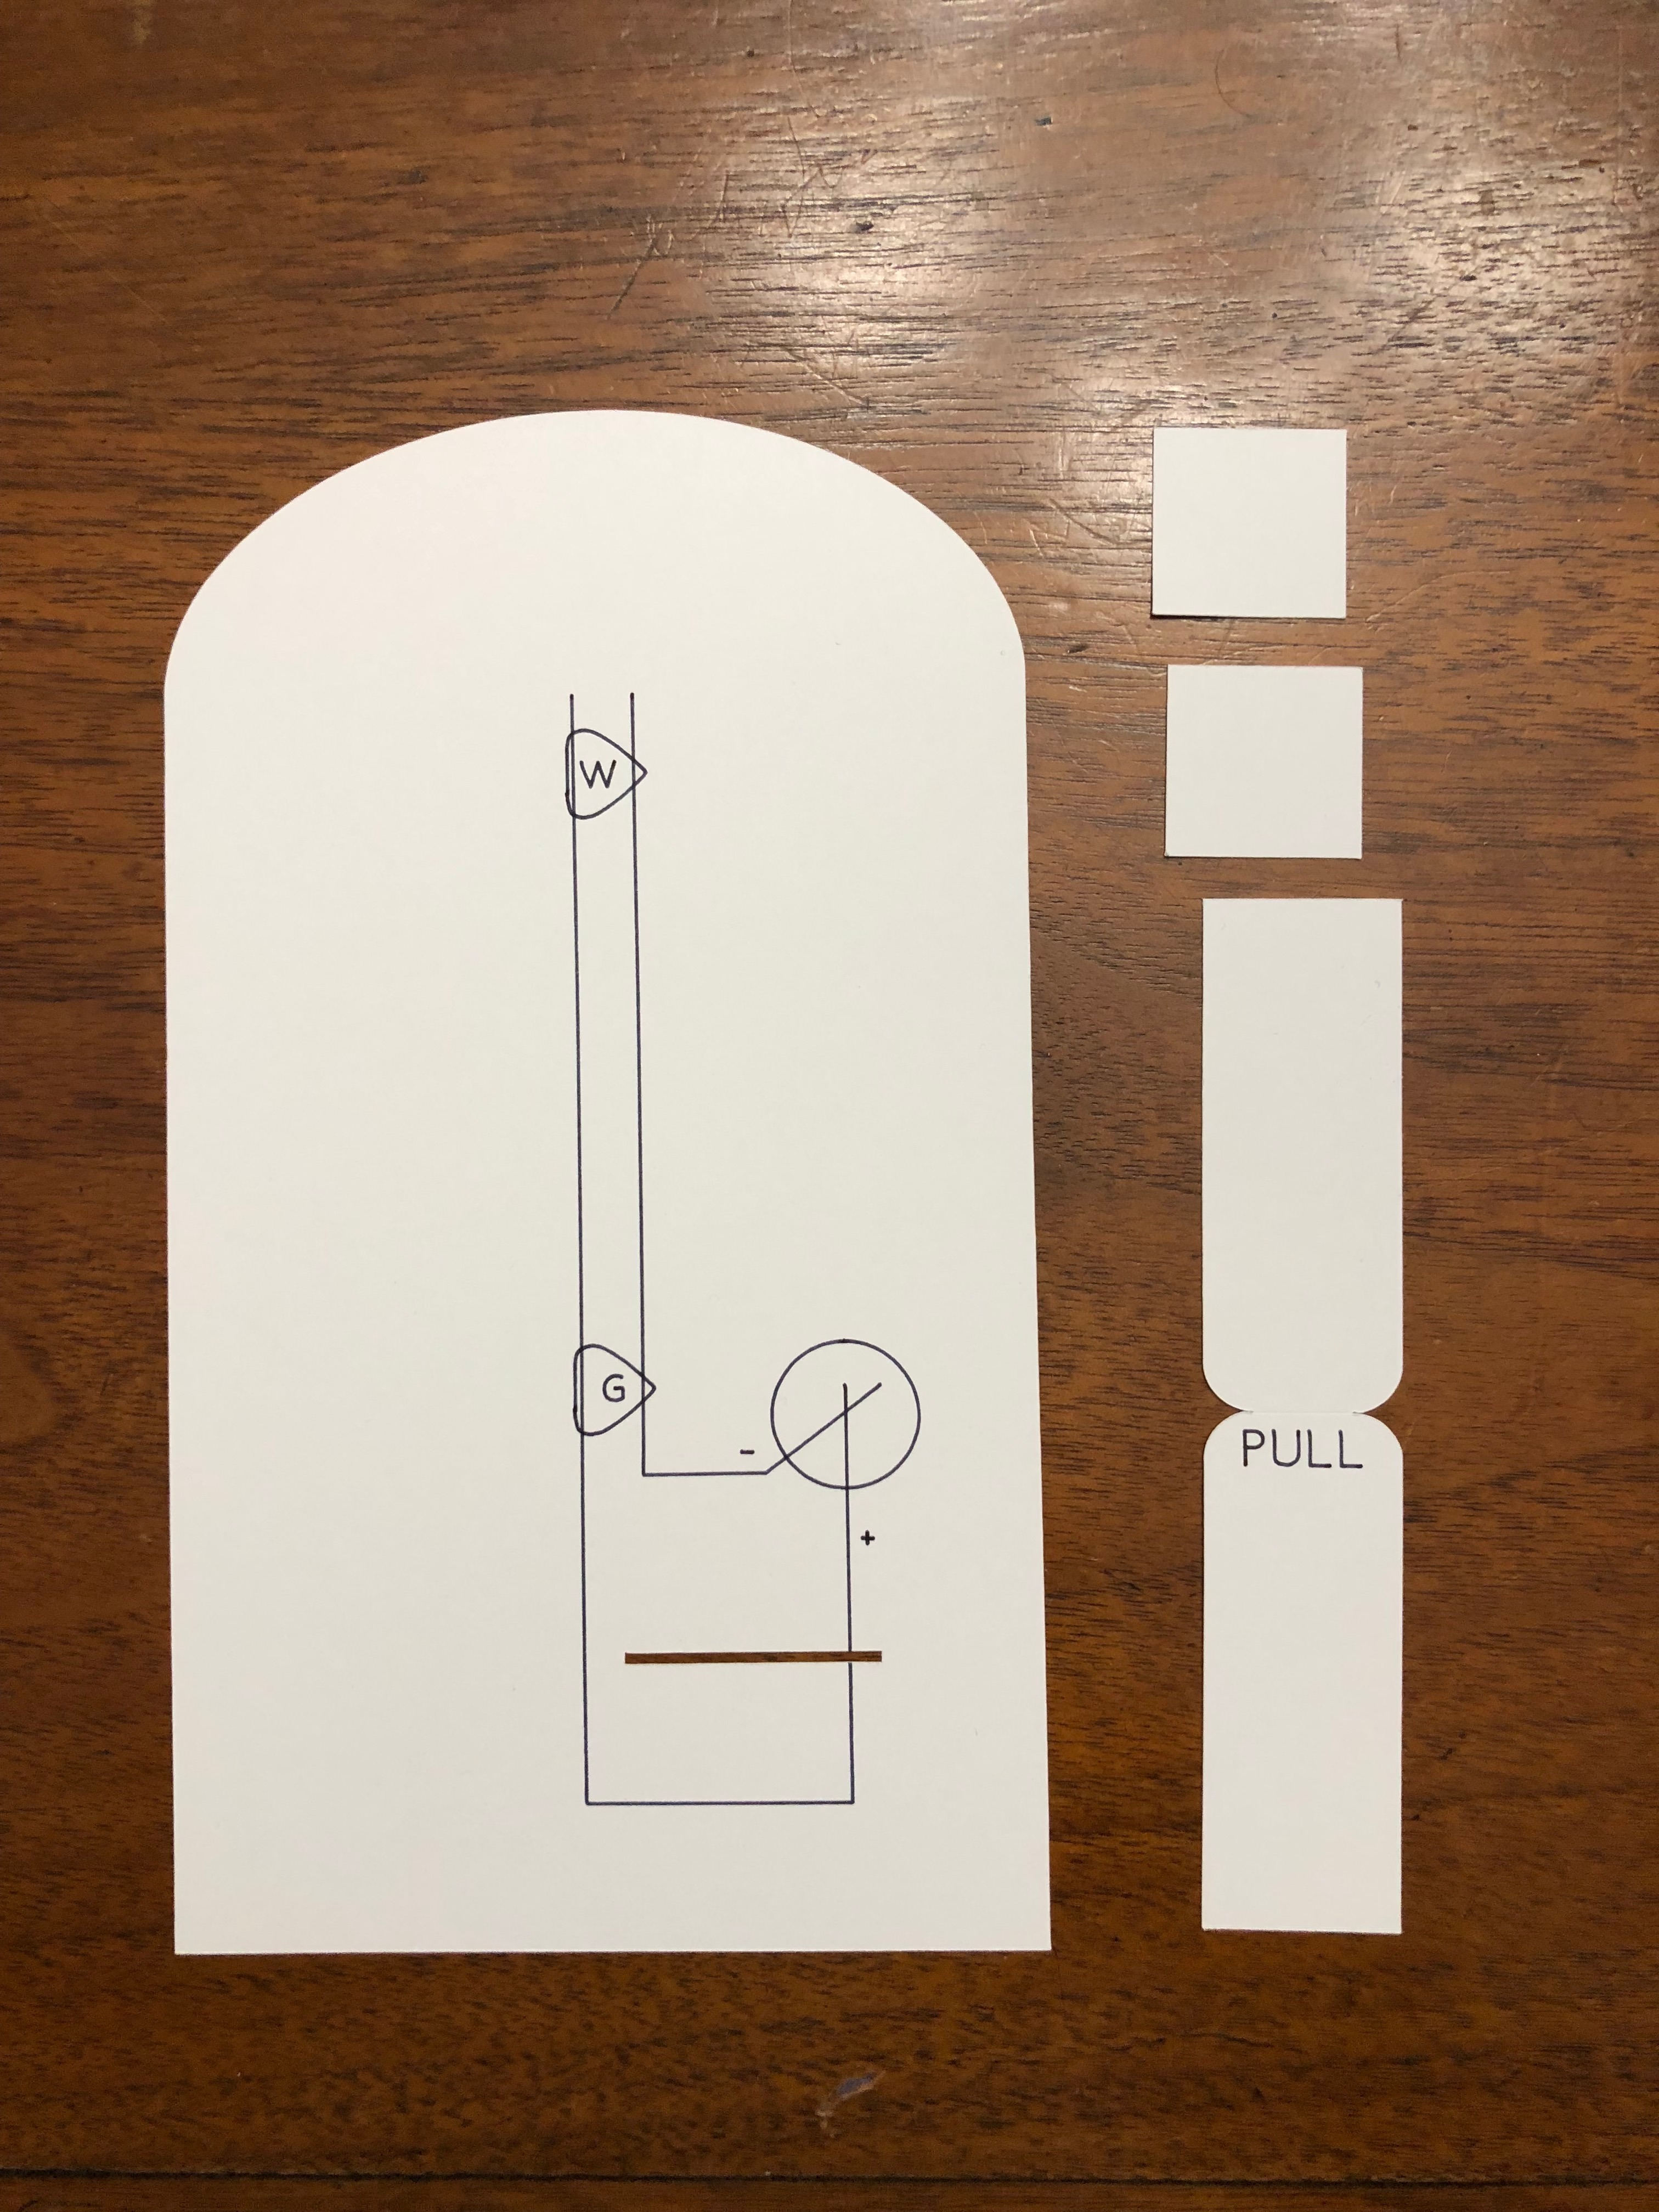
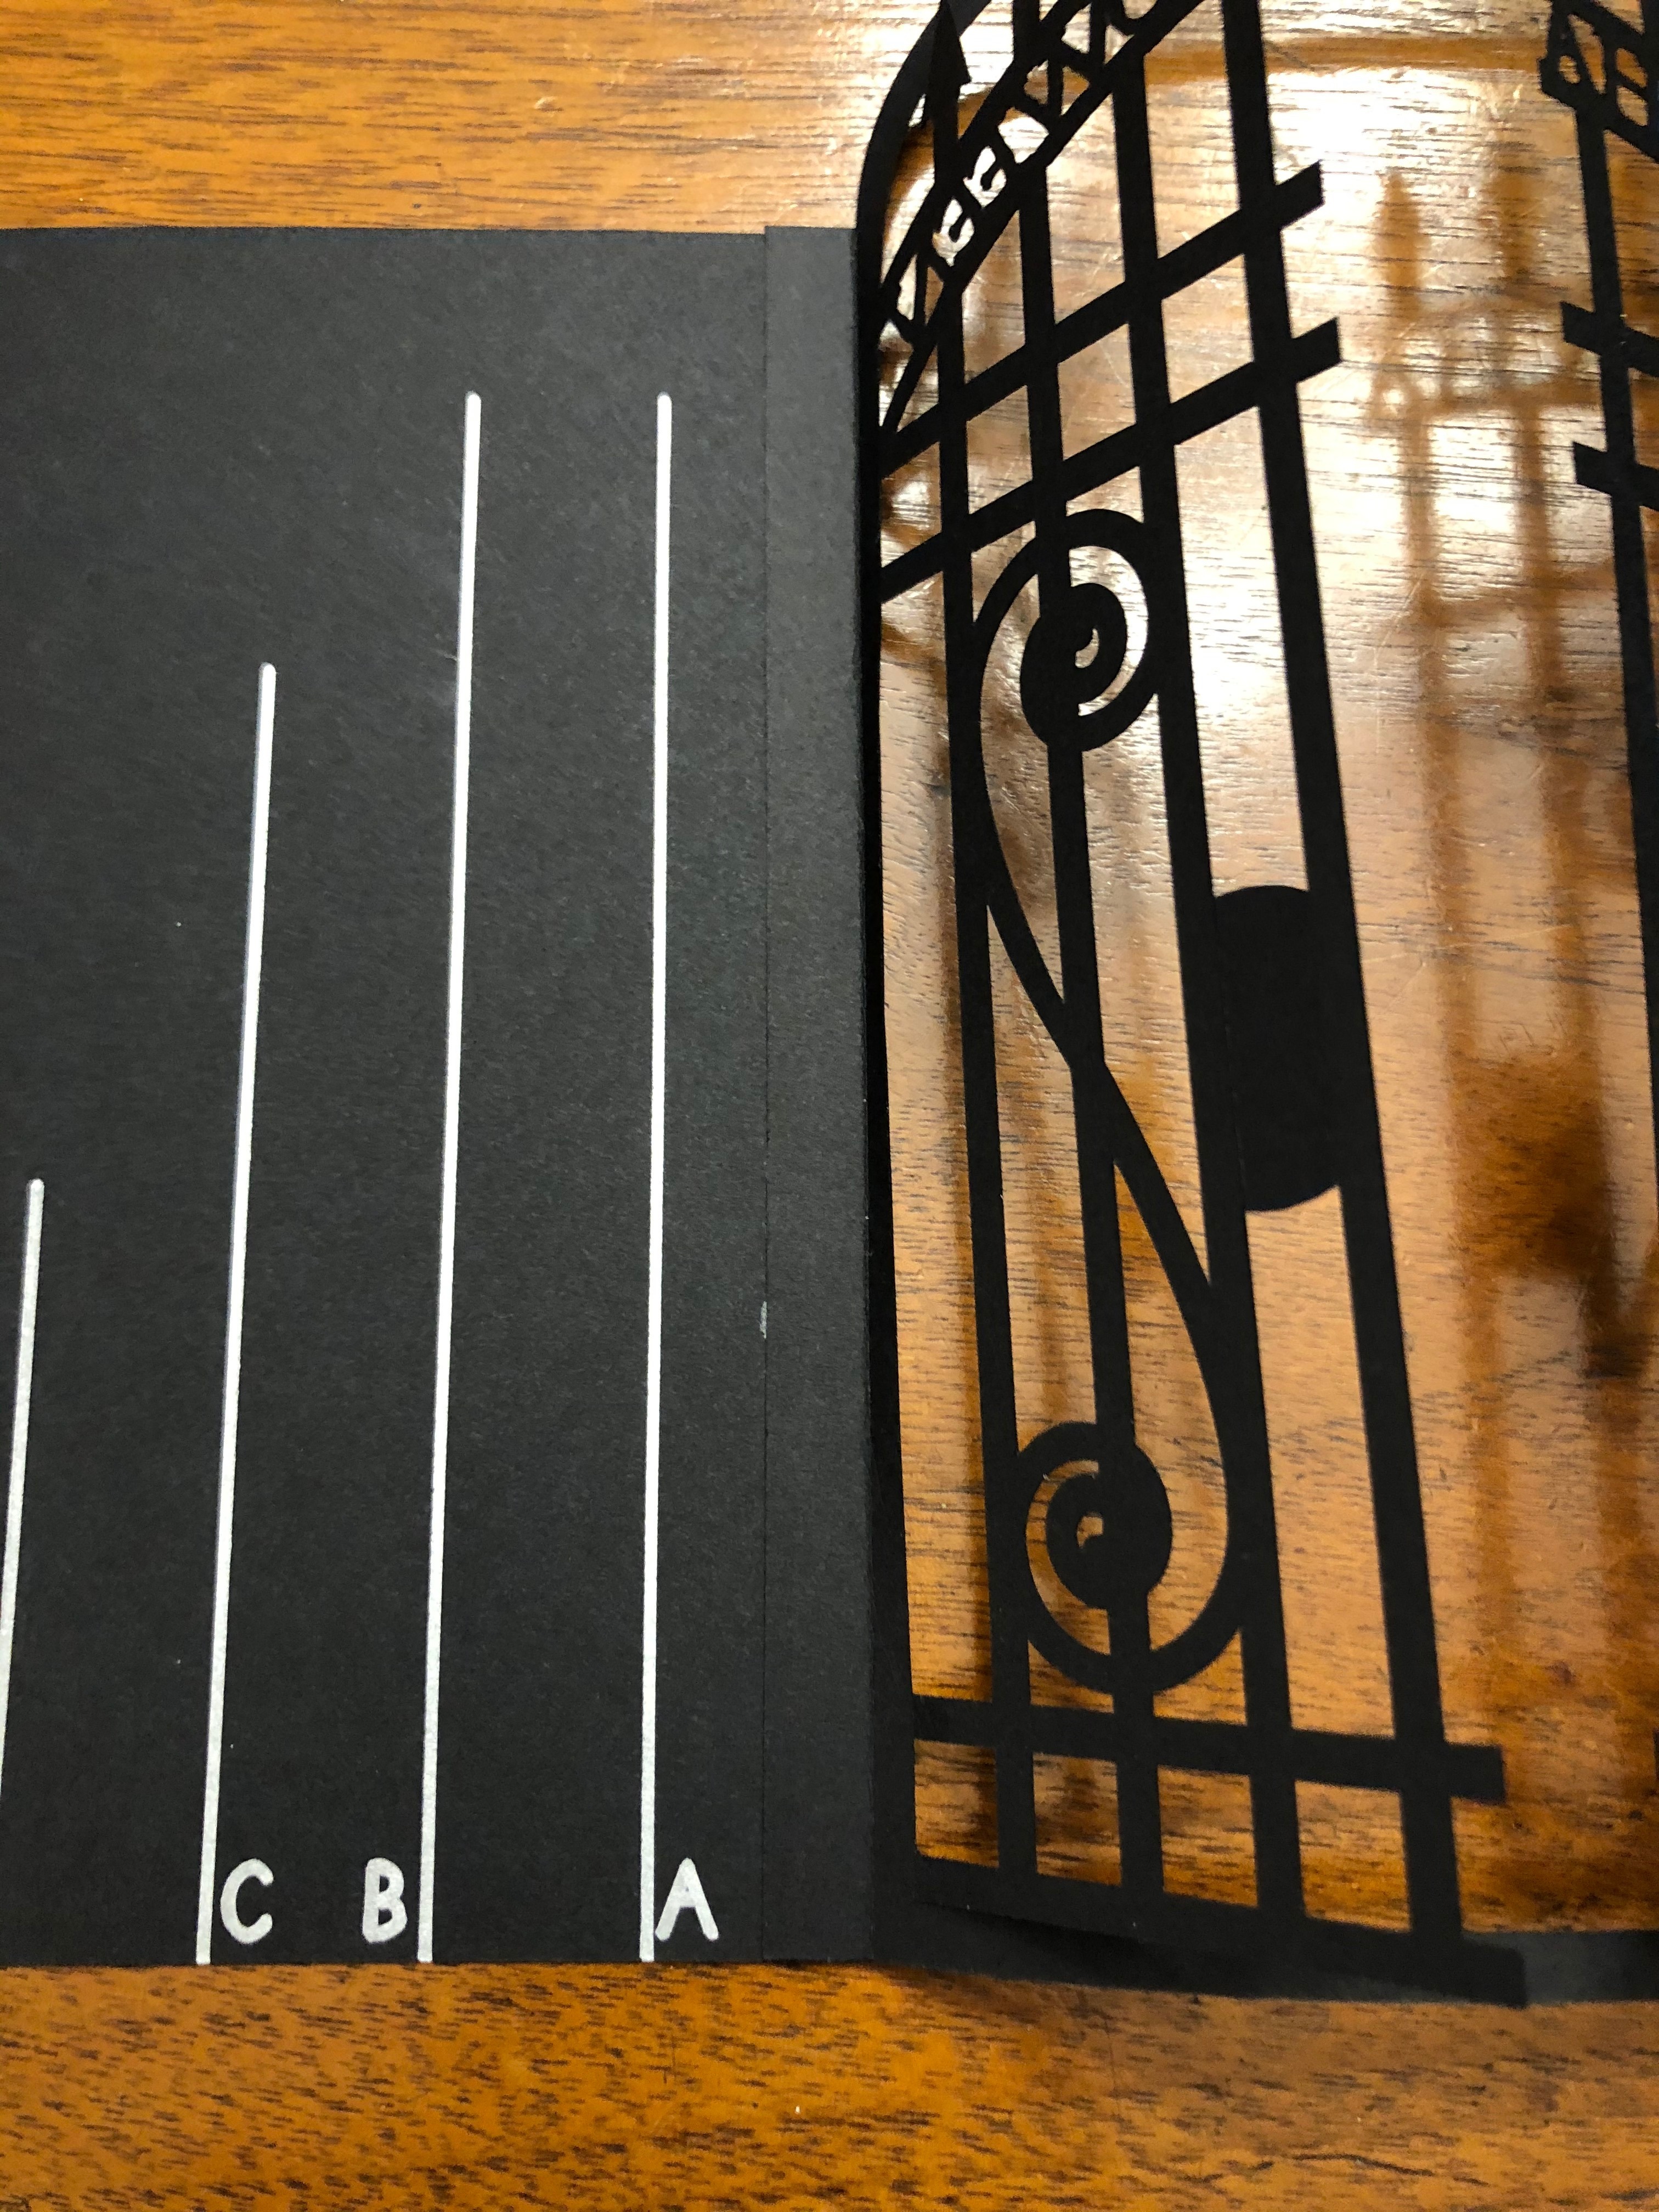
I also my software to draw out my circuit (yeah, it's annoying the Cricut and circuit are spelled similarly) so I can line the LEDs up with my moon and other design features. Then I can have the cricut draw it on my card. For this project, I took a lot of inspiration from Eiko's shadow box tutorial, especially for the paper switch, which I also laid out in illustrator. I also added a slot for the switch in the back cover piece. Finally, I made some simple paths in the shapes of letters to give a guide to line up the tabs, and also to label the bulb colors for the circuit. I forgot, but I also sometimes label the positive and negative side of the battery. I also added "PULL" to the switch tab in this manner. I sometimes set up the writing in DS (which has specialized single stroke writing fonts, a few for free), but I wanted all necessary parts to be in this file. I set the parts to be drawn with black pen to a green stroke color. I set the parts to be drawn with white pen to a white stroke.
Lastly, save as an .SVG for importing to DS.
Note: You will have the best success with designs that connect at the bottom and top. Parts that stick out from the sides of the card but do not connect will require a little finessing when unflattening / flattening the card. You will see this issue with my clouds and some of the framing tree branches.
Adjusting Within Design Space

This is probably everyone's least favorite part, but once you do this one time and save the file to your projects, you'll be able to cut one of these babies out quickly and on demand!
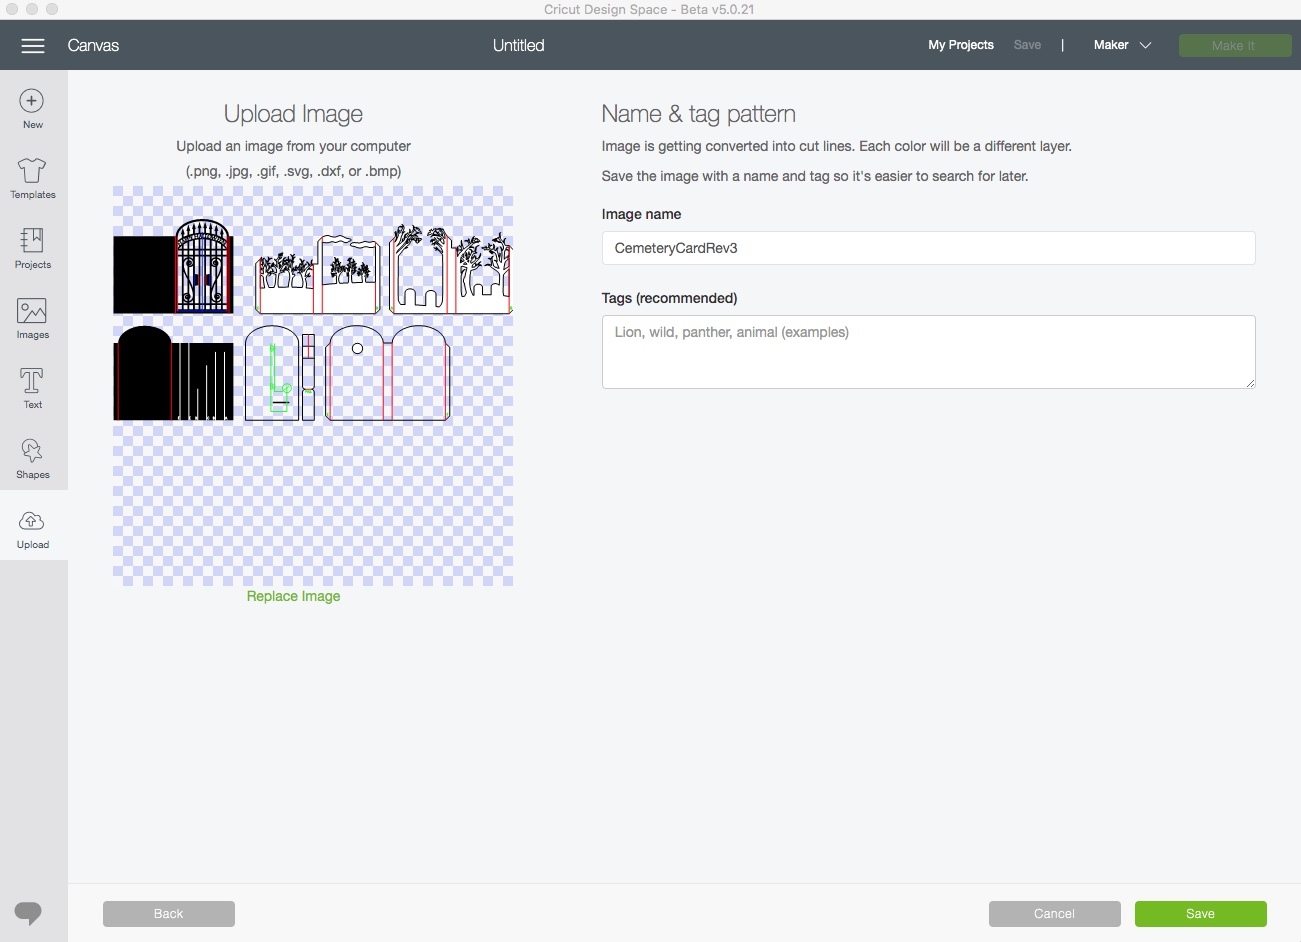
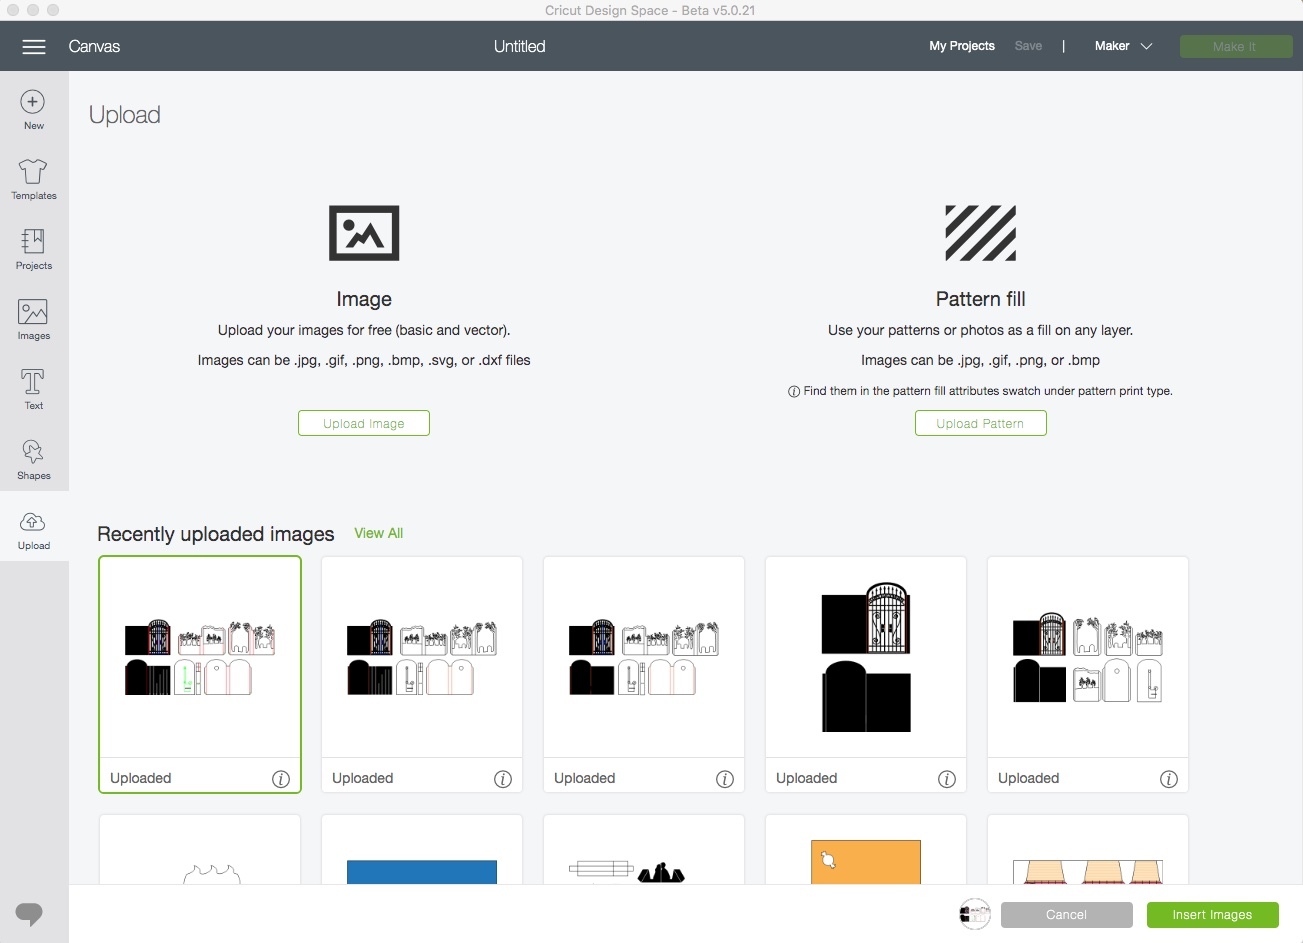
Start a new project in DS and click import. Select your .SVG and add it to the project. Save your project.
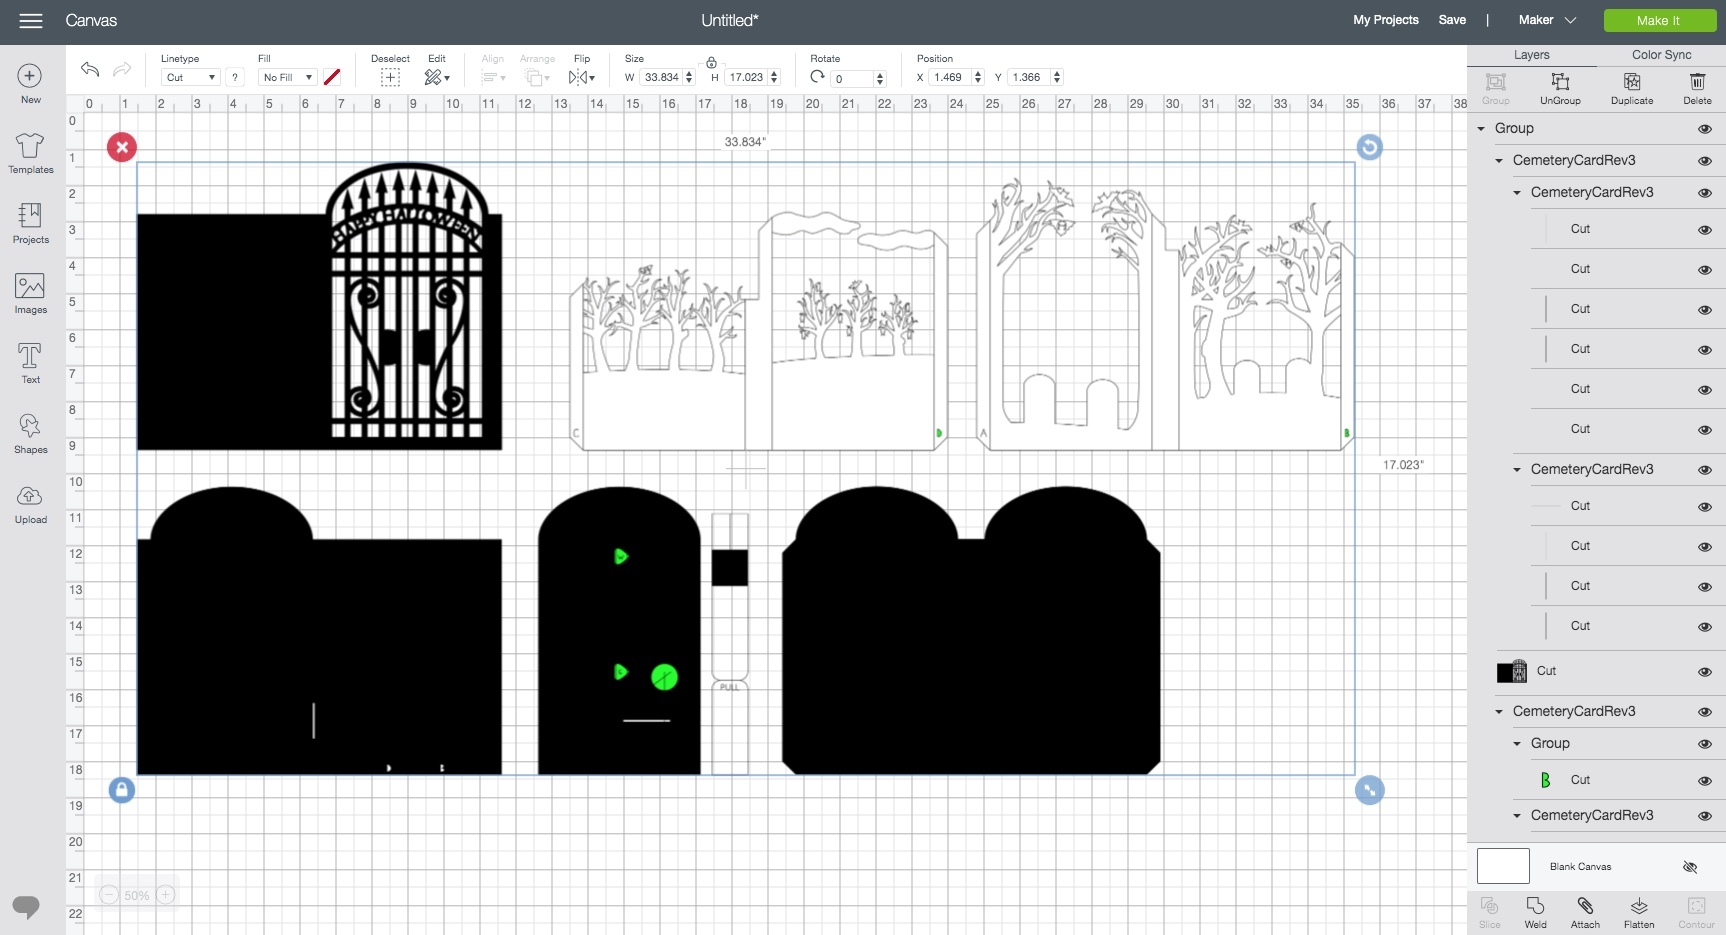
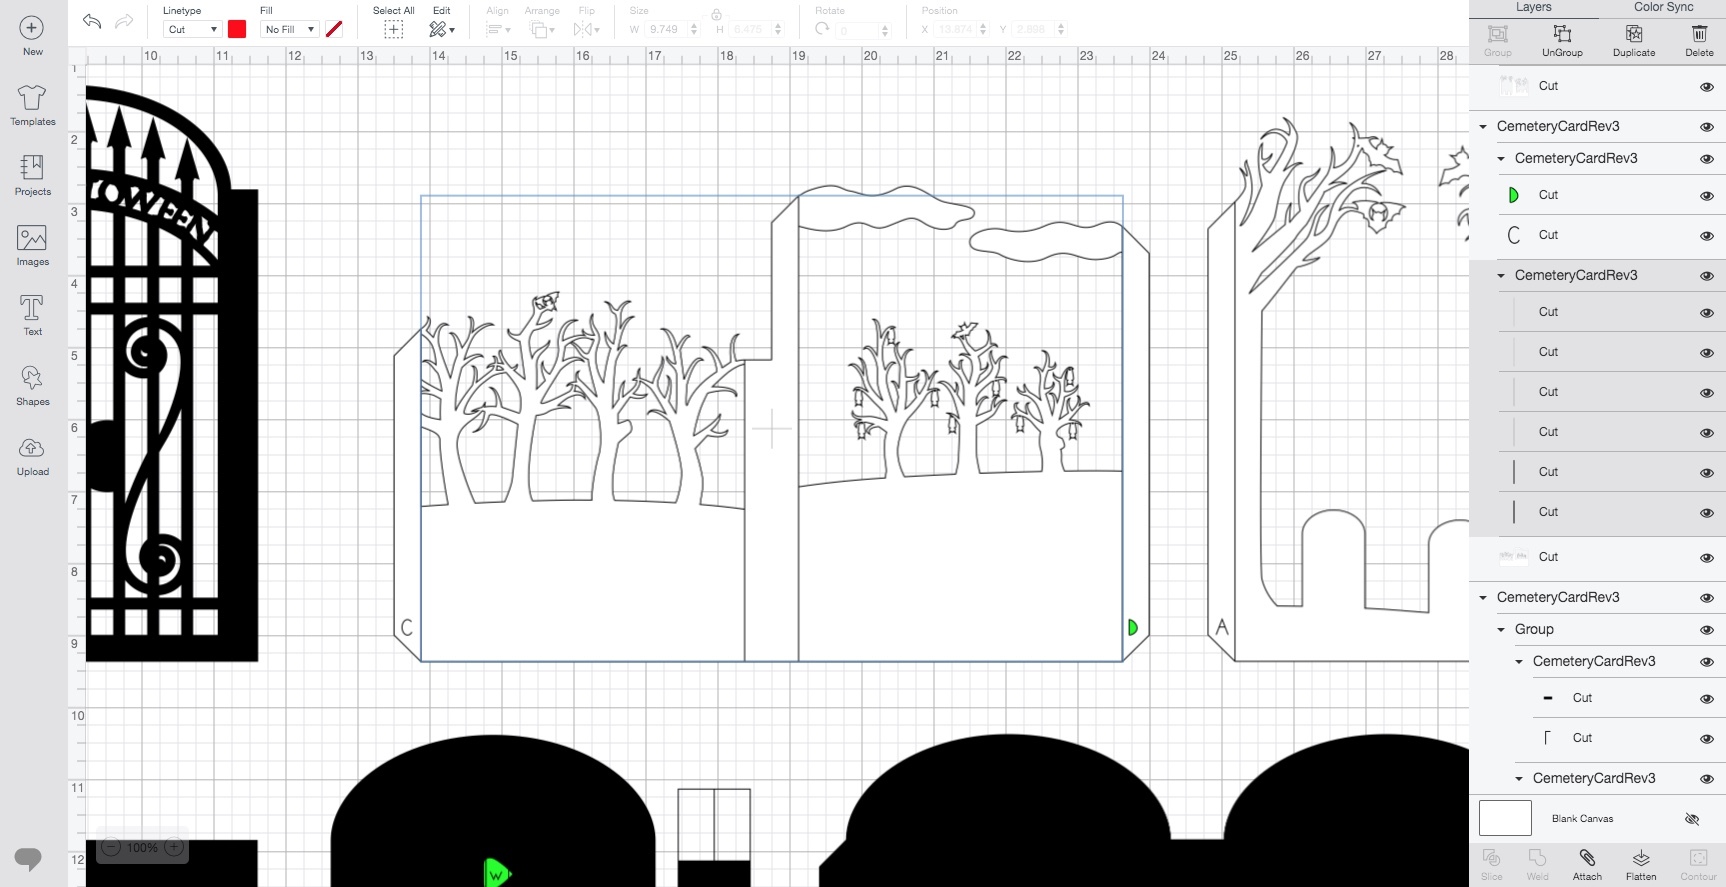
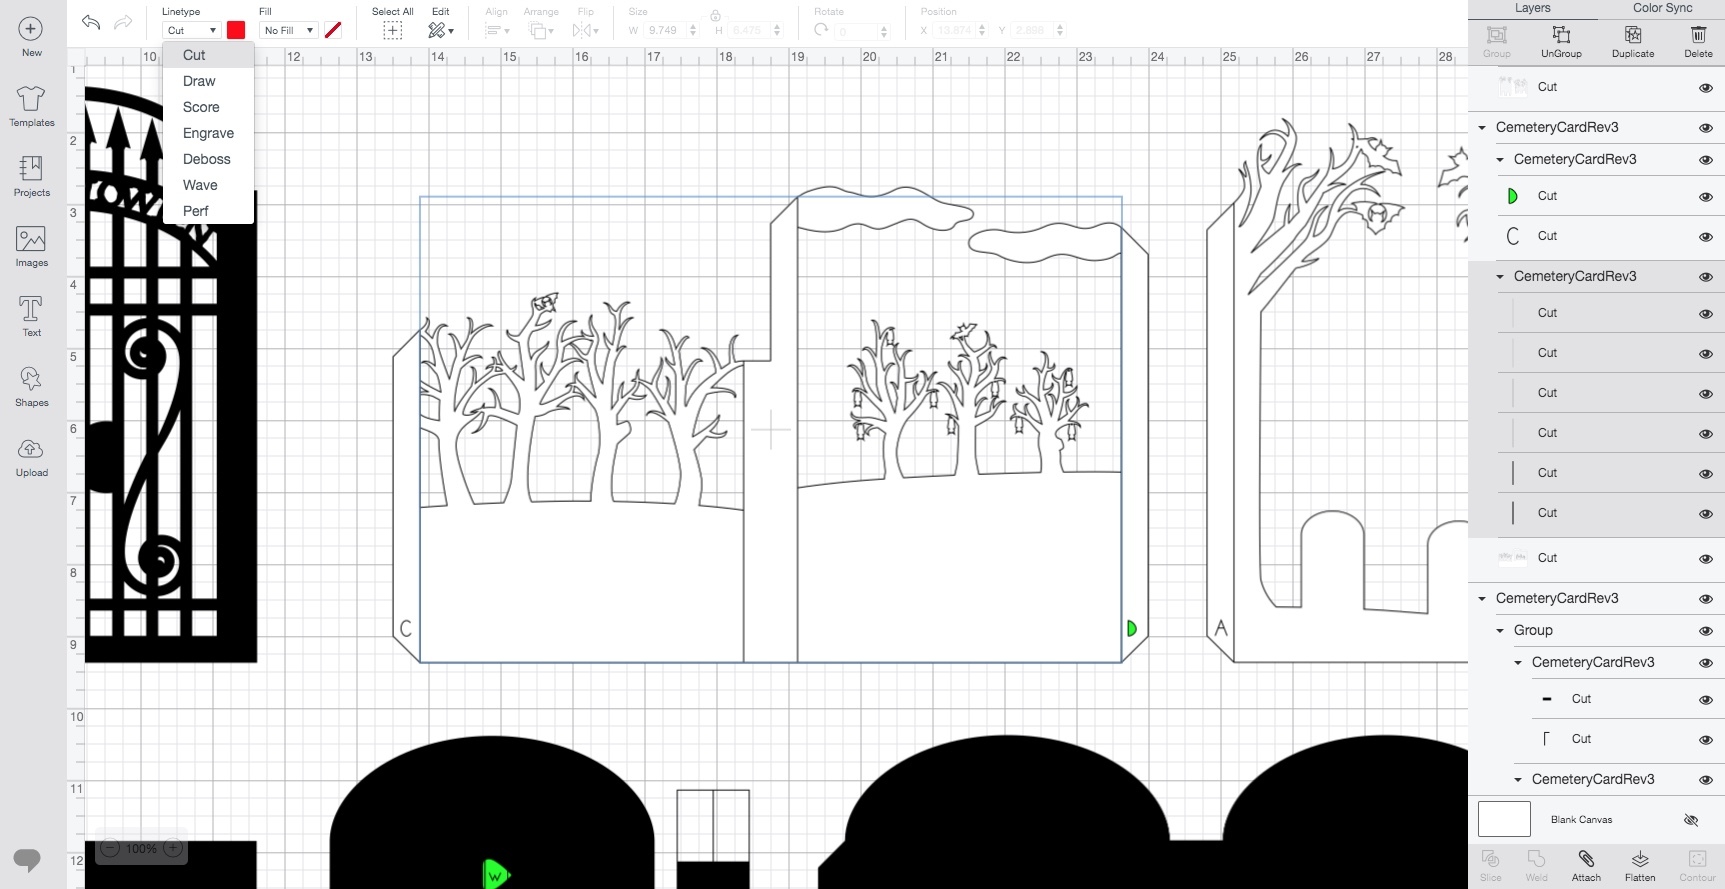
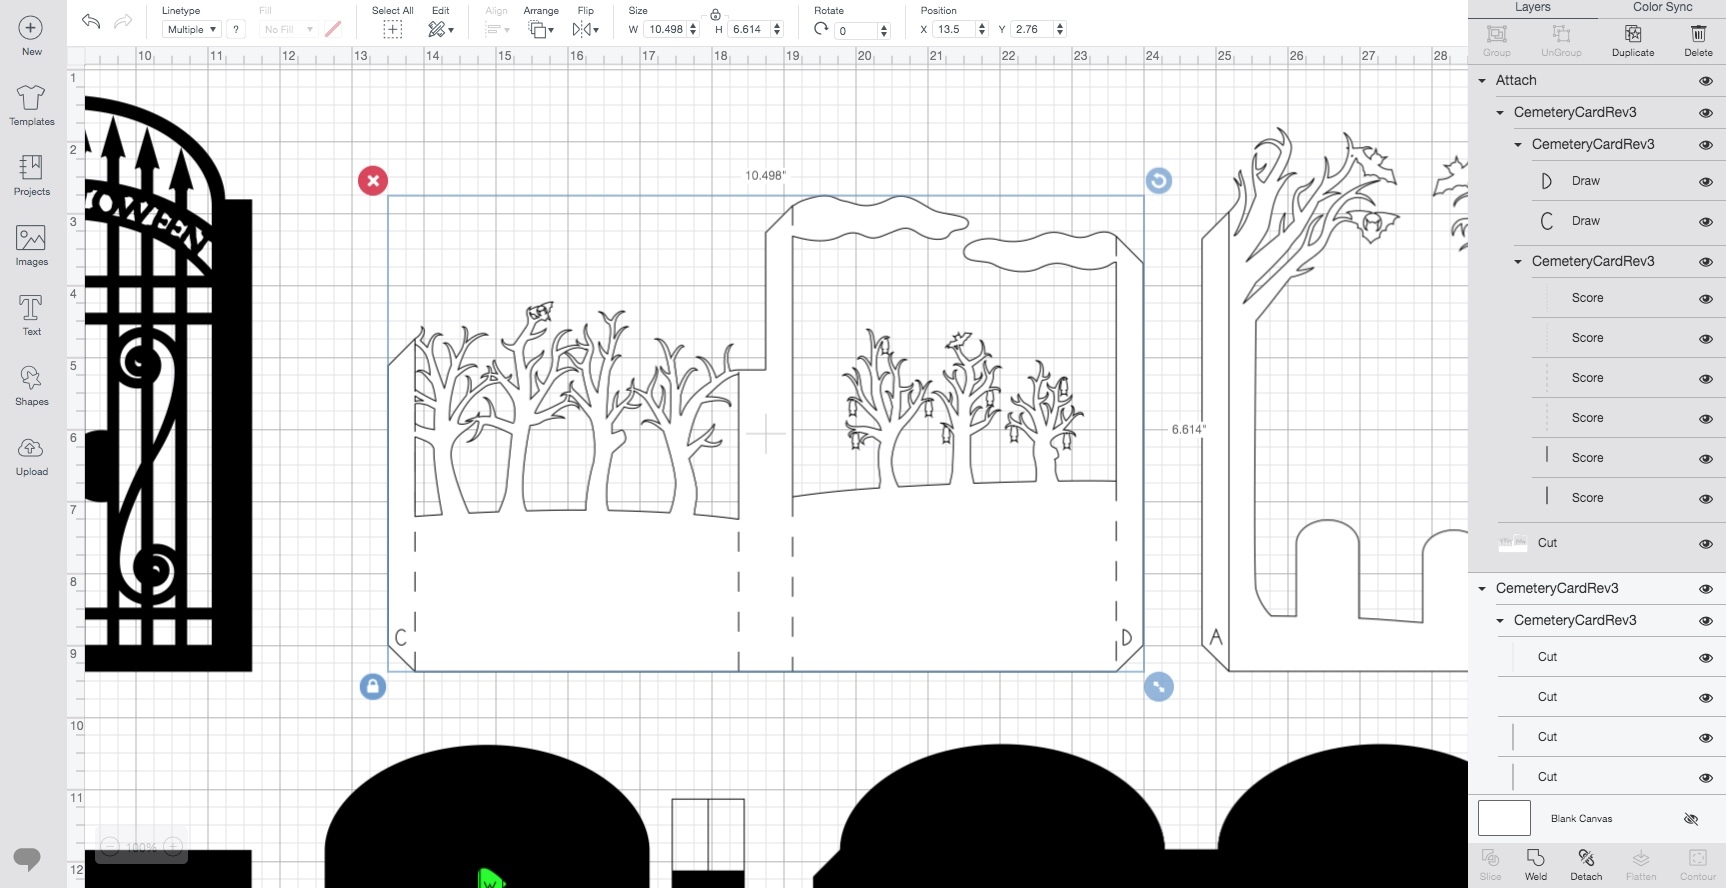
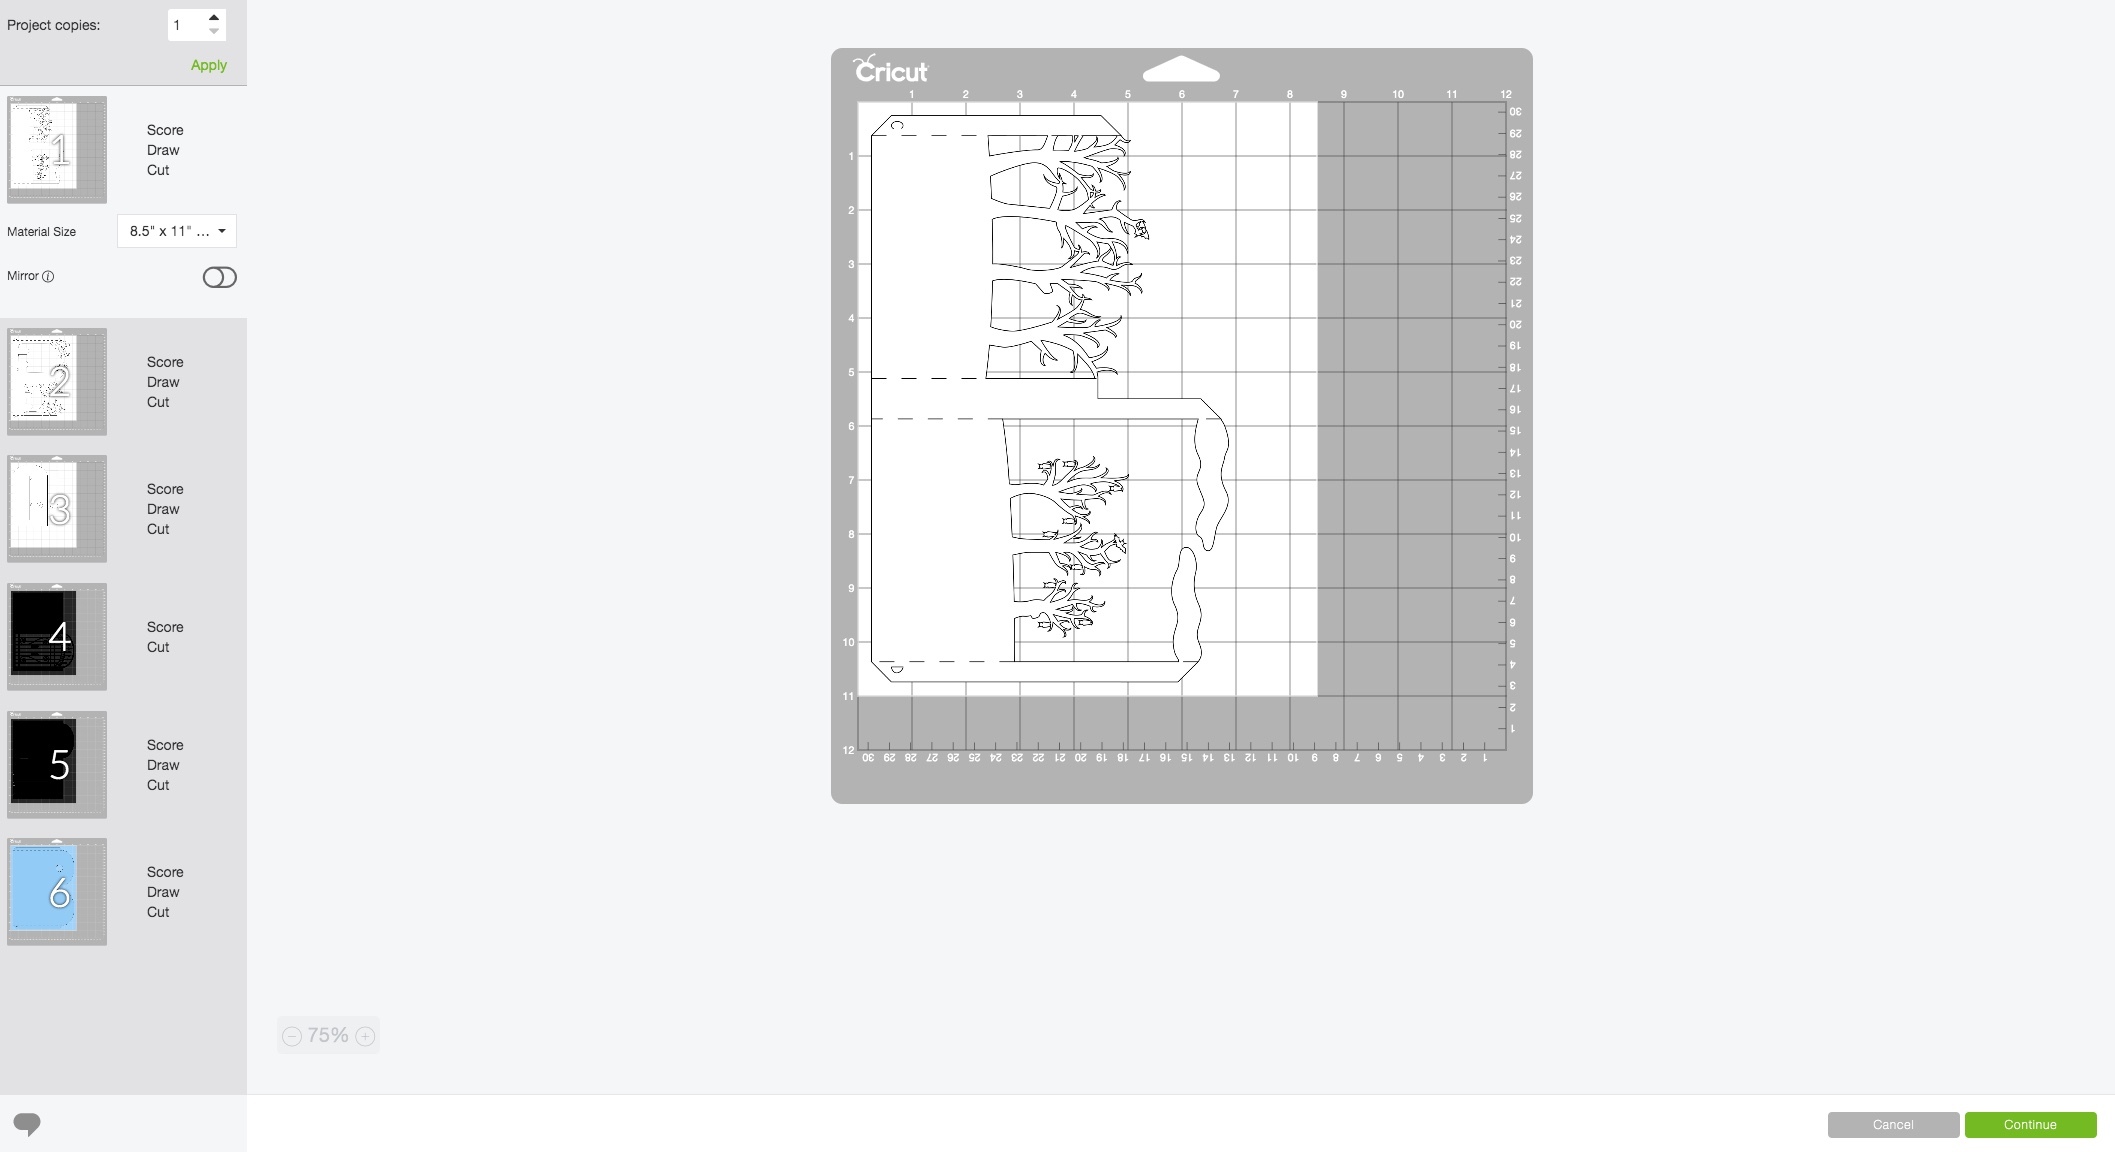
If you made your .SVG in Adobe Illustrator like me, every part will be collected under one group. Select this and click "Ungroup". Now each part that should be on one piece of cardstock or paper is in a group of its own, for six major groups. Within each of these groups, there are parts for cutting and separate groups for scoring, and sometimes additional cuts and drawing. Right now, everything will be set to the default, cut.
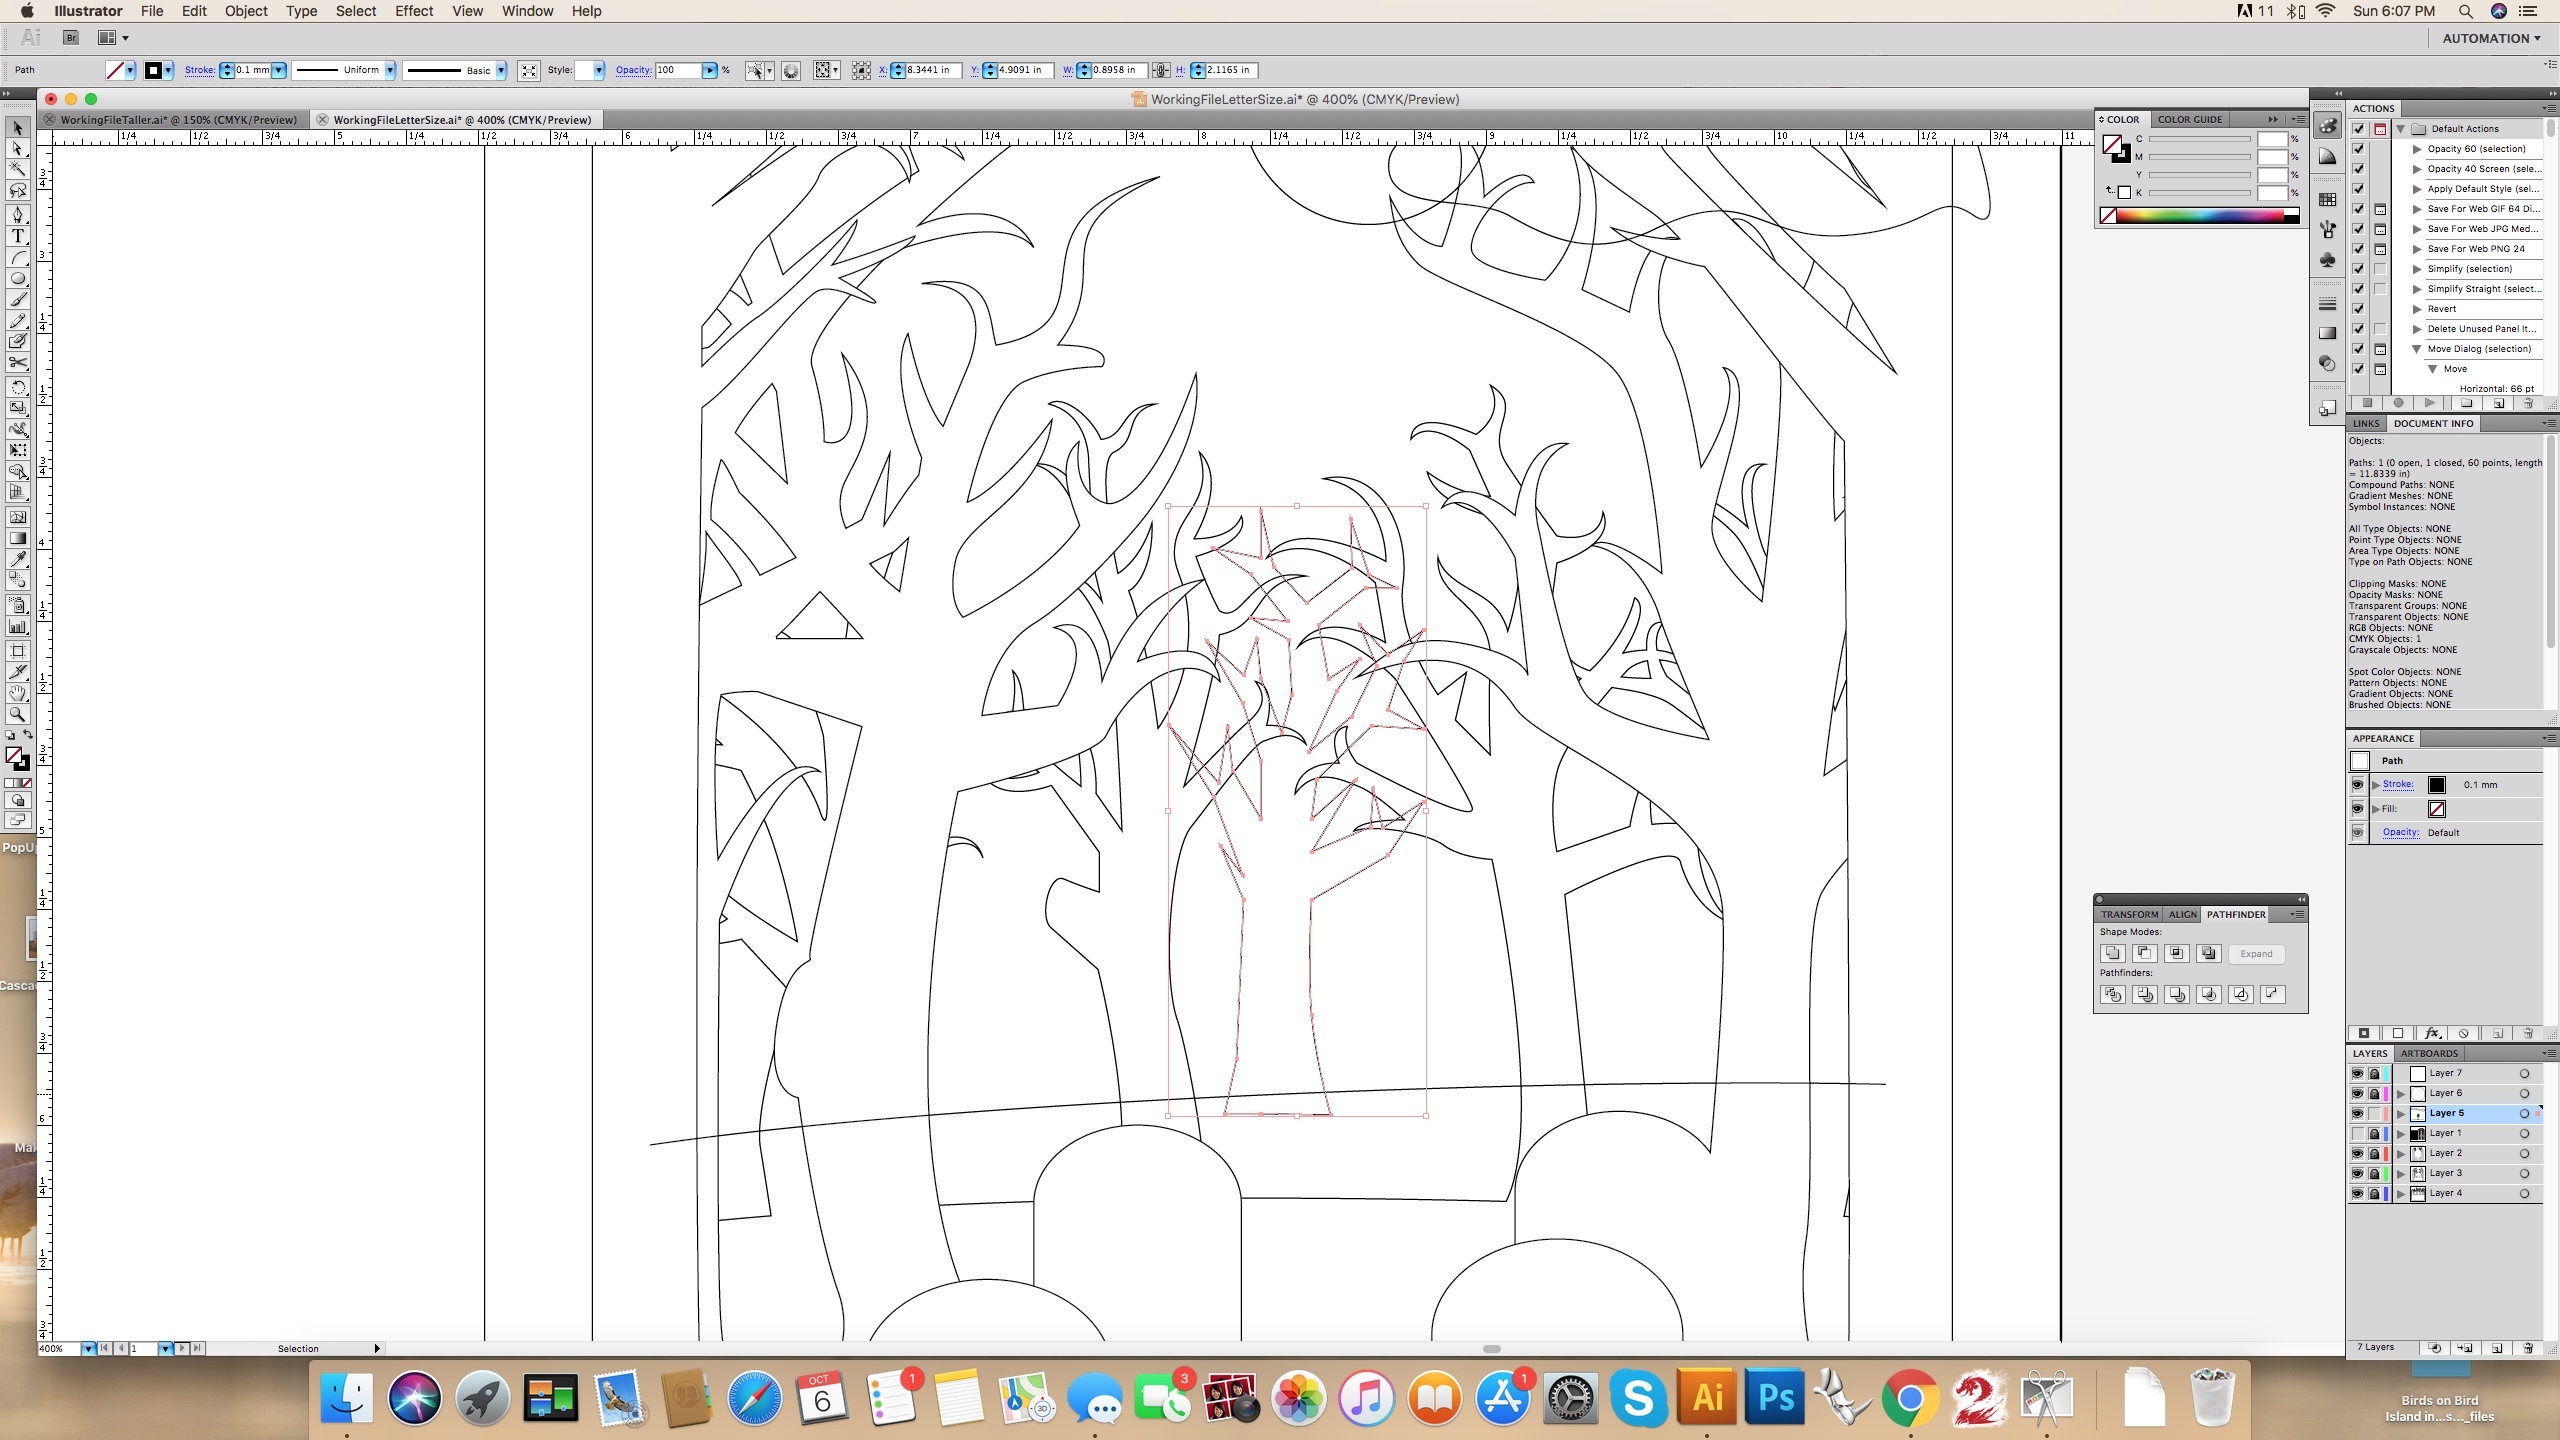
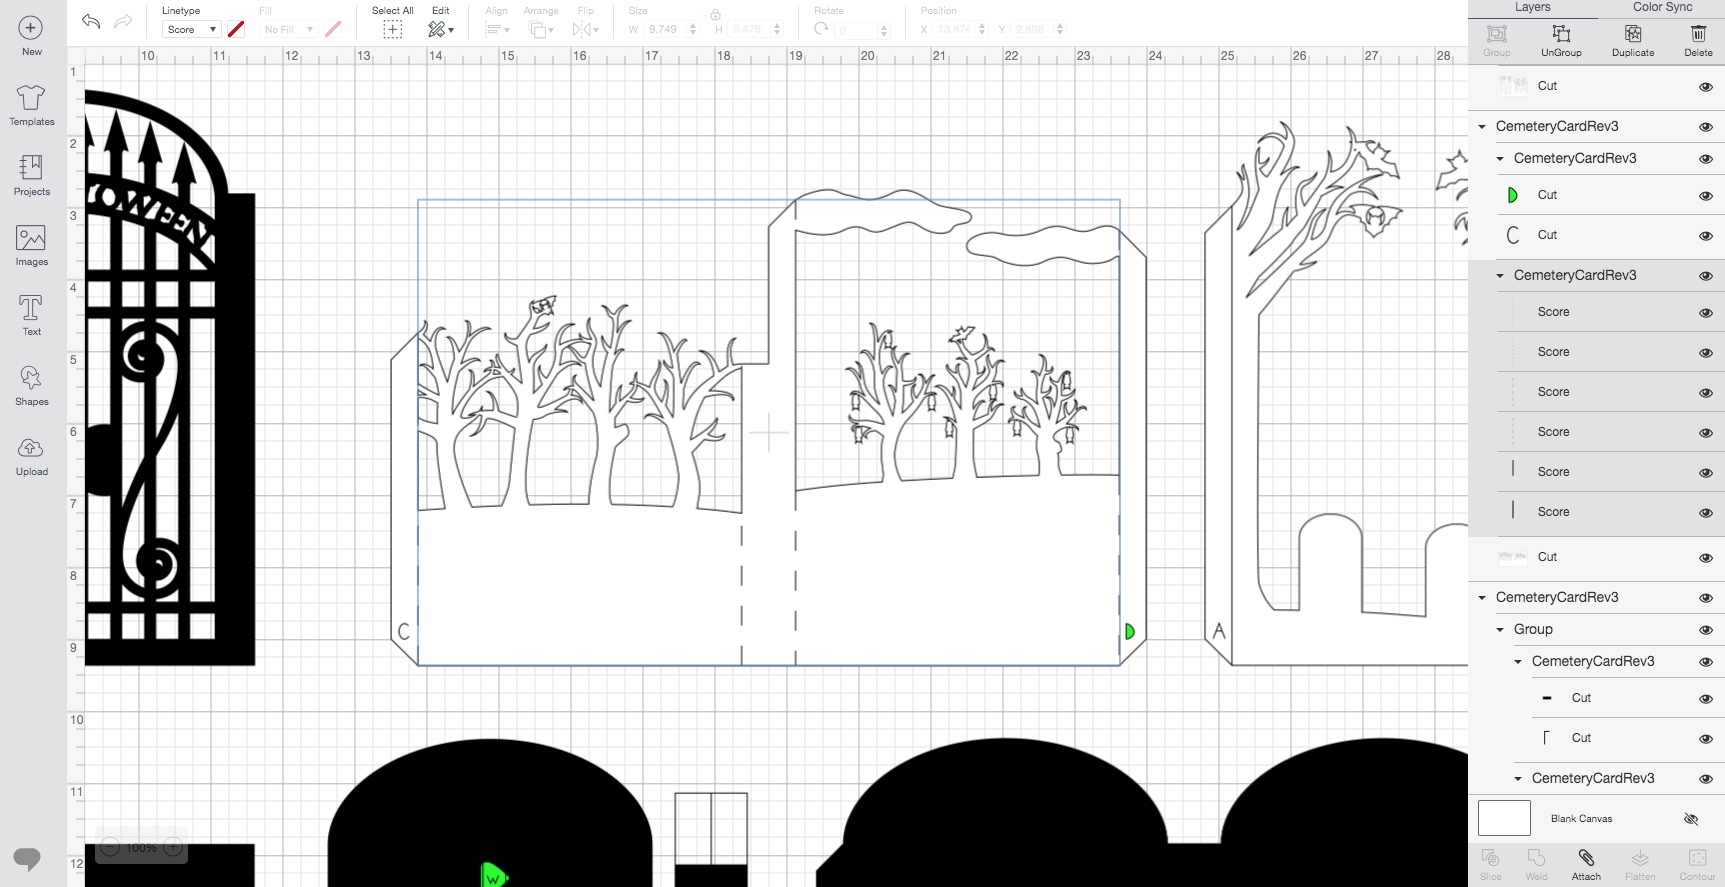
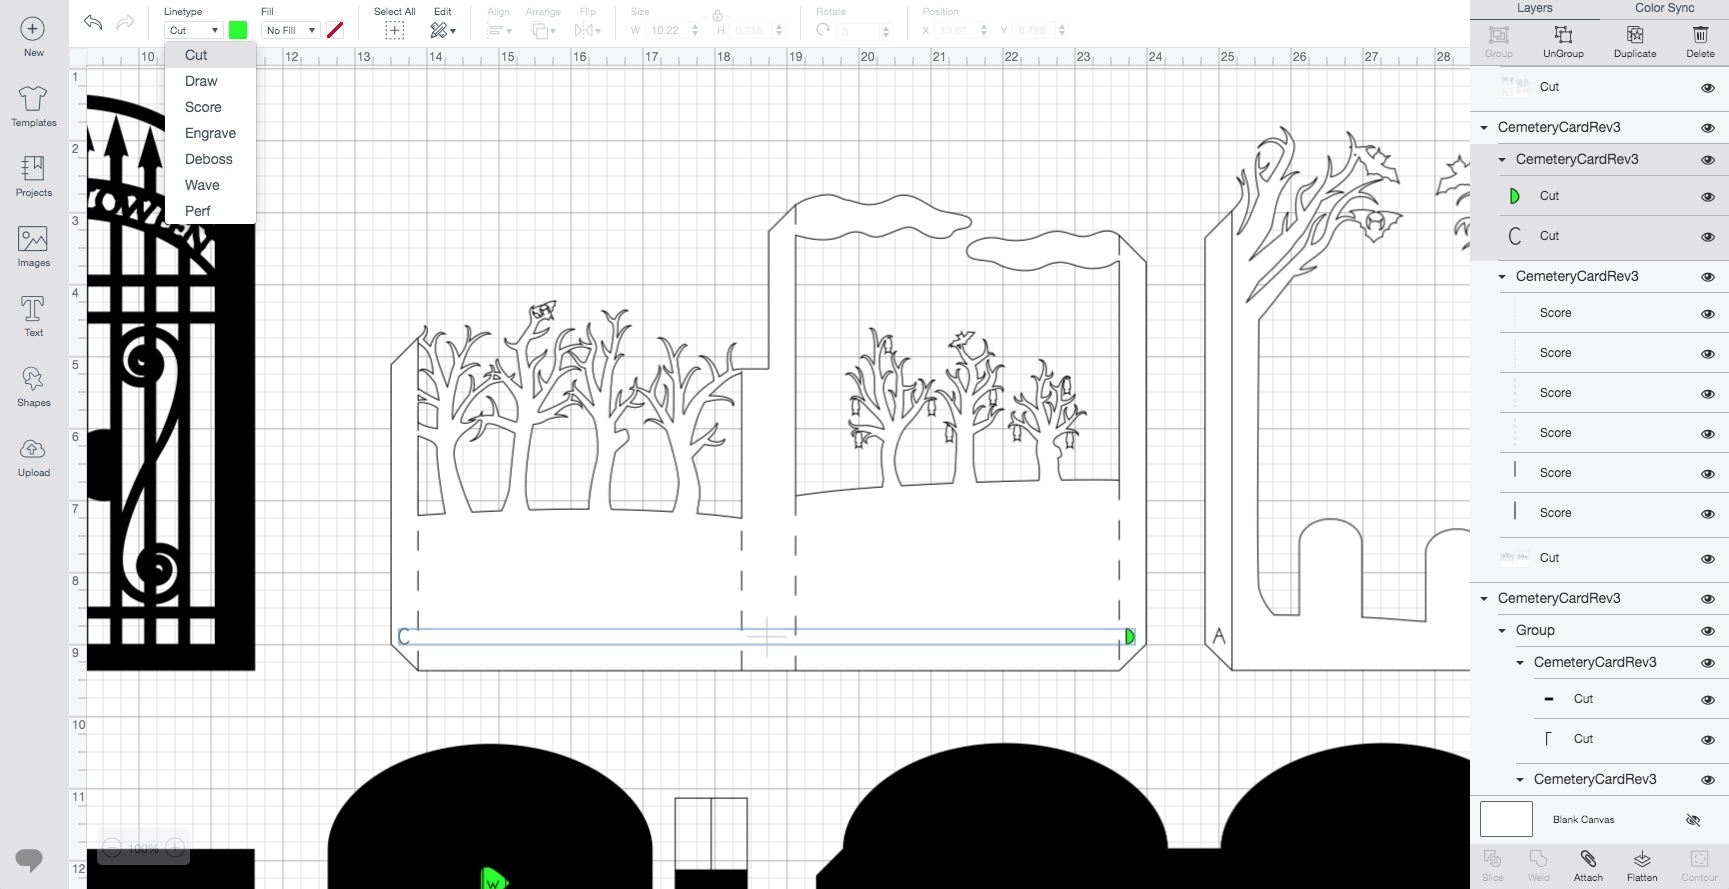
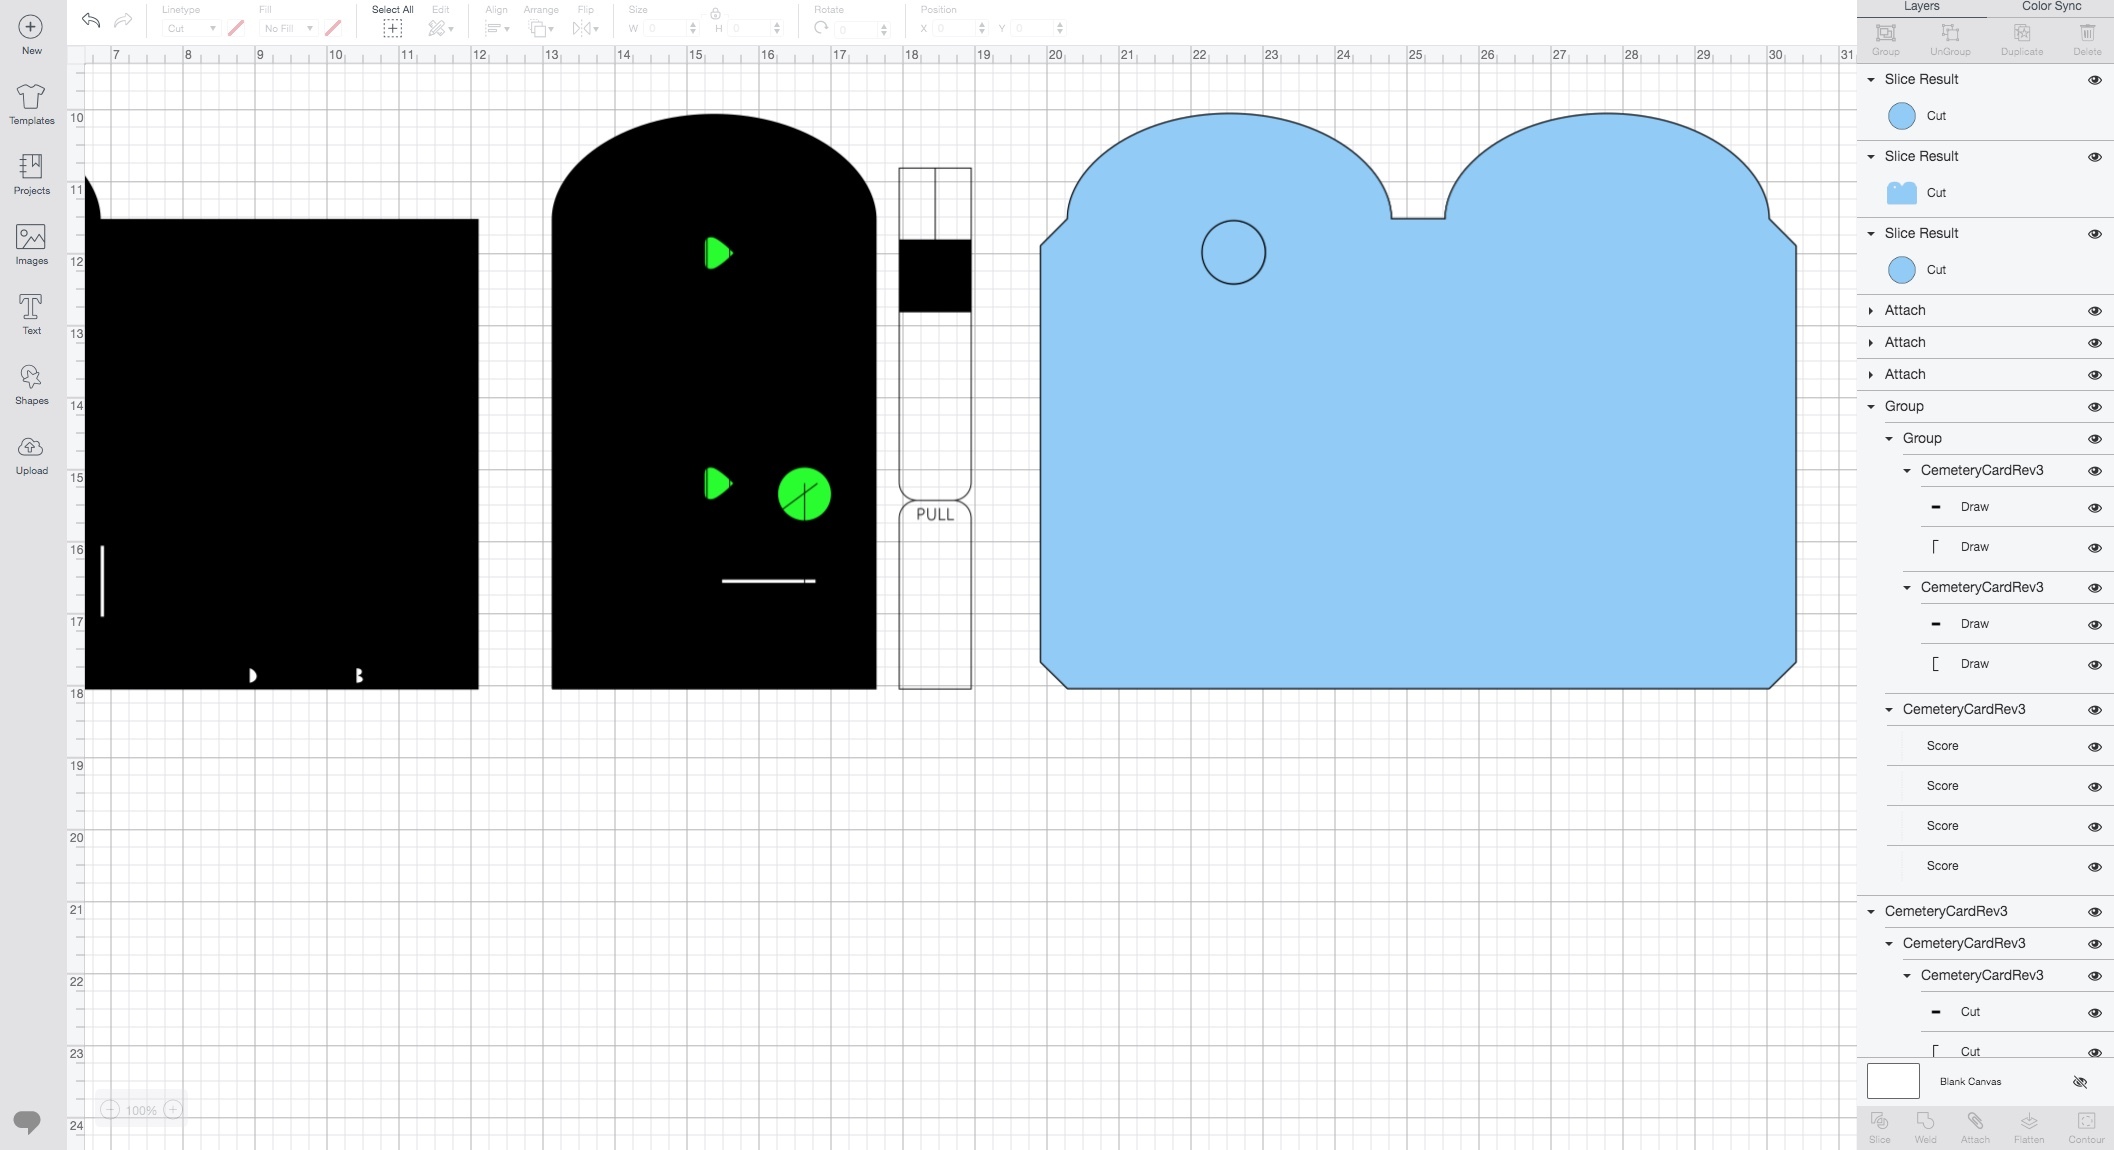
For each major group, find the group underneath that should be scores, and set to "score". You can usually see which part of your design is the score, but if you remember from the last step, I set up different colors within Illustrator to designate different line types. The lines will not show up in color on the canvas the same way they would in illustrator. As you can see in my image, when you select the lines, it will show their fill as the red I selected for scoring. Since none of the score lines consist of shapes that would show a fill, you cannot see this color by just looking at the canvas. On the other hand, some of the letters do have filled areas, where you see the green.
Set the appropriate groups to the drawing line type. Make the drawing groups the same black pen except on the dark cardstock pieces. There I selected a grey color, but I will load a metallic silver pen in the machine.
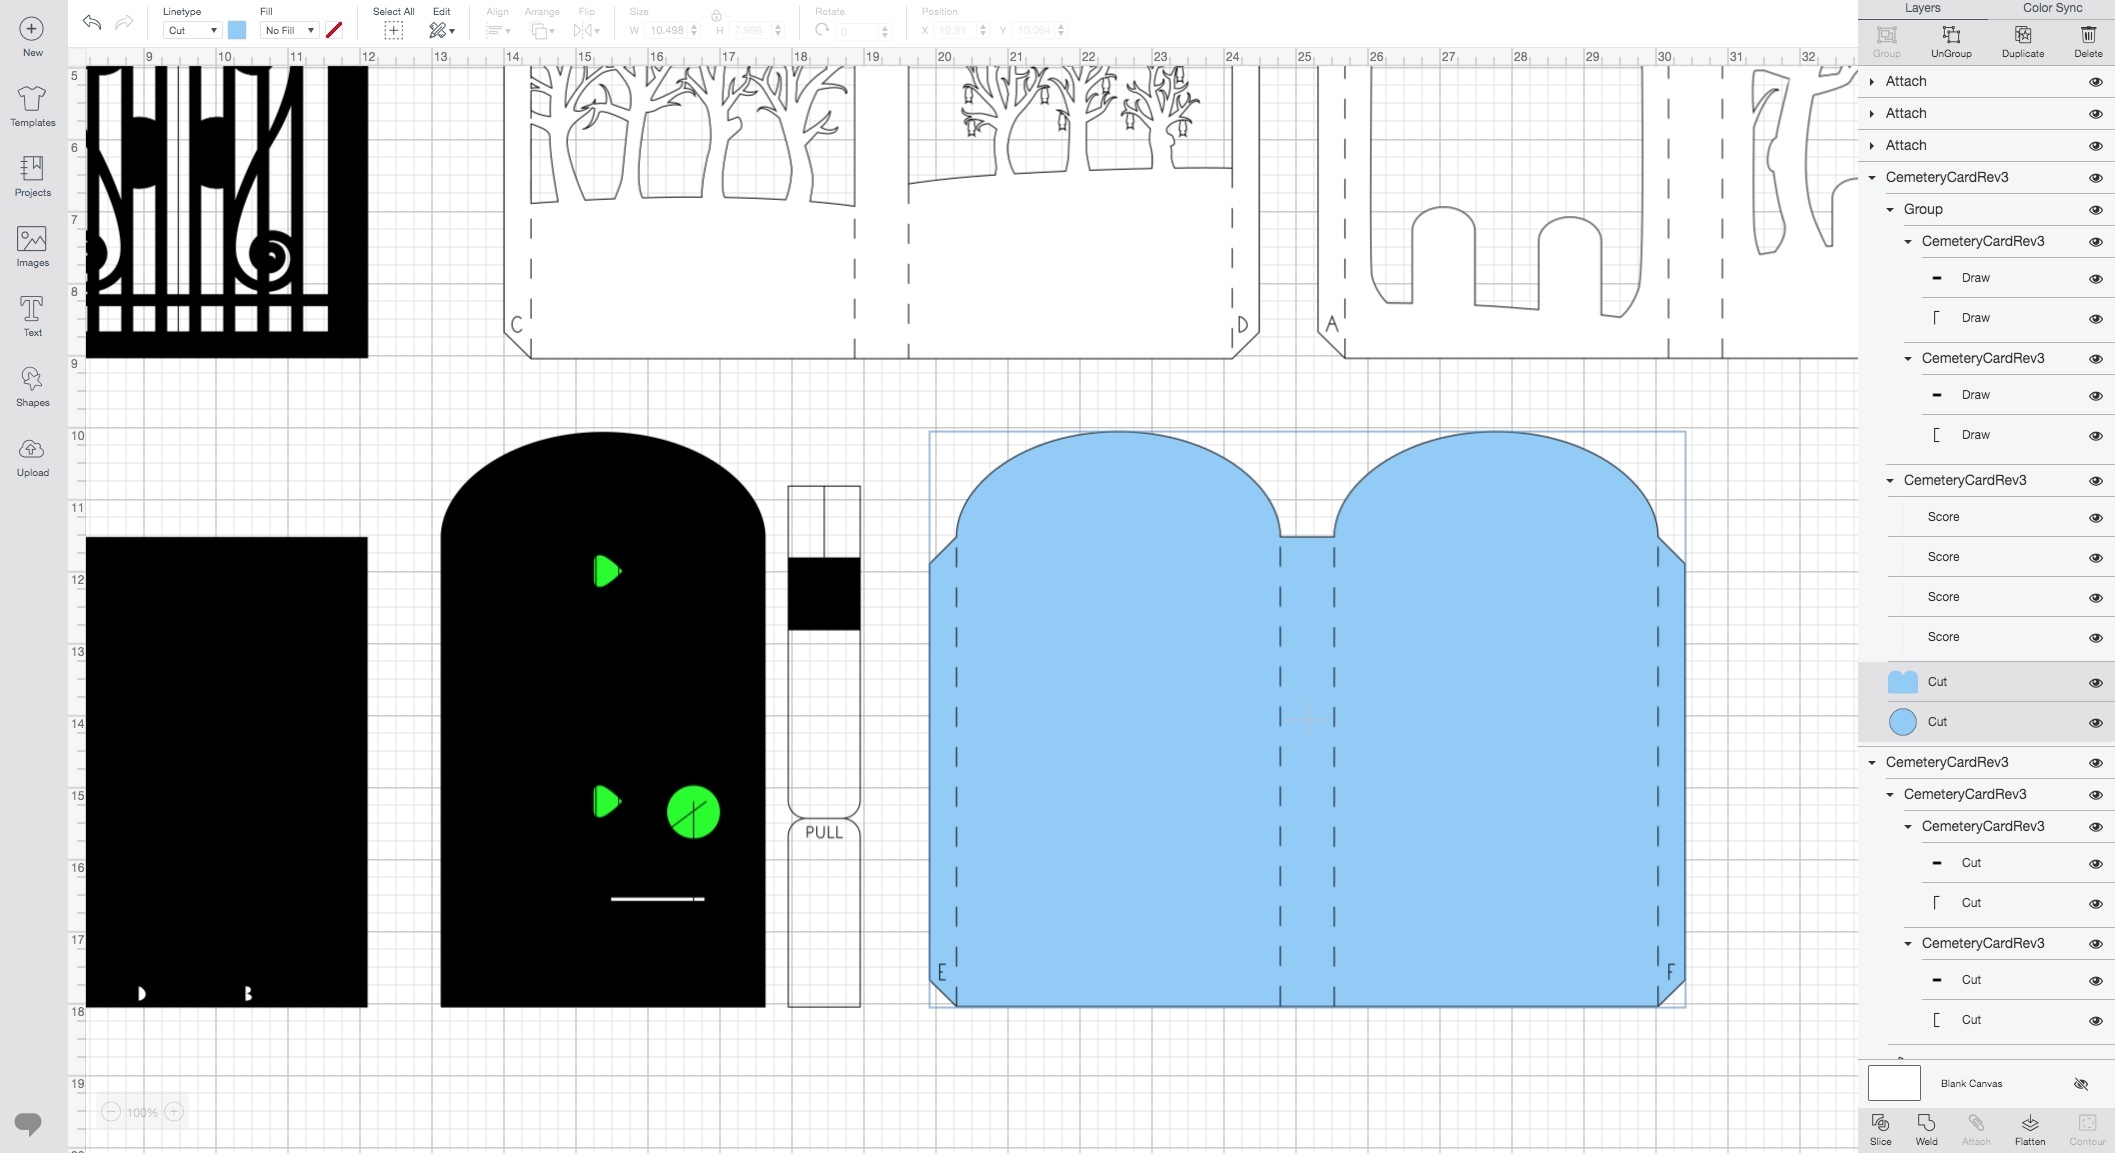
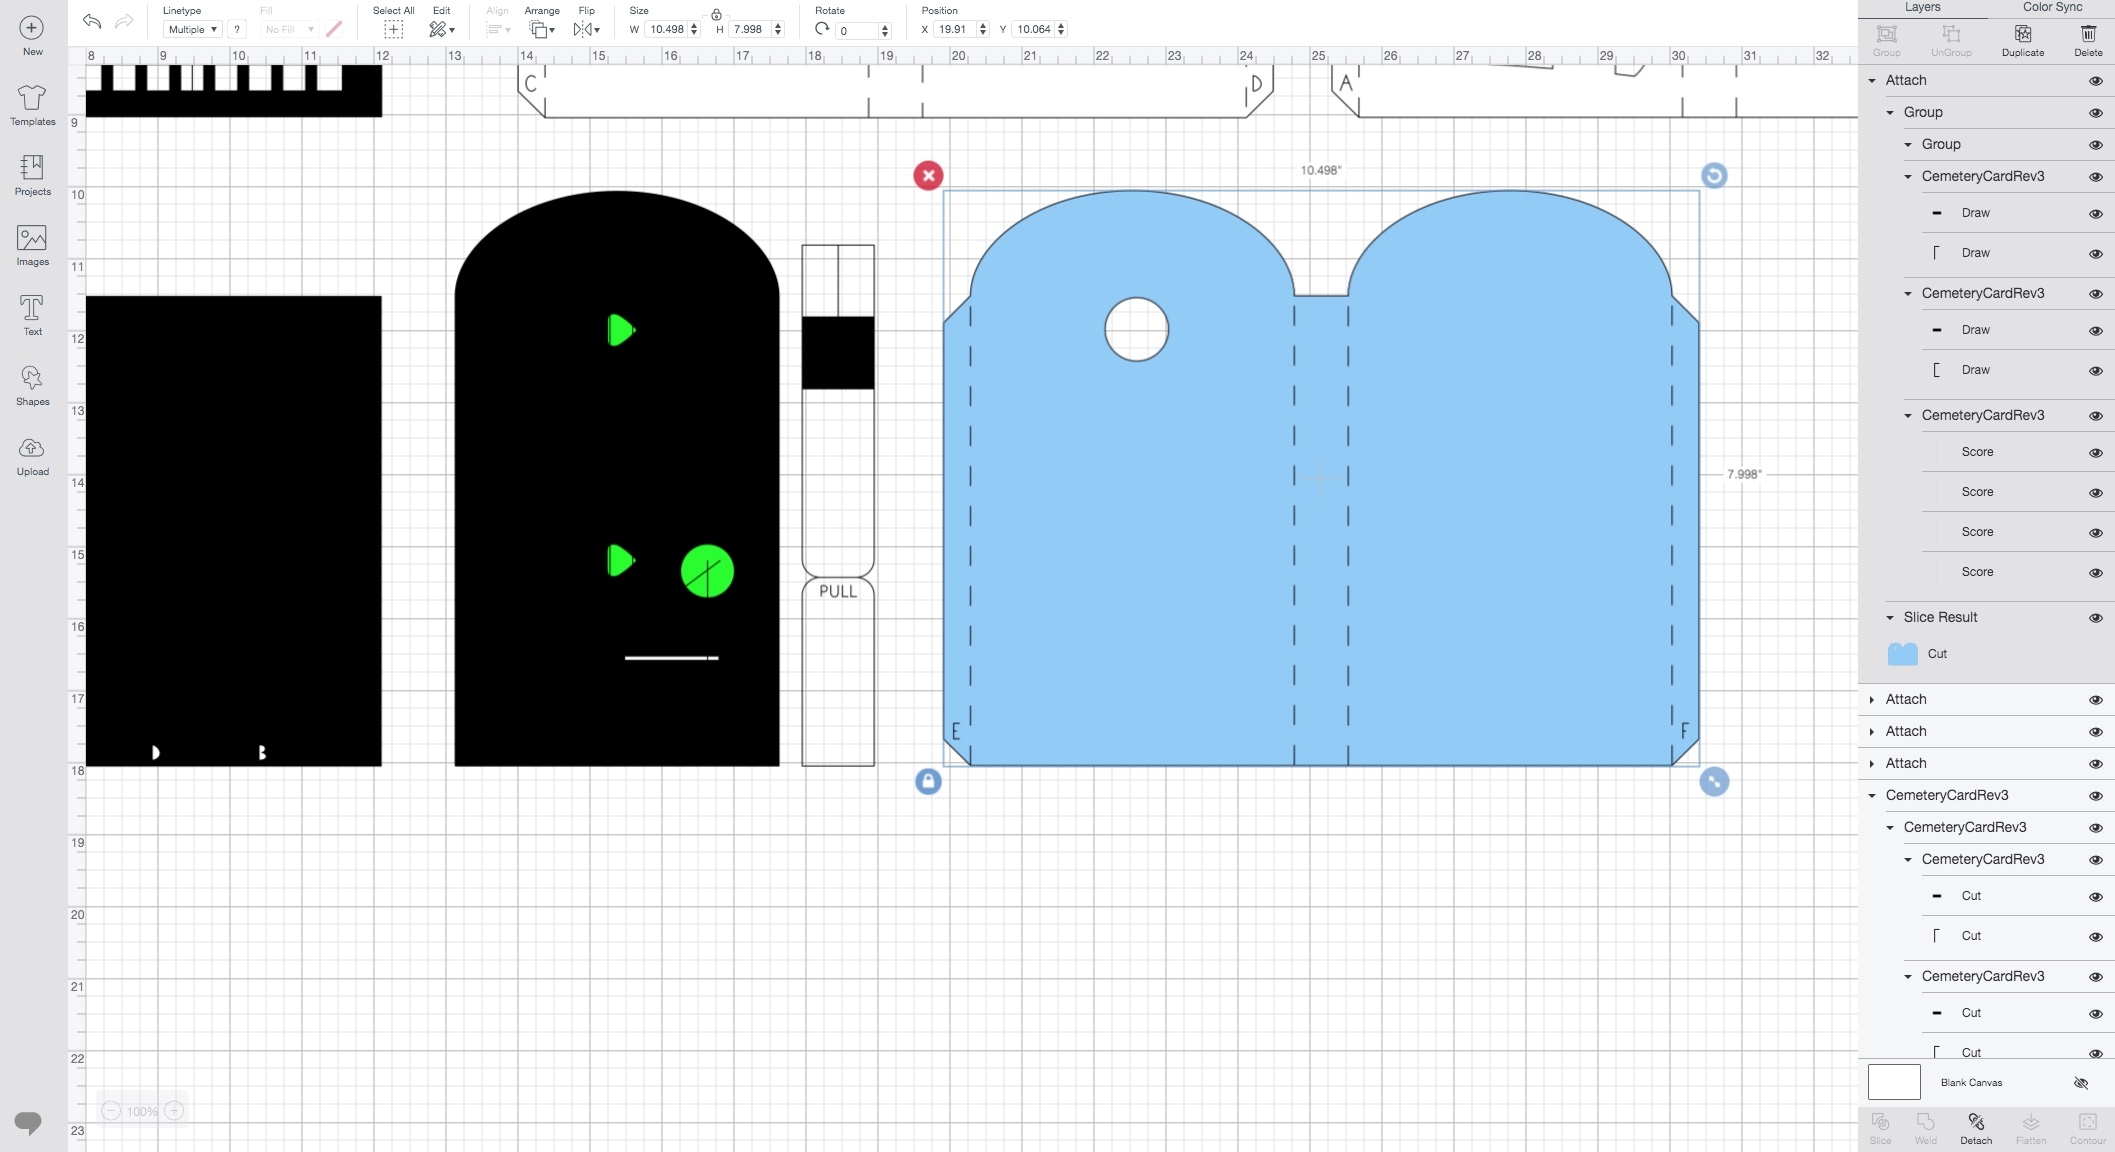
In this example, I sliced the cut outs for the moon and the switch slot. This is completely unnecessary (attach will work just fine here), but I liked seeing it how it should look in the final project. If you do this, just delete the unneeded slice results as shown in the photo and make sure to put the item back into the applicable group or at least attach them.
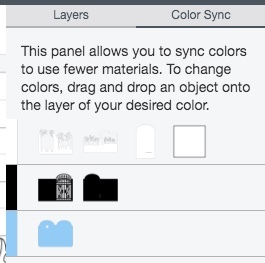
Attach each major group and set the colors to group by material. I did white for white 65 lb cardstock, black for black 65 lb cardstock, and powder blue for copy paper (the two layers closest to the LEDs in my design are copy paper to diffuse the lights).
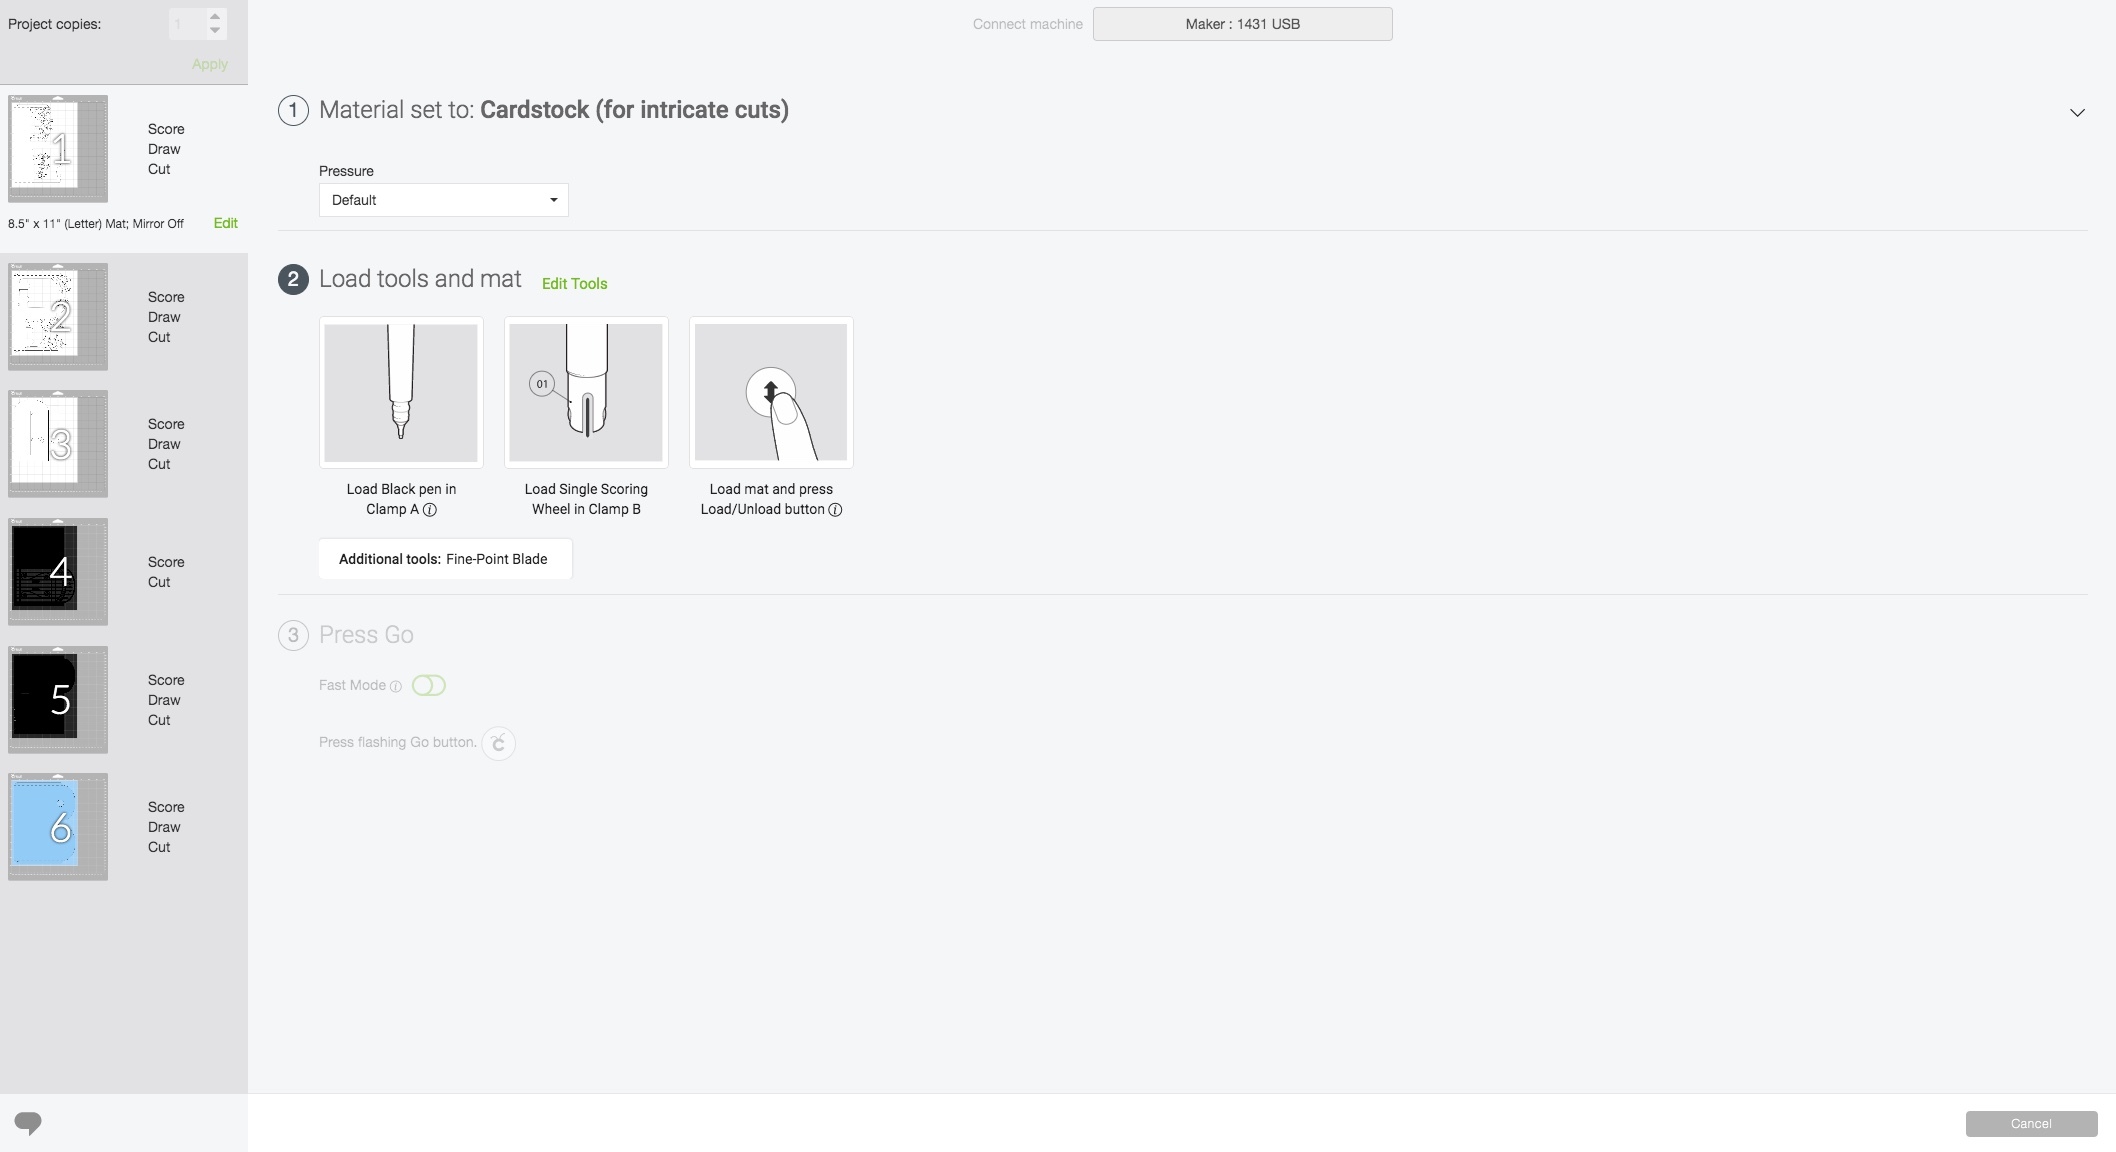
Now hit "Make It" and follow the prompts on the machine, then continue to the next step for final assembly!
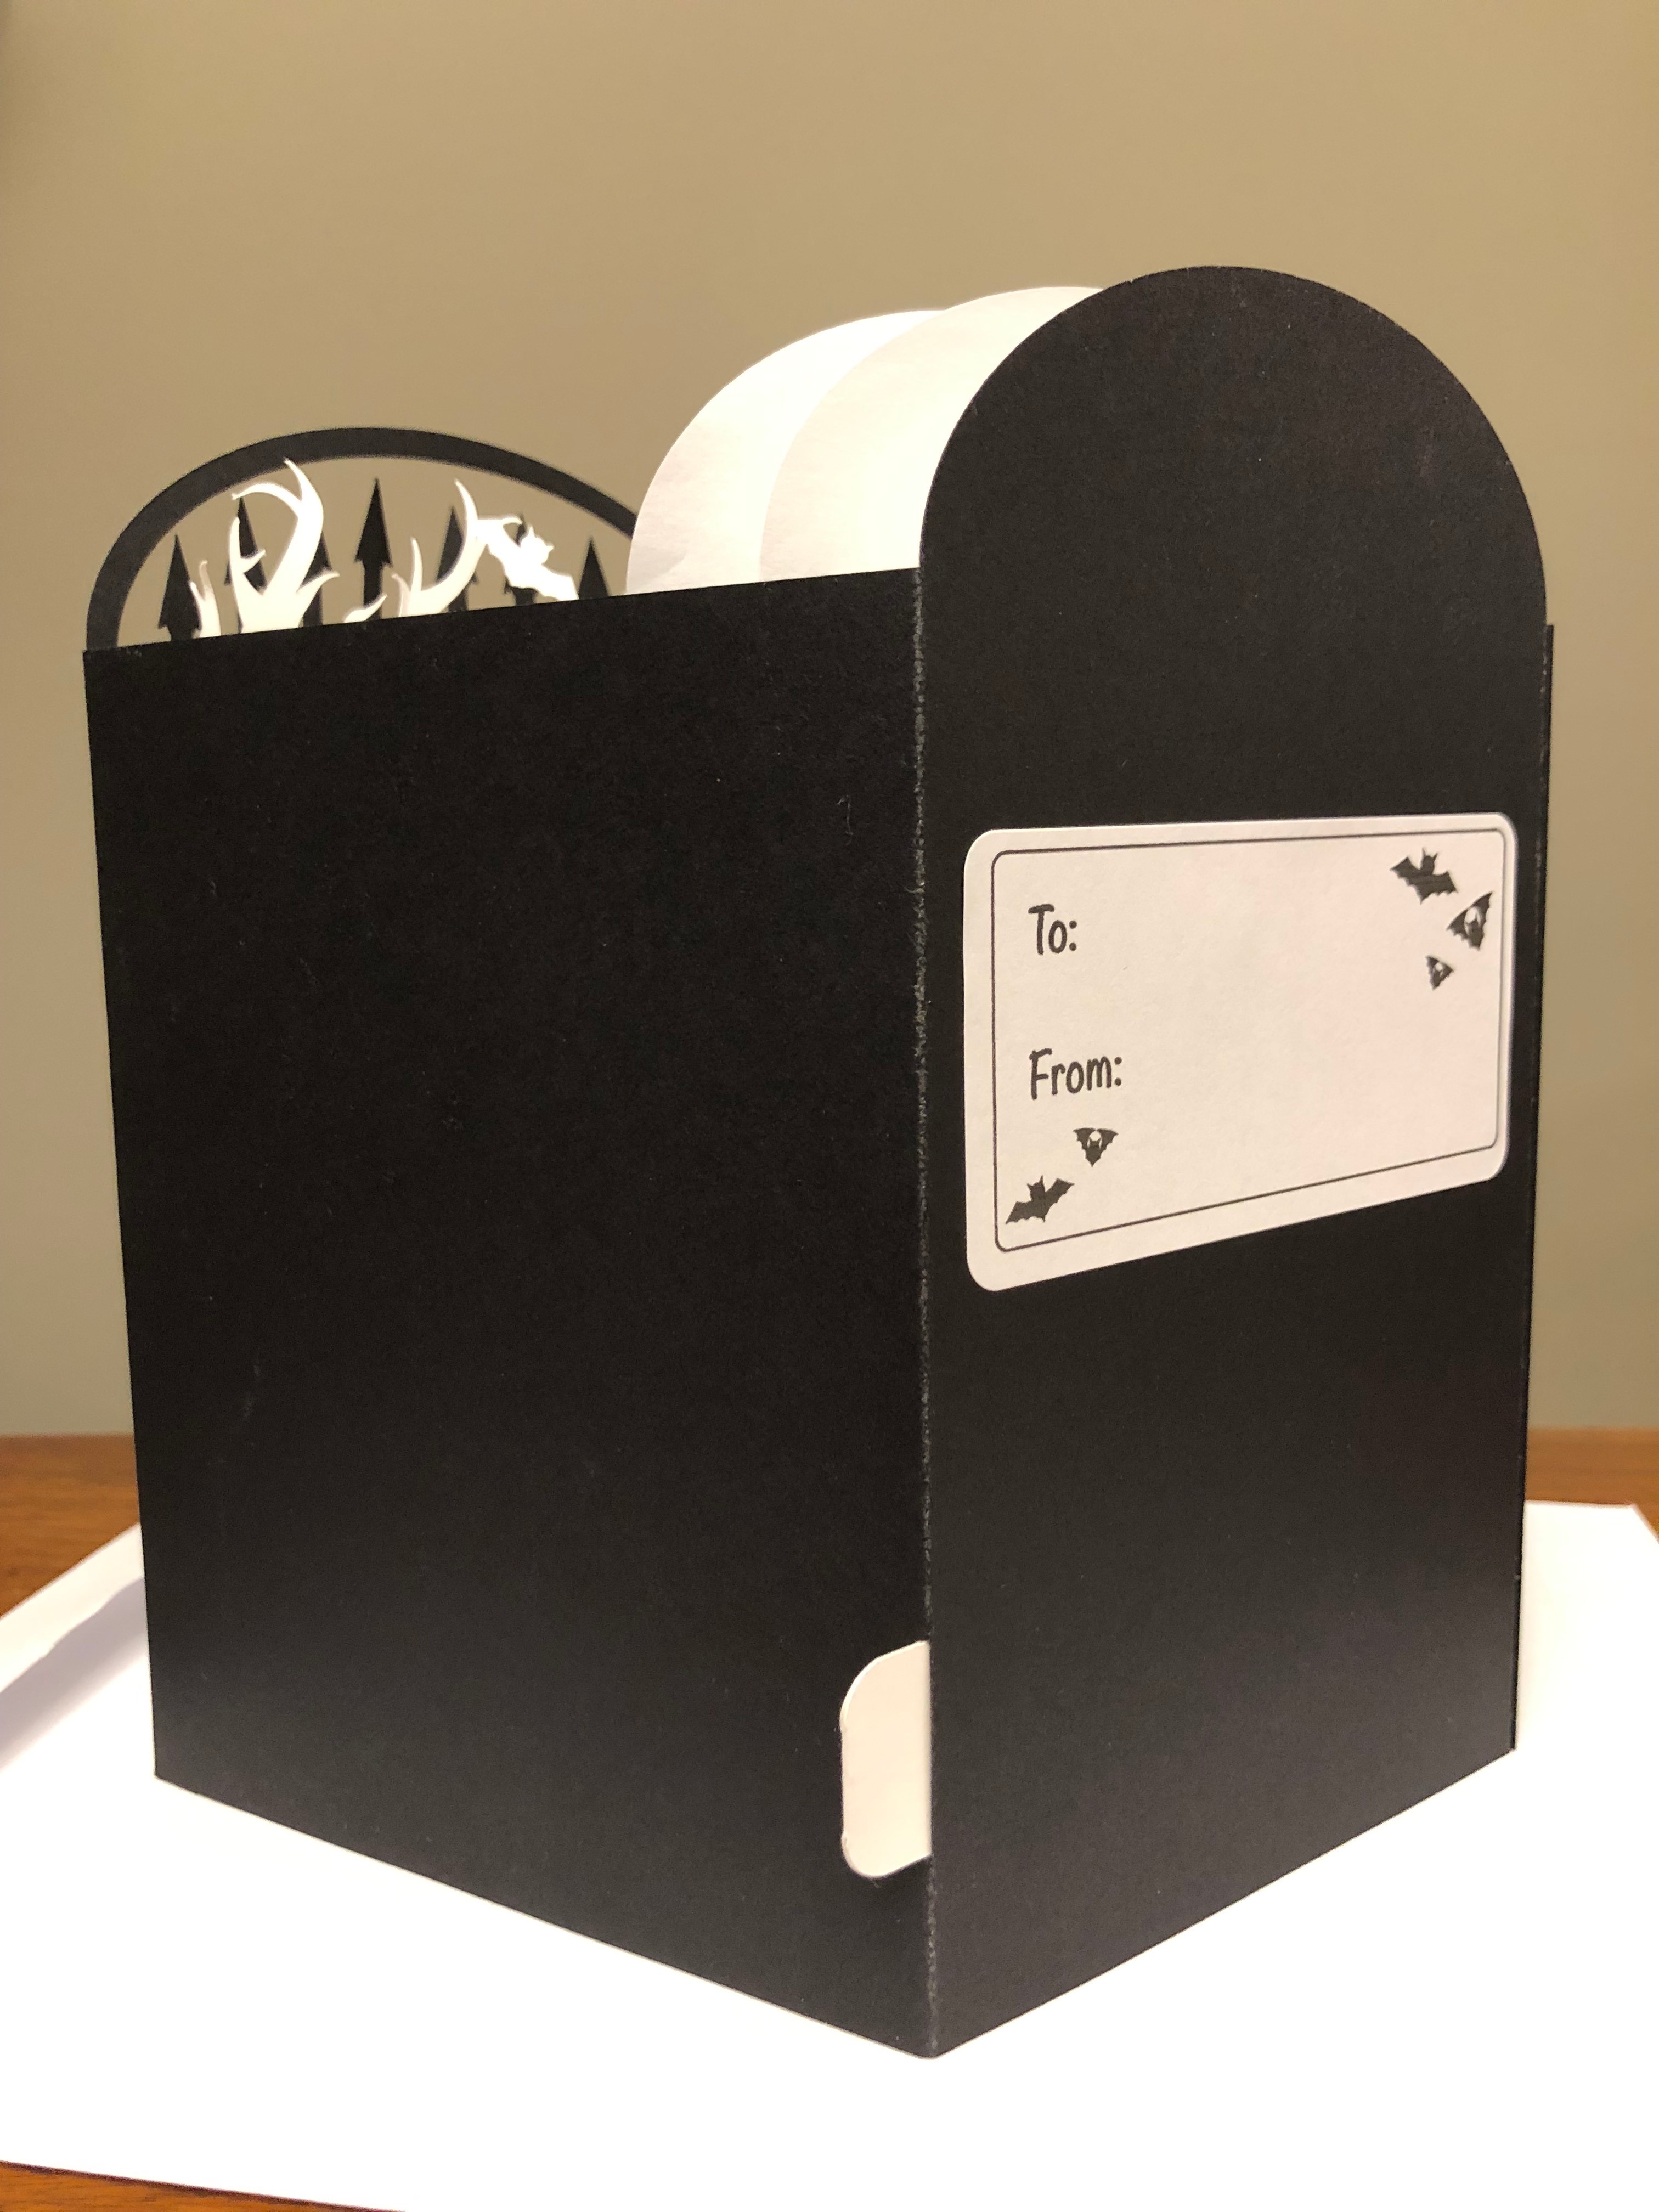
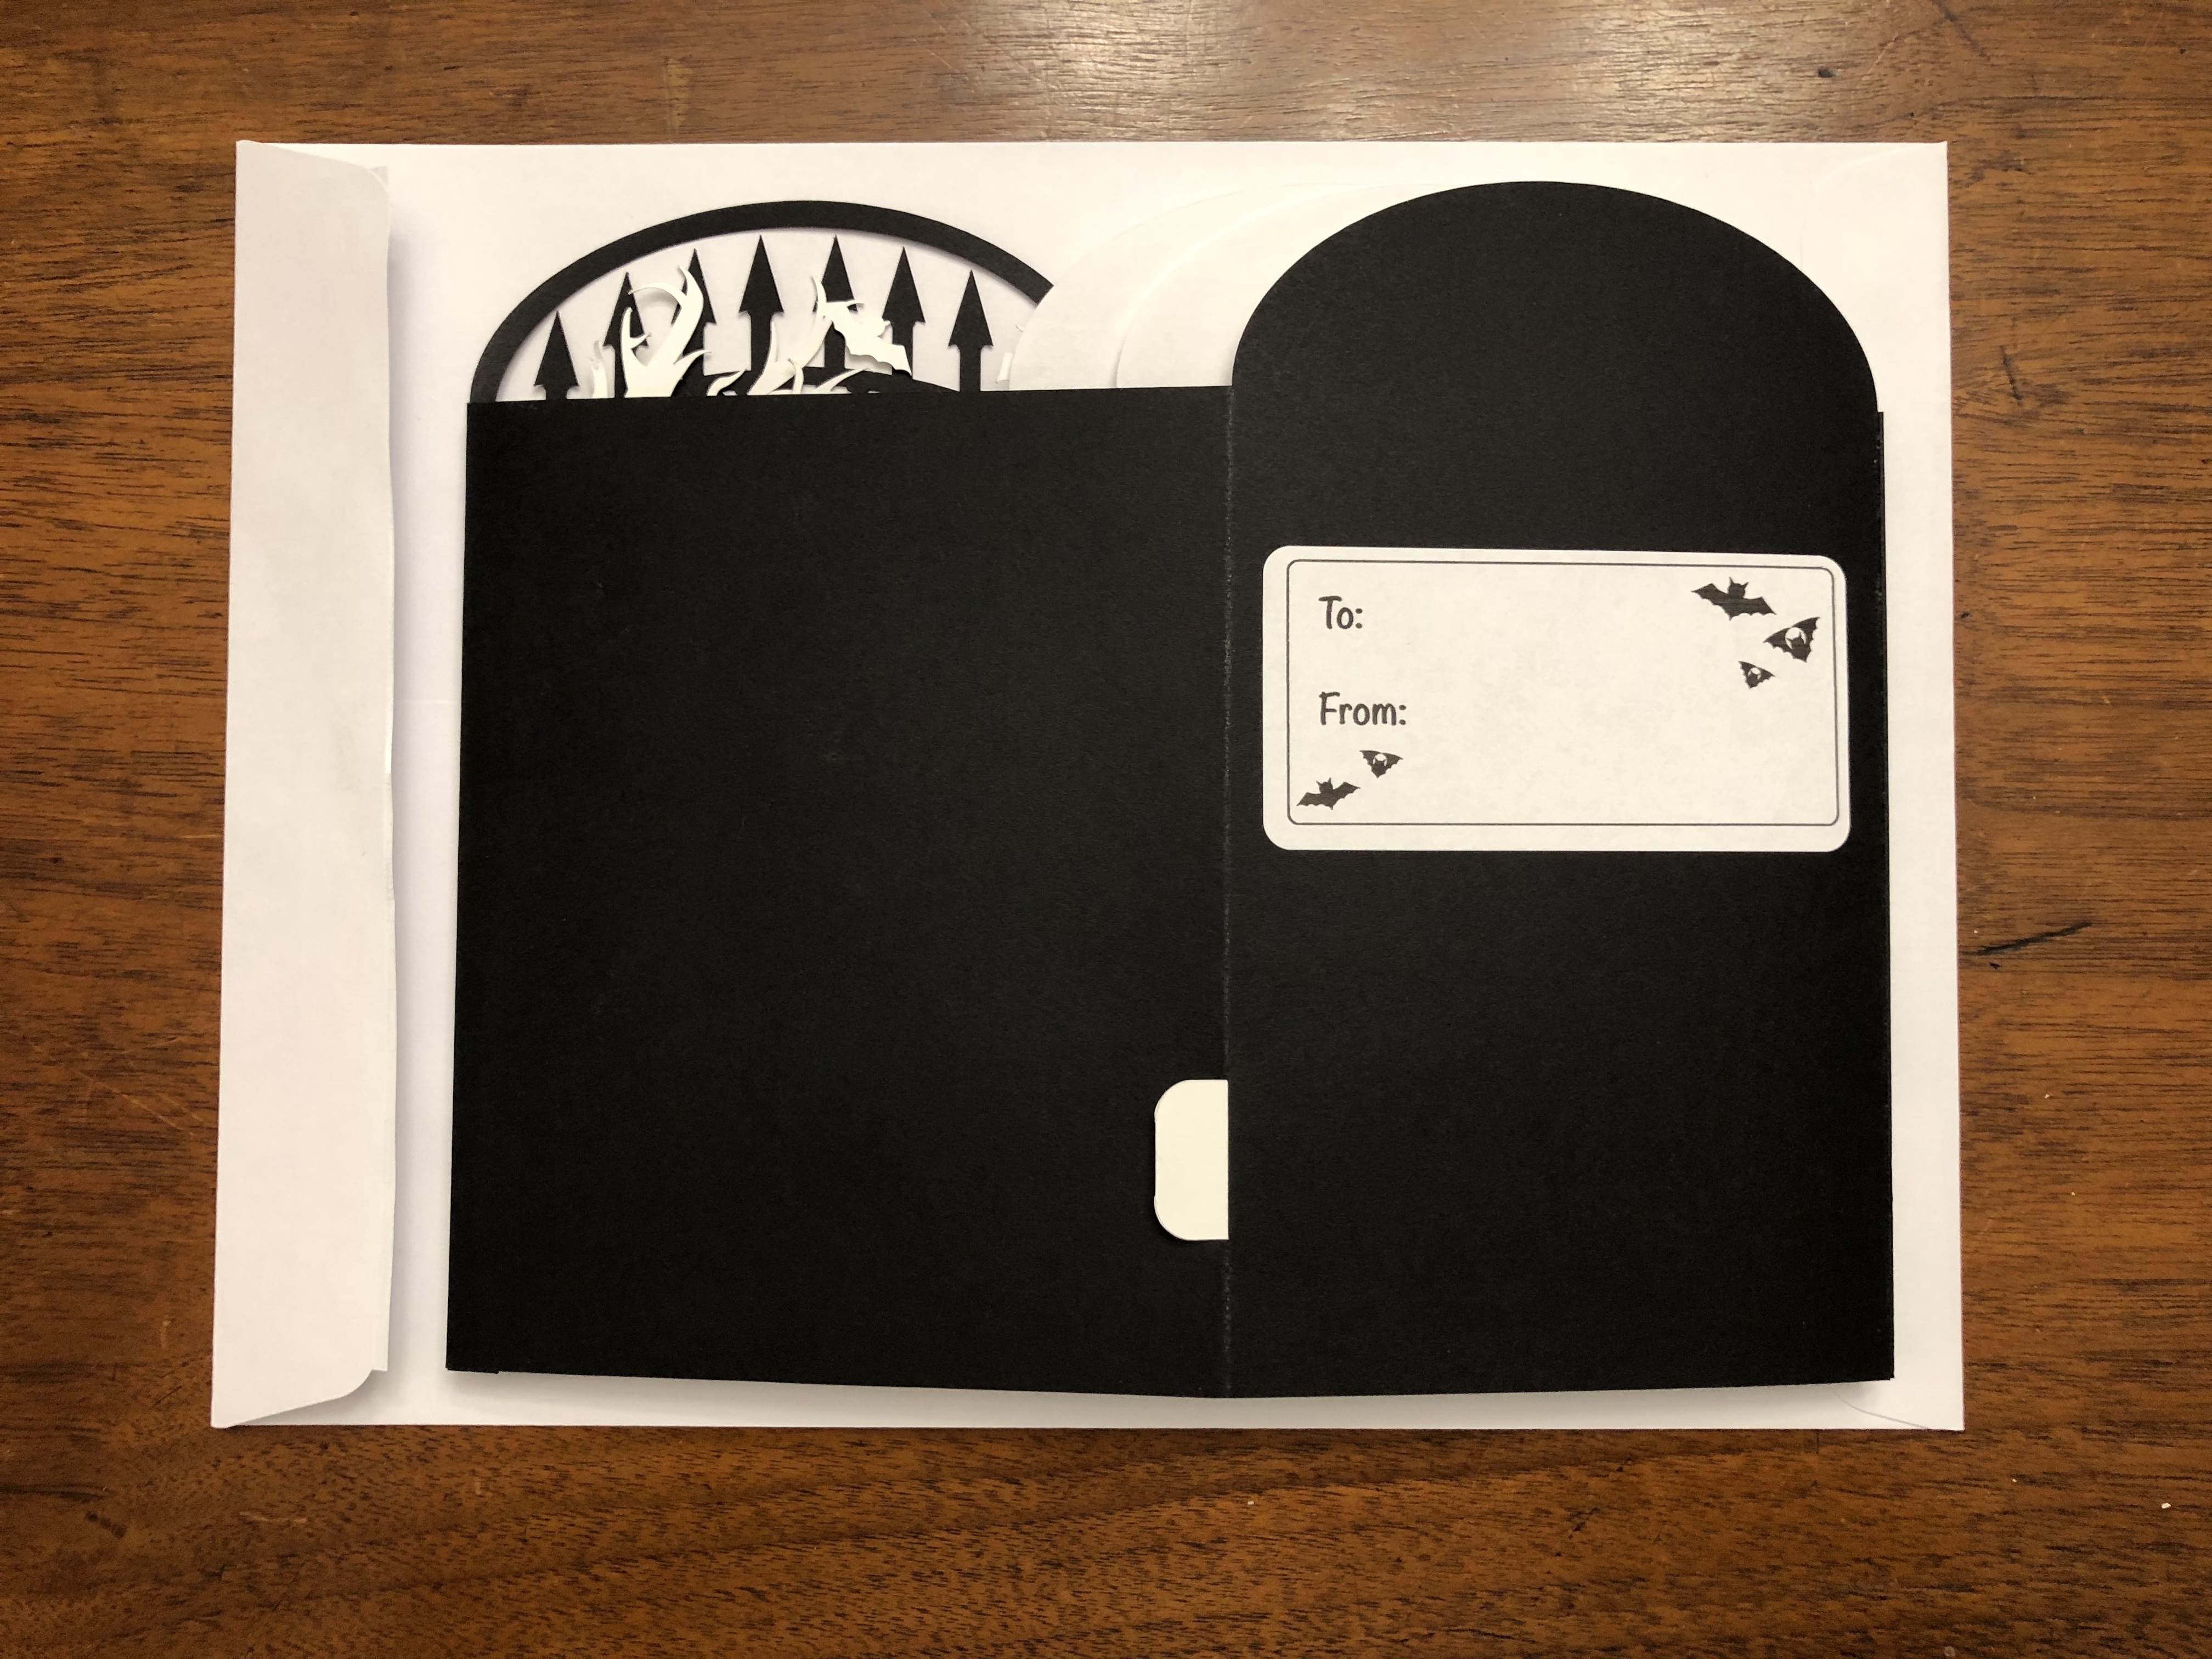
Optional step for personalization: after the back of the card is cut out, make a DS project with a writing font of what you want to say on the card. Then set the machine up to draw this on the back part of the card (not the side with the tab guide). I used labels on mine instead, so I could give them to friends who wanted to gift them.
Build the Circuit (Optional)

If you are making the light up version of this card, use this step to create the circuit. If not making the light up version, skp to the next step.
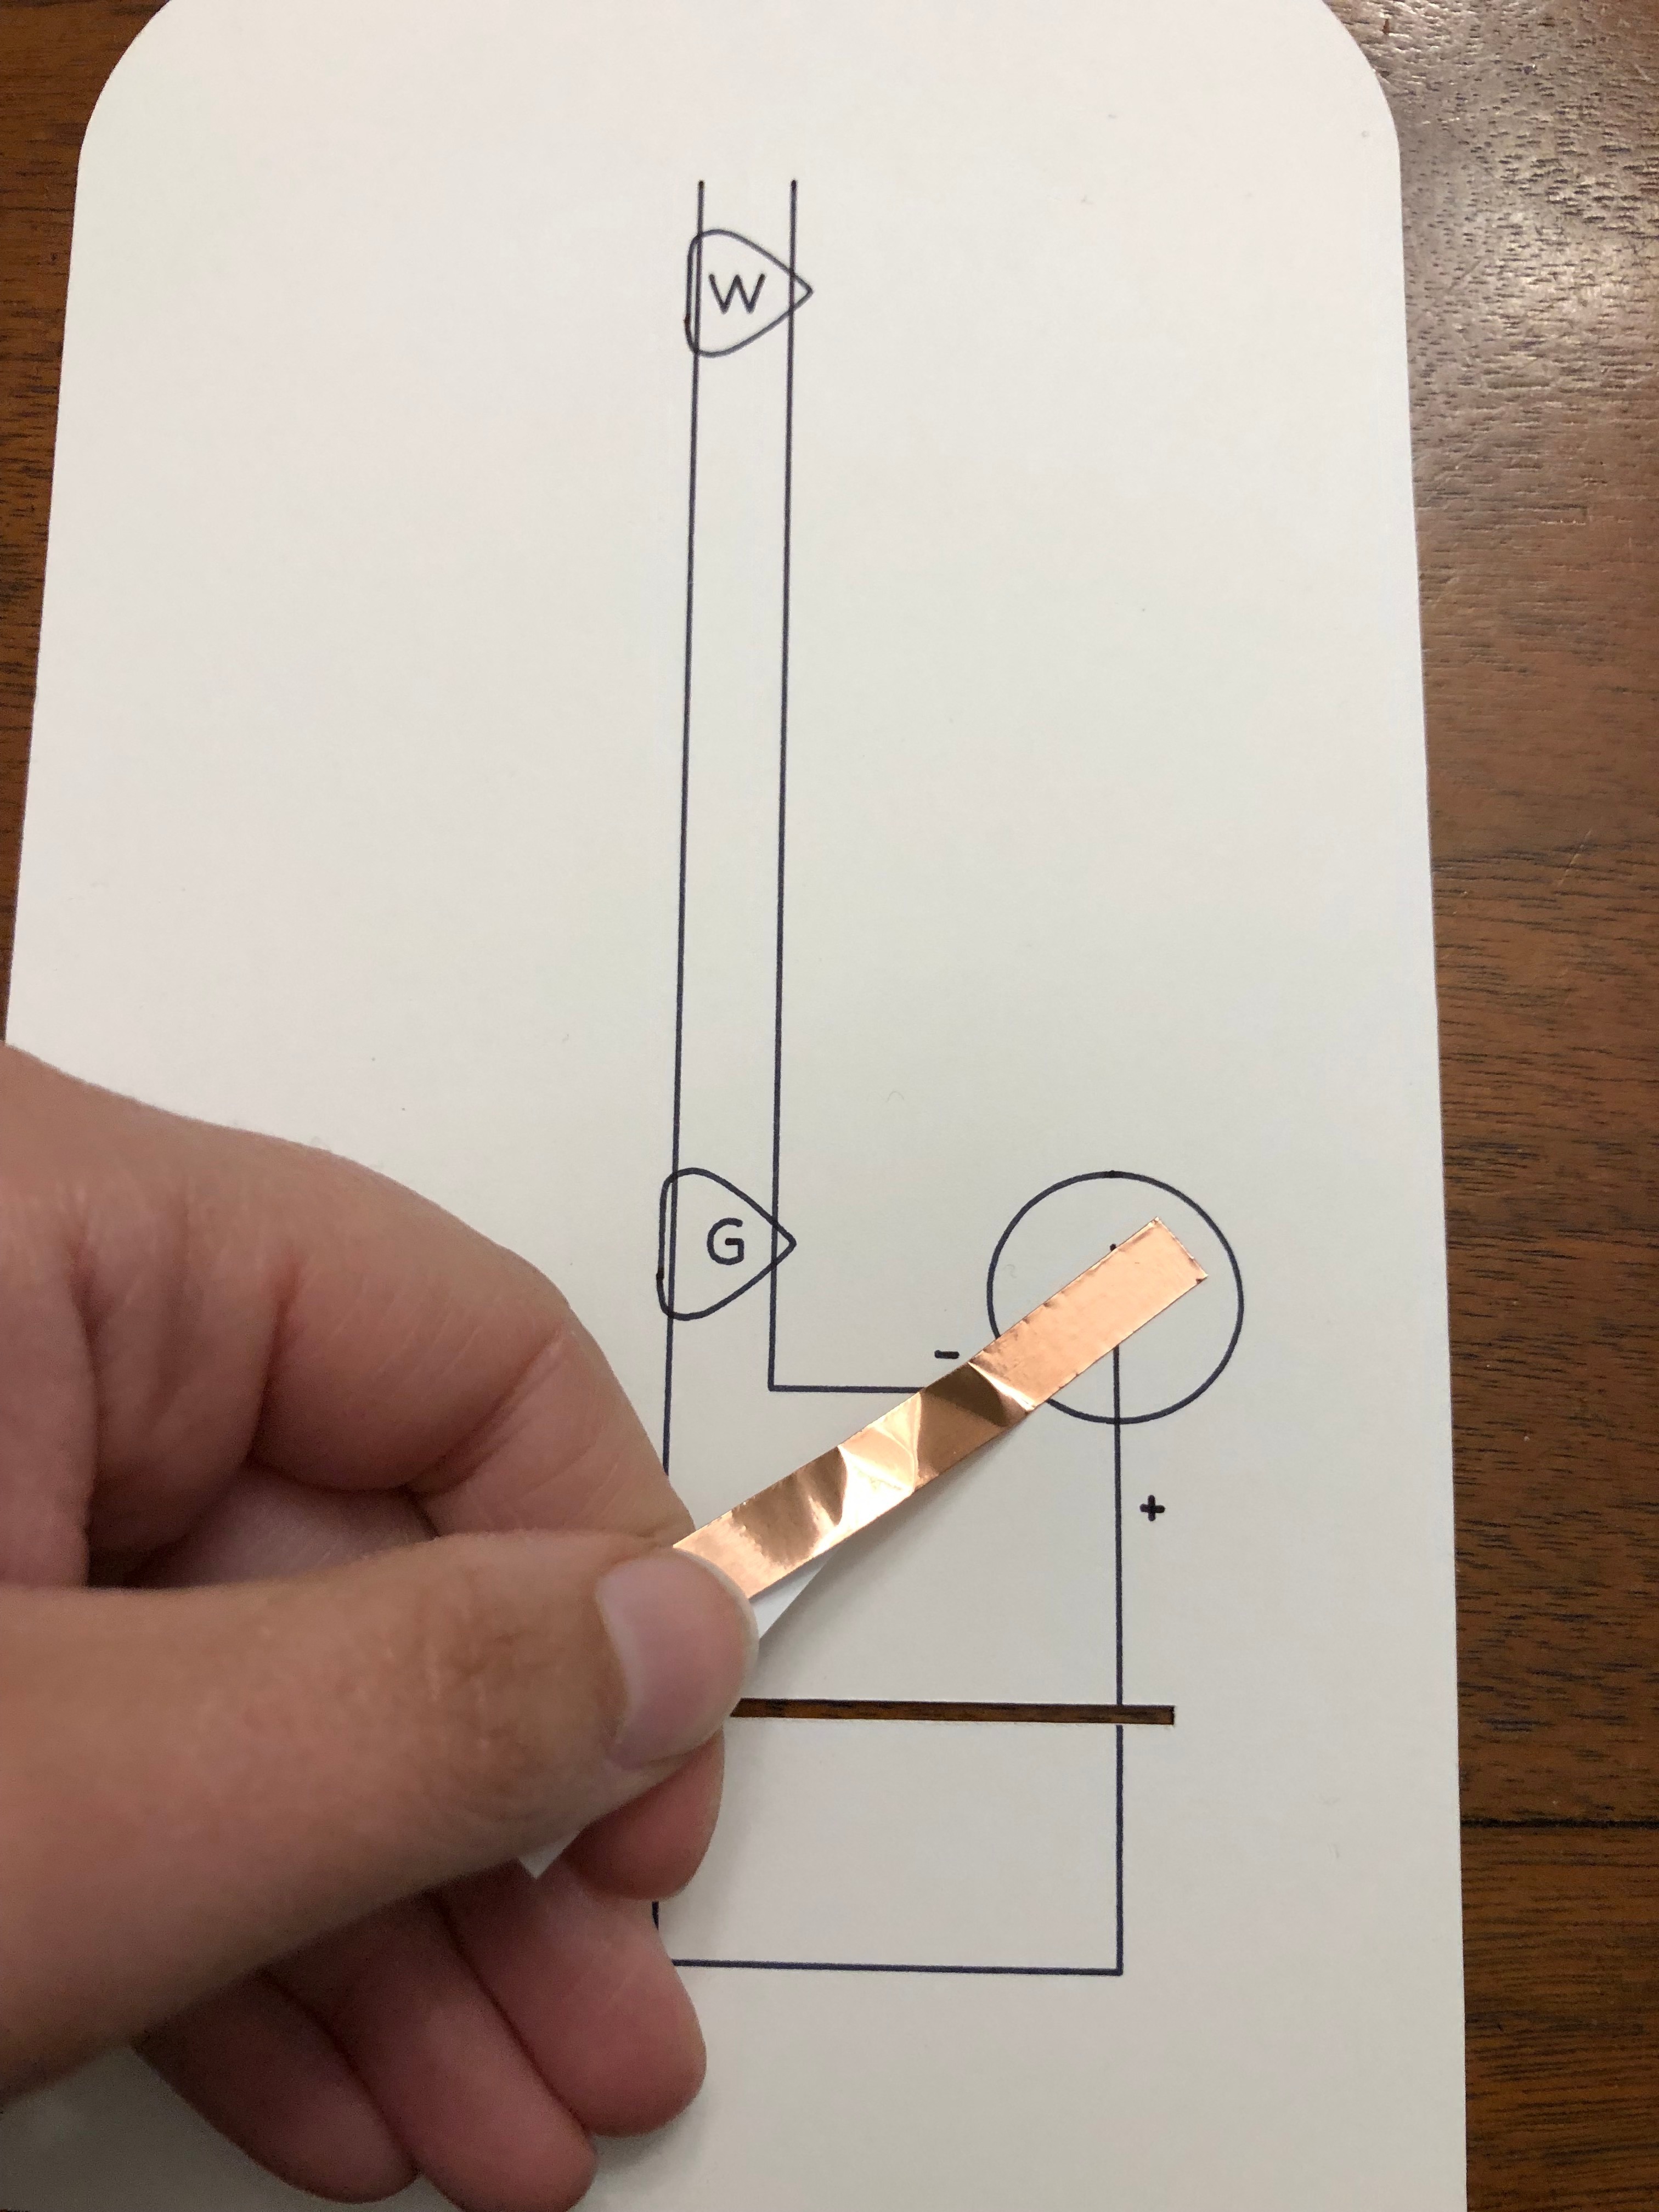
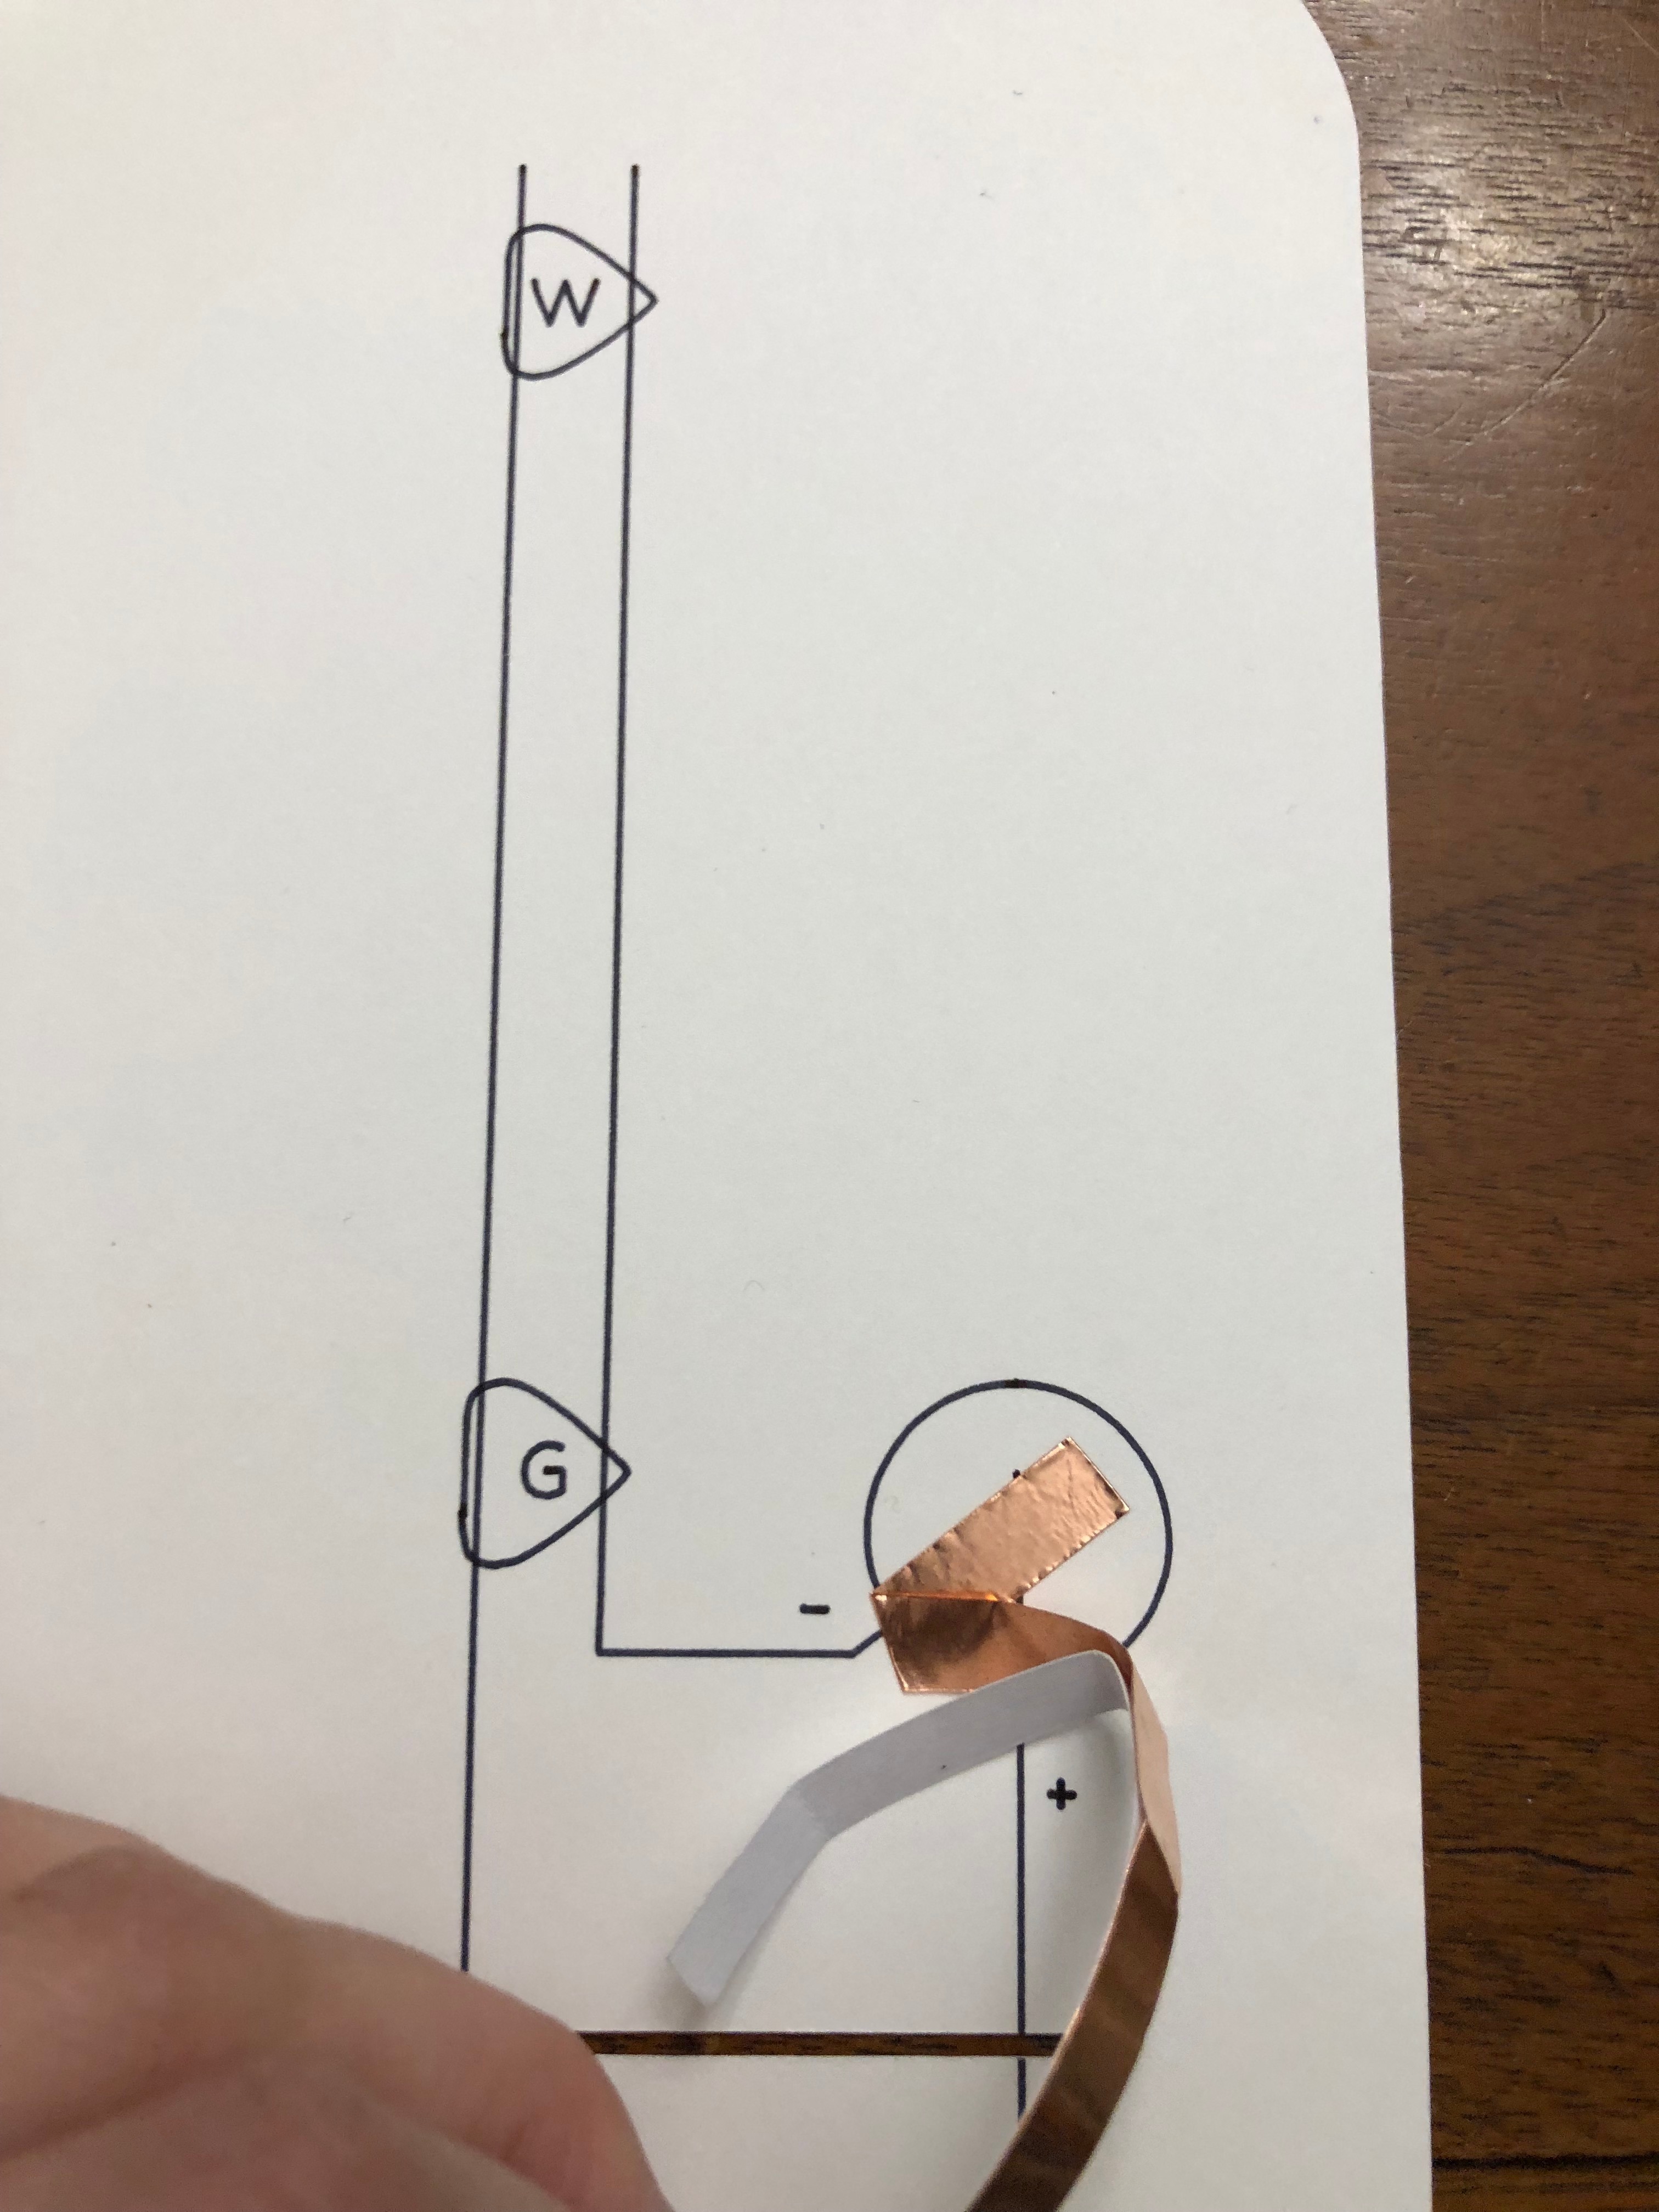
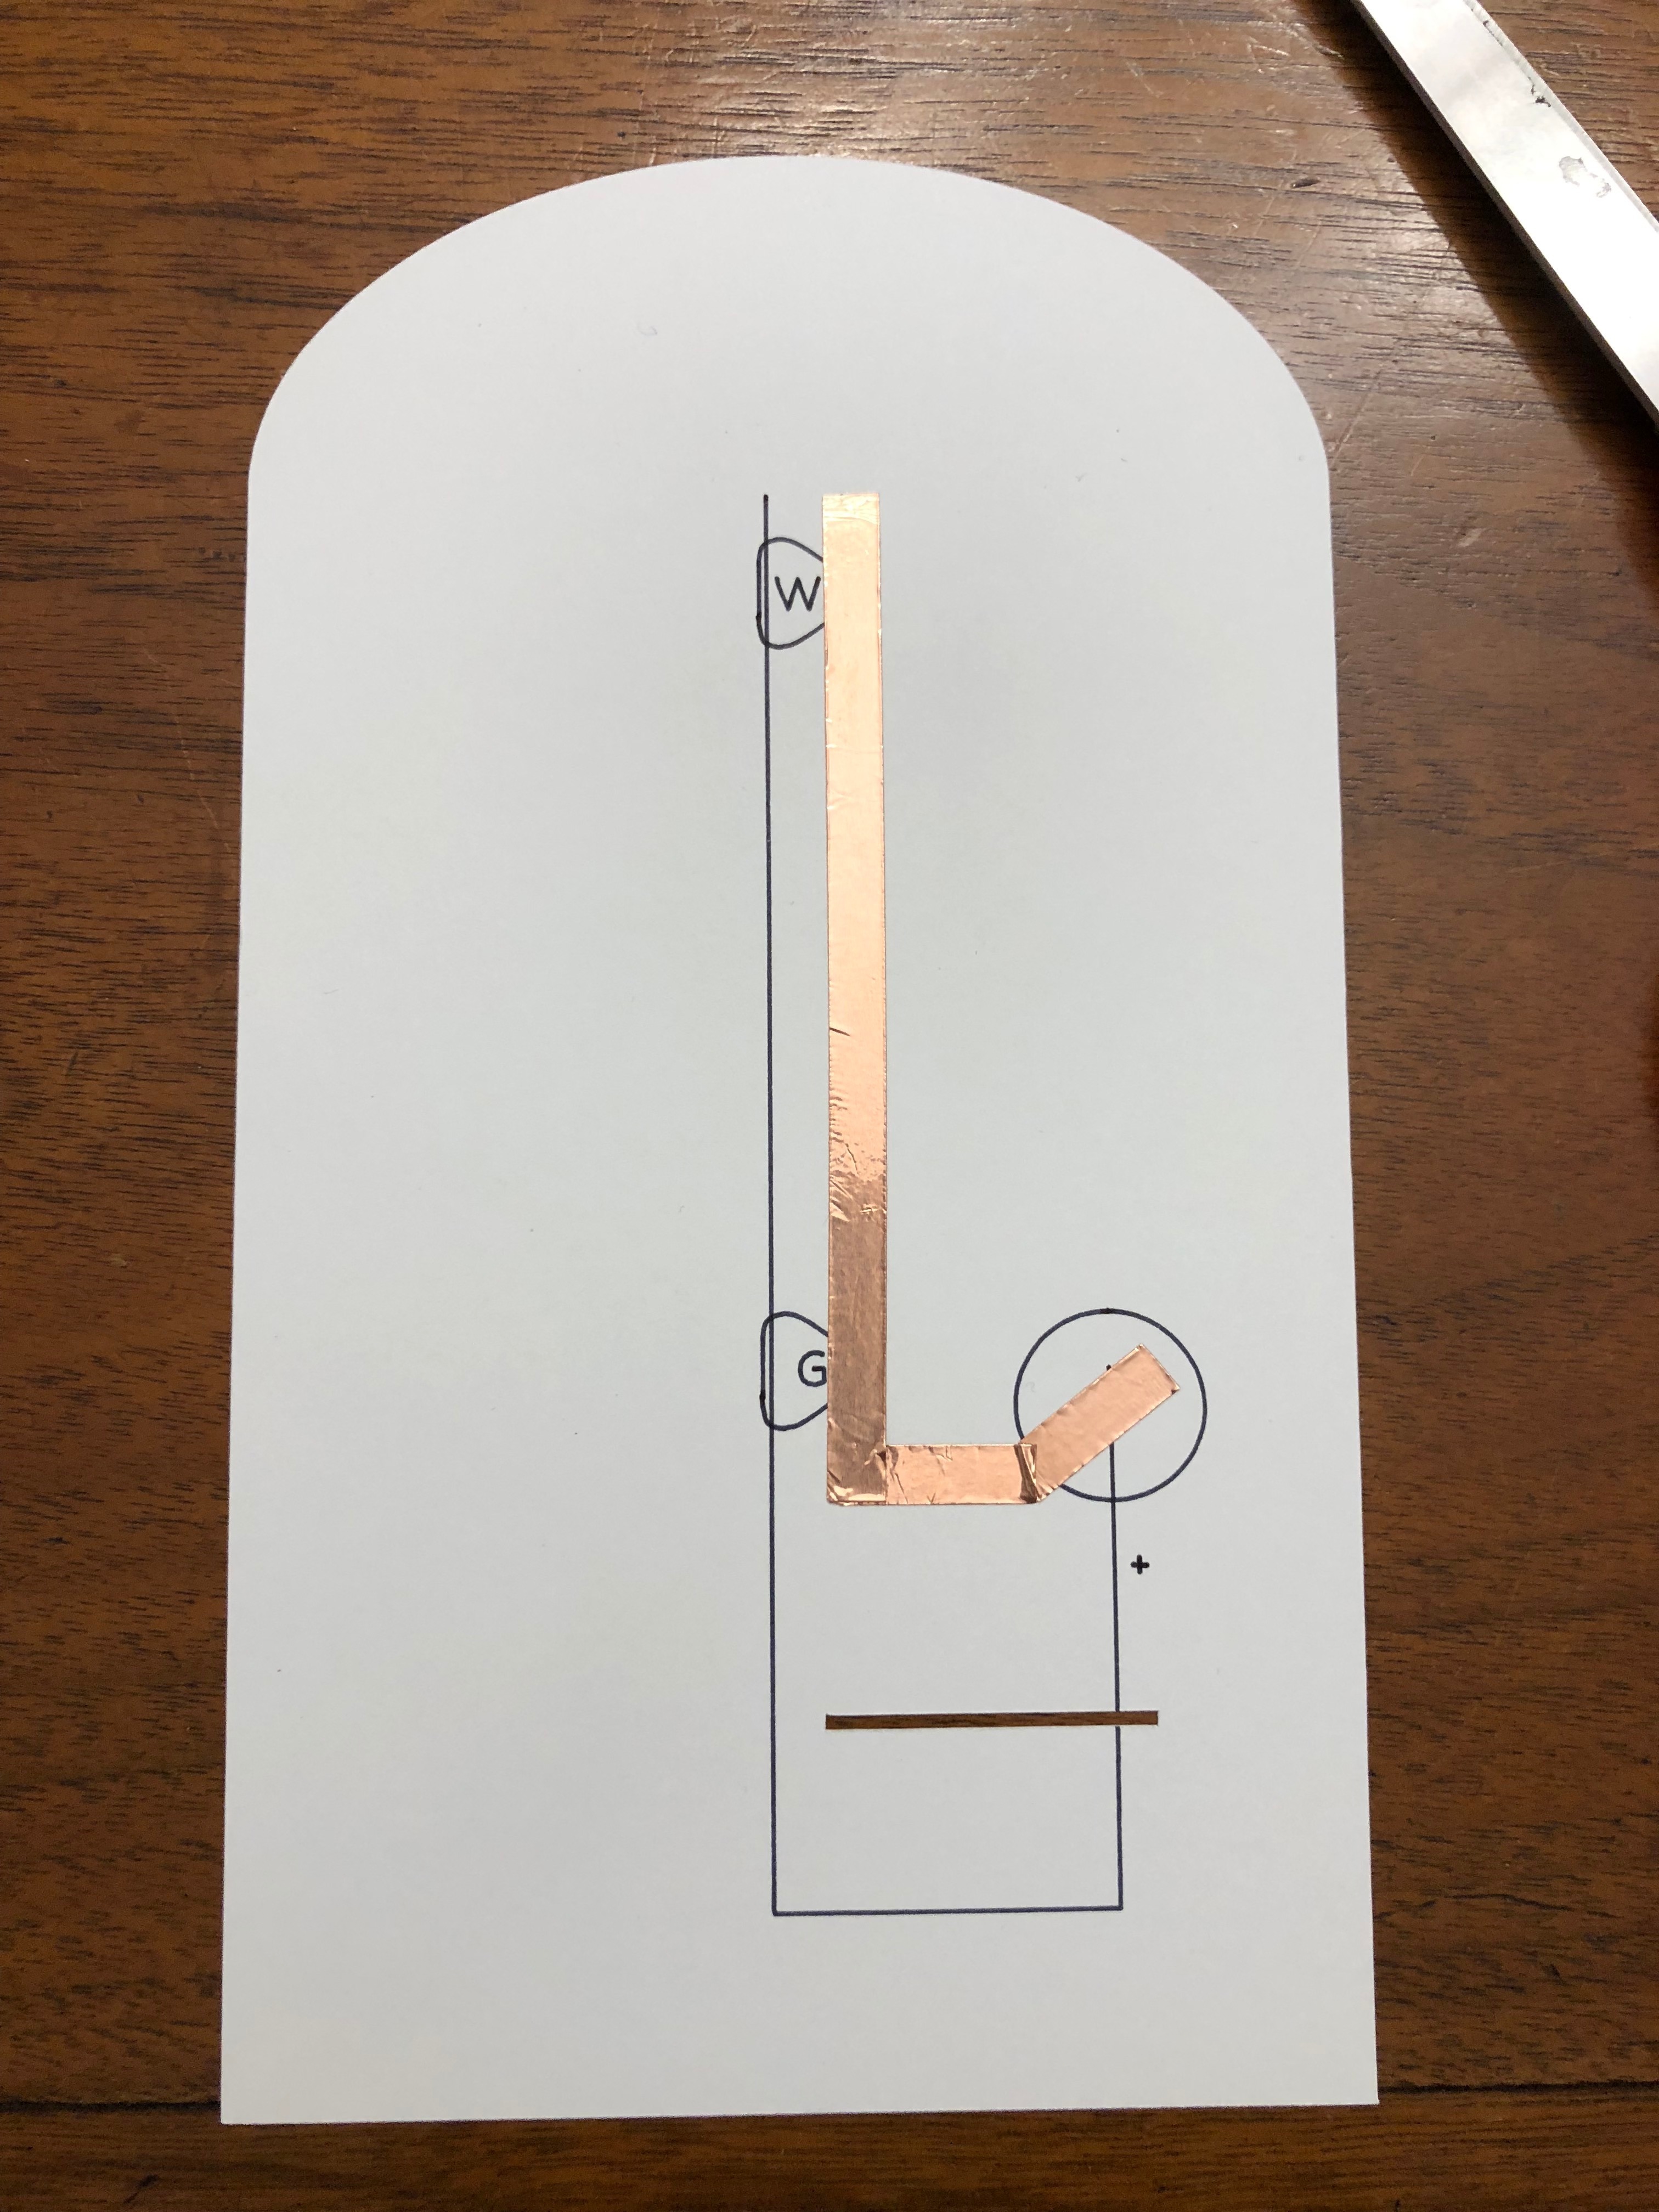
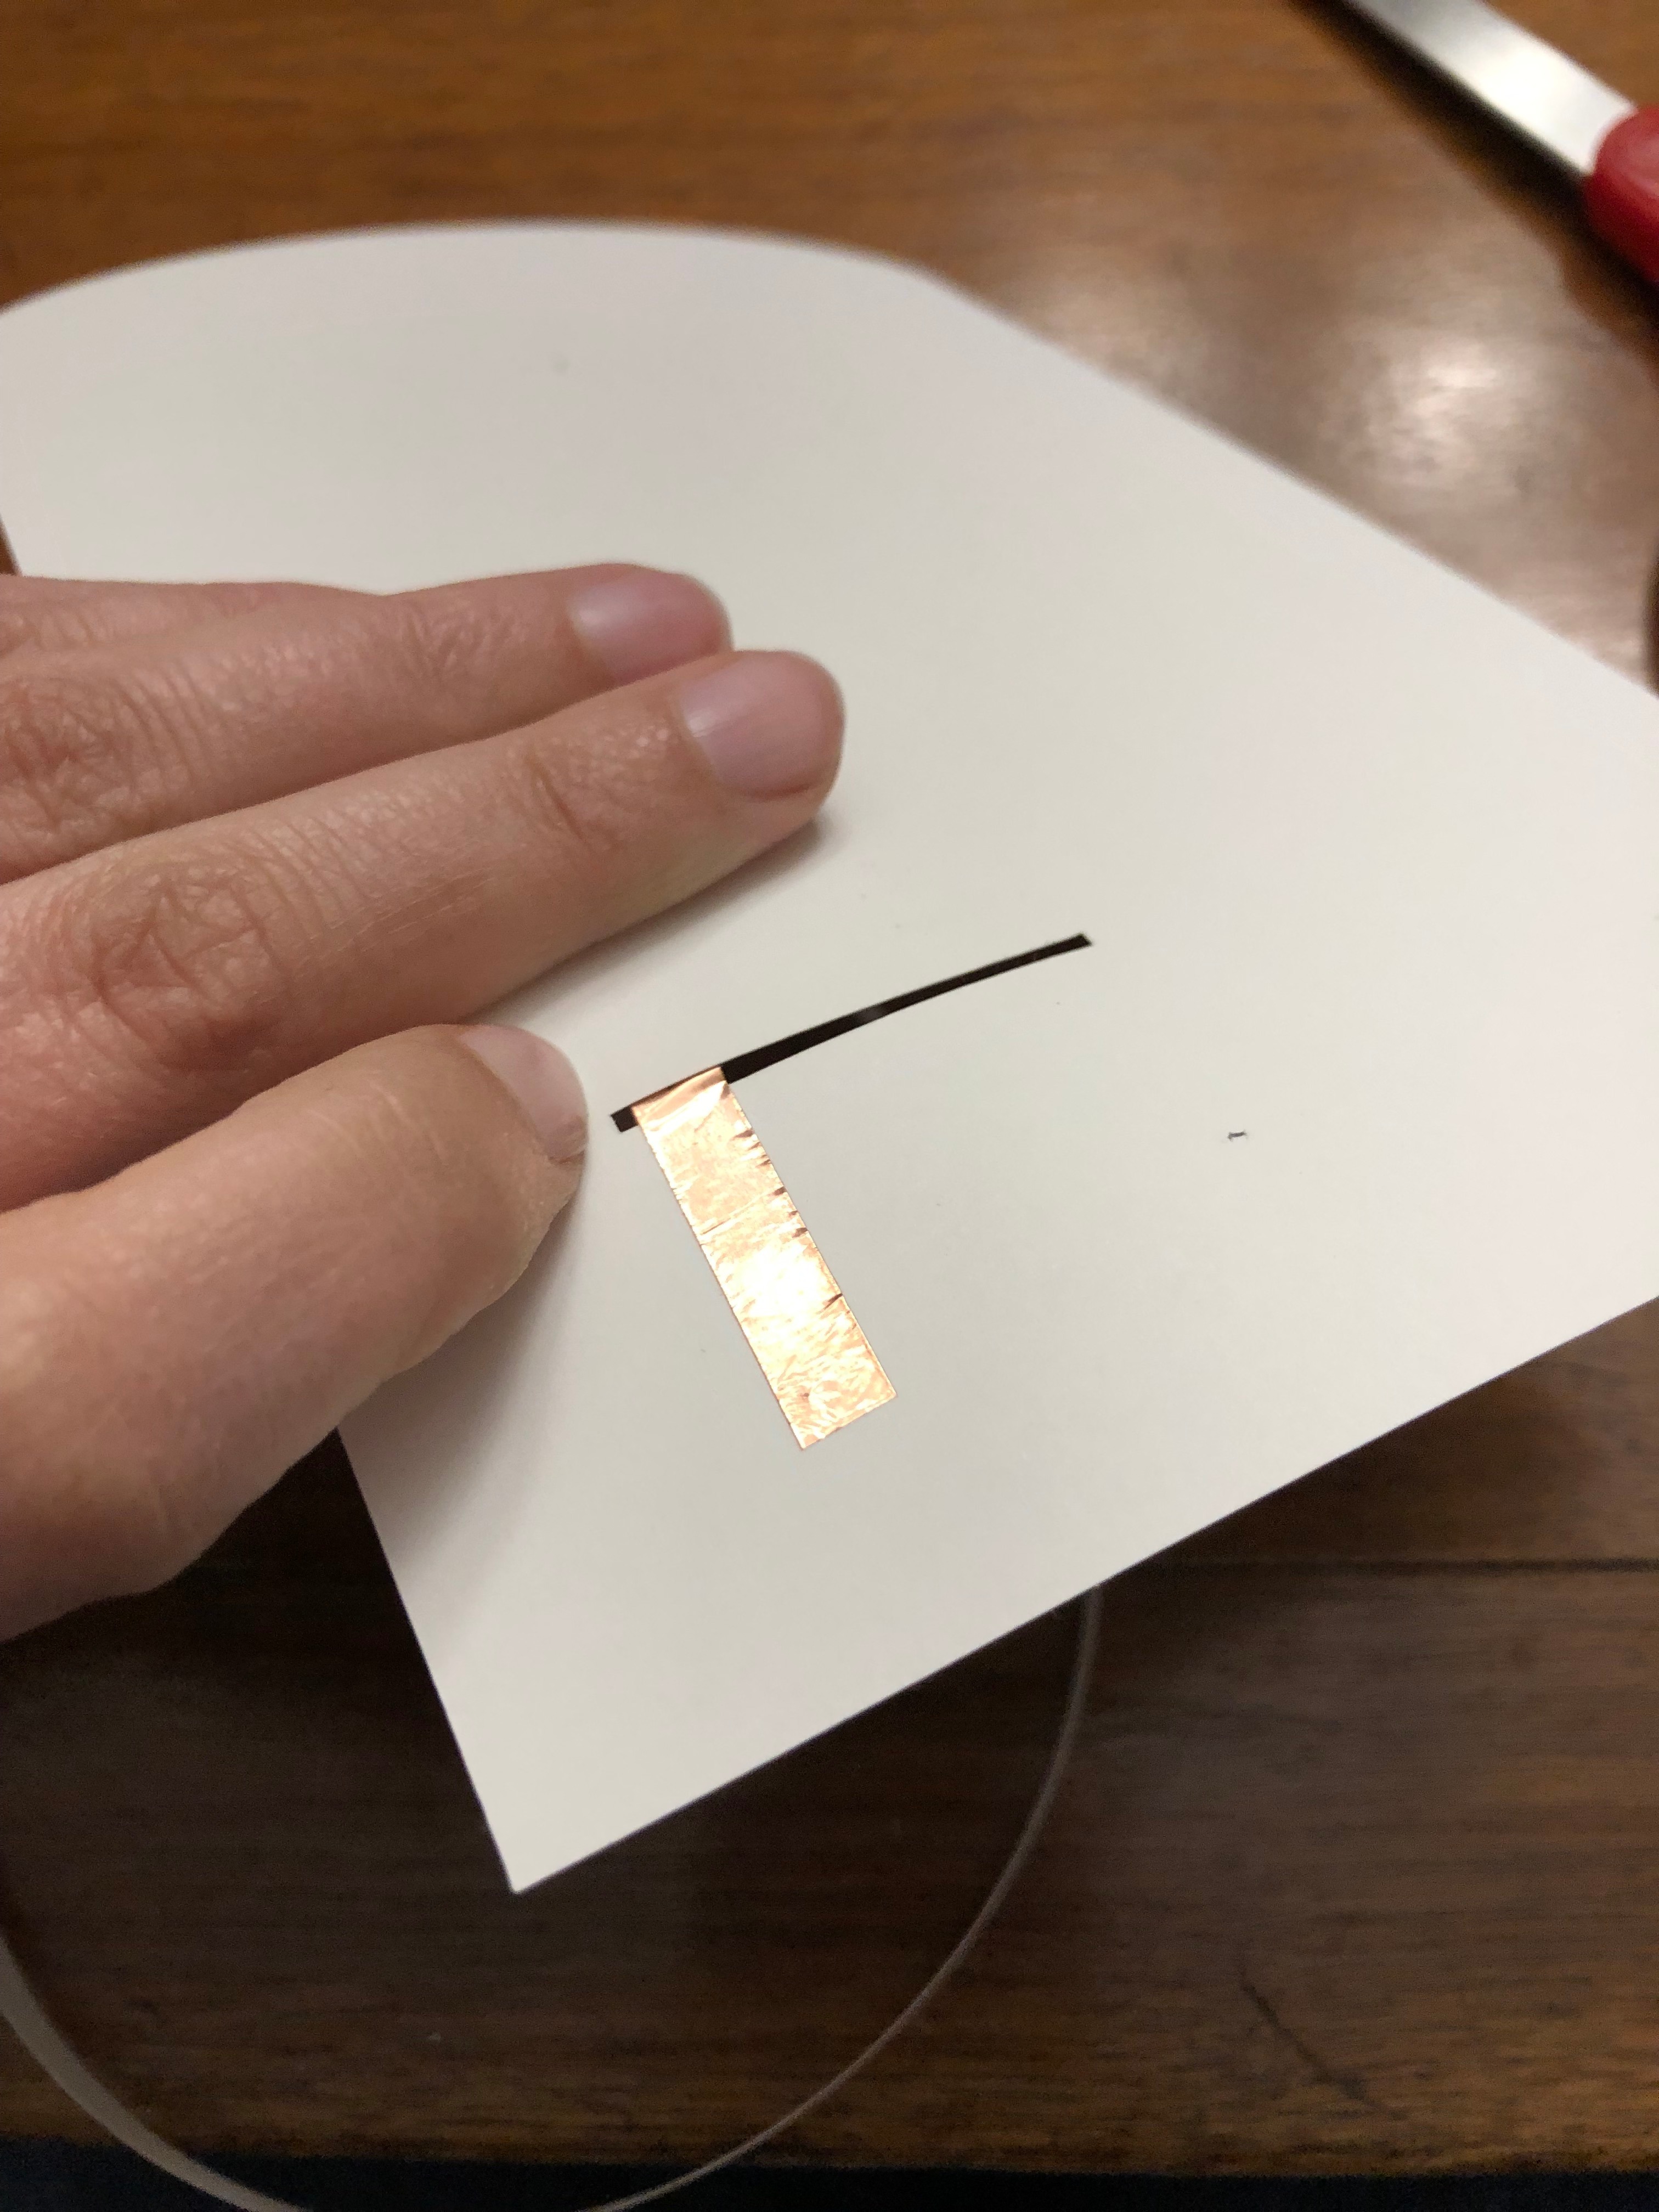
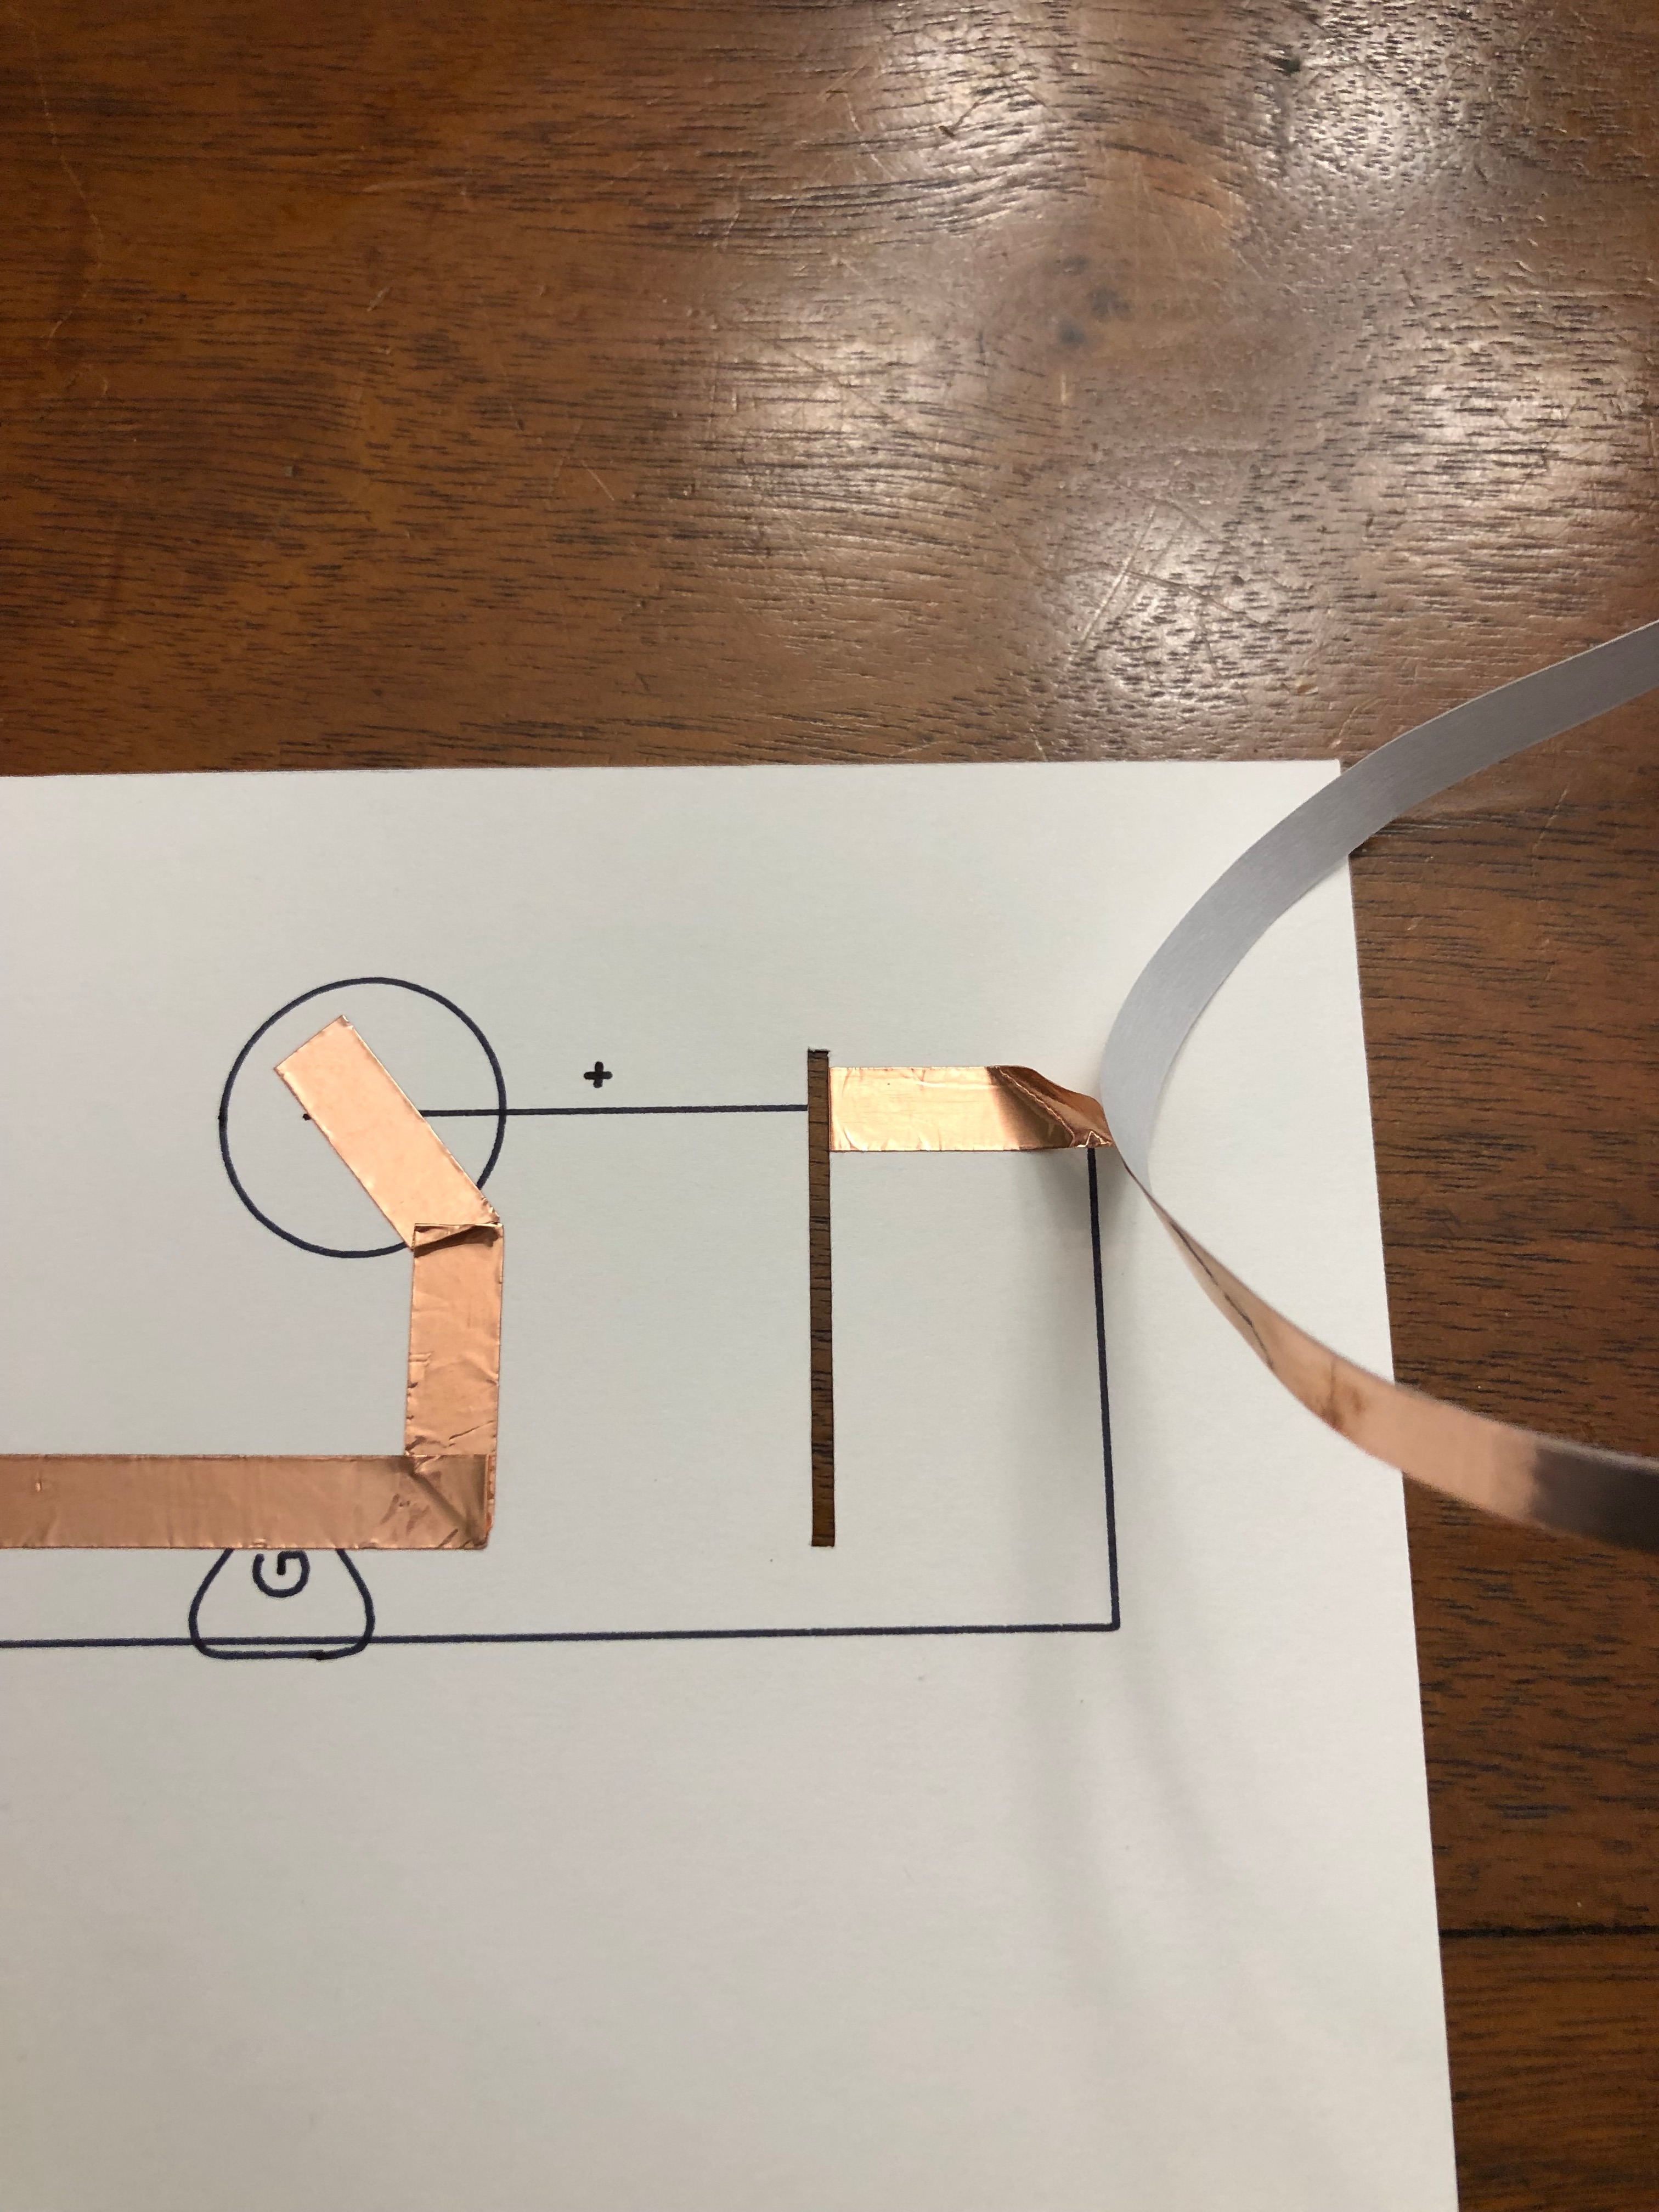
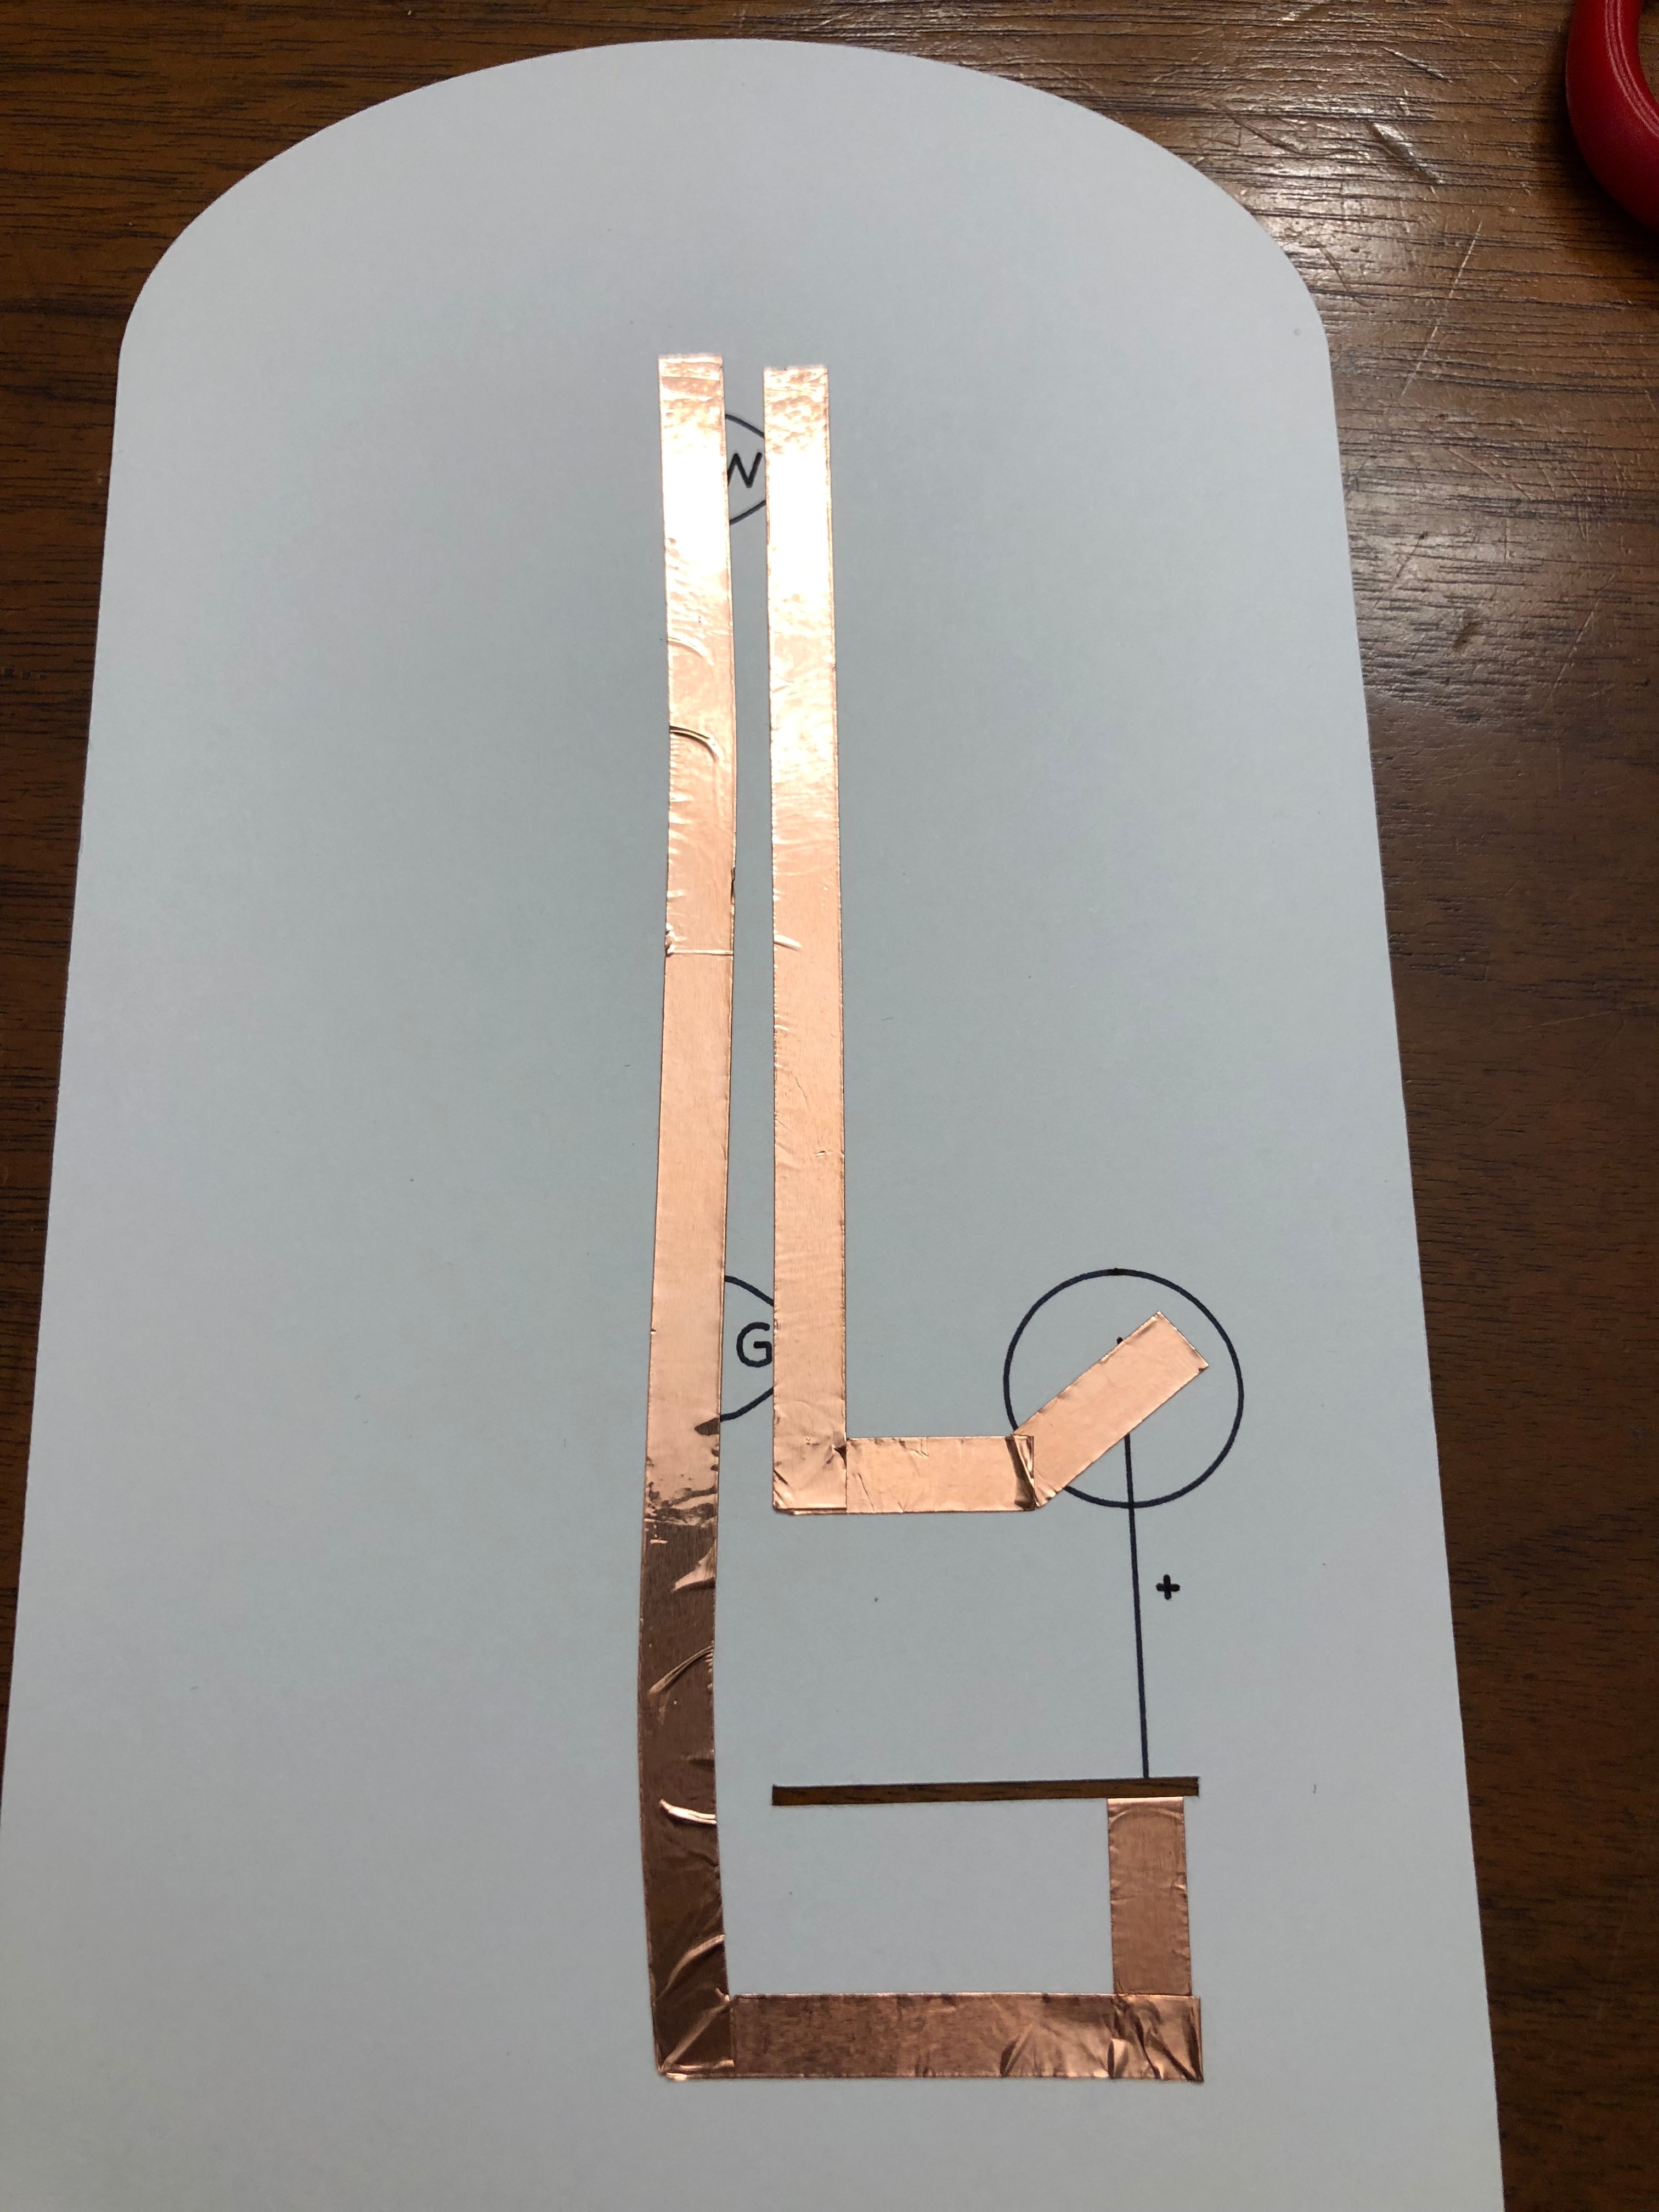
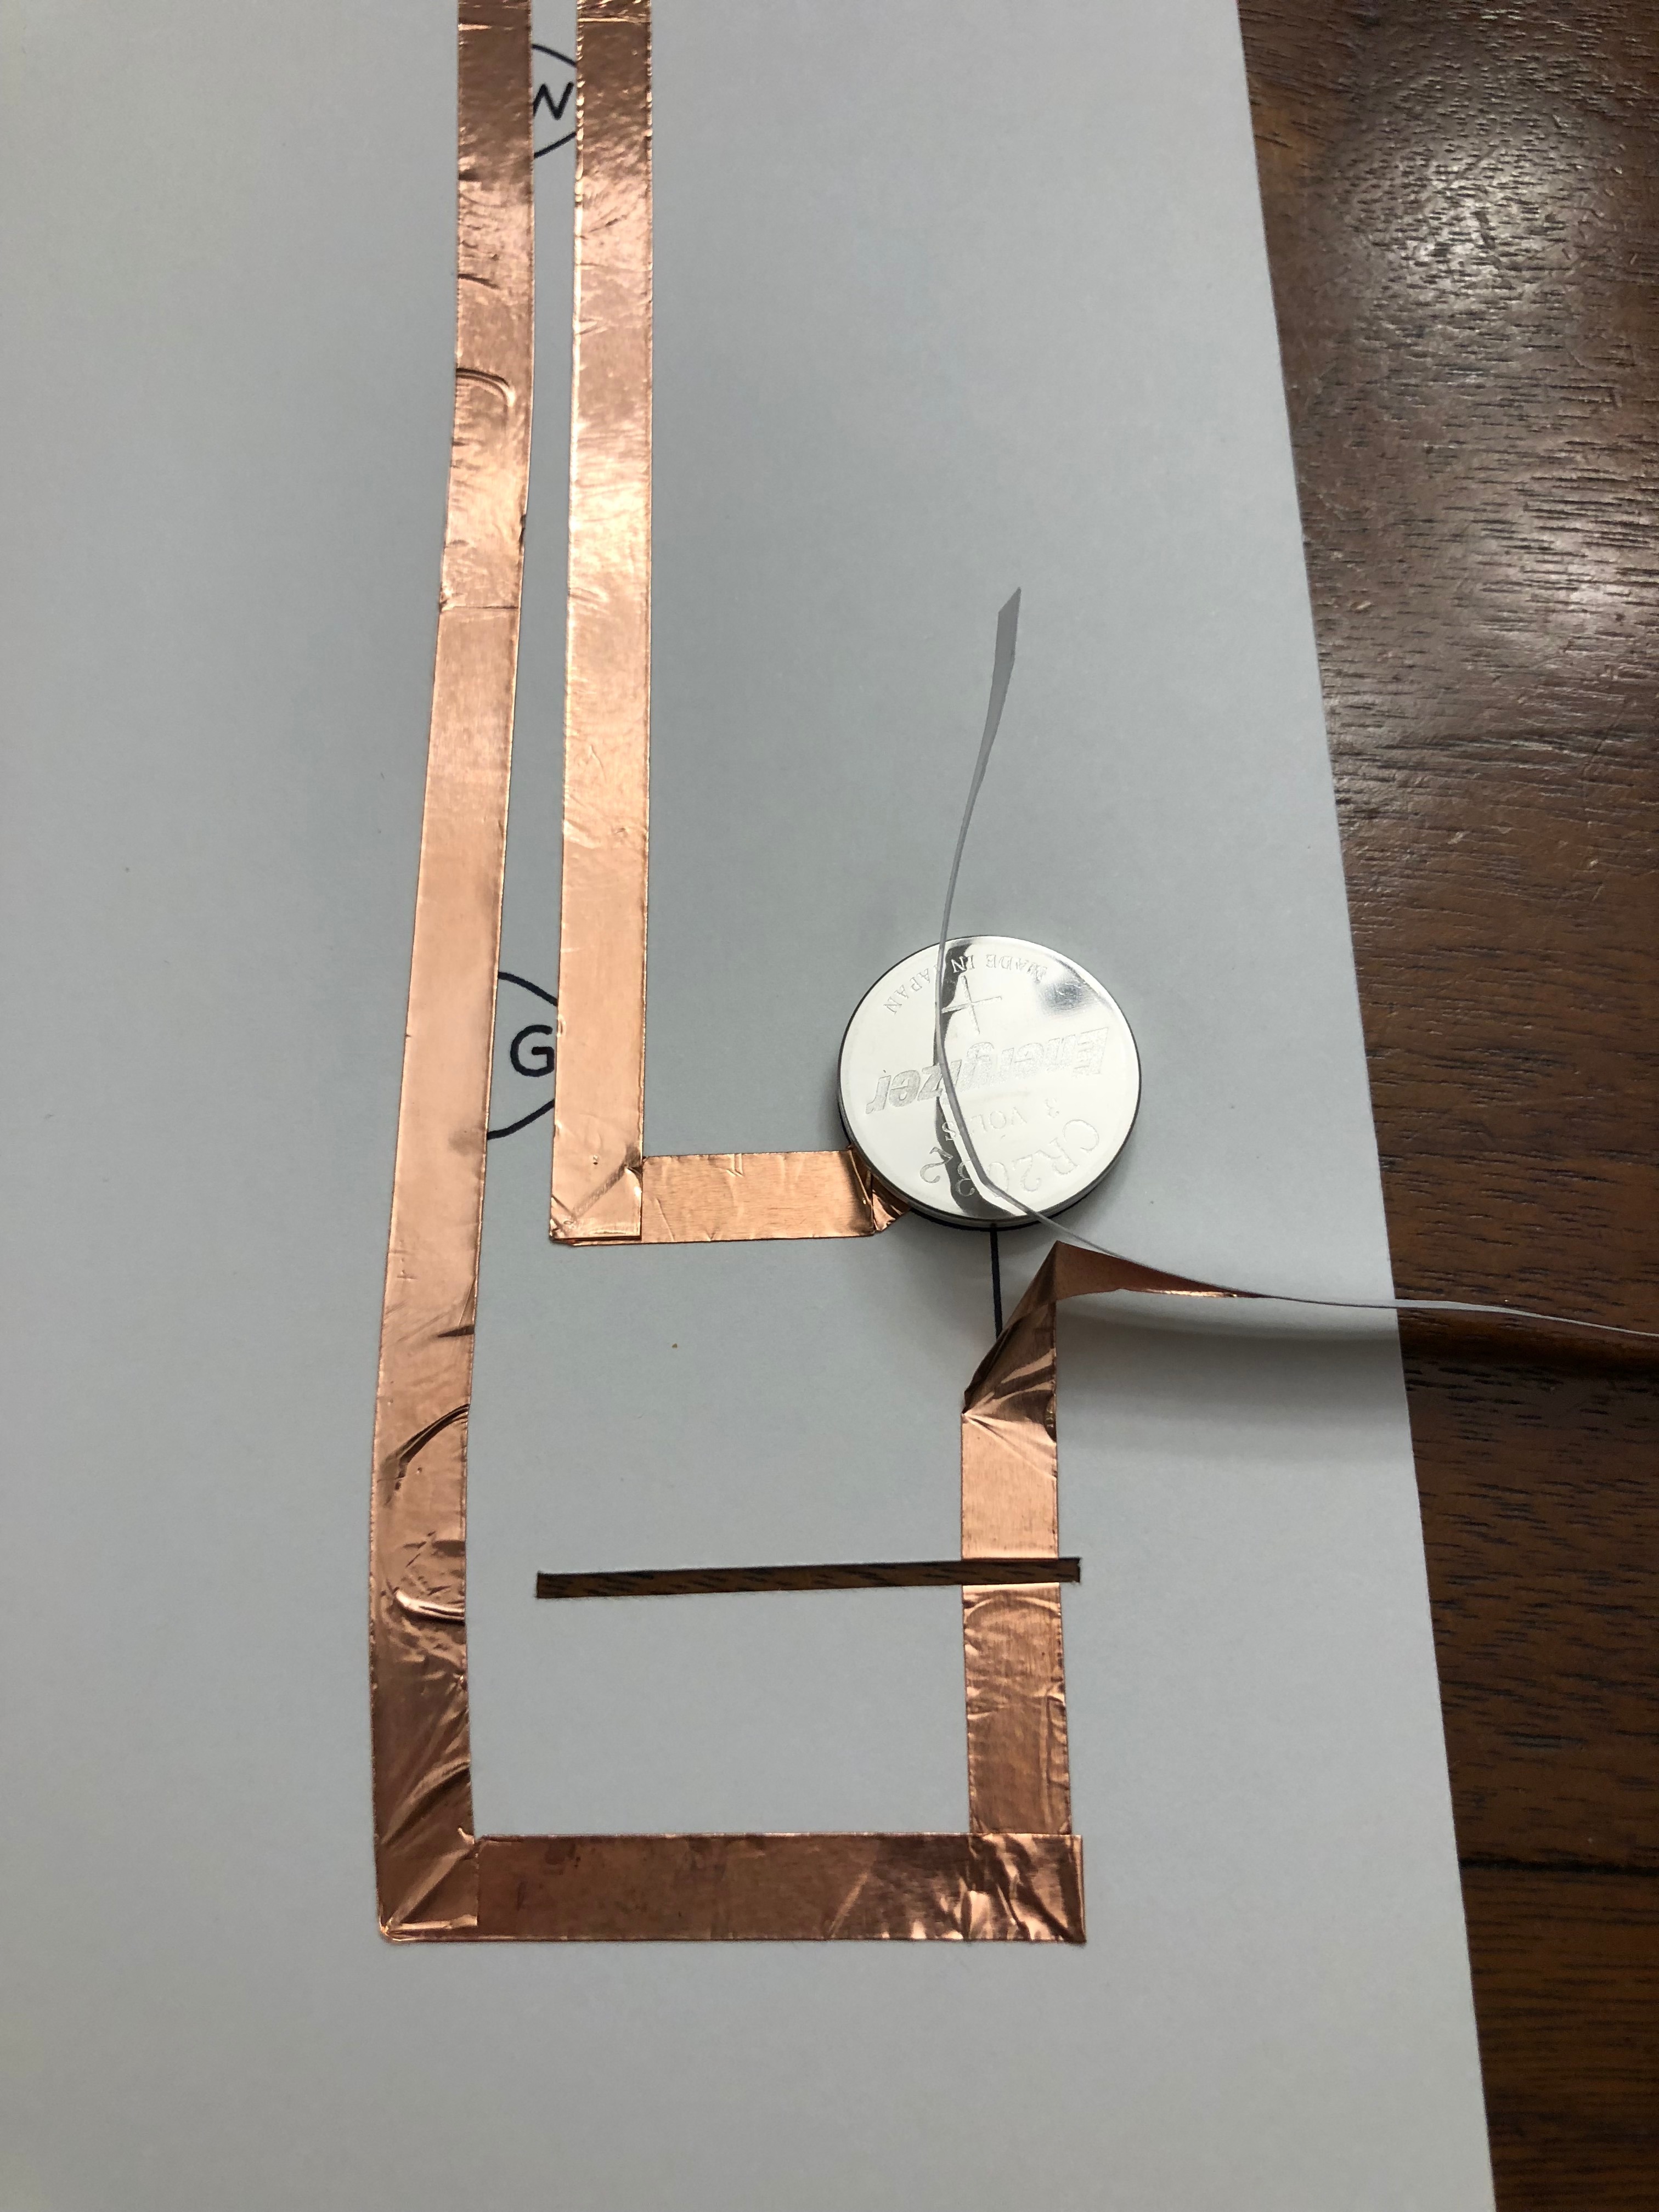
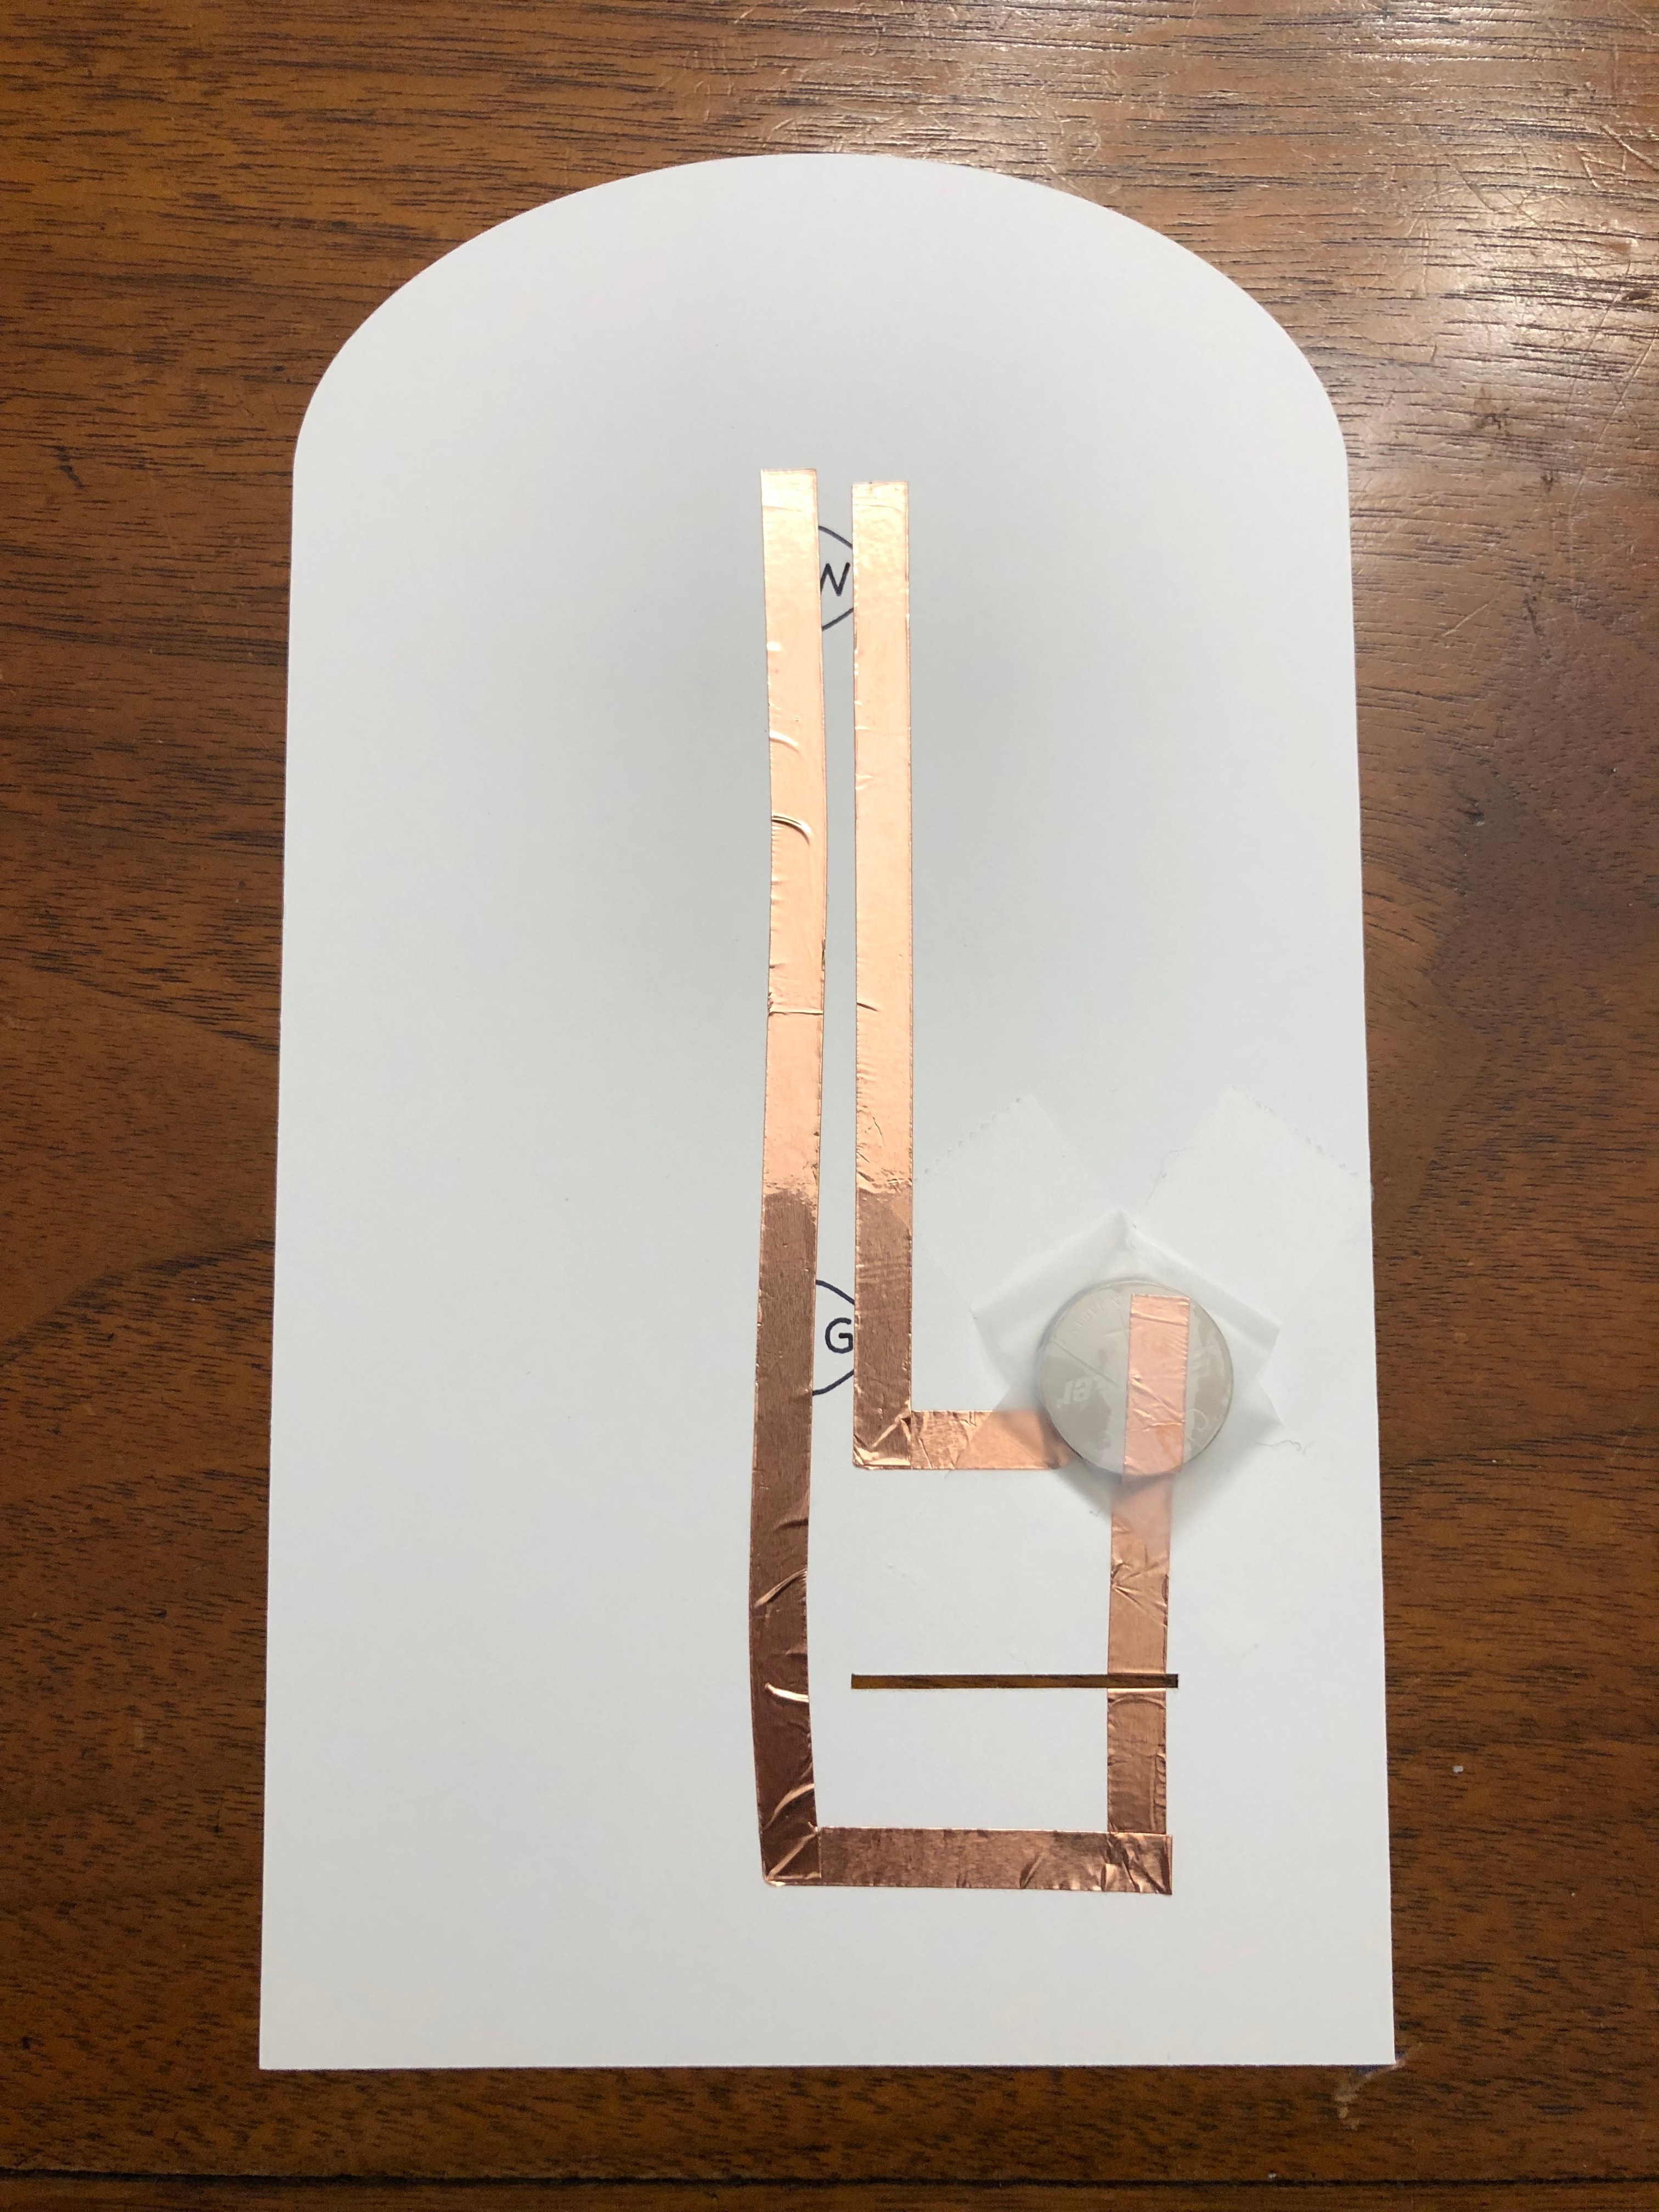
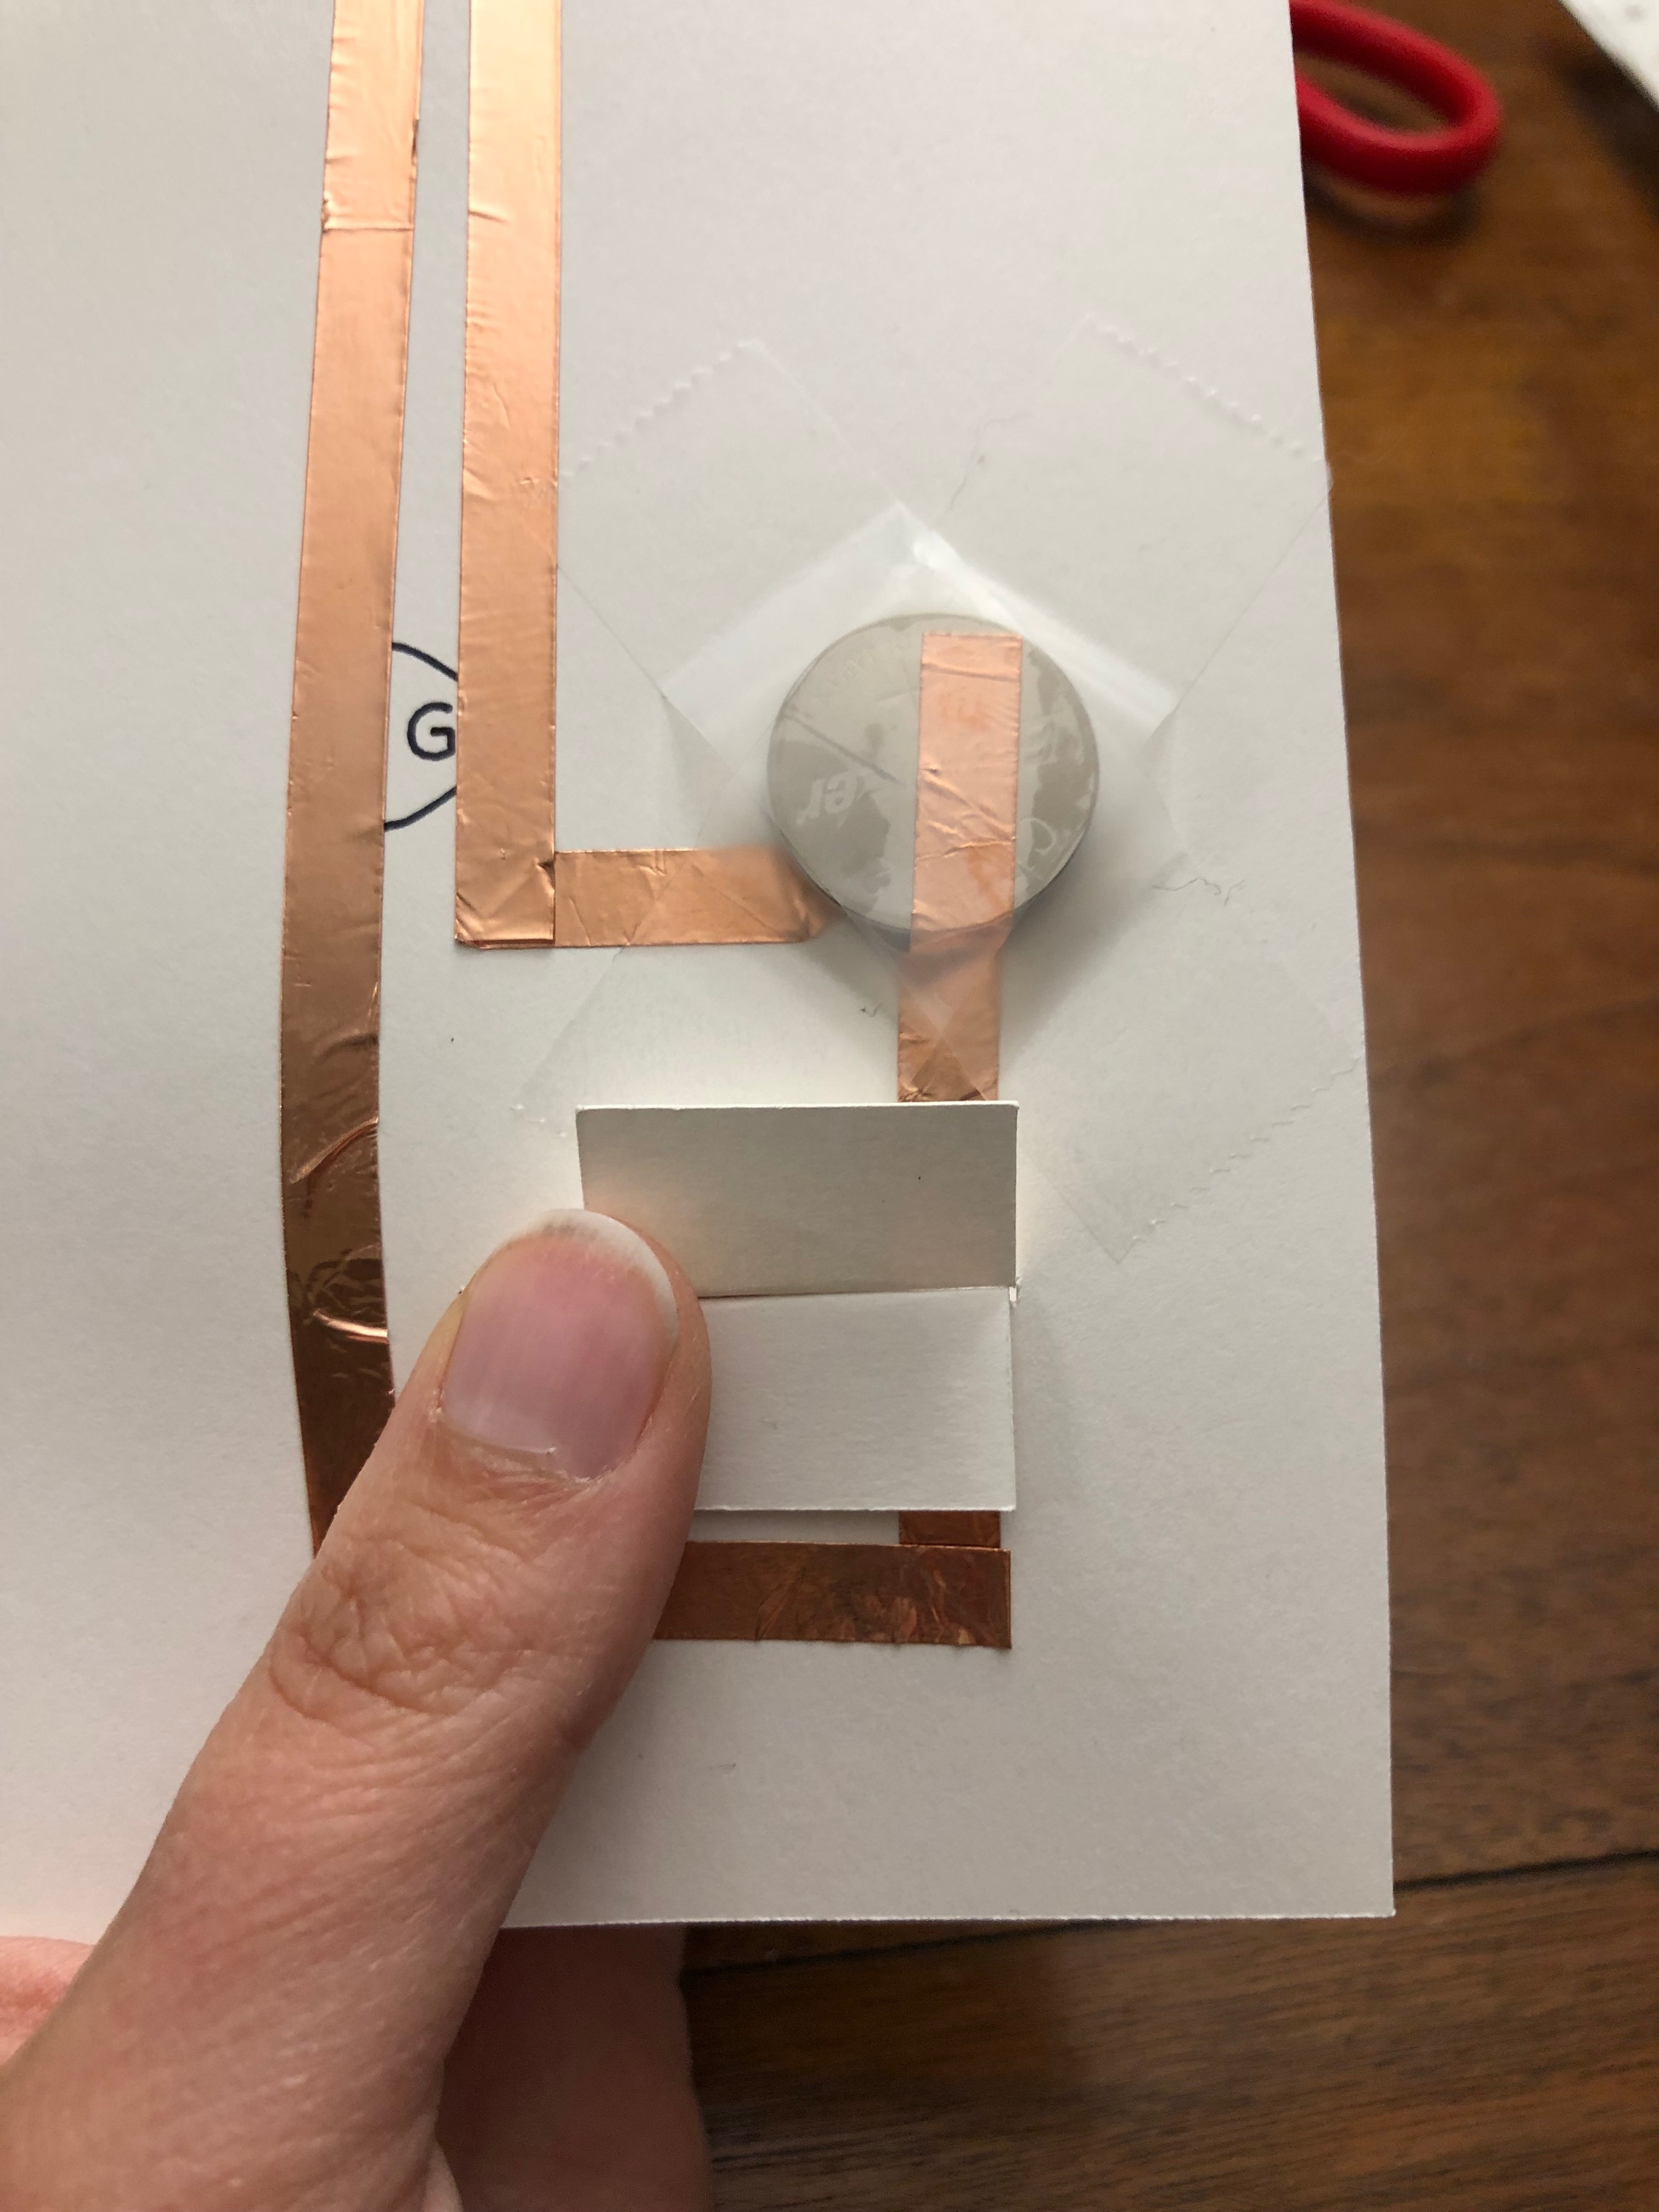
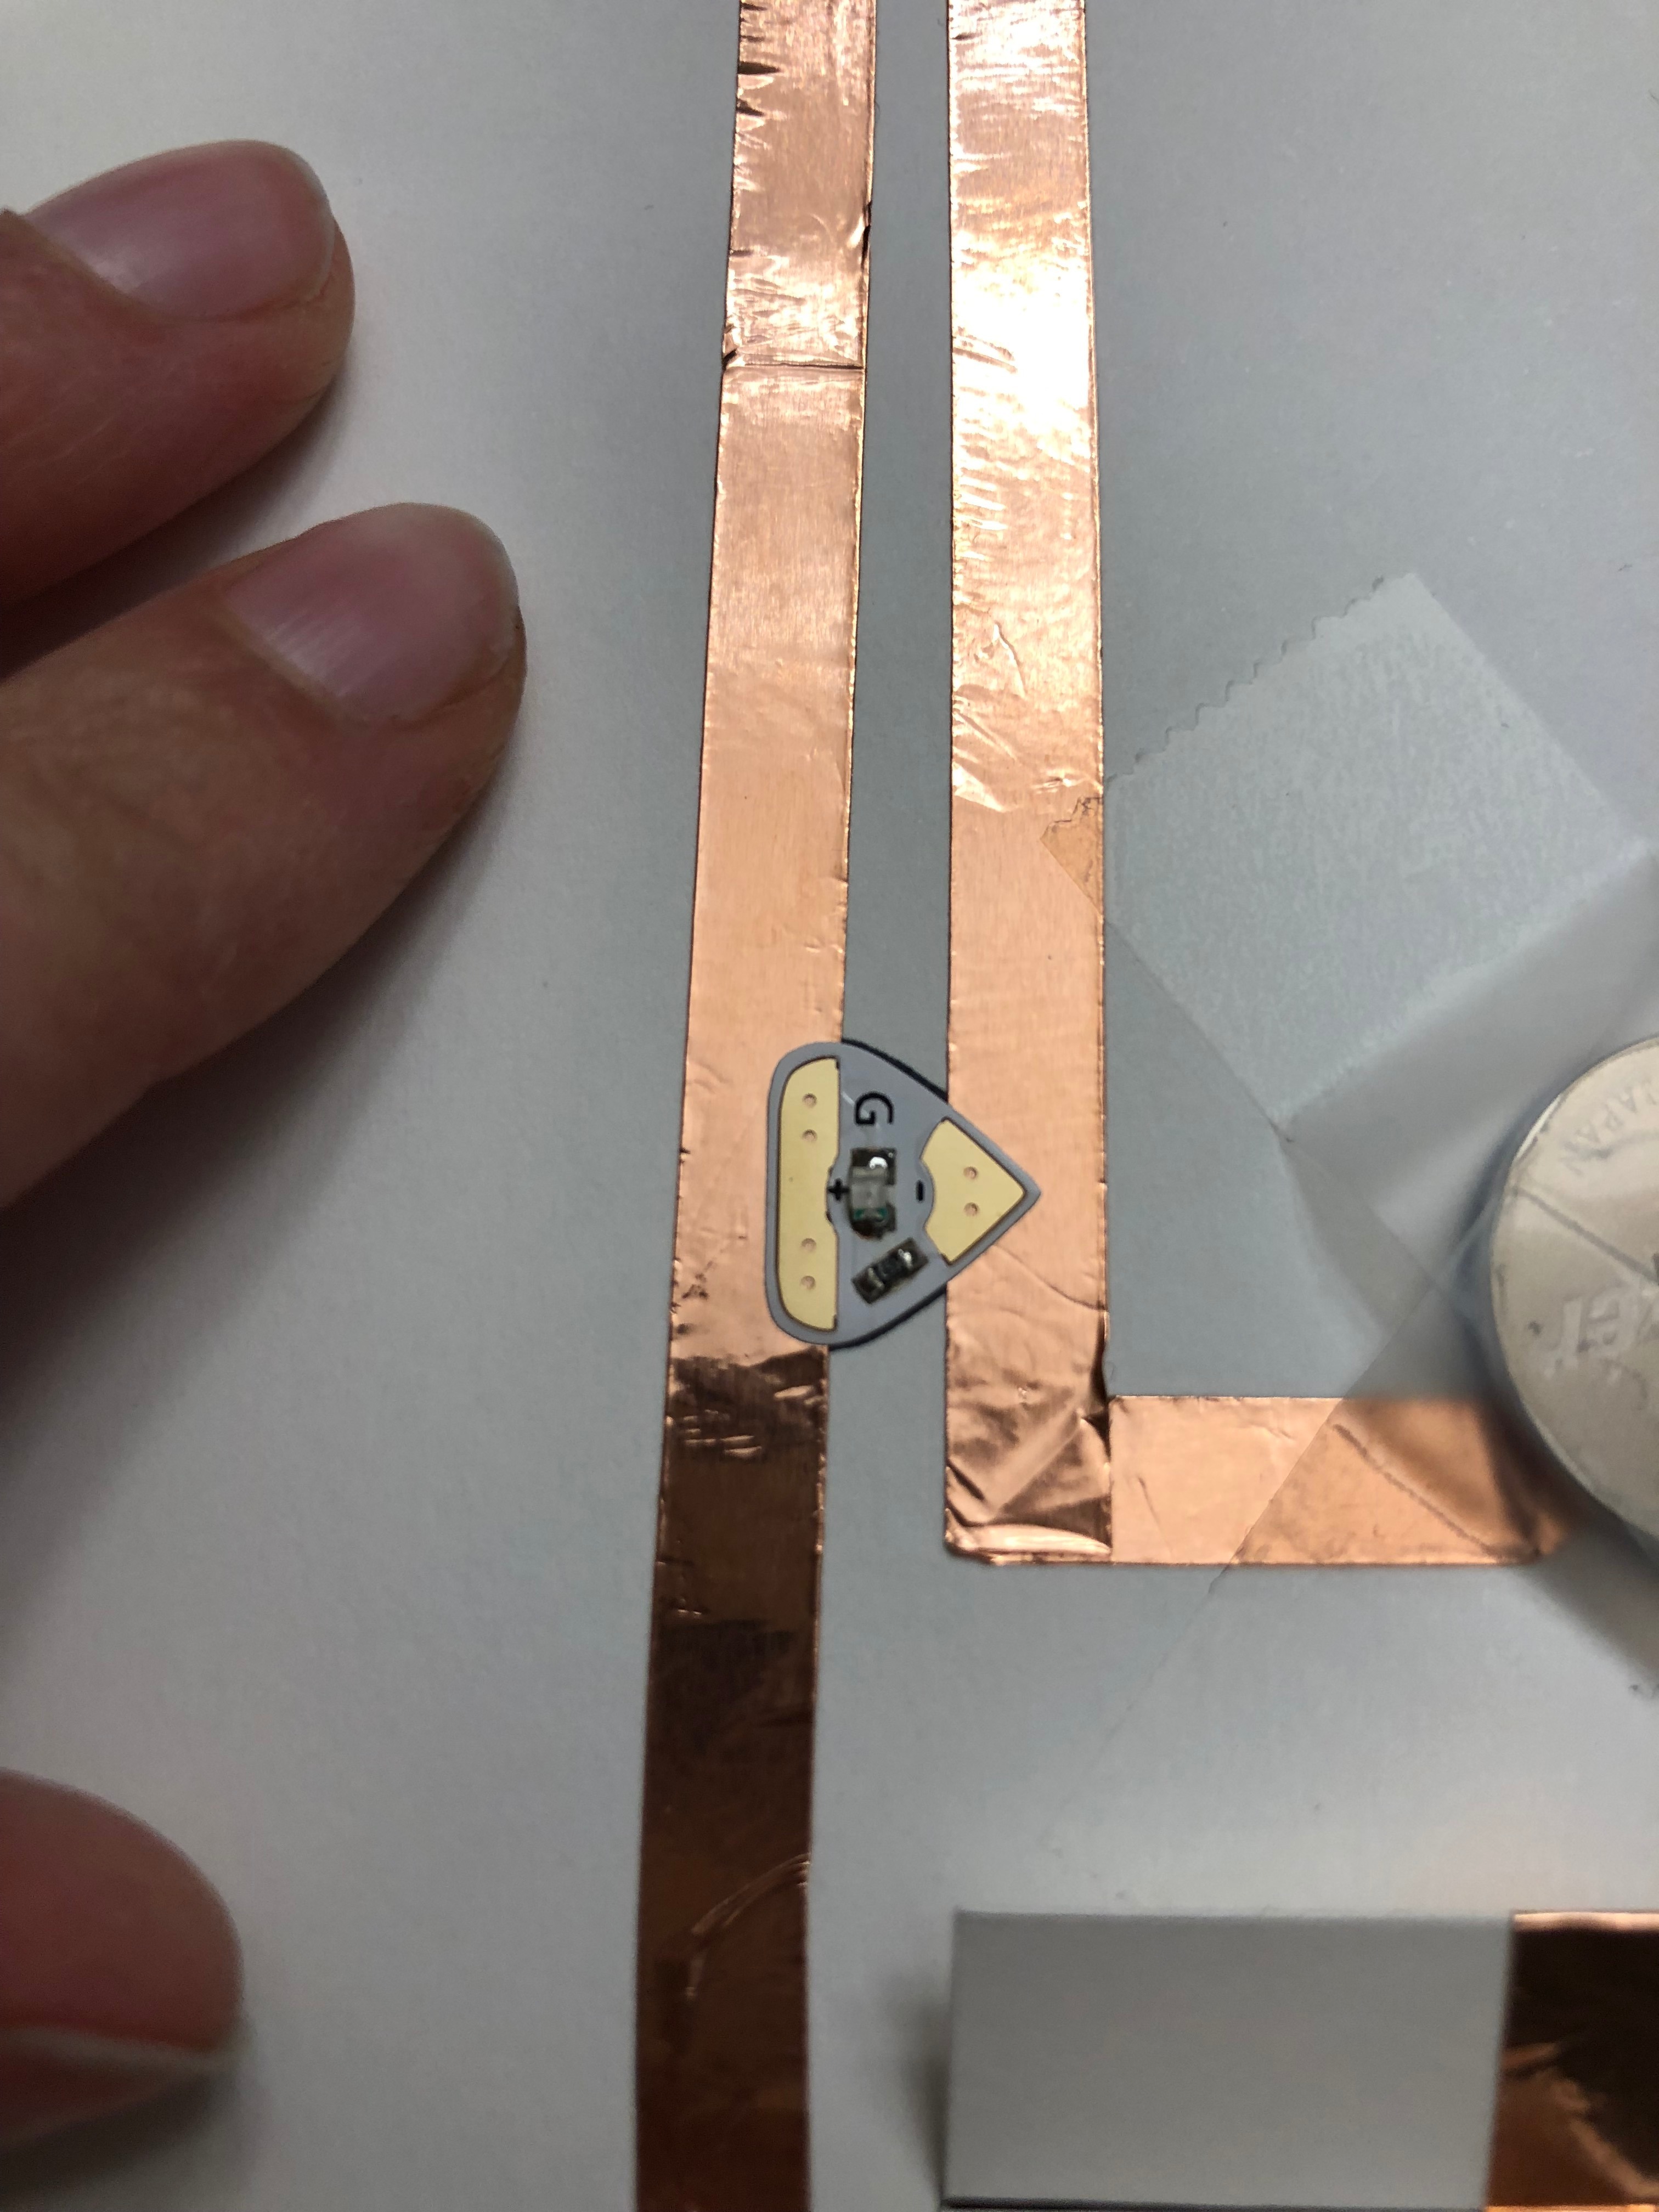
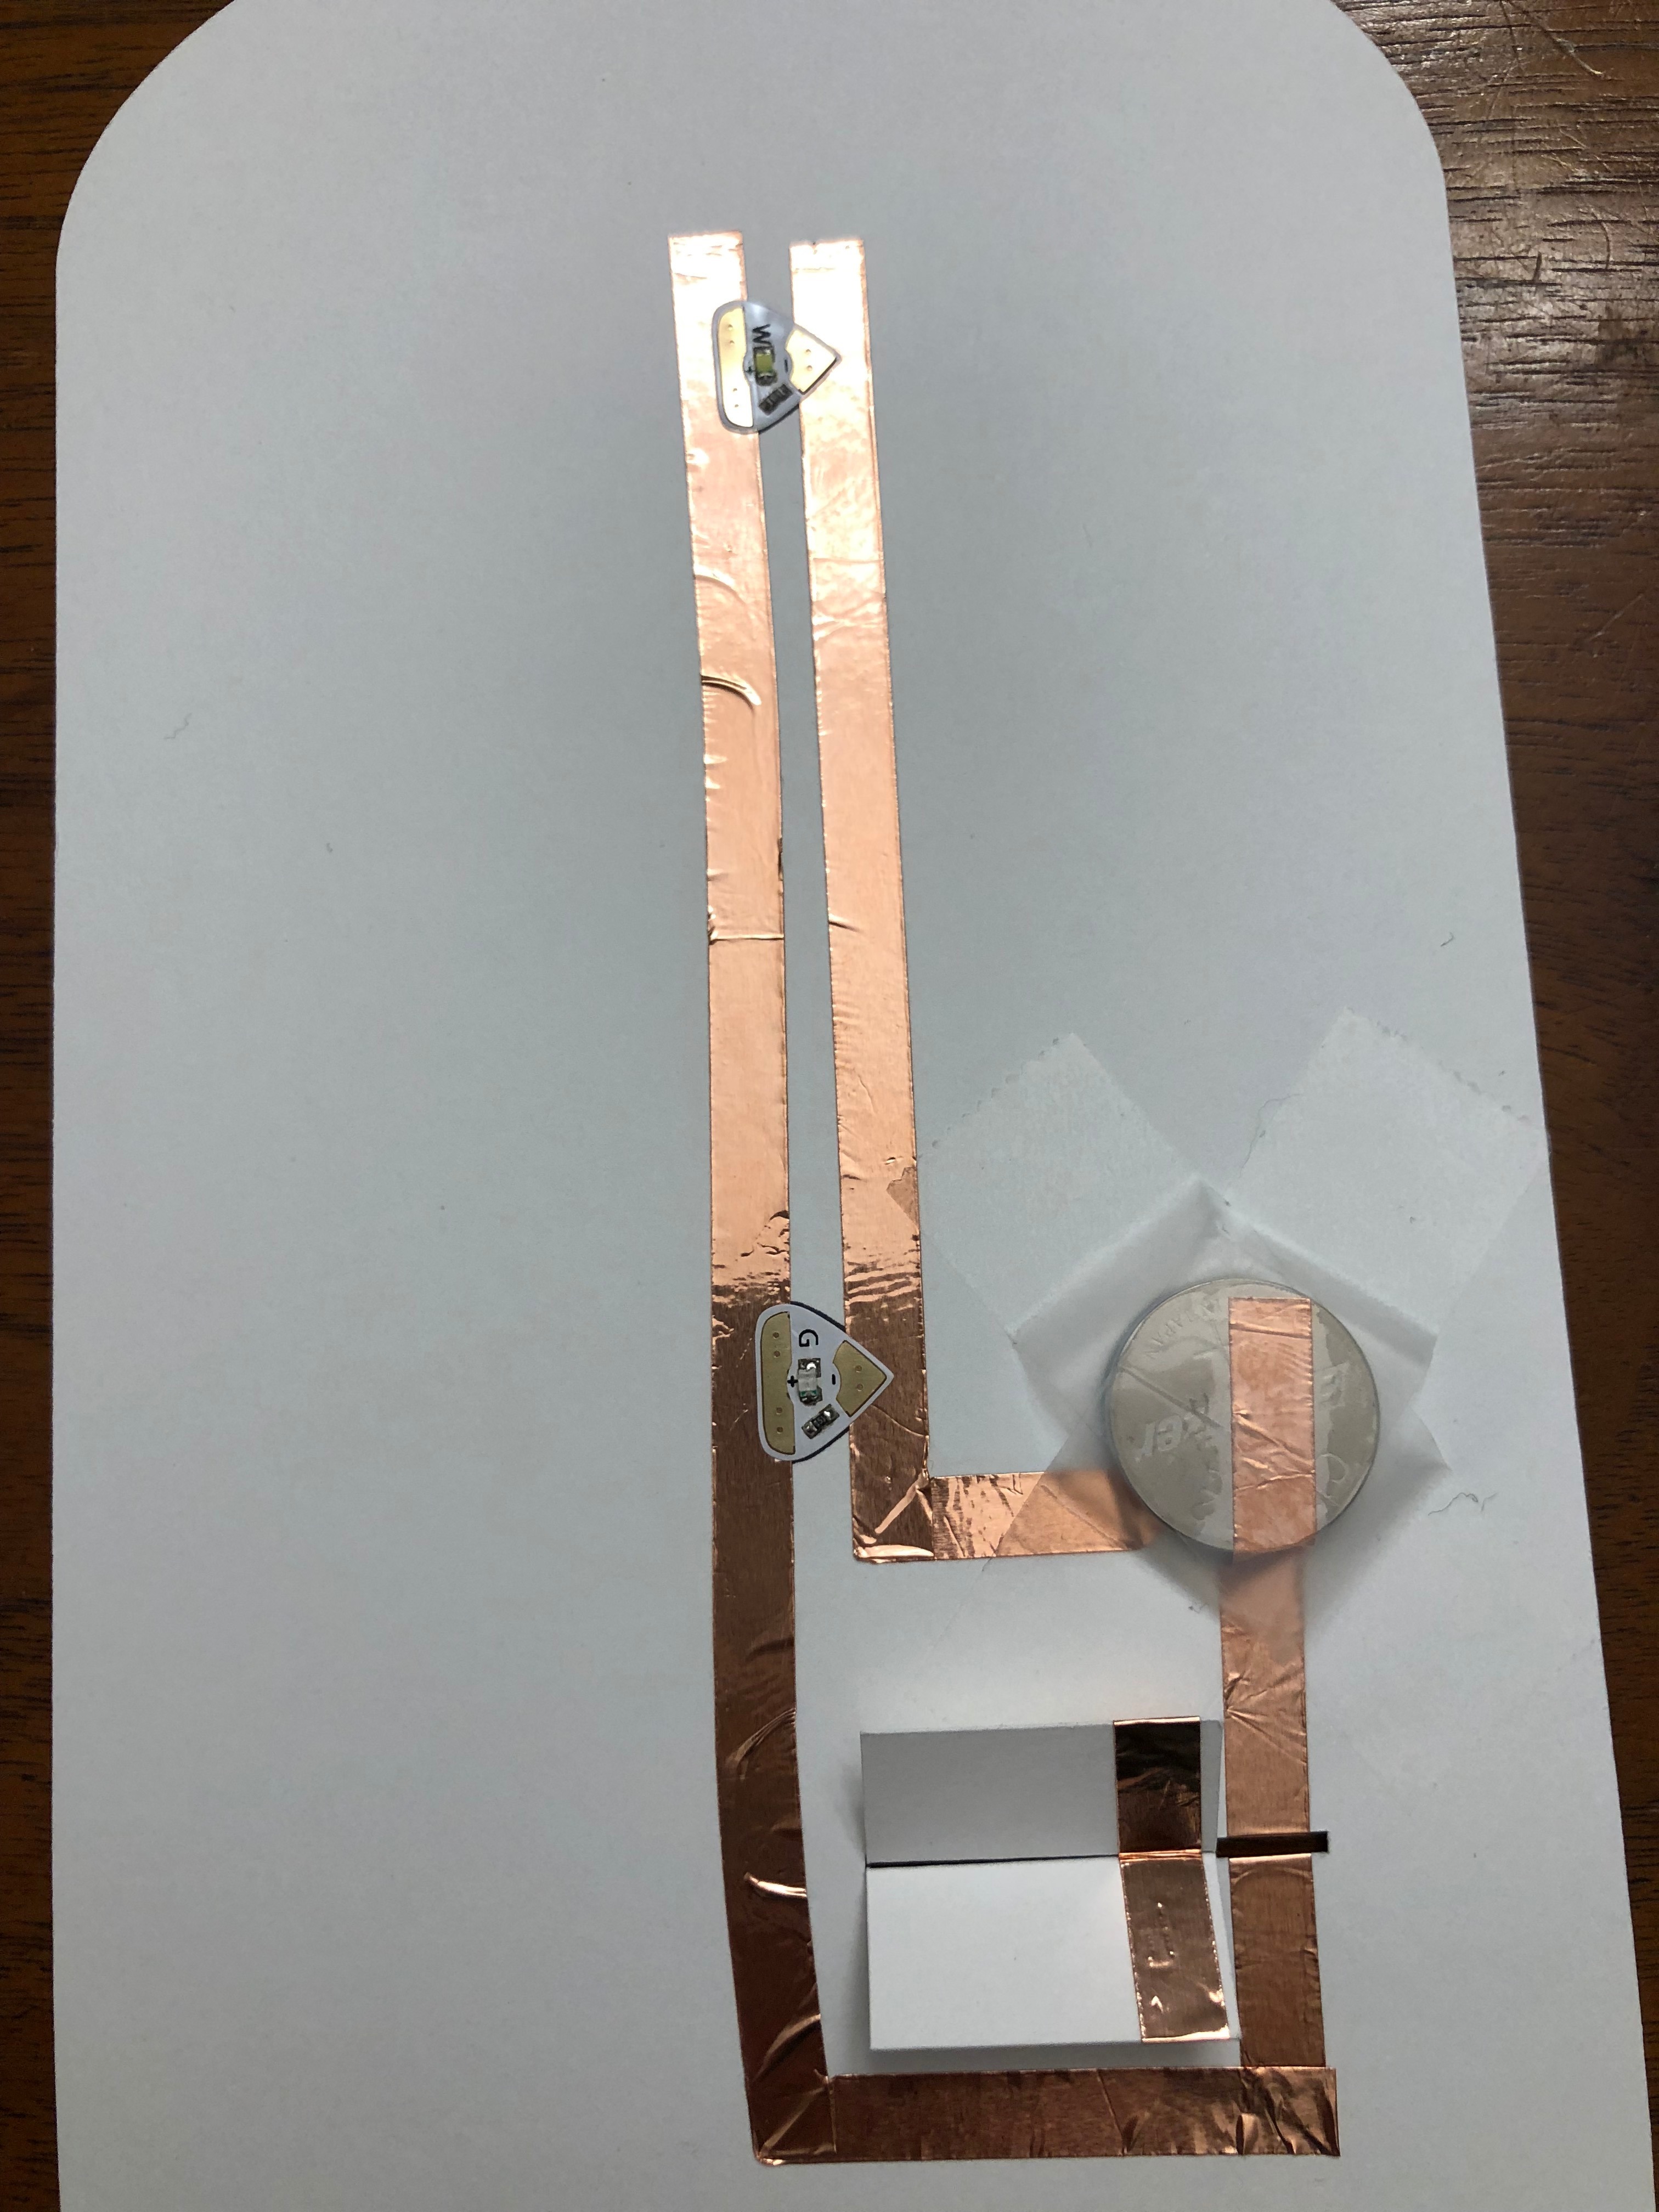
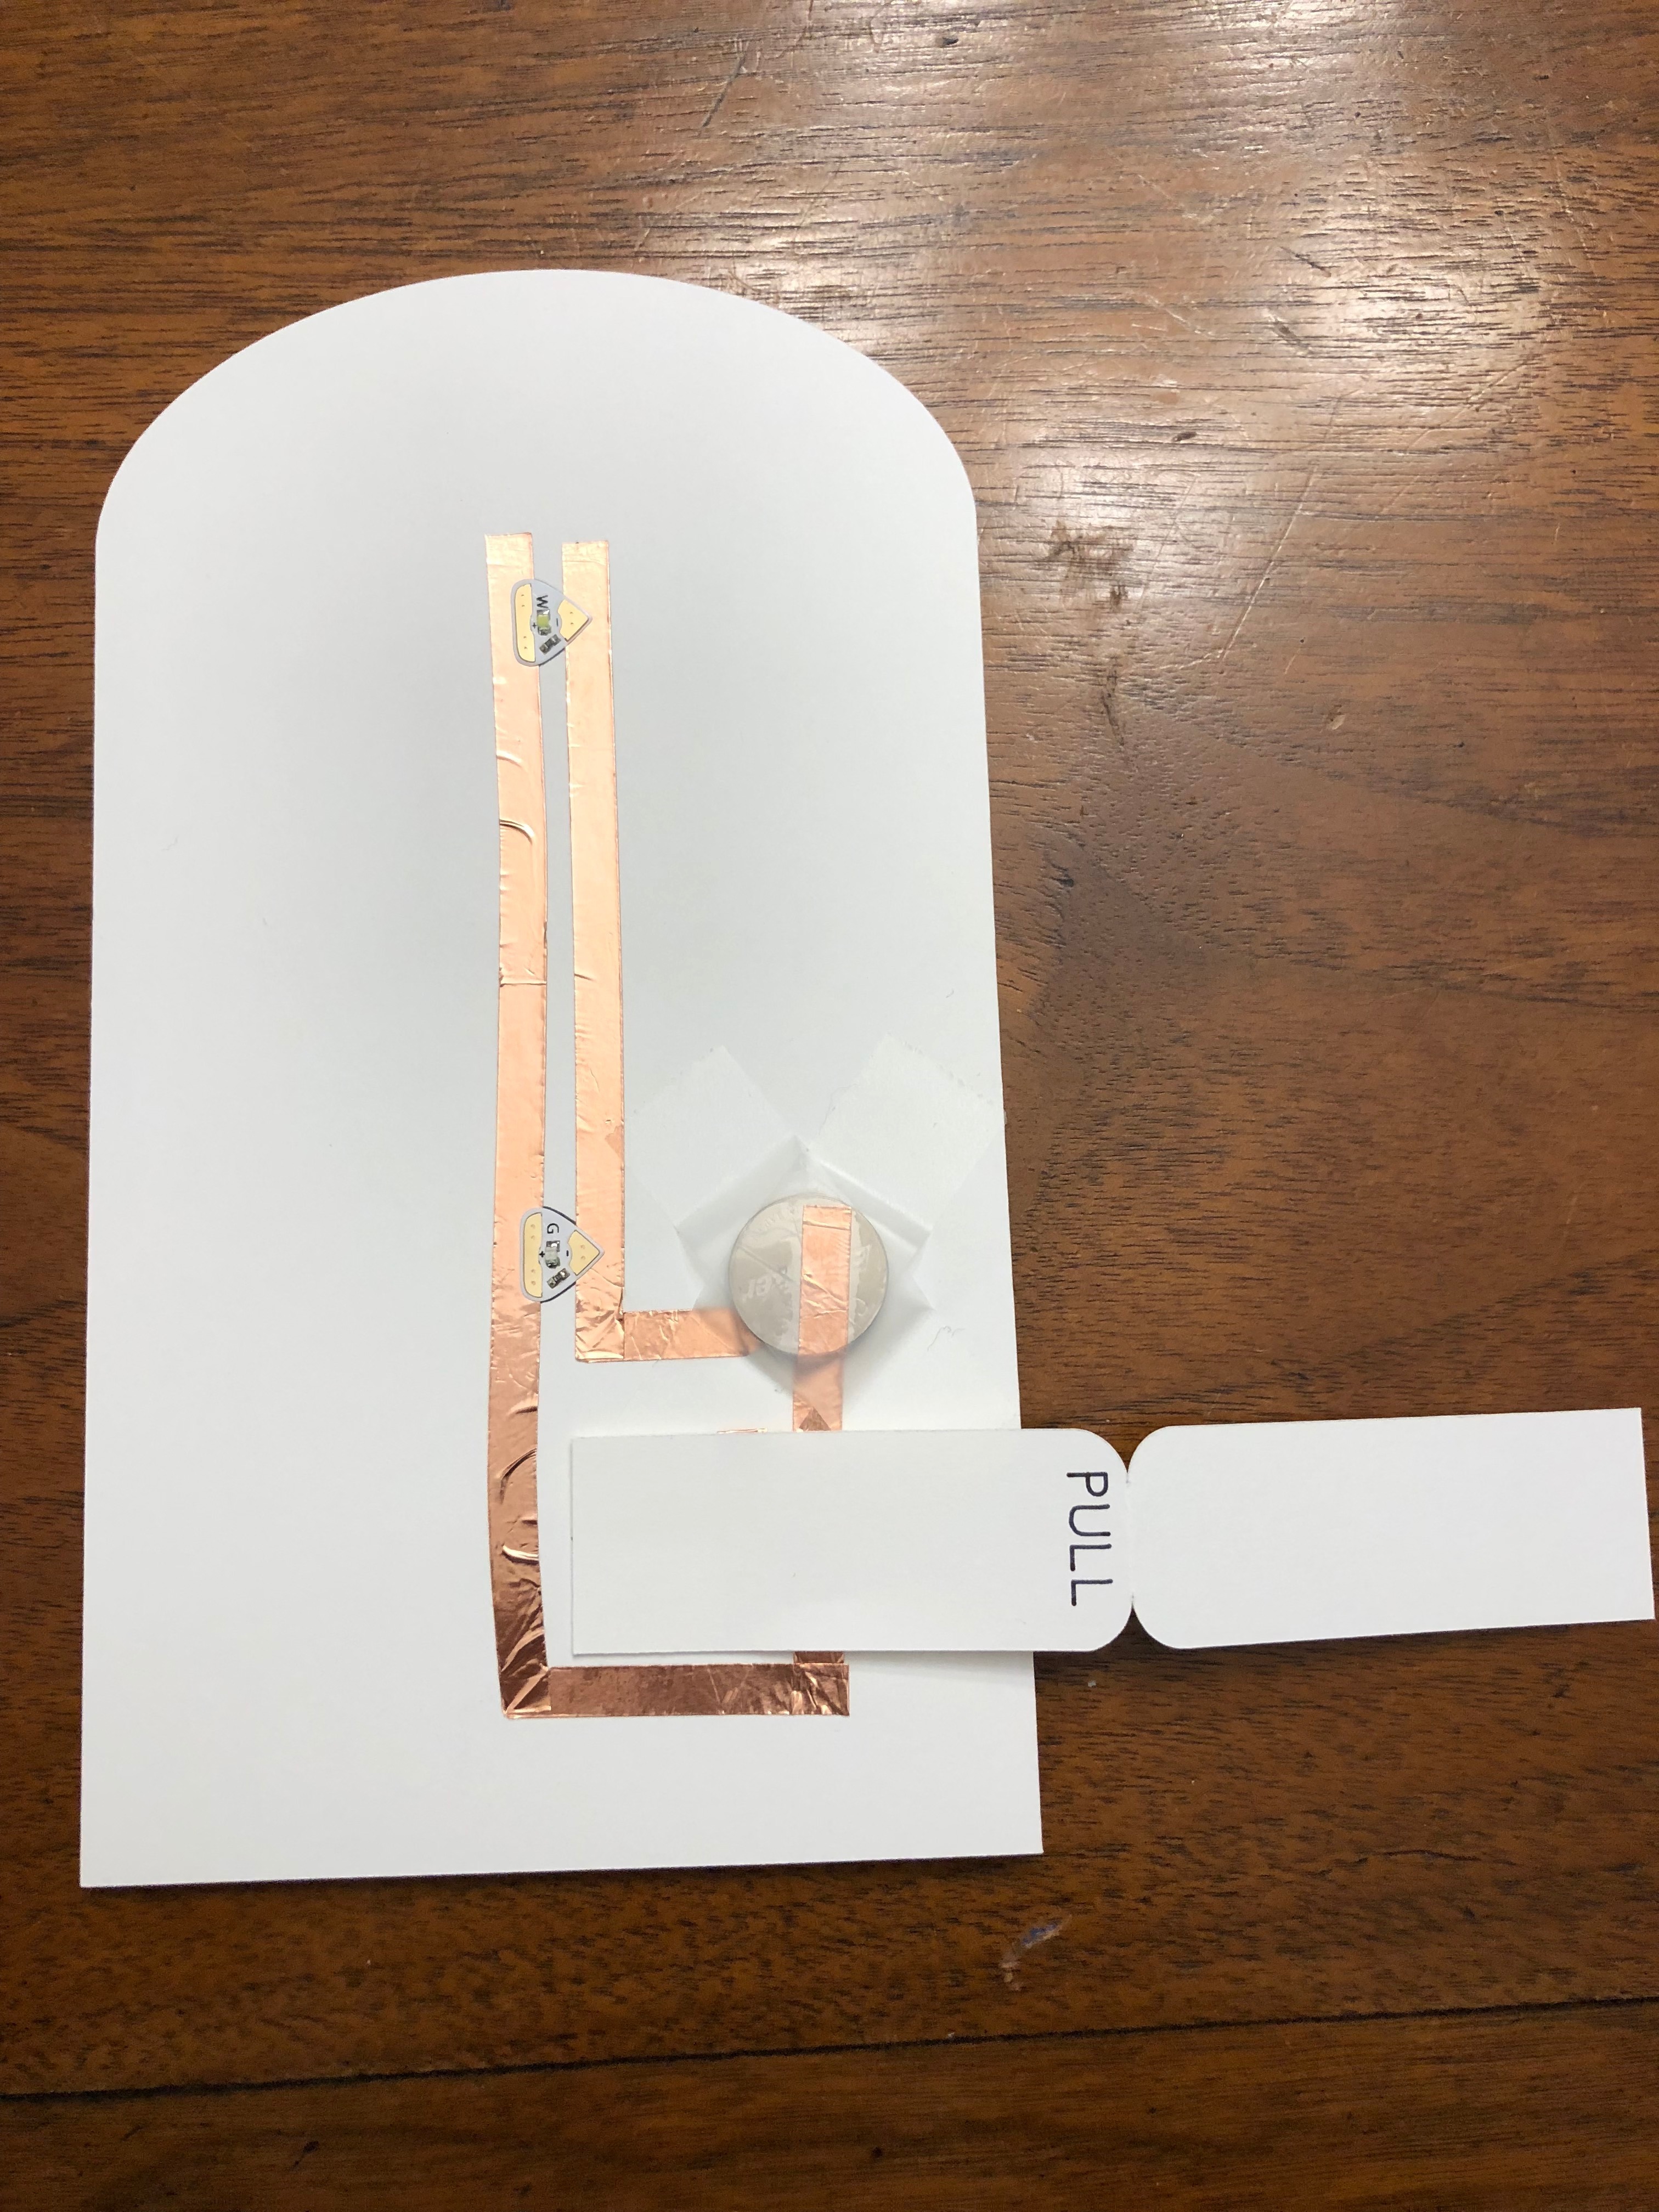
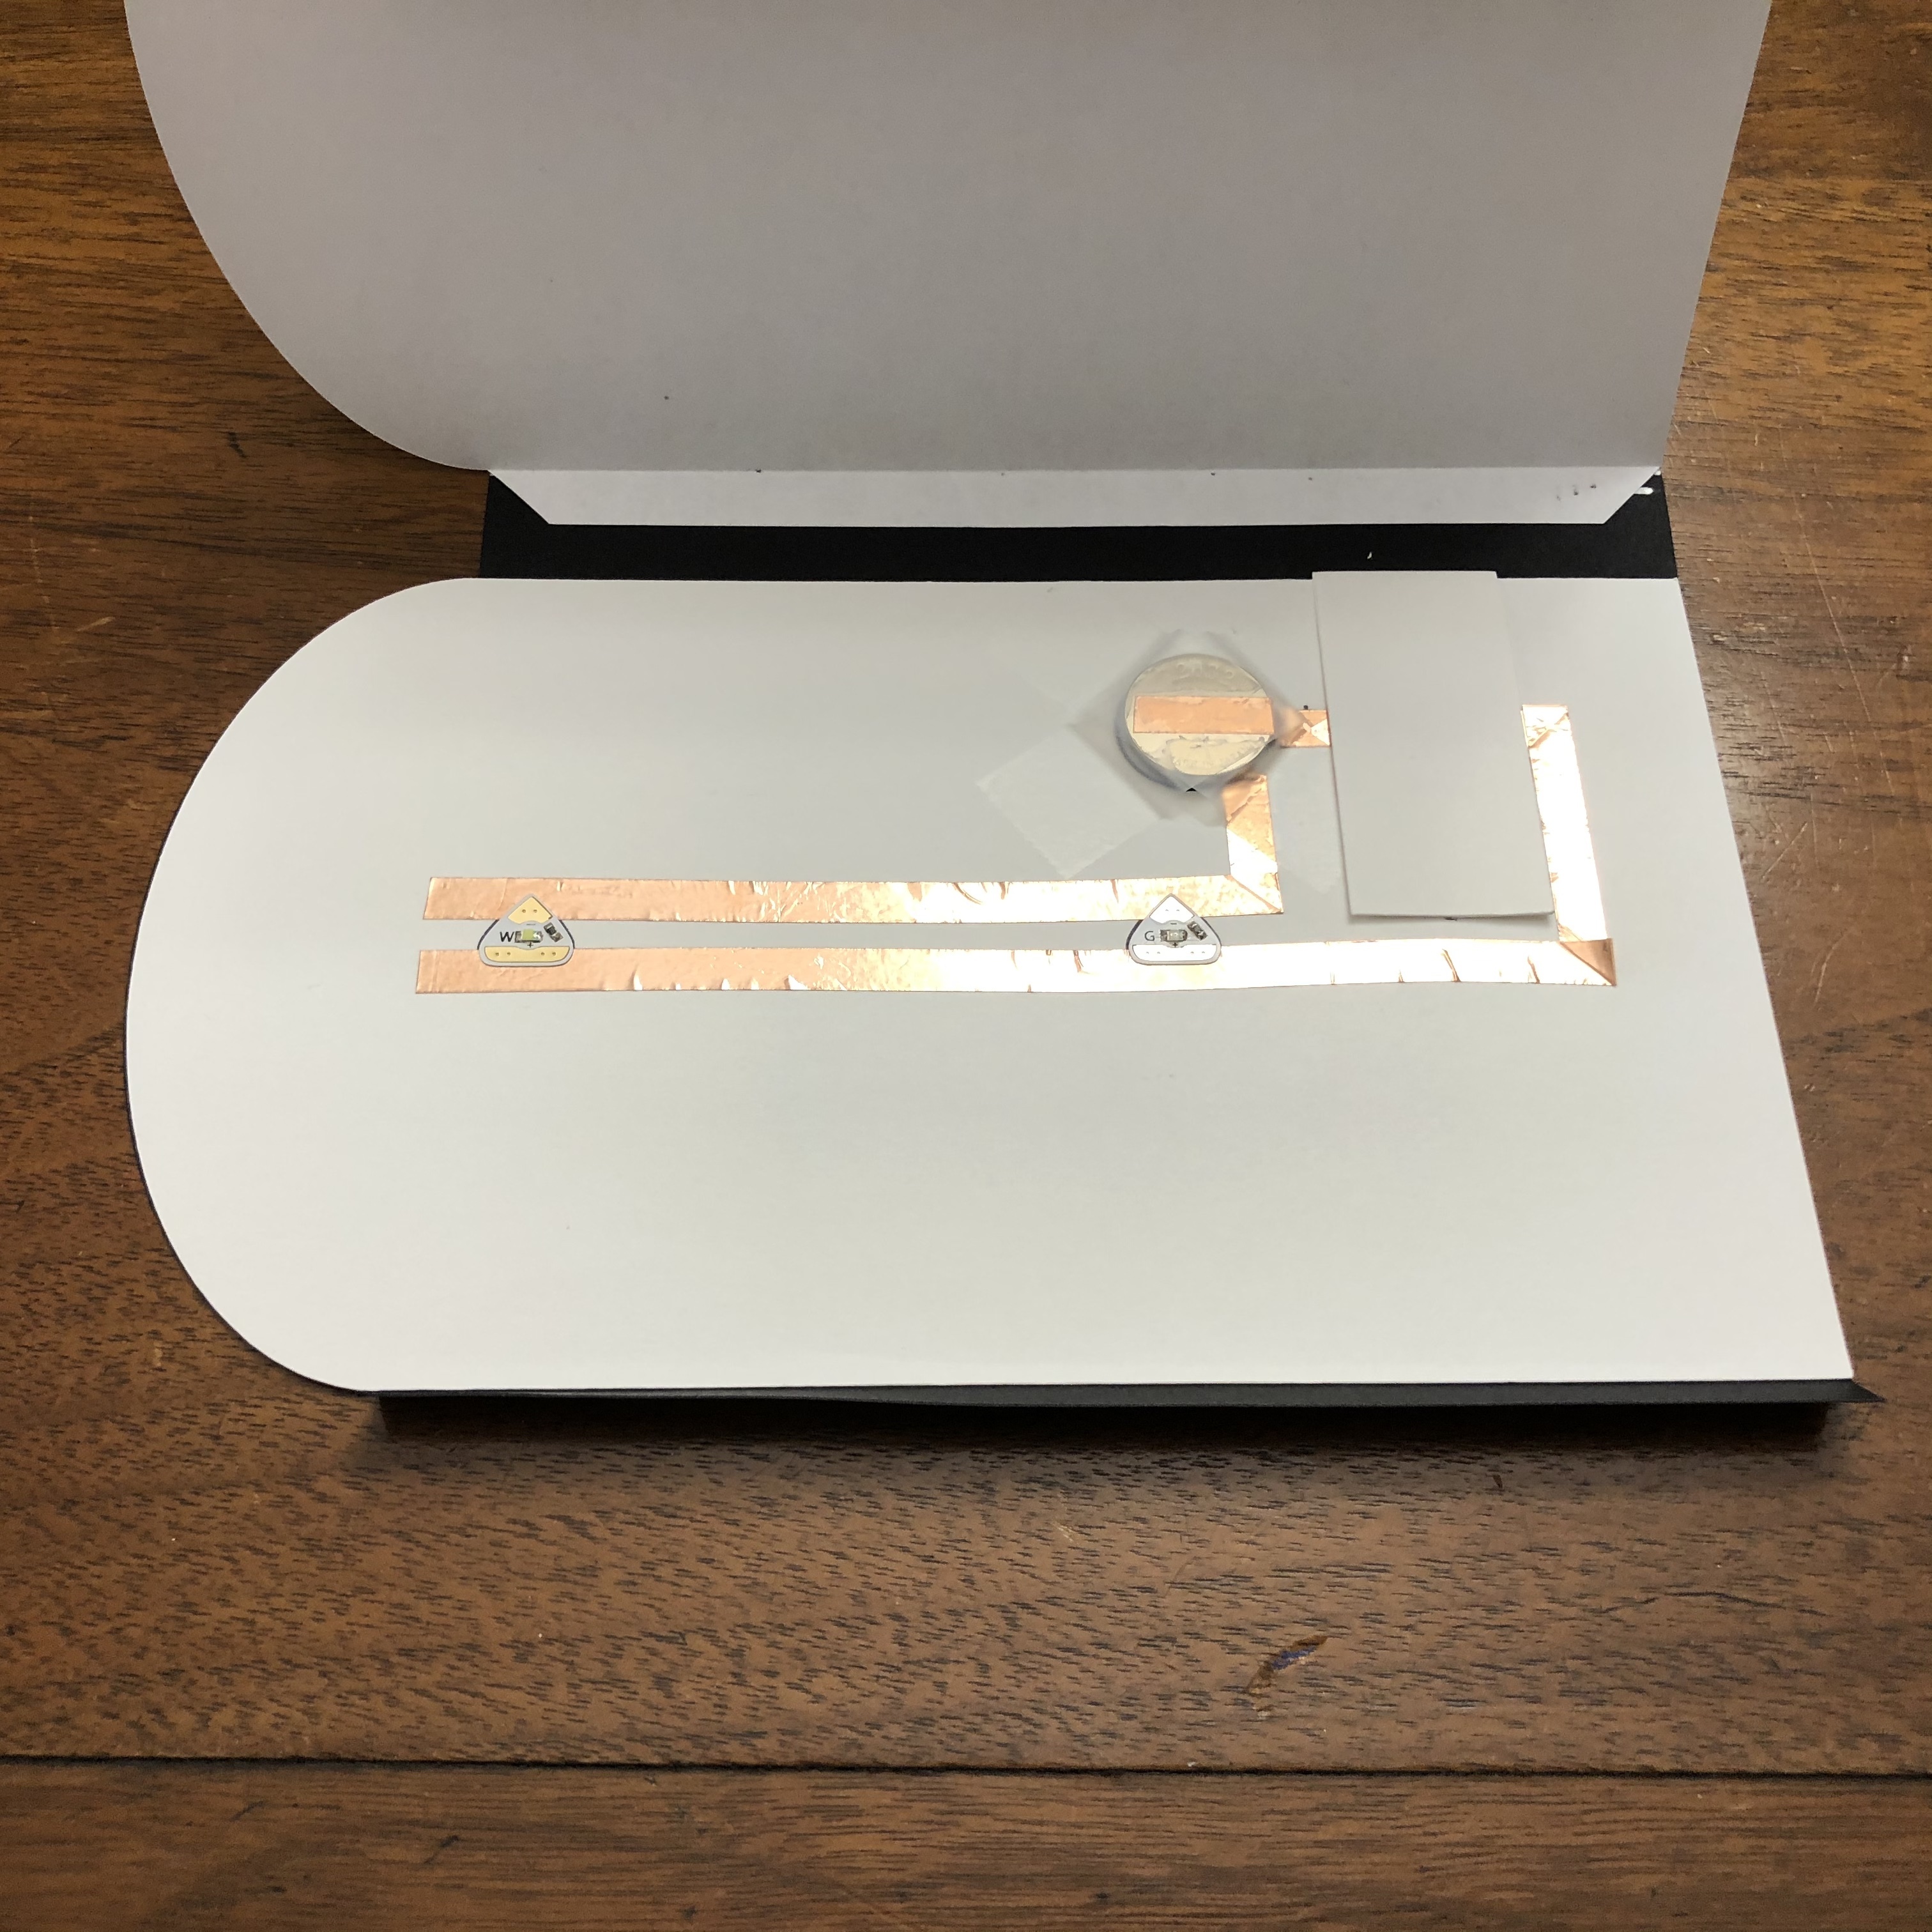
Apply the copper tape along the negative path. To turn the tape, pull it back in the opposite direction of where you want it to go, and then pull it forward making a little fold in the tape so it lays flat. Make the positive path on the bulb side of the switch - start by putting almost an inch of tape into the slot and sticking it to the back side as shown. Lay the path between the battery and the switch. Feed some extra tape into the slot in the same manner as used with the previous path. Put the battery down and run the positive tape up on top of the battery. Use a scotch tape X to secure the battery. Stick the Chibitronics LEDs down on their respective spots.
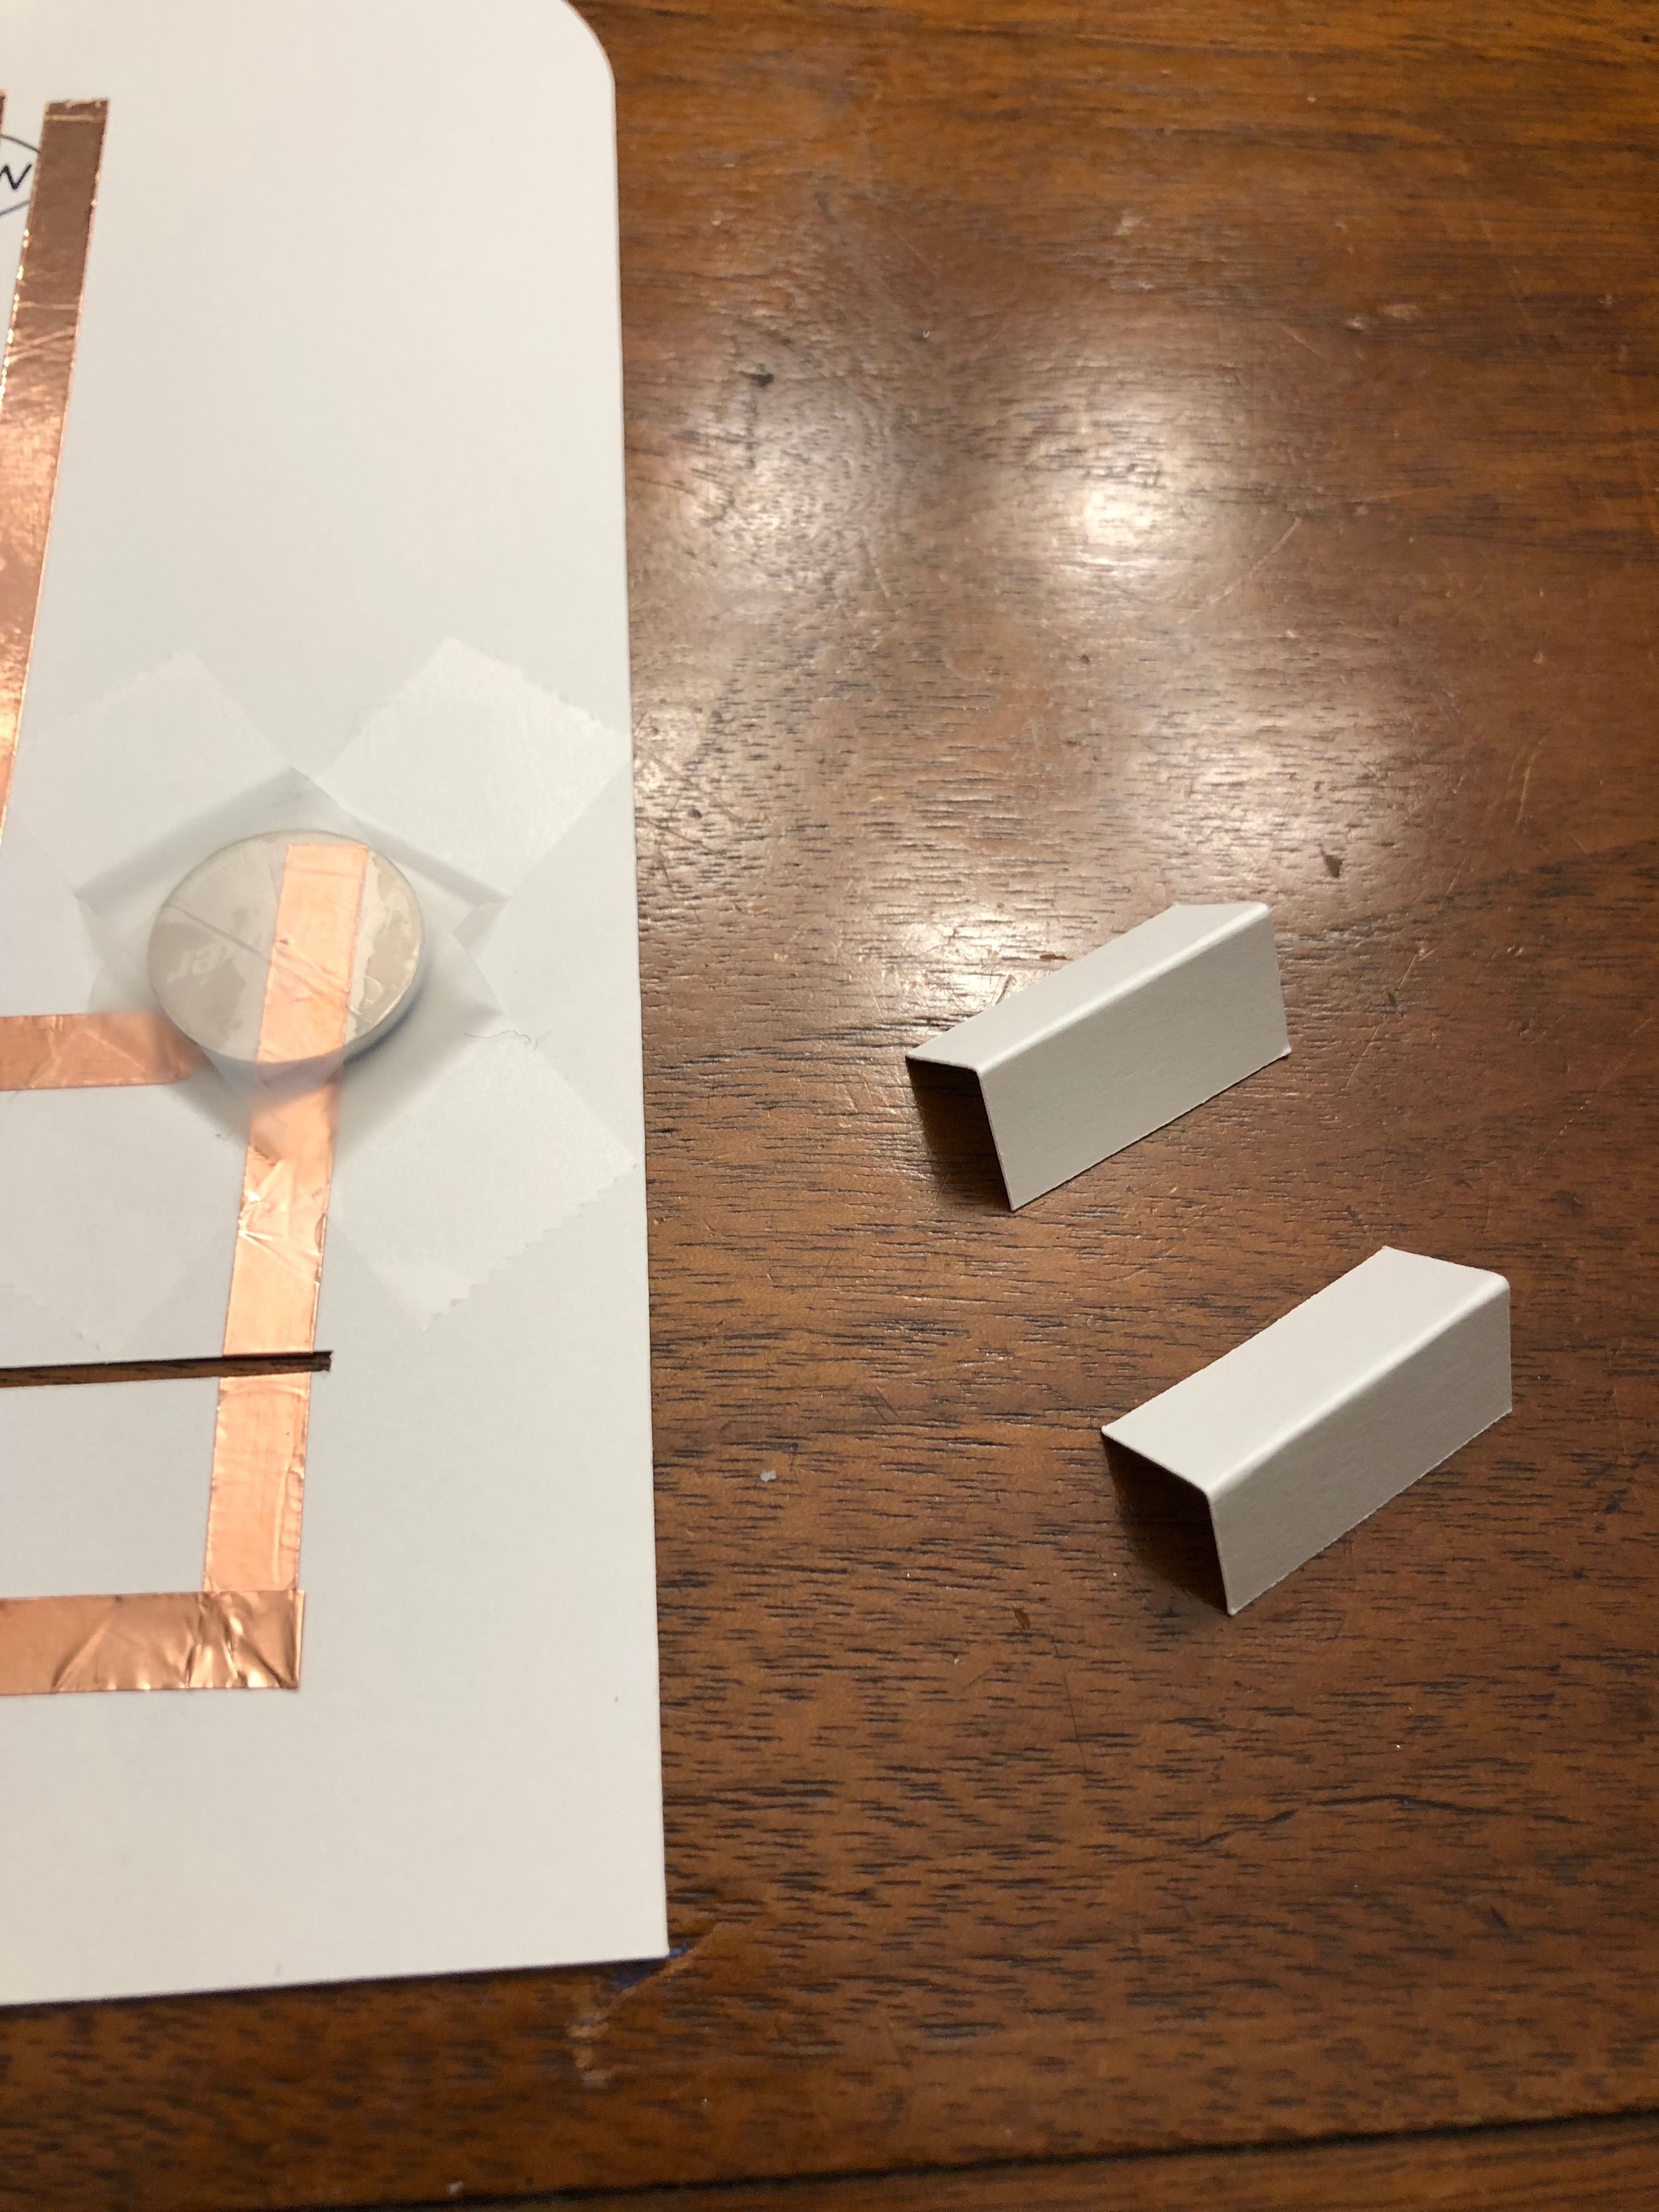
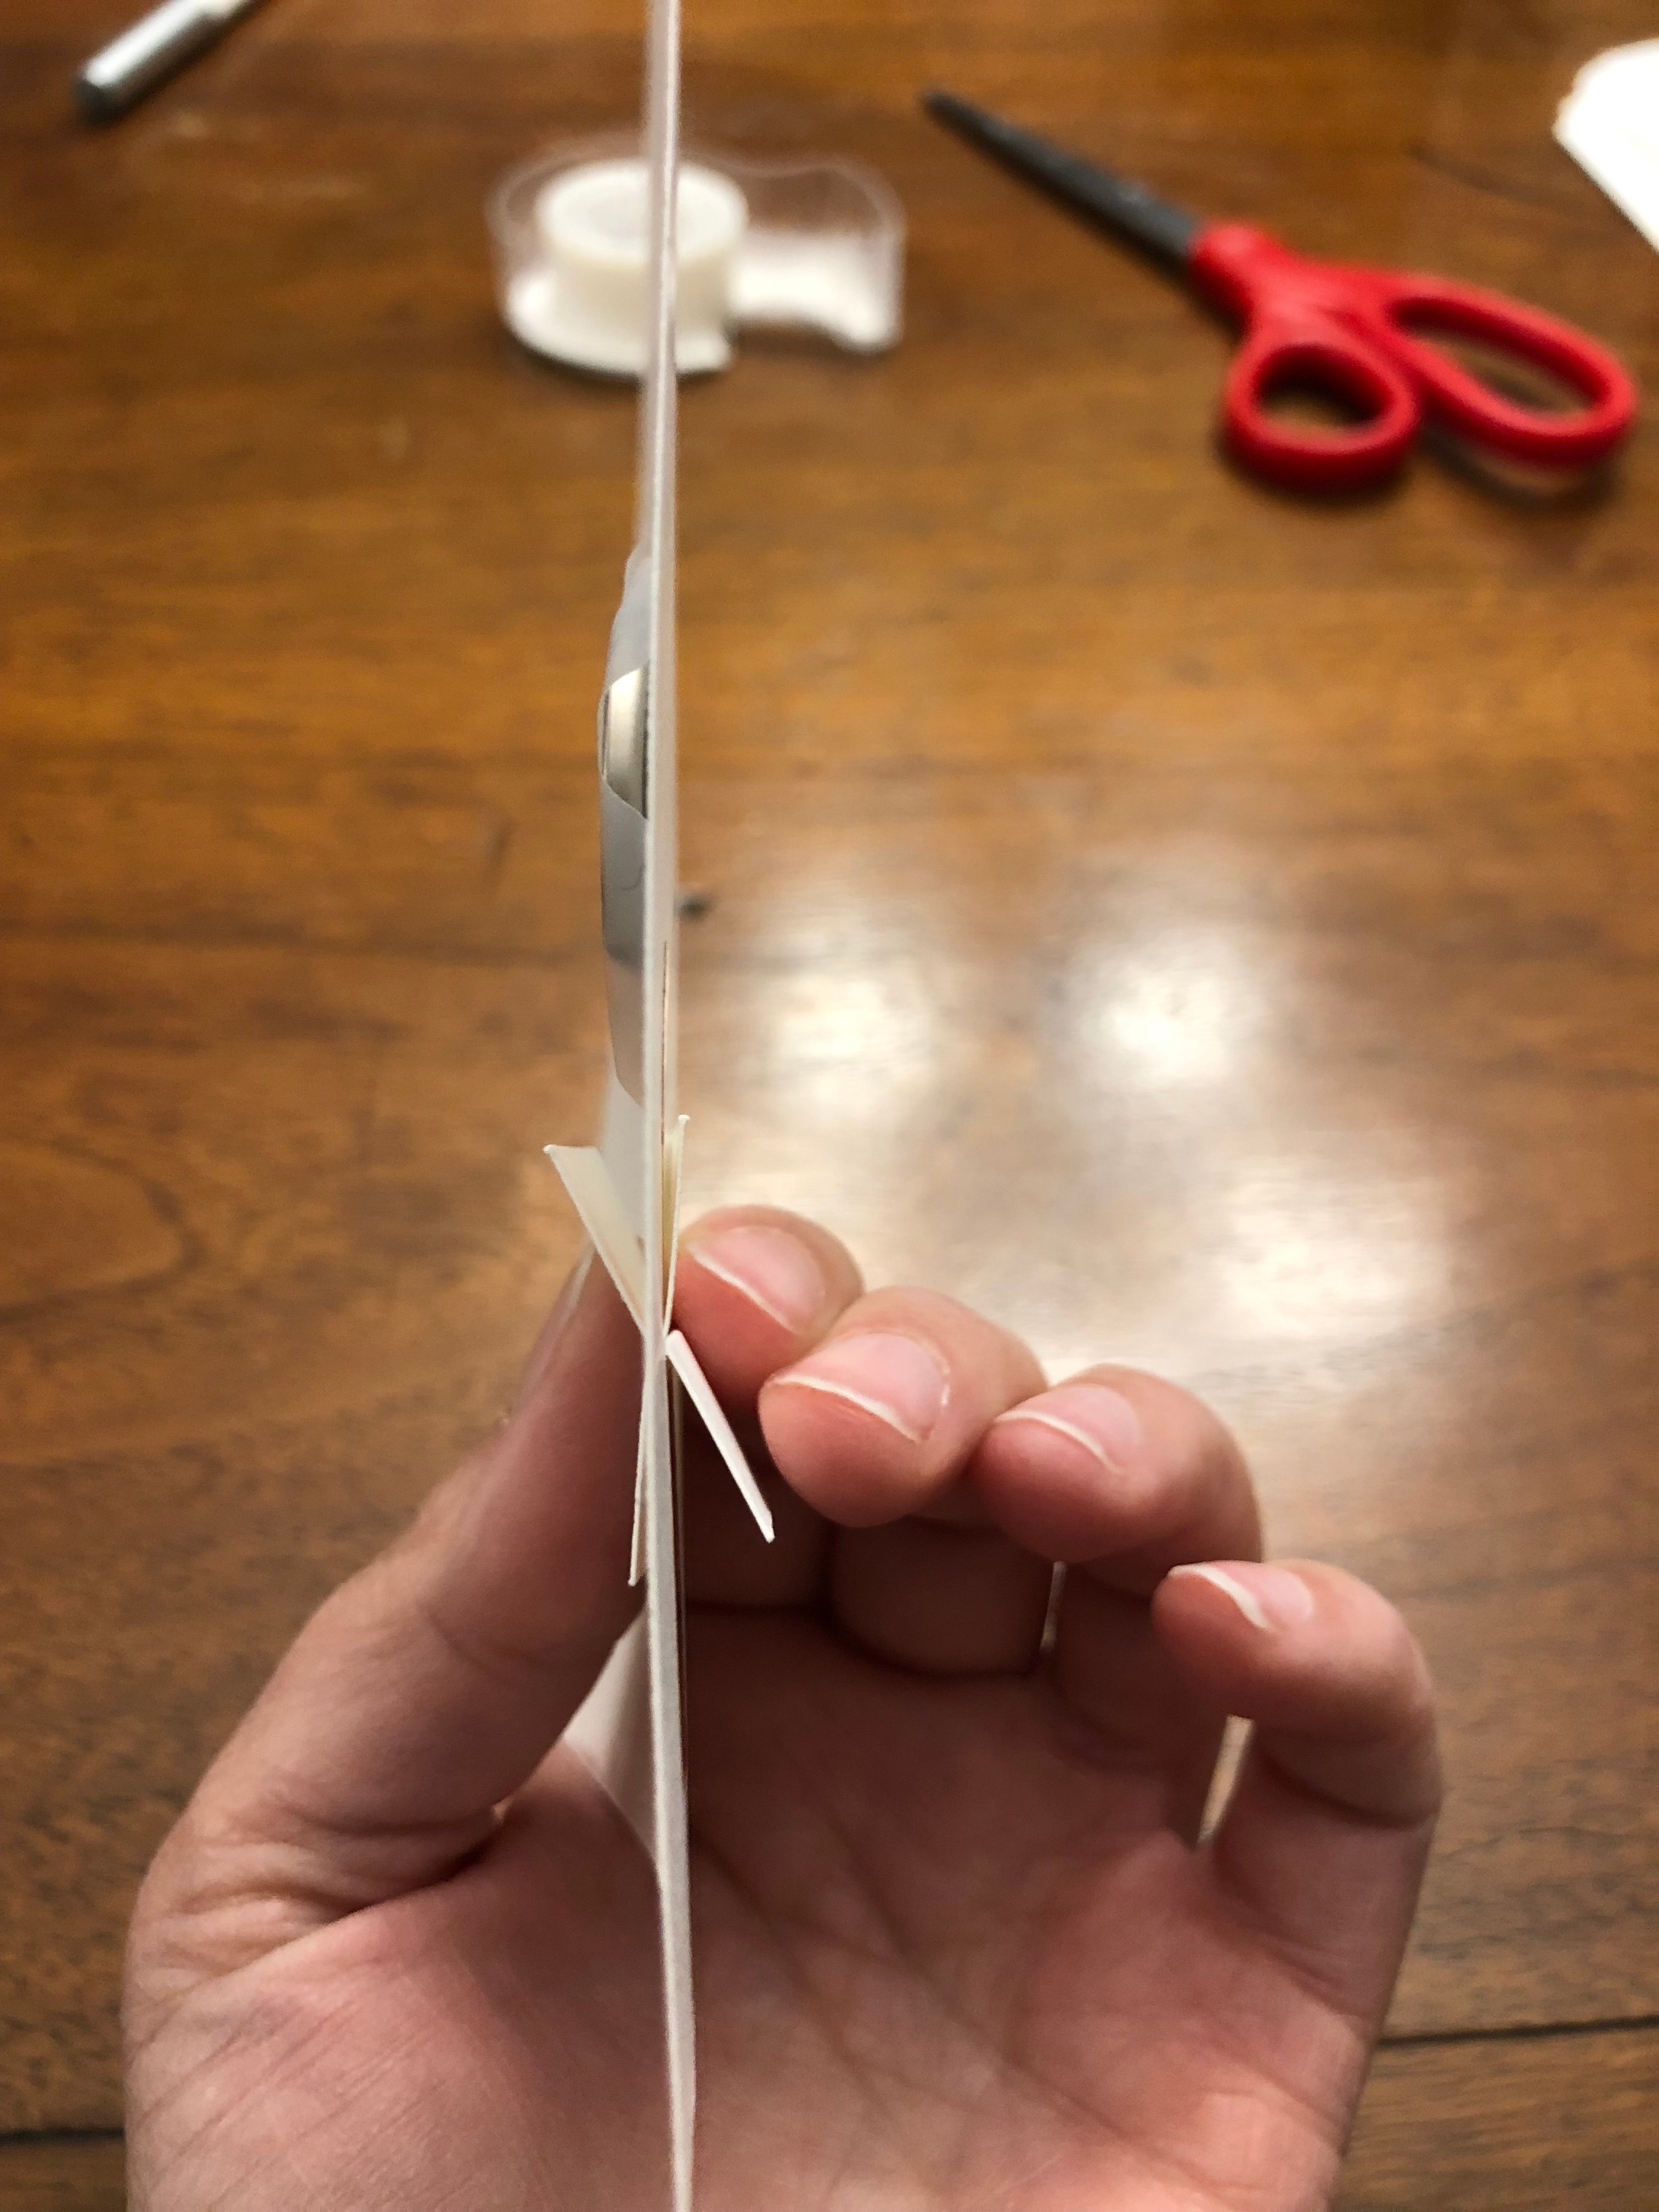
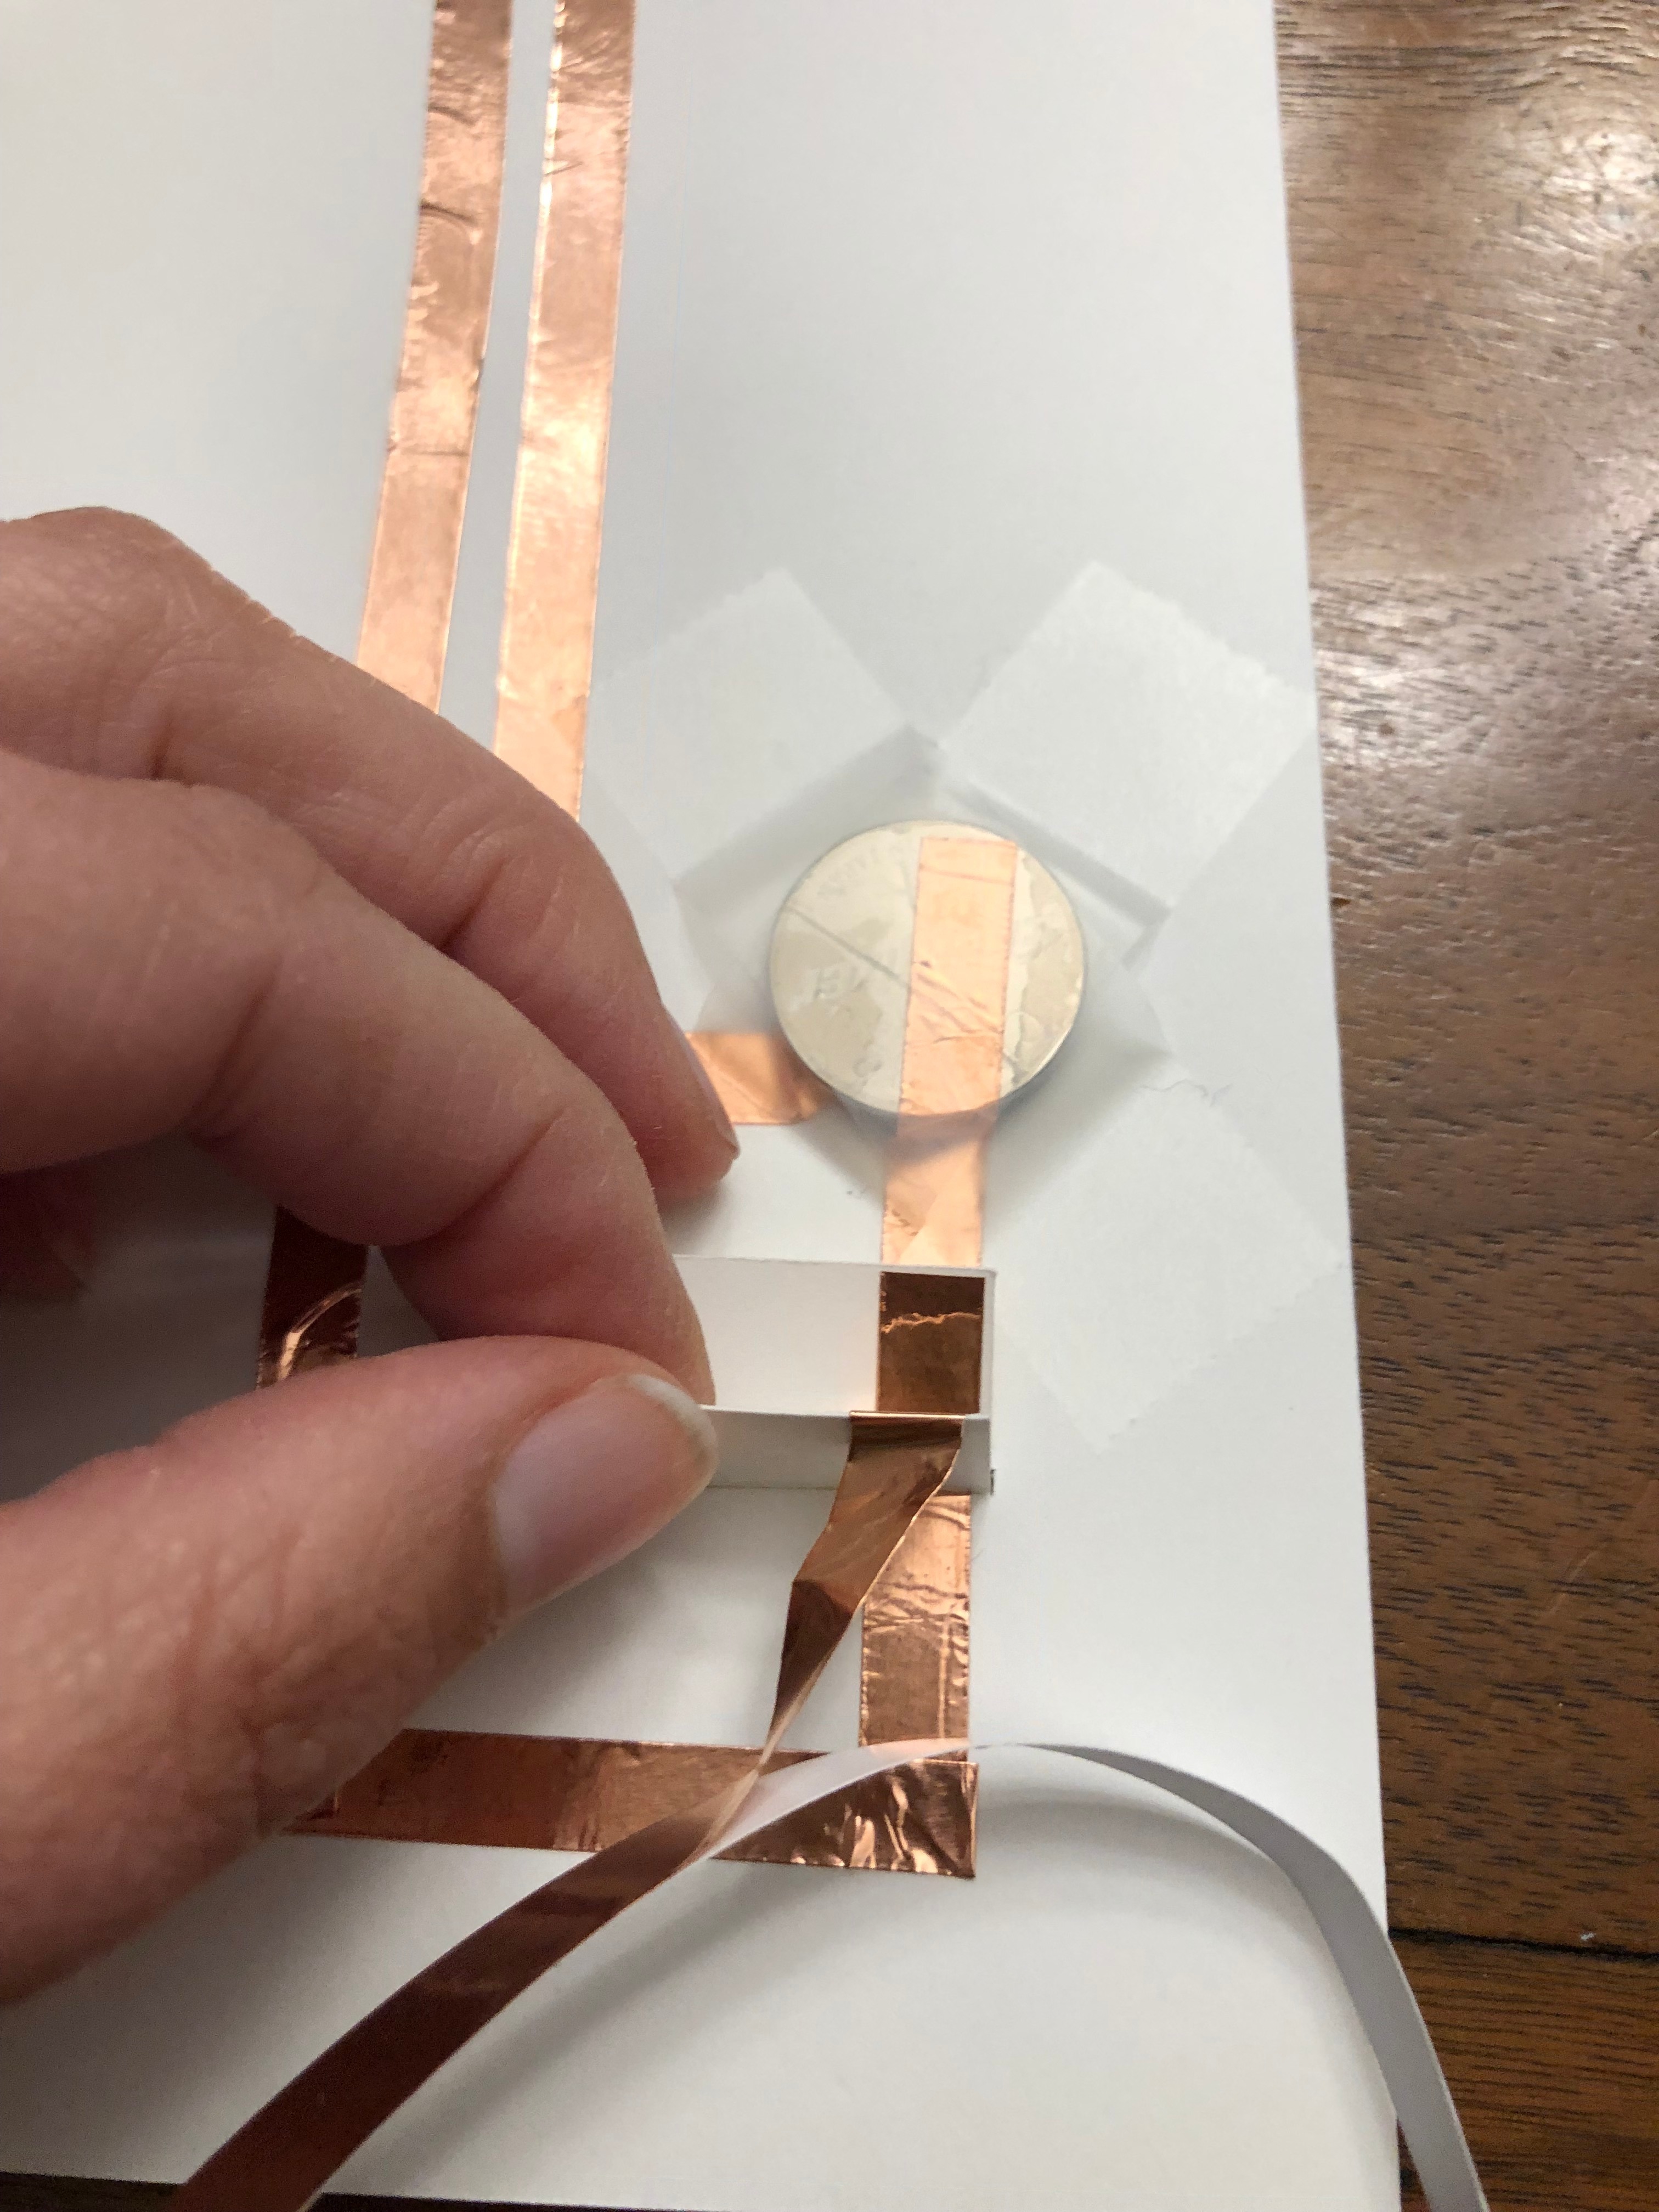
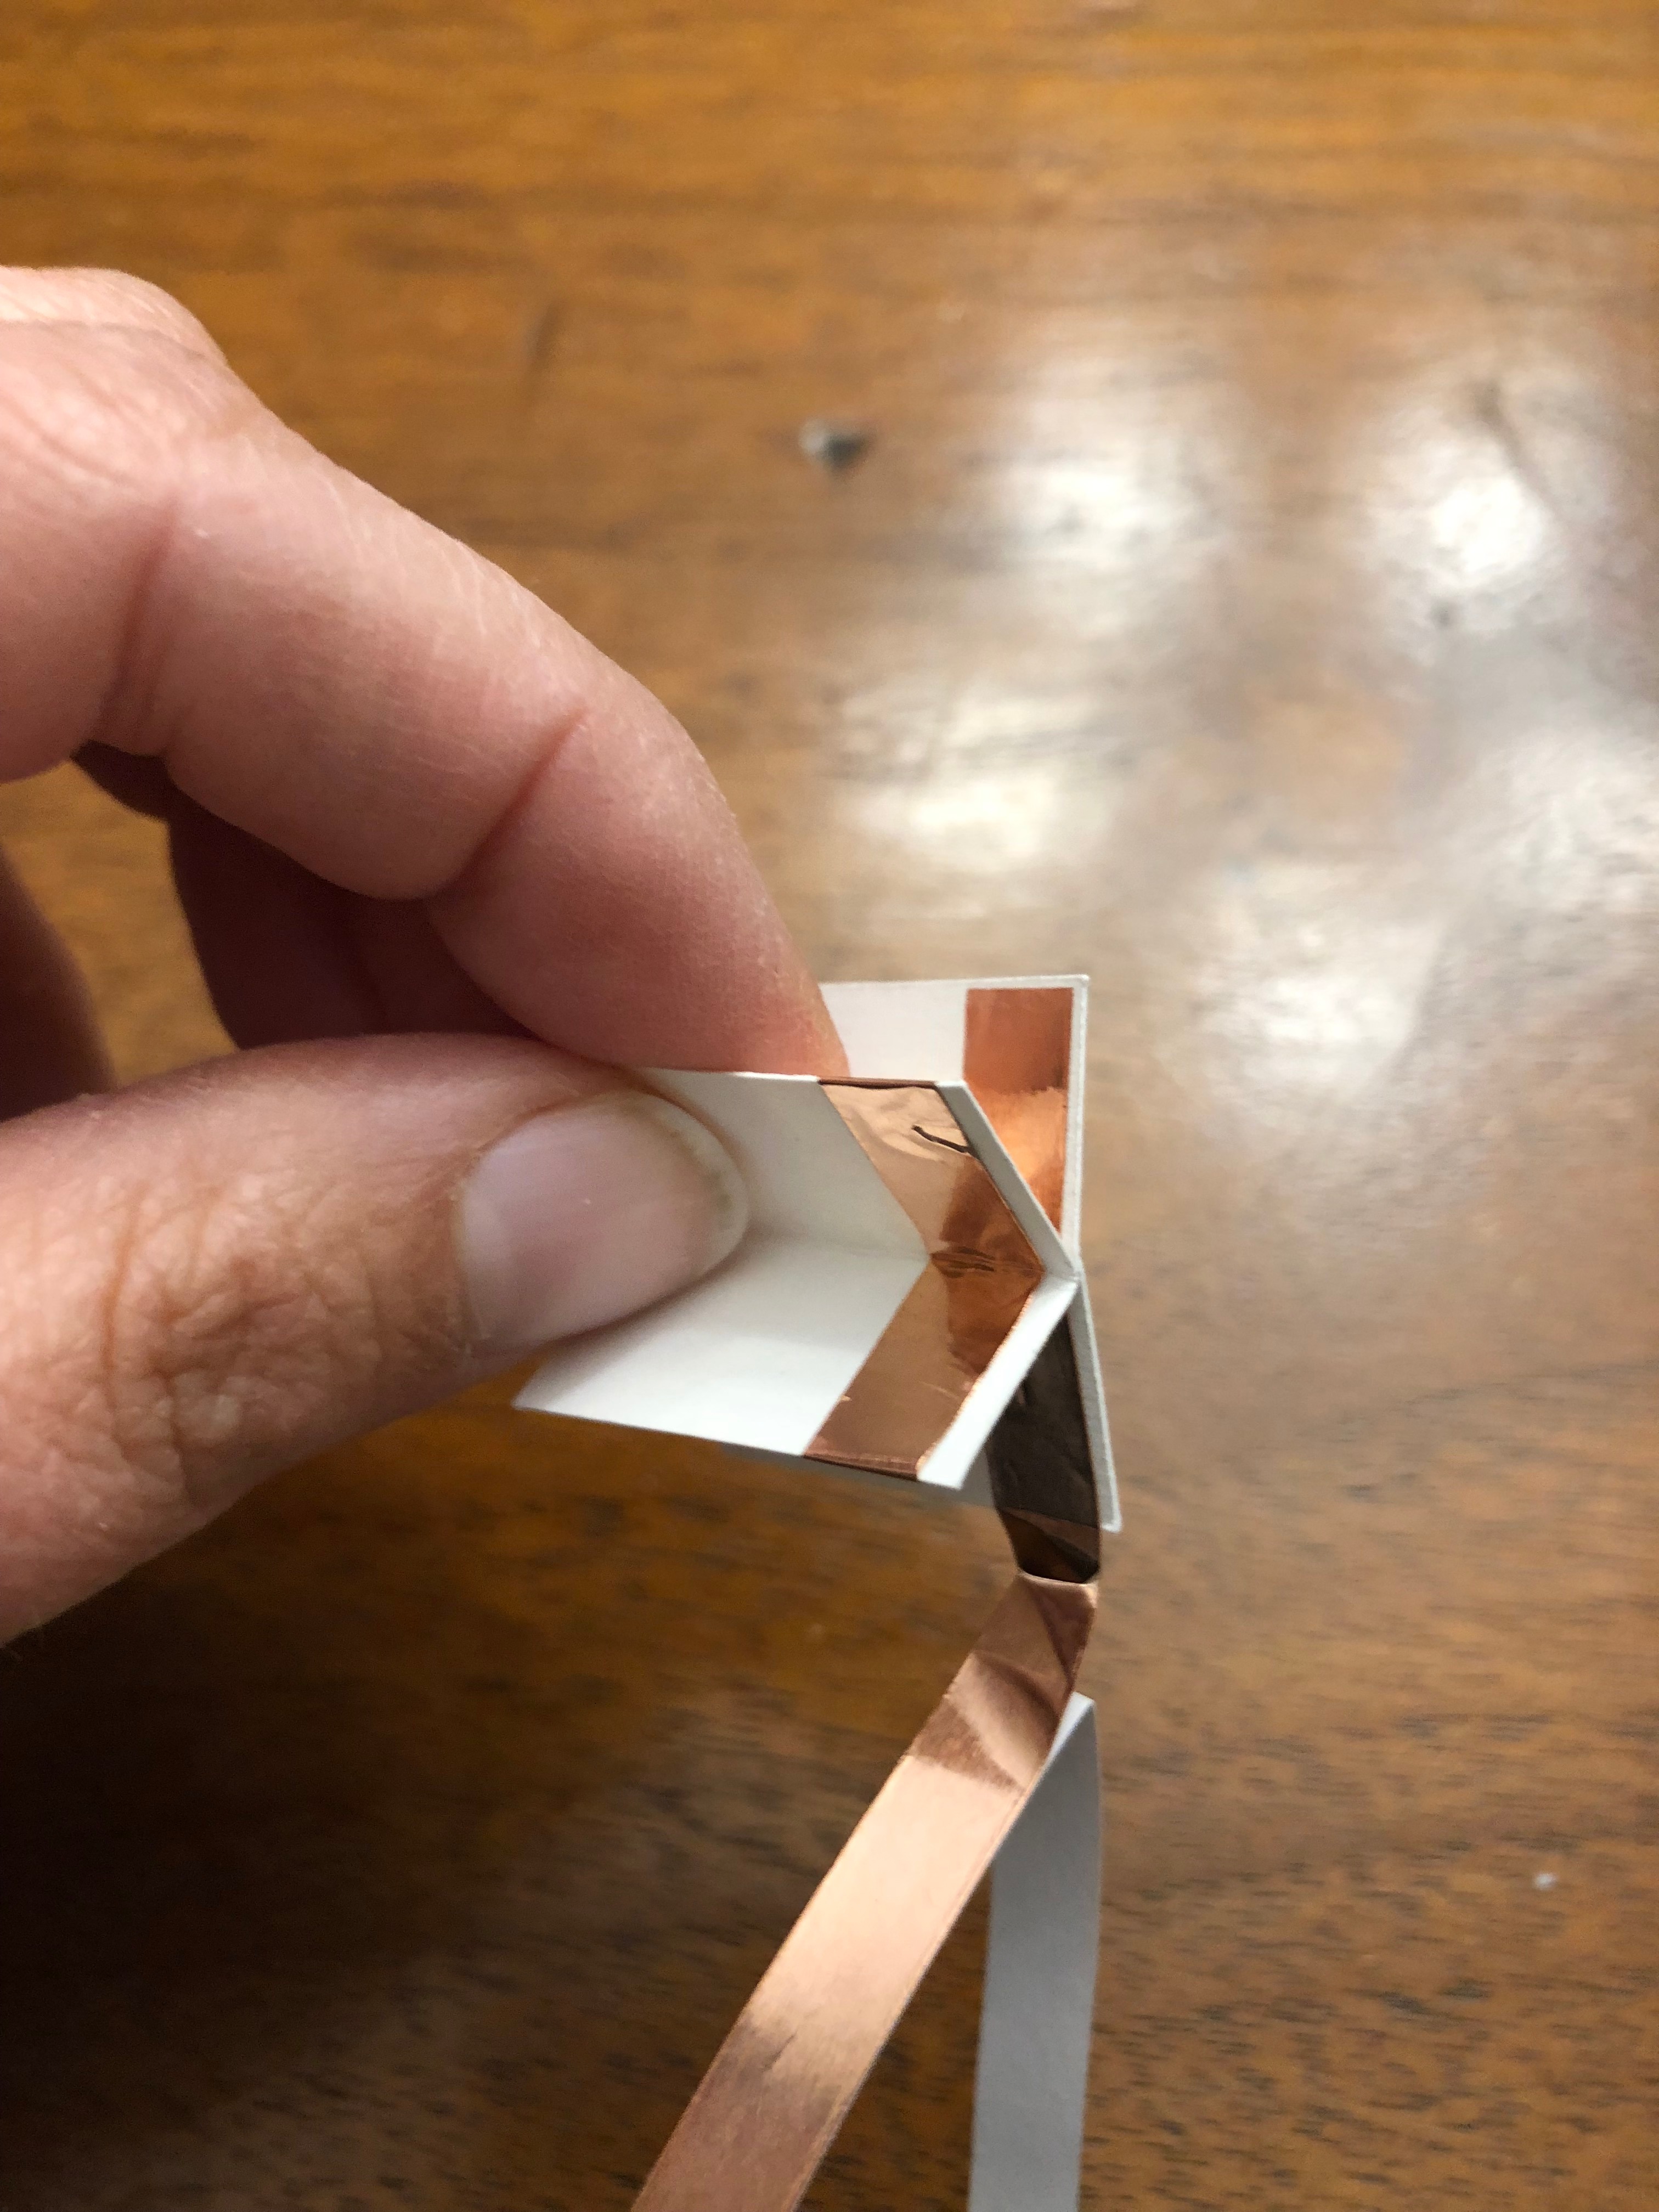
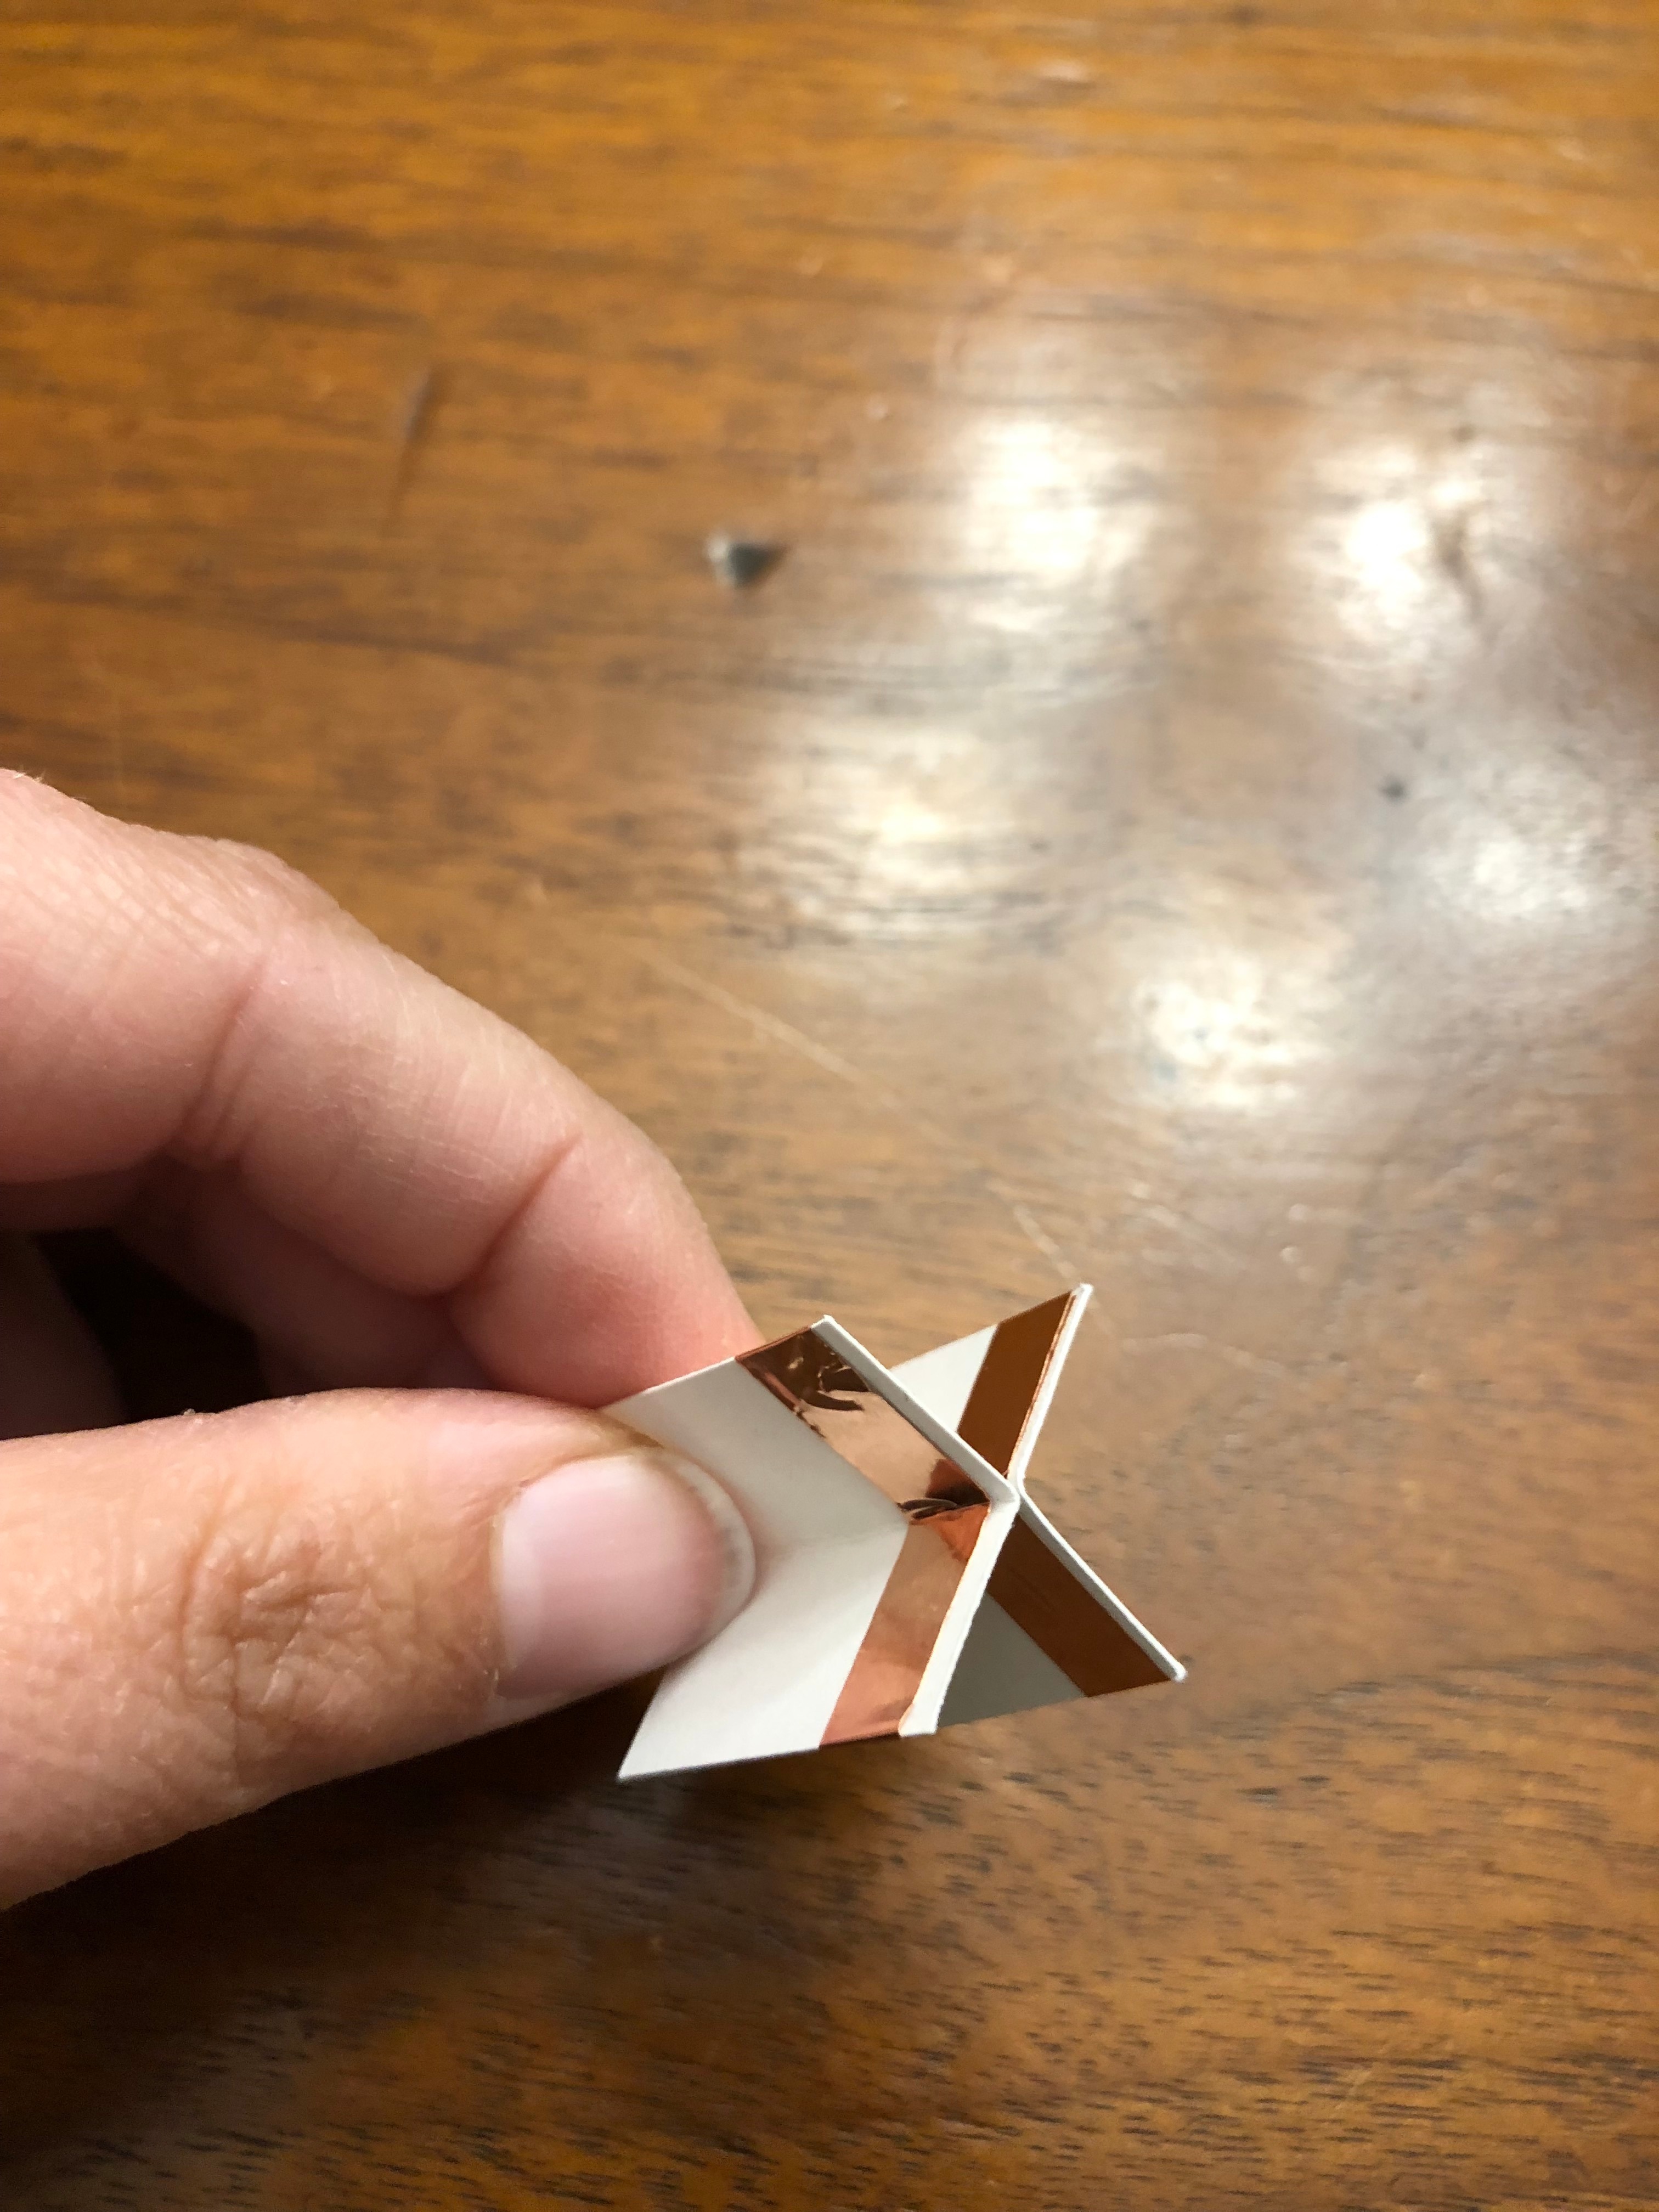
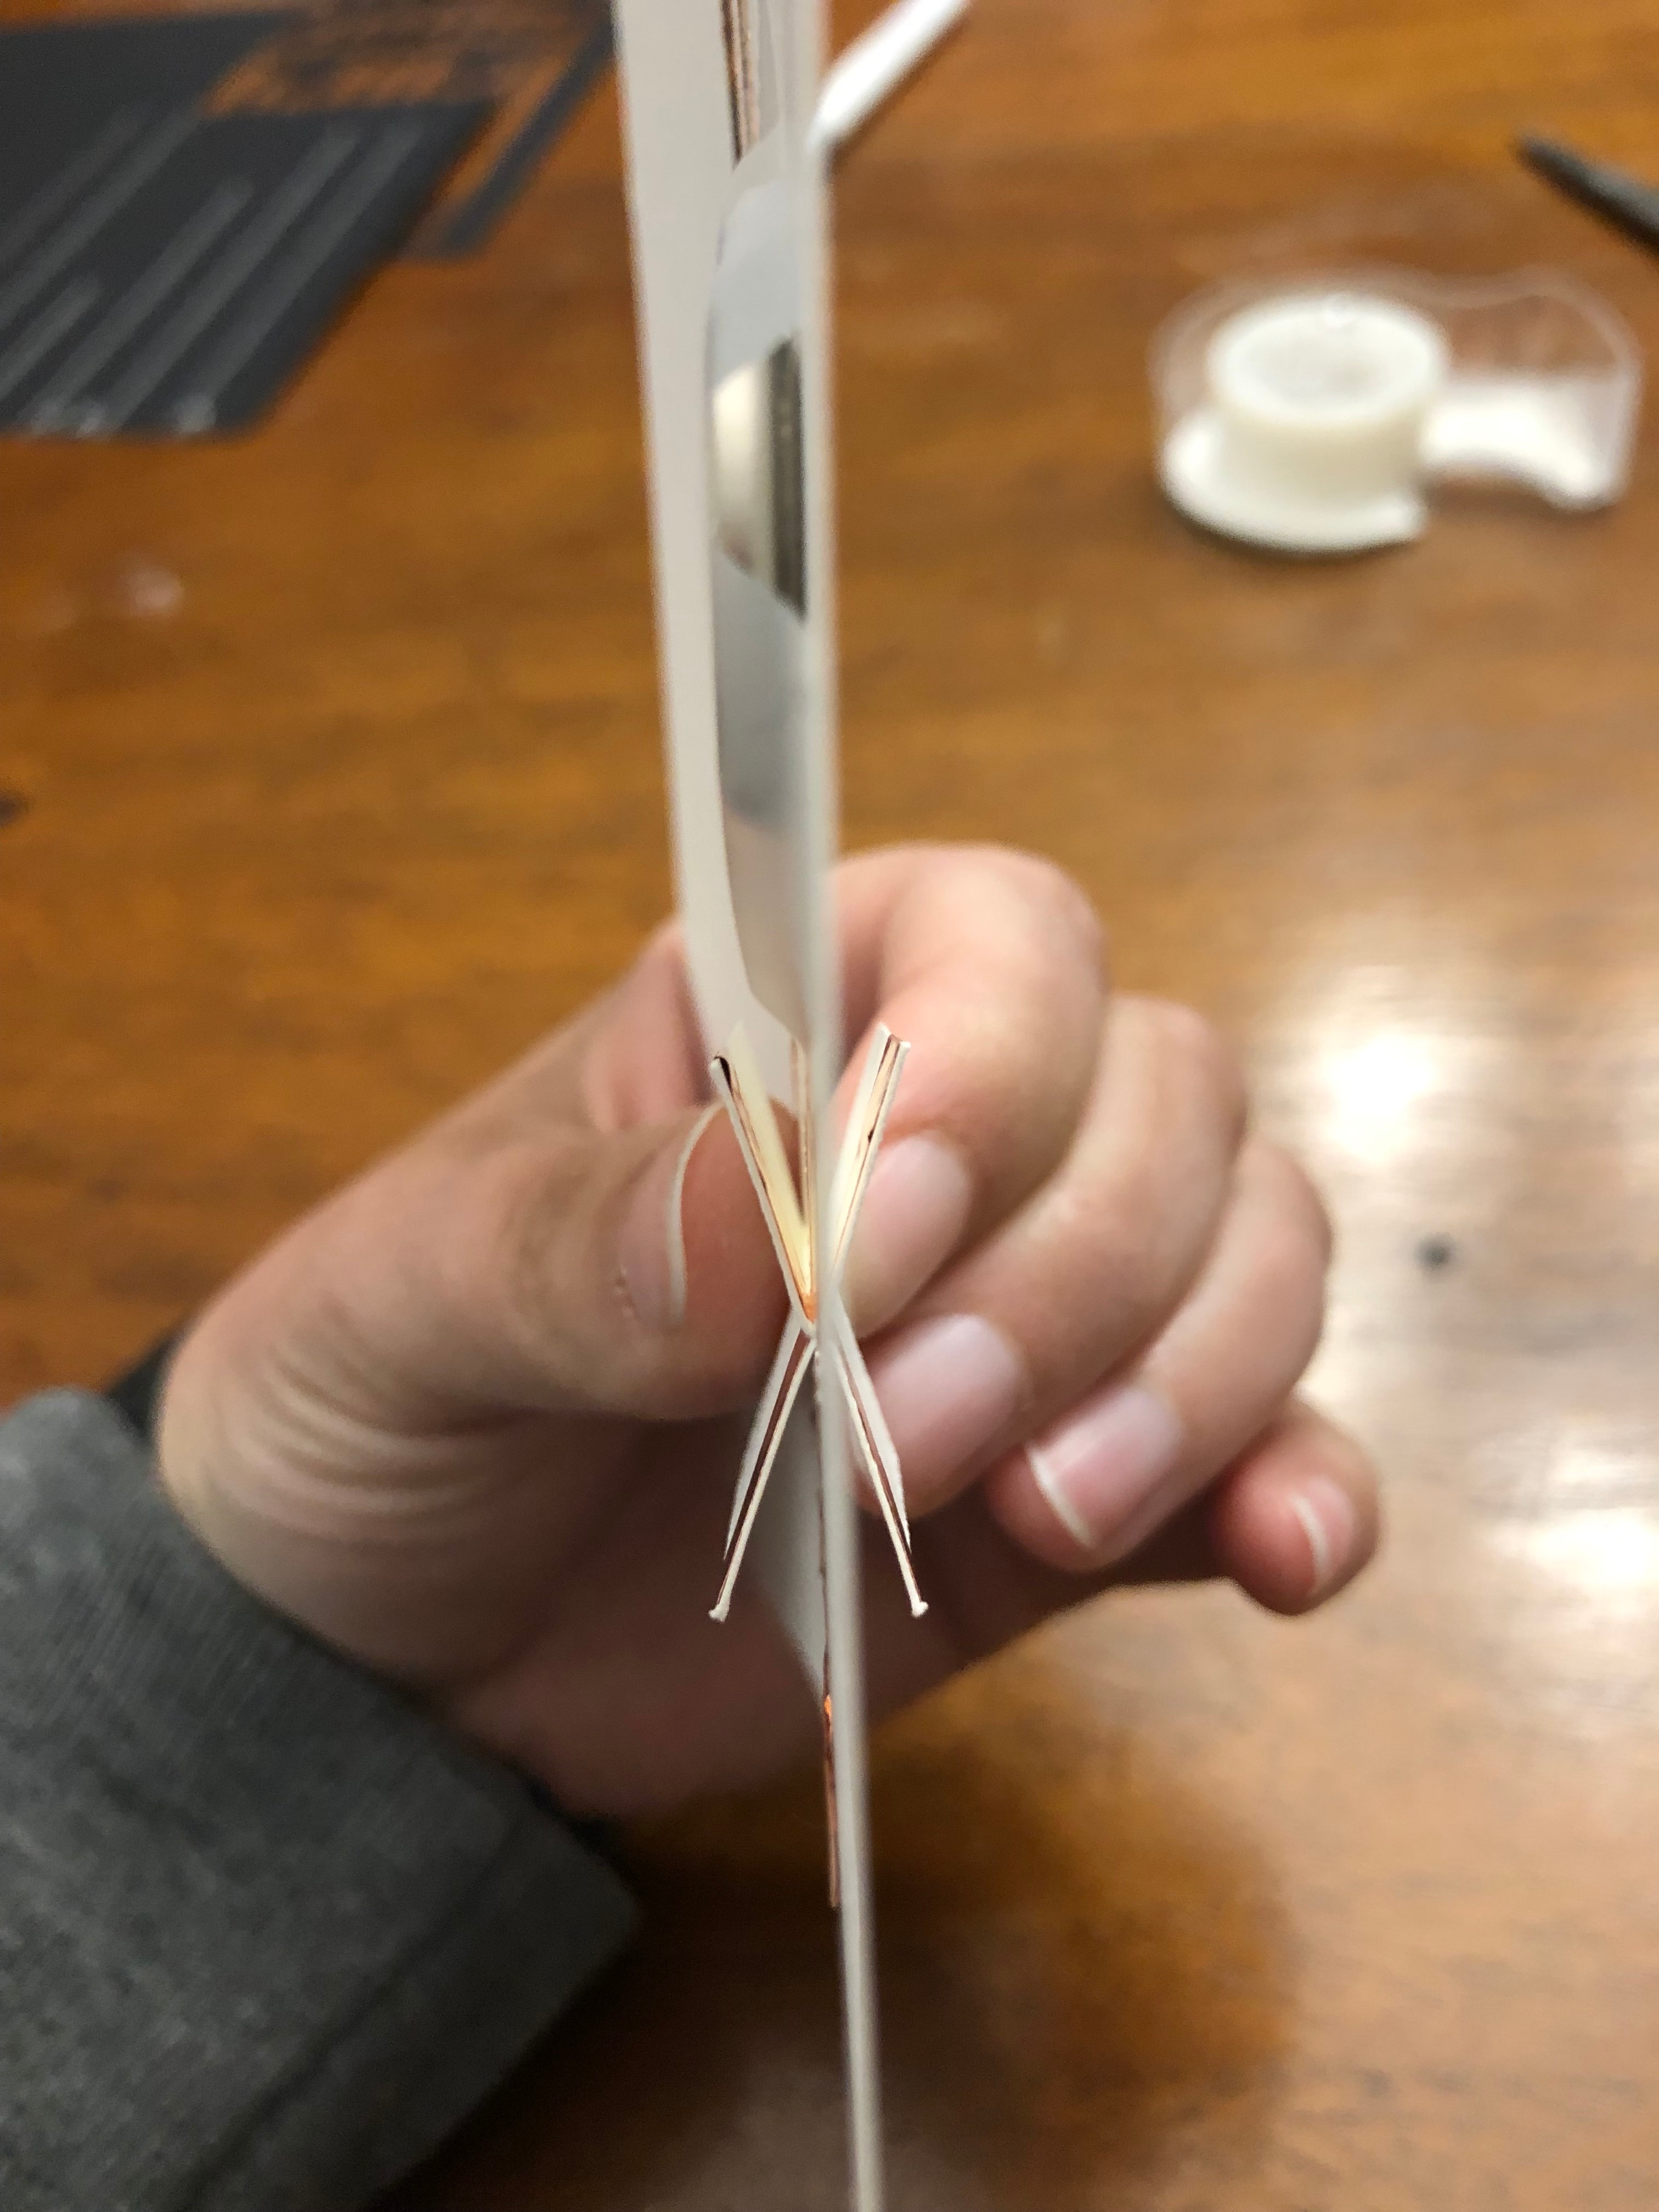
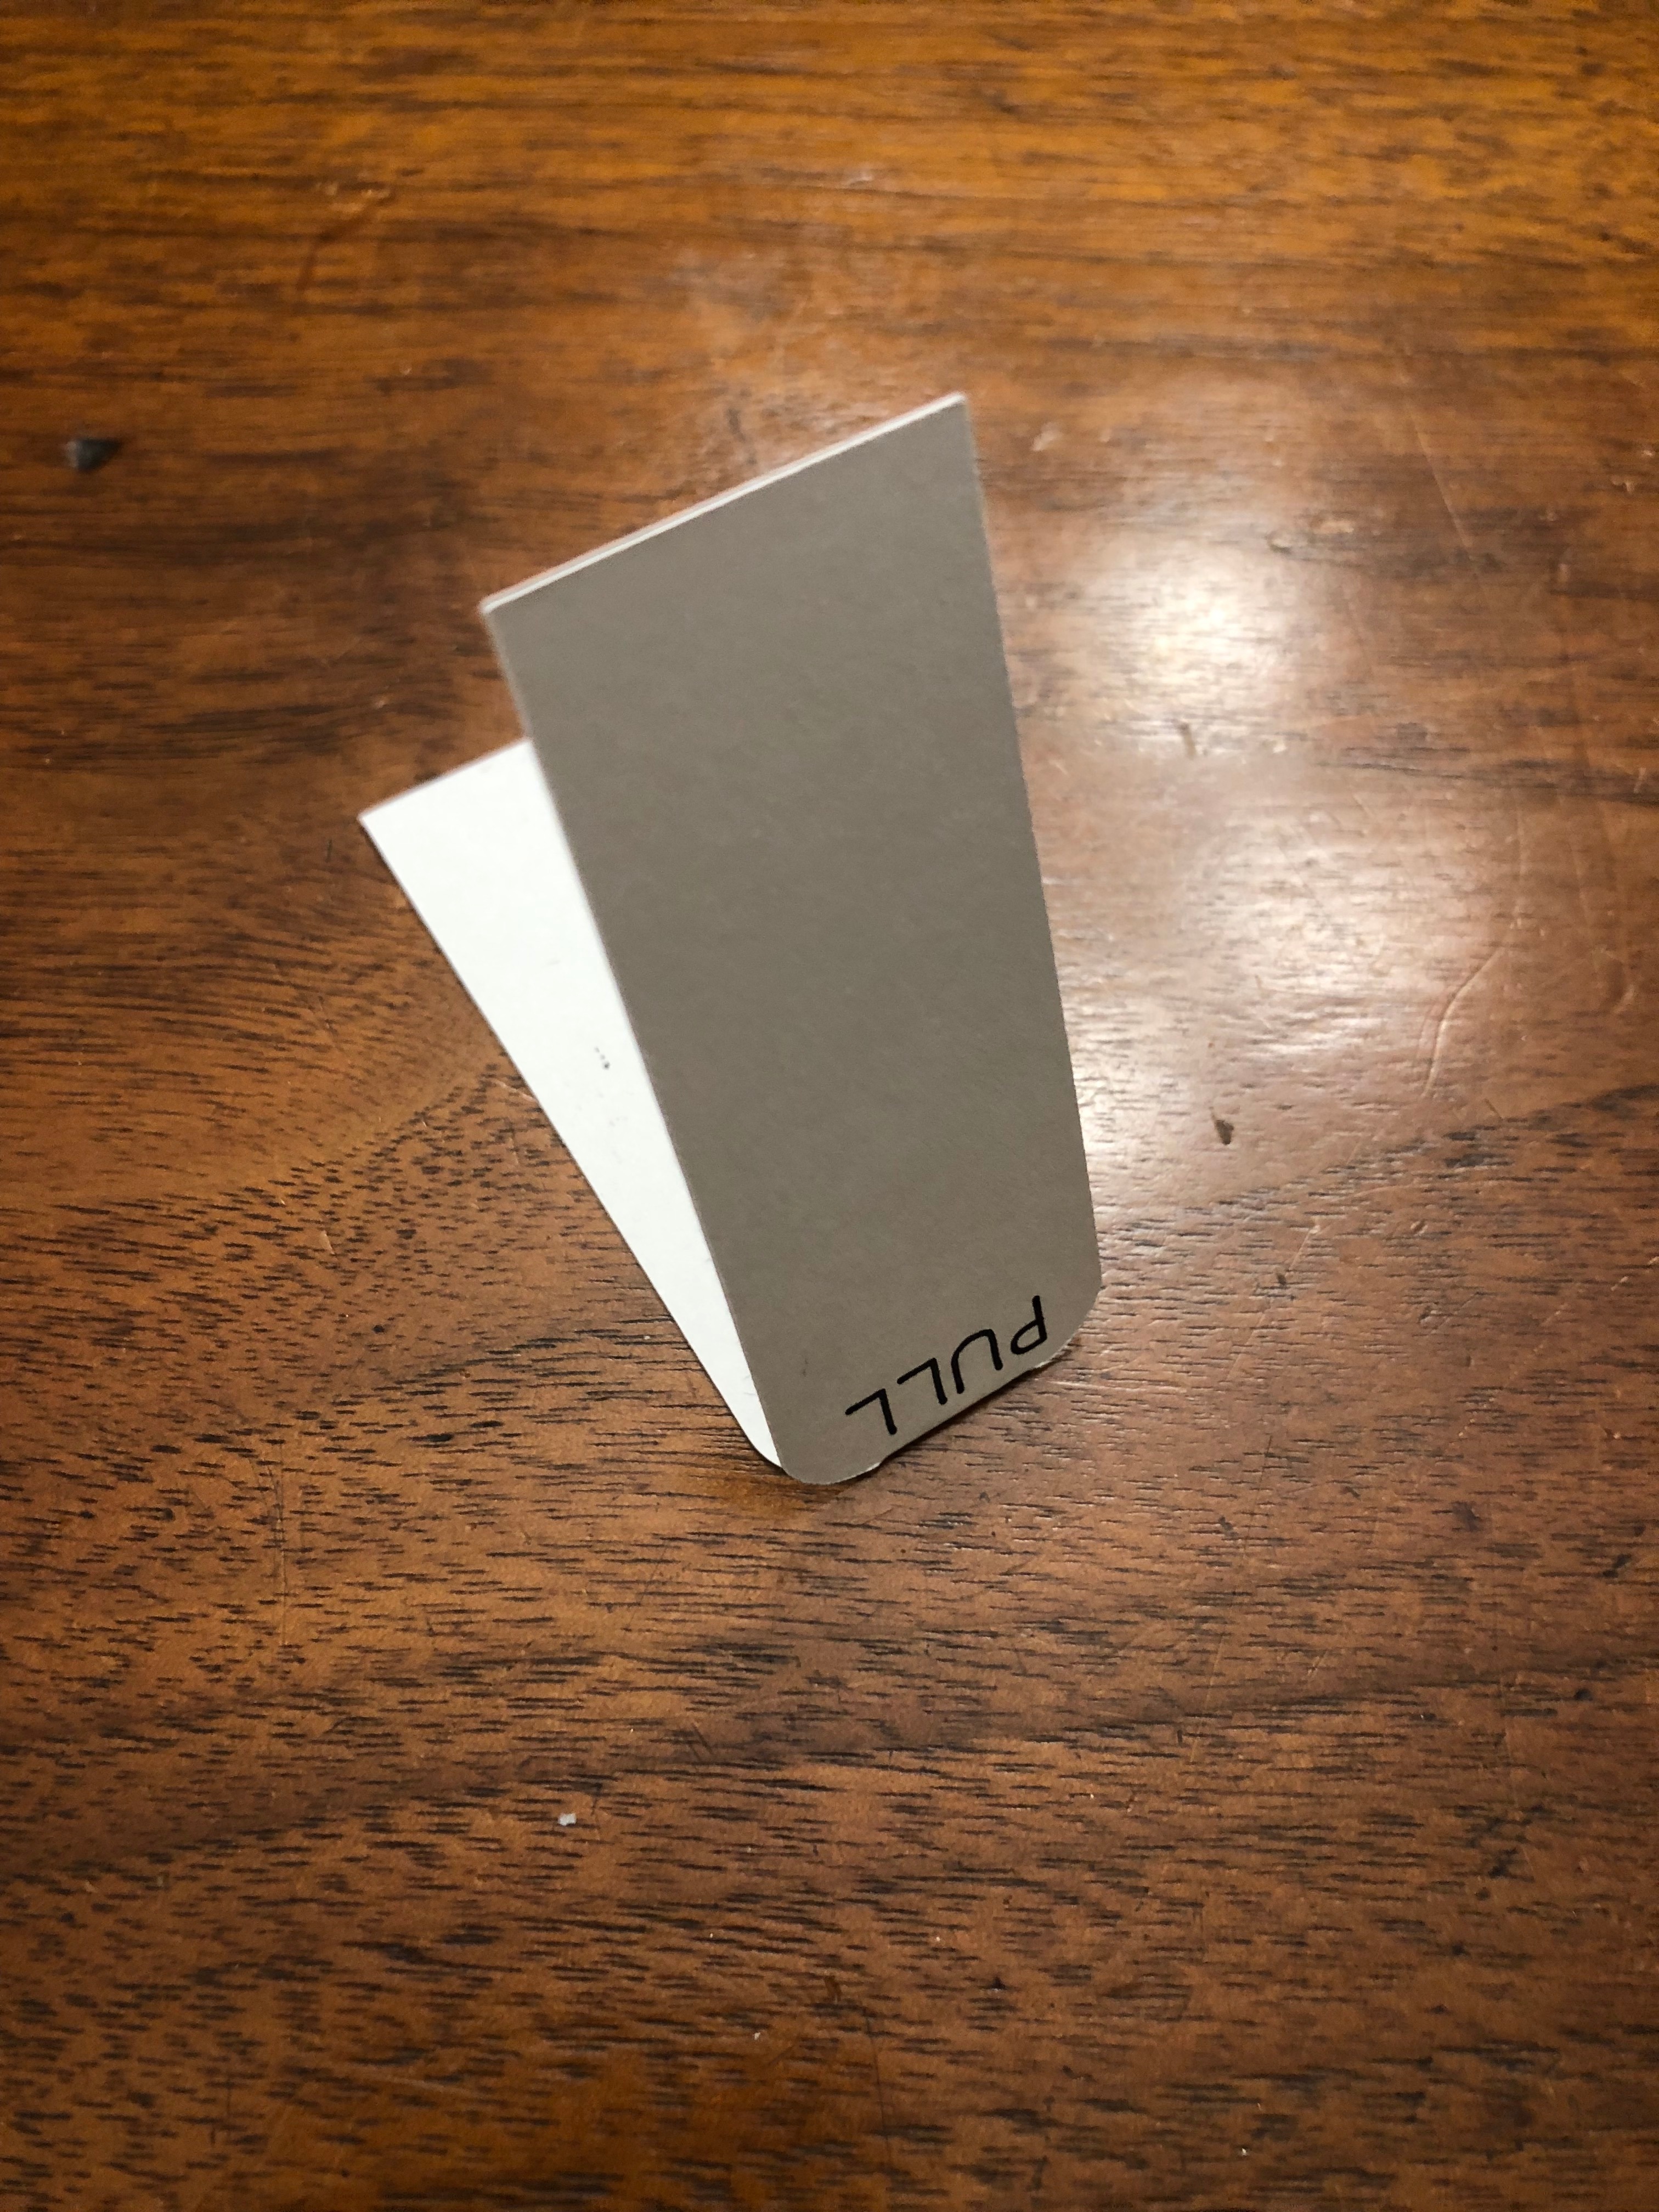
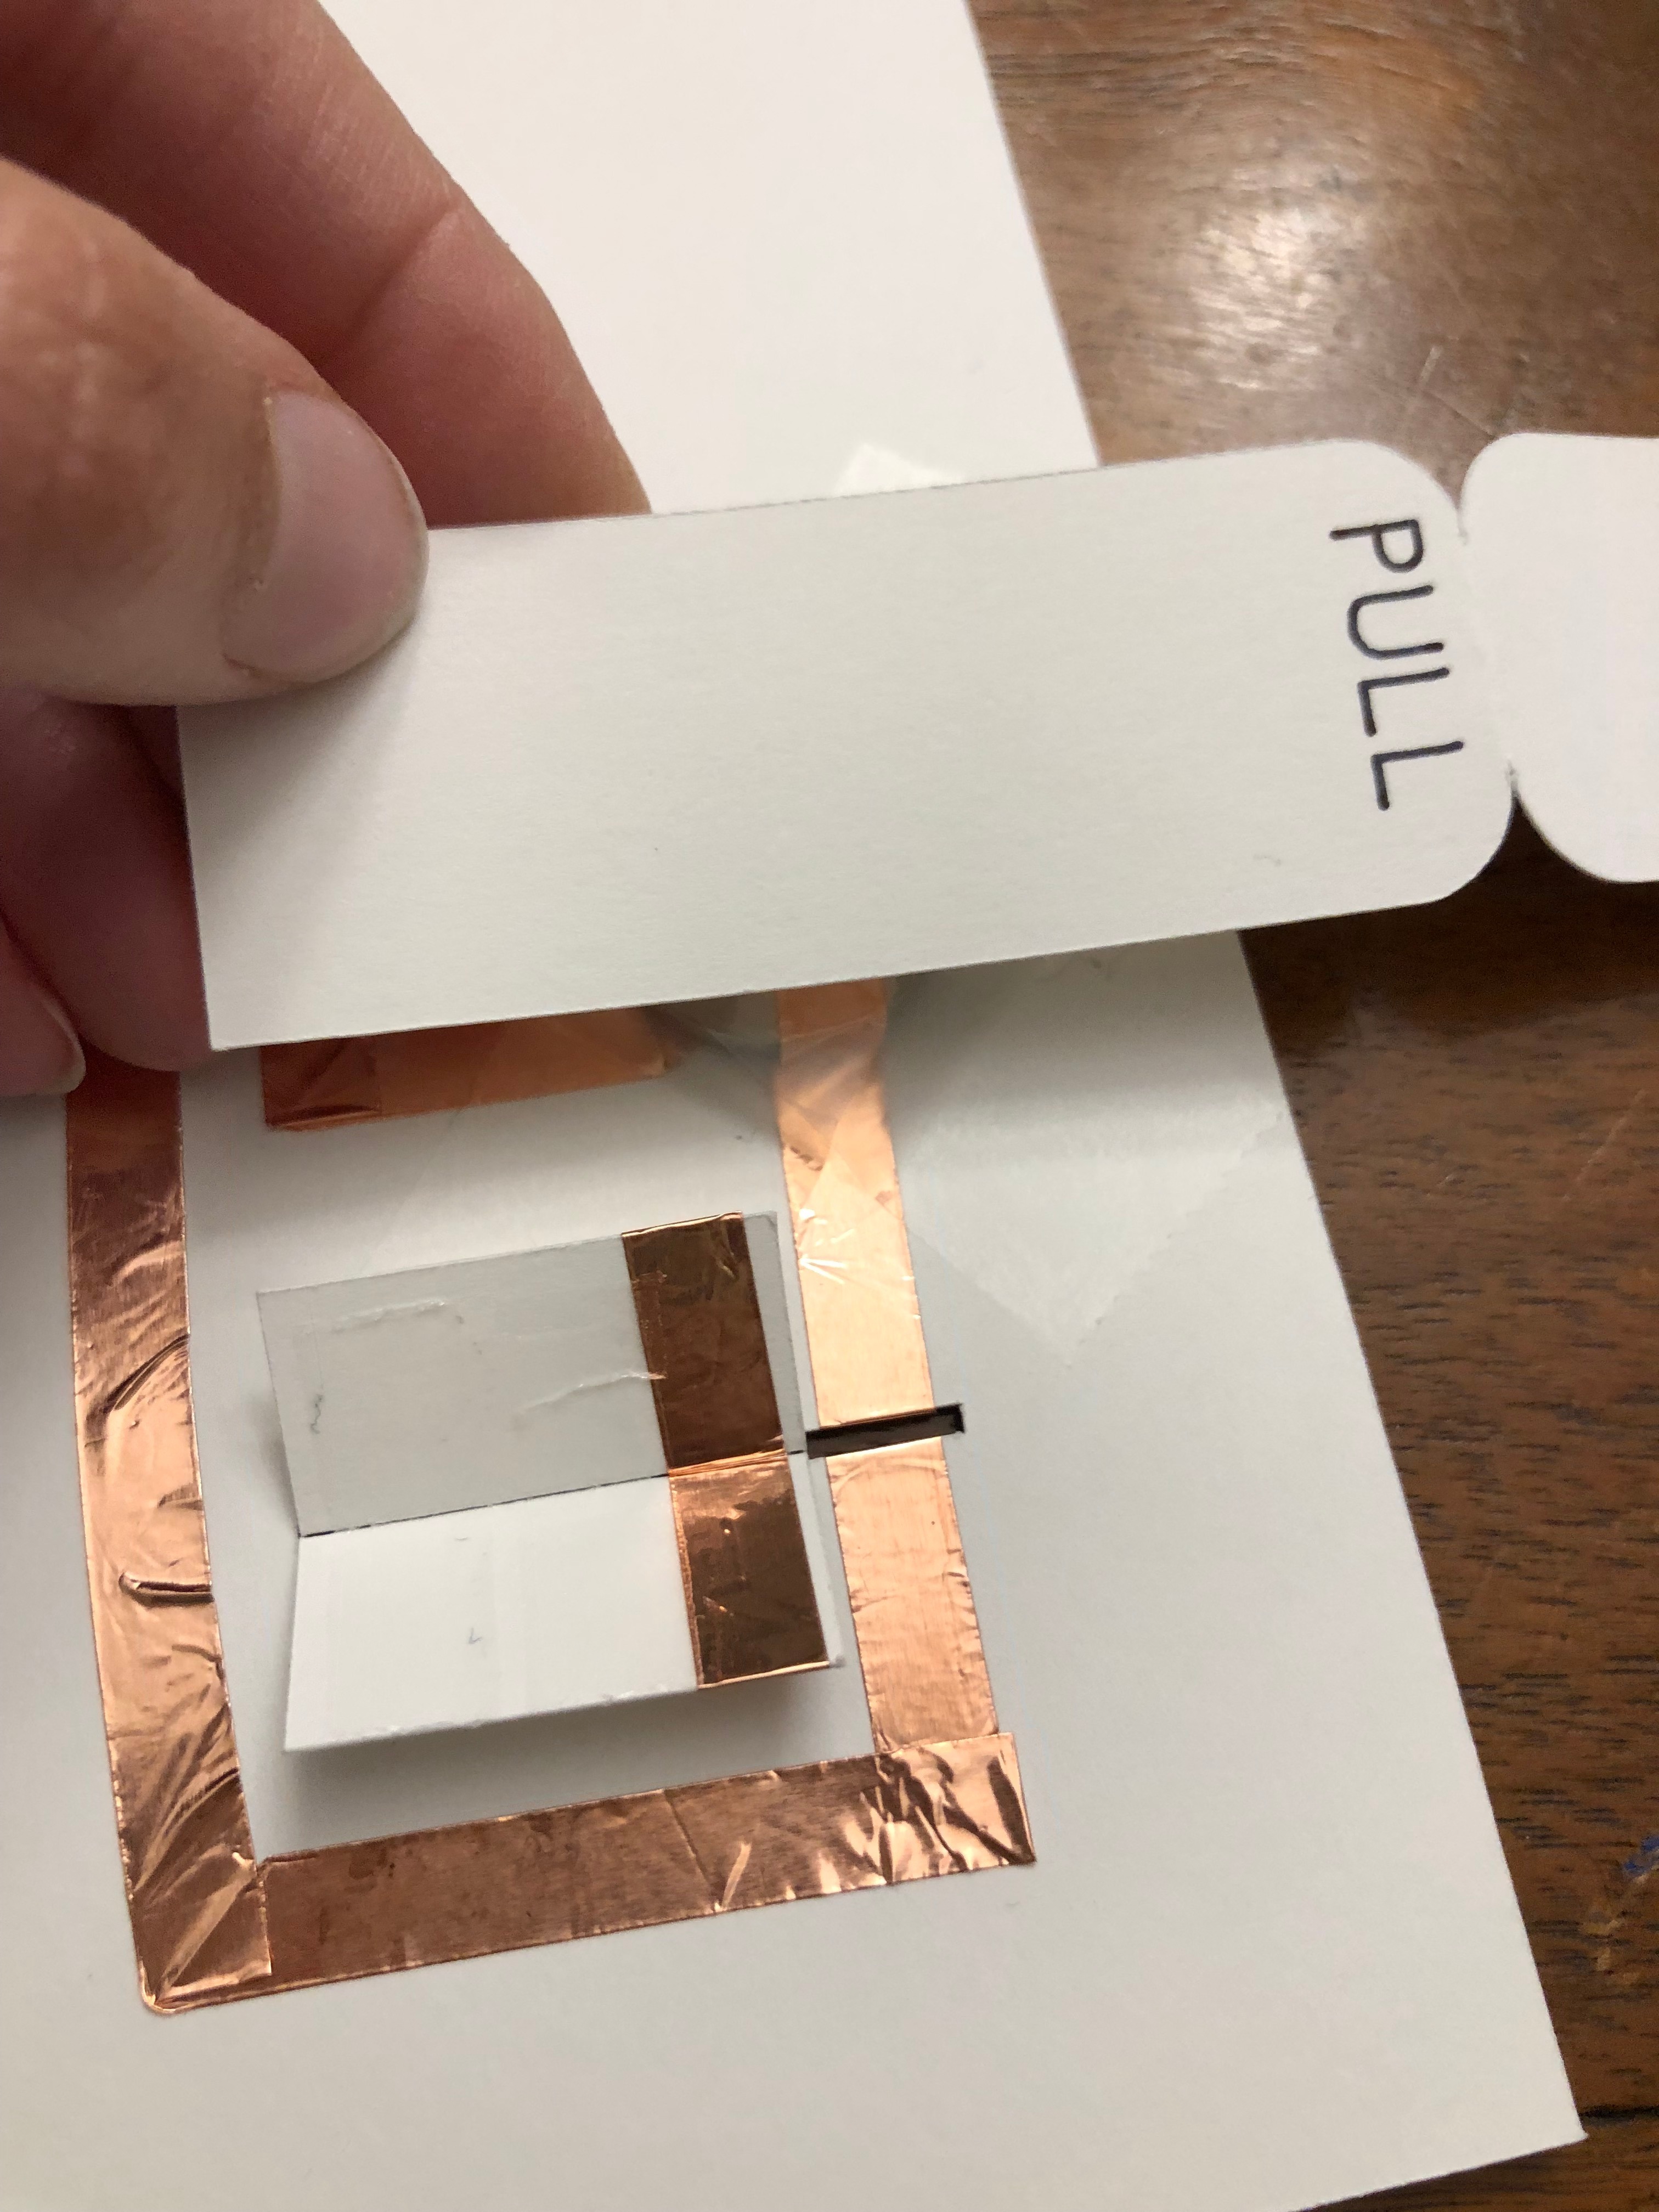
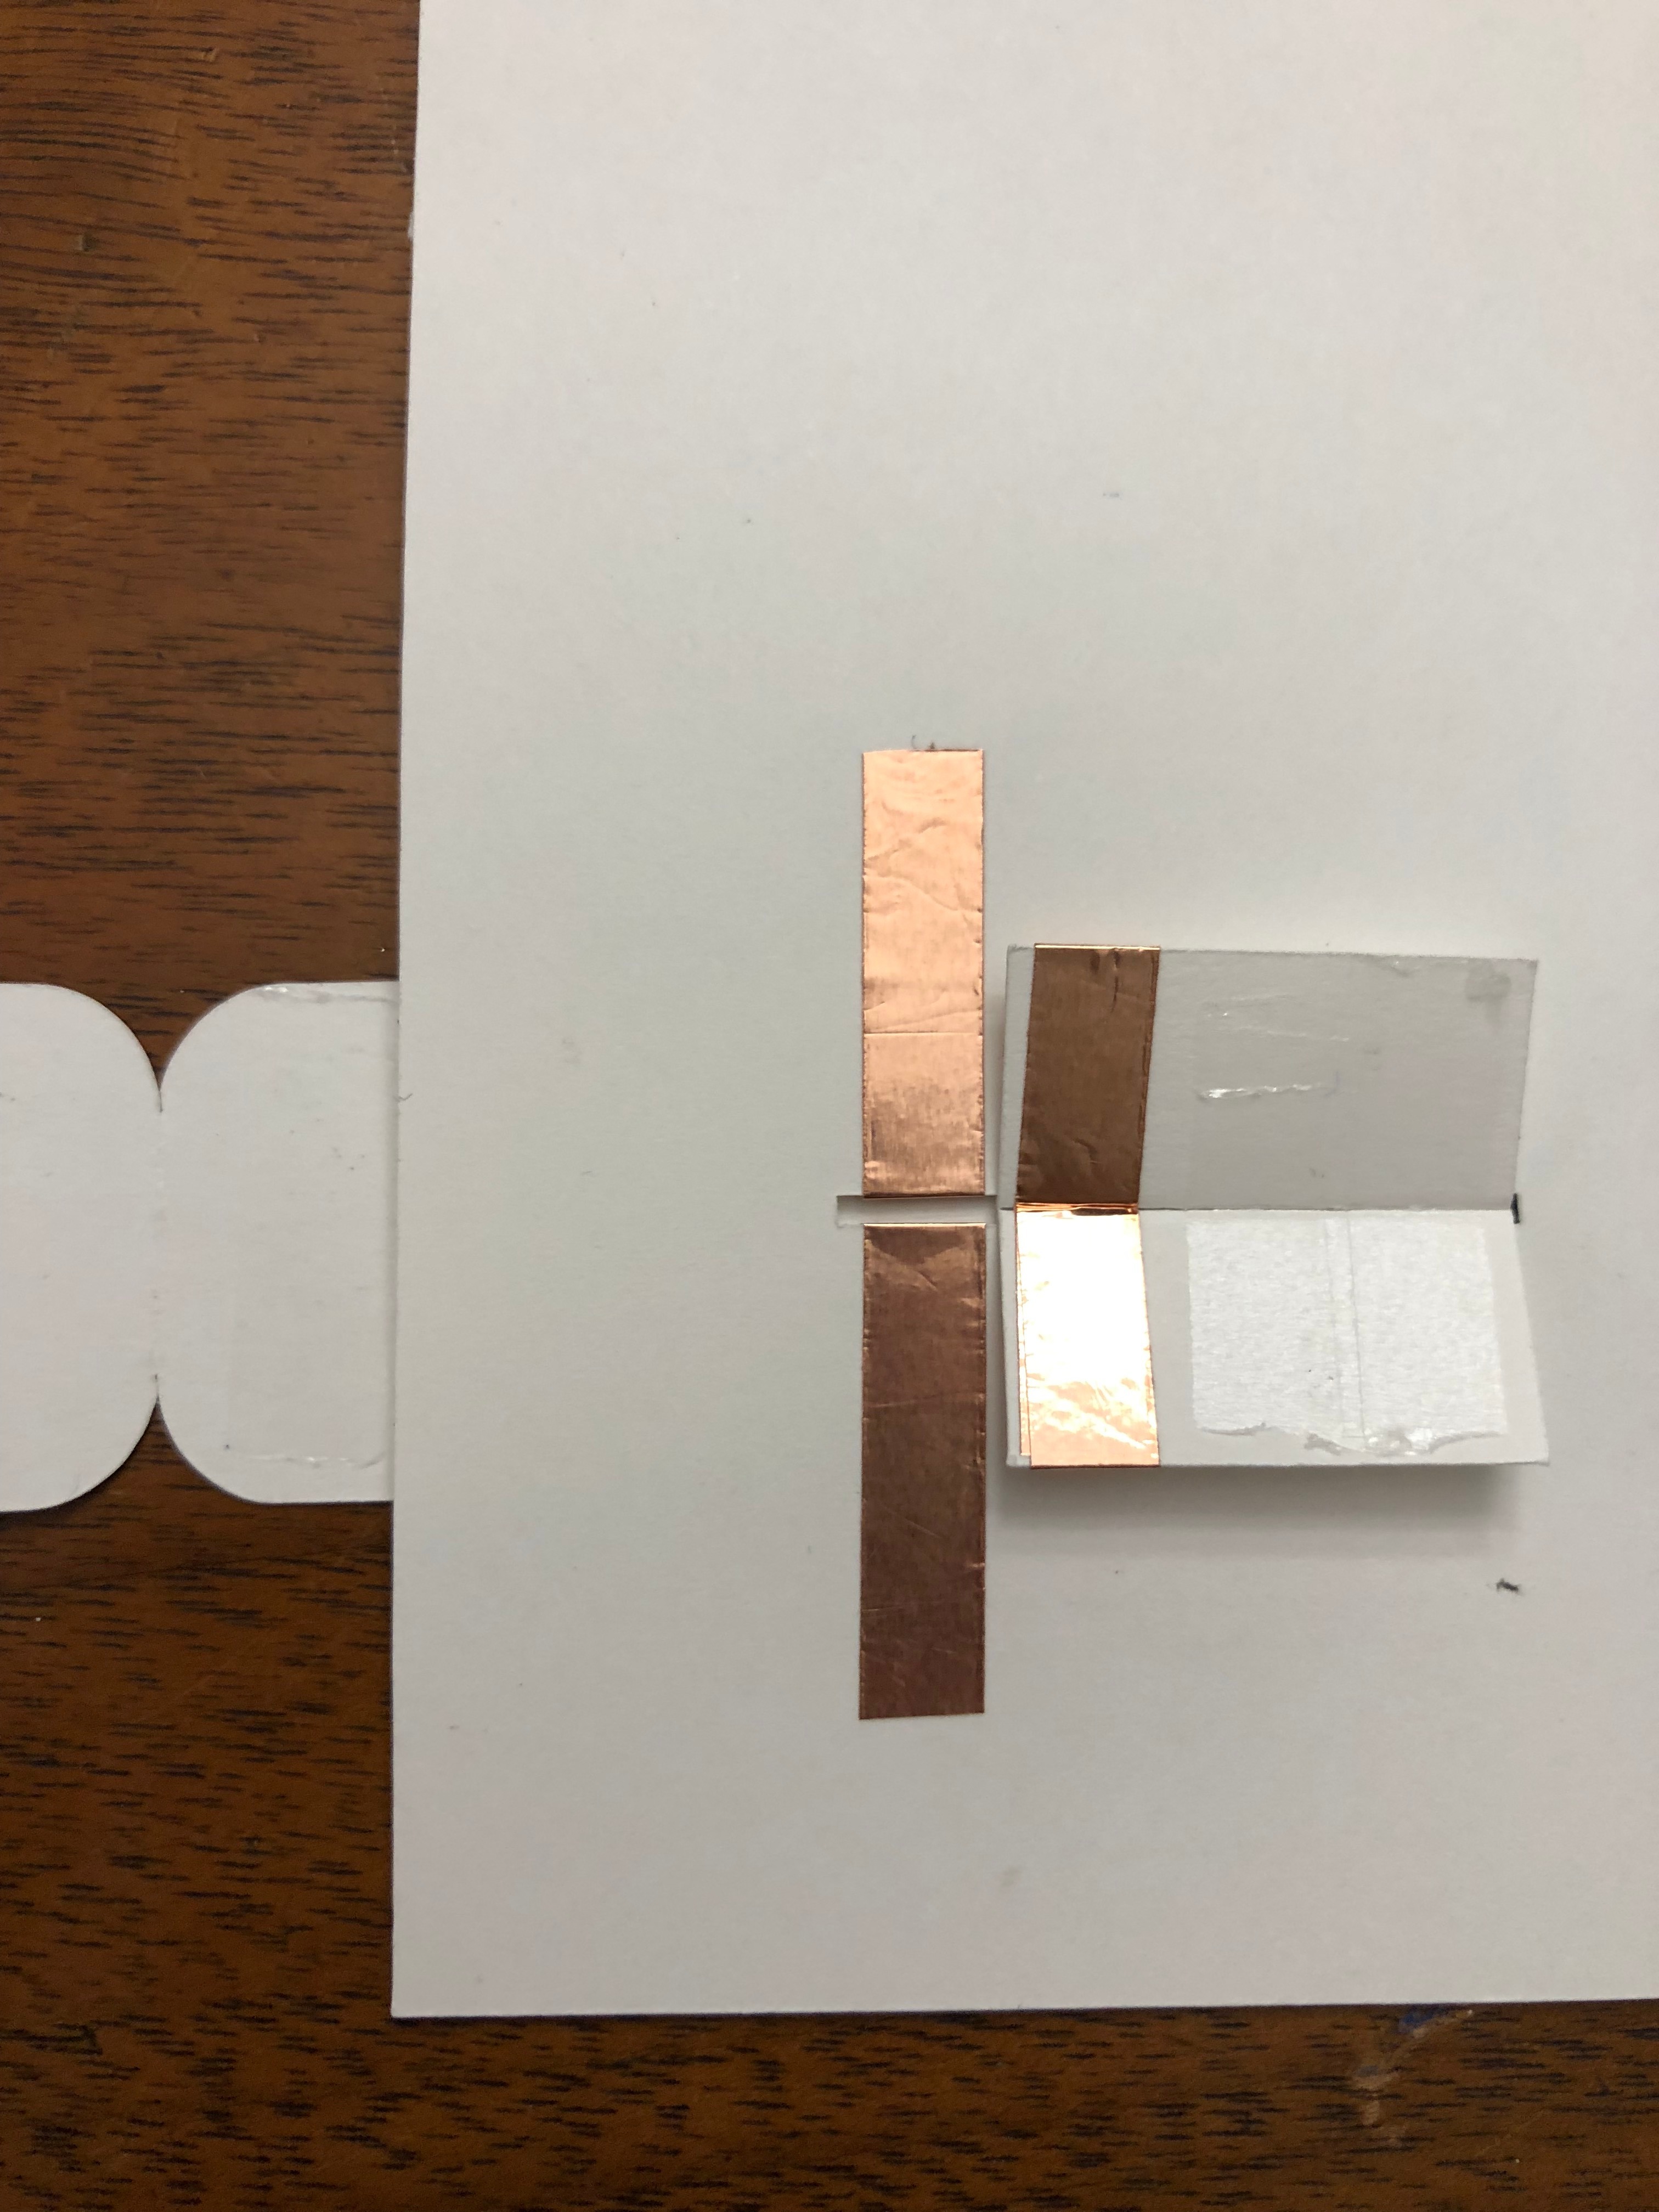
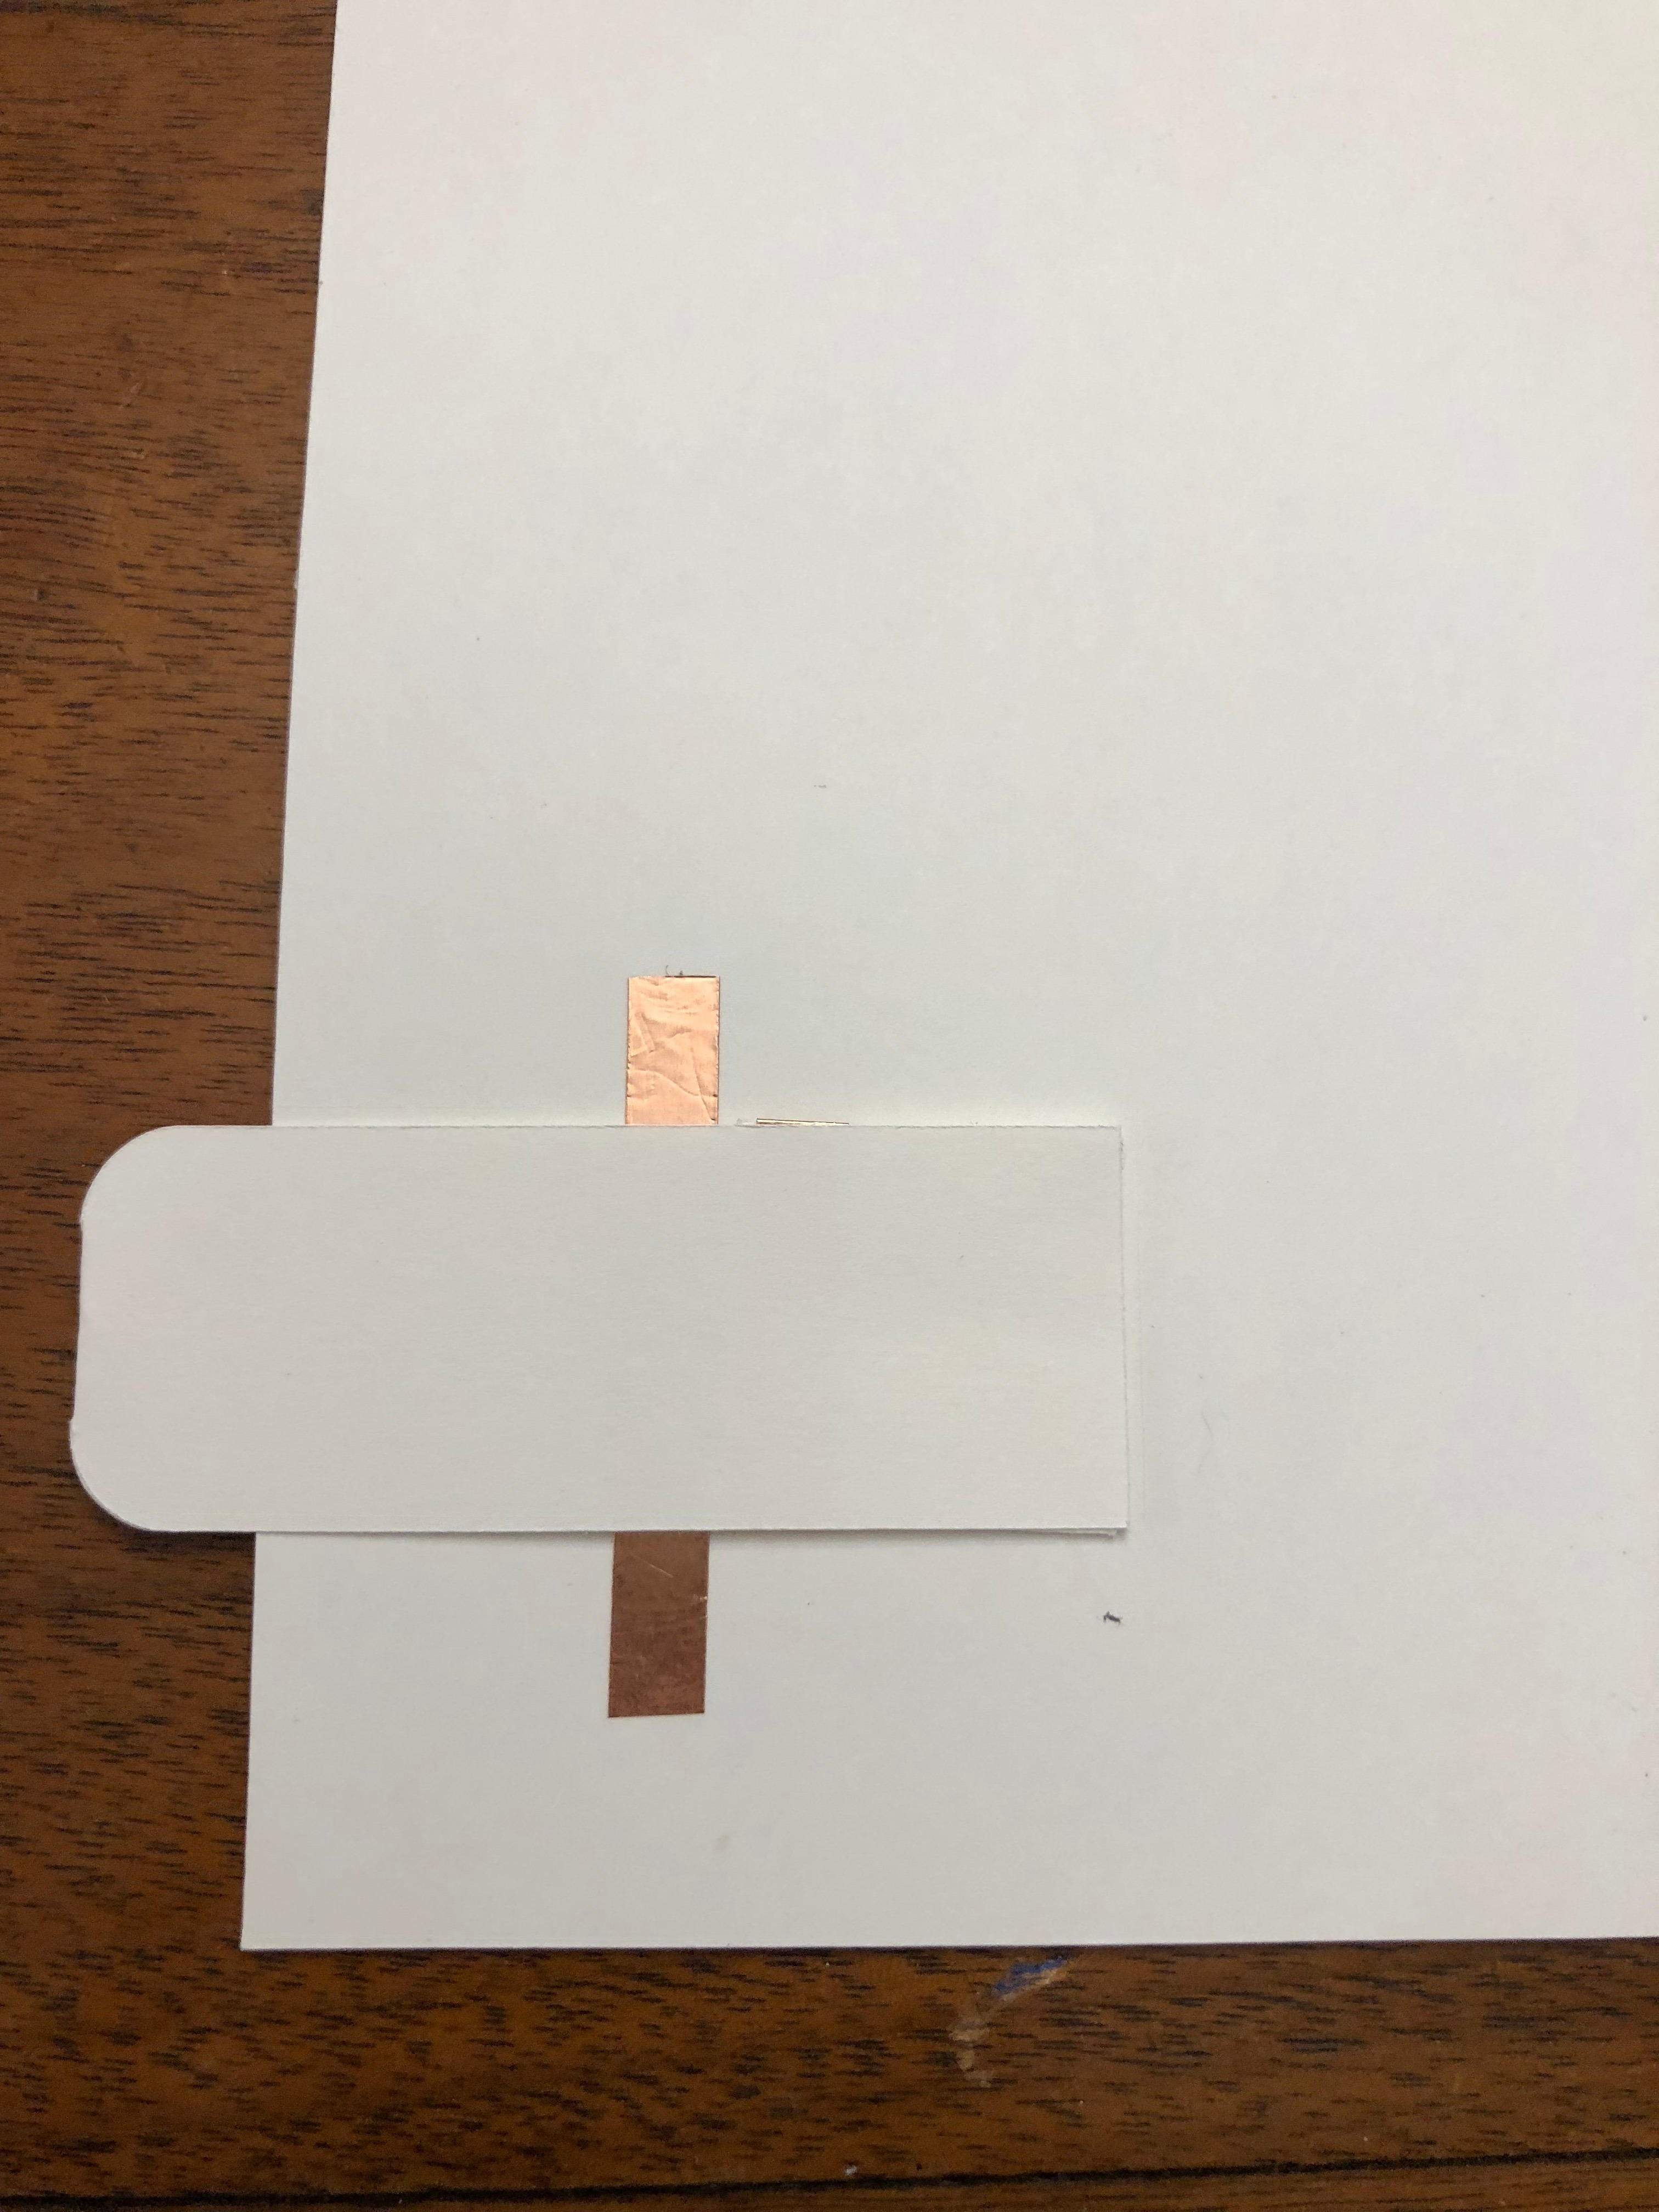
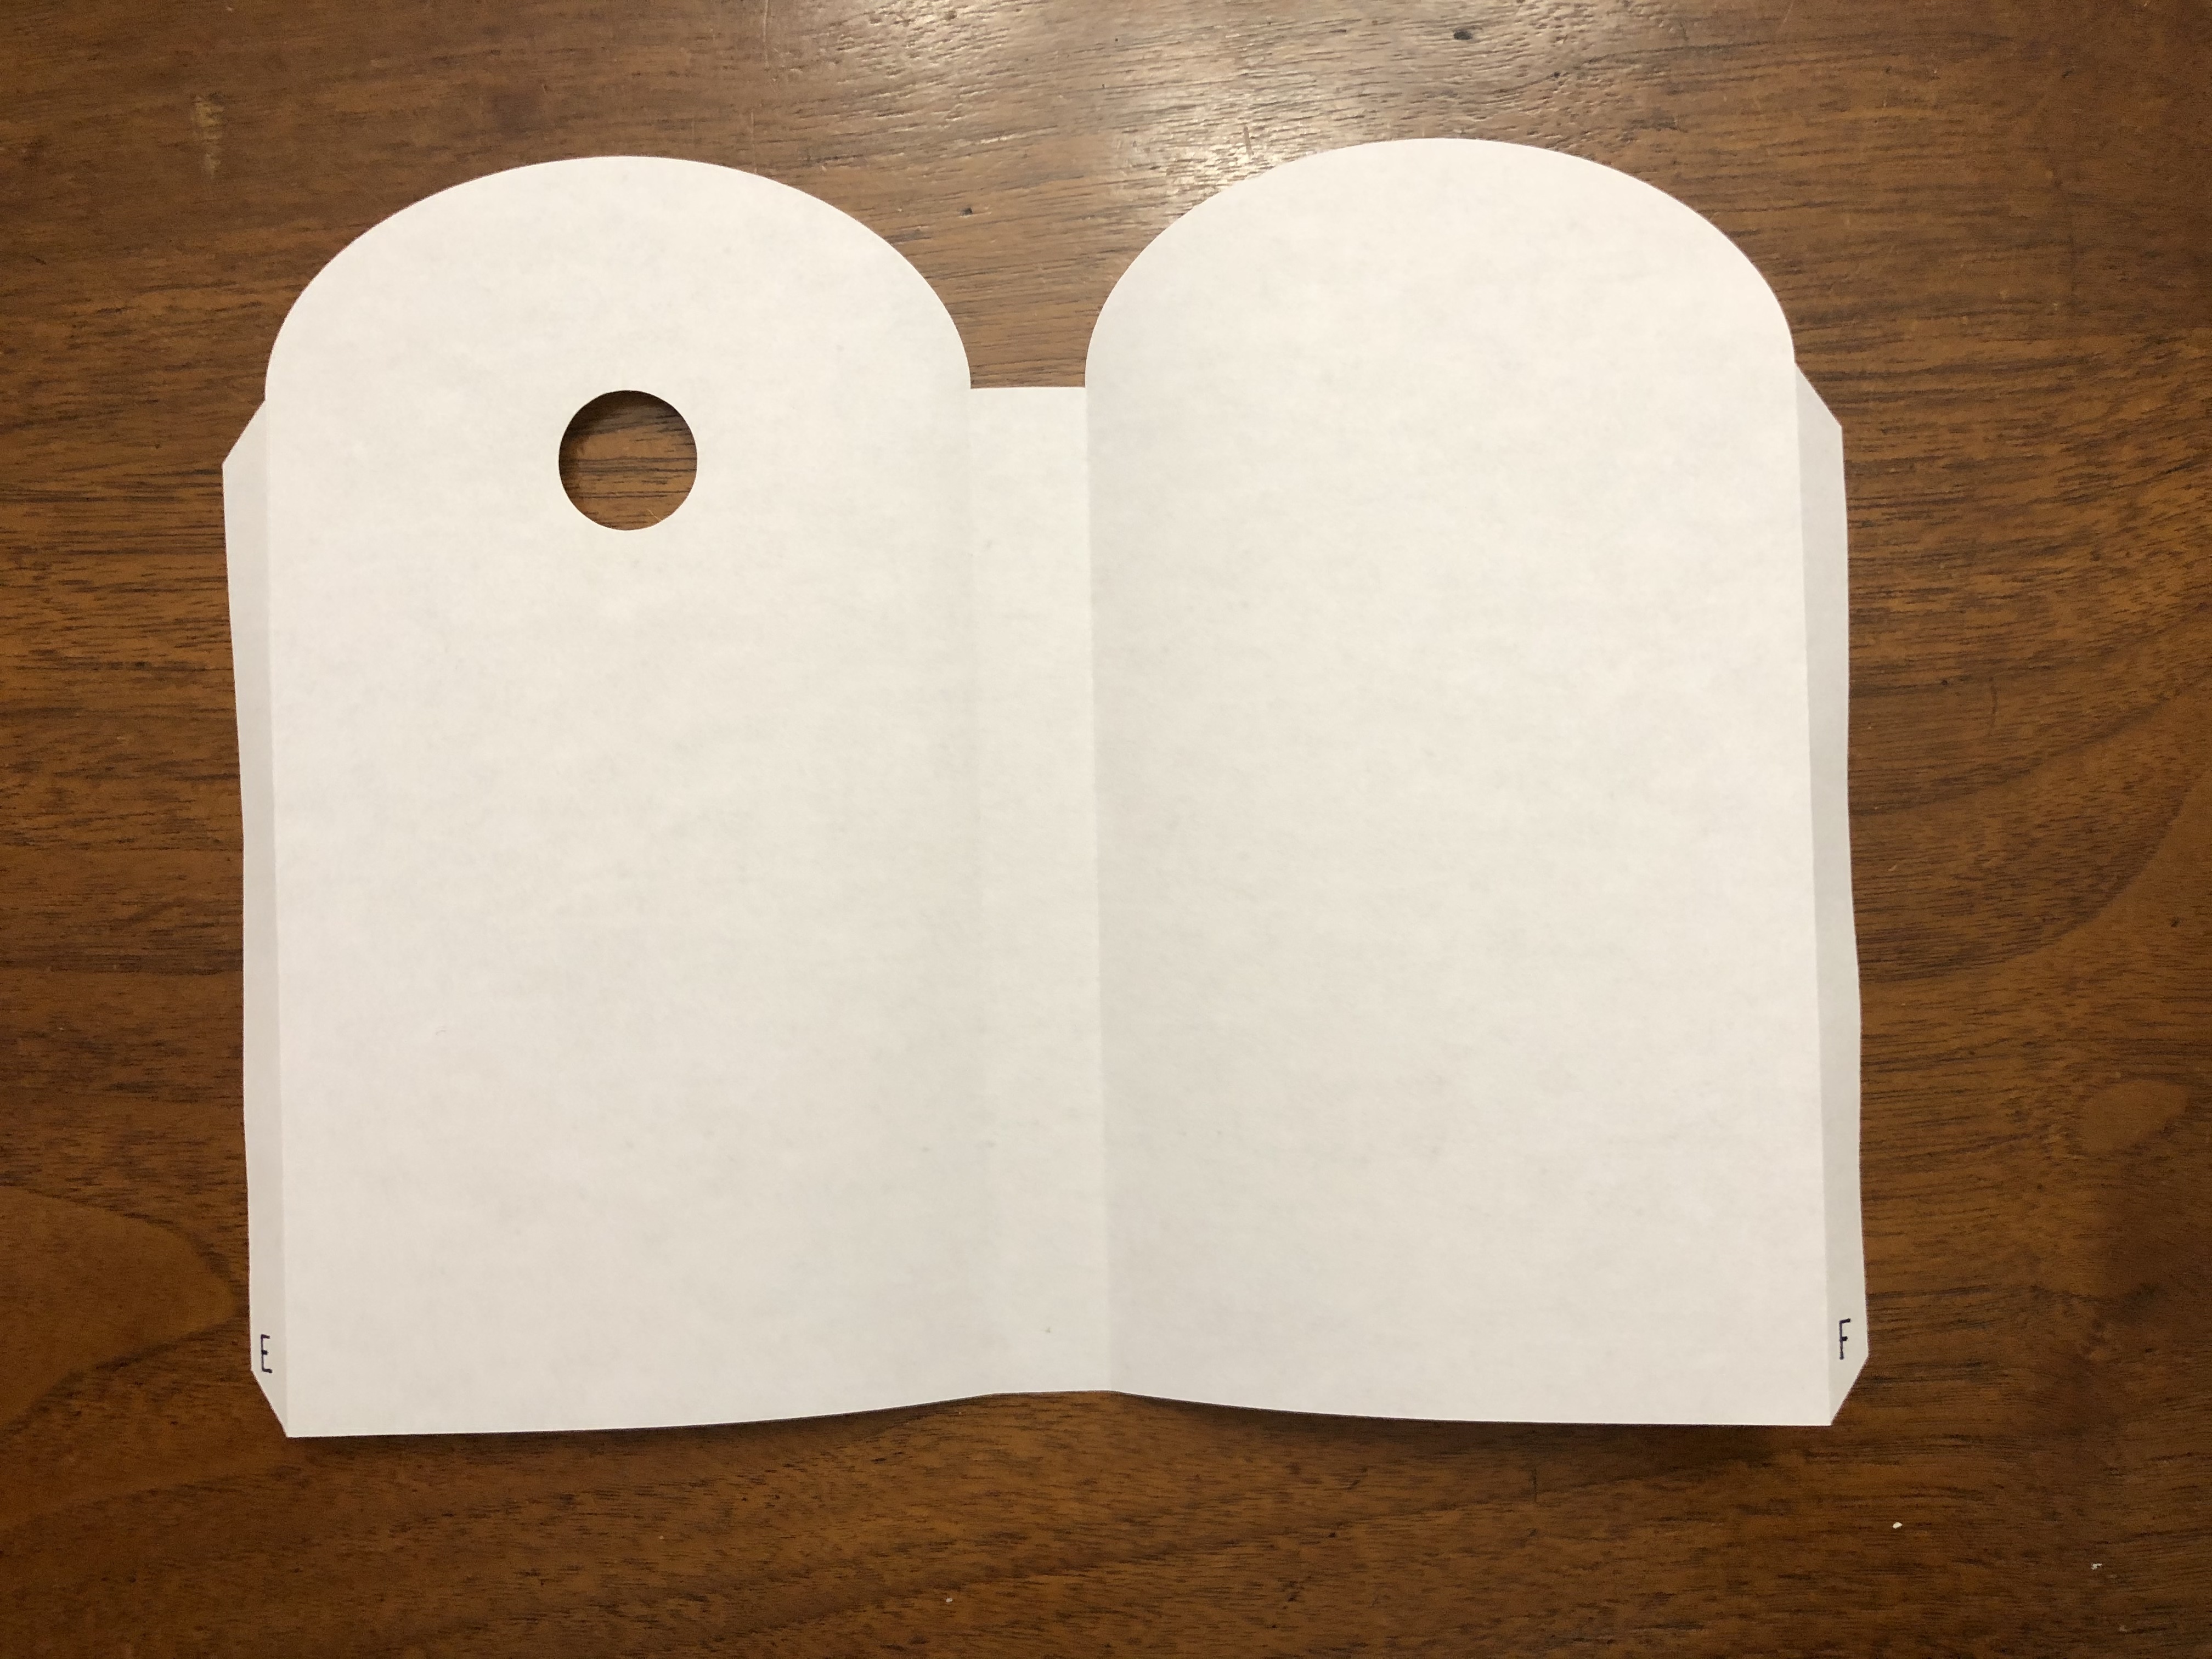
To make the switch, fold both 1" x 1" squares in half along their creases. Insert them into the slot as shown, and slide them both all the way to the right. Begin taping on them aligned to the tape already on the card. Carefully slide them out of the slot to continue taping around the cross shape. Re-insert the fully taped cross as shown and slide it all the way to the left. Apply adhesive on the bare part of the cross and stick on the pull tab as shown. Turn the card over and apply adhesive to the back of the cross as well as the bit of the pull tab sticking out from the front. Fold the pull tab over and press to secure.
Final Assembly!
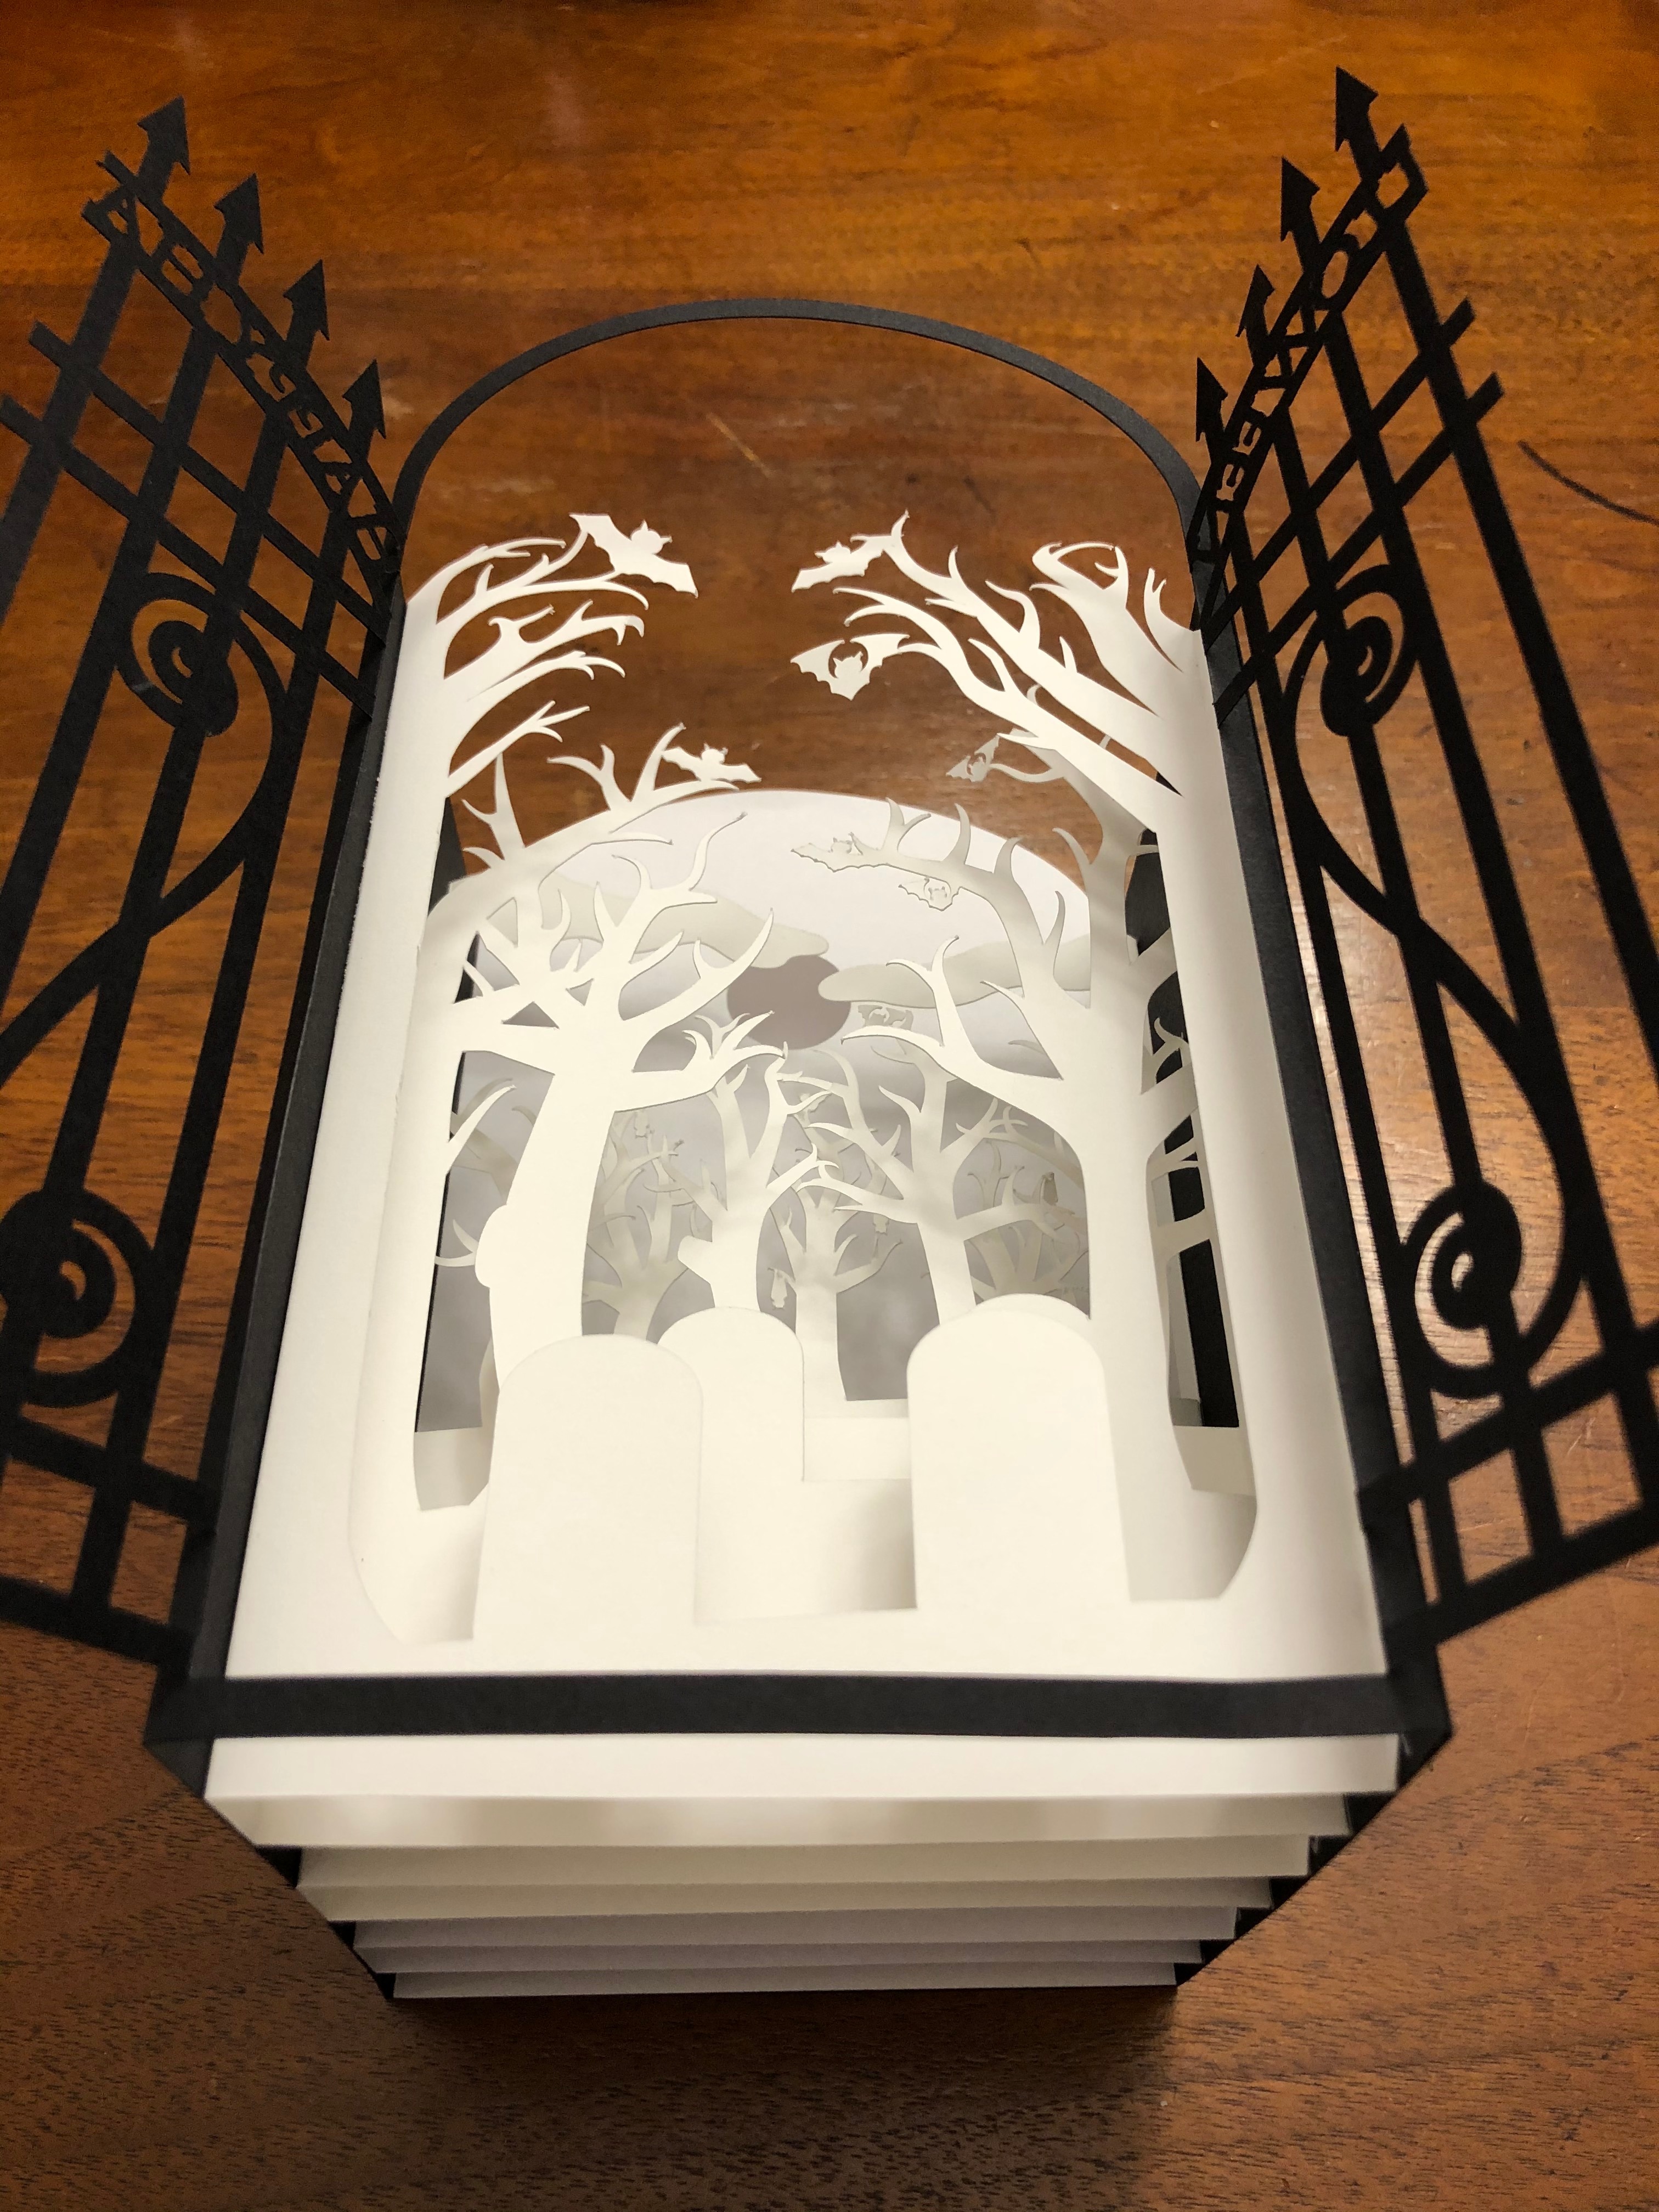

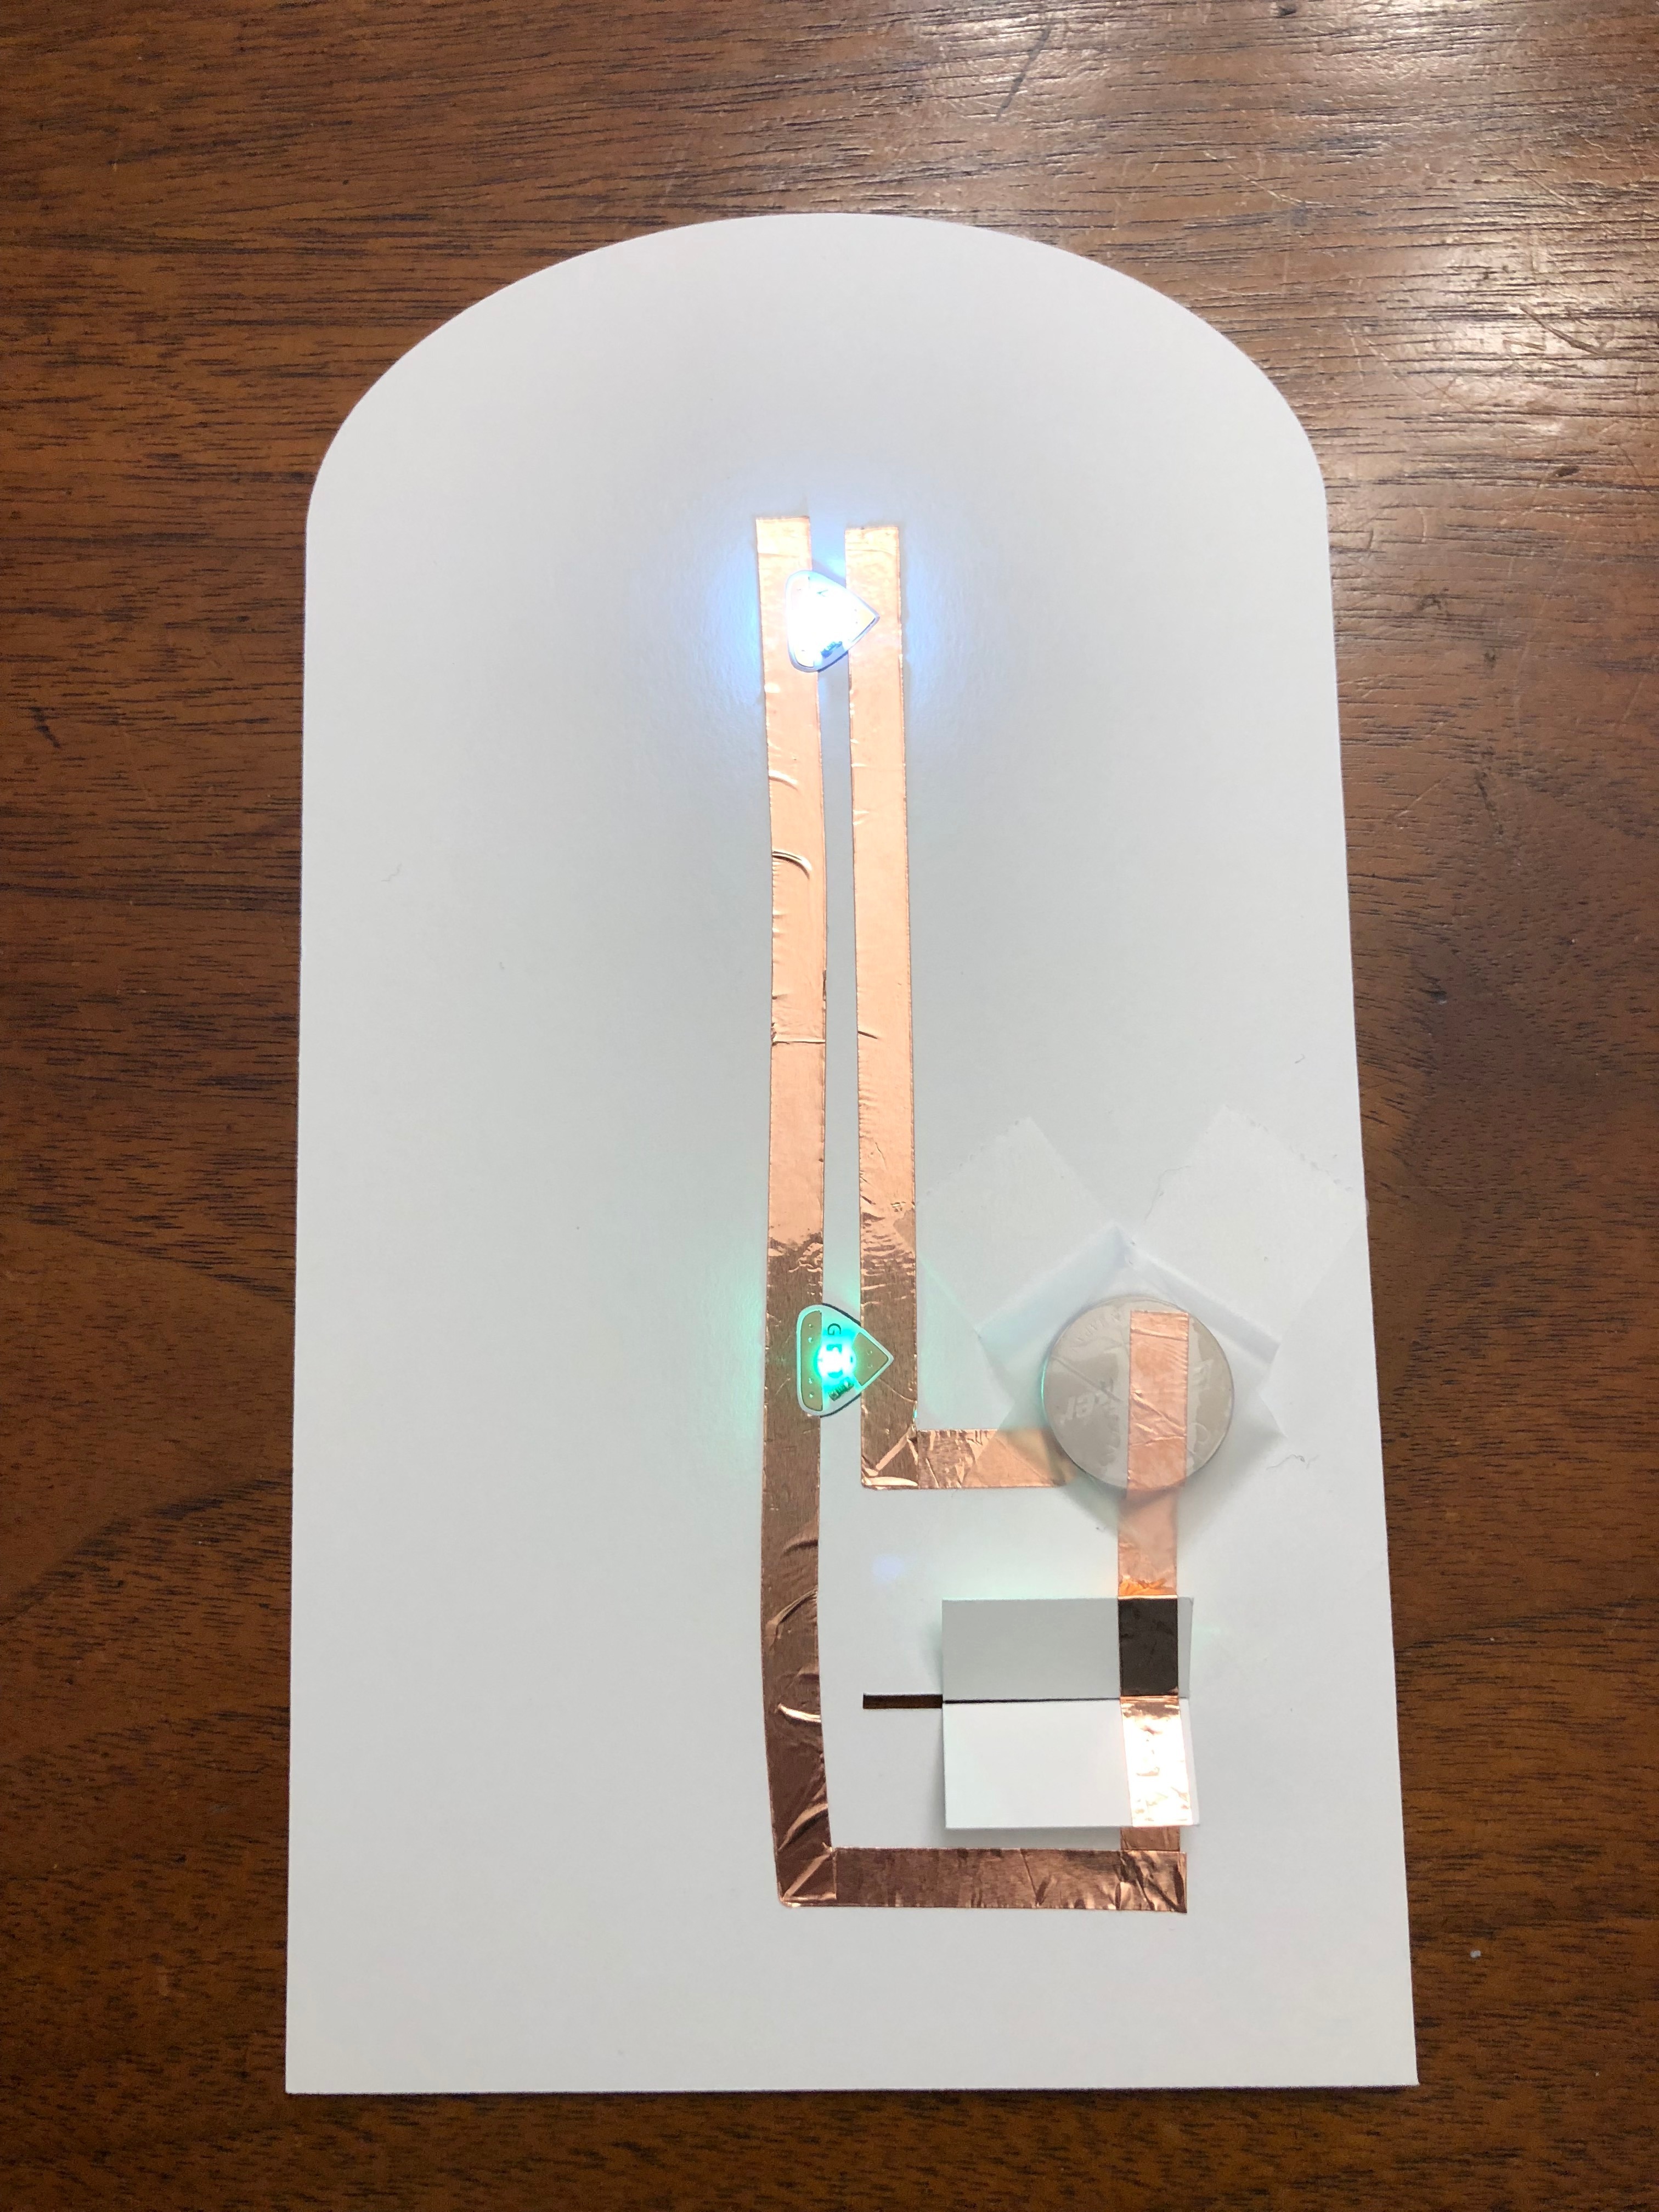
Congrats if you've made it this far! Now you get to see this card come to life.
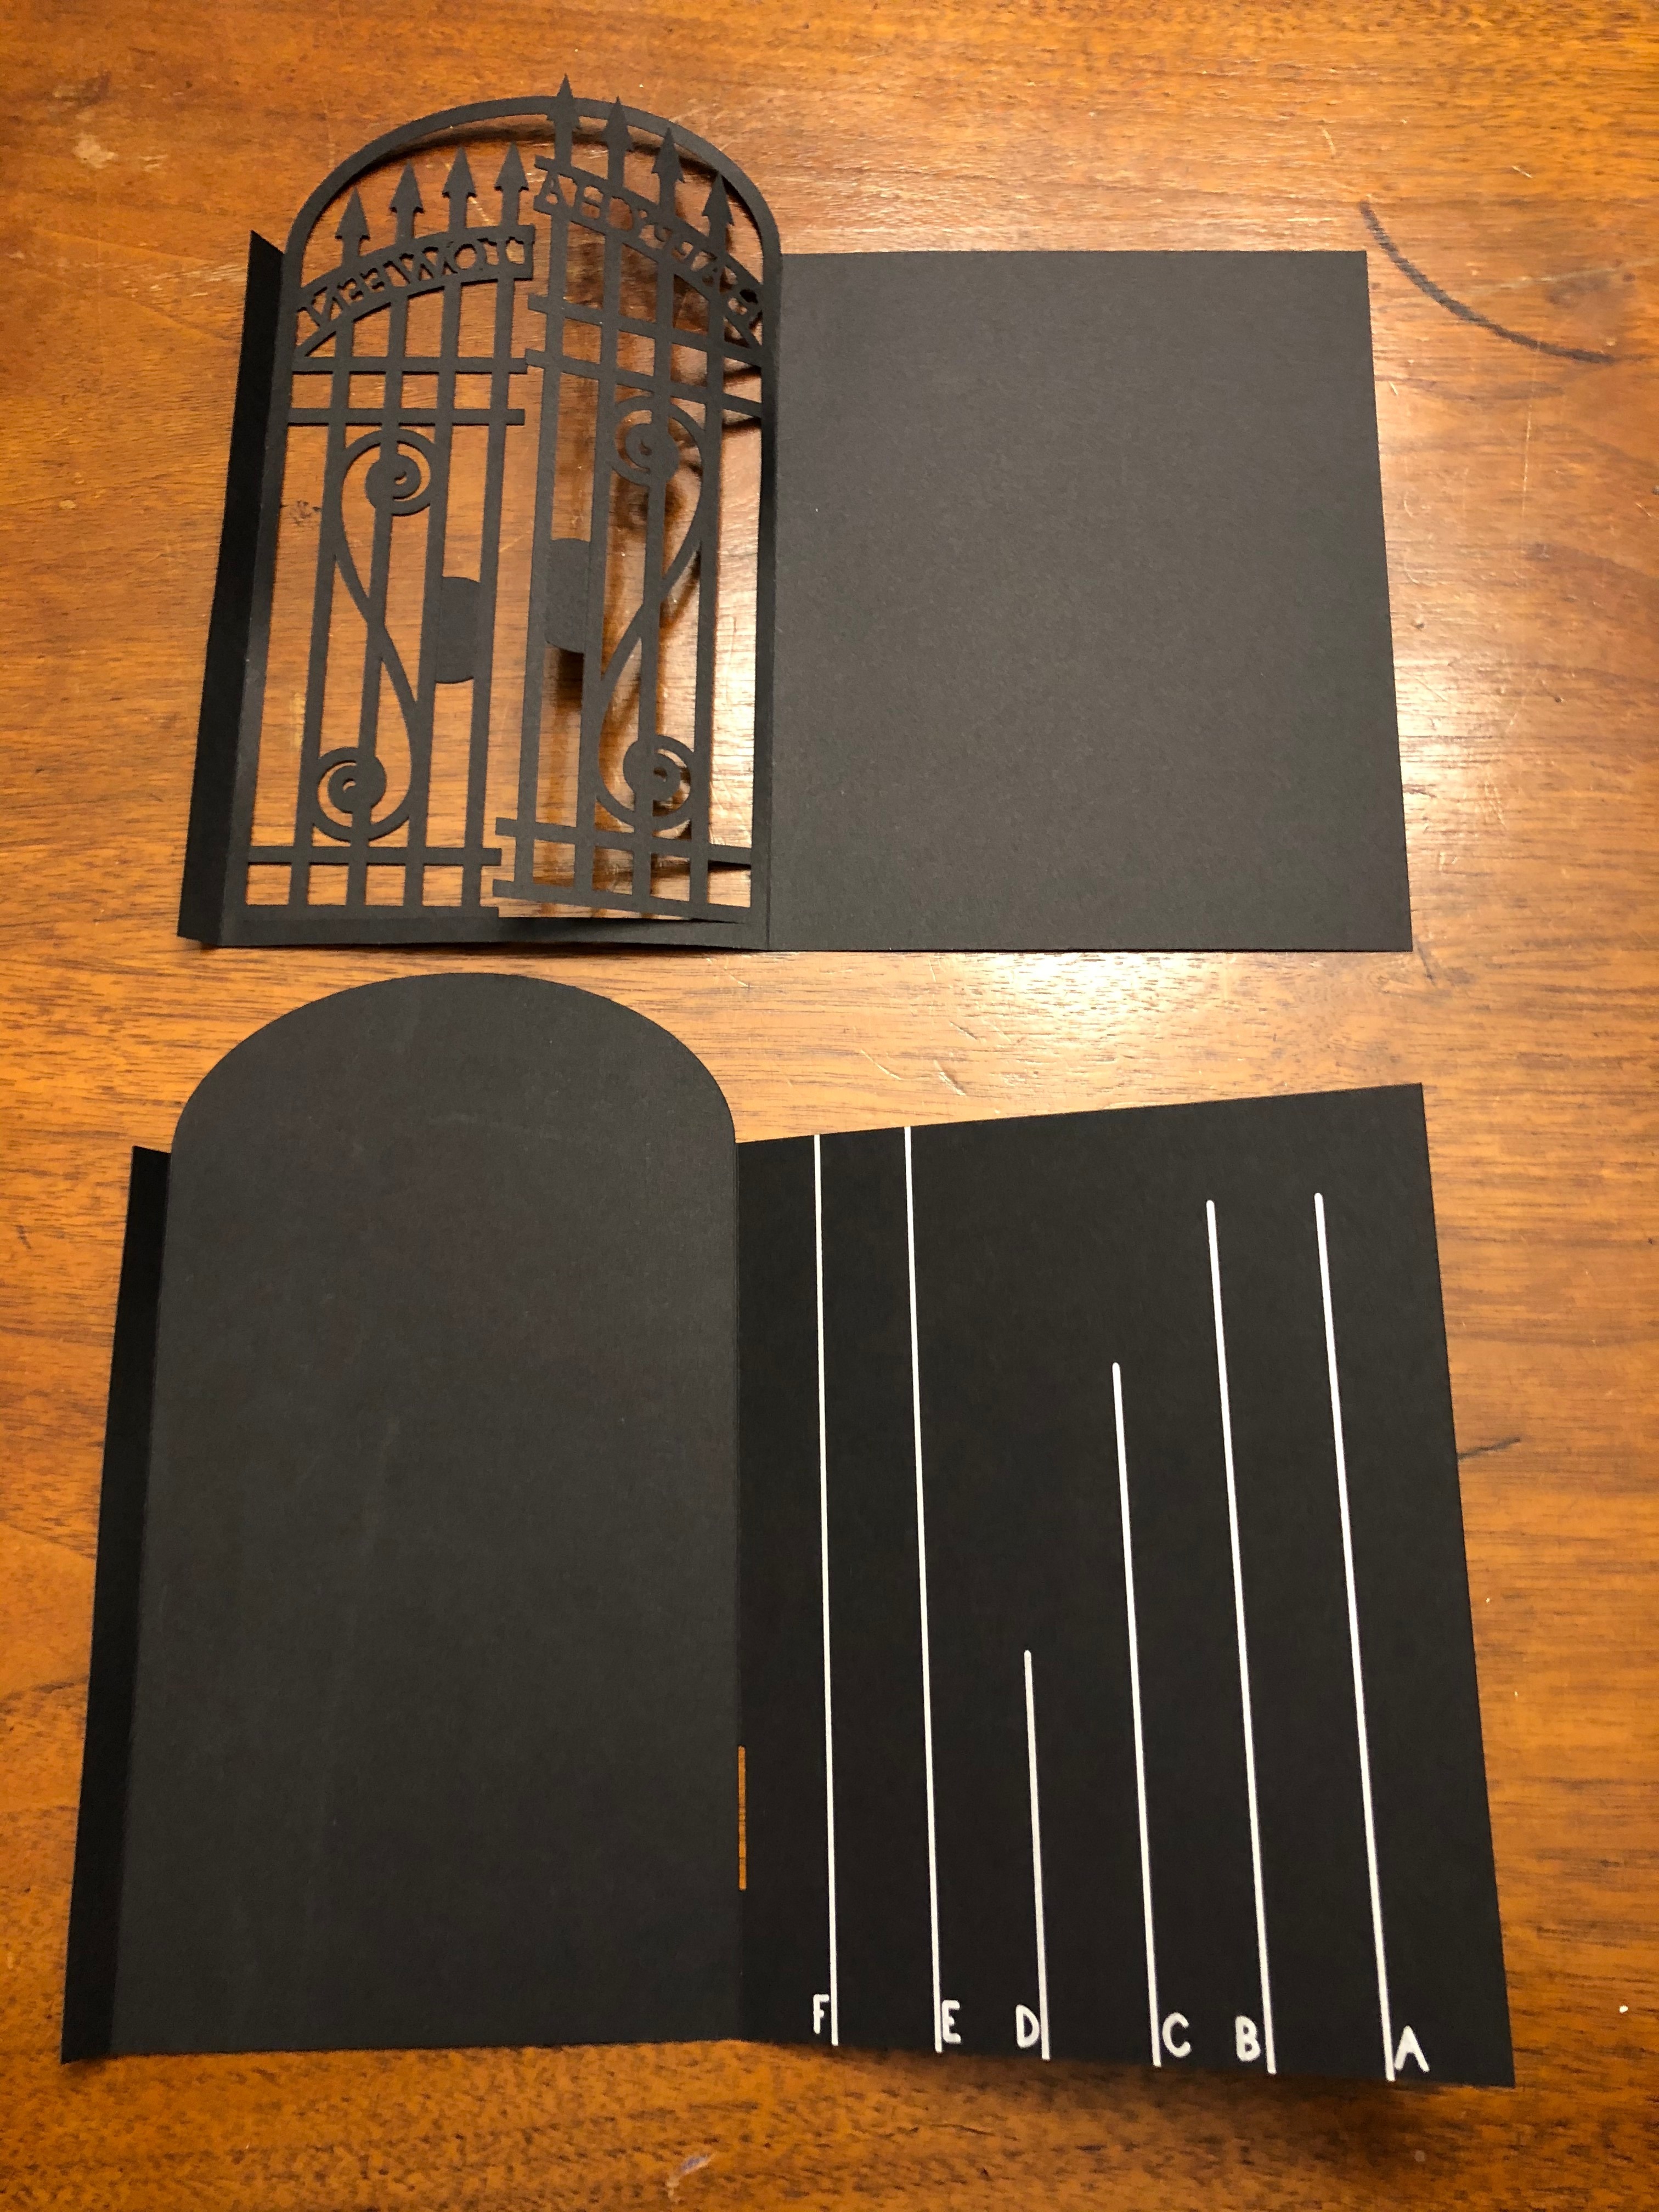
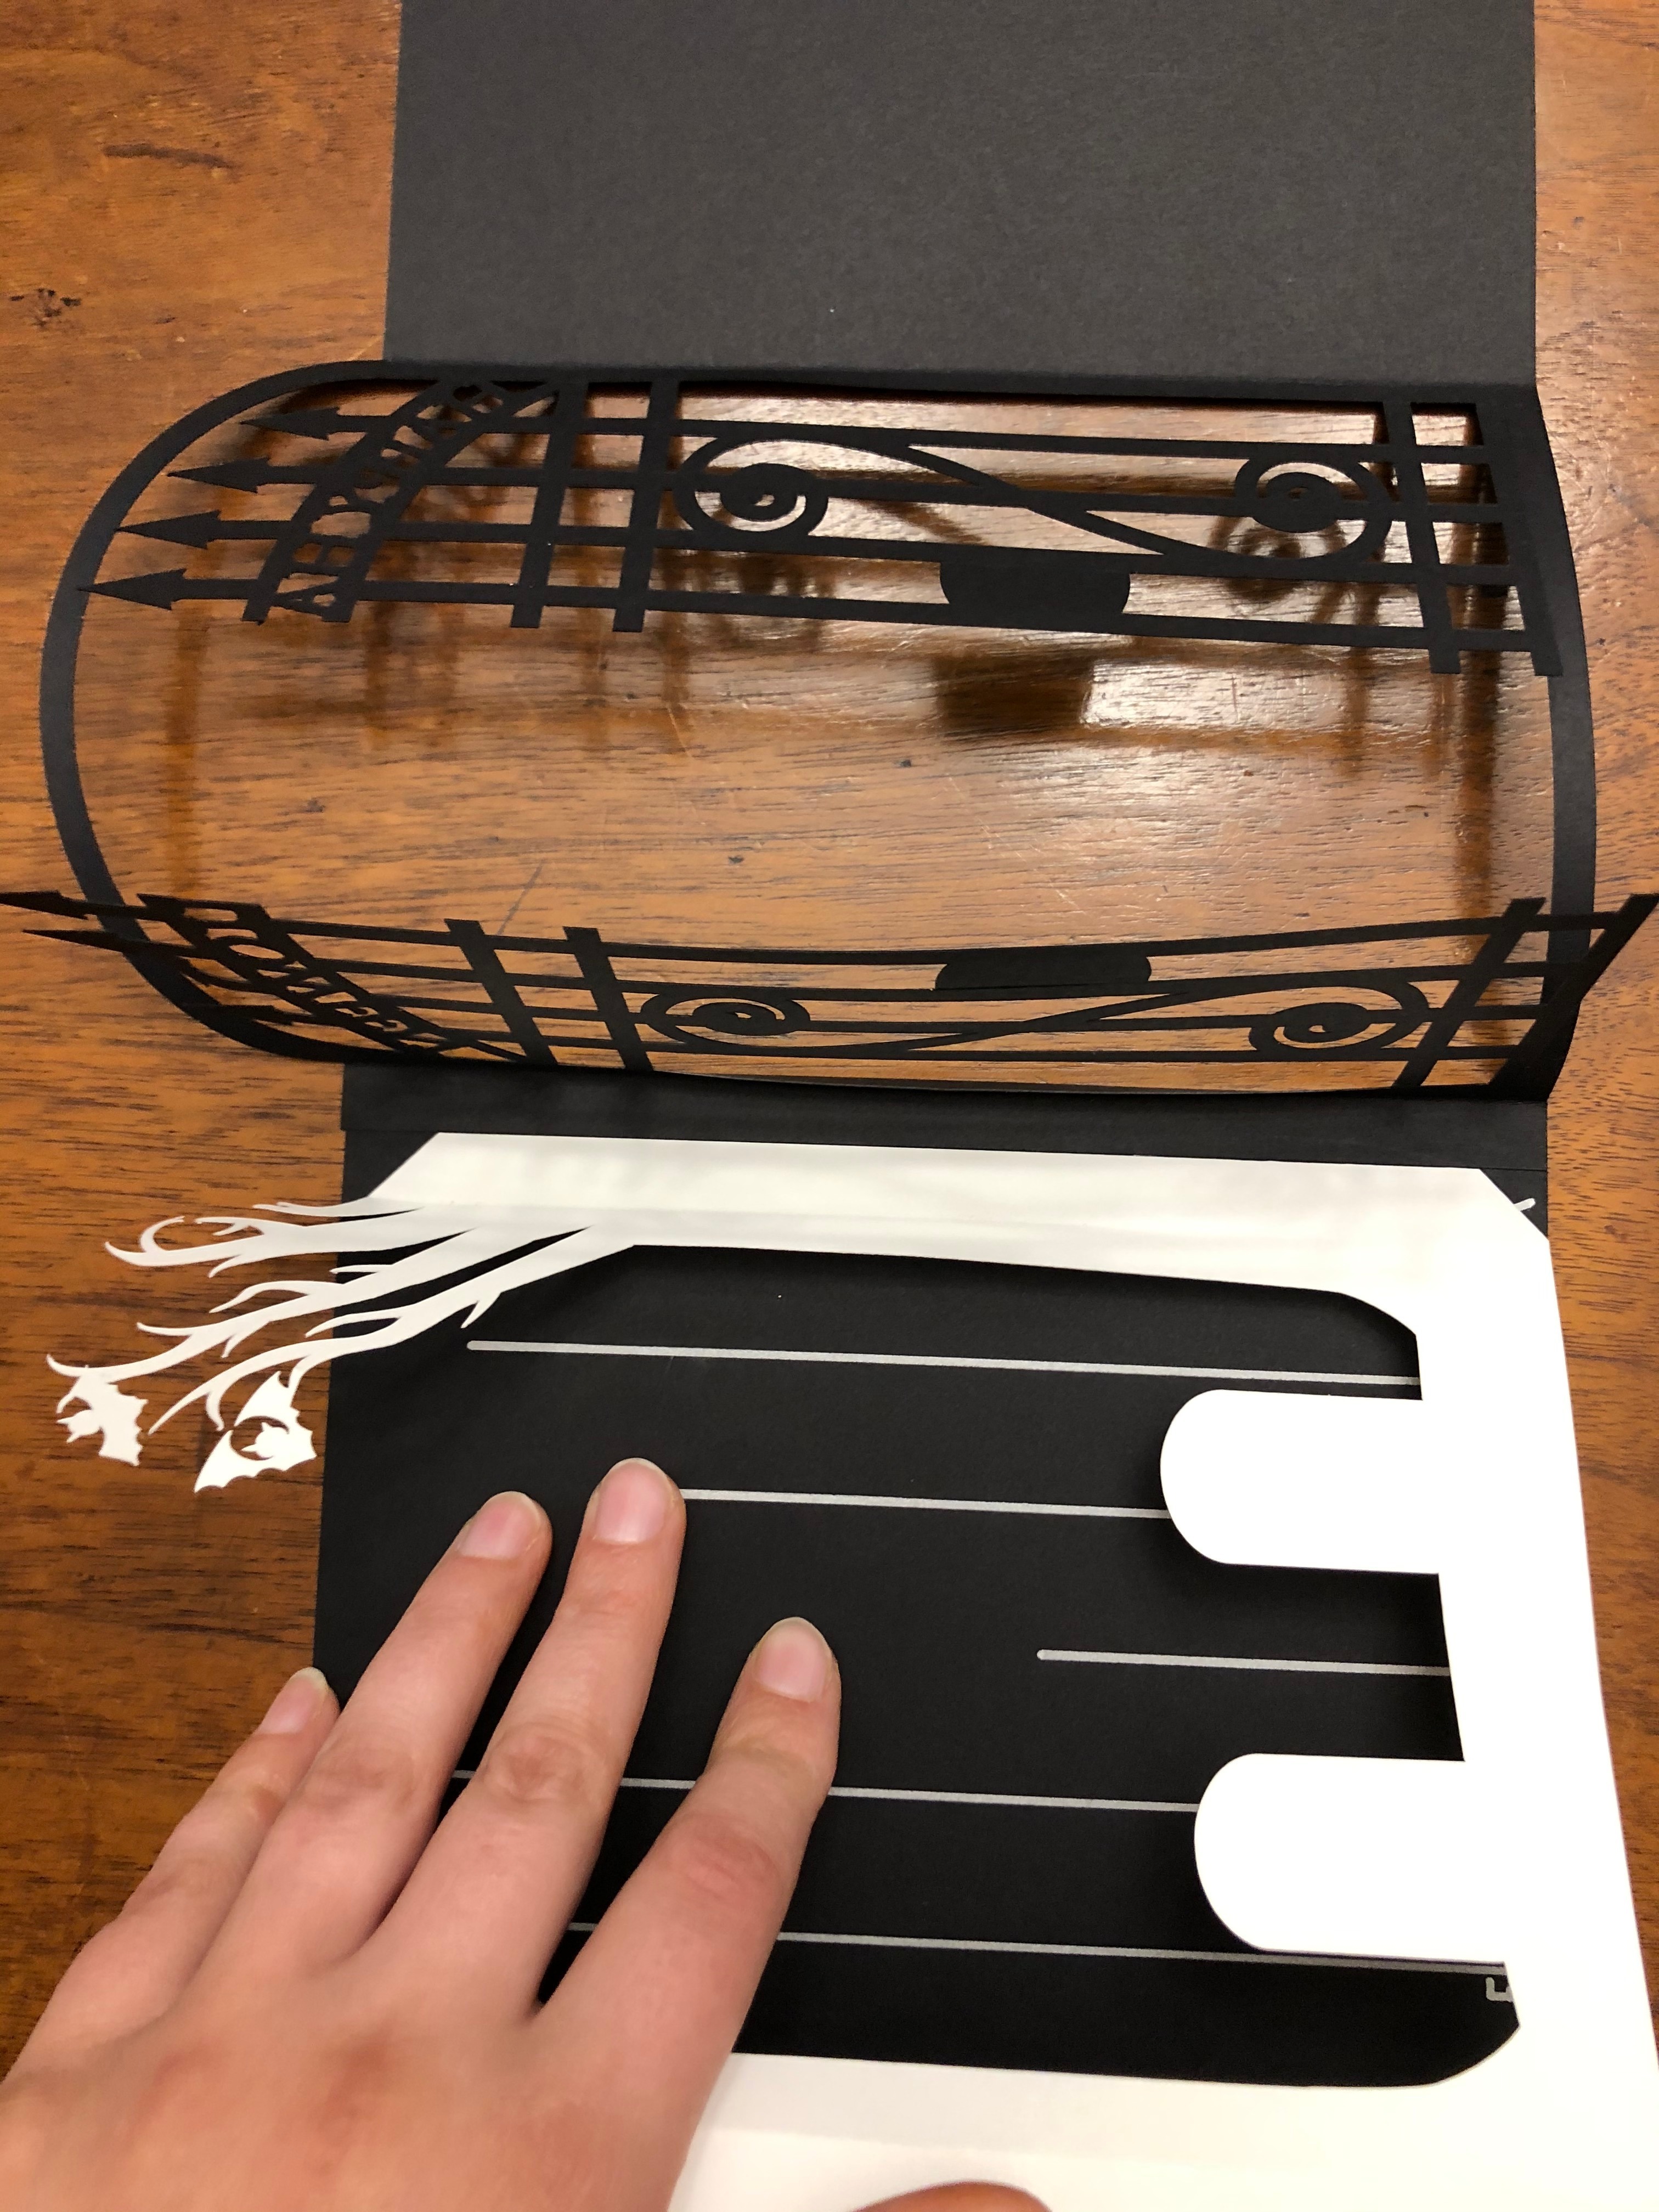
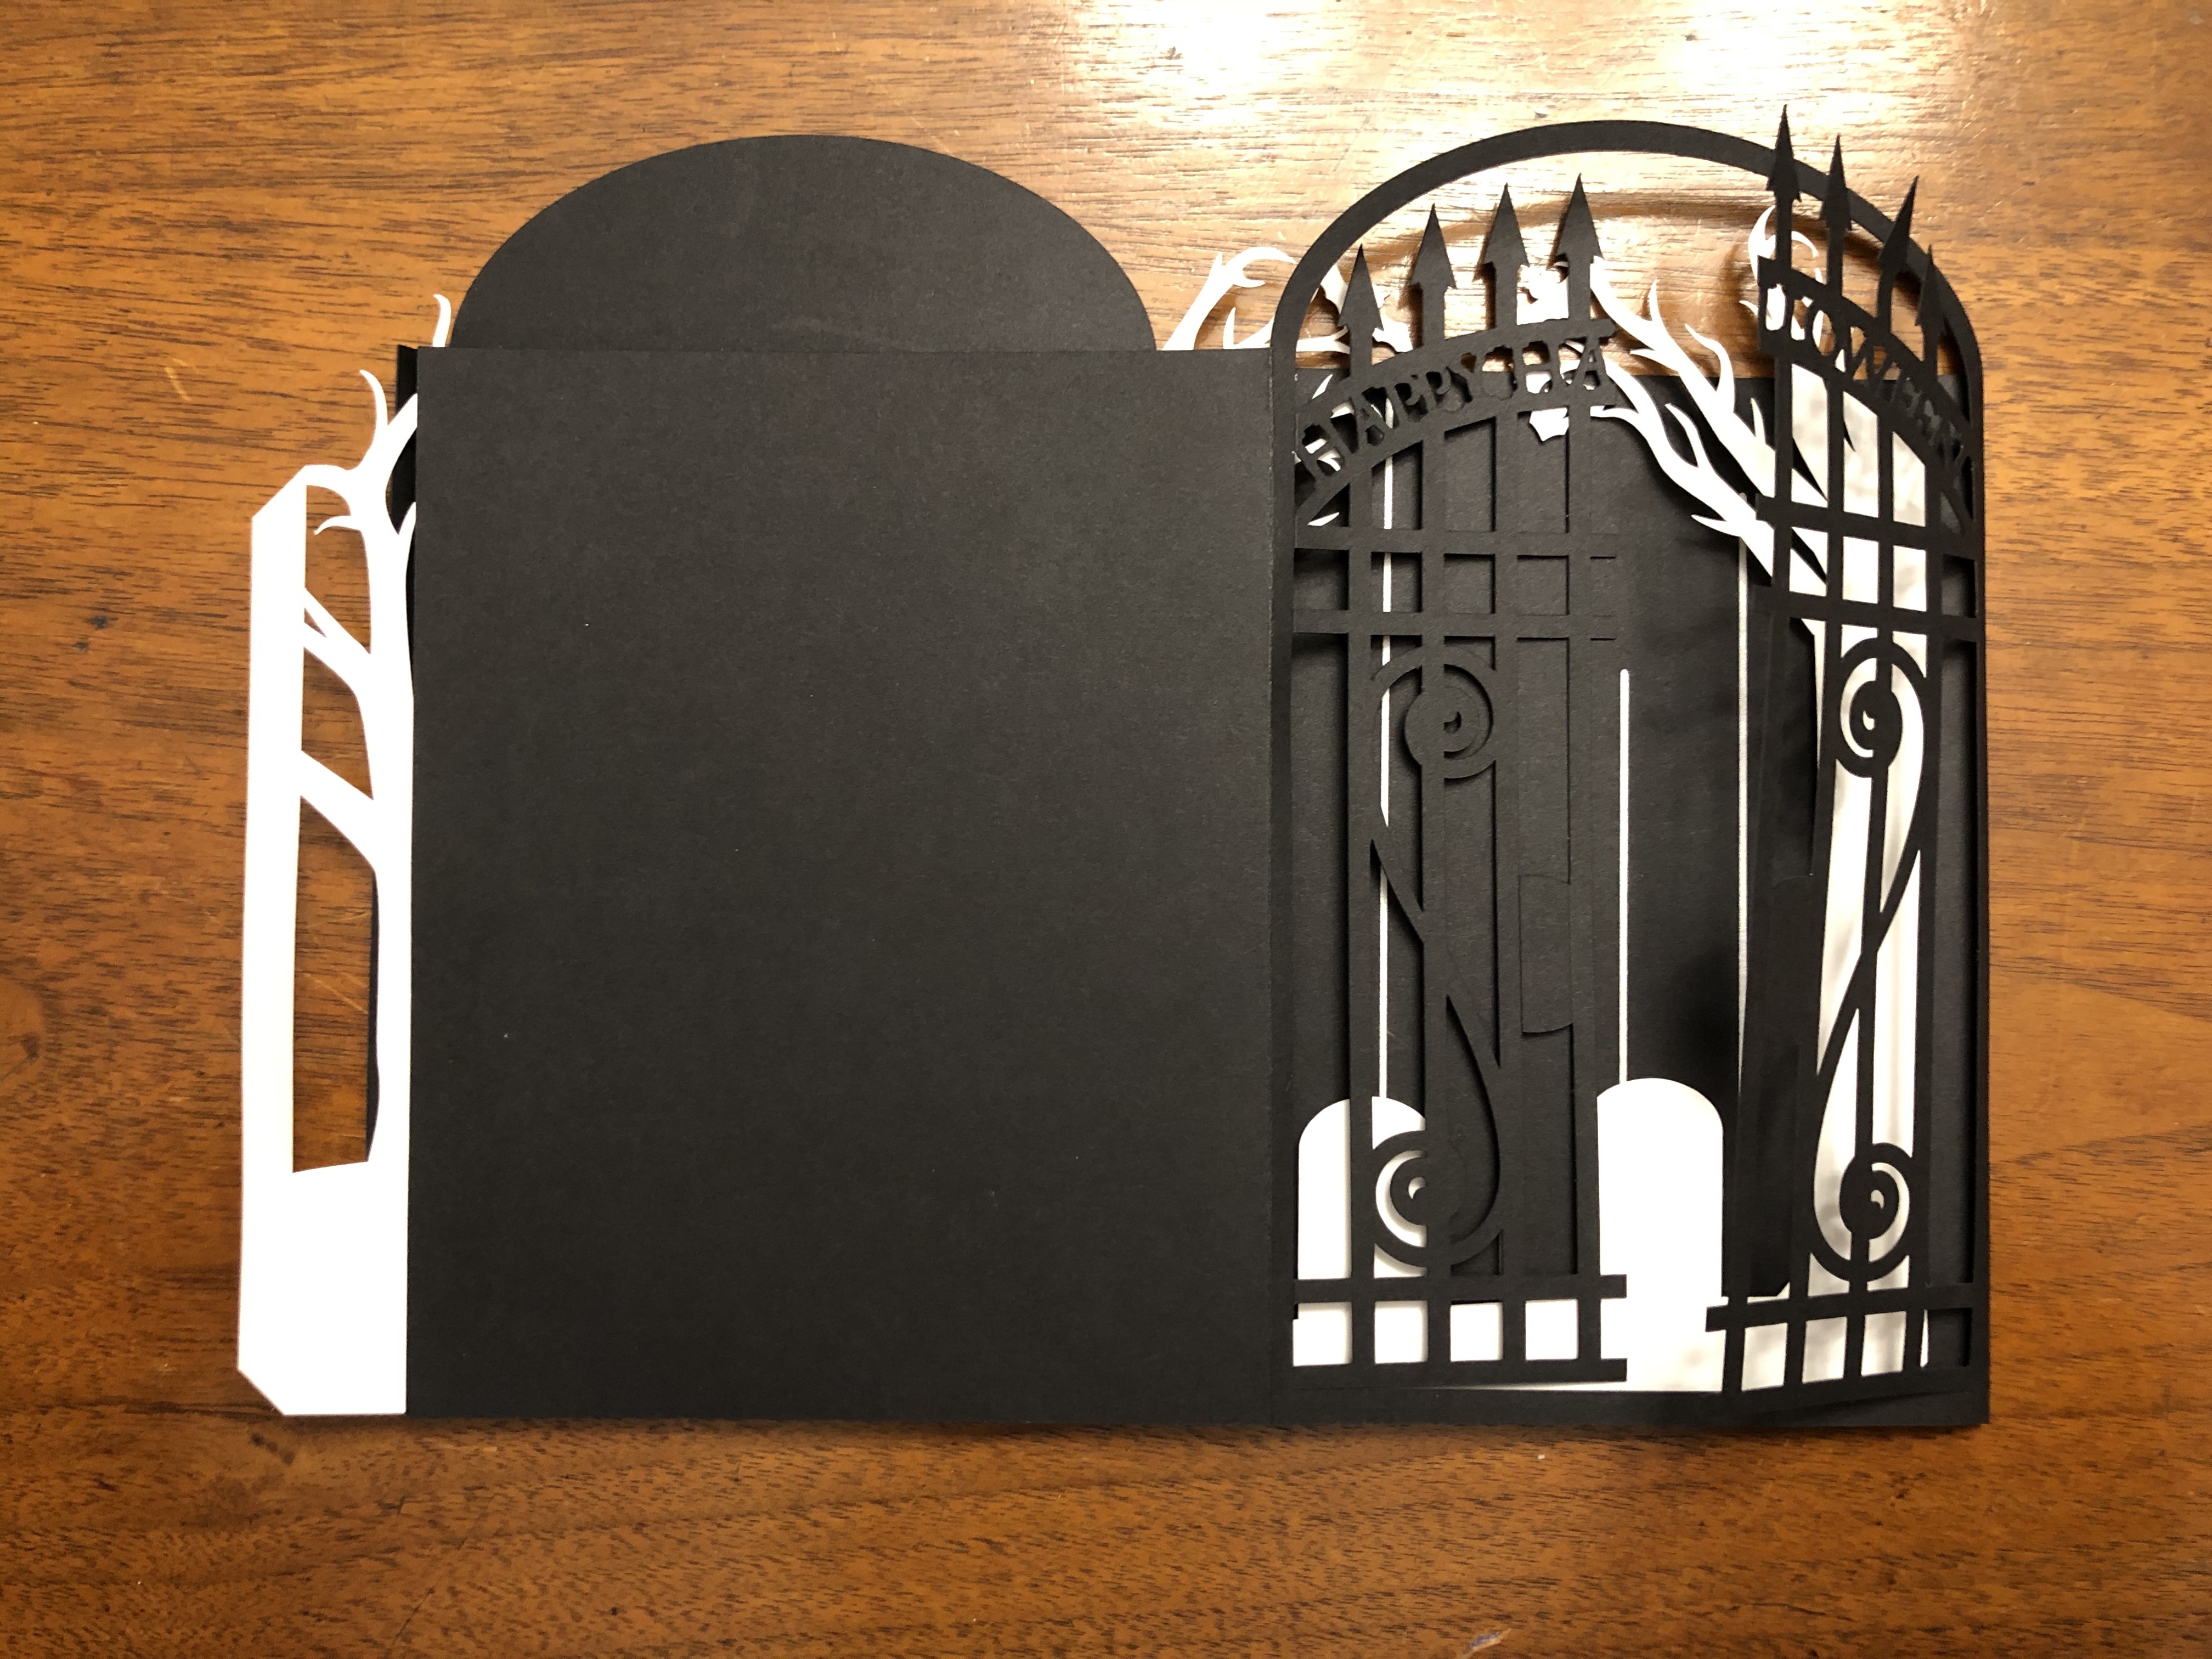
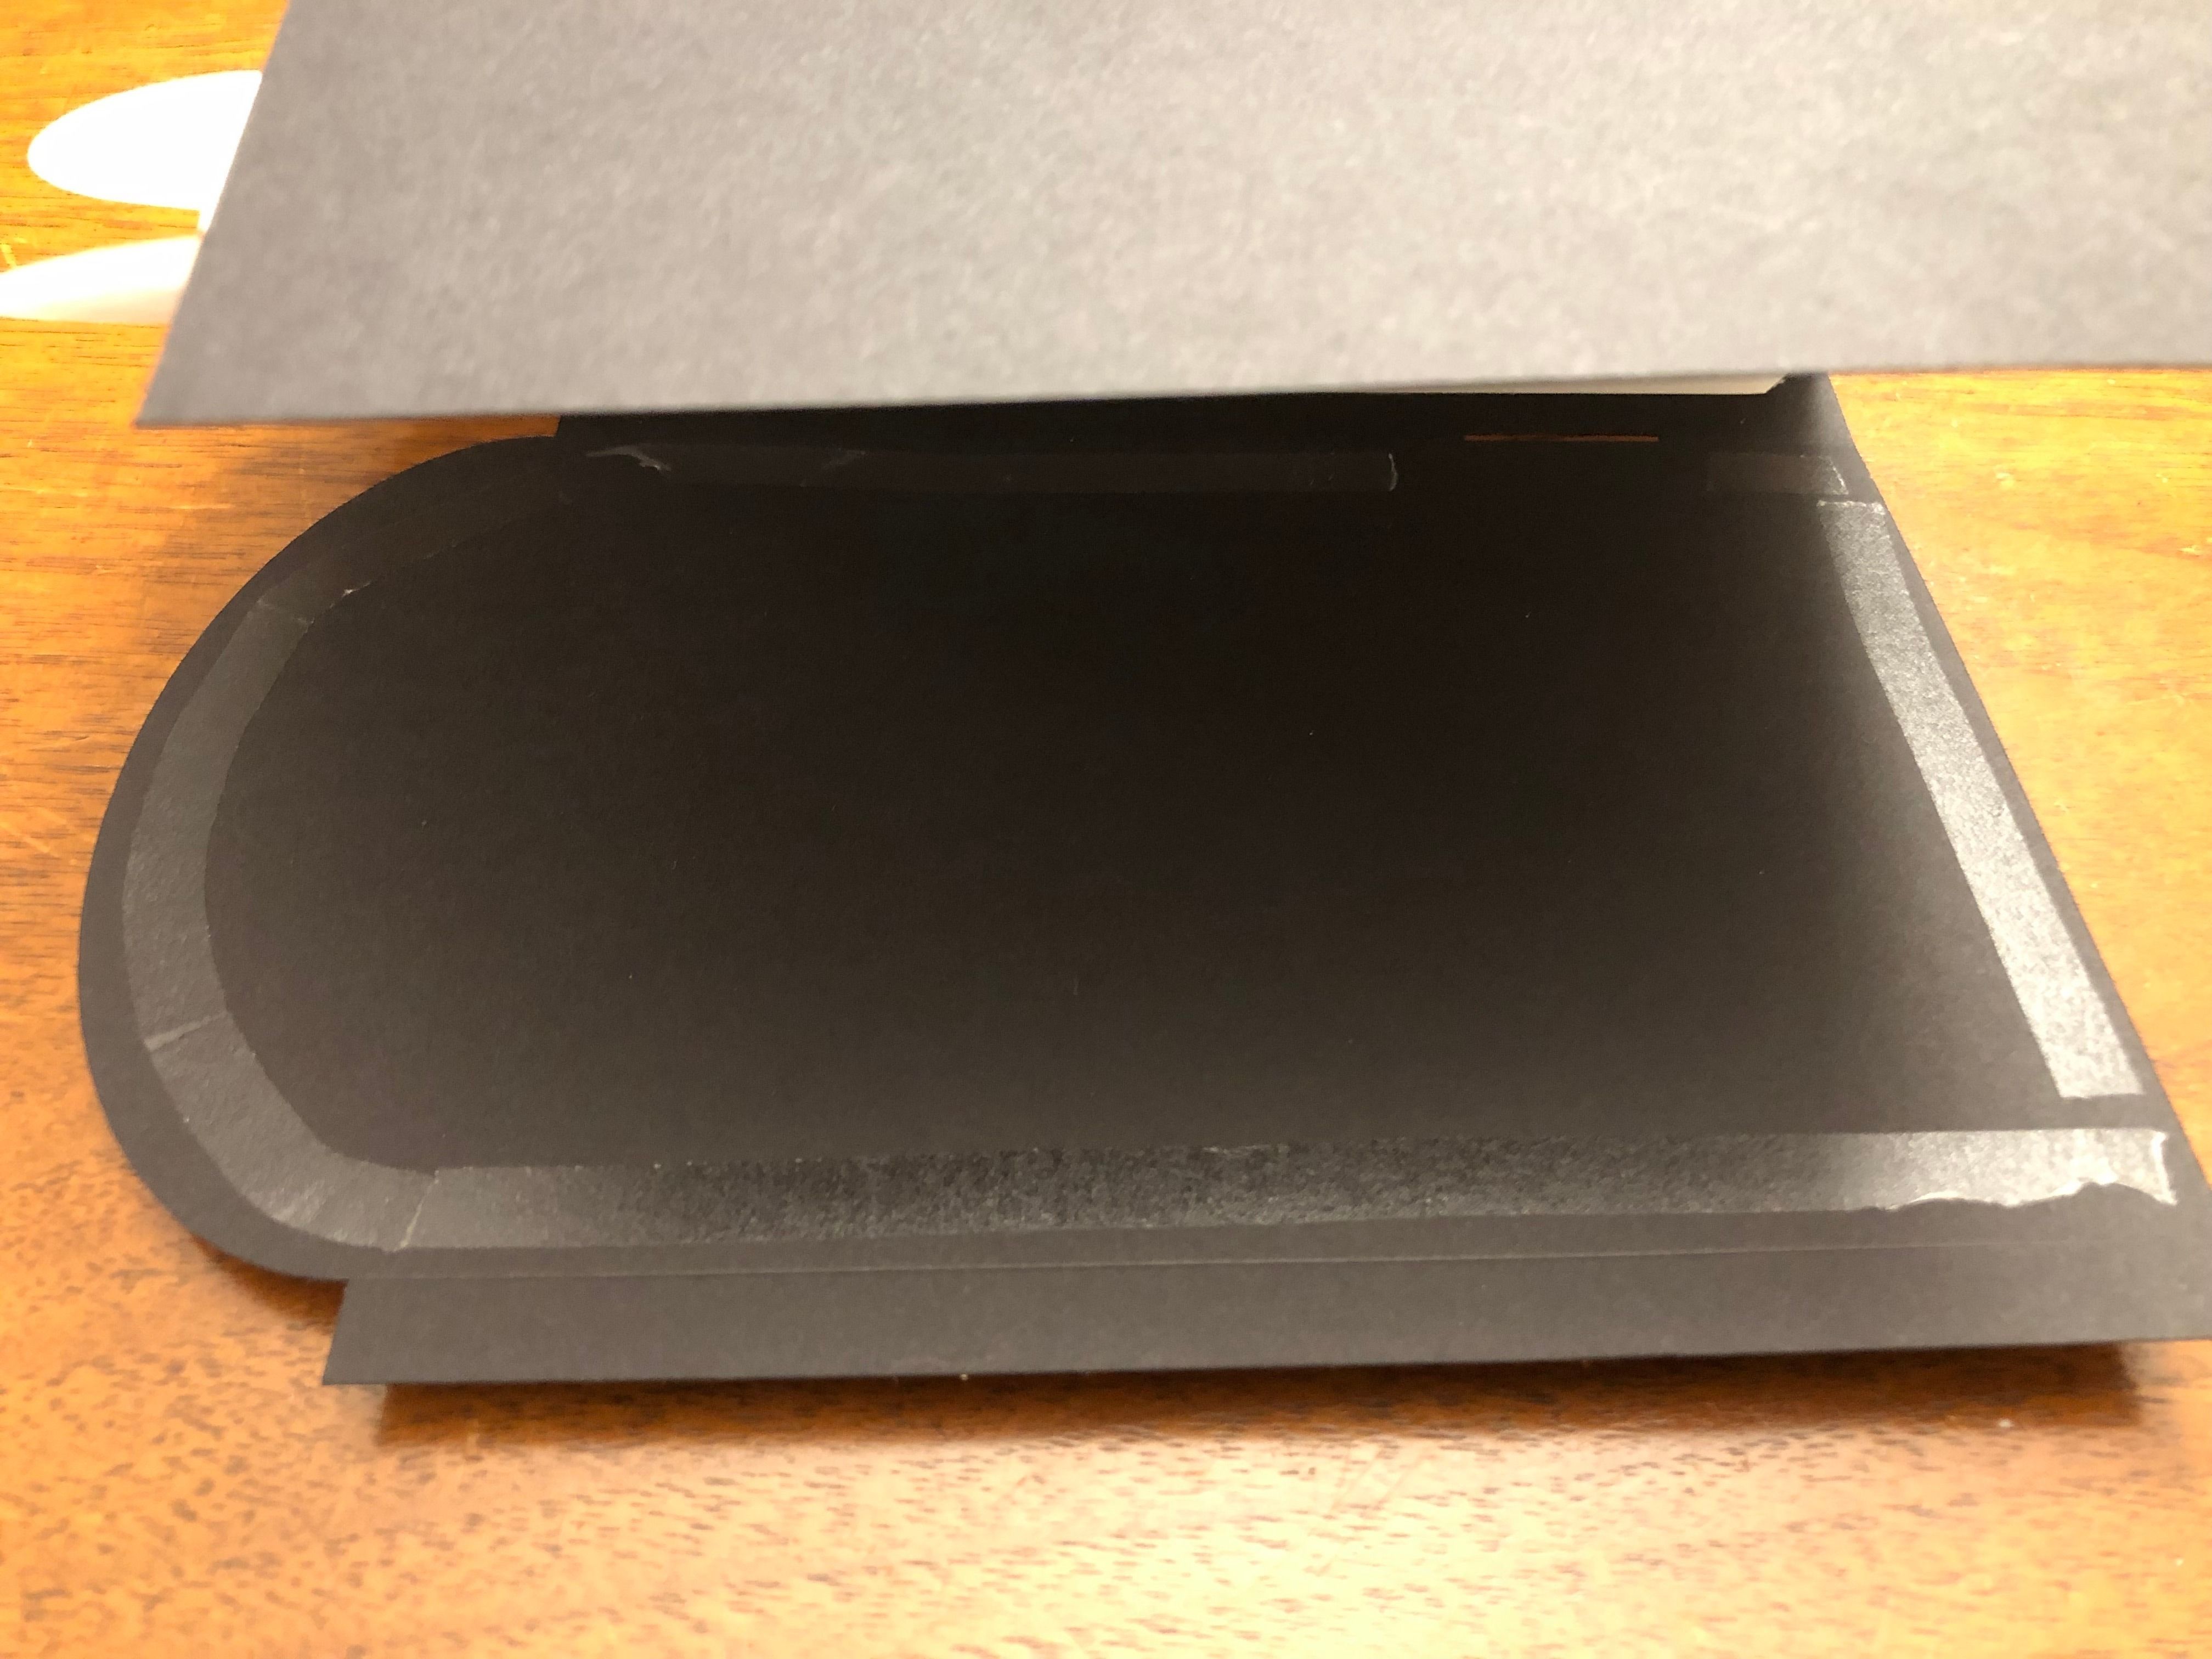
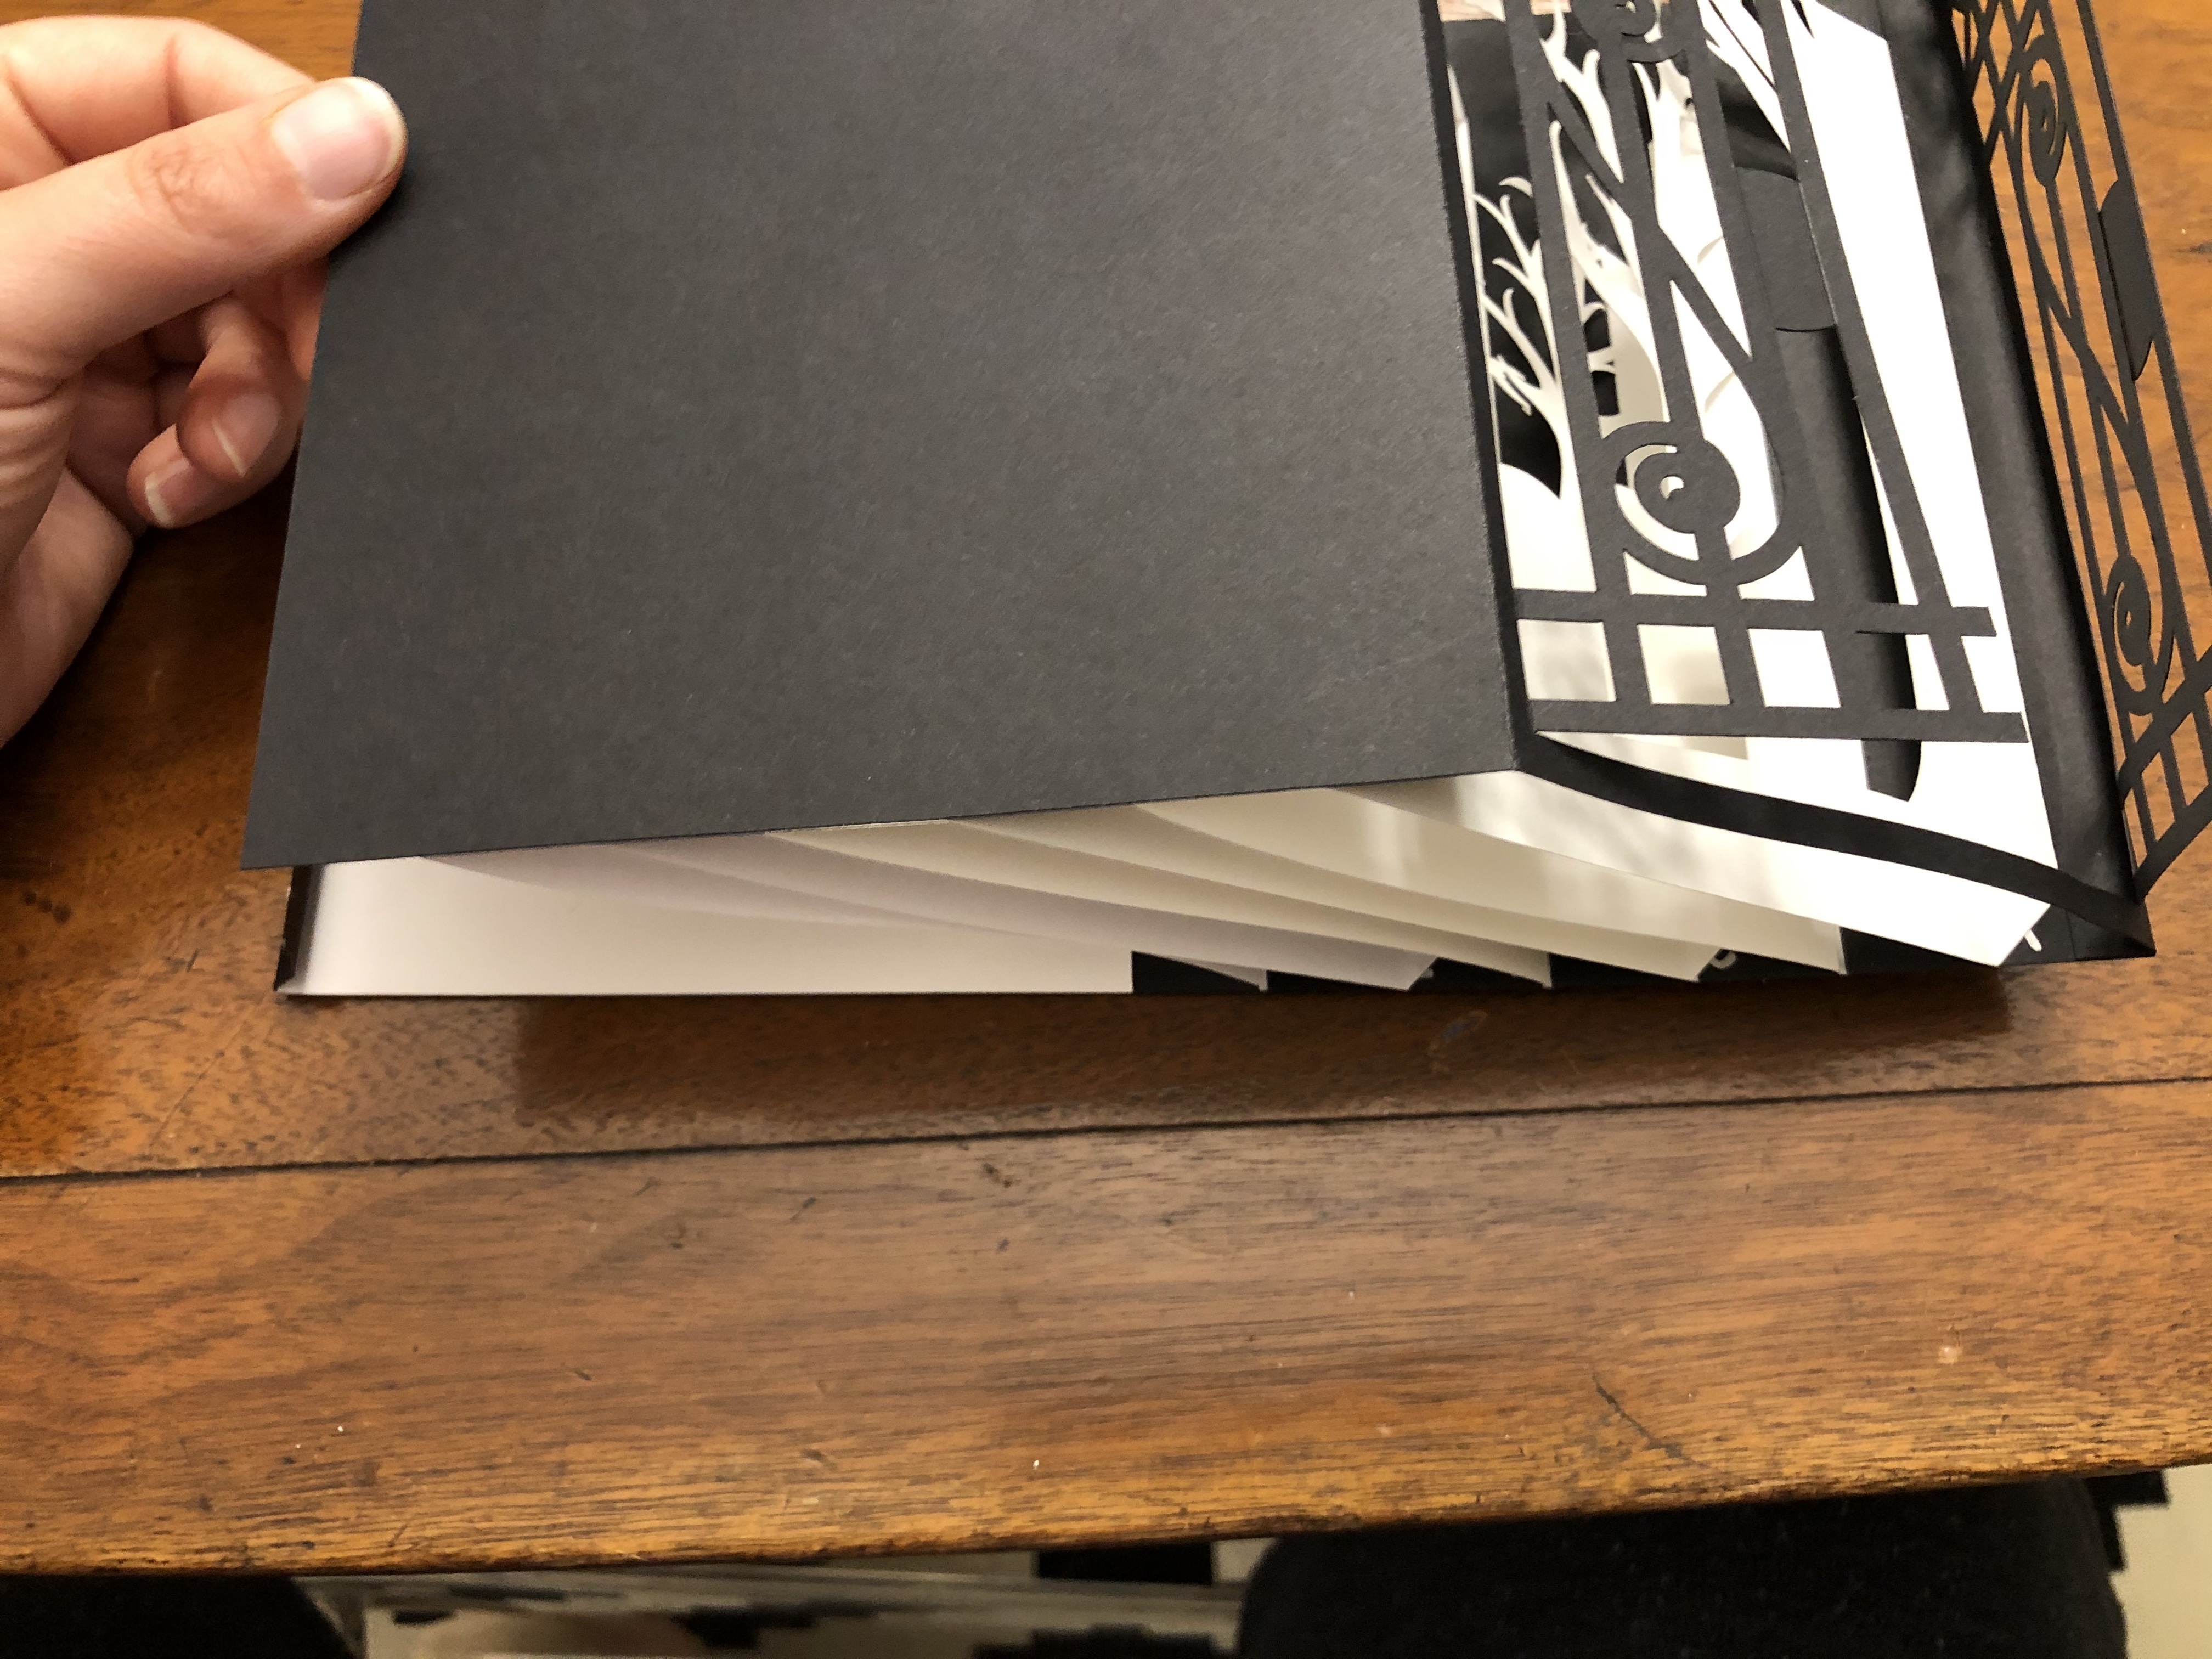
Begin with the black parts. The black cover card, with the gates is right side out. The back cover card is set up so the writing is on the inside. Make the folds as shown in the photo. Mountain folds for the corners of the box on the gate page, valley folds for the back. Run adhesive down the front cover tab and attach the two parts.
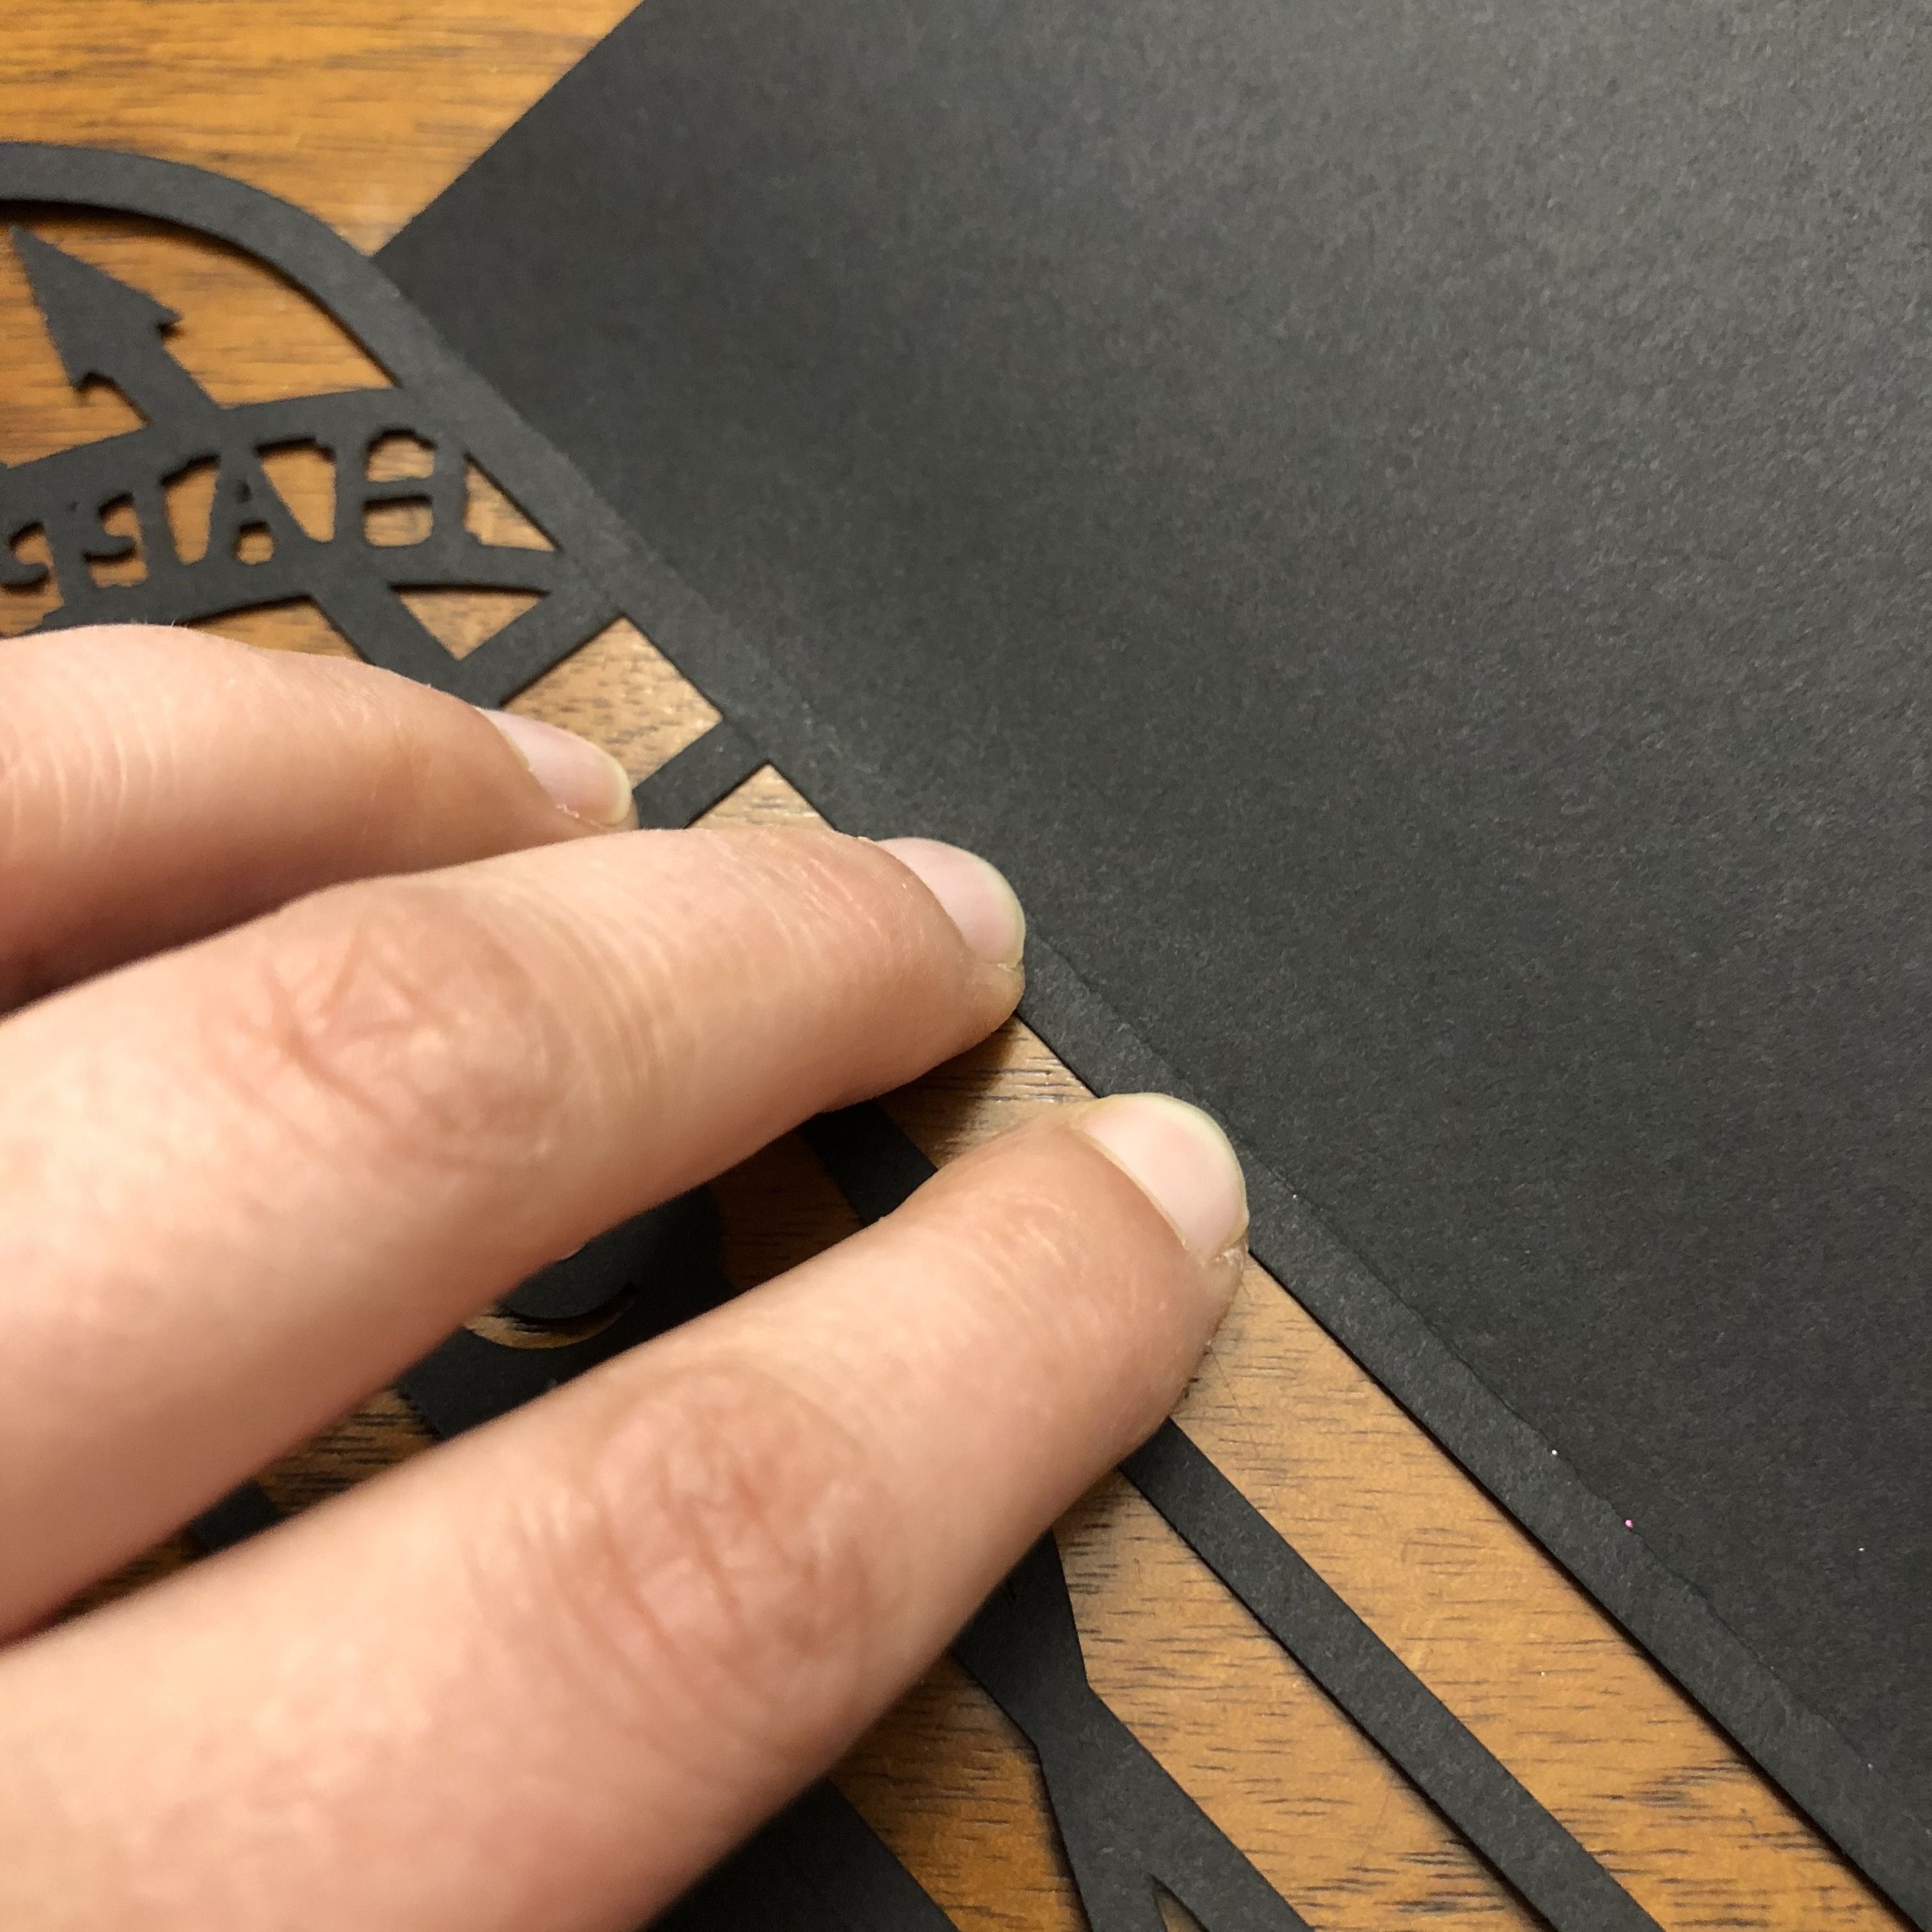
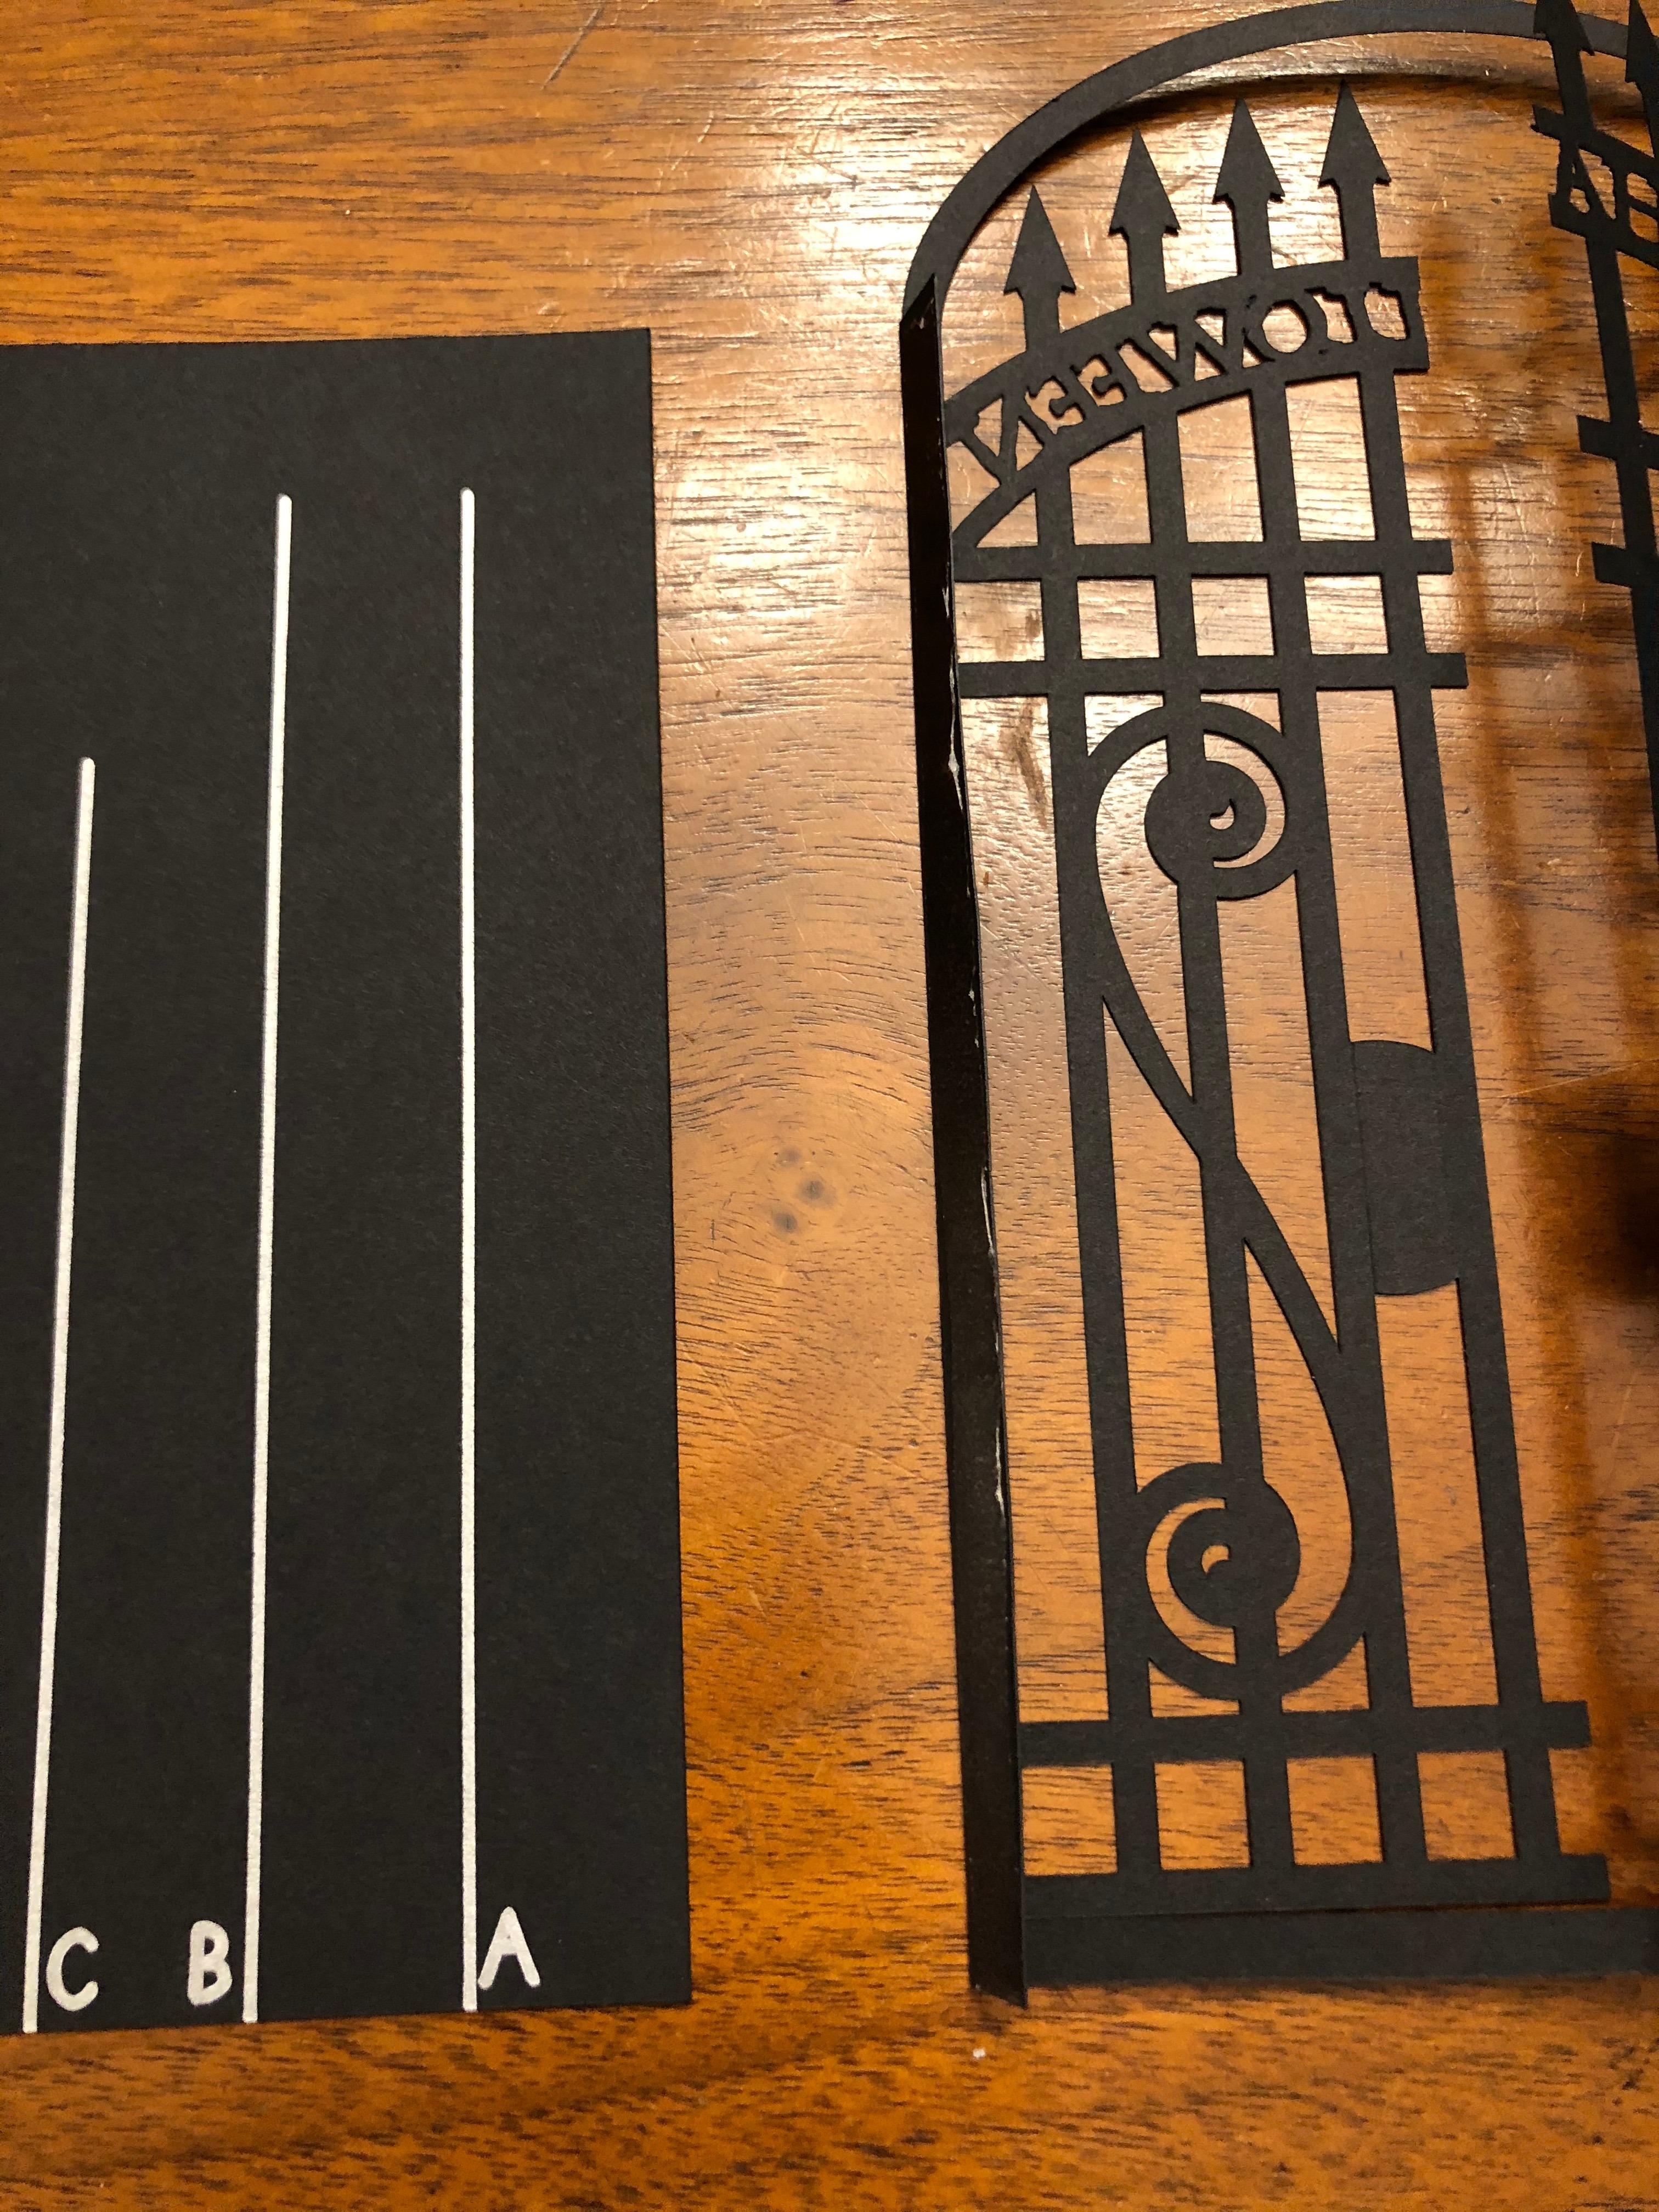
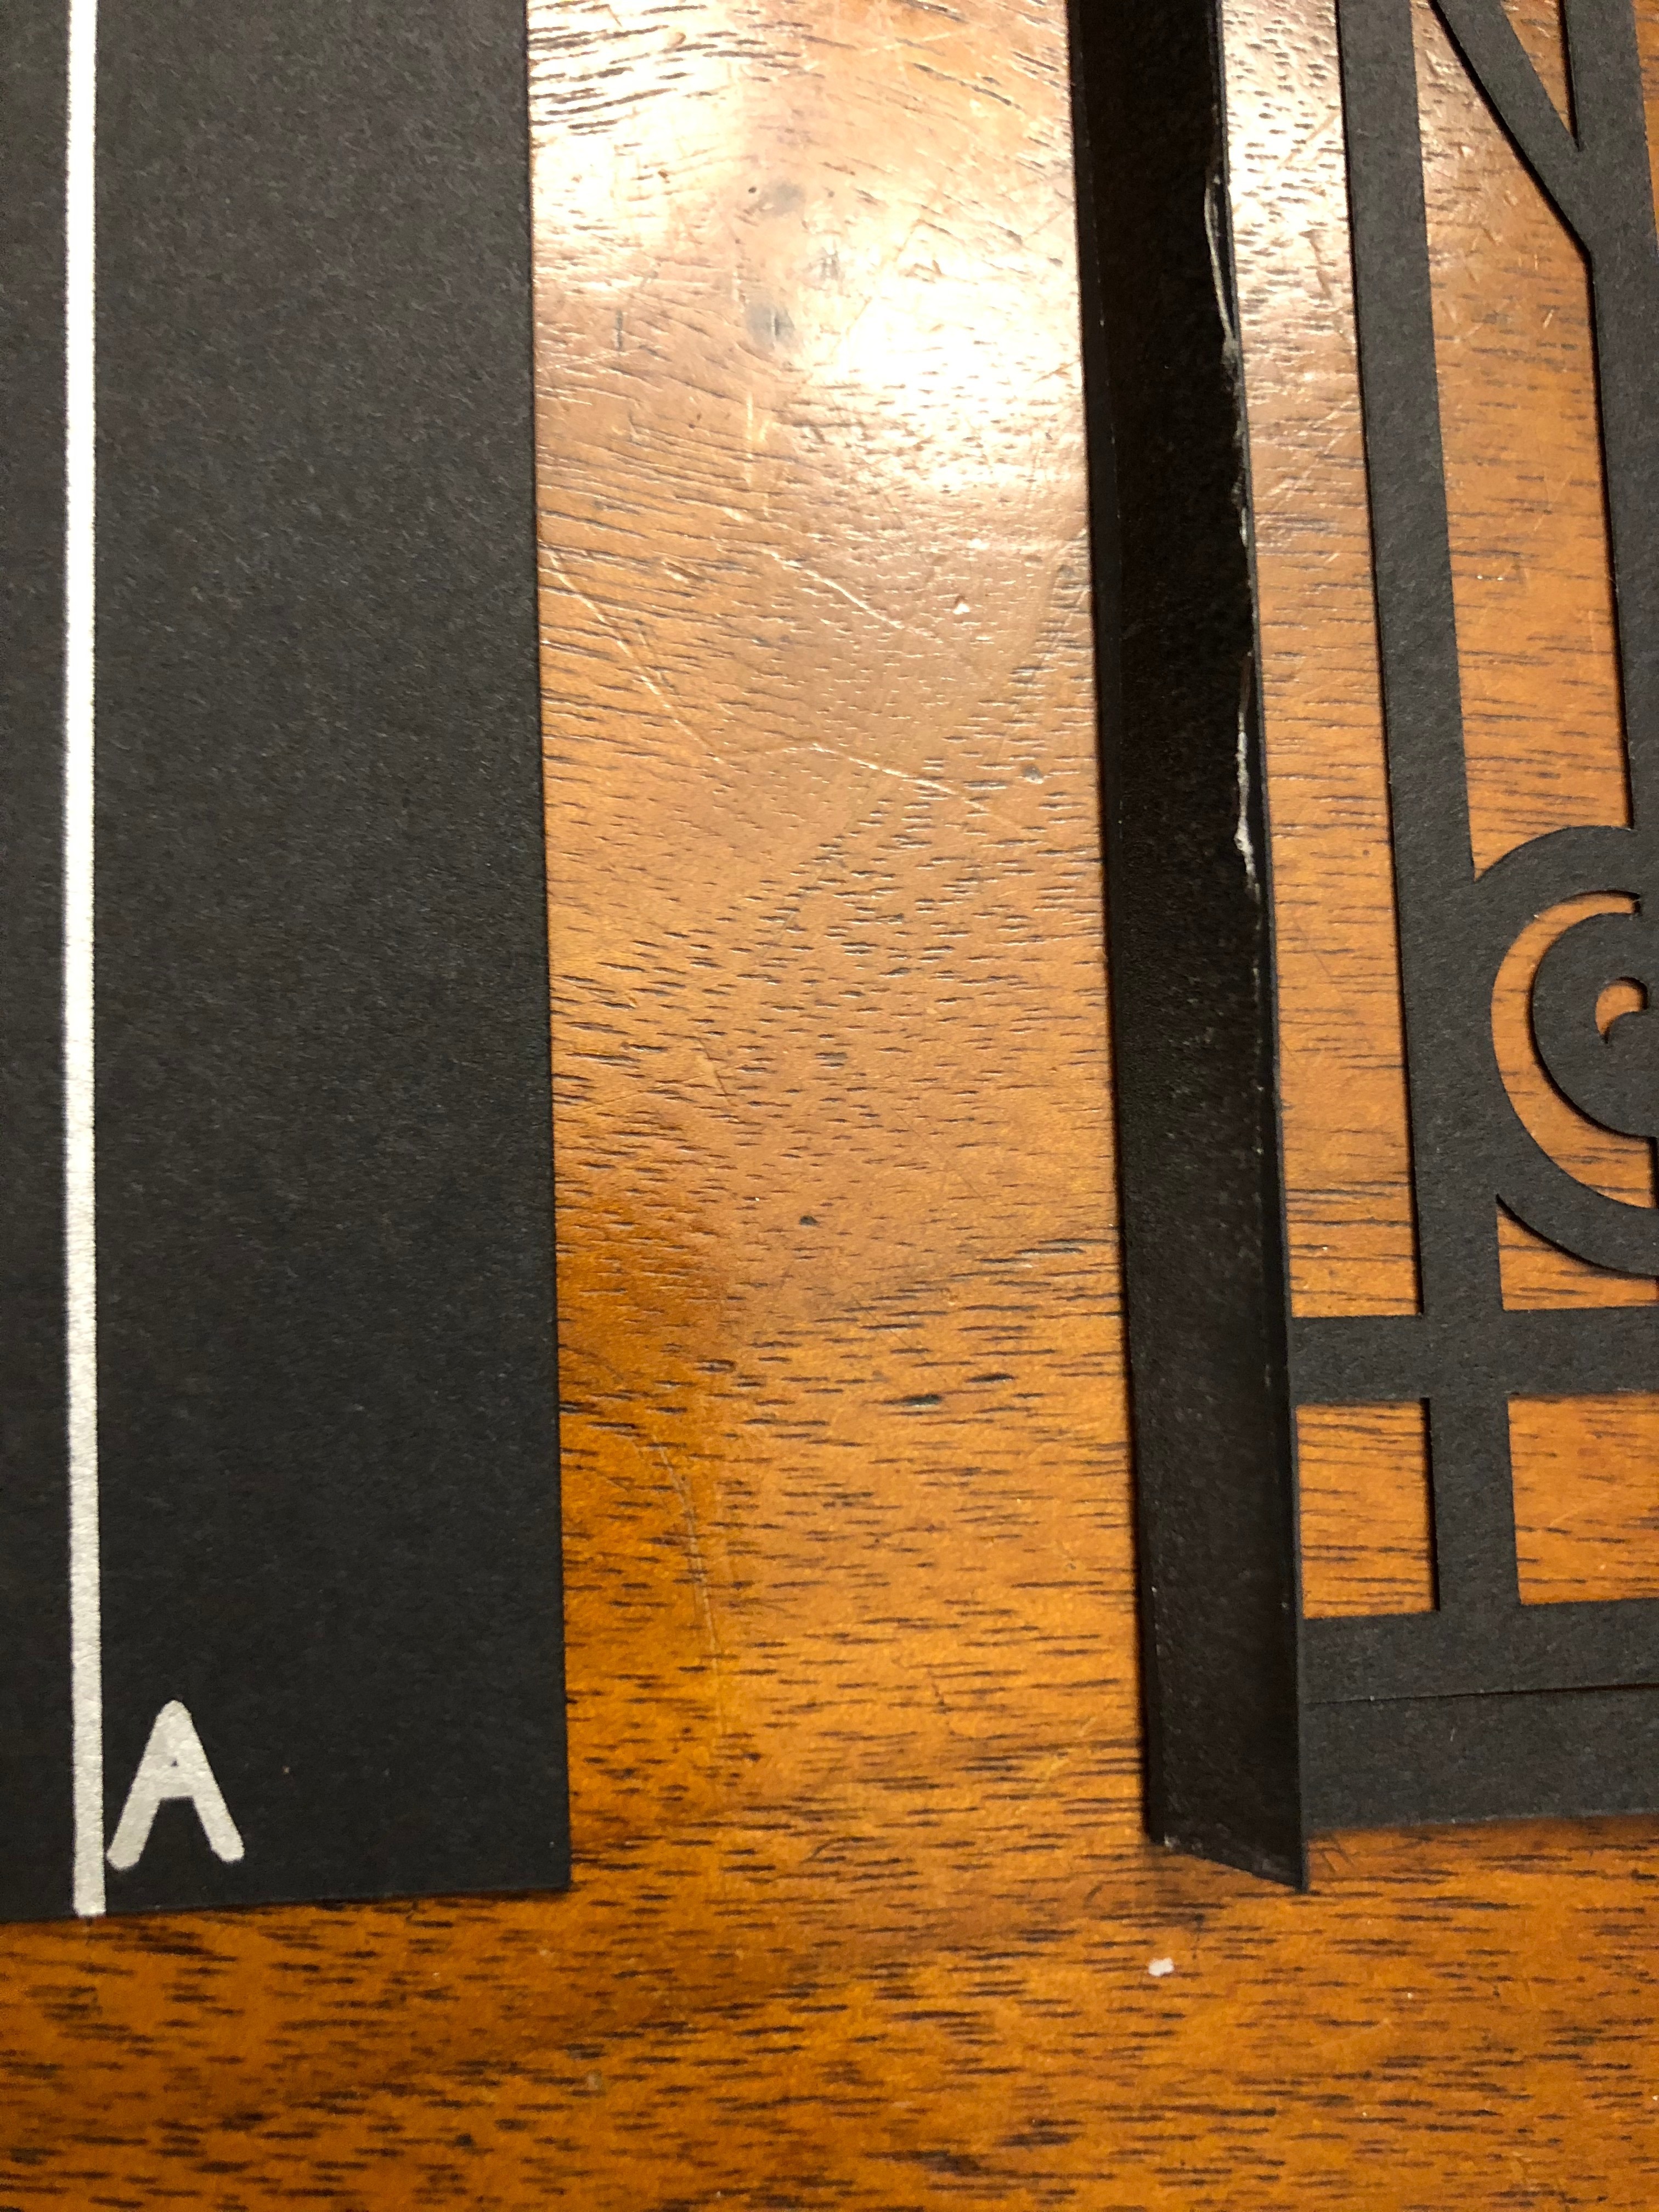
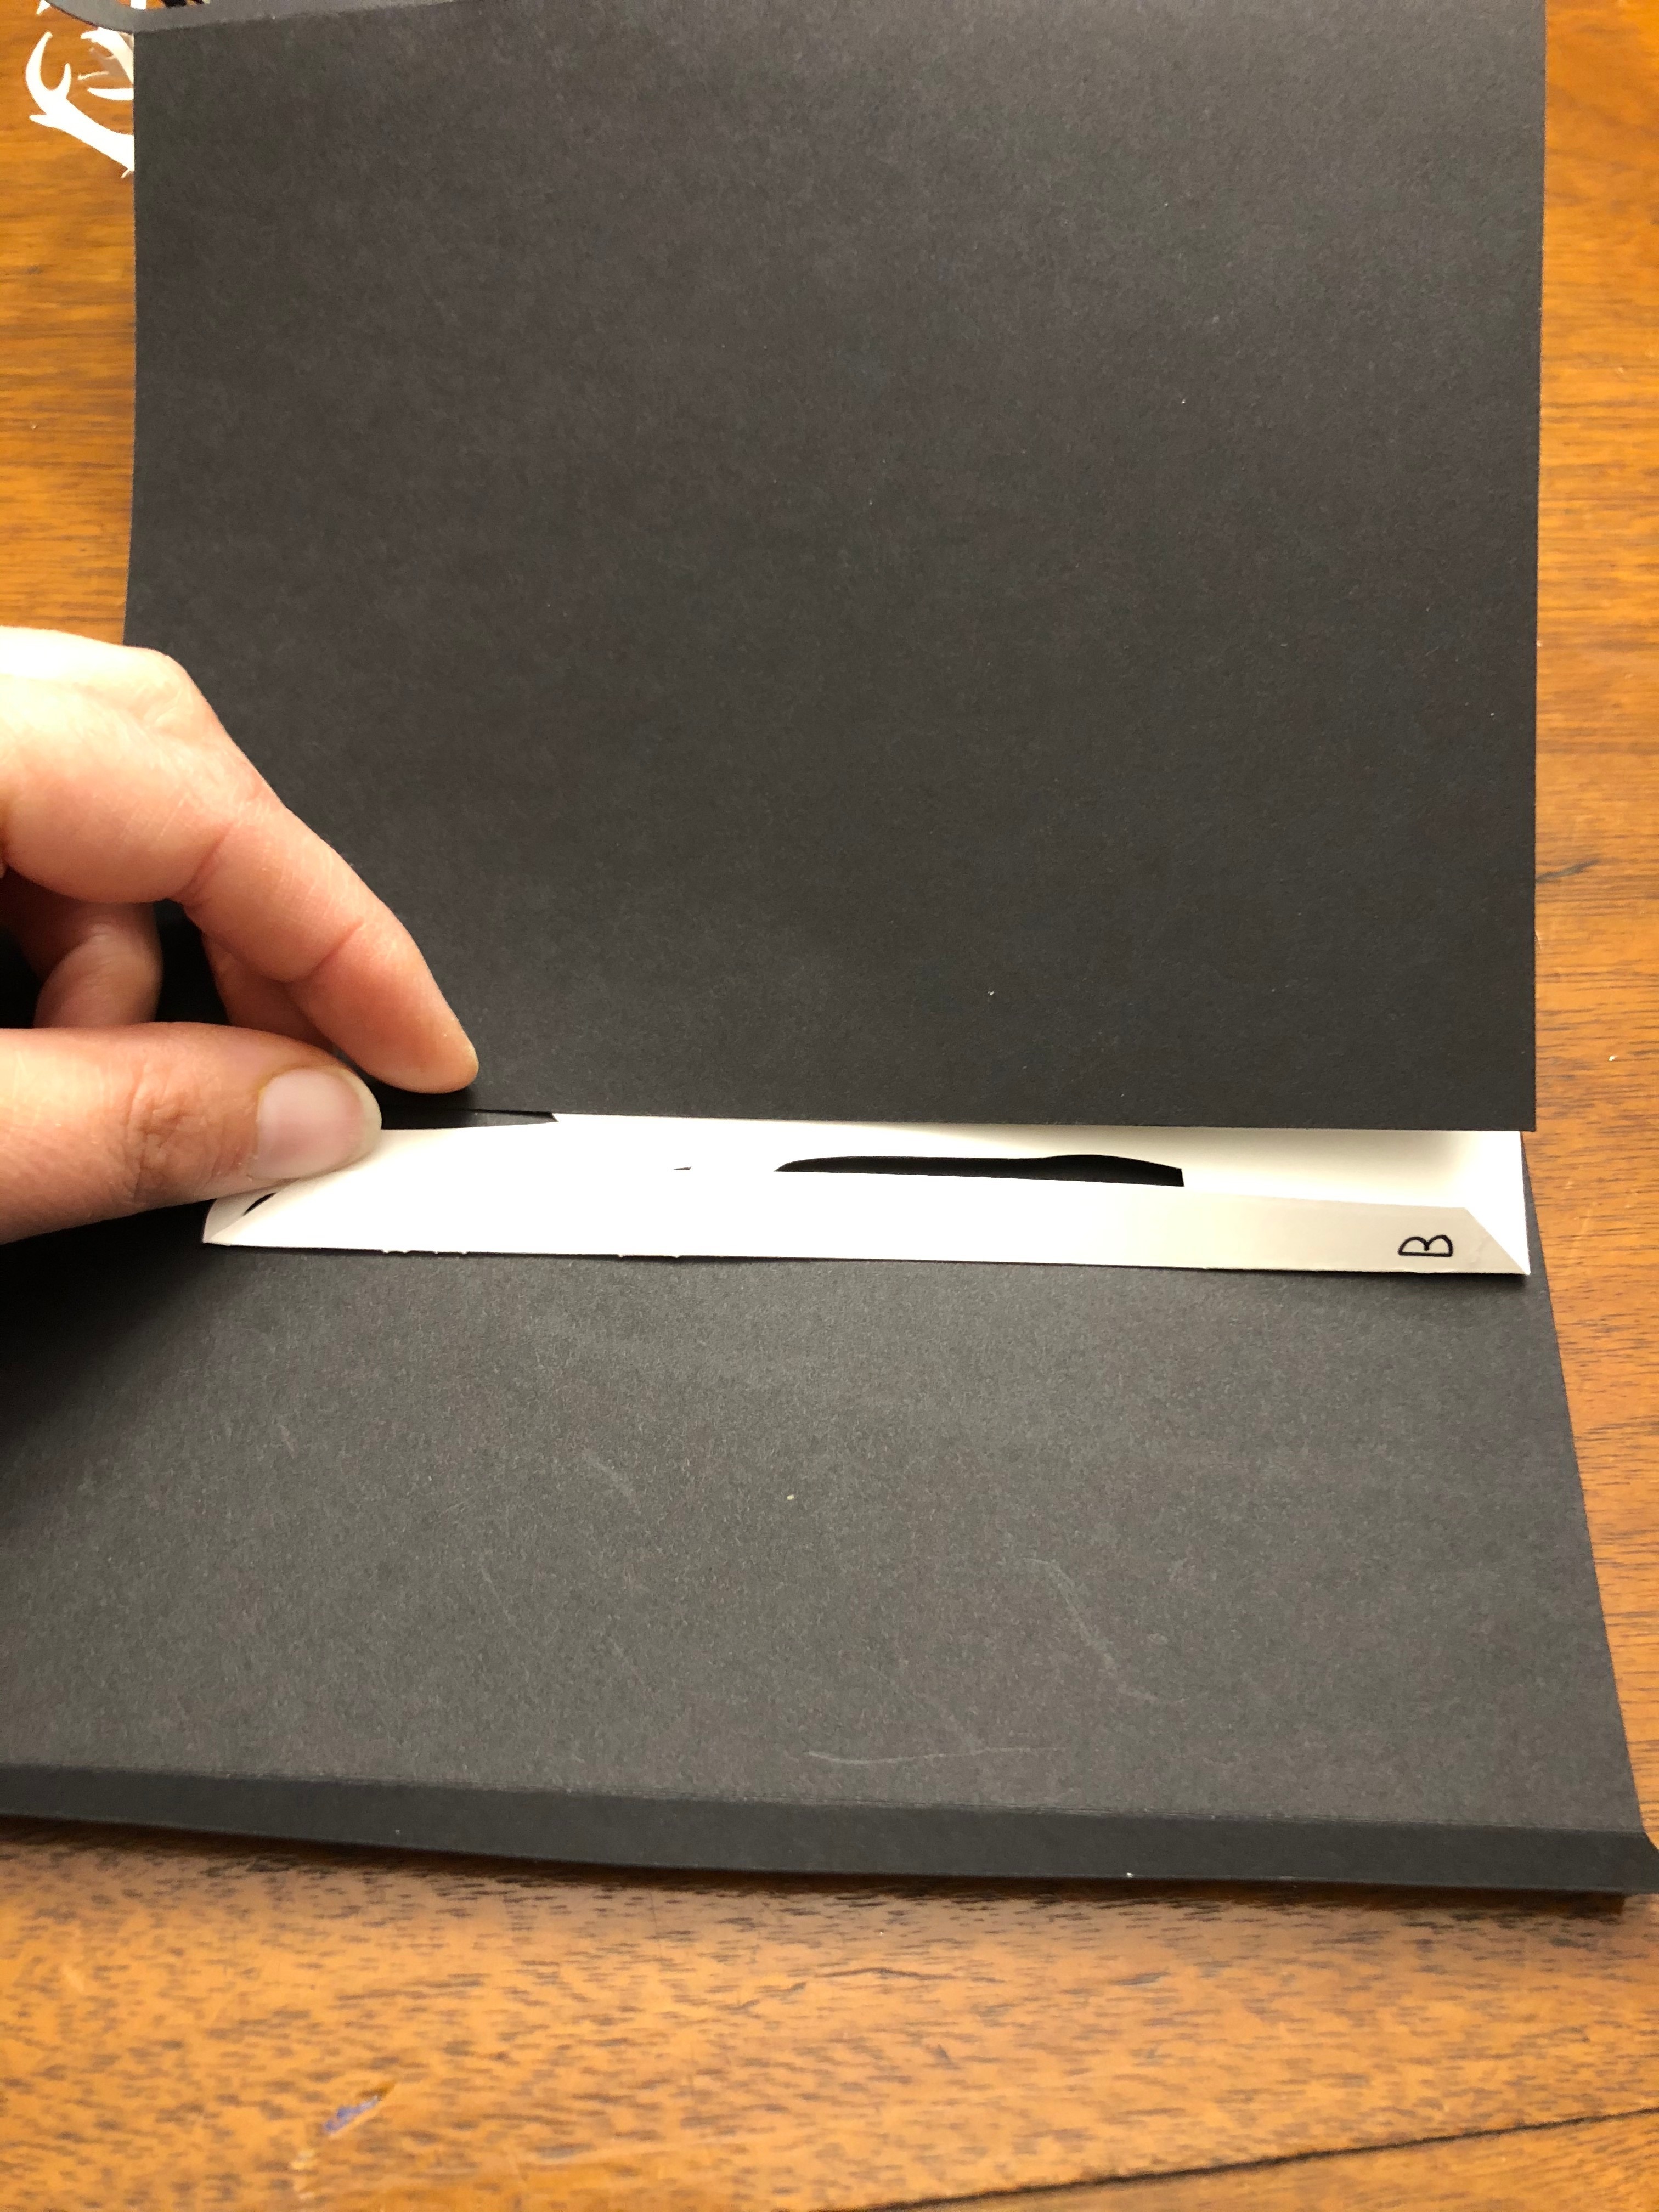
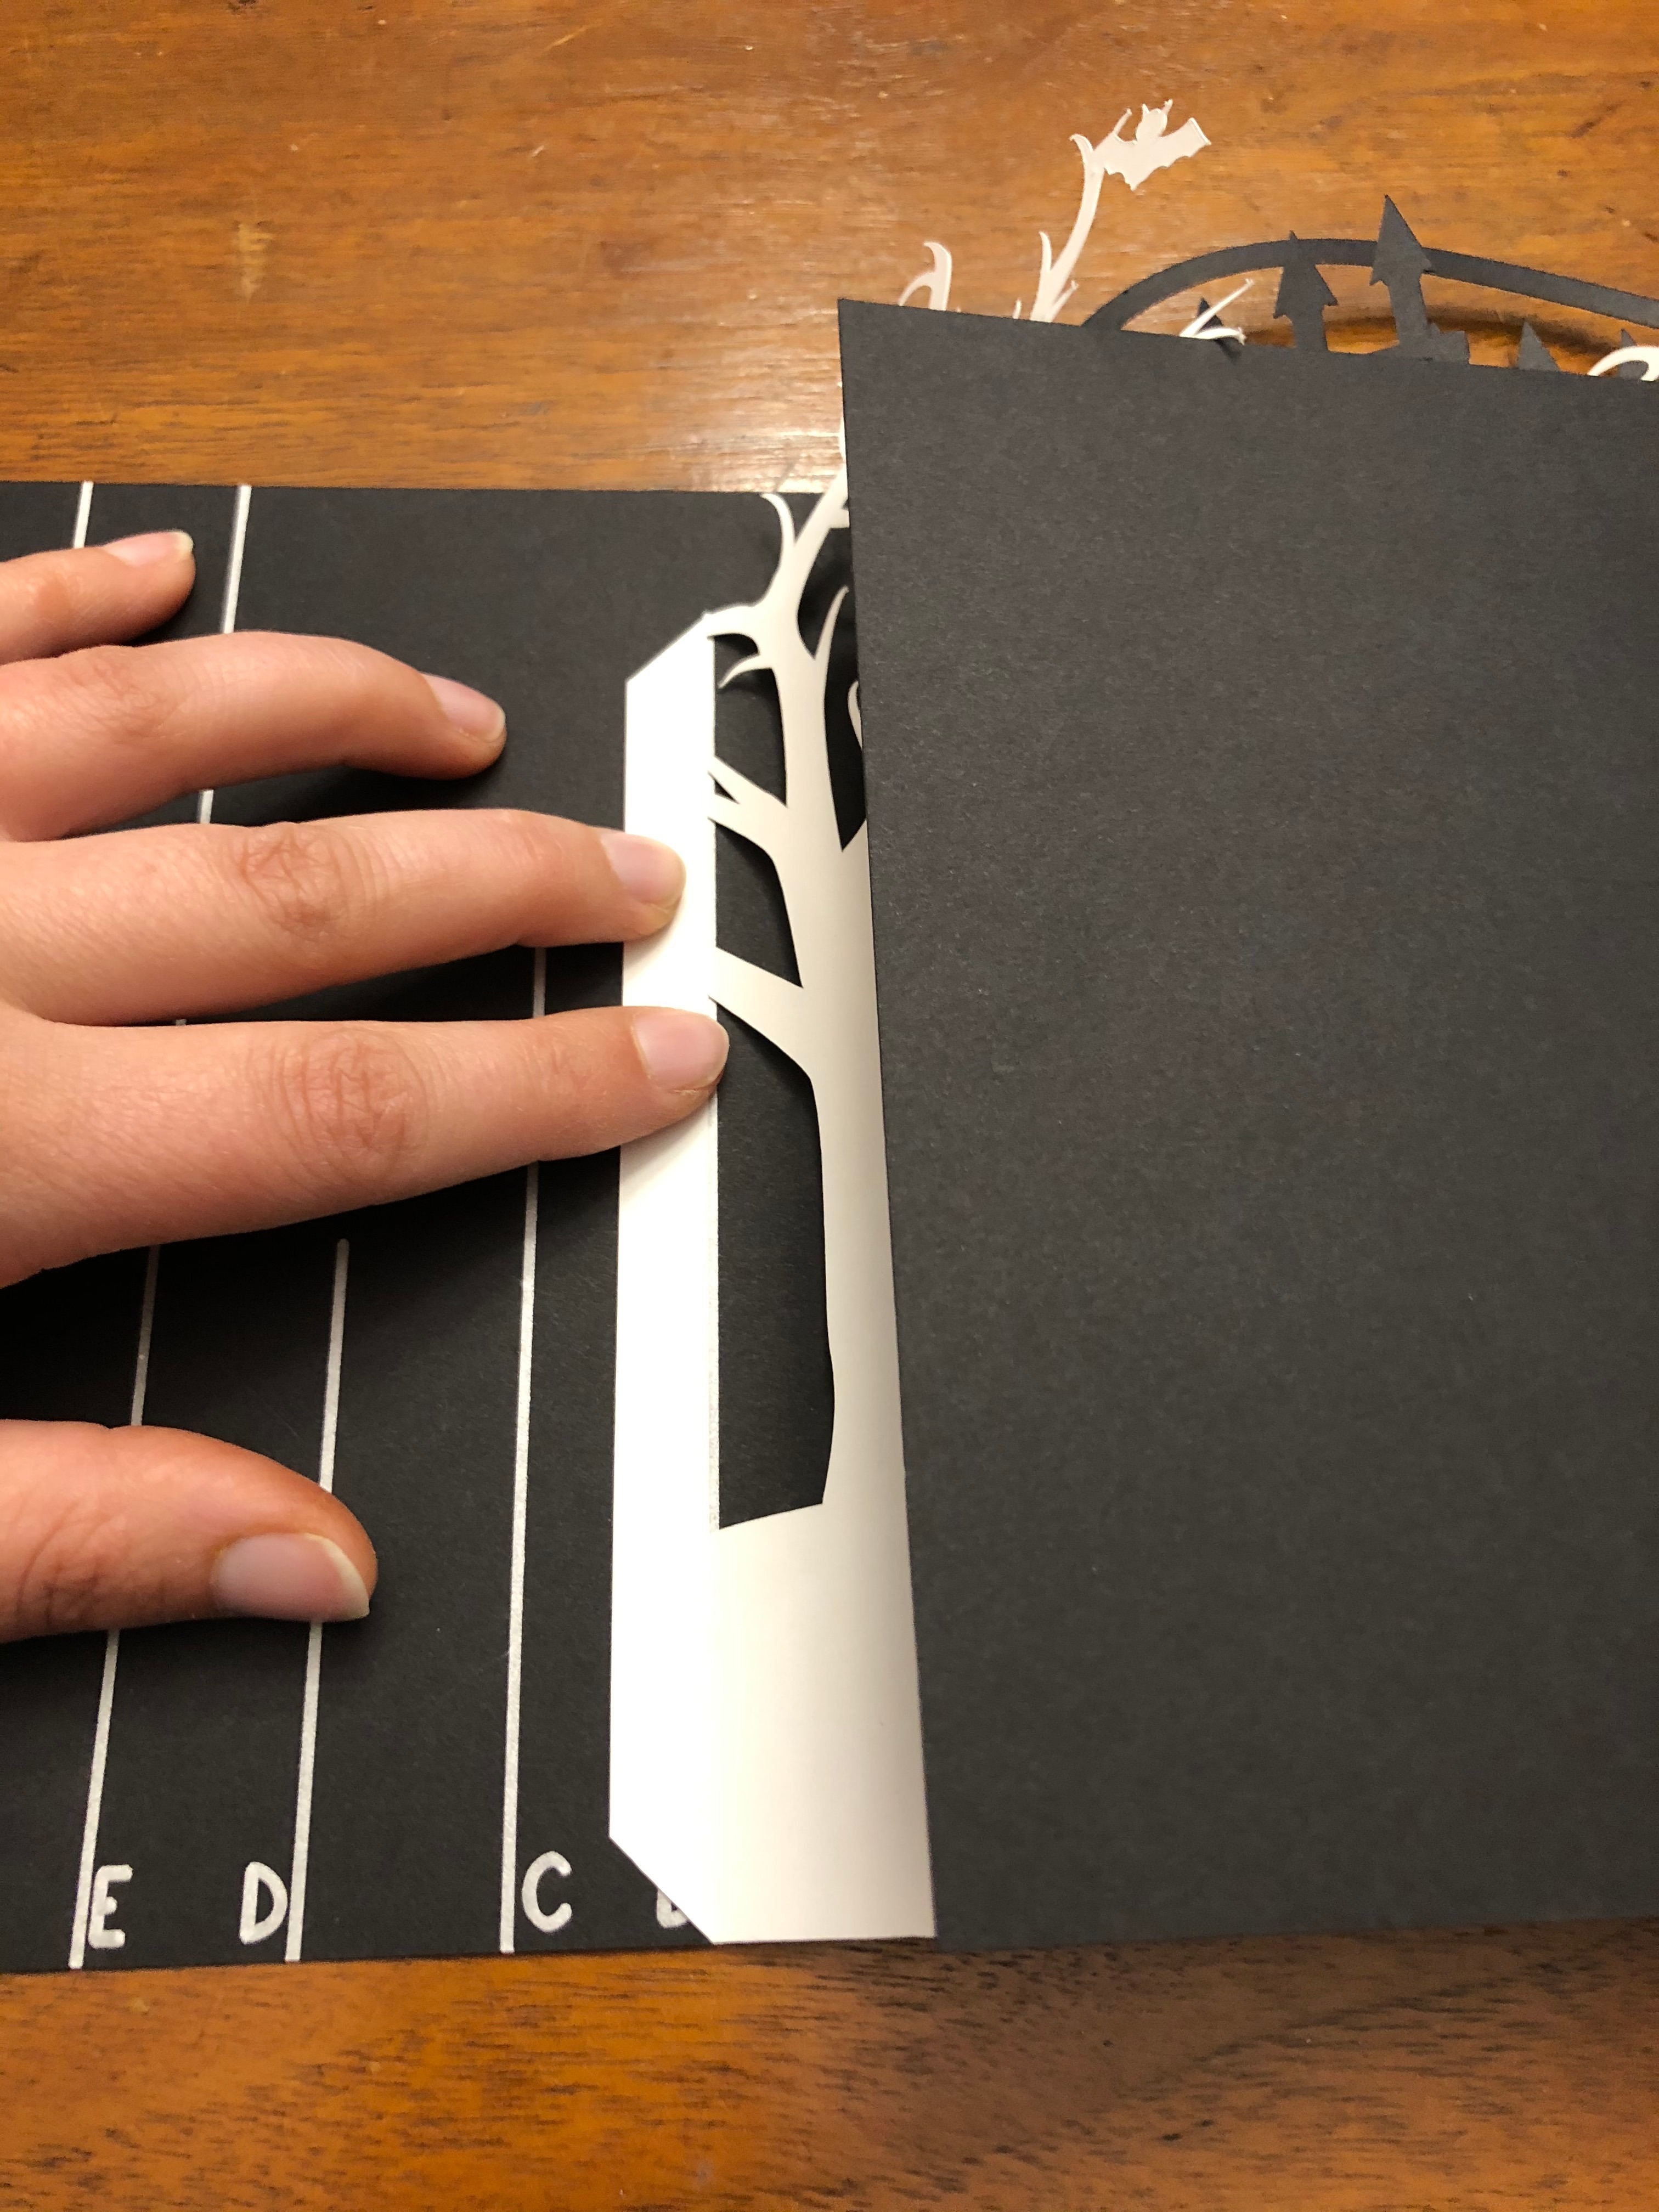
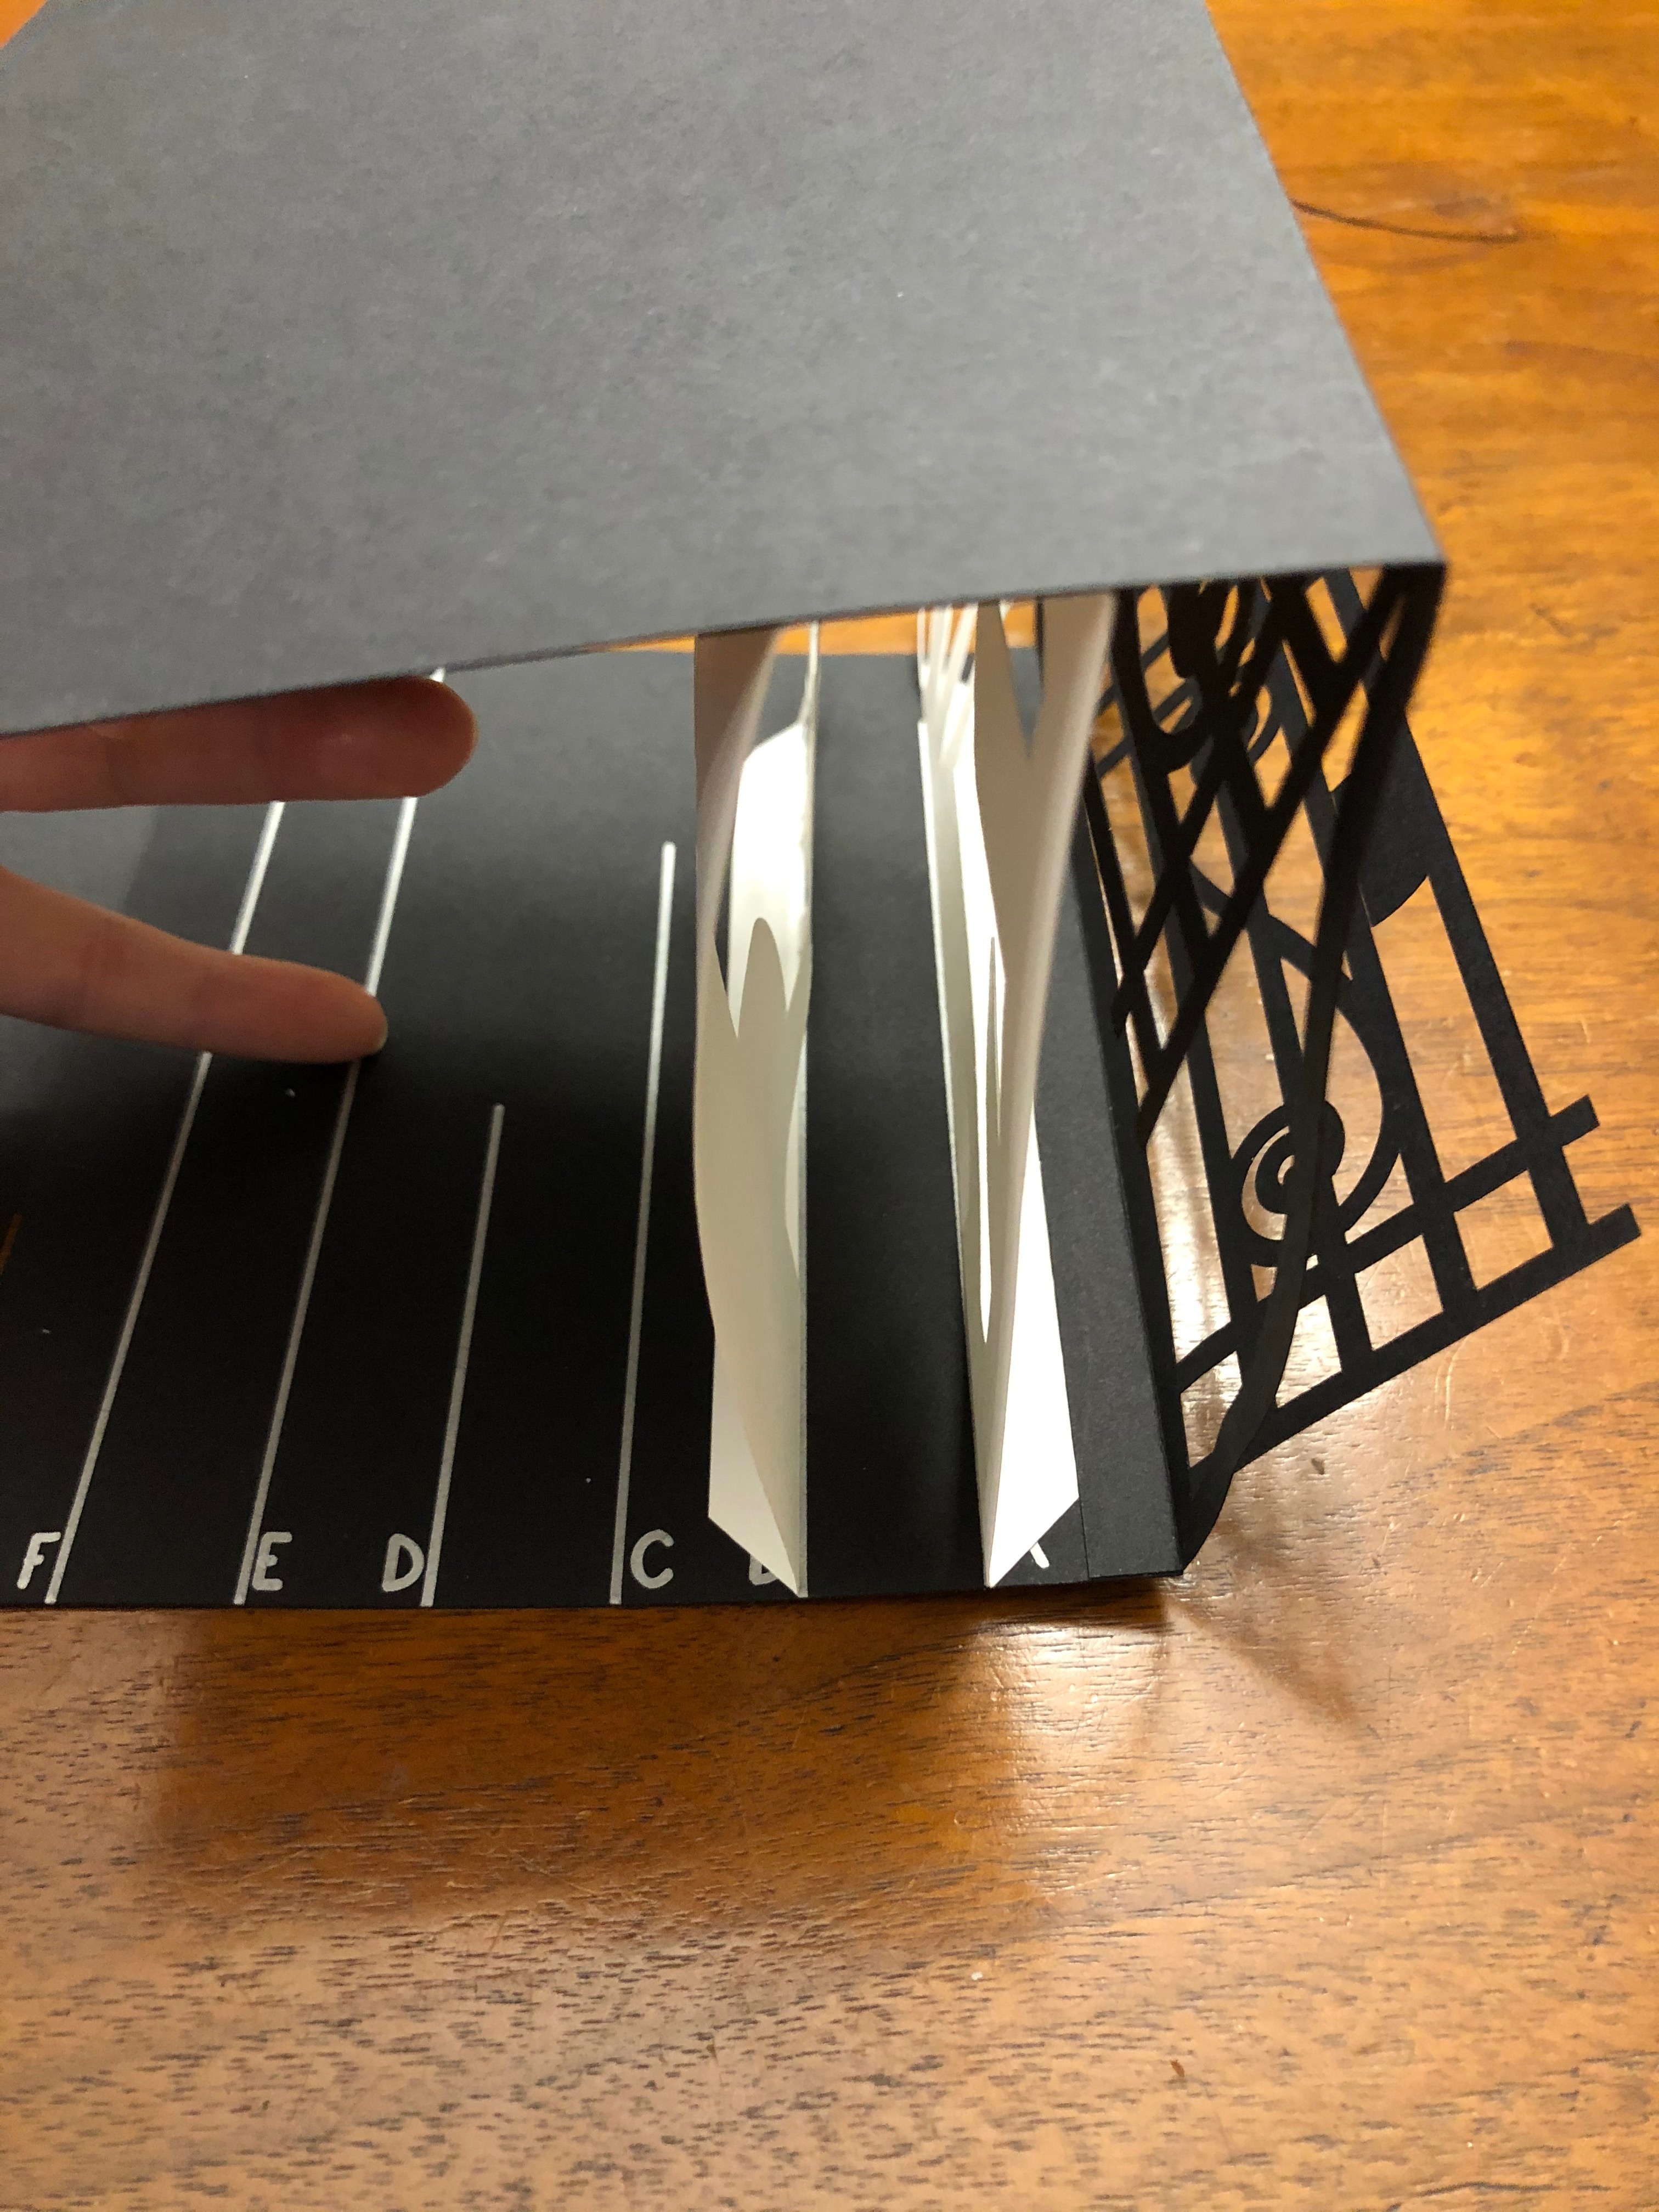
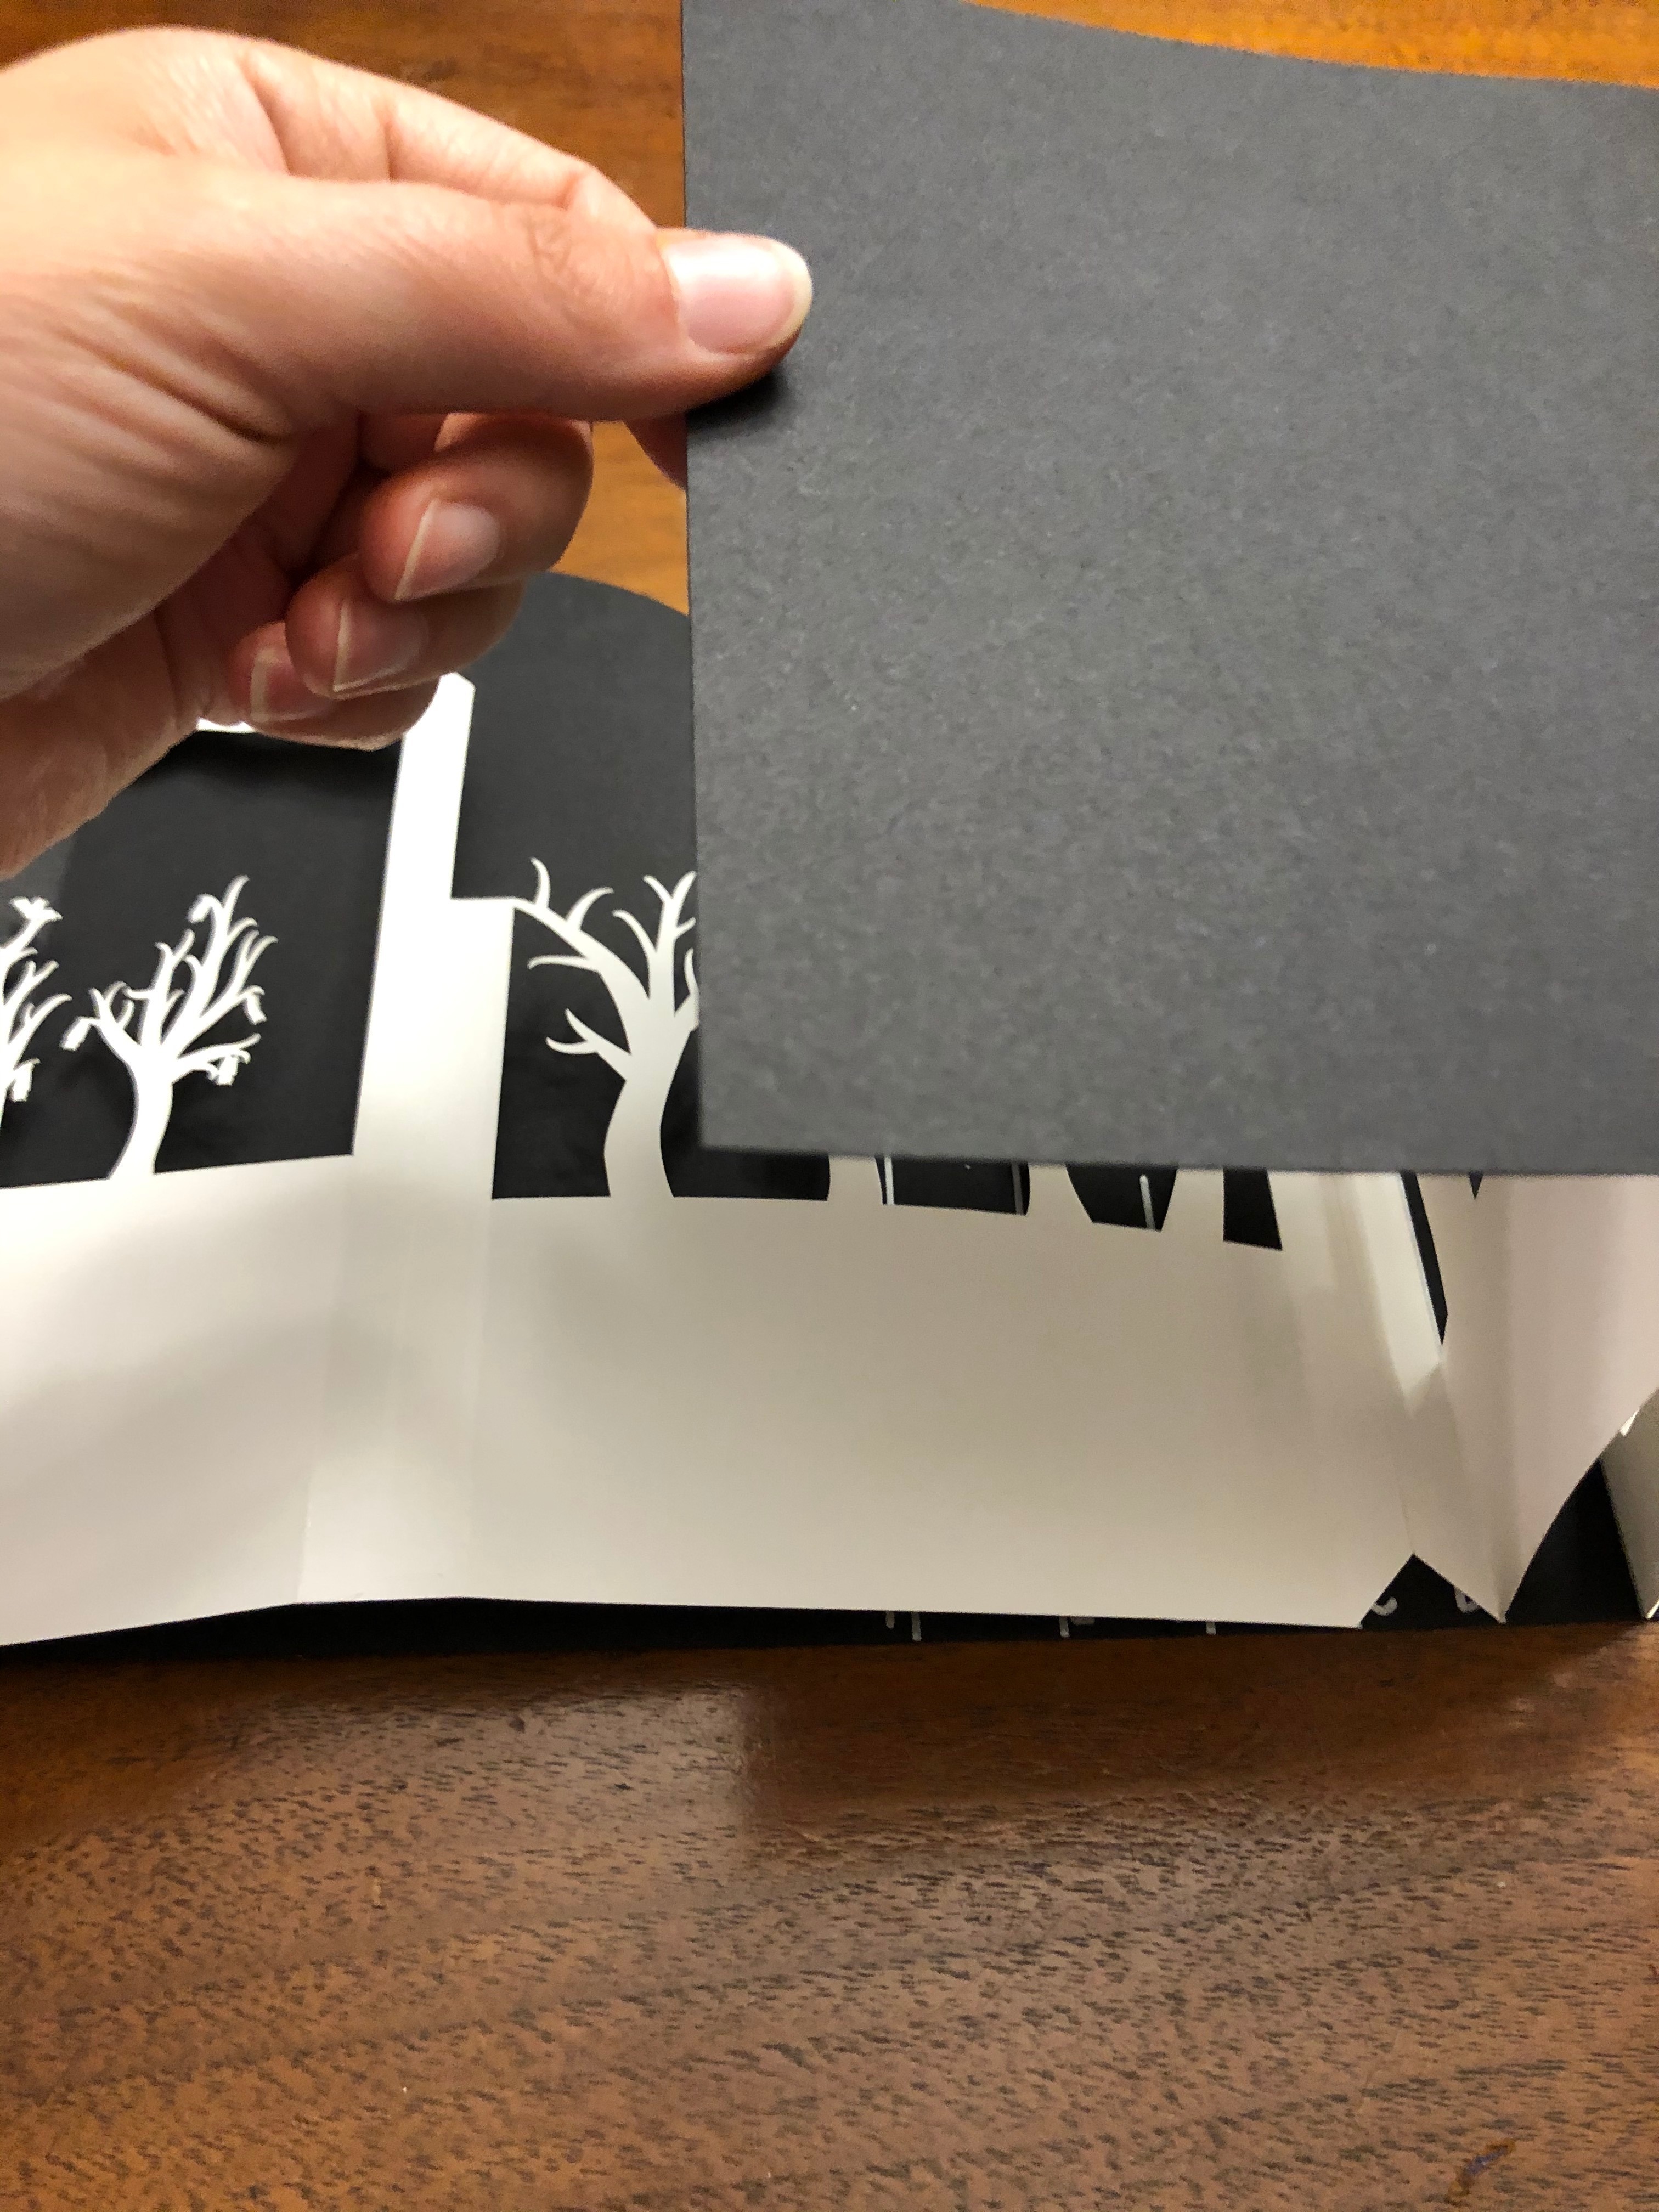
Take the white card with the A and B markers. With the writing up, make the outboard folds mountain and the inboard folds valley folds, as shown in the photo. Apply adhesive to the A tab and butt the tab against the black tab that's already glued down, ensuring that the orientation is correct. Press down. Lay out as shown and apply adhesive to the wide tab between the first two layers (between the two folds). Fold the front card down to as shown and rub over the adhesive. Apply adhesive to the B tab and line up with the drawn line. Flatten the card down again to make sure it will flatten correctly and press the adhesive down. Repeat the above with the C/D and E/F sheets.
Apply adhesive to the perimeter of the inside of the back except along the slot for the pull tab since the tab needs to be free to move. Lay the circuit part down with the pull tab through the slot and press down to attach. Use adhesive to attach the last black tab. Fold the gates and gate pulls out and then flatten them back down.
Final optional step: print a label to stick to the back, or just write a message with white or metallic pen! You could have gotten fancy and done this with the Cricut as well, as explained in step 2.