Spherical Lithophane Lamp
by legolor in Workshop > 3D Printing
17640 Views, 89 Favorites, 0 Comments
Spherical Lithophane Lamp

In this project I will show you all the steps you need to follow to create a spherical lithophane using an image and the software 3ds Max. Then I'll show you how I 3D printed the model and made it into a desktop lamp. This same process could be used for applying an image to any shape.
Lithophanes are objects that can create high quality images when light is shined through them. It's quite easy to create lithophanes using online generators that will give you a .stl file after you simply upload the image. If you're looking for a simple flat lithophane I've found that this one works well and is free. However, if you're looking to control more details and learn about new software I would definitely recommend trying this instructable out.
If you want to skip some of the steps download the model or the image I used click here (image) or here (model).
Supplies
Tools
Access to 3ds Max
3D printer big enough to print globe
soldering iron
saw or lathe
sandpaper
Materials
500g-1000g White PLA (hatchbox is my favorite)
~8' 18 gauge 2 strand wire (Home Depot)(Amazon), 14 or 16 gauge will also work ***
Plug to attach to wires (Home Depot)(Amazon)***
Light Bulb socket (make sure to match to the light bulb you will be using)(Amazon), standard is E26 ***
LED remote controlled light bulb (a good option)
Wood (I turned a thick piece of black walnut on the lathe but you could make the base out of anything)
Wood glue
Solder
Wood finish of your choice
***You could use an old lamp or buy this
Finding an Image
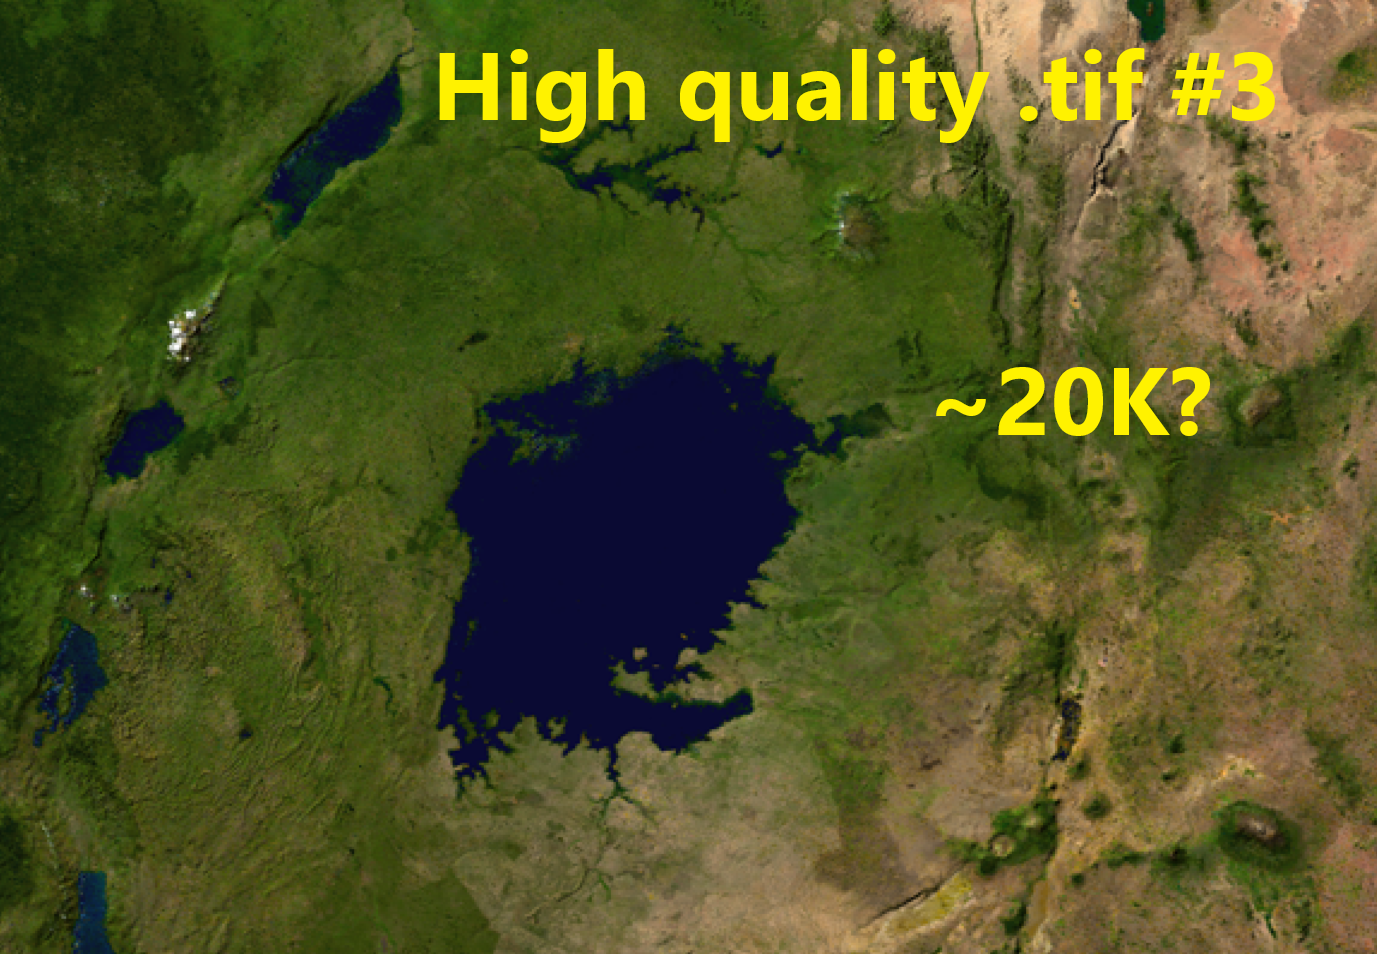
This step proved harder than I expected and is definitely the most important factor leading to the resolution of your final product. I started by trying to use .png images because they are readily available on the internet. As I progressed through doing test prints I realized that these wouldn't work for the resolution I wanted on the sphere of my size (8"). If you are shooting for a 4" or even a 6" sphere a .png image will probably work.
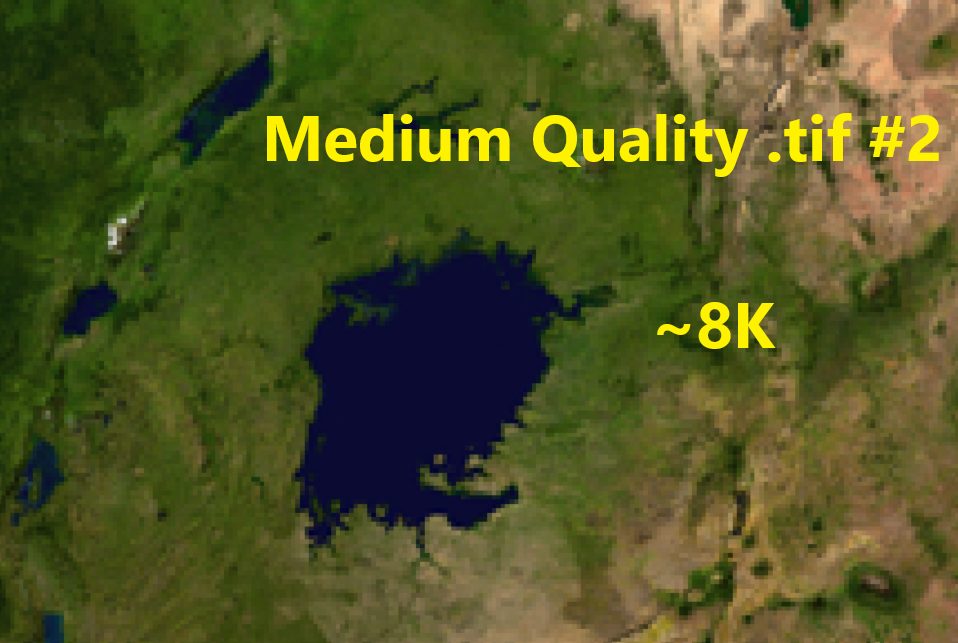
You'll want to look for a mercator projection of the earth (or whatever planet you're doing)(preferably without grid lines). The mercator projection is the most common projection and will allow for the image to be wrapped back onto the sphere later.
It's also important to find your image of a satellite view (without clouds). I haven't tried making one with elevation image but the continents would not be as distinguishable from the oceans.
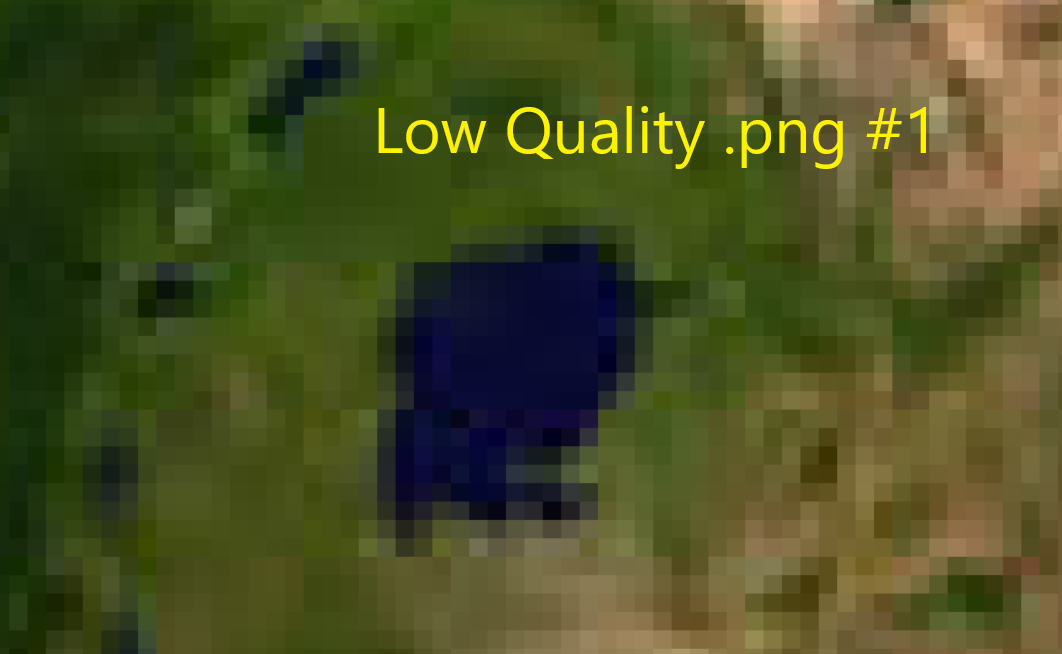
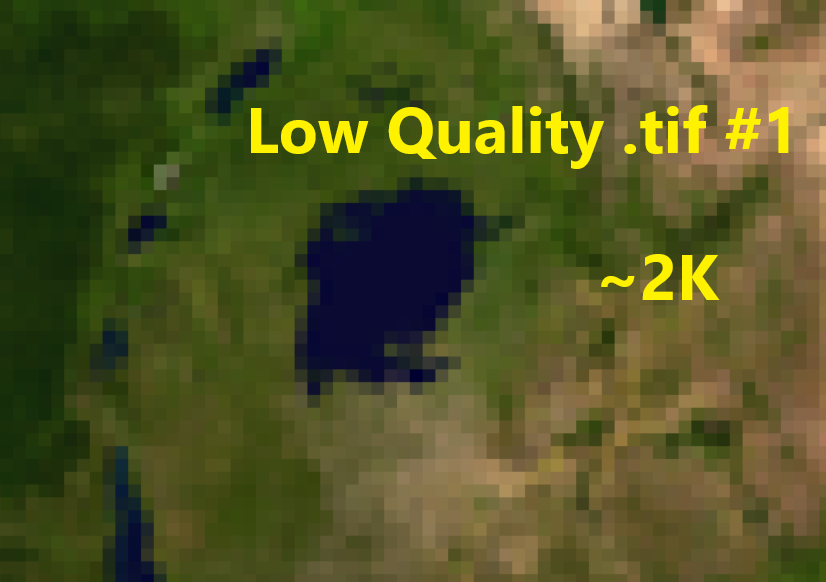
I ended up using a .tif file which is very similar to a .bmp (bitmap) file. These file formats are not compressed, in other words they can have more resolution. The bad news is that these are slightly harder to find. Here is the website I used (NASA).
The images above show the difference of quality between images I found (zoomed in on the same lake). I personally used the ~20K .tif which might be overkill but it worked for me.
The Image Really Matters
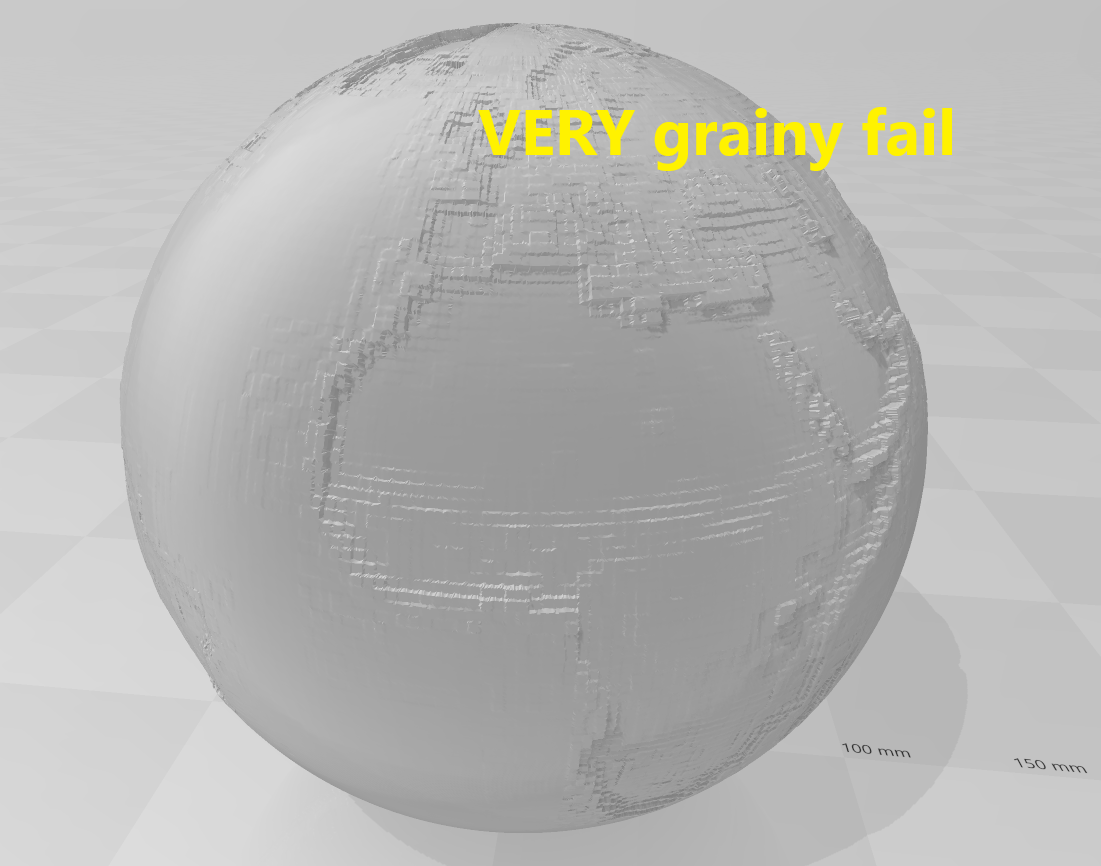
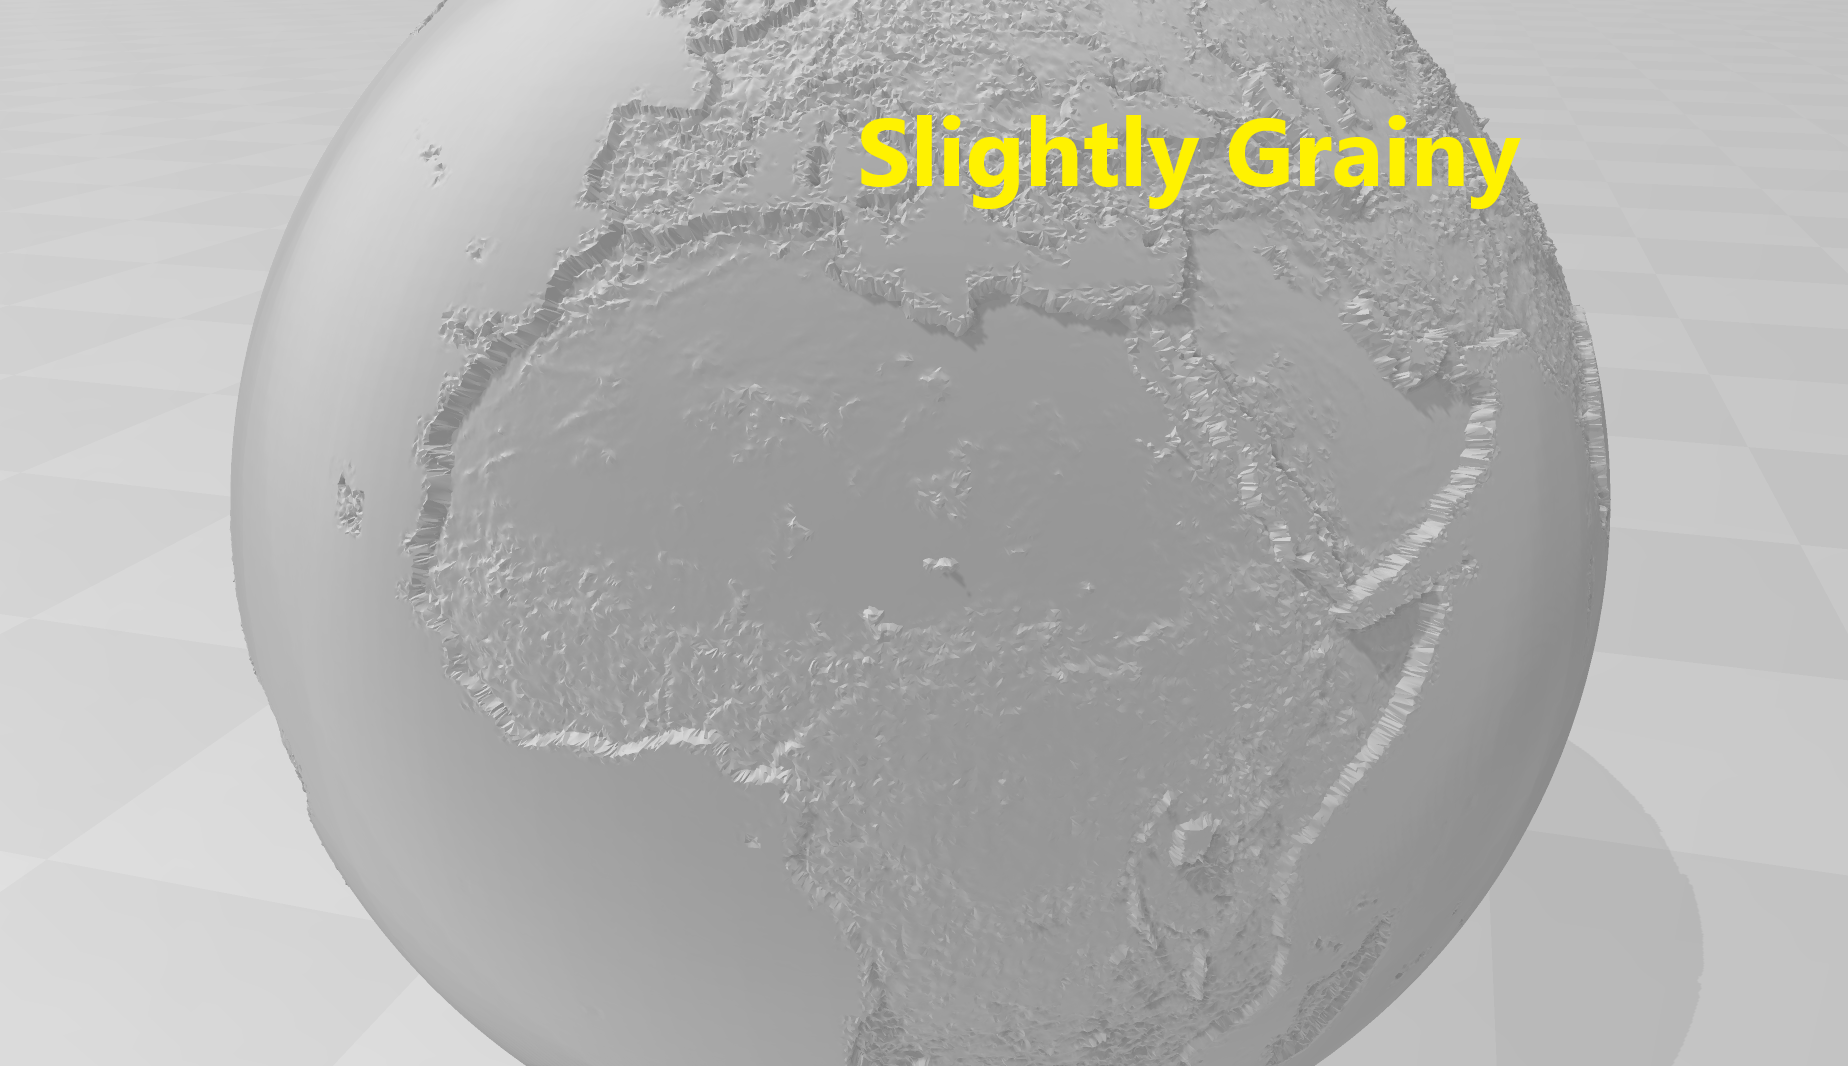
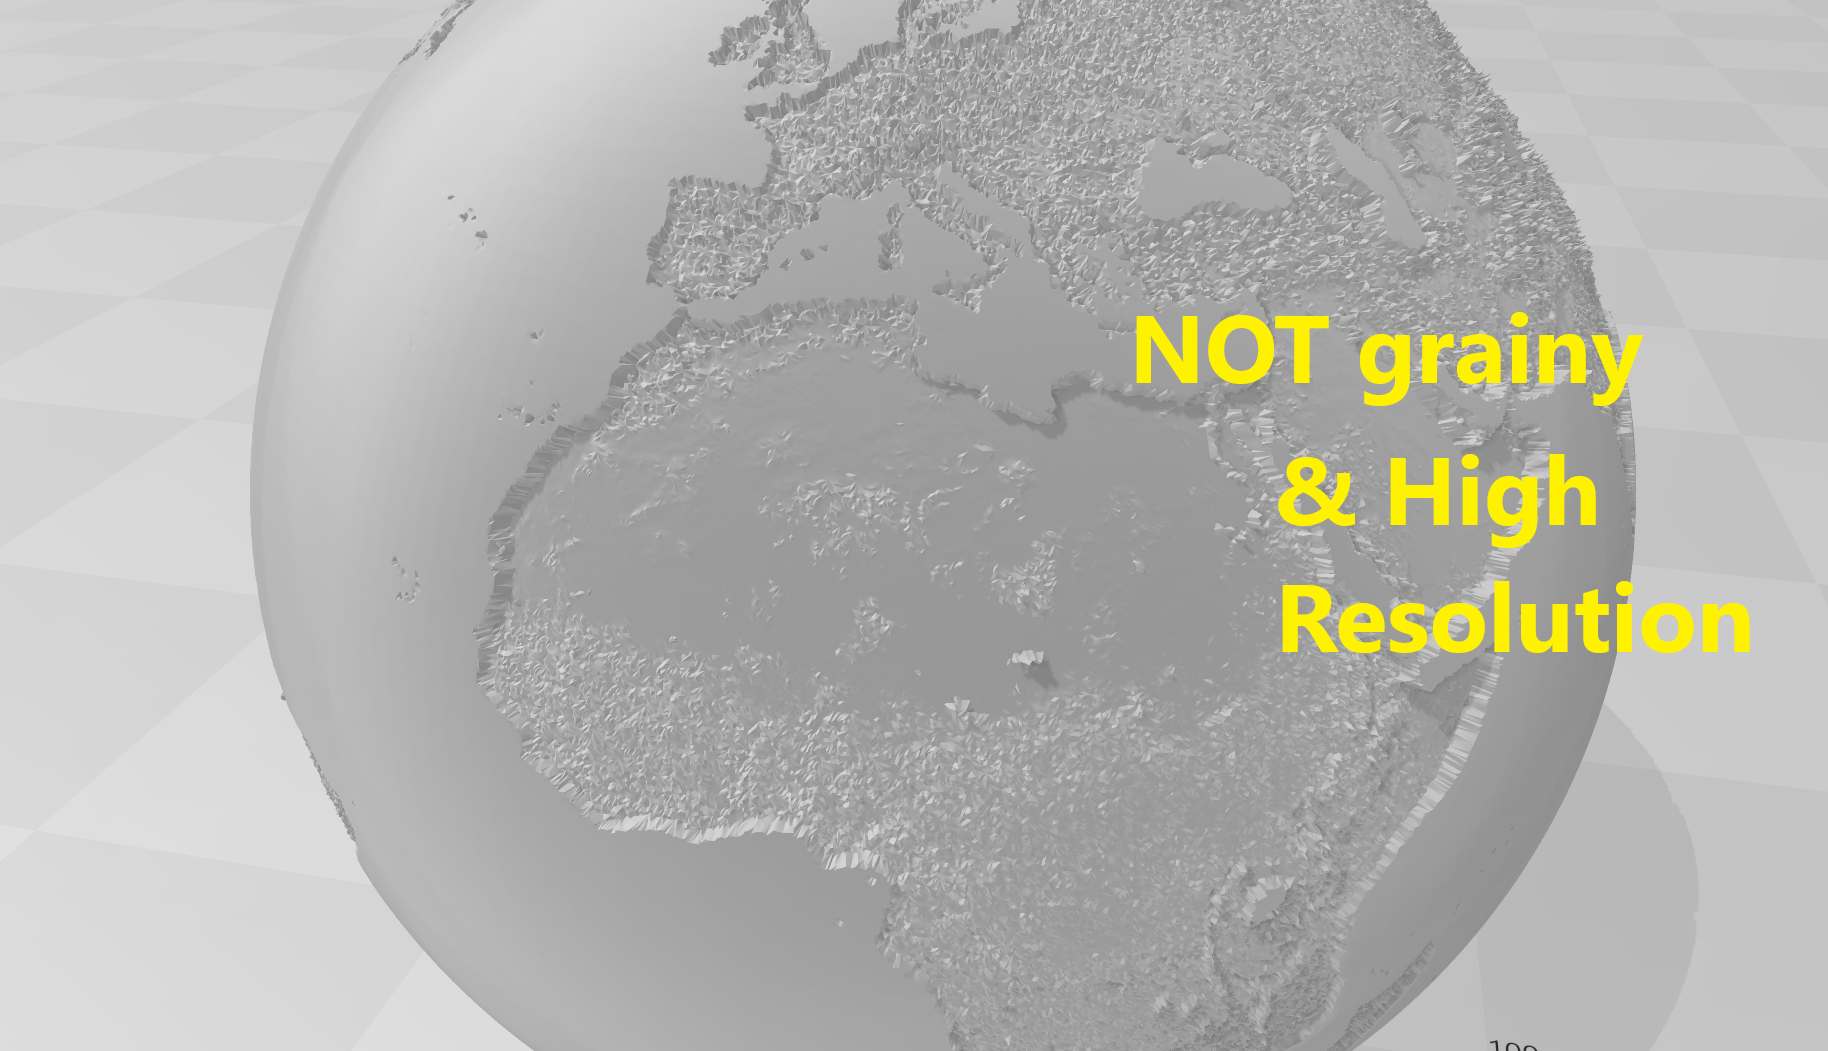
I can't stress this enough how much the image quality affects the final product. Here are some previews of my failed attempts I have had solely because of poor image quality.
Editing the Image
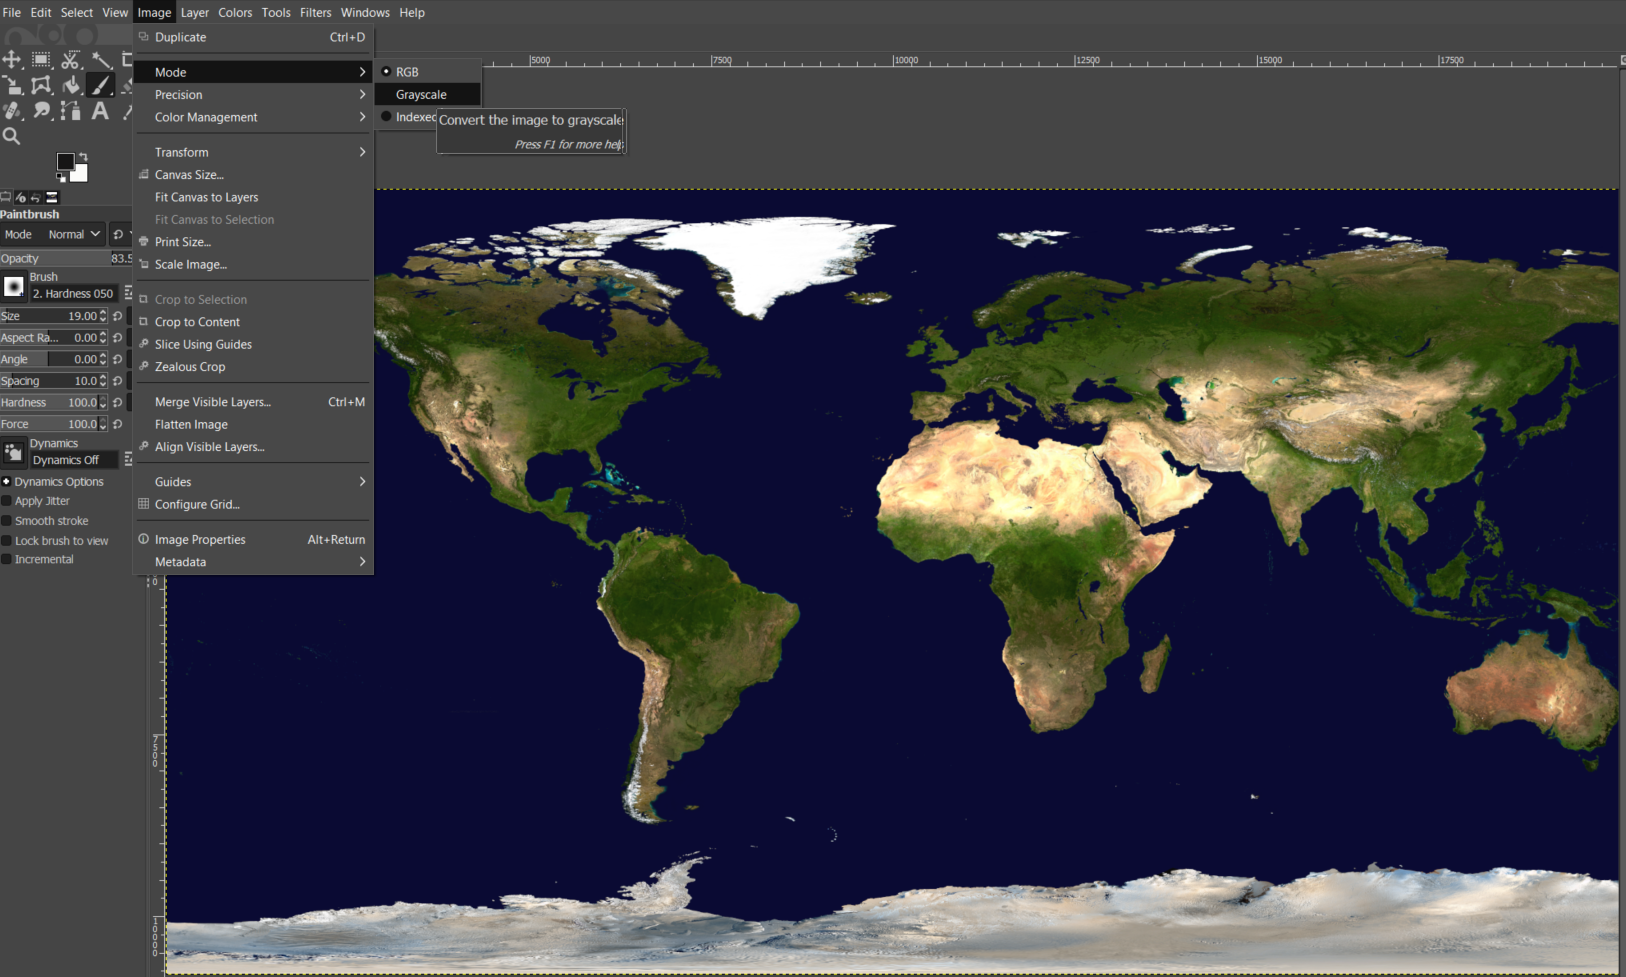
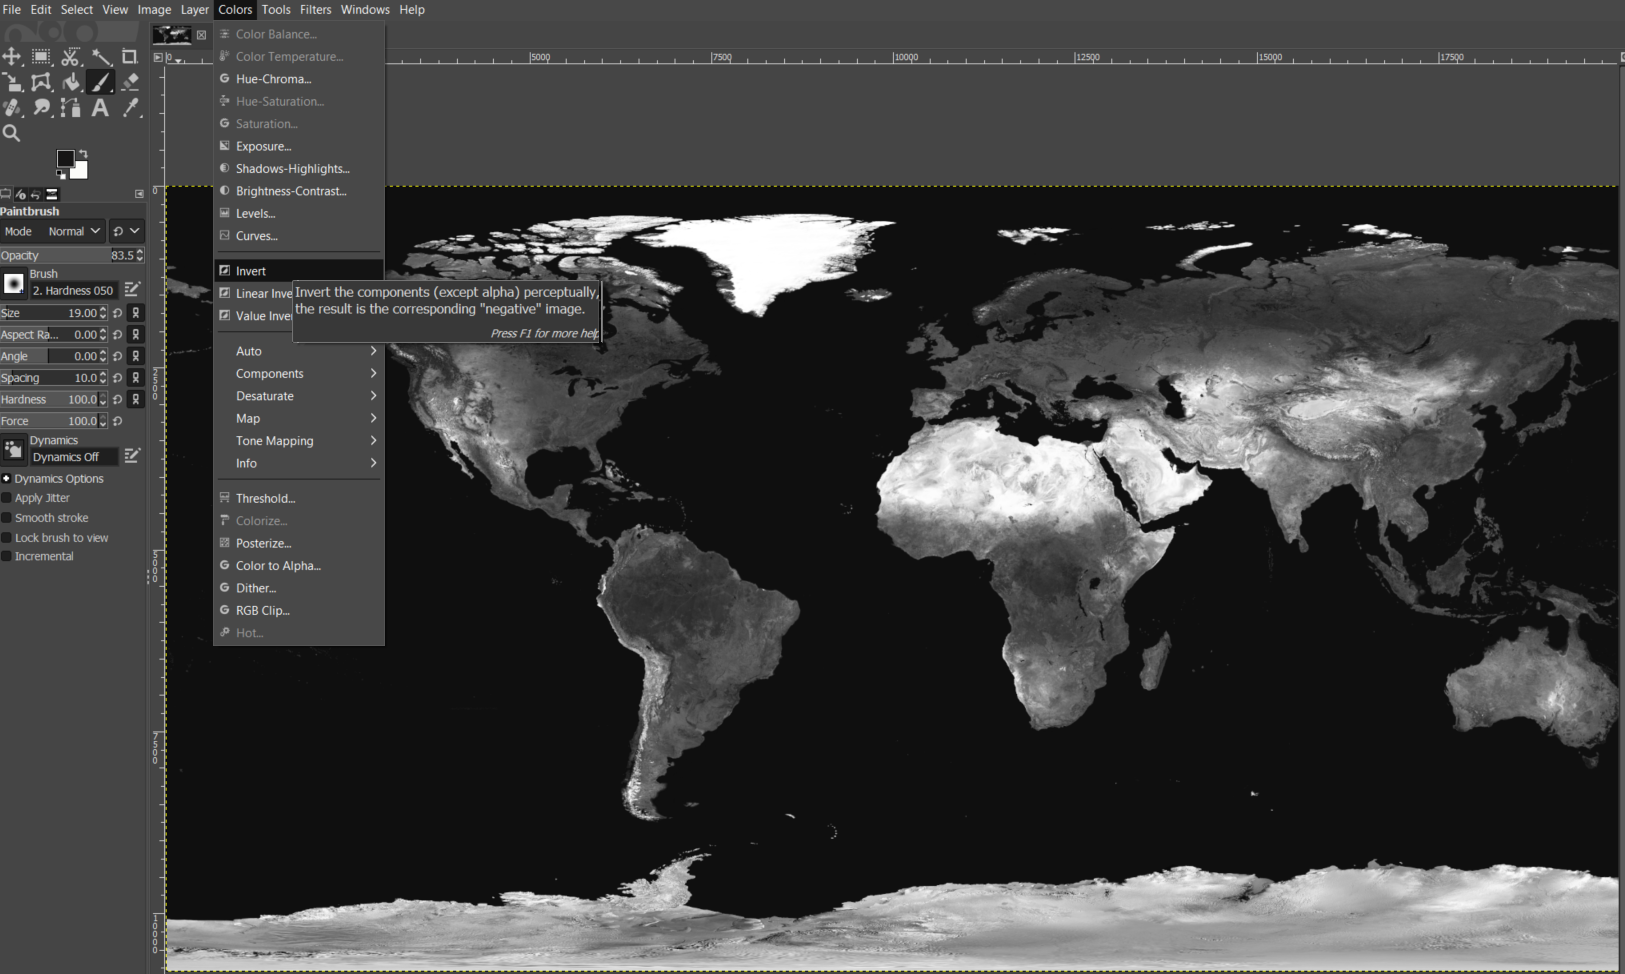
To portray the image on your object you will have to convert your image to grayscale and the invert the colors.
Option 1: Use GIMP, it's free software and it's incredibly easy to use.
Option 2: Use online conversion websites. This is a better option if you don't want to/can't download a program. These are 2 websites that would probably work although I'm not 100% sure they can handle .tif files. (grayscale, color inverter)
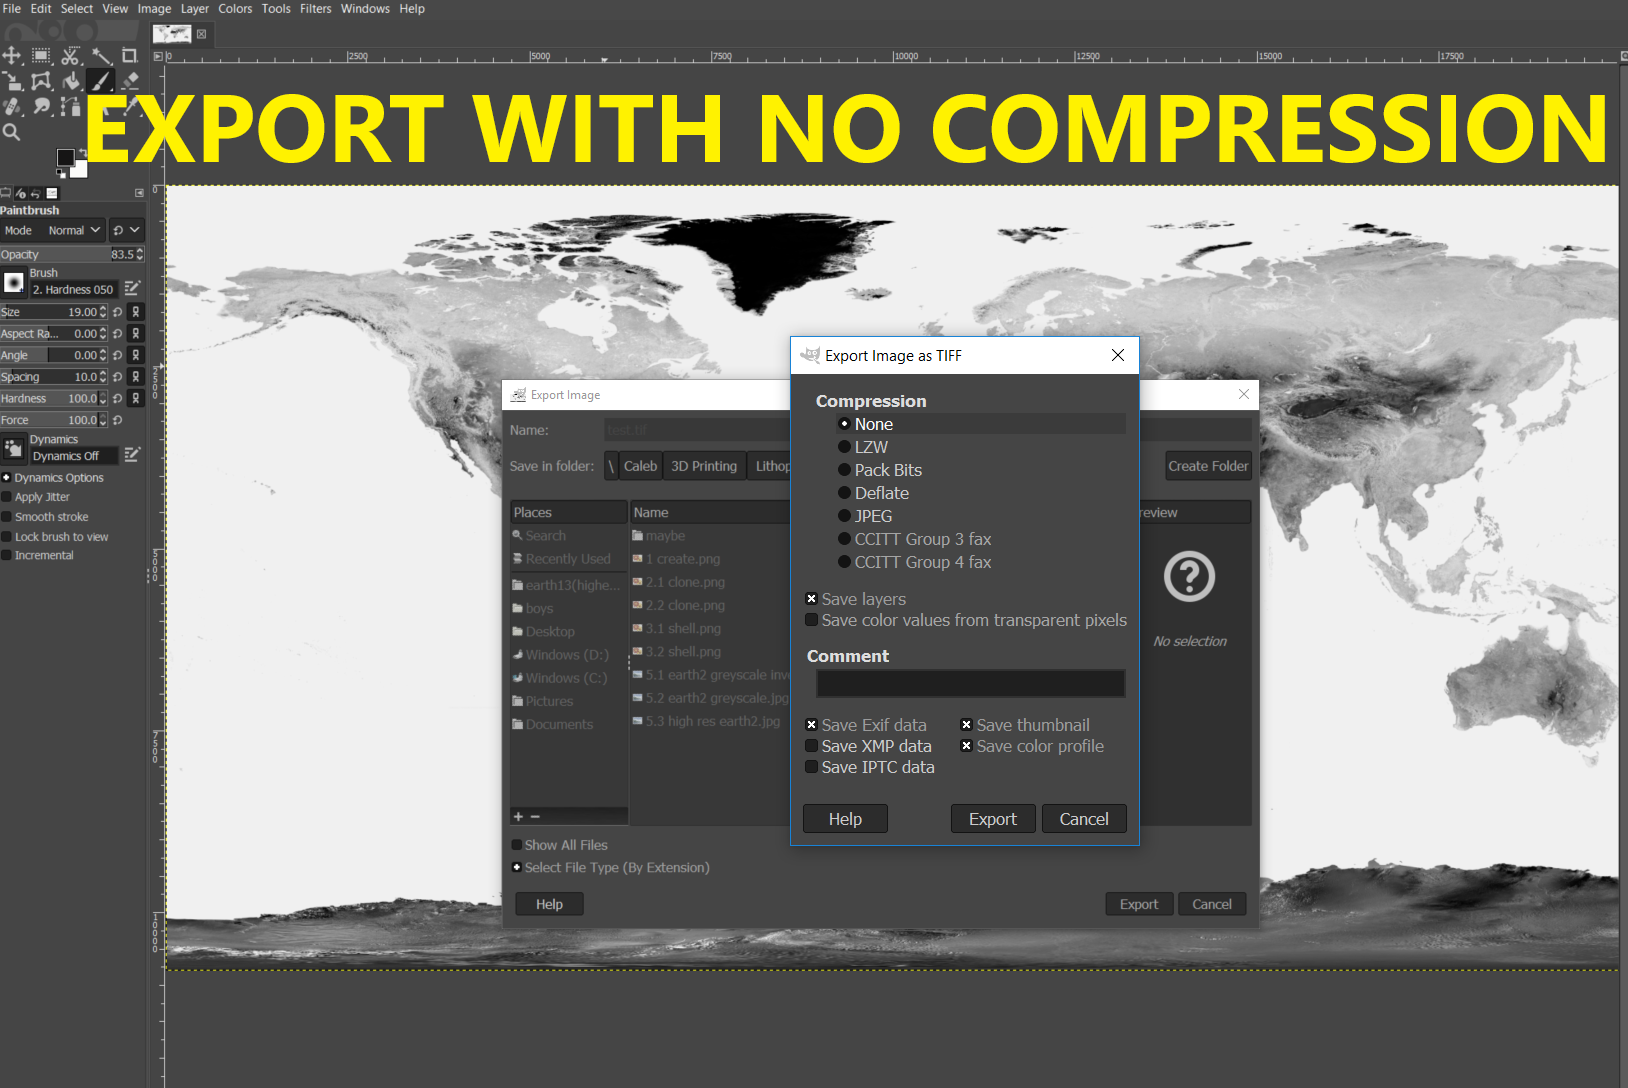
The pictures above show how to do it in gimp with 2 clicks. To turn the photo into grayscale go to Image-> Mode-> Grayscale. Next, for inverted colors, go to Colors-> Invert . Make sure to export it with no compression.
Here is the high quality .tif image I ended up with. Image, it's on google drive because it wouldn't upload to Thingiverse. Feel free to use it on your own projects.
Download 3ds Max
I have tried multiple pieces of software to attempt to create a lithophane. The specific operation we are looking for in the program is the displace modifier. I attempted to do this in blender but I had trouble wrapping the image around a sphere.
To get a free 30 day trial of this program go to Autodesk.
Software Overview
3ds Max is unlike any program I have ever used before; it took me quite a while to realize how to use it. I'm far from an expert but I can definitely now understand the basics. The thing that confused me the most is that in 3ds it seems to make shapes solid in between the primitives that you place.
If you get caught on a step watch this great video by RCLifeOn that briefly explains the steps.
Insert Primitive
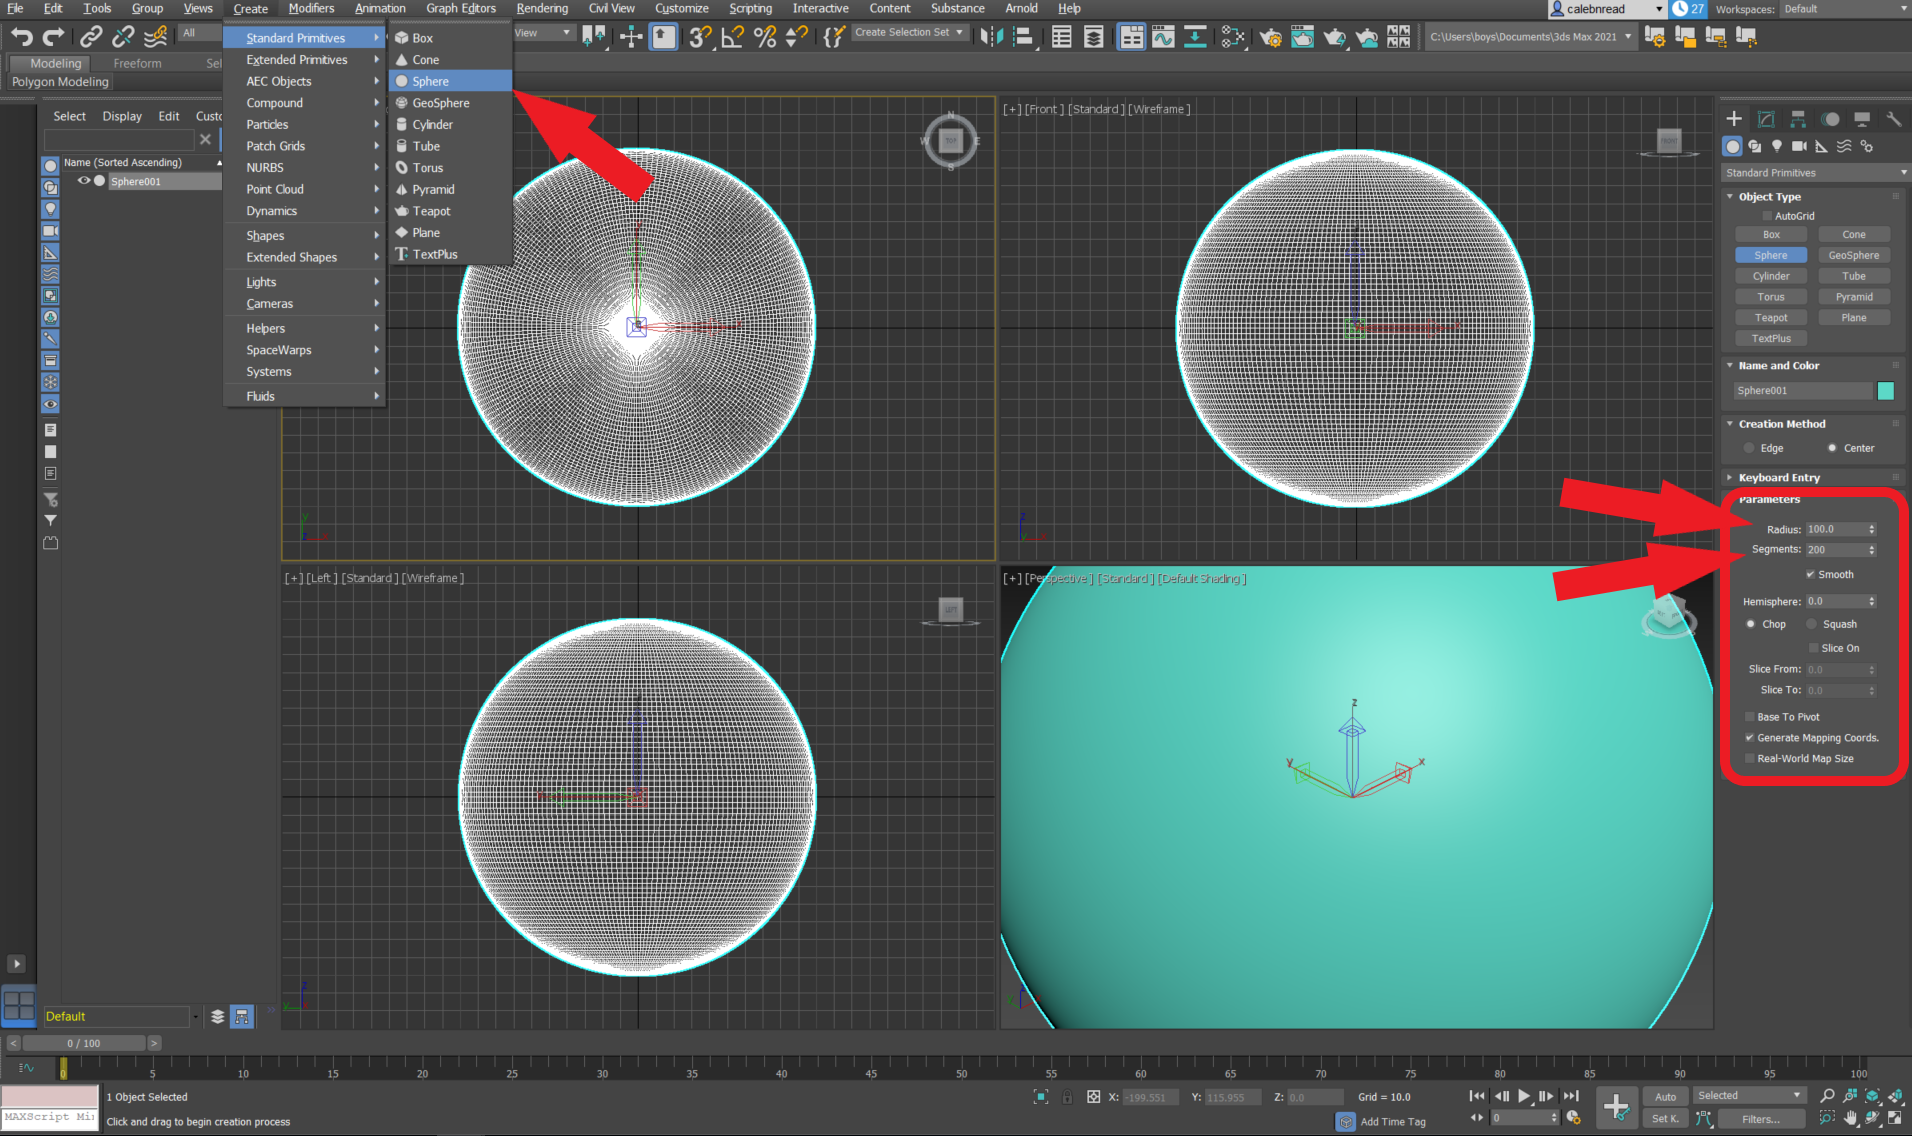
First we need to insert the basic sphere. Create-> Standard Primitive-> Sphere, then click and drag on the grid. I want my sphere to be a total of about 8" so I set the radius at 100mm which is close enough for me. Next you want to bump up the segments up to 200 (max number) to give you more quality for when you add your displacement modifier.
Clone Primitive
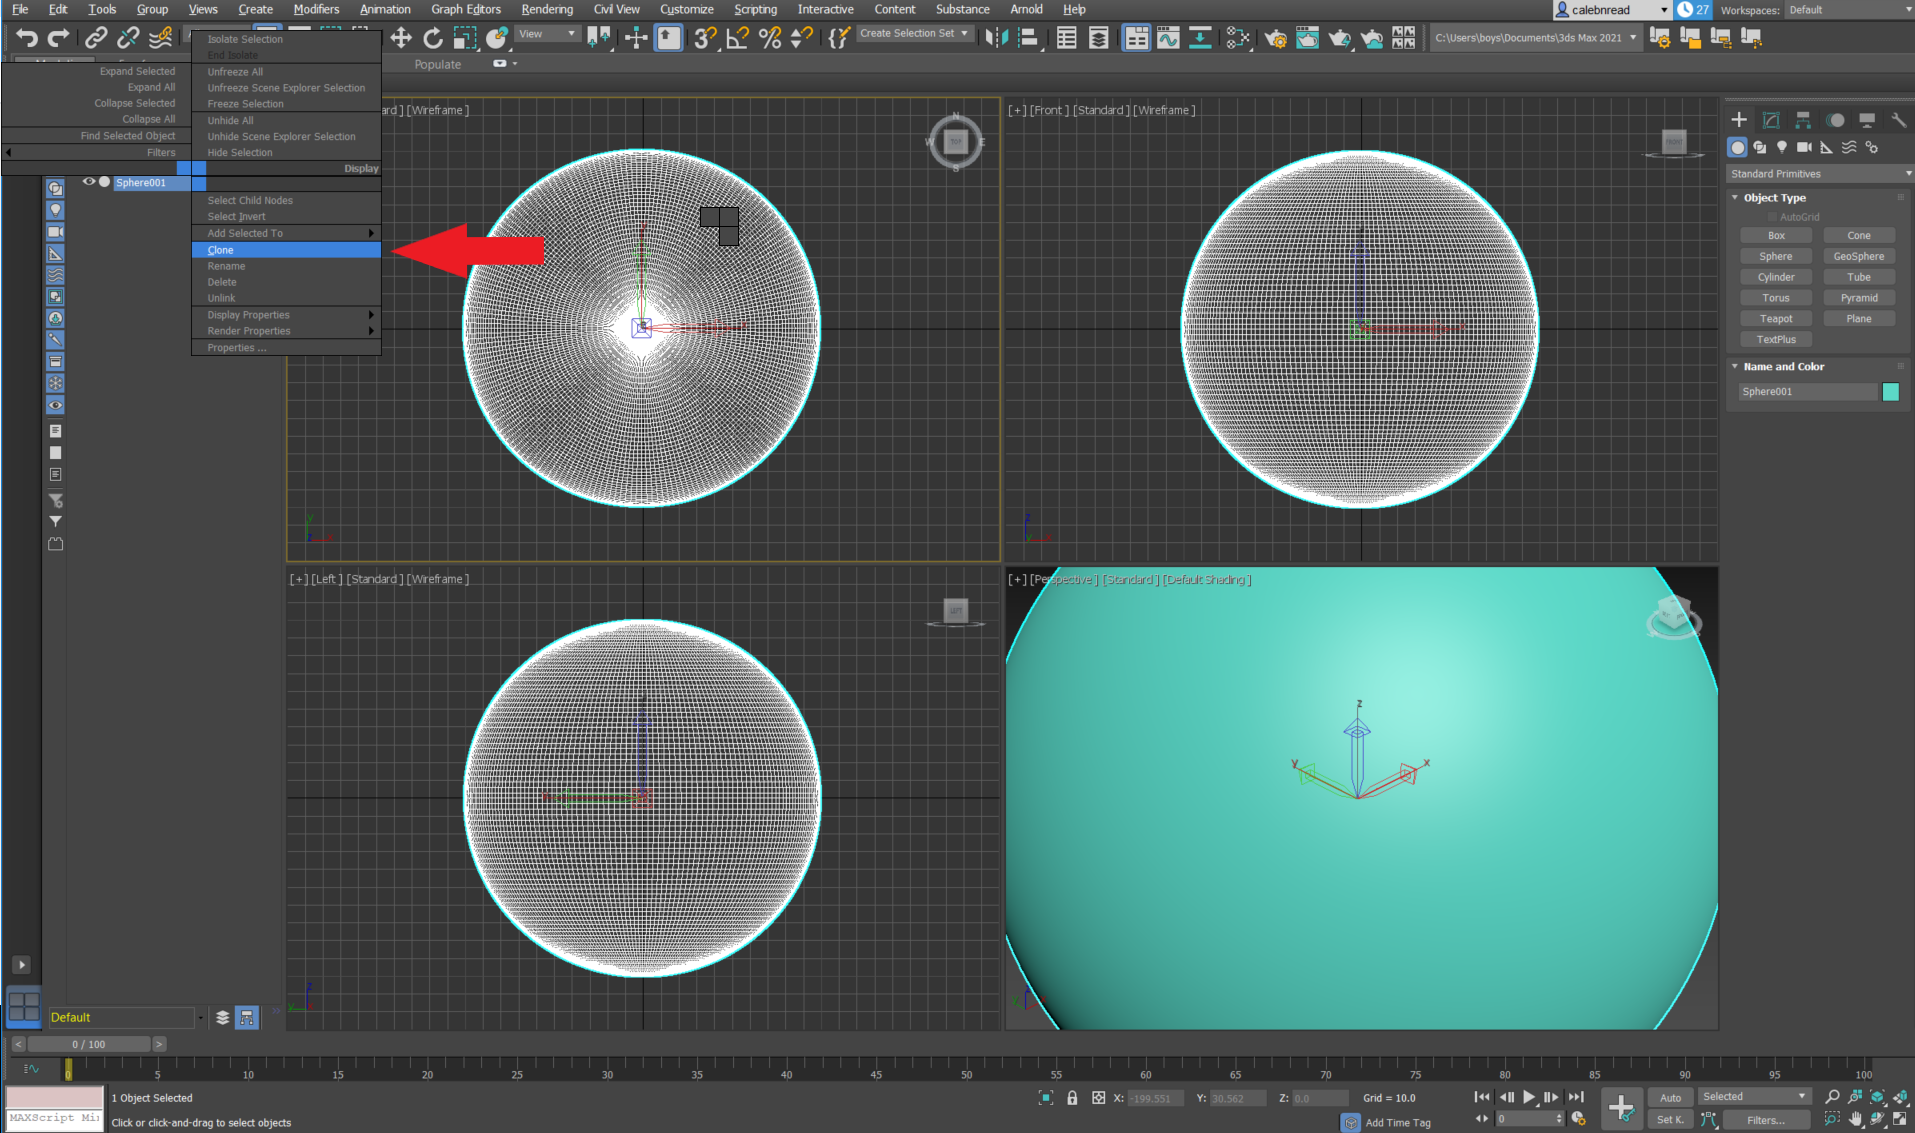
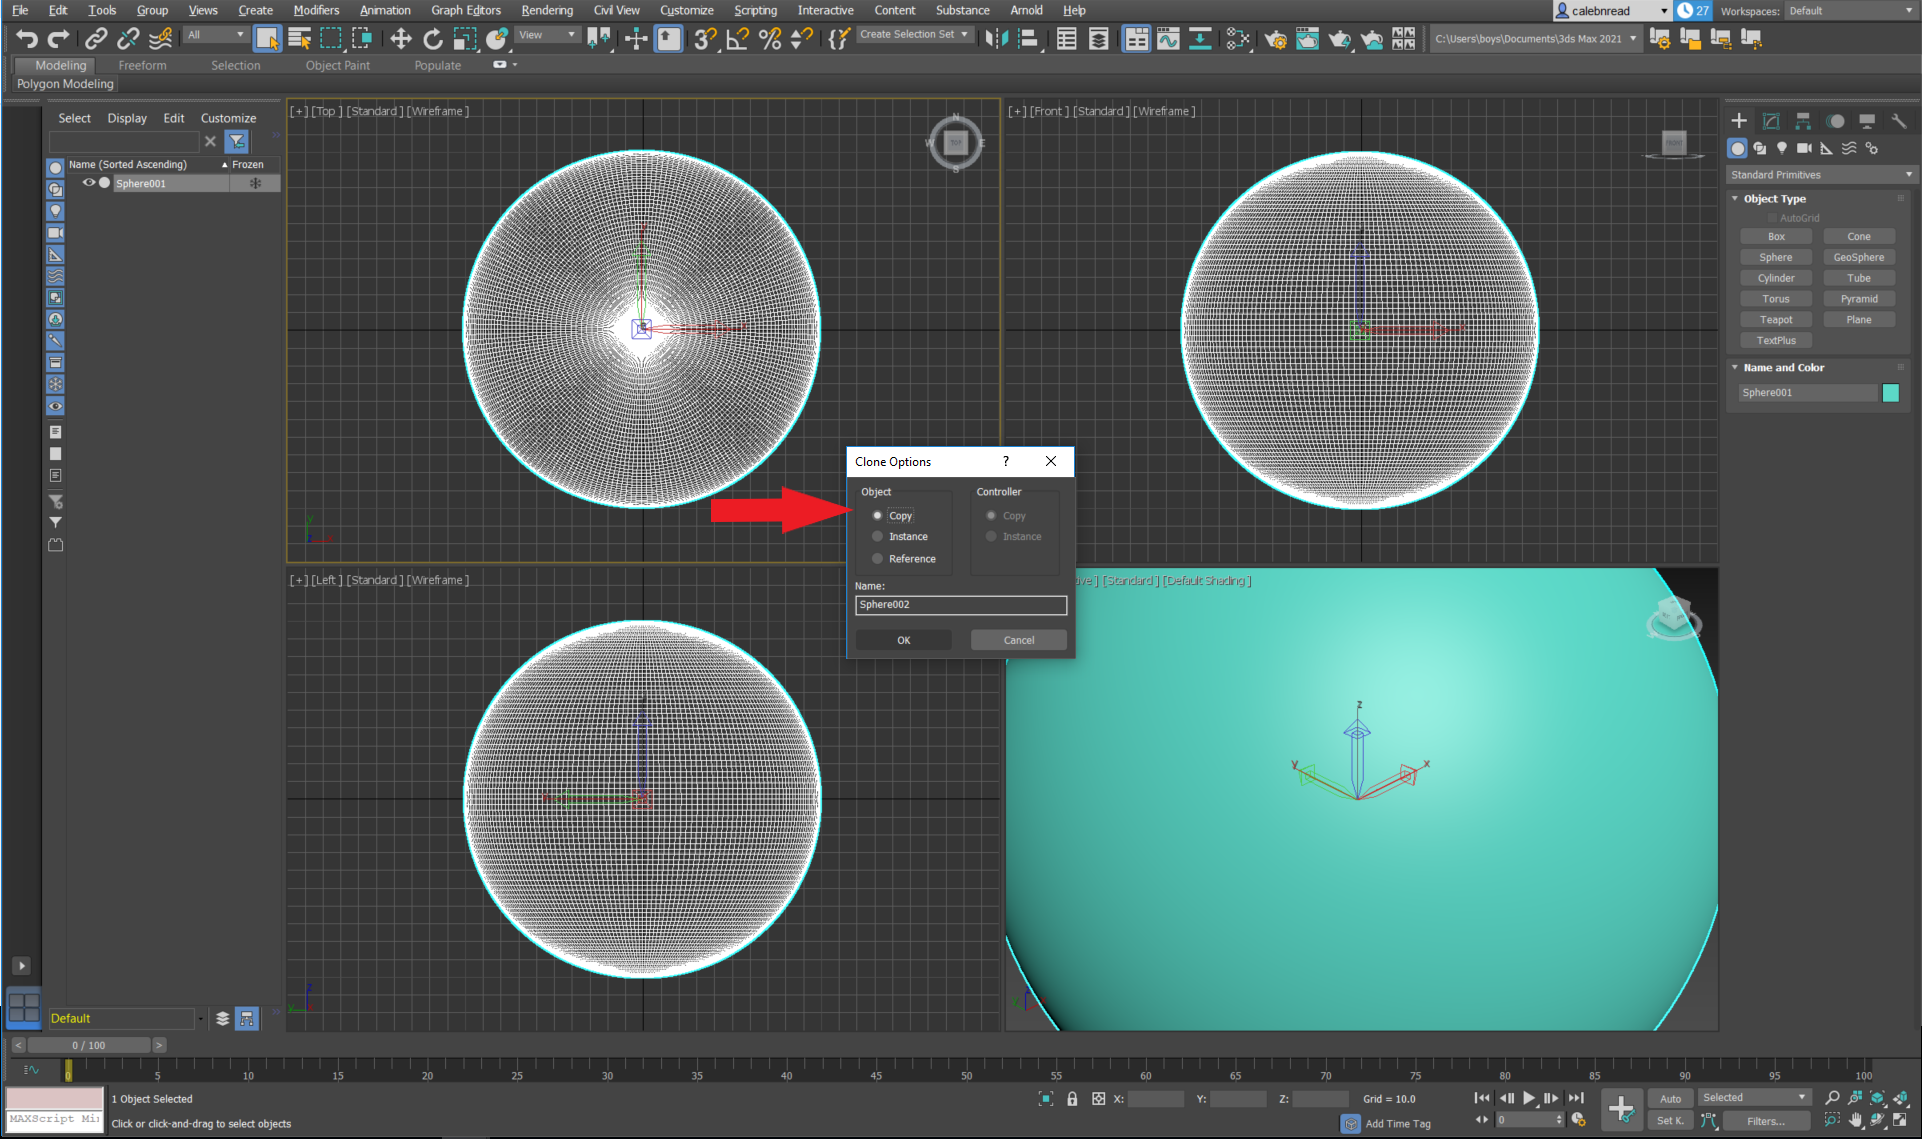
The second step is to make a copy of the initial sphere.
To clone, hit escape/click in open space to cancel the primitive tool. Then right click on Sphere001 and click clone and change it to copy, instance will create a copy that gets edited at the same time you edit the original.
Create the Shell
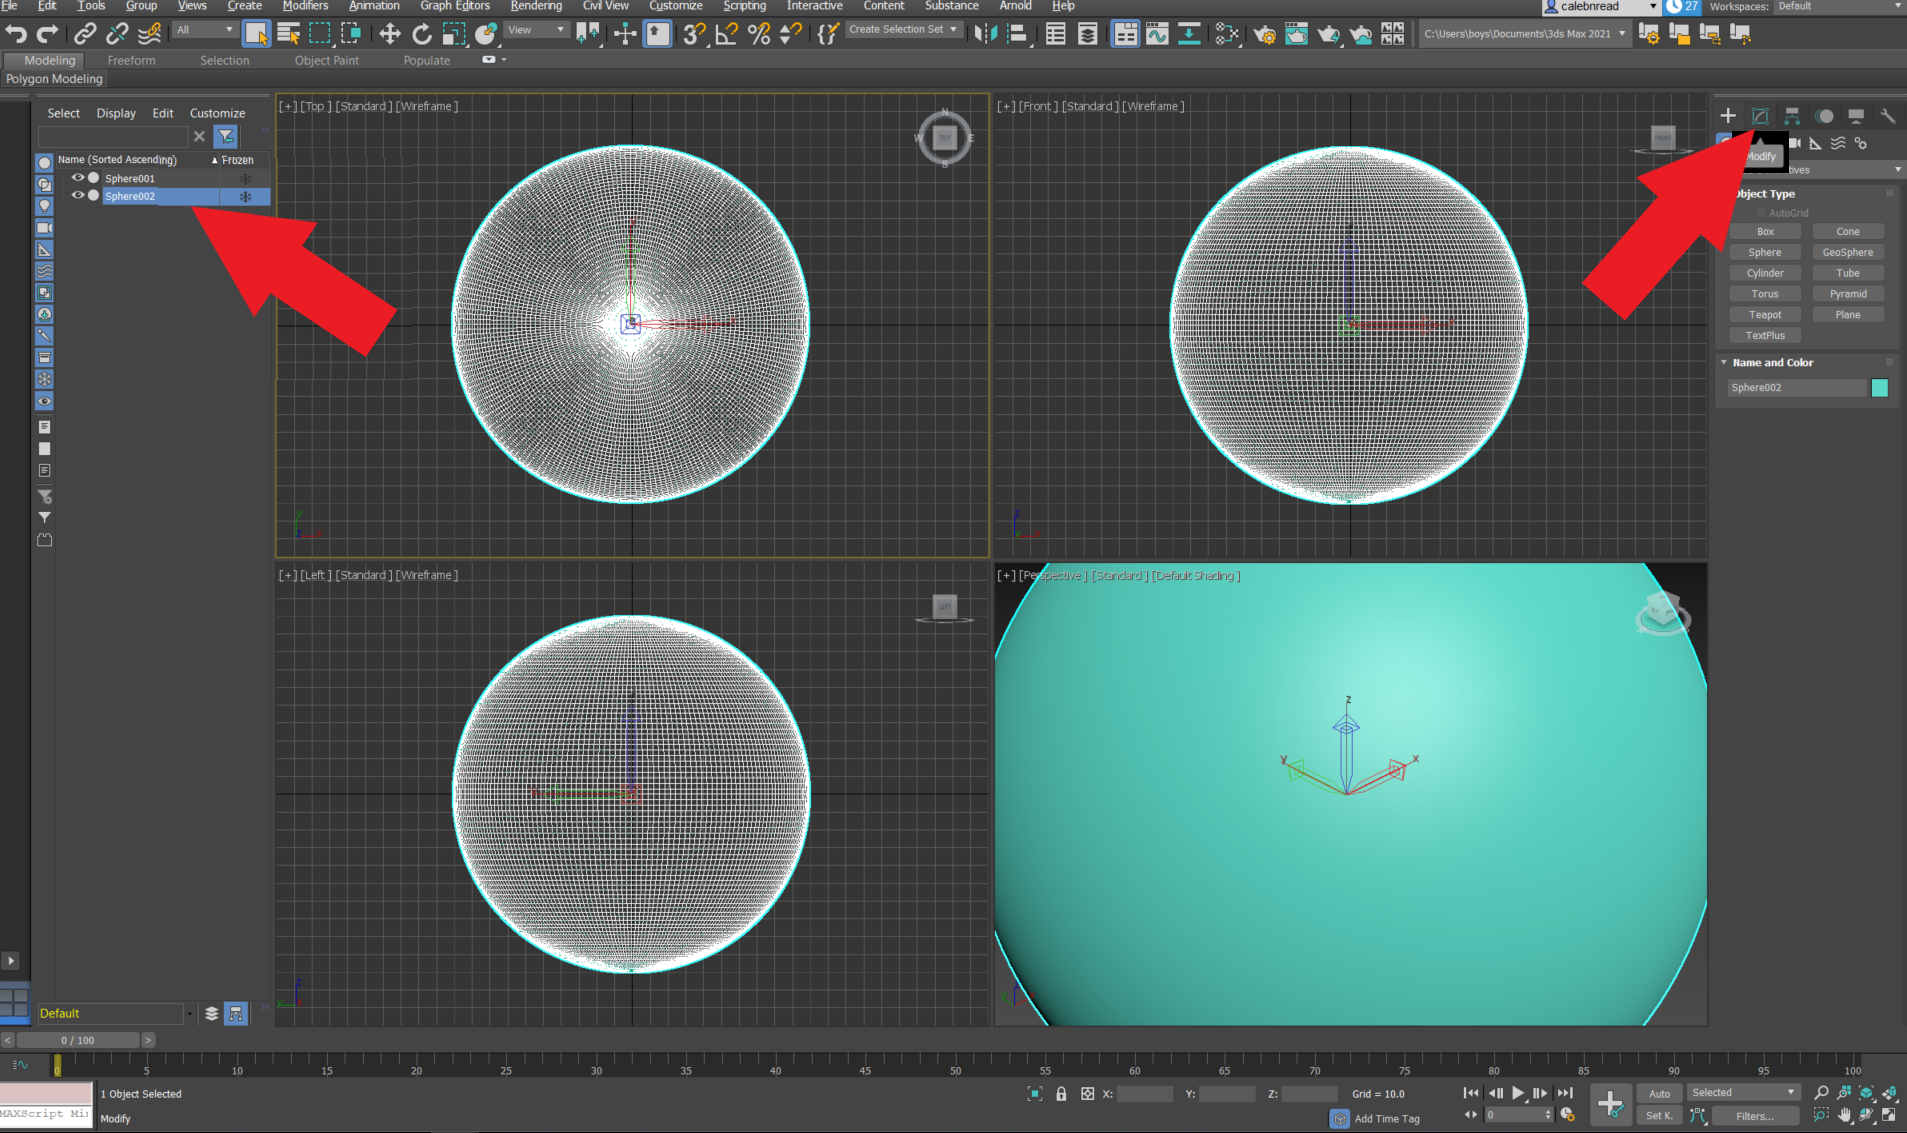

To my understanding, 3ds max will fill in the space in between the two spheres to create a shell which will be the minimum thickness of your globe.
Make sure Sphere002 is selected and edit the size of that sphere to have a radius of .8mm more than Sphere001. This will make your minimum shell .8mm at its thinnest point. If you use a .4mm printer nozzle that is 2 shells. This ensures that your project won't be to fragile. Alternatively, you could probably get away with a .4 mm wall because the only spot with minimum thickness is really Greenland (white because of the ice)(possibly also the north/south poles).
Smoothness & Detail Modifiers
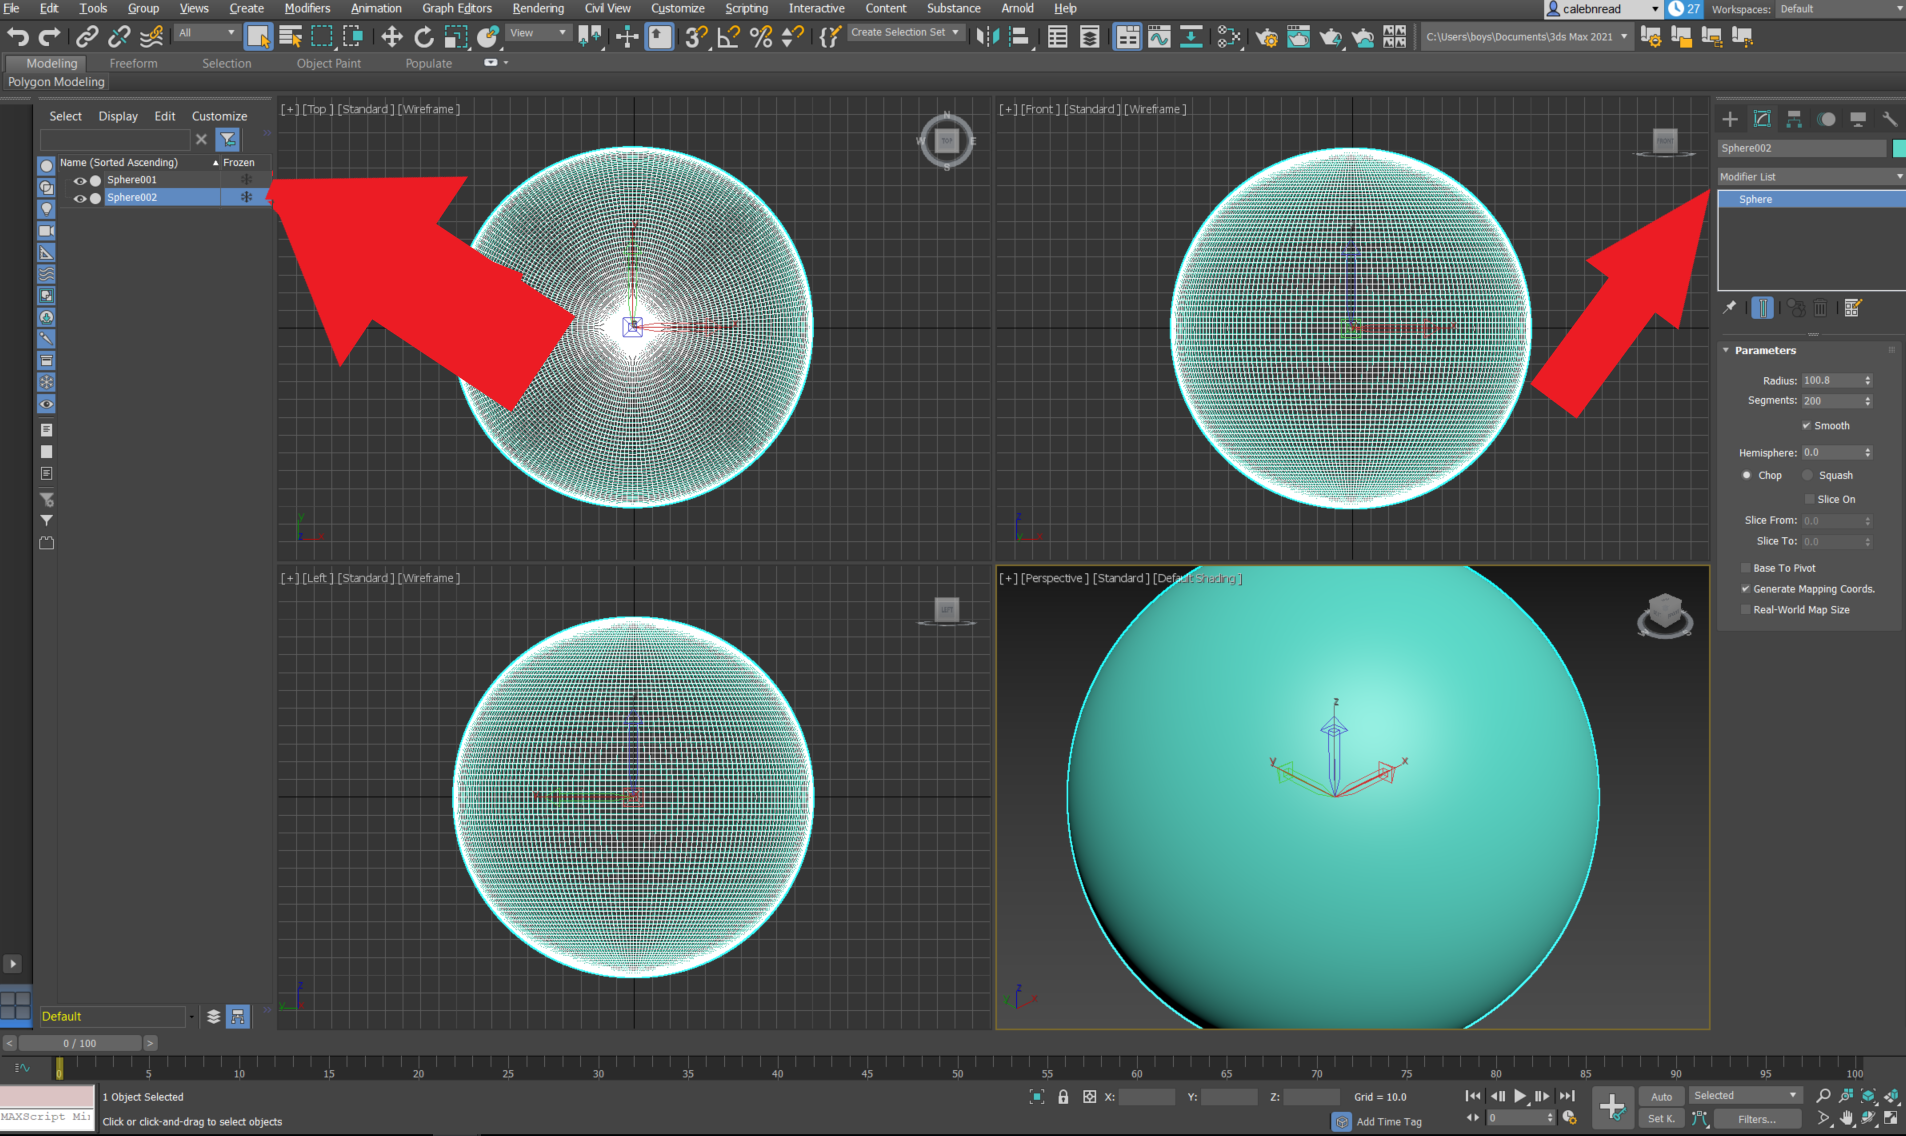
If we tried to add the image now we would end up with a very grainy look or a lot of sharp edges. To solve these problems we will add to modifiers to Sphere002.
Make sure that Sphere002 is still selected and go to the right tab and click on Modifier List.
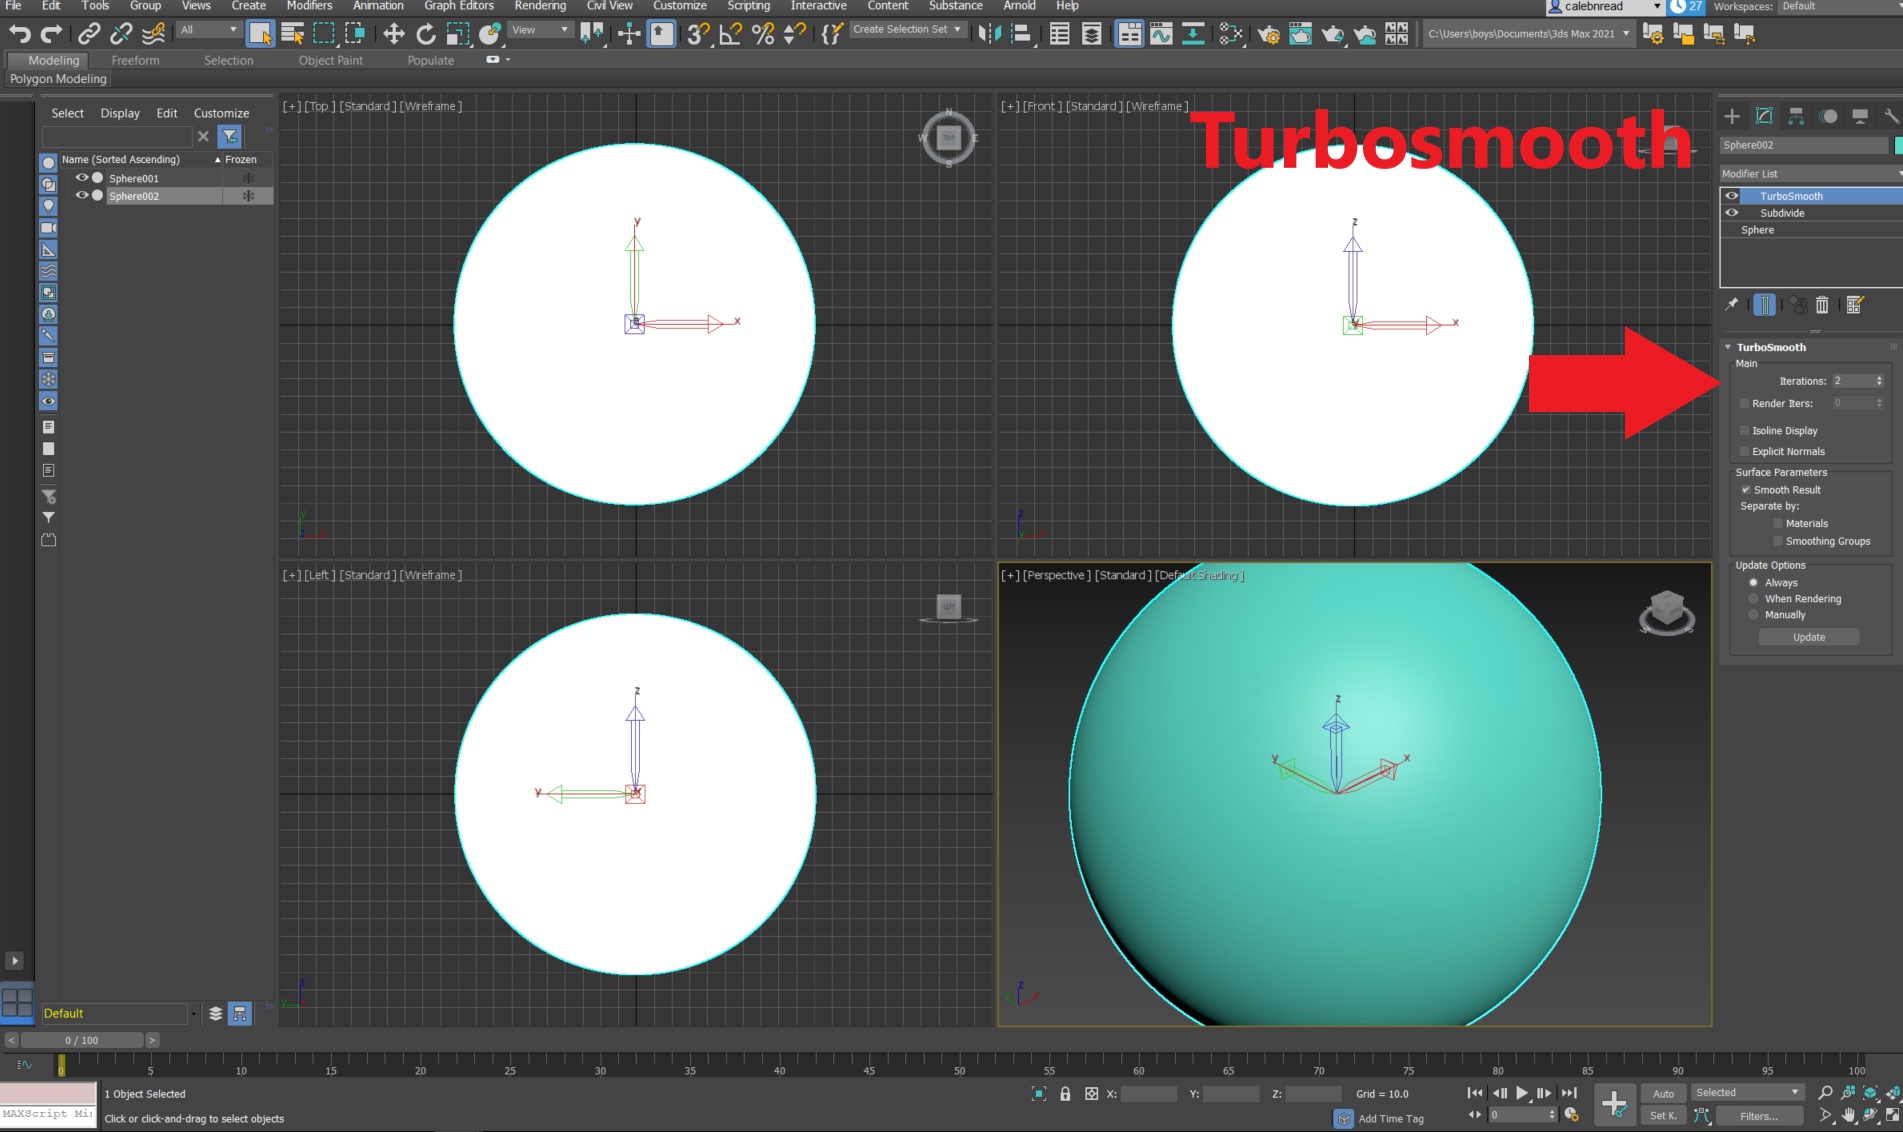
Click on Turbosmooth and change the iterations to 2 (max amount). This will smooth out all the bumps for after you add the image so it won't look pixelated. This modifier may or may not be required based on how high quality your image is.
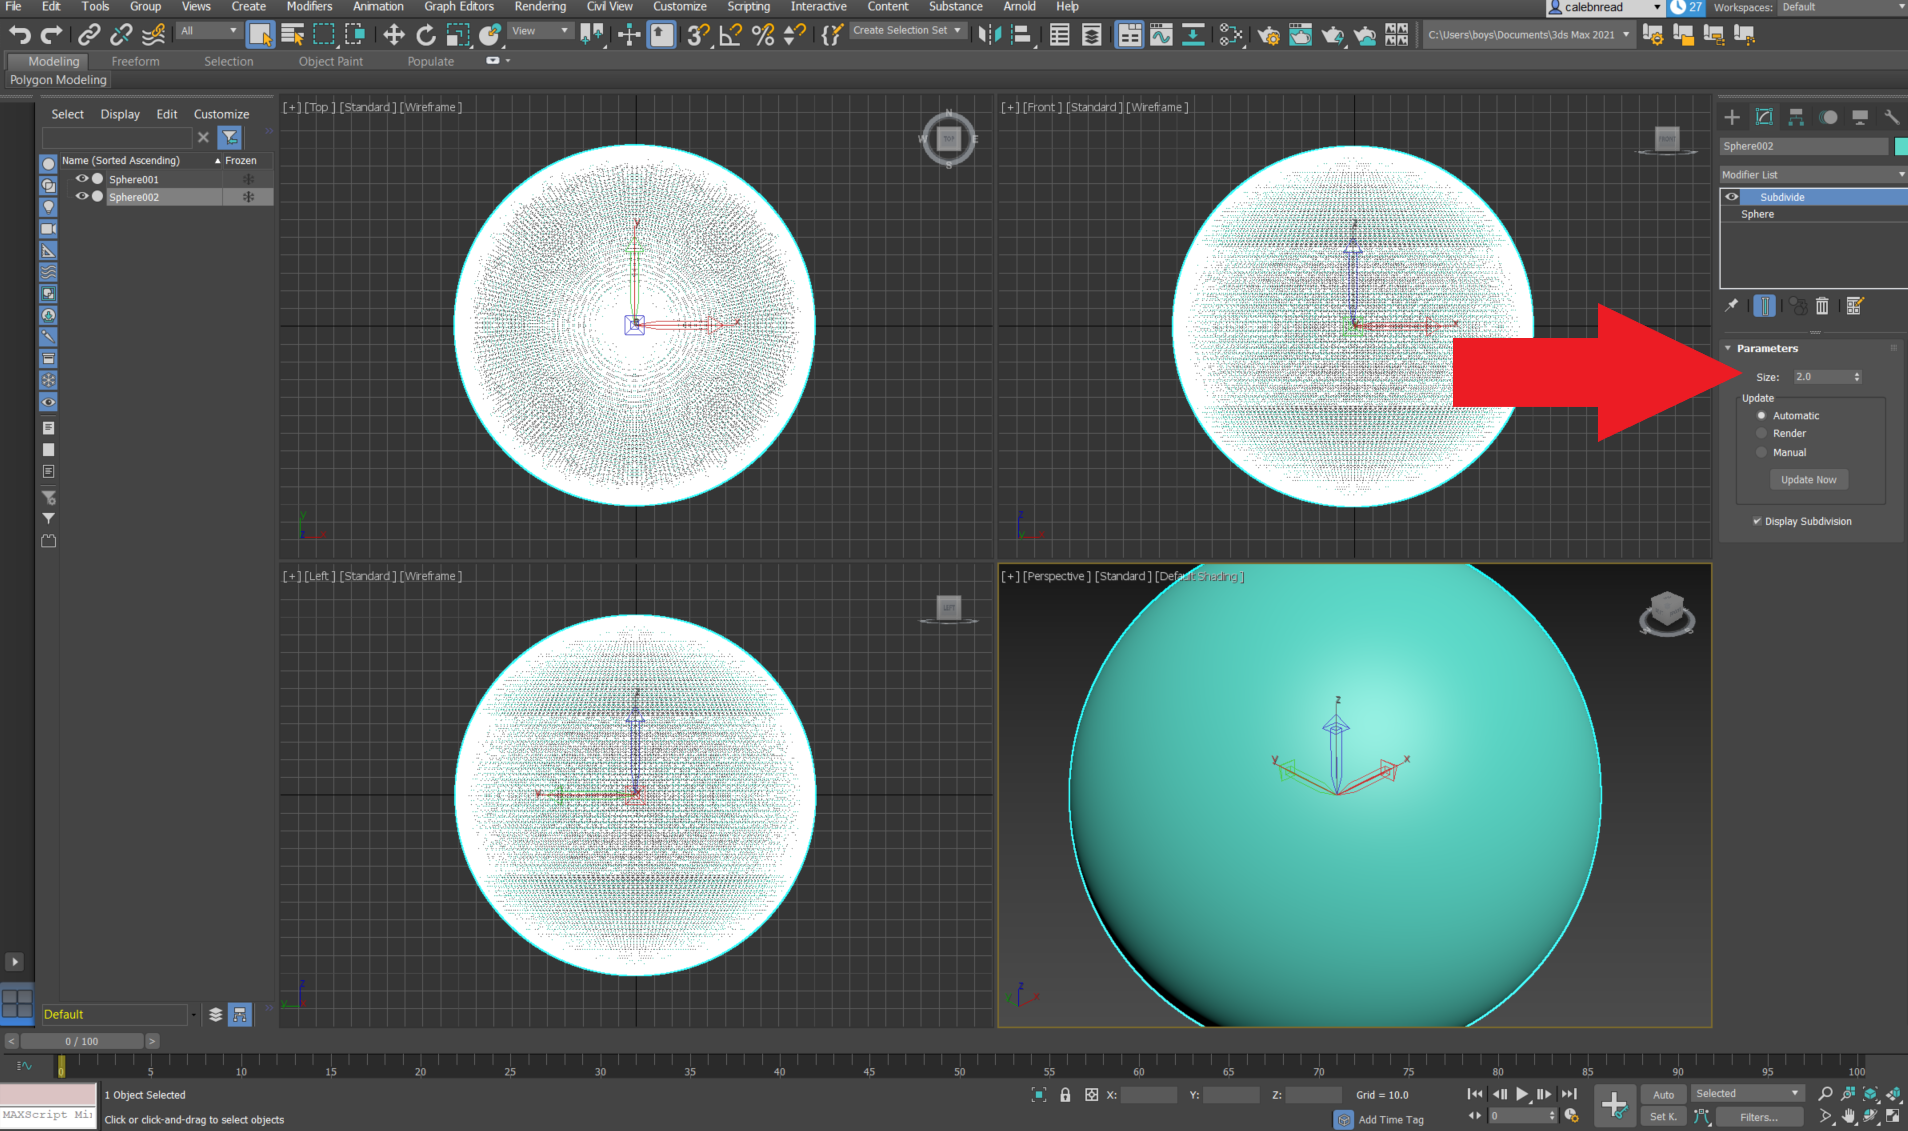
Next, add the Subdivide modifier to create more facets to be able to apply your image to. Change the size to 2 (max amount) to ensure maximum quality.
Add Displacement Modifier/Image
Finally we get to add the image to the to the sphere.
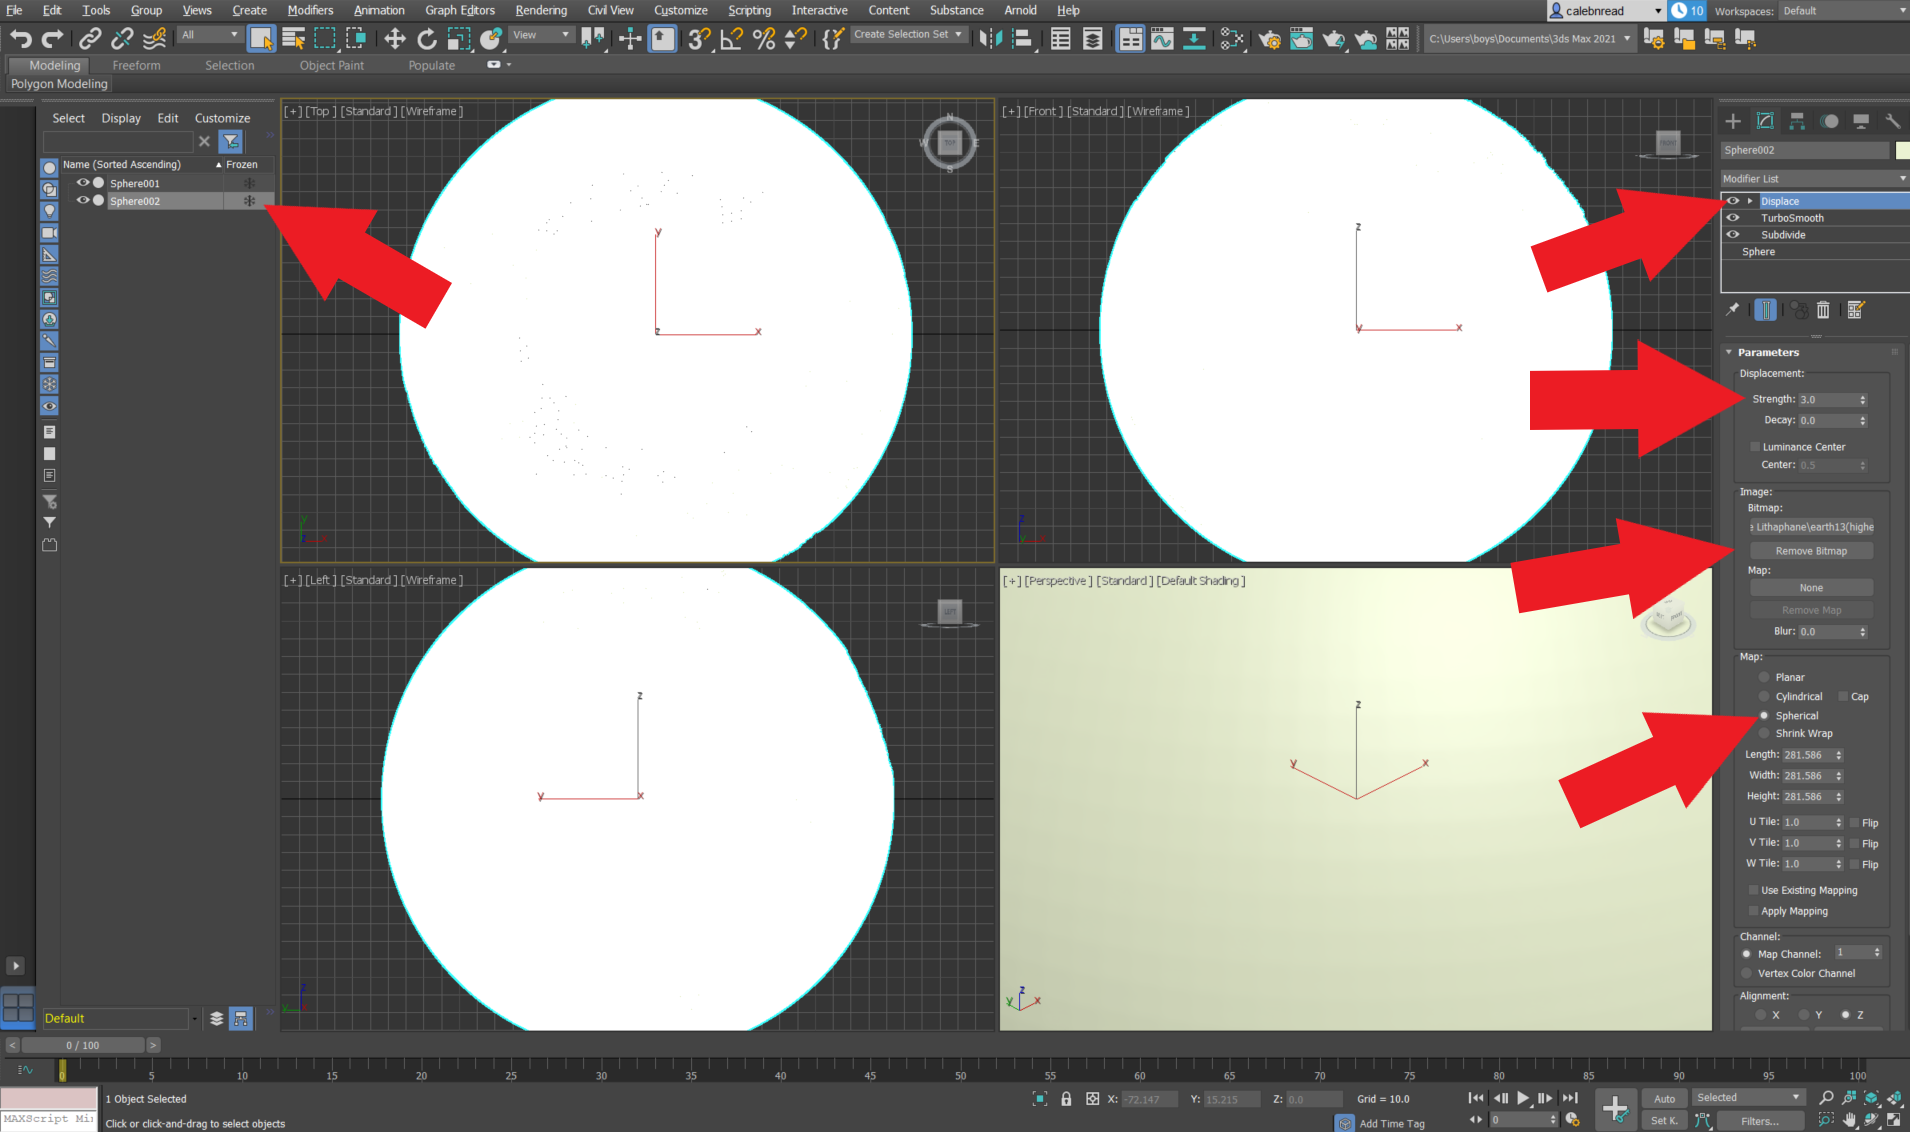
Again on Sphere002 add the displace modifier. Next, click add bitmap and insert your image. After that, change how the image maps to spherical so that it wraps around the sphere correctly.
The last setting to change is the strength. 3 is a good place to start, I've found in my testing that at a strength of 3 you should have a maximum thickness of about 3.5mm. If you increase the number you increase the maximum thickness and thus contrast (dark will become darker). With a higher strength comes a higher print time and more material used.
Now just export the file as a .stl and you're done with the designing portion! Make sure to have both objects selected when exporting.
Decide Bottom Hole Size/Distance
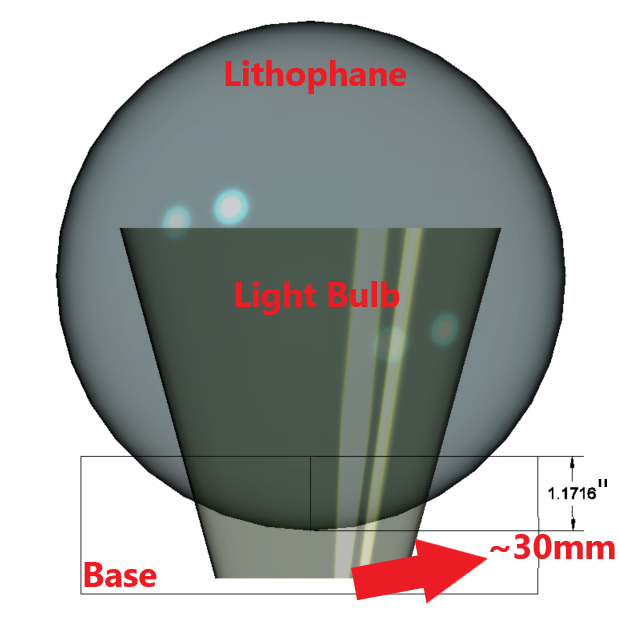
I measured the light bulb and decided how high I wanted it inside the sphere. Based on the sketch I drew up I decided I wanted to cut off the bottom 30mm of the globe.
Cut Off Bottom & Repair
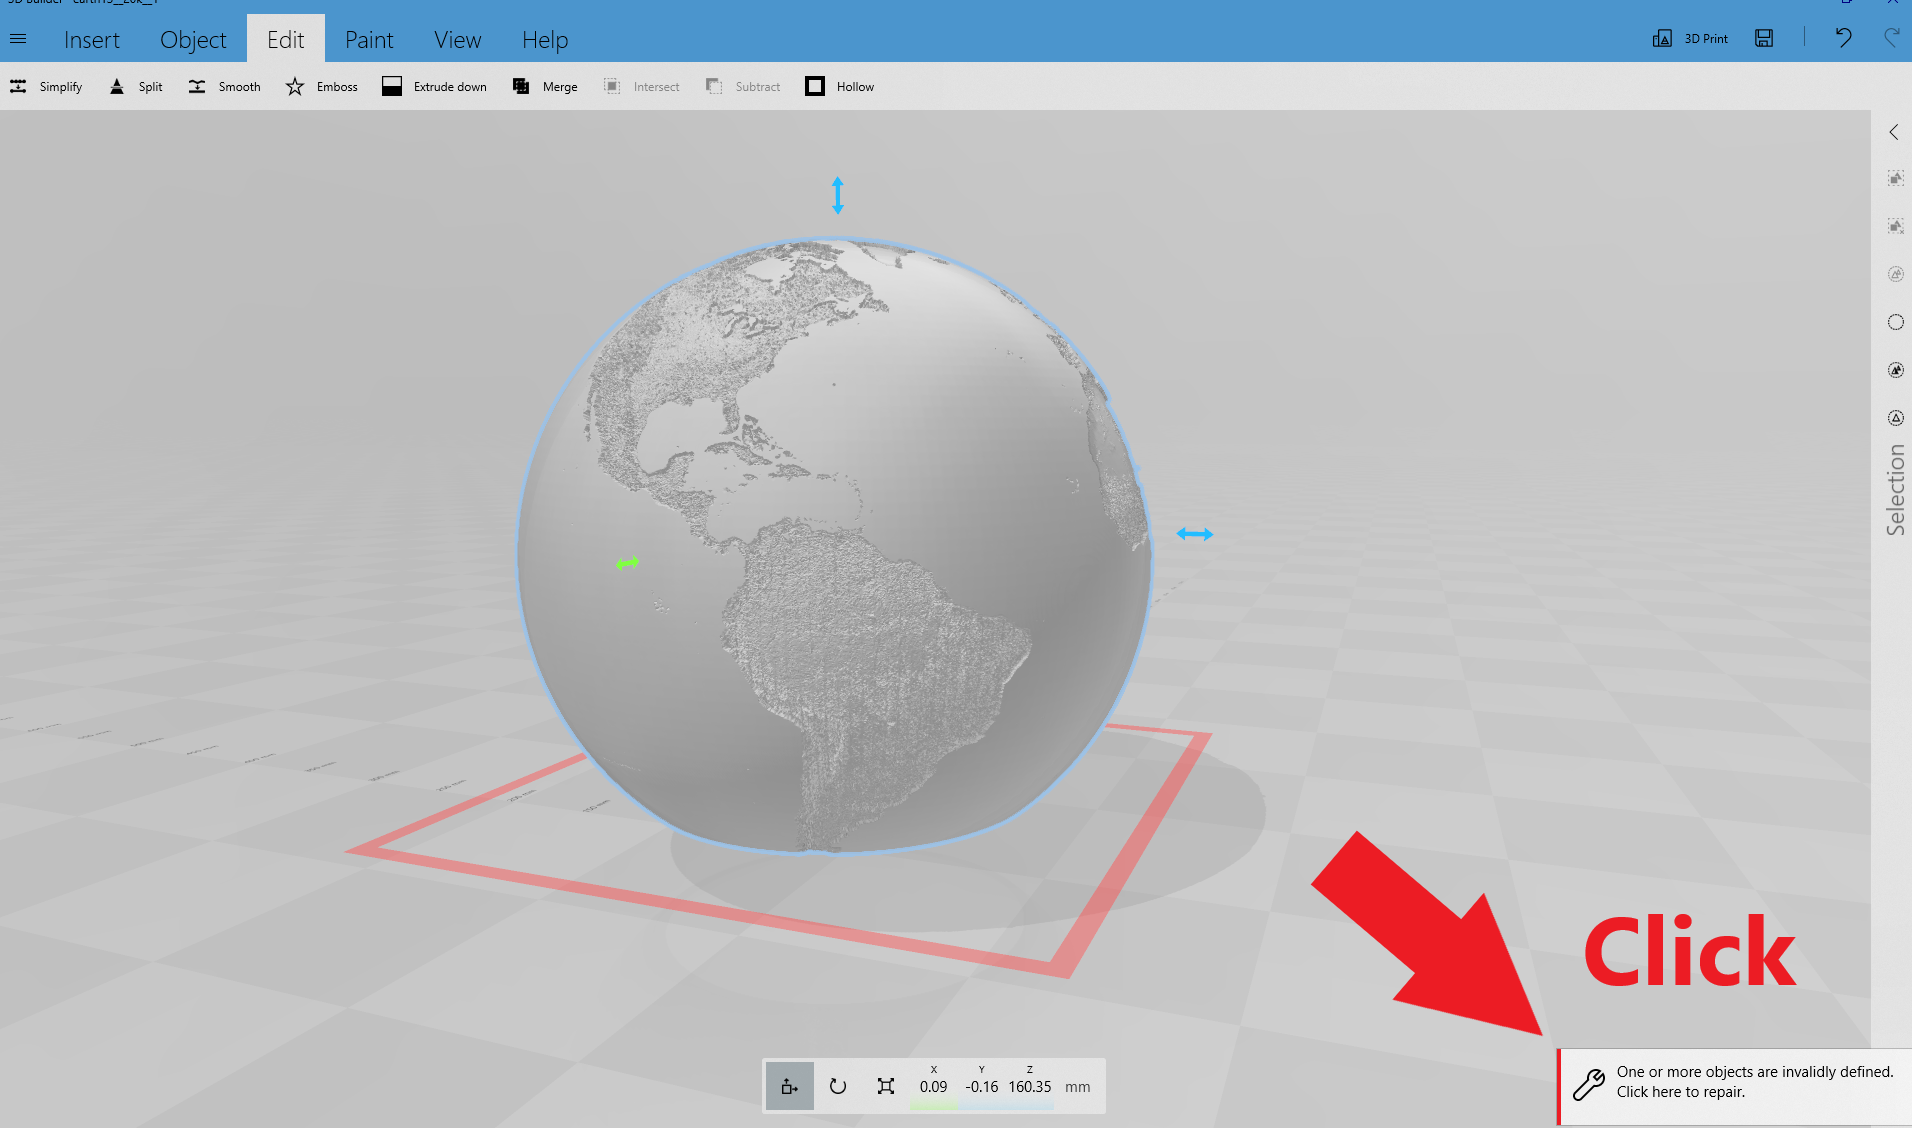
There are tons of ways to perform a plane cut on a 3D model. Meshmixer is a good option, so is Fusion360, I'm also sure I could have done this in 3ds. However, for this I used microsoft 3D builder which comes pre-installed on all microsoft computers. I like 3D builder because it can to plane cuts as well as repair some issues with the model (usually manifold errors).
Right click on your file and click Open With-> 3D Builder-> (once it's open) Import File.
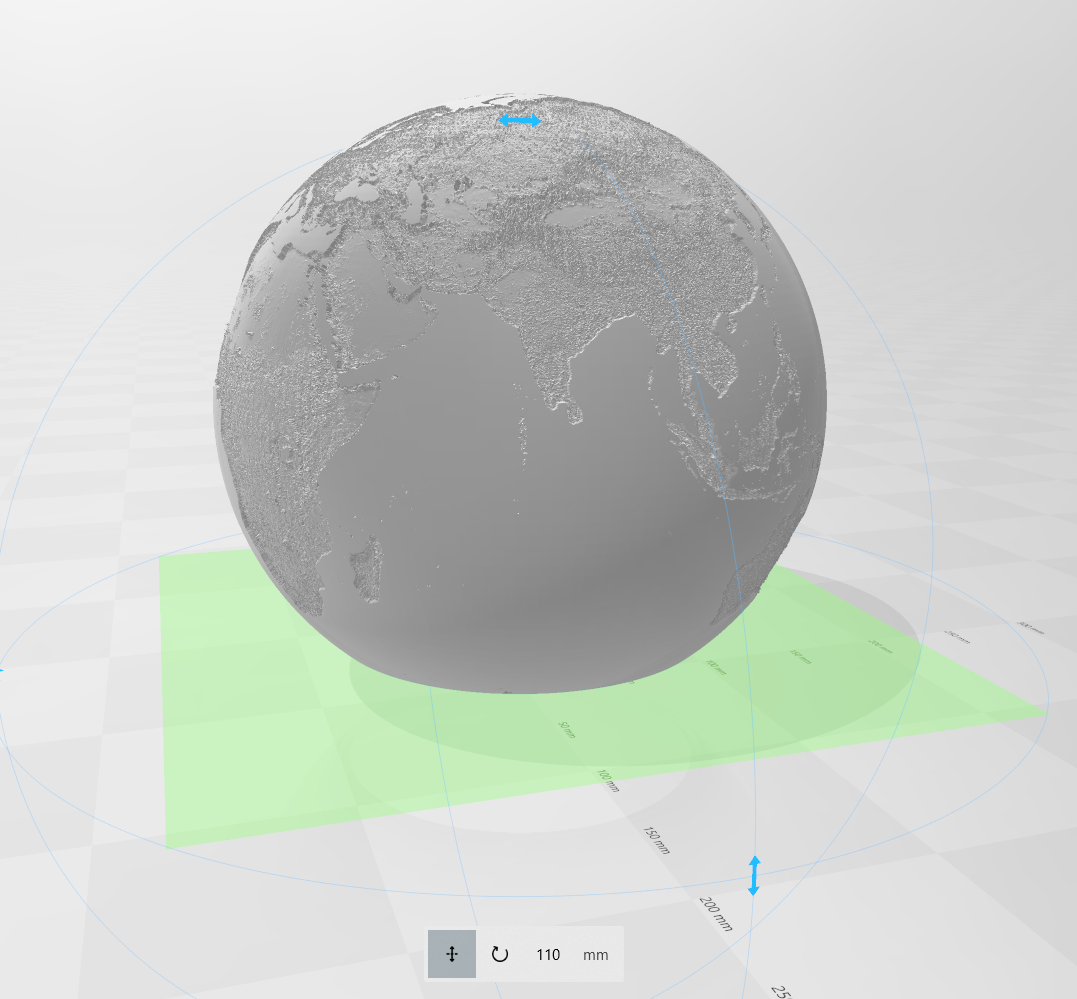
Click on Edit-> Split. Then, drag the green plane or type a number into the box to cut off the right amount (click split to finish).
Make sure to click repair if it ever gives you the option.
Save the file as a .stl.
If you're interested in printing this exact file here's a link to it on thingiverse.
Slice & Print Model
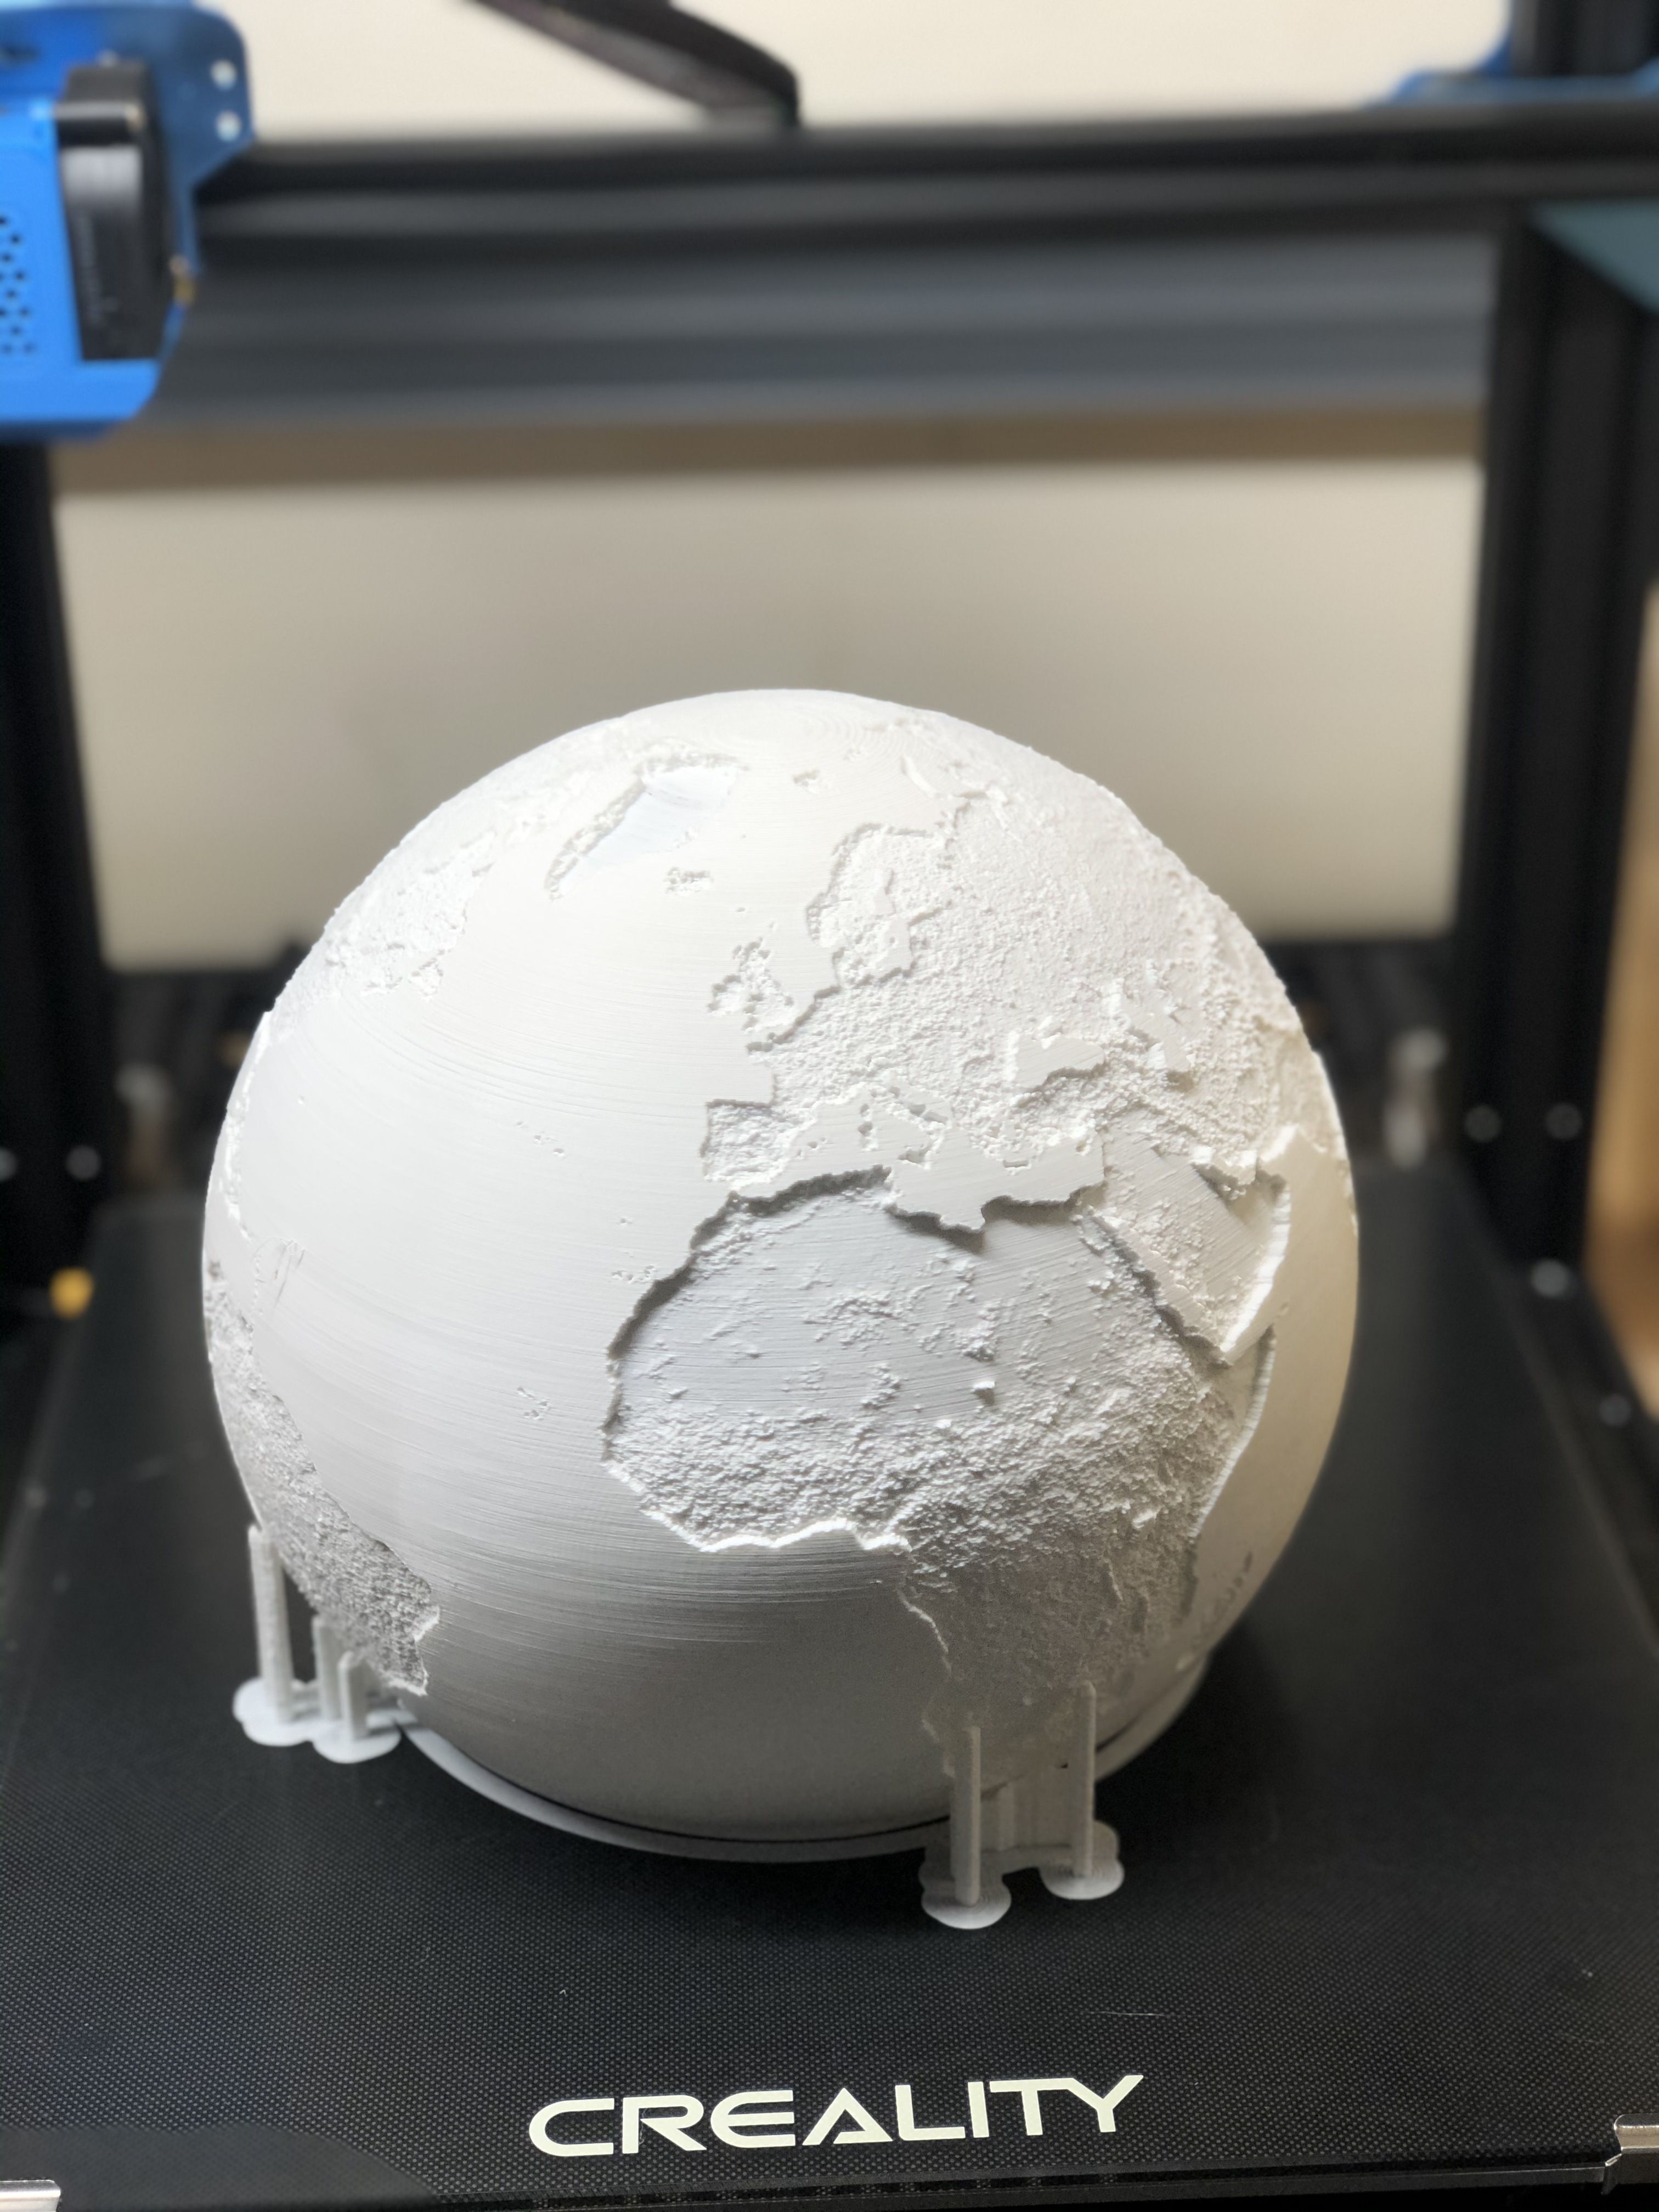
Import the cut model into whatever slicer you use (I use cura).
Settings:
.2mm layer height--- I usually print .12mm but .2 will take less time
10mm/s first layer speed
50mm/s layer speed--- to ensure good quality
95% infill--- you want it to be solid but sometimes printing with 100% infill can cause "zits" if the printer isn't perfectly calibrated
200C nozzle temperature
65C bed temperature
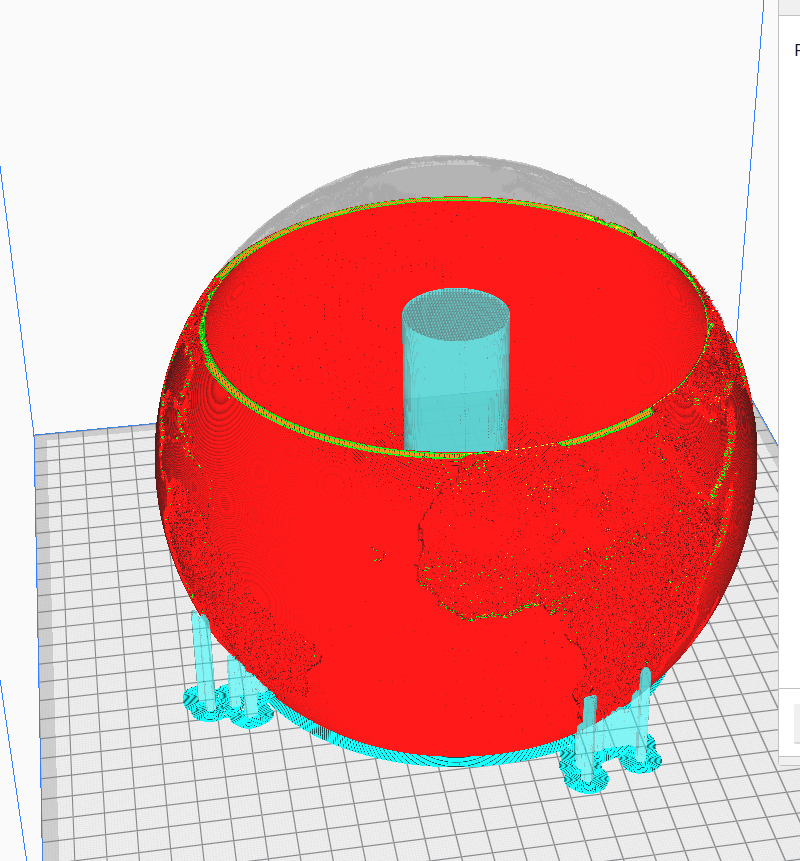
Supports touching buildplate--- on
Support overhang angle 80 degrees--- I was very concerned about printing the top of the sphere. I didn't want to waste a lot of material for supports but at the same time I wanted it to print well. The 80 degree support overhang angle worked well for me.
Buildplate Adhesion, brim--- In the future I will print these with rafts to avoid warping of the bottom of the globe.
My 8" globe ended up being 70 hours long and taking just short of 500g.
Find Wood & Bring to Shape
You have plenty of options for your lamp base. I chose to go with wood; however, you could 3D print this as well.
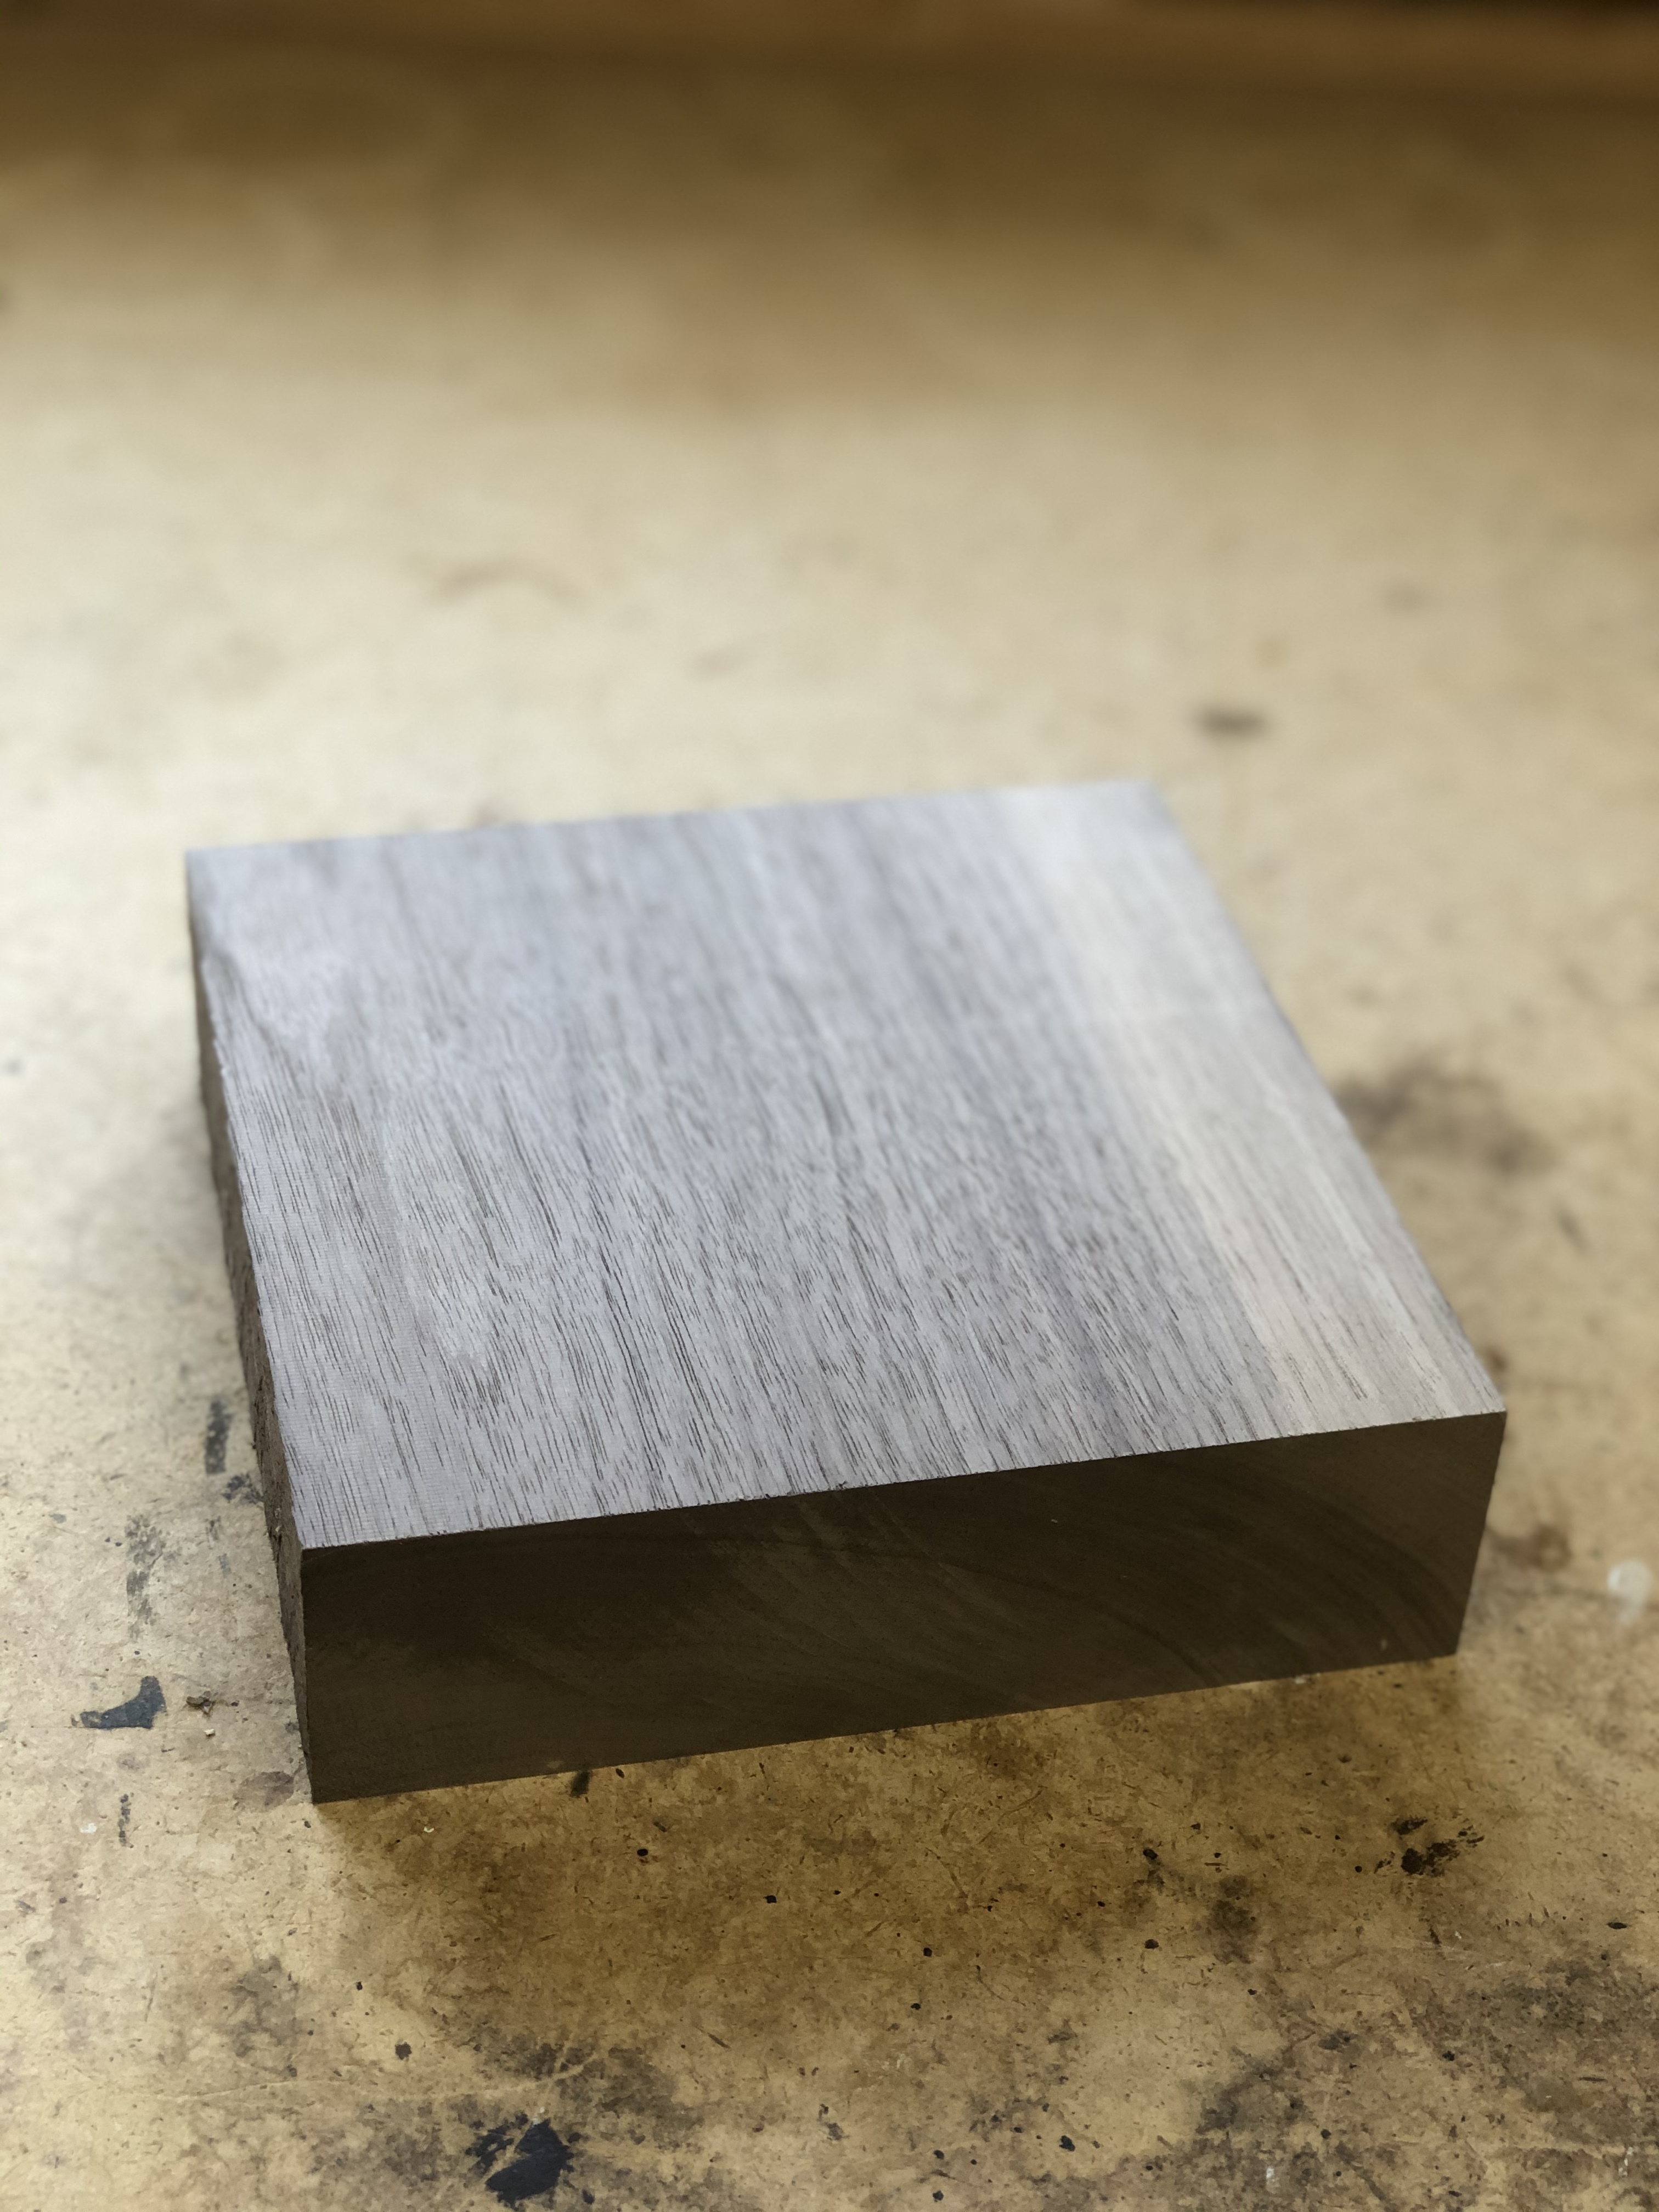
I decided to go with a piece of black walnut for a sharp contrast to the pearly white globe. The wood I used had already been milled but you could turn a log just as well.
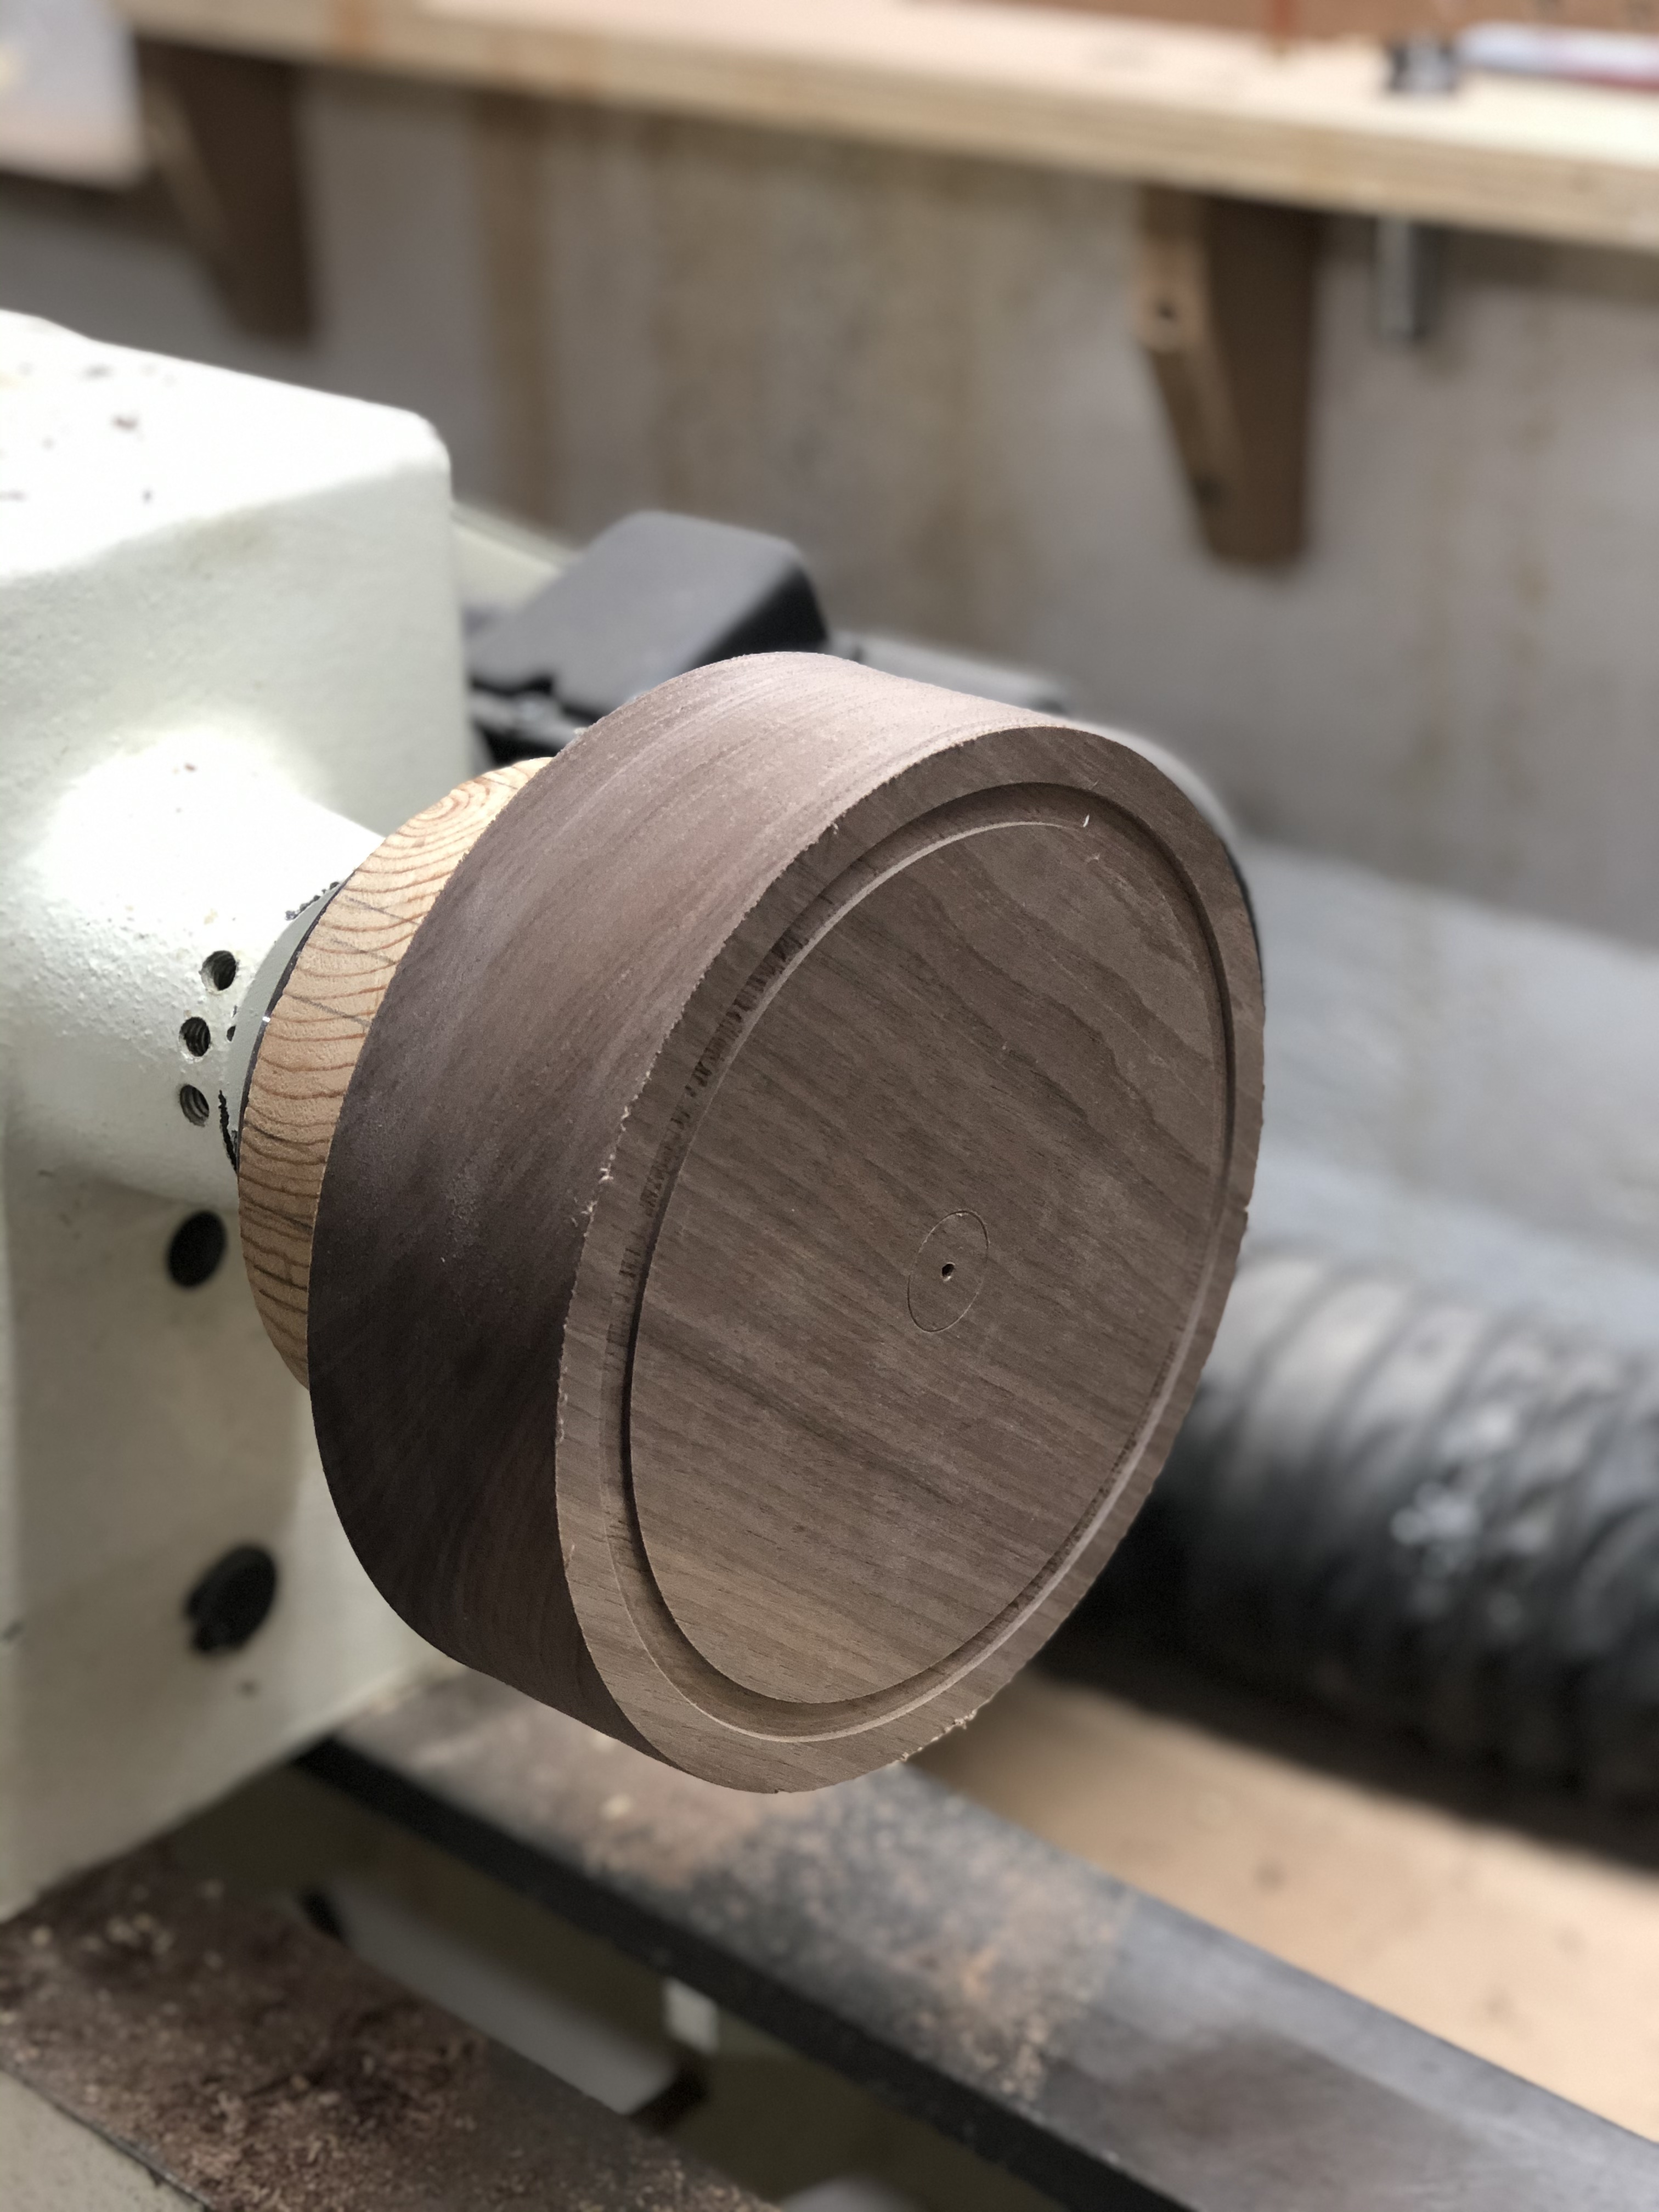
First I planed the walnut down to thickness (1 15/16"). Then I cut it down to about 6 3/4" square. After that I chucked it into the lathe and began to knock off the edges with a bowl gouge until it had no flat spots (the edge was round).
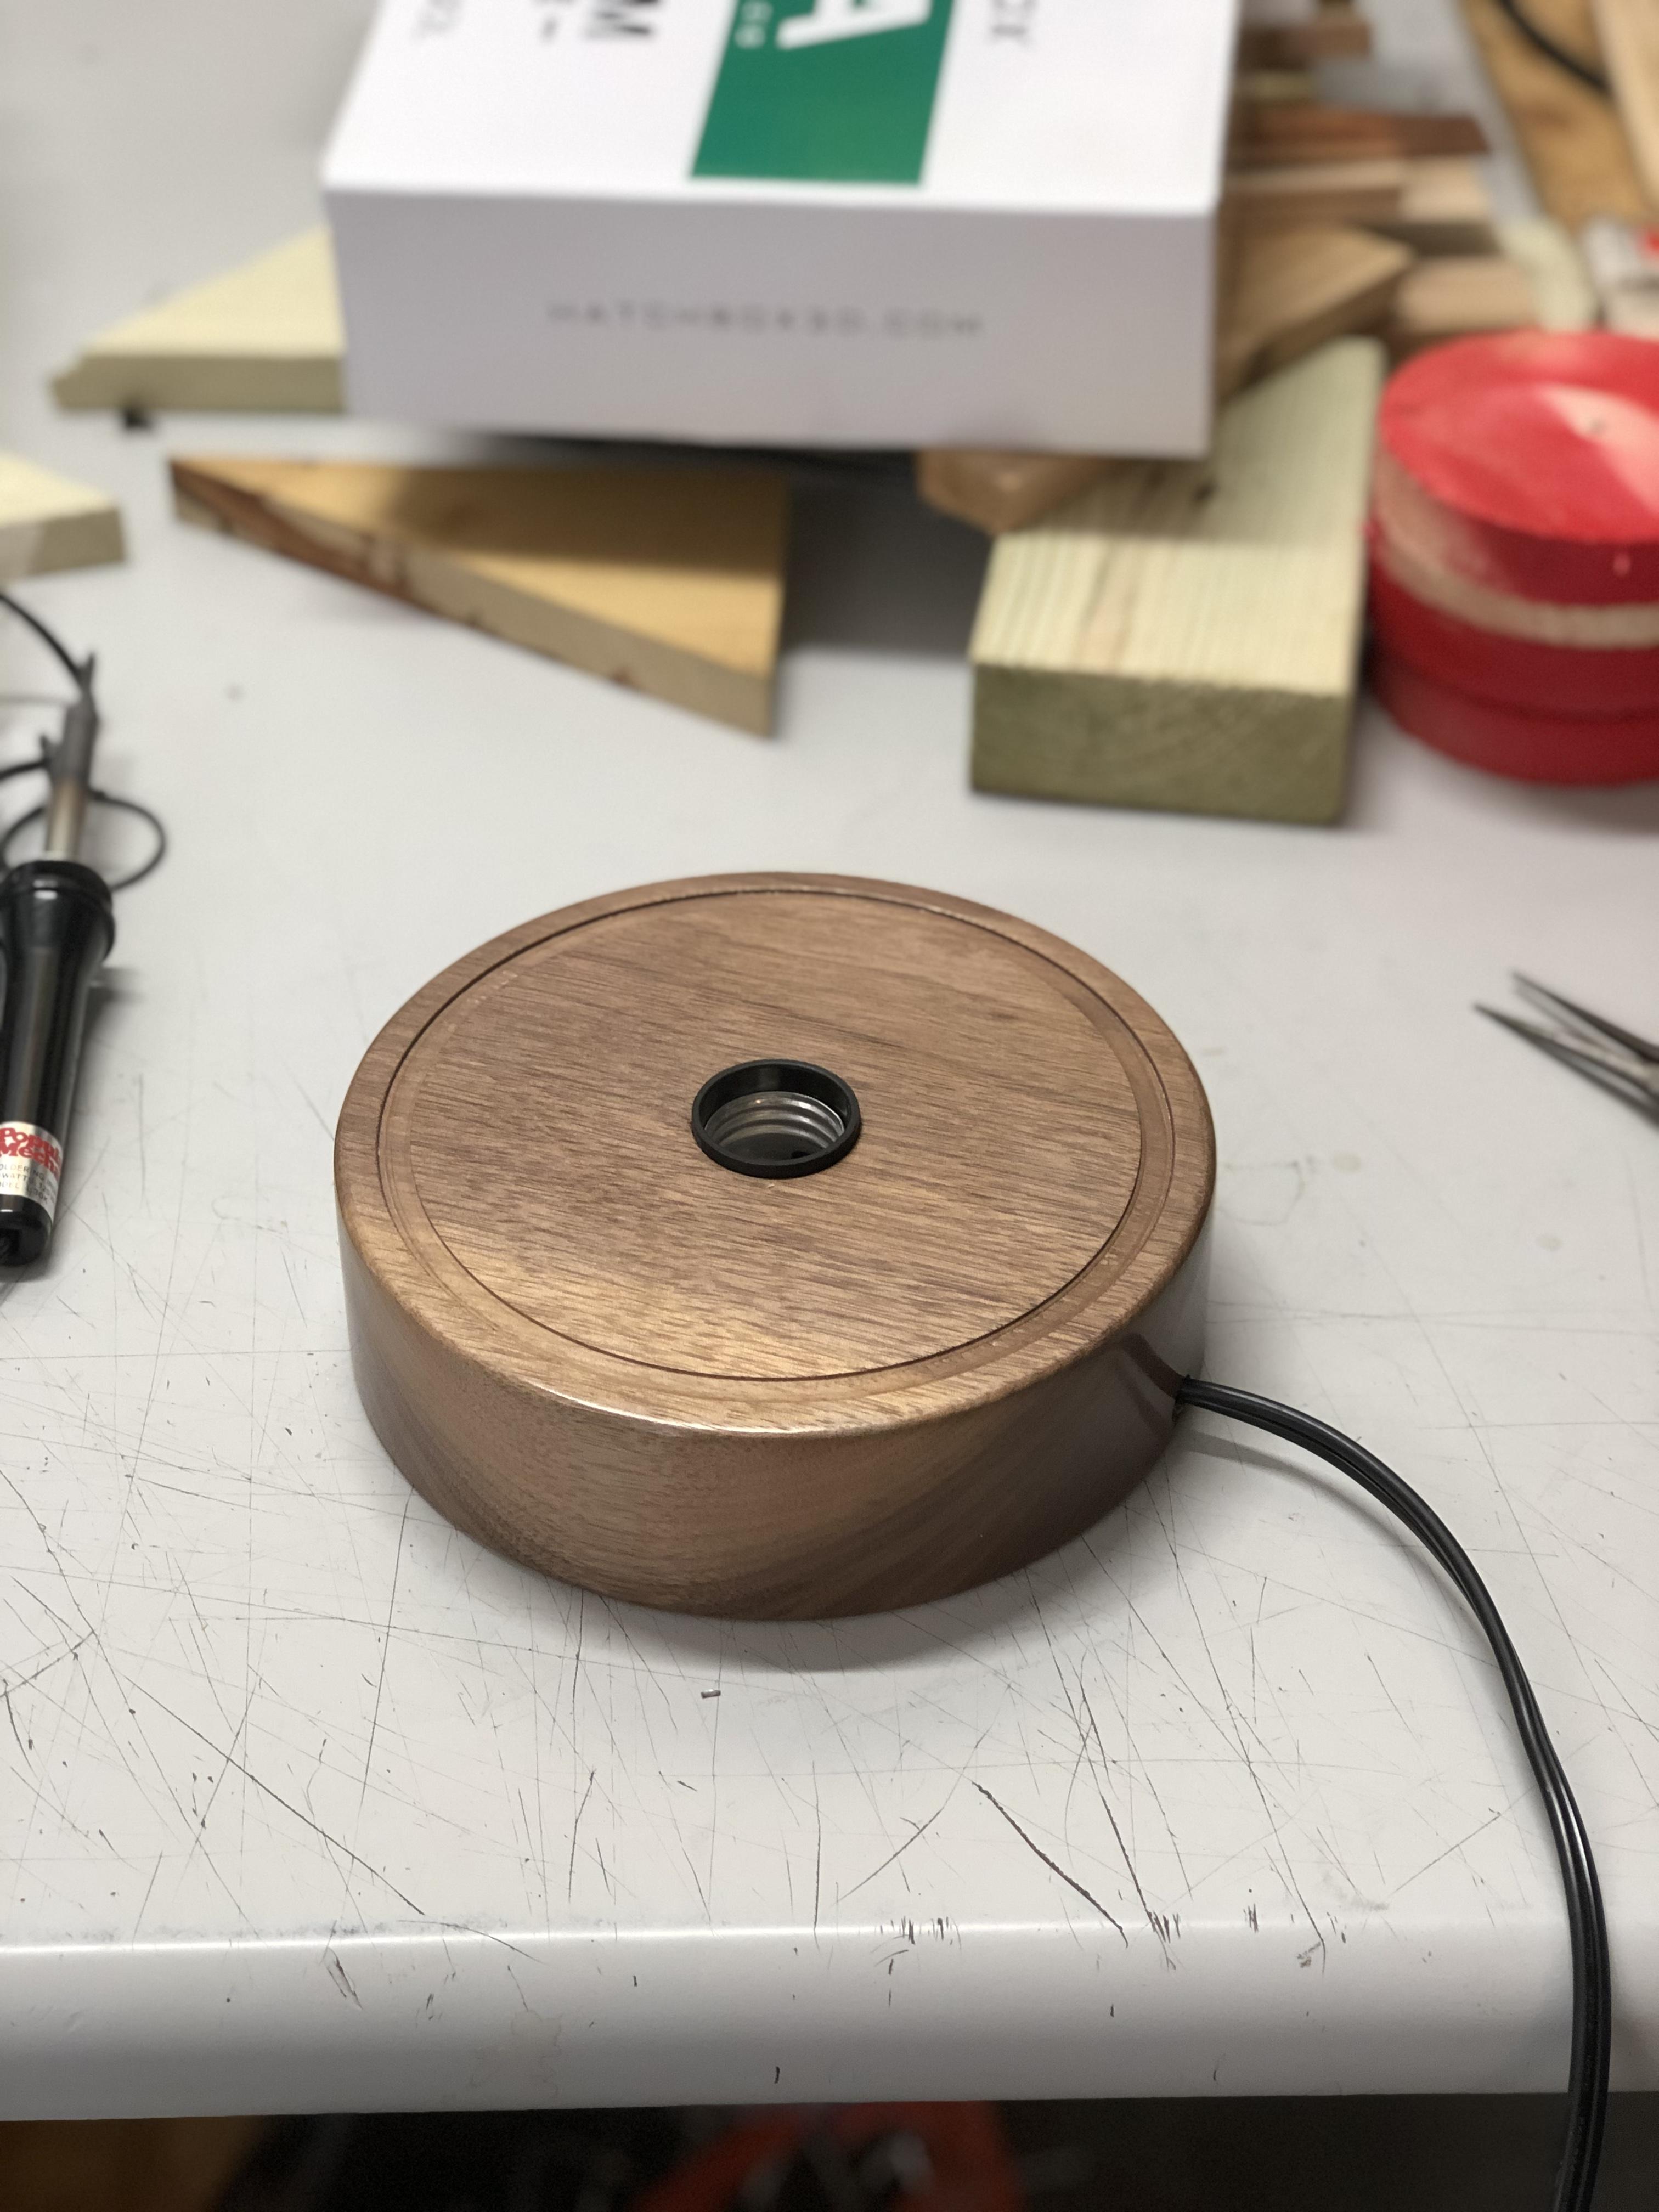
Create Groove & Hole


Measure the outside thickness of the lip of your globe as well as the thickness of the globe walls at the lip. Mark the outside with a pencil. Using a parting tool carefully cut out your groove. Alternatively the groove can be achieved with a router and a circle jig. This groove will allow for the globe to sit without moving in the base. However, I don't plan on gluing the globe to it in case I print a second globe or have to change the light bulb.
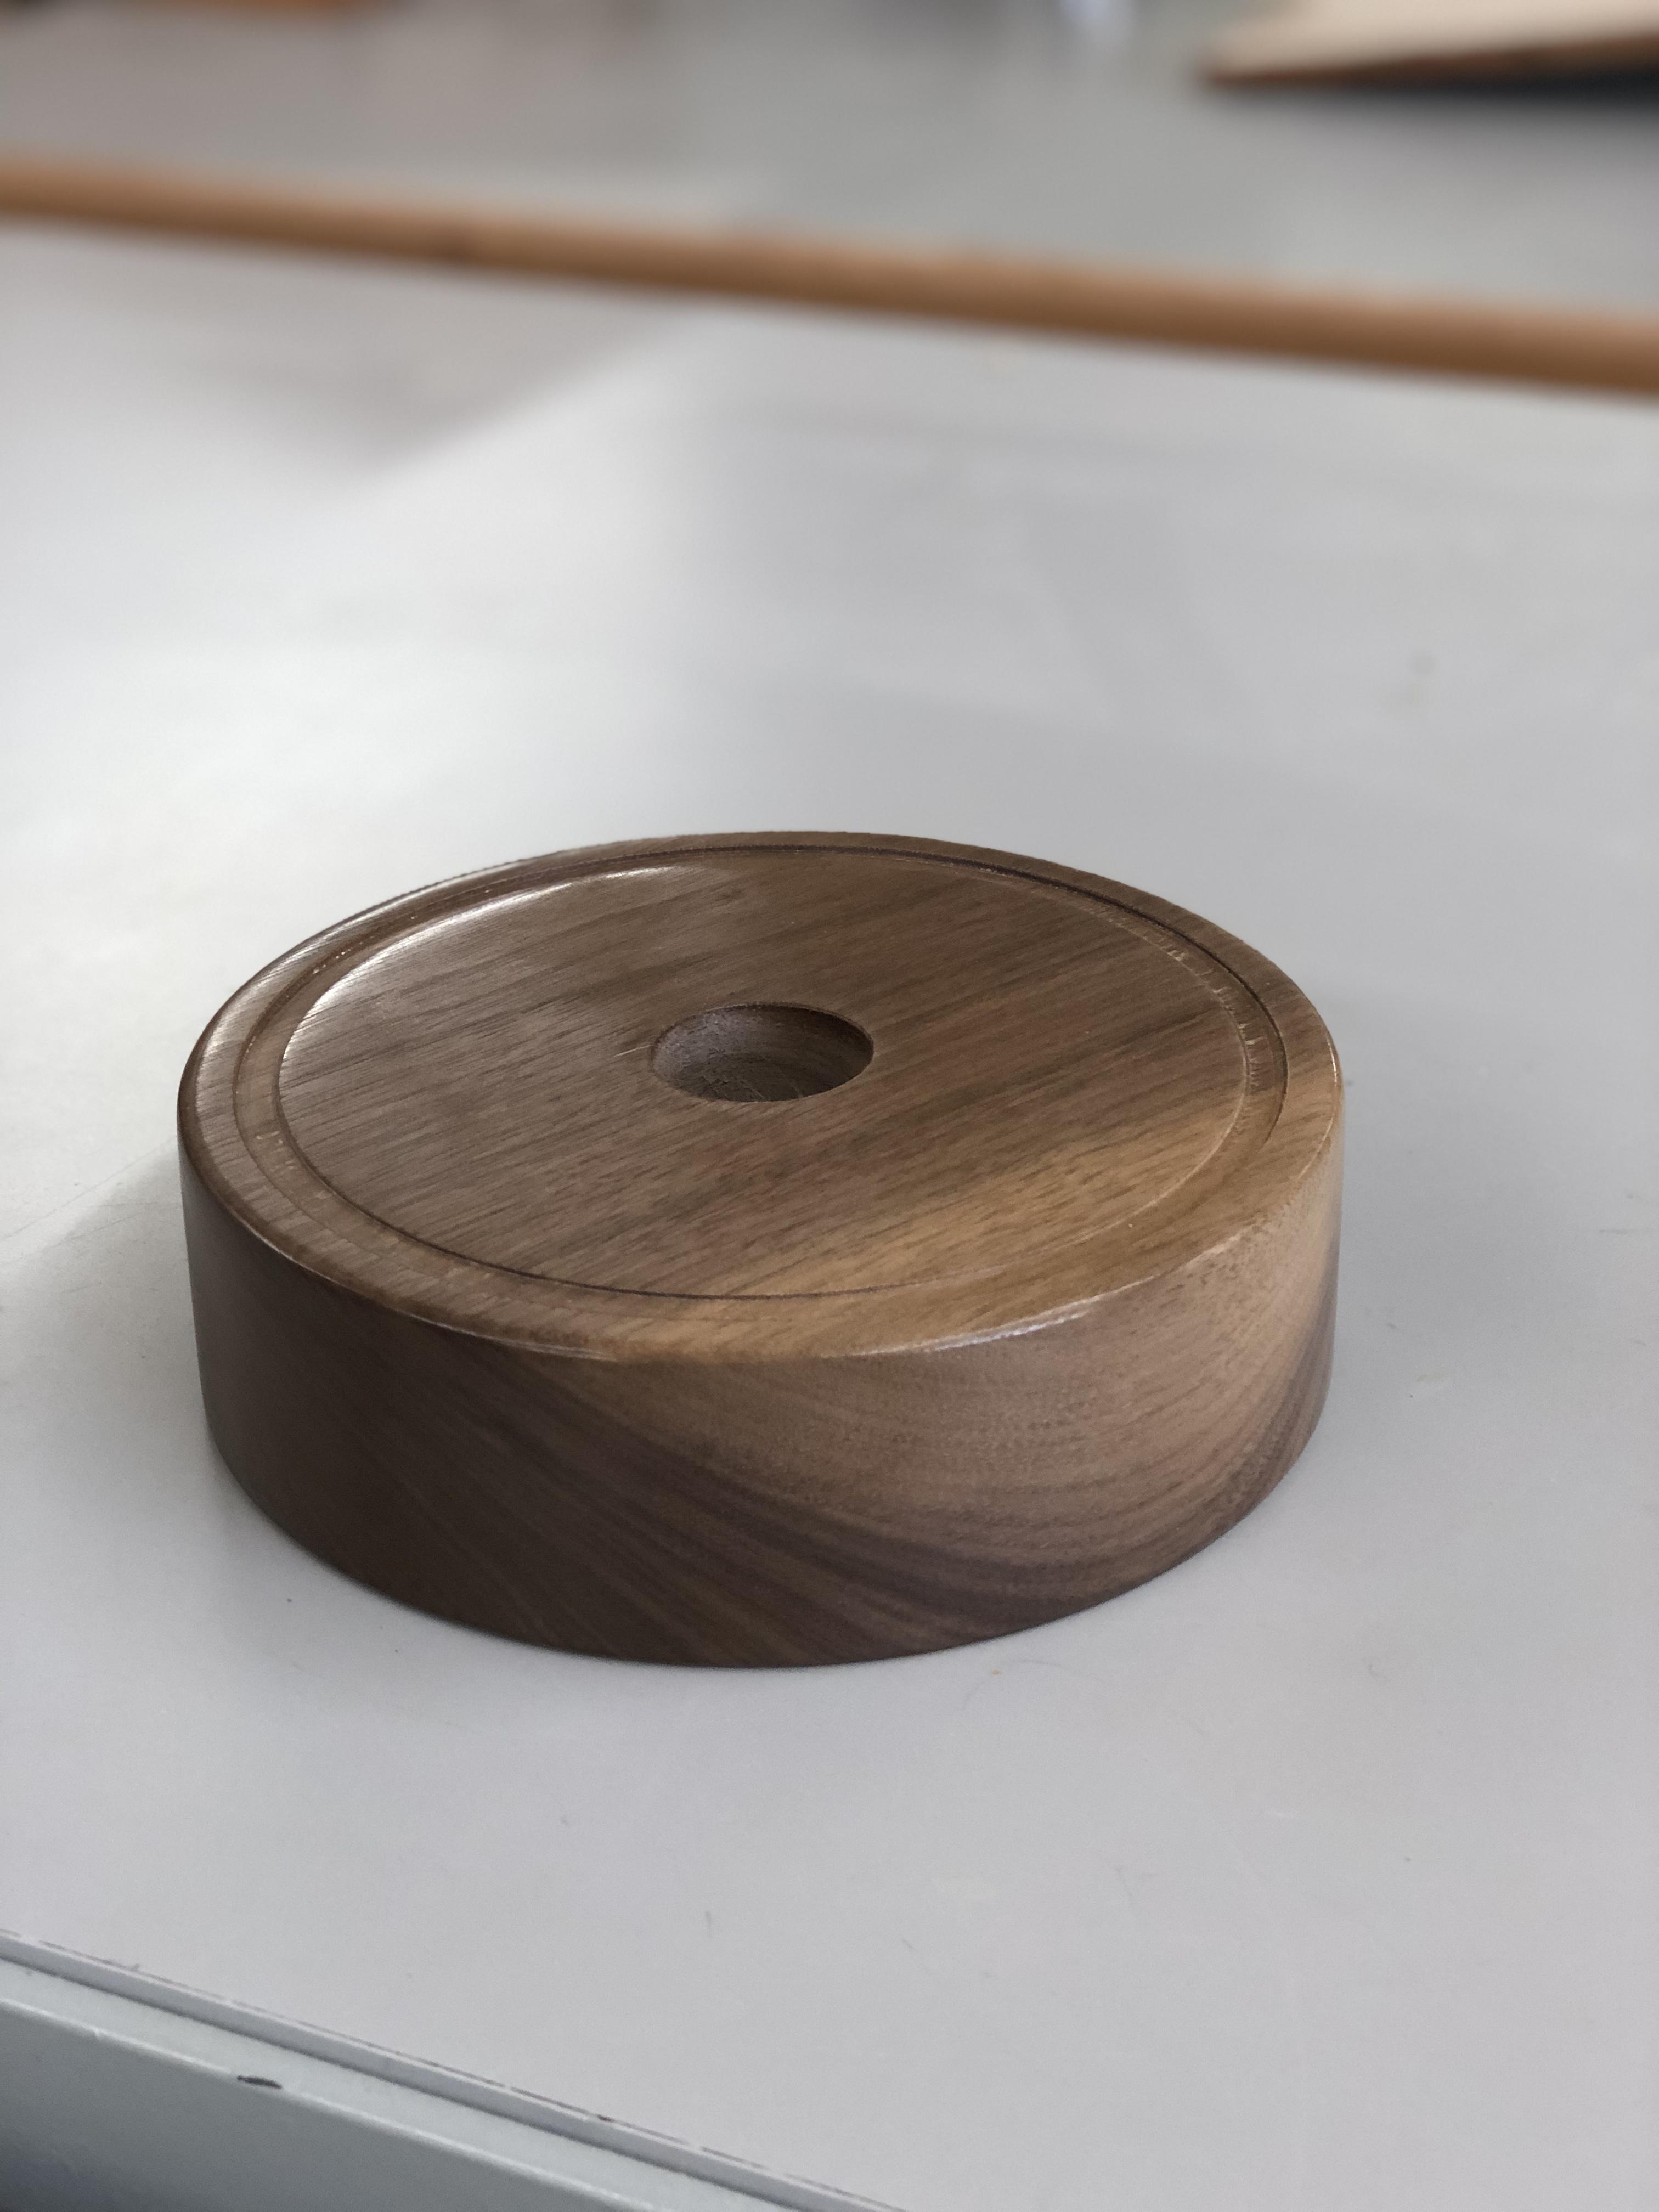
Next, create a hole for the light bulb socket. On the drill press or still on the lathe, use a forstner bit that is the same size as your light bulb socket to drill into the center of the stand (not all the way through).
Sand Until It Shines

Yay! The fun part, watch as the wood comes alive.
Starting with 100 then progressing through the grits to 400 sand your piece (100-> 150-> 220-> 320-> 400).
You also have the opportunity now to apply a coat of finish such as wipe-on polyurethane or a wax. However, we're not quite done.
Drill Wire Channel & Round Edges
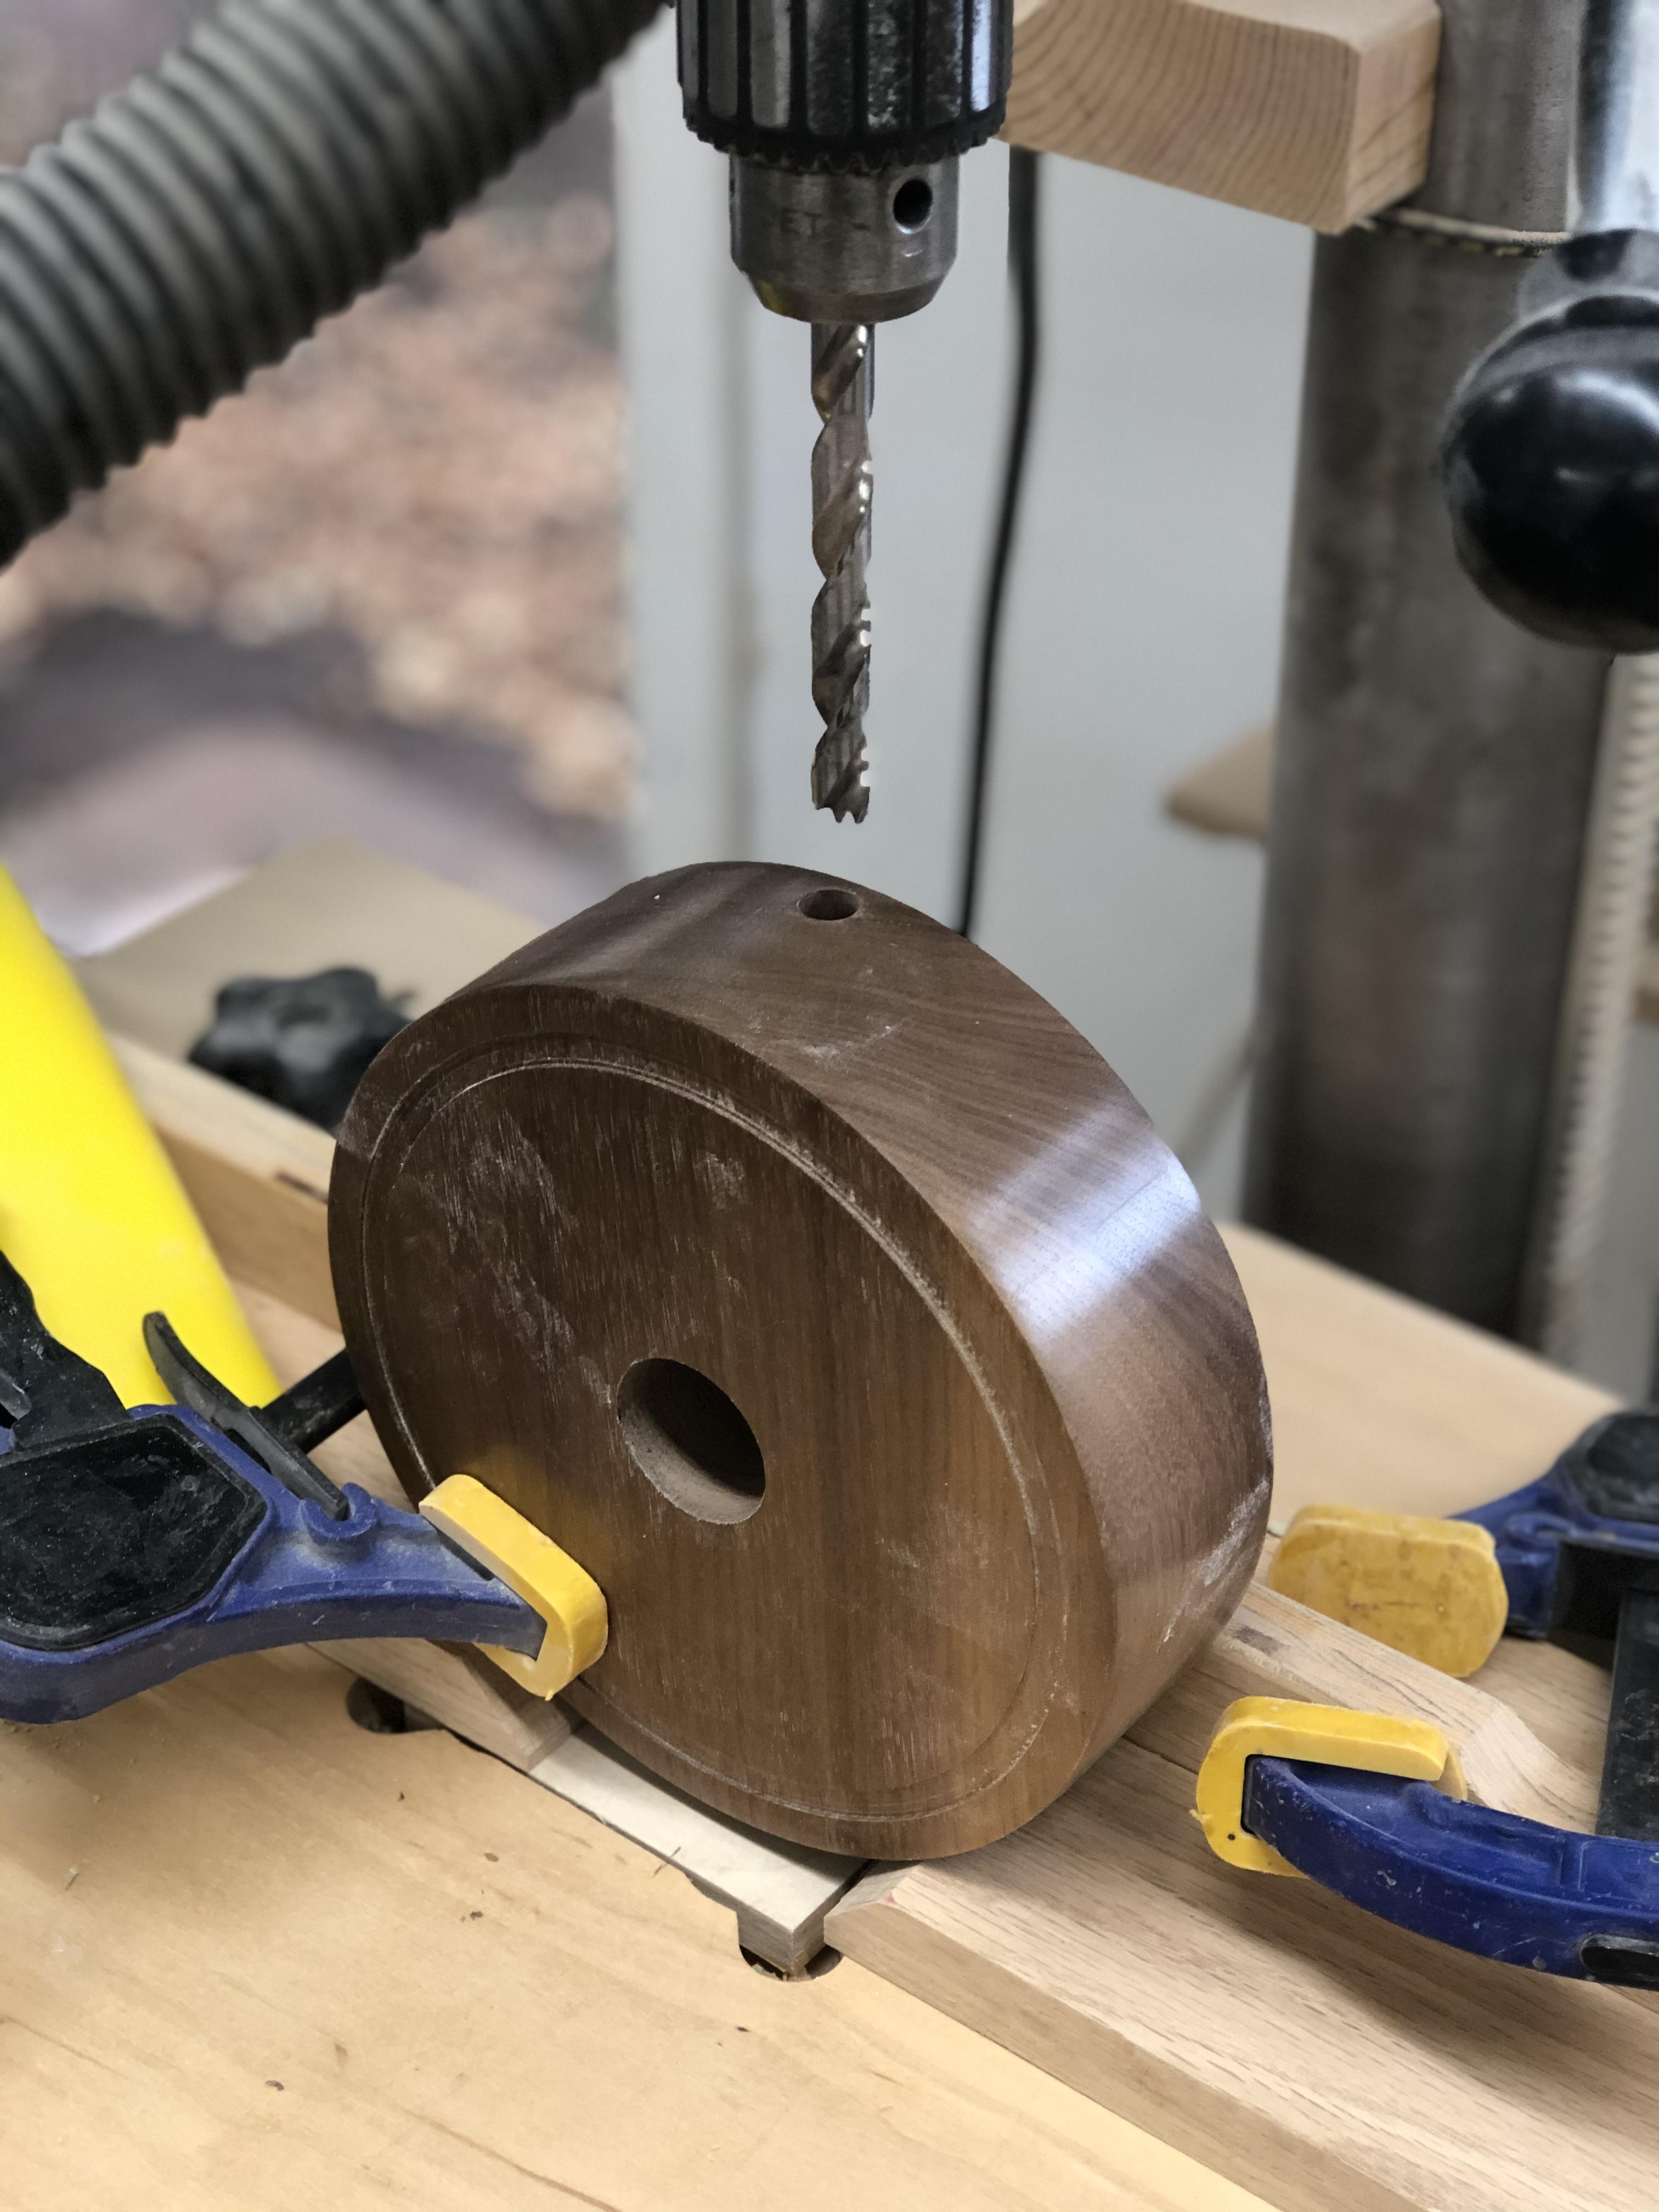
Now to hide the wires. Using a drill press cut the hole big enough to fit your wires through. Make sure to clamp it down tight to insure a straight hole.
Either with a sander or a small roundover bit, round the corners of your cylindrical base. This will prevent dents/chips as well as to make it feel nicer.
After that finish it with whatever you prefer. I used a buff-on wax to get a shiny semi-protective finish. Polyurethane, lacquer, or any oil would also work fine.
Wire the Lamp
Another option for this step is to simply use an old lamp. However, it's fairly cheap (<$10) to assemble your own setup.
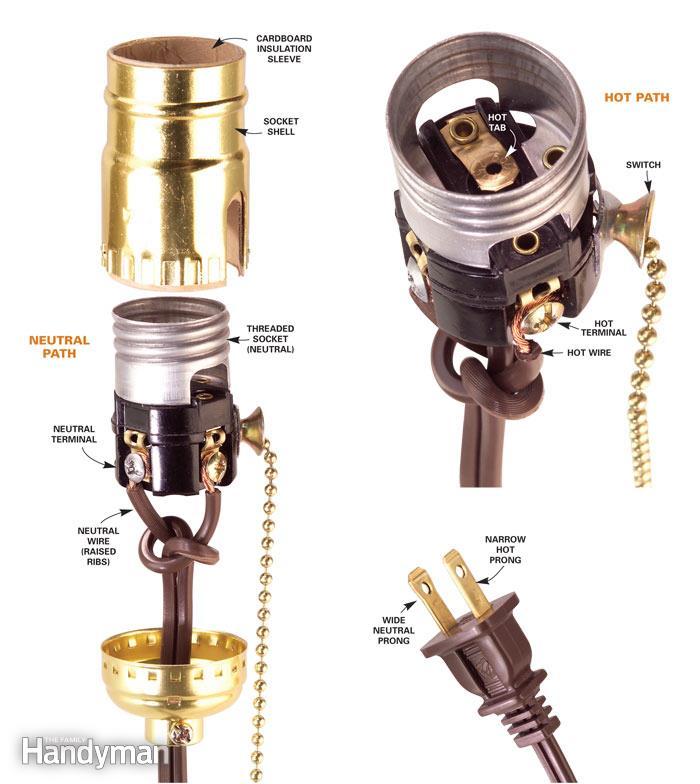
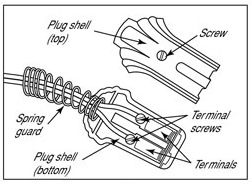
First attach the wire to the plug adapter and create a secure connection (picture above). Make sure that the wire with the notch in the casing is running to the wider prong of the plug.
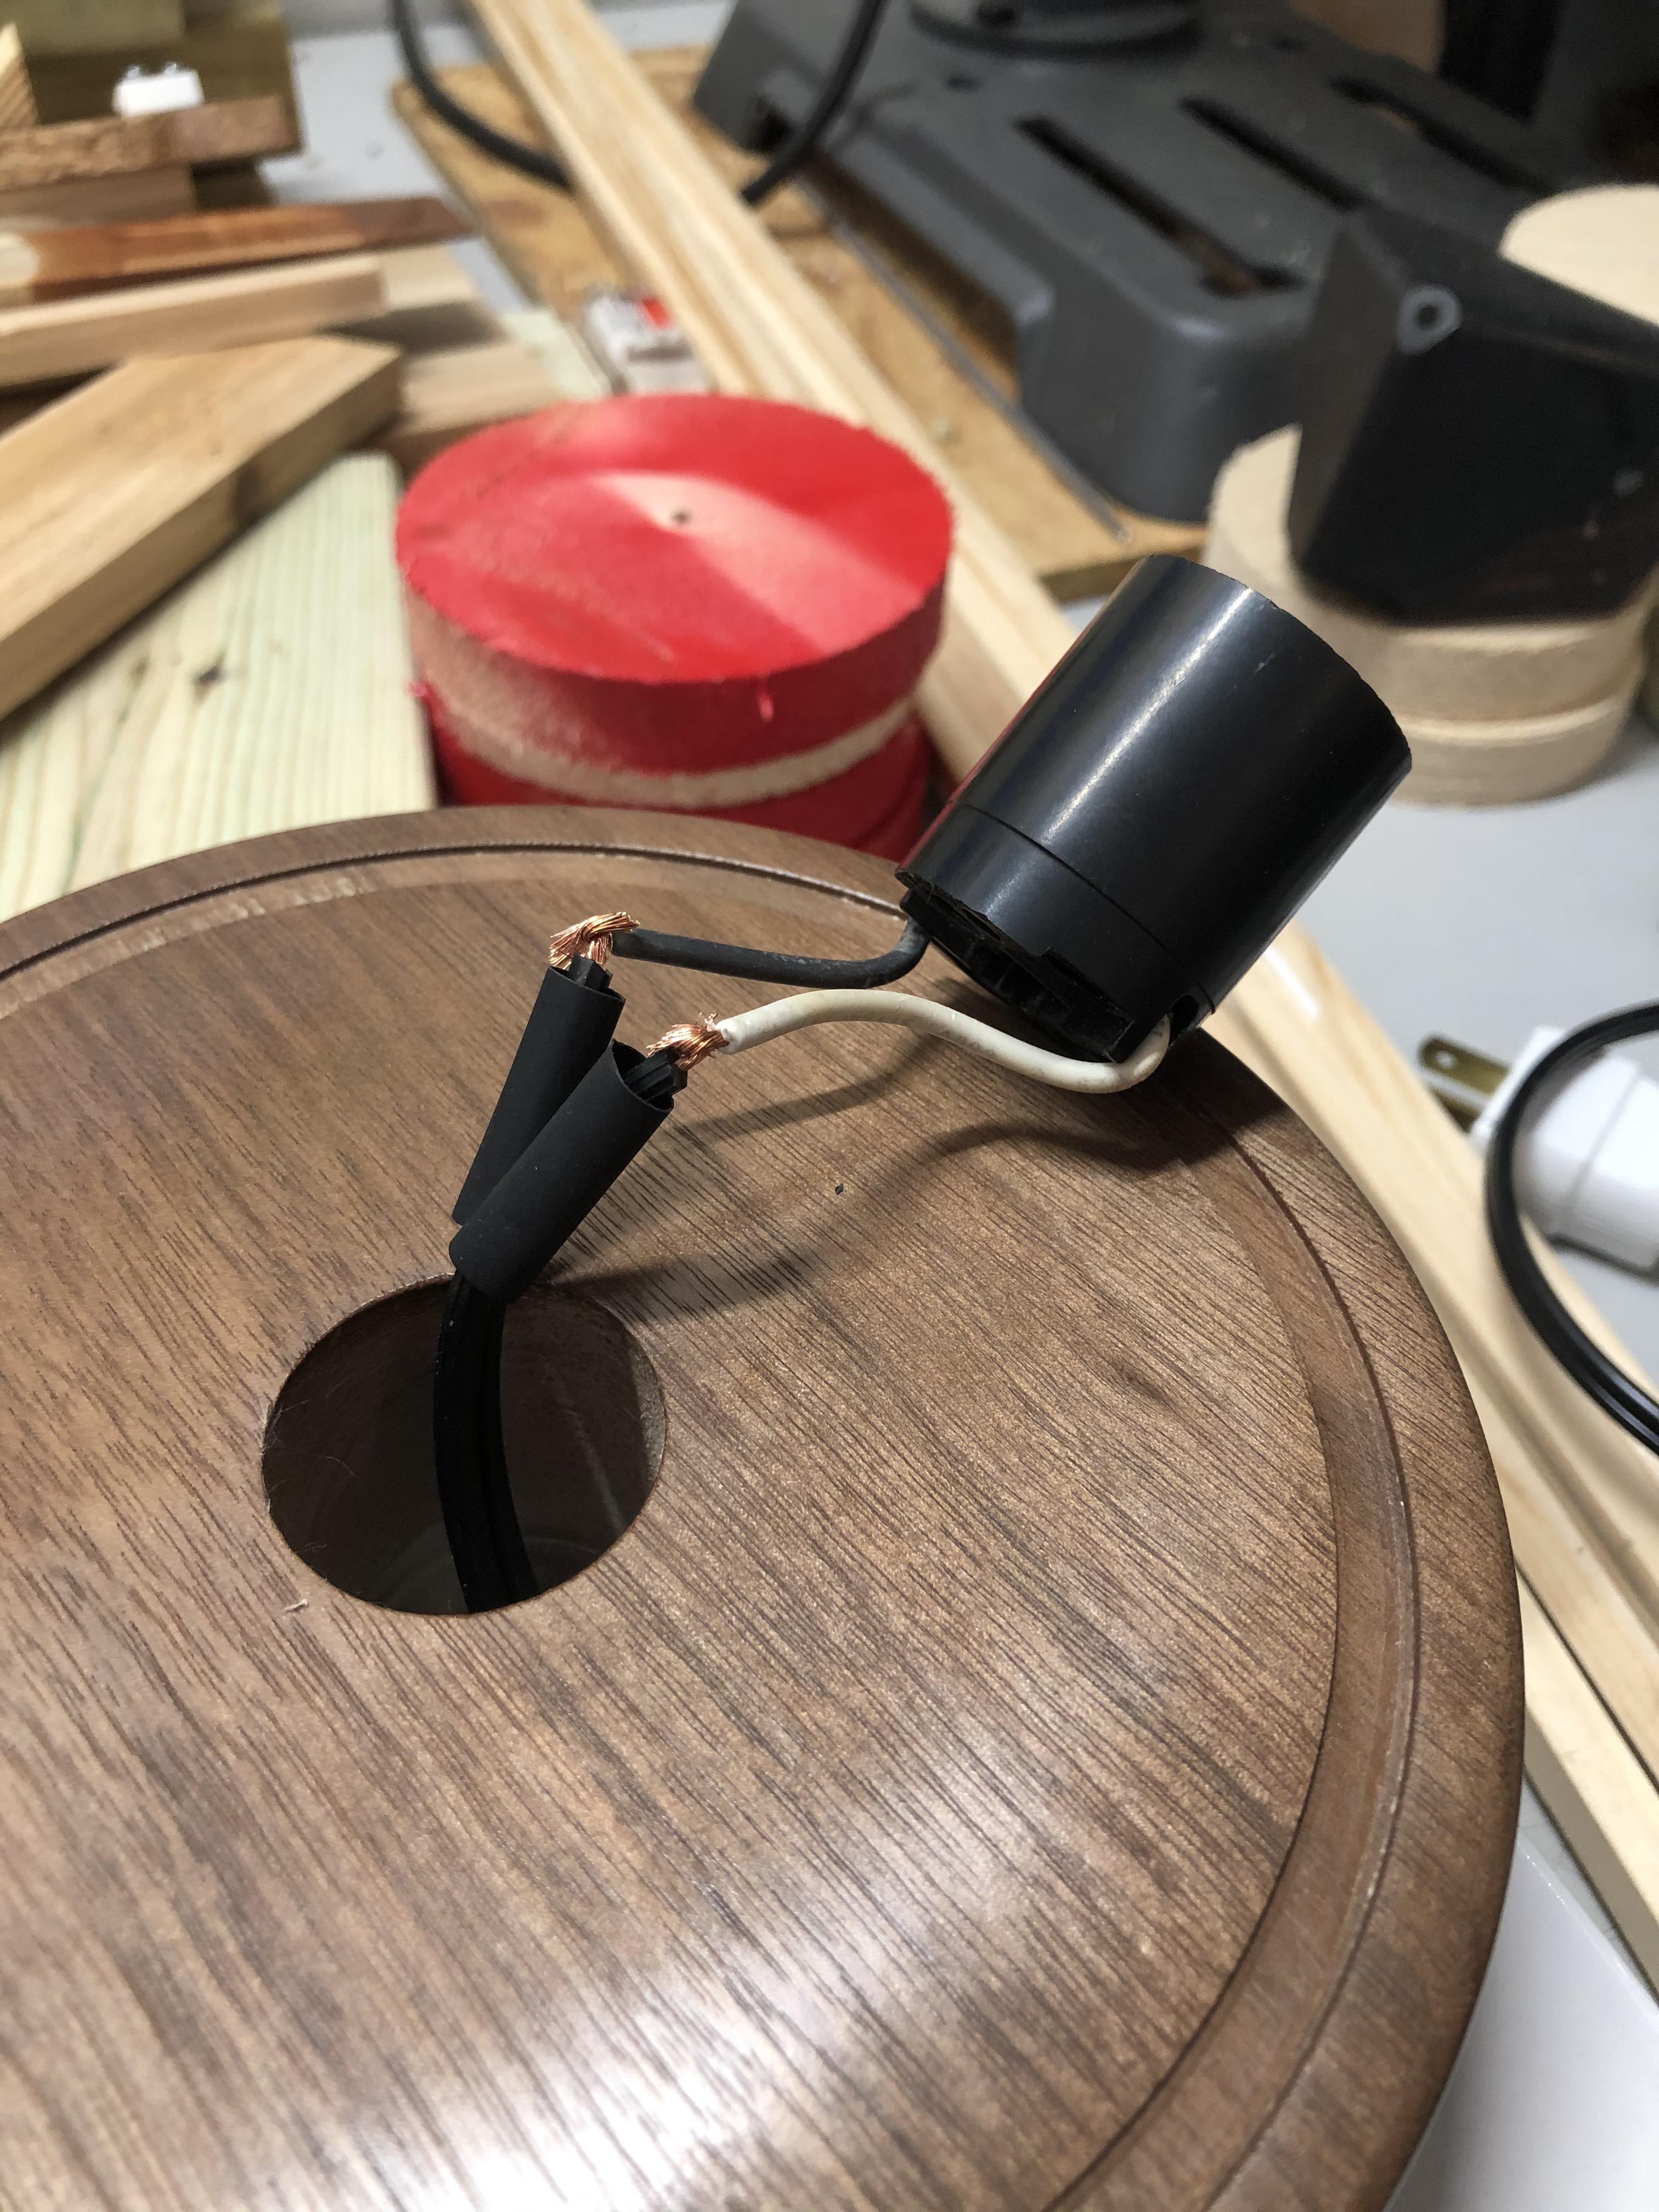
Next, put the light bulb socket in place and solder the wires/ terminals to your lamp wire. Use heat shrink tubes to protect the connection and everything in contact with the connection. The wire with the notch in it should run to the threads of the light socket. Here's a helpful site if you need help.
Pick a Light Bulb

The light bulb is obviously very important. You want to try to stay away from incandescents because they will melt or warp your globe over time. I picked a remote controlled RGB LED (remote controlled so I didn't have to install a switch). The downside with these RGB LEDs are their snow cone shape. The shape of the plastic blocks out a lot of light which could cause the bottom of the globe to be unilluminated. I did some tests to ensure that I wouldn't have this problem but worst case I can replace it with a normal edison LED light bulb (also E26 socket ) that spreads the light in a wider angle.
Test It Out!
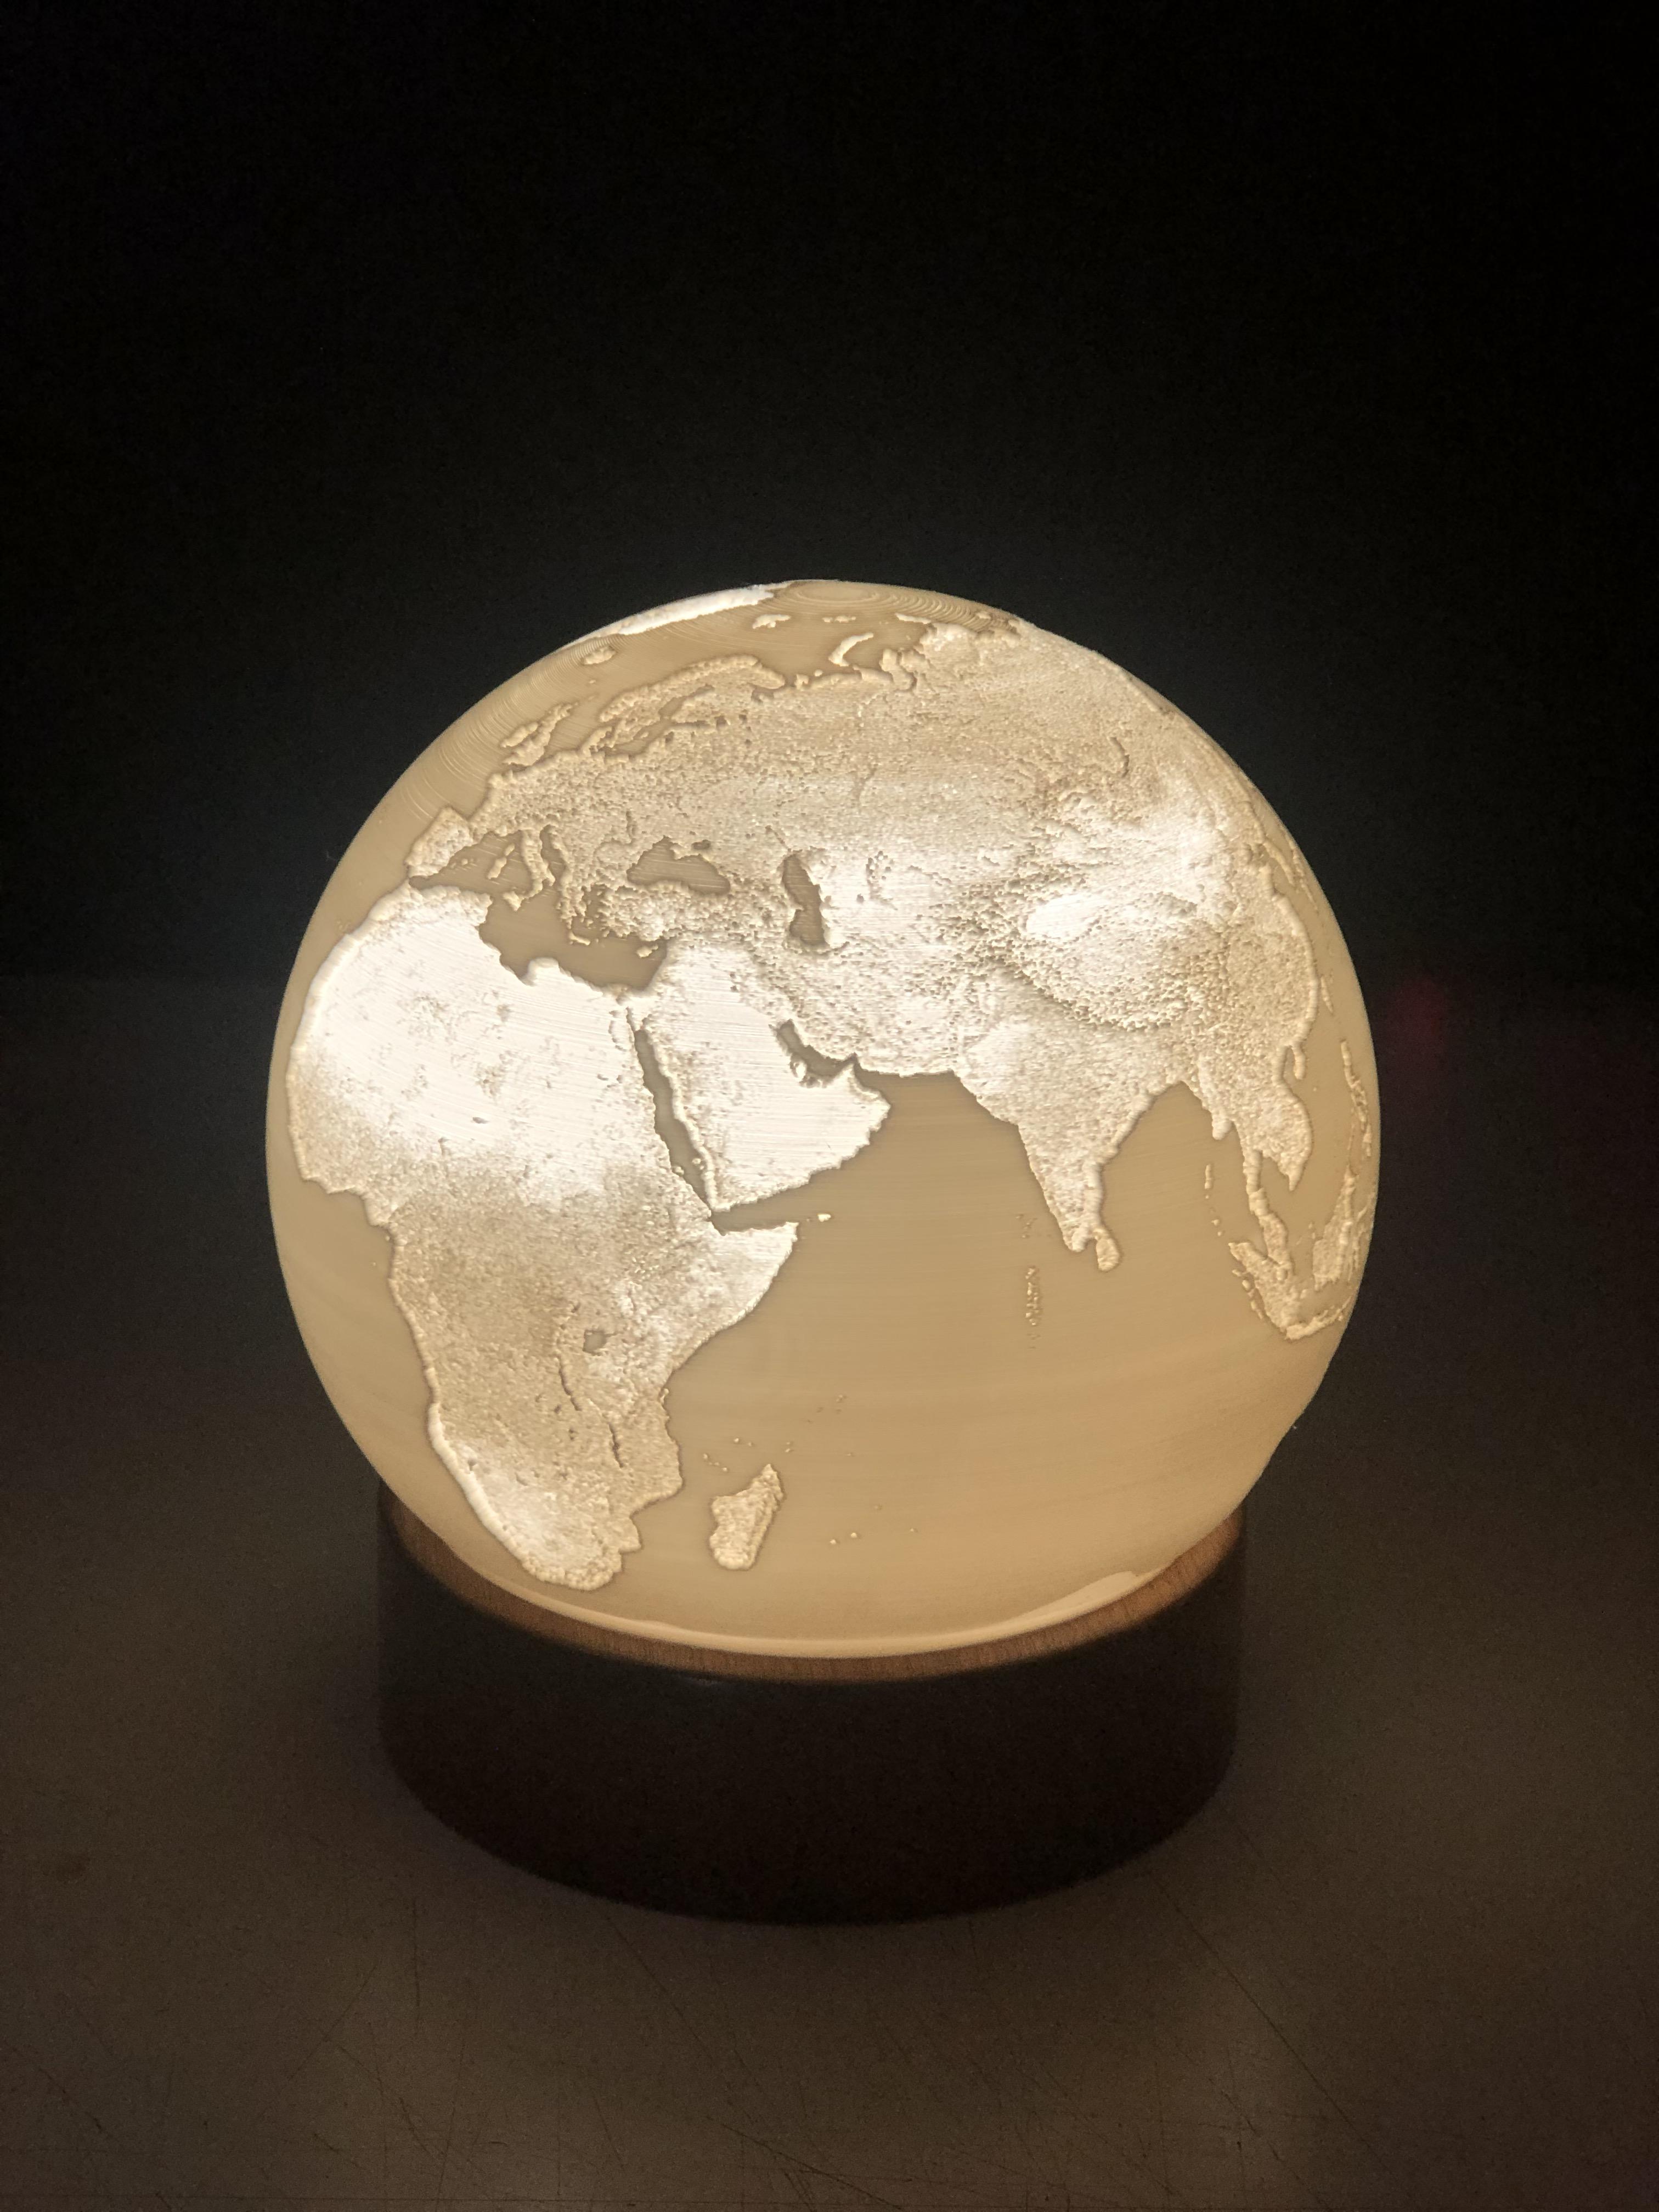
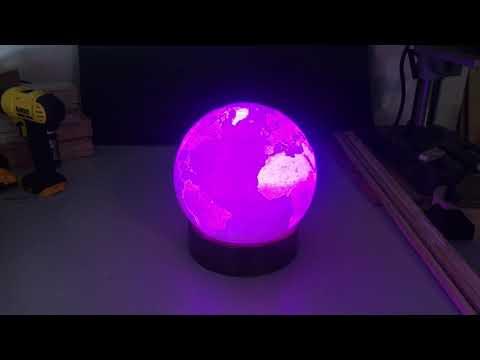

Screw in your light bulb in and voilà! Admire your handiwork and the beautiful new lamp you have.