Speech Tree Text

The work presented hereafter focus on the interaction between someone's voice and its representation in the digital world i.e sound and text (transcript). The chosen representation of the interaction is a dynamic real-time generated tree pattern. The pattern may also suggest a human lung, the pattern expanding itself when sound gets louder. A tree is also the resource that makes spreading of text possible across the world through paper and printing.
It is a tribute to the words that bring back together analogical wor(l)d and digital (through algorithm which is nothing but words that gives us ability to dialog with machines).
Supplies
For this work, the following is needed (almost nothing special) :
- a text or a list of words, ".csv" file format
- a sound sample ".wav" format
Processing software (https://processing.org/)
Create a List of Words

This is the Text Contest isn't it ? Please, be more imaginative than me.
Sound Sample

Continue by recording a sample of your voice when reading the chosen text. This is recommendation, but you can continue with any sound, for example I use a record of a storm.
Downloads
Fractal Background

Focus a bit on the art behind fractal :
A fractal is a never-ending pattern. Fractals are infinitely complex patterns that are self-similar across different scales. They are created by repeating a simple process over and over in an ongoing feedback loop.
This seems to be a great opportunity to focus on a simple algorithm. As mentioned in below sources, trees can be seen as fractal patterns (as many other natural patterns such as above cabbage). Each branch grows from another throughout a process of subdivision starting from the first one, the trunk.
Sources :
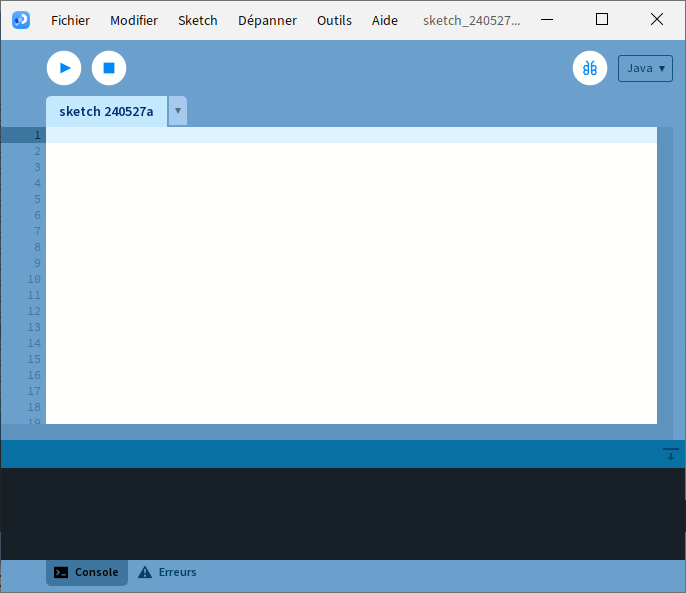
Handle Processing

Let's run Processing (or any of your favorite programming language), I will focus on this one because it is for me the easiest way to start coding with visual interface.
The basic set-up before starting to work :
1.Import sound libraries
import processing.sound.*;
Seems obvious when dealing with sound.
2.Define Sound Object & Table
Sample will refers to the recording ".wav"
fileAmp is the variable containing amplitude of sample at a given frame.
WordTable refers to the .csv input file containing our words
Amplitude Amp;
SoundFile Sample;
String[] WordTable;
3.Define size of Canvas (1920x1080) :
public void settings() {
//Define canvas size
size(1920, 1080);
}
4. Define Setup
void setup(){

// Define black background
background(0);

// No Stroke on shape
noStroke();

// Default filling color for shape
fill(255, 255,255);

// Define sample
Sample= new SoundFile(this, "\\Input.wav");

// Audio File processing
Amp= new Amplitude(this);
Sample.play(); Sample.loop();
Amp.input(Sample);

// Load words
WordTable = loadStrings("\\Input.csv");

}
Filling color and background are black & white to emphasize on words.
Inputs files are the following :
- Input.wav
- Input.csv
In the code above they are located in the folder of the processing files (if you choose a different folder adjust code to match the exact location).
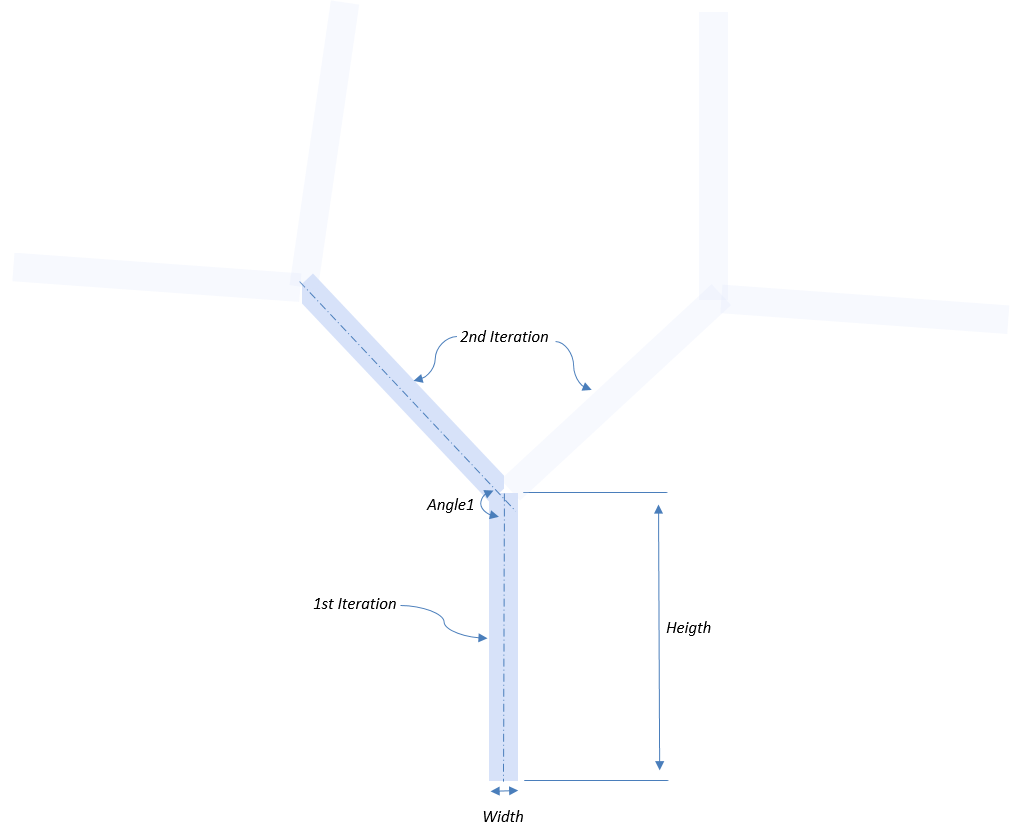
First Iteration


Remember one thing with Processing :
The origin (0, 0) is the coordinate is in the upper left of the window.
The canvas being 1920x1080 (cf. Step 4.3 Define size of Canvas), to draw a centered rectangle, it is needed to move to the coordinates (1920/2 ; 1080) and to rotate grid by 180° in order to draw rectangle from bottom to top.
void draw() {
//Re-initialize Grid (clear previous drawing)
  background(0);

 float Width=15;   //Define width in pixels
 float Height=100; //Define height in pixels
 float Xpos=0;     //Define X1
 float Ypos=100;   //Define Y1
 float Angle=0;    //Define Angle for initial iteration

 // Move grid to plot location
 translate(1920/2, 1080);
 rotate(radians(180));

 // Draw Rectangle
 rect(0,0,Width,Height);
}
To best understand transformation (rotate, translate, ...), do not hesitate to have a look to Processing documentation (https://processing.org/tutorials/transform2d)
By running the code, you should be able to hear the recorded sound (loop) and to see one centered rectangle in middle of the canvas (nothing fancy yet).
//2nd Iteration | //[Draw Rectangle]

What about making 2nd iteration i.e the first branch ?
 // Update brush for next Rectangle
 fill(255,255,255);

 // Update Grid
 pushMatrix();

 // Move the origin to the pivot point
 translate(Xpos, Ypos);

 // Then pivot the grid
 rotate(radians(Angle));

 // Trace Rectangle, remember to take half of its width into account for X position (to make it centered)
 rect(-Width/2,0,Width,Height);

 // Update Grid
 popMatrix();
The job is quite simple here, once at the position P1(X1, Y1) or (Xpos,Ypos), a rotation (Angle°) is performed, and rectangle is filled (pop & pushMatrix allow to update grid, again, they are detailed in processing documentation https://processing.org/tutorials/transform2d).
We've got our first branch !
Functional Recursion
We may continue this way, rectangle by rectangle ... but we're not here for this isn't it ?
To build our digital tree, it is needed to build a function able to plot a rectangle at a given position of the canvas with a certain angle (a branch).
Once this function is created, it is only needed to call the function ... well... inside the function ; this is called recursion !
Think about how you start making the fractal tree manually (Step 5 & 6) :
- First step, draw a line of a given height and width with any angle,
- Then move at a given height along that line and draw another line of a given height and width with any angle,
- Then move at a given height along that line and draw another line of a given height and width with any angle,
- Then ...
Step 2, 3 and 4, are identical to the first. The difference lies in parameters used to draw the line : height, width, starting position and angle. These parameters are updated at each call of the function.
Let's proceed, our function is called BuildBranch, it is constructed as follow :
void BuildBranch(float Xpos,float Ypos,float Width,float Height,float Angle);
{
float XposChild, YposChild, ChildAngle, ChildAngle2;

//[Draw Rectangle]
//[Compute Child Position]

//Call the function itself (Recursion) with child parameters
BuildBranch(XposChild,YposChild,Width,Height,ChildAngle);
}
XposChild, YposChild and ChildAngle and ChildAngle2 are the parameters that are used for recursion (the one that are updated at each call).
The block //[Draw Rectangle] has been describe during Step 5.
The block //[Compute Child Position] is what follow.
//[Compute Child Position]


A bit of trigonometry.
Up to now, we've seen how to move at P0 and draw the first iteration (Step 5). At previous step we've seen how to move at P1 and draw a rectangle with a given angle. Now, how about moving at P2(X2, Y2) taking into account the angle chosen at previous step ?
Just by using trigonometry formula that gives us the X-axis and Y-Axis coordinate of P2(X2, Y2) related to the Angle.
P2 is translated on X-axis relatively to P1 on a distance Height*cos(radians(90-Angle)) (negatively).
P2 is translated on Y-axis relatively to P1 on a distance Height*sin(radians(90-Angle)).
In term of code this means :
 // Coordinates for next iteration (Remember X-Axis is reversed)
 XposChild=Xpos-Height*cos(radians(90-Angle));
 YposChild=Ypos+Height*sin(radians(90-Angle));
Choose a ChildAngle relative to Angle for every next iterations:
ChildAngle = Angle + 15 ;
Up to this point, the result might be disappointing. The recursion being defined only with an increasing Angle (+15° each iteration), this ends up with only one series of branches bent at a rate of 15° per branch.
Solution consists in defining the recursion twice, once with an increasing angle, another with a decreasing angle :
// Each iteration, angle is either increased or decreased by +/-15°
ChildAngle  = Angle + 15 ;
ChildAngle2 = Angle - 15 ;

//Call the function itself (Recursion) with child parameters, increasing angle
BuildBranch(XposChild,YposChild,Width,Height,ChildAngle);

//Call the function itself (Recursion) with child parameters, decreasing angle
BuildBranch(XposChild,YposChild,Width,Height,ChildAngle2);
Here we go, a tree is born (well... almost).
Recursion Bounds
The recursion is by definition infinite (never-ending remember ?), each call to the function is leading to a call of the function which is leading to a call of the function which is... well you understand the principle.
All we need is to stop the infinite loop by limiting the iteration number.
Iteration becomes a parameter of the function, and it is decreased by 1 at each call. It must be greater than 2 to continue the execution otherwise the recursion is stopped
void BuildBranch(float Xpos,float Ypos,float Width,float Height,float Angle, int iteration)
{
 //Recursion bounds - Overflow control
if (iteration>2)
   {
      BuildBranch (XposChild,YposChild,Width, Height, ChildAngle, iteration-1);
      BuildBranch (XposChild,YposChild,Width, Height, ChildAngle2, iteration-1);
   }
}
Link Sound and Display

From the sound playing in loop, amp.analyze() function allows us to recover the amplitude. Choice is made to link amplitude to the number of recursion iteration (in other words the more louder the sound is, bigger will be the tree).
To avoid any overflow (as seen previously), the number of iteration is bounded.
 void draw() {

// Record Amplitude of sound sample
 int iteration=round(Amp.analyze()*50);

 // Limit to avoid saturation of drawing
 if (iteration>10)
 {
  iteration=10;
 }

}
Link Words and Display

To trace words instead of rectangle, remember to import the WordTable from .csv file (as shown below).
Then replace step "rect(...)" in BuildBranch by step "text(...)". The WordTable used Iteration as index to get a different word at each call, you can easily adapt it (similarly with Textsize which can be adapted to your need).
void setup()
{
// Load words
 WordTable = loadStrings("\\Input.csv");

}

void BuildBranch (float Xpos, float Ypos, float Width, float Height, float Angle, int iteration)
{
  // Size for text plot
  textSize(Width);

  // Trace Text, remember to take half of its width into account for X position
  text(WordTable[iteration],-Width/2,0,Width,Height);

}
Don't Be So Perfect & Explore


Here we are, mastering sound generated text tree plot (if you have a better name...).
From now on, one can easily change every parameters, dynamically at each iteration. Playing with colors, size, random numbers, text sources and so on.
Free your imagination and share your results ;)
Full Code


Enjoy !
As always, if you enjoyed reading this article or felt inspired, please consider buying a coffee 😊
Downloads
Bonus : Customize With Live Microphone
Get more interaction by using direct playback of your voice, juste replace // Audio File processing step by the following :
AudioIn MicSample ;

void setup(){
 // MIC input
  MicSample = new AudioIn(this, 0);
 // MIC processing
  Amp = new Amplitude(this);
  MicSample.start();
  Amp.input(MicSample);
}