Specialized Entertainment/Communication PPT
by WSUAssistiveTech in Circuits > Assistive Tech
415 Views, 2 Favorites, 0 Comments
Specialized Entertainment/Communication PPT

The purpose of this power point is to provide a simple, customizable tool that is usable entirely through a single mouse click. Using a Switch Interface and Big Red switch, an individual with cerebral palsy can select/activate options presented to them during a slideshow presentation. After an option is selected and given time to execute, the presentation proceeds. This significantly reduces the amount of assistance and monitoring required, giving someone with cerebral palsy more independence and freedom.
Supplies
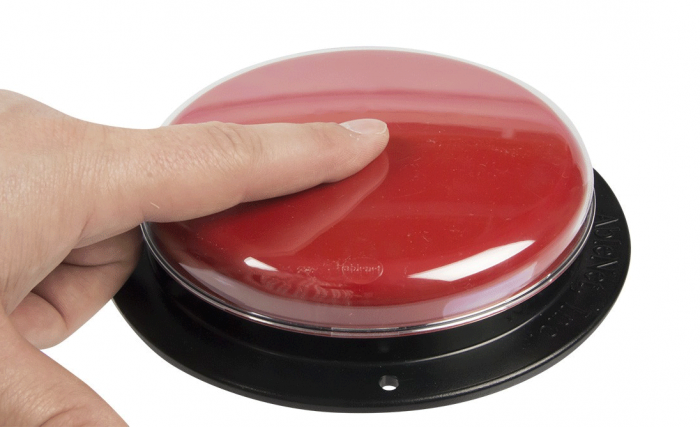
AbleNet Big Red Switch (or similar device)
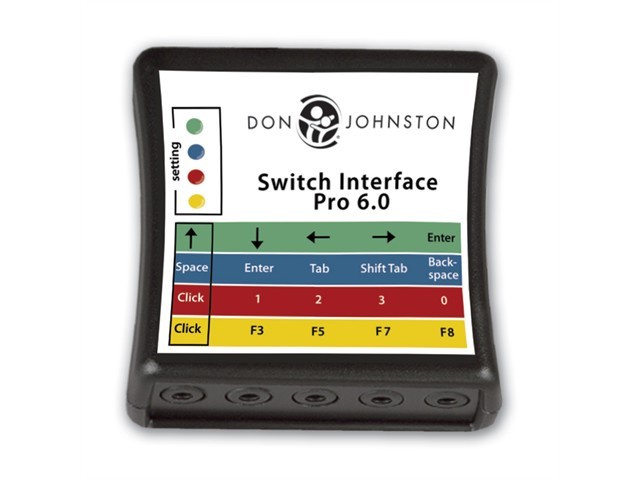
Don Johnston Switch Interface Pro (or similar device)
Entertainment / selection options (Videos, Music, Audio recordings, Images, etc.)
Microsoft PowerPoint 2013 or newer
Creating the PowerPoint
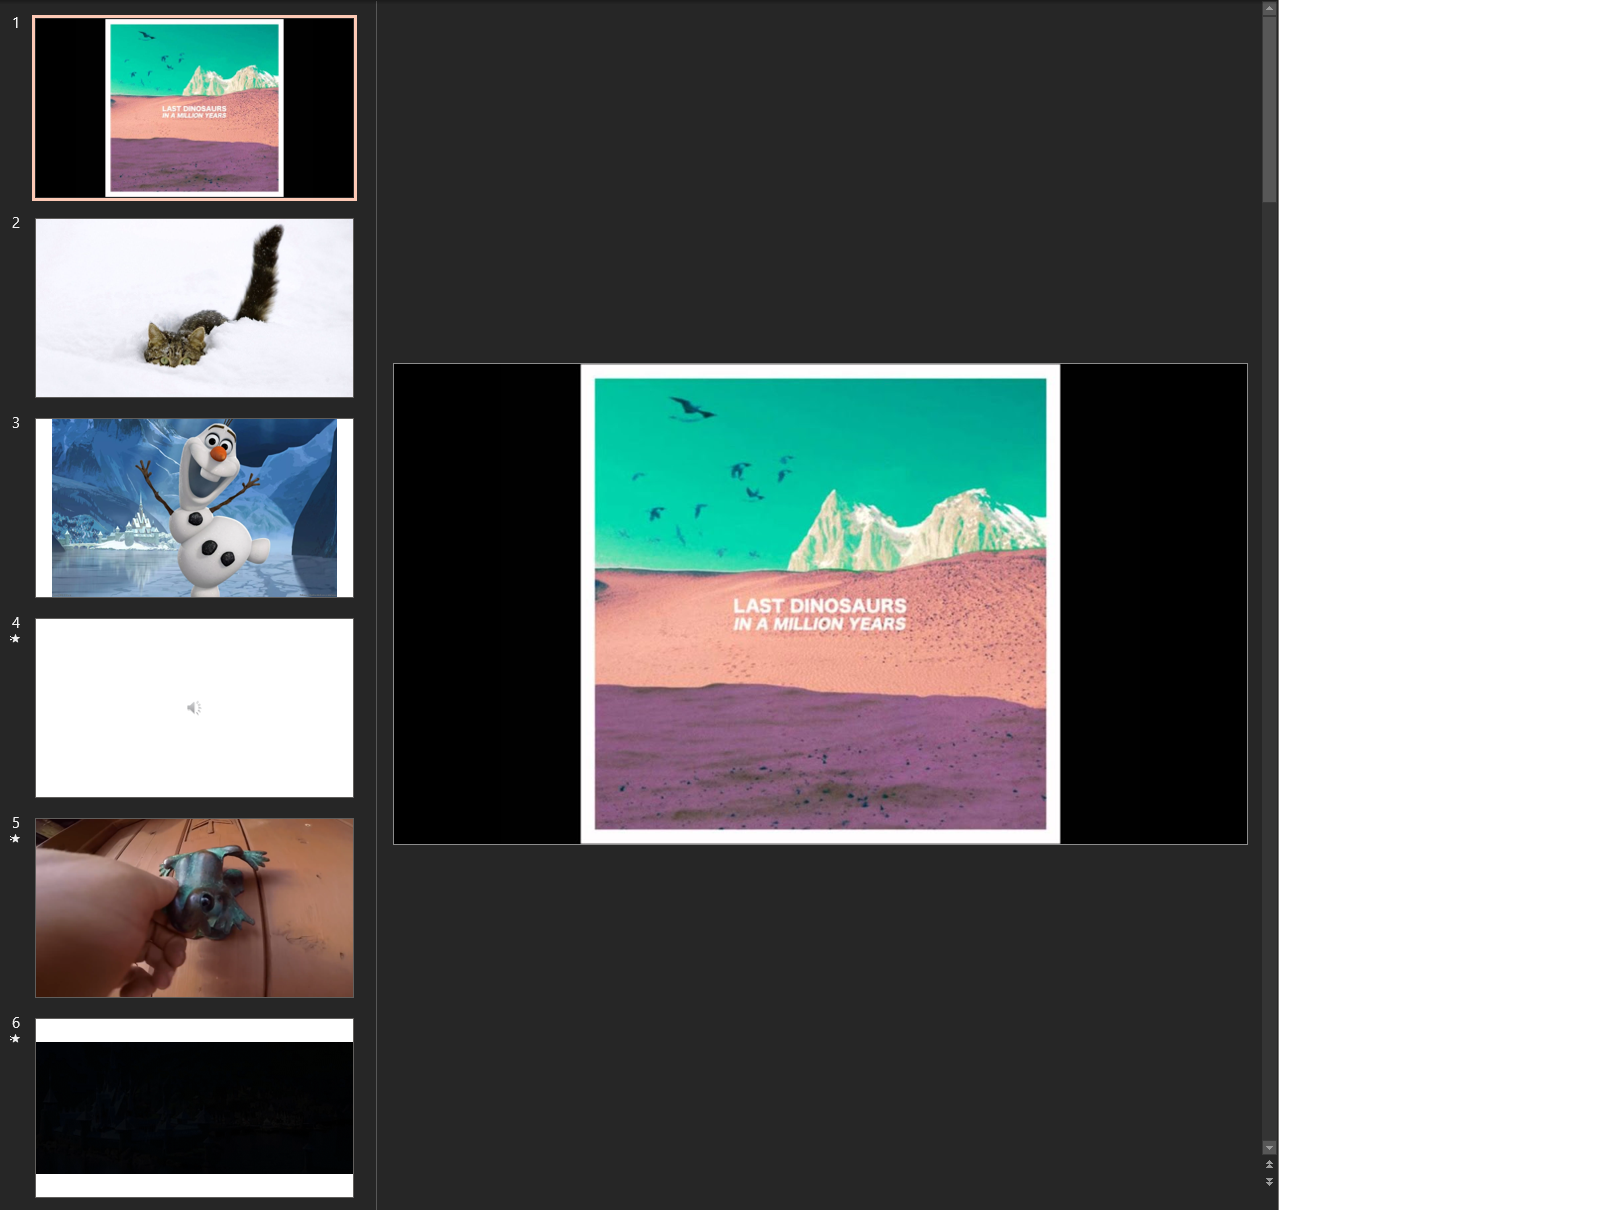
- Begin with an empty presentation and create 2 slides for every selection desired.
- For 4 options - 8 slides, 5 options - 10 slides (this tutorial has 3 options - 6 slides)
- Insert media individually into the second half of the slides.
- Music in one slide, video in another, etc.
- Music in one slide, video in another, etc.
- Add an image similar/related to the media in the first half of the slides.
- For a song on slide 4, I have the album art on slide 1
- For a snowboarding cat video on slide 5, I have an image of a cat on slide 2
- For a trailer of Frozen on slide 6, I have a picture of Olaf on slide 3.
Linking the Slides
Goal is to connect matching slide pairs using PowerPoint's hyperlink feature.
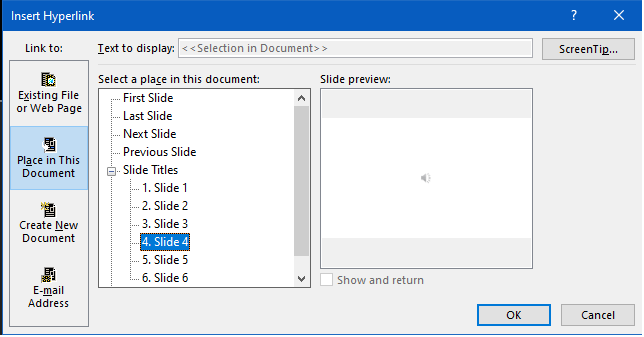
- On the first slide, right click on your image and select "link".
- Along the left hand side, select "Place in This Document"
- Under "Slide Titles" select your matching slide (Slide 4 in this tutorial example)
- Begin a slideshow presentation and confirm by clicking anywhere that the presentation jumps to the proper slide
- Repeat for all other slides
Configure Slide Show
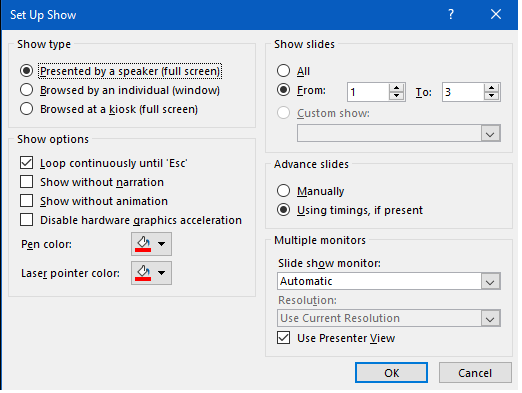
We need to set up the slide show to only include our first half and to loop automatically when it ends.
- At the top of the PowerPoint window select the "Slide Show" tab.
- Click on "Set Up Slide Show"
- Check the box "Loop continuously until Esc"
- Change the slide range from "All" to only the first half of your slides
- Enter slideshow presentation mode and confirm only the first half of your slides appear.
Set Up Timings
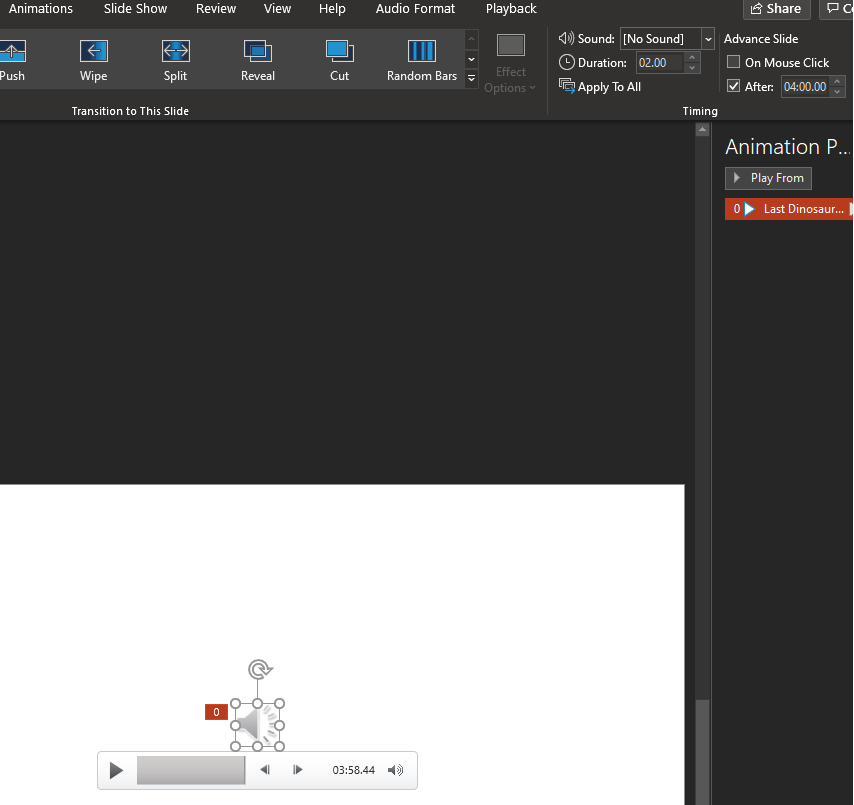
Timings are necessary to make the slides transition automatically between options or after media is complete. How long to set timings is up to your discretion. This tutorial example uses 5 seconds for option slides and a few seconds longer than a video/song's length for media slides.
- Starting with the first media slide, select the "Transitions" tab at the top of the PowerPoint window.
- Under "Advance Slide" at the top right, uncheck "On Mouse Click" and check "After:"
- Enter the time in the box next to after: (my song is 3min 58seconds so I enter 4:00.00)
- Time format used by PowerPoint is HH:MM:SS.MS
- A timing less than the media's length will not work as intended.
- If your timing is too short, the slide will simply transition after the media completes.
- Repeat for all media slides.
- Start a presentation and confirm after media completes, slide show returns to the first half of your slides
Configure Switch & Interface
The switch interface converts the button press into a computer input (mouse click or keyboard key) through USB.
- Connect Big Red Button to a switch interface port that has "click" as an option.
- Plug switch interface into a USB port on your computer.
- Press the button on the switch interface until the "setting" light matches the row with "click" for the port connected to the Big Red Button.
- Test if the Big Red Button works the same as a mouse click
Protect Media During Playback

A common issue that could occur is accidental activation of the Big Red Button which pauses a video or song. To resume the media would require another click. To prevent this from occurring, a workaround must be used as there is no option built into PowerPoint to stop clicks from pausing media. If this behavior is desirable to you, this step can be skipped.
- On each slide with media, insert a text box using the "Insert" tab followed by selecting "Text Box"
- Draw the textbox to the full width of the PowerPoint slide.
- Type in the text box using the "Enter" key until the textbox is larger than the slide vertically
- In the image included with this step, you can see the highlighted vertical bar shows all the enters i pressed.
- Start a slideshow presentation and confirm clicking no longer pauses media.
Finishing Touches
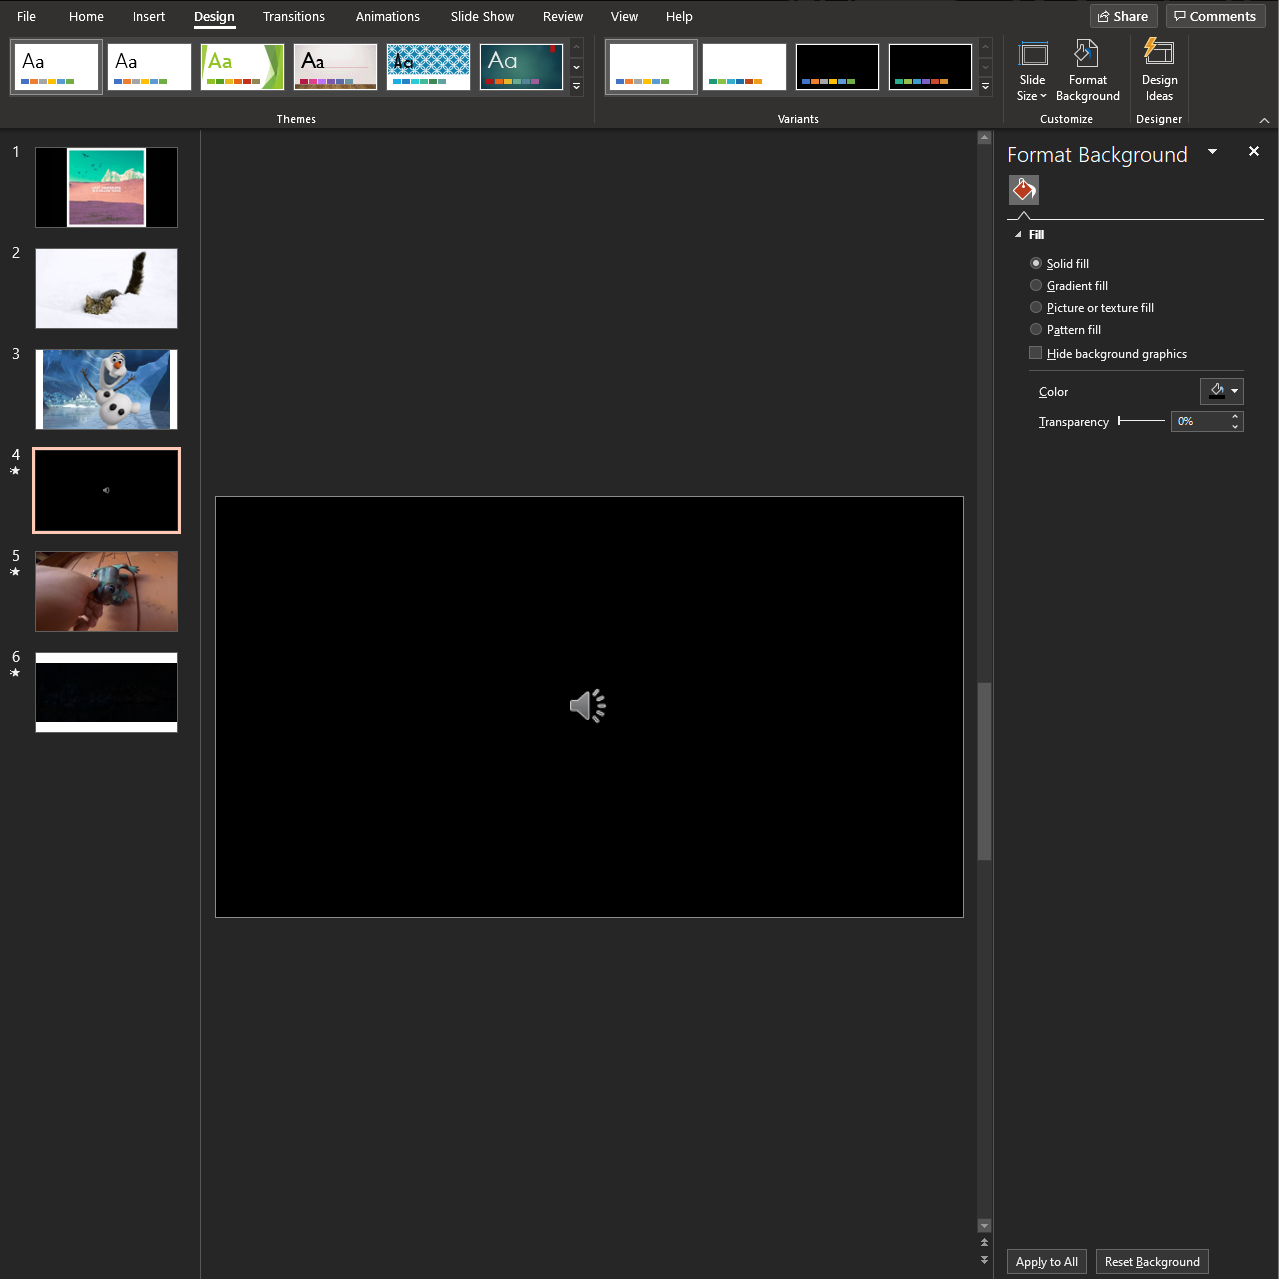
At this point the PowerPoint is complete and all that's left is to add personalizations such as changing the slide colors, adding transitions or additional slides. I prefer black as the background color over white personally. Here is the procedure if you would like to make this change as well.
- Select the "Design" tab at the top of the PowerPoint window
- Select "Format Background" and under "Fill" change the color to black
- At the bottom right select "Apply to All"
The completed presentation has been included with this step as a reference.
Downloads
(Bonus) Dealing With Small Images and Linking
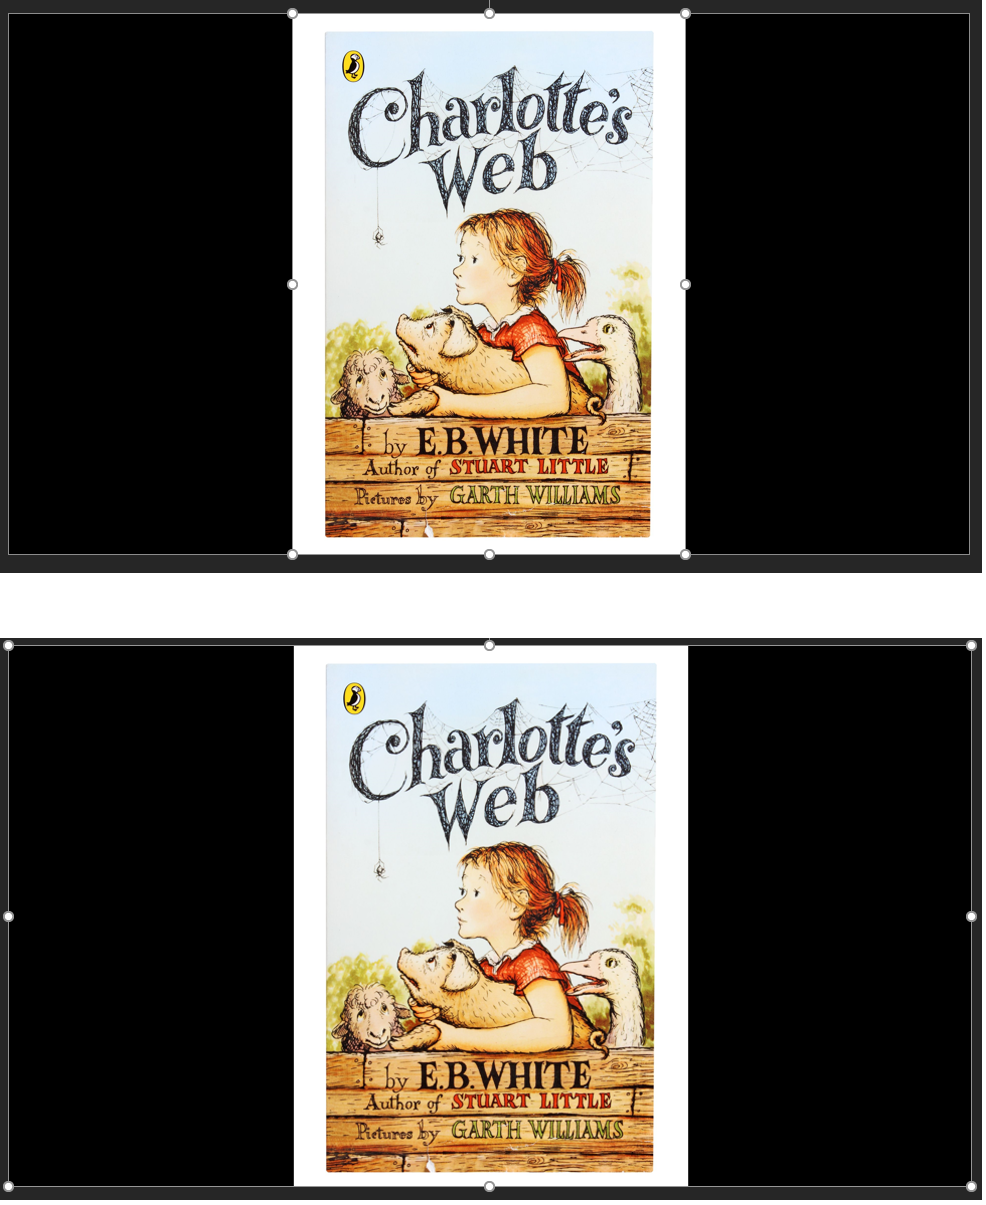


You may run across an image that does not take up the whole slide but you want the mouse click to activate the link regardless of where the cursor is located during a presentation. Links are associated with objects like images, so during a slideshow, clicking outside the image will not activate the link. In this example I use the book cover for Charlotte's Web. Rather than stretch the image across the entire slide, I can quickly make a new image using the background + the image.
- Open start menu and type "Snip & Sketch" and press enter
- Press "New" in the top left corner and select the image with the PowerPoint background
- Delete the image in the slide and replace with one captured using snip and sketch
This makes the slide have one image that covers it completely without having to stretch our original image.