Solar Observatory
What is the tilt of the Earth's axis? What latitude am I at?
If you want the answer quickly, you either turn to Google or a GPS app on your smartphone. But if you have a Raspberry Pi, a camera module, and a year or so to make some observations, you can determine the answers to these questions yourself. By setting up a camera with a solar filter in a fixed location and using the Pi to take pictures at the same time every day, you can gather a lot of data about the sun's path through the sky and, by extension, the Earth's path around the sun. In this Instructable, I show you how I made my own solar observatory for under $100.
Before we go much further though, I should point out that I am only two months into my year-long experiment so I won't be able to include the final results. However, I can share my experience building this project and hopefully give you an idea of how to build your own.
While not at all hard, this project provides the opportunity to exercise several different skills. At a minimum, you need to be able to hook up a Raspberry Pi to a camera and a servo and you will need to be able to do some level of software development to extract data from the pictures you take. I also made use of basic woodworking tools and a 3D printer but these are not crucial to this project.
I'll also describe the long-term data-gathering effort I have undertaken and how I will use OpenCV to turn hundreds of pictures into numeric data that can be analyzed using a spreadsheet or your programming language of choice. As a bonus, we 'll also tap into our artsy side and look at some interesting visual images.
Tldr; Short Instructions
This Instructable is a bit on the long side so to get started, here are the bare-bones, no extra detail provided instructions.
- Get a Raspberry Pi, camera, servo, relay, solar film, wall warts, and assorted hardware
- Hook up all that hardware
- Configure the Pi and write some simple scripts for taking pictures and saving the results
- Build a project box and mount all that hardware in it
- Find a place to put the project where it can see the sun and it won't get bumped or jostled
- Put it there
- Start taking pictures
- Every few days, move the pictures to another computer so you don't fill up your SD card
- Start learning OpenCV so you can extract data from your images
- Wait a year
That's the project in a nutshell. Now keep on reading for additional detail on these steps.
Background
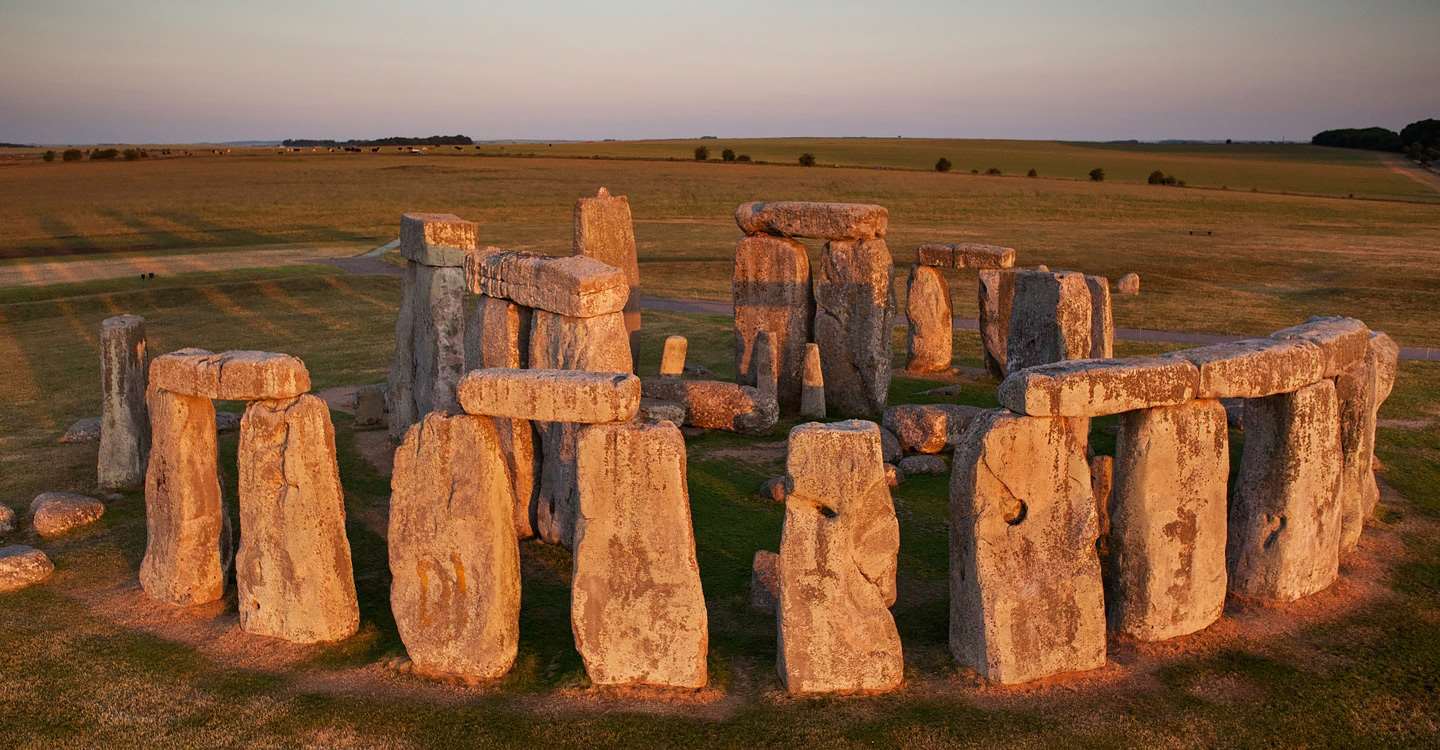
Humans have been watching the sun, moon, and stars for as long as we've been around and this project doesn't accomplish anything that our ancestors didn't do thousands of years ago. But instead of placing a stick in the ground and using rocks to mark the locations of shadows at key times, we'll use a Raspberry Pi and a camera and do it all from inside the comfort our homes. Your project won't be a tourist site a thousand years from now but on the plus side, you won't have to struggle getting gigantic boulders into place either.
The general idea in this project is point a camera at a fixed location in the sky and take pictures at the same time every day. If you have a suitable filter on your camera and the right shutter speed, you will have crisp, well-defined images of the disk of the sun. Using these pictures, you can put a virtual stick in the ground and learn a quite a few interesting things.
To keep the size of this Instructable manageable, all I will cover is how to determine the tilt of the Earth's axis and the latitude where the pictures are taken. If the comments section indicates enough interest, I can talk about some of the other things you can learn from your solar observatory in a follow-on article.
Axial Tilt
The angle between the sun on the day it is furthest north and the day it is furthest south is the same as the tilt of the Earth's axis. You may have learned in school that this is 23.5 degrees but now you will know this from your own observations and not simply from a textbook.
Latitude
Now that we know the tilt of the Earth's axis, subtract that from the elevation of the sun's path on the longest day of the year to learn the latitude of your current location.
Why Bother?
Obviously you could find these values much more precisely and quickly but if you are the type of person that reads Instructables, you know there is a lot of satisfaction doing it yourself. Learning facts about the world around you using nothing more than some simple, direct observations and straight-forward mathematics is the whole point of this project.
Required Components
While you could do this entire project with a suitably expensive and fancy camera, I don't have one of those. A goal for this project was to make use of what I already had on hand from previous projects. This included a Raspberry Pi, camera module, and most of the other items listed below though I had to go to Amazon for a few of them. Total cost if you have to buy everything will be around 100 USD.
- Raspberry Pi (any model will do)
- Raspberry Pi camera module
- Longer ribbon cable for camera (optional)
- Wireless dongle
- Standard servo
- 5V relay
- Powered USB hub
- Power strip and extension cord
- Sheet of solar film
- Scrap lumber, plastic, HDPE, etc
- Corrugated project board
I also made use of my Monoprice 3D printer but that was a convenience and not a necessity. A little creativity on your part will let you come up with a suitable way to get by without that.
Configuring the Raspberry Pi
Setup
I'm not going to go in much detail here and will assume that you are comfortable with installing an OS on the Pi and configuring it. If not, there are plenty of resources on the web to help you get started.
Here are the most important things to pay attention to during setup.
- Make sure that your WiFi connection starts up automatically when the Pi reboots
- Enable ssh
The project will probably be installed in an out of the way place so you won't have it hooked to a monitor and keyboard. You'll use ssh & scp quite a bit to configure it and copy pictures to another computer. - Be sure to enable auto-login via ssh so you don't have to enter your password manually each time
- Enable the camera module
A lot people plug the camera in but forget to enable it - Disable GUI mode
You'll be running headless so there is no need to spend system resources running an X server - Install the gpio package using apt-get or similar
- Set the timezone to UTC
You want your pictures at the same time each day and don't want to get thrown off by Daylight Savings Time. Easiest just to use UTC.
Now would be a good time to experiment with the camera module. Use the program 'raspistill' to take a few pictures. You should also experiment with the command-line options to see how the shutter speed is controlled.
Hardware Interfaces
The camera module has its own dedicated ribbon cable interface but we use the GPIO pins to control the relay and servo. Note that there are two different numbering schemes in common use and it is easy to get confused. I prefer to use the '-g' option to the gpio command so I can use the official pin numbers.
Your selection of pins may vary if you have a different model Pi than the one I am using. Consult the pinout diagrams for your specific model for reference.
- Pin 23 - Digital out to Relay
This signal turns the relay on, which provides power to the servo - Pin 18 - PWM to the servo
The servo position is controlled by a Pulse Width Modulation signal - Ground - Any ground pin will suffice
See the attached shell scripts for controlling these pins.
Note: The upload dialog on this site objected to my attempts to upload files that ended in '.sh'. So I renamed them with a '.notsh' extension and the upload worked fine. You will probably want to rename them back to '.sh' before use.
crontab
Since I want to take pictures every five minutes over a period of about 2.5 hours, I used crontab, which is a system utility for running scheduled commands even when you aren't logged in. The syntax for this is a bit clunky so use the search engine of your choice to get more detail. The relevant lines from my crontab are attached.
What these entries do is to a) take a picture every five minutes with the solar filter in place and b) wait a few hours and take a couple of pictures with no filter in place.
Project Box
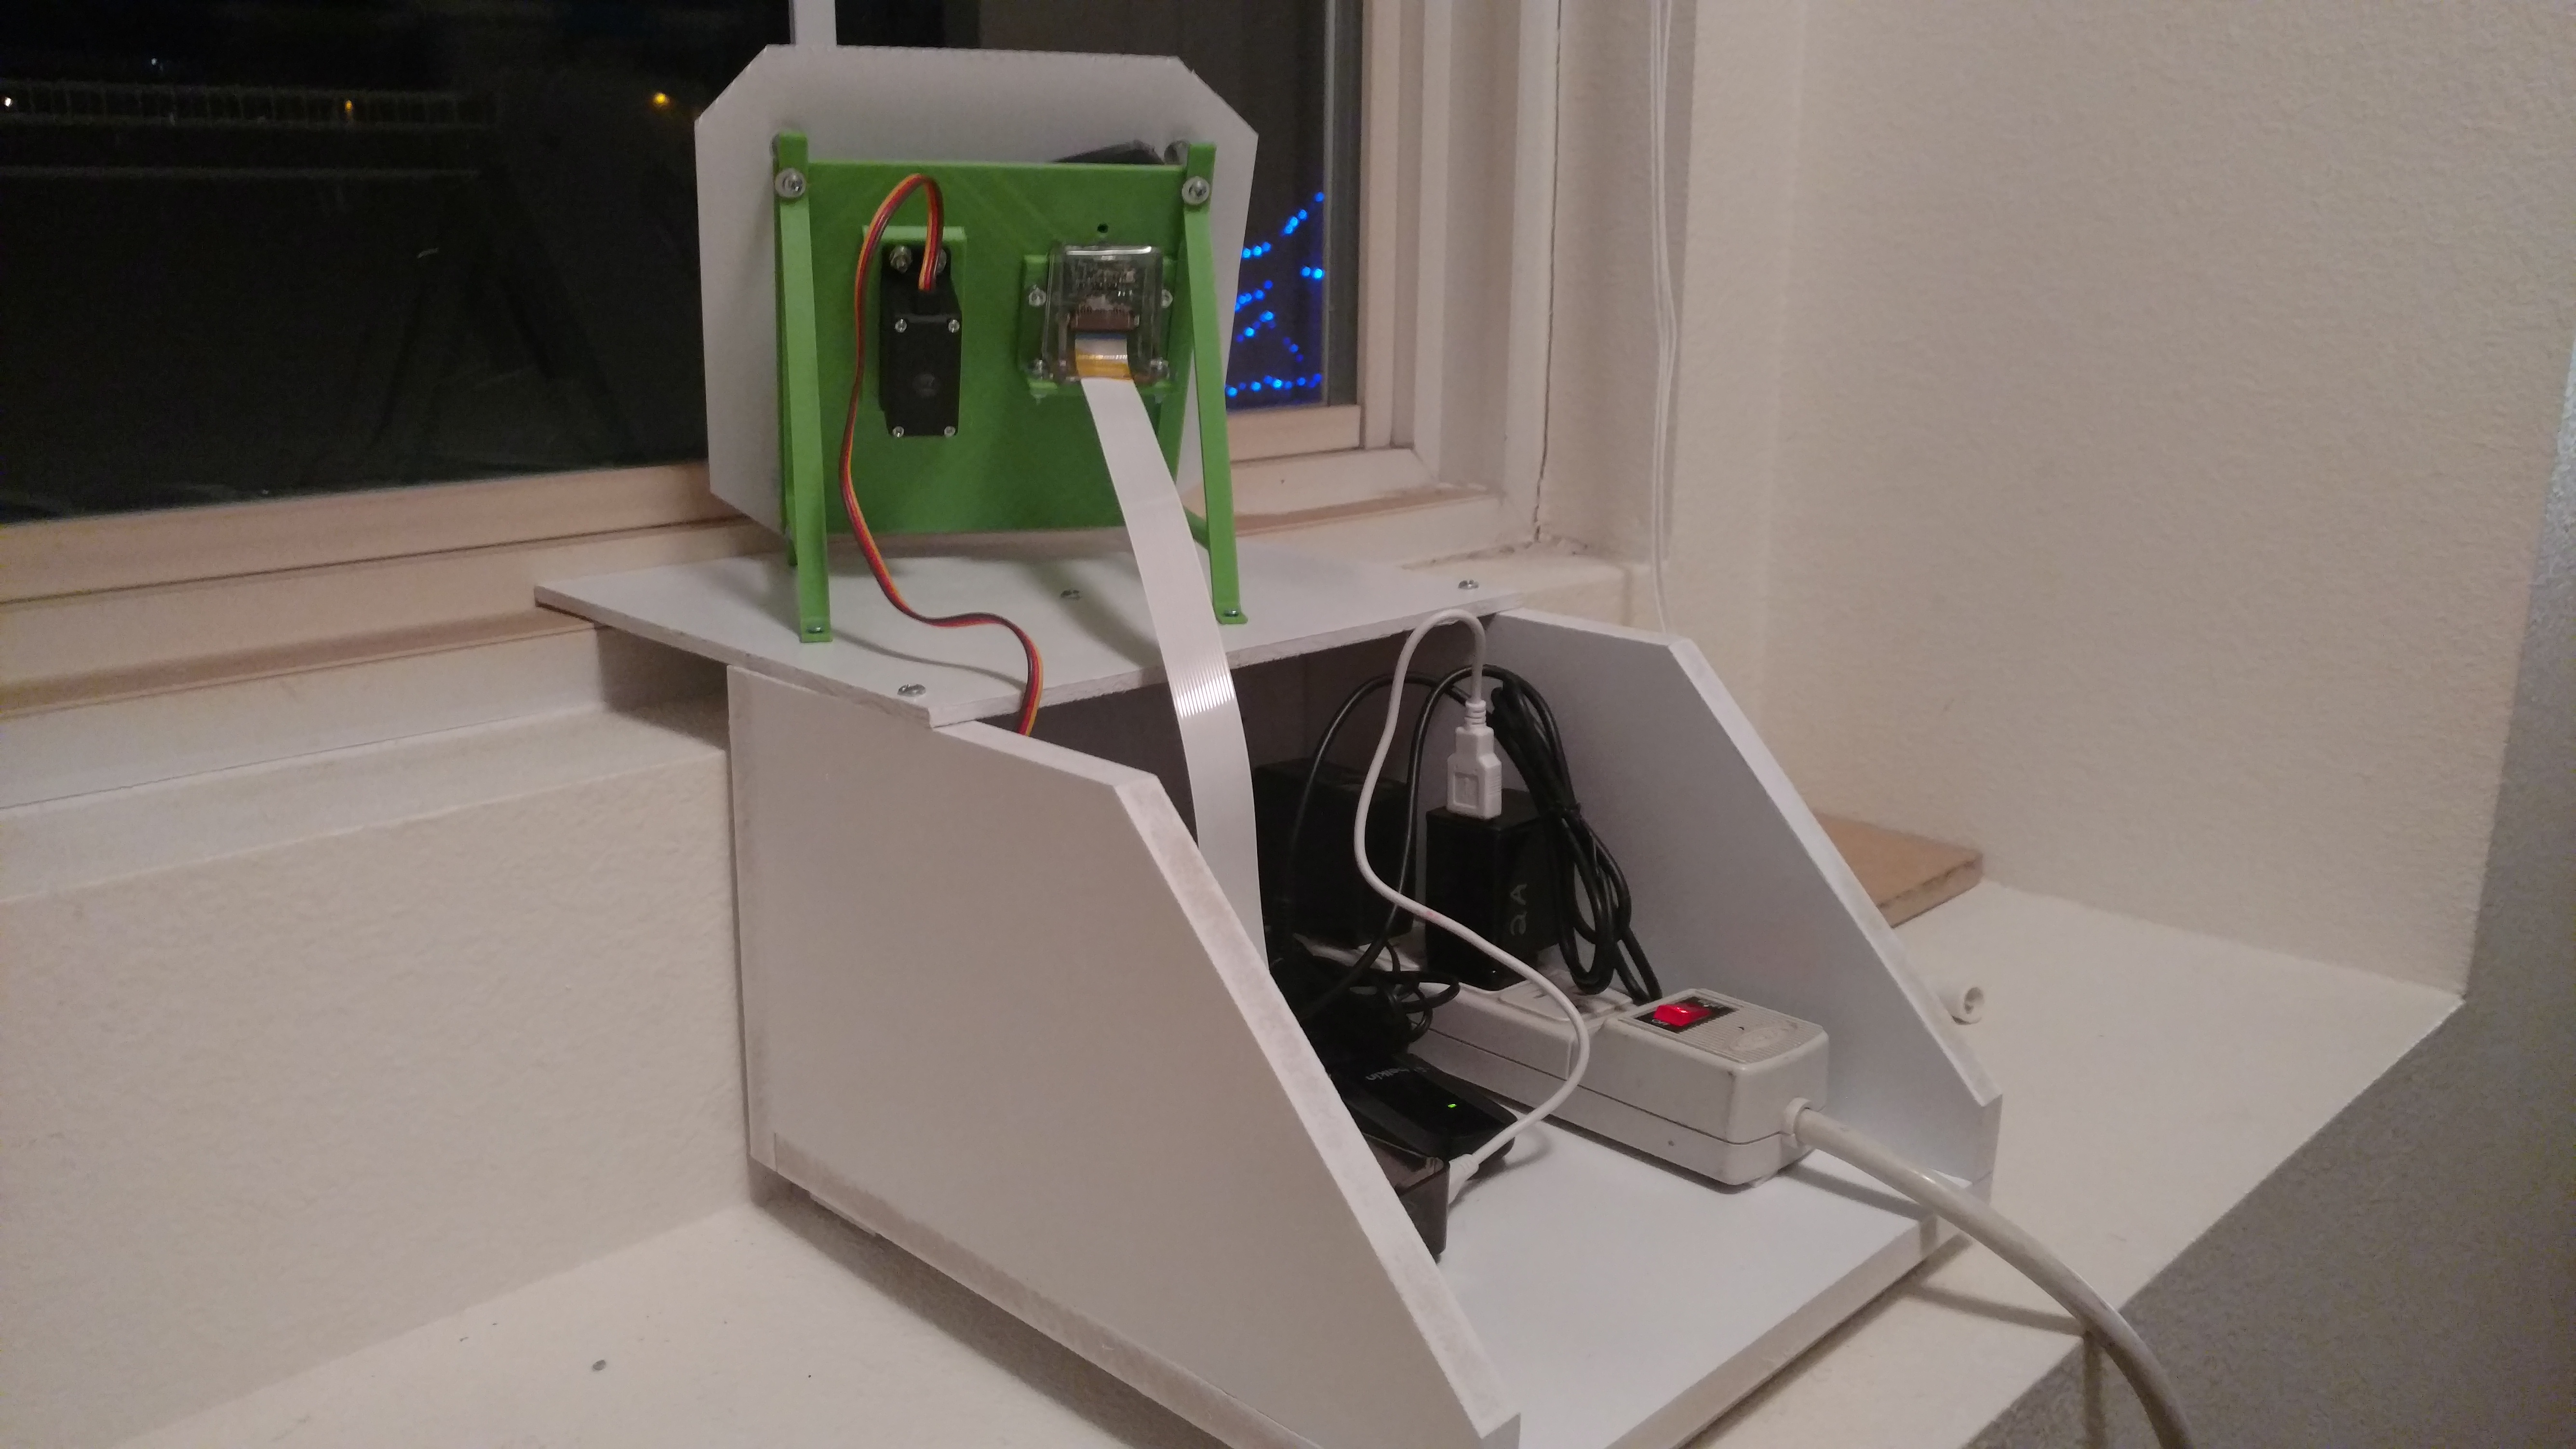
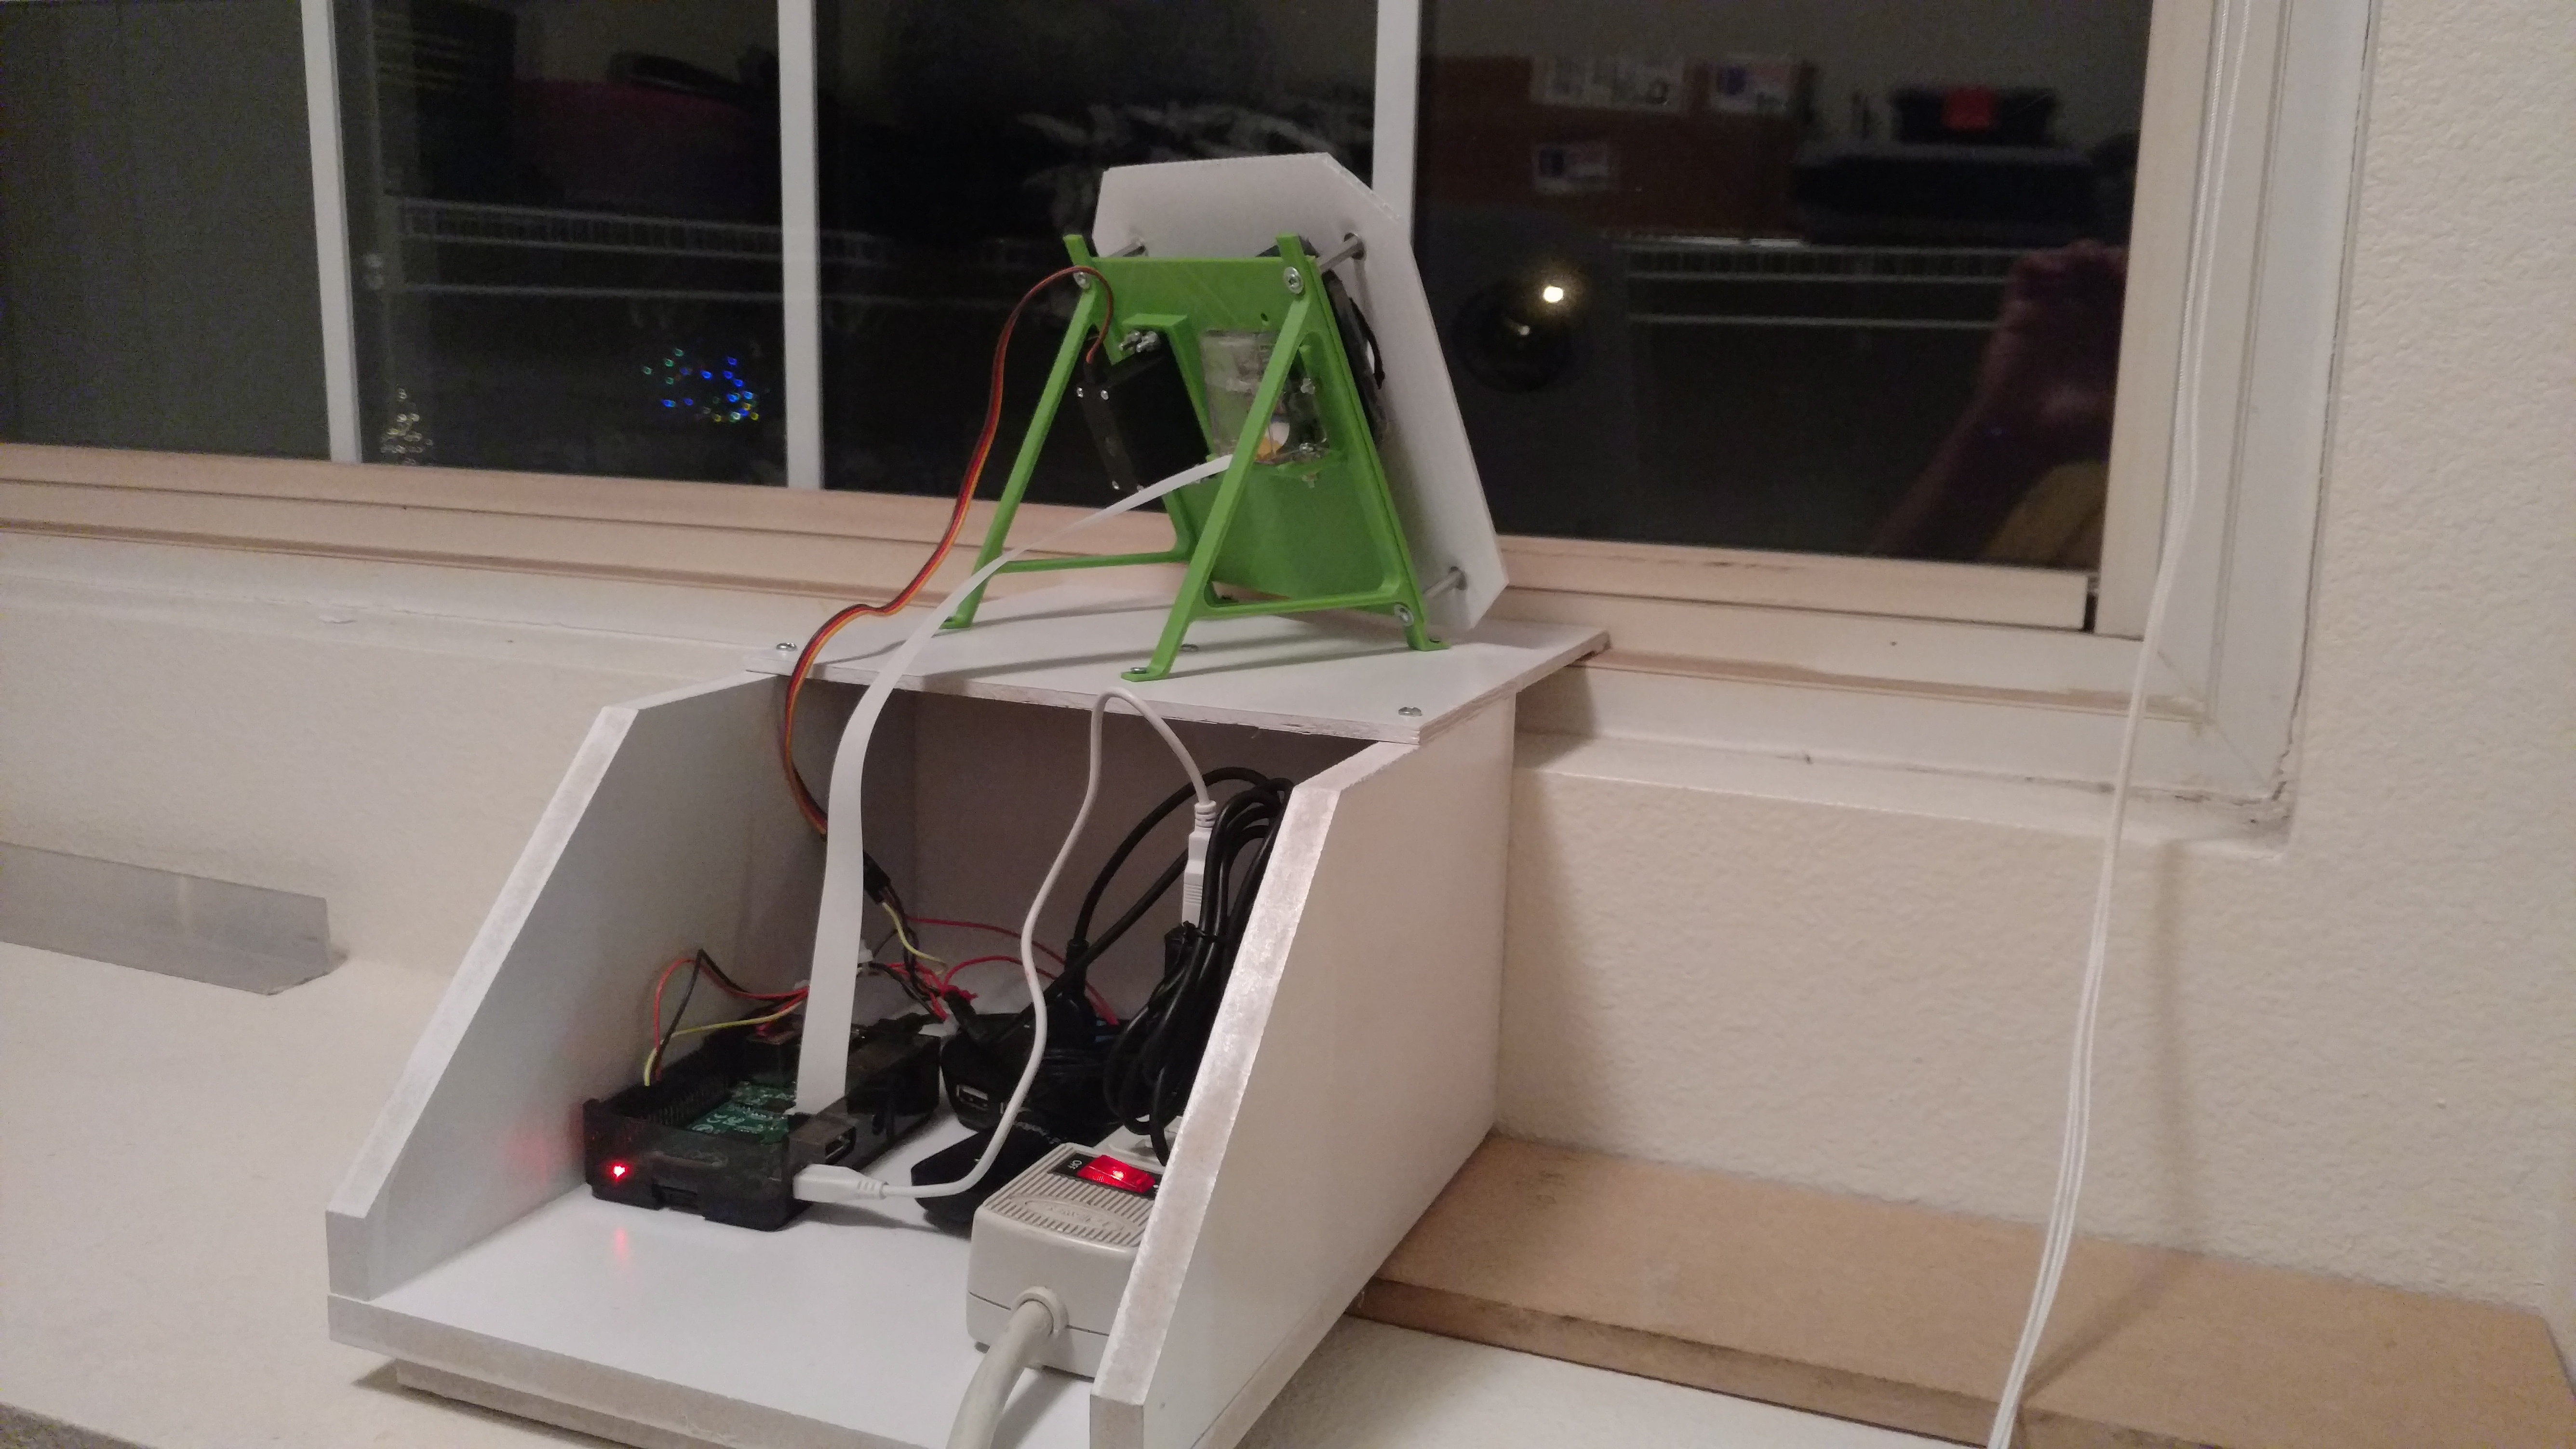
I am going to really skimp on instructions in this section and leave you to your own imagination. The reason is that every installation will be different and will depend on where you install the project and the types of material you are working with.
The most important aspect of the project box is that it be placed in a way that it won't move around easily. The camera should not move once you start taking pictures. Otherwise you will have to write software to perform image registration and line up all the pictures digitally. Better to have a fixed platform so you don't have to deal with that problem.
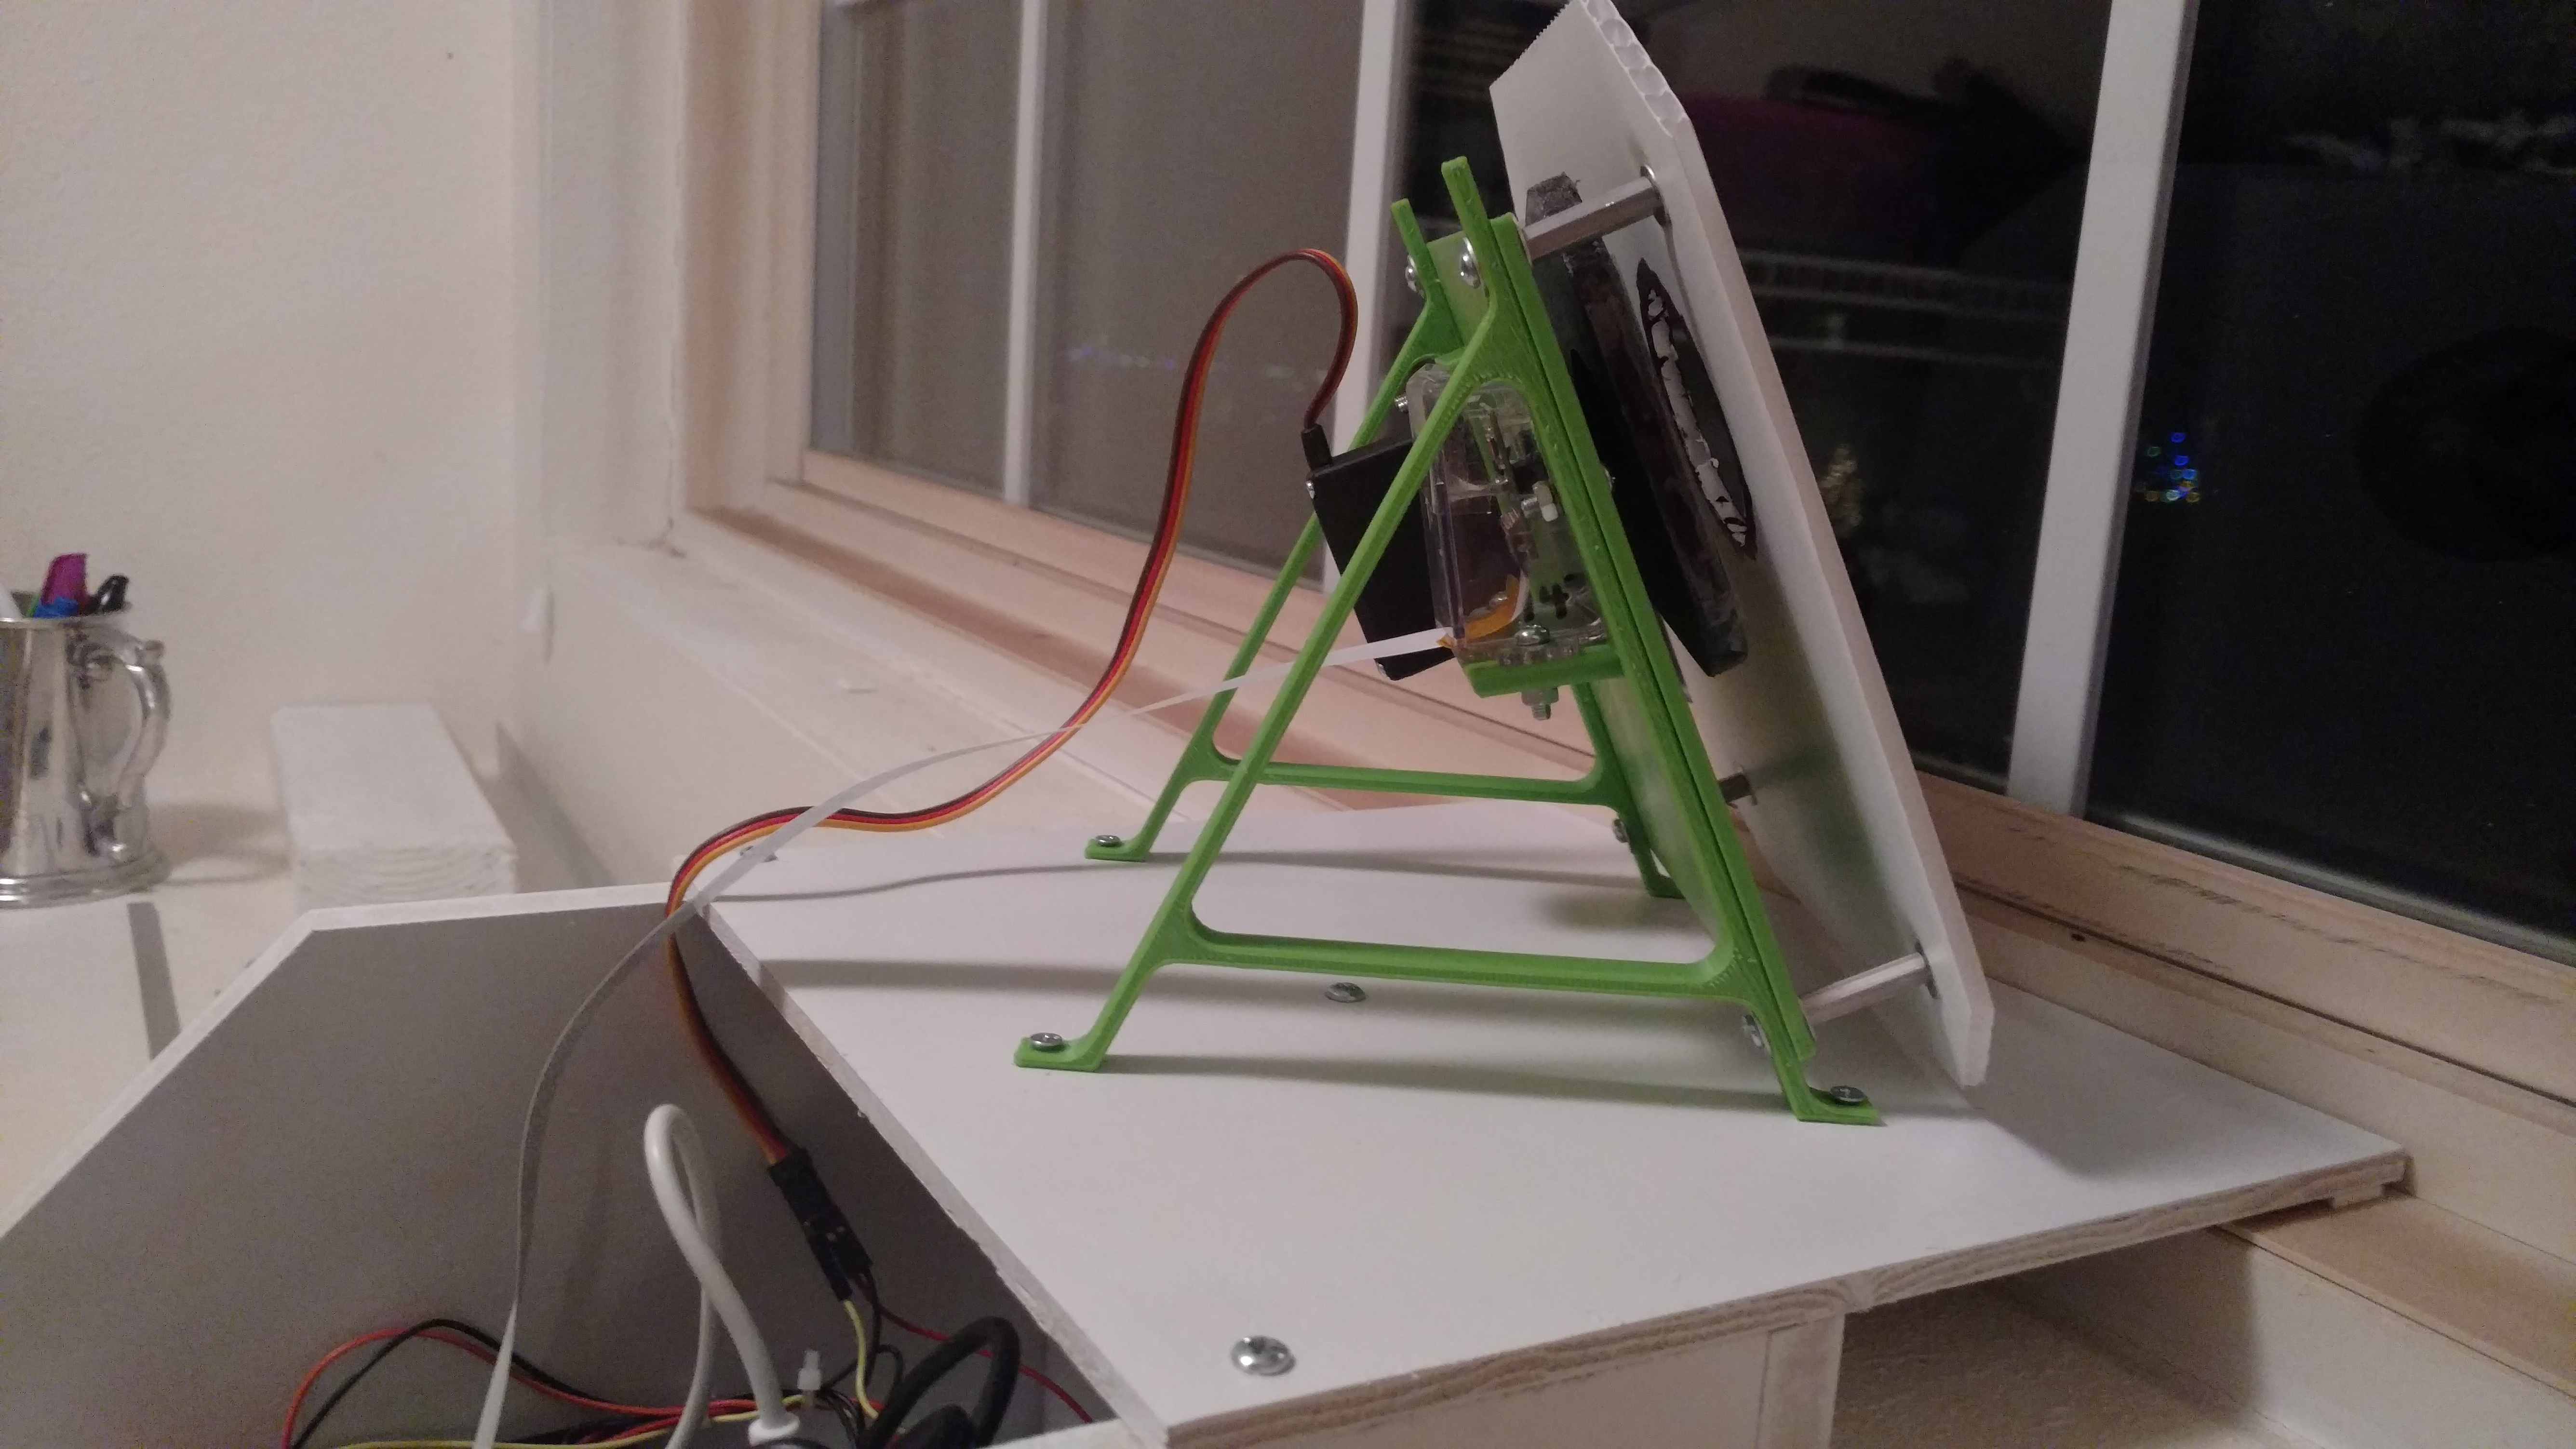
For my project box, I used 1/2" MDF, a small piece of 1/4" plywood, a 3D printed frame to hold the camera at the desired angle and some white corrugated project board. That last piece is placed in front of the 3D printed frame to protect it from direct sunlight and avoid potential problems with warping.
I left the back and top of the box open in case I need to get to the electronics but that hasn't happened yet. It has been working for seven weeks now without needing any fixes or tweaks on my part.
Movable FIlter
The only part of the project box that deserves some explanation is the servo with the movable arm.
The standard Raspberry Pi camera module doesn't work so well if you just point it at the sun and take a picture. Trust me on this... I tried.
To get a usable picture of the sun you have to place a solar filter in front of the lens. There are probably expensive pre-made filters that you can buy for this but I made my own using a small piece of solar film and a piece of 1/4" HDPE with a circular hole cut in it. The solar film can be purchased from Amazon for about $12. In retrospect, I could have ordered a much smaller piece and saved a little money. If you have some old solar eclipse glasses laying around unused, you might be able to cut one of the lenses and make a suitable filter.
Making the Filter Move
While most of the pictures that you take will be with the filter in place, you also want to get pictures at other times of the day when the sun is out of frame. These are what you will use as the background images for overlaying your filtered sun pictures. You could build it so that you manually move the filter and take these background images but I had an extra servo laying around and wanted to automate that step.
What is the Relay For?
Between the way that the Pi generates PWM signals and the low-end servo I used, there were times that I would power everything on and the servo would just sit there and "chatter". That is, it would move back and forth in very small steps as it tried to find the exact position that the Pi was commanding. This caused the servo to get very hot and made an annoying noise. So I decided to use a relay to provide power to the servo only during the two times a day that I want to take unfiltered pictures. This required the use of another digital output pin on the Pi to provide the control signal to the relay.
Providing Power
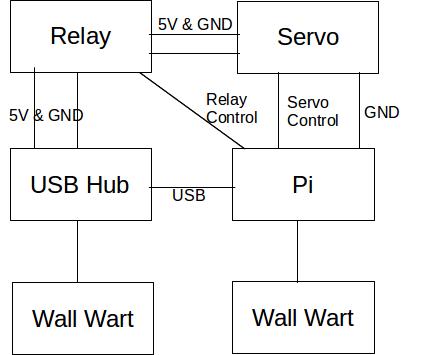
There are four items that need power in this project:
- Raspberry Pi
- Wi-Fi dongle (If you are using a later model Pi with built-in wi-fi, this won't be necessary)
- 5V Relay
- Servo
Important: Do not try to power the servo directly from the 5V pin on the Raspberry Pi. The servo draws more current than the Pi can supply and you will do irreparable harm to the board. Instead, use a separate power source to power the servo and relay.
What I did was use one 5V wall wart to power the Pi and another to to power an old USB hub. The hub is used for plugging in the Wi-fi dongle and for supplying power to relay and servo. The servo and the relay don't have USB jacks so I took an old USB cable and cut the connector off the device end. Then I stripped the 5V and ground wires and connected them to the relay and the servo. This provided a source of power to those devices without risking damage to the Pi.
Note: The Pi and the external components are not completely independent. Because you have control signals coming from the Pi to the relay and servo, you must also have a ground line going back from those items to the Pi. There is also a USB connection between the hub and the Pi so that the wi-fi can operate. An electrical engineer would probably shudder at the potential for ground loops and other electrical mischief but it all works so I'm not going to worry about the lack of engineering excellence. :)
Putting It All Together
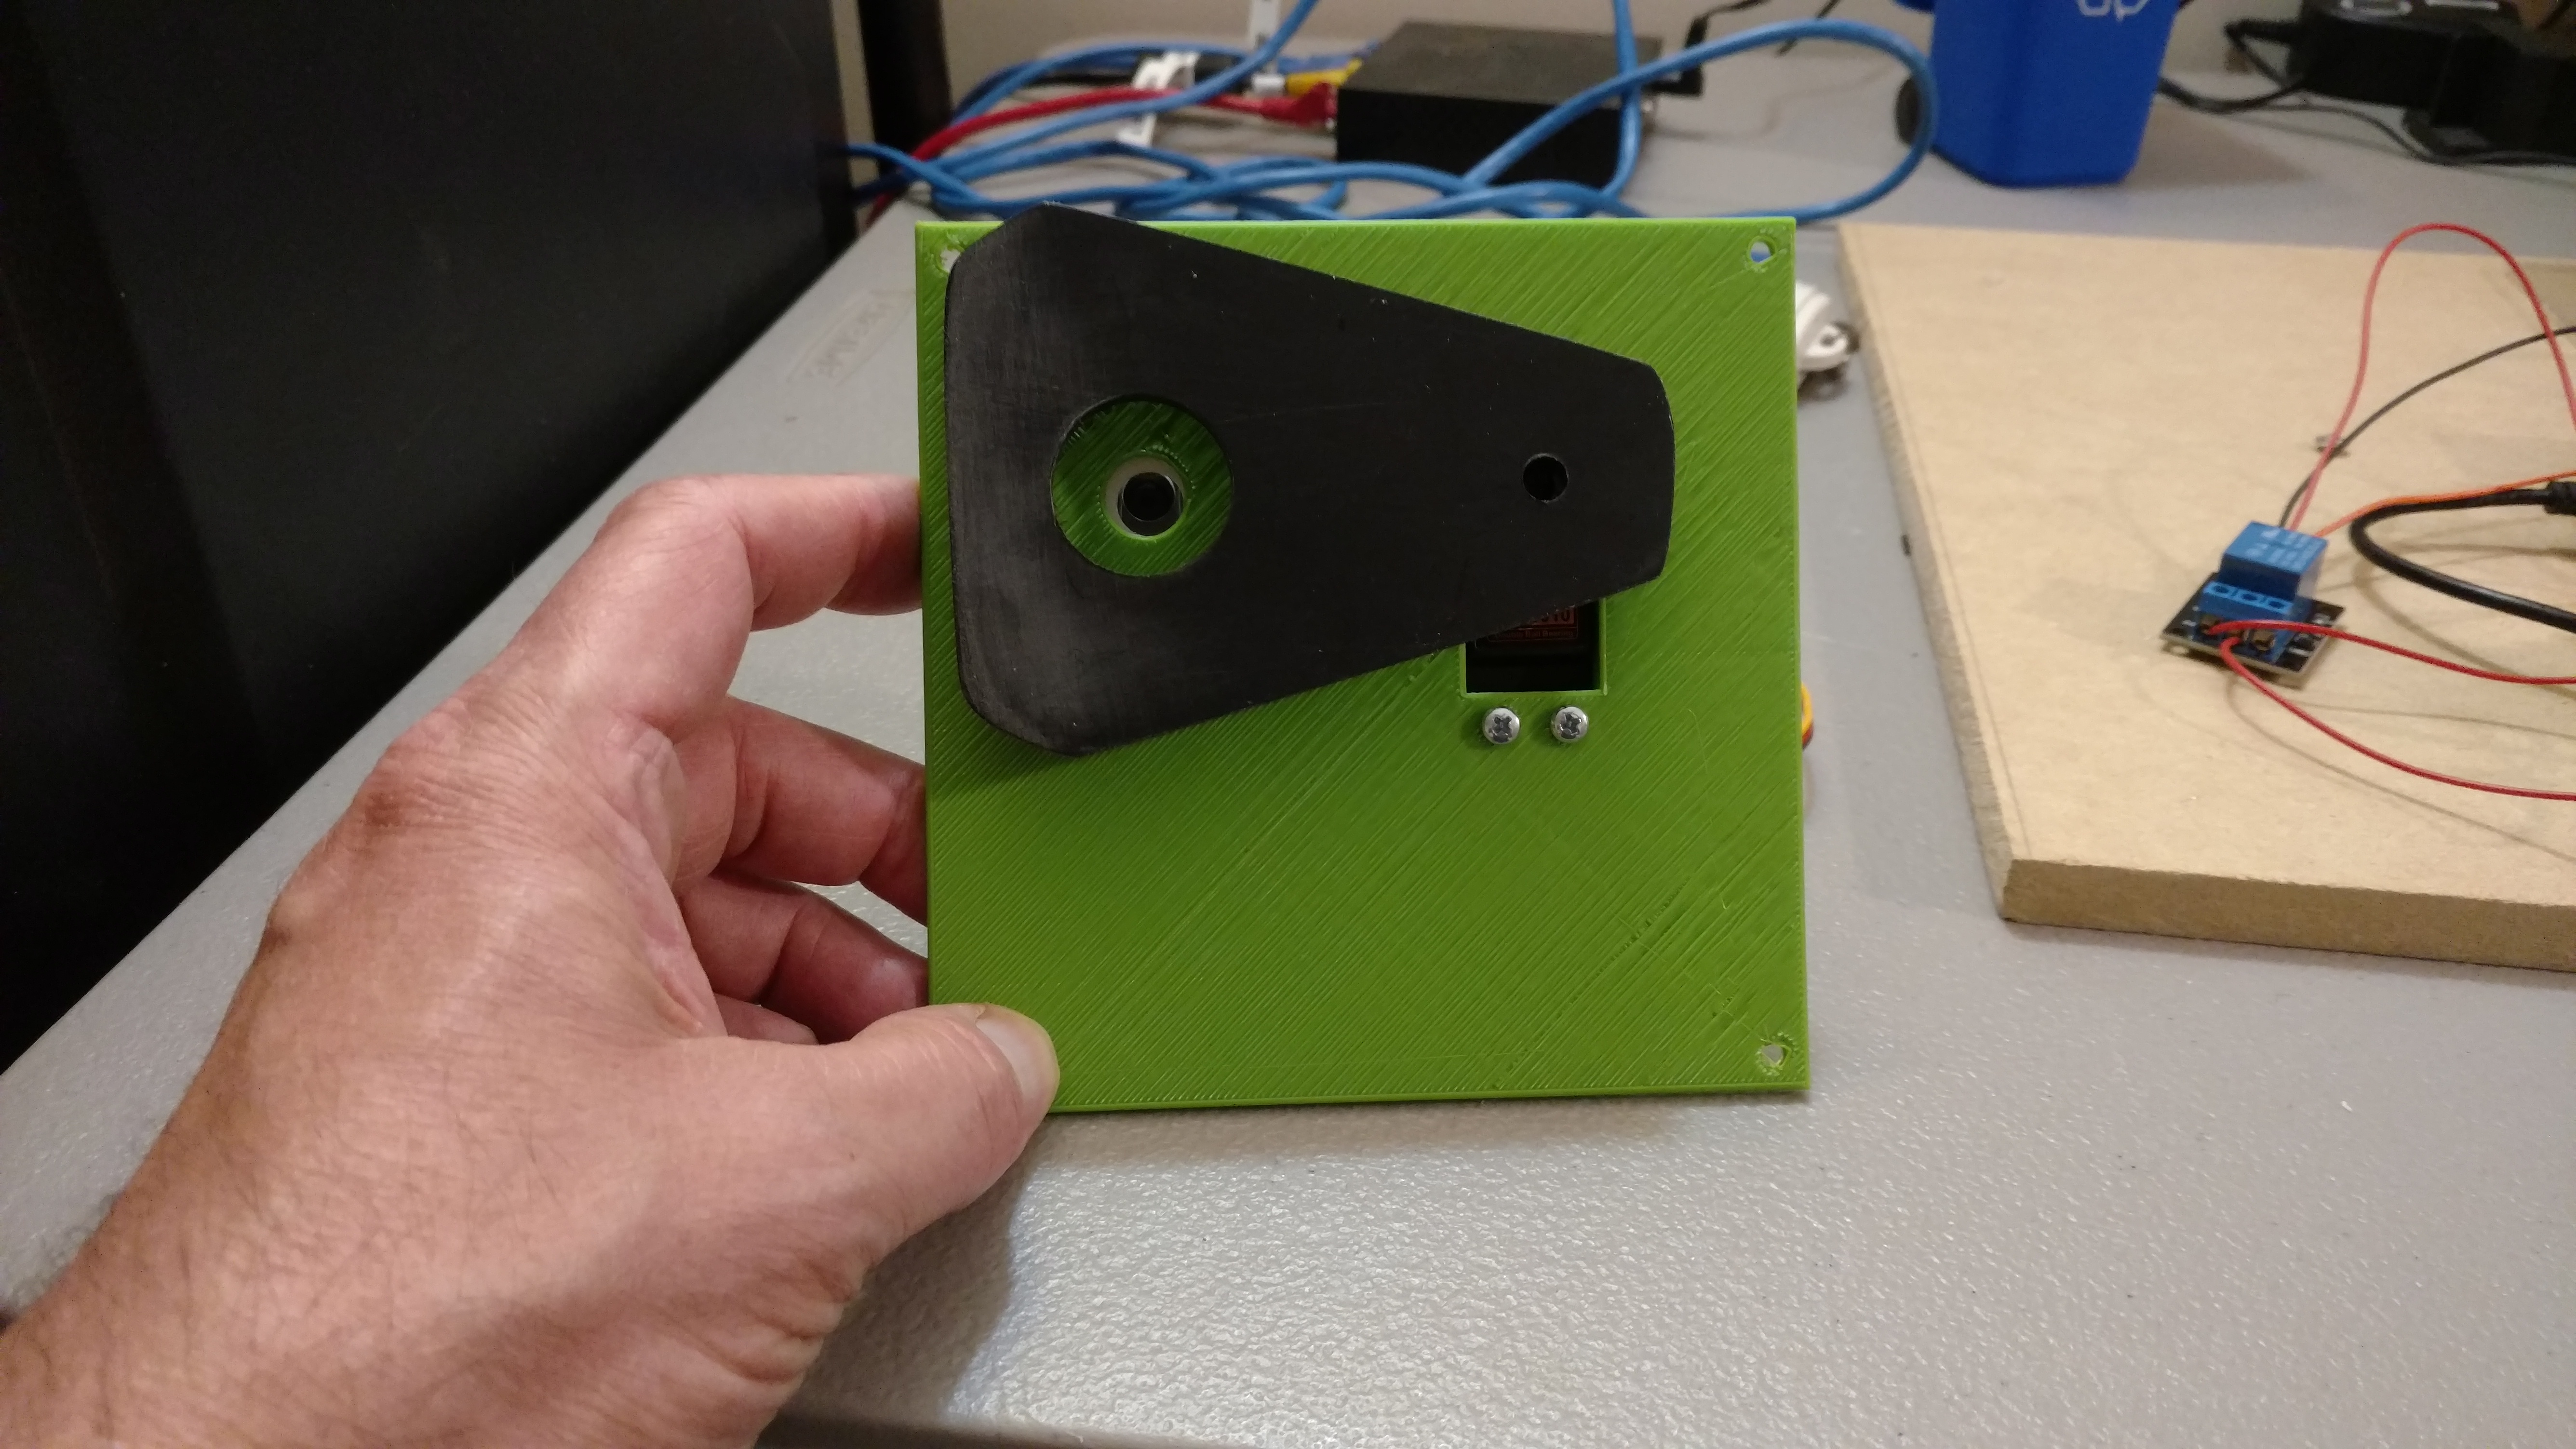
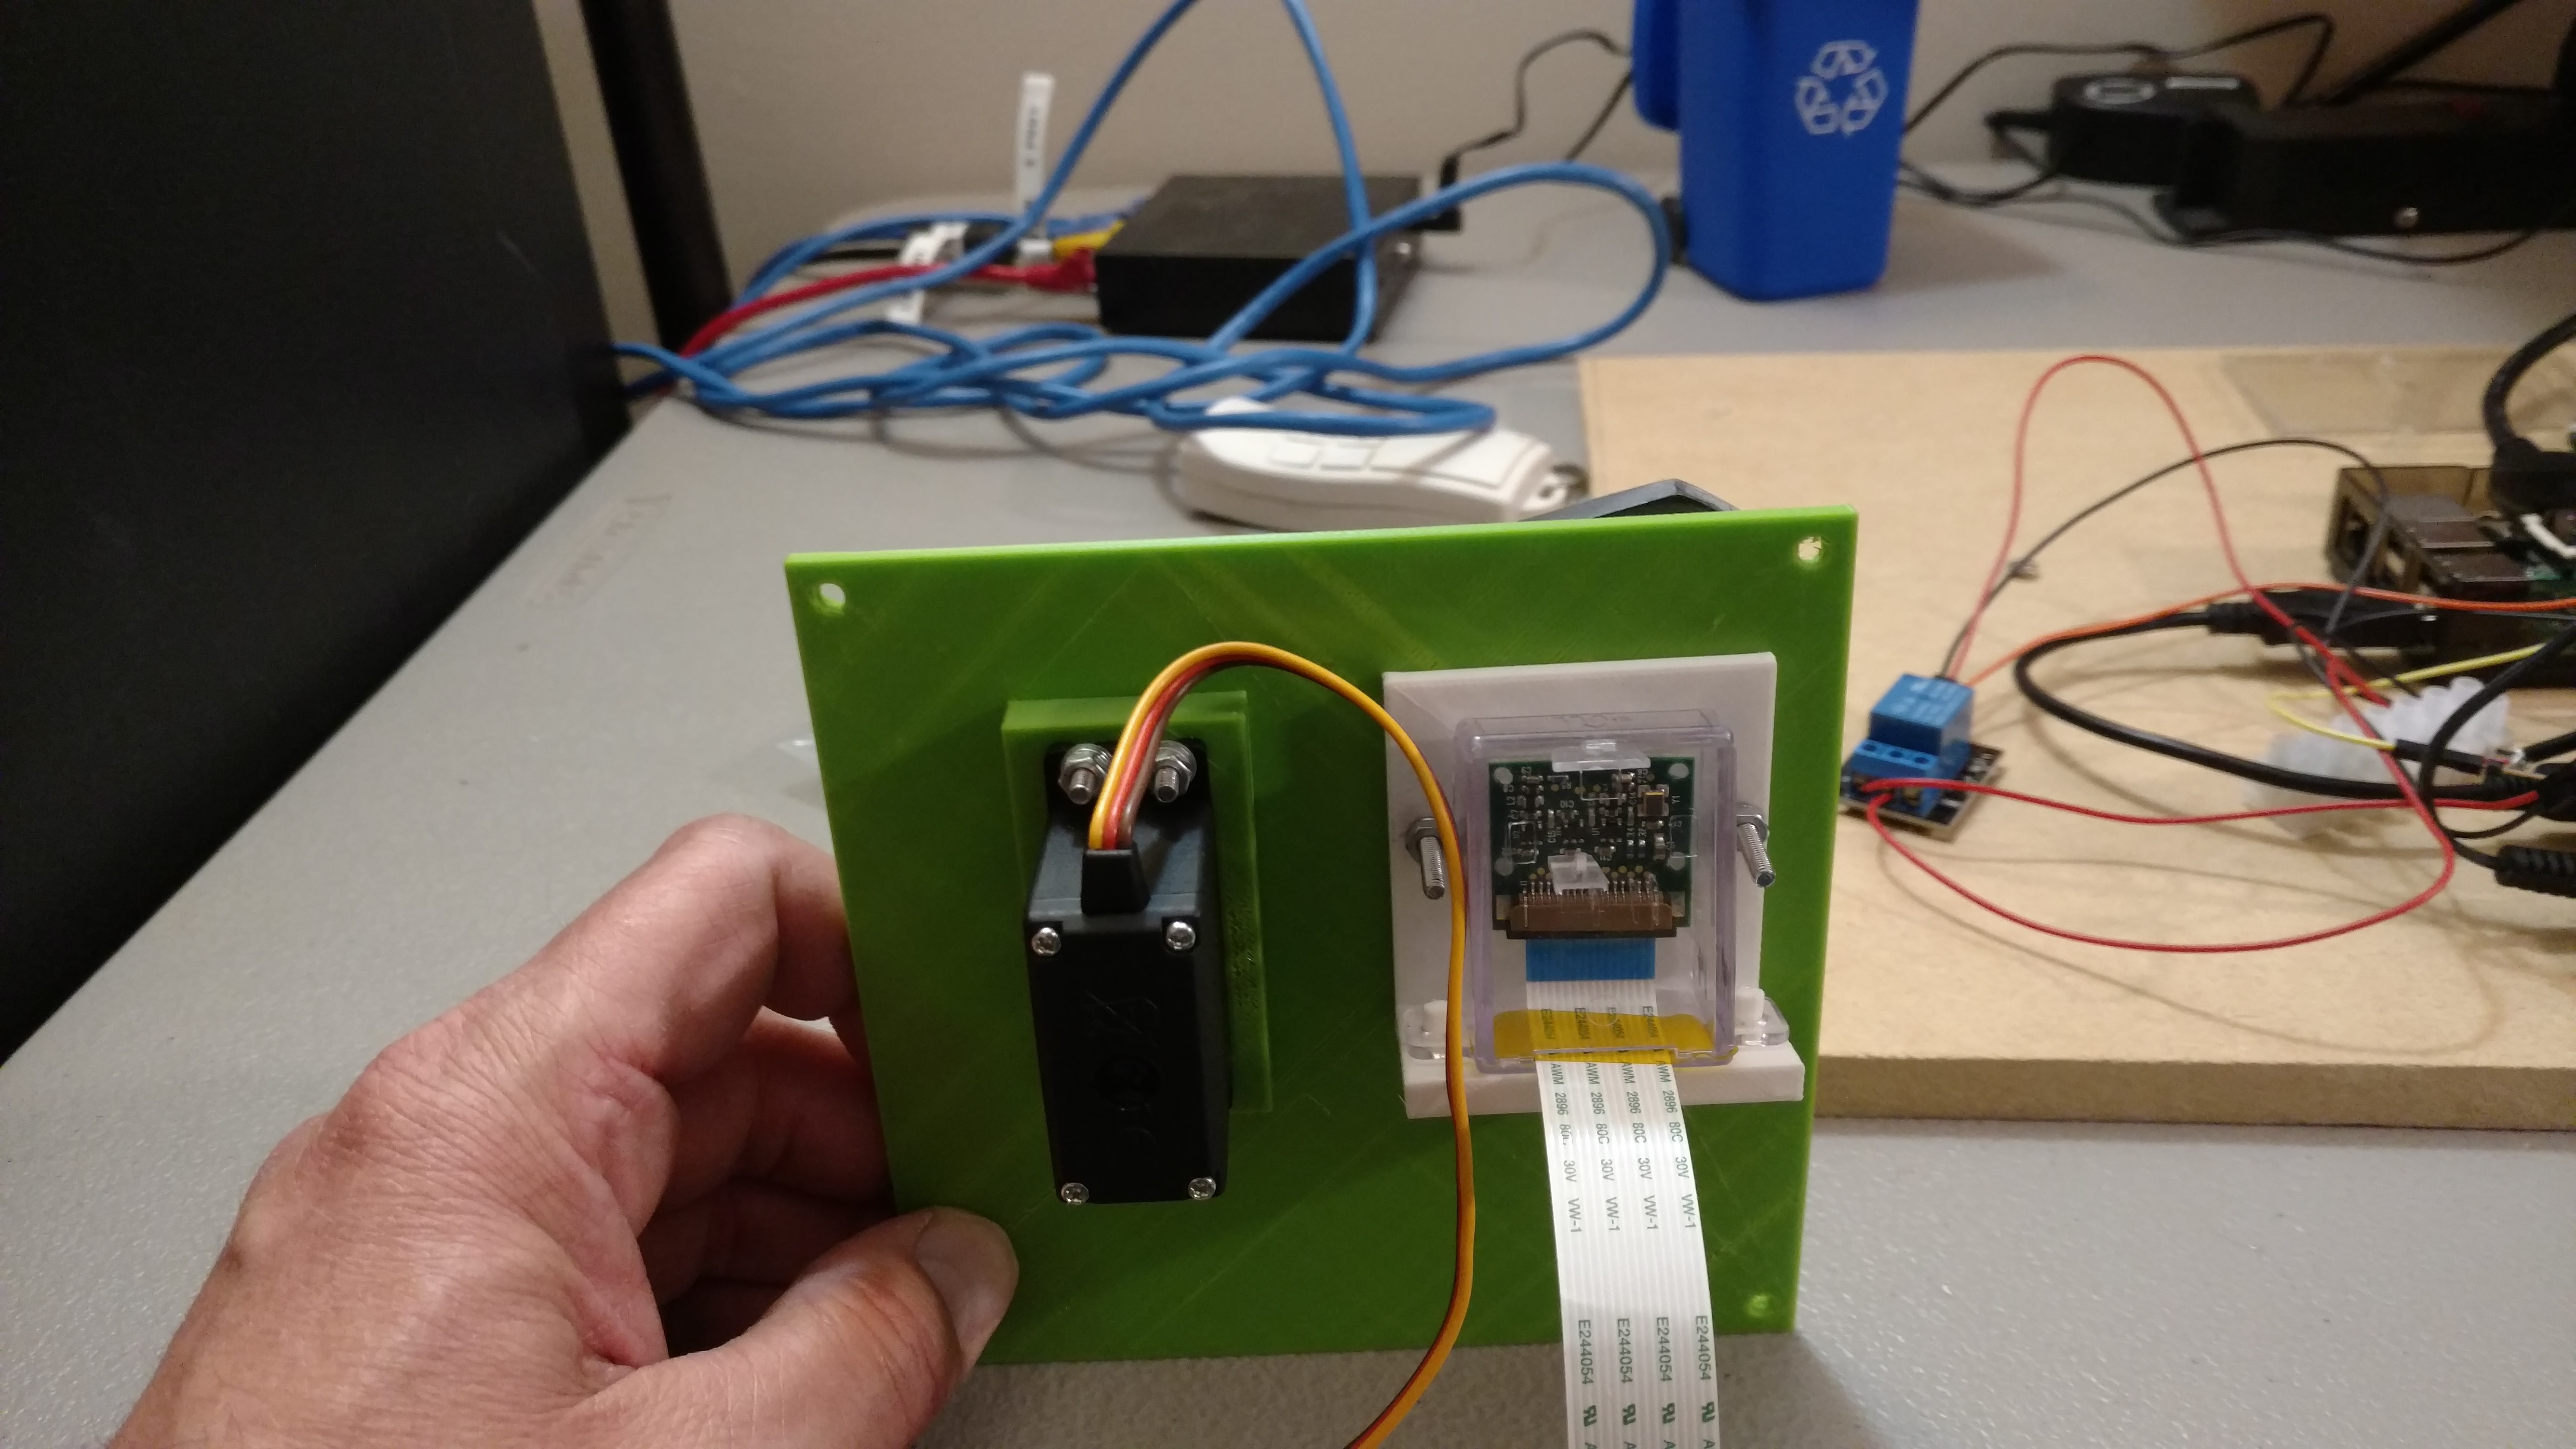
Once you have all the parts hooked up, the next step is to mount the servo, shutter arm, and camera on the mounting plate.
In one picture above, you can see the shutter arm in position (minus the solar film, which I hadn't taped on yet). The shutter arm is made out of 1/4" HDPE and is attached using one of the standard hubs that came with the servo.
In the other picture, you can see the back of the mounting plate and how the servo and camera are attached. After this picture was taken, I redesigned the white piece that you see to get the camera lens closer to the shutter arm and then reprinted it in green. That's why in other pictures the white part is not present.
Word of Caution
The camera module has a very tiny little ribbon cable on the board that connects the actual camera to the rest of the electronics. This little connector has an annoying tendency to pop out of its socket frequently. When it pops out, raspistill reports that the camera is not connected. I spent a lot of time fruitlessly re-seating both ends of the larger ribbon cable before realizing where the real problem lay.
After I realized that the problem was the small cable on the board, I tried holding it down with Kapton tape but that didn't work and I finally resorted to a dab of hot glue. So far, the glue has held it in place.
Site Selection
The world's great telescopes are located on mountain tops in Peru, Hawaii, or some other relatively remote location. For this project, my complete list of candidate sites included:
- An east-facing windowsill in my house
- A west-facing windowsill in my house
- A south-facing windowsill in my house
Notably absent from this list are Peru and Hawaii. So given these choices, what was I to do?
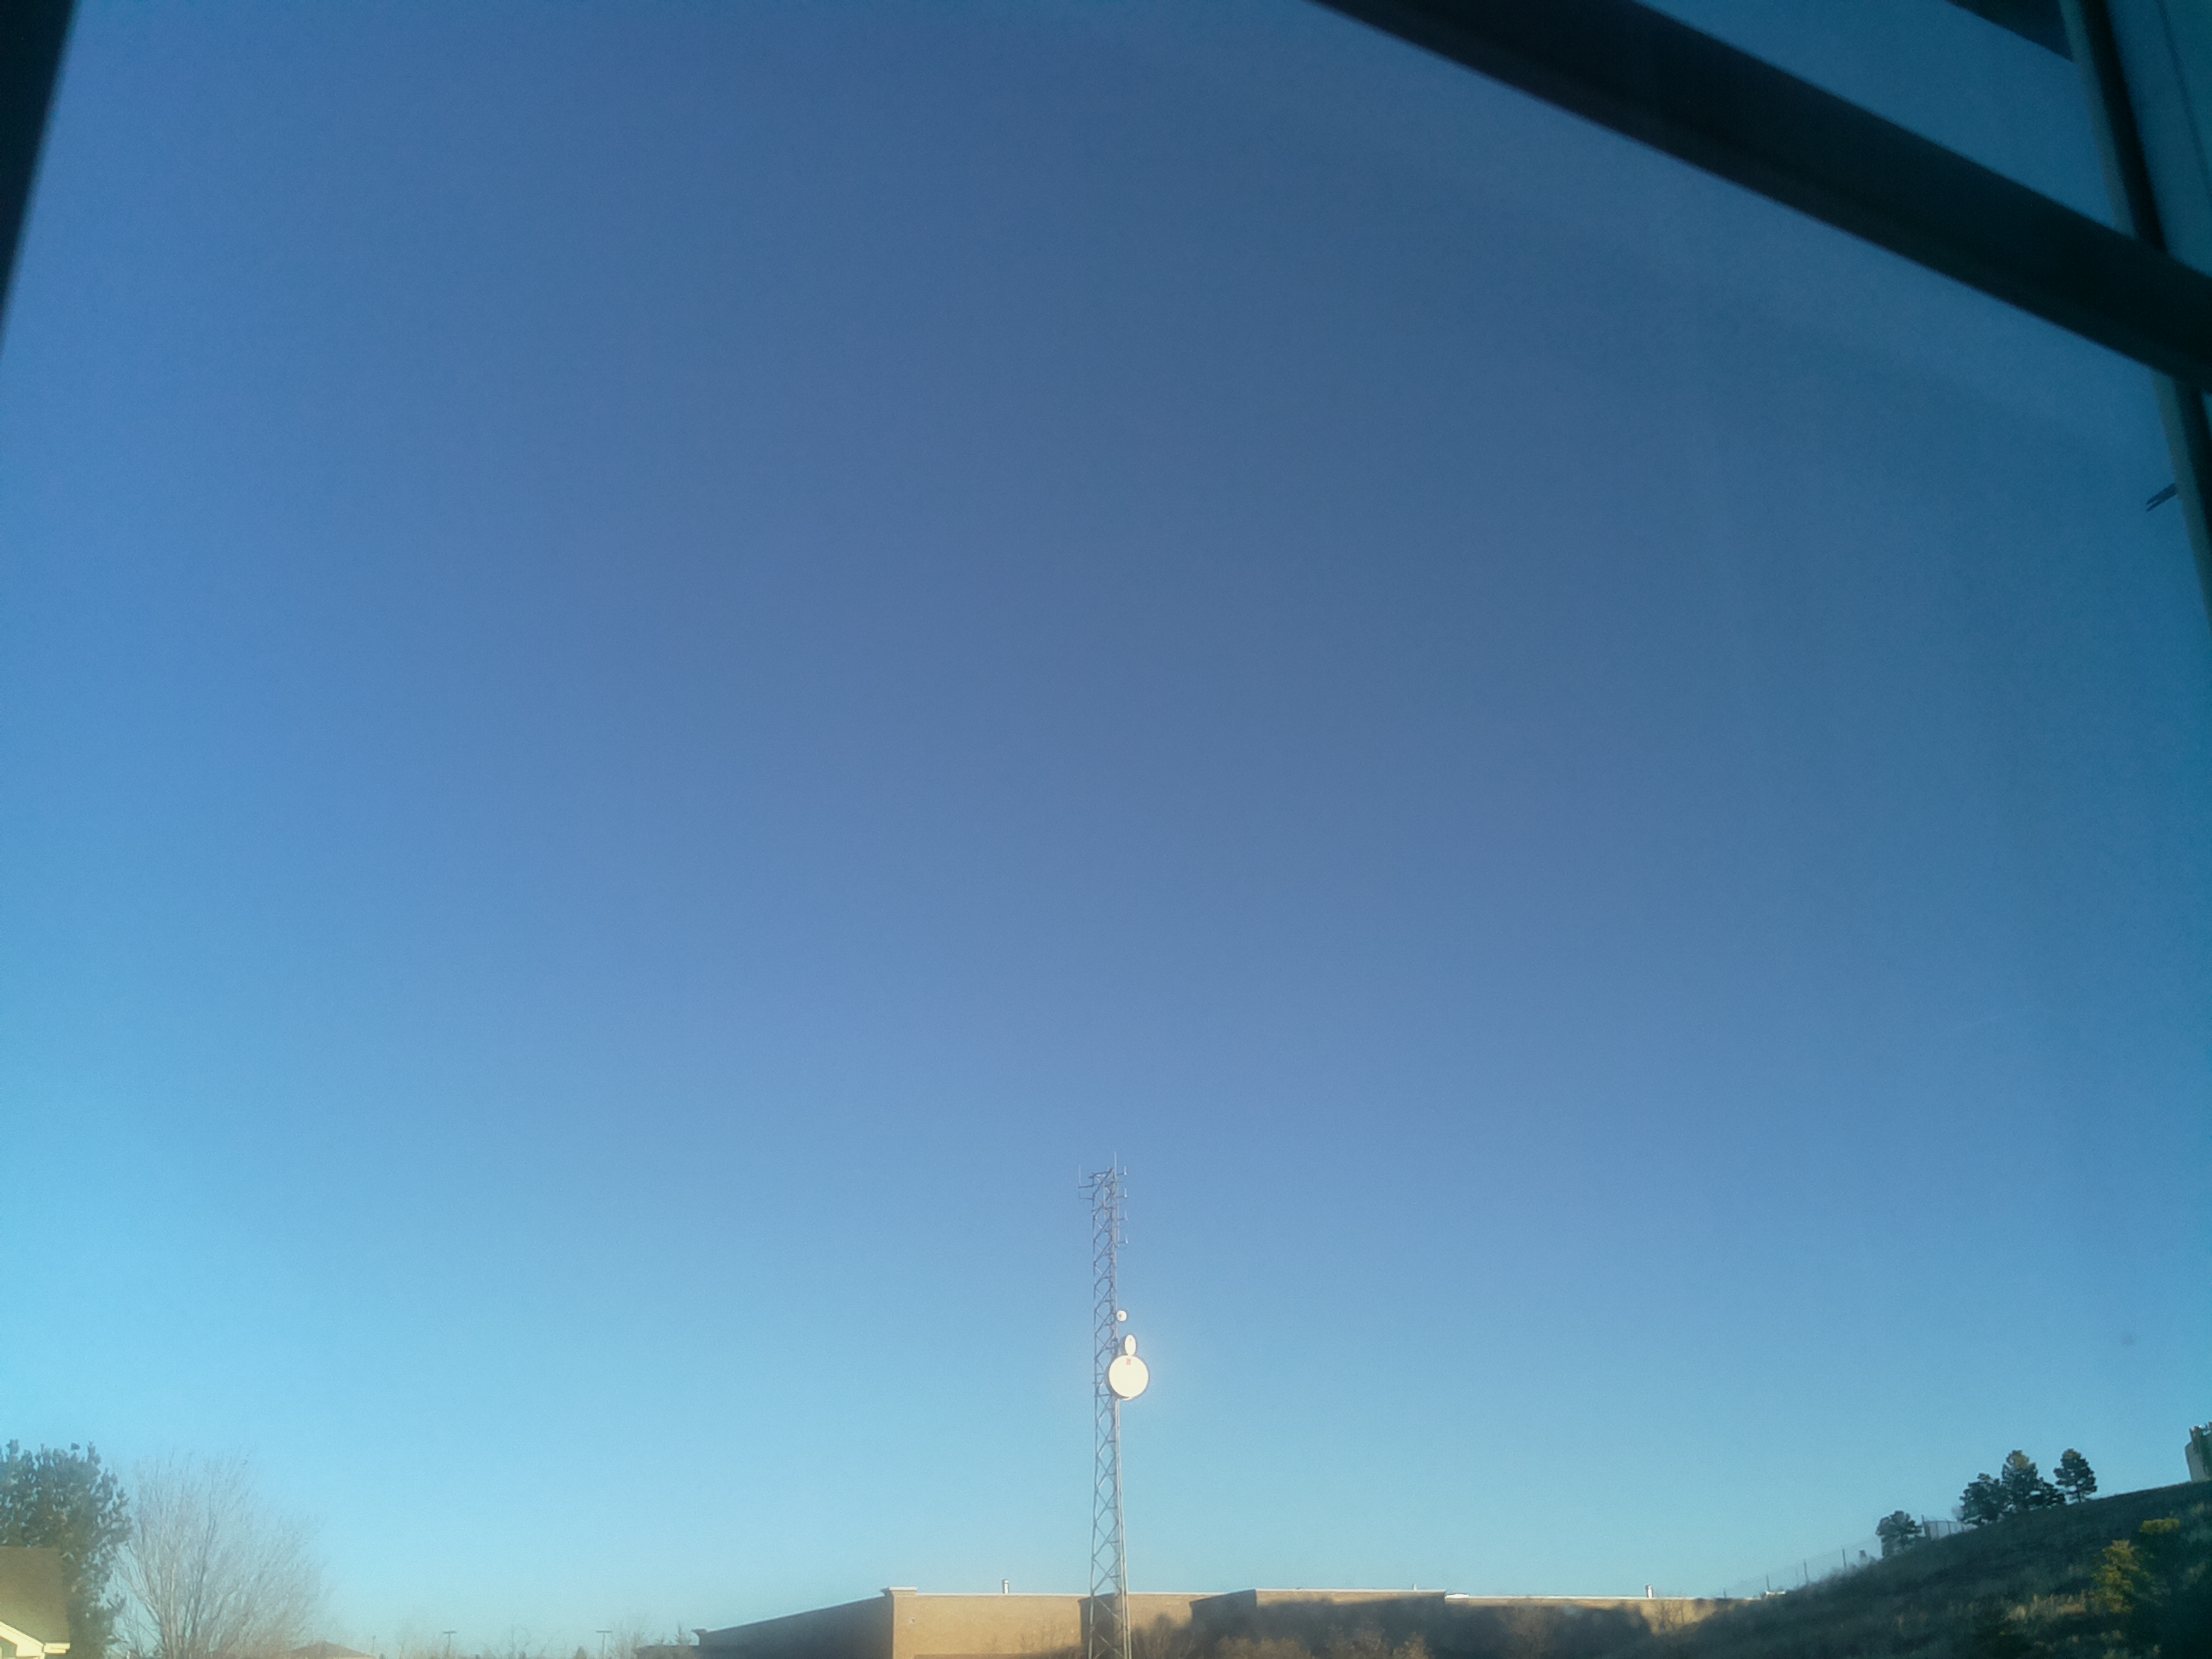
The south-facing window has a wide-open expanse with no buildings in view but due to a problem with the weather seal, it isn't optically clear. The west-facing window includes a great view of Pikes Peak and would have made for a terrific view but it is located in the family room and my wife might not like having my science project be so prominently displayed for an entire year. That left me with the east-facing view which looks out on a big antenna tower and the back of the local Safeway. Not very pretty but that was the best choice.
Really, the most important thing is to find a place where the project won't be jostled, moved, or otherwise disturbed. As long as you can get the sun in frame for an hour two each day, any direction will work.
Taking Pictures

Cloudy Skies
I happen to live somewhere that gets a lot of sunshine each year, which is good since clouds really play havoc with the pictures. If it is slightly cloudy, the sun comes out as a pale green disk rather than the well-defined orange disk I get on a cloudless day. If it is quite cloudy, nothing shows up on the image.
I have started writing some image processing software to help alleviate these problems but that code isn't ready yet. Until then, I just have to work around the vagaries of weather.
Backup Your Data!
With the camera I'm using and the number of pictures I take, I generate about 70MB of images each day. Even if the micro-SD card on the Pi were big enough to hold a year's worth of data, I wouldn't trust it. Every few days, I use scp to copy the recent data to my desktop. There, I view the images to make sure they are okay and that nothing weird happened. Then I copy all those files to my NAS so that I have two independent copies of the data. After that, I go back to the Pi and delete the original files.
Analemma (or... an Astronomically Large Figure Eight)
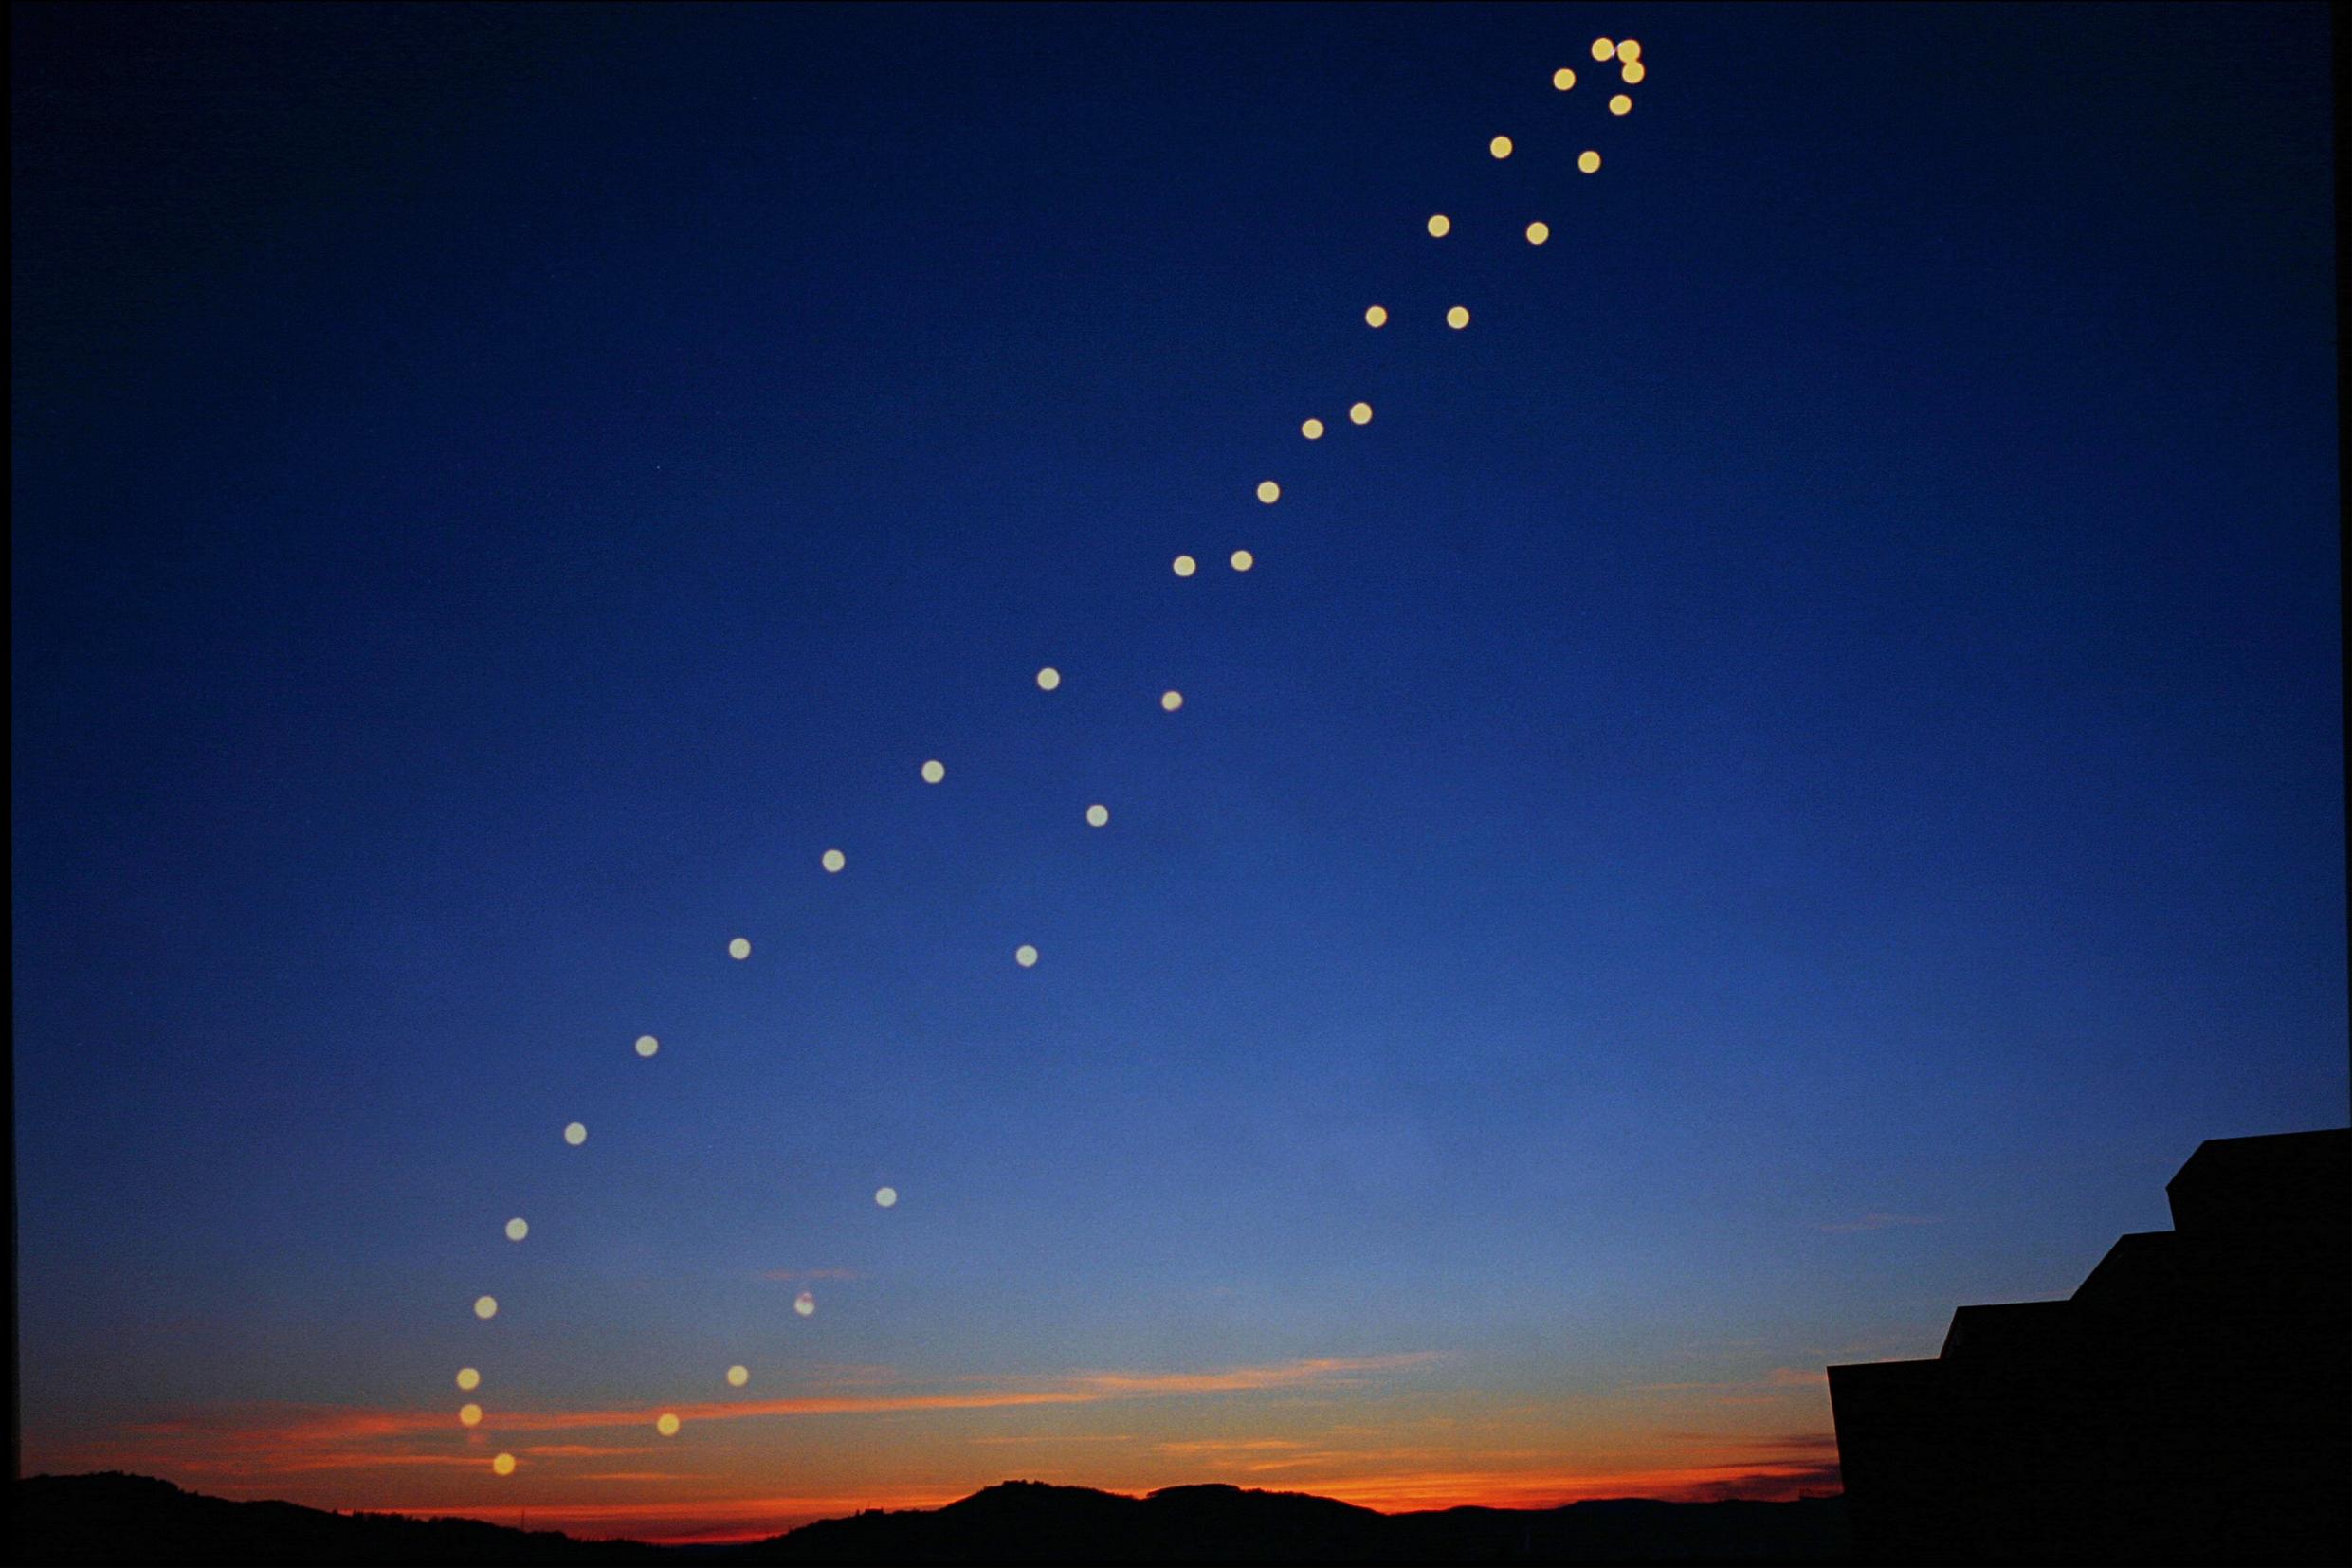
Besides determining axial tilt and latitude, taking pictures at the same time every day can also provide us with a very cool view of the Sun's path over the course of a year.
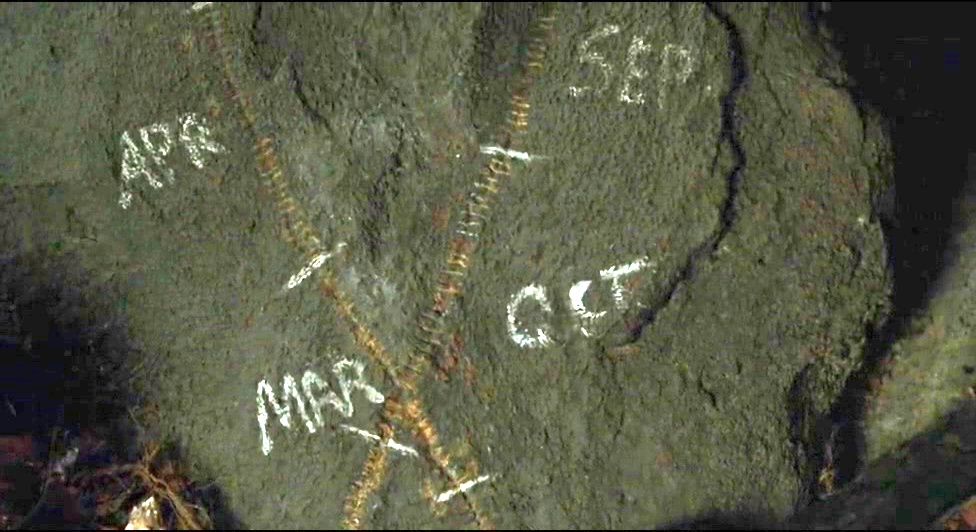
If you've ever seen the movie Cast Away with Tom Hanks, you might remember the scene in the cave where he marked out the sun's path over time and it made a figure eight. When I first saw that scene, I wanted to learn more about that phenomenon and a mere seventeen years later, I finally am getting around to doing just that!
This shape is called an analemma and it is the result of the tilt of the Earth's axis and the fact that the Earth's orbit is elliptical and not a perfect circle. Capturing one on film is as simple as setting up a camera and taking a picture at the same time every day. While there are a lot of very good pictures of analemma on the web, one of the things we will do in this project is create our own. For a lot more on analemma and how one can be the centerpiece of a pretty useful almanac, see this article.
Prior to the advent of digital photography, capturing a picture of an analemma required actual photographic skills since you would have to carefully take multiple exposures on the same piece of film. Obviously the Raspberry Pi camera doesn't have film so instead of skill and patience, we're going to simply combine multiple digital images to get the same effect.
What's Next?
Now that the little camera-robot is in place and faithfully taking pictures every day, what next? As it turns out, there are still quite a few things to do. Note that most of these will involve writing python and using OpenCV. I like python and have been wanting an excuse to learn OpenCV so that's a win-win for me!
- Automatically detect cloudy days
If it is too cloudy, the solar film and short shutter speed make for an opaque picture. I want to automatically detect that condition and then either increase the shutter speed or move the solar filter out of the way. - Use image processing to find the sun even in cloudy pictures
I suspect it is possible to find the center point of the sun even if clouds are in the way. - Overlay solar disks on a clear background picture to form a track of the sun's path during the day
- Create an analemma
Same basic technique as the last step but using pictures taken at the same time each day - Measure the angular resolution of the camera (degrees/pixel)
I'll need this for my later calculations
There's more than this but that will keep me busy for a little while.
Thanks for sticking with me to the end. I hope you enjoyed this project description and that it motivates you to tackle your own next project!