Solar Cooling System Timed by Arduino
by sdhingra in Circuits > Arduino
893 Views, 1 Favorites, 0 Comments
Solar Cooling System Timed by Arduino

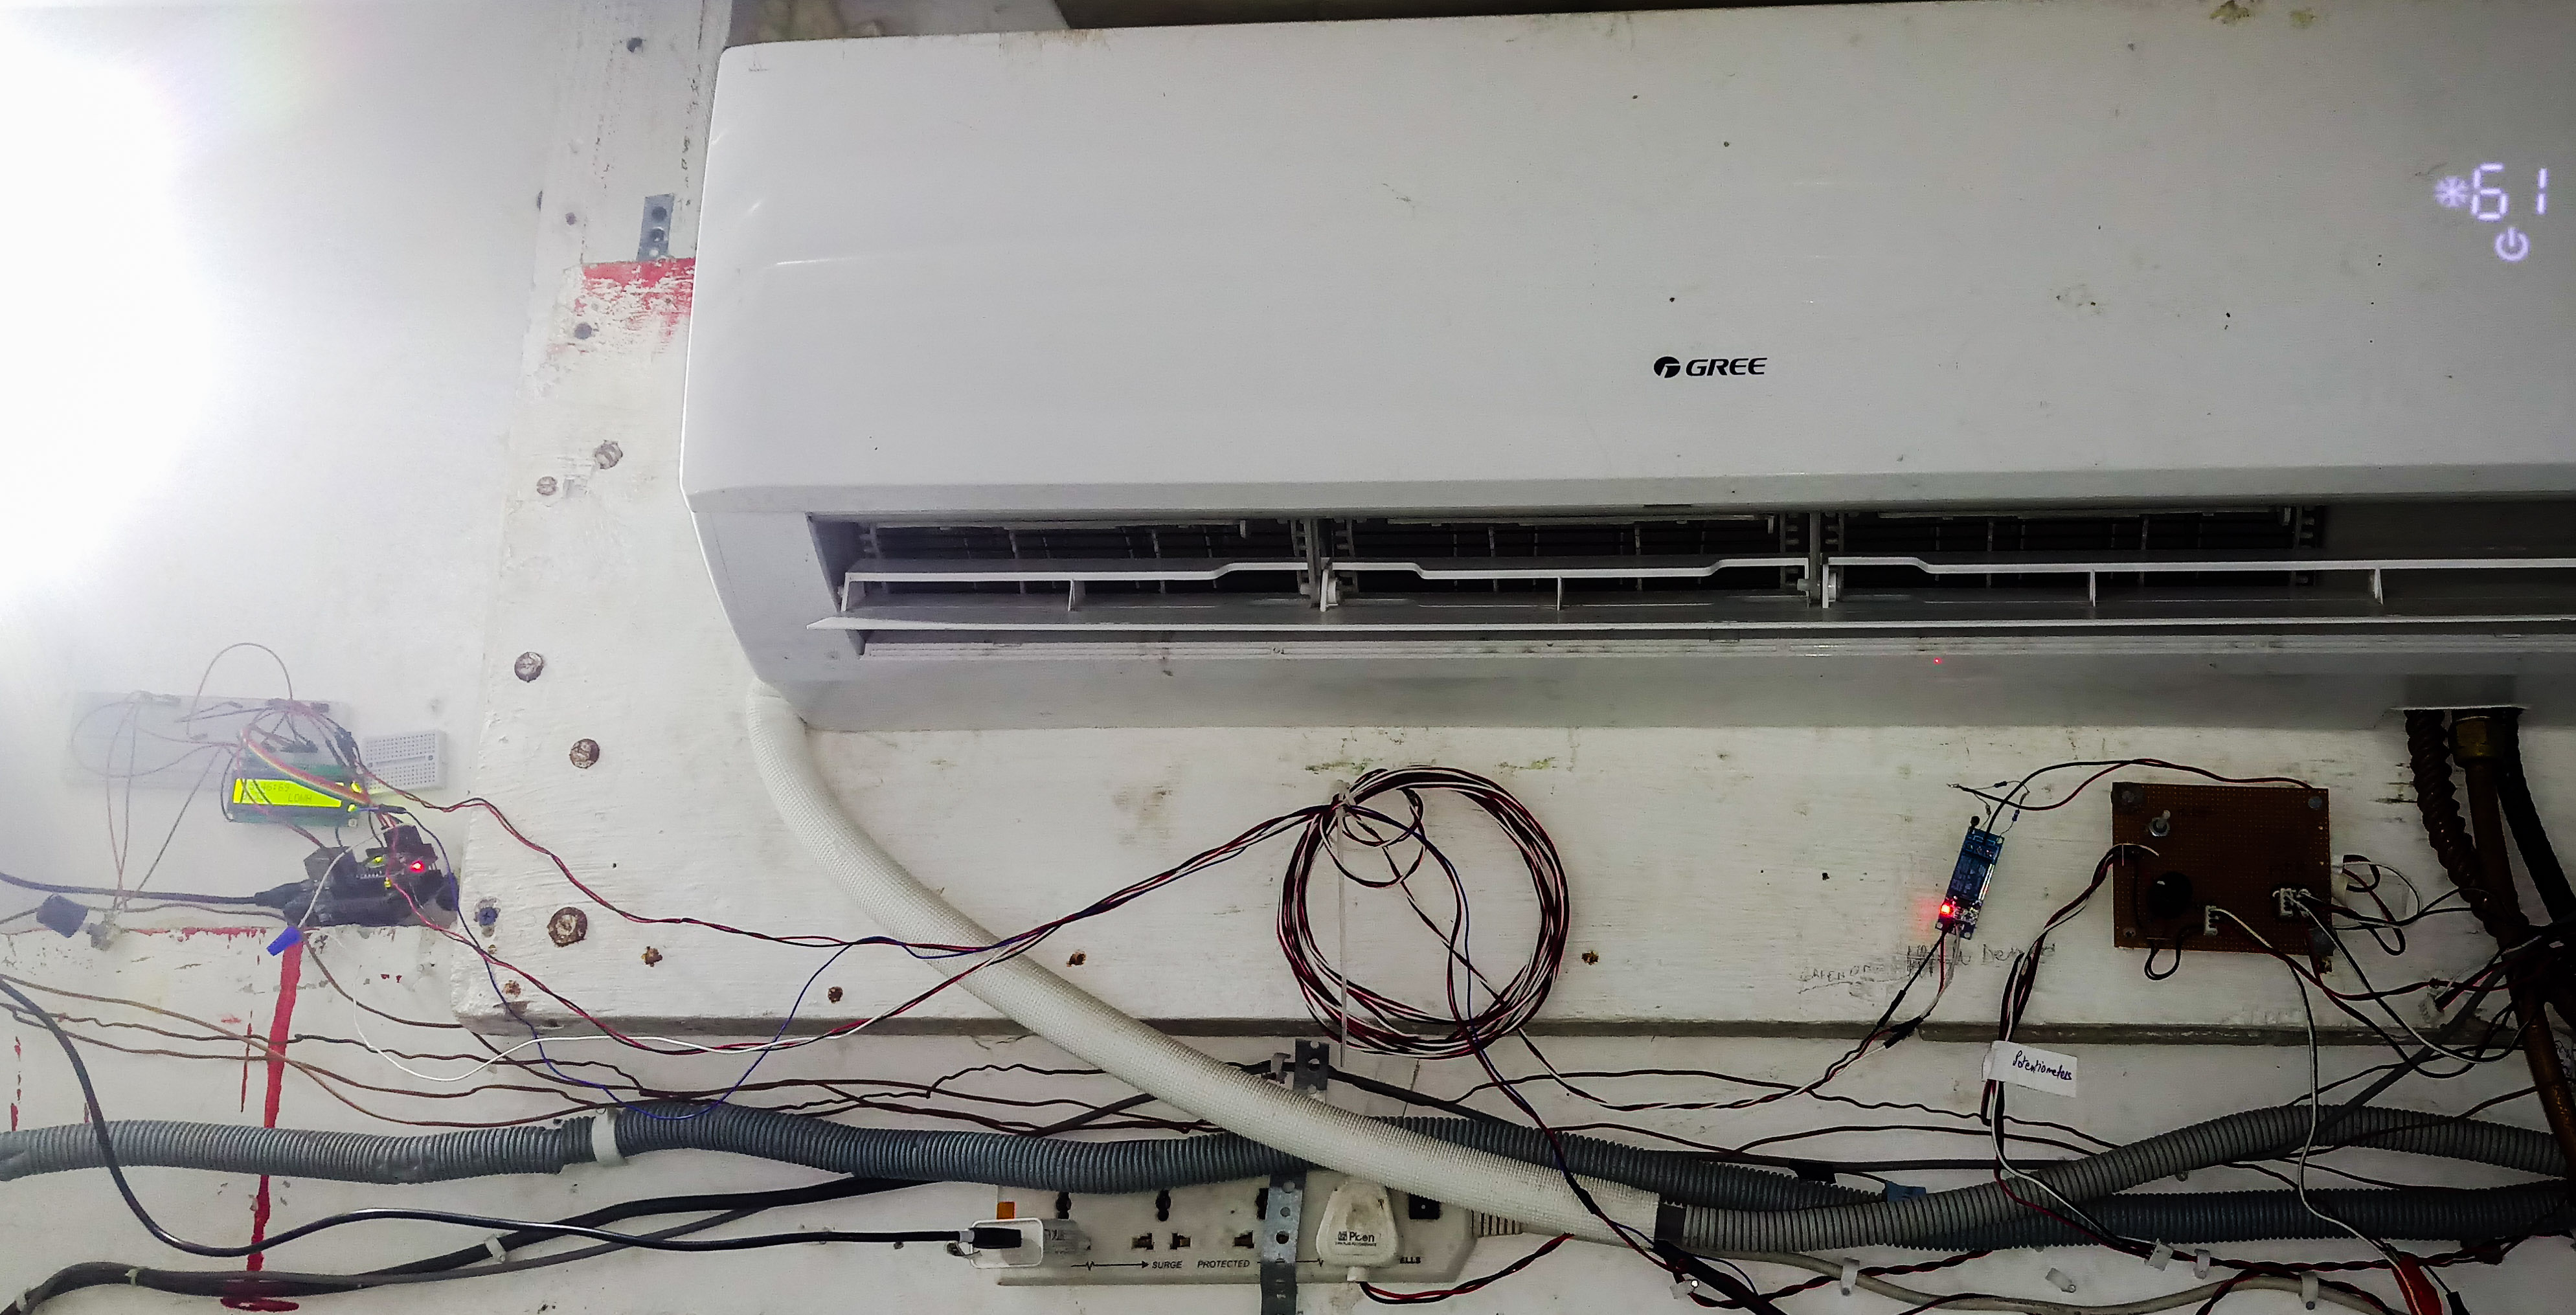
In this project, we have 10-12 solar panels rated at 325 watts. The DC current output from the solar panels is connected to a DC to AC converter, which is finally connected to an Air Conditioning unit. The Air Conditioning unit is set up to cool a room during the day.
The Arduino comes into the picture because we removed the Thermistor from the AC unit. We are manually controlling the cooling level on the AC unit as per our cooling requirements. Because the Solar Panels are connected directly into the AC-DC converter and are not connected to batteries or a grid of any kind, we need to modulate the level of cooling to accommodate the amount of current being provided by the panels.
Before I set up an Arduino to do this task of managing the AC's cooling level, the team had a potentiometer in place of the thermistor which they would change as per their requirements. During the day when the sun is high, we changed the resistance to lower value and thereby increased the cooling of the AC. When the sun started to set, we would change the potentiometer to a higher resistance value, thereby reducing the cooling of the AC and also the amount of current it drew from the Solar Panels.
The big challenge of this system is: when the solar panels aren't generating enough current but the AC is drawing power, the DC-AC converter goes into overload mode and shuts the system down. Then it tries to reboot and if it still doesn't get enough current, it goes into error mode and shuts down.
To manage this we have done two things:
- Connect the Arduino to a RTC clock, which tells the AC unit to switch from high power consumption to low power consumption at certain times of the day when the Solar panels don't generate enough power (in the morning/ late evening).
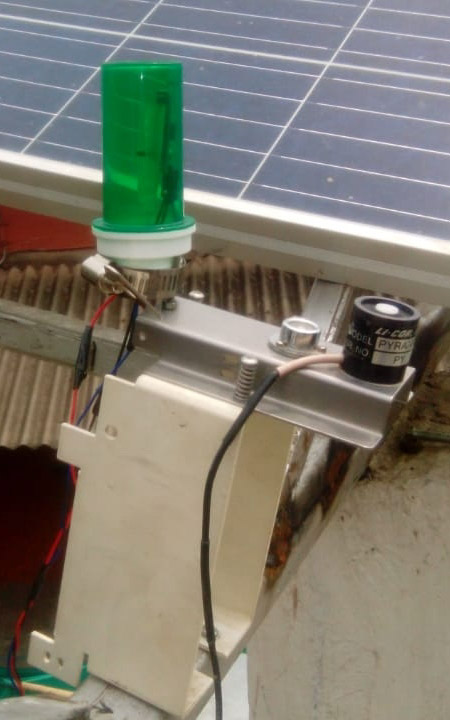
- Set up a Solar Insolation measuring system, which ideally detects whether its cloudy or sunny outside, thereby putting the AC in low power consumption mode, allowing the DC-AC converter to run without going into error or overload mode. For now, we are using an LDR to check the voltage value. The lower the voltage on the LDR, the higher the amount of sunlight there is.
Step 1: Understanding the Arduino Set-up.

Components that you need for this project:
- Arduino Uno
- Relay Module
- Ds1307 RTC Module
- Hookup wires
- A breadboard (Optional)
- Wifi Module (Optional)
- LCD Screen (Optional)
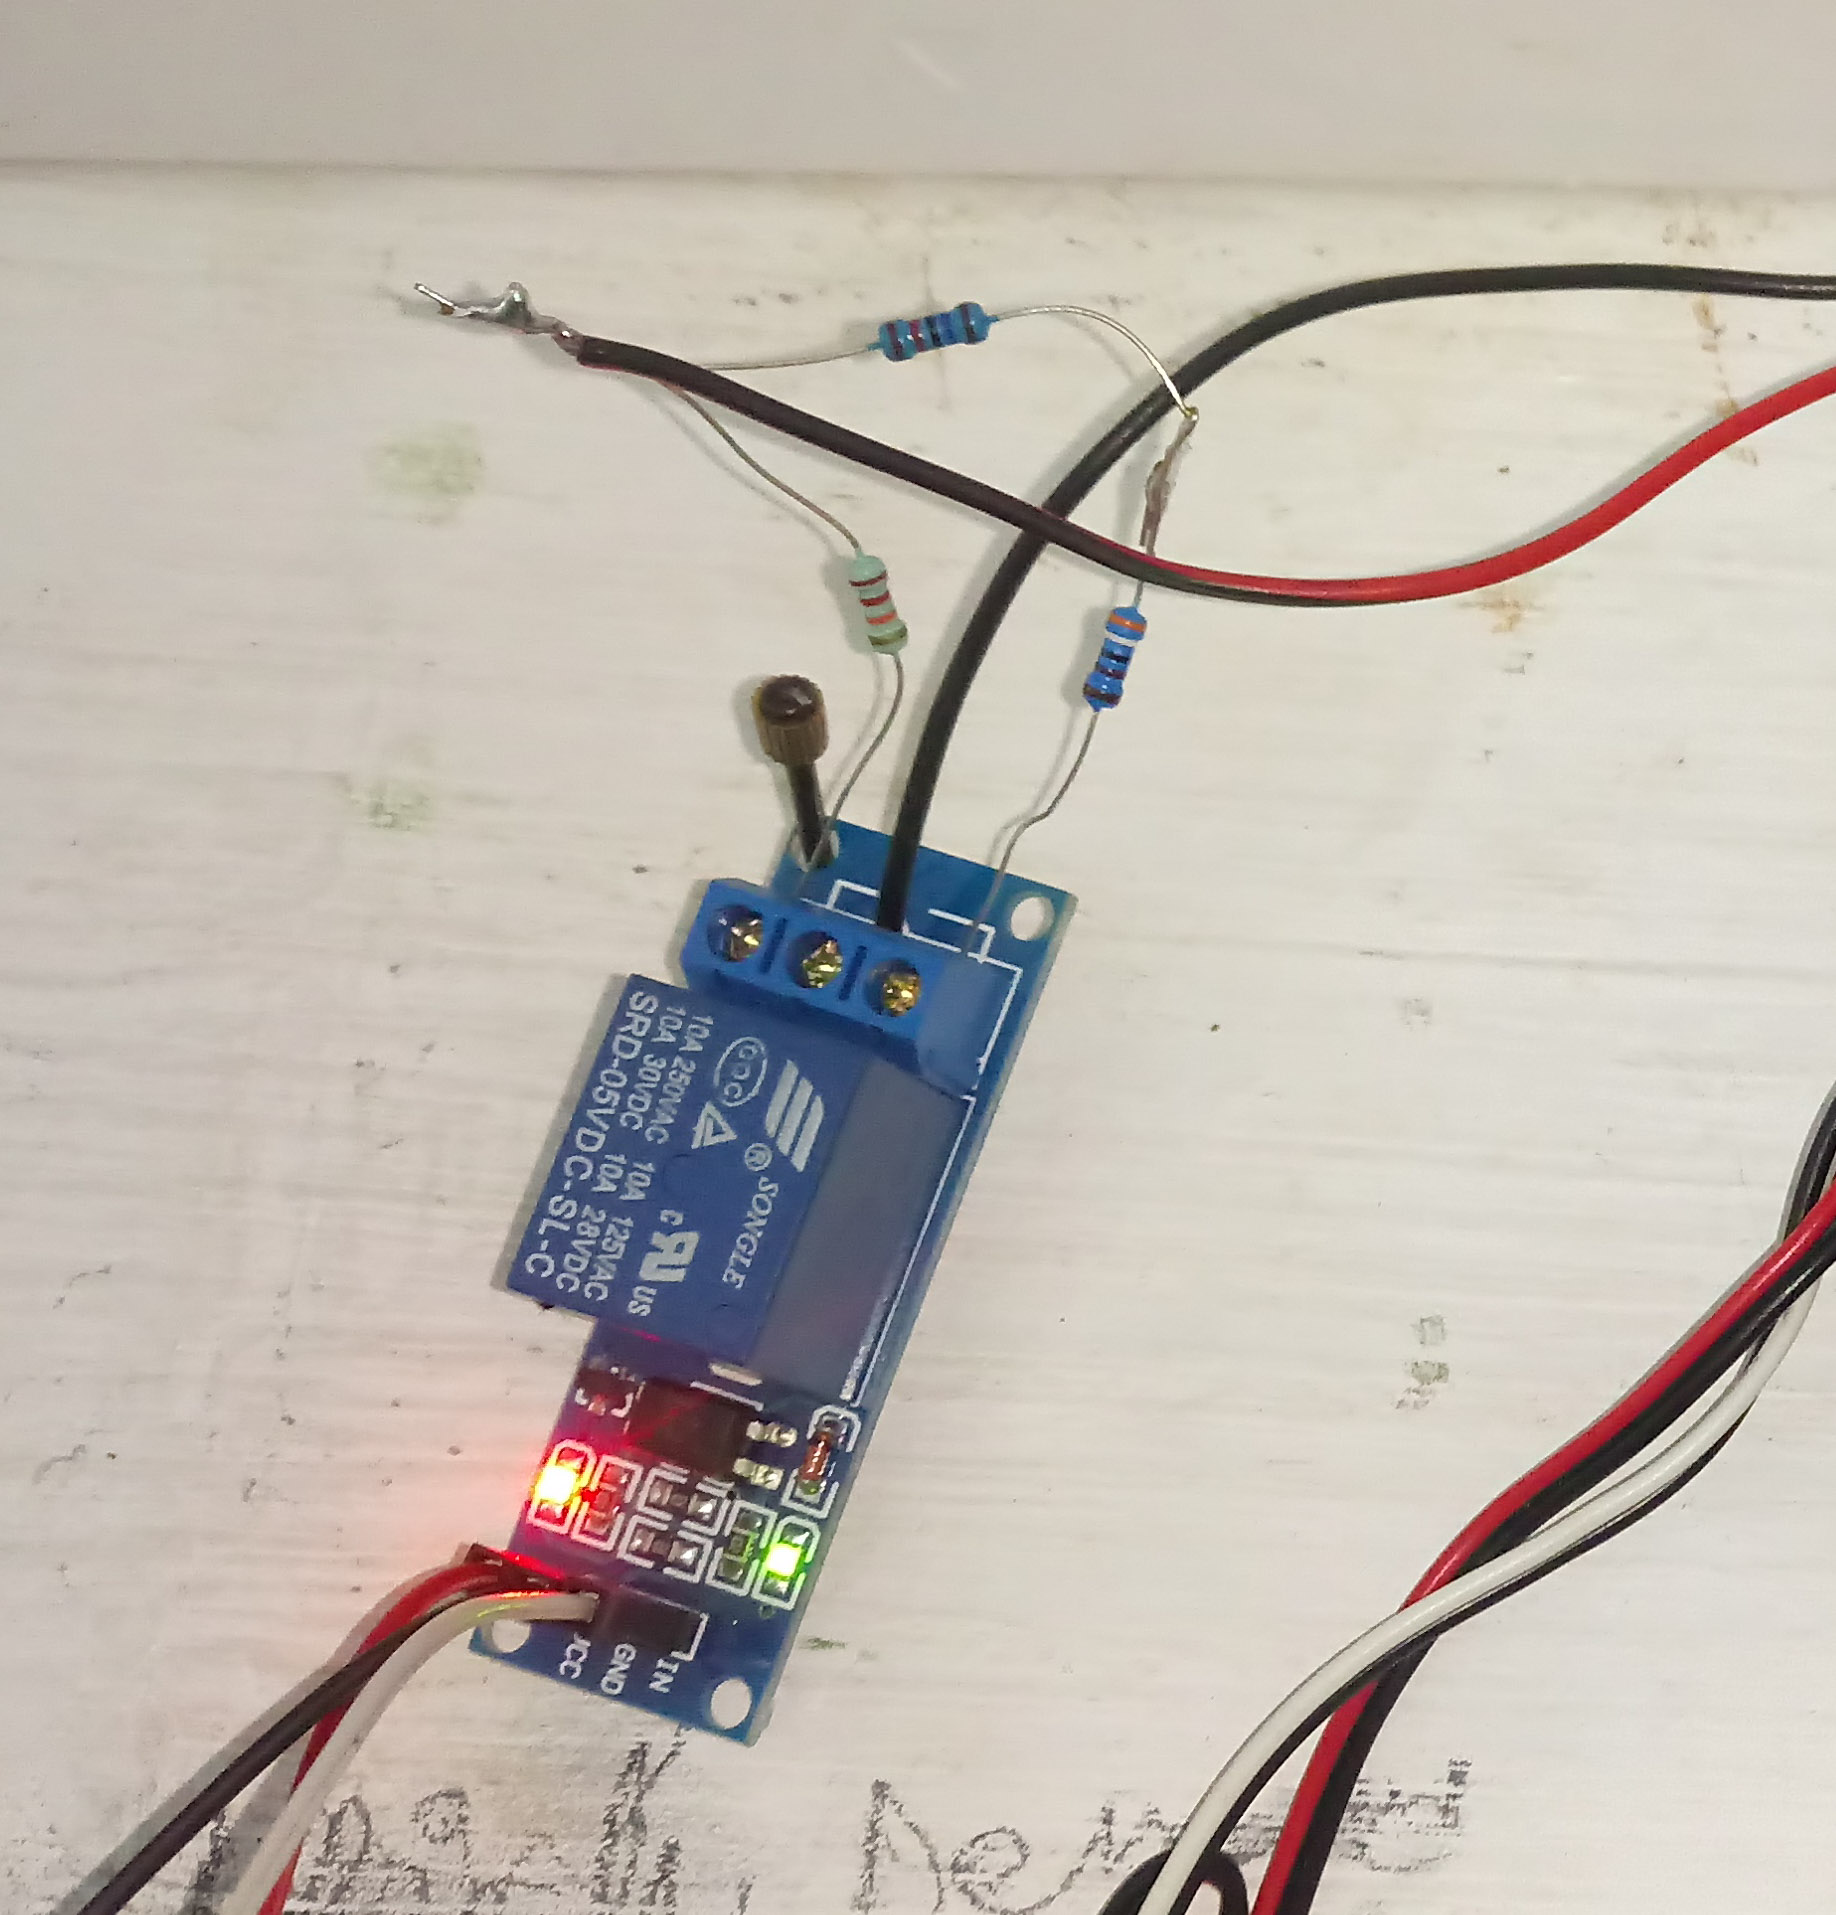
In this system the Arduino output pin on Digital Pin 2 is connected to the relay. It gives a LOW or HIGH value to the relay depending on the time. The relay has the two resistance values that we need, one 21.8kΩ and the other 20kΩ. As per the relay state one of these values is delivered to the AC unit. The lower value of 20kΩ is fed to the AC when we want it run on high power, and the higher 21.8kΩ value is fed to the AC when we want it to run on low power.
The Arduino feeds these values to the AC through the relay. One resister is connected to the normally closed and the other to the normally open part. See picture. Upon changing the relay state within the Arduino, the AC increases or decreases its power consumption.
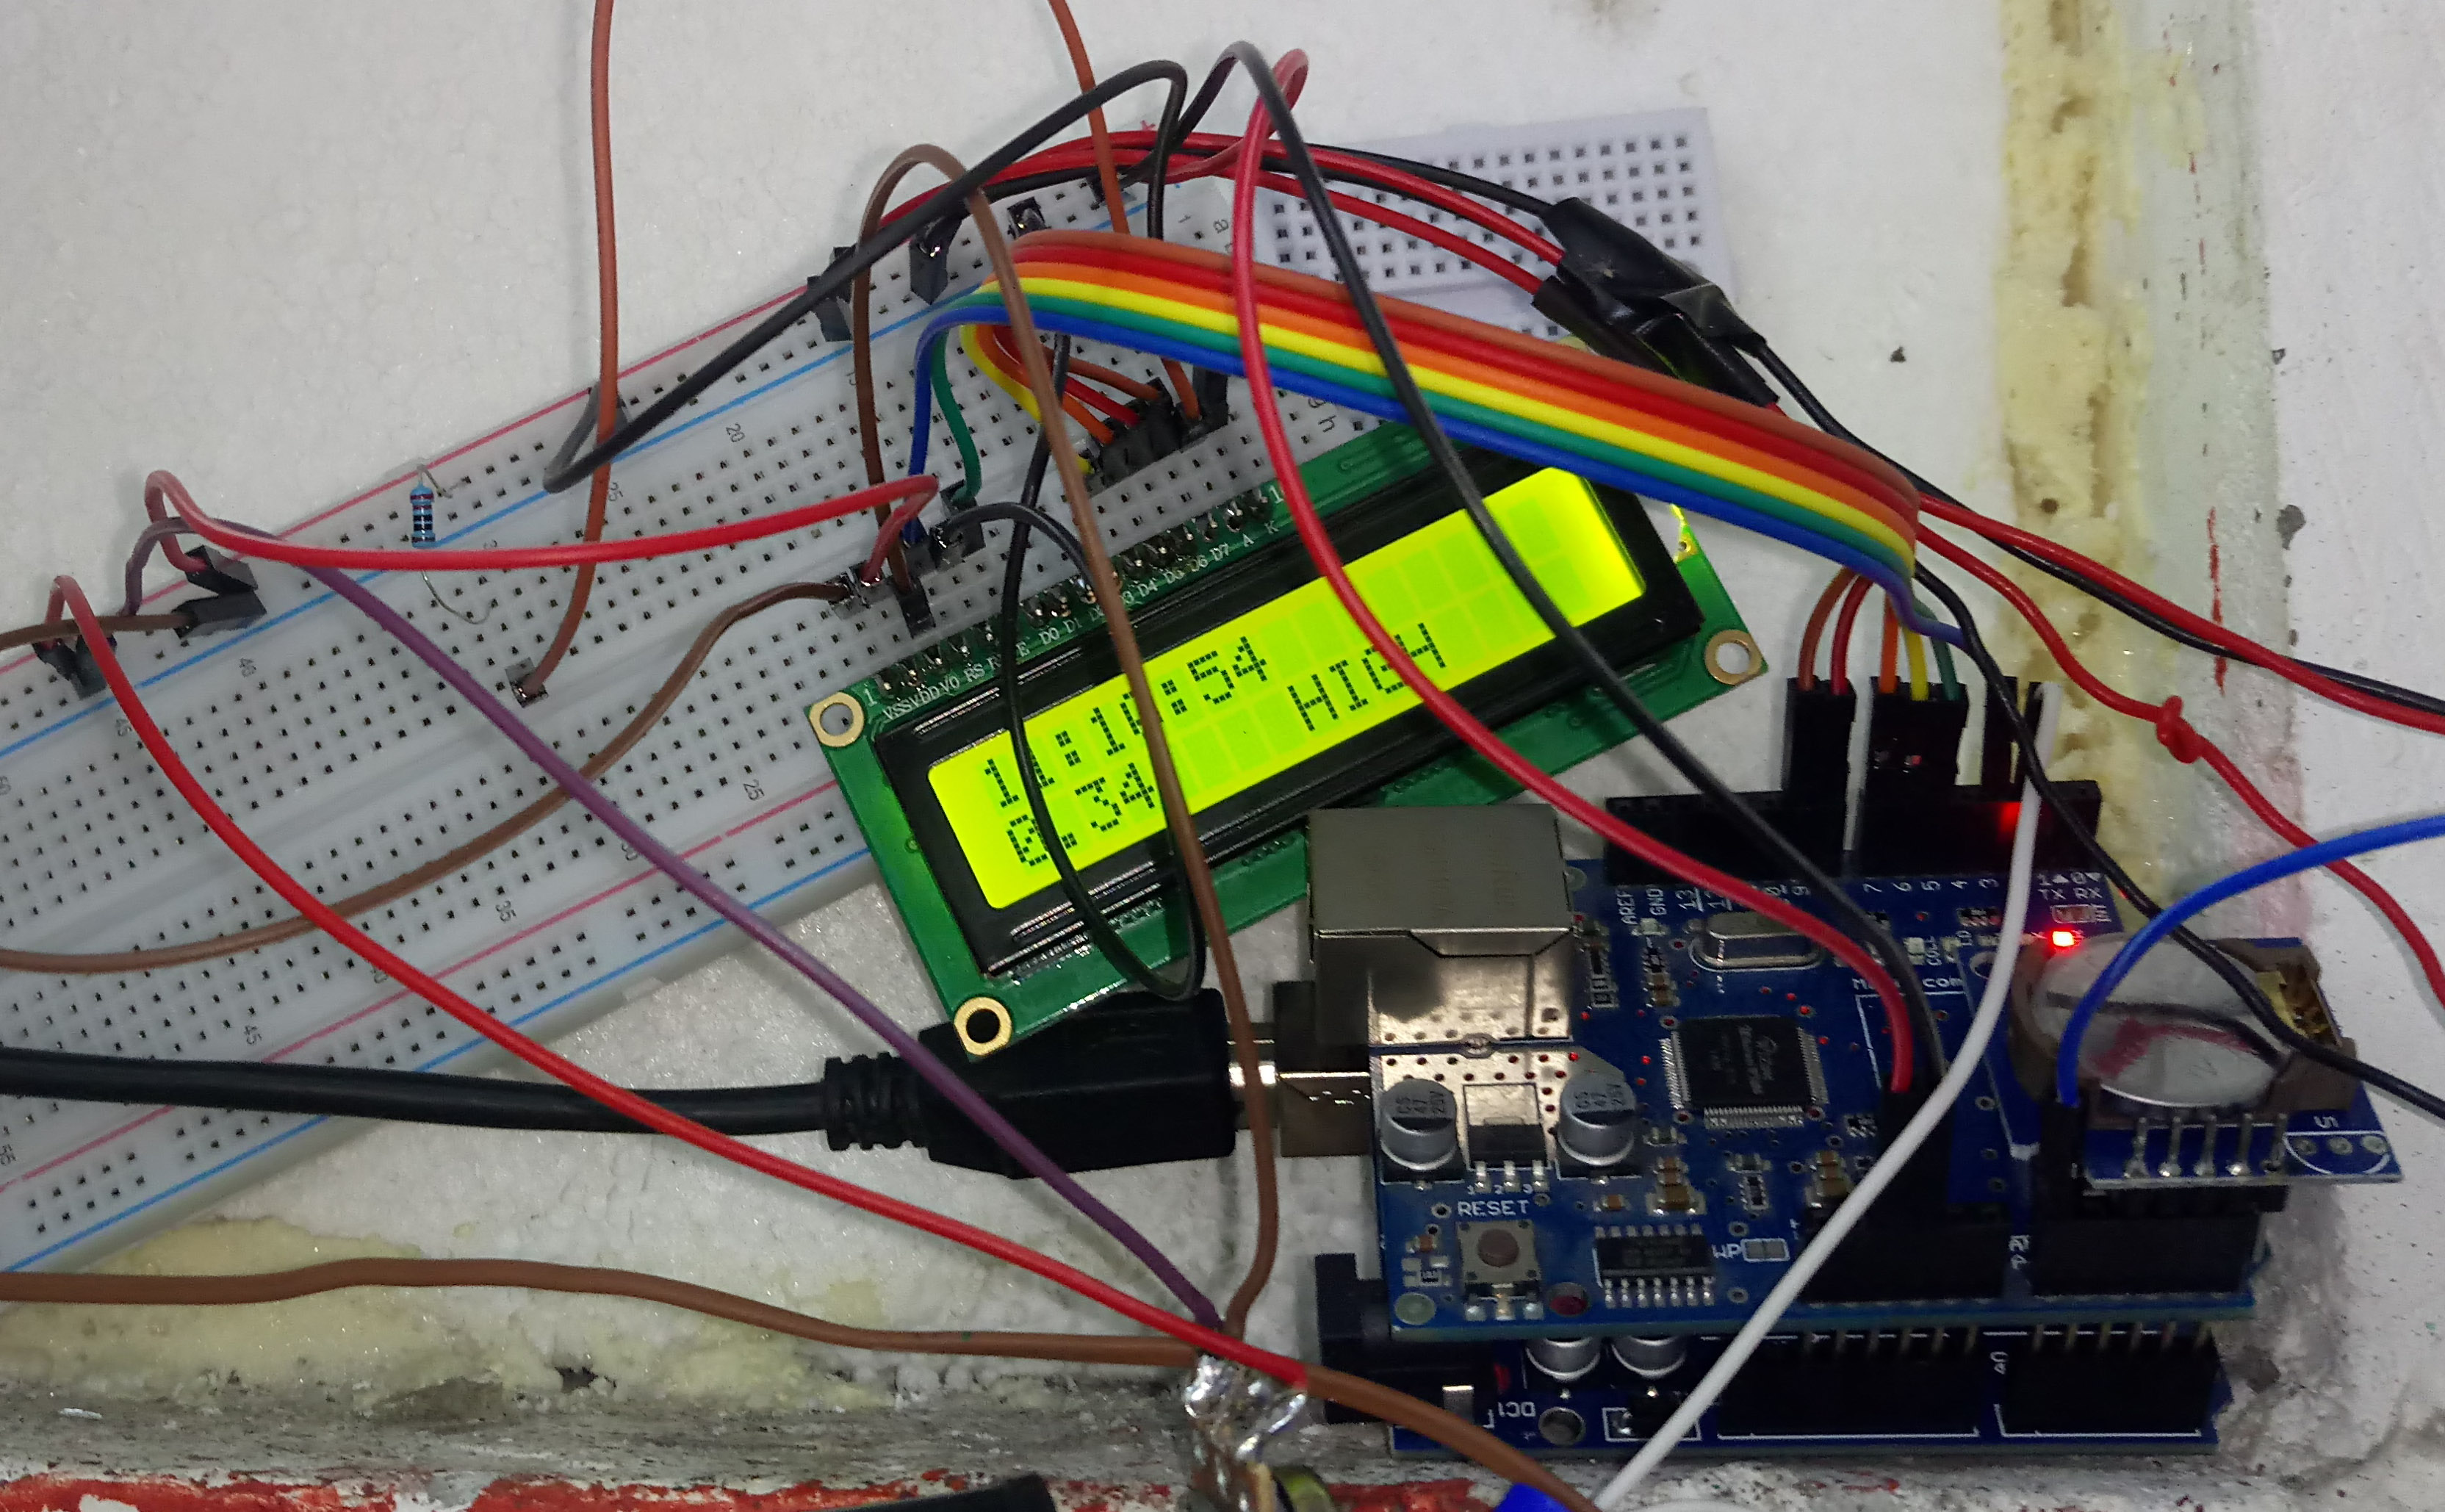
The RTC Module tells the Arduino the time. The DC-AC converter has its own timer that turns it on at 9:30 AM. At this point the Arduino lets the relay stay in its normally close mode. Meaning the Arduino does nothing. The normally closed circuit has the higher resistance value of 21.8kΩ. This lets the AC run on low power consumption mode till 11:00 AM. At this point the Arduino signals the relay to change its state, thereby letting the lower resistance value of 20kΩ to be fed into the AC unit. Then the AC unit runs on high power consumption mode for 4 hours till 3:00 PM. At 3:00 PM, the Arduino again changes the relay state to its normally closed state.
We set up the higher resistance value in the normally closed state so that if the Arduino is malfunctioning for some reason, at least the AC unit is fed the higher value resistance, so it runs regardless, albeit at a lower level of performance.
Step 2: Connecting Your Arduino With the Modules


- The relay is connected to the Arduino on Digital Pin 2.
- DS1307 is connected to the Arduino on Analog Pins 3, 4, 5, 6.
- Solar insolation sensor is connected to Arduino on A0 pin. For now this is an LDR with a pill bottle to protect it from rain and so on. See picture.
- Wifi Shield for the Arduino is plugged into the Arduino. Digital Pin 4 is to be left unused so that CS_POW value for running the SD card can be assigned to it. (This is only necessary if one is using an SD card to log solar insolation data from the Arduino.)
- LCD is connected to 6 pins on the Arduino. 9, 8, 7, 6, 5, 3. This is because the Wifi Shield takes up space on pins 13 to 10. (This is only necessary for debugging and showing the time
- VSS - GND
- VDD - +5 V
- VO - 10k Potentiometer
- RS - 3
- RW - GND
- E - 5
- D4 - 6
- D5 - 7
- D6 - 8
- D7 - 9
- A - by way of resistor (220 ohm) - + 5V
- K - GND
Step 3: Coding Your Arduino (with SD Card Logging and LCD Time Display).
The RTCLib.h Library for this was downloaded from http://www.exploringarduino.com/content/ch13. It's attached as a zip file to this Step. Add it to your Arduino IDE by going into Sketch > Include Library > Add .ZIP Library and then select the zip file you downloaded. Then include it into your sketch. Other libraries required for this sketch are the SD.h, Wire.h, and LiquidCrystal.h, all of which can be downloaded and included from within the Arduino IDE.
Most of the code here is taken from the book "Exploring Arduino" by Jeremy Blum. After you connect the pins are per the instructions in the last step and run this code, Voila! You are done.
if (hour == "11" && voltage <= 0.30 || hour == "12" && voltage <= 0.30 || hour == "13" && voltage <= 0.30|| hour == "14" && voltage <= 0.30)<br>  {
    digitalWrite(relay, LOW);
    Serial.println(F("Morning Alarm"));
    //Printing state to LCD. Optional.
    lcd.setCursor(8, 1);
    lcd.print("HIGH");
  }
  else if ( hour == "10" || hour == "15" || hour == "16")
  {
    digitalWrite(relay, HIGH);
    Serial.println(F("Morning Alarm"));
    //Printing state to LCD. Optional.
    lcd.setCursor(8, 1);
    lcd.print("LOW ");
  }
  else
  {
    digitalWrite(relay, HIGH);
    Serial.println(F("Off state"));
    //Printing state to LCD. Optional.
    lcd.setCursor(8, 1);
    lcd.print("OFF ");
  }
This is the logical statement used to run the Arduino. The voltage value in the first statement can be changed according to the amount of sunlight you need to run the AC unit. In this case, we are only testing for sunlight within the four hours between 11:00 am and 3:00 pm. Only within these hours if there isn't enough sunlight, the AC unit is supposed to go to low power consumption mode. This is to prevent DC-AC from overloading or going into error mode on a cloudy day.