Smoothly Animated Robot Eyes on OLED Displays With the RoboEyes Library
by FluxGarage in Circuits > Robots
13240 Views, 23 Favorites, 0 Comments
Smoothly Animated Robot Eyes on OLED Displays With the RoboEyes Library
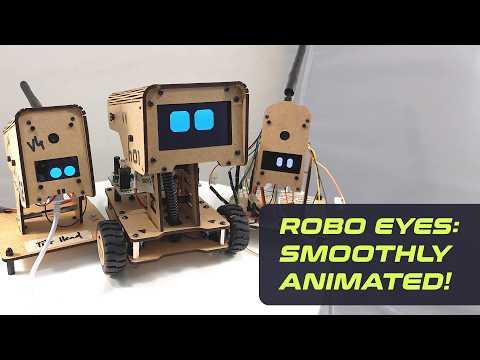

A few weeks ago I started to create my own custom-made robot. As a designer, I started with a clear focus on the robot's styling and personality. And after I've prepared several lasercut MDF robot heads and chassis, it was time to create the robot's face, especially THE EYES.
My aim was to create monochrome eyes in the typical robot pop-culture style, as they can be seen in the movie Wall-E or at robot toys like cozmo or vector. I wanted the eyes to be fluidly animated, offering several mood expressions with smooth movements and transitions between all different states. Additionally, I wanted to be able to realize several different eye shapes that can simply be defined through a set of generic variables.
With that purpose in mind, I wrote the open source FluxGarage RoboEyes Arduino library that made all of this possible (download link below).
And whereas there are already two videos available on youtube that cover all the library's details (see videos above), I here want to show you how to build the "configuration board" as shown in the first video. It's a simple breadboard circuit that allows to discover the library's capabilities in a playful way.
*Update* Just found this great Wokwi simulation of the configuration board, created by an unknown user:
Supplies

Download the FluxGarage RoboEyes Library From Github:
- Navigate to github.com/FluxGarage/RoboEyes
- Choose "Code > Download Zip"
- In the Arduino IDE, navigate to "Sketch > Include Library > Add .ZIP Library" and select the downloaded zip-file
Gather the Following Parts:
- Fullsize breadboard
- Arduino Nano R3 or compatible microcontroller
- An I2C oled display with 1306 or 1309 driver chip
- 7 pushbuttons
- A joystick module (optional, is used to manually change the eye's position)
- Jumper wires
- A USB cable to upload sketches to your controller
- Some adhesive (washi-)tape to label the buttons (optional)
Prepare Breadboard Layout

- Attach the Arduino, the display and the buttons to the breadboard. I'd suggest to use similar positions for each component as shown in the image.
- Connect the Arduino's 5V out to the breadboard's plus-line and the Arduino's GND to the breadboard's minus line.
- It's helpful to also wire the just connected plus and minus lines with the respective plus and minus lines on the opposite side of the breadboard.
- Connect the display's...
- ... GND to the breadboard's minus line
- ... VCC to the breadboard'S plus line
- ... SCL/SCK to the controller's I2C serial clock pin (=A5 on Arduino Uno or Nano R3)
- ... SDA to the controller's I2C serial data pin (=A4 on Arduino Uno or Nano R3)
- Connect each pushbutton's upper right leg to the breadboard's minus line (see picture for reference), then connect each pushbutton's upper left leg to the following Arduino pin (no resistors needed, we'll use the Arduino's internal pullup resistors):
- Mood button to D5
- Laugh button to D6
- Confused button to D7
- Flicker button to D8
- Mode button to D9
- Mode + button to D10
- Mode - button to D11
- For the joystick, connect everything as follows:
- Joystick's GND to breadboard's minus line
- Joystick's +5V to the breadboard's plus line
- Joystick's VRX to Arduino pin A0
- Joystick's VRY to Arduino pin A1
- Joystick's pushbutton (SW) to Arduino pin D12
Upload Sketch
Once the hardware is ready to go, connect your arduino to your computer. In the Arduino IDE, go to "file > examples > FluxGarage RoboEyes for OLED Displays" and open the "ConfigurationBoard" example.
Then upload this sketch to your Arduino.
Play Around
Now it's time to play around with the board and to create your custom eye shapes, if you want to. Initially, the eyes start with the "autoblinker" and the "idle mode" turned on, meaning the eyes will blink and reposition automatically.
Using the Joystick and its Button
By pushing the joystick's button, you can turn the idle mode off, meaning you can then freely position the eyes with the joystick. Pushing the joystick's button again, reactivates the idle mode.
Mood Button
By pushing the mood button, you can switch between the different mood types. Currently, "tired, angry, happy and default" are available.
Trigger Animations
Pressing "laugh, confused or flicker" triggers the respective animations, while laugh and confused are oneshot animations and flicker is an infinite loop animation that will be "played" as long as you hold the button (the library allows to set the flicker on or off, as well as setting a pixel value for the amplitude).
Eyes Configuration Buttons
The "mode" button allows you to switch between the eye manipulation modes listed below. Use the plus or minus button to increase or decrease the values inside of each "mode". Behind each mode title that will be displayed shortly, there is the current value of the width, height, border radius and the space between. This can be helpful if you want to write down the values for later use, since the configuration won't be saved when unpowering your arduino.
Modes:
- Width
- Height
- Border radius
- Space between
- Cyclops toggle
- Curiosity toggle
- Predefined positions
Post Pictures or Videos of Your Robots With RoboEyes
You have now everything at hand to equip your own robot with smoothly animated eyes.
I'm always very curious about what you people create with this library and I'm happy when you post pictures or video links in the comments section here or below my videos on Youtube.
Let's rock! :)