SmartBin Using Netduino 3 WiFi & ClicksendSMS Gateway
by brijesh_sng in Circuits > Microcontrollers
923 Views, 1 Favorites, 0 Comments
SmartBin Using Netduino 3 WiFi & ClicksendSMS Gateway
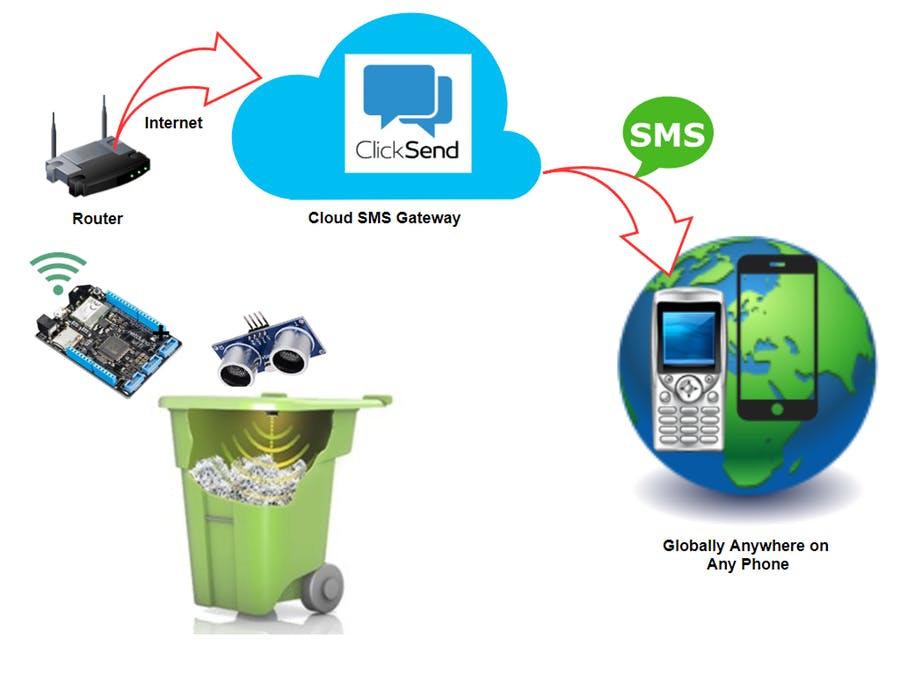
The idea of this project is to monitor the garbage level of your home or society's waste bin remotely using IoT technologies. So, this avoids the overflow of the bin by timely informing to your local waste collection authorities. Here to demonstrate the project I made the prototype using Netduino 3 WiFi development board and the ultrasonic sensor for hardware build and connected device to ClickSend Cloud SMS service via the Internet. So, this enables to send SMS alert to any mobile phone number without the need for a dedicated SIM card anywhere in the world.
What You Need for This Project:
Hardware:
1. Wilderness Labs (Netduino) Netduino3 WiFi x1
2. Ultrasonic Sensor - HC-SR04 x1
Software Apps and Online Service:
Setting Up a Development Environment
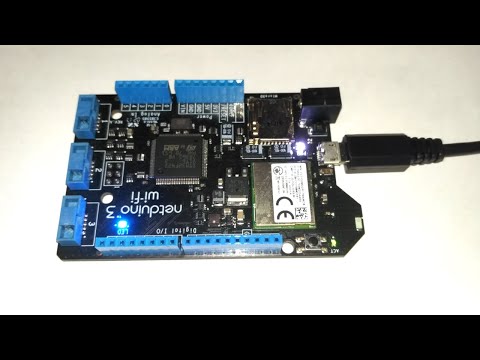
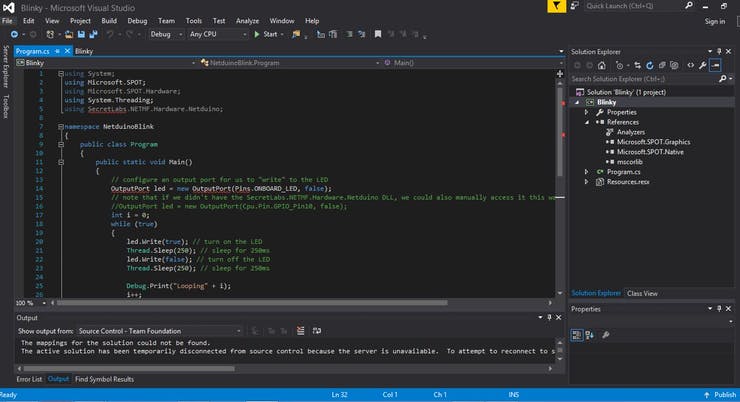
Visit the Link-> http://developer.wildernesslabs.co/Netduino/About/Downloads/
to download various software under Development Environment and follow the sequence mentioned on the link during installation.
For Windows user
1) Visual Studio 2015.
2) .NET Micro Framework (.NETMF) v4.3.2 - QFE2 SDK
3) .NETMF Plugin for Visual Studio 2015
4) Netduino SDK
You will have to signup first on Wilderness Labs developer site to download .NETMF Plugin and Netduino SDK. For Mac follow steps as given on the official site.
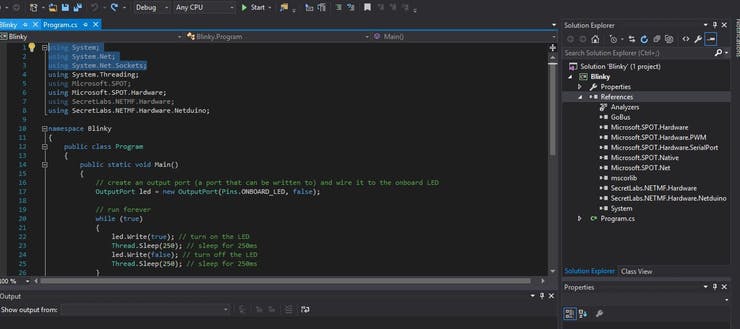
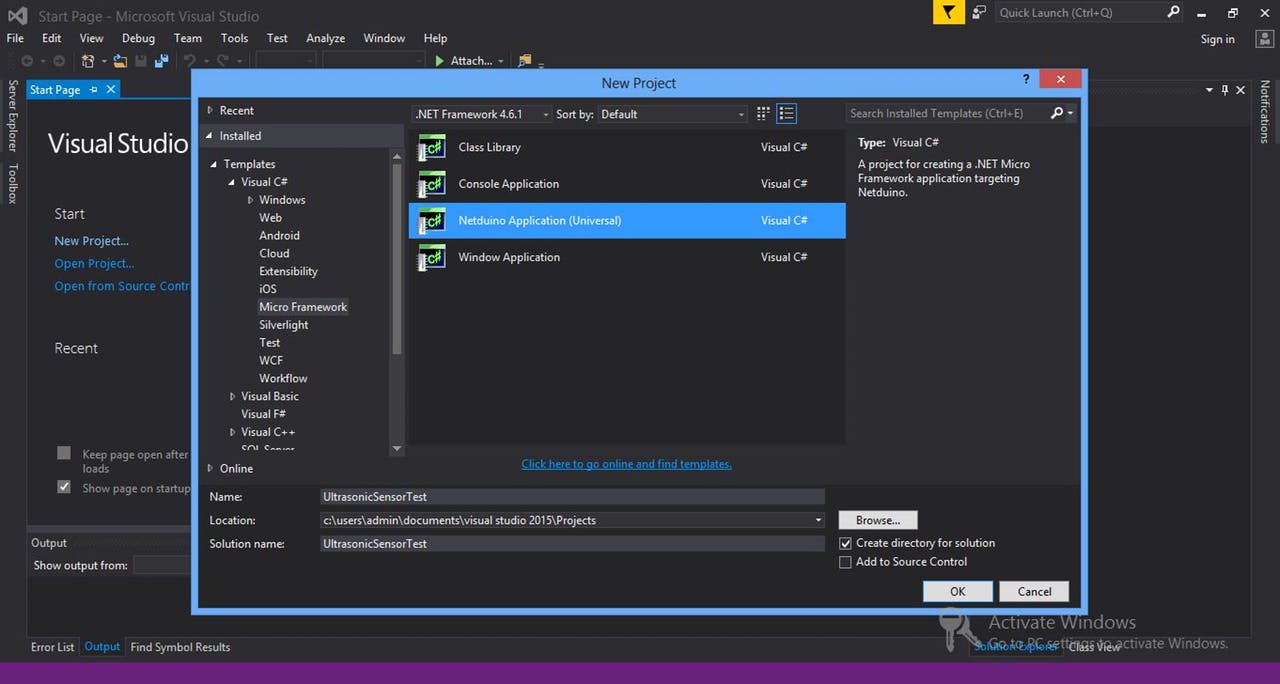
From here we can proceed to write our first sample test code for testing. Follow steps as shown in the video above to create your first application. You can copy the code of blinky_code.cs file to program.cs
Another way of Creating Application:
Follow steps mentioned on the link: http://developer.wildernesslabs.co/Netduino/Getti...
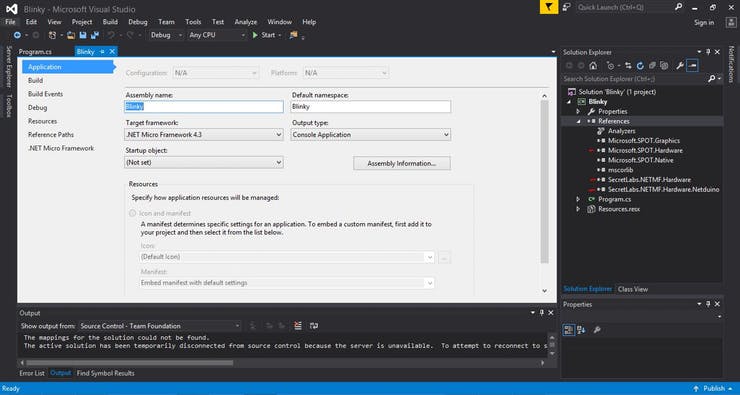
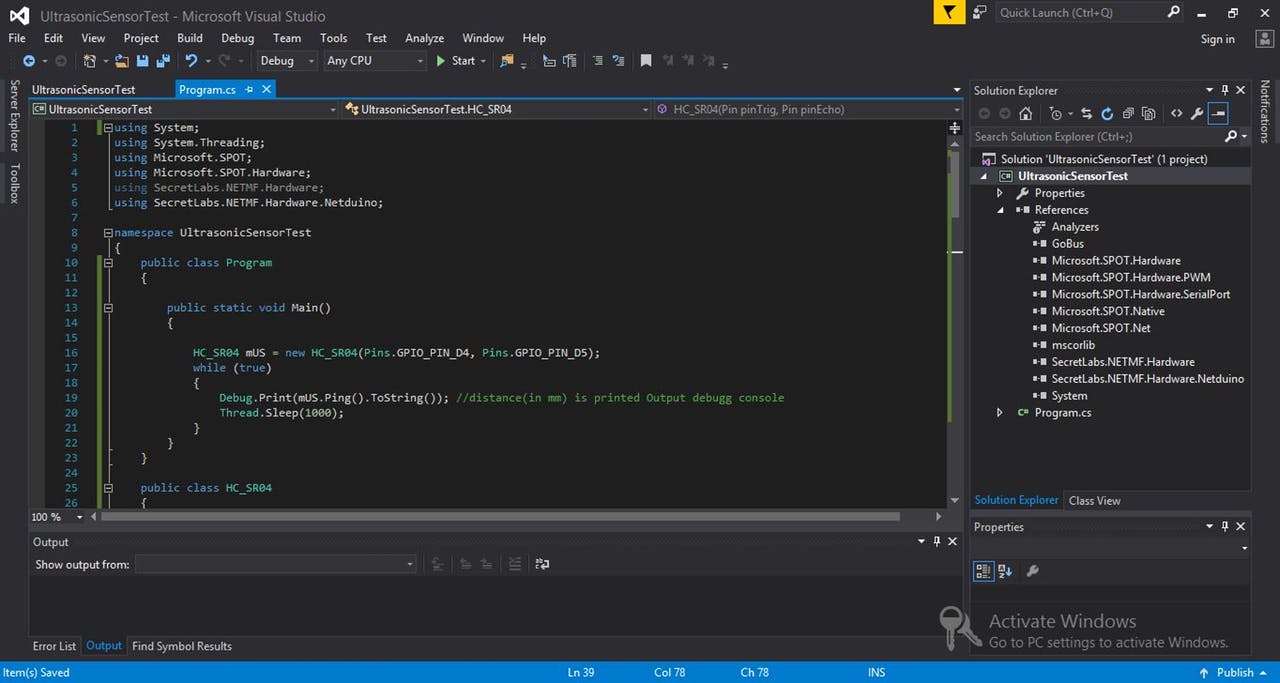
Only things you need to remember in both cases is setting .NET Micro Framework 4.3 as target framework and reference must contain -> Microsoft.Spot.Hardware, SecretLabs.NETMF.Hardware and SecretLabs.NETMF.Hardware.Netduino
as shown in the above images.
Otherwise, you will get an error as shown in the last image, with red underlines.
This happens when you go by creating a console application. Because by default it won't add reference needed for Netduino. So, you have to add manually. If you follow by creating Netduino Application, then by default it takes those files in references. I have shown both because we need to follow this procedure for further section explained next. Especially how to add references for various needs.
Downloads
Configure WiFi Setting of Netduino 3 Wifi
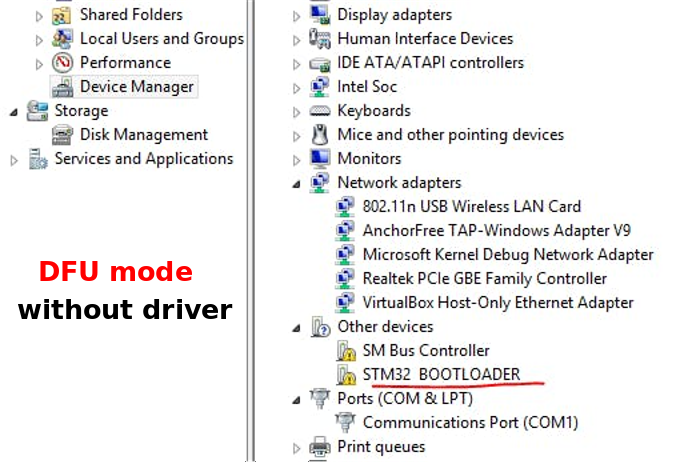
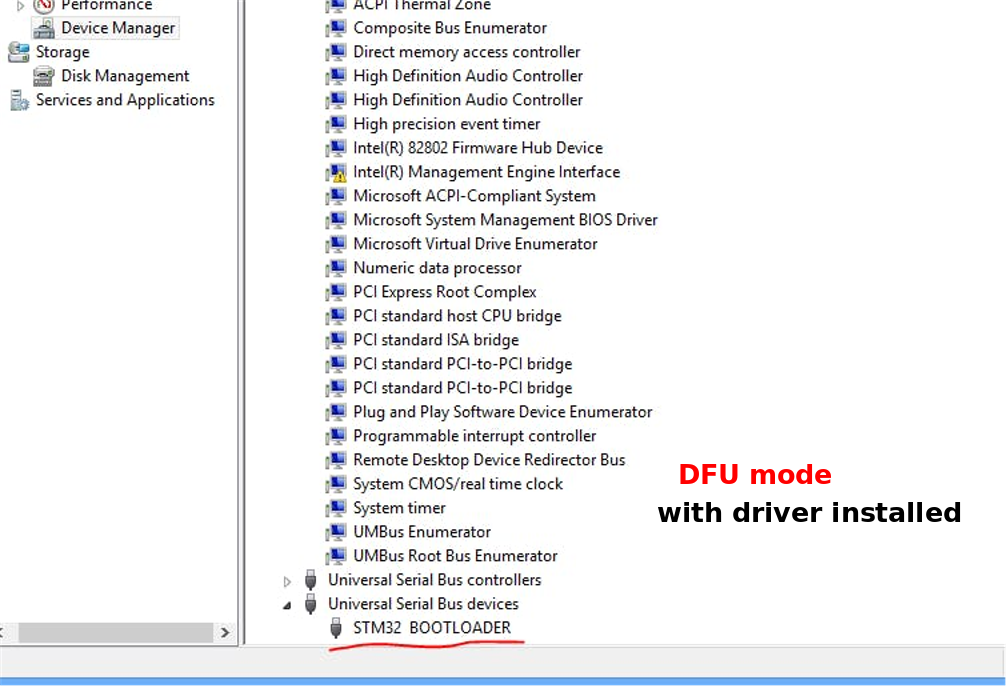
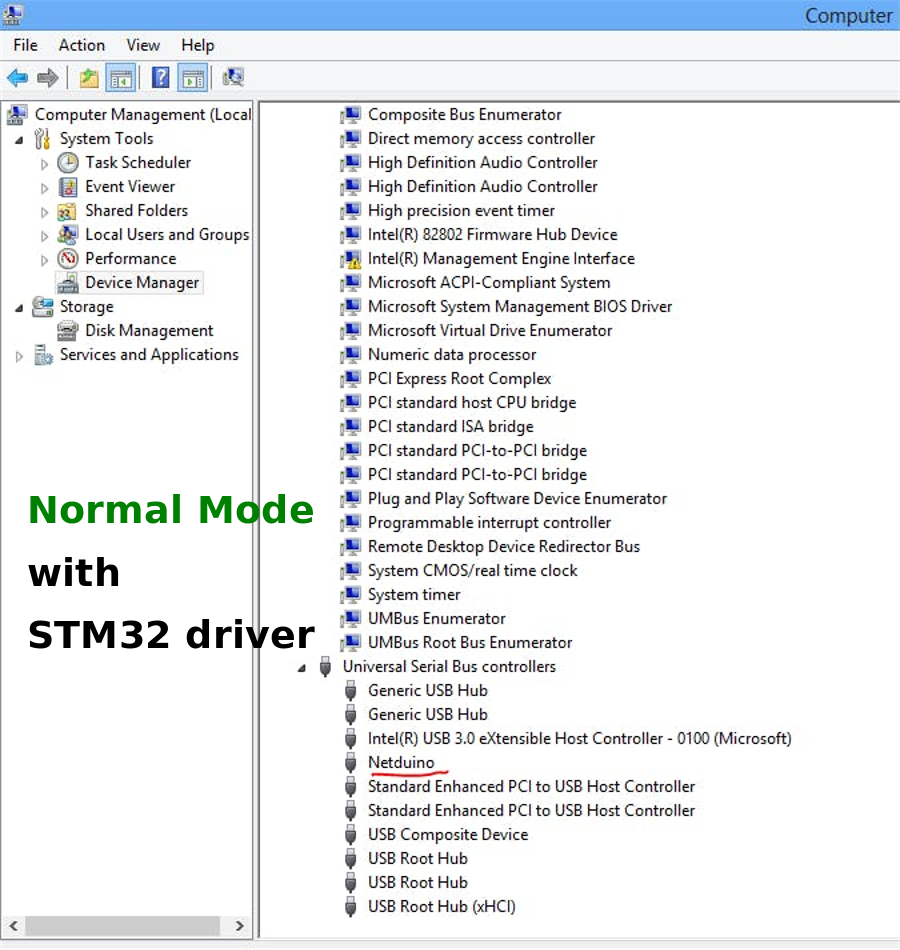
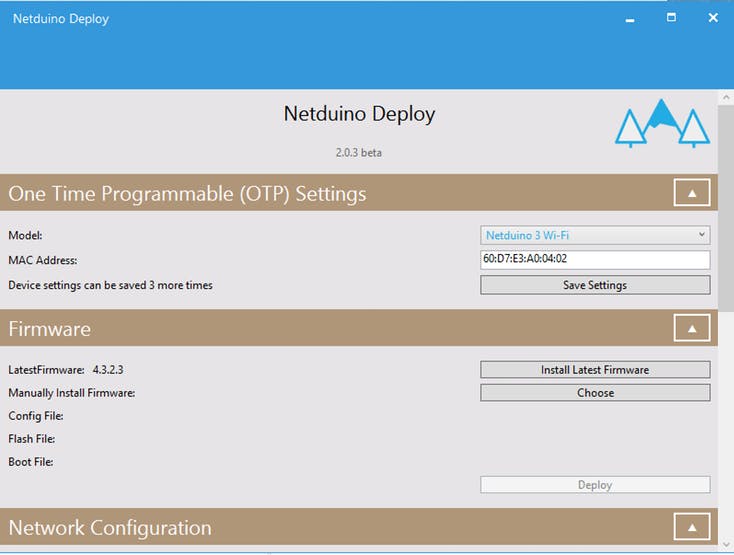
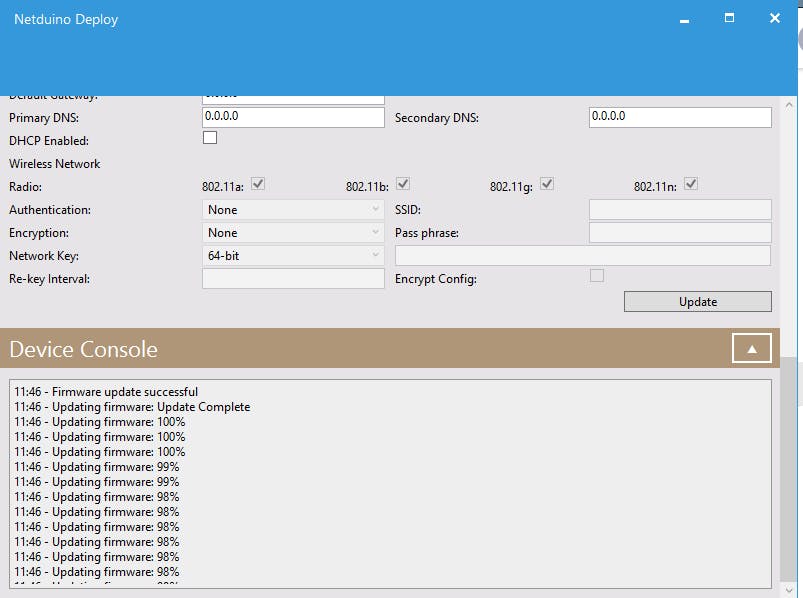
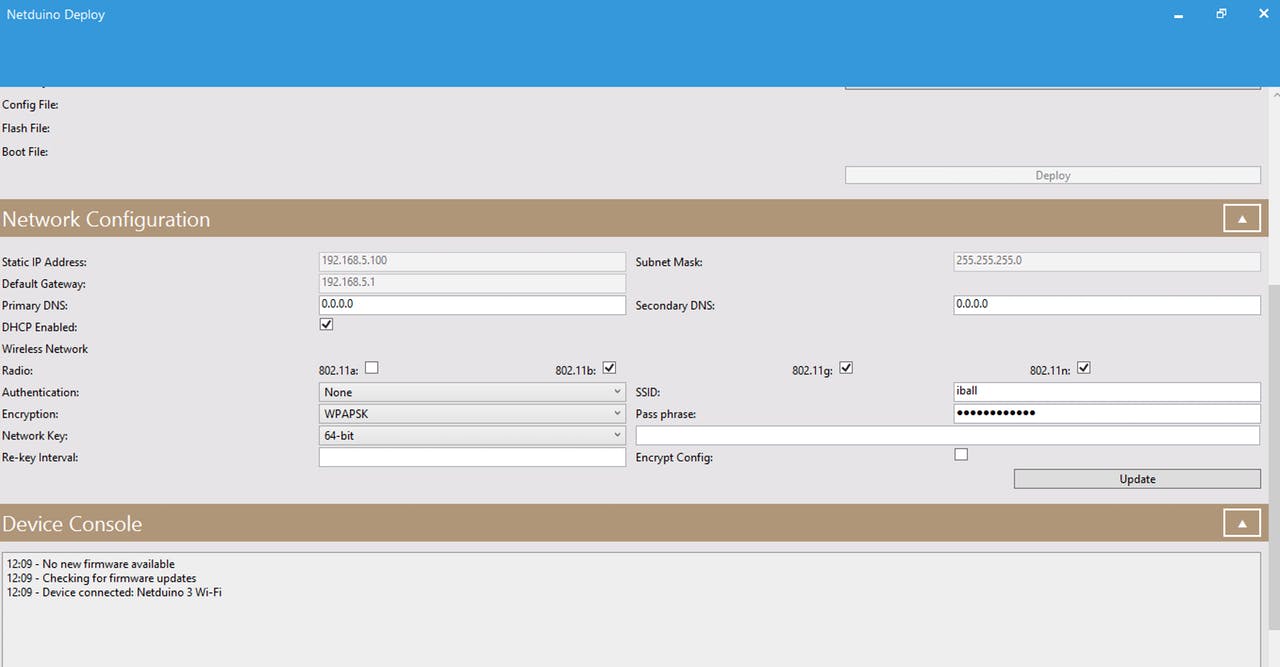
To begin with the configuration you need NetduinoDeploy application and STM32 driver if not already installed by visiting same download link under Firmware Updater and Configuration Tool. Again to download NetduinoDeploy app you will have to sign in.
Once done you can verify with the screenshot of the device manager in a different mode(normal & DFU) of Netduino board as shown in the above images.
To put Netduino in DFU mode you need to press switch available onboard then plug the USB power cable keeping button pressed and after this release.
Once done then start NetduinoDeploy.WPF.exe and first update the firmware of Netduino to the latest one as shown in the images above.
Now you can add WiFi Network setting, for my router, it is WPA2 and 128bit key encryption. Check for your router vendor's site to get that information. The screenshot is shown in above images for network setting.
Note: If you stuck with any problem while performing firmware update or WiFi settings because I faced some difficulties and finally resolved with the help on the forum. So you can post any difficulties on the forum or comment below -> https://community.wildernesslabs.co/t/how-to-conn...
Interfacing Ultrasonic Sensor
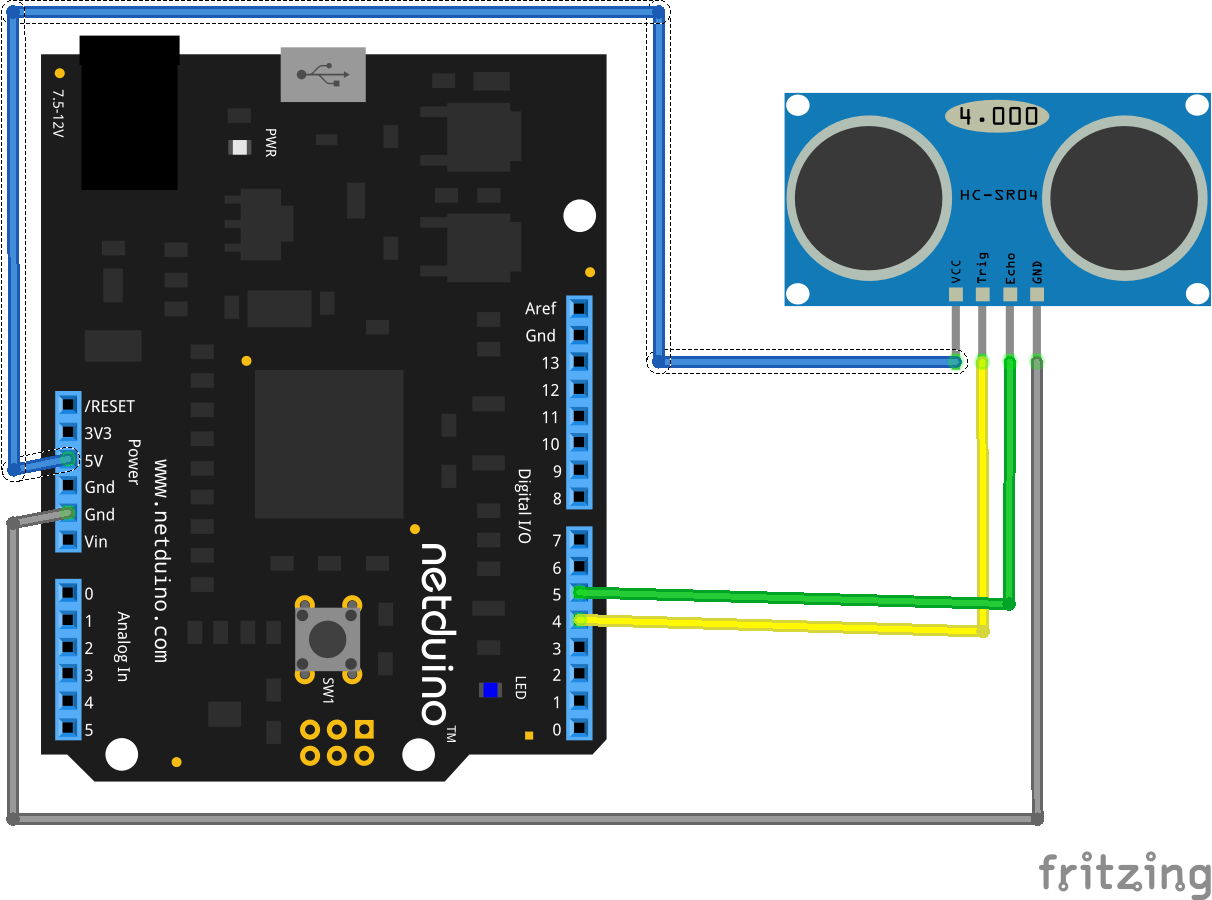
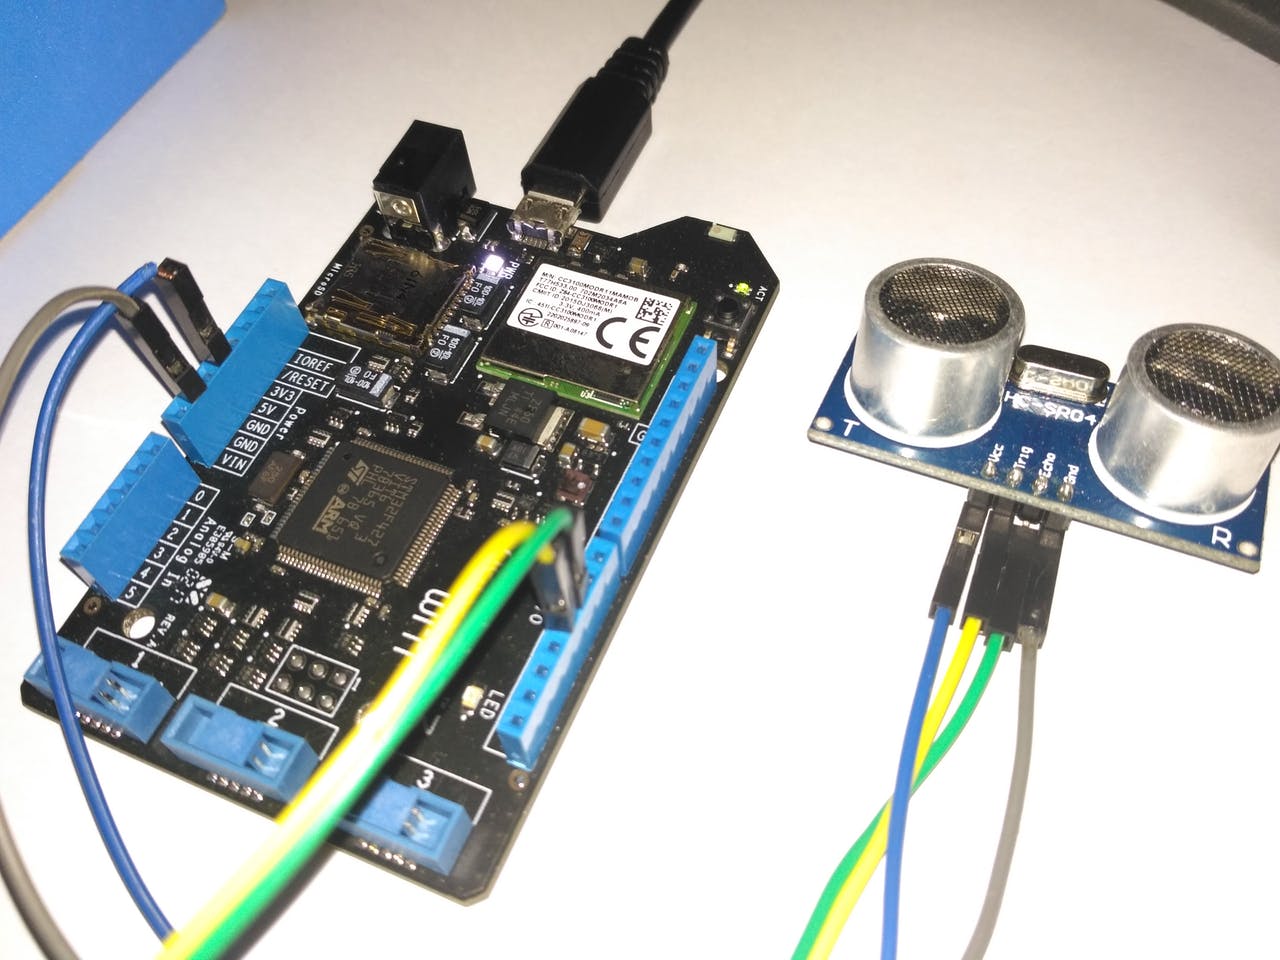
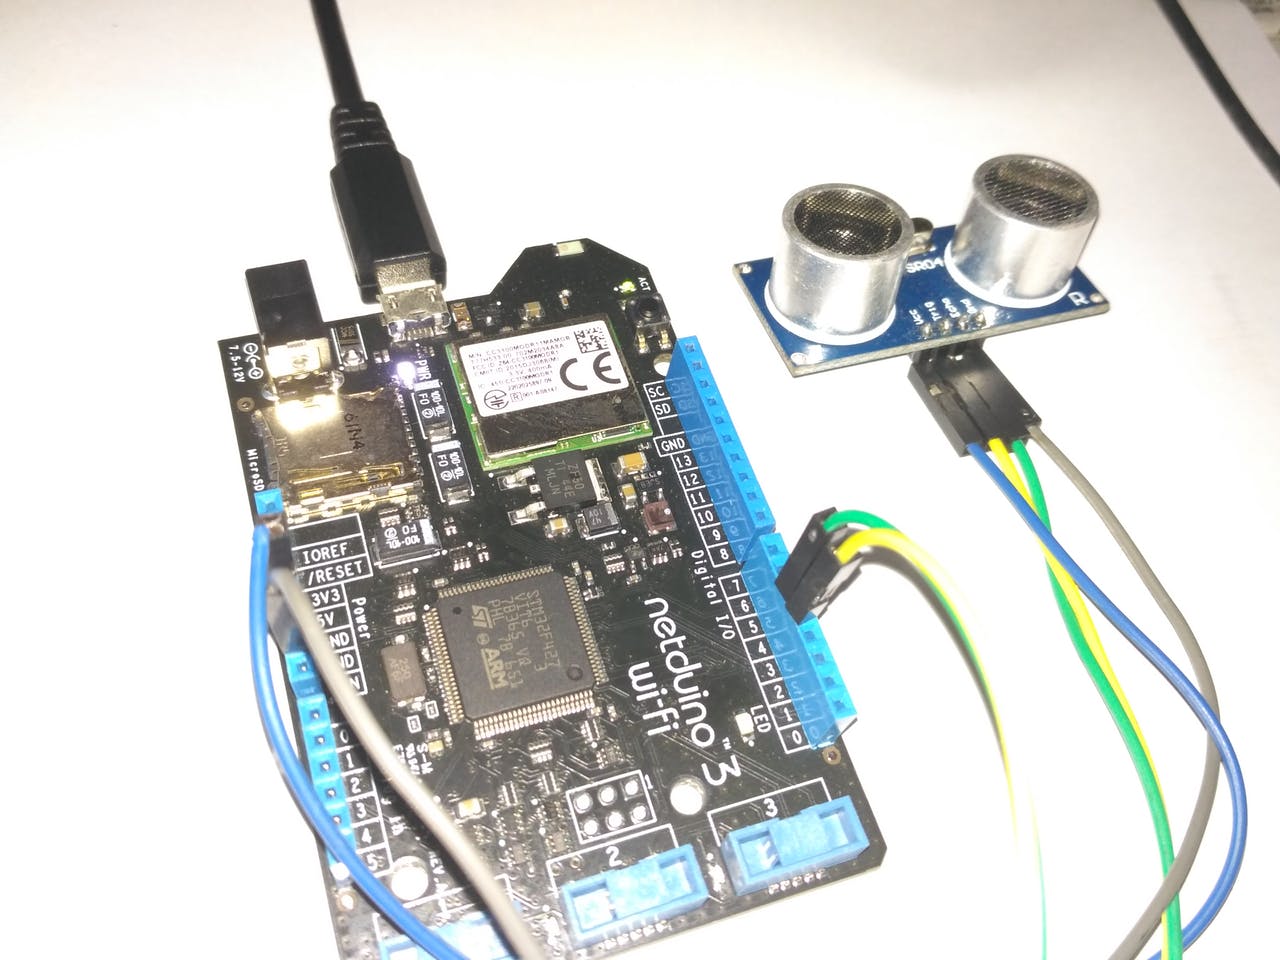
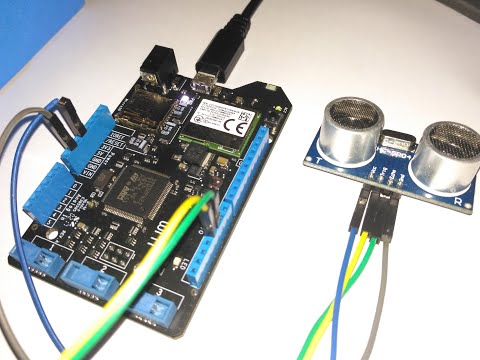
Here I am using the HC-SR04 ultrasonic sensor to detect the fill level inside Bin. Make a connection as shown in the image above.
After this create a test application and copy code of ultrasonicsensortest_code.cs provided below
Code is simple self-explanatory with comments if still facing issue comment below.
Downloads
Getting ClickSend Cloud API Key
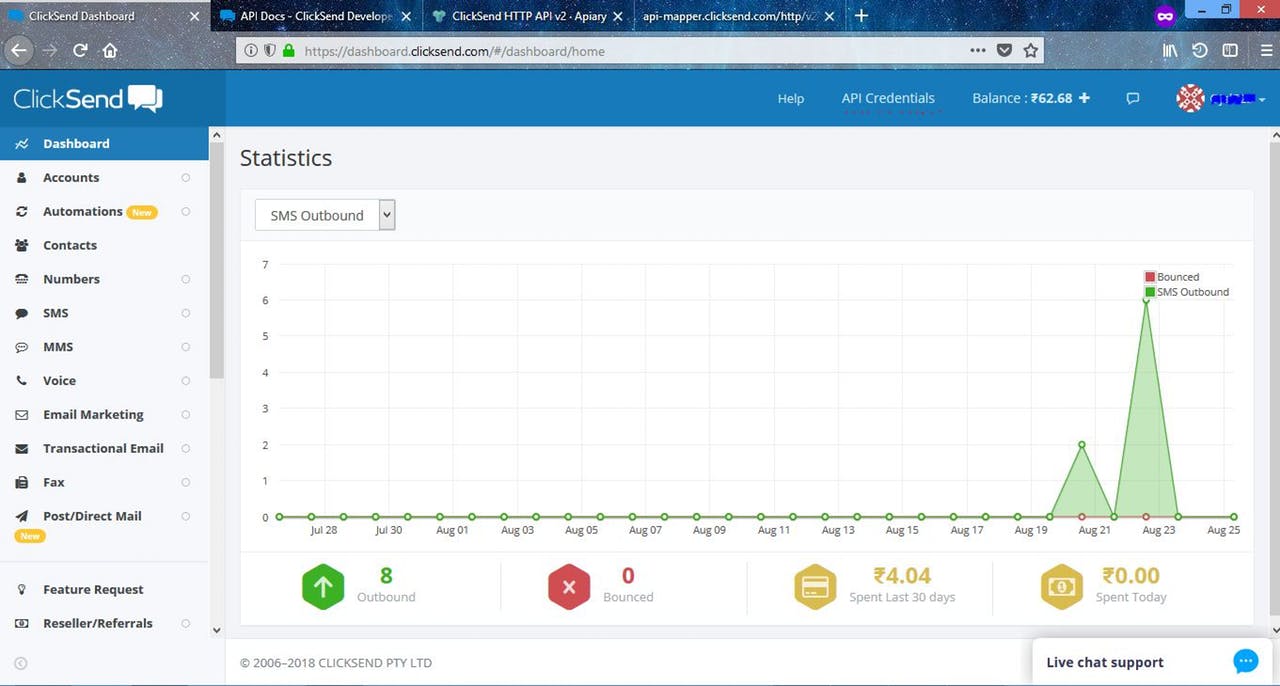
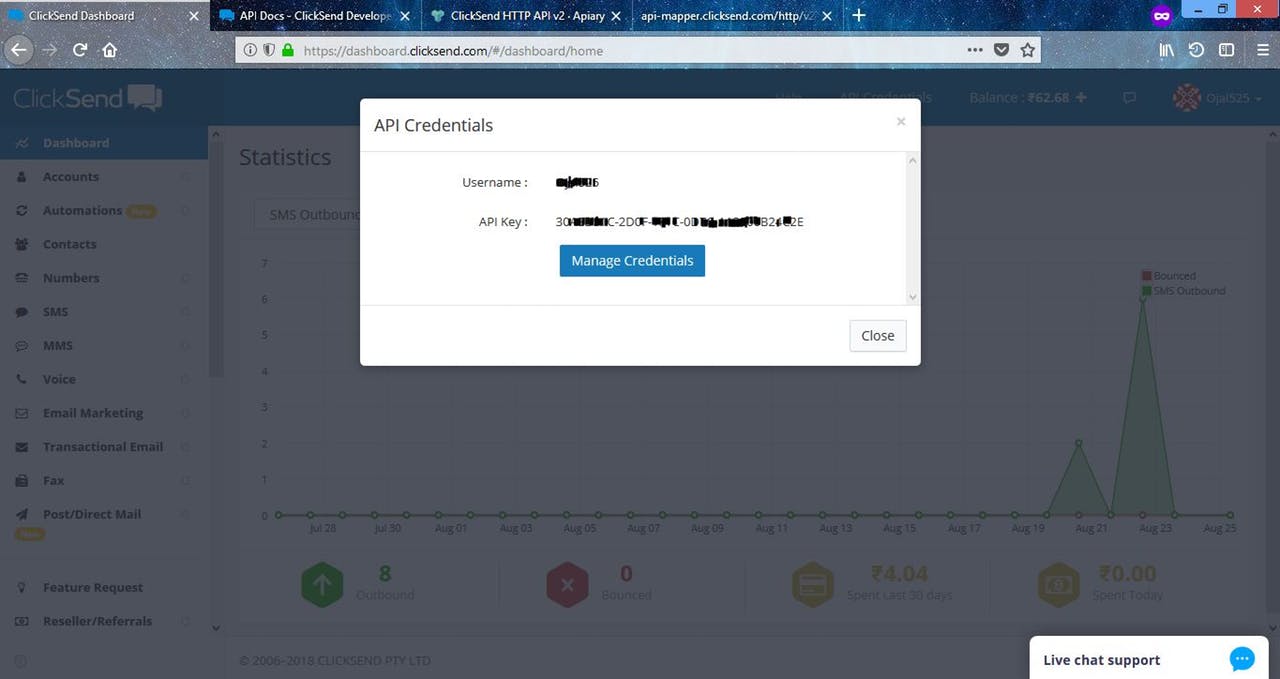
Visit https://www.clicksend.com/in/ and signup to create your account on ClickSend Cloud SMS gateway service. For the trial, service provides you with some initial balance.
Once done, then login to view Dashboard where you will get credential needed to use service. Click on API Credential on top to copy your username and API key, as shown in the above images.
Testing ClickSend With Browser
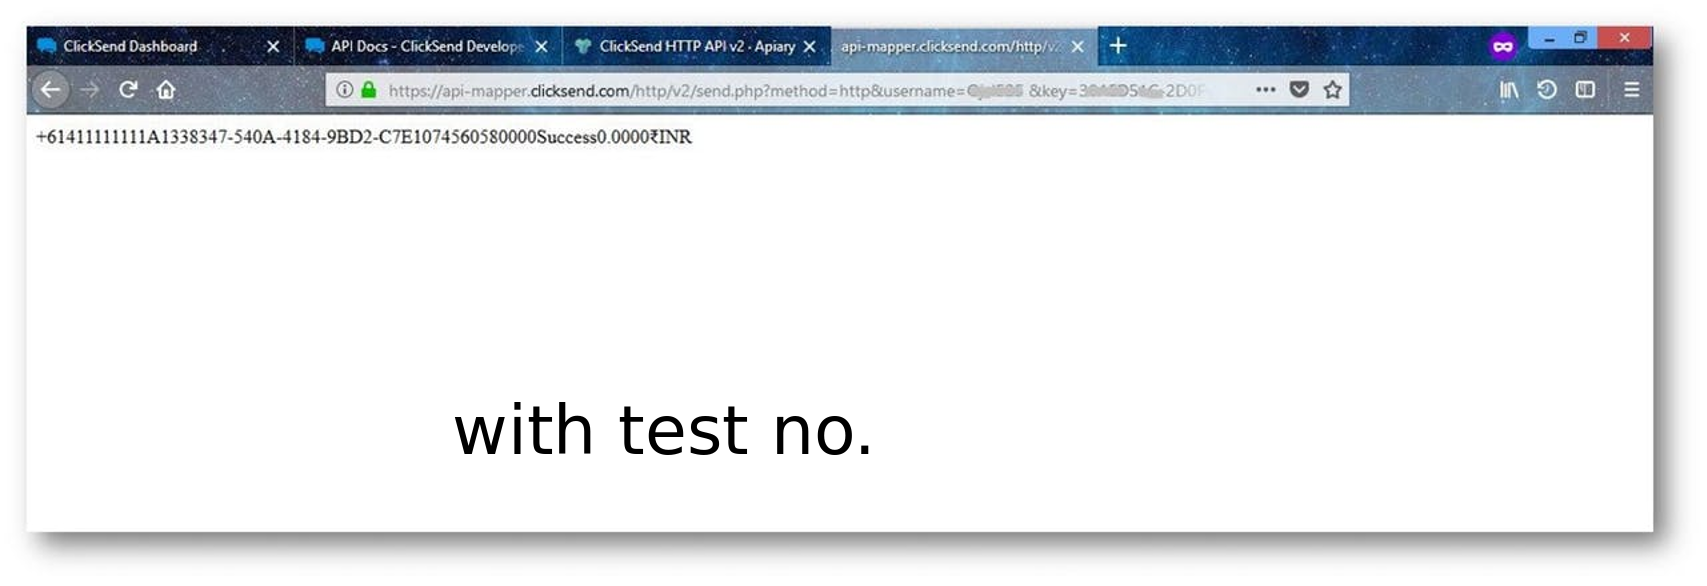

This service supports different protocols(Rest, HTTP, SMTP, SMPP, and FTP). Detail documentation is available on link https://developers.clicksend.com/docs/
For this project, I am using HTTP/ HTTPS protocol whose documentation is available on link https://clicksendhttpapiv2.docs.apiary.io/#refere...
On the above link of HTTP protocol documentation, you will find the testing method and trial numbers. You can use these numbers without any charges.
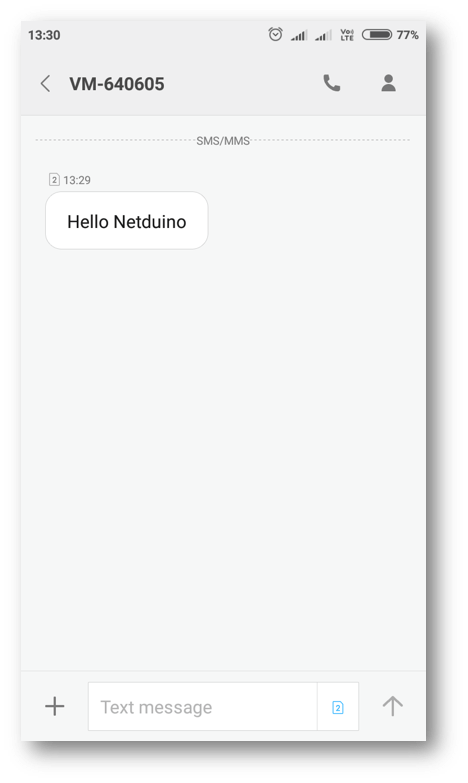
Below is some test which you can try out. Simply copy those https link with your username and password in your browser. So when you hit enter then you will receive a response as shown in the above images for two cases. Also, the screenshot of mobile phone SMS is shown for the real number test case.
Case 1: With test Number, replace username and key with your
https://api-mapper.clicksend.com/http/v2/send.php?method=http&username=YOURUSERNAME&key=YOURAPIKEY&to=+61411111111&message=hello
Case 2: With a real number,
https://api-mapper.clicksend.com/http/v2/send.php?method=http&username=YOURUSERNAME&key=YOURAPIKEY&to=+917955555555&message=Hello%20Netduino
HTTP/HTTPS Request Testing on Netduino 3 WiFi
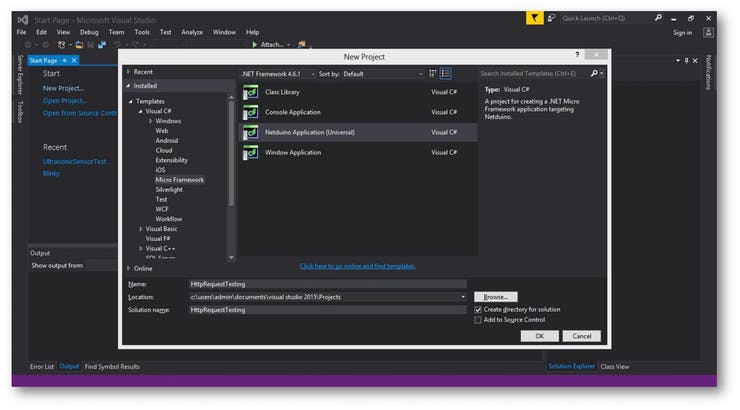
Here I will show how to make HTTP/HTTPS calls using Netduino and try the same example shown in the above section to call ClickSend API with Netduino instead of a browser.
You can get sample code available on Link- http://developer.wildernesslabs.co/Netduino/Input...
which show how Netduino connects to the network, then gets IPAddress and finally makes the simple HTTP request to google.com Let's create an HTTP Request application
I copied the same code but got errors, as shown in below steps and solution to resolve those.
Resolving Compile Error
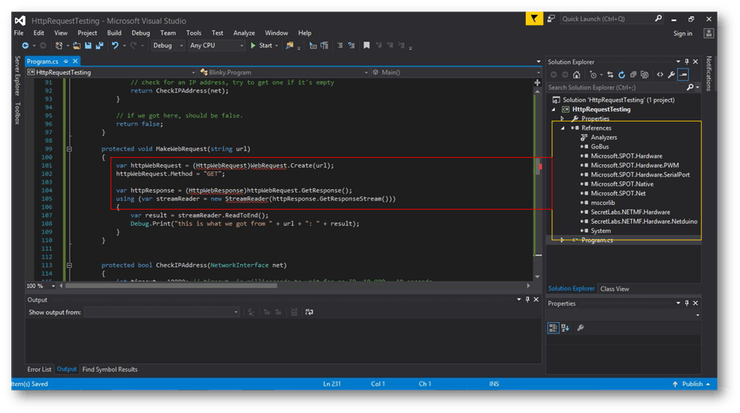
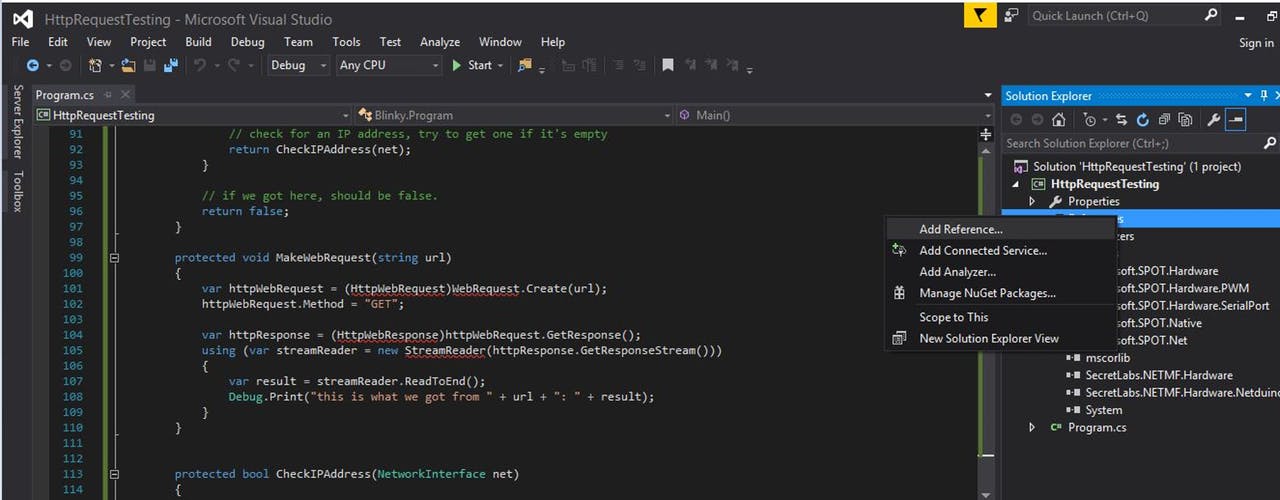
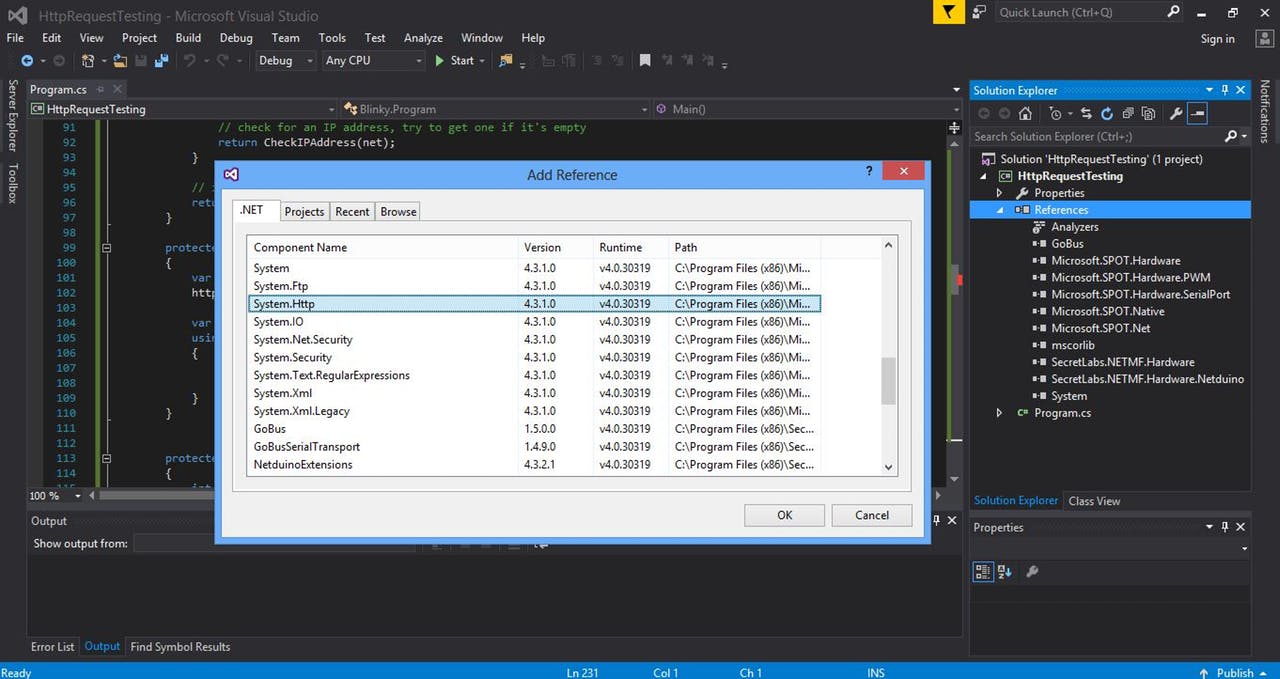
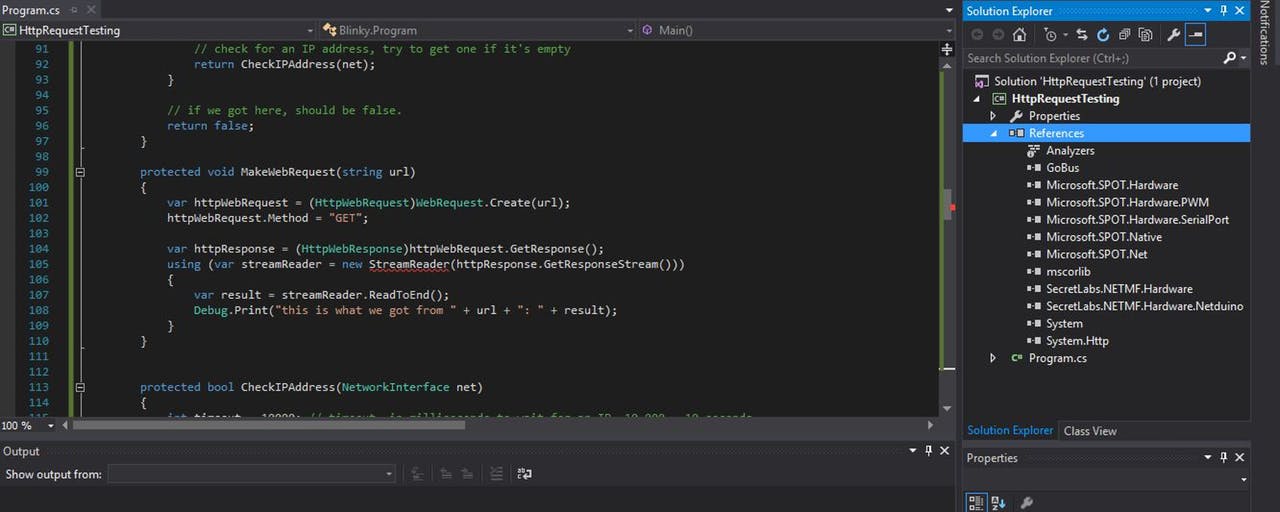
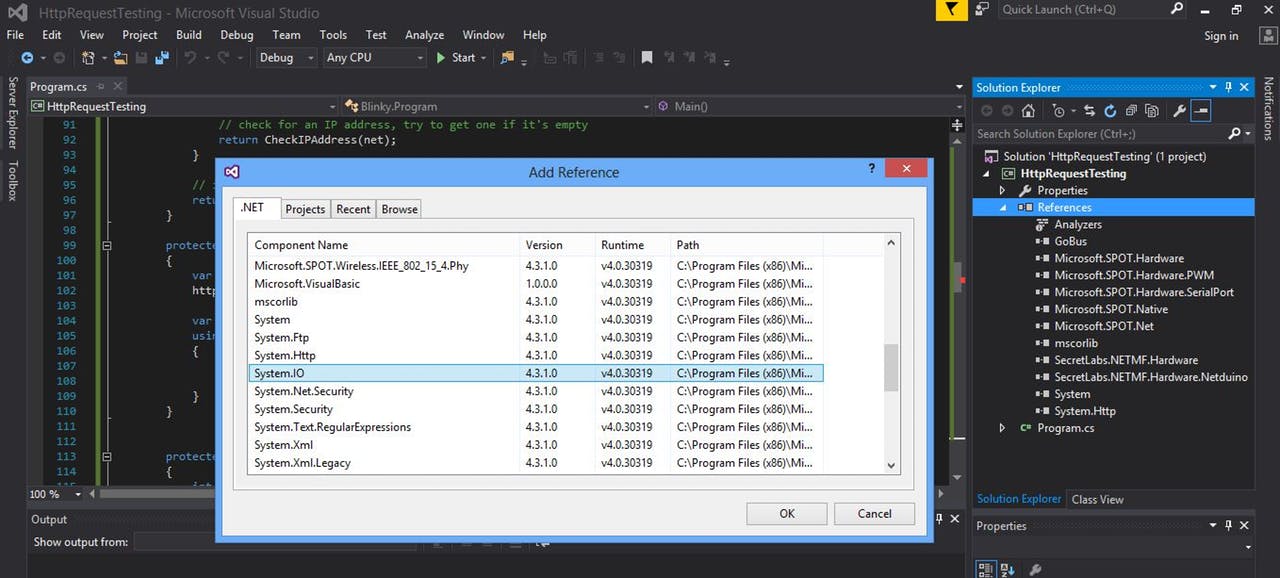
Errors pointed in the red box. Also, look at the marked reference section because here we have to add references to removed those errors.
Simple just right click on References then click on add reference, next select particular reference and click on OK. We need to add two references System.Http(related to HttpWebRequest,WebRequest and HttpWebResponse) and System.IO(related to StreamReader)
After this compile issue resolved but faced another issue during runtime after deploying code into the board with the following error(Error: ff000000) shown in below steps and solution. Reason marked with an amber-colored box.
Resolving RunTime Error
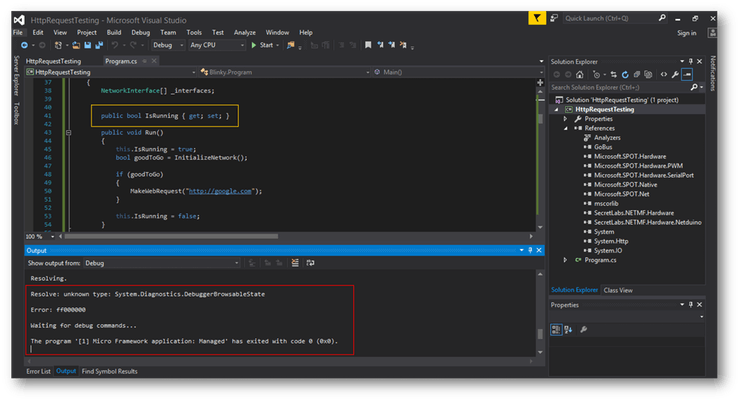
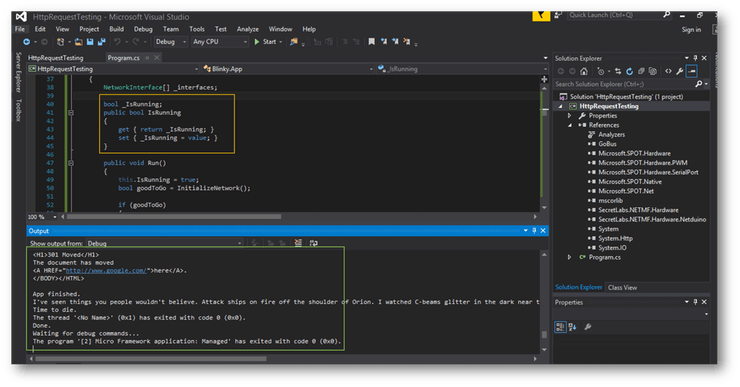
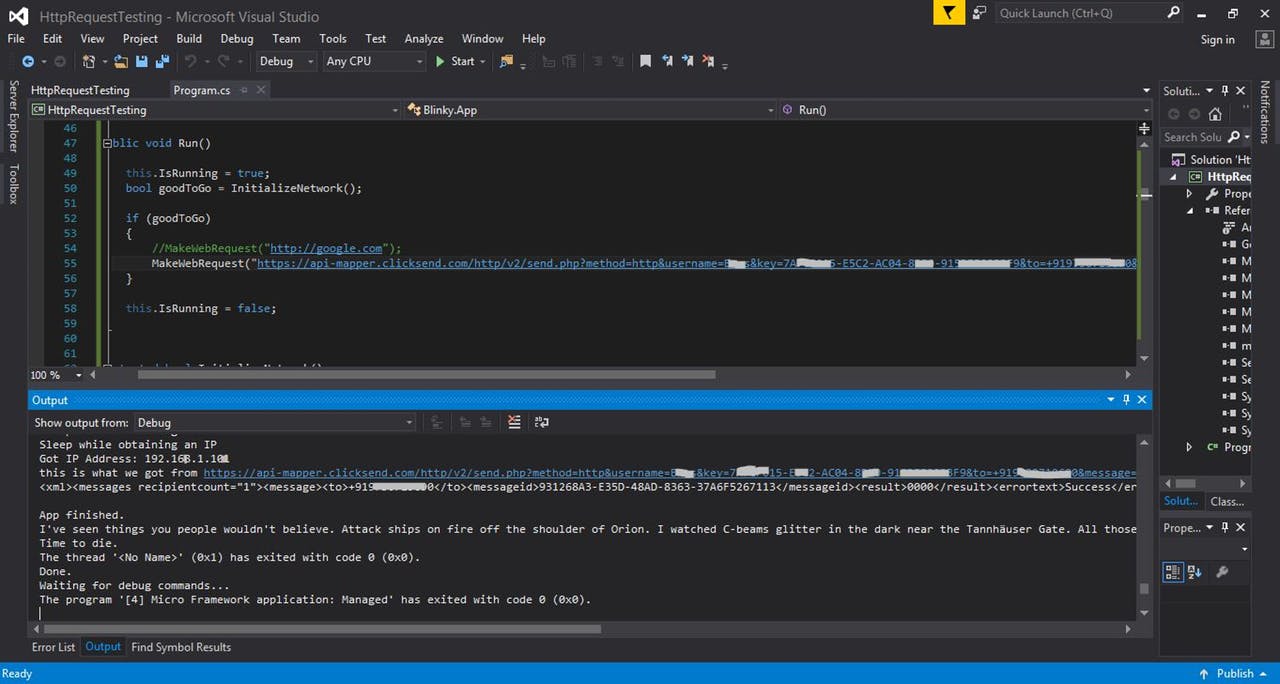
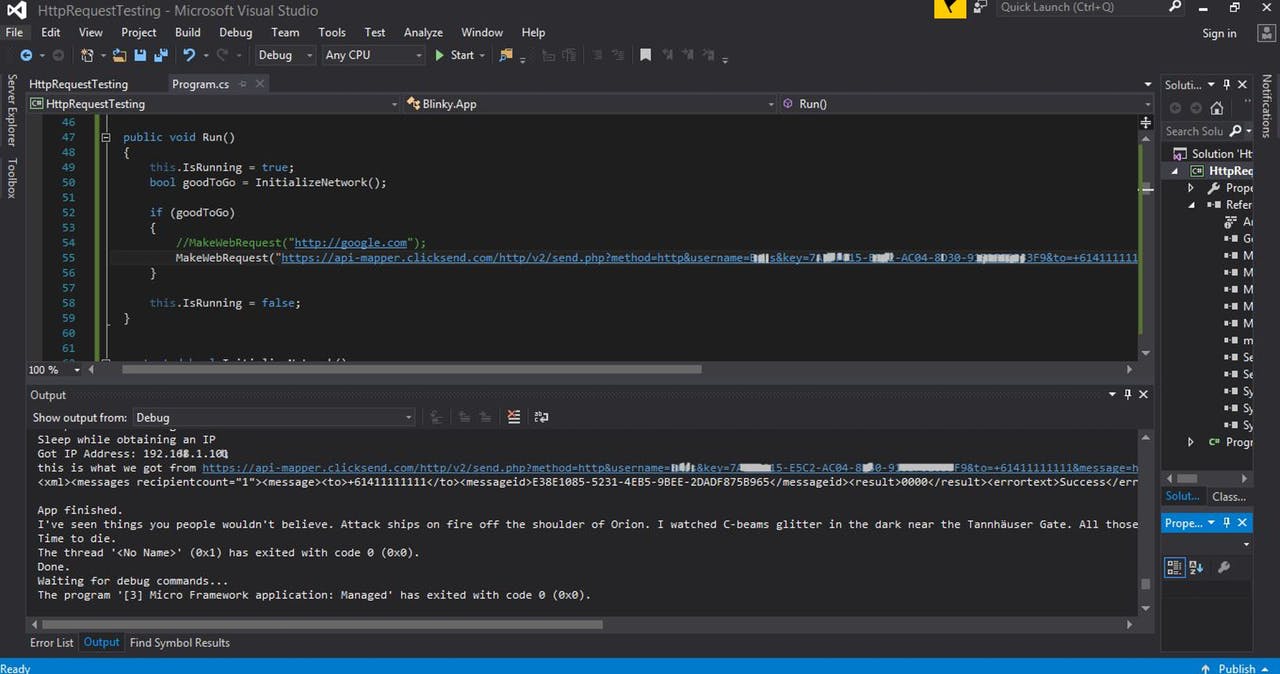
So, the required changes in code are
bool _IsRunning;
public bool IsRunning
{
    get { return _IsRunning; }
    set { _IsRunning = value; }
}
Get below test code (httprequesttest_code.cs) with correction. Just make changes to comment and check both conditions of ClickSend API call with the test number and real number.
if (goodToGo)
{
  MakeWebRequest("http://google.com");
  //MakeWebRequest("https://api-mapper.clicksend.com/http/v2/send.php?method=http&username=YOURUSERNAME&key=YOURAPIKEY&to=+61411111111&message=hello");
  //MakeWebRequest("https://api-mapper.clicksend.com/http/v2/send.php?method=http&username=YOURUSERNAME&key=YOURAPIKEY&to=+YOURNUMBERWITHCOUNTRYCODE&message=hello");
}
Response received for both conditions shown above.
Downloads
Final Coding and Working Demo
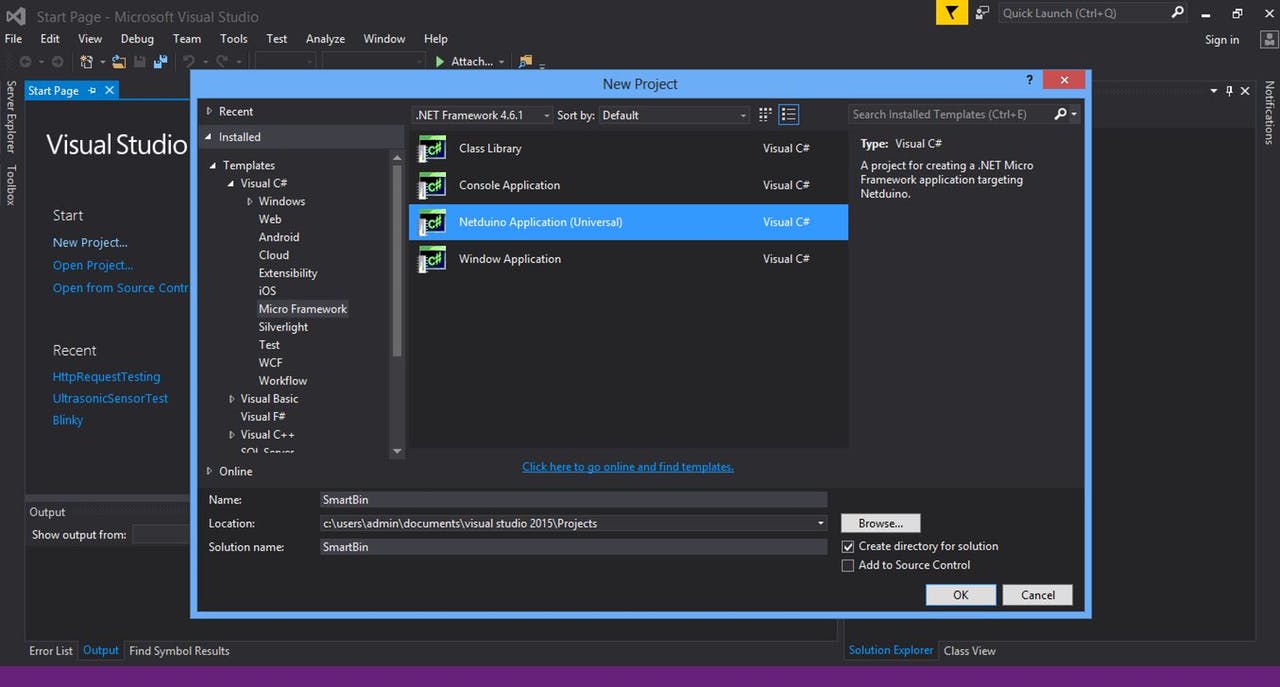
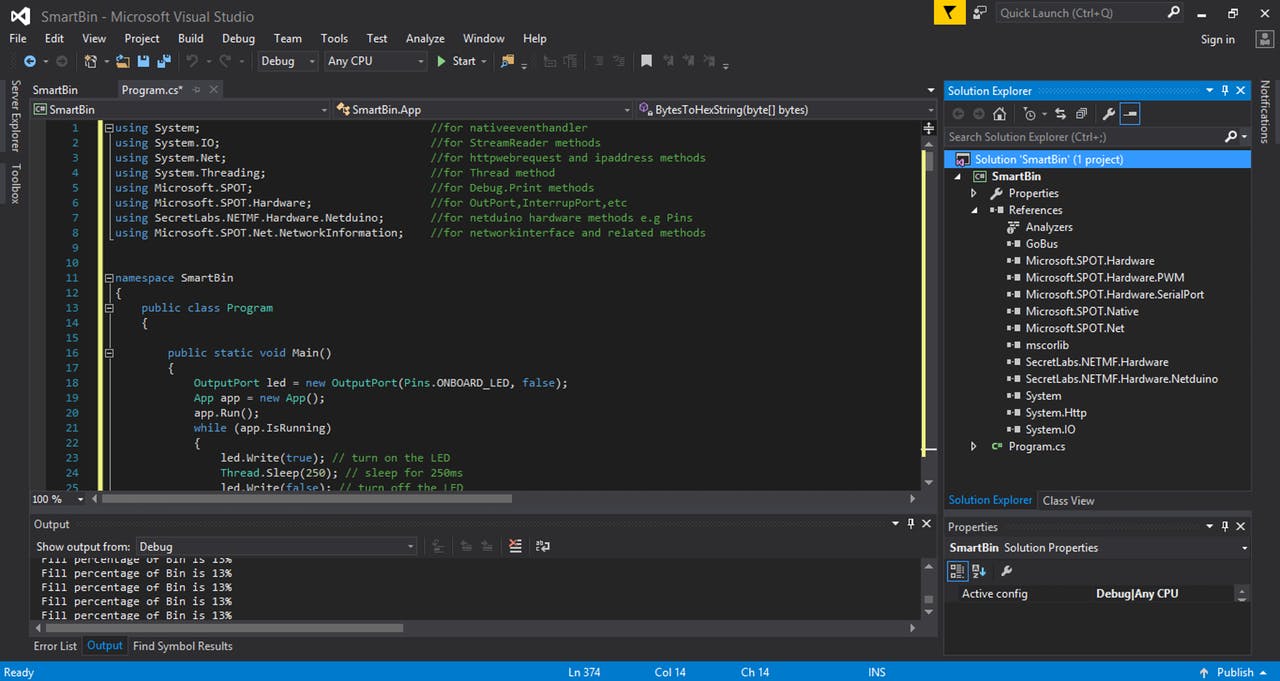
Let's now proceed to create a final application to test the actual project idea. Create a new SmartBin application as shown in the above steps and then download and copy smartbinfinal_code.cs code provided below in your application.
I have added comments to understand the need for various namespace for the application. Also, do not forget to add references System.Http and System.IO
using System;                            //for nativeeventhandler
using System.IO;                       //for StreamReader methods
using System.Net;                     //for httpwebrequest and ipaddress methods
using System.Threading;                   //for Thread method
using Microsoft.SPOT;                       //for Debug.Print methods
using Microsoft.SPOT.Hardware;                        //for OutPort,InterrupPort,etc
using SecretLabs.NETMF.Hardware.Netduino;  //for netduino hardware methods e.g Pins
using Microsoft.SPOT.Net.NetworkInformation; //for networkinterface and related methods
To final code, I have change MakeWebRequest() method of class App from protected to public
public void MakeWebRequest(string url)
so that it is accessible from the Main method of Program class, as shown below
app.MakeWebRequest("https://api-mapper.clicksend.com/http/v2/send.php?method=http&username=YOURUSERNAME&key=YOURAPIKEY&to=+61411111111&message=Please%20Empty%20WasteBin");
The working logic of code shown below:
HC_SR04 mUS = new HC_SR04(Pins.GPIO_PIN_D4, Pins.GPIO_PIN_D5);
long initialLevel;
initialLevel = mUS.Ping();
byte cnt = 1;
Debug.Print("Empty BinLevel: " + mUS.Ping().ToString() + "mm");
long currentLevel;
float fillPercent;
while (true)
{
    fillPercent = initialLevel - currentLevel;
    Debug.Print("Fill percentage of Bin is " + fillPercent.ToString() + "%");
    if (fillPercent > 80)
    {
        if (cnt == 2)
        {
            Debug.Print("More than 80% Full");
            Thread.Sleep(100);
            //replace with your ClickSend API credential and mobile phone number
            //app.MakeWebRequest("https://api-mapper.clicksend.com/http/v2/send.php?method=http&username=YOURUSERNAME&key=YOURAPIKEY&to=+61411111111&message=Please%20Empty%20WasteBin");
            app.MakeWebRequest("https://api-mapper.clicksend.com/http/v2/send.php?method=http&username=YOURUSERNAME&key=YOURAPIKEY&to=YOUNUMBERWITHCOUNTRYCODE&message=Please%20Empty%20WasteBin");
            cnt = 0;
        }
    }
    if (fillPercent > 50)
    {
        if (cnt == 1)
        {
            Debug.Print("More than 50% Full");
            Thread.Sleep(100);
            //replace with your ClickSend API credential and mobile phone number
            //app.MakeWebRequest("https://api-mapper.clicksend.com/http/v2/send.php?method=http&username=YOURUSERNAME&key=YOURAPIKEY&to=+61411111111&message=WasteBin%20is%20Half%20Filled");
            app.MakeWebRequest("https://api-mapper.clicksend.com/http/v2/send.php?method=http&username=YOURUSERNAME&key=YOURAPIKEY&to=YOUNUMBERWITHCOUNTRYCODE&message=WasteBin%20is%20Half%20Filled");
            cnt = 2;
        }
    }
    if (fillPercent < 10)
    {
        Debug.Print("Emptied!");
        cnt = 1;
    }
    Thread.Sleep(5000);
}
When the device is power on it connects to the network and then it first measures the initial empty bin level. After which it will keep on measuring the current calculated distance which goes on reducing with an increase in waste level. Using those data fill level is calculated in percentage.
Once the fill percentage cross margin of 50% then the first alert is sent via SMS and a final alert sent when the level is more than 80%. The process will be repeated once the bin is Emptied.
Downloads
Packaging
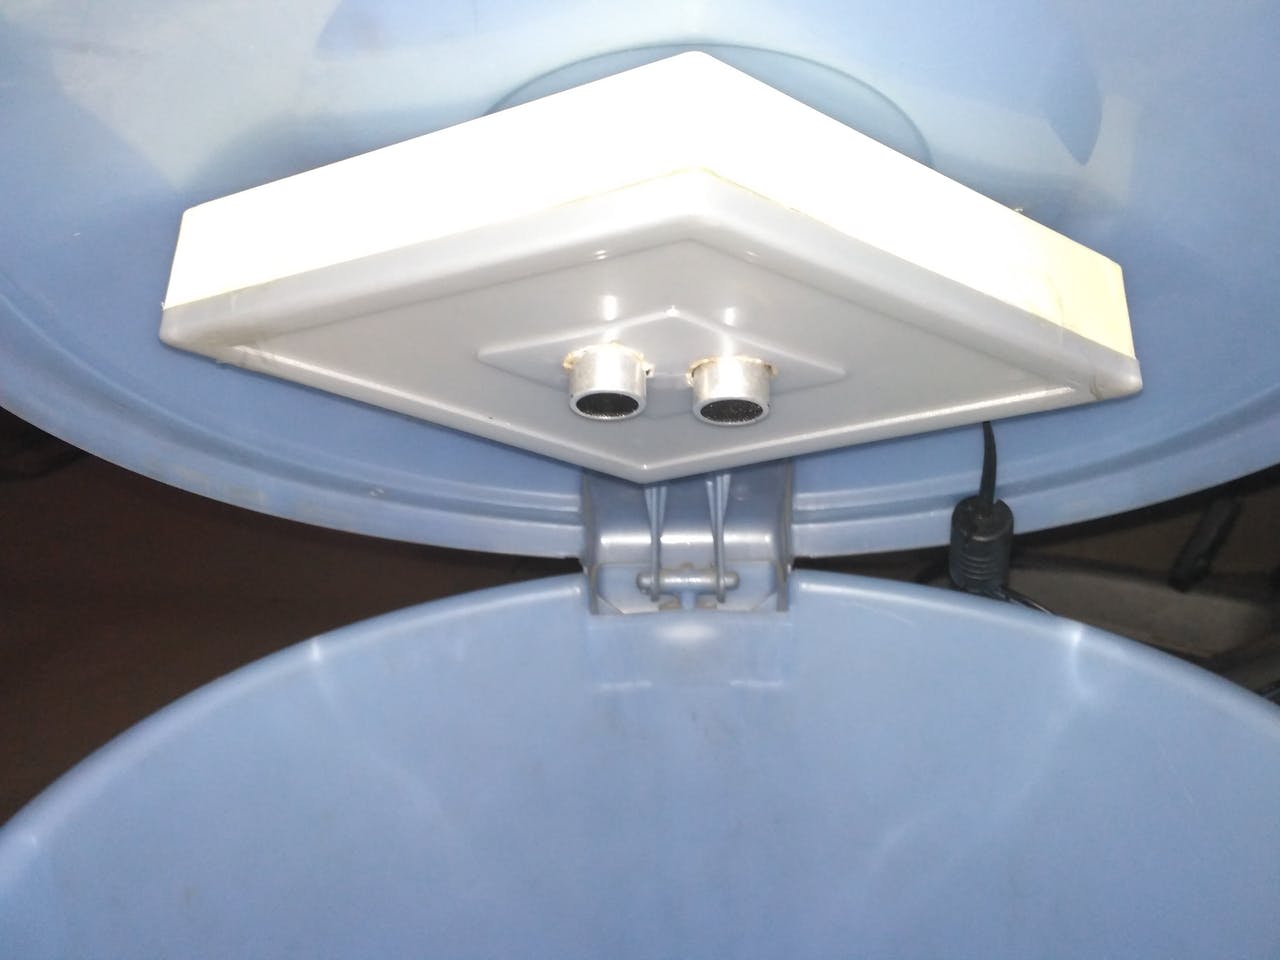
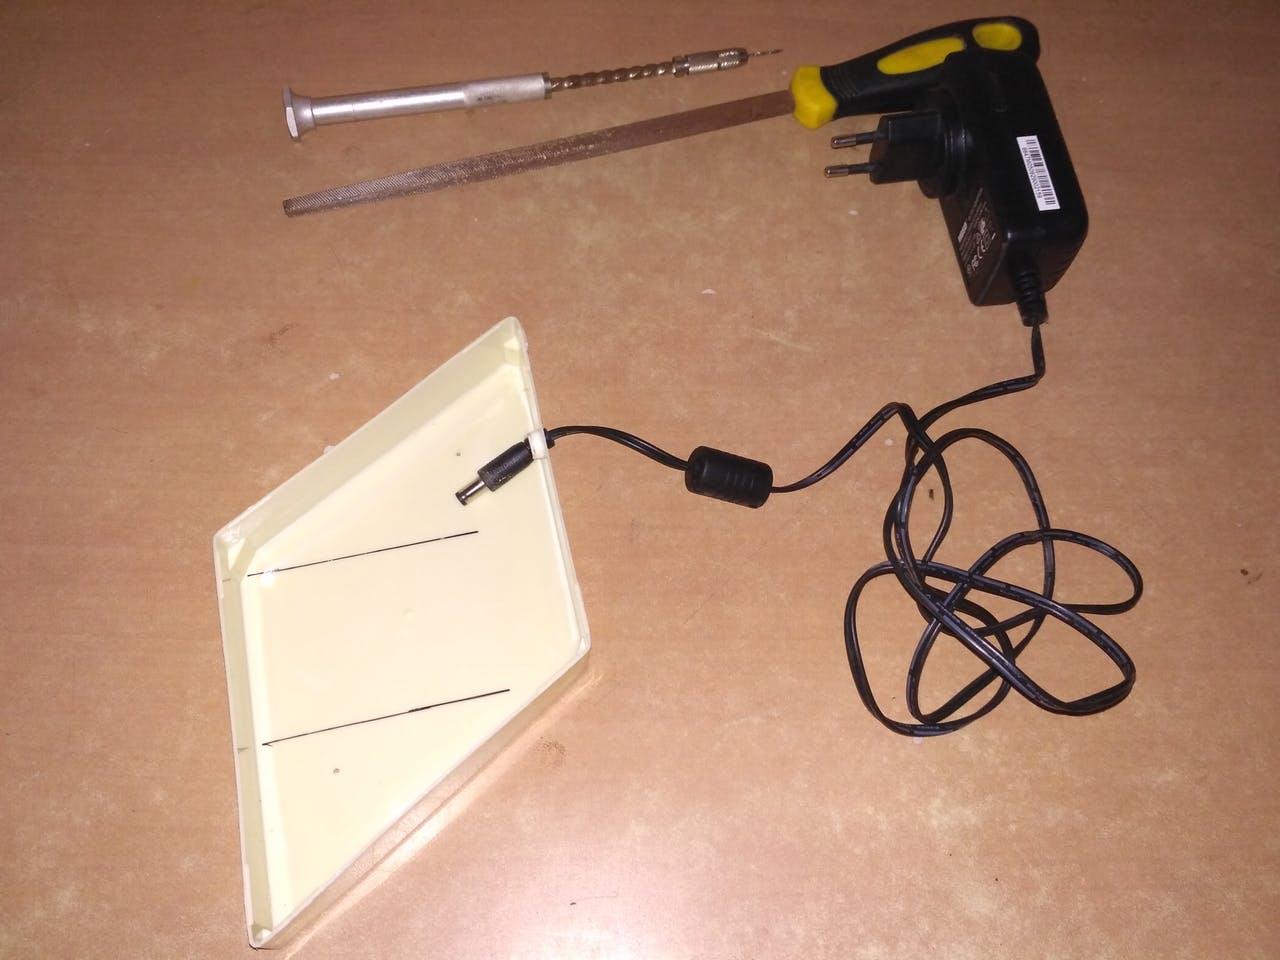
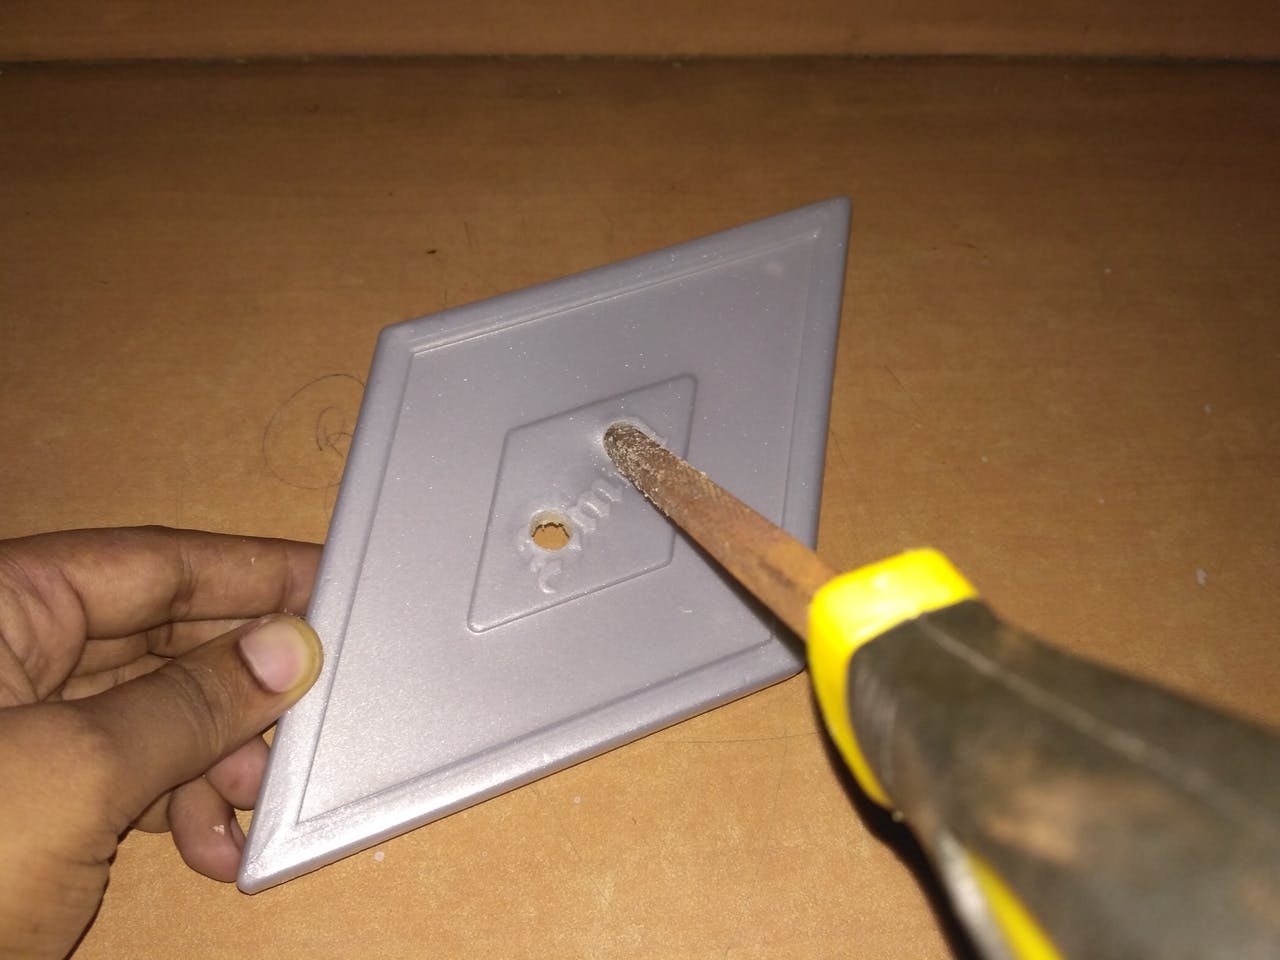
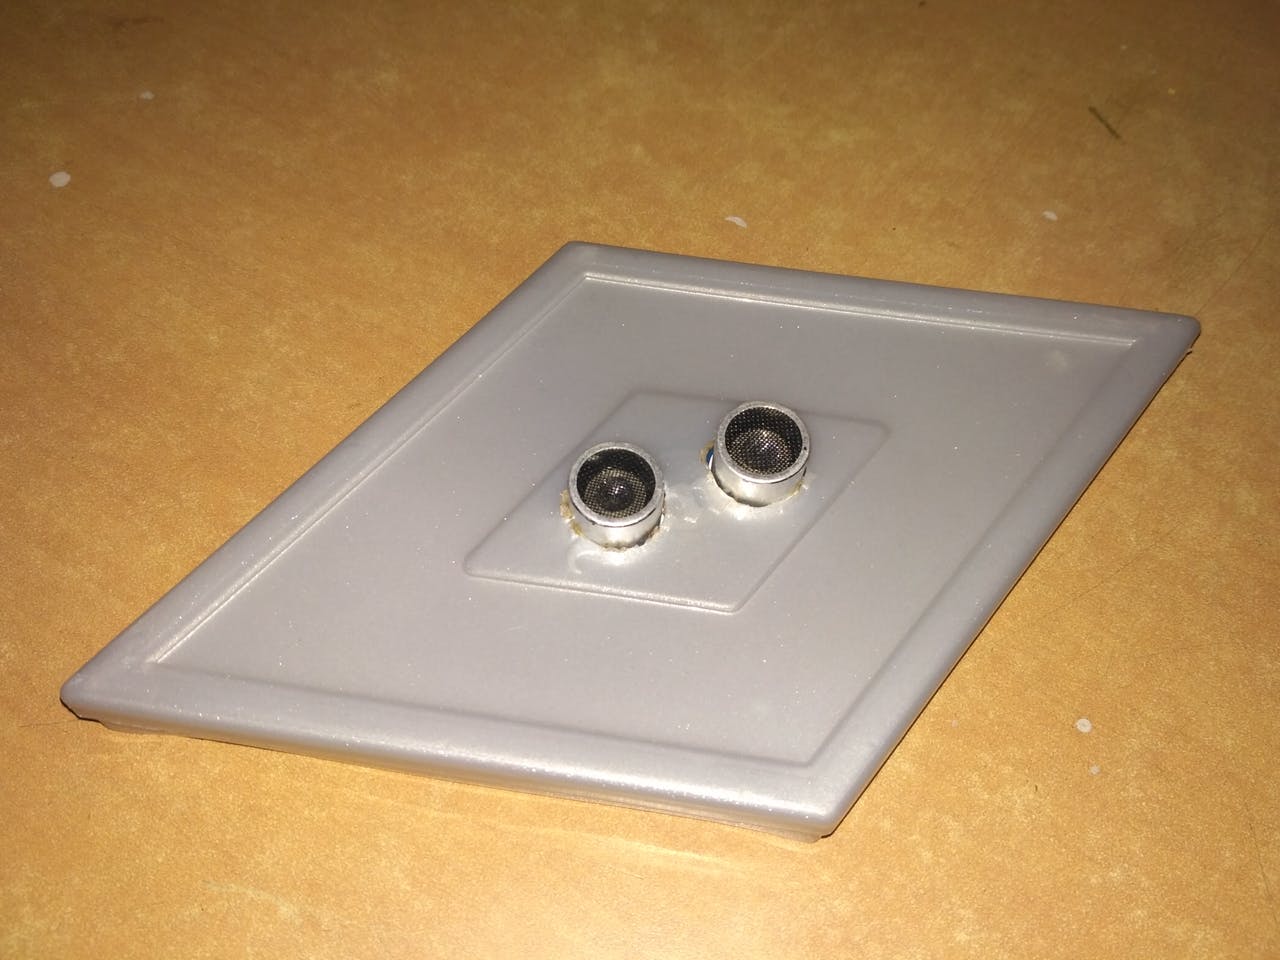
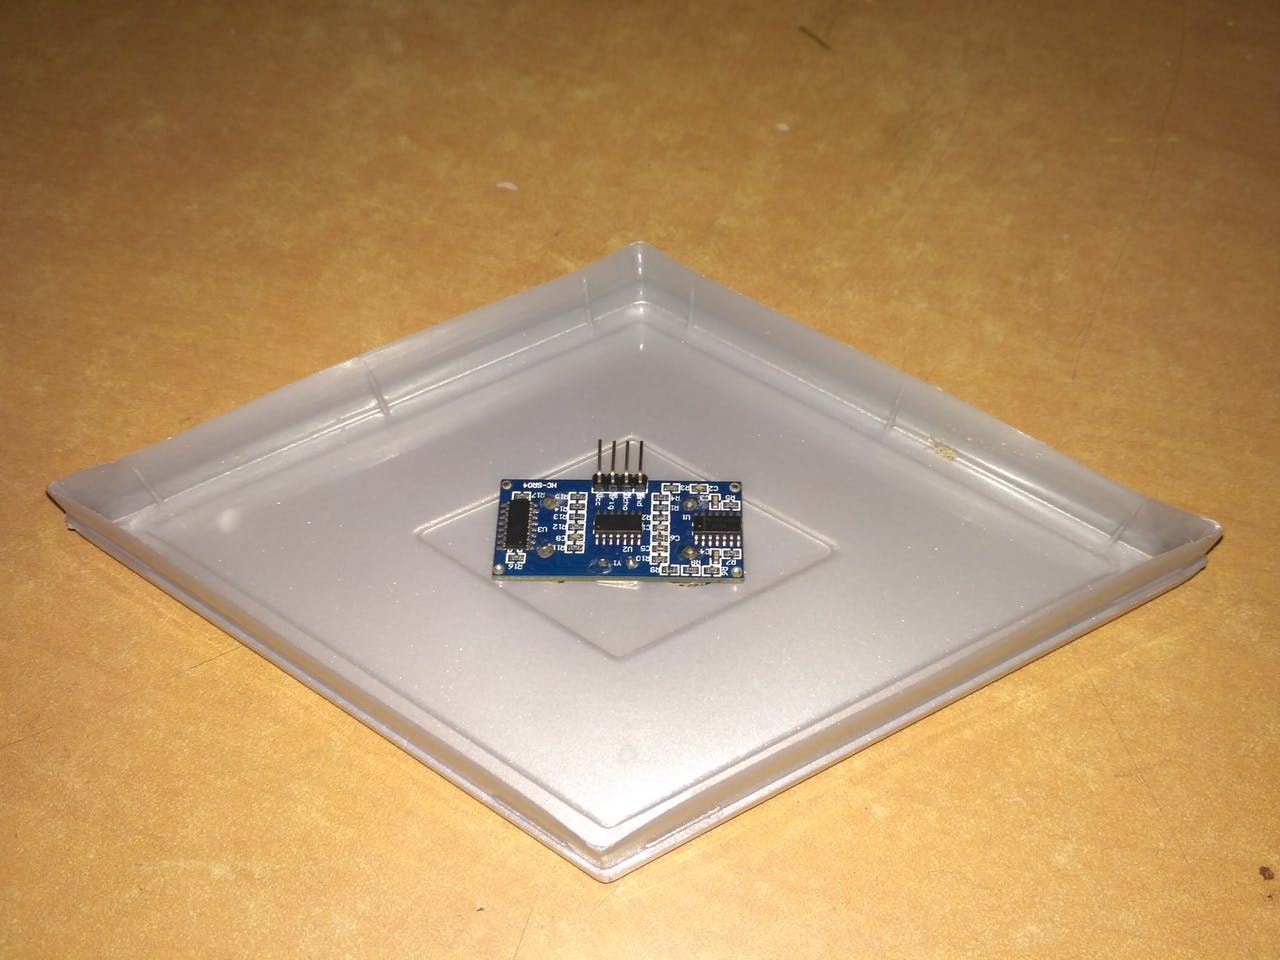
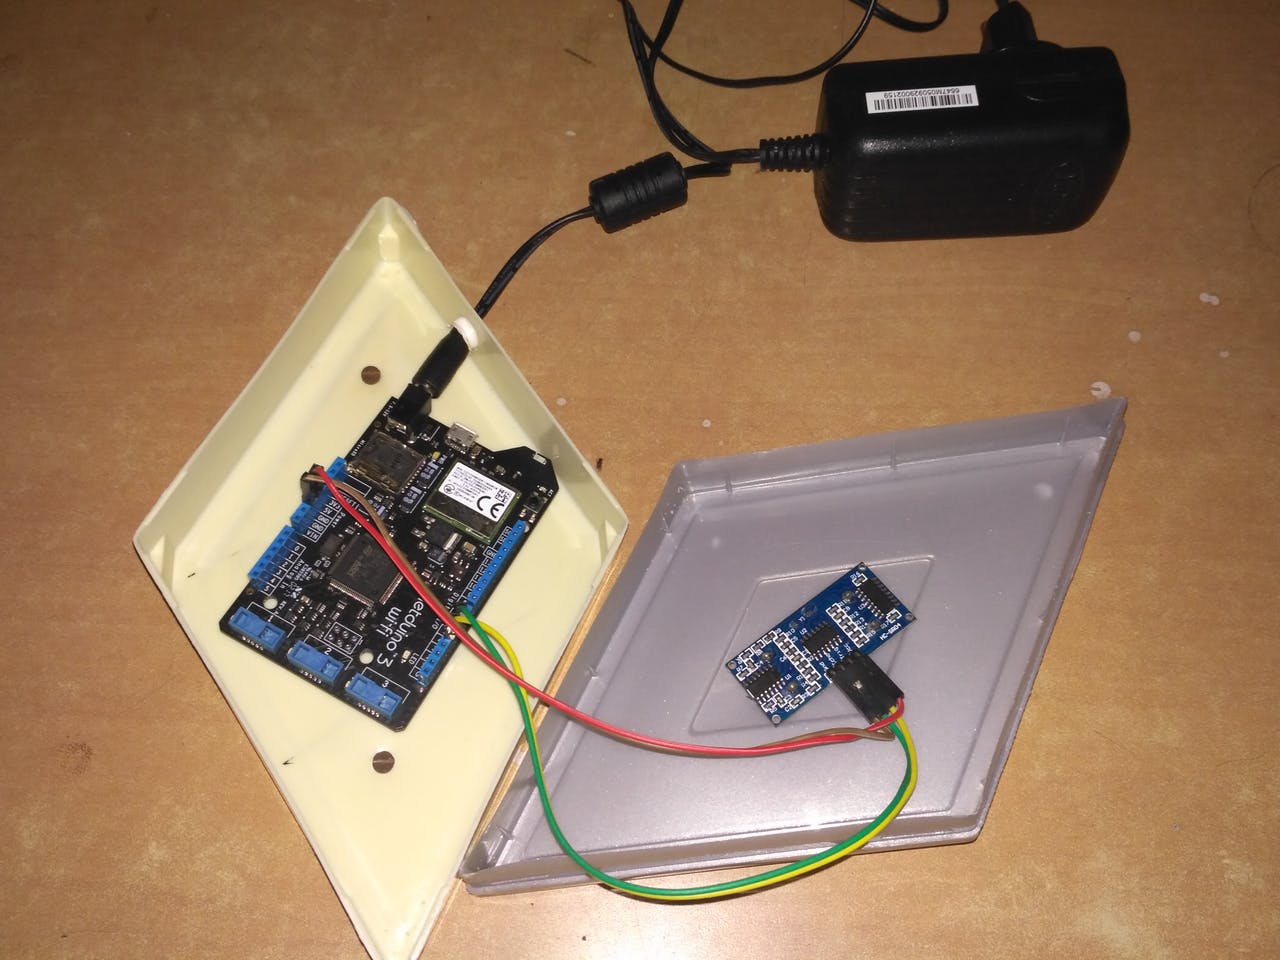
Some packaging highlights which you could try out shown above.
Other Possible Applications of Project:
- To measure Container Oil Level
- To measure Water Level Of Tank
- To Measure Chemical Level
Thanks!!