Smart Sleep Alarm


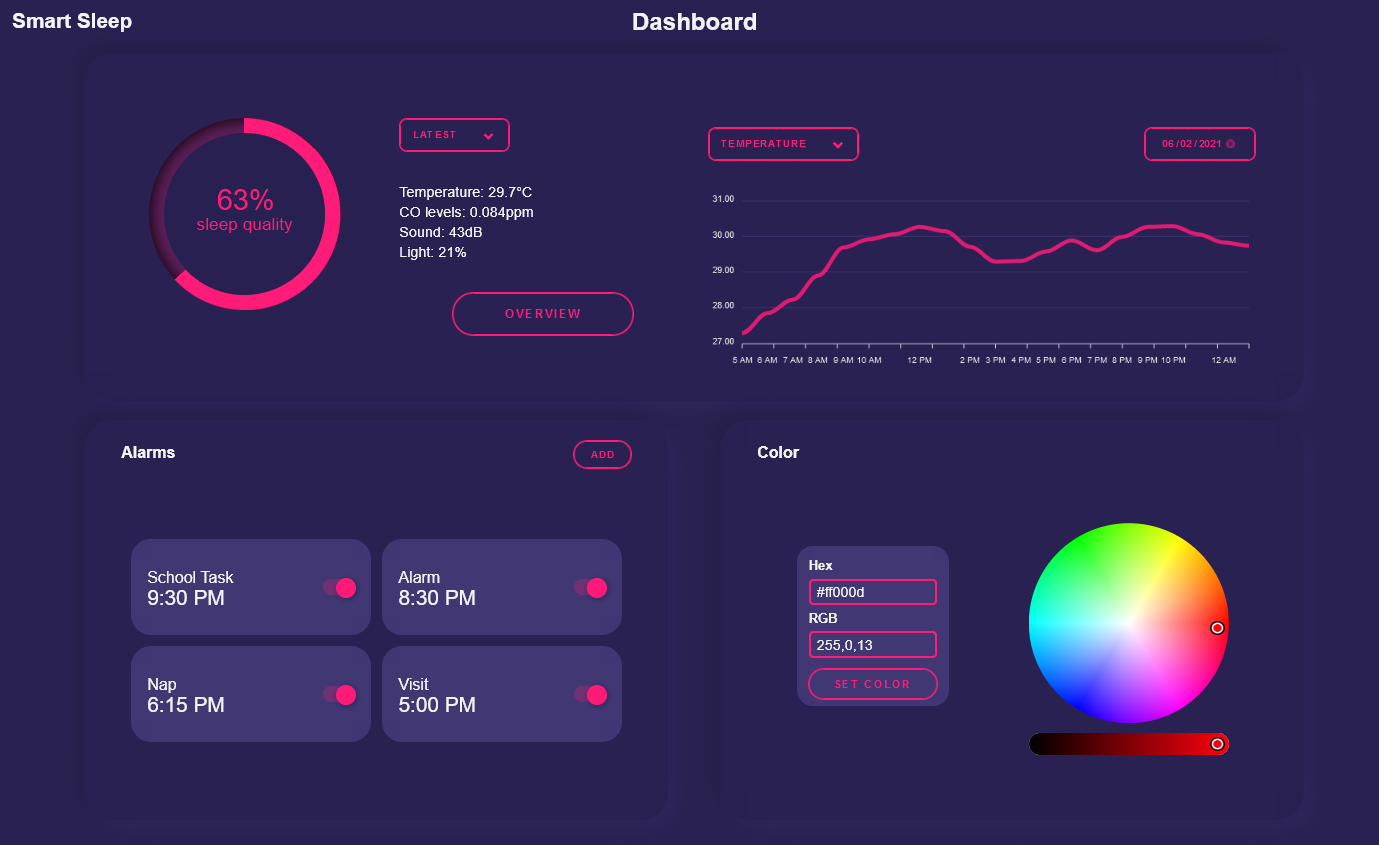
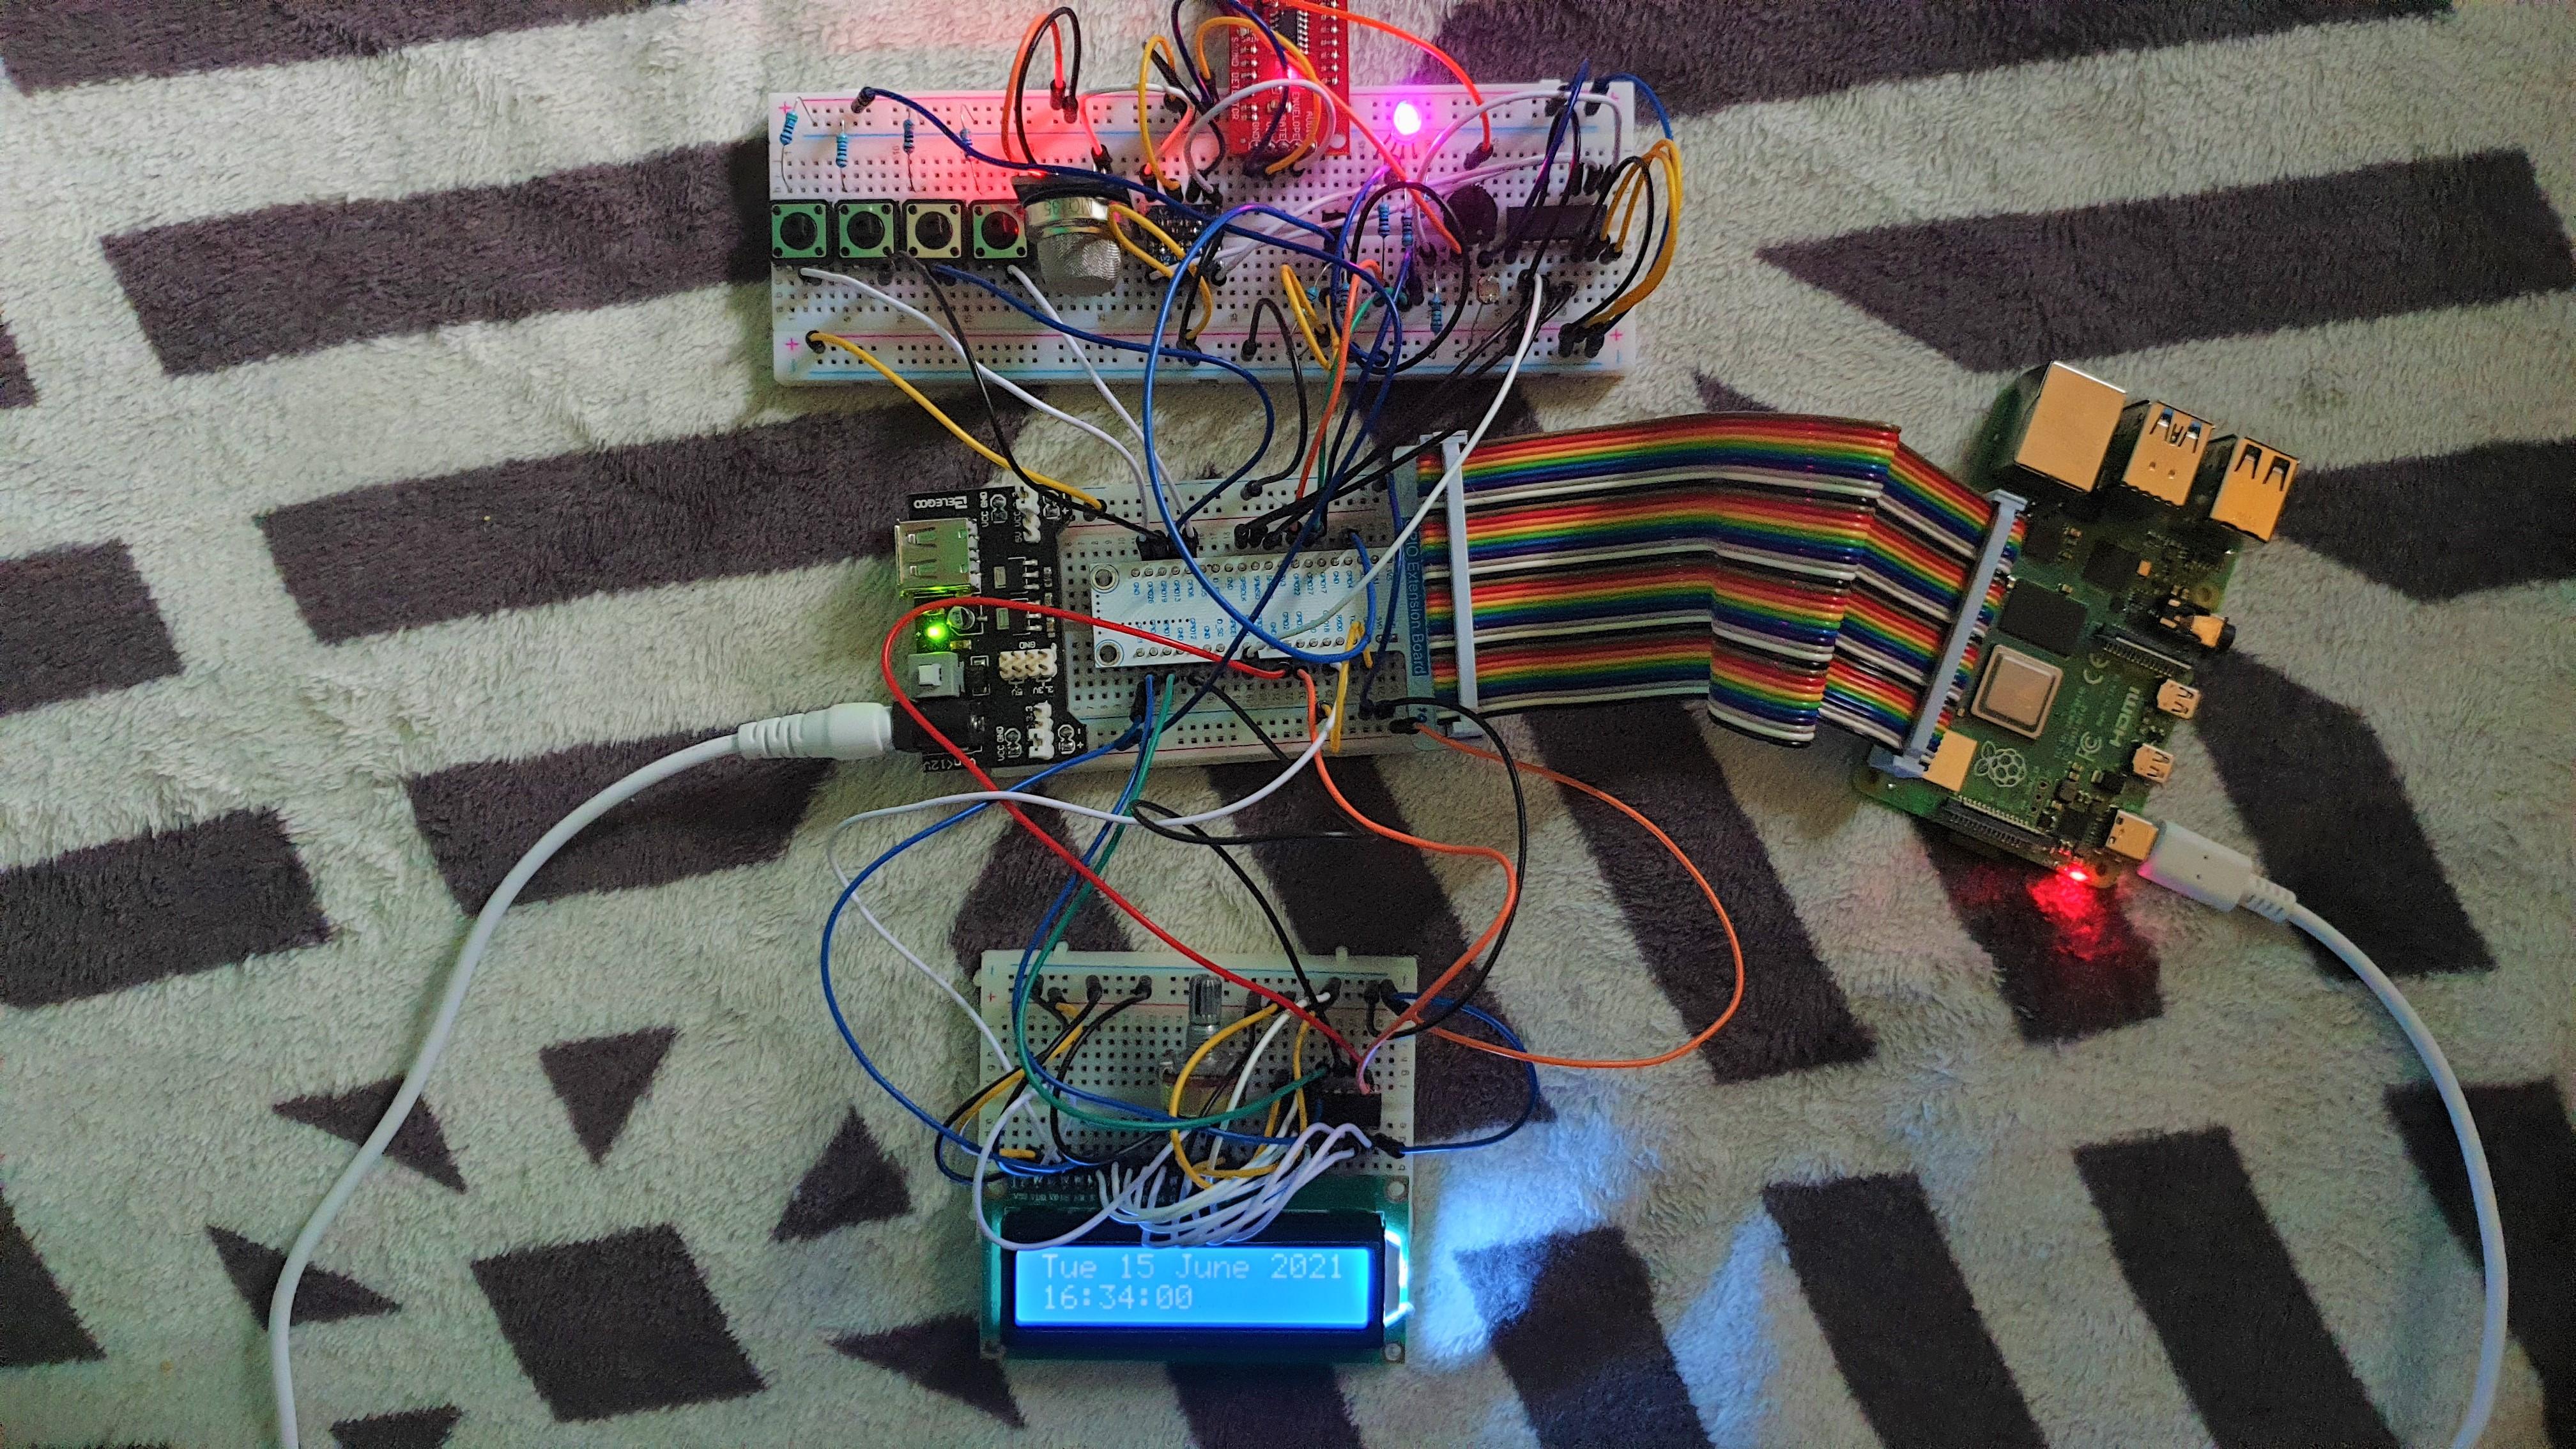
An alarm designed to monitor the enviroment of the bedroom such as light intensity, temperature, noise level, air quality, which is then displayed on a web interface hosted on the RPI.
This web interface will show both latest values and a history of recorded values along with tips on how to improve your sleep enviroment. As well as having the ability to set alarms and control the RGB on the device.
For the sound to work you'll have to connect a speaker to the RPI with an AUX cable
Supplies
- Raspberry Pi 4 Model B
- 16x2 LCD Display
- Sparkfun Sound detector
- DS18B20 One-wire Temperature Sensor
- FlyingFish MQ gas sensor
- LDR light sensor
- MCP3008 ADC
- 5V to 3.3V Logic level converter
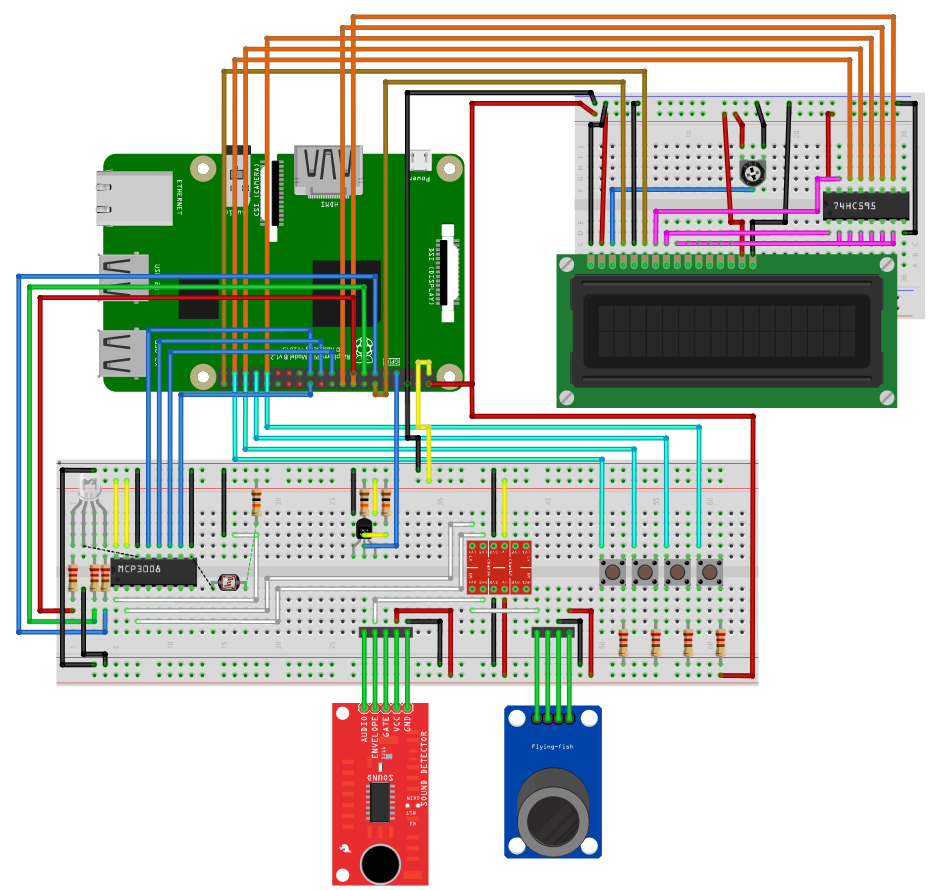
Breadboard Connection

For more detail, see one of the following files:
Create a New User
I strongly recommend you create a new separate user for this, which you can easily do with
sudo adduser smartalarm
You also might want to give the user administrative rights
sudo usermod -aG sudo smartalarm
Github Repository

You can get the code for the device, API, and web interface from the Github Repository
Be sure to clone this repo into the home directory of the newly created 'smartalarm' user!
Setting Up Webserver

To set up the web server you'll need to have Apache installed, which you can do with the following command:
sudo apt install apache2
After you've installed apache you'll need to make some configurations
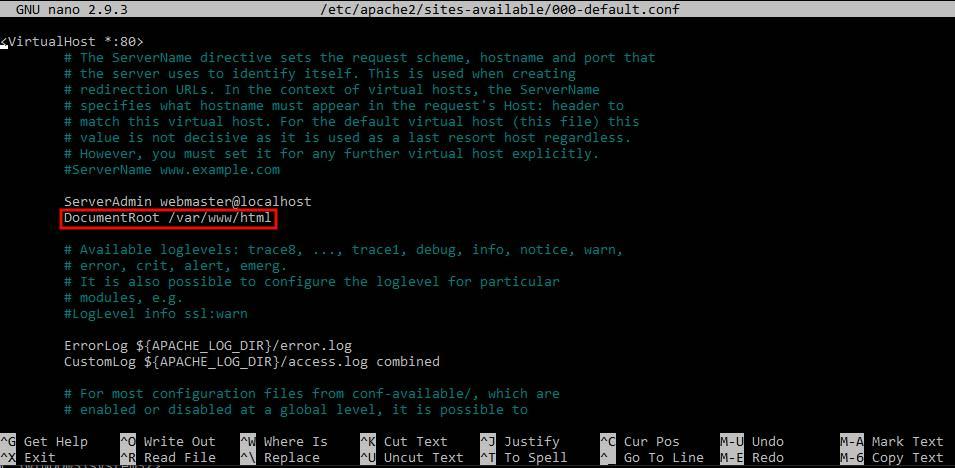
sudo nano /etc/apache2/sites-available/000-default.conf
and after DocumentRoot change the
/var/www/html
to
/home/smartalarm/smart-sleep-smartalarm/Frontend
where is your user's name
Starting API
It's important to first start the API before you start the Device, as it'll need to gather data from the database through the API.
You can easily start the API by running the following:
python3 -u /home/smartalarm/smart-sleep-smartalarm/Backend/api/app.py
Starting Device
After the API successfully started you can start the device
You can start the device by running the following:
python3 -u /home/smartalarm/smart-sleep-smartalarm/Backend/sensors/sensors.py
(Optional) Settings Up .service Files for Automatic Execution
You might want to have files run automatically each time you power up your RPI so that it can fully run headless.
To do this we'll need to create 2 .service files
API service file
Run the following
sudo nano /etc/systemd/system/smartalarm-api.service
and paste
[Unit]
Description=SmartAlarm API
After=network.target
[Service]
ExecStart=/usr/bin/python3 -u /home/smartalarm/smart-sleep-smartalarm/Backend/api/app.py
WorkingDirectory=/home/smartalarm/smart-sleep-smartalarm/Backend/api
StandardOutput=inherit
StandardError=inherit
Restart=always
User=smartalarm
[Install]
WantedBy=multi-user.target
Device service file
Device service file
Run the following
sudo nano /etc/systemd/system/smartalarm-sensors.service
and paste
[Unit]
Description=SmartAlarm Device
After=network.target
[Service]
ExecStart=/usr/bin/python3 -u /home/smartalarm/smart-sleep-smartalarm/Backend/sensors/sensors.py
WorkingDirectory=/home/smartalarm/smart-sleep-smartalarm/Backend/sensors
StandardOutput=inherit
StandardError=inherit
Restart=always
User=smartalarm
[Install]
WantedBy=multi-user.target
then enable both service files by running the following
sudo systemctl enable smartalarm-api.service
sudo systemctl enable smartalarm-sensors.service