Smart Safe Driving With Kids



INTRO:
Are you a parent that drives with your child?
Are you scared you'll forget your child?
Do you get nervous that they will unbuckle their seat belt or that it's too cold/ hot in the back seat?
Are you trying to potty train your little one and scared they will miss on the ride?
Does your child get bored and wants some music played?
If you answered yes, you might want to check this out and have a smart safe drive with your loved one!
Who are we?
Hello, we are Nofar Ben Yashar and Moshe Nagar third year Computer Science students at IDC Herzliya, Israel.
We are well aware of the dangerous "Forgotten Child Syndrome" as well as the struggle parents face while trying to focus on driving safely while their little ones are in the back seat.
As a result, as a part of our IOT (Internet of Things) course, we decided to tackle this issue by providing this new one of a kind project with many helpful features to make the next ride more enjoyable, less stressful and most importantly safer!
Throughout this instructable, we will guide you step by step to a safer better drive,
Let's get started!
Supplies
Setting the Environment
.jpeg)
.jpeg)
.jpeg)
.jpeg)
Installations:
- On your computer, Arduino IDE
- On your computer, Circuit playground driver
- On your computer, Arduino boards manager
- On one of your smartphones, Blynk app - AppleStore or PlayStore
- On both of your smartphones, Integromat app - AppleStore or PlayStore
Configurations
- First, sign up for Integromat
- On Integromat app:
- On PARENT phone, go to settings and enable the Reminder option
- On CALLER phone, go to settings -> calls -> enable “Make call” option. Then choose “Call any number”.
- On Blynk app:
- Sign up via the app
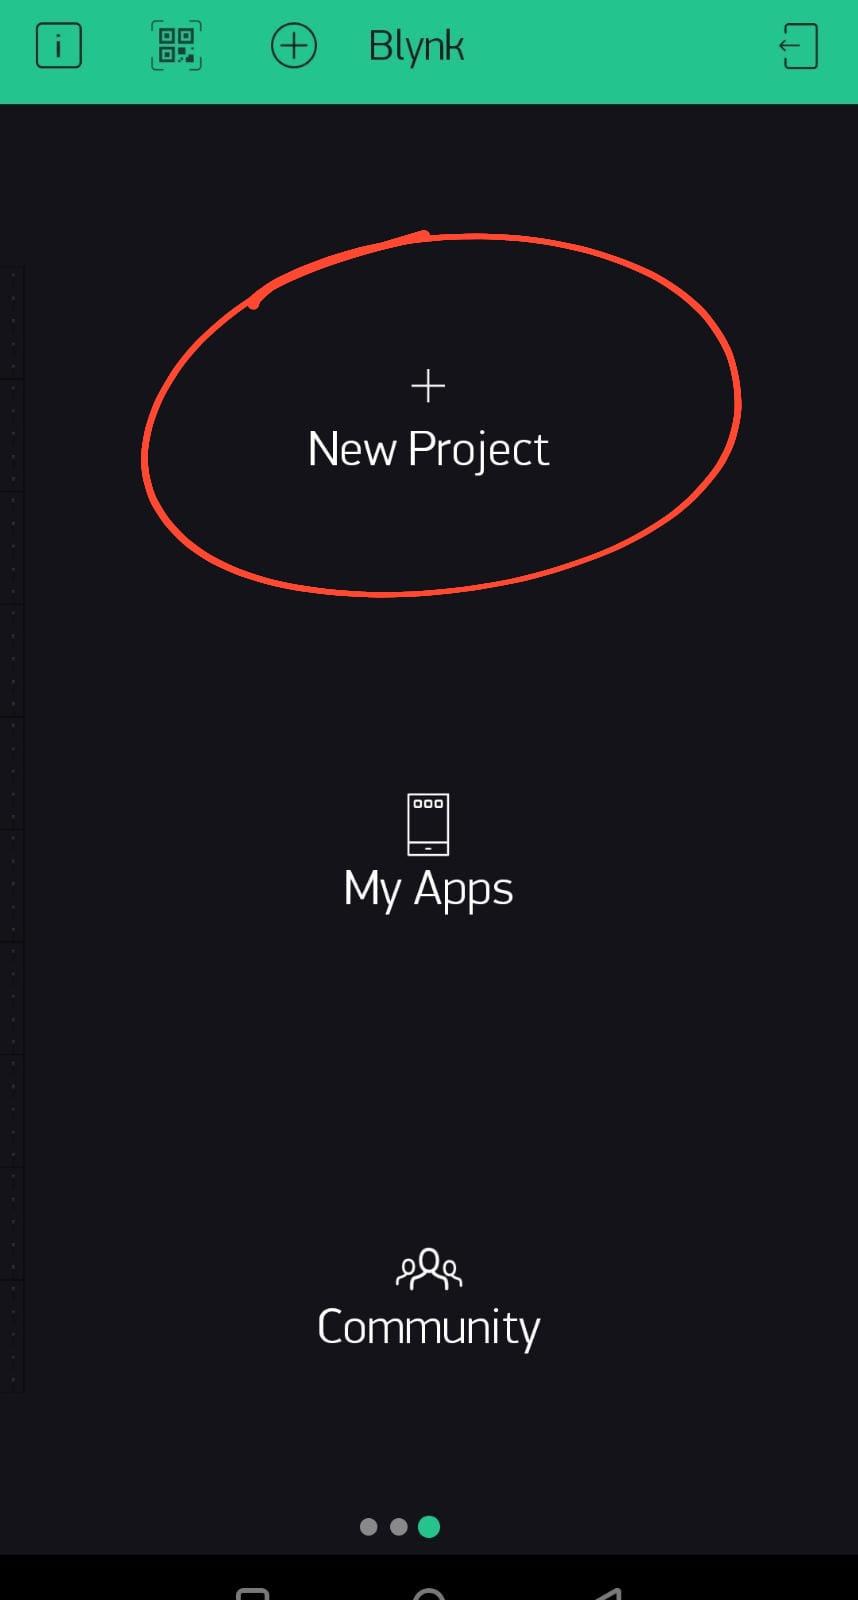
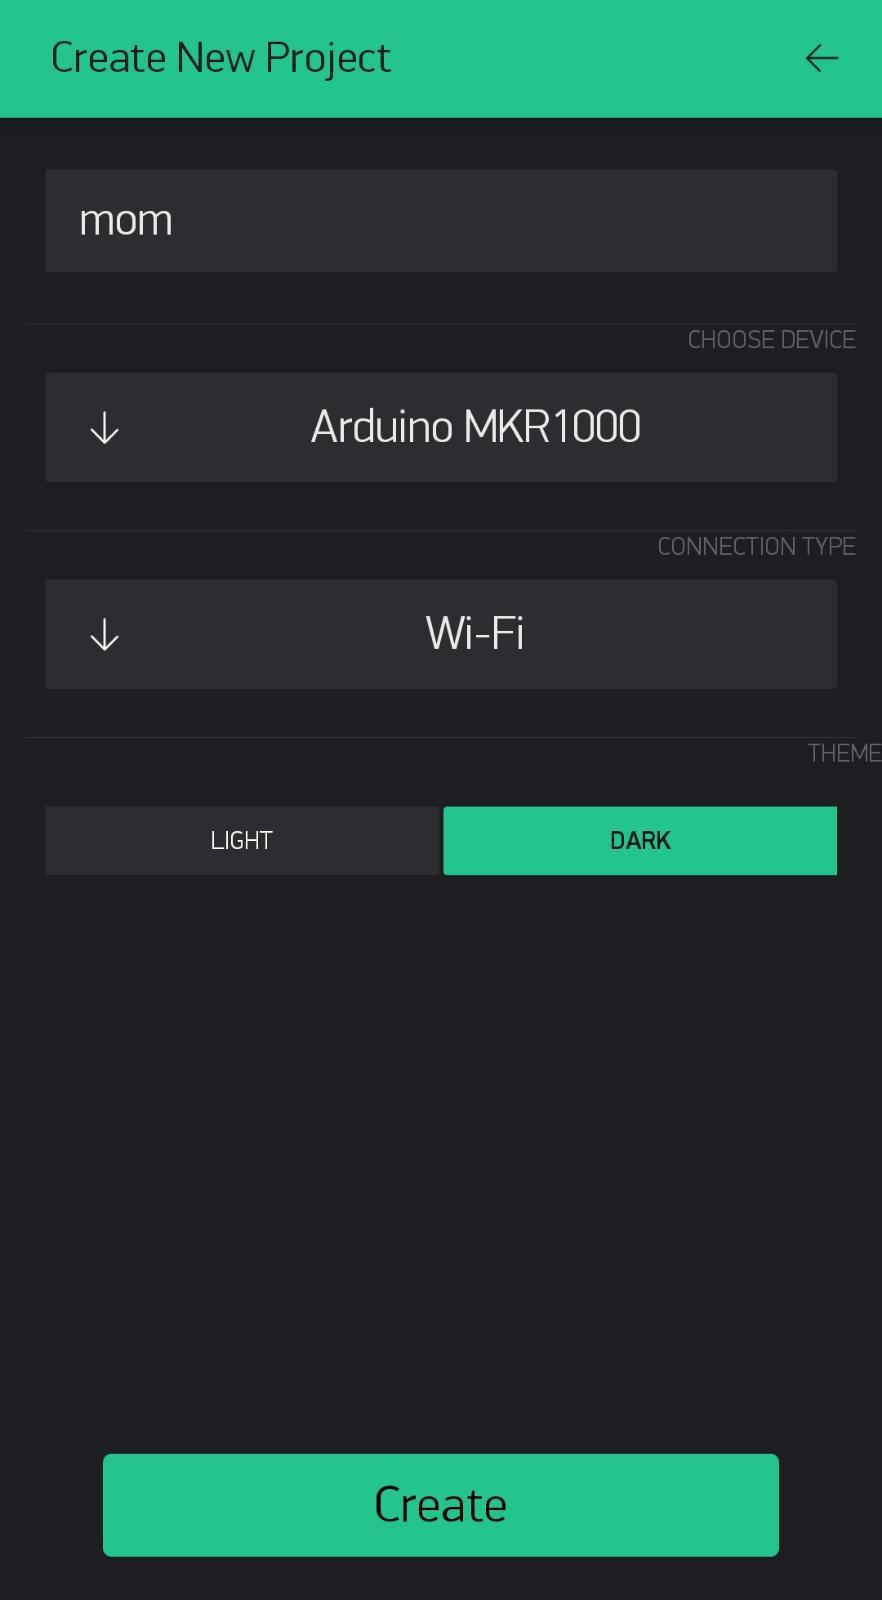
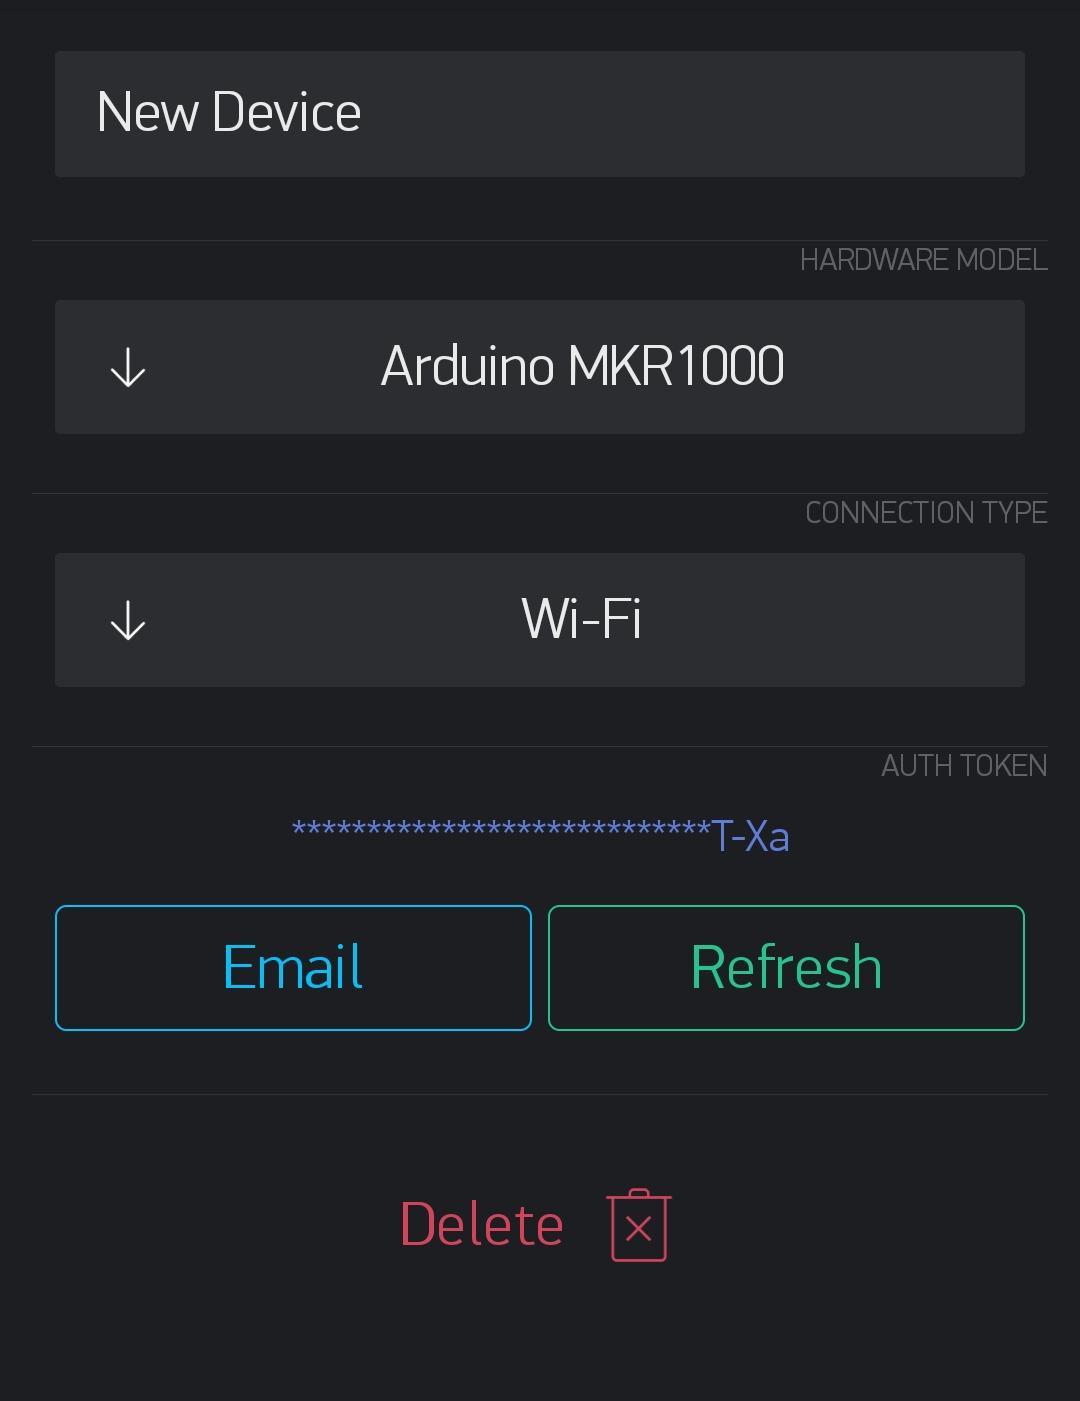
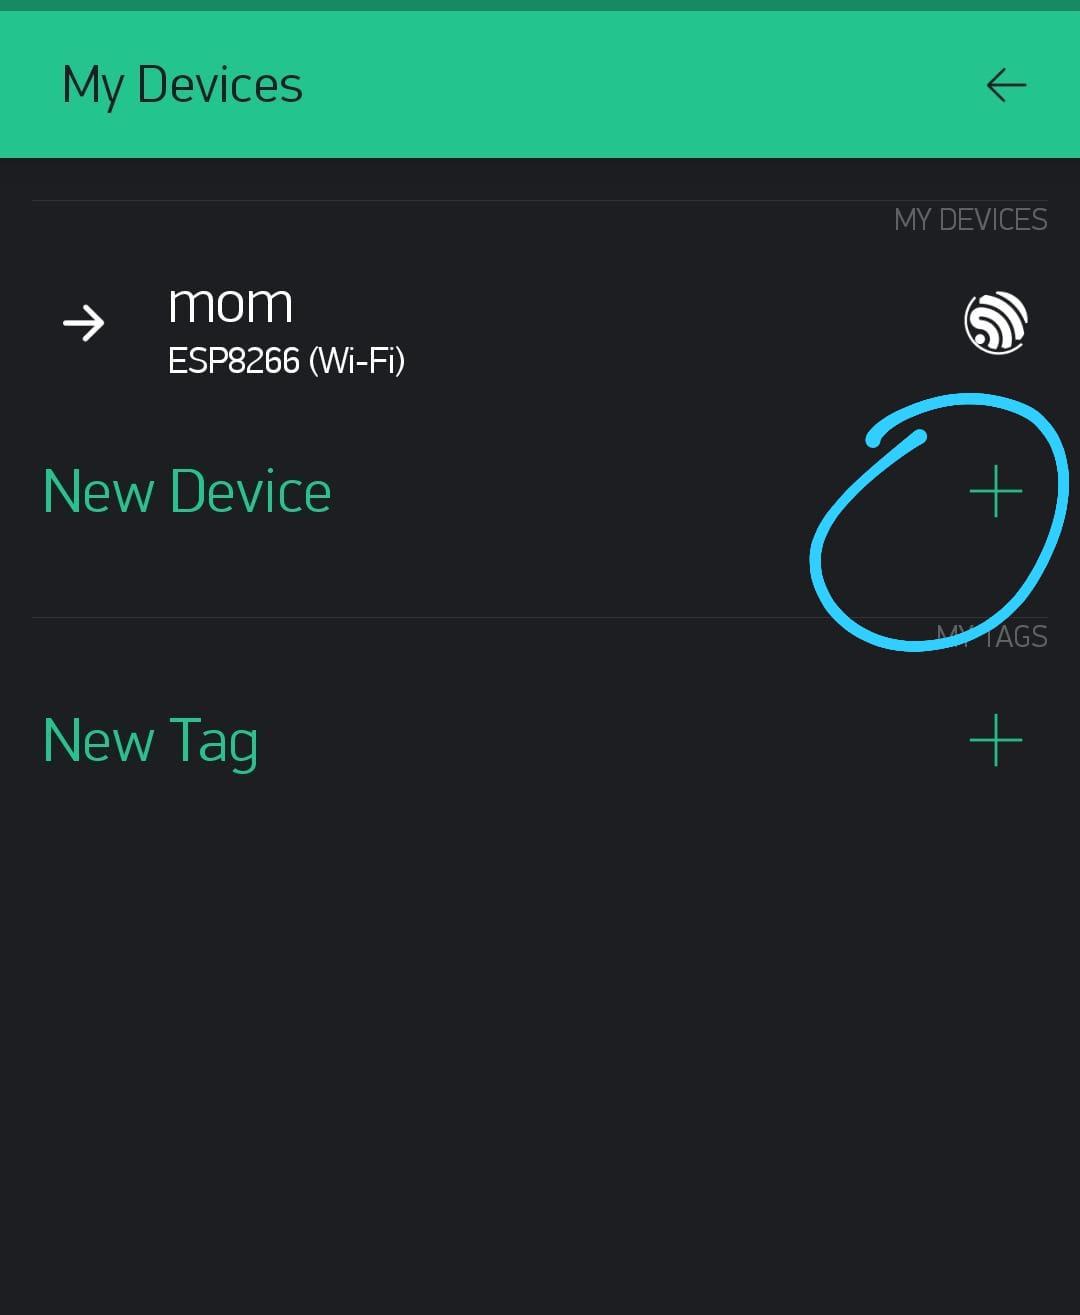
- Create a new project with the configurations you see in the pictures.
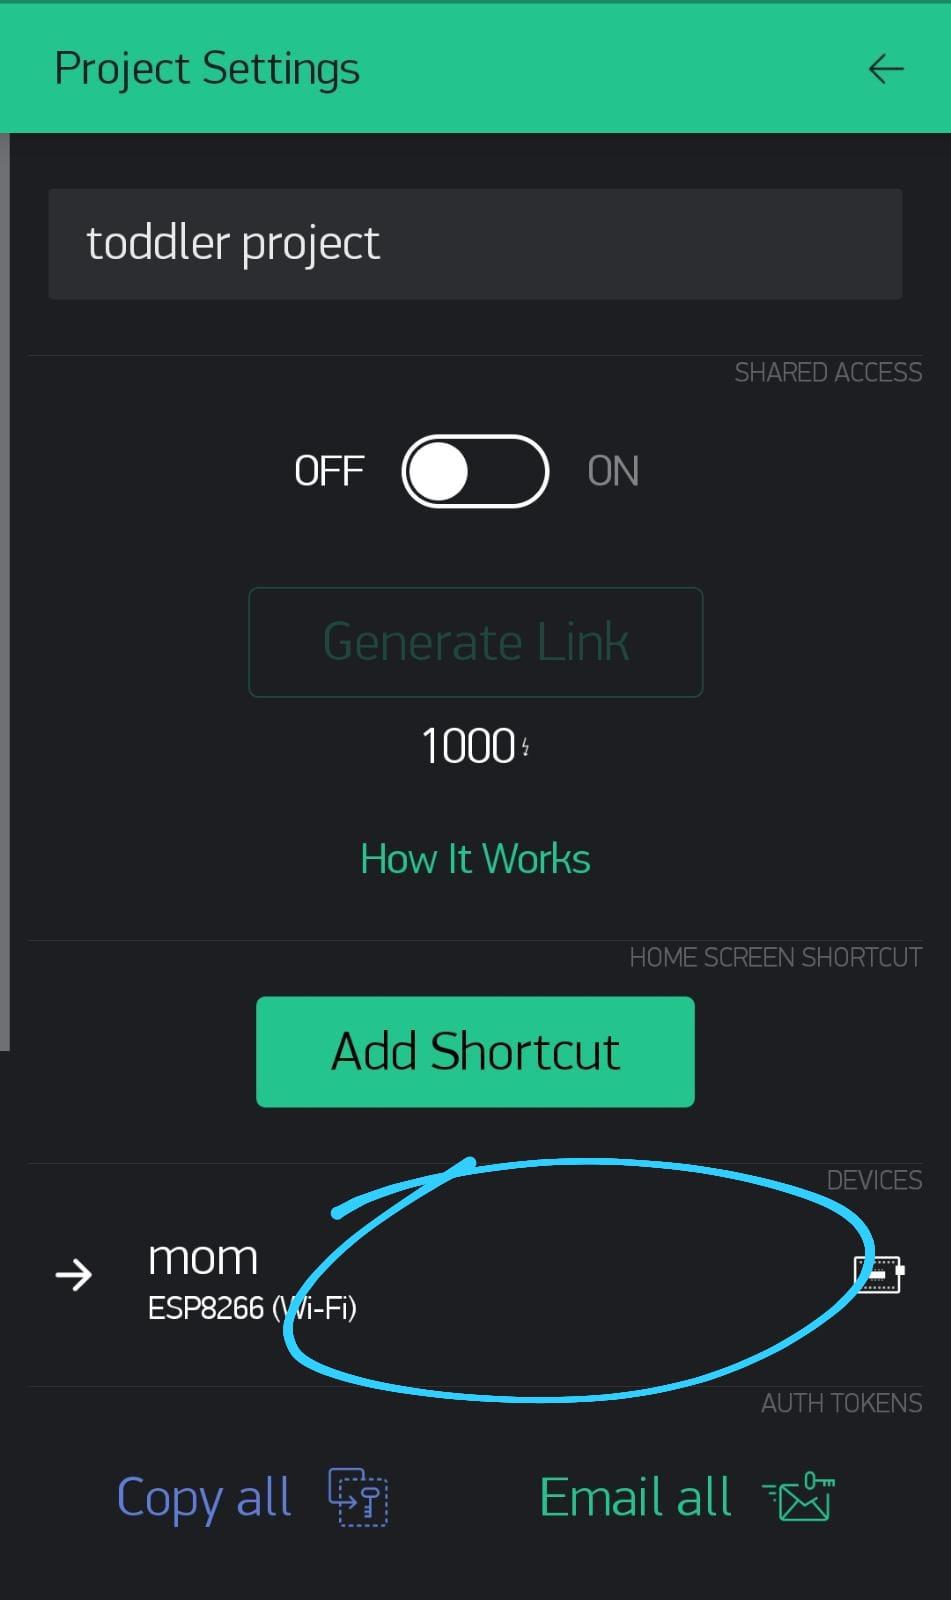
- Add another device with the same configurations.
- You will get auth tokens in your email - one for each device. Please keep them, you will need them.
The Flow
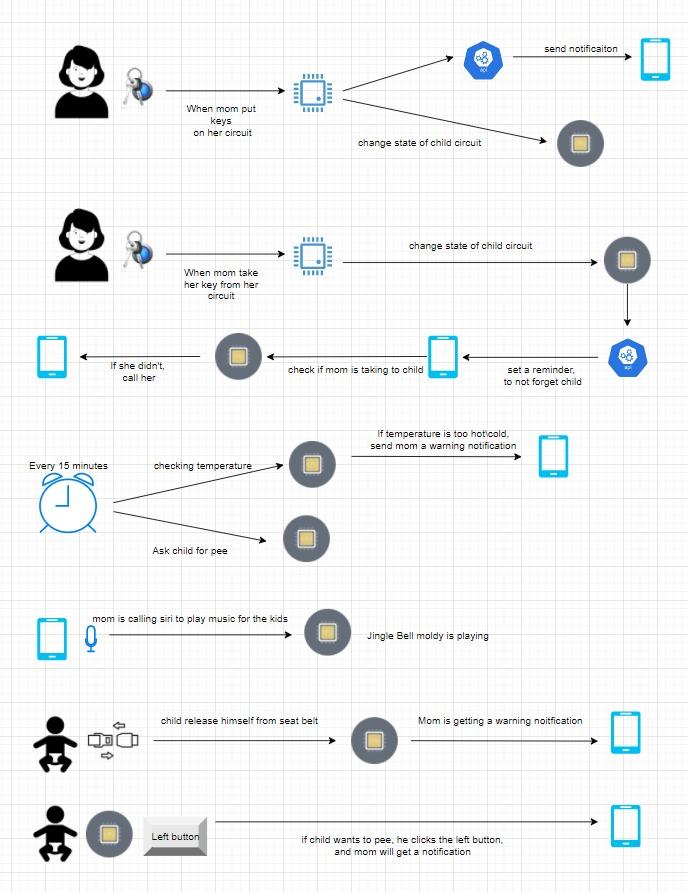.jpeg)
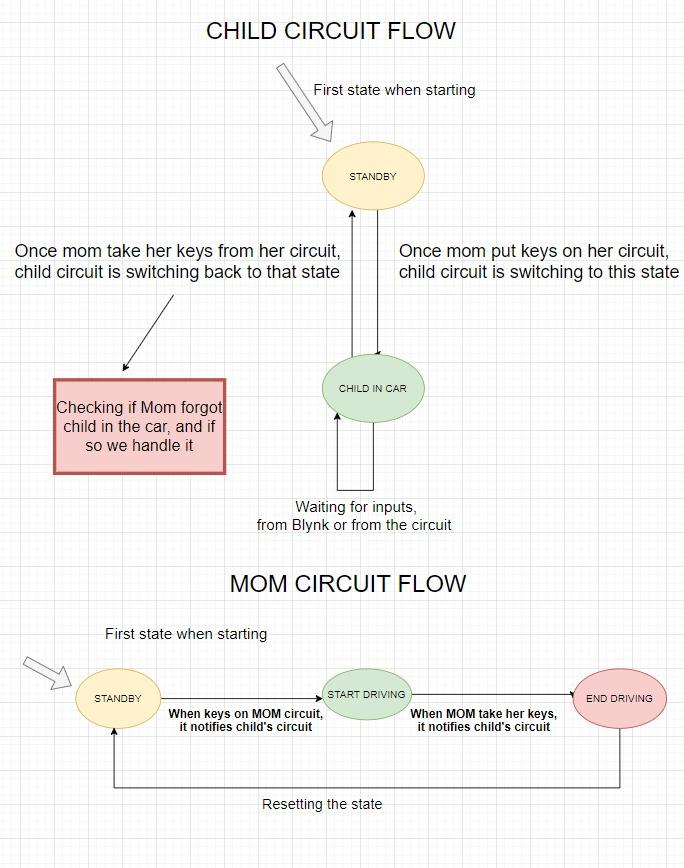
This is the flow of the project, as you can see we have 7 features:
1. Start Drive: When the parent puts the keys in the cupholder, the parent gets notified and DRIVING MODE is turned on.
2. End Drive: When the parent ends the drive, the parent gets a reminder not to forget the child.
3. Forget child: If after 5 min (that the parent ended the drive), the parent didn't take the child, it gets an emergency phone call.
4. Temperature: Every 15 min the CPX checks the temperature. If its too hot or too cold the parent gets notified.
5. Potty Train (part 1): Every 15 min the CPX asks the child if he/she needs to pee. If the child presses the left button, the parent gets notified that the child needs to pee.
6. Play Music: The parent can tell Siri, "Play music for my child" and music will be played with flashing lights.
7. Seat belt: If the child unbuckles their seat belt, the parent gets notified.
Setting and Configuring Integromat
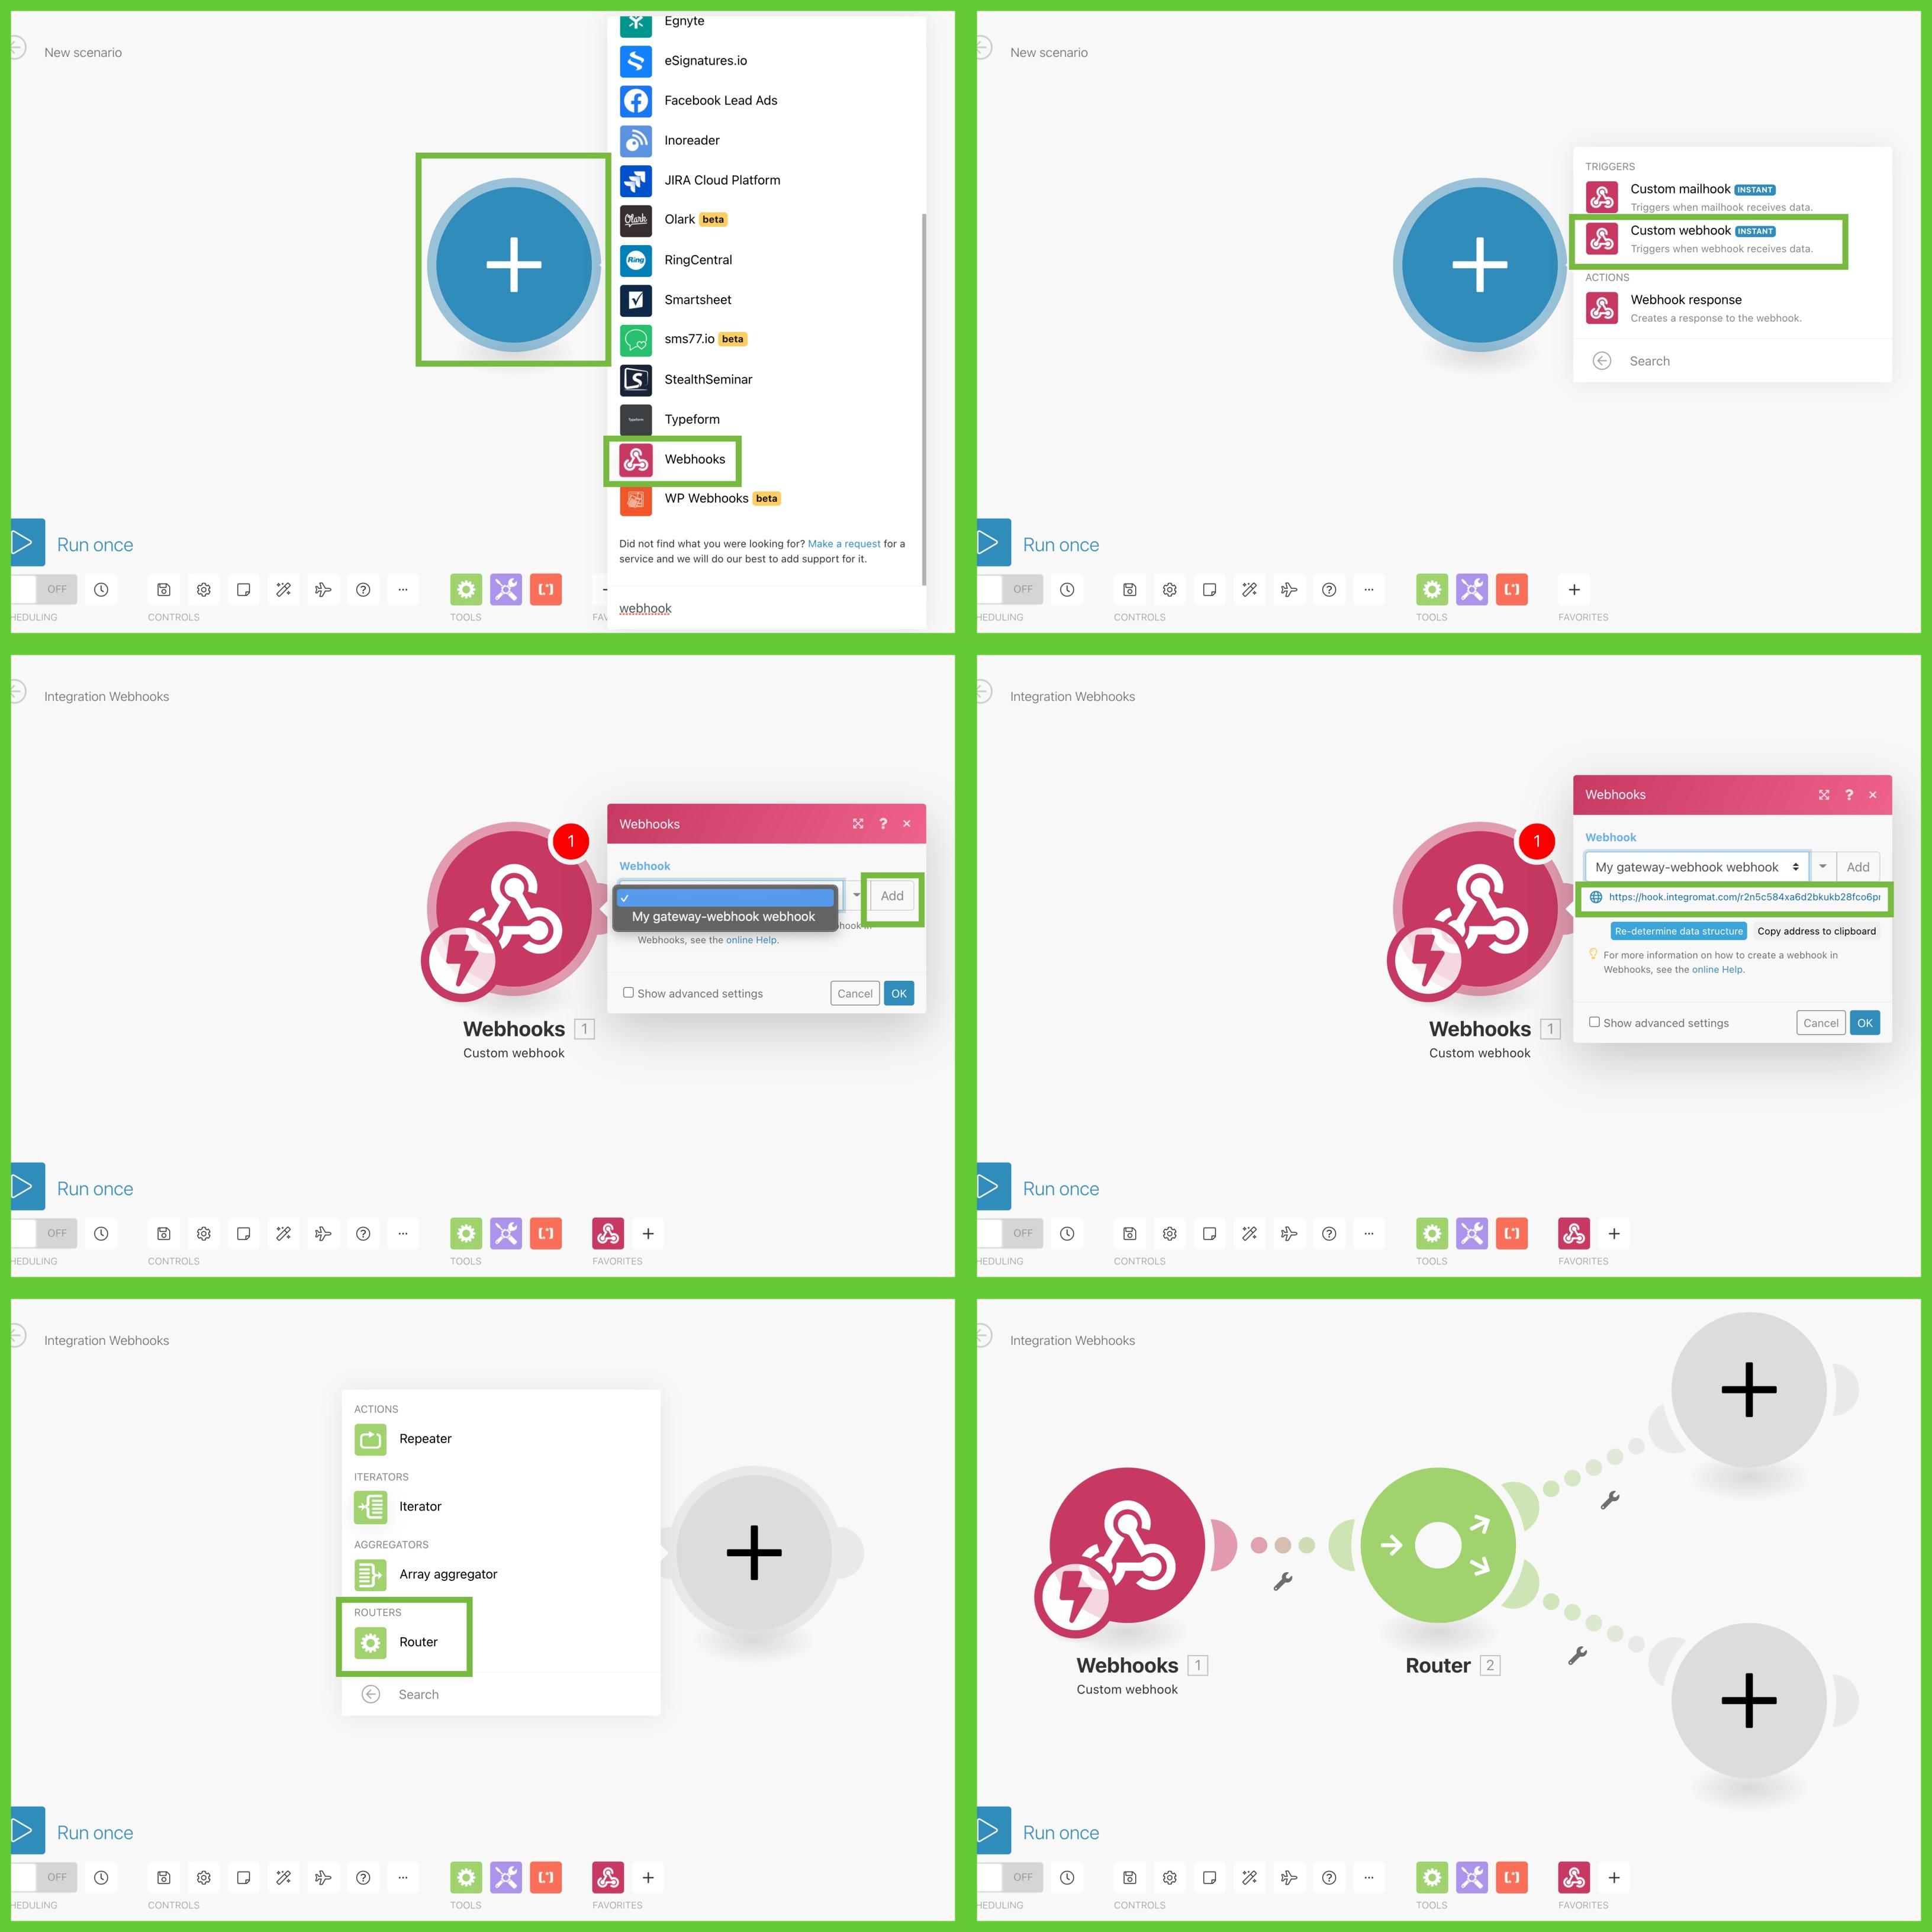
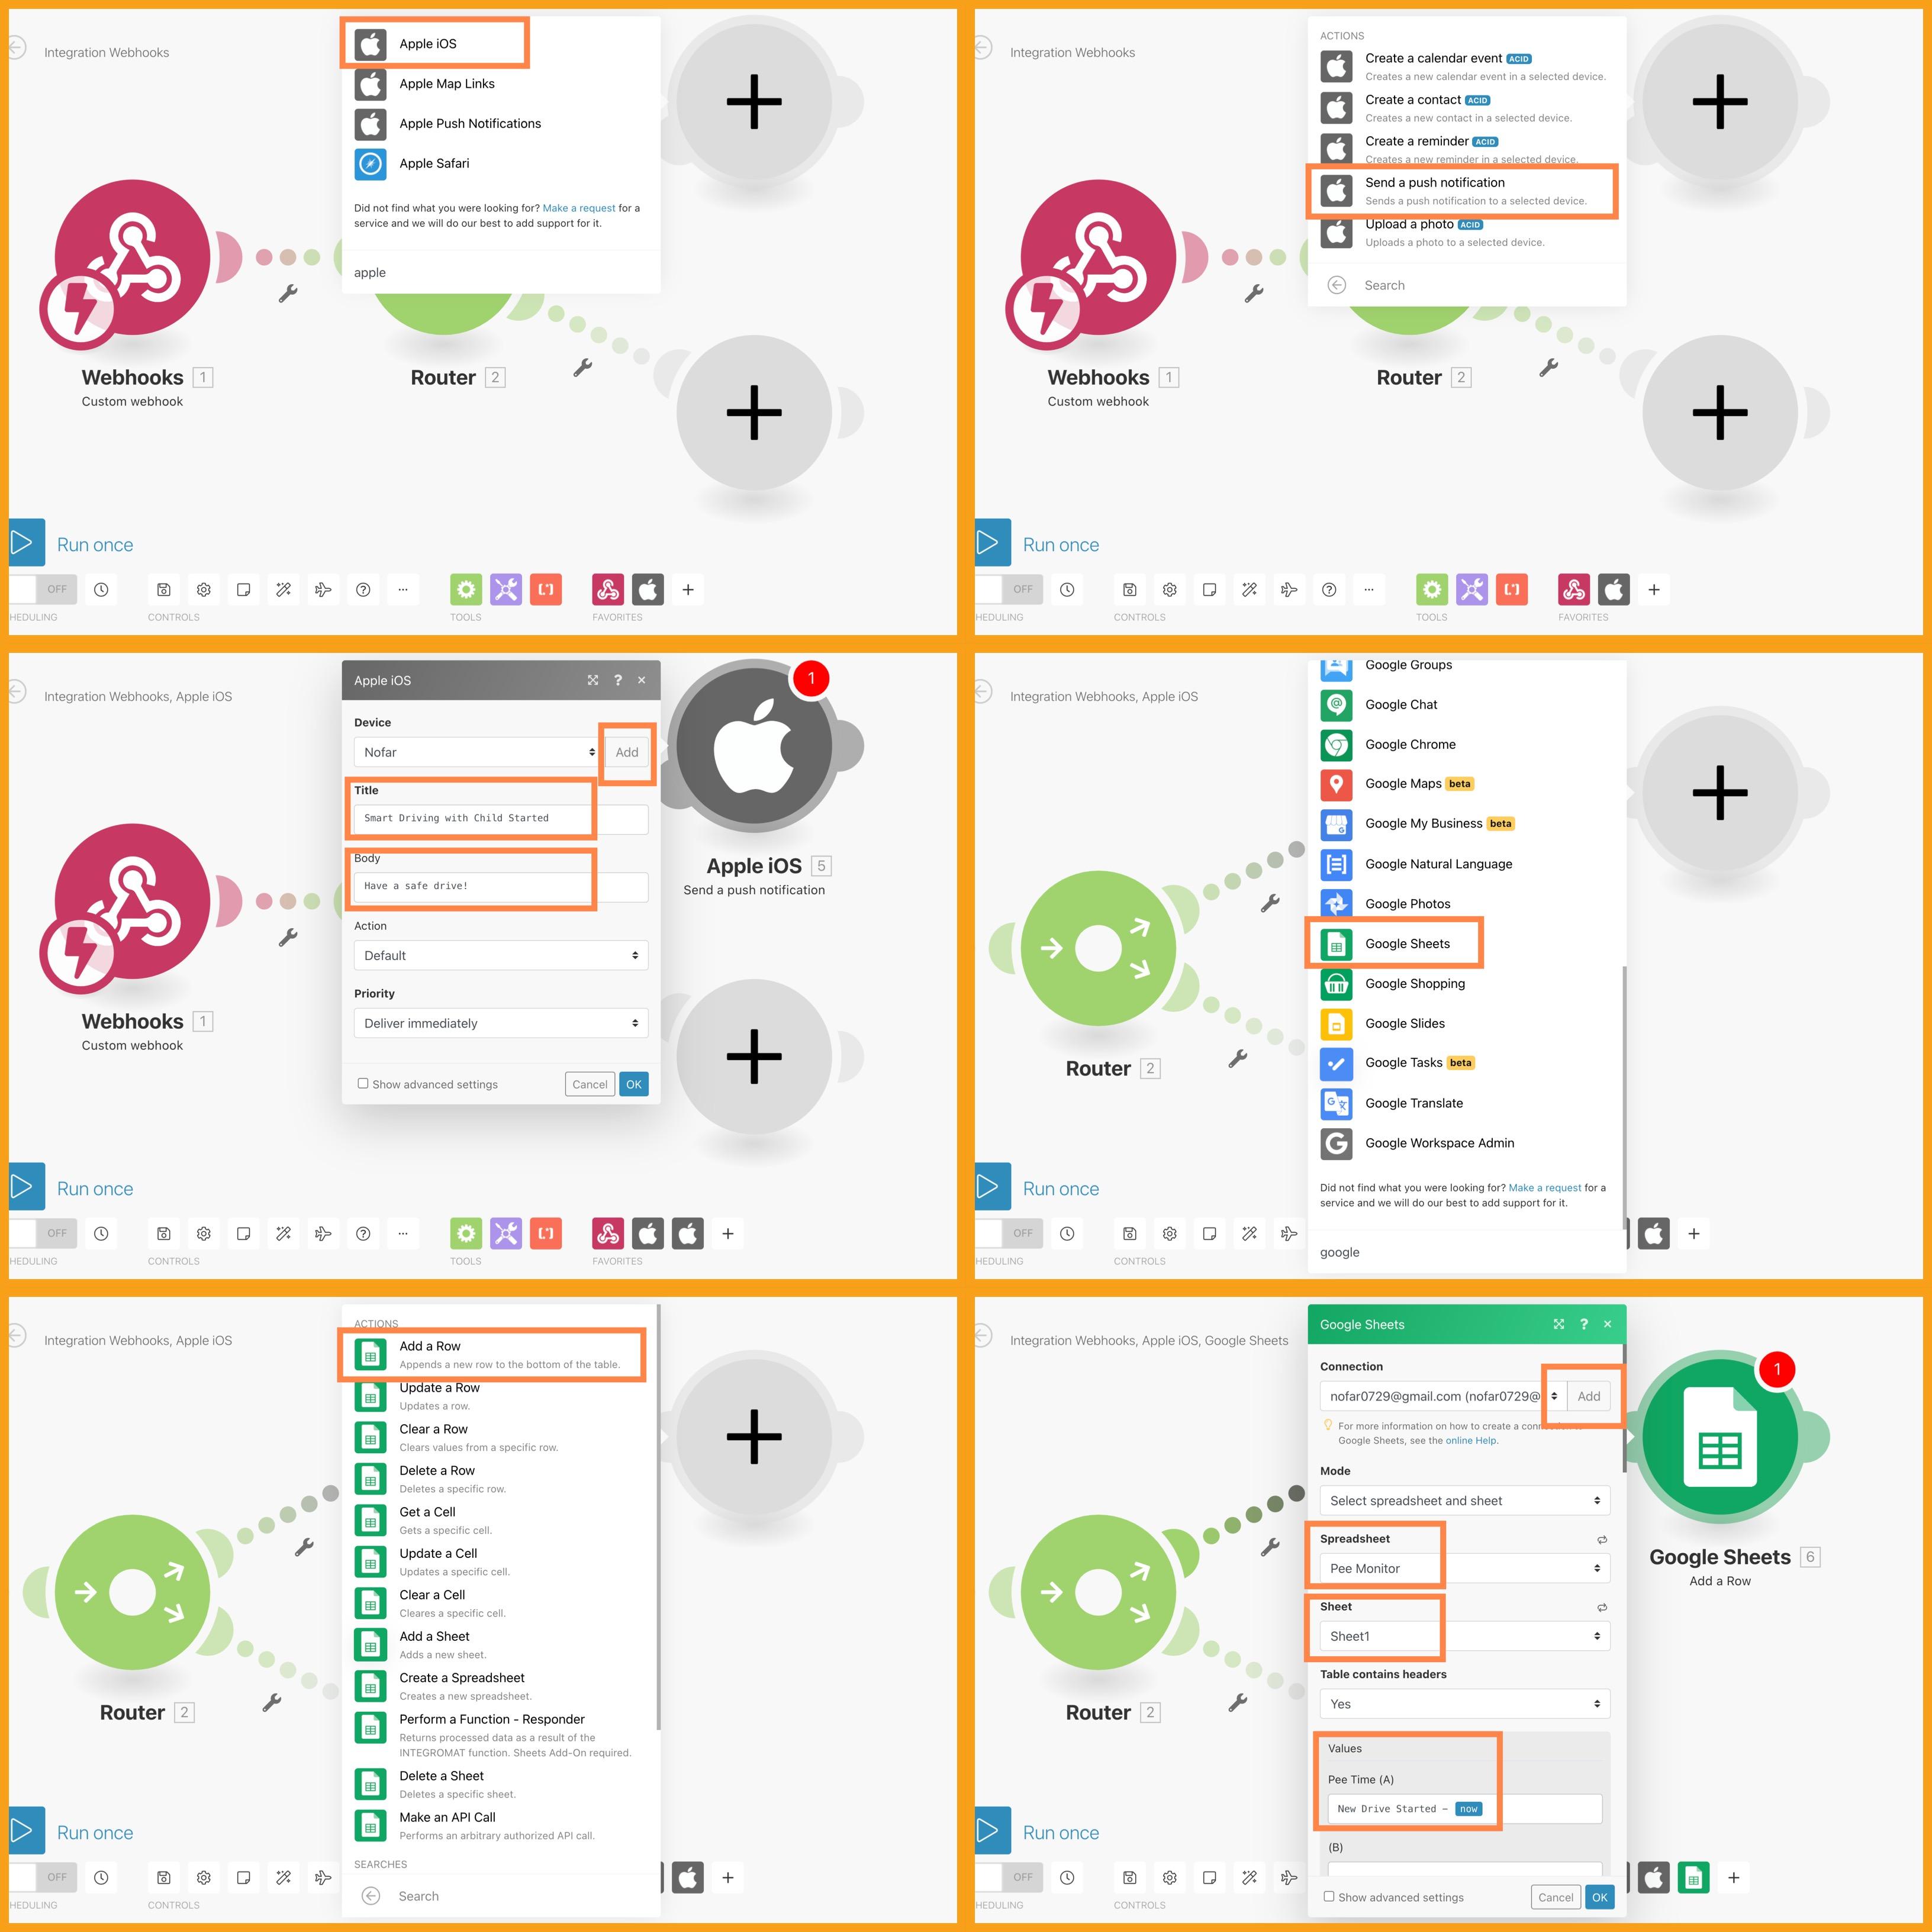
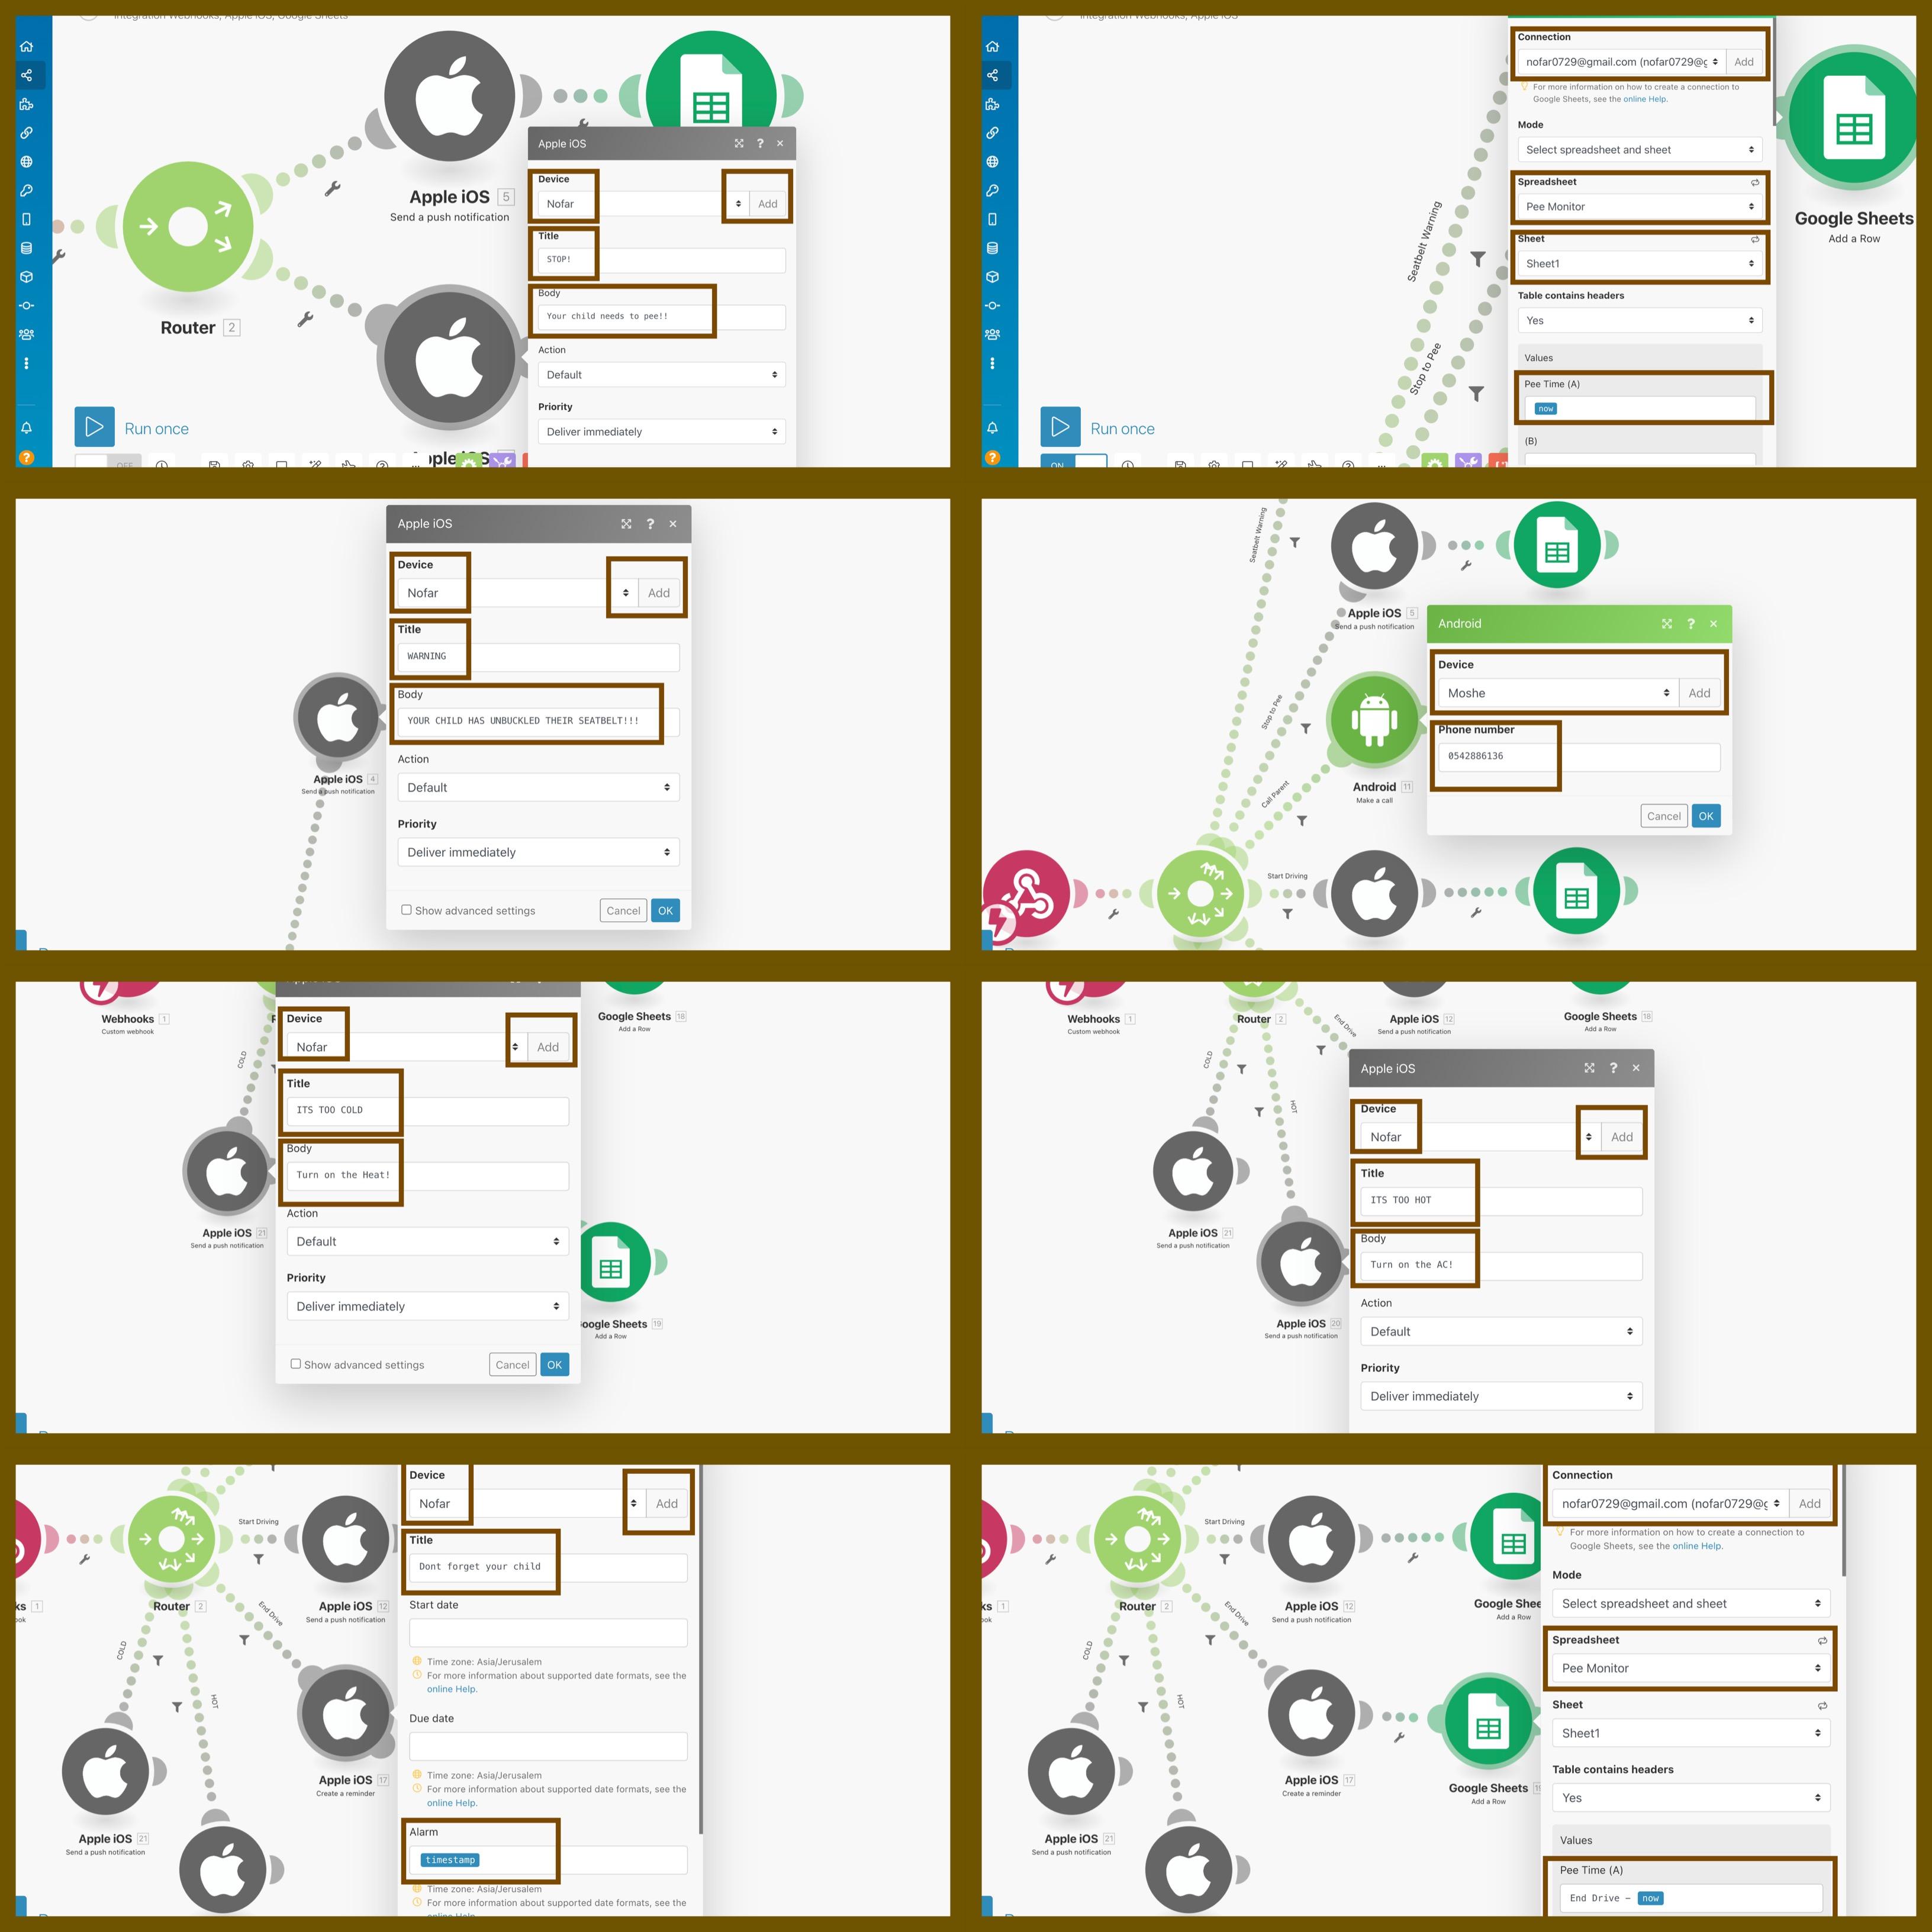
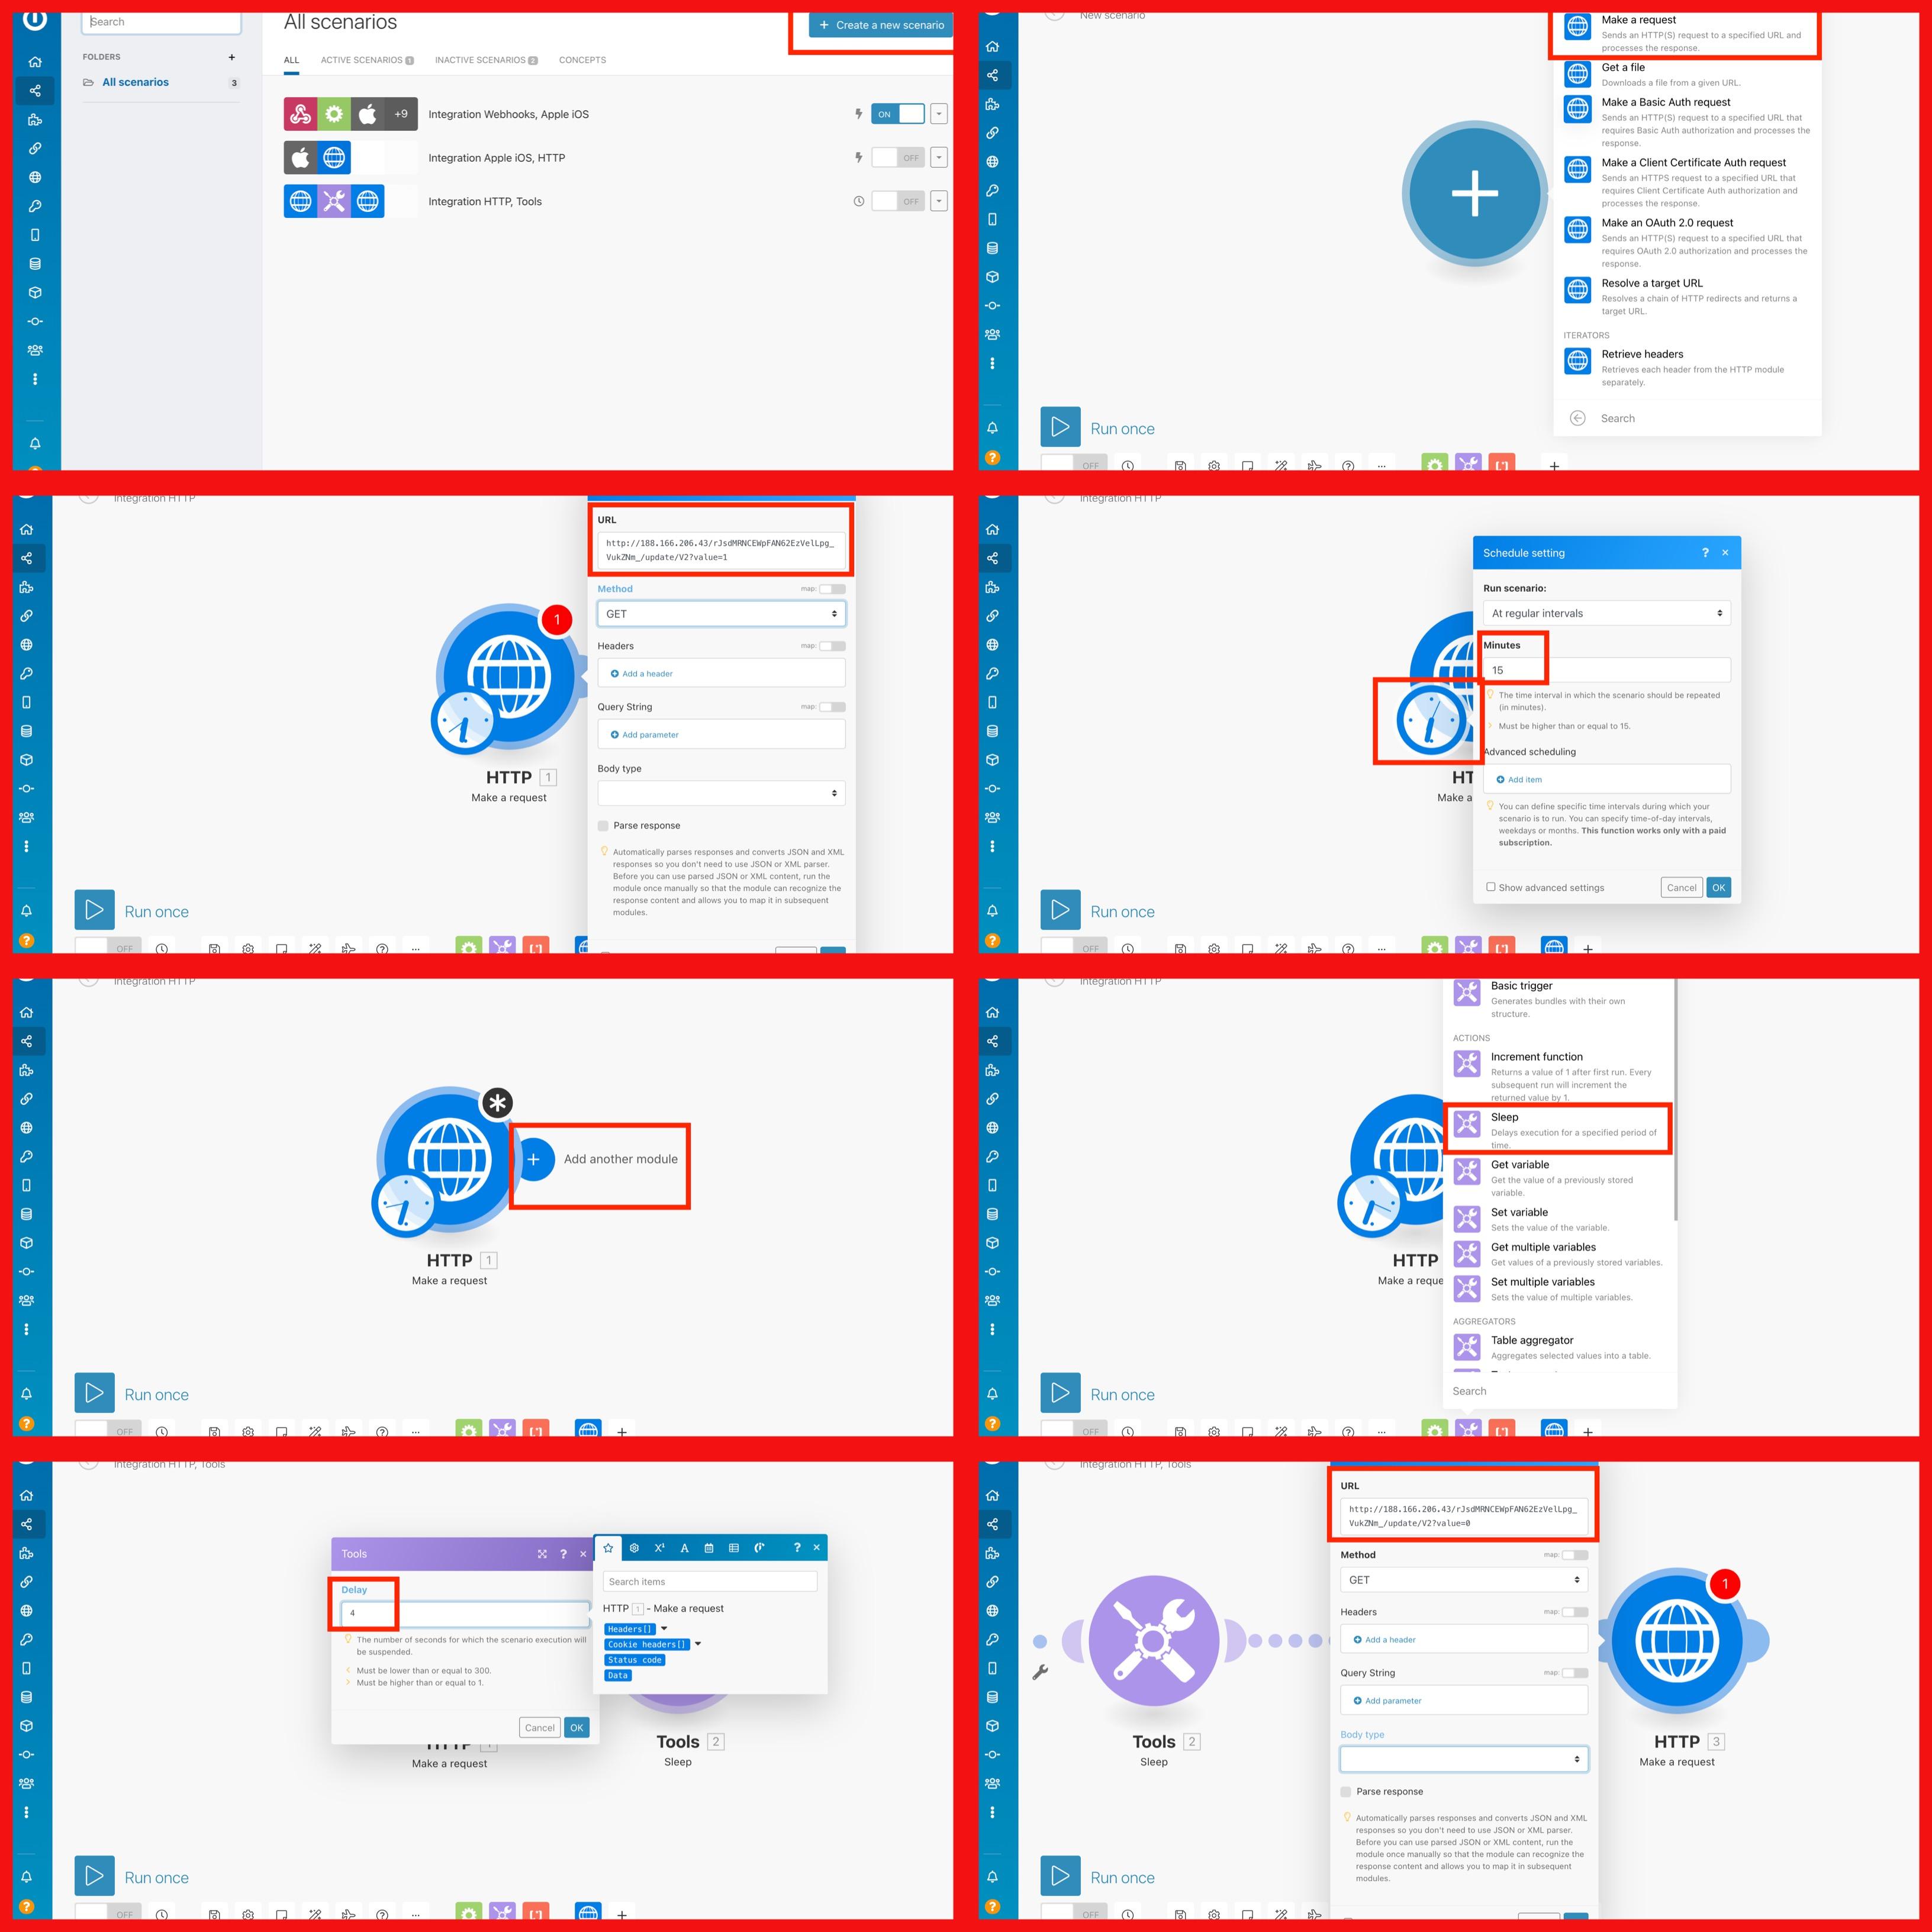
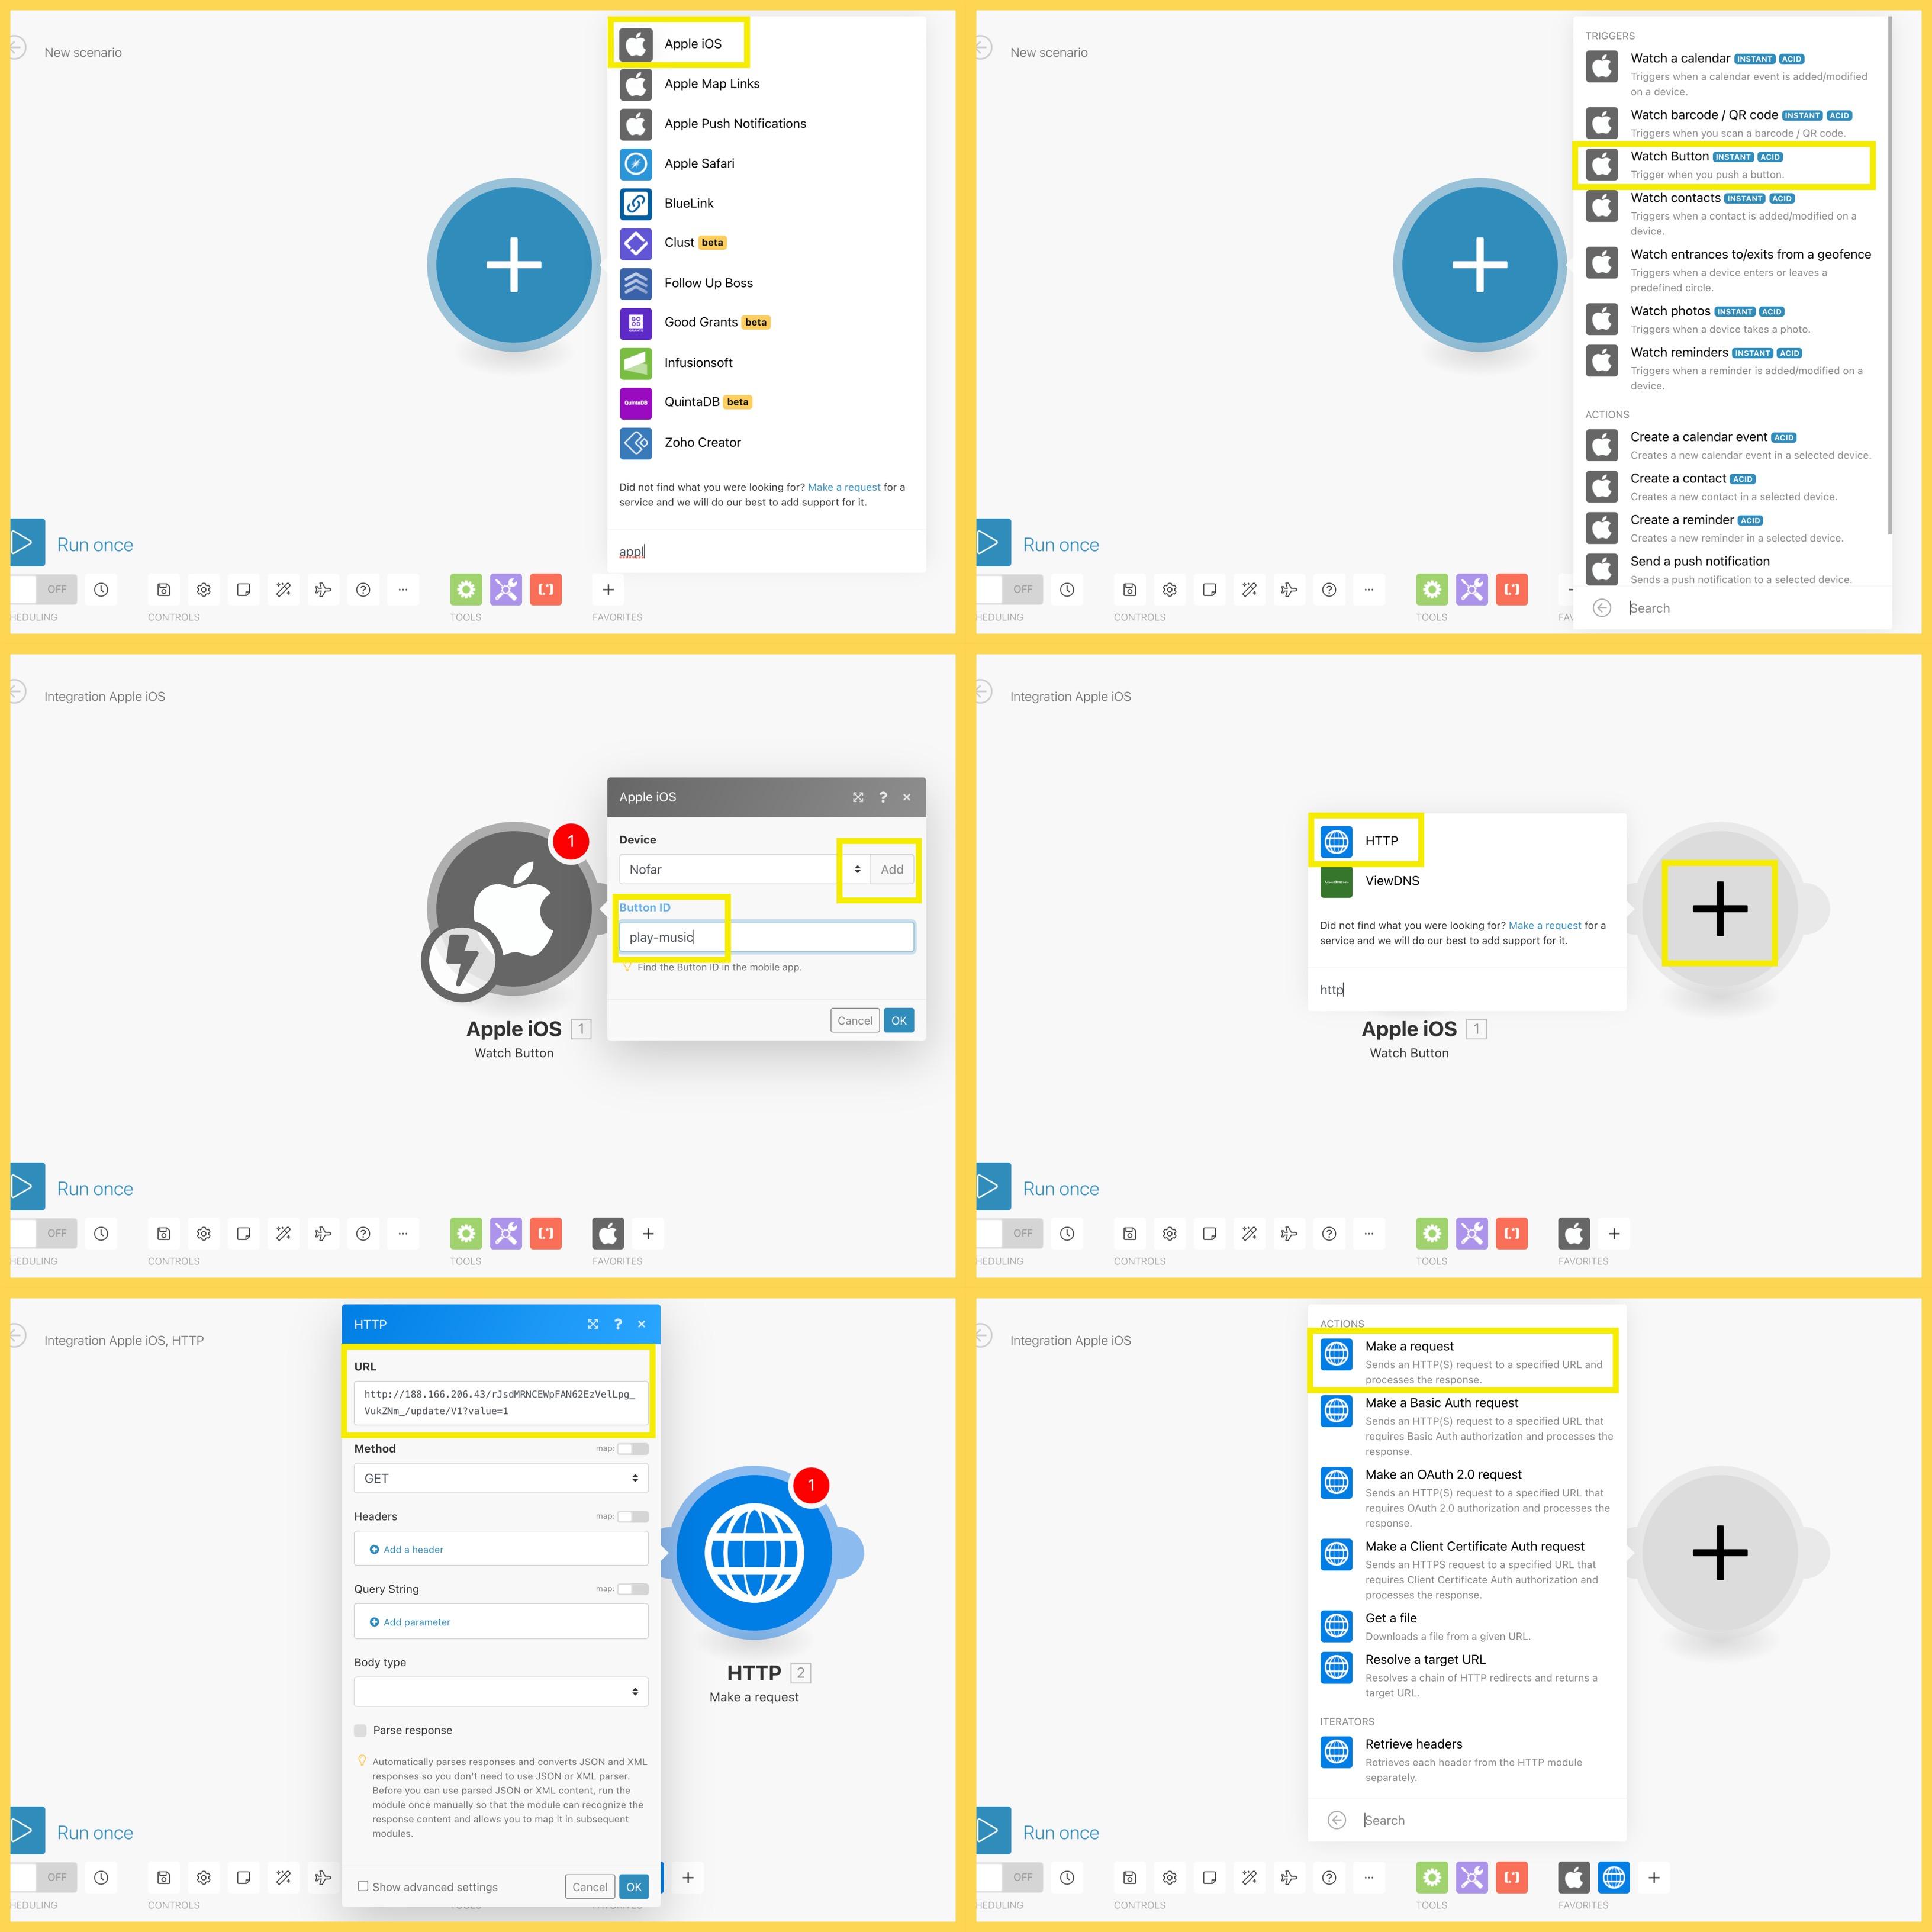
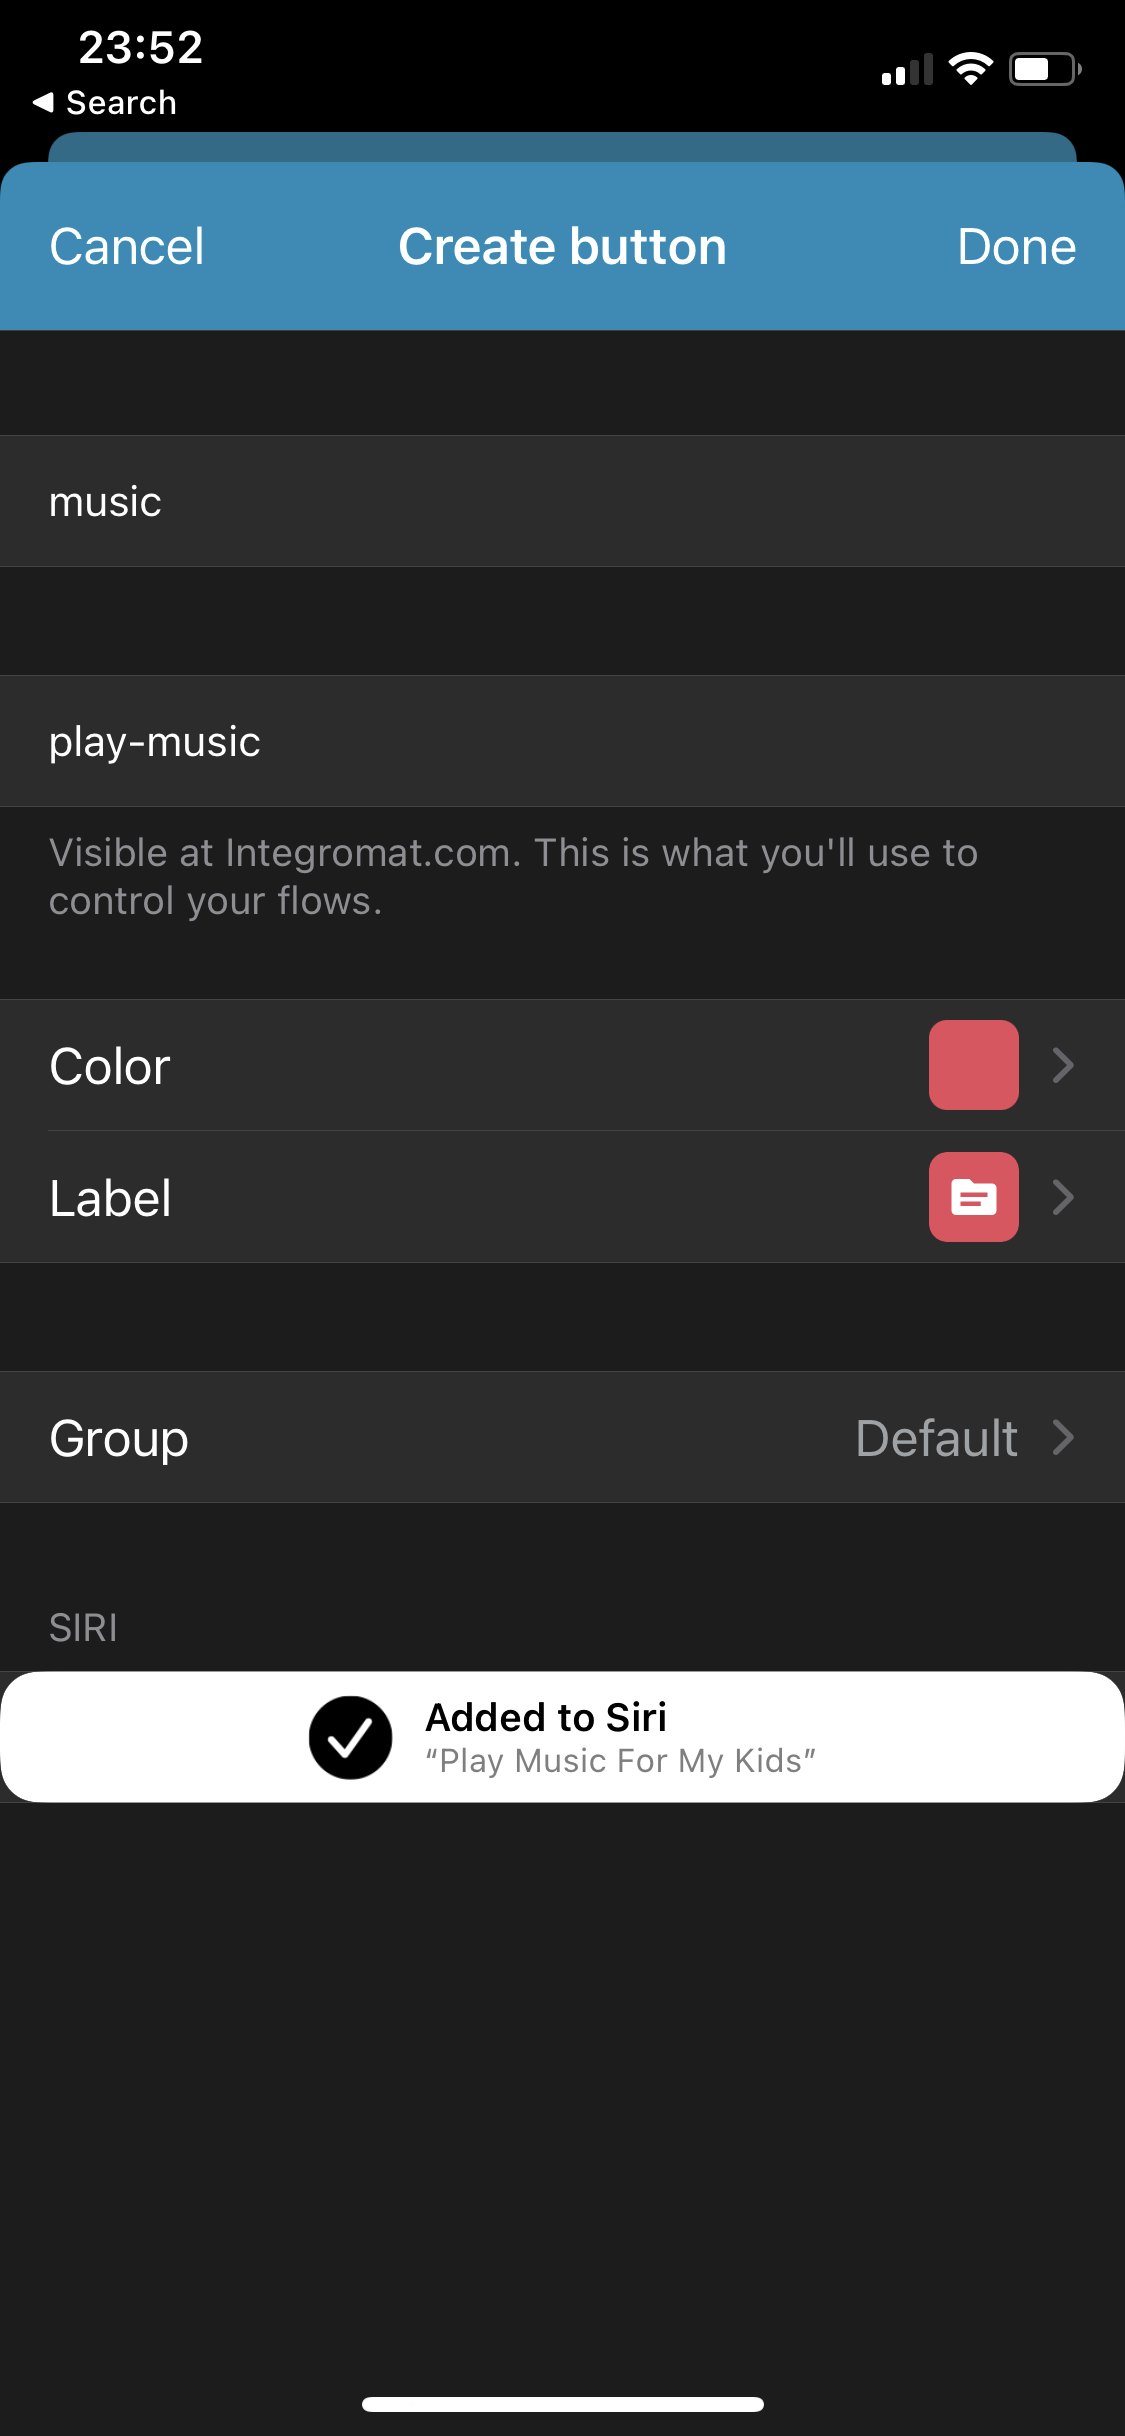
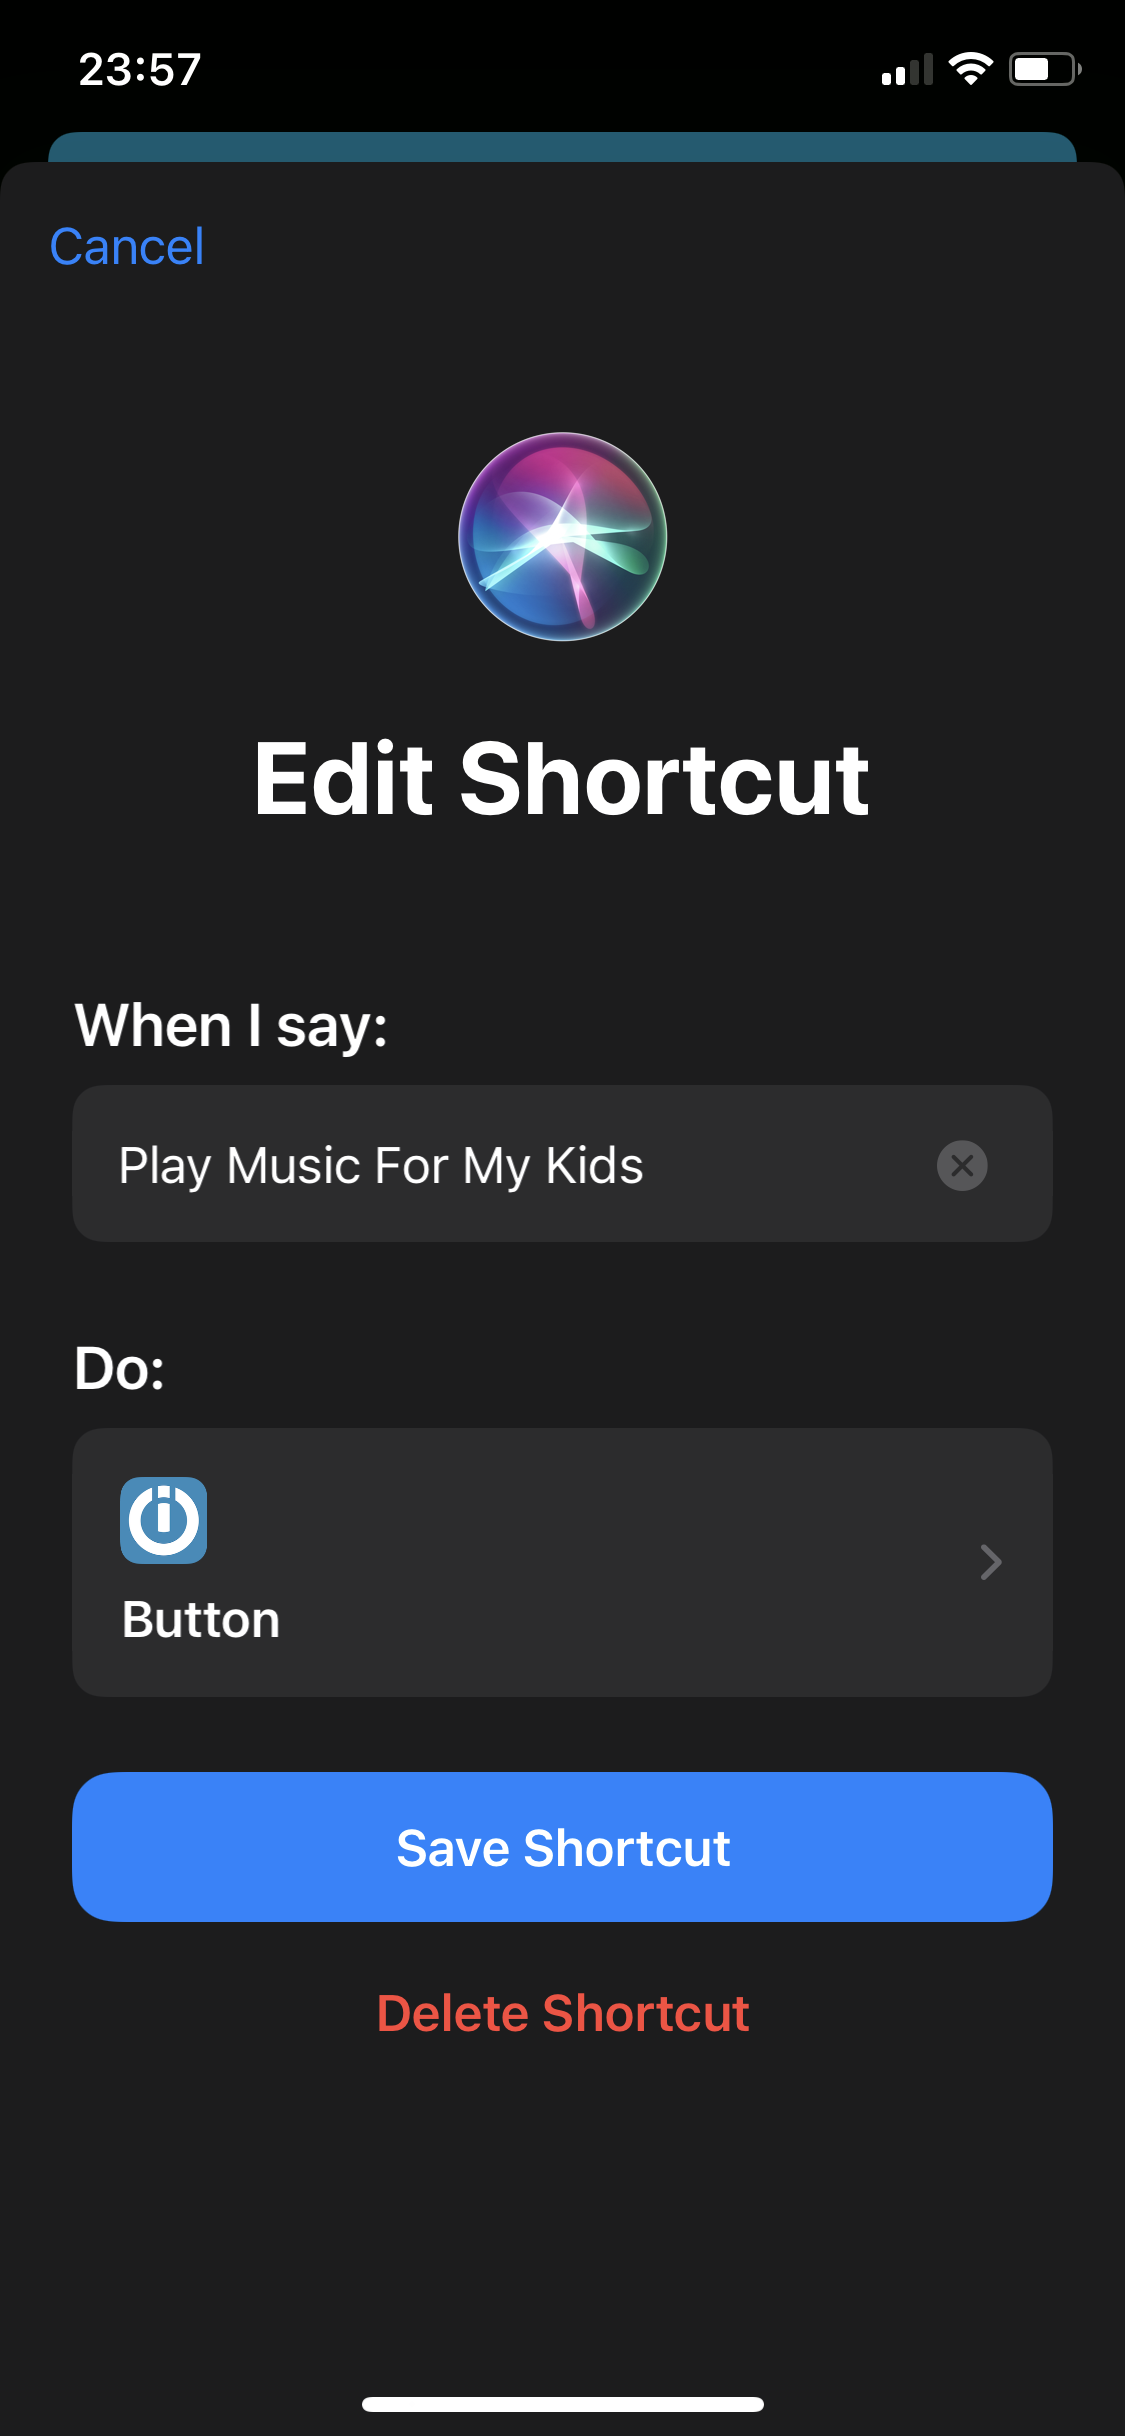
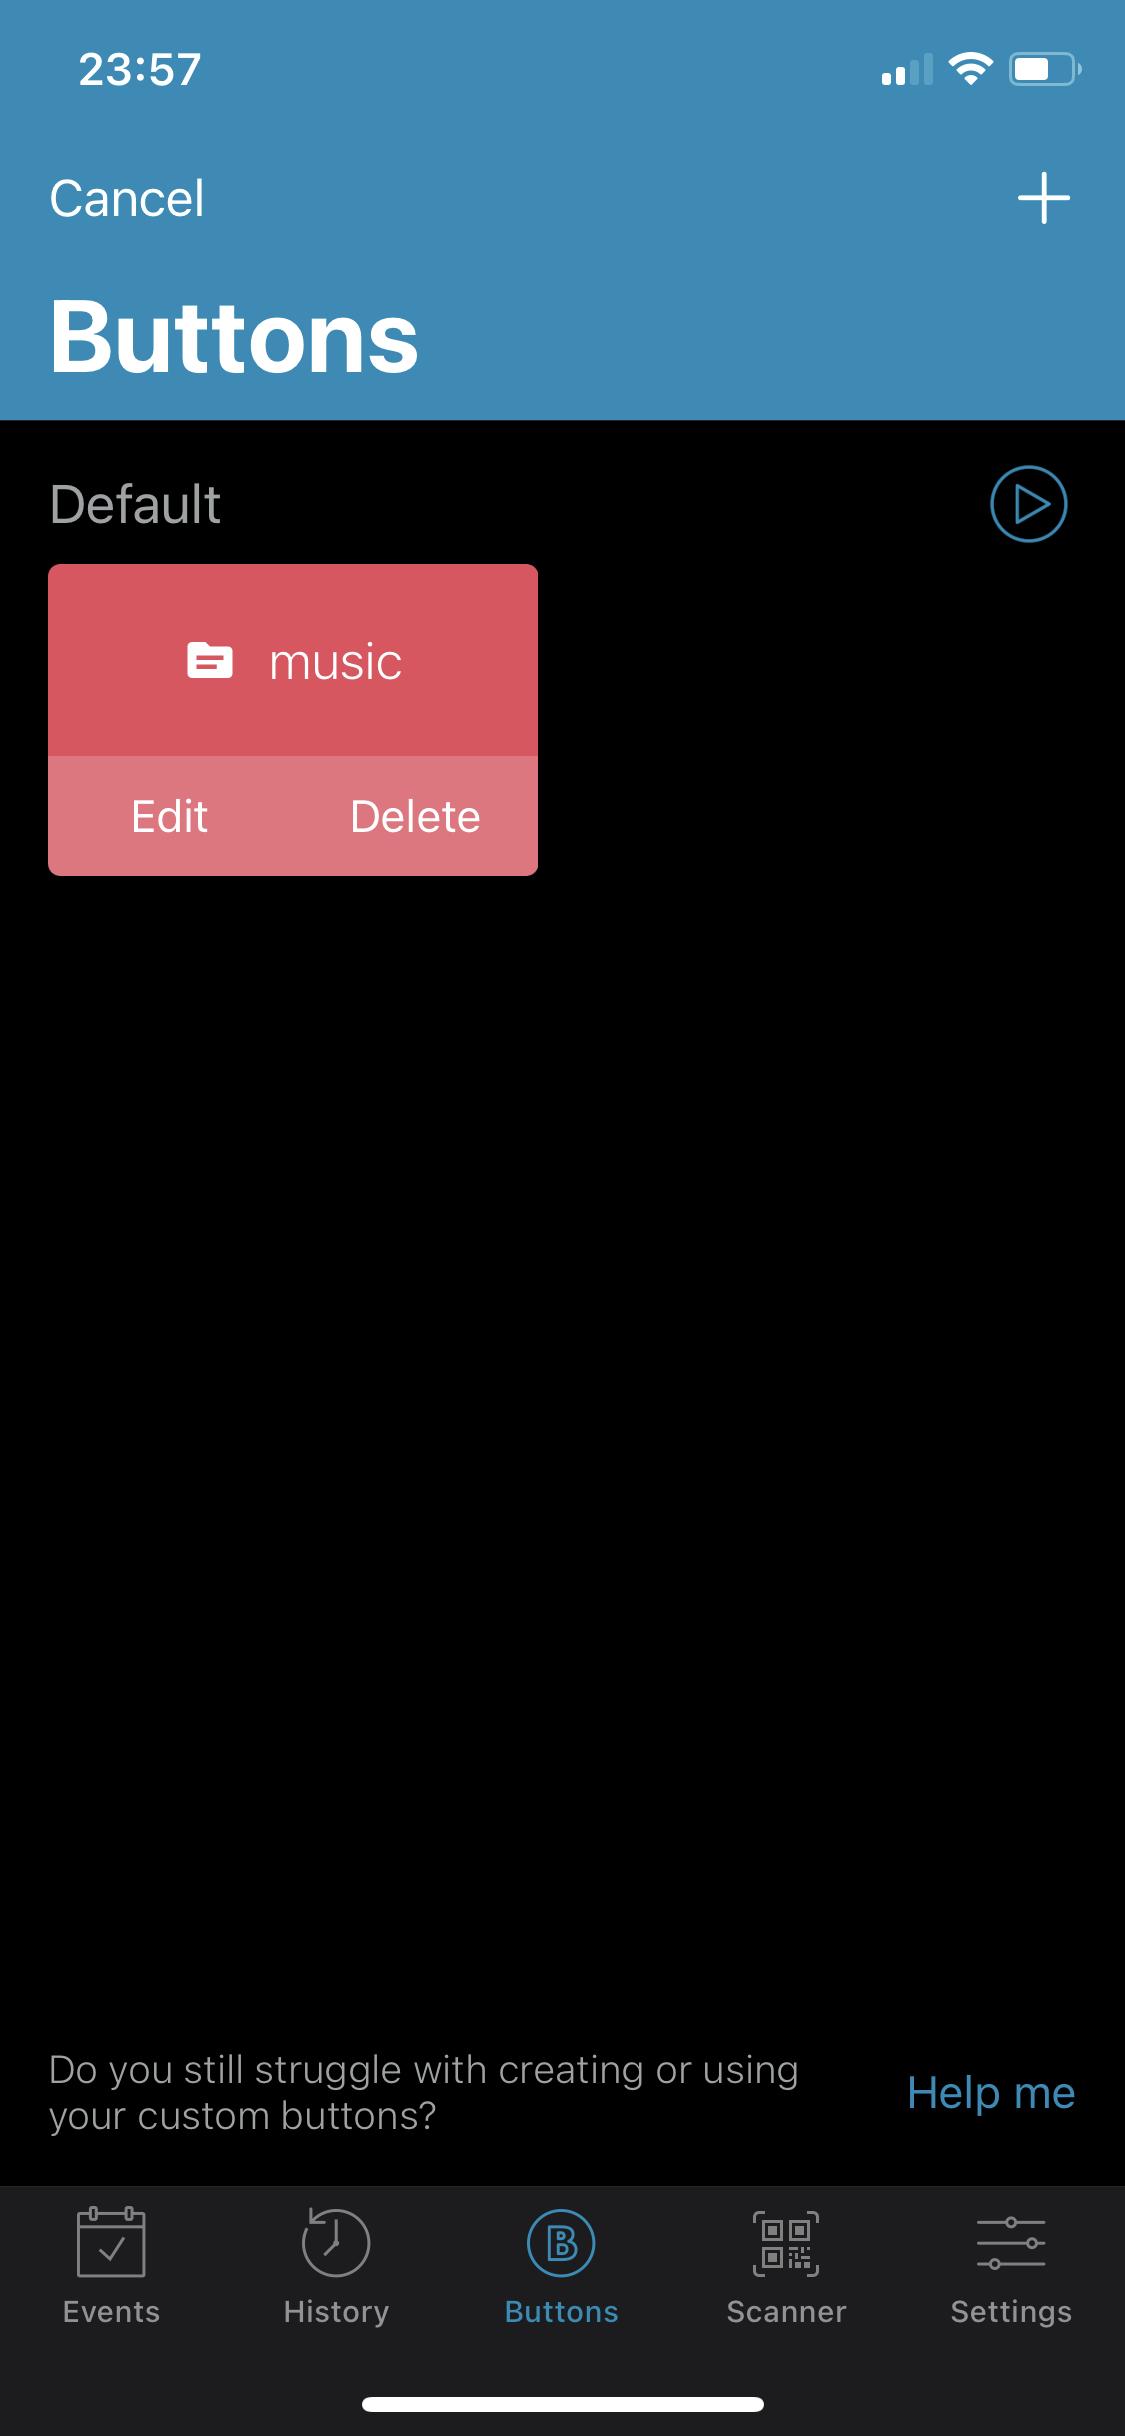
Setting up Integromat is fairly easy if you follow closely.
We broke it down, the explanation will be based on the color of the picture.
Main Scenario
This scenario consists of a main WebHook and a router that based on the value given it continues to the relevant scenario.
- Set up WebHook and Router (GREEN)
- Create a new scenario
- Add a new module, search for WebHooks
- Press on "Custom WebHook"
- Choose your custom webhook or add a new one. Please keep webhook's url - you will need it later.
- Add a new module, press on Flow Control and choose router
- Start Drive Scenario (ORANGE)
- Add a new module, search for Apple IOS
- Press on push notification
- Choose your IOS device or add a new one
- Add a title and body for the message
- Add a new module, search for google sheets
- Choose your connection or add a google account.
- Choose "Add a row"
- Choose the google sheet information (speadsheet, sheet number, value).
- Seatbelt, Temperature Notification, Pee Monitor Notification, End Drive, Forgot Child (BROWN)
- Seat Belt:
- Add a new module, search for Apple IOS
- Press on push notification
- Choose your IOS device or add a new one
- Add a title and body for the message
- Seat Belt:
- Pee Monitor Notification:
- Add a new module, search for Apple IOS
- Press on push notification
- Choose your IOS device or add a new one
- Add a title and body for the message
- Add a new module, search for google sheets
- Choose your connection or add a google account.
- Choose "Add a row"
- Choose the google sheet information (speadsheet, sheet number, value).
- End Drive
- Add a new module, search for Apple IOS
- Press on "Create a Reminder"
- Choose your IOS device or add a new one
- Add a Title to the reminder
- Add an Alarm time
- Add a new module, search for google sheets
- Choose your connection or add a google account.
- Choose "Add a row"
- Choose the google sheet information (speadsheet, sheet number, value).
- Forgot Child
- Add a new module, search for Android
- Choose your Android device or add a new one
- Enter the phone number you wish to call
- Temperature Notification
- Add a new module, search for Apple IOS
- Press on push notification
- Choose your IOS device or add a new one
- Add a title and body for the message (hot)
- Repeat for cold
Check Temperature and Ask for Pee scenario (RED):
- Create a new scenario
- Add a new module, search for HTTP
- Click on make a request
- In the url enter the value you wish to change * so that the temperature and pee monitor start
- Make sure you schedule the timer for 15 min.
- Add another module, search for tools, then click on sleep
- Make sure to put in the delay you wish.
- Add a new module, search for HTTP
- Click on make a request
- In the url enter the value you wish to change (bring back to original)
Play Music Scenario (YELLOW):
- Create a new scenario
- Add a new module, search for Apple IOS
- Click on "Watch Button"
- Add your IOS device ** and choose it
- Enter your button ID (the one you created on the app on your phone)
- Add a new module, search for HTTP, click on make a request
-
In the url enter the value you wish to change
In the IOS device:
Add Button, name it play-music, add the Siri option to: "Play music for my kids"
Setting and Configuring Blynk
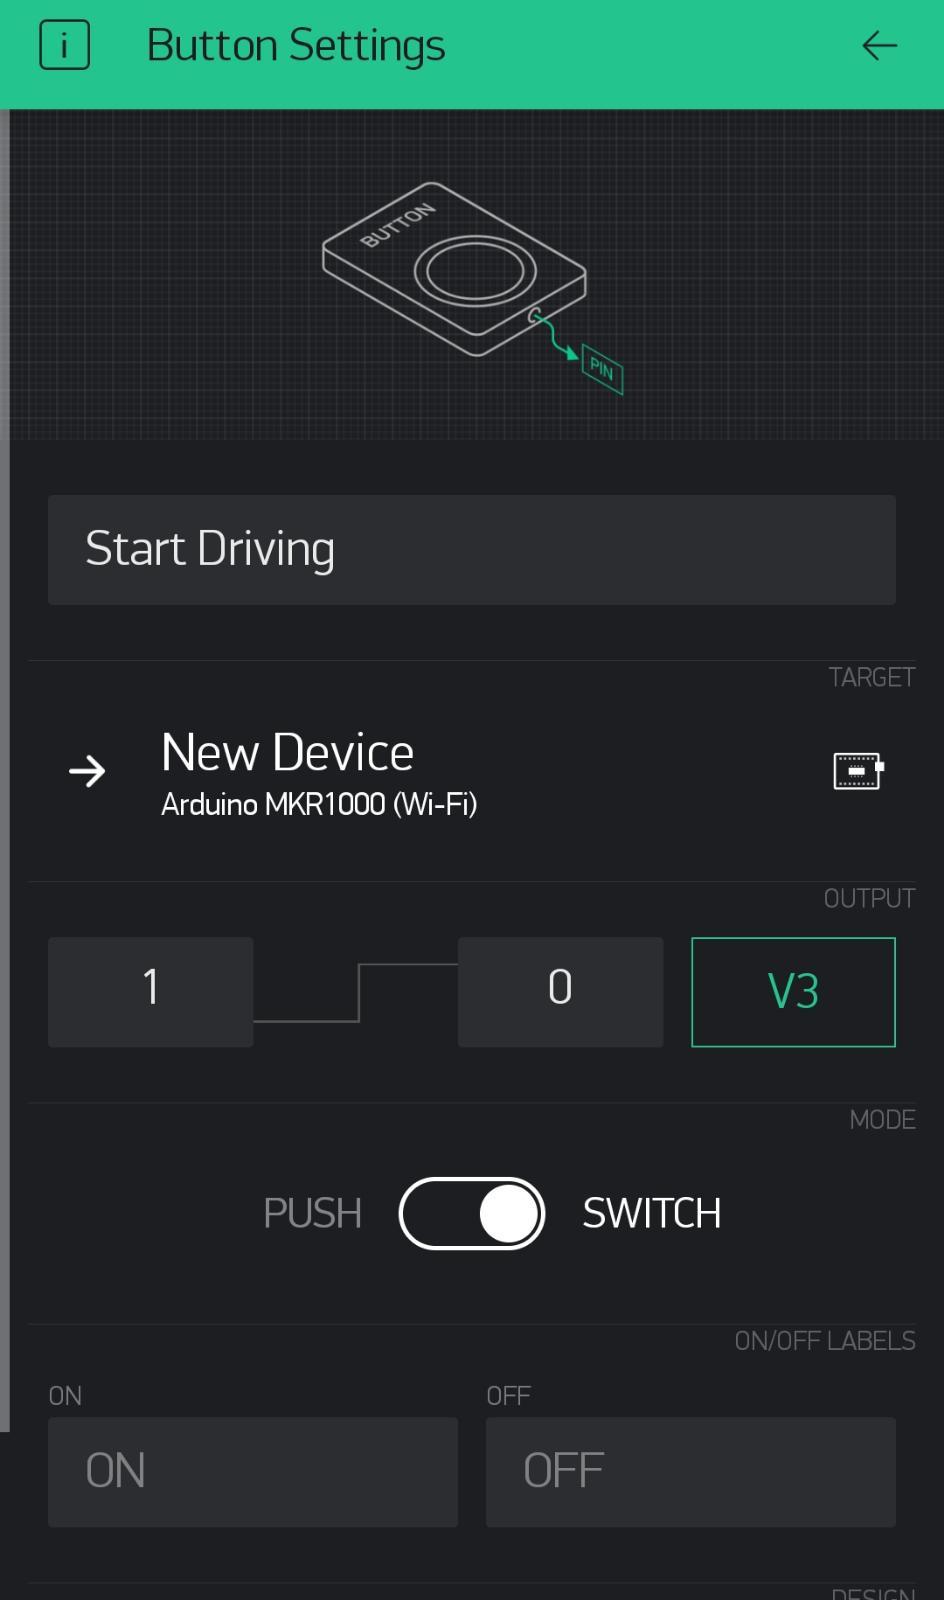
.jpeg)
.jpeg)
.jpeg)
.jpeg)
.jpeg)
.jpeg)
.jpeg)
- Enter the Blynk app, go to your project.
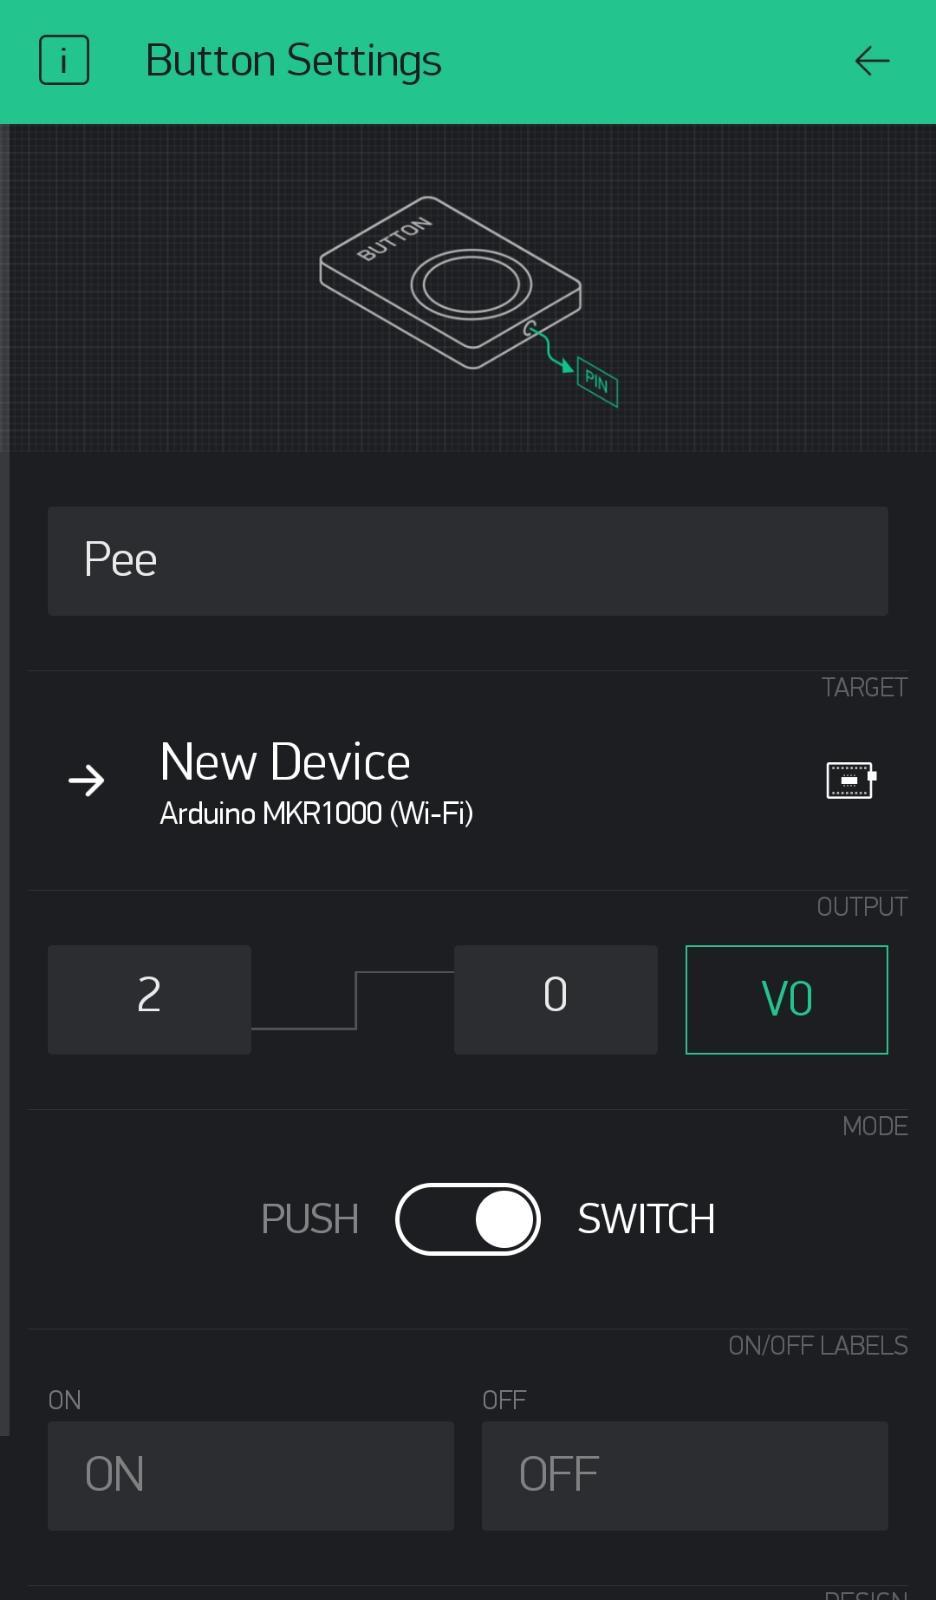
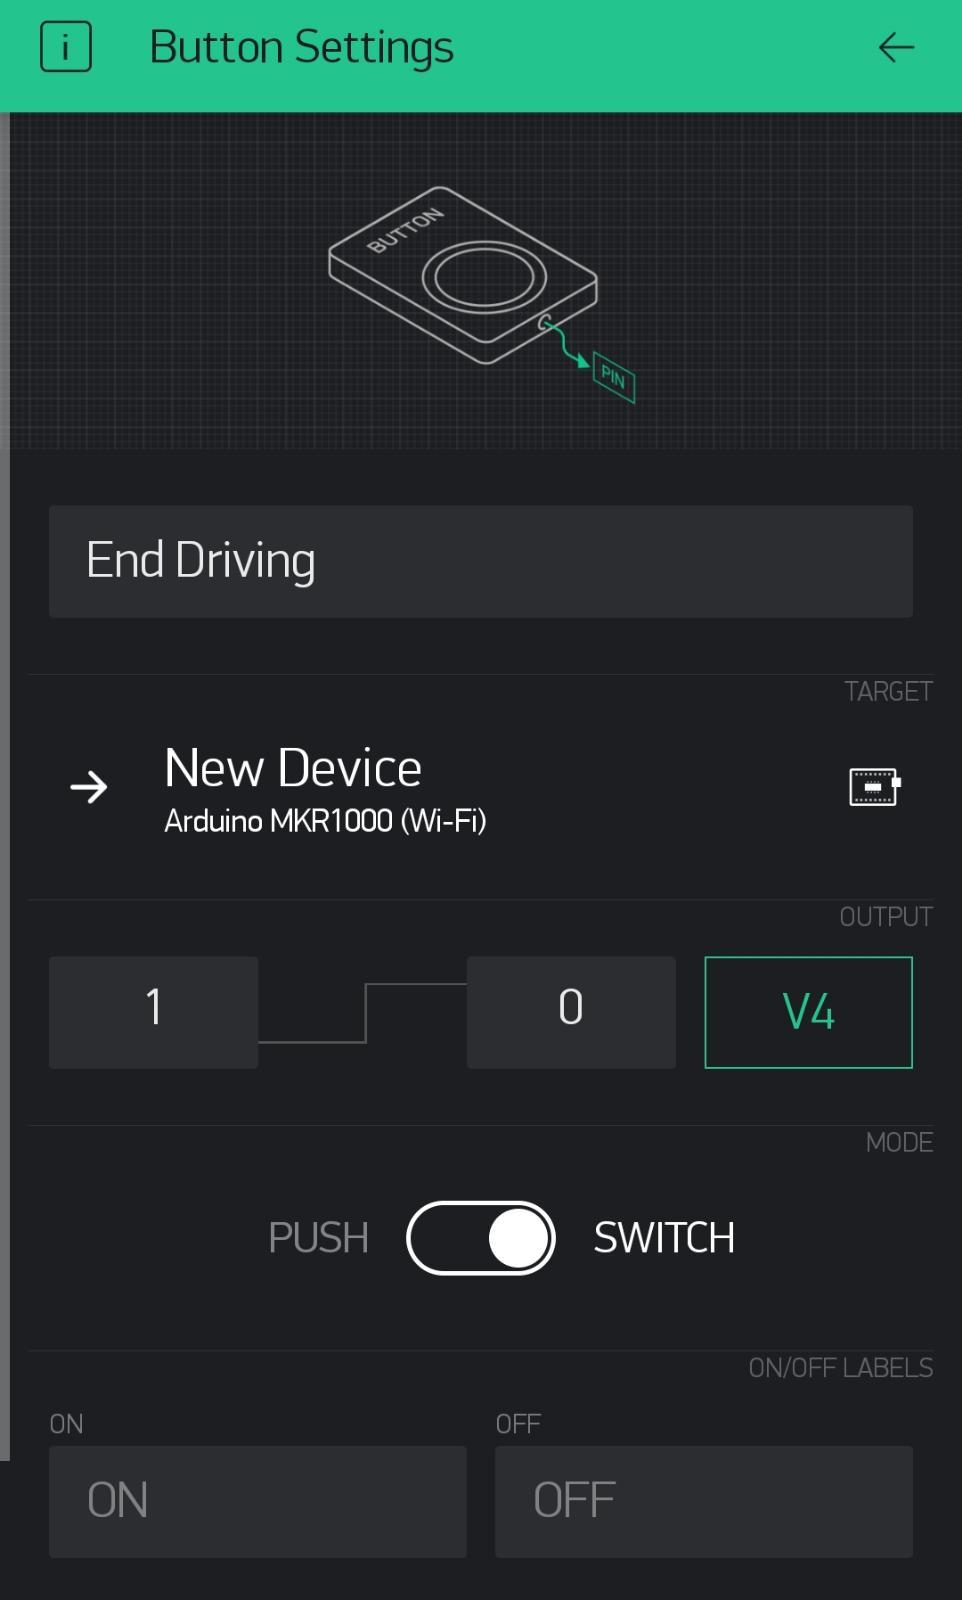
- Press on the “+” Button in order to add widgets.
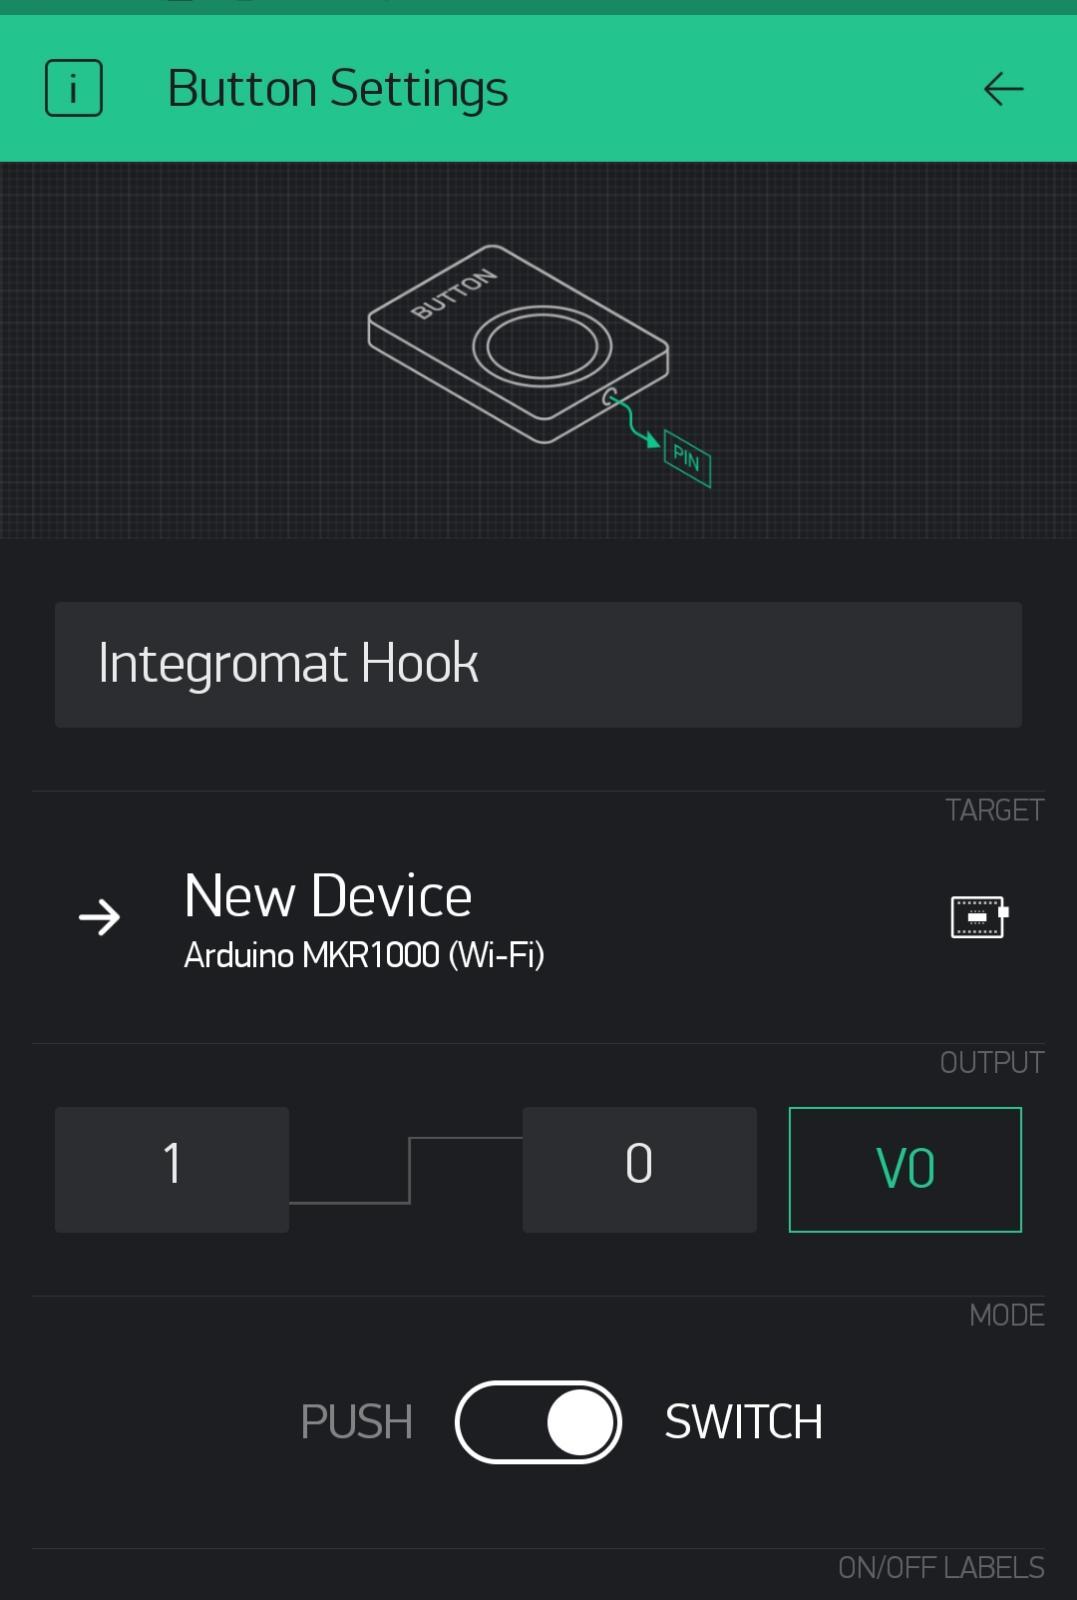
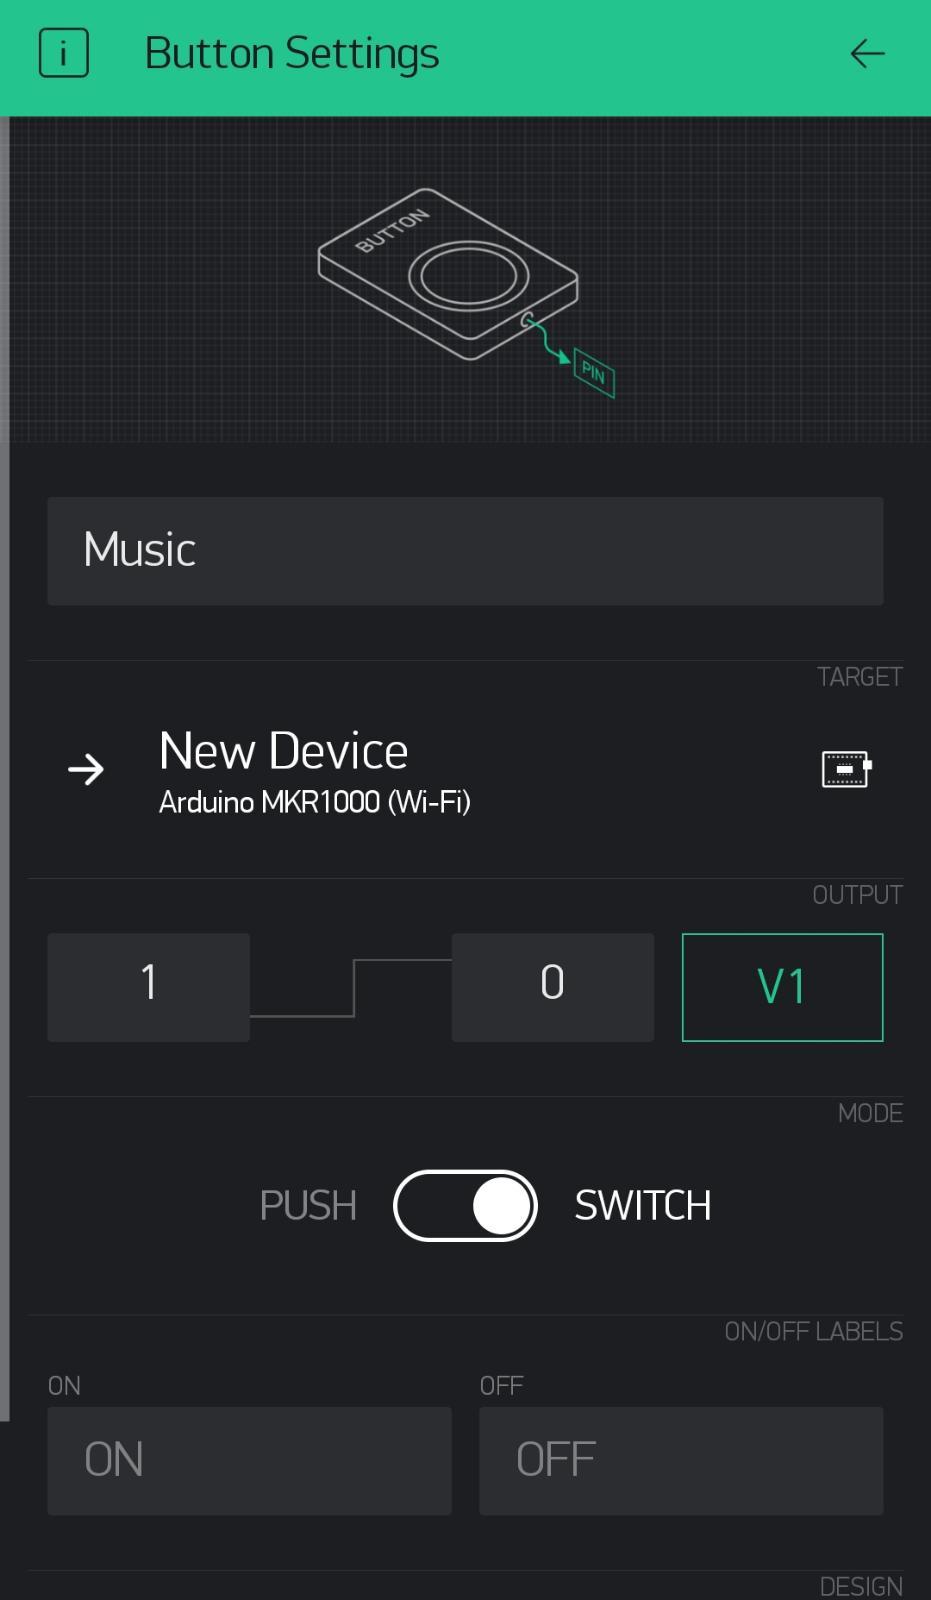
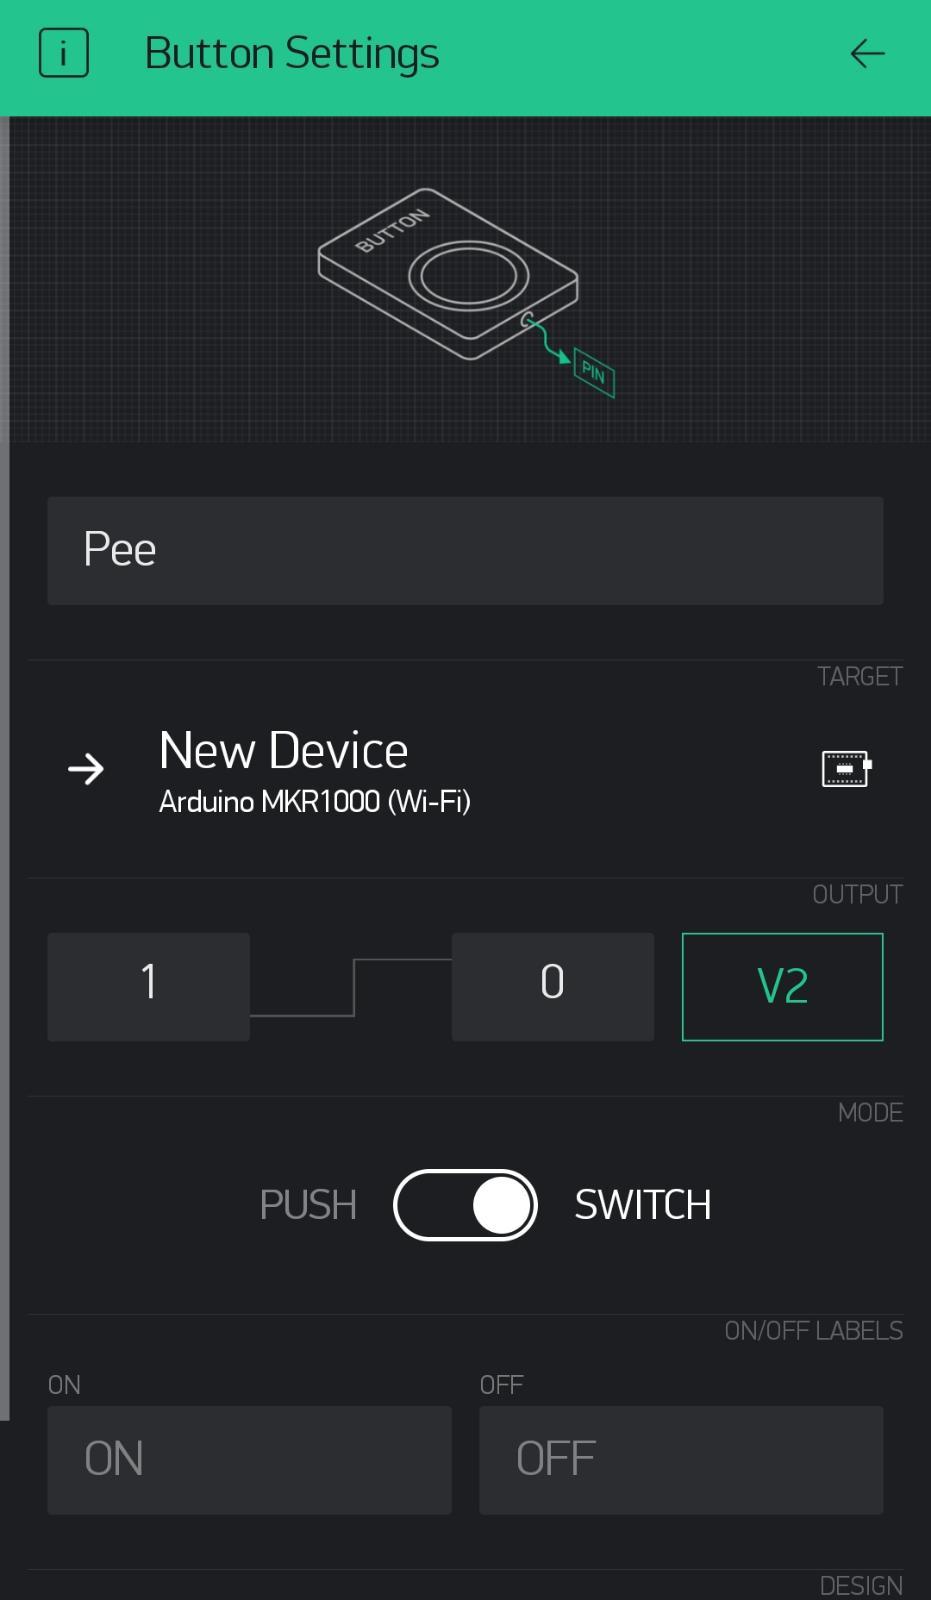
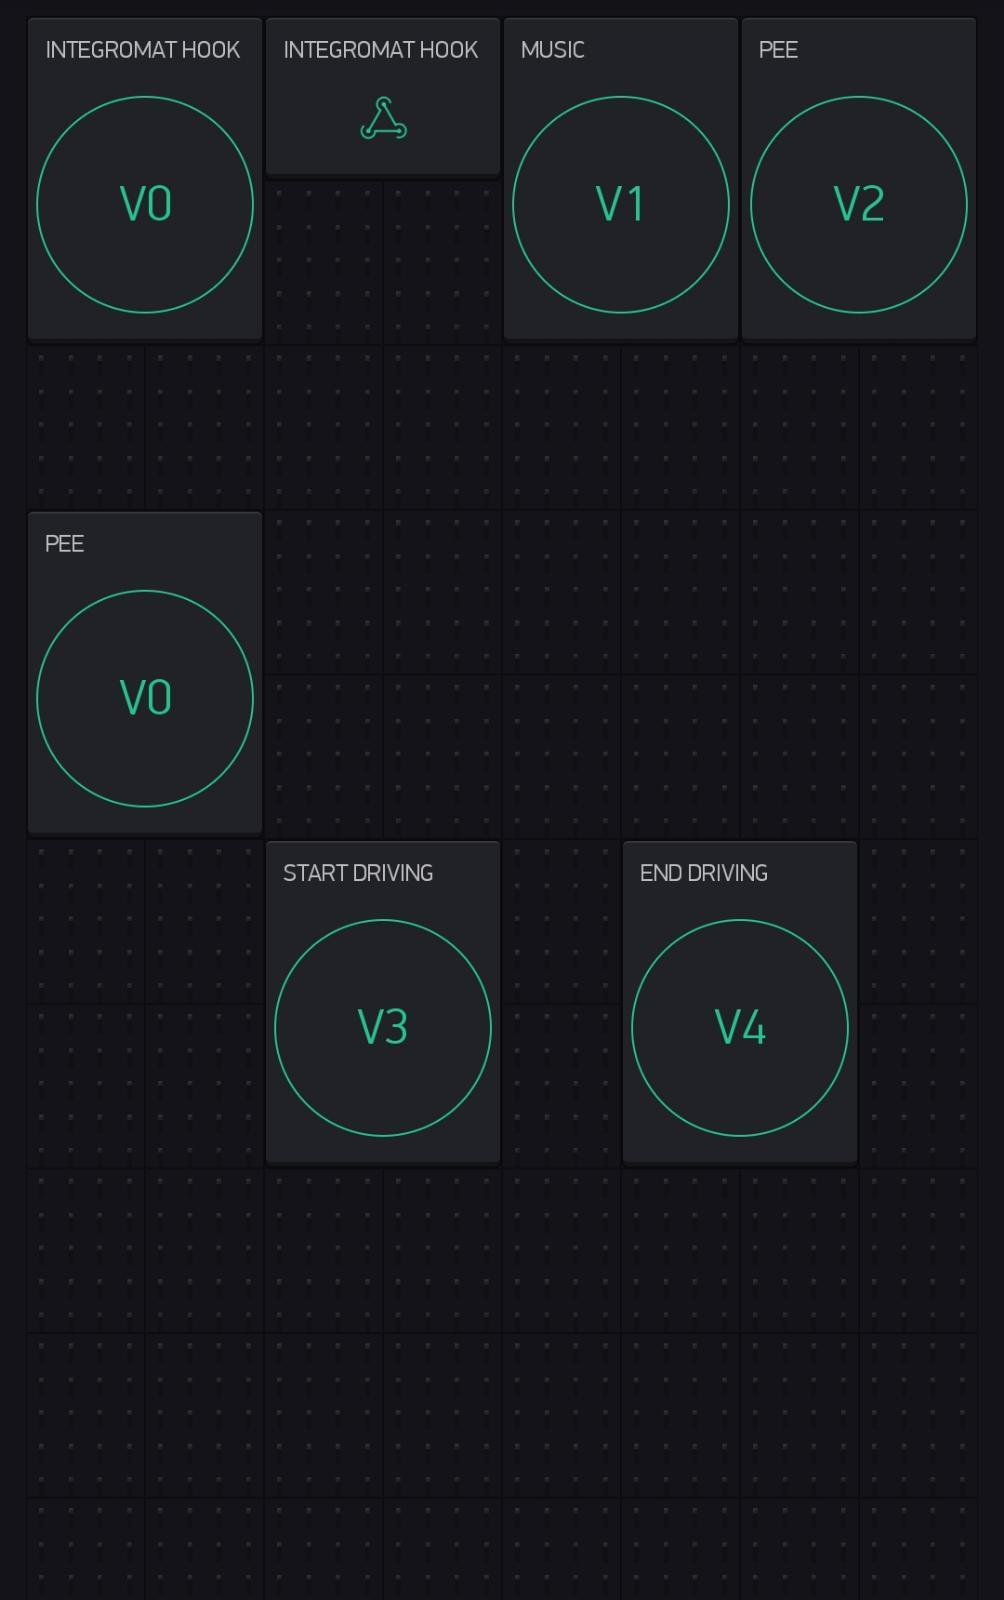
- Add 6 buttons and 1 webhook, configured as the pictures:
- Integromat hook button, with pin V0
- Music button, with pin V1
- Pee button. with pin V2
- Another pee button, with pin V0
- Start driving button, with pin V3
- End driving button, with pin V4
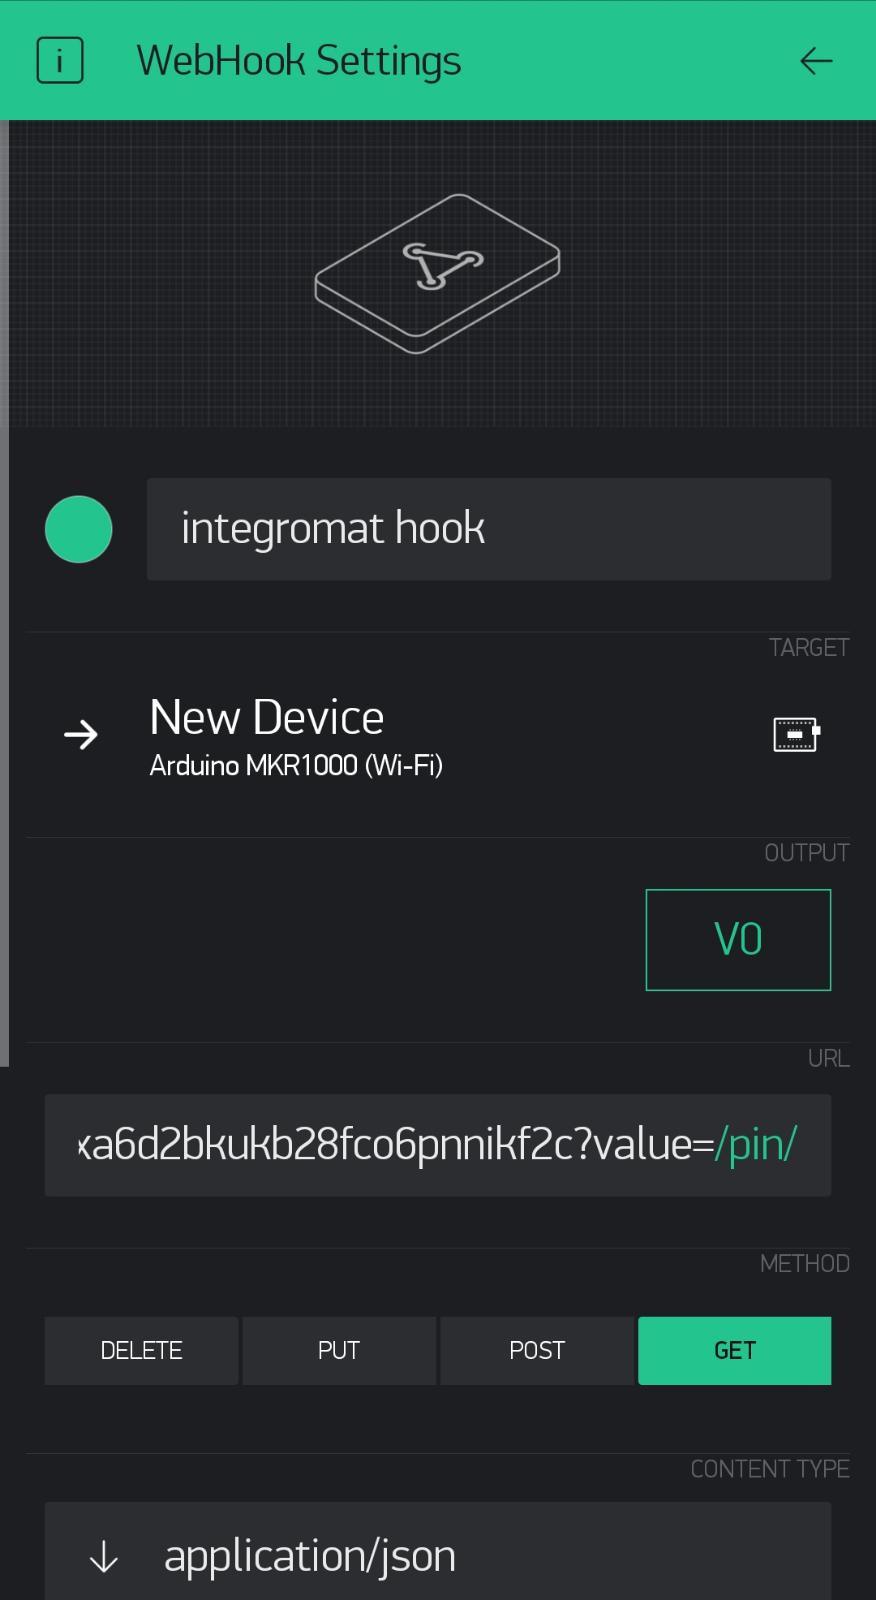
- Integromat hook webhook
- On the webhook widget, in the url section, put the Integromat webhook url you saved from the last step. You should add ?value=/pin/ as you can see in the relevant picture.
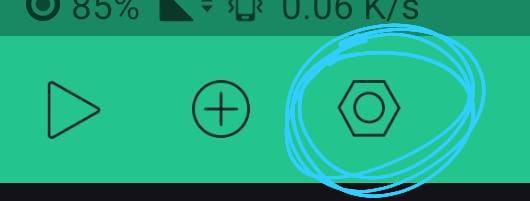
- Once you finished, press on the “Play”, on the top-left corner, and keep it running the whole time.
You can see here also the result with all the widgets.
Writing the Code
- Create a new folder in your computer.
- Download the code and put it into that folder
- Open the .ino files - MomSide.ino and ChildSide.ino (Accept when it asks you to create folder), and edit those line
- Each file must has it's own blynk token (that's why we created 2 devices) and wifi details. You can open hot-spot in your smartphone.
- After those configurations, saved the files.
- Connect the first CPX and reload it the MomSide.ino file, using Arduino IDE (Probably Ctrl+U)
-
Connect the second CPX and reload it the ChildSide.ino file, using Arduino IDE (Probably Ctrl+U)
-
After reloading, connect the CPXs to the battery holder.
-
Wait for the green light - it's on! Check on Blynk app that your devices are connecting.
Setting Up the Car
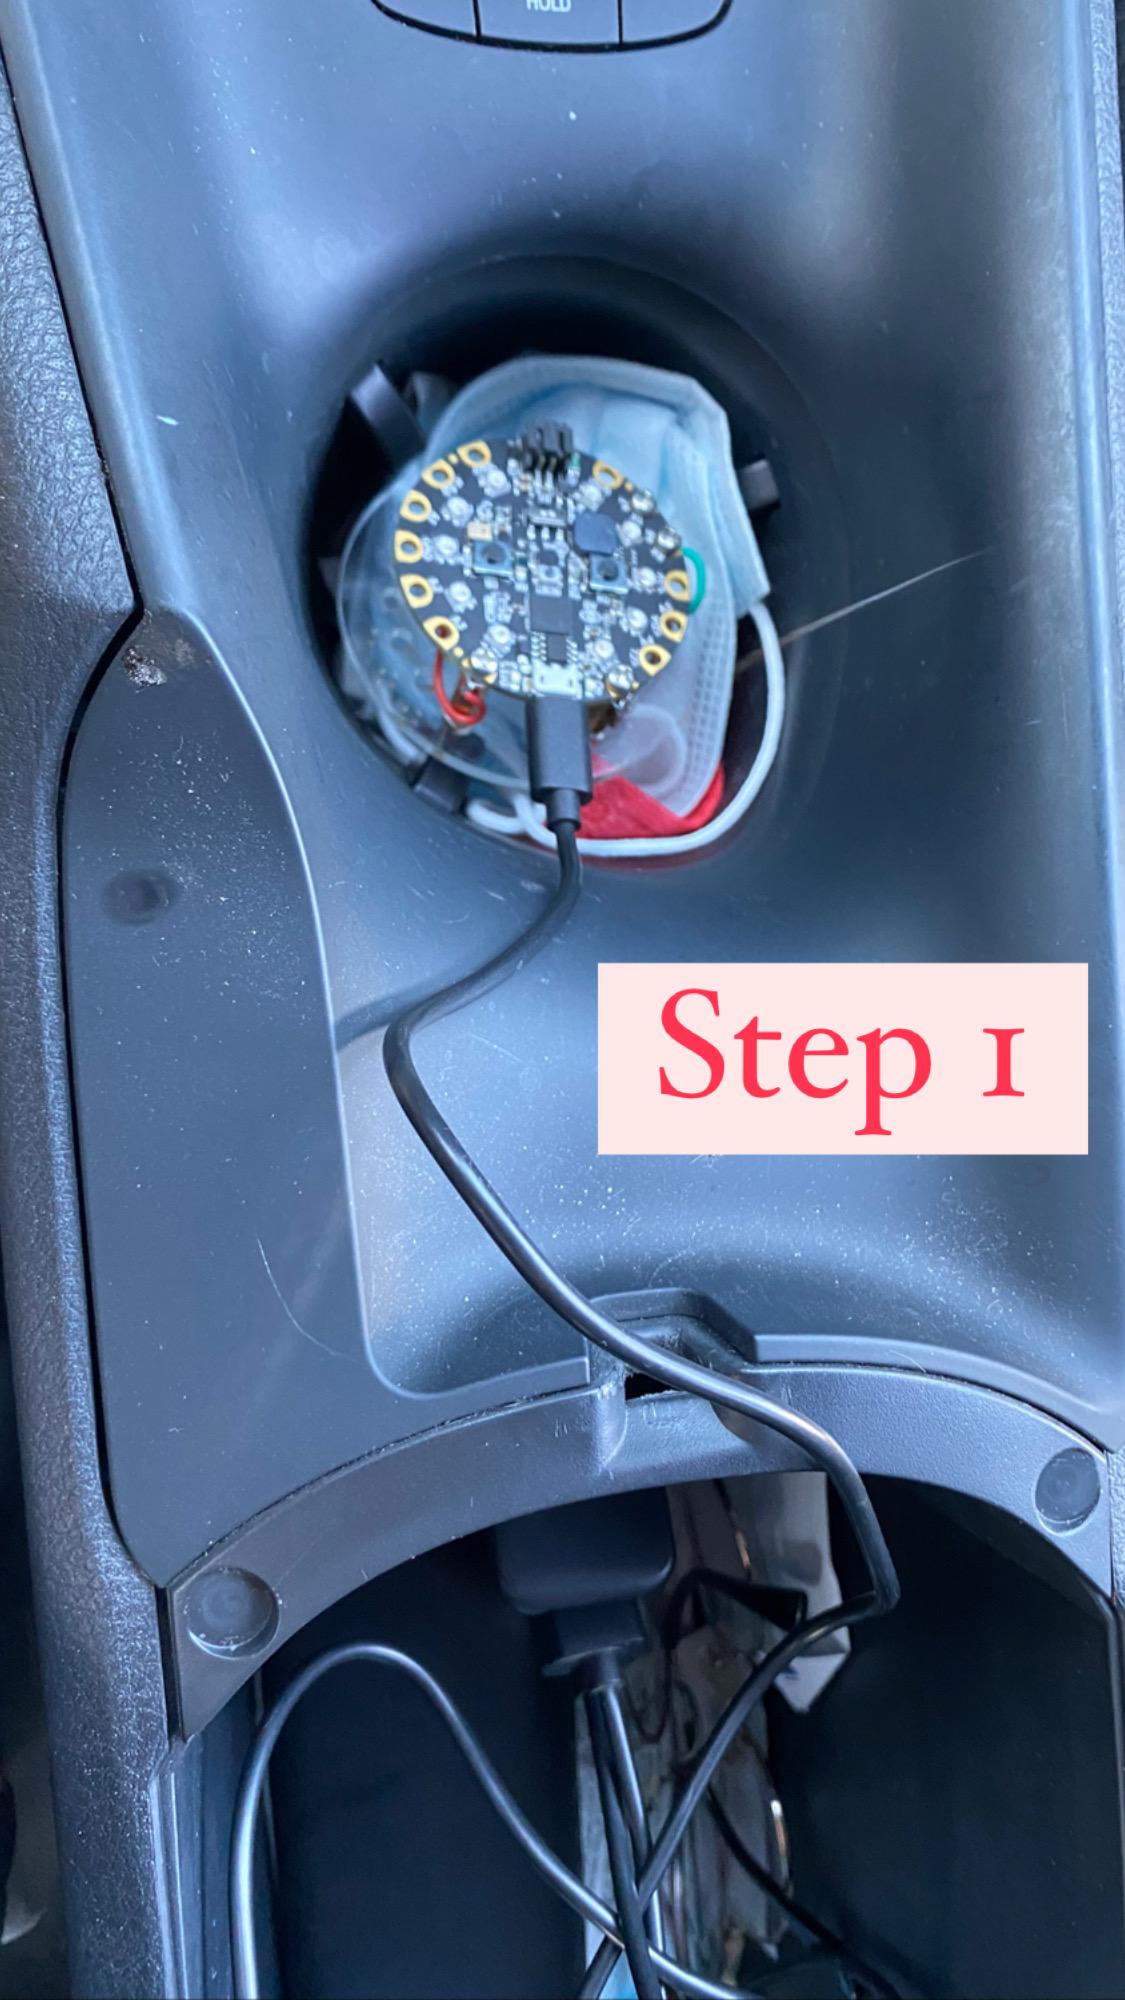
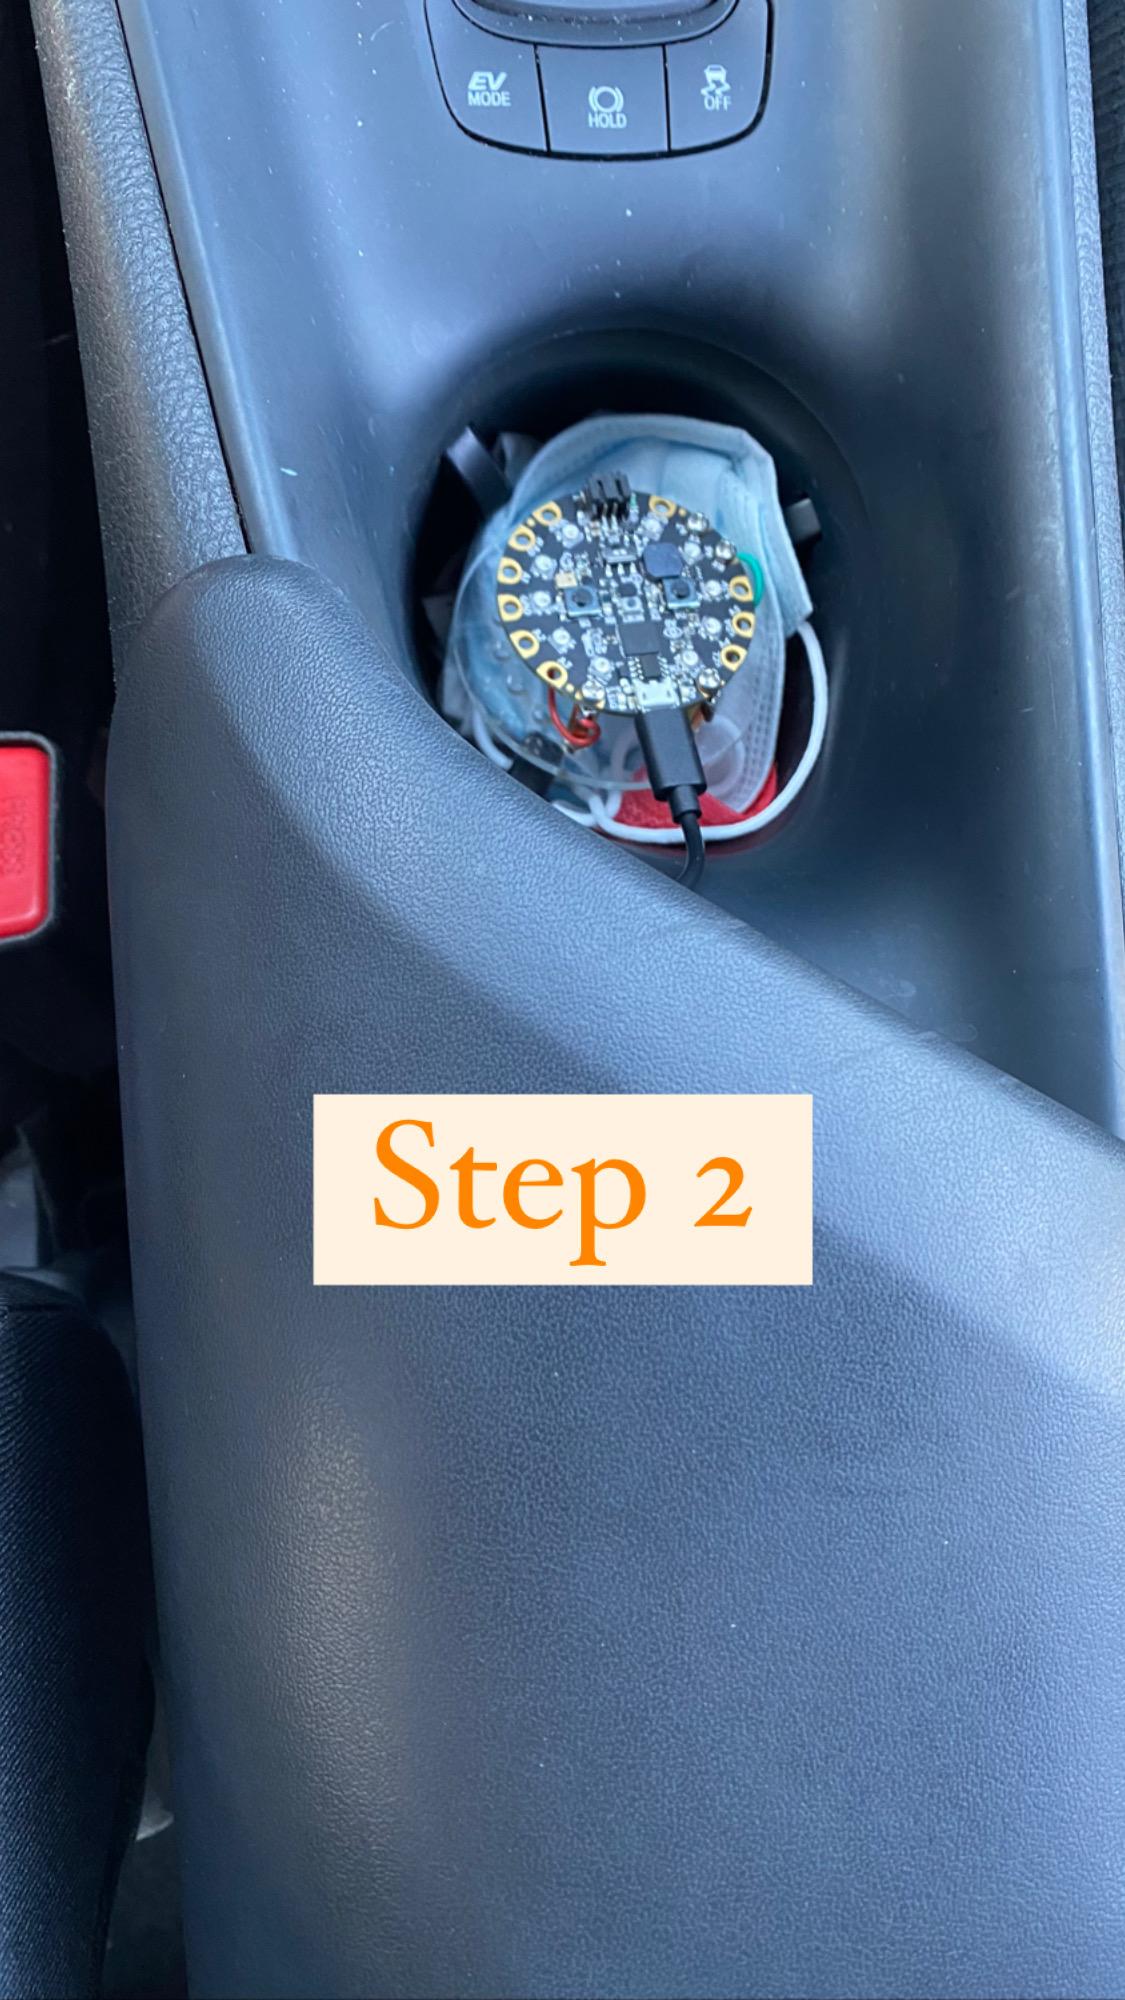
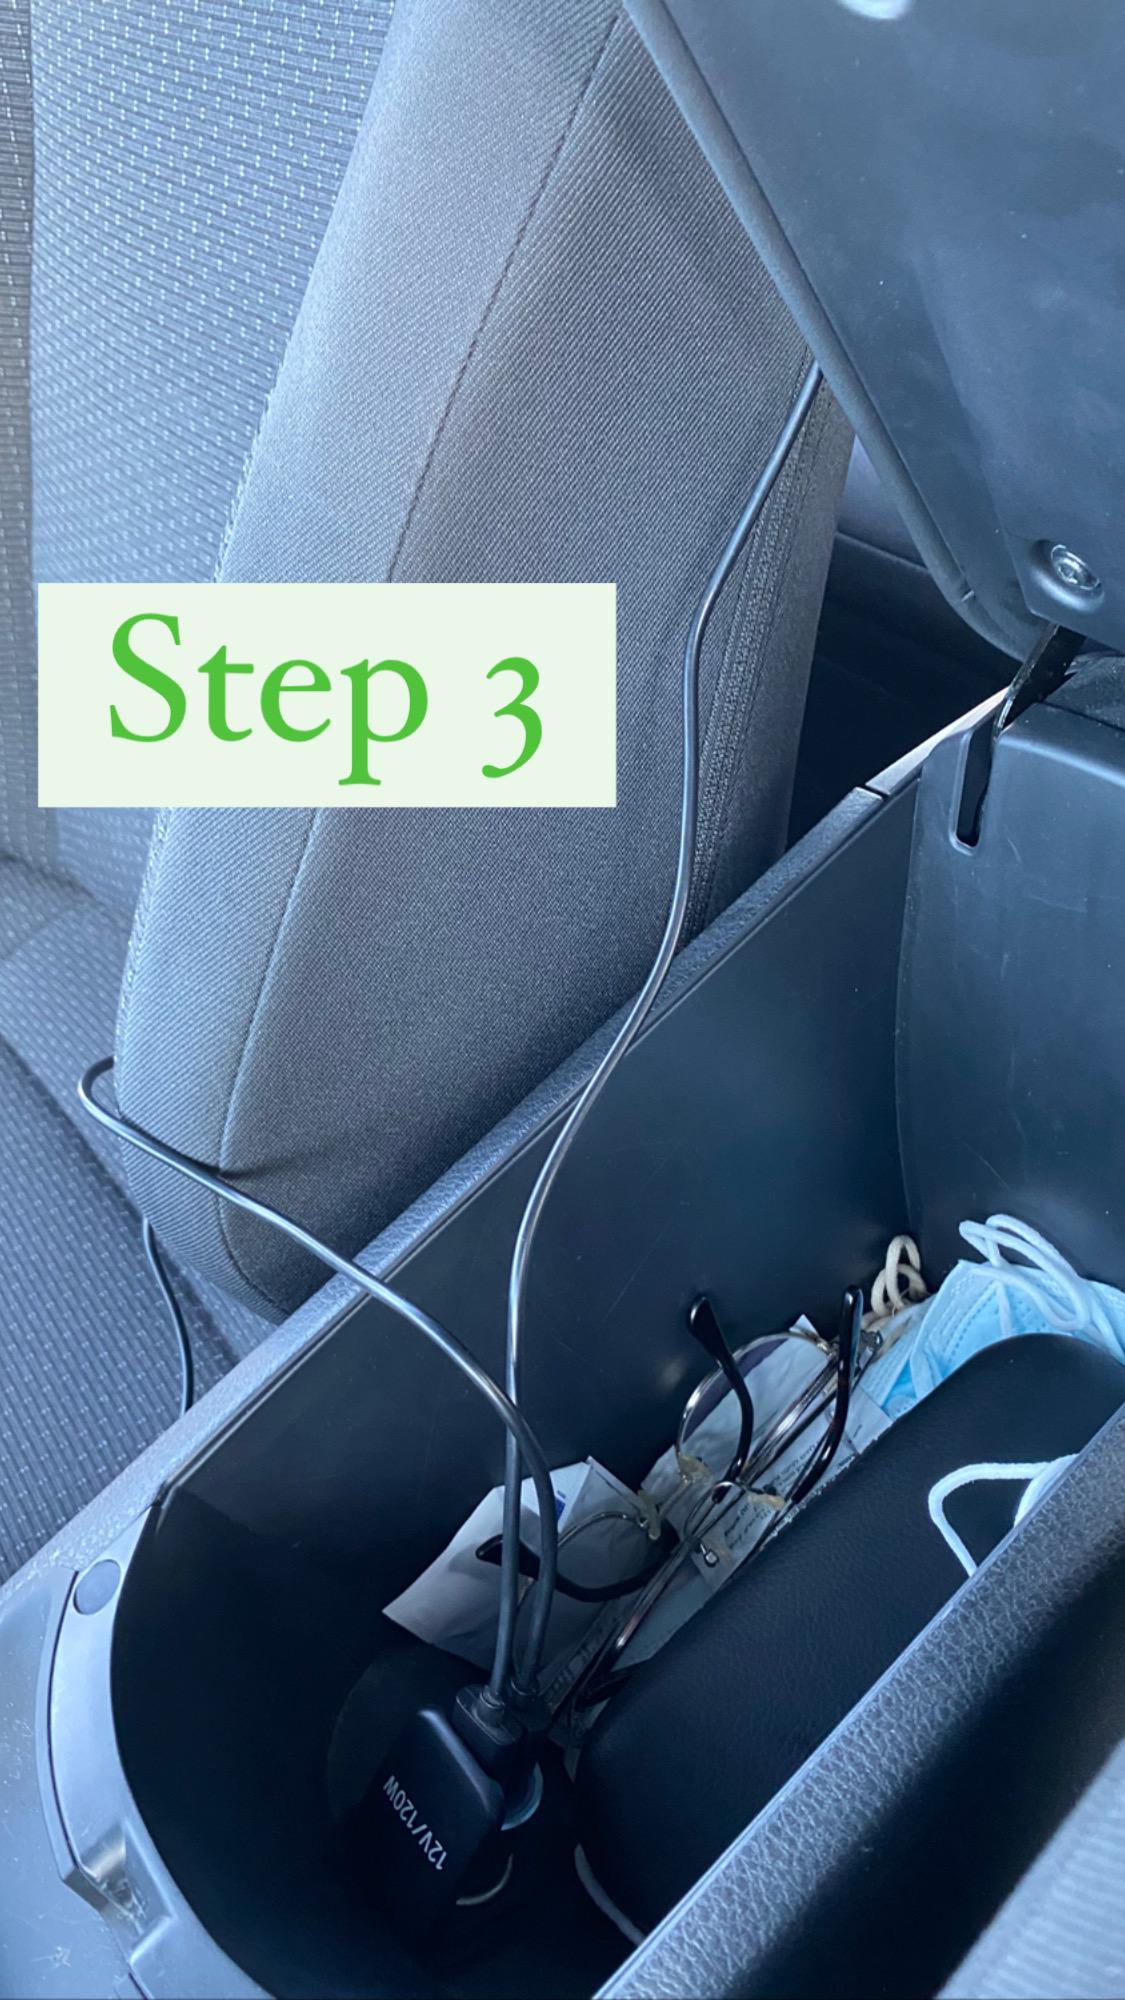
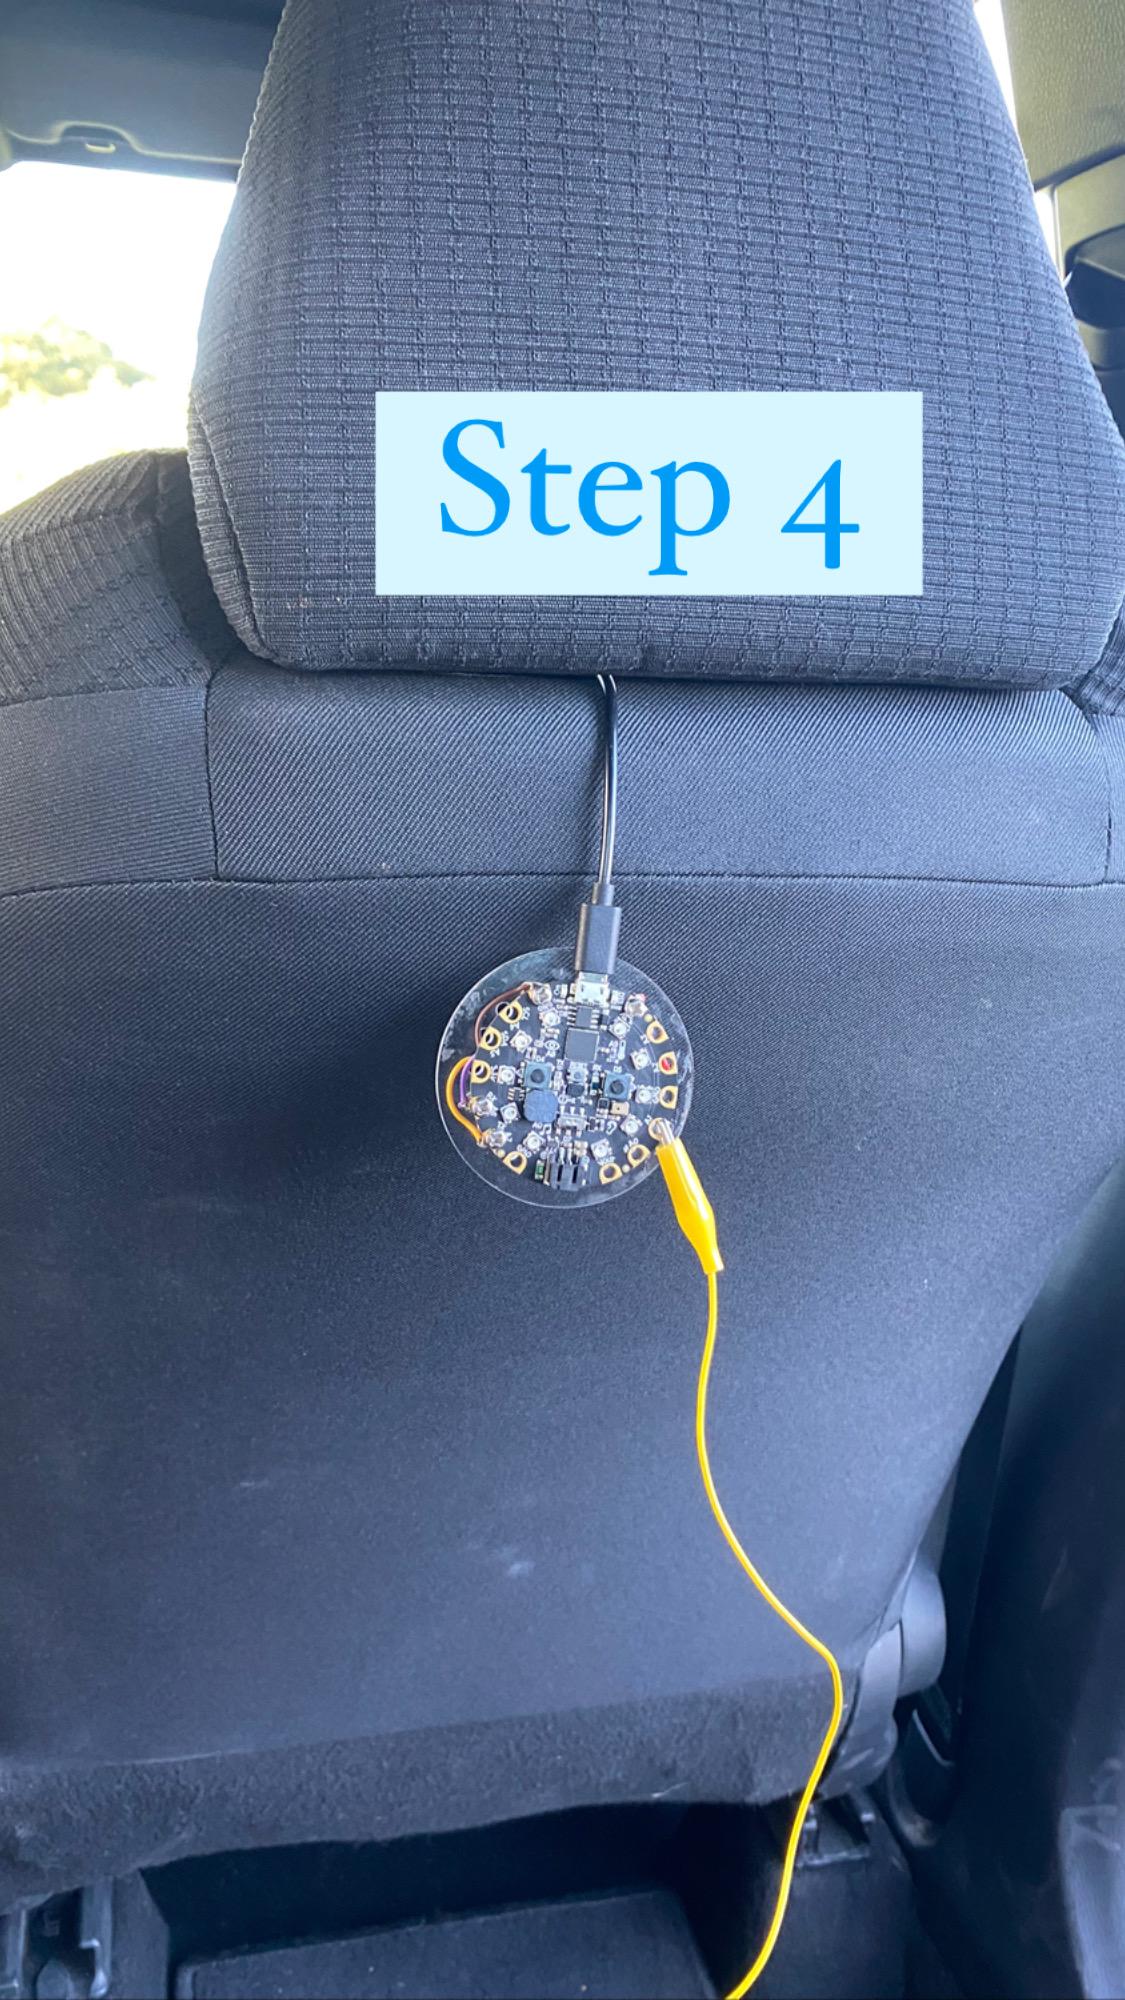
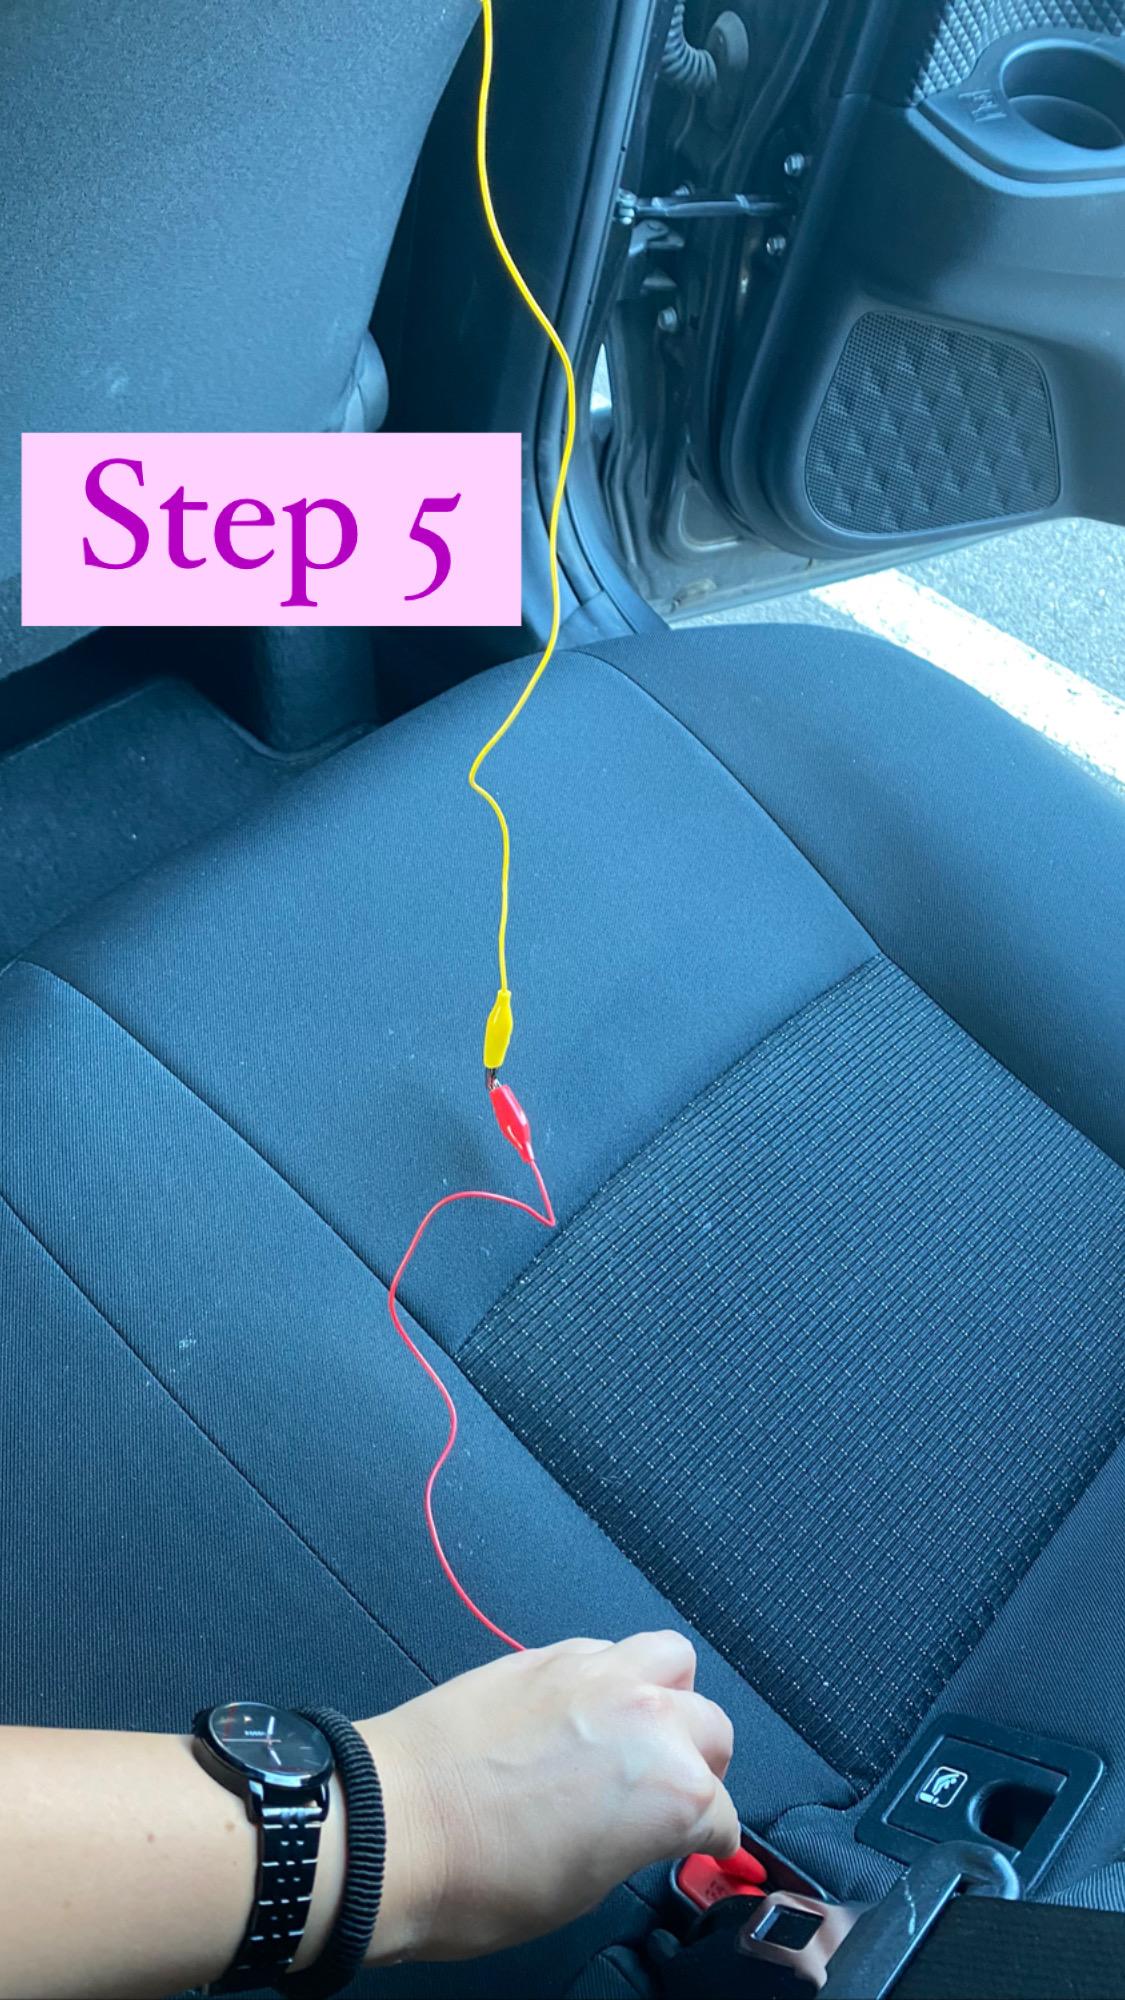
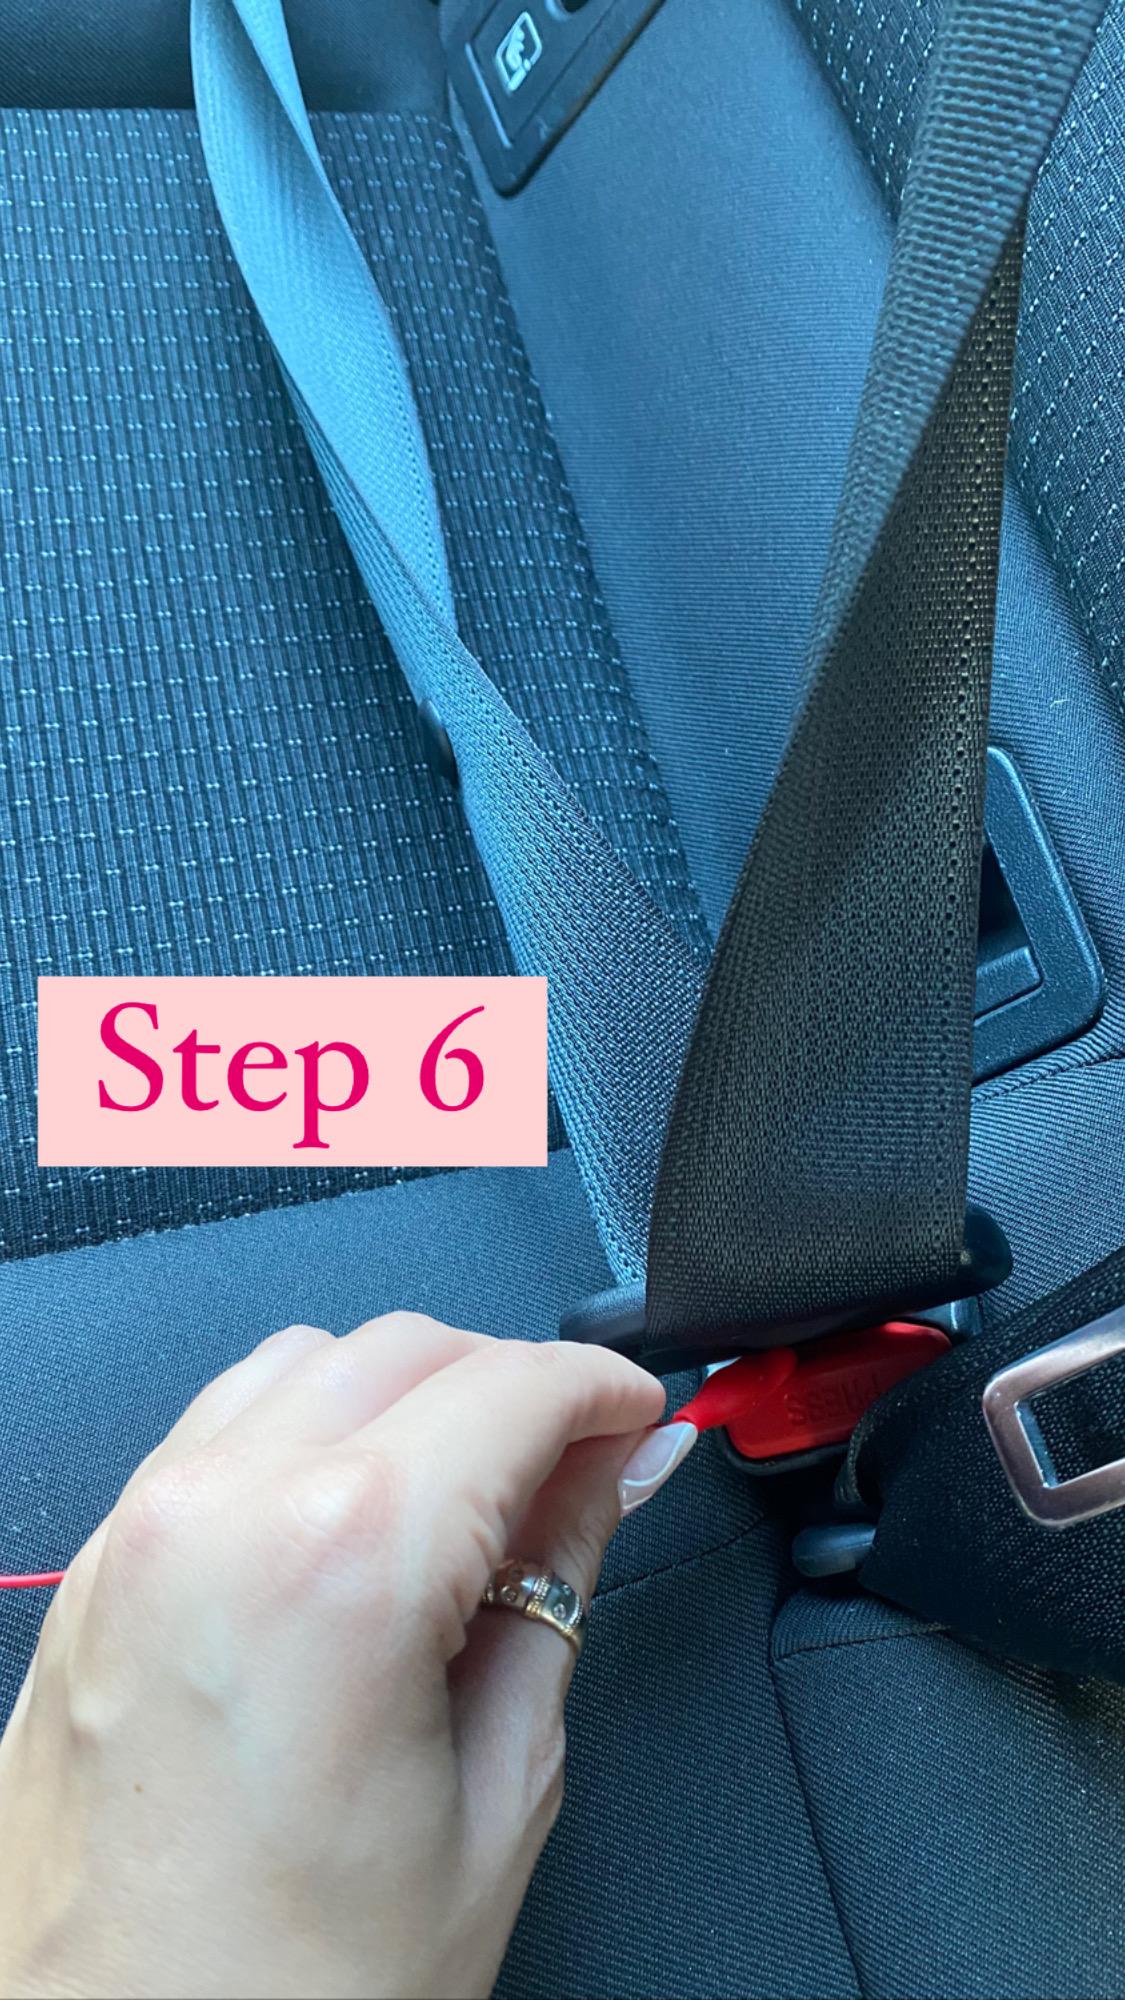
Setting up the car is the last step and then you have a smart safe drive ahead of you..
All you need is to do the following:
Step 1: Connect the "Parent" CPX to the USB car charger by the Micro - USB cable.
Step 2: Place the "Parent" CPX in the cup holder.
Step 3: Connect the "Child" CPX to the USB car charger by the Micro - USB cable.
Step 4: Place the "Parent" CPX on the back seat of the front passenger.
Step 5: Connect the first Alligator cable to A1. Then connect the second Alligator cable to the first.
Step 6: Connect the second Alligator cable to the buckle once the child is seated.