Smart Plant Tracker
![WhatsApp Image 2021-08-28 at 16.14.11 (2).jpeg](/proxy/?url=https://content.instructables.com/FTO/G78X/KSVSNNKW/FTOG78XKSVSNNKW.jpg&filename=WhatsApp Image 2021-08-28 at 16.14.11 (2).jpeg)
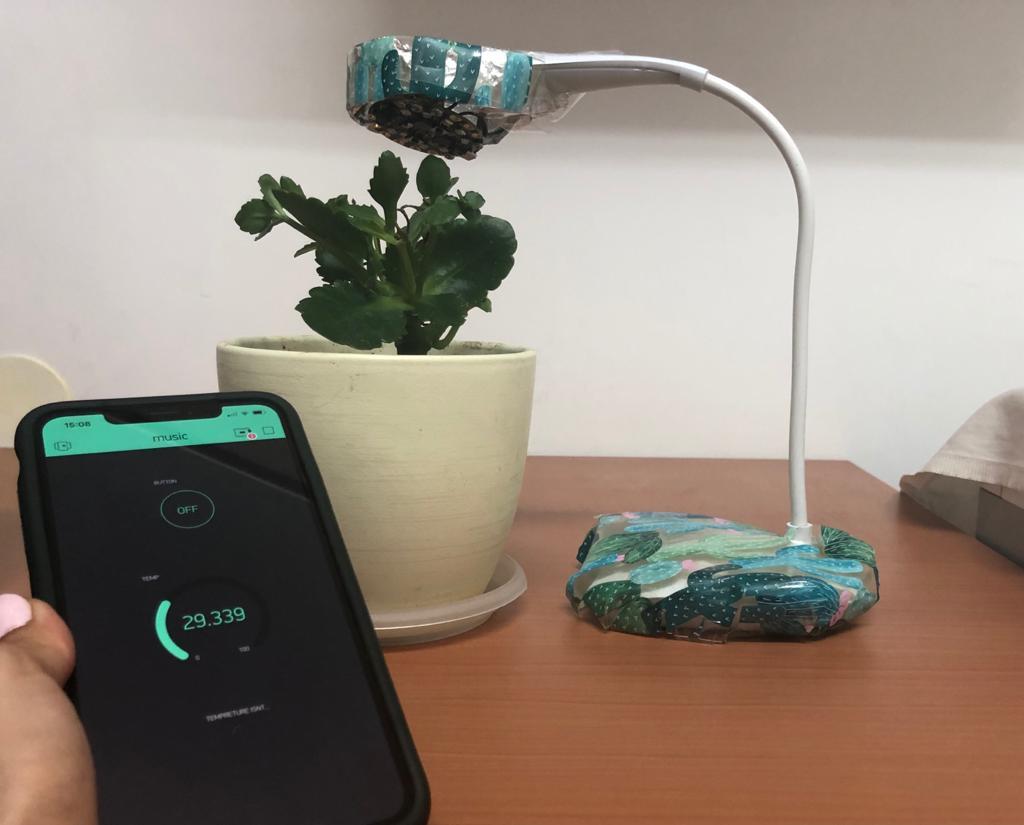
The Smart Plant Tracker helps you to take care of your plants, it tracks the temperature, the lights and managing the lights according to the environment, in addition and sends you a warning when the temperature isn’t correct.
Lets build one:
The Physical Setup - Steps 1-5
The Technical Setup - Steps 6-13
For result video download --> Smart Plant Tracker
For the code download --> CODE
Supplies
Circuit Playground Express Board
Blynk application
USB cable
Lamp stand
Aluminum foil
Duct tape
Decoration paper
Scissors
WIFI connection
![WhatsApp Image 2021-08-28 at 14.56.54.jpeg](/proxy/?url=https://content.instructables.com/FWK/XJM1/KSVSNBTD/FWKXJM1KSVSNBTD.jpg&filename=WhatsApp Image 2021-08-28 at 14.56.54.jpeg)
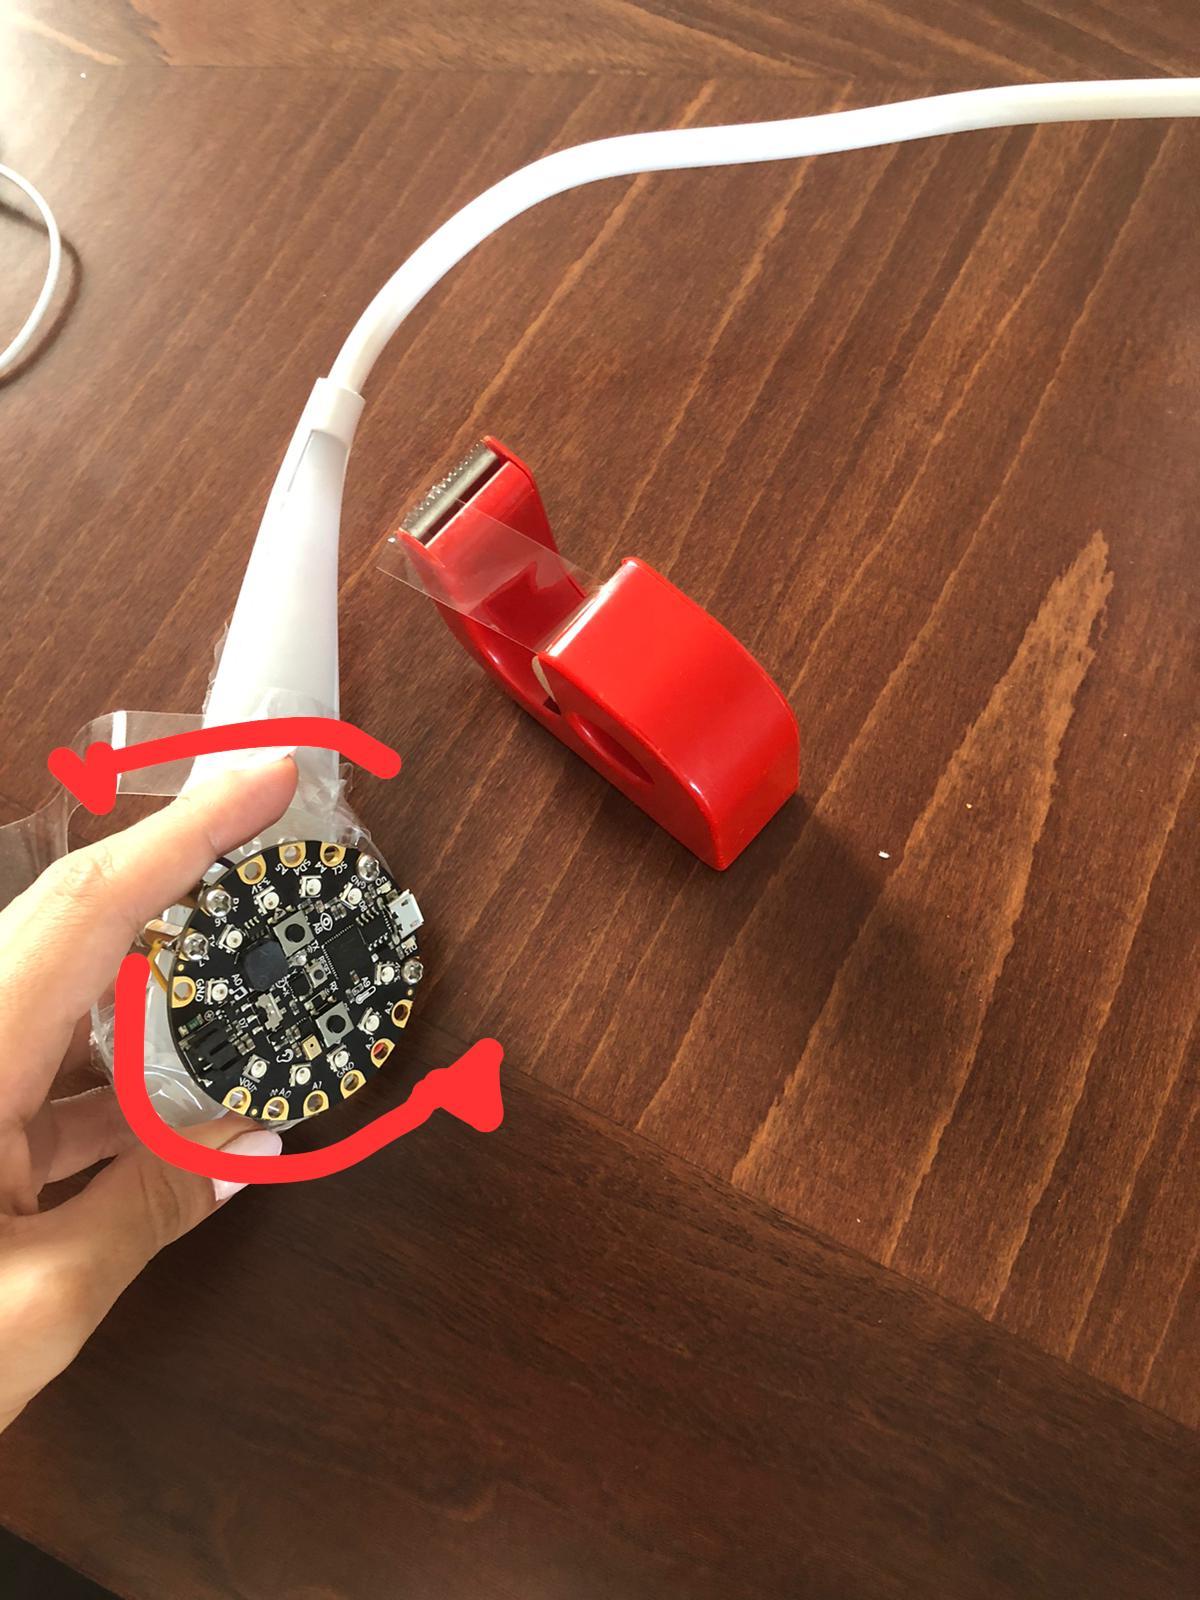
Duct the Circuit to the head of the lamp.
![WhatsApp Image 2021-08-28 at 15.12.47.jpeg](/proxy/?url=https://content.instructables.com/F55/KENB/KSVSNBU9/F55KENBKSVSNBU9.jpg&filename=WhatsApp Image 2021-08-28 at 15.12.47.jpeg)
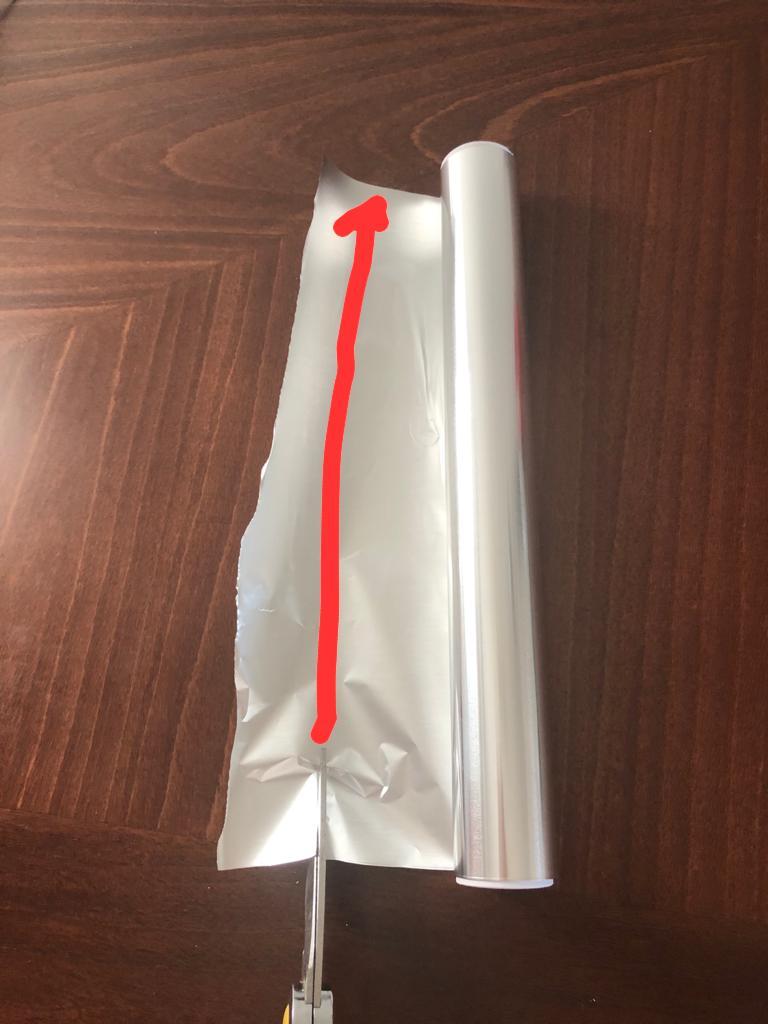
Cut the Aluminum foil according to the arrows, 2 strips.
![WhatsApp Image 2021-08-28 at 14.51.14.jpeg](/proxy/?url=https://content.instructables.com/FXJ/LAS4/KSVSNBUY/FXJLAS4KSVSNBUY.jpg&filename=WhatsApp Image 2021-08-28 at 14.51.14.jpeg)
![WhatsApp Image 2021-08-28 at 14.51.38.jpeg](/proxy/?url=https://content.instructables.com/FIN/37S9/KSVSNBUZ/FIN37S9KSVSNBUZ.jpg&filename=WhatsApp Image 2021-08-28 at 14.51.38.jpeg)
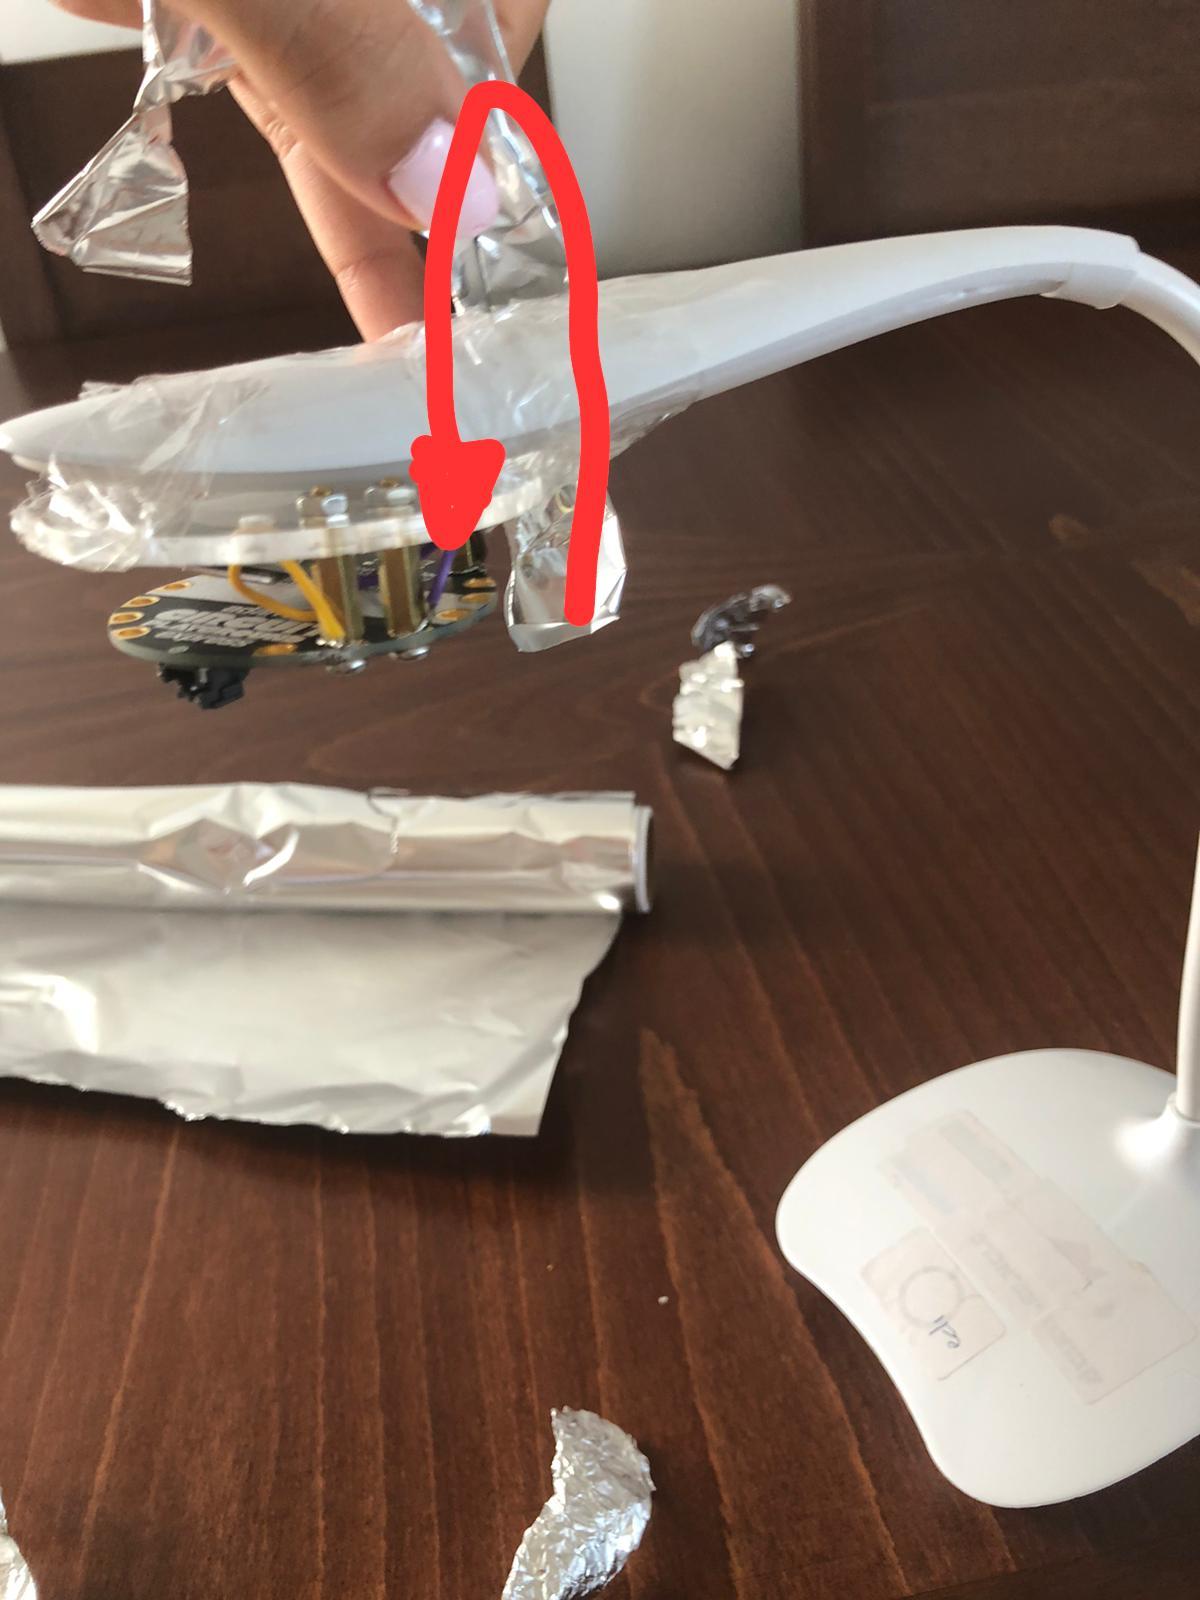
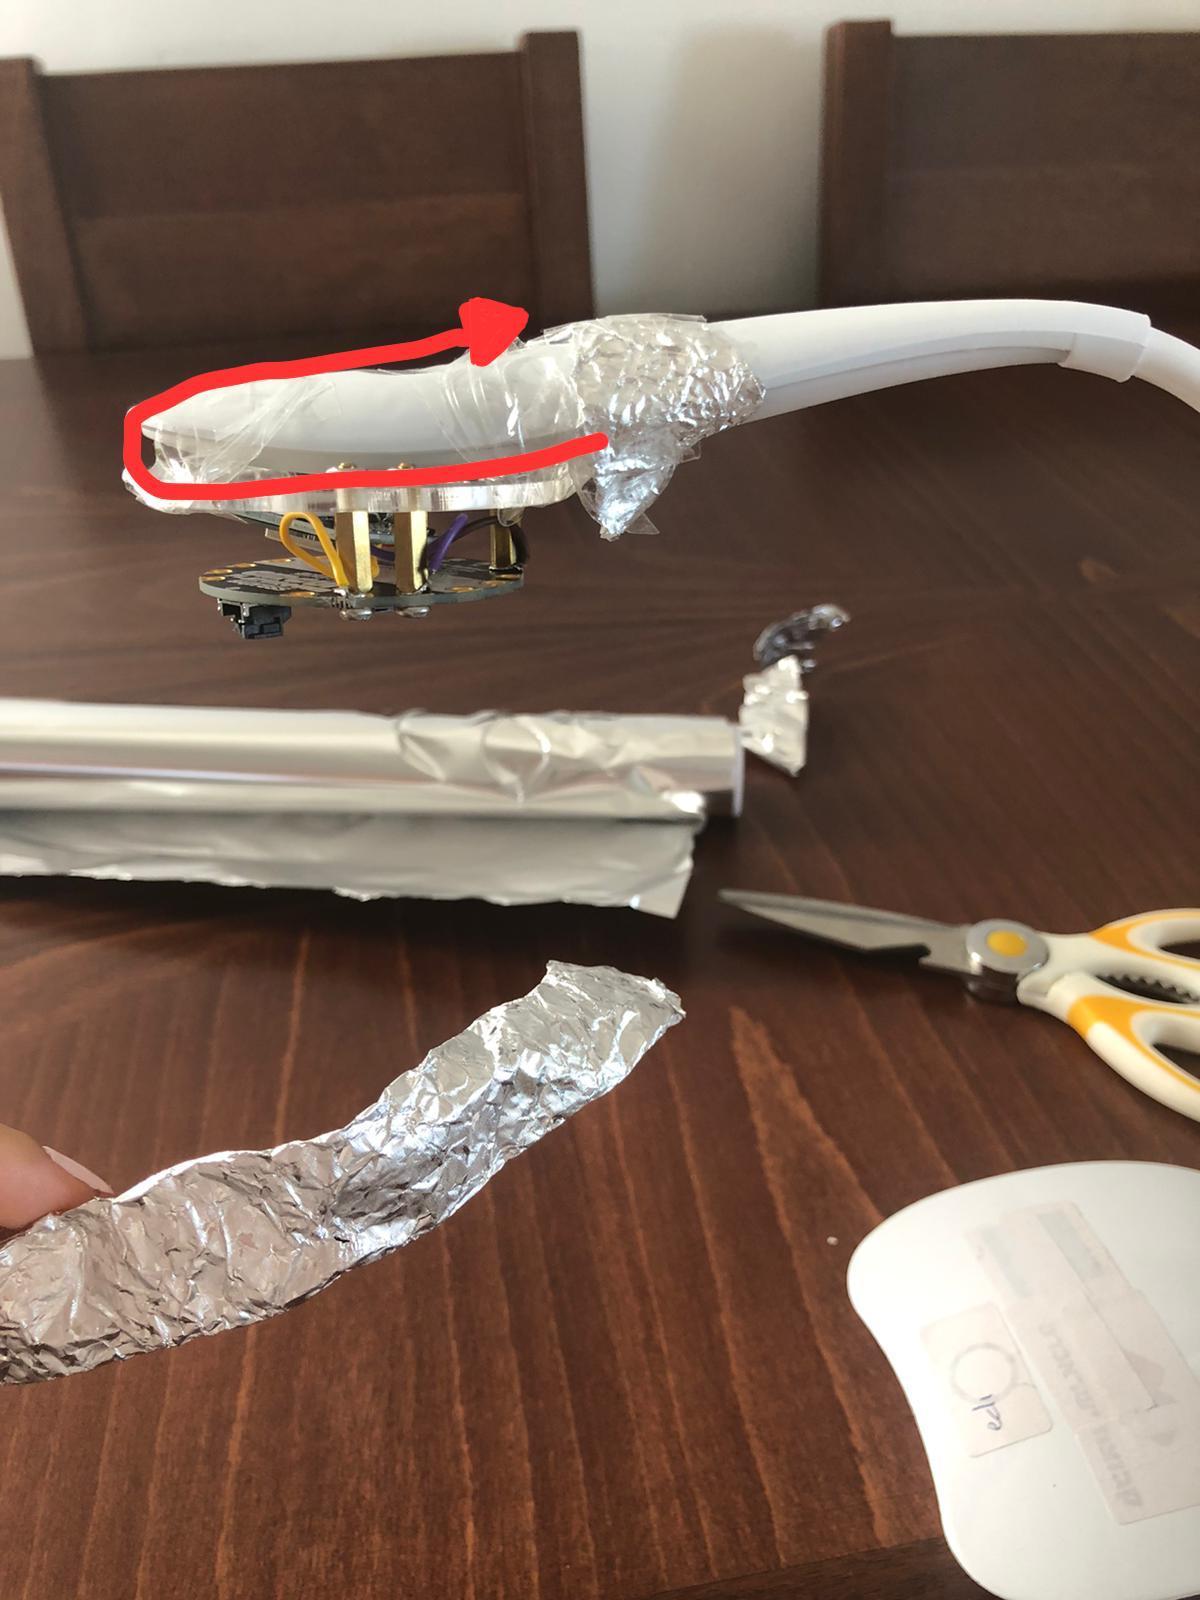
Attach the Aluminum around the head and the stand according to the arrows.
![WhatsApp Image 2021-08-28 at 14.55.52.jpeg](/proxy/?url=https://content.instructables.com/F6N/81OL/KSVSNBWD/F6N81OLKSVSNBWD.jpg&filename=WhatsApp Image 2021-08-28 at 14.55.52.jpeg)
![WhatsApp Image 2021-08-28 at 14.52.57.jpeg](/proxy/?url=https://content.instructables.com/FGP/X3Y2/KSVSNBWE/FGPX3Y2KSVSNBWE.jpg&filename=WhatsApp Image 2021-08-28 at 14.52.57.jpeg)
![WhatsApp Image 2021-08-28 at 16.25.38.jpeg](/proxy/?url=https://content.instructables.com/FAI/DDBN/KSVSNBWF/FAIDDBNKSVSNBWF.jpg&filename=WhatsApp Image 2021-08-28 at 16.25.38.jpeg)
![WhatsApp Image 2021-08-28 at 14.53.38.jpeg](/proxy/?url=https://content.instructables.com/FHM/FZS9/KSVSNBWG/FHMFZS9KSVSNBWG.jpg&filename=WhatsApp Image 2021-08-28 at 14.53.38.jpeg)
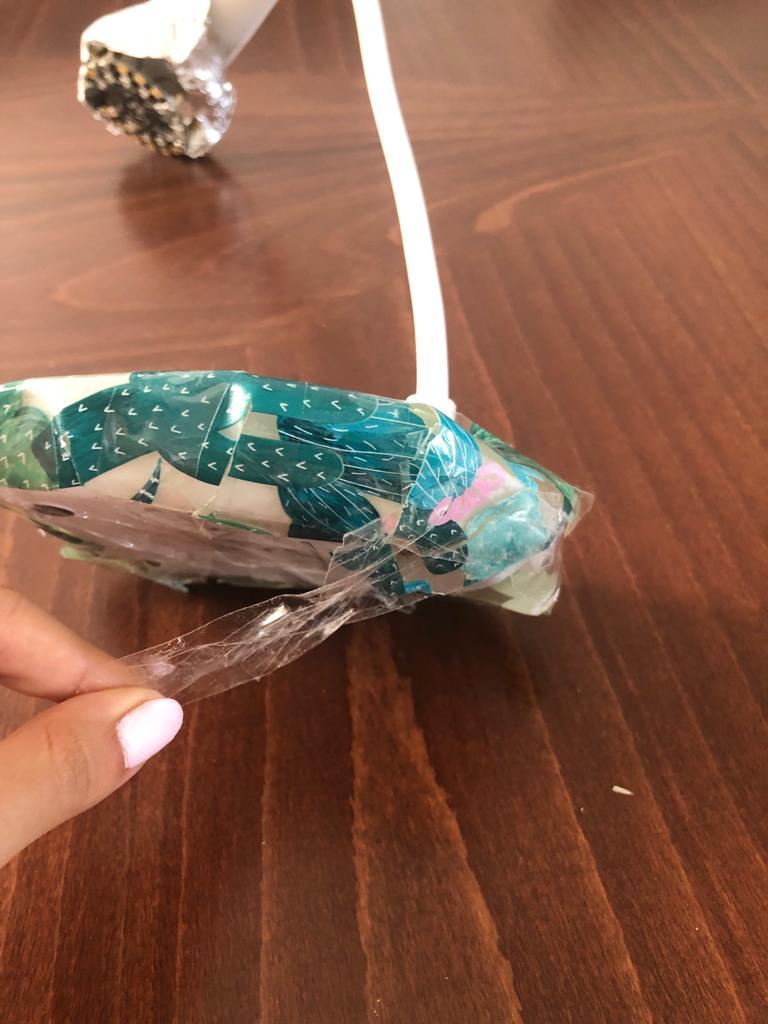
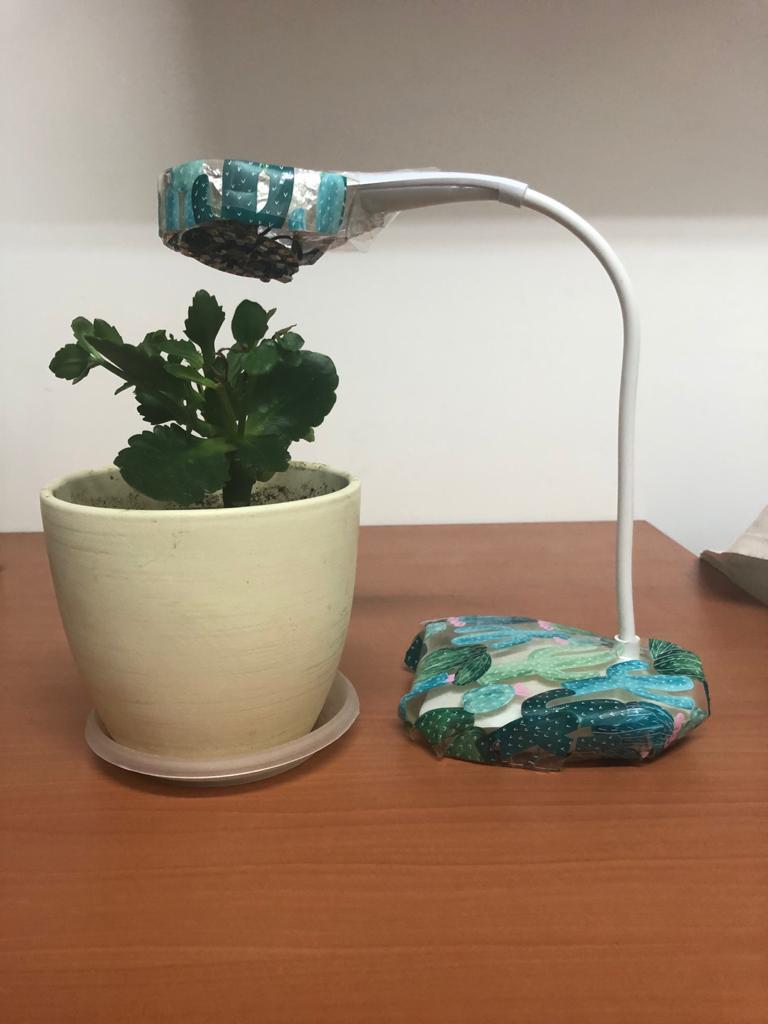
Decorate the lamp as you like, there is an example in the images below:
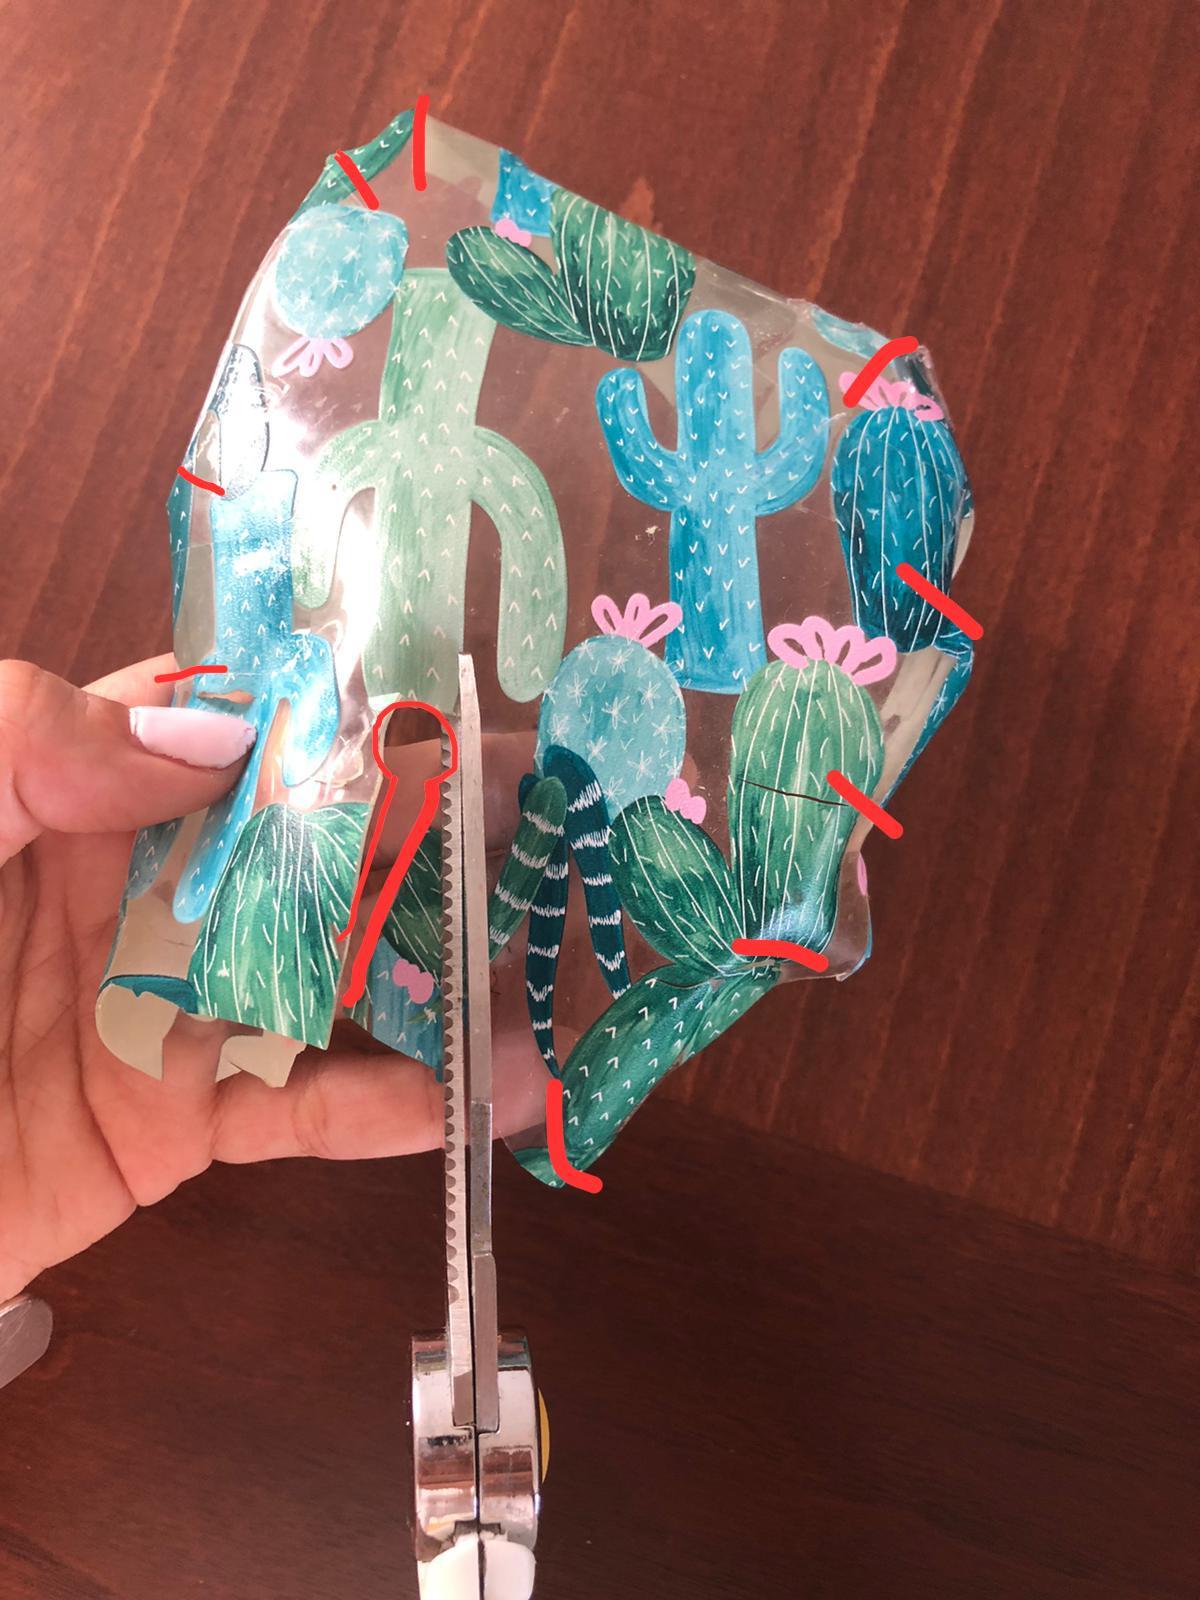
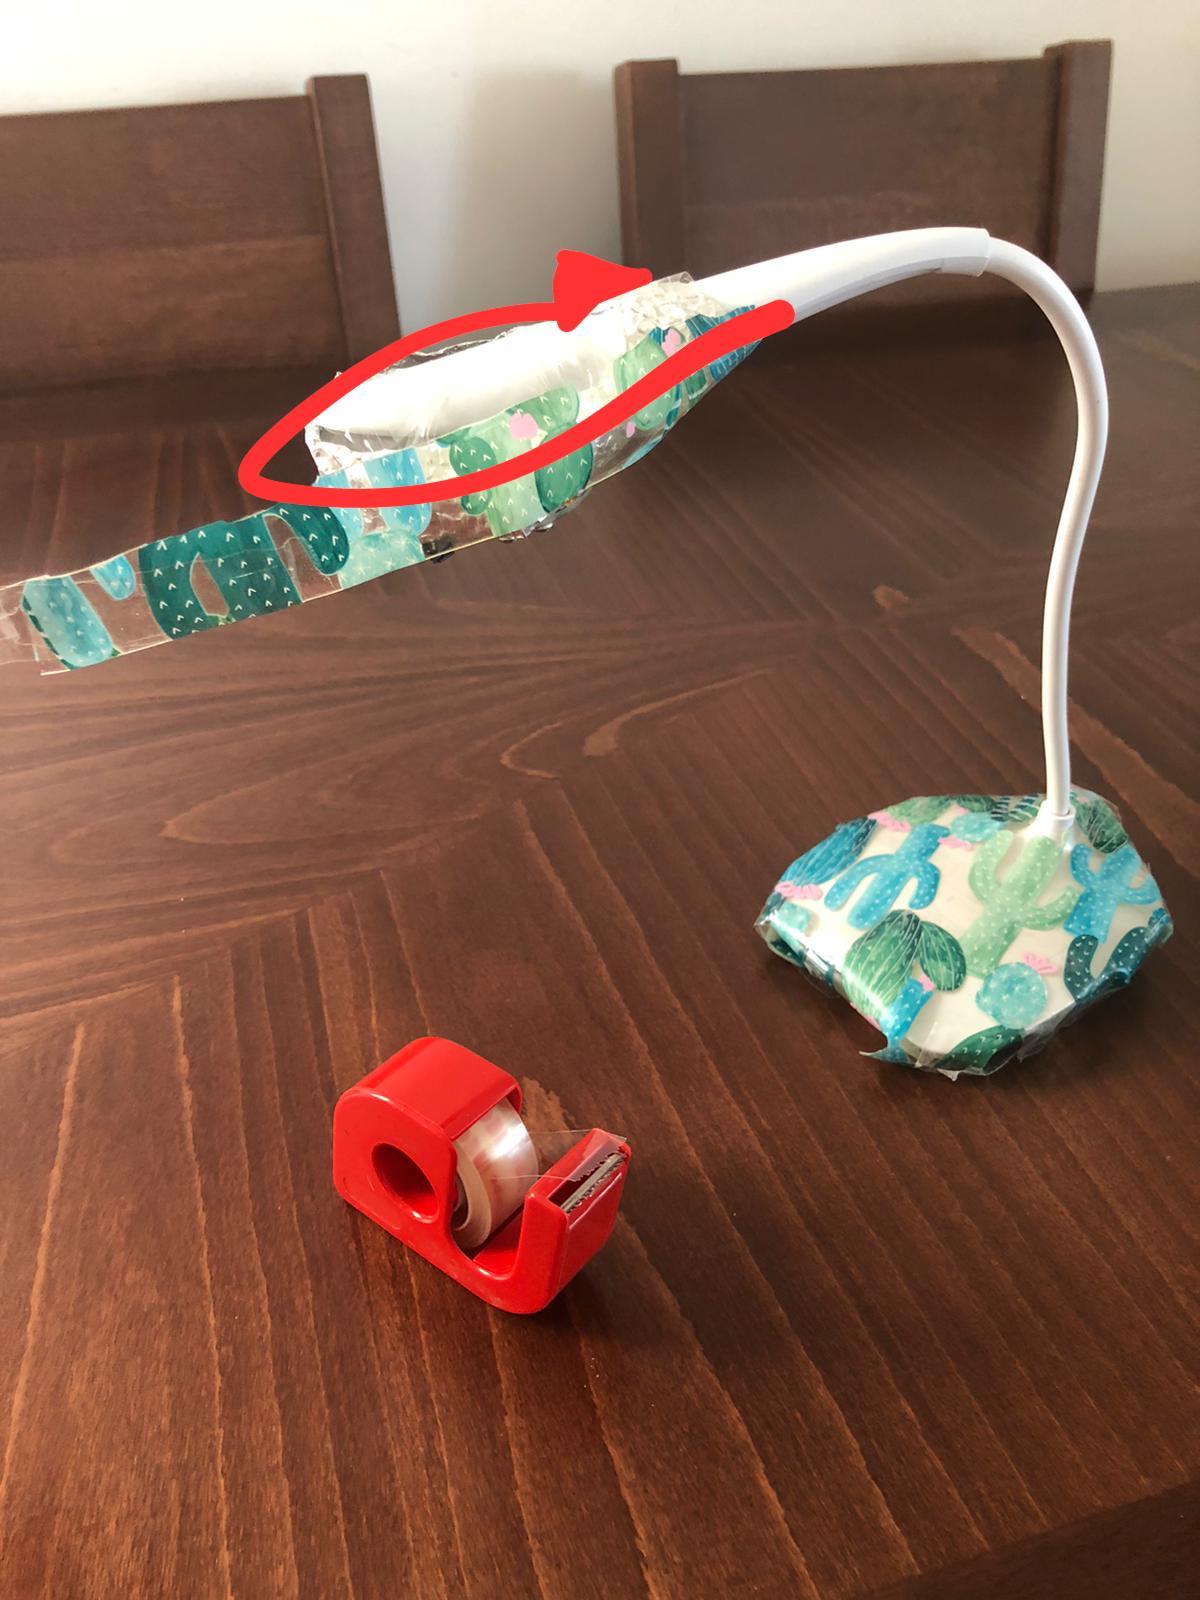
1. Cut the the decorating paper as the red line.
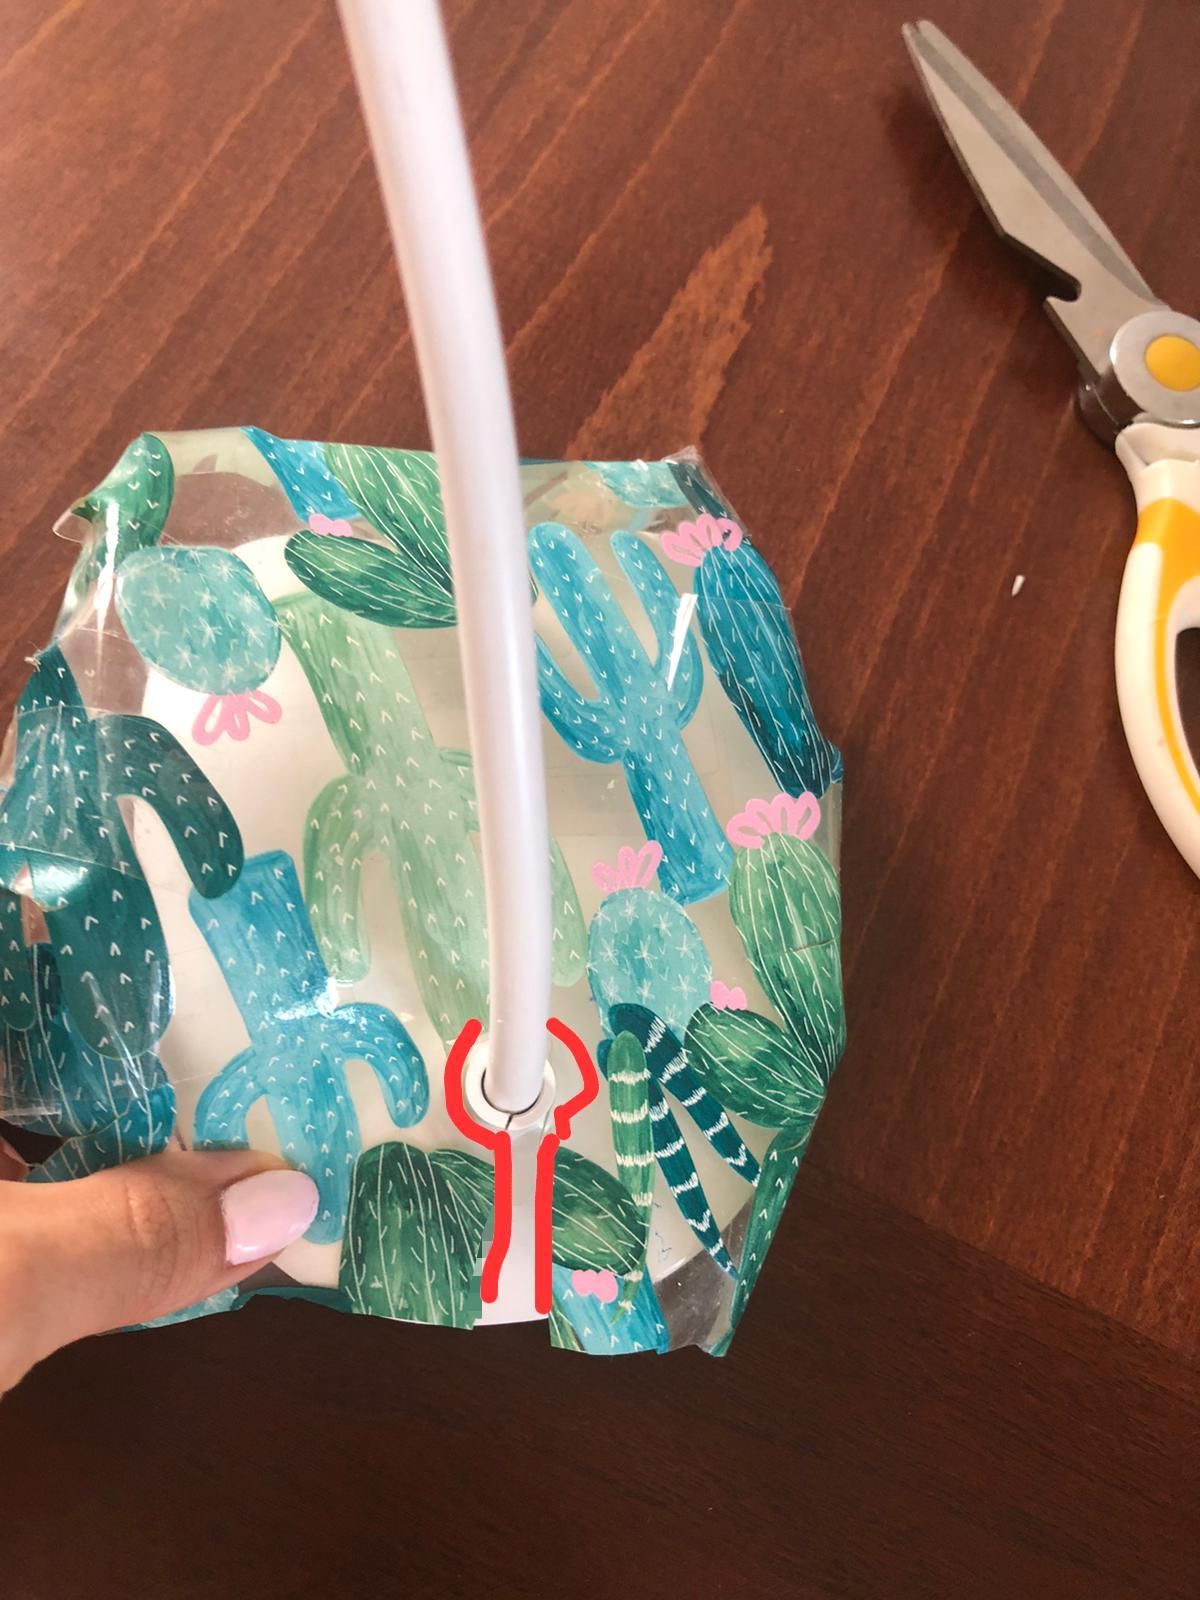
2. Attach the paper to the stand of the lamp using the duct tape. 4.3 Do the same to the lamp head. According to the images below.
The Physical Setup - Done
![WhatsApp Image 2021-08-28 at 16.29.01.jpeg](/proxy/?url=https://content.instructables.com/F1G/OXOQ/KSVSNBZB/F1GOXOQKSVSNBZB.jpg&filename=WhatsApp Image 2021-08-28 at 16.29.01.jpeg)
![Screen Shot 2021-08-29 at 9.12.29 AM.png](/proxy/?url=https://content.instructables.com/FJM/LVJ7/KSVSNN2Q/FJMLVJ7KSVSNN2Q.png&filename=Screen Shot 2021-08-29 at 9.12.29 AM.png)
Download the Arduino software to your computer.
https://www.arduino.cc
![WhatsApp Image 2021-08-28 at 16.48.34.jpeg](/proxy/?url=https://content.instructables.com/FGW/YV5A/KSVSNC5F/FGWYV5AKSVSNC5F.jpg&filename=WhatsApp Image 2021-08-28 at 16.48.34.jpeg)
Download the “Blynk” app to your smartphone.
https://blynk.io/en/getting-started
![WhatsApp Image 2021-08-28 at 14.58.24.jpeg](/proxy/?url=https://content.instructables.com/FIY/UH4N/KSVSNC7K/FIYUH4NKSVSNC7K.jpg&filename=WhatsApp Image 2021-08-28 at 14.58.24.jpeg)
![WhatsApp Image 2021-08-28 at 17.15.10 (1).jpeg](/proxy/?url=https://content.instructables.com/F9F/NIN5/KSVSNN9N/F9FNIN5KSVSNN9N.jpg&filename=WhatsApp Image 2021-08-28 at 17.15.10 (1).jpeg)
![WhatsApp Image 2021-08-28 at 15.00.06.jpeg](/proxy/?url=https://content.instructables.com/FWN/KNRB/KSVSNNA4/FWNKNRBKSVSNNA4.jpg&filename=WhatsApp Image 2021-08-28 at 15.00.06.jpeg)
![WhatsApp Image 2021-08-28 at 14.57.47.jpeg](/proxy/?url=https://content.instructables.com/FG0/PT3W/KSVSNNAM/FG0PT3WKSVSNNAM.jpg&filename=WhatsApp Image 2021-08-28 at 14.57.47.jpeg)
![WhatsApp Image 2021-08-28 at 17.15.10 (2).jpeg](/proxy/?url=https://content.instructables.com/FL1/THSR/KSVSNNB5/FL1THSRKSVSNNB5.jpg&filename=WhatsApp Image 2021-08-28 at 17.15.10 (2).jpeg)
![WhatsApp Image 2021-08-28 at 17.15.10 (3).jpeg](/proxy/?url=https://content.instructables.com/FVK/GWFV/KSVSNNBP/FVKGWFVKSVSNNBP.jpg&filename=WhatsApp Image 2021-08-28 at 17.15.10 (3).jpeg)
![WhatsApp Image 2021-08-28 at 17.15.10 (4).jpeg](/proxy/?url=https://content.instructables.com/FW5/LUPX/KSVSNNCB/FW5LUPXKSVSNNCB.jpg&filename=WhatsApp Image 2021-08-28 at 17.15.10 (4).jpeg)
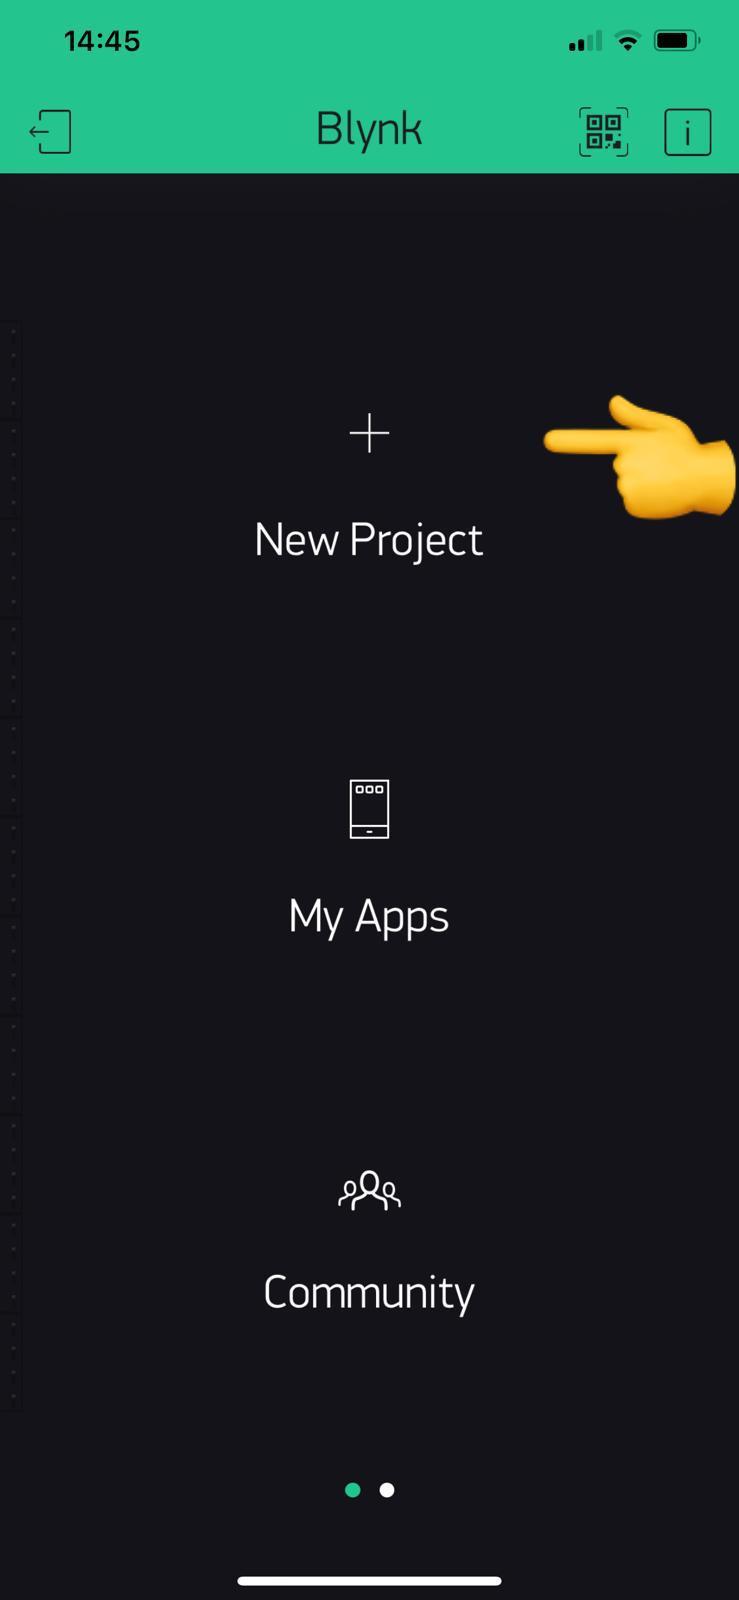
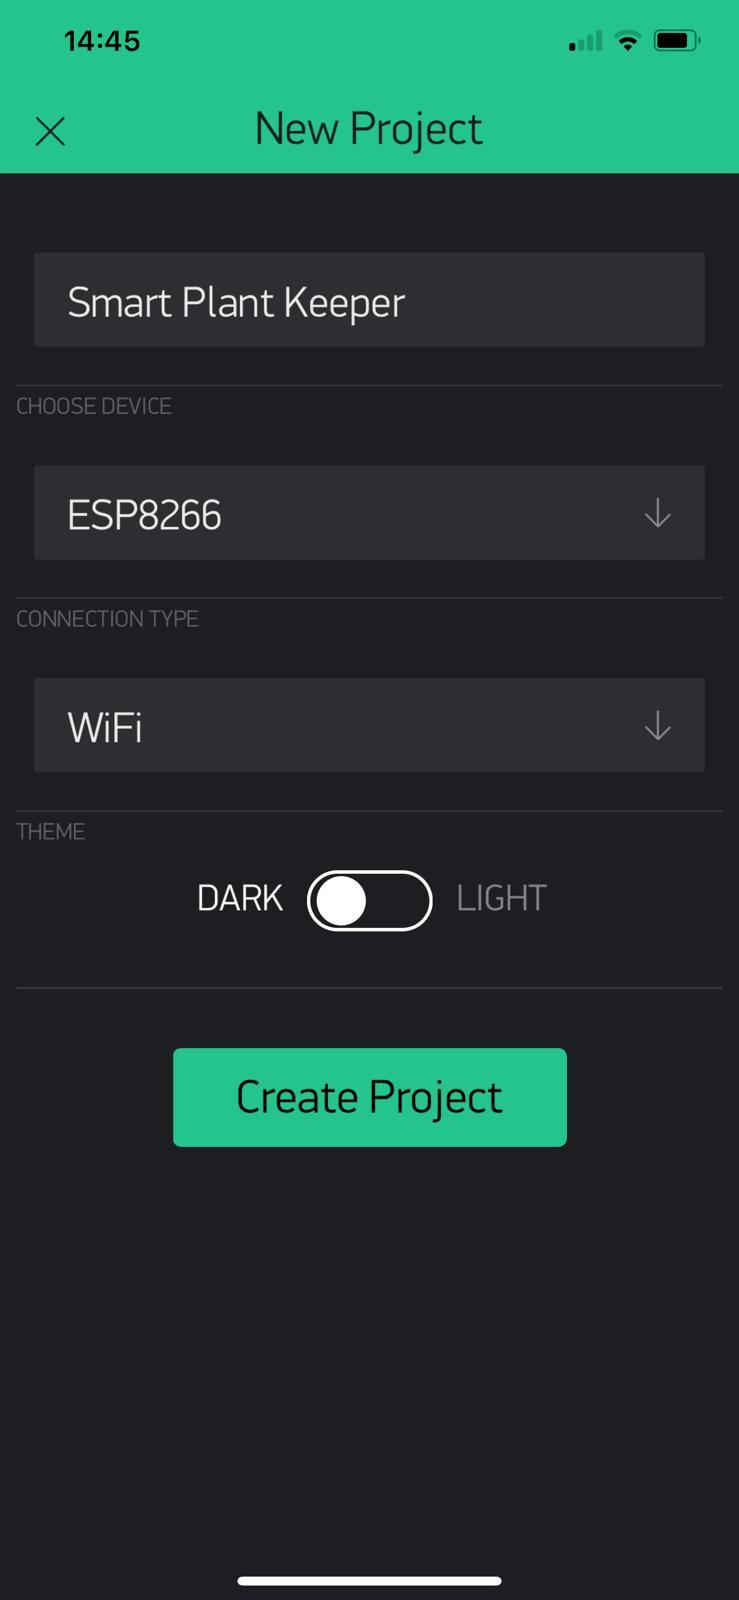
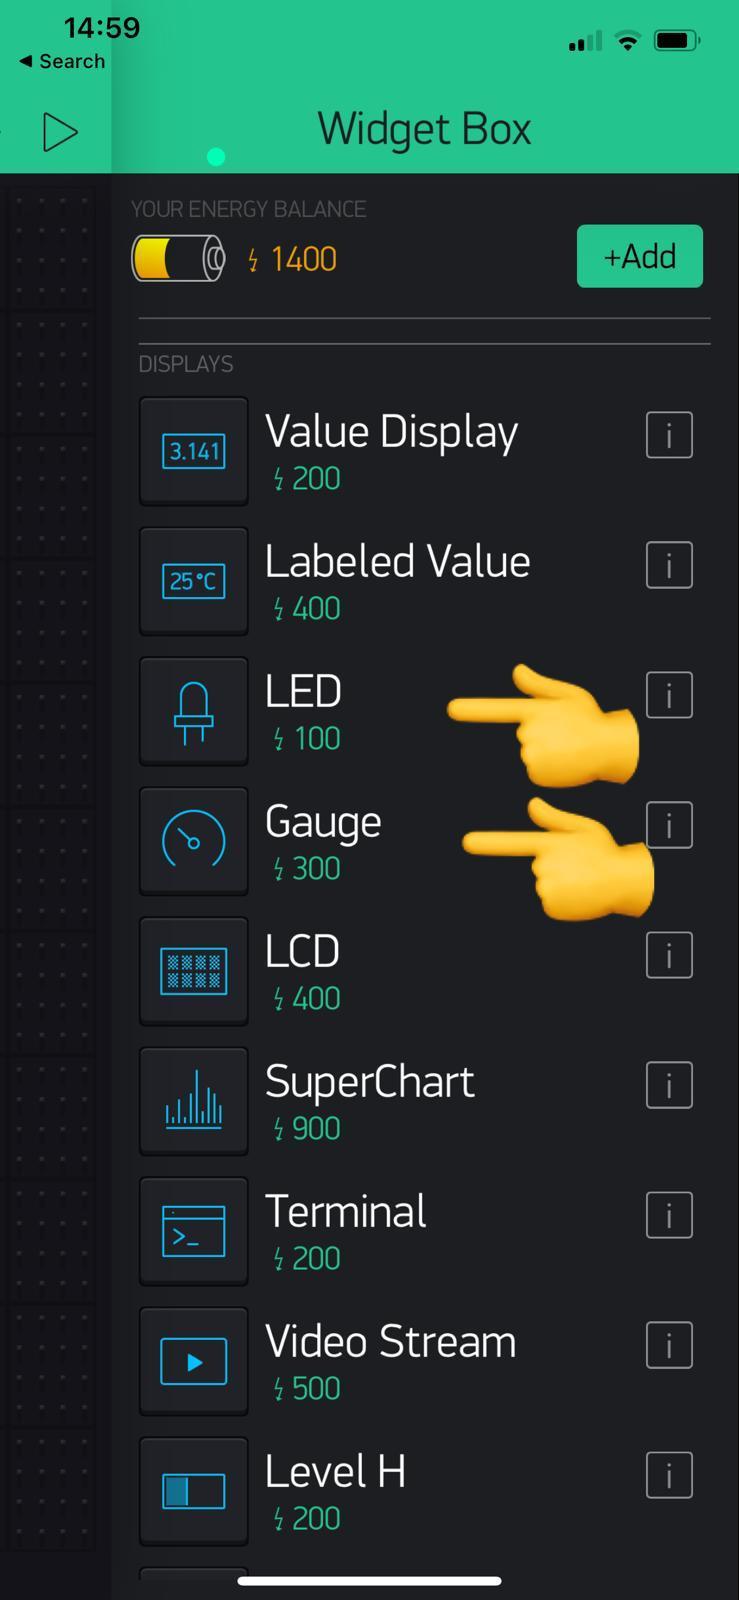
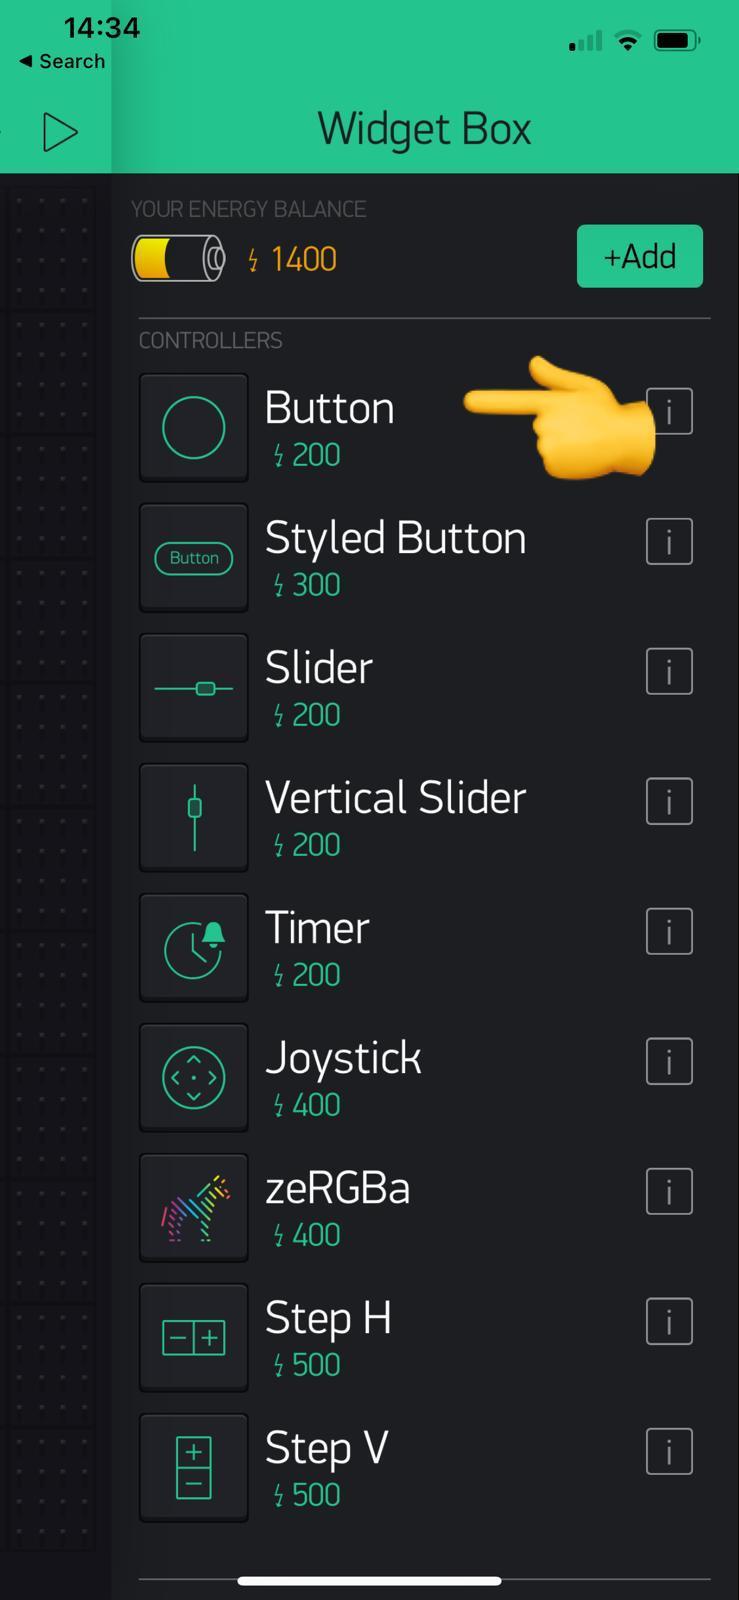
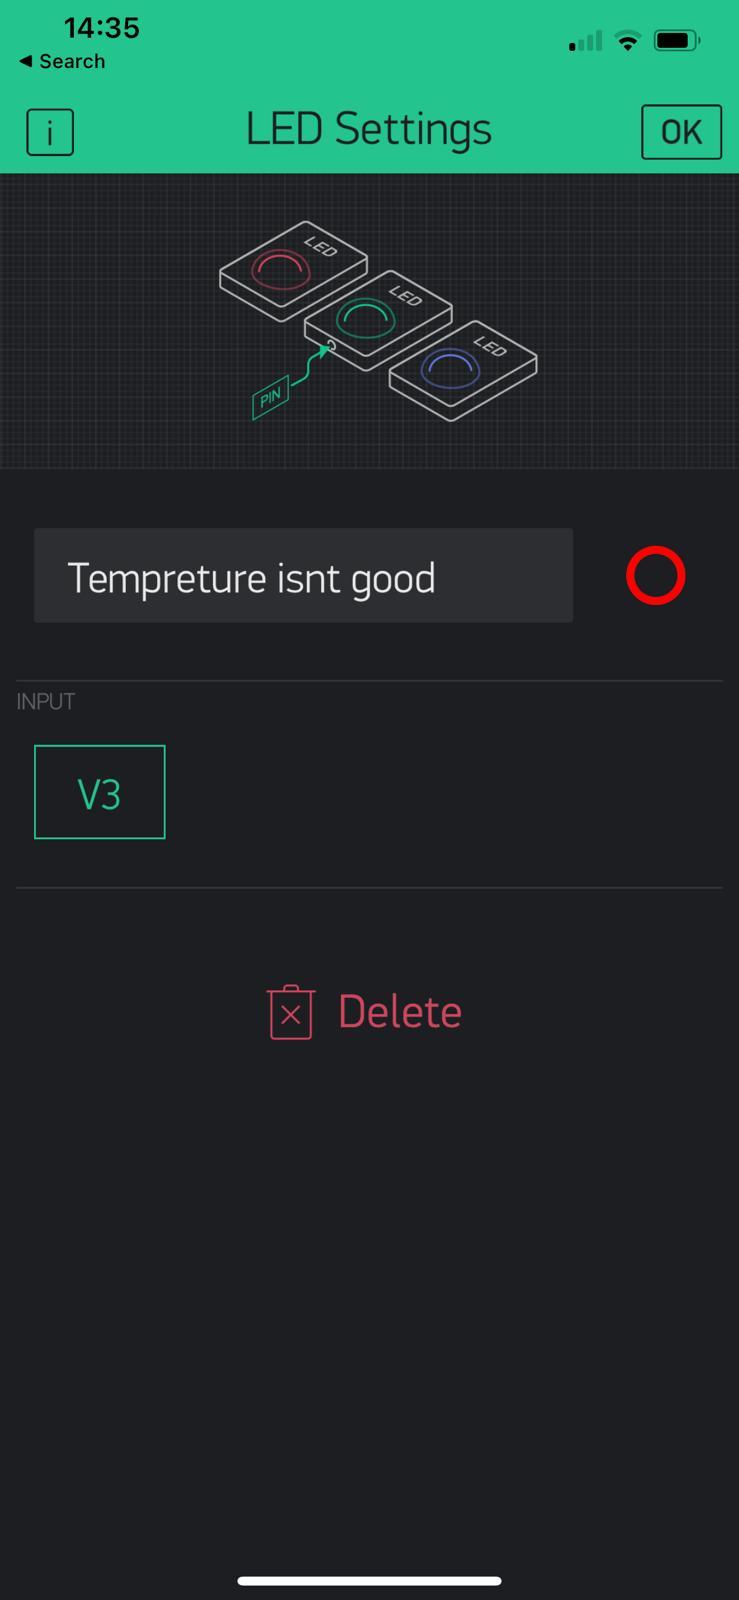
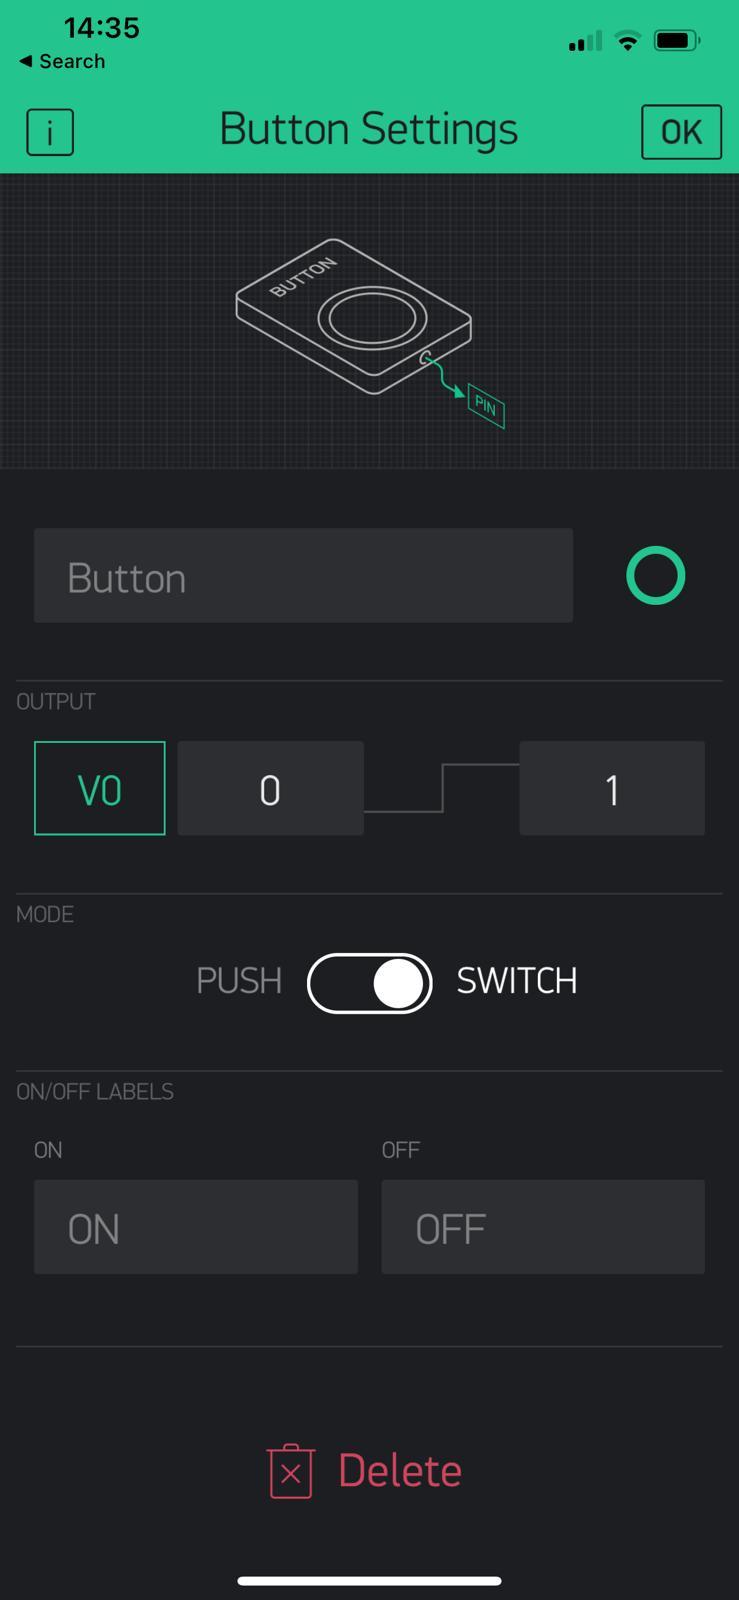
set up a new project in the “Blynk” app and set it according to the images.
Copy the code to you Arduino software.
Change the “auth” variable to the authorization code in your “Blynk” app.
![Screen Shot 2021-08-29 at 9.33.58 AM.png](/proxy/?url=https://content.instructables.com/FIQ/DN1H/KSVSNNFH/FIQDN1HKSVSNNFH.png&filename=Screen Shot 2021-08-29 at 9.33.58 AM.png)
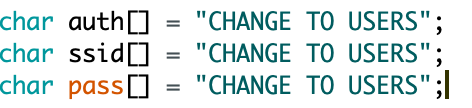
Change the “ssid” and “pass” variables to you WIFI connection info.
Upload the code to the Circuit using USB cable.
![WhatsApp Image 2021-08-28 at 16.14.11 (1).jpeg](/proxy/?url=https://content.instructables.com/FBD/G1JA/KSVSNN47/FBDG1JAKSVSNN47.jpg&filename=WhatsApp Image 2021-08-28 at 16.14.11 (1).jpeg)
Enjoy the new Smart Plant Tracker.