Smart Mirror

We all know the moment you're in the bathroom and lose track of the hour. Or you don't know what the weather will be today... etc. A smart mirror can help. For my project I did a smaller version of the smart mirror to save some space in the bathroom. You can find the weather, hour, day, place, temperature and humidity on it. There is also a website linked to it where you can find all the data in graphs and change the colour of the LED strip.
The Components You Need
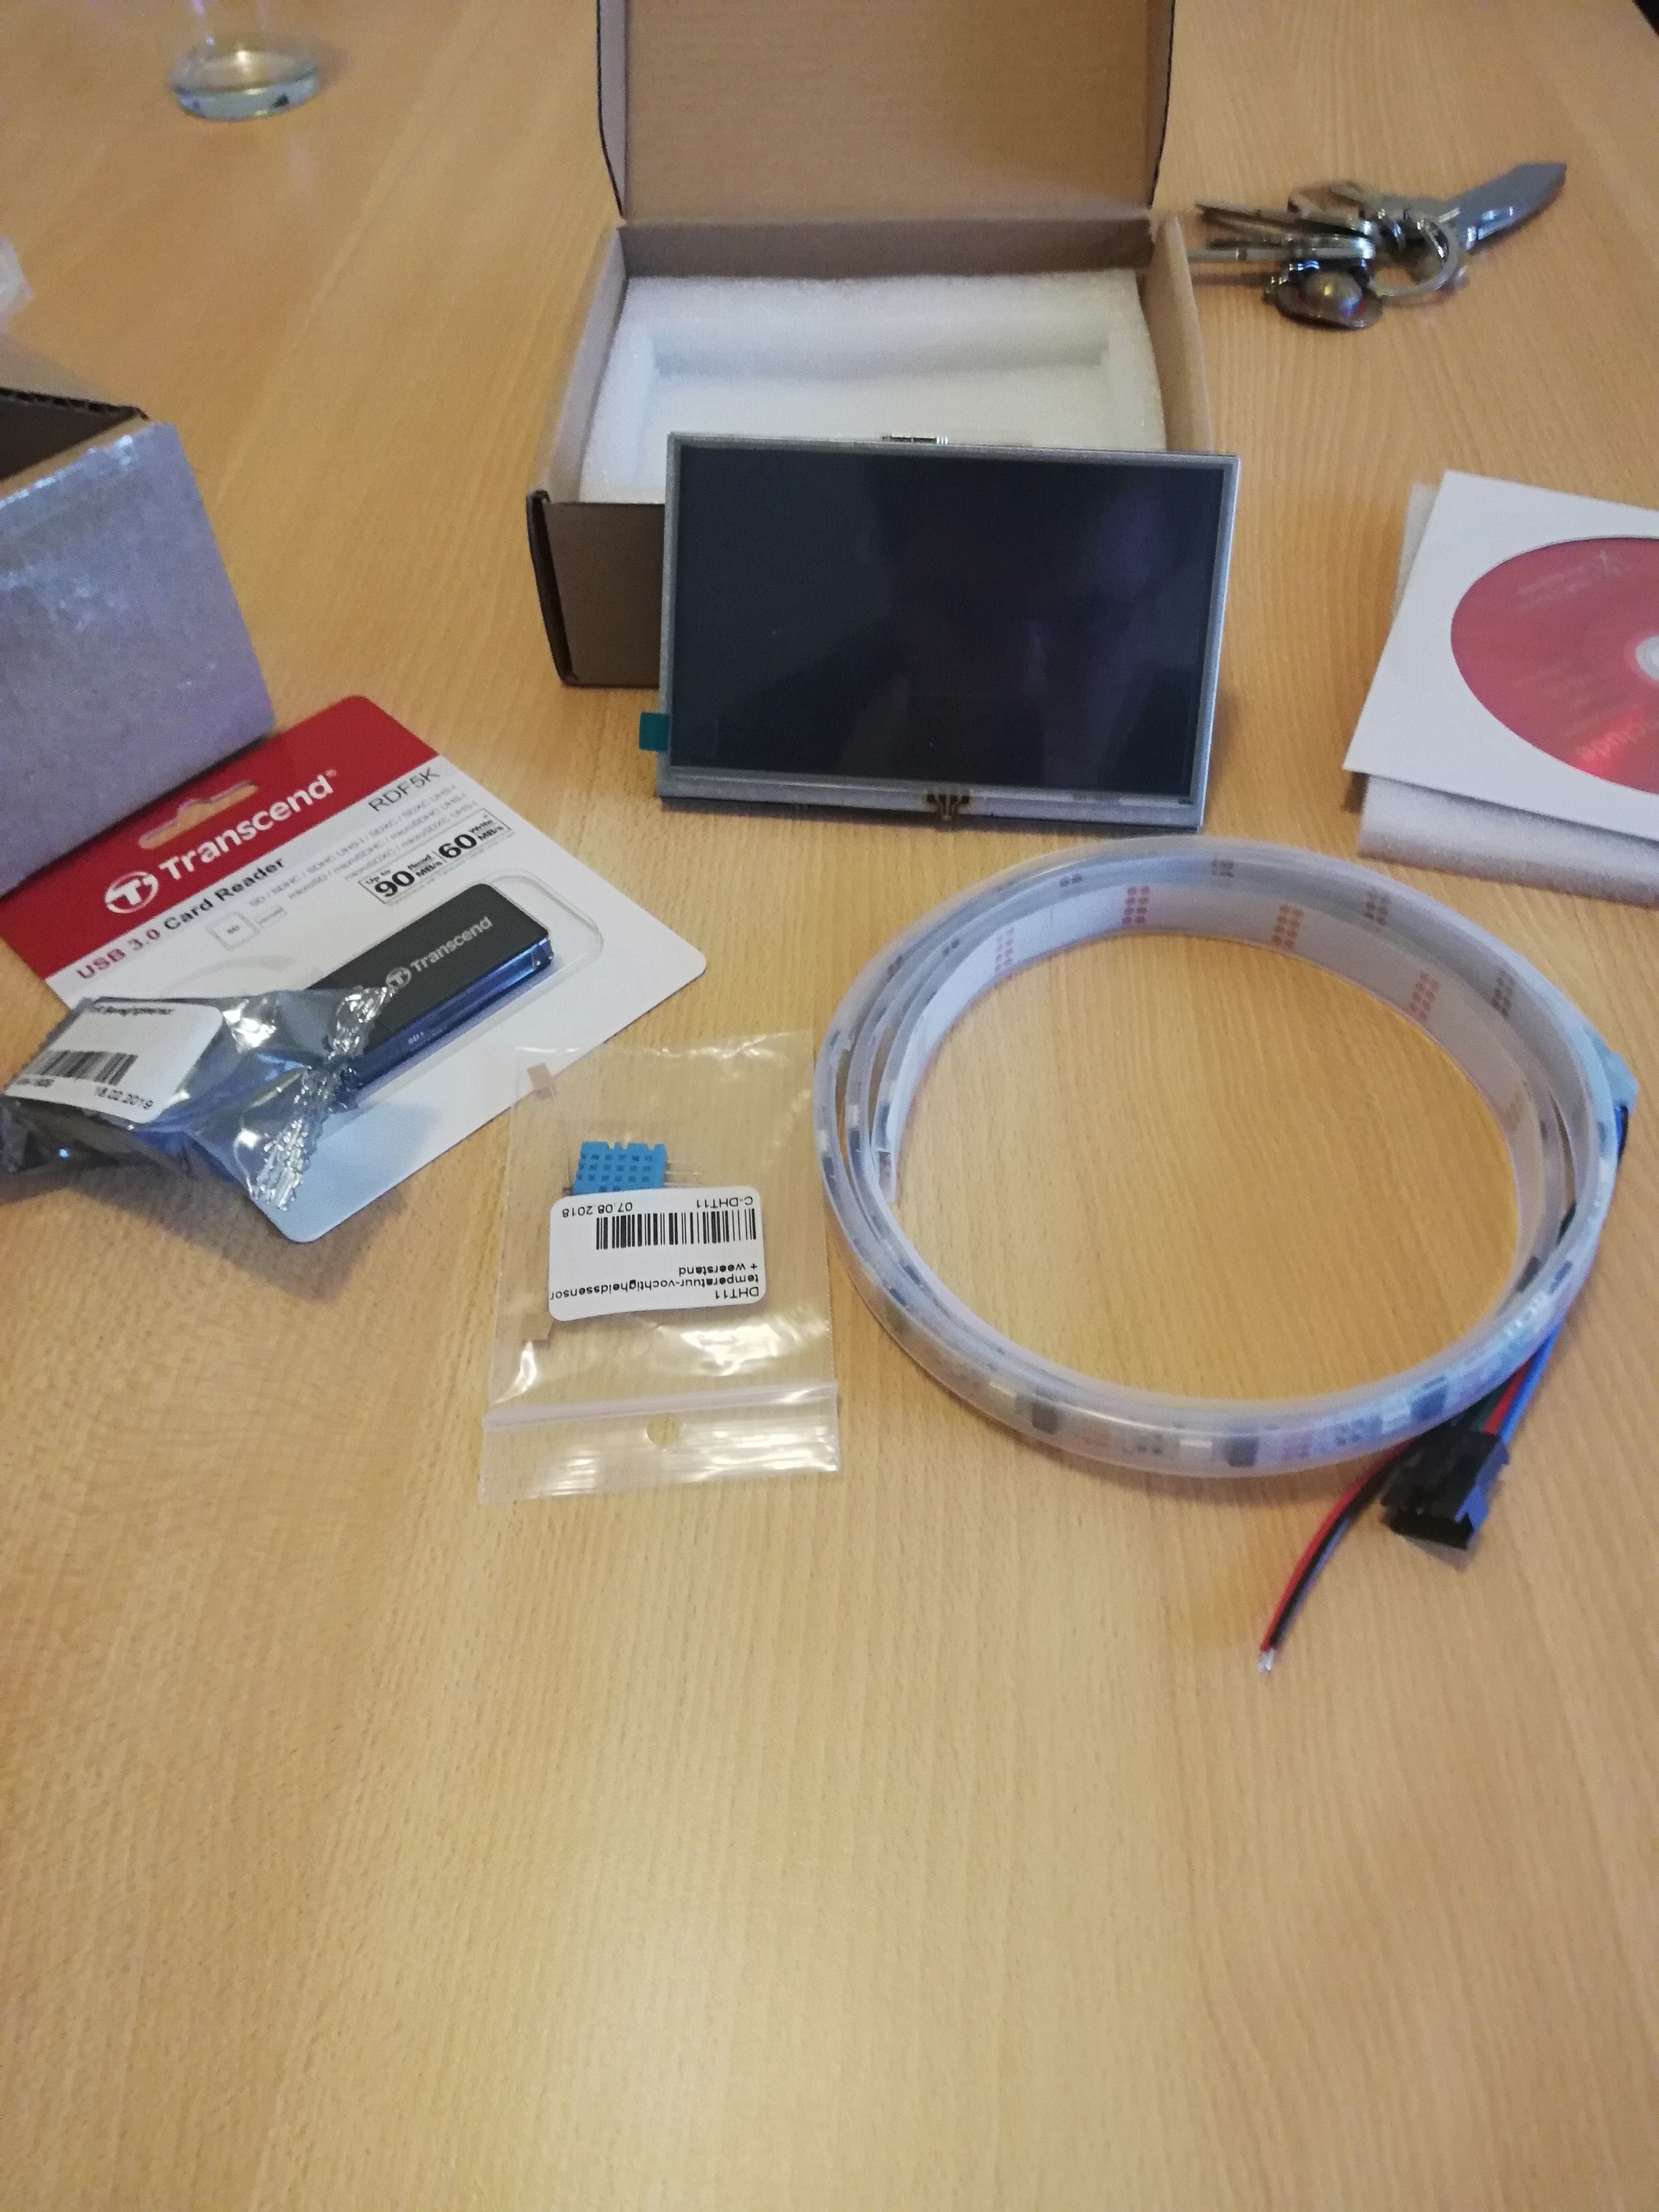
Here's a list of the components you need.
- Raspberry Pi display 5inch
- Raspberry Pi 3 b+
- 8GB micro sd
- Raspberry Pi supply 5.1V/2.5A
- Digitale RGB Ledstrip WS2801
- DHT11 temperature and humidity sensor
- Wood
- Hardware to fix the wood (glue & saw)
- HDMI cable
- PIR (motion sensor)
- DS18B20 (temperature sensor)
Raspberry Pi Setup
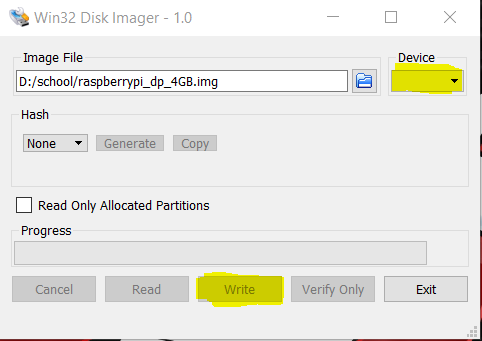
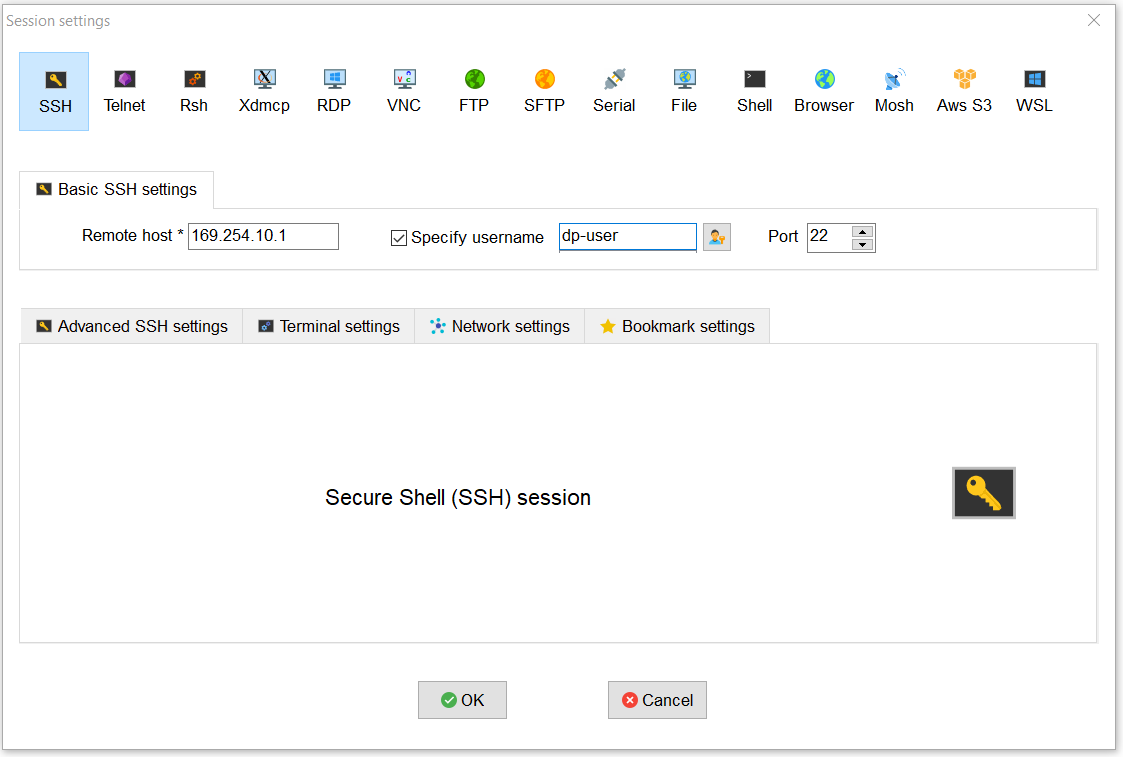
Let's start by installing some software.
First you install Win 32. Once you have installed Win 32 you can start installing the image on the pi.
When you open win 32 you will see that a folder can be selected. Select your micro sd card (top right) and click on write (bottom). The installation may take a while. Meanwhile you can install all other software.
Once your image is installed, you can put your sd card in your pi and power your pi. Connect your pi with an ethernet cable to your computer/laptop.
After this you start the mobaXterm. Go to session => SSH => and fill in the following data (see image for more detail). With this you log on to your pi via an ssh connection on port 22 with username "dp-user" and password "dp-user".
Downloads
Connecting Your Pi to Your WIFI
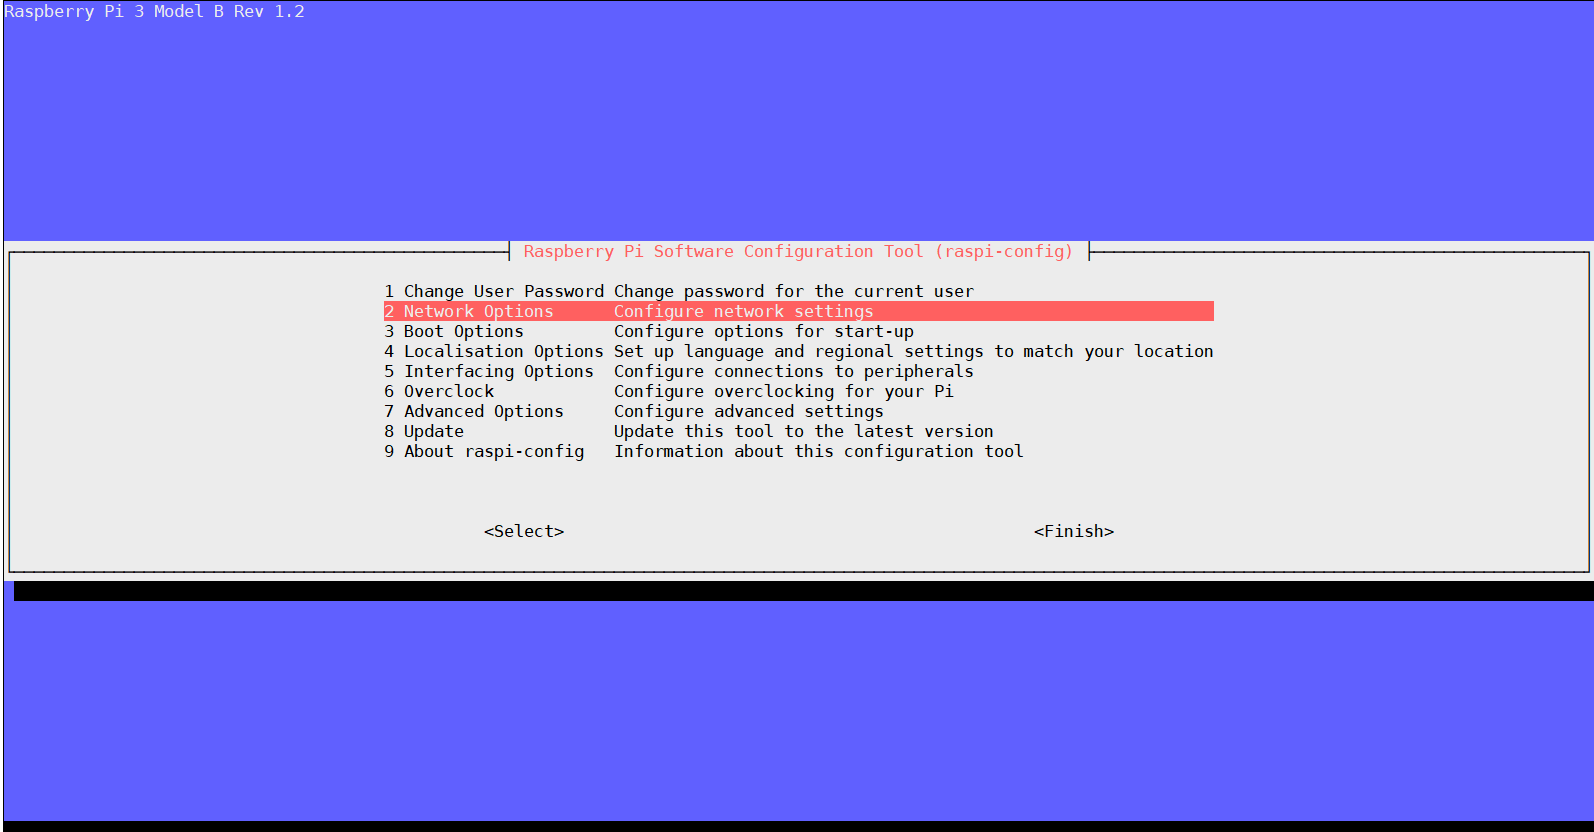
If you are connected to your pi you can set your wifi with the following steps.
sudo raspi-config
- Go to network options
- Go to wi-fi
- Enter your network name
- Enter your password
Now you have access to your wifi and can update your pi with the following code.
sudo apt update
sudo apt upgrade -y
This ensures that your pi is up to date.
Hardware
Now that your pi is completely ready you can start setting up the circuit. connect as above schematics your circuit. You will see that an mcp3008 is being used. You don't need this one, this is the connection for the screen. The ledstrip has a clock, Mosi, GND and a 5V.
SQL- Database
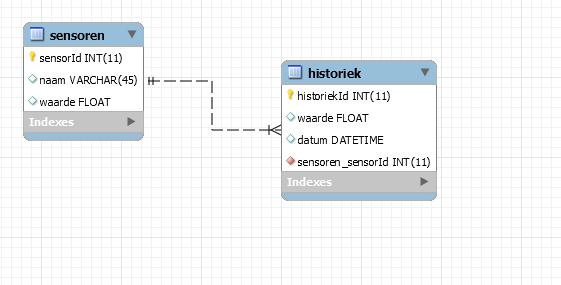
Time to create a database. Open your mariaDB environment on your pi with the code below.
First you create a user with:
CREATE USER 'mct'@'%' IDENTIFIED BY 'mct';
then you make sure he has all the privileges:
GRANT ALL PRIVILEGES ON *.* TO 'mct'@'%' WITH GRAND OPTION;
Last but not least, you flush everything:
FLUSH PRIVILEGES;
Now restart the service:
sudo service mysql restart
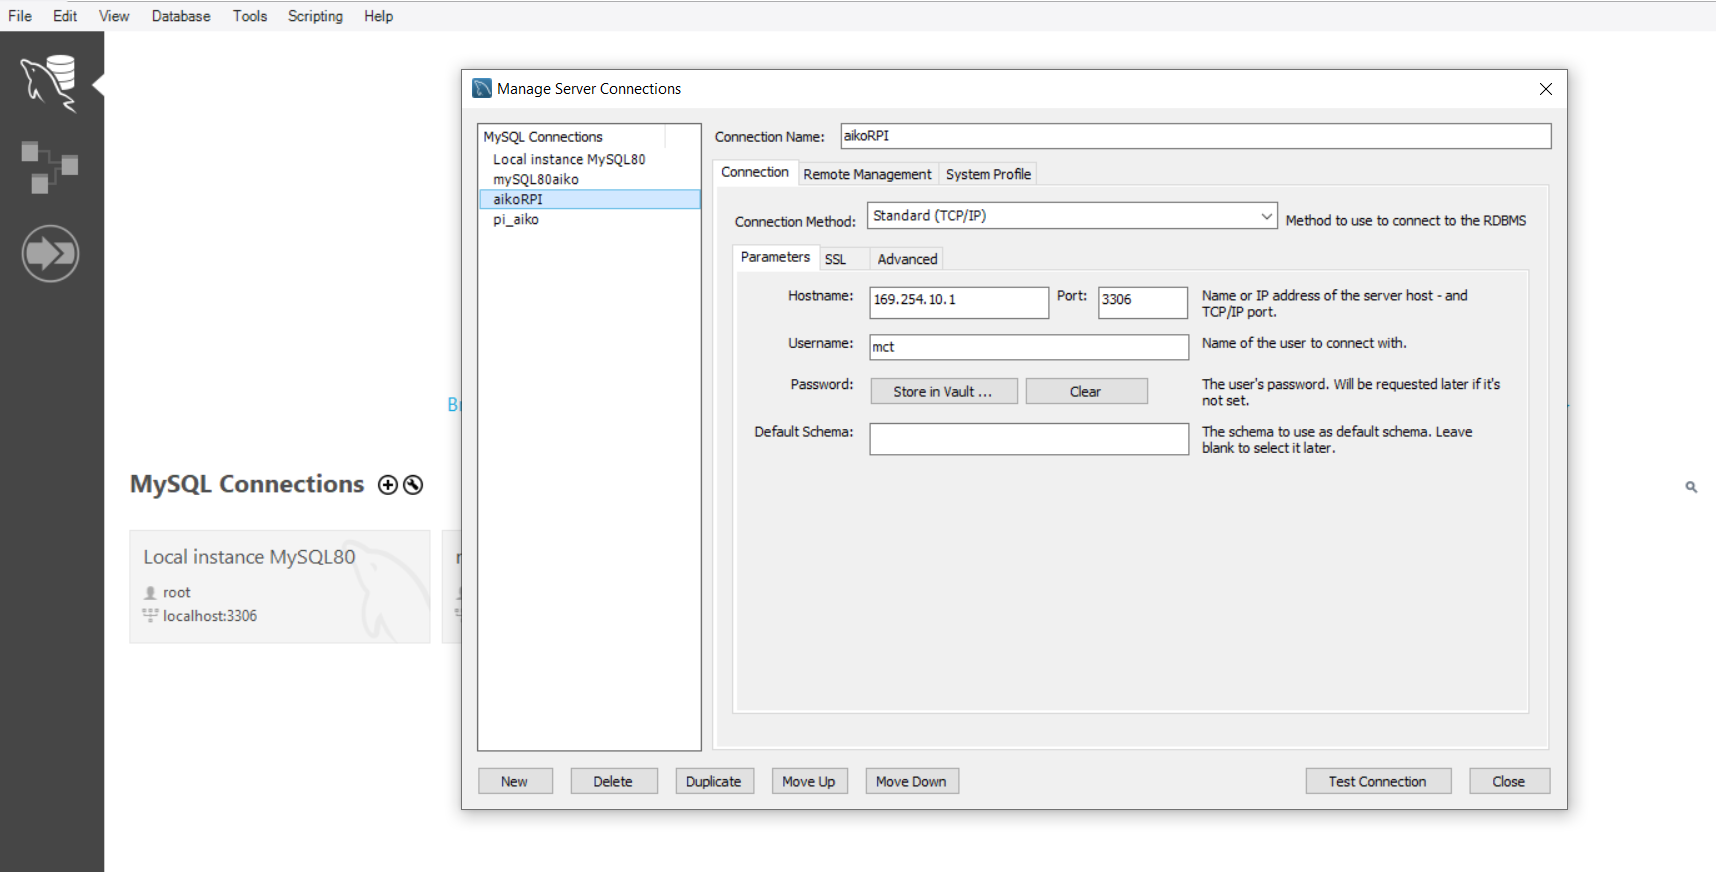
Open mysql Workbench. Make a new connection. For more details see picture.
Now open import, import the file and execute the code.
Code for the Mirror
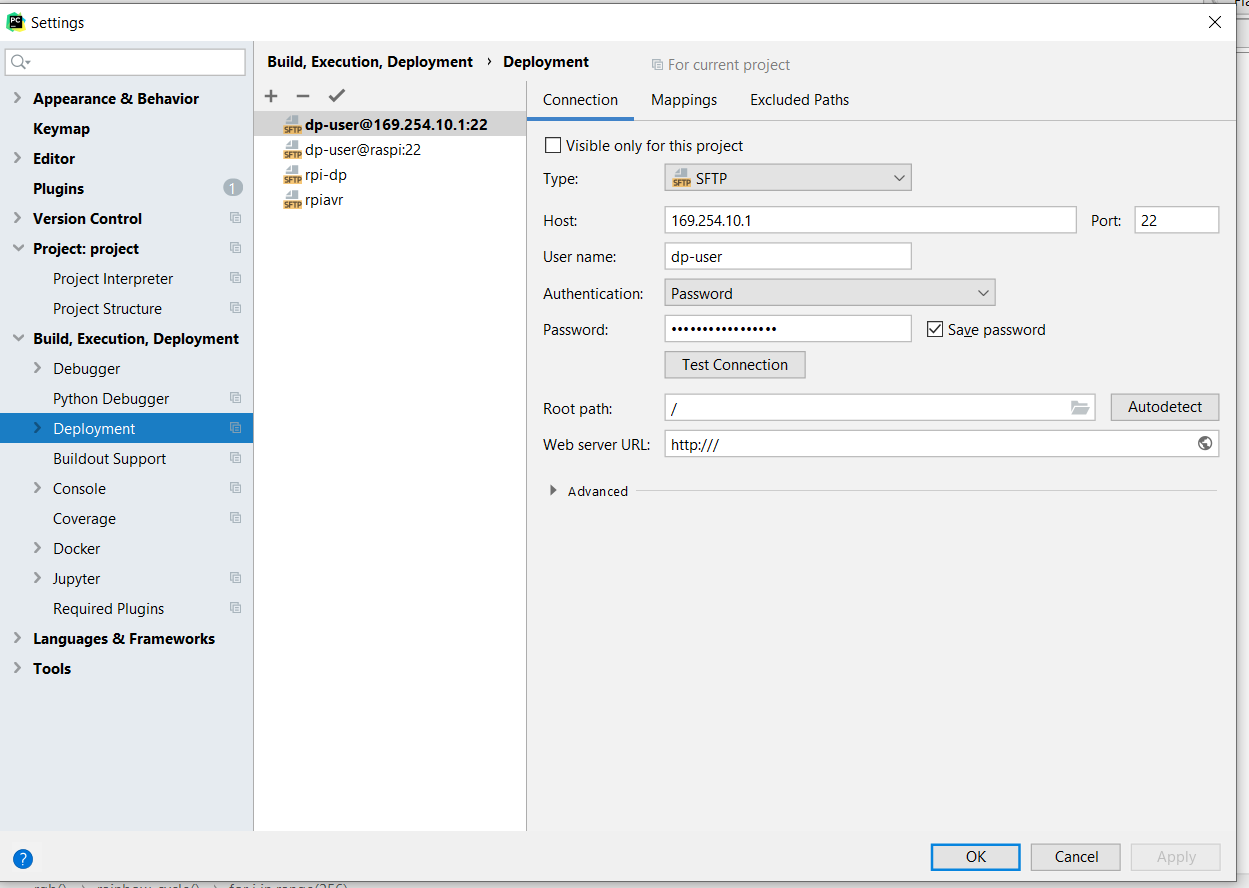
Open pyCharm and go to settings => Build, Exixution,Deployment => deployment. Press the plus and add a SFTP (see image).
Now you just download the code from my github and open it in pycharm.
Website
To put a web server on your pi, add the following code to your pi.
sudo apt-get intall apache2-y
To gain access as a dp-user:
sudo chown dp-user:root *
To access the folder and add files to it.
sudo chown dp-user:root /var/www/html
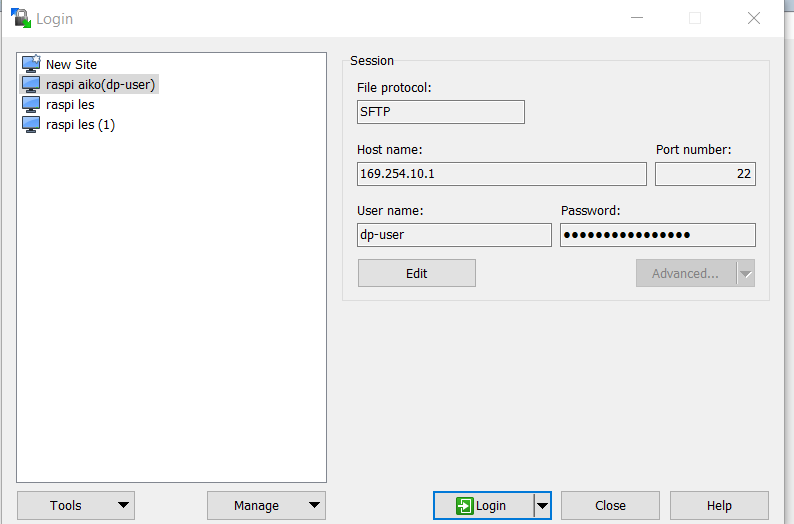
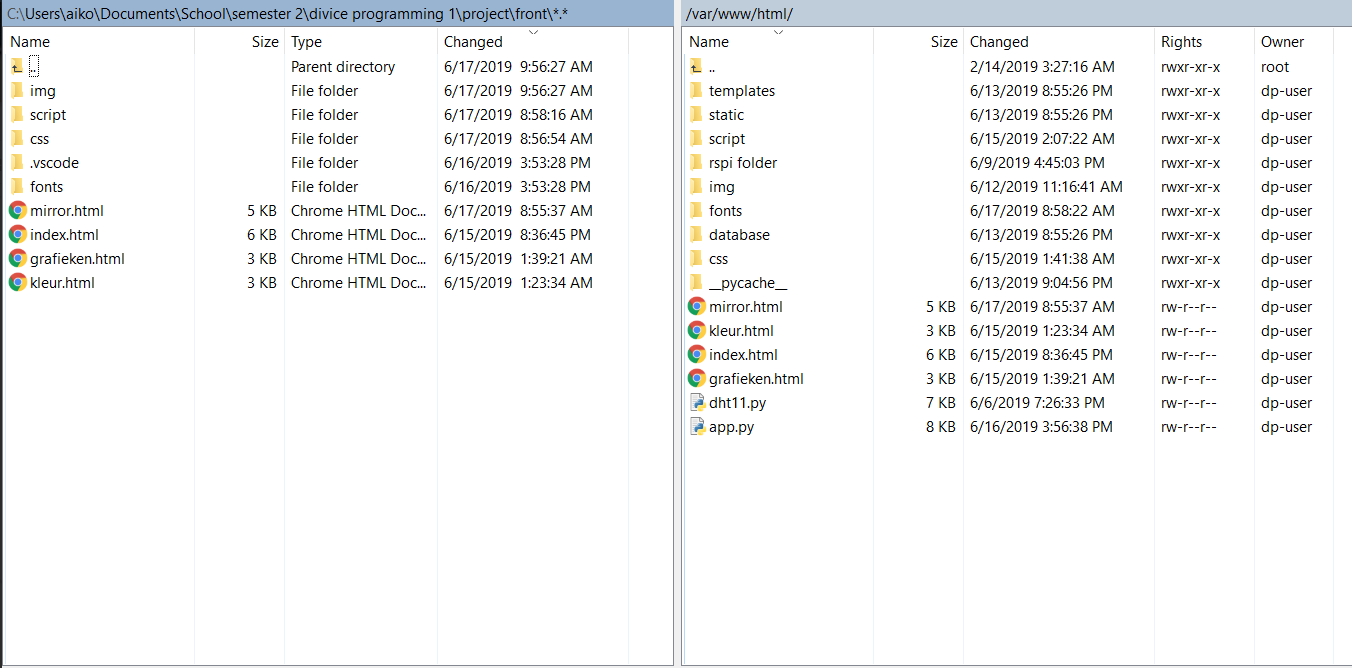
Open WinSCP. Create a new session and fill in the file as shown in the image.
Select your files and drag them to your /var/www/html folder.
Auto Start App.py
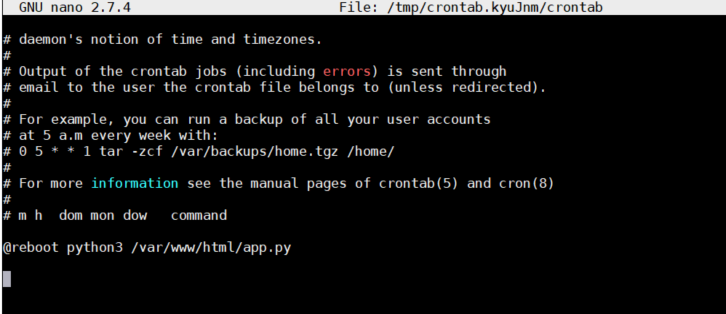
To start up your app.py automatically go to your crontab and add this code:
sudo crontab -e
At the bottom of the file, enter the following code (explained in the image).
@reboot python3 /var/www/html/app.py
Ctrl + x to get out and y enter to save.
Make a Case
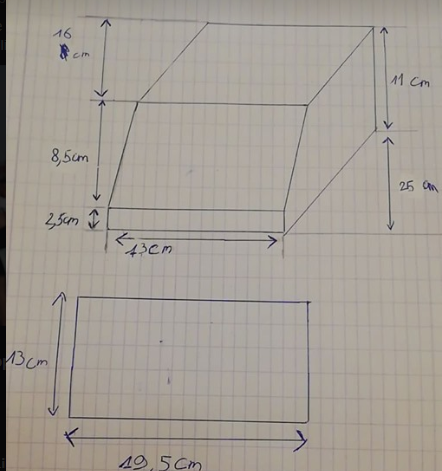
The concept is easy I took the size of my screen, the length of my breadboard and the size of my pi made a hole at the bottom to put the PIR in.
Because you are using a hdmi cable there should be another piece that should be on you.
I Hope You Like It
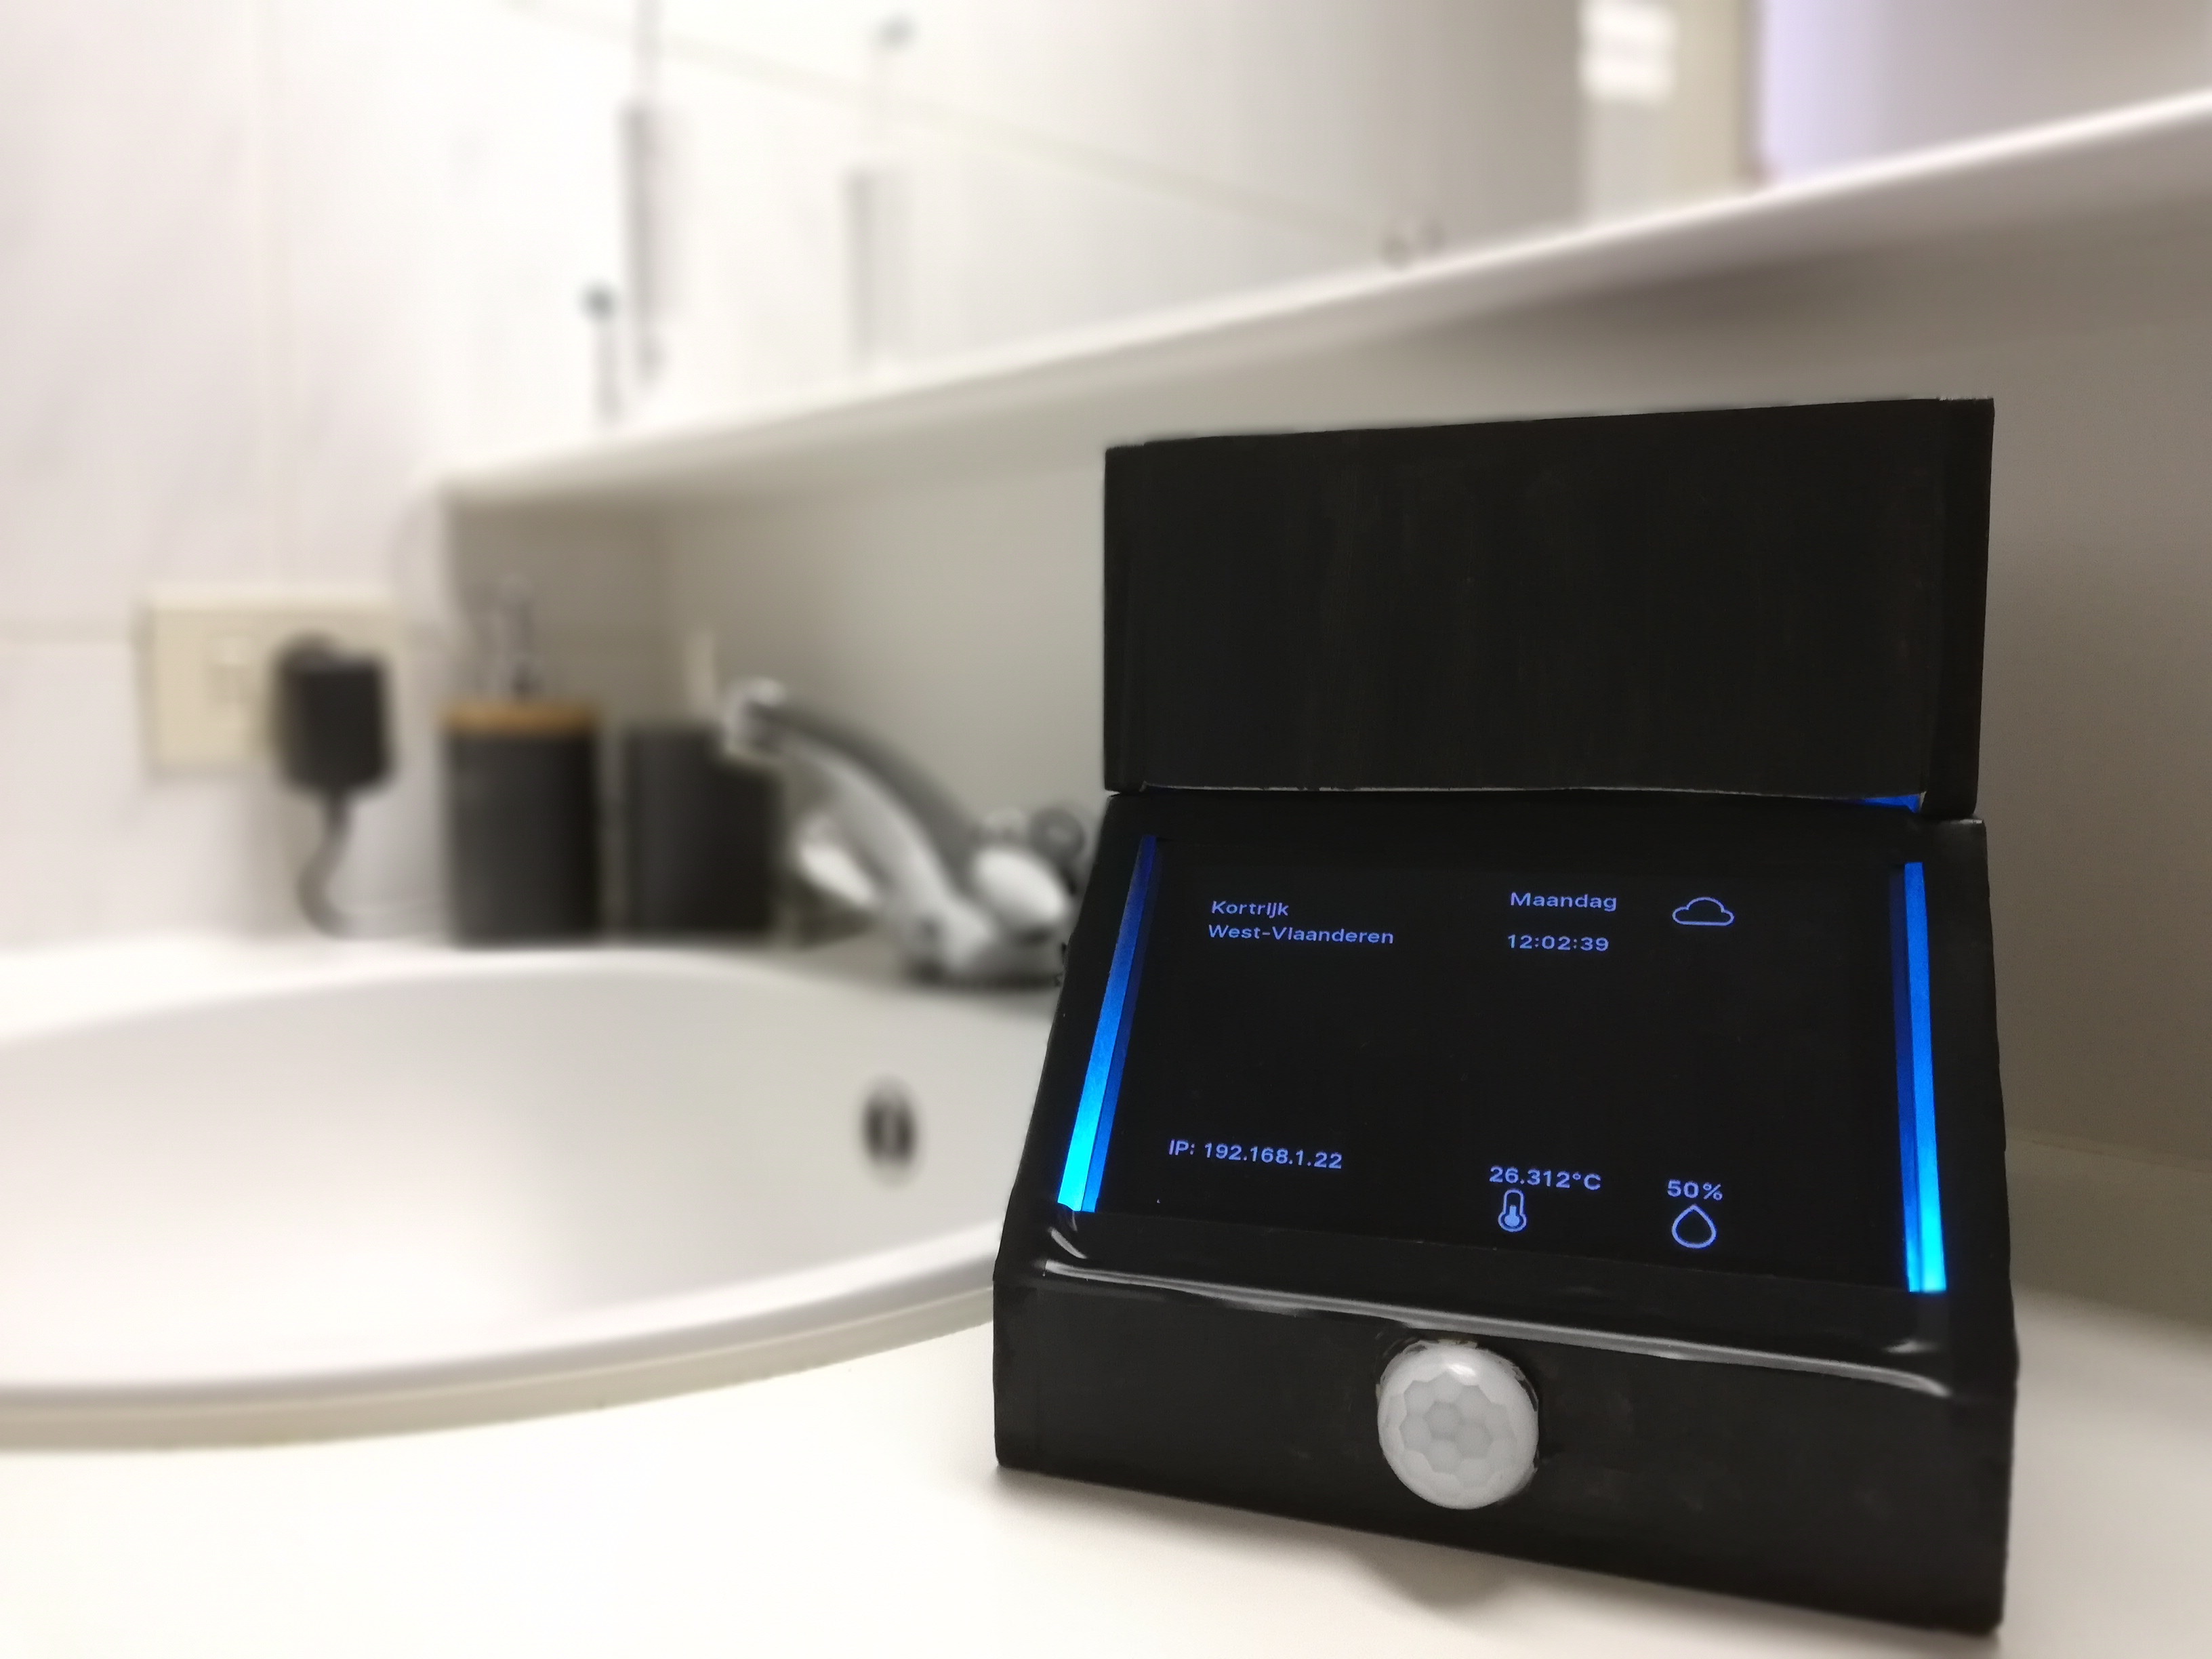
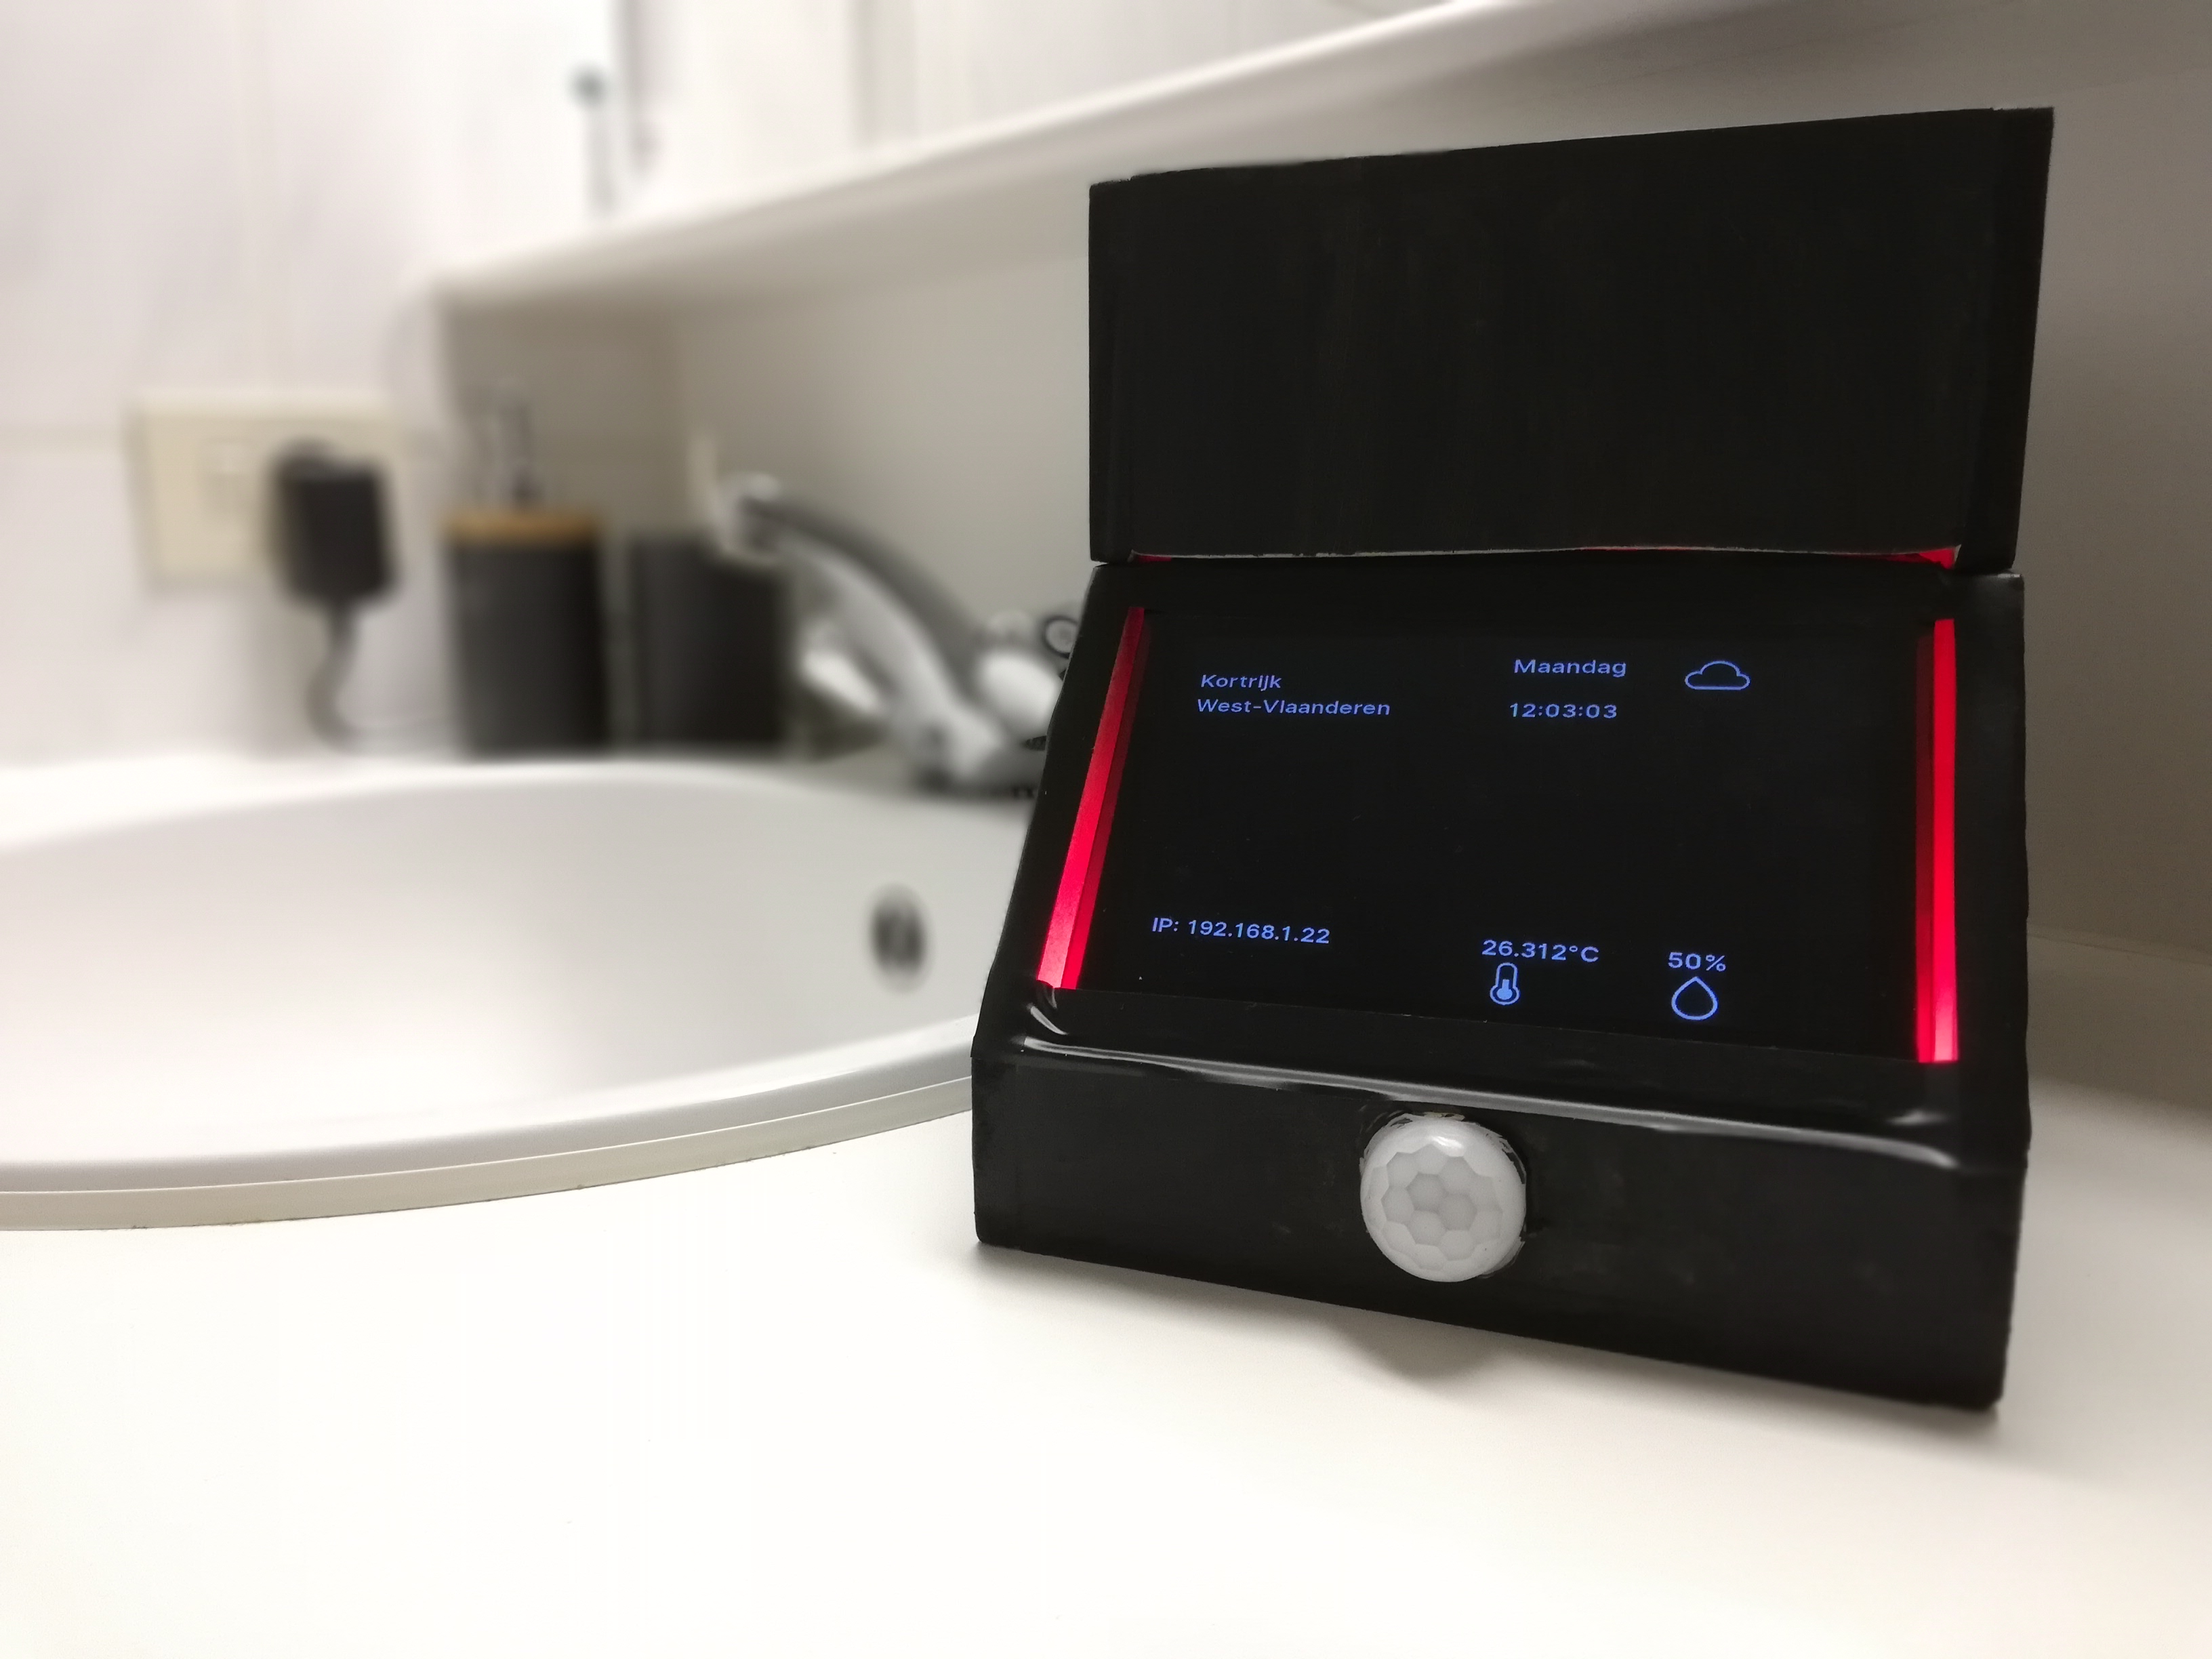
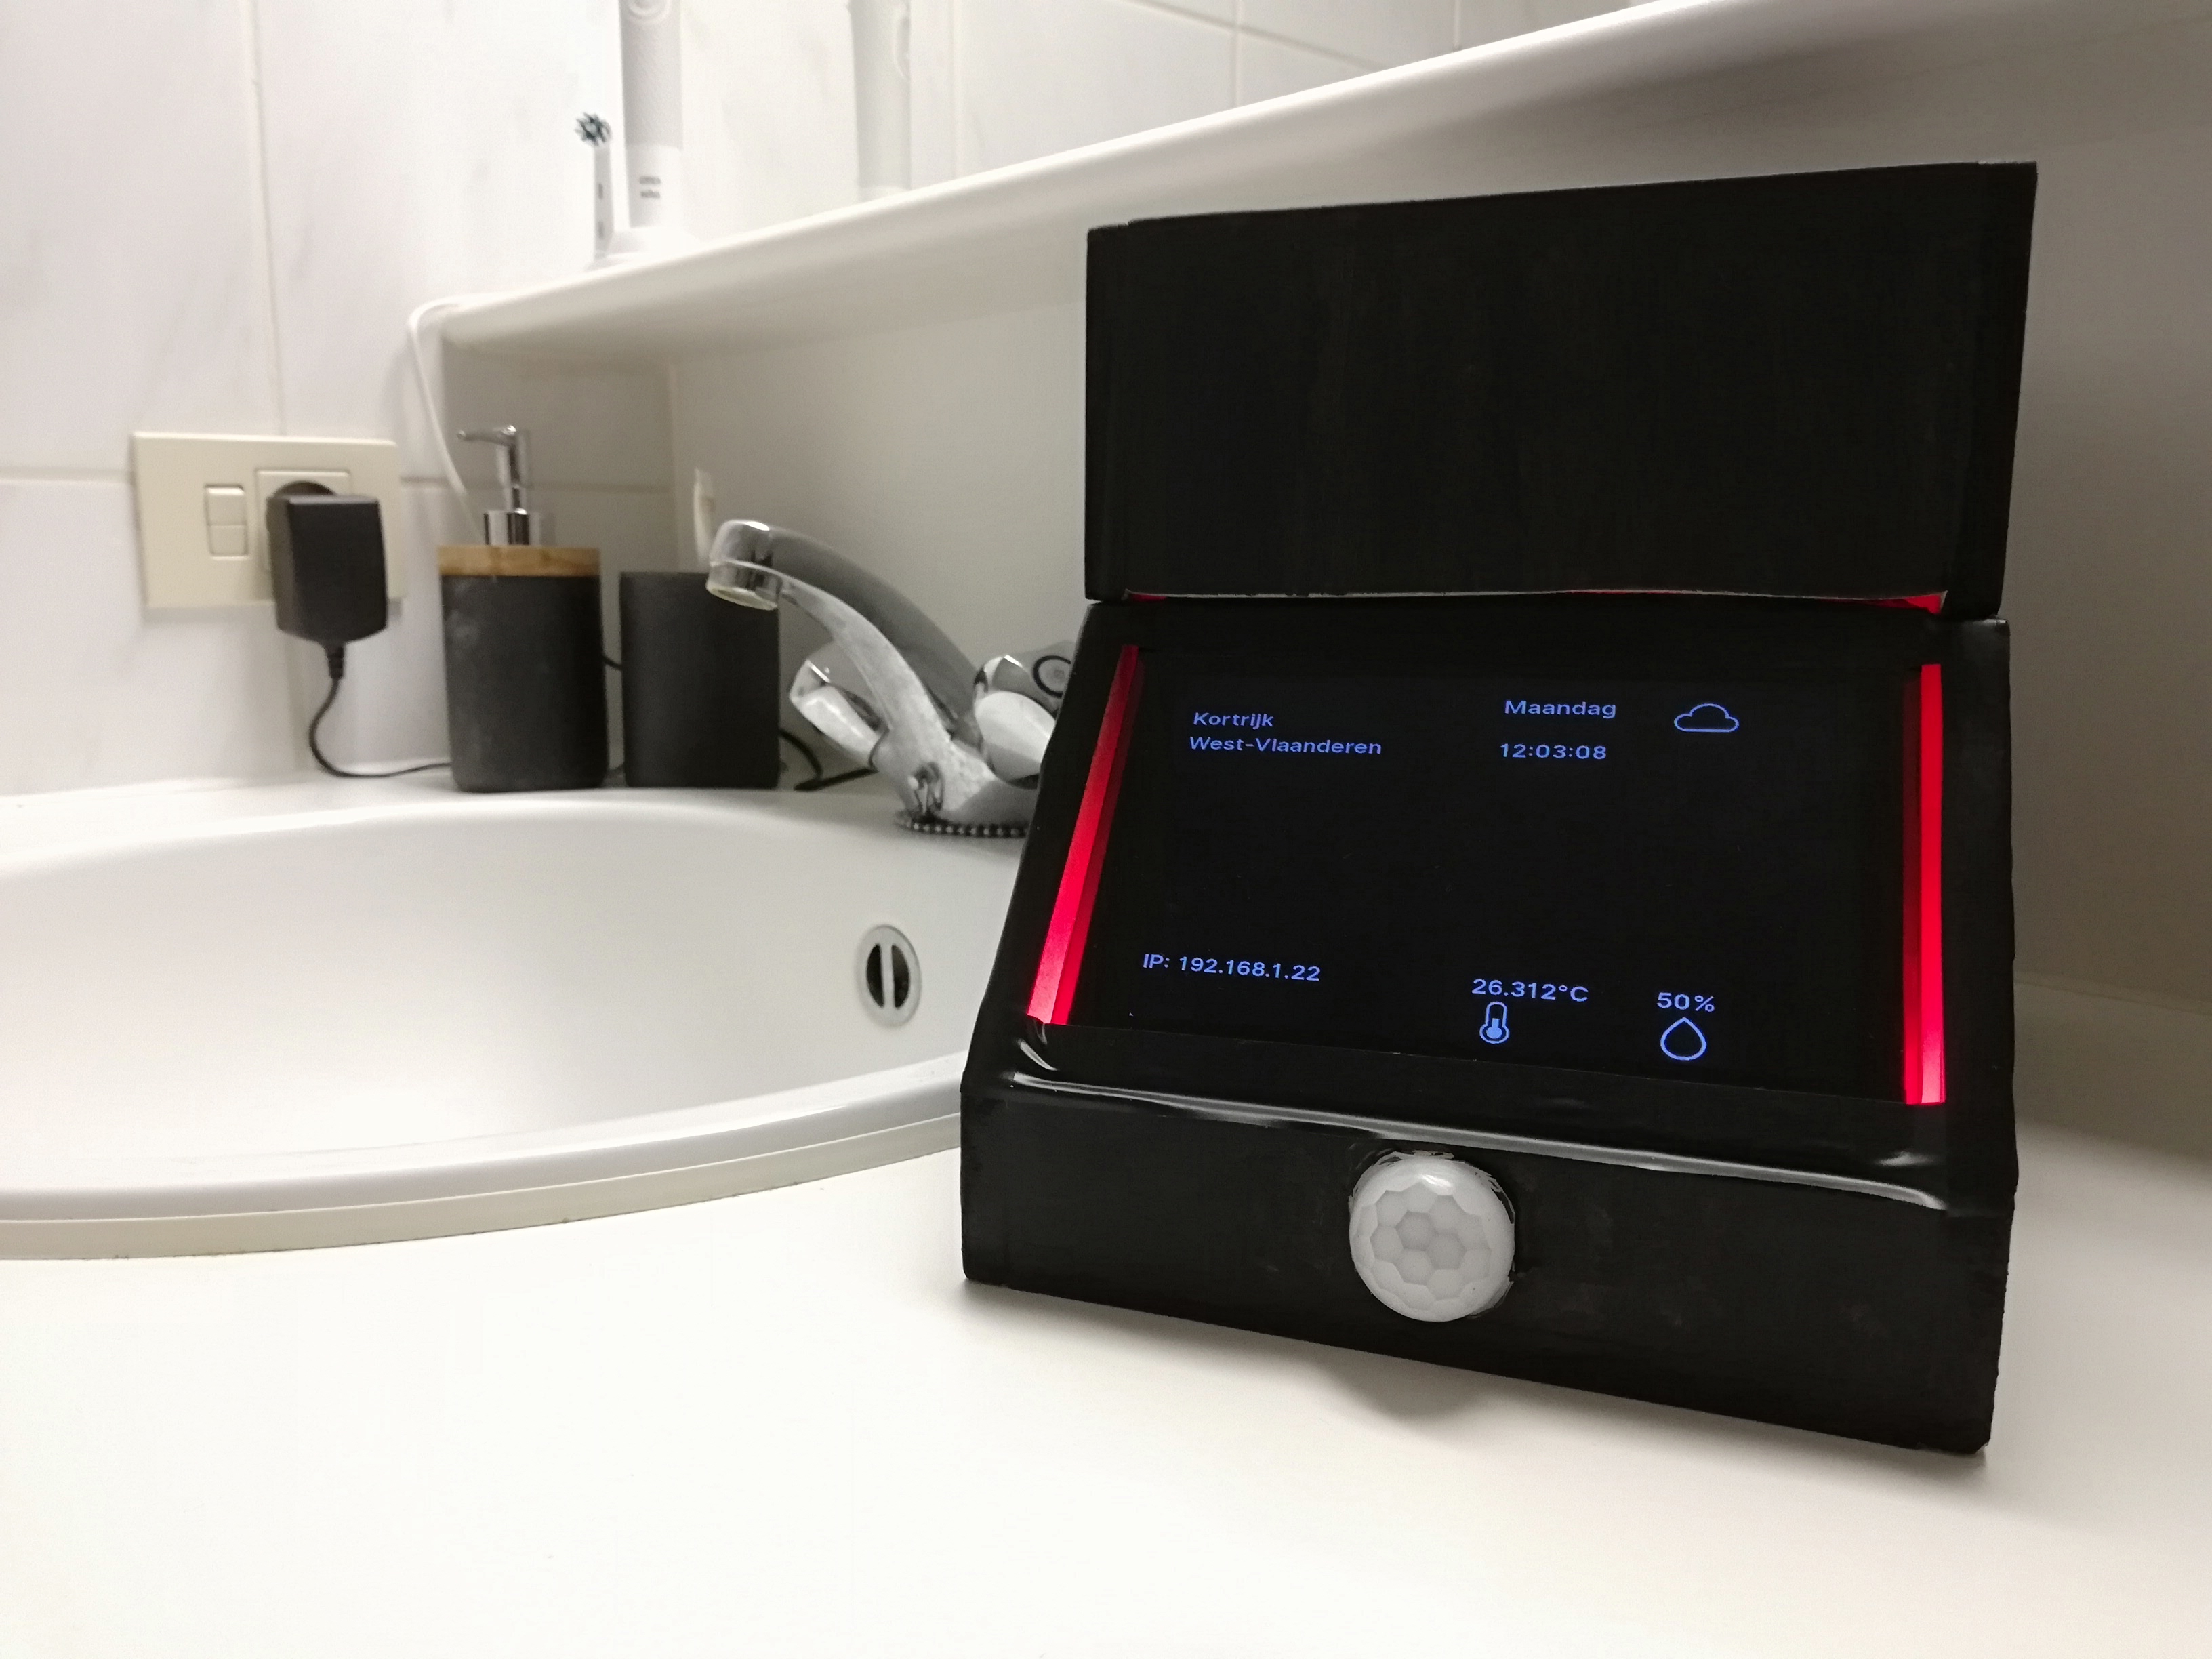
I hope you enjoy the mini smart mirror.
Good luck!