Smart Mirror
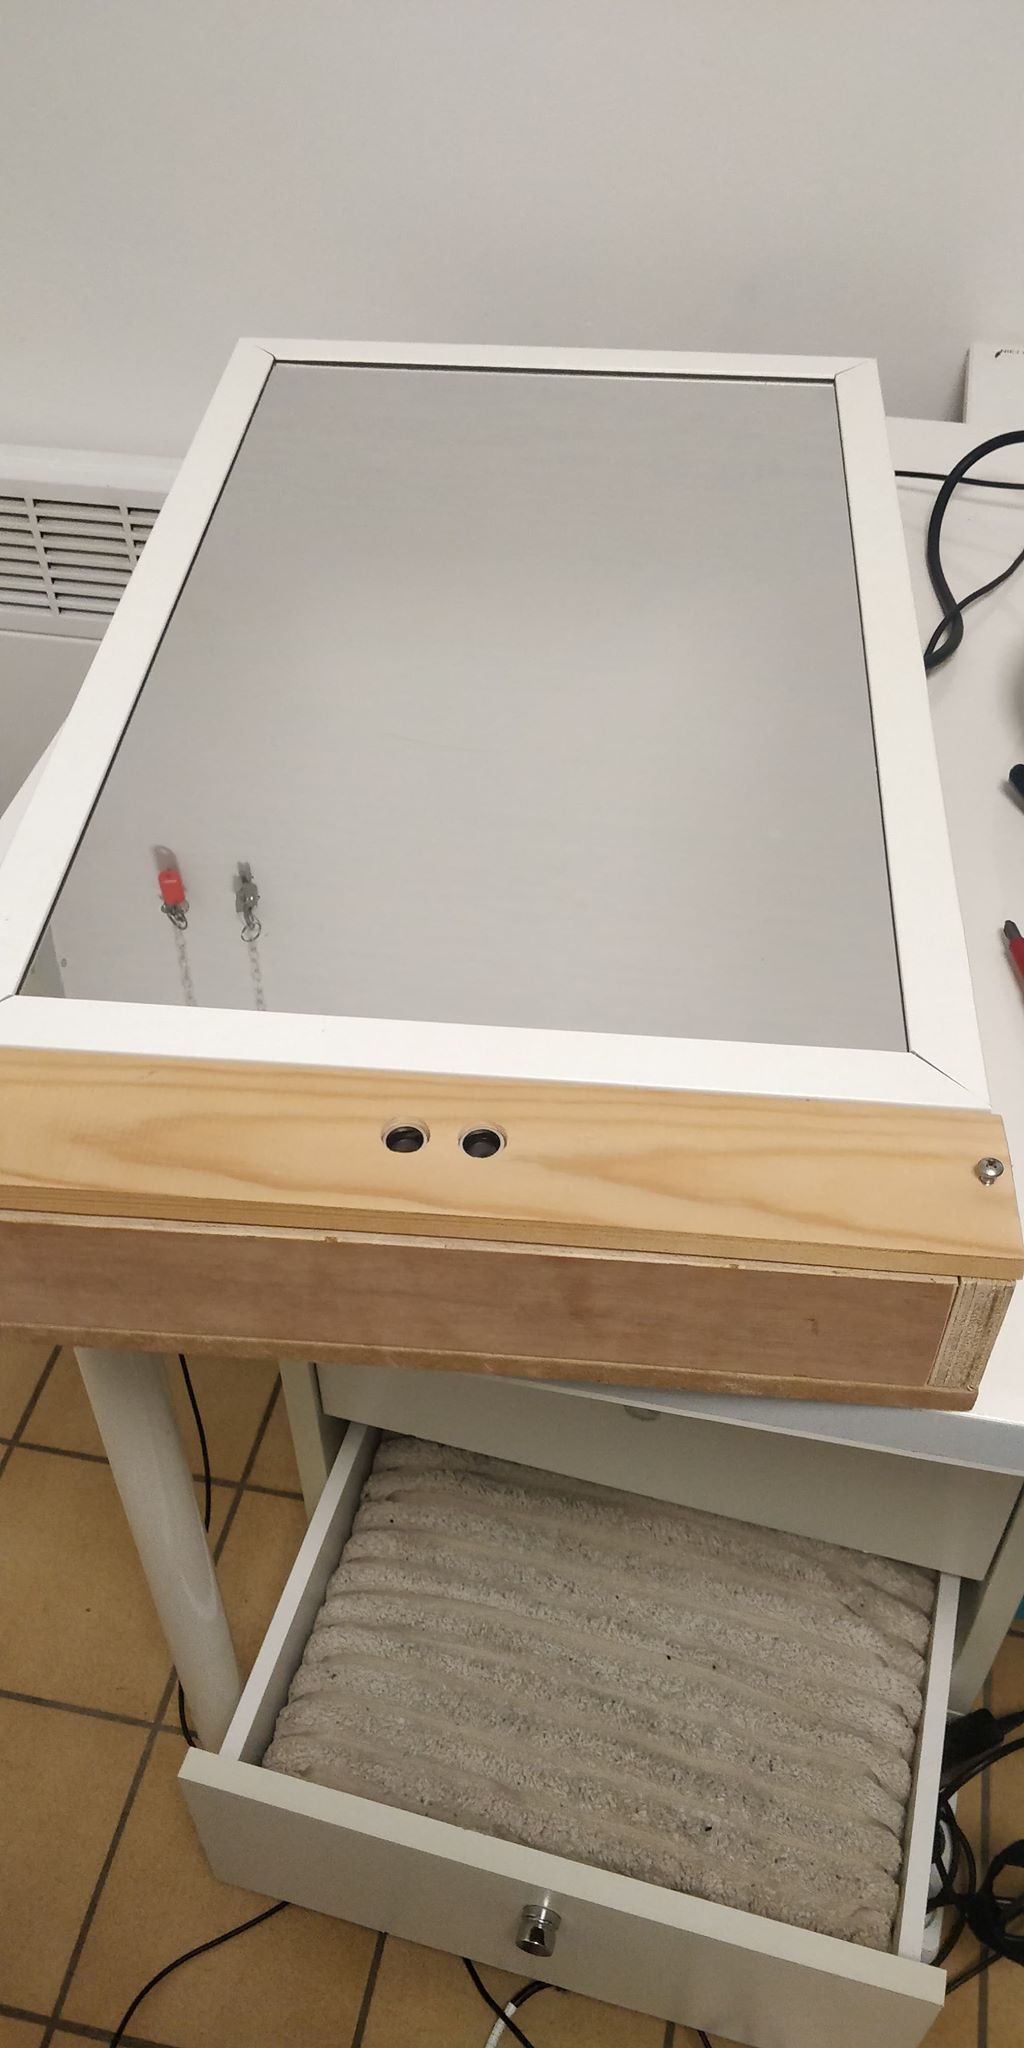
Do you have some spare time? Do you like to create your own creations? The Smart Mirror is the bet choice for you! These mirrors become more and more common place in houses. It's a nice way to decorate your everyday rhythm. It's also not just a decoration, it's useful aswell and also there's no real limit to how far you can go...
I made this and had a lot a fun and it was an amazing expercience. I hope you'll find it too!
Materials
This is what you'll need
- RaspberryPi
- GPIO T-Cobbler
- 16GB SD Card (min. 8GB)
- Breadboard
- Ultrasonic sensor HC-SR04 (datasheet)
- Temperature sensor DS18B20 (datasheet)
- 1x 1KΩ resistor
-
1 x 2KΩ resistor
-
1 x 10KΩ resistor
-
Male to male jumper wires
-
HDMI cable
-
Monitor (recommend 19"+)
-
Plexiglass (size of screen)
-
Reflective window film (Amazon)
-
Wood
-
Screws (for the connection of the casing)
Maximum cost: €250,00 (if you have a spare moniter it's half of the price)
Setting Up Your Pi

The Pi is a very complex machine, so it's best you set it up right from the start.
- Download raspbian
- Extract the file and write it on to your SD Card
- This is easy using disk imager
- On your SD Card -> open "cmdline.txt"
- Write "169.254.10.1" at the end
- You can now use your SD Card
You can now install Putty after connecting the Pi select SSH with Host name "169.254.10.1" using port 22. You can now login with the default credentials ("pi", "raspberry"). Now you want yourself to set up a WiFi connection using "wpa_passphrase "ssid of your network" "password of your network". You can copy the output and paste it here using putty of course:
sudo nano /etc/wpa_supplicant/wpa_supplicant.conf
If you want to see your IP of your Pi you can use:
ifconfig
Pycharm and Raspi

This is a hard part of you're not used to coding so take it slow.
This Github link will help you to set up a service and connect your pycharm and raspi. There are some files already in there but not for our Mirror so you can paste mine in there.
Enough Coding Lets Start Creating
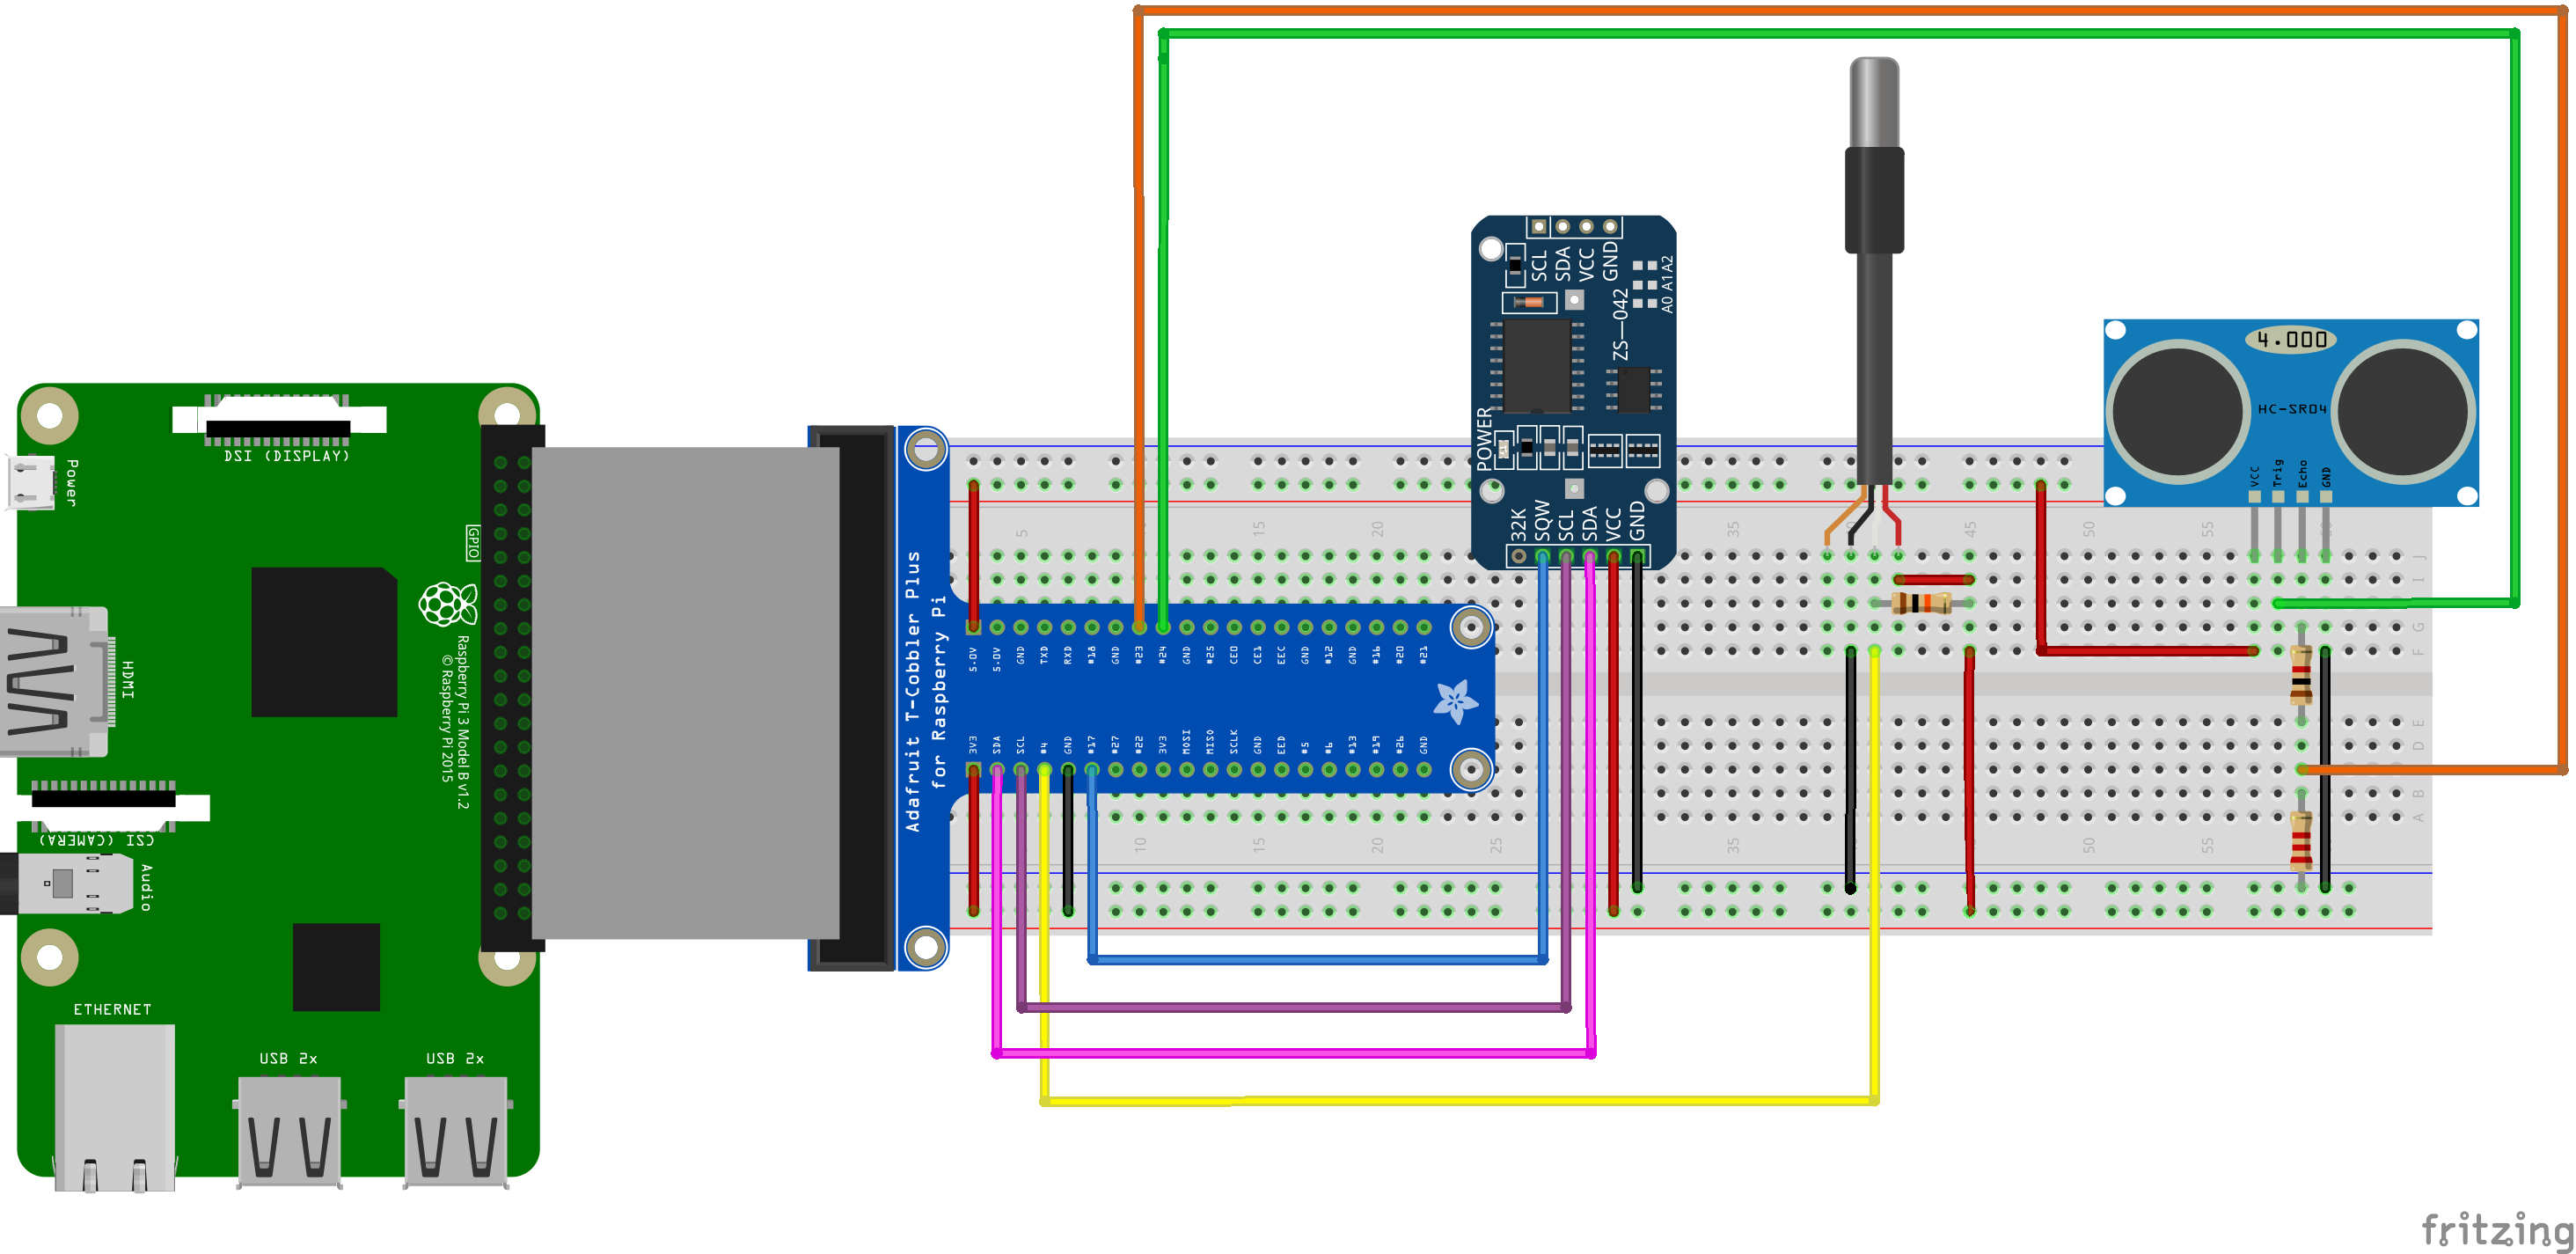
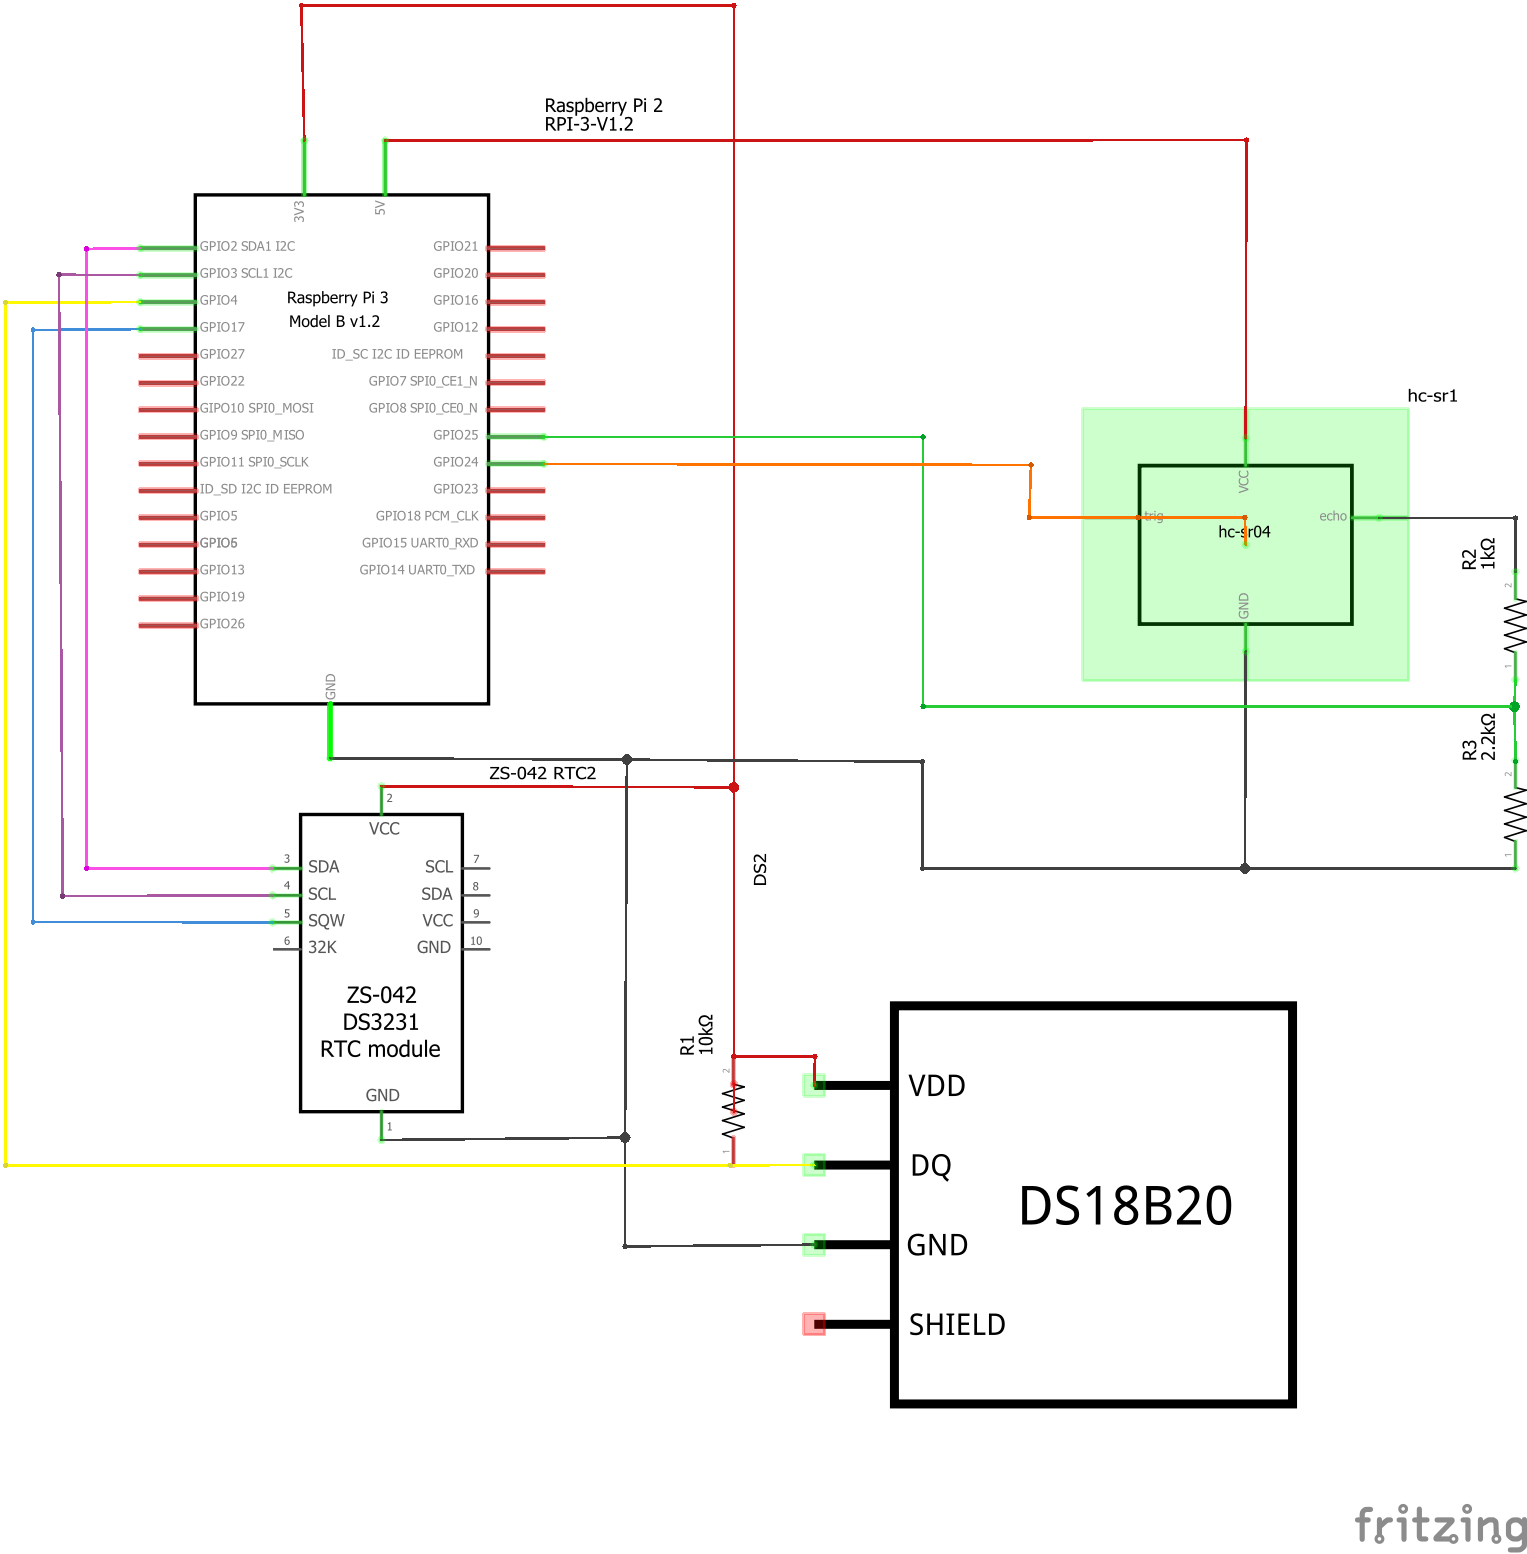
After sitting in front of a screen for too long you want yourself some easier tasks and not hurting your eyes. The connection of my compenents are very easy if you have all components.
The best way to make sure you did it right just use the PNG's I uploaded wich makes it a lot easier.
Casing
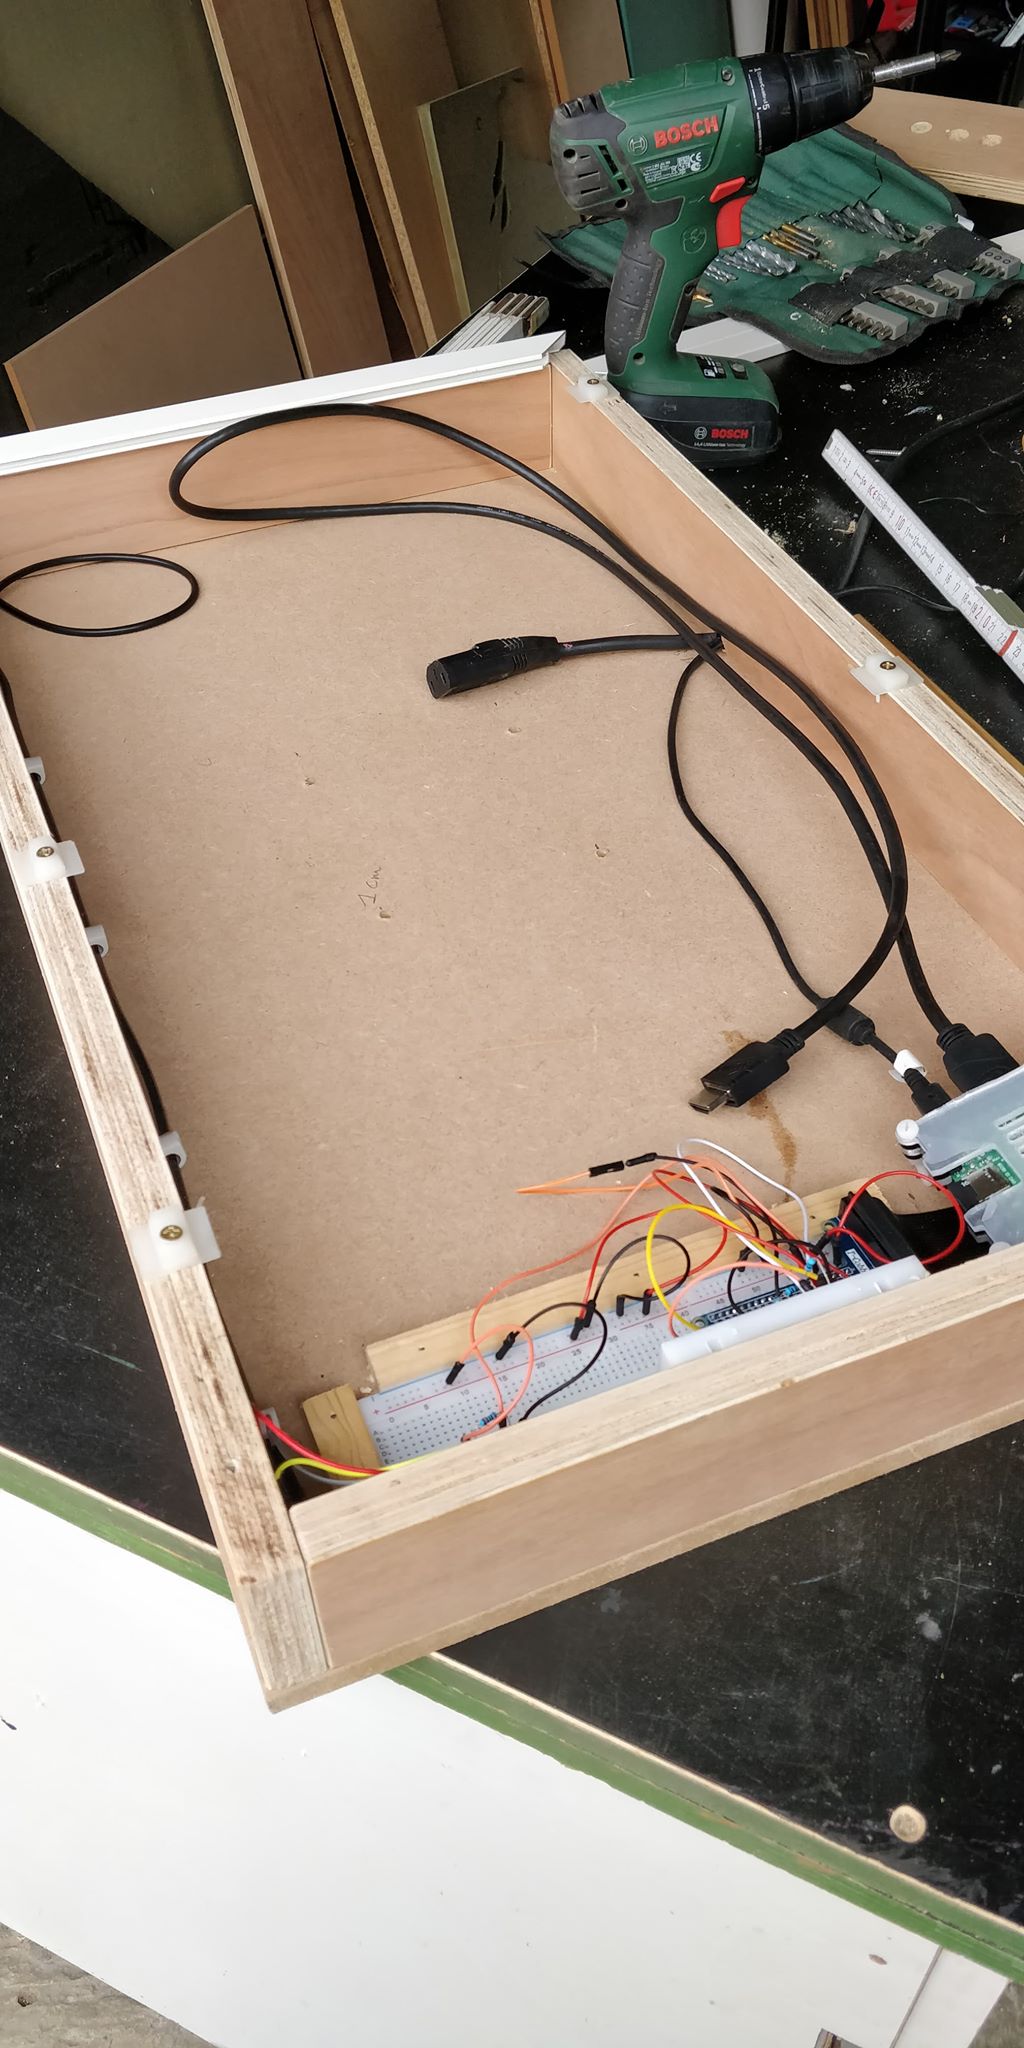
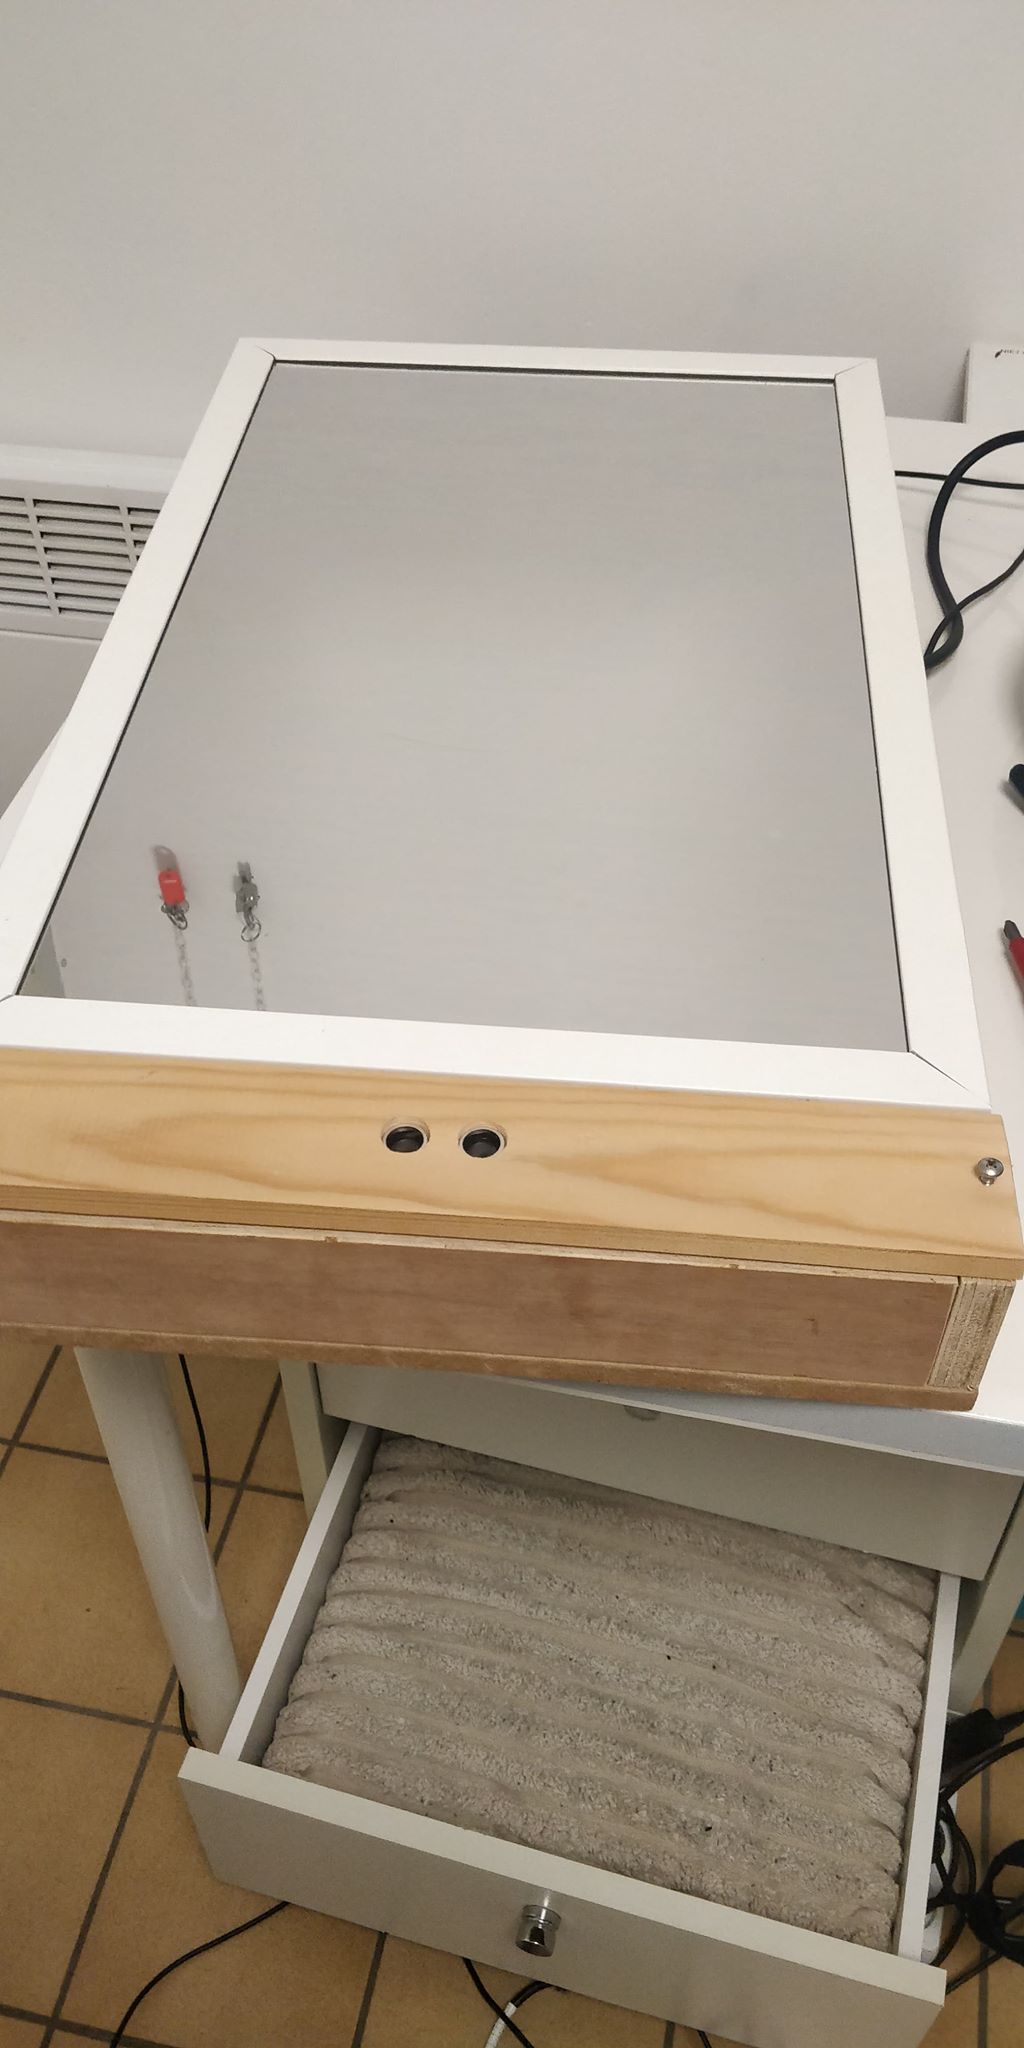
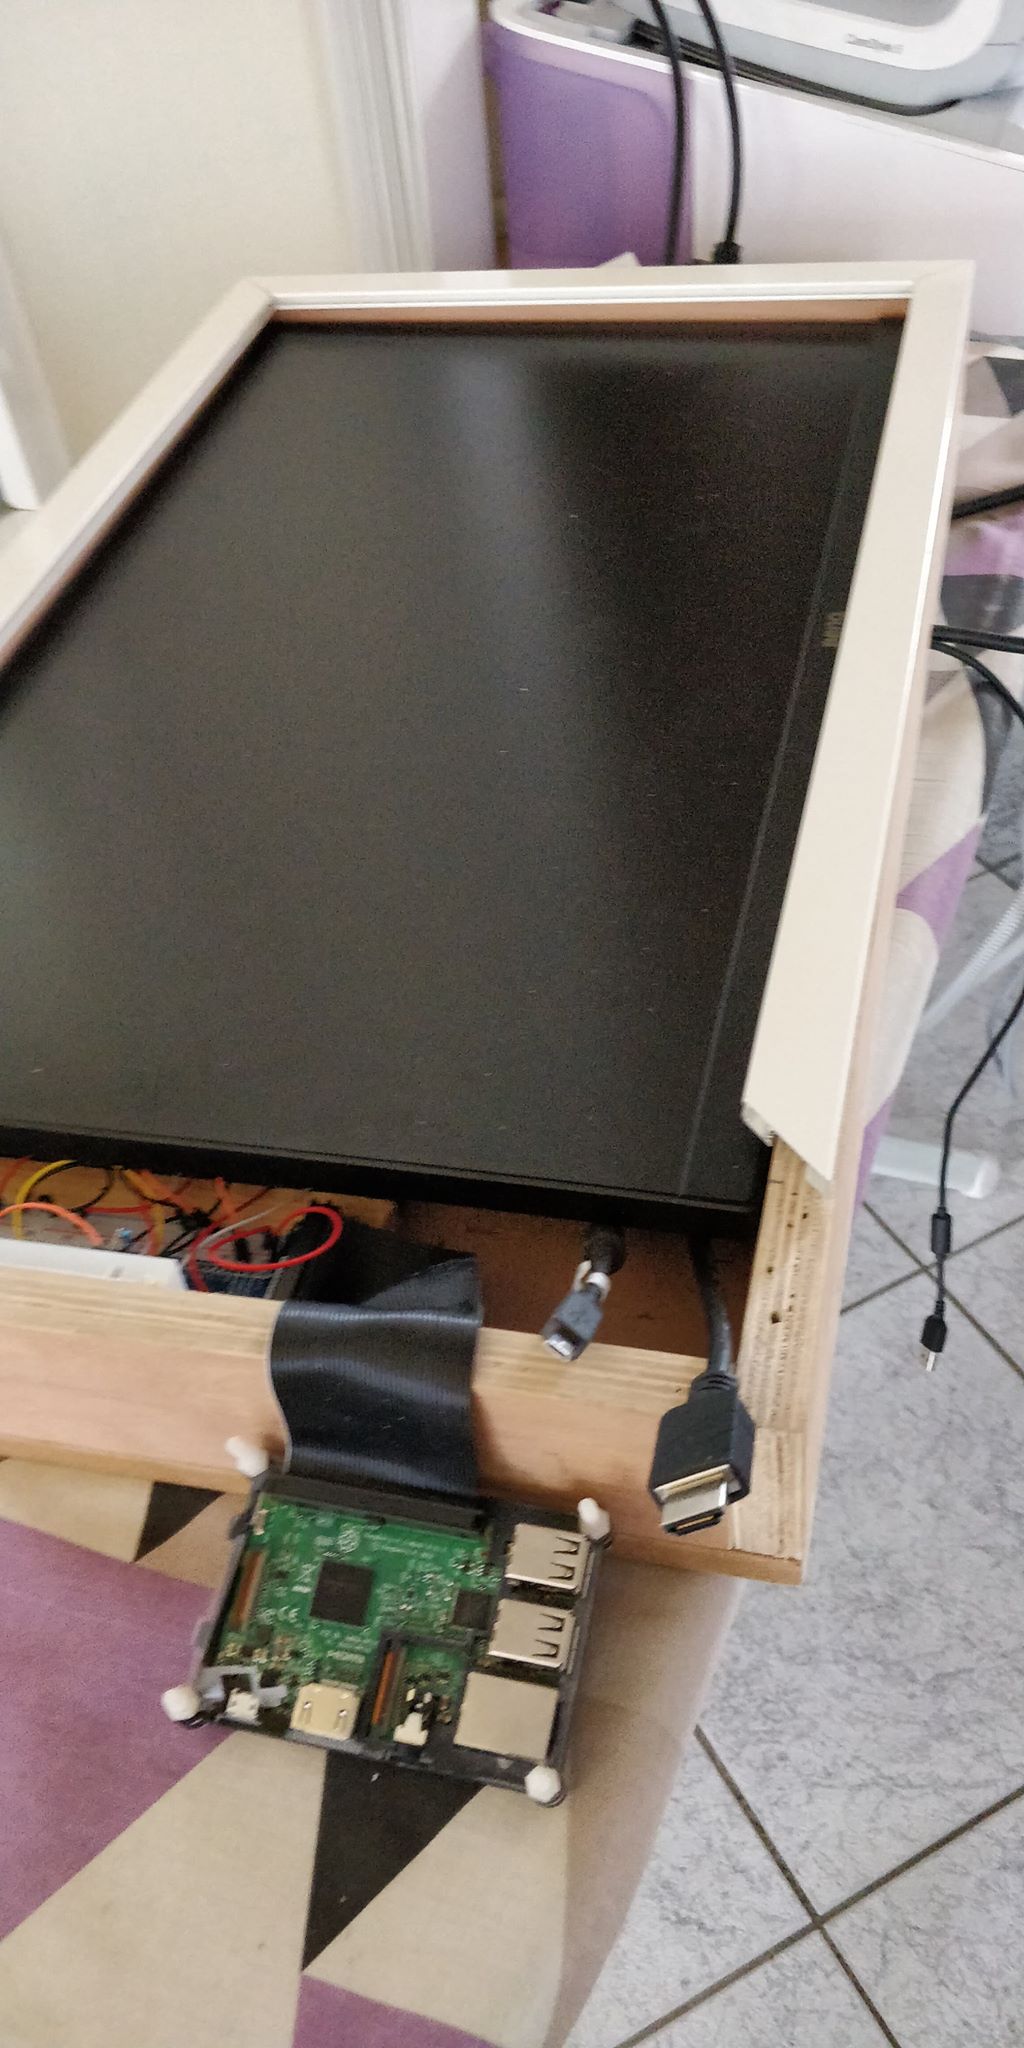
Don't stop there!
Use the circuit with the Raspberry Pi and place it in your simple case. Make sure you cables dont overlap each other and the power and place HDMI cable at the side. You can now safely place ur monitor in the case with the cables around it.
Now the hard part, place reflective window film on the plexiglass. This part is a struggle there are a lot more people with more experience with this so take a look at them before trying yourself!
After you completed that you can safely place it a couple centimeters above your screen without touching it. You can now close the case and start up your amazing creation.
Good luck and don't forget to have fun!