Smart House
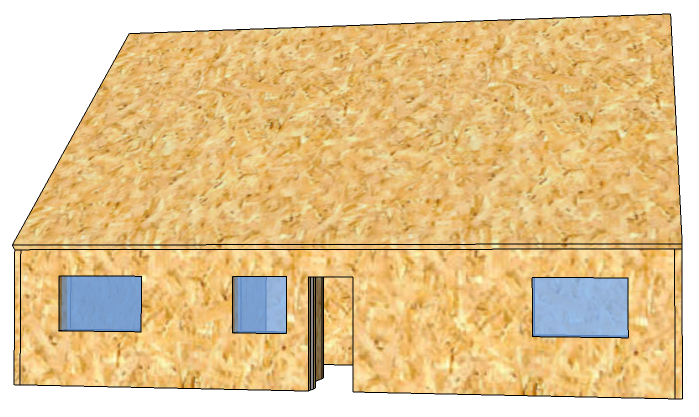
If you want to make a smart hous with a raspberry pi then you just have to follow the steps below and before you know it you've made a smart house yourself.
Supplies
- Planks (MDF 6mm)
- 1 x 600 mm * 341,9 mm For the ront roof
- 1 x 600 mm * 335,9 mm For the back roof
- 2 x 568 mm * 443 mm For the attic floor and the ceiling
- 3 x 556 mm * 100 mm For the interior walls
- 2 x 443 mm * 100 mm
- 2 x 212,5 mm * 100 mm
- 1 x 75 mm * 100 mm
- 1 x 56 mm * 100 mm
- 2 x 475 mm x 361,5 mm For the outer walls
- 2 x 588 mm x 124 mm
- 2 x 600mm * 600mm
- 1 x wooden corner bar
- 2 x wooden beams 40 mm * 50 mm * 2100 mm
- 1 x cable VTBST0,75 Rood 15 m
- 1 x cable VTBST0,75 Zwart 25 m
- 2 x PVC roll 0,7 mm 100 mm * 1000 mm
- 1 x wood glue 250G
- 1 x velcro 20 mm * 10 mm
- 1 x raspberry pi 3b+,
- 1 x micro sd card (32gb)
- 1 x LCD with I2C
- 1 x DS18B20
- 1 x 74HC595
- 1 x MCP3008
- 1 x UV sensor
- 1 x Volts sensor
- 1 x resistors 10 ohm
- 10 x push button
- 10 x LED tellow 5 mm
- 20 x resistors 470 ohm
- 4 x 3,5V - 250mA Solar panel
- 1 x Solar Lithium Ion/Polymer charger
- 1 x Male DC Power adapter with terminal block
- 1 x Lithium Ion Polymer Battery - 3.7v 2500mAh
- heat shrink tubing
- solder tin
Tools:
Soldering iron
Fretsaw
Drilling machines
vouwmeter
pencil
Configuring the Raspberry Pi
Once you have all your supplies we can start!
- Put your microSD card in you computer;
- Download the Raspbian OS image;
- Flash the image on the micro SD-card with software like Etcher or win32diskimager;
- Go into the accesible partition of the SD-card and open the cmdline.txt file with notepad;
- Add ip=169.254.10.1 save and close;
- Now put your micro-SD card in your raspberry pi;
- once it's booted, download Putty;
- Now, connect to your raspberry pi by using the ip-adress we typed earlier;
- Login with user pi and password raspberry;
- Type sudo raspi-config, change your password, go to networking options, change the hostname of your pi. Go to localisation options and change your wi-fi country and timezone. Next, go to boot options, turn wait for network at boot off and wait for splash screen off. Finally go to interfacing options and open the i2c and spi interface;
- Connect with wi-fi using the following steps connect to wifi;
- Do the commands sudo apt-update and sudo apt-upgrade;
Database (Mariadb)
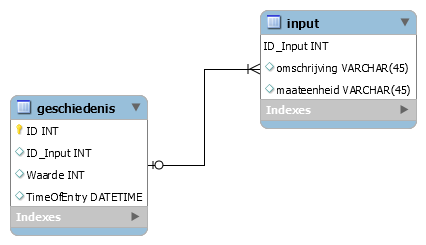
Add database to our Raspberry Pi. We do this in Putty.
- sudo apt-get install mysql-server, mysql-client
- mysql -u root -p
- create user 'root'@'localhost' identified by password;
- GRANT ALL PRIVILEGES ON *.* TO 'root'@'%'
- Now copy the code of the sql file and paste it in Putty and execute it
Downloads
Build the Bottom of the House
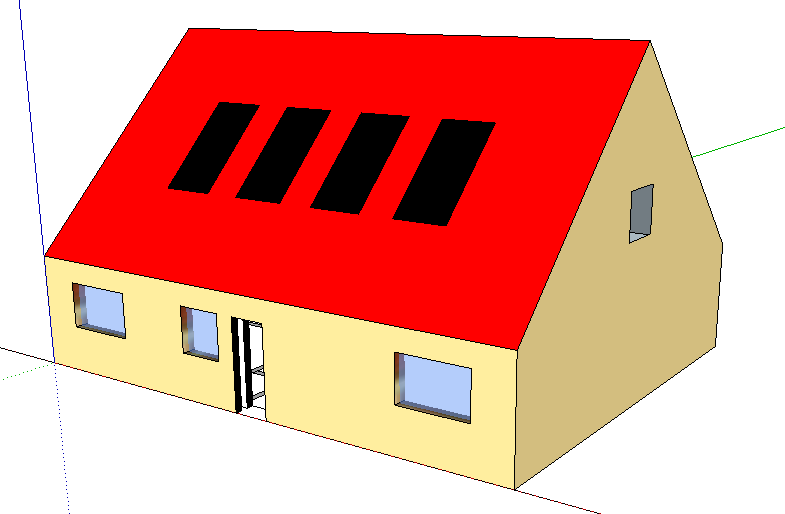
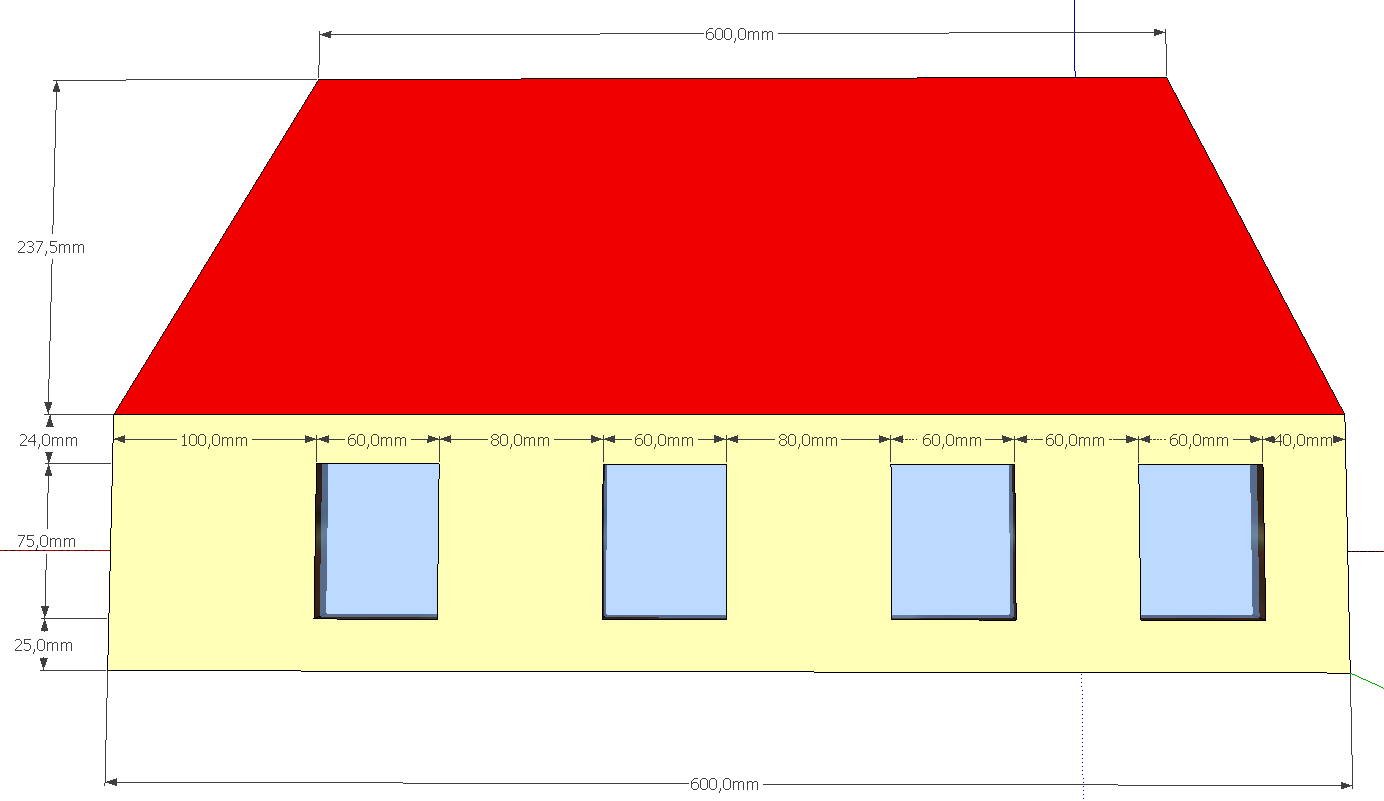
If you have your own design for a house then you should not follow steps 3 and 5. Just make sure if you have your own designed house that you have inside and outside walls to put the electricity between the two walls. And that you have put wires for the LED, solar panels and UV sensor (if you are going to mount this sensor in the roof) later you will see where you need to connect them.
First you take all the shelves that we use for the interior walls
First you take the planks that are on the plan where the windows and door will enter the house.
Then you glue the 2 planks of 556 mm * 100 mm and the planks of 443 mm * 100 mm together with wood glue so that you get a nice rectangle
Then take the last planks of 556 mm * 100 mm and glue it into the rectangle. this way you get 2 spaces in the house.
Then you take the 2 planks of 212.5 mm * 100 mm and glue them in 1 of the 2 spaces so that you have 1 large space and 3 smaller spaces.
Then you take the 2 smallest planks and we will turn it into a toilet room. we hang the 2 boards together so that you get an L shape. then glue this L in the middle space.
When the glue has dried, take 1 planks of 568 mm * 443 mm and glue it together so that you have a ceiling for these spaces. On the ceiling you glue a small block in the corners of maximum 12 mm high.
Allow it to dry nicely and when that is done you have already made it all downstairs.
Base Plate
The base plate is intended as a floor for our house. But also to put away all electricity so that it is hardly visible anymore
You take 1 plate of 600 mm * 600 mm and the wooden beams. You glue the wooden beams around the wooden plate so that we can put electricity into us there. Make sure you provide a 10 cm hole so that you can put your raspberry pi in between.
Then you take the lower floor of your house and place it with the back on an edge of your base plate. now you can mark a few holes at the front of the 7 mm house. But be careful that these holes do not come in front of the door or in front of a window. We drill these holes so that our electricity can go from the bottom plate to the house.
If you know where your house will be on the bottom plate then you can mark 10 holes (2 rows of 5) for you to place push buttons and draw a hole for the LCD screen.
After you have drilled all the holes we can start on the outside of the house
Outside House
Now we enter the outside walls of the house on the lower floor.
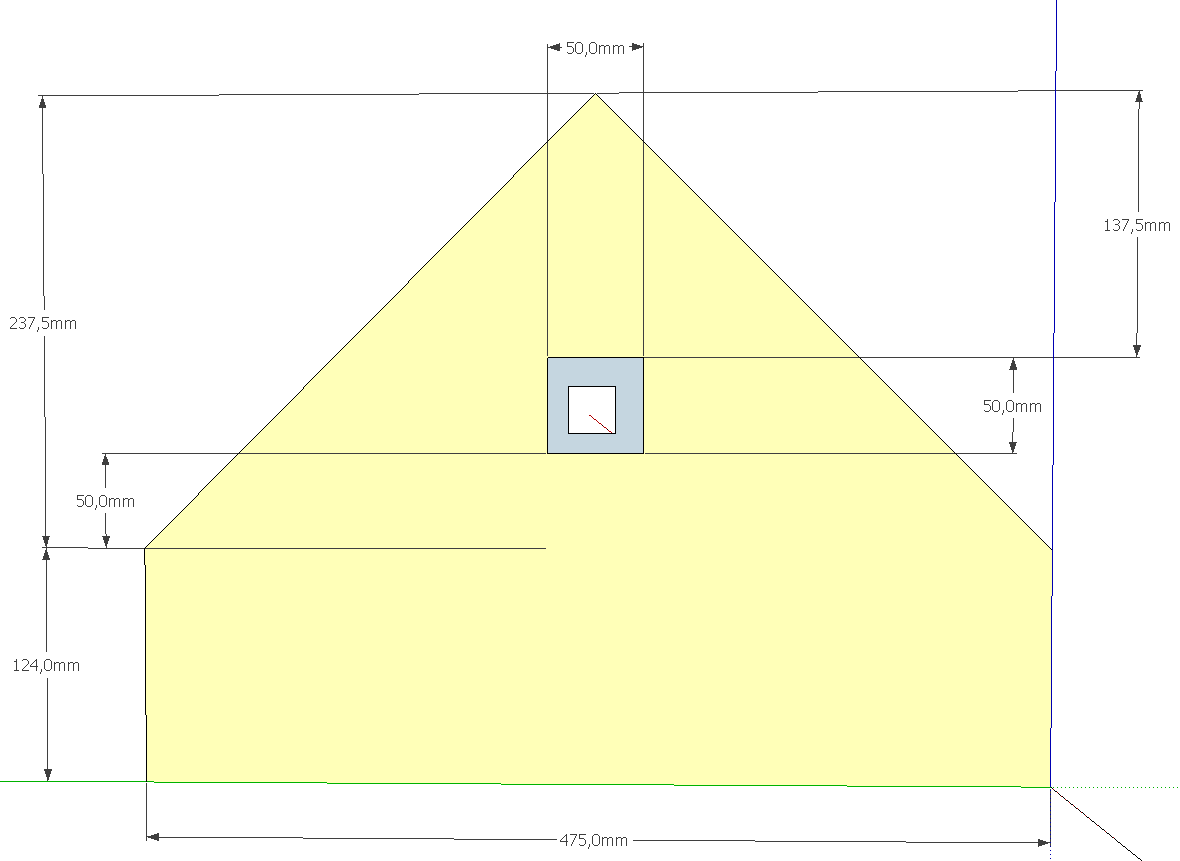
You take you take the 2 planks of 475 mm * 361.5 mm. you measure along the side of 361.5 marks 124 mm along the 2 sides. then you measure the center of 475 mm from the other side of your planks. Then you connect your first points to the second point so that you have a house-shaped shape on your planks and you cut off the 2 corners.
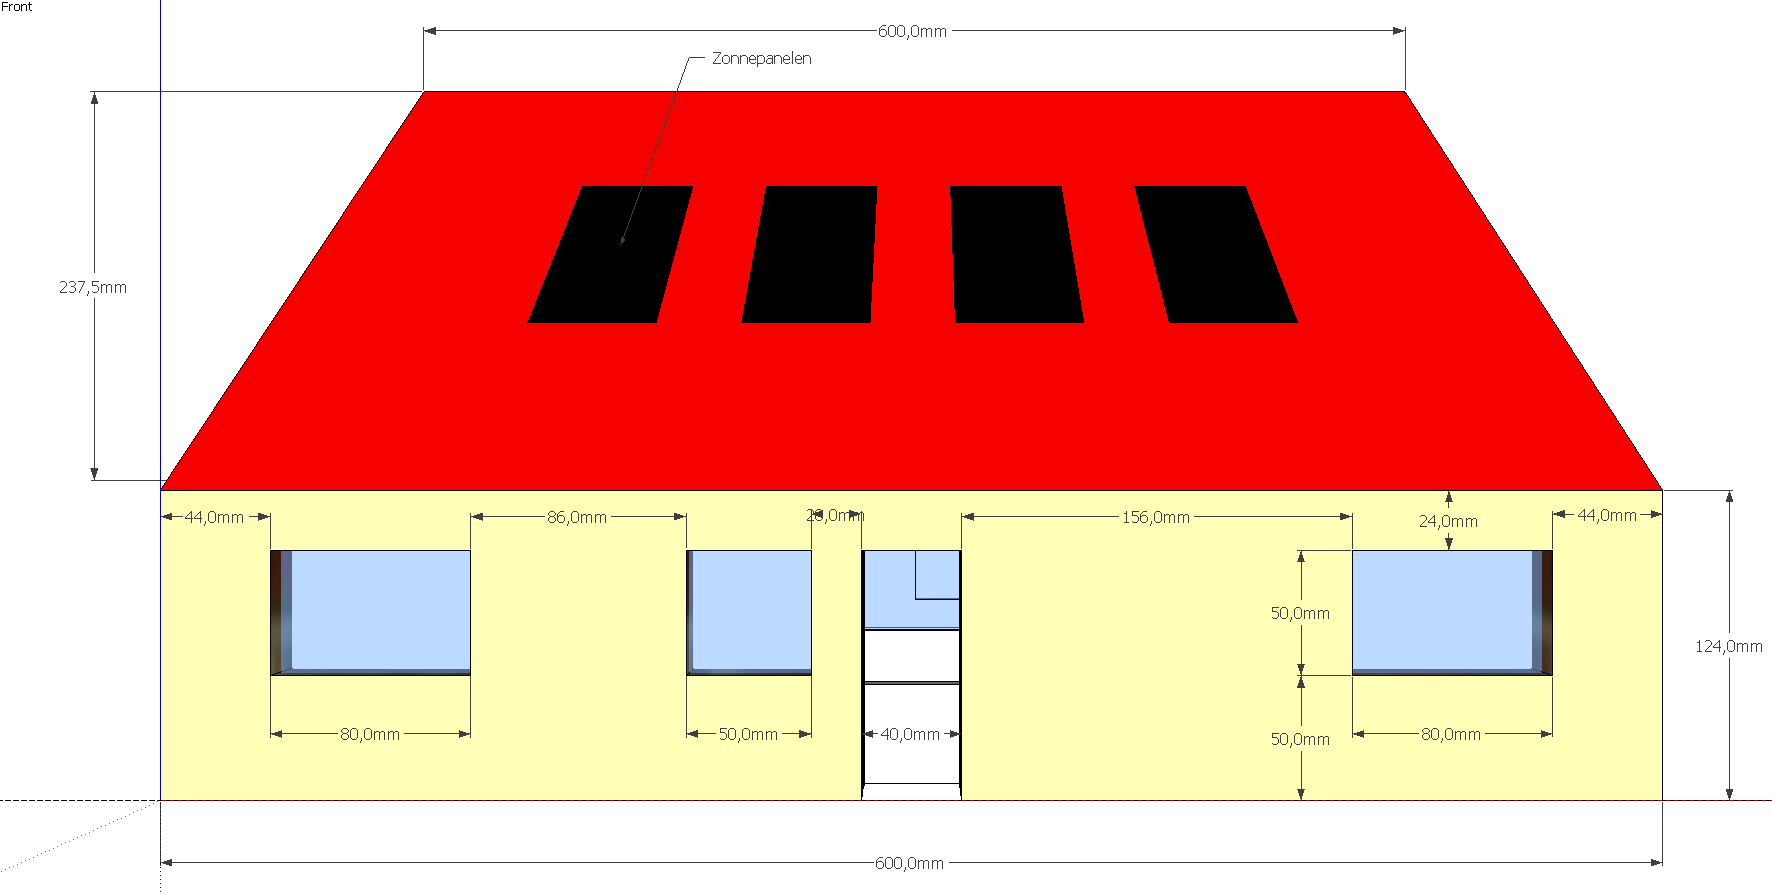
Then you glue the 2 planks of 588 mm x 124 mm on the front and back of your house. Make sure that the door and windows are cut out in these boards. If you want a window in your house, you can stick a piece of PVC between the 2 boards and glue it and the outer wall.
Then you place the 2 other boards that you have made and the other 2 said of the house. also make sure that you make a diamond in the triangle so that you can see if the light is burning or not. Here too you can hang a piece of PVC in front of the window.
When the glue has dried, you are almost finished building your house.
Build the Electric Circuit
Before we finish the house completely, we will first place our electricity in our house.
You can place your LEDs in your house (always place 1 LED in the middle of each room, in the large room you better place 3 LEDs) Now you have normally placed a total of 9 LEDs.
Glue your house on the base plate.
connect all components in the bottom plate as shown below.
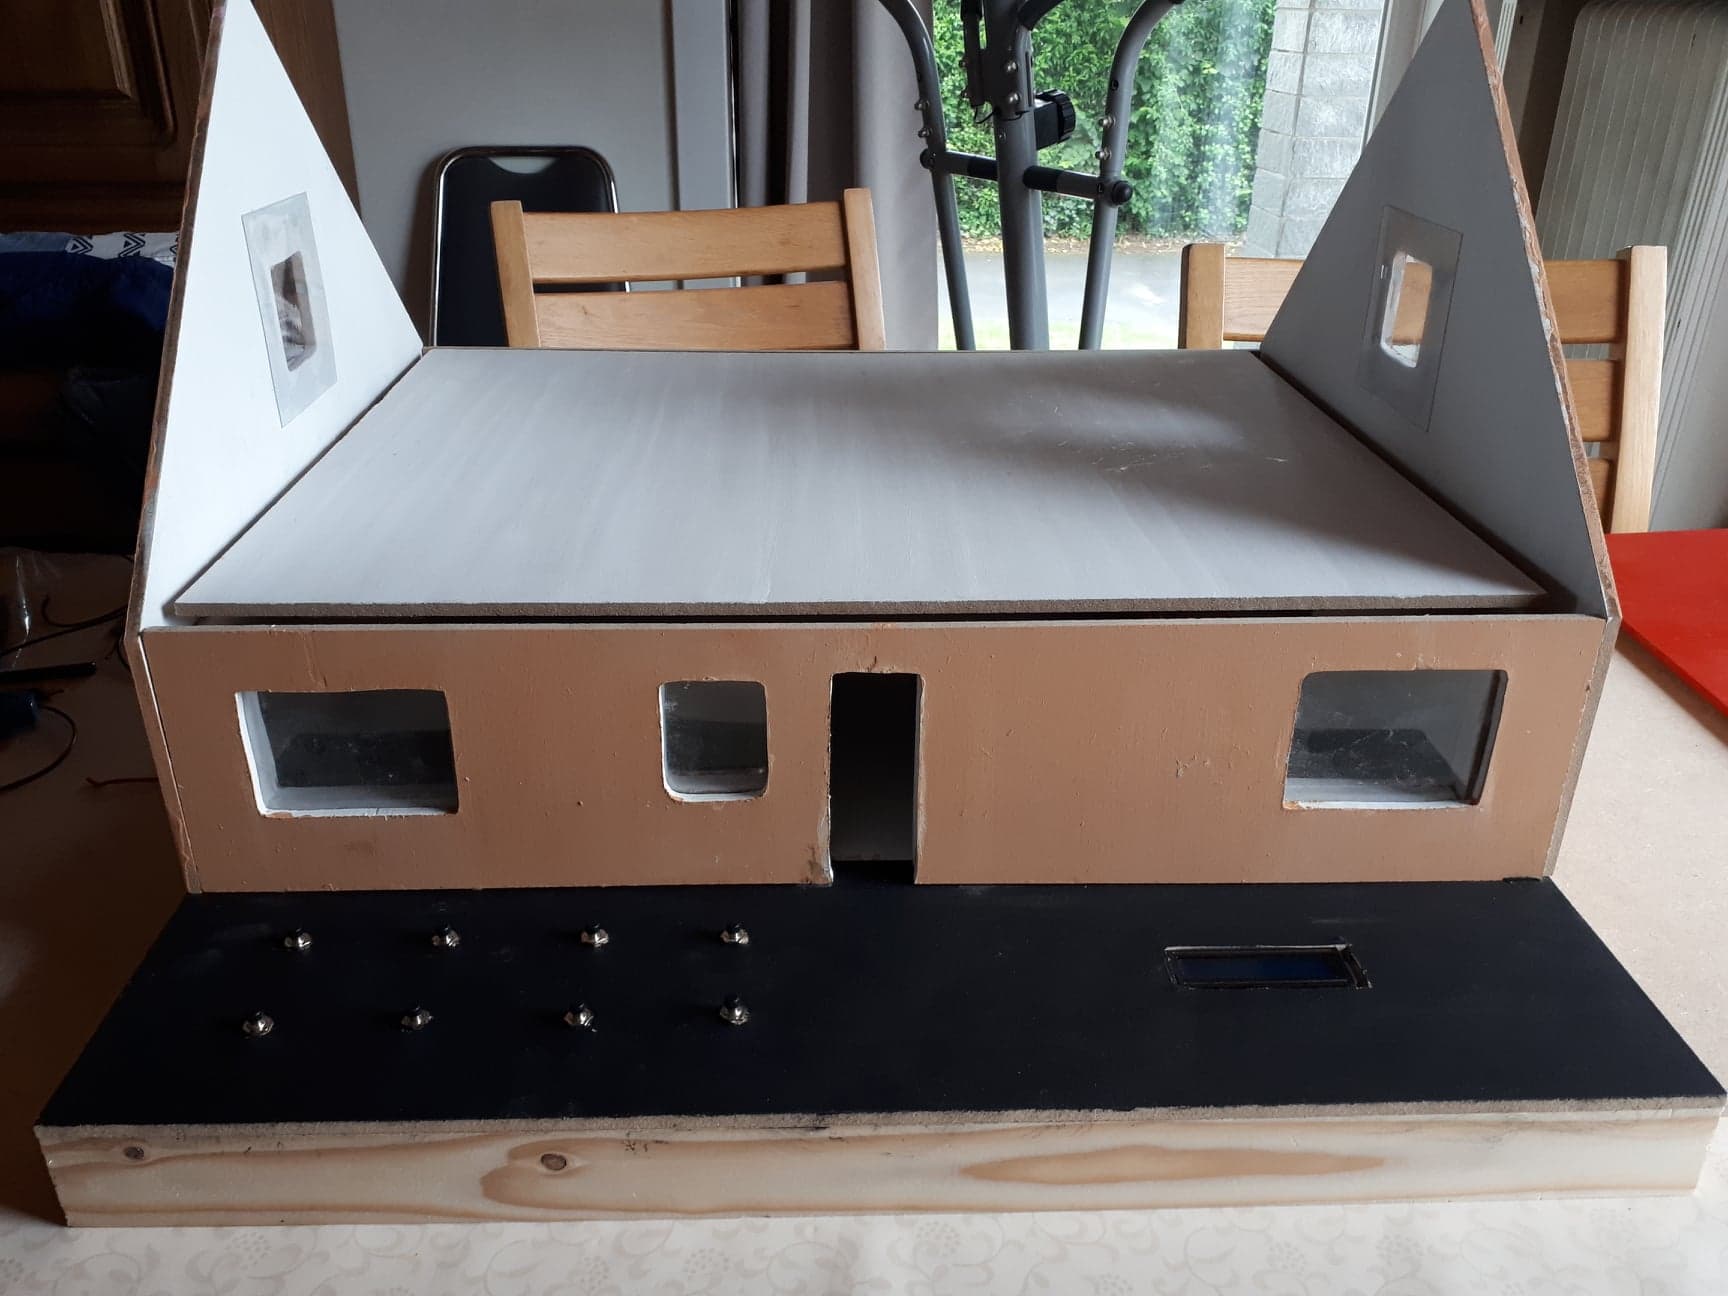
When you're done with that, you can place the second planks of 568 mm * 443 mm on the other board with the same dimensions. When you have done that, your house will look like photo 1.
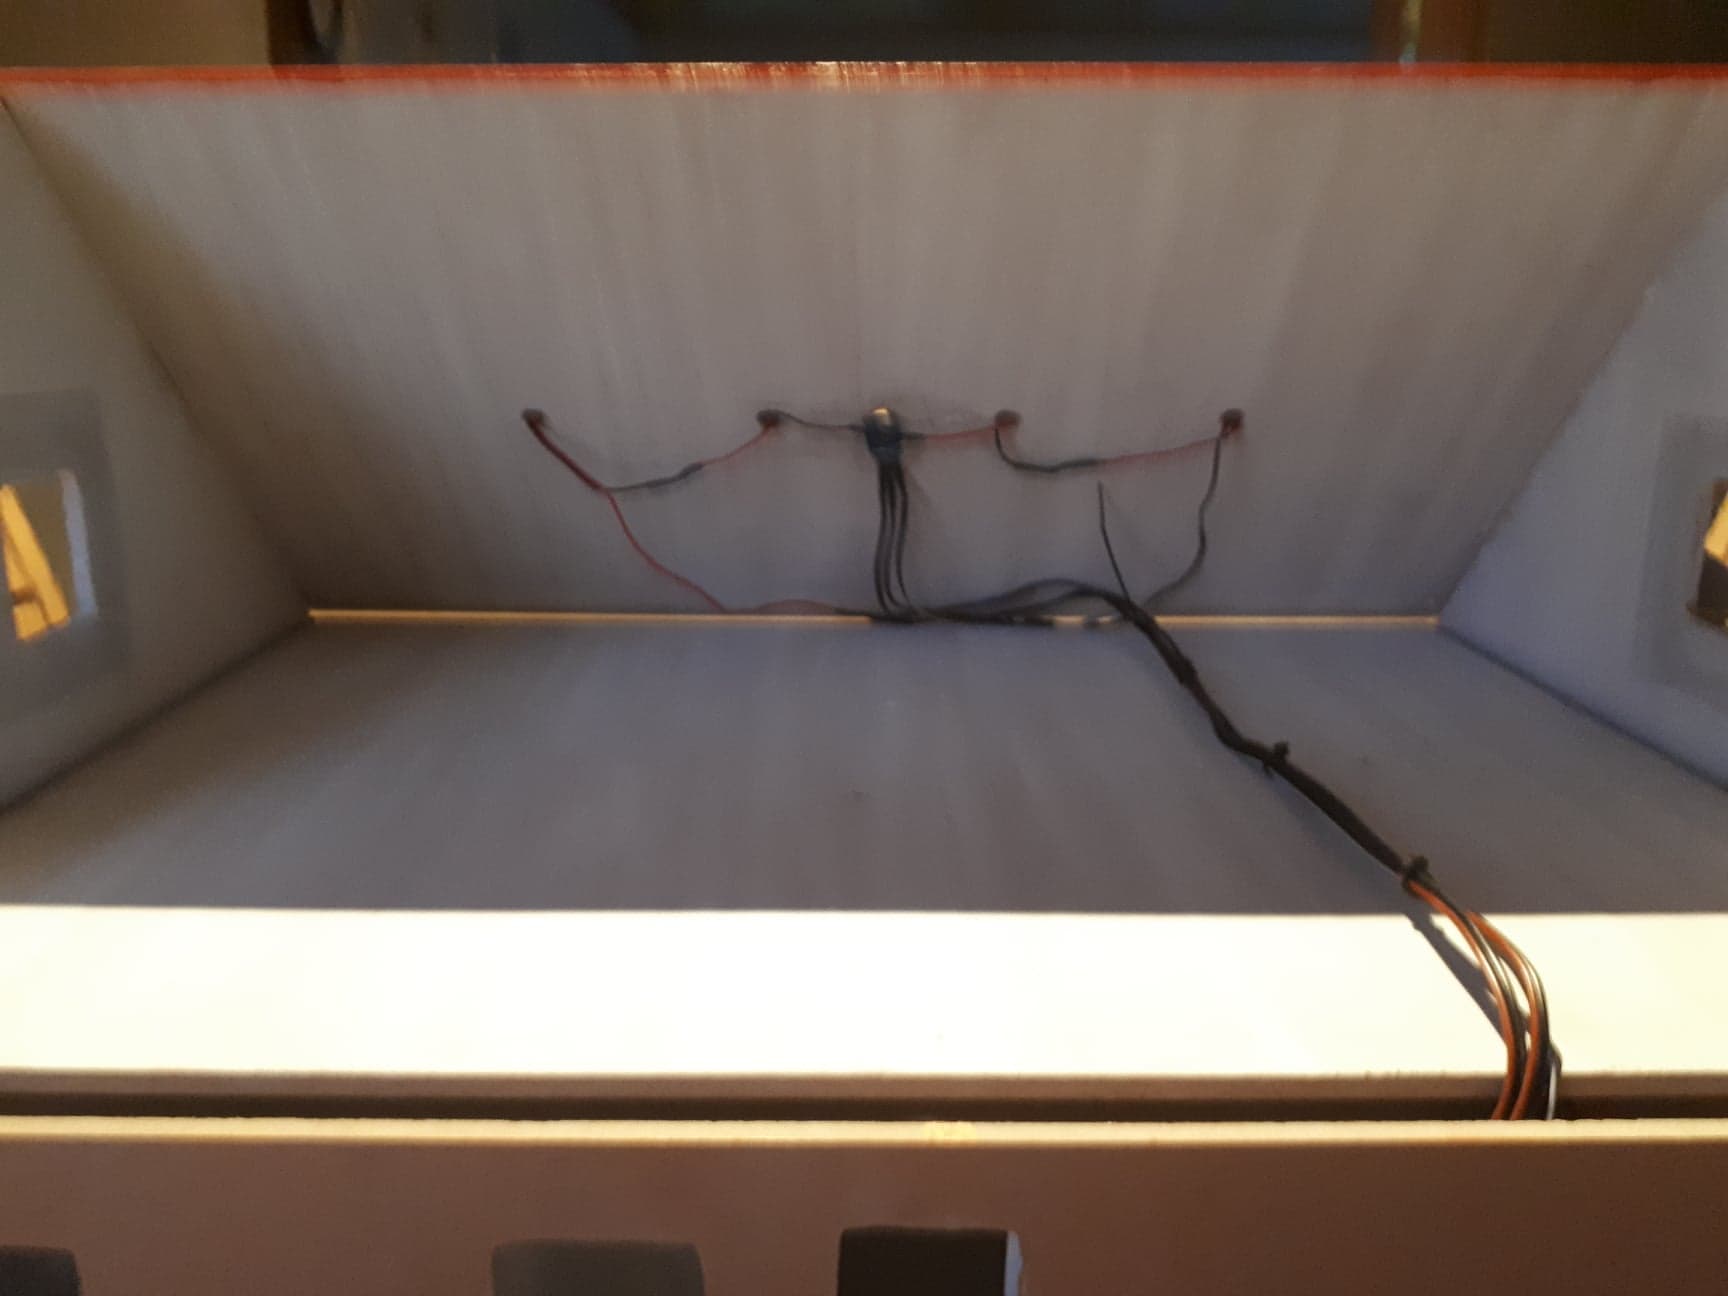
Then grab the planks that will be at the back of the house, hang the 4 solar panels on the planks and make sure that the cables from the solar panels on the other side (inside) come from the planks. Then drill a small hole and hang the UV sensor before it goes, so that this sensor is nicely integrated. when you have done this, you can connect everything and you can planks your shelf at your house. (then your house roof looks like photo 2).
Downloads
Code
You can download the code here and place it in your raspberry pi.
Webserver
You perform these commands in putty.
Do the command sudo apt-get install apache2 -y
surf to 169.244.10.1 on the internet. normally see an apache page with you if that is not the case, enter first sudo apt-get update and re-install apchach.
Now move the frontend folder of the code you downloaded into /var/www/html using the mv command.
sudo service apache2 restart.
Now you should see the web interface if you surf to the pi's ip-adress.
Autorun
Now we have to make sure the script runs automatically if you boot your pi up.
Edit the rc.local file, using sudo nano /etc/rc.local
Add the command to execute your code, this will be python3.5 /yourpath/project.py &
Make sure to leave the exit 0 at the bottom.
now do sudo reboot and check if it worked.
Finish
Test everything again and if everything works you place the other side of the roof on the house.
If this is not the case, this is because you have not made your circuit god and you will still have to check it.
Finally, you can hang the last plank at the bottom of the bottom plate and place a piece of velcro where you have provided a hole for your raspberry pi. Also hang a piece of velcro on the back of your raspberry pi so that your pi hangs on your house.
So now your Smart House is complete.