Smart Halloween Pumpkin Lamp


Halloween is coming up soon and probably you need something to impress your friends.
This is the project for you: a 3D-Printed Halloween Pumpkin Lamp that changes color and hums a halloween song when it hears a noise around.
The design is very simple, as most of the dirty job is done for you by Zerynth, the programming tool, and by Zerynth Shield, the multi-sensor shield compatible with Arduino-like and Particle boards.
Required Material


The project requires few elements:
- Zerynth Studio. No matter which OS you use, Zerynth runs! Just download the package and install it.
- Arduino DUE or ST Nucleo or Particle Photon or Mikroe Flip&Click. No matter which board you use, Zerynth is multi-board compatible! You can find all the Supported Boards details in the dedicated section of the Zerynth documentation.
Zerynth Shield.
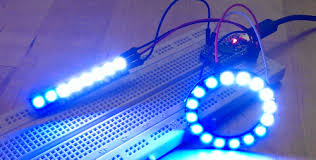
A ready to use multi-sensors board that adds smart functions to your everyday life objects. It is a multiboard shield that presents a set of sensors and actuators, including sensors for touch detection, infrared LED, microphone, light sensor and temperature sensor.- a strip (or a ring) of NeoPixel LED from Adafruit (available here https://www.adafruit.com/products/1426)
- this cute 3D-printable Jack O Lantern (http://www.thingiverse.com/thing:500762)
Assembling


Nothing could be easier.
With a set of sensors on board and all the most used communication ports ready to be plugged, the Zerynth Shield allows makers, designers and IoT professionals to easily develop their smart objects, without care about wiring and soldering becoming crazy with funky circuits.
Just piggyback the Zerynth Shield onto your Arduino and and take full advantage of the microphone and the buzzer.
In the Zerynth Shield there's also included a port dedicated to the connection of Adafruit Neopixel LEDs strips. Port pins are: GND; Vin; LED control pin.
Put all the boards and the LEDs into the 3D-Printed Pumpkin Lamp and you're done!
Programming

Using Zerynth is very easy!
- connect and "virtualize" your board (already explained here https://www.instructables.com/id/A-multithreaded-bl...)
- create a new project in Zerynth (already explained here https://www.instructables.com/id/IoT-Notes-Printer-...)
- copy the code presenting here
- upload the code on your board and you're done!
The code is very simple and has a lot of comments. For any questions or suggestions please feel free to post on the Zerynth community forums.
Enjoy It!

Did you like it? Let’s get hardcore!
Perhaps you would like to remotely control your Pumpkin lamp? With Zerynth you can easily do this too!
Take a look at the image above: a lamp controlled via mobile for IoT ambient light. The related tutorial is almost ready... stay tuned!
Luigi F. Cerfeda (@L_F_Cerfeda) - Zerynth team