Smart Fan Controller
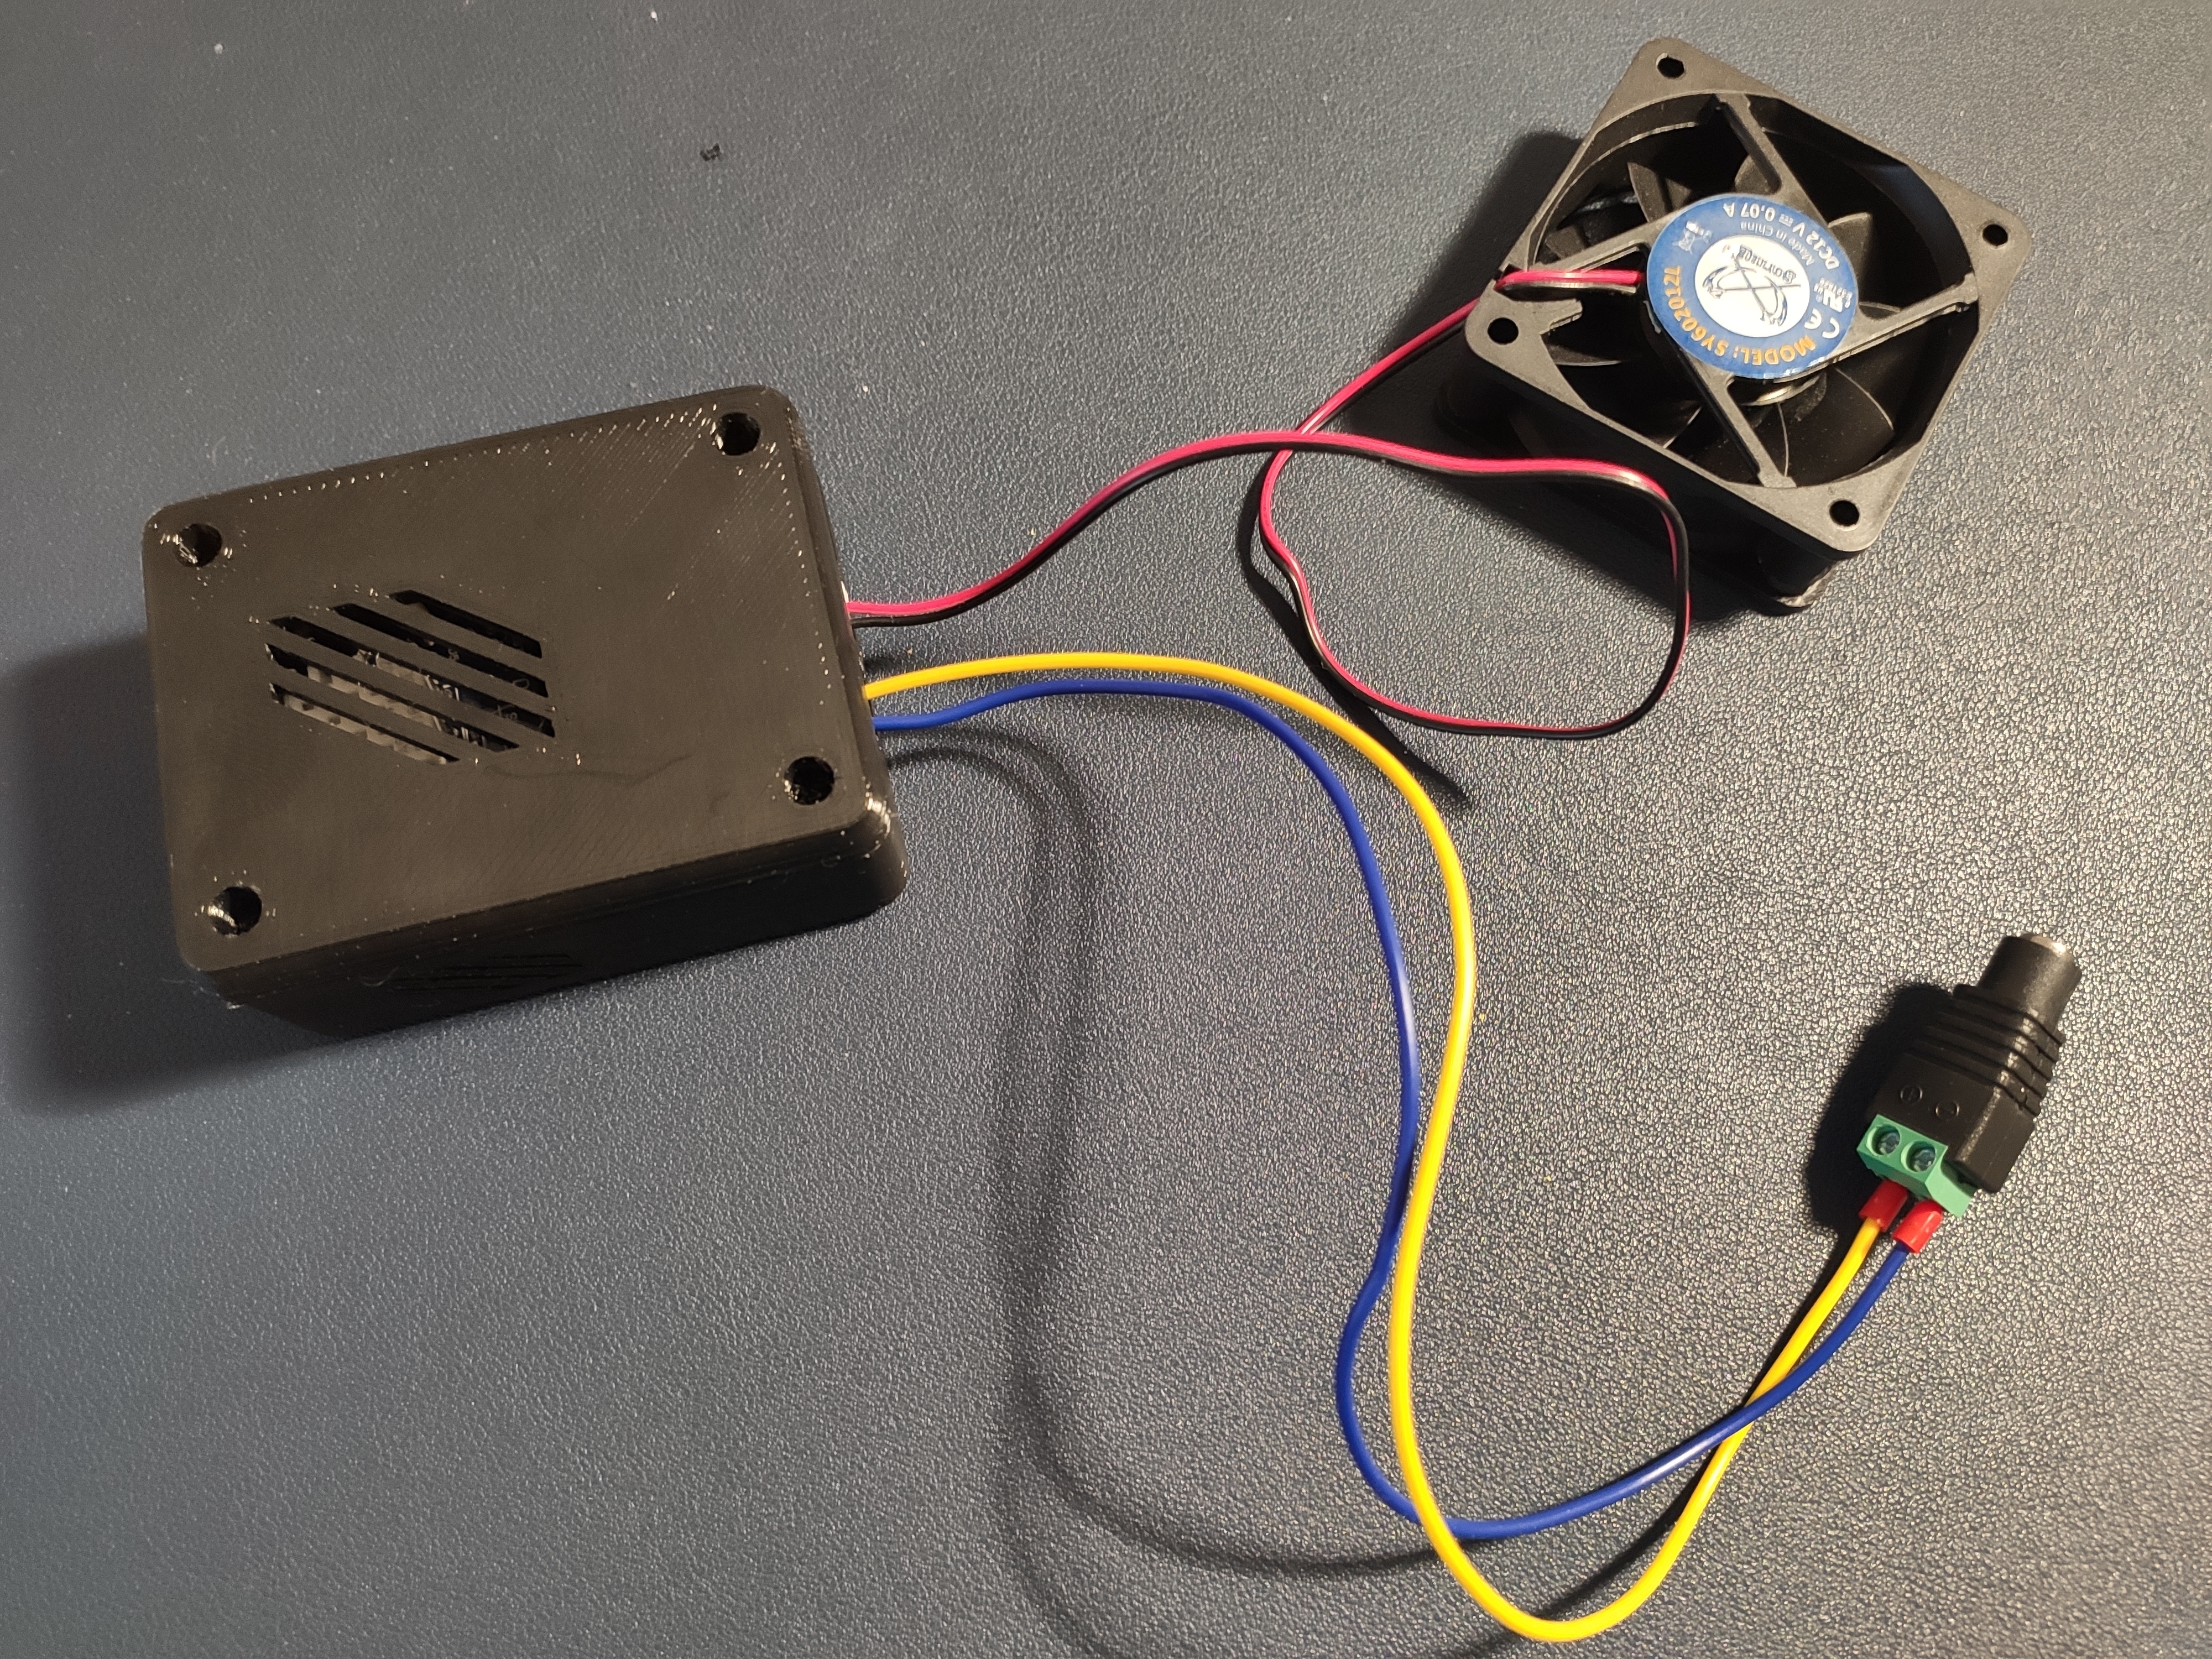
This project was created to fullfill the need of controlling a fan in an enclosure by interpreting current temprature information. It has the goal to drive a fan either 2 pin or 3 pin by pulse width modulation on a small budget and should be controllable by wifi.
As a seconde target it should be easy to use in a smart home system.
I decided to use a standard ESP8266 with a Temprature Sensor Shield and breakout board for the Mosfet.
The PWM is controlled by the ESP which is switching the mosfet in a rapid frequency.
Supplies
- Mosfet Breakout
https://de.aliexpress.com/item/32789499779.html
- Wemos D1 Mini V3 (Make sure you choose V3 , because it has mount holes.)
- DHT22 Shield
https://de.aliexpress.com/item/32648082692.html
- Femal Dupont Wires
https://de.aliexpress.com/item/33039596089.html
- 3D Printed Case (see attached STLs)
- ESP Easy Firmware
https://github.com/letscontrolit/ESPEasy/releases
- 3x8mm screws (prefered for screwing in plastic)
- Hot Glue
- Soldering iron
Print the Case
Print out the case with a 3D Printer or use a Print Service.
This are my print settings for the case:
- Layer Height:0.2
- Material: PLA (low temp area), PETG/ABS (high temp area)
Print with support for the big holes e.g. USB. You don't need support for the ventilation slots.
Soldering the Boards
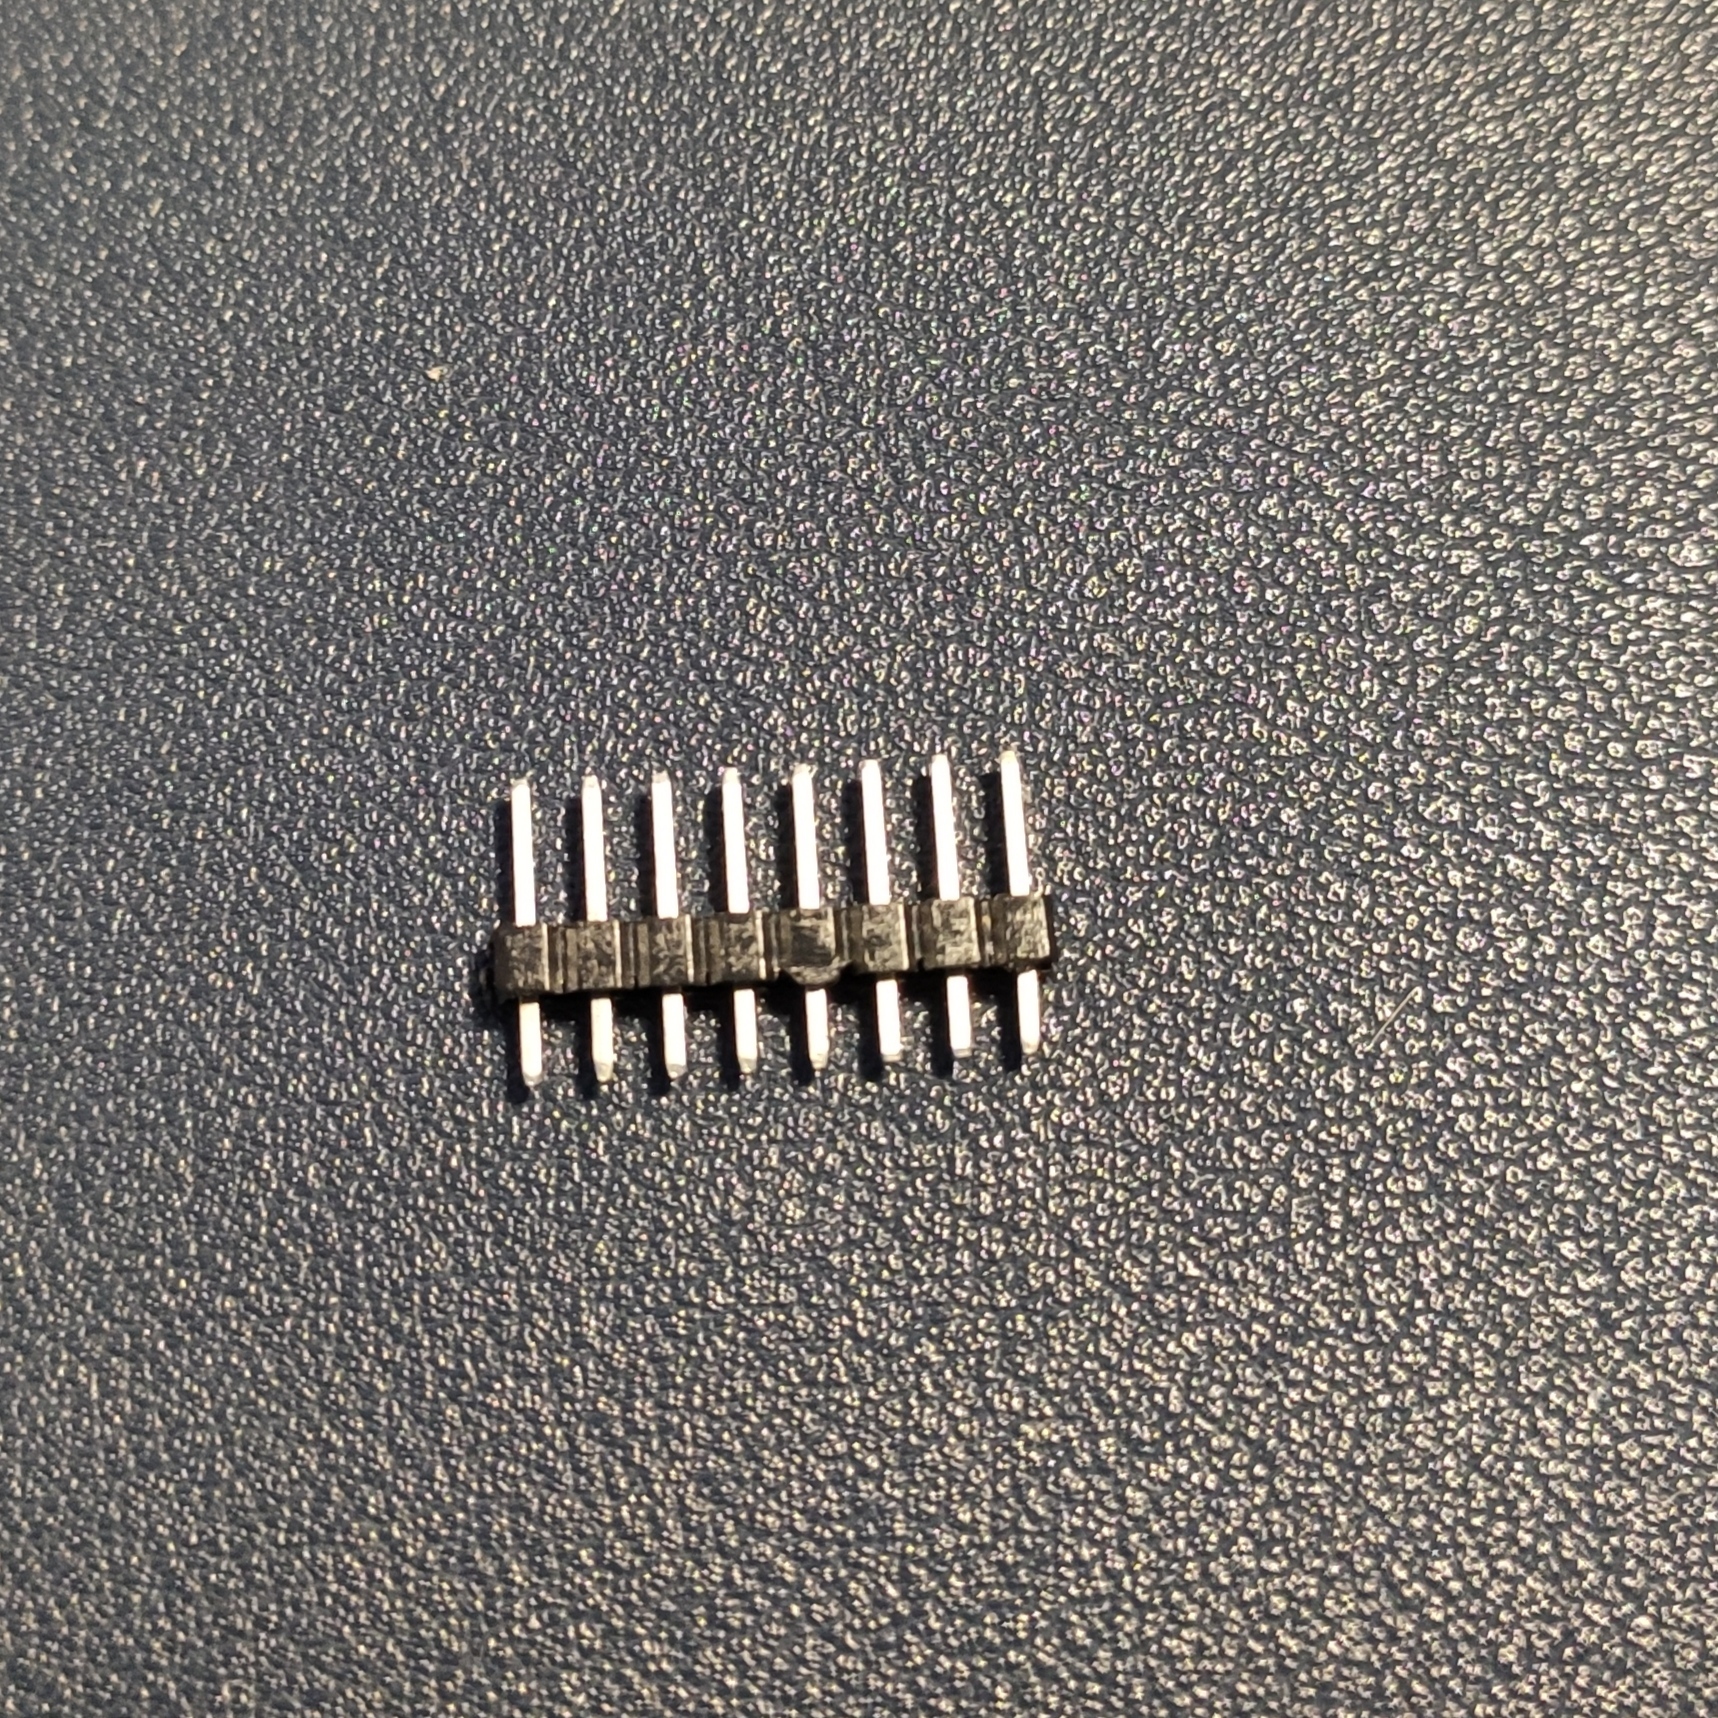
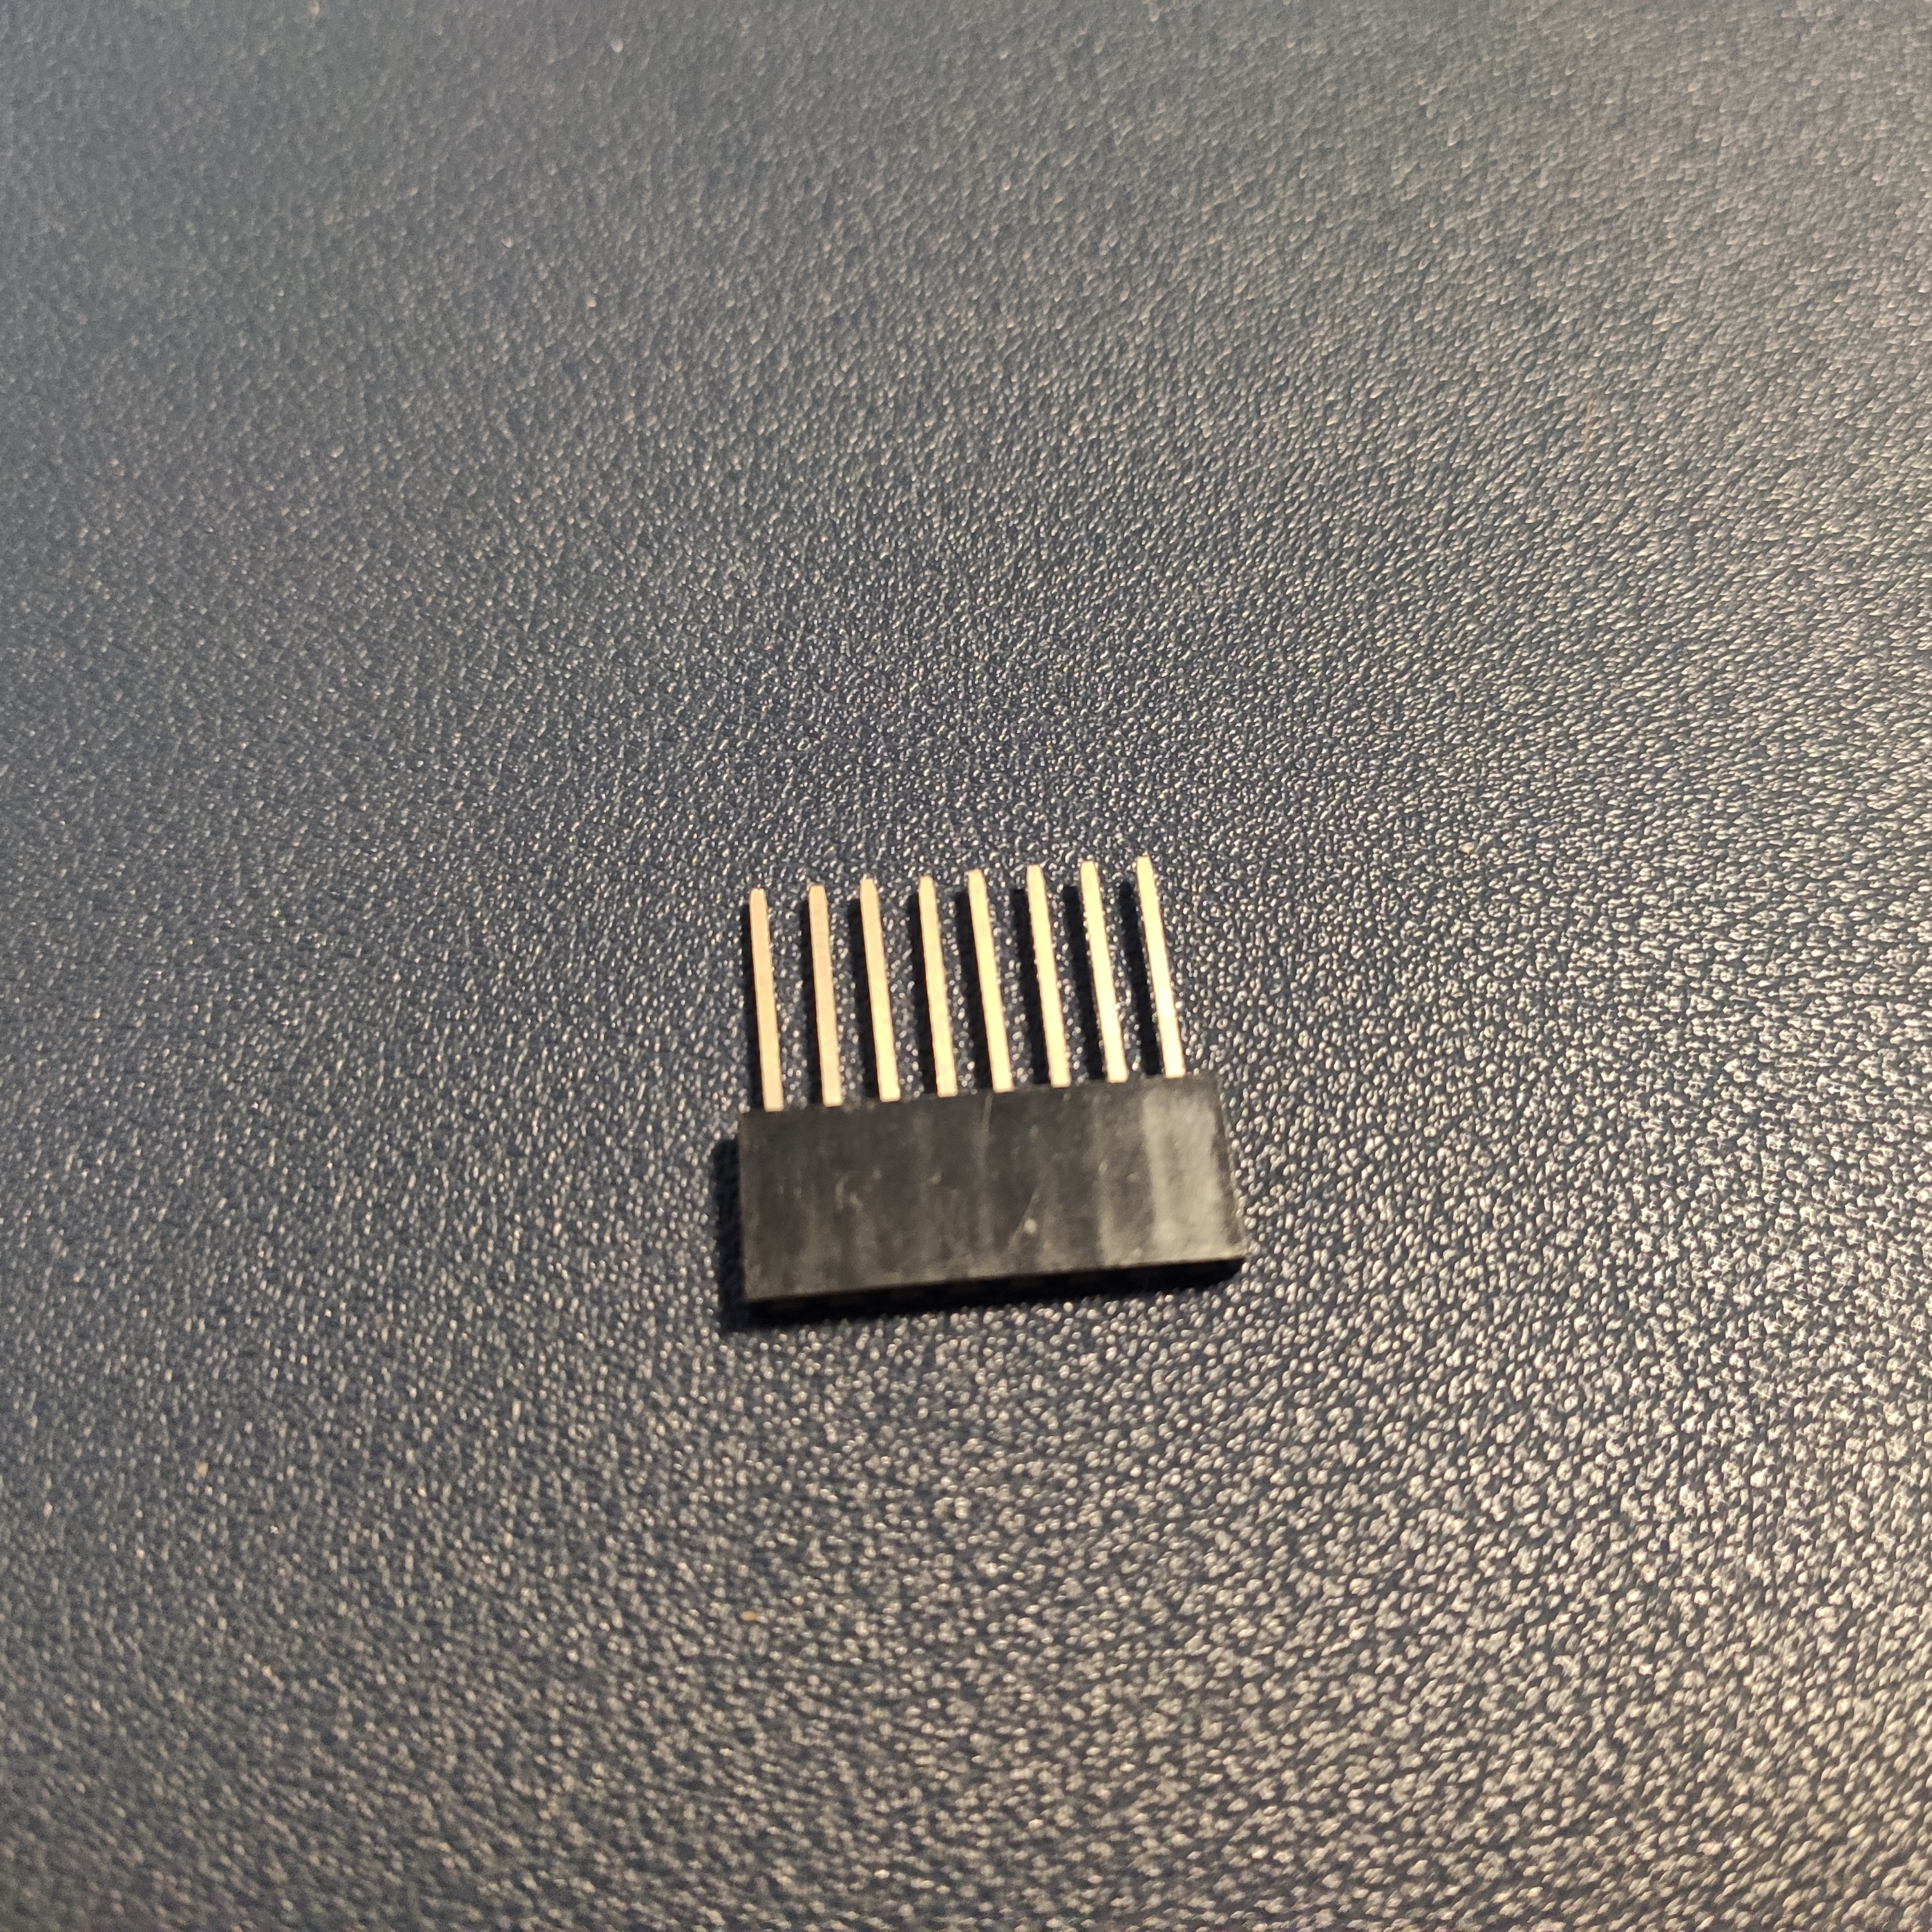
Solder the pins which have been delivered with the wemos v3 package to the board.
The longer side with the plastic should be on the top of the board. (Pic. 1.) The small pins show out of the bottom board.
Hint: Use a breadboard to solder the pins , you may need small tip.
After that solder the spacer with long pins to the temperature shield.(Pic. 2.)
For now leave the long pins.
Soldering the Wires
- Use three cables with dupont female connectors.
- Cut one end of the each cable , adjust the length you may need.
- Remove a short part of insulation and solder each wire end.
- Put the heat shrink tubing already over the cable and push it to the dupont connector end.
- Cut around the half of the long pins at the following:
- 5V
- GND
- One PWM PIN -> e.g. D5
Have a look on your Temperature Shield to determine which PIN is used for data.
On the DHT22 Shield , D4 is used. Don't use the same PIN!
You can also use 3.3V Pin as alternative for 5V.
- Put a little bit of solder already on the 3 pins.
- After that solder the pins and the cables together, one for each.
- Put the shrink tube over it and use a heat gun to shrink it.
Be carefull not to put the heat directly against the temp. sensor it might get damaged otherwise.
Put the Parts in the Case
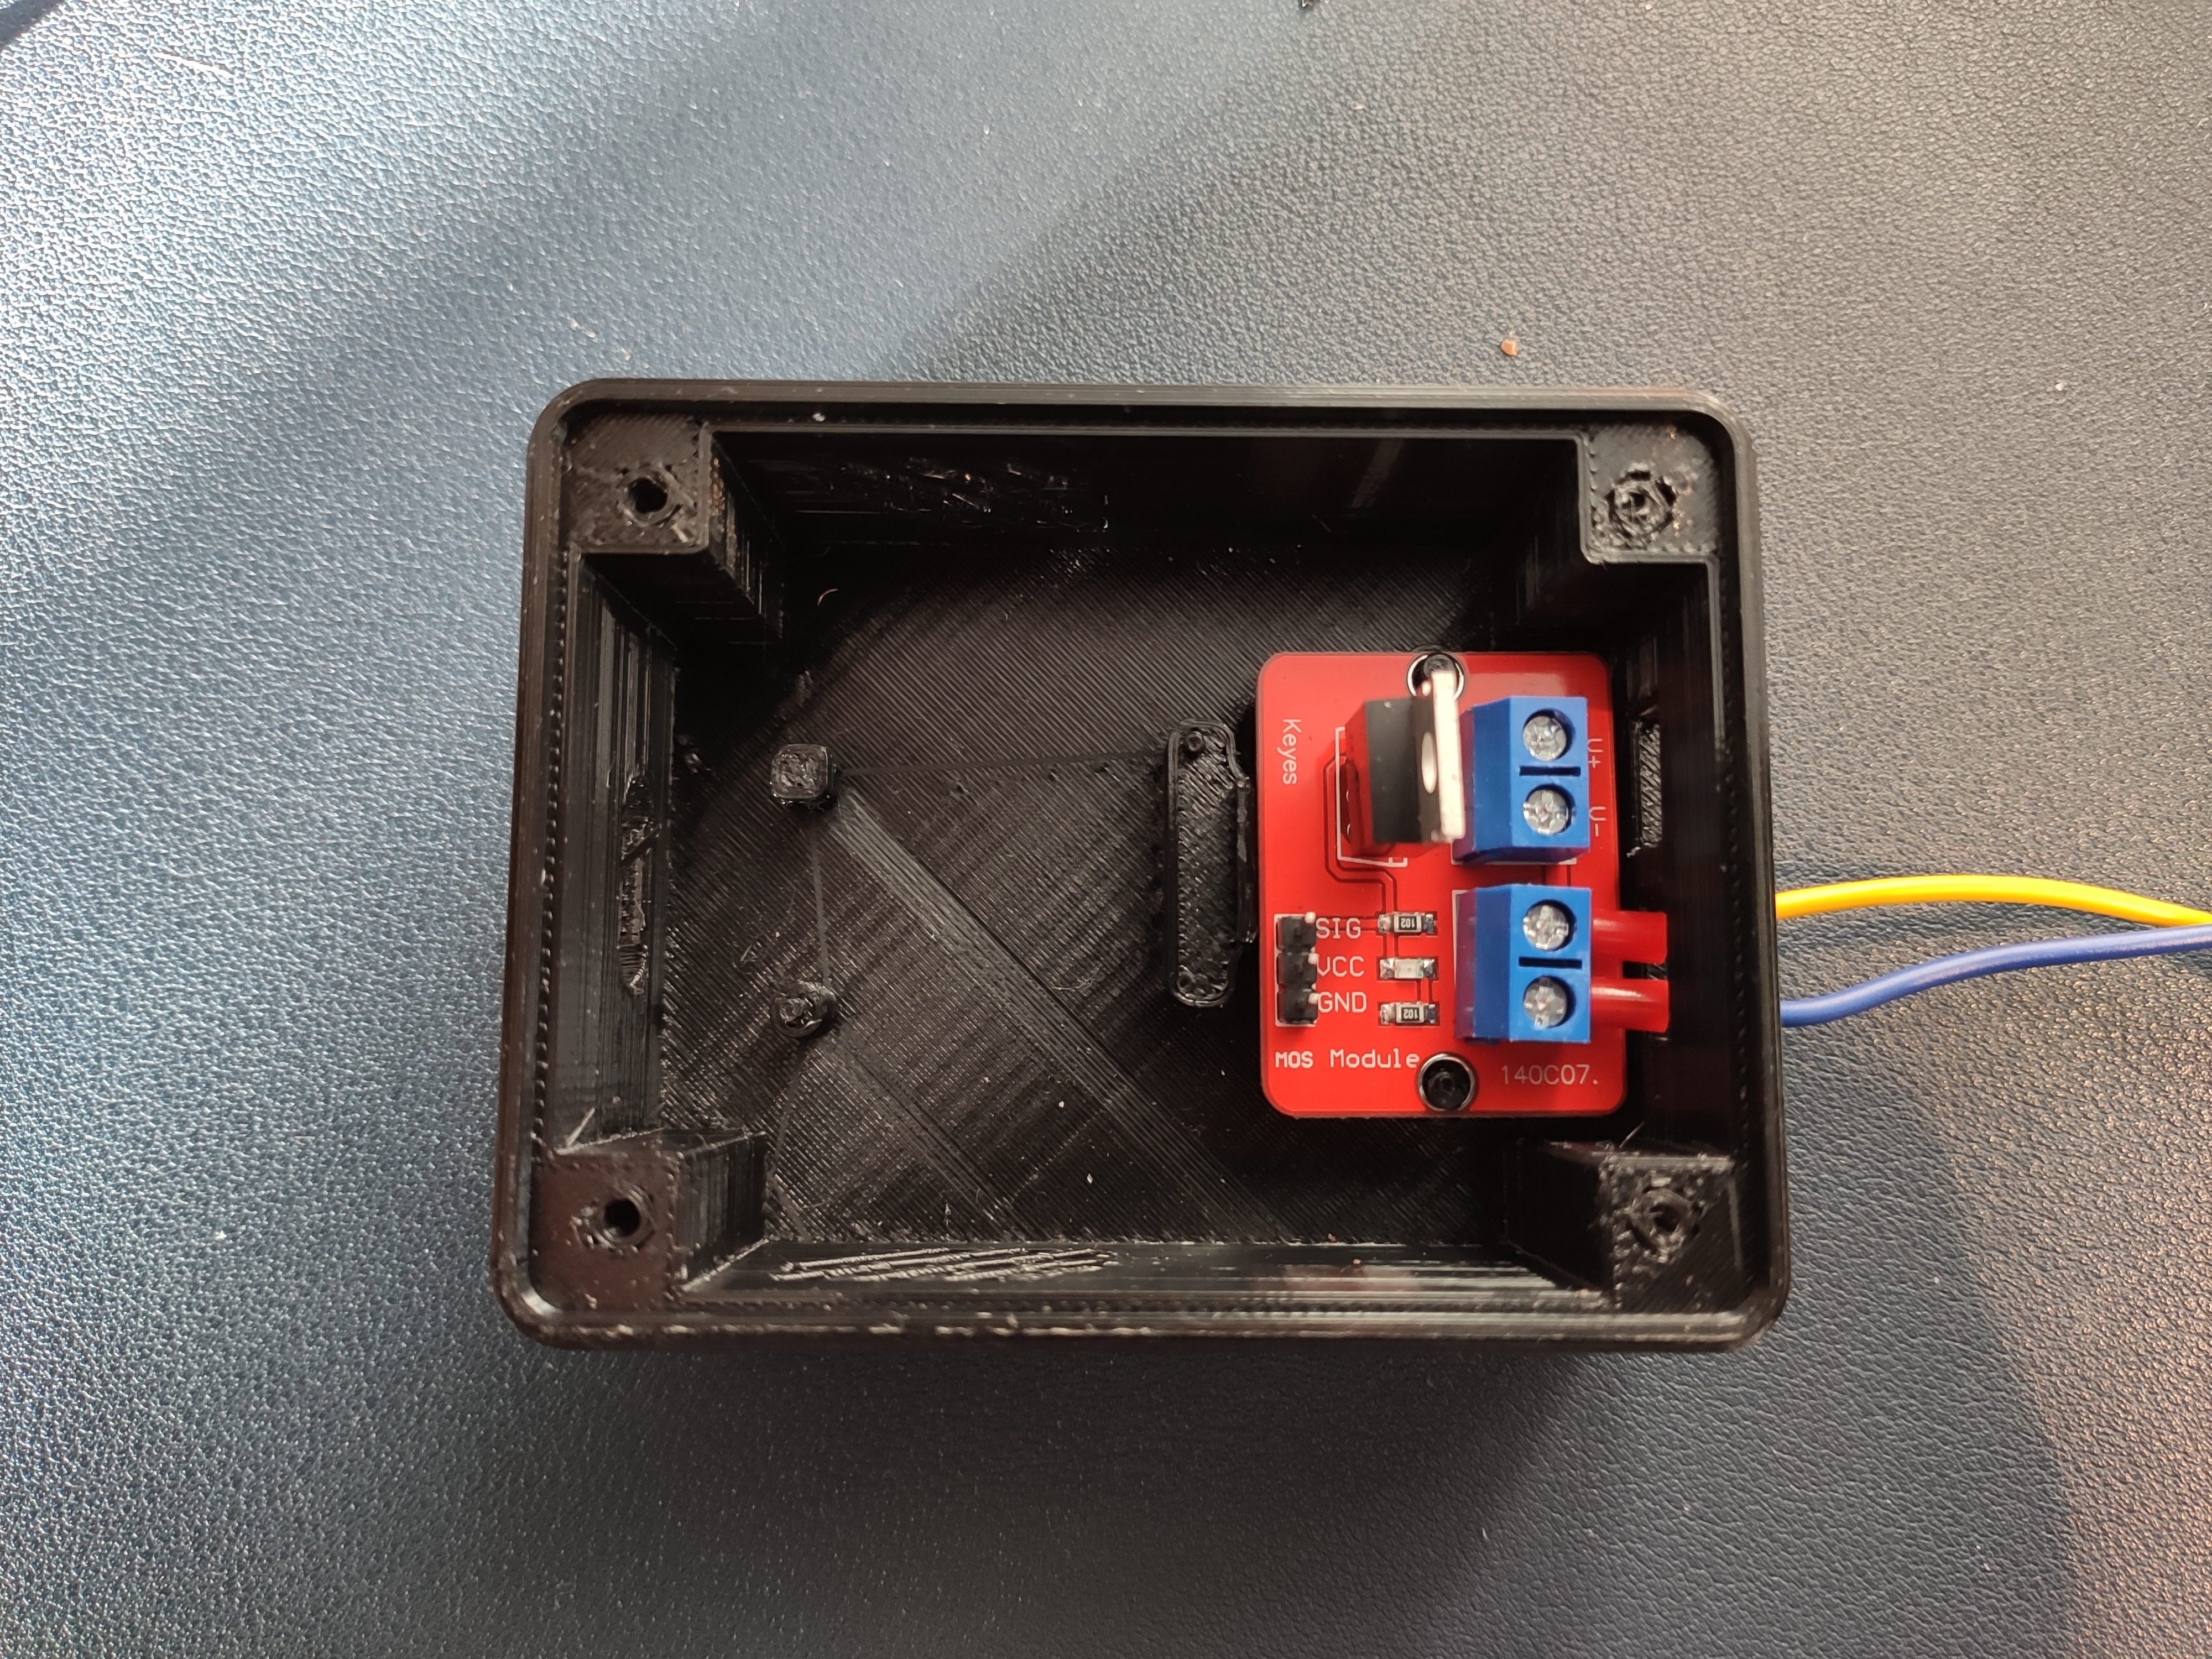
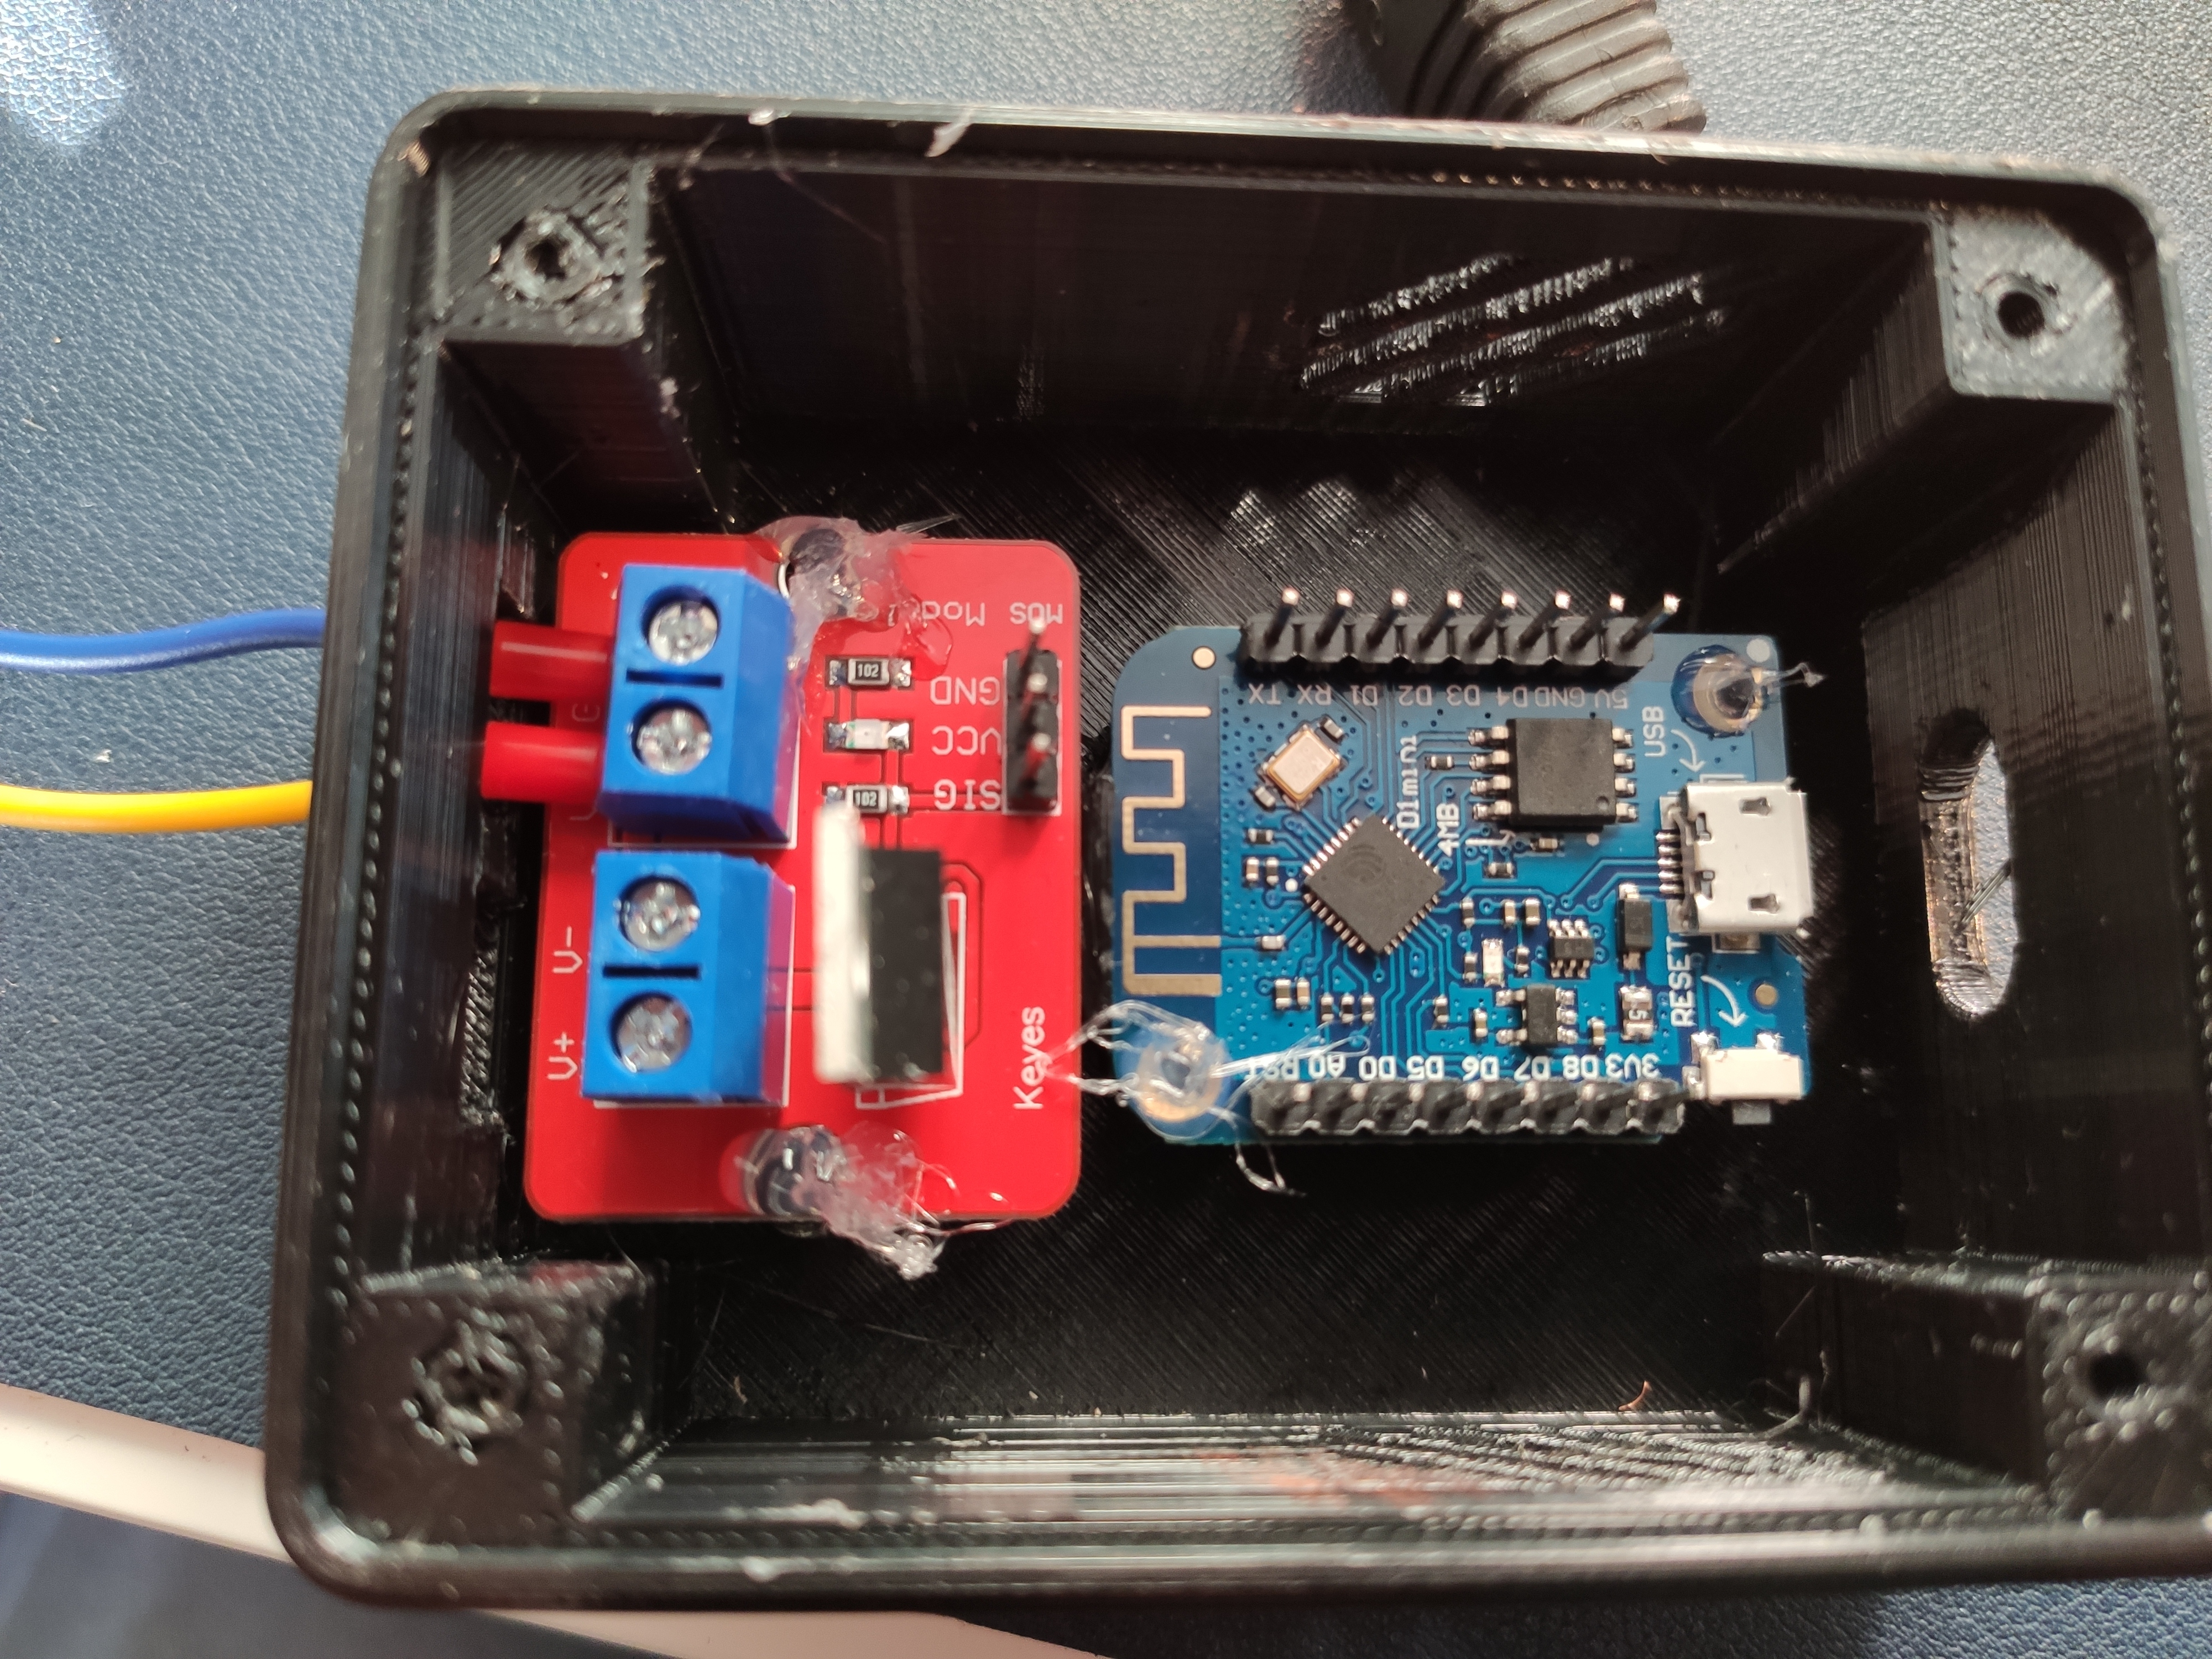
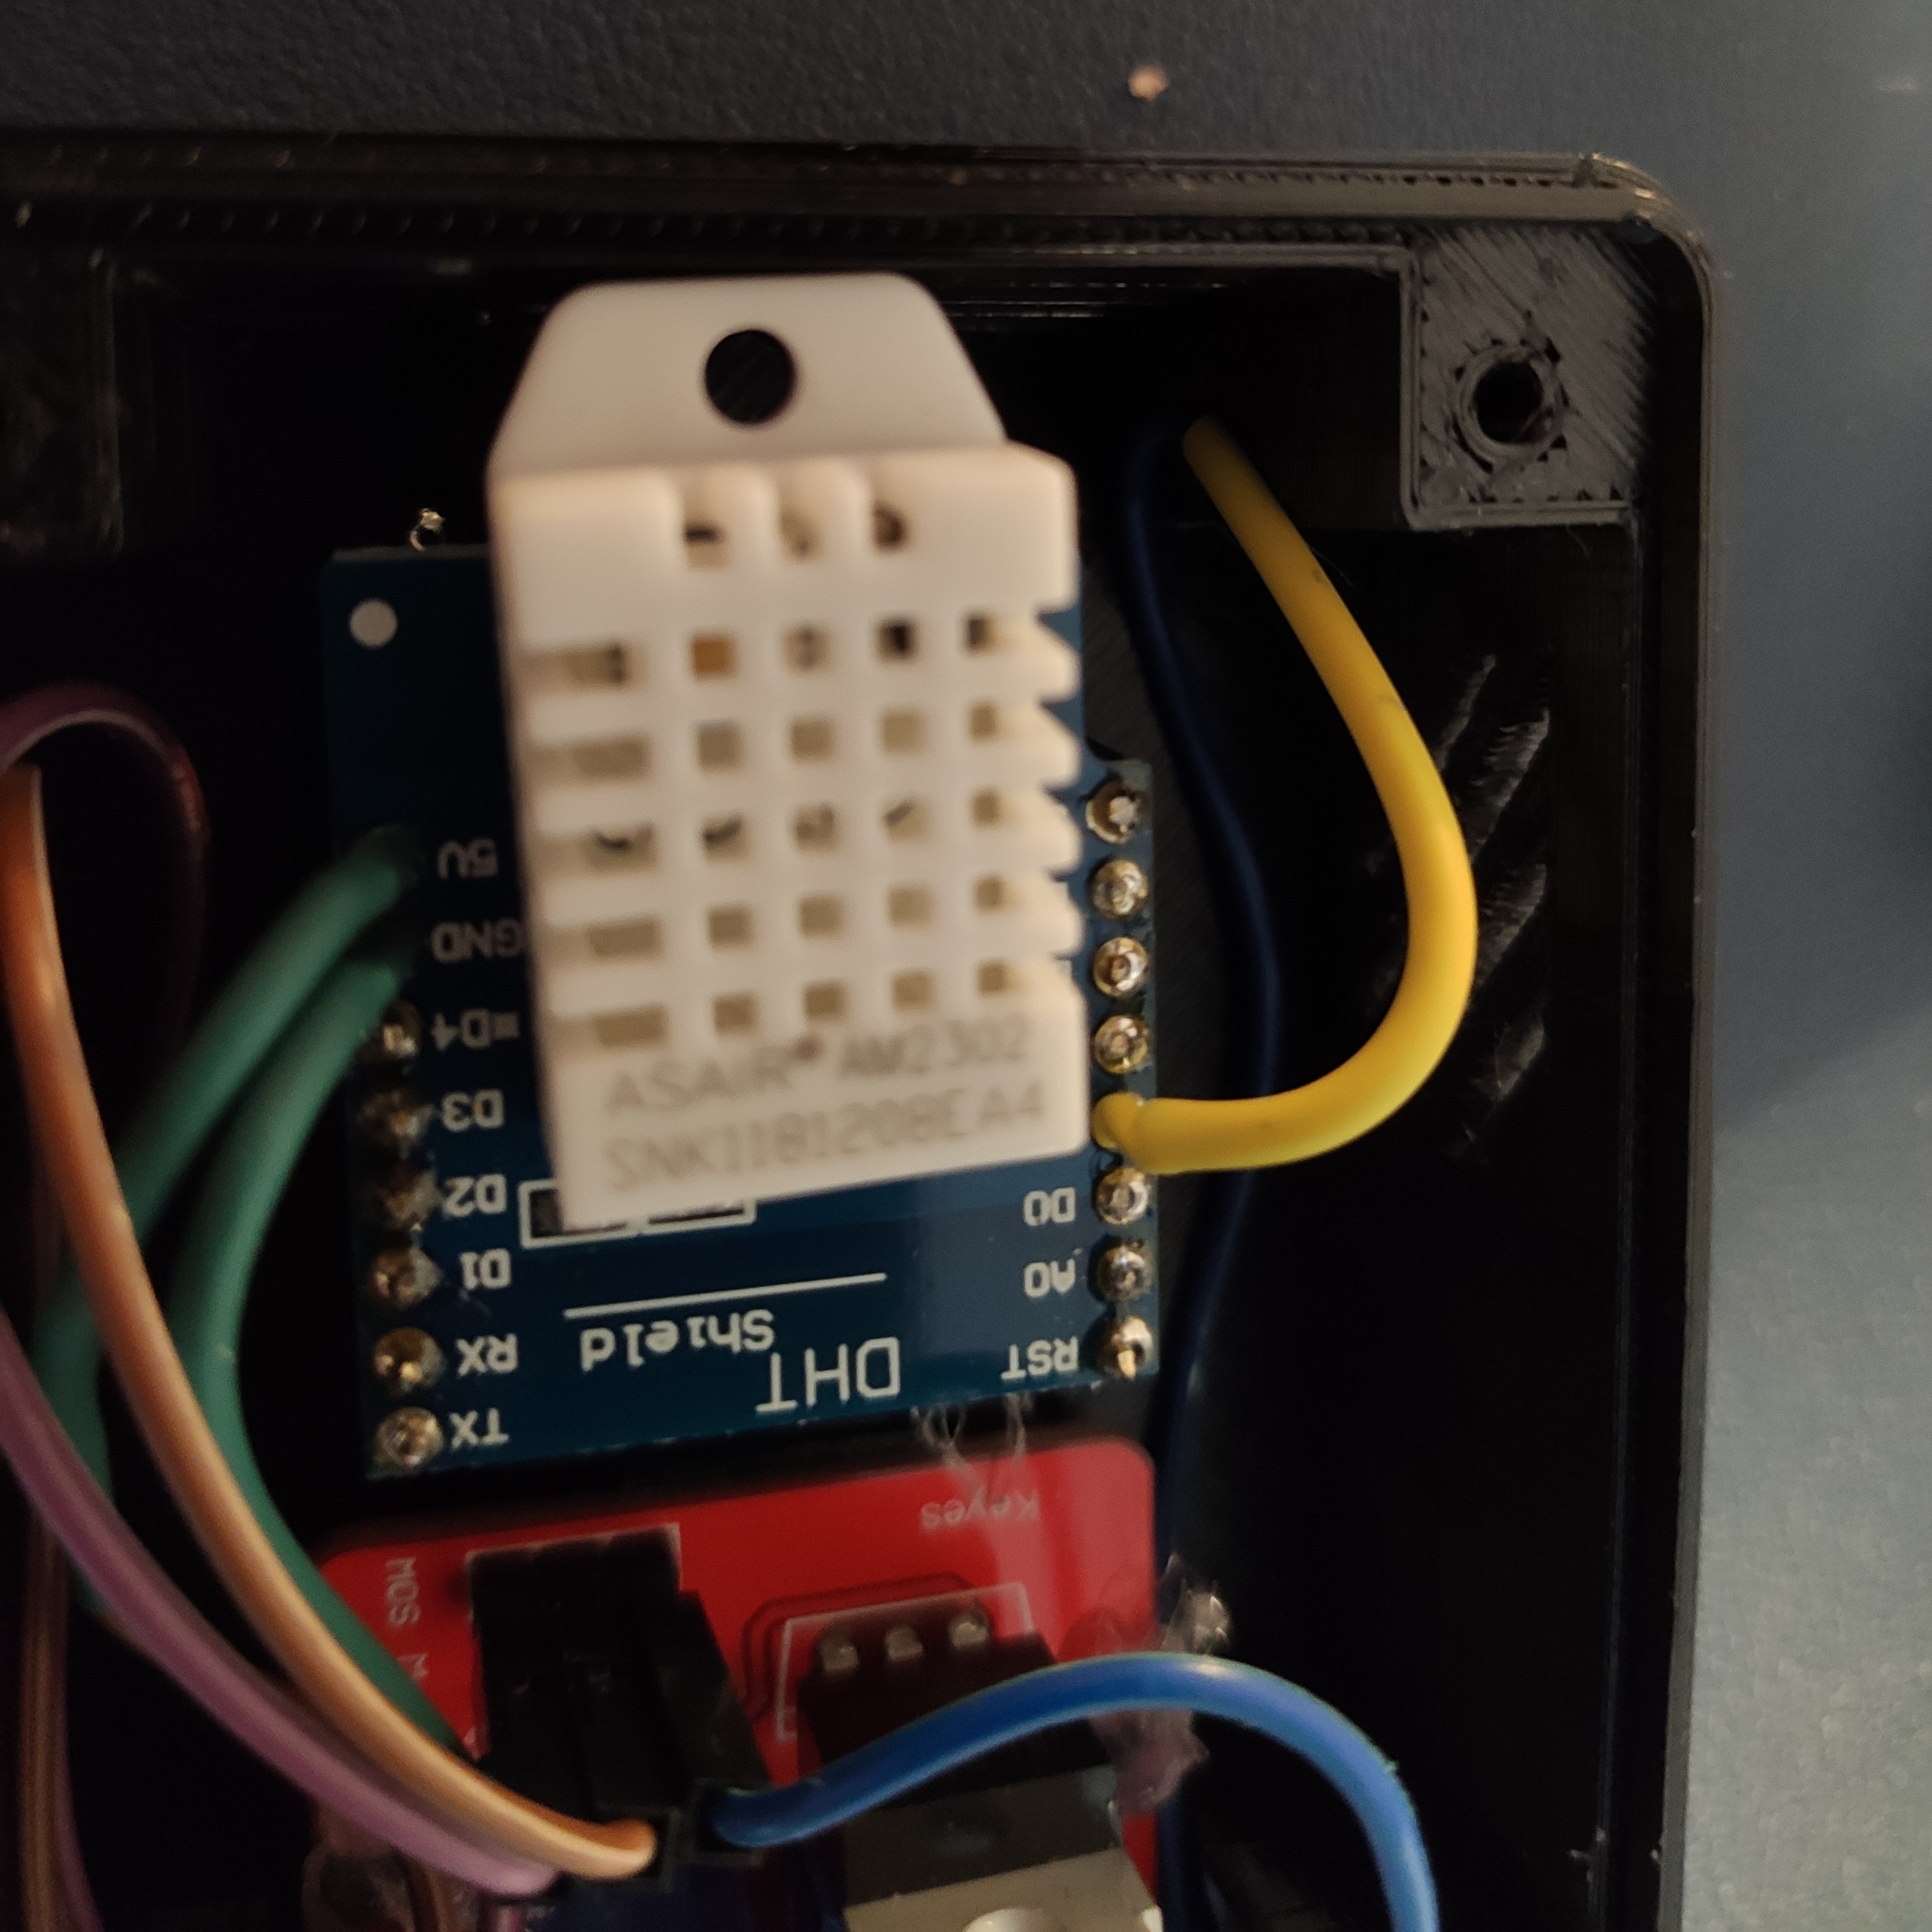
- Gently press the mosfet board and the wemos in side the case. As seen on the picture. They should be hold in place already.
- Put some hot glue on the pins holding the two boards, so that the board can't get loose.
- After that put the temp shield on top of the wemos.
Take attention to the right alignment of the shield e.g. 5V matches at both boards the same pin.
The DHT22 sensor end should point to the case border as an example.
- You can cut off carefully later the rest of the pins of the shield. (maybe after testing)
Wiring Alltogether
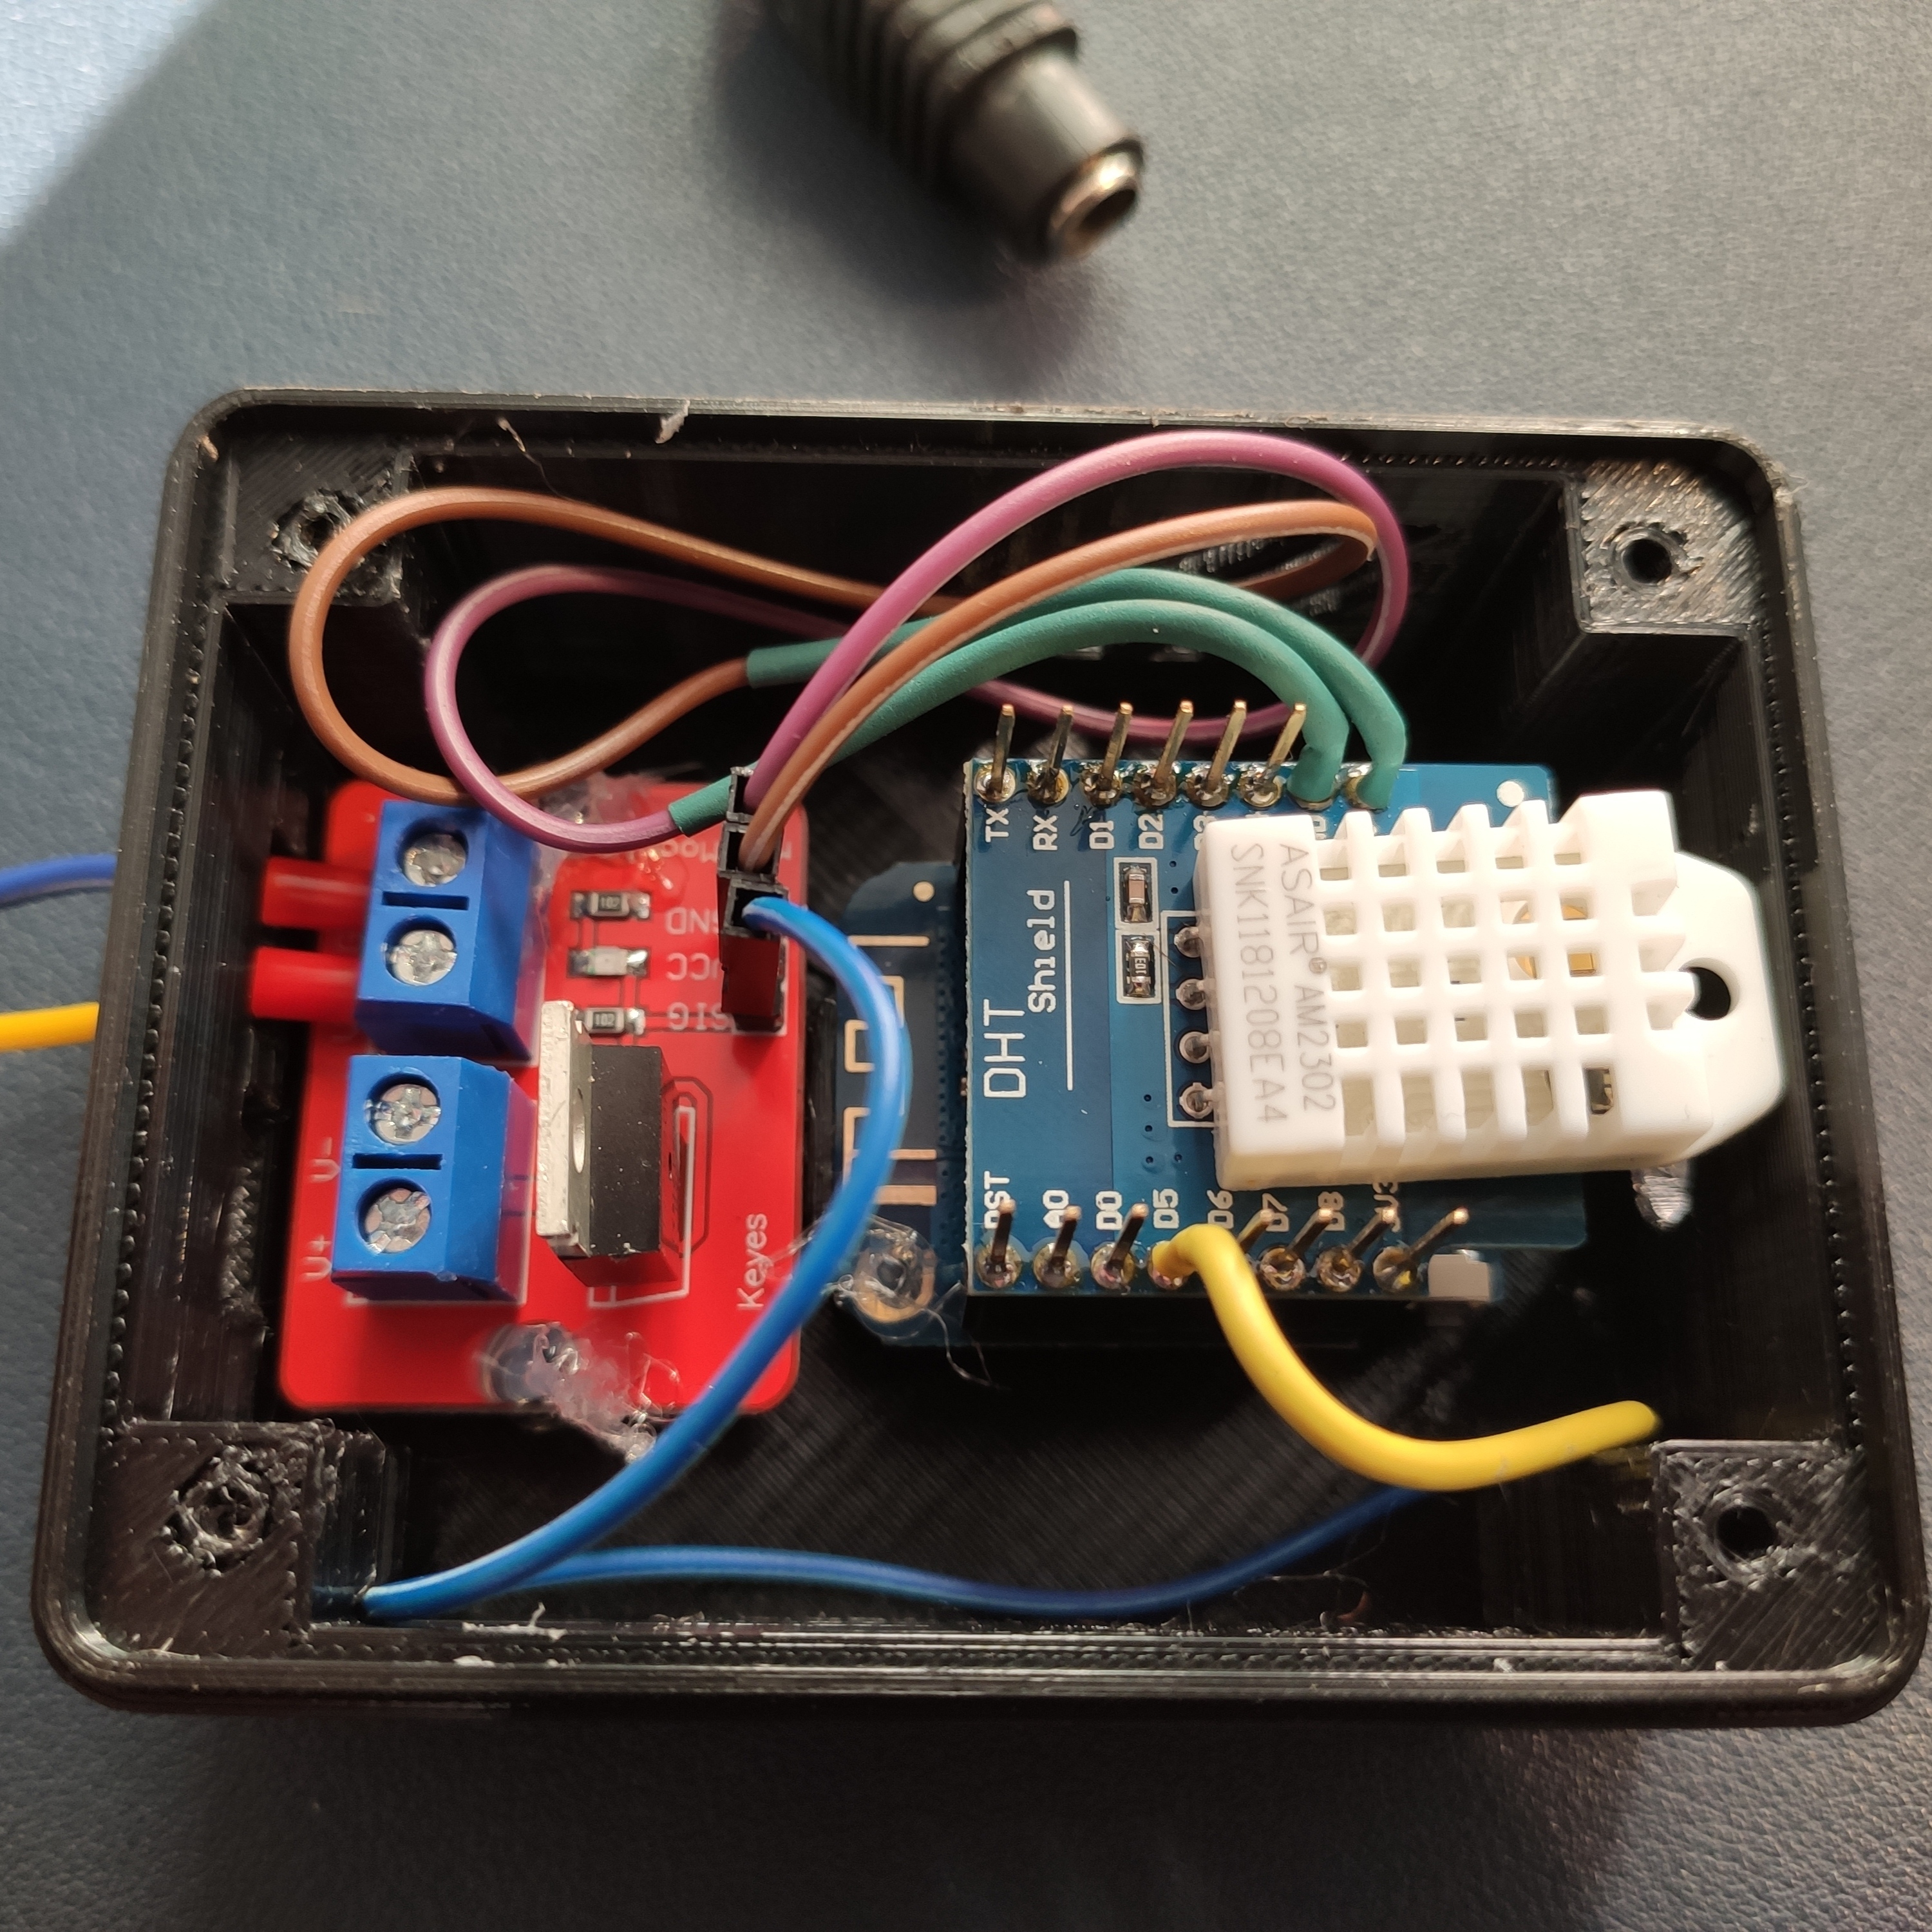
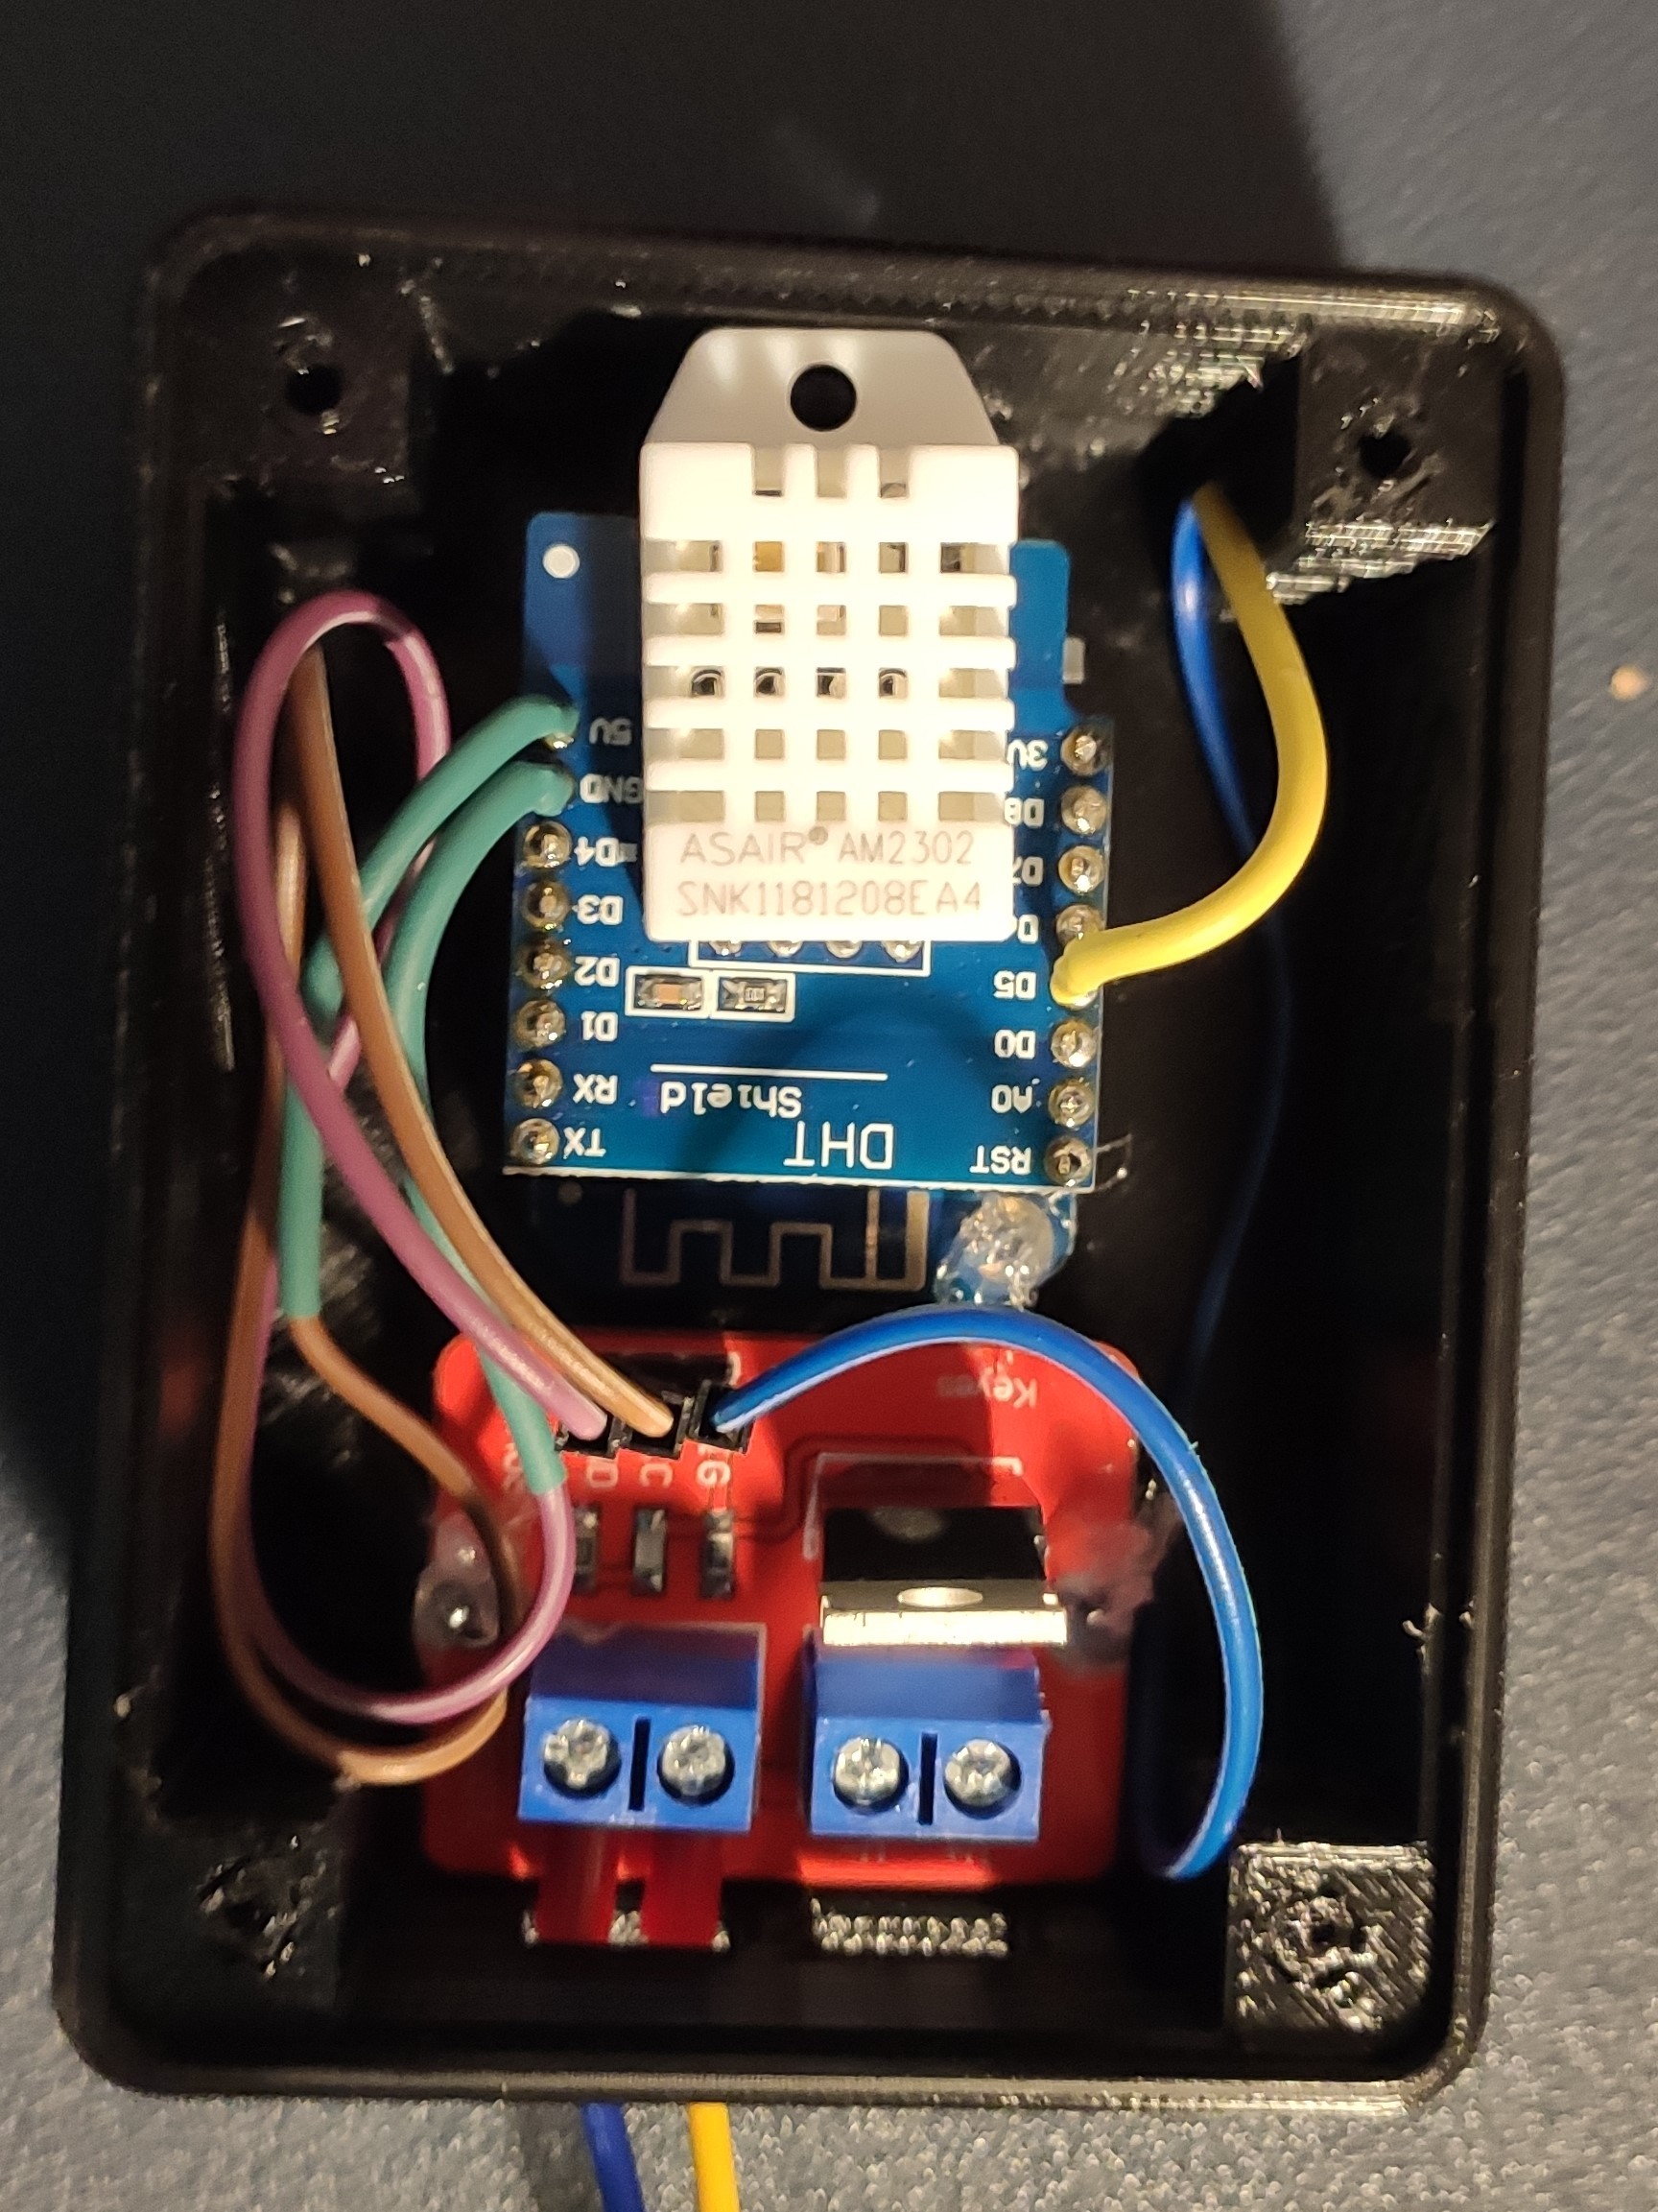
Shield to Mosfet:
5V -> VCC
GND -> GND
PWM PIN -> SIG
Mosfet:
Power Source + -> VCC IN
Power Source - ->GND
FAN + -> V +
FAN - -> V -
FAN (optional 3 PIN) -> Don't connect it. Cut it and put a shrink tube over it.
Use always wire ferules for screw terminals.
Firmware
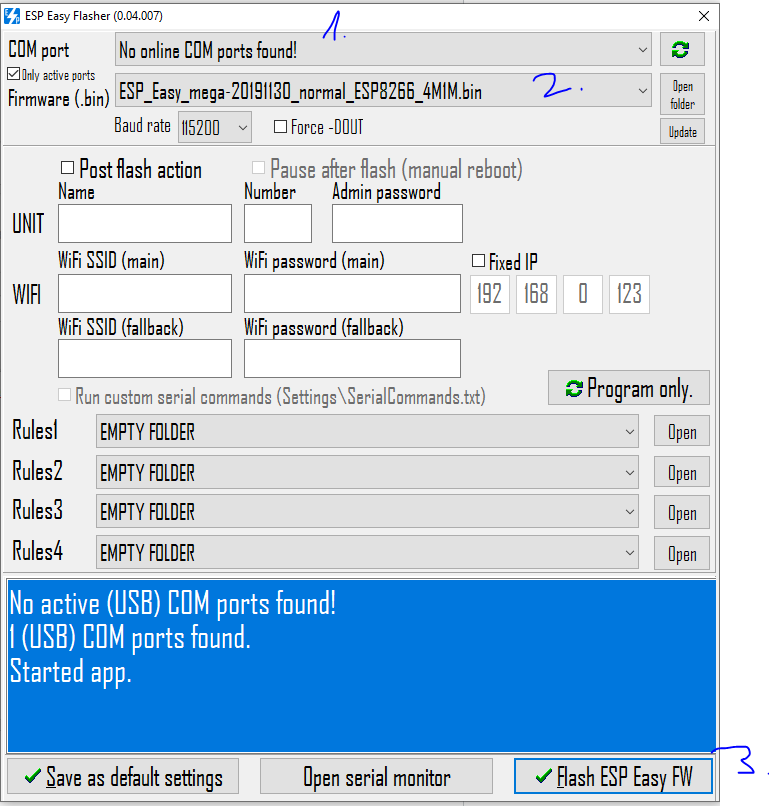
I decided to use ESPEasy for controlling the ESP. The advantage is you don't need to know how to write C Code to get to your goal.
- Get one of the ESP Easy Release https://github.com/letscontrolit/ESPEasy/releases
- Extract it and use the ESP.Easy.Flasher.exe
- First select a com port
- Than a firmware ending with normal_ESP8266_4M1M.bin
- Write it to the wemos
- Restart device (unplug the usb for a short period)
-
WiFi AP "ESP_Easy_0" will appear, password: configesp
(prior to 2.0 the AP was named ESP_0) If you're not automatically taken to the log-in page, browse to 192.168.4.1 -
Configure the ESP to use your wifi.
The 4M is used because of 4MB Flash.
Connect to SmartHome
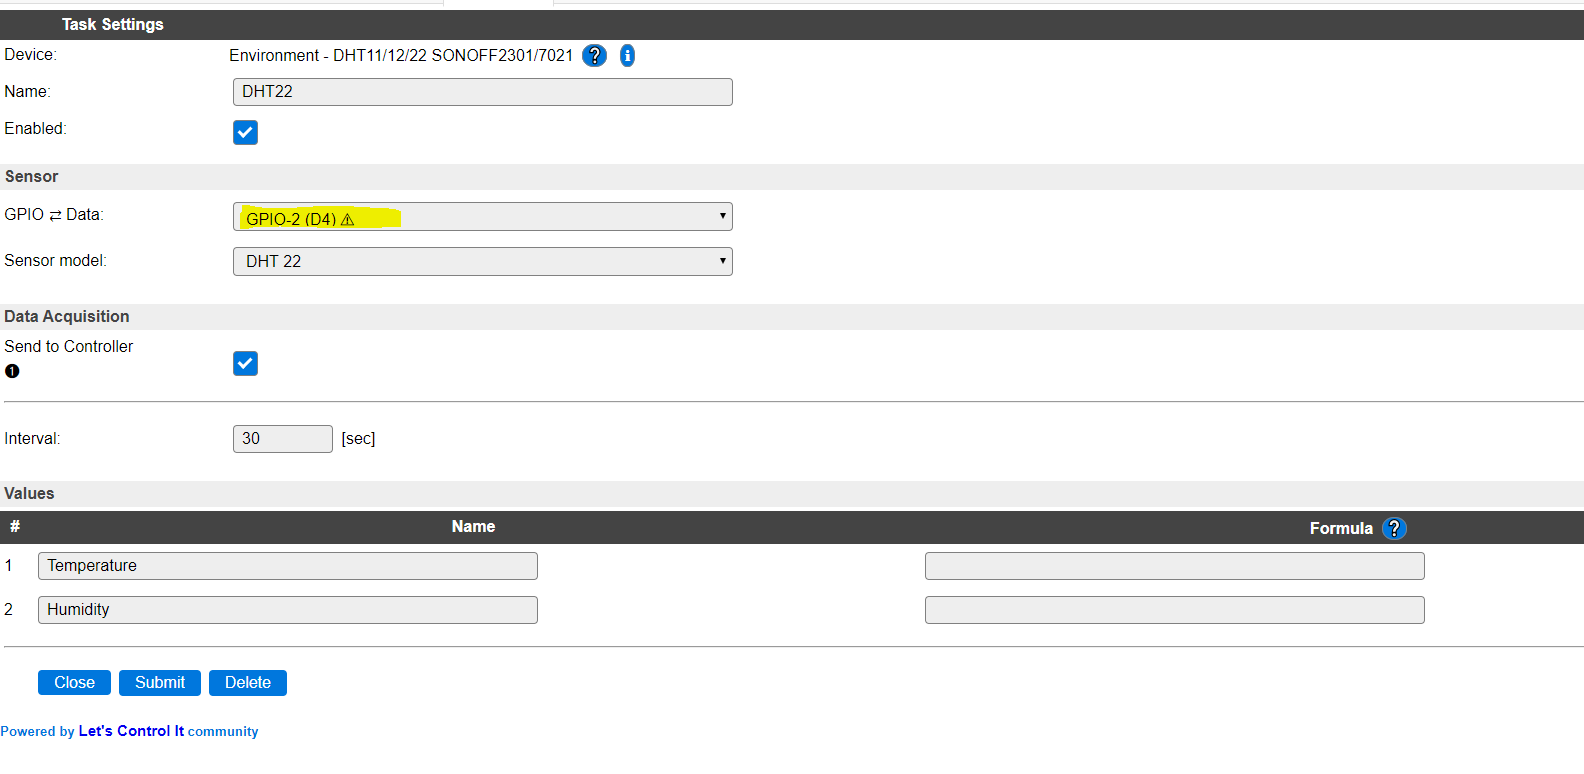

- Connect to the UI of your ESPEasy.
- Use you're router to determine which IP-Address the ESPEasy has. Usually it's listed as espeasy-0.
- Than go to the webinterface by entering http://yourip
- At the device section add the new sensor device.If you have the DHT22 it's usually the D4 GPIO Pin.
- After succesfull adding the device you can see the values in the overview (Pic.2)
- Go to the Controllers Tab and choose your HomeAutomation System. If you don't have one yet you can use MQTT or generic HTTP
Than you can go further to write rules or automations depending on your automation.
You can test the PWM with the following command:
http://yourip/control?cmd=PWM,14,2300
The fan should run at almost fullspeed.
Final Assembly
If everything works finally put the cover on top and screw 4 times, 3x8mm screws in it.
I usually prefer screws made for screwing into plastic. Regular M3 screws might also work.
Useful Links
I use homeassistant as my smarthome solution, here are some useful links to integrate it.
https://www.home-assistant.io/integrations/mqtt/