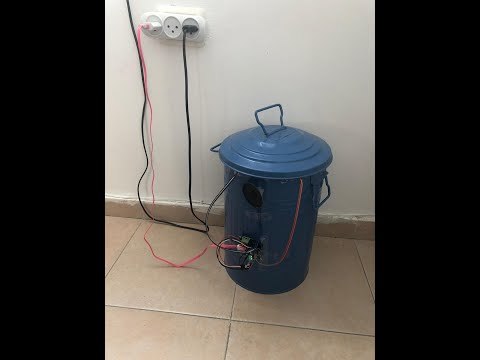
Smart Bin
Why Smart Bin?
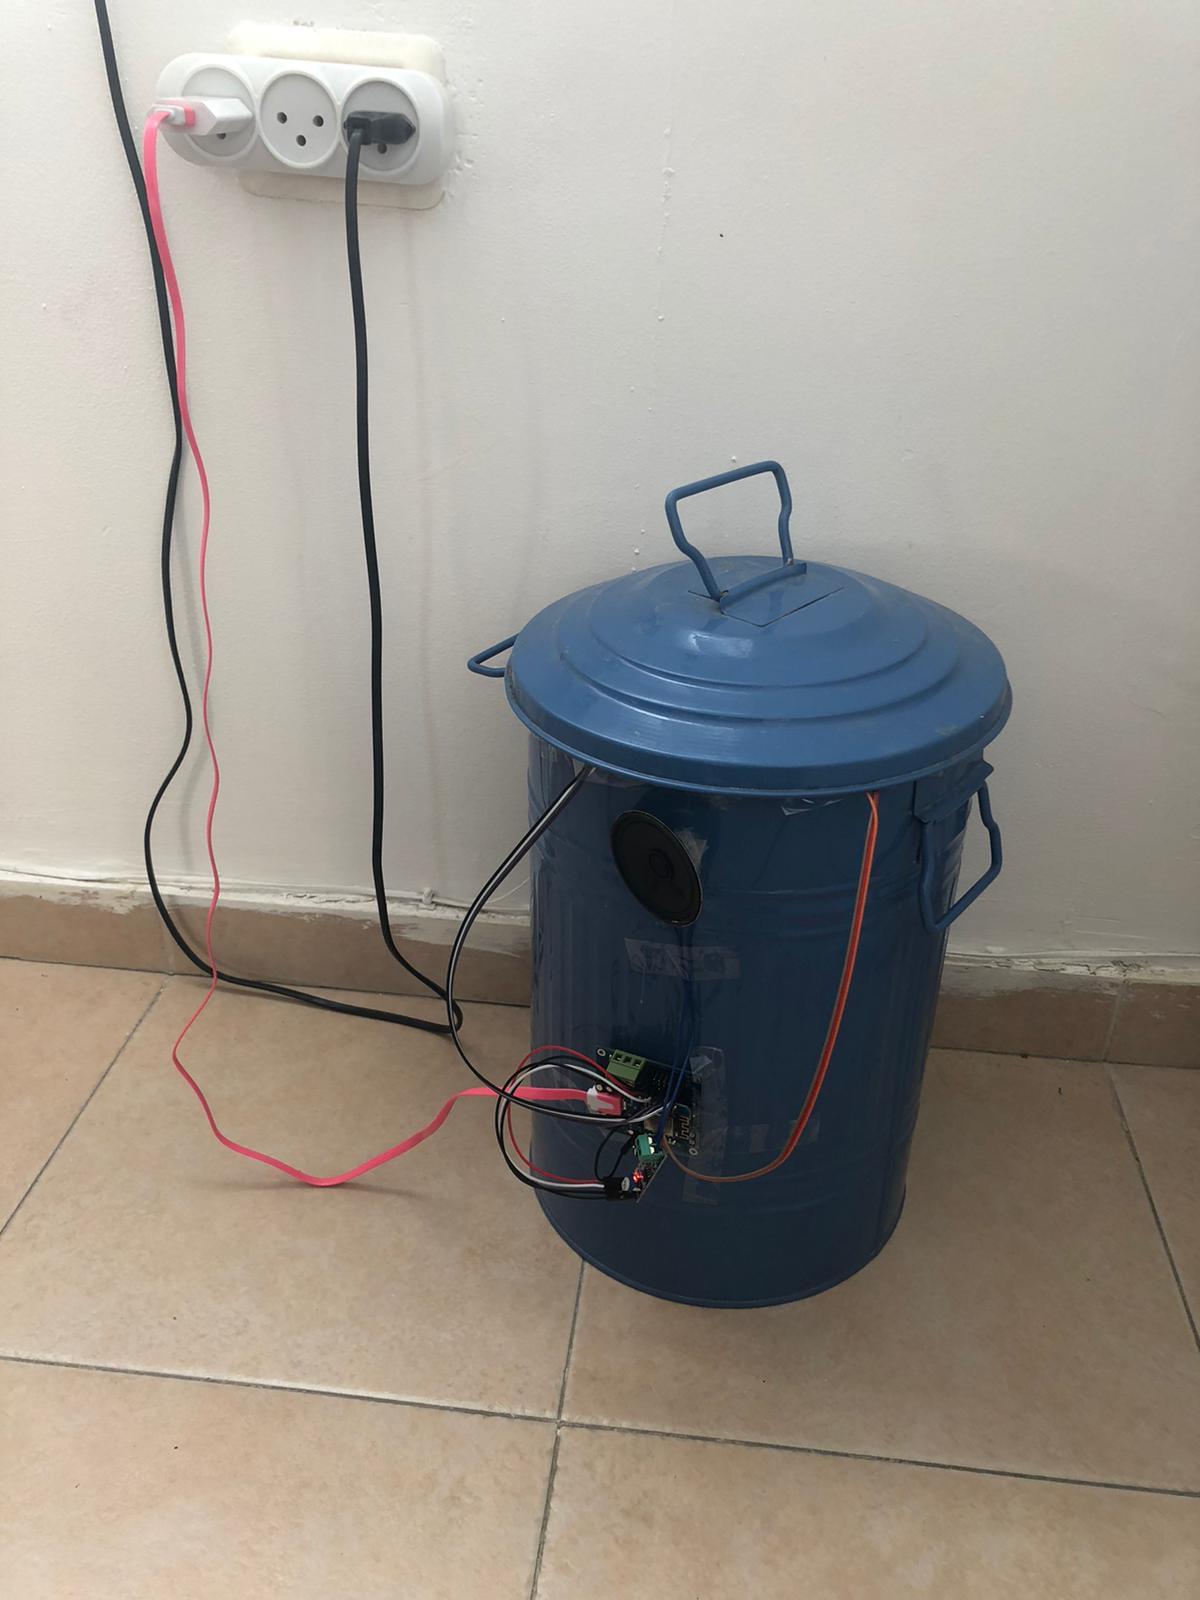
Everyone has garbage. And most likely, everyone has experienced the painful argument of who should take out the trash and when. We recently had such an argument in our own homes, and decided that it was time to put an end to this madness.
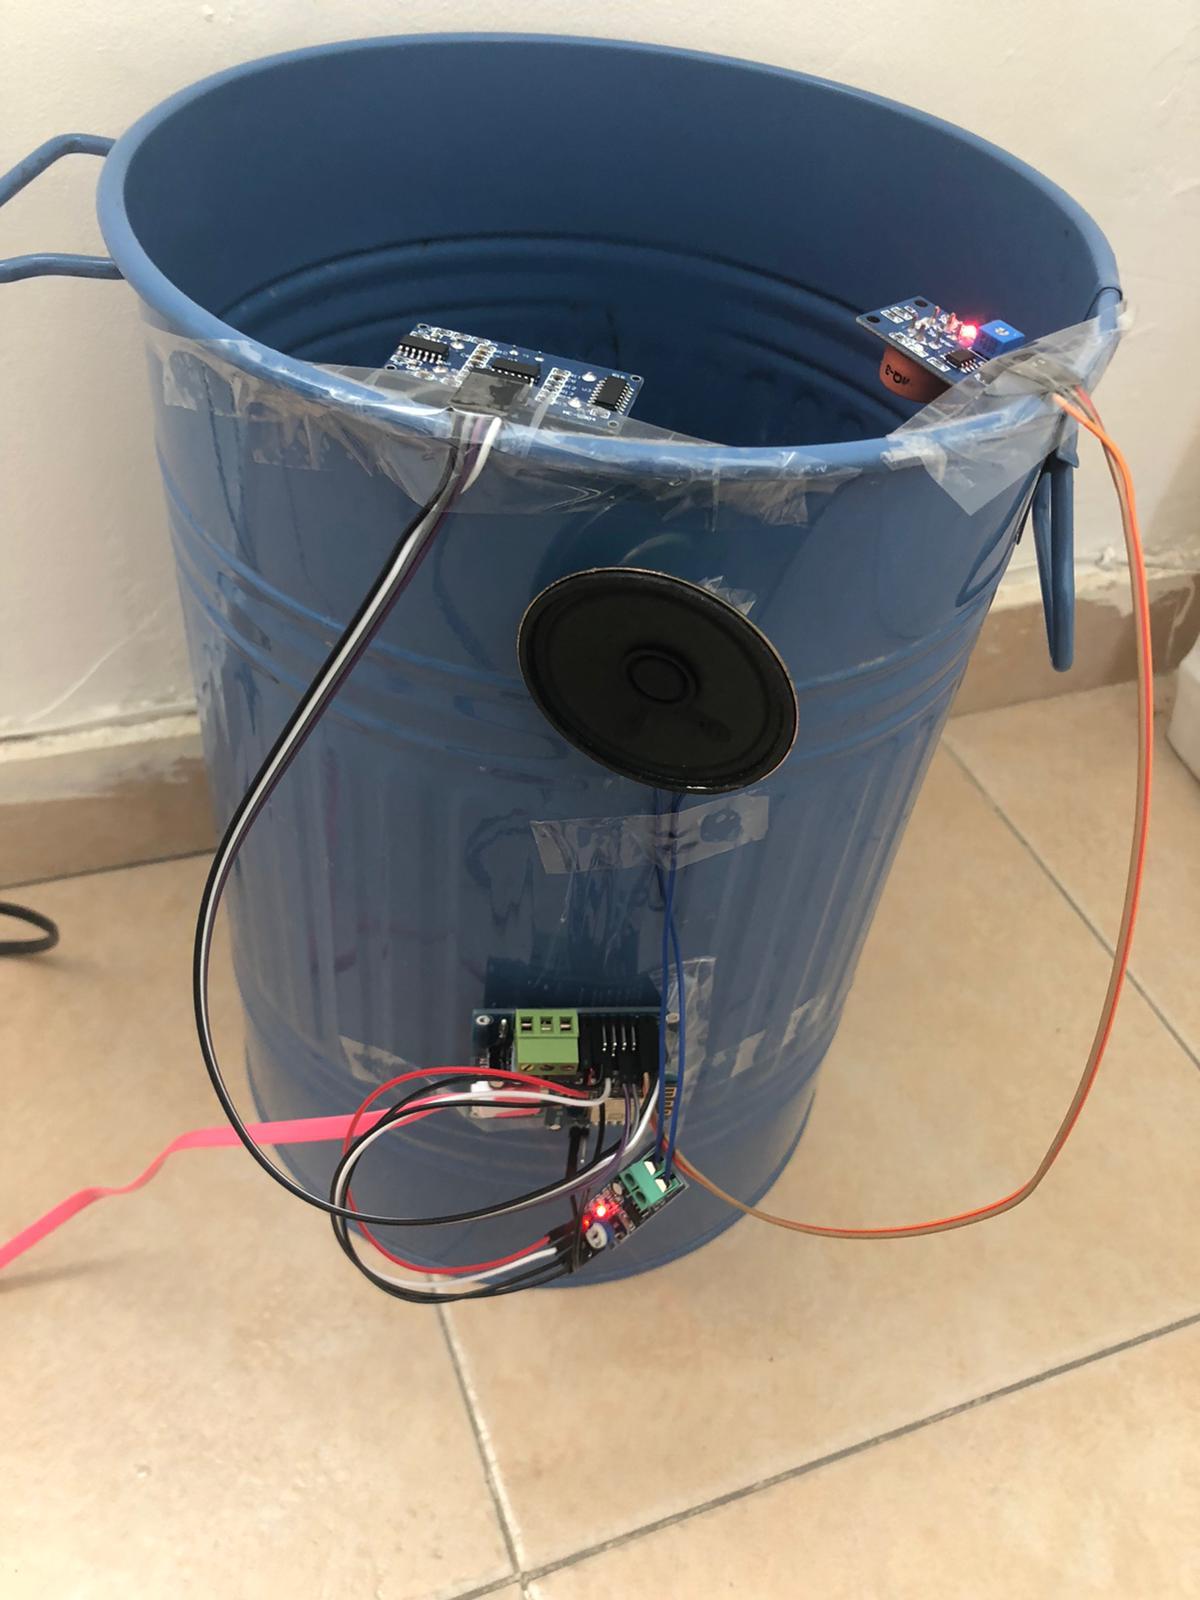
We have created a mechanism that will alert us when the bin is getting full, or when it reaches an alcohol scent level that requires replacement (i.e., it's stinky). We used two sensors; one that detects the trash level in the bin, and another that detects alcohol levels in the bin's contents. Both sensors transmit the information by sending alerts to our smartphones and emails when the levels reach a certain point.
Ever wanted to passive-aggressively remind your roommate/partner to do their part and take out the trash? We have created just the thing! If they're at home, you can notify them that the bin is full/smelly with the press of a button on your smartphone, which will make the bin sing a little tune.
The real bread and butter of this design is, of course, the odor sensor, since scent is invisible (though sometimes hard to miss). This feature is designed to significantly upgrade your trash removal experience, so you won't have to argue about it anymore!
Who are we?
This IoT project was created by Udi Rahav and Ran Havaletzki. We are Computer Science students from the Interdisciplinary Center (IDC), Herzliya, Israel. We came up with this idea as our final IoT project and we are really proud to share it with you.
Below you will find the steps to carry out the project in a simple and friendly way so you can also make a smart bin of your own. Enjoy!
Supplies
- Any small to medium size trash bin with or without a lid.
- Masking tape.
Hardware and Software Supplies
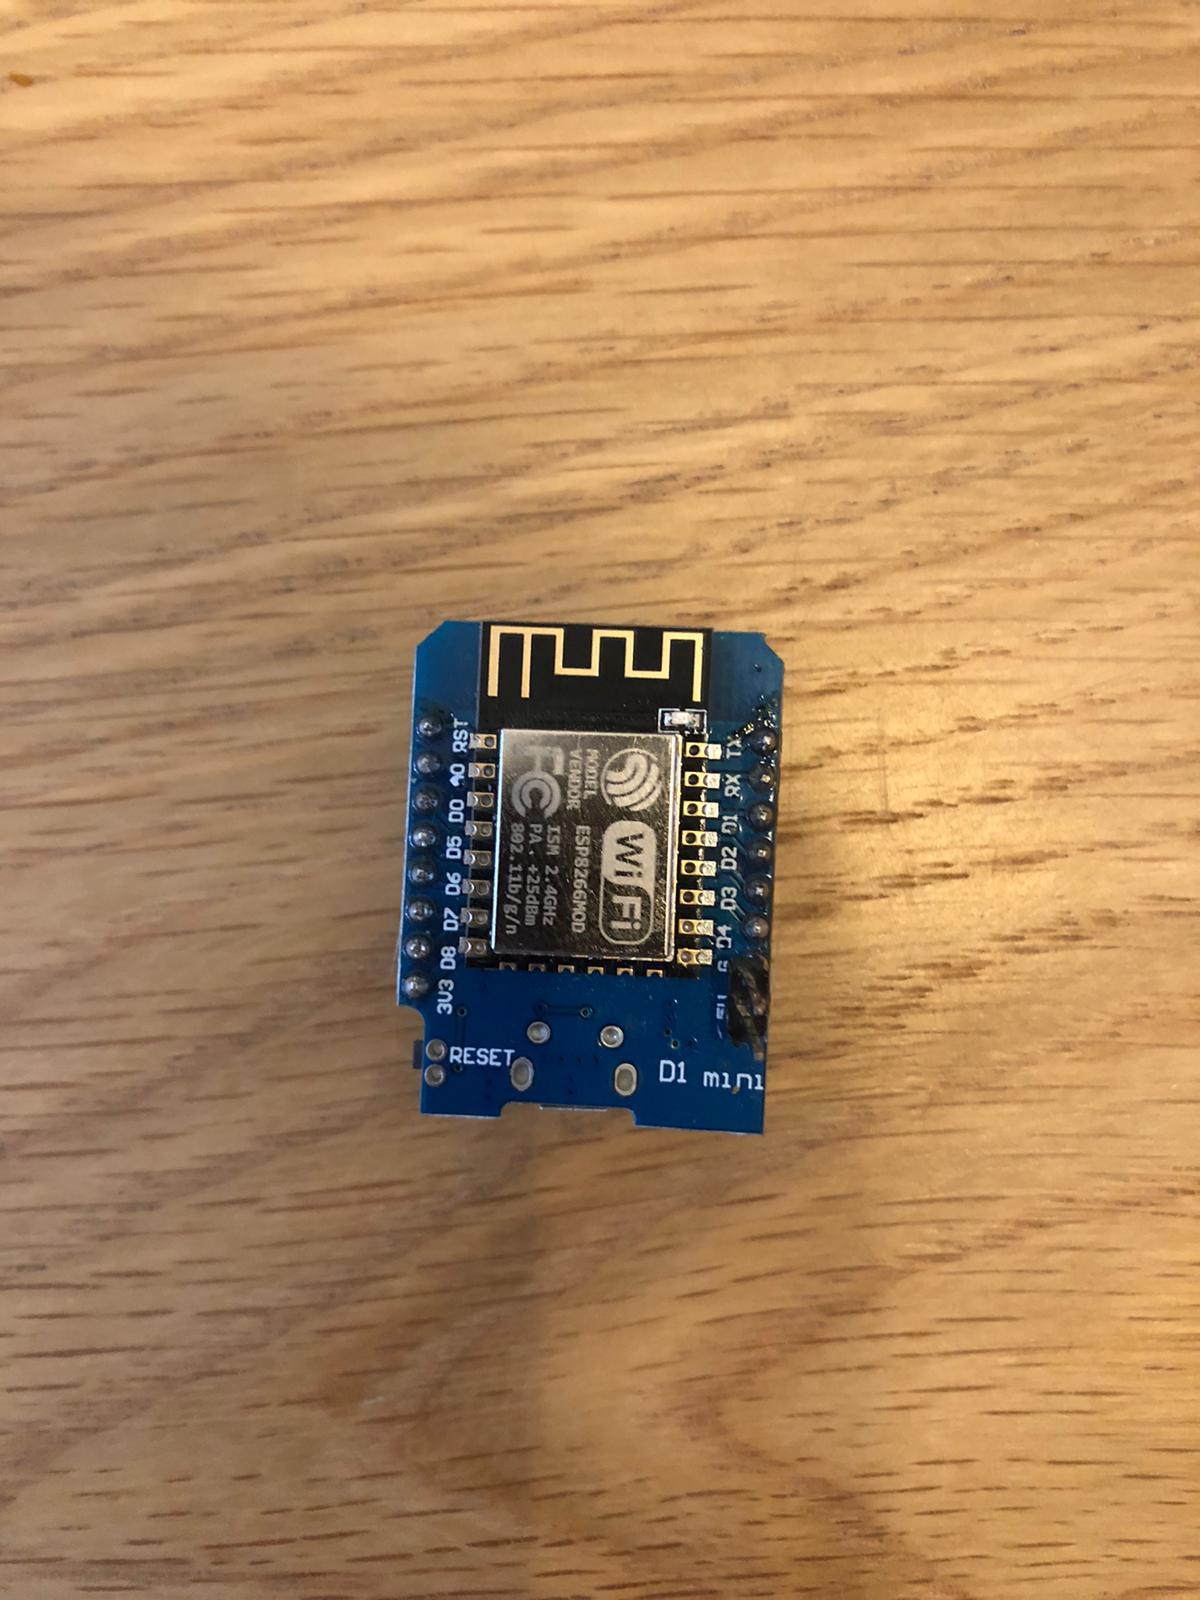.jpeg)
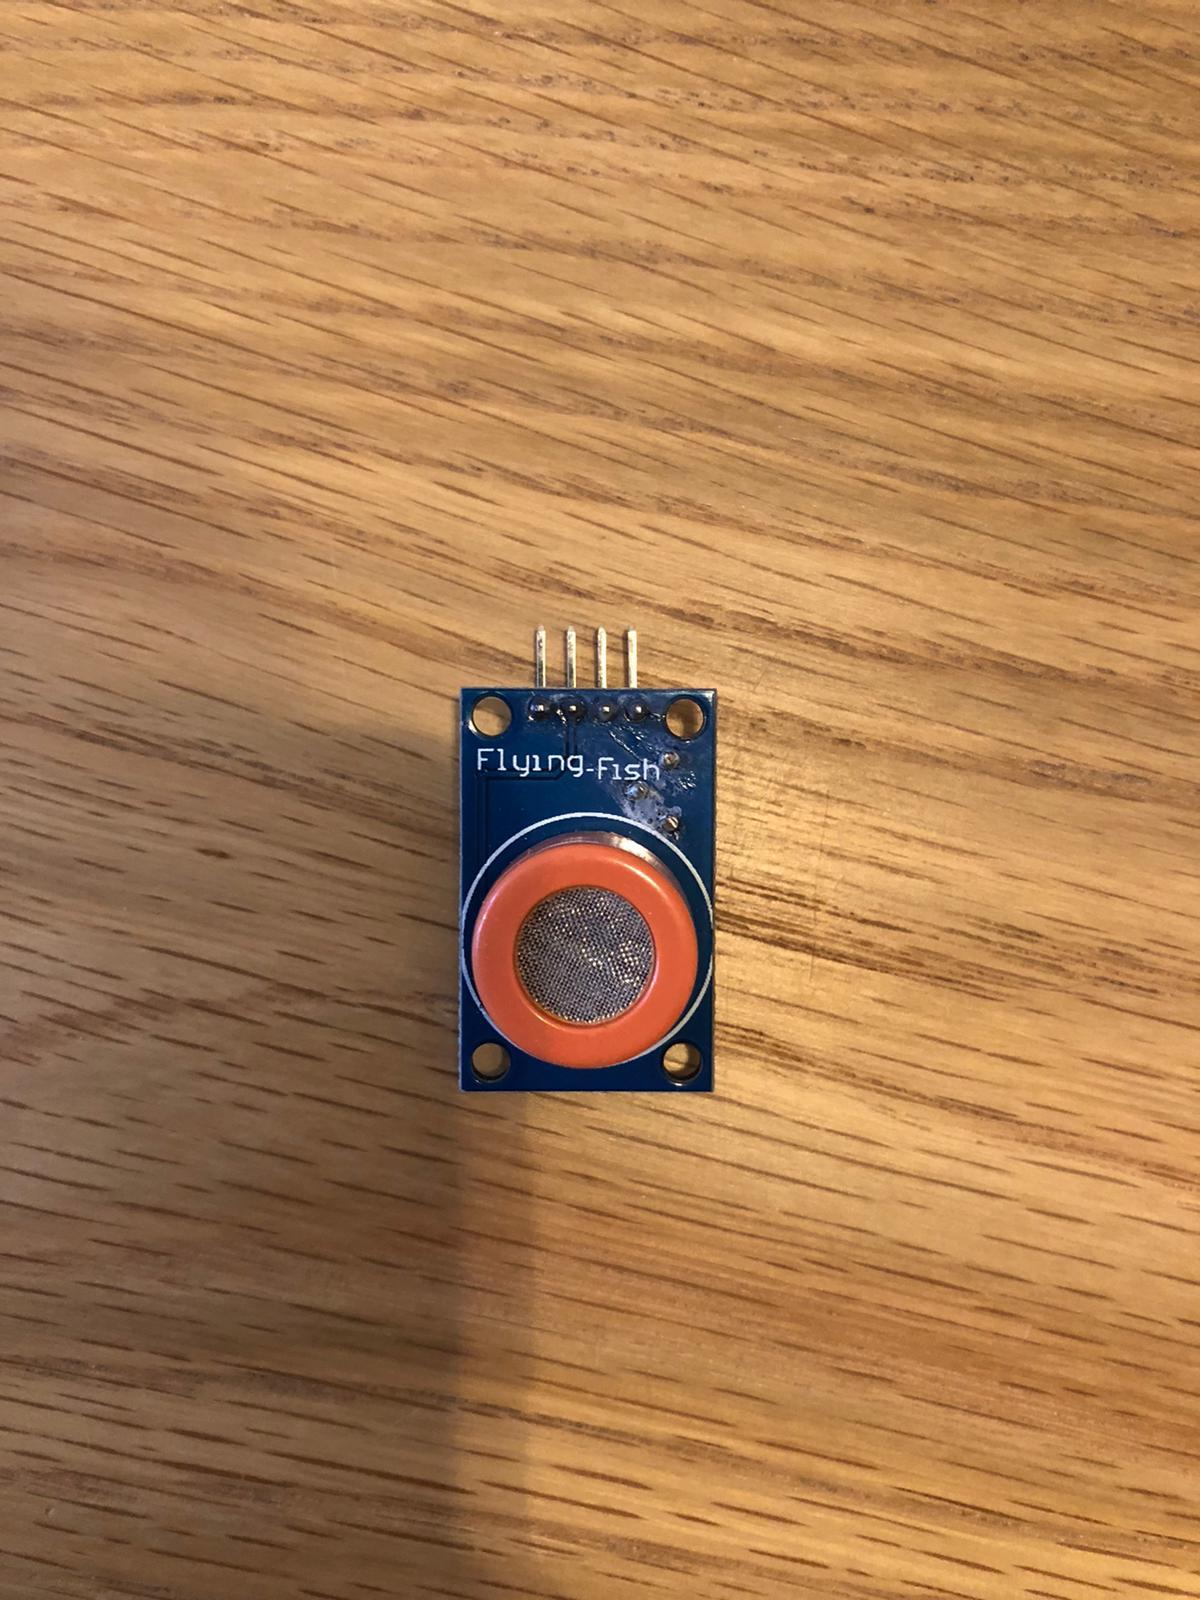
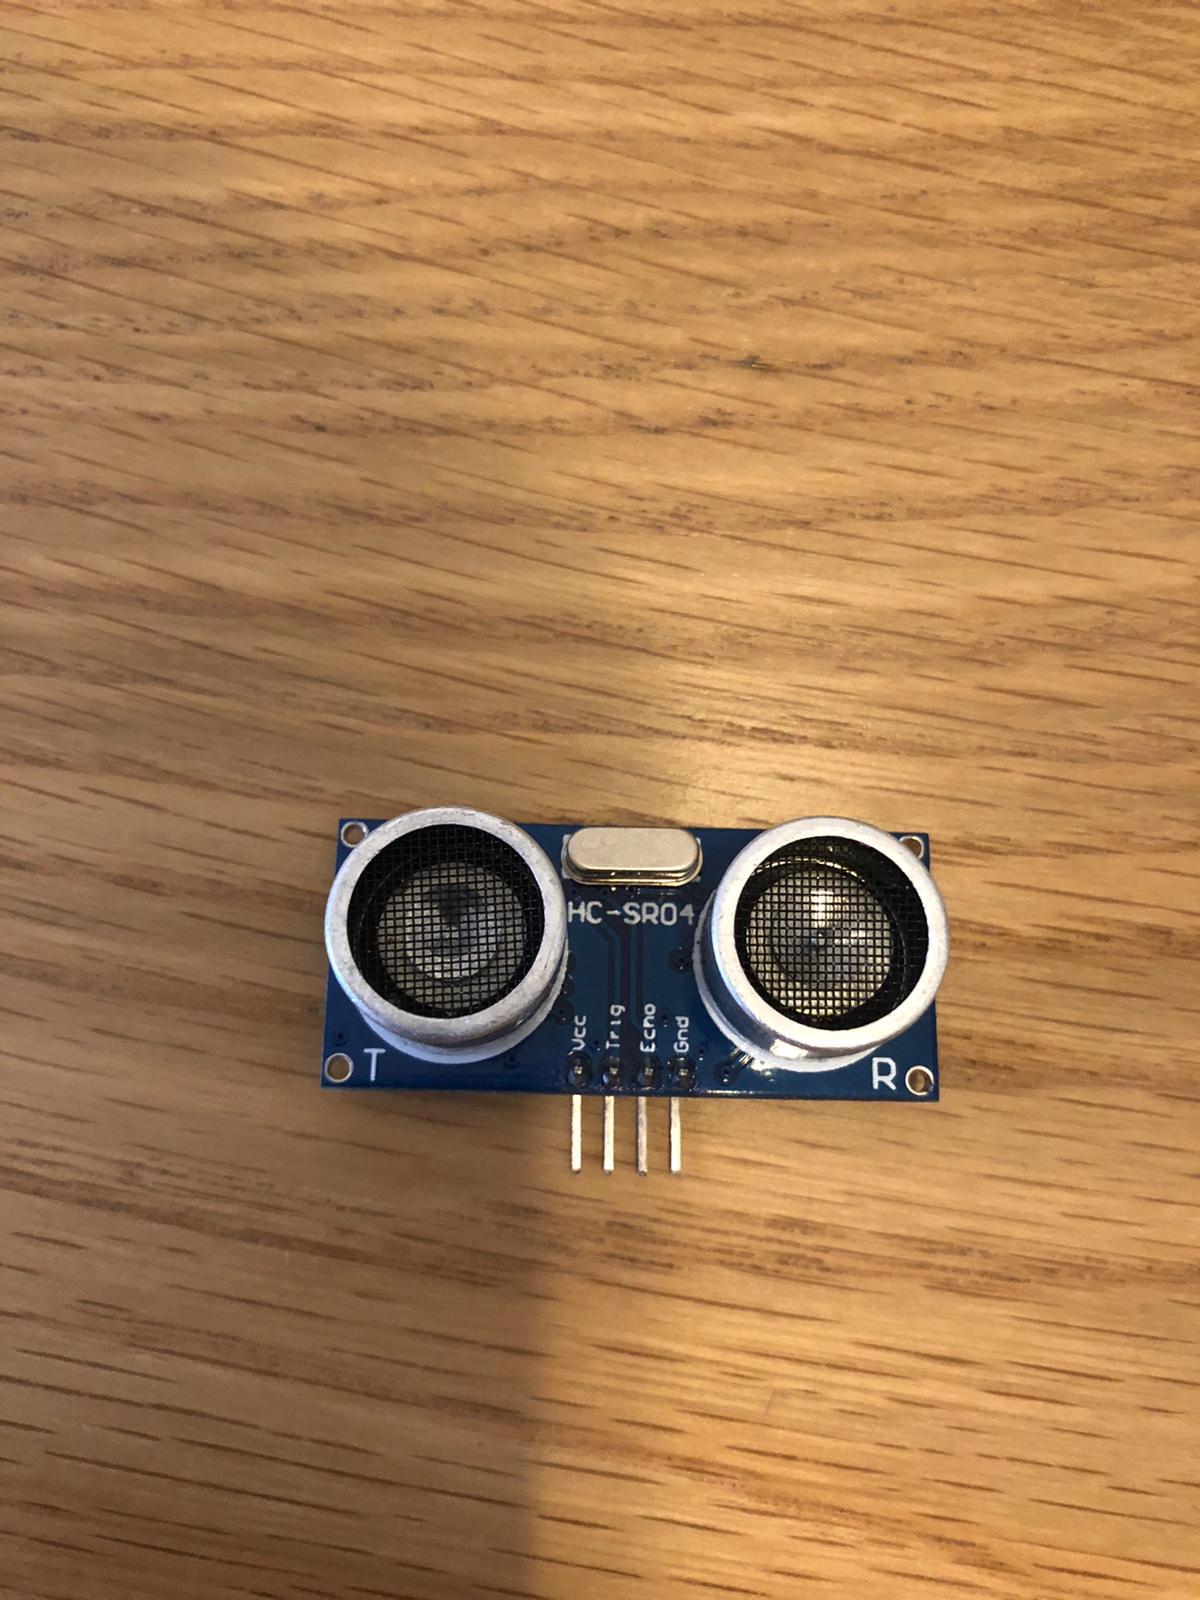.jpeg)
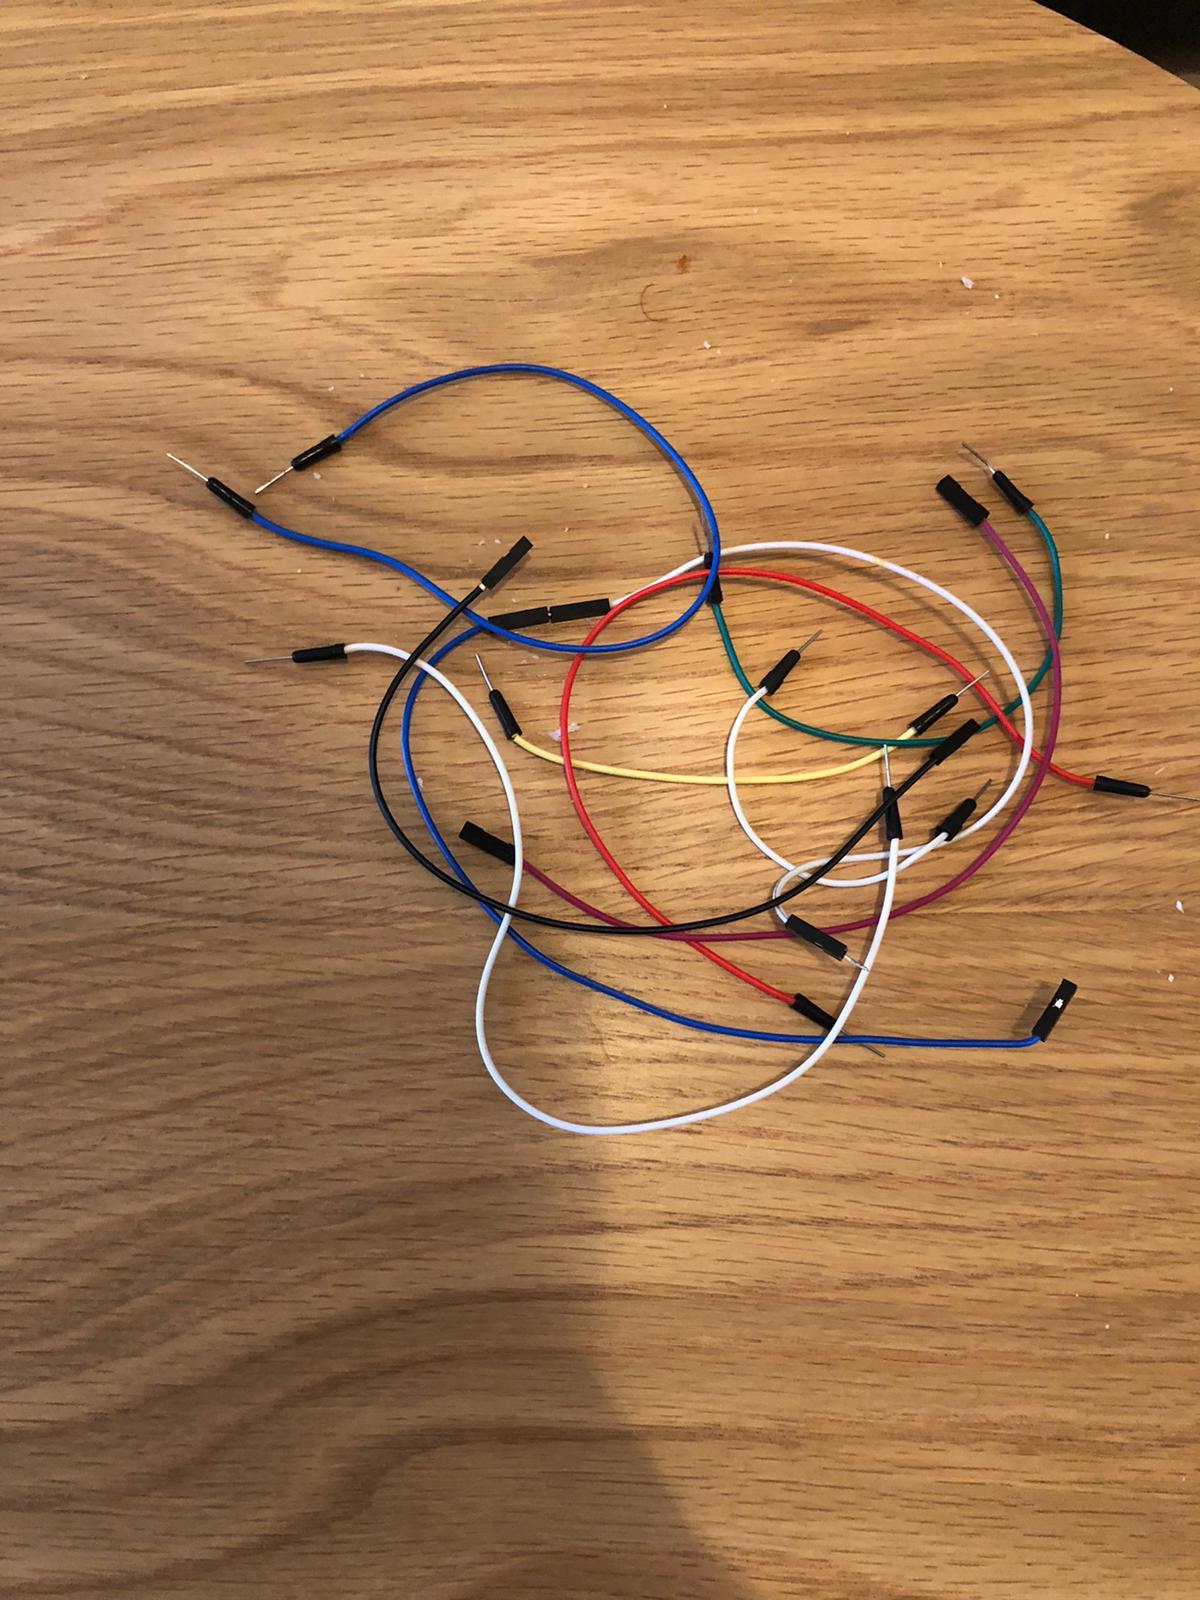
Hardware:
- Shield For NodeMcu - Replace the Breadboard for convenience, but you can use the Breadboard as well.
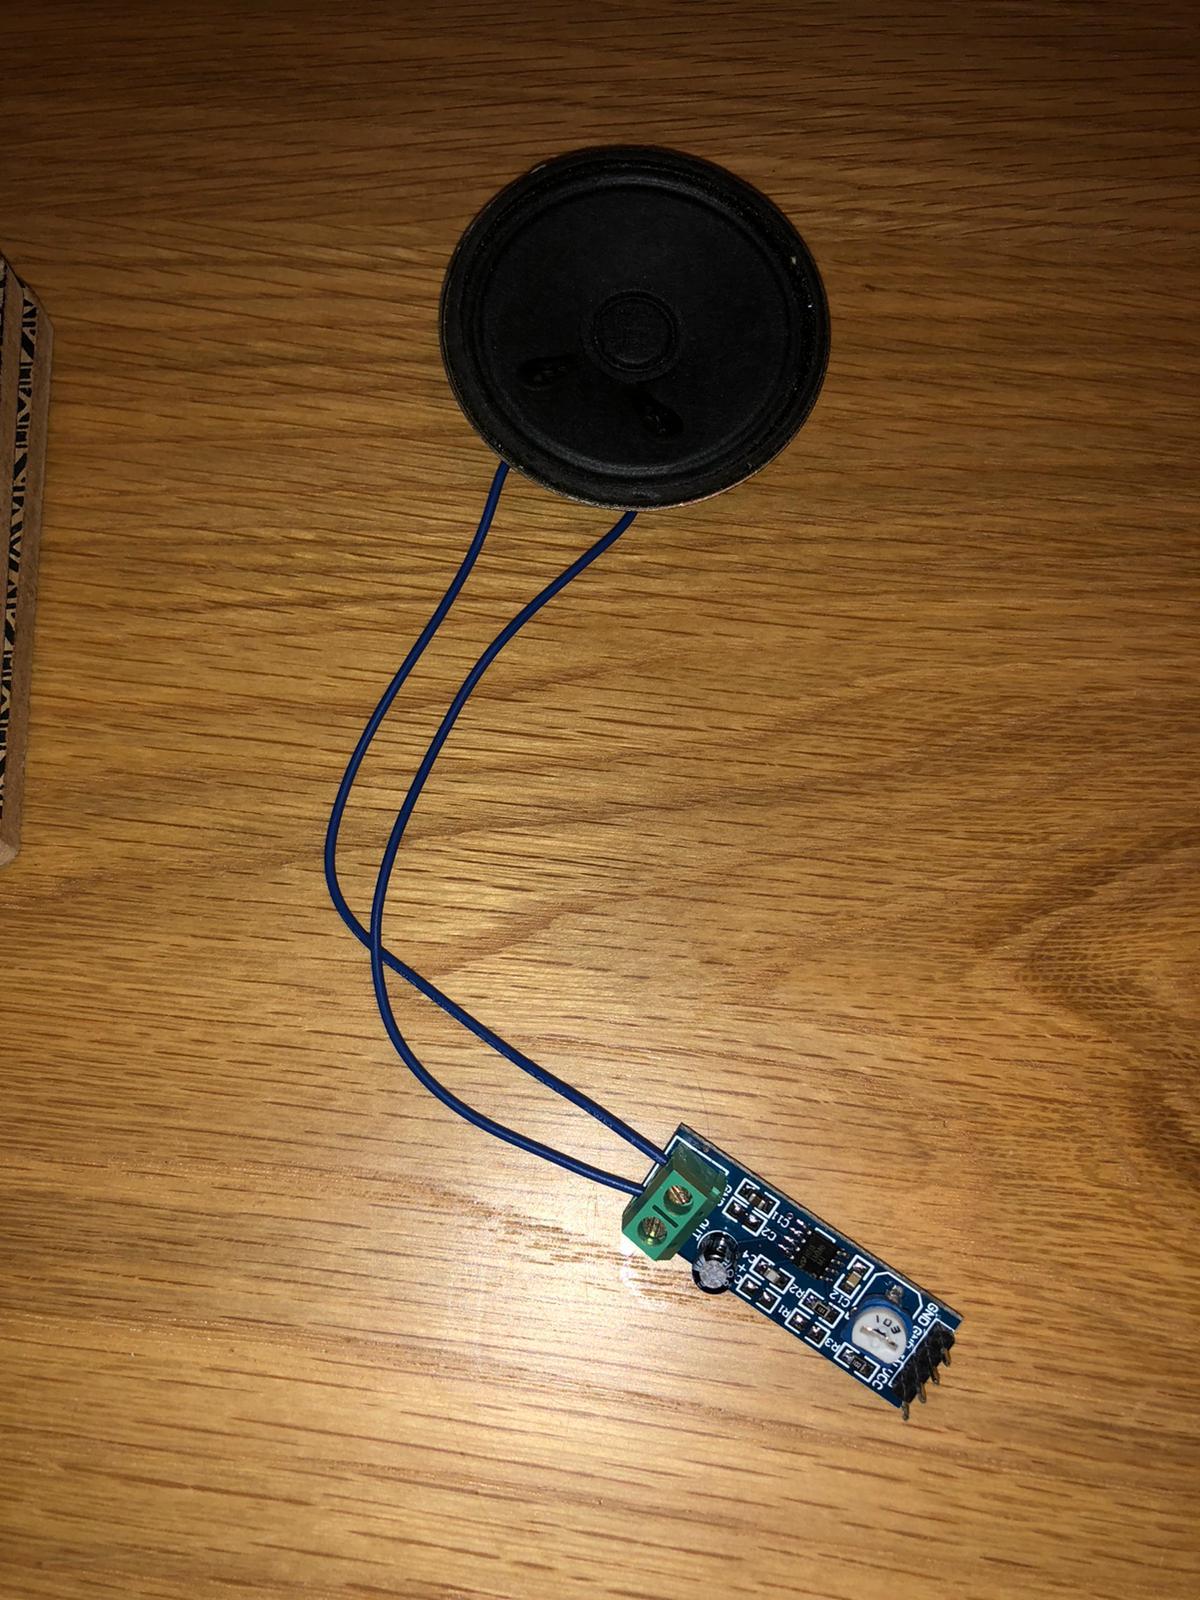
- Speaker
- LM386 Amplifier - Used to make the speaker louder.
Sensors:
Software:
- Arduino IDE
- Blynk app
- Adafruit io
- IFTTT
- Gmail
- Google Drive
- Google Sheets
Wiring (Sensonr -> Breadboard)
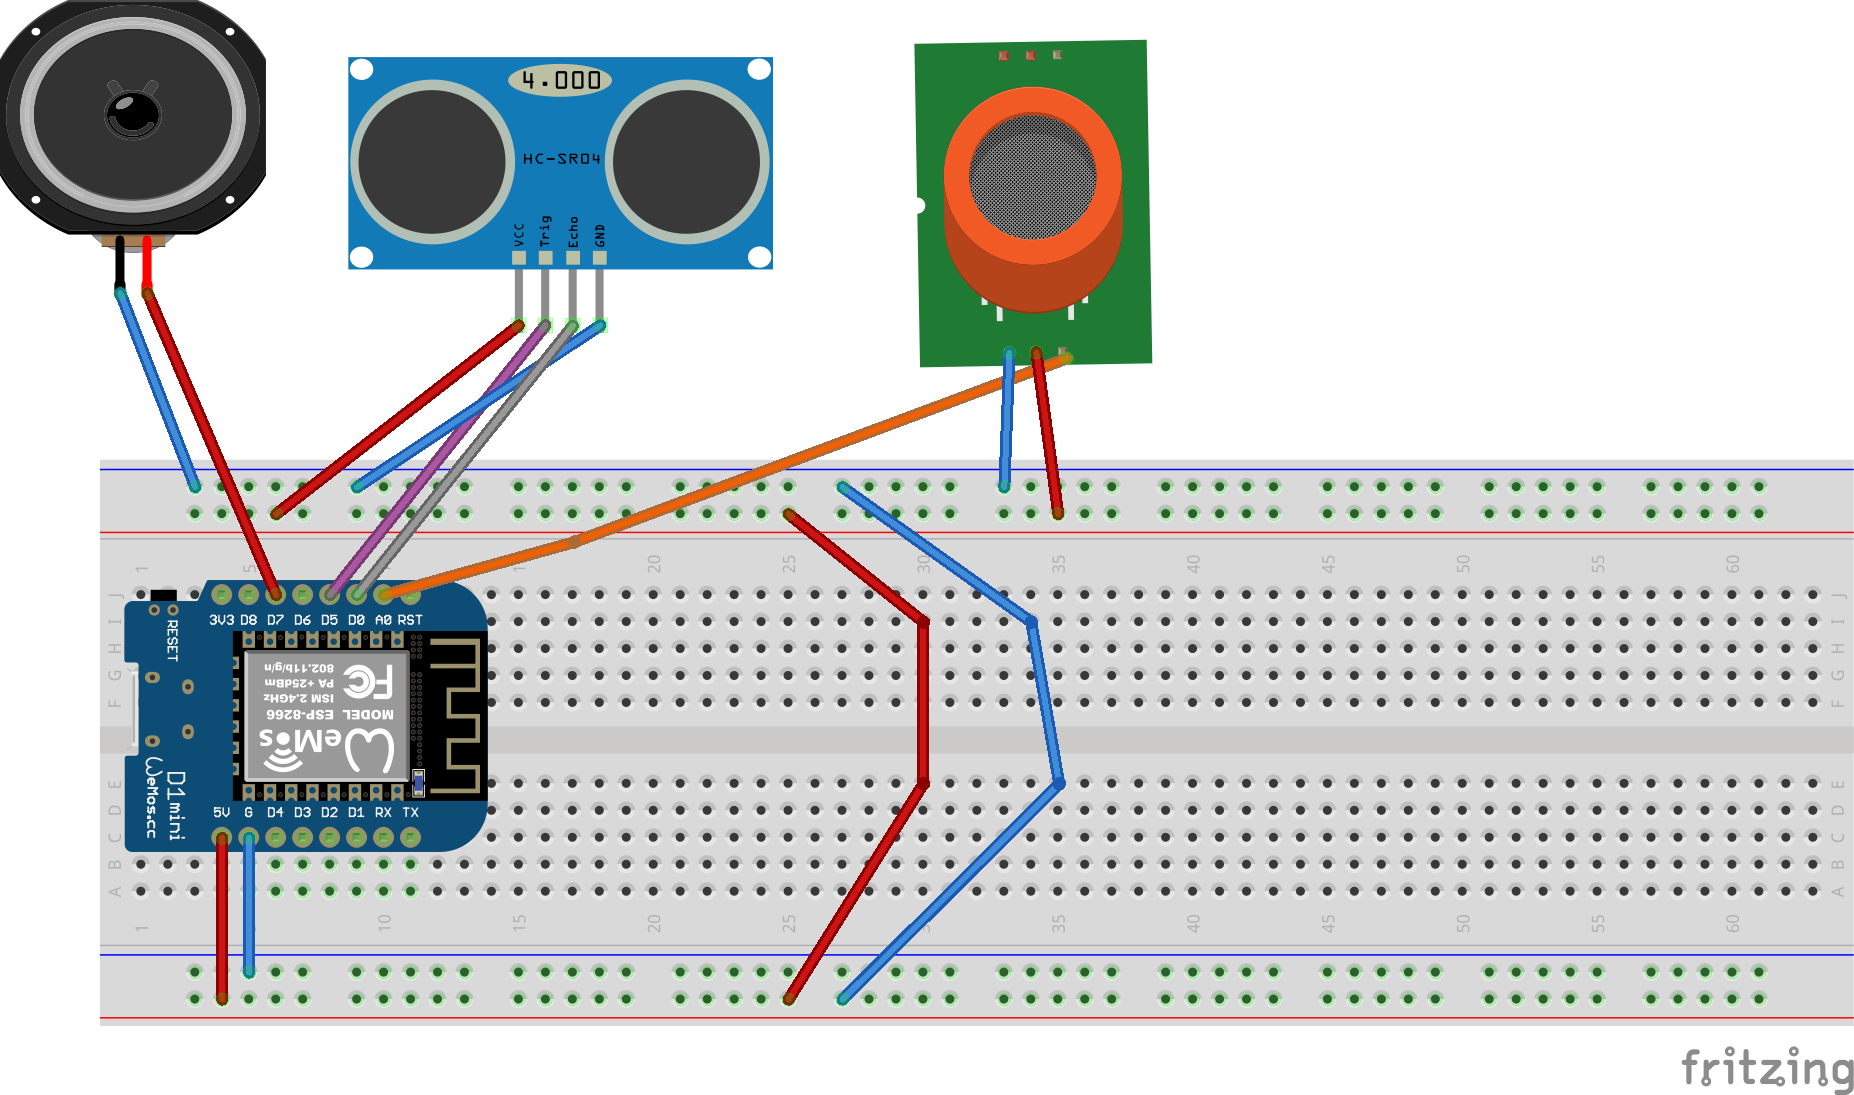
HC-SR04 Ultrasonic Sensor
- VCC -> V+
- Trig -> D5
- Echo -> D0
- Gnd -> G(-)
mq3 alcohol sensor
- A0 -> A0
- GND -> G(-)
- VCC -> V+
Speaker - Connect to the Amplifier
- + -> GND
- - -> OUT
LM386 Amplifier
- GND -> G
- GND -> G
- IN -> V+
- VCC -> D7
Arduino IDE

Setting Up Your Code
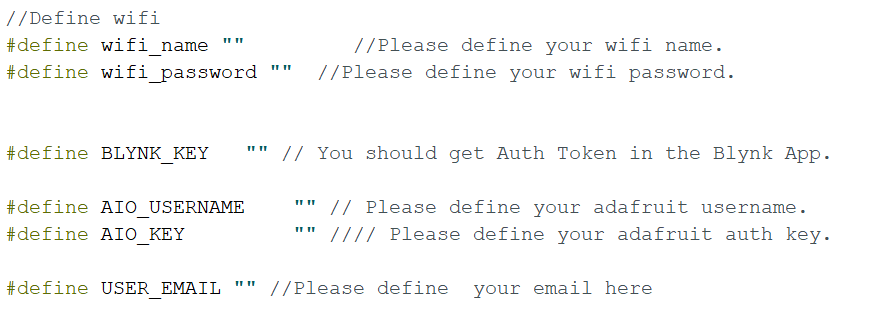

After you download the project, you'll have 3 tabs.
Go to config.h file
wifi_name - The wifi name your computer is conected to .
wifi_password - The wifi npassword your computer is conected to .
BLYNK_KEY - your Blynk Token (from step 4 stage 5).
AIO_USERNAME - Your Adafruit IO user name ( from step 3 stage 6).
AIO_KEY - Your Adafruit IO key ( from step 3 stage 6).
USER_EMAIL - enter your email here to recive alarets.
Downloads
Adafruit IO

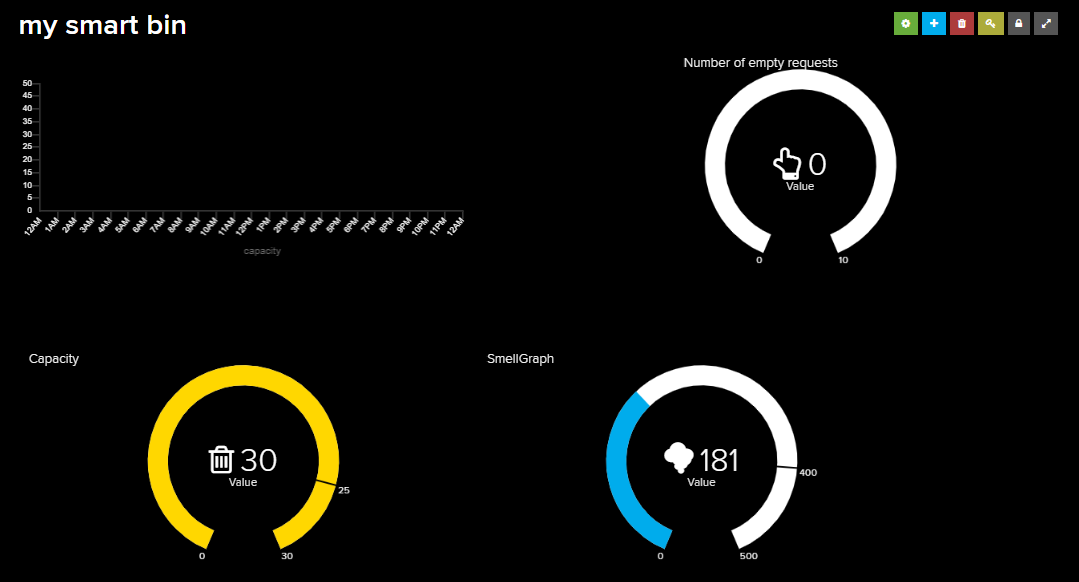

- Go to Adafruit IO website https://io.adafruit.com/
- Log in - If you don't have an account yet, sign up. If you have, please log in.
- Feeds - Go to feeds, and create 3 new feeds: Bin capacity, Bin smell, and speaker
- Dashboard Go to dashboard and create new dashboard "My smart bin"
- Blocks - After you create the dashboard, click on it. Your dashboard is empty, go to "Create a new block" (the blue button on with [+] on it ) and 3 graphs, for each graph choose a different feed from step 3.
- YOUR AIO KEY - click on the "YOUR AIO KEY" button ( yellow with a key on it ), a new window will open with your Username, and Active Key. Please write down the username and Active key, we'll need it later to compile the code.
Blynk
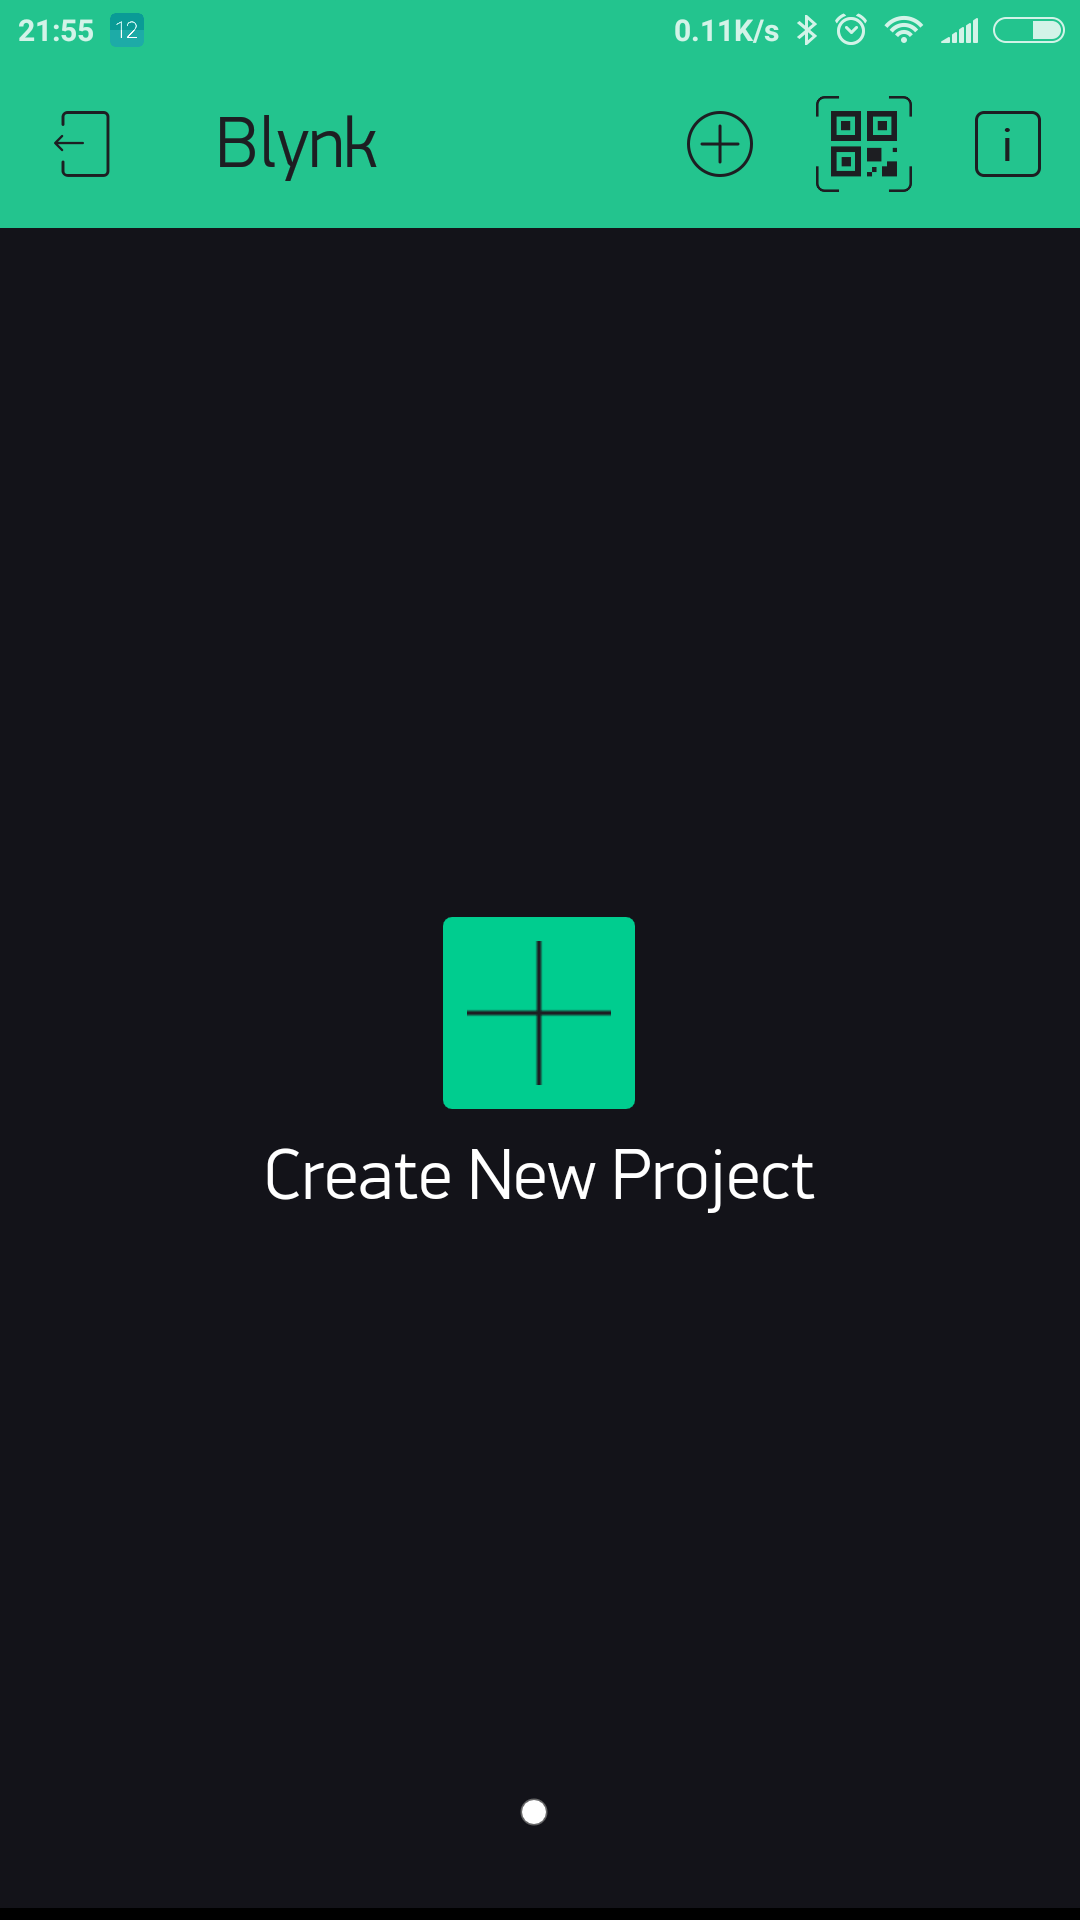
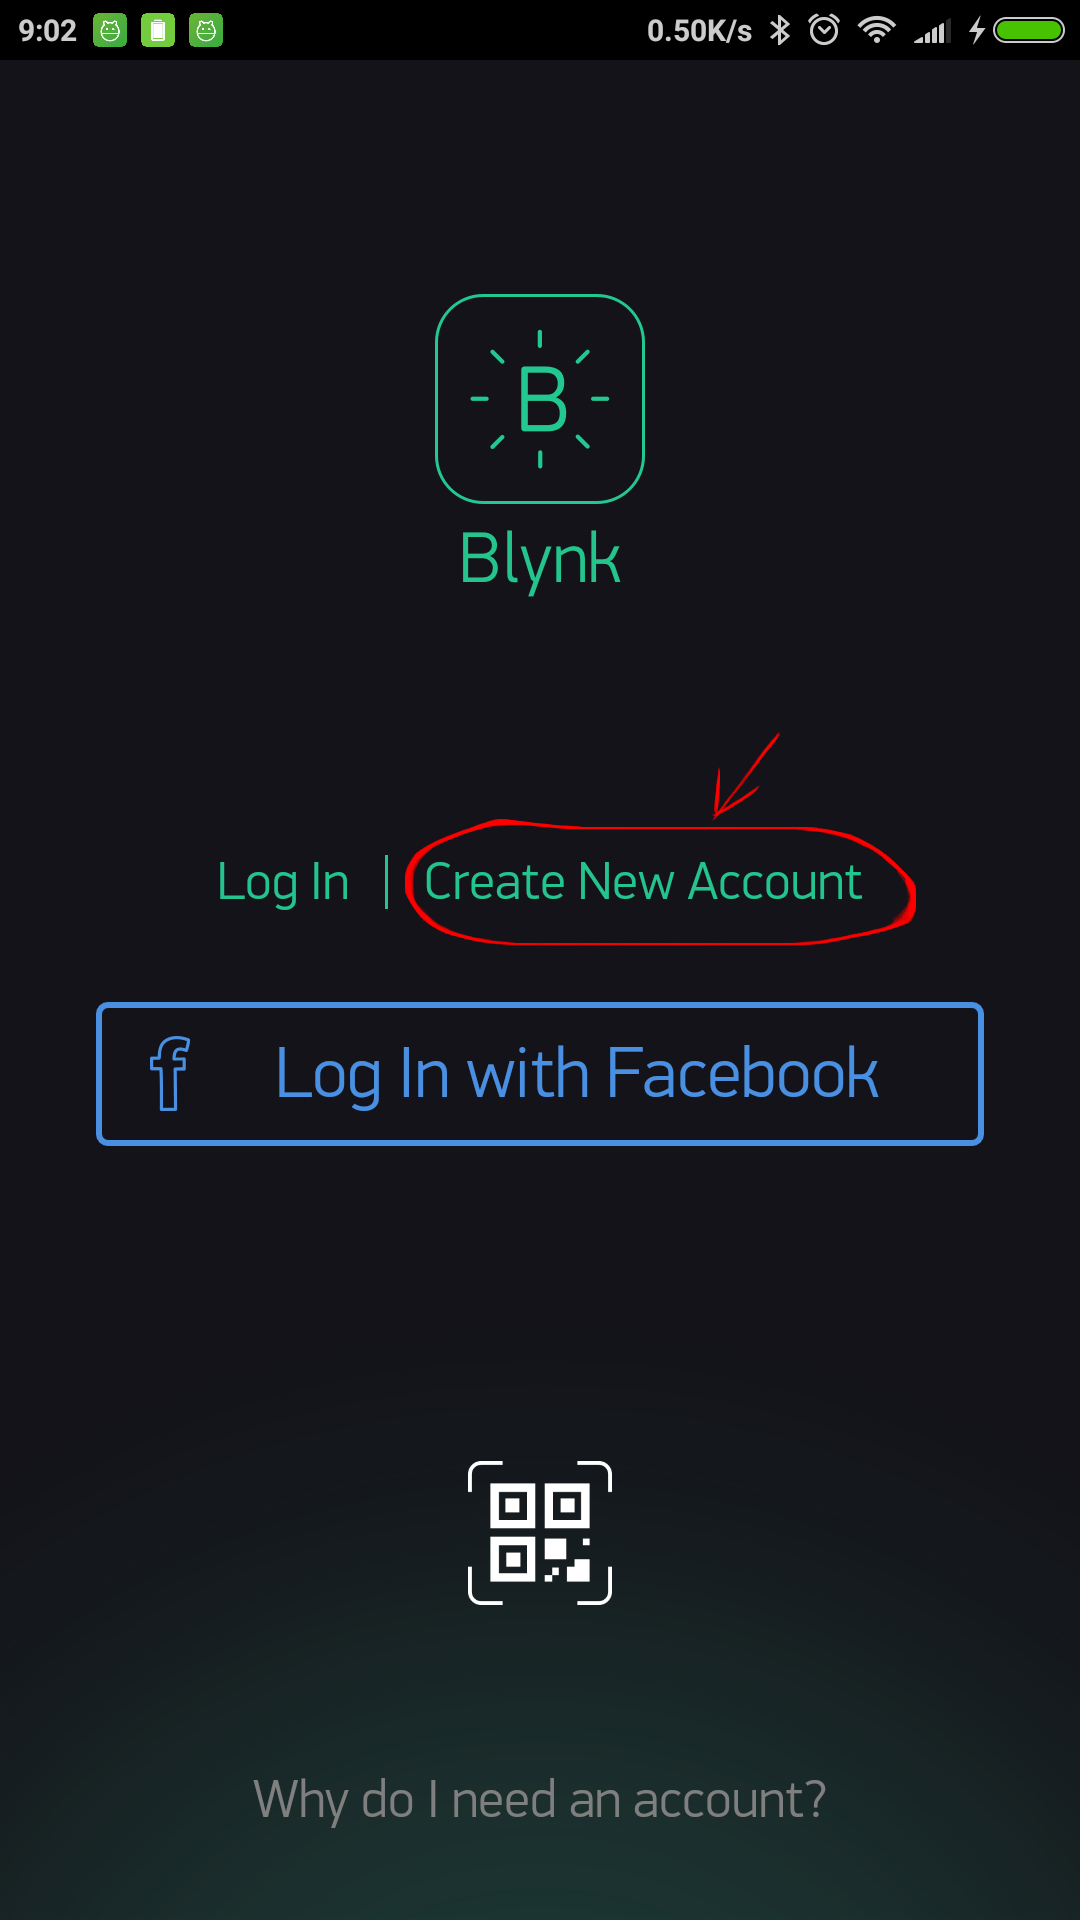
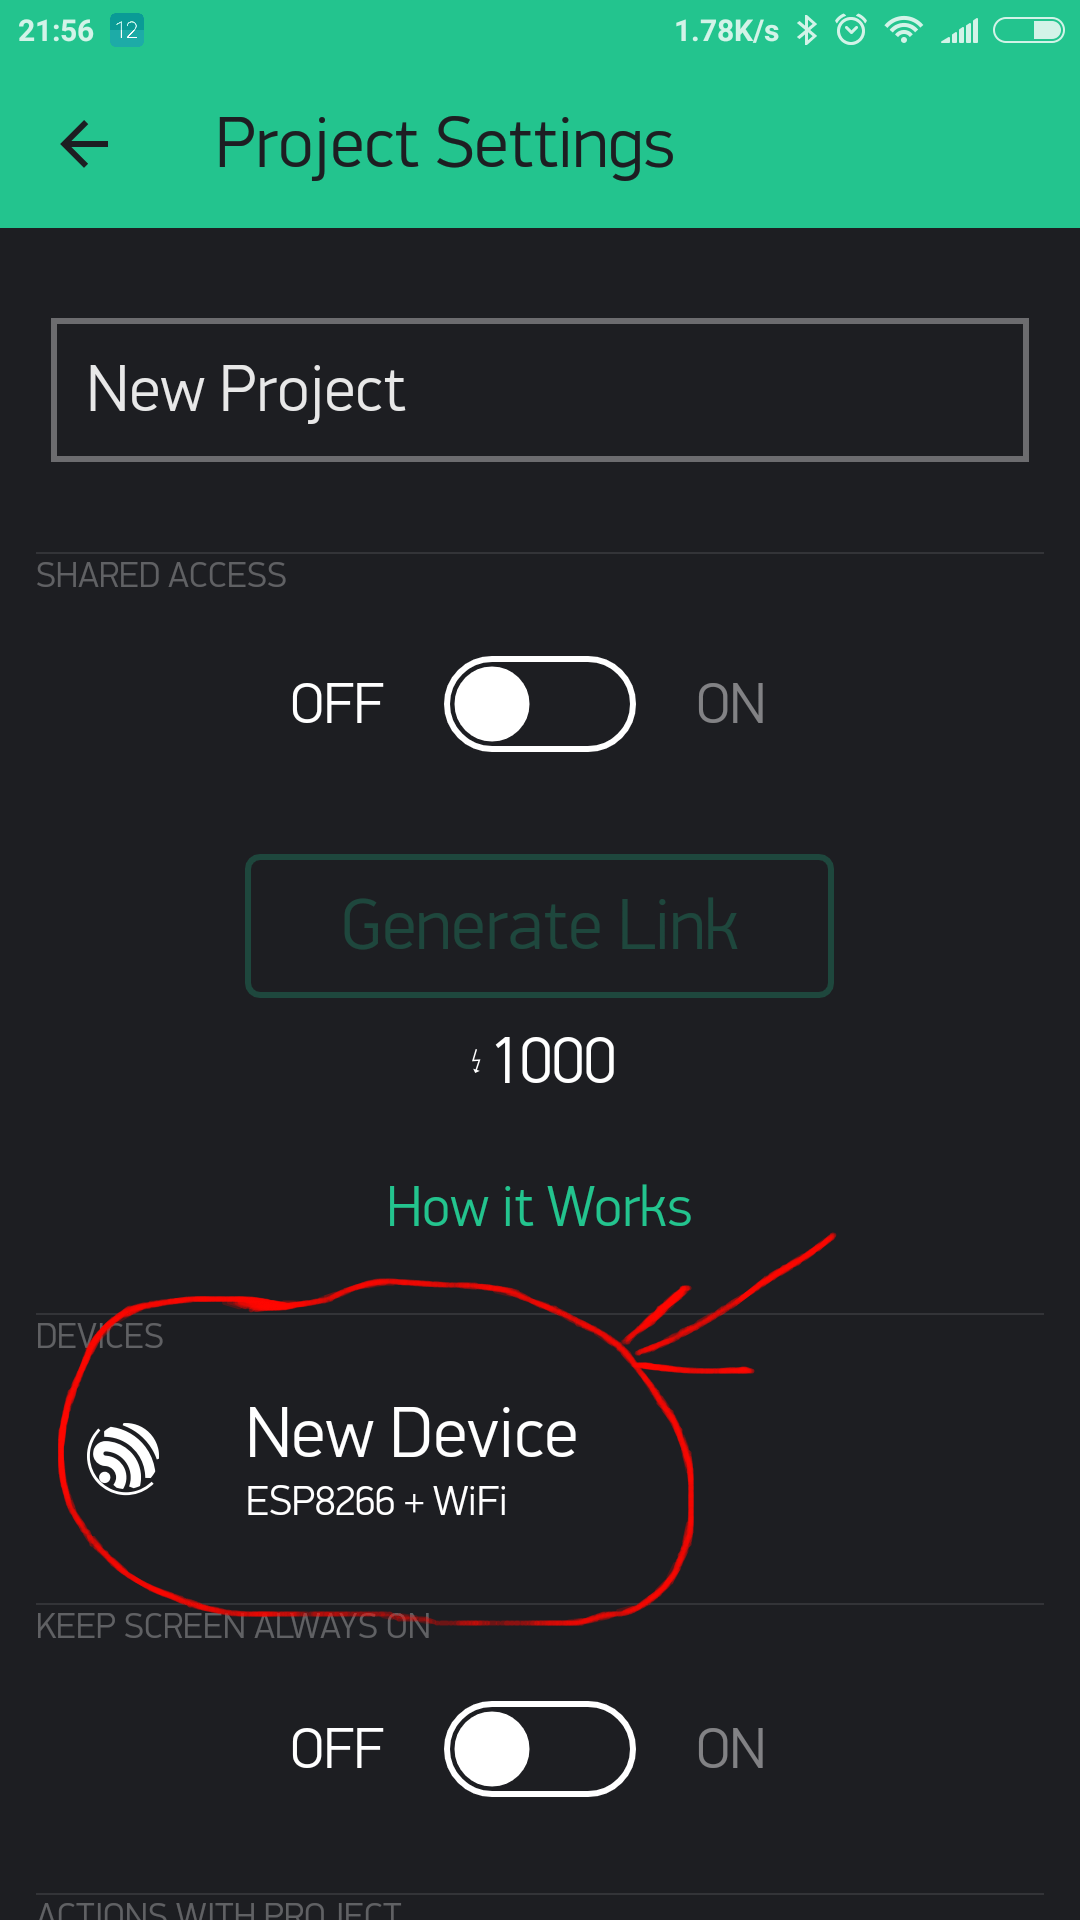
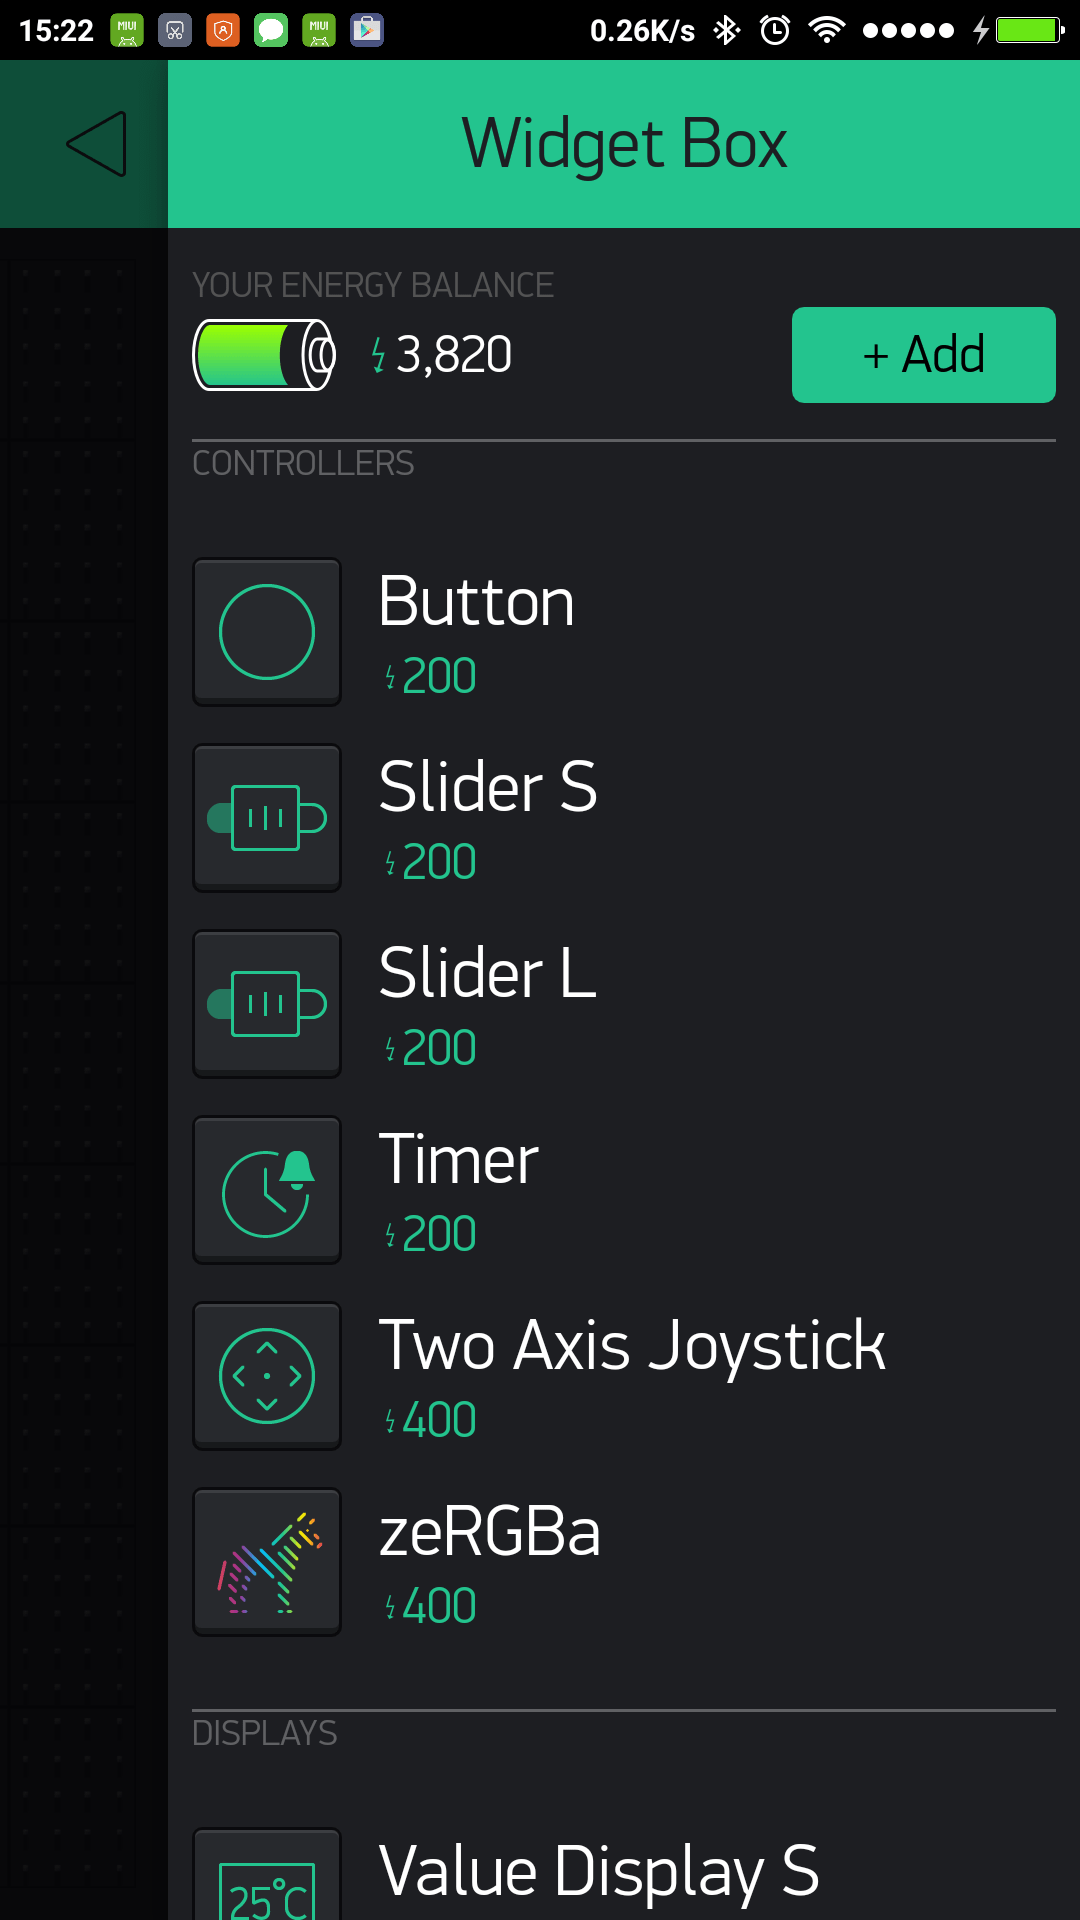
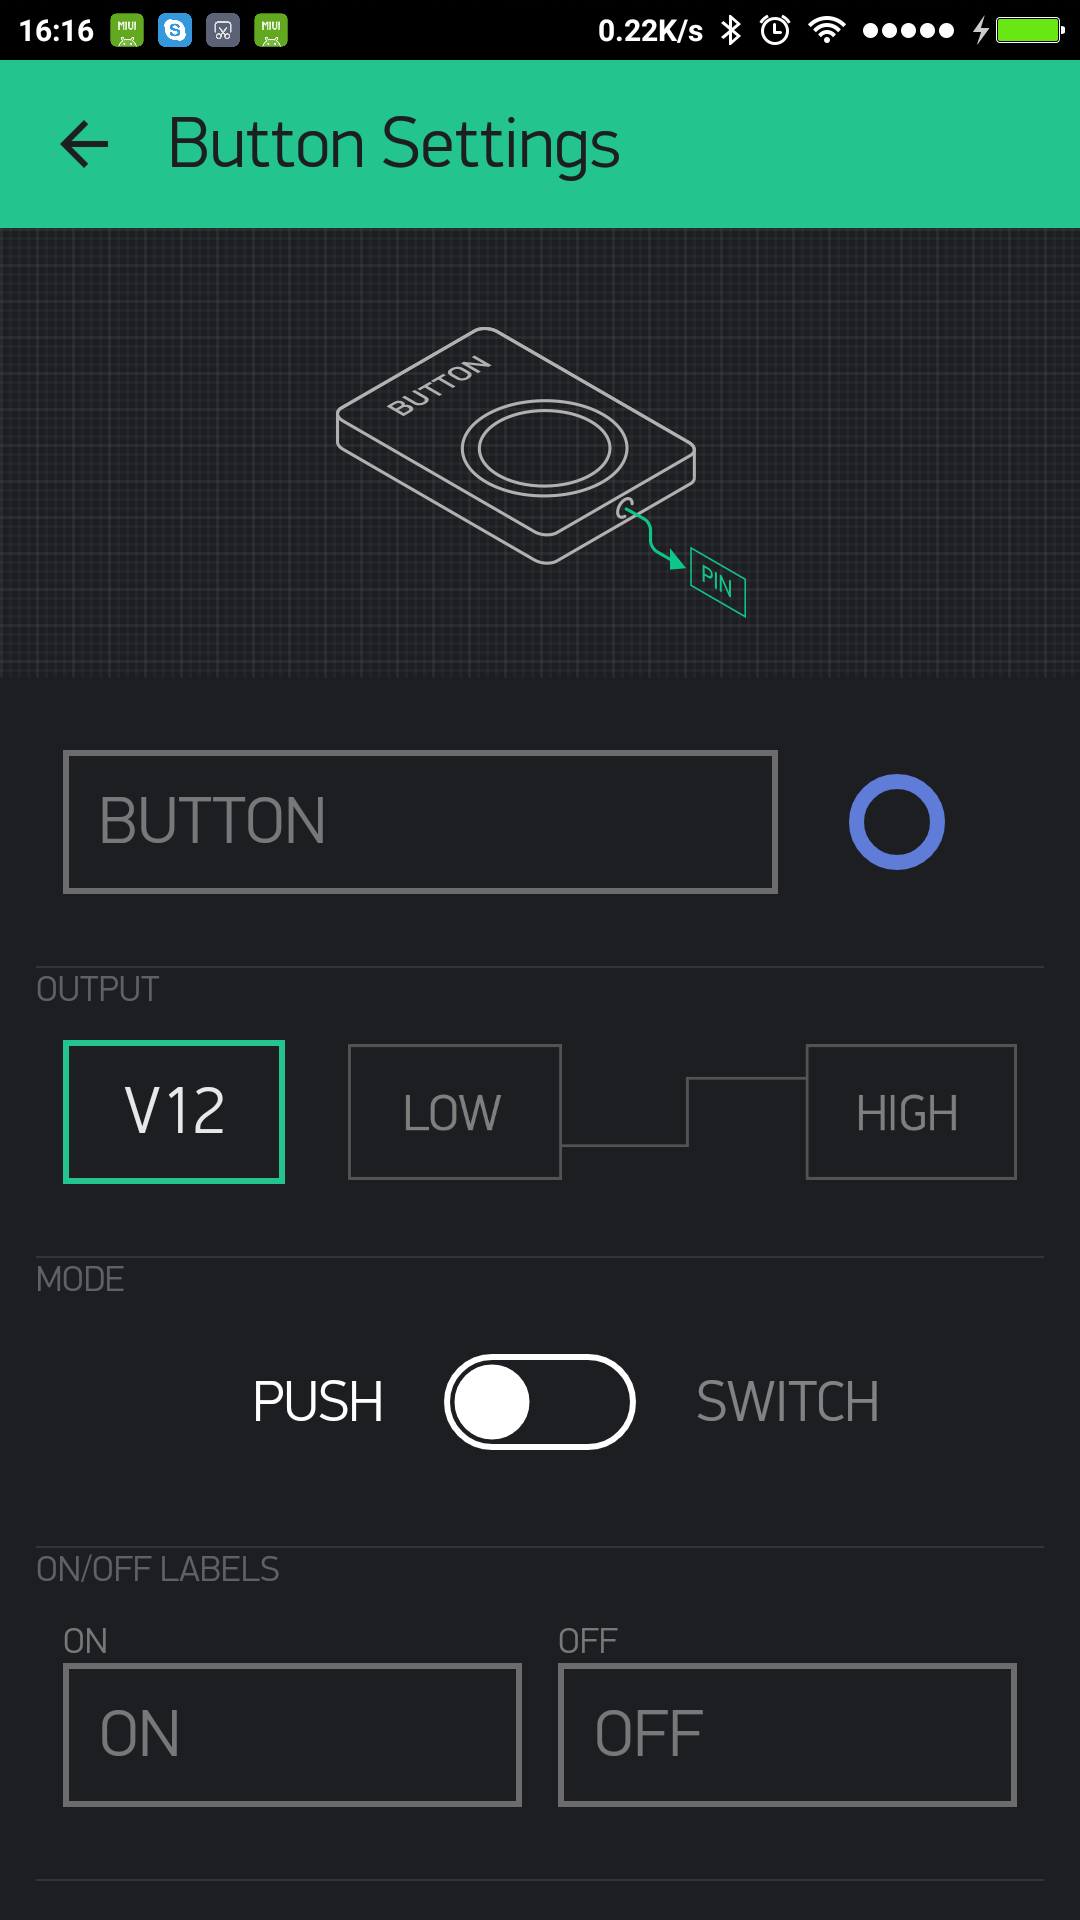
- Download the Blynk app to your phone from App Store\Google play.
- Create a Blynk Account - After you download the Blynk App, you’ll need to create a New Blynk account. This account is separate from the accounts used for the Blynk Forums, in case you already have one.
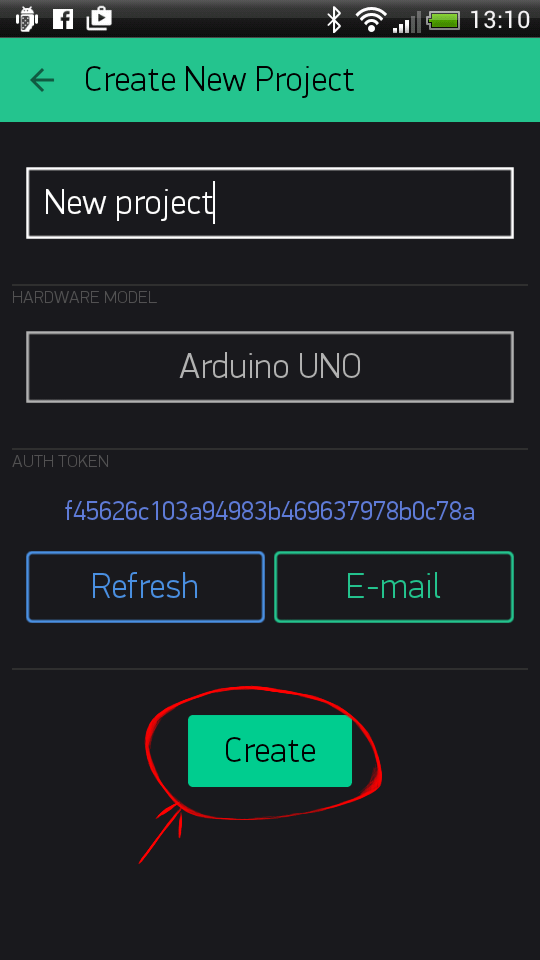
- Create a New Project - After you’ve successfully logged into your account, start by creating a new project.
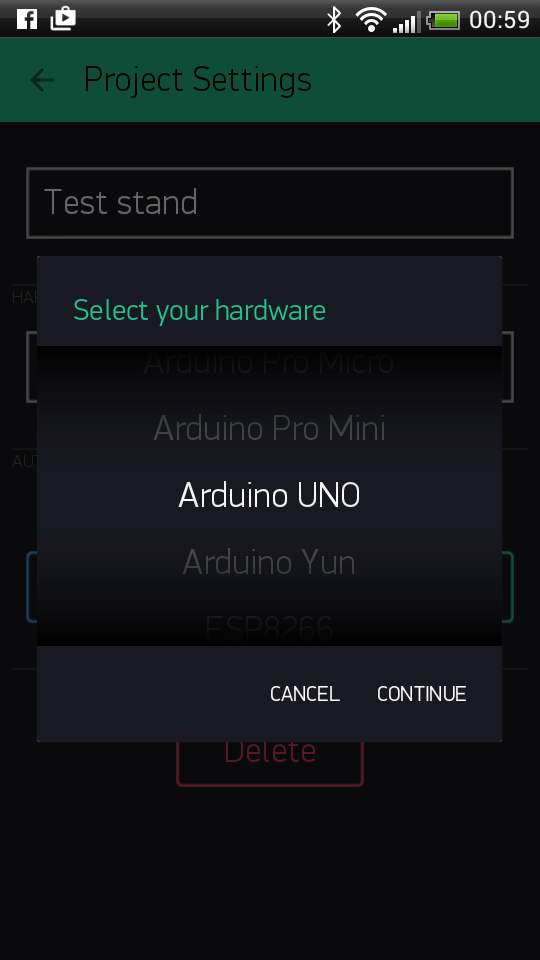
- Choose Your Hardware - Select the hardware model you will use. on our project, we used ESP8266.
- Auth Token - is a unique identifier that is needed to connect your hardware to your smartphone. Every new project you create will have its own Auth Token. You’ll get Auth Token automatically on your email after project creation. You can also copy it manually. Click on devices section and selected required device, and you’ll see token (Please write it down, we will need it later on the code).
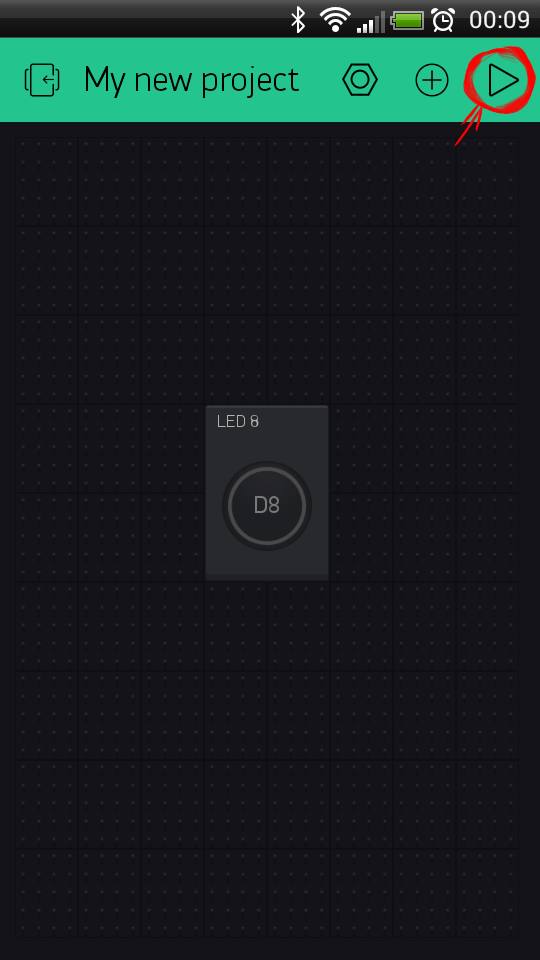
- Add a Widget - Your project canvas is empty, go to Widget Box and add Button, Notification, and Email.
- Button settings - The most important parameter to set is PIN. The list of pins reflects physical pins defined by your hardware. If your SPEAKER is connected to Digital Pin 7 - then select D7 (D - stands for Digital). Also, please select the PUSH MODE.
- Your Blynk Project is ready to run. BUT before you click play, follow the next steps.
- For more information please go to Blynk guide in here.
Connect Adafruit to Google Sheets Using IFTTT
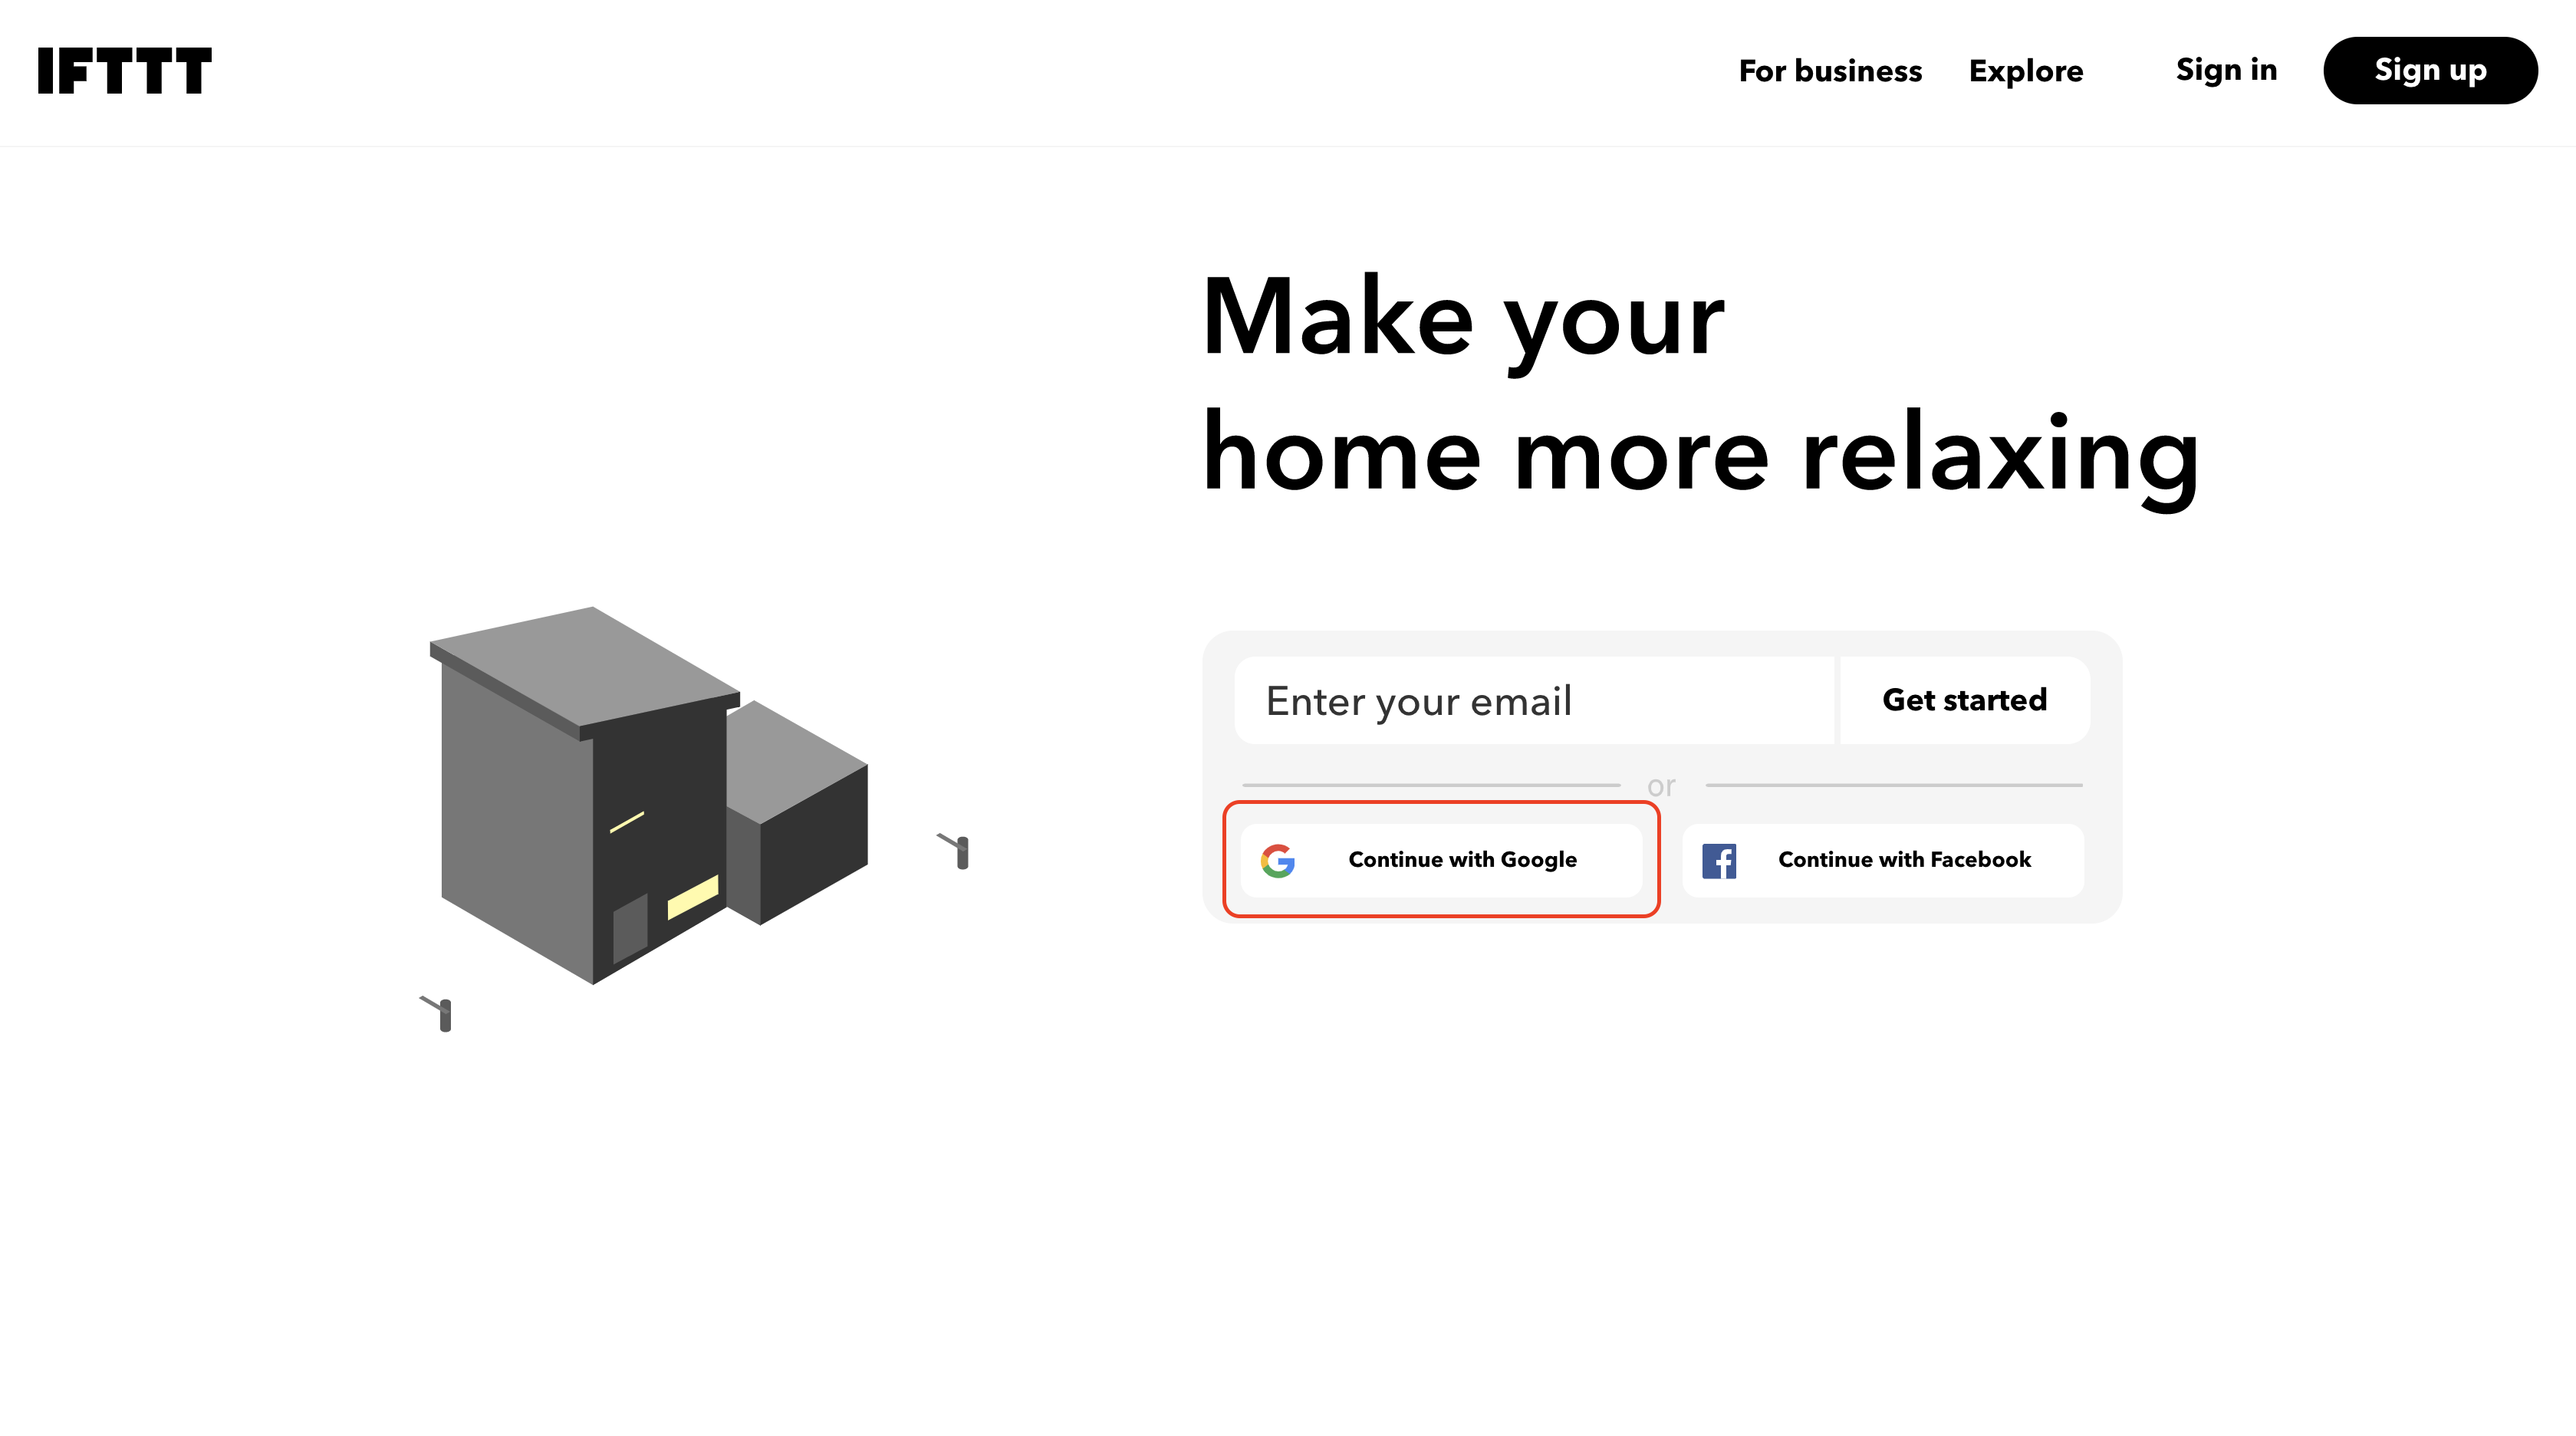
IFTTT
"If This Then That, also known as IFTTT, is a free web-based service that creates chains of simple conditional statements, called applets. An applet is triggered by changes that occur within other web services such as Gmail, Facebook, Telegram, Instagram, or Pinterest."
We will use this service to create applets, triggered by changes that occur within Adafruit, and to update a Google Sheet using multiple functions, an example of the information you can gather with the data we received and by that create more information about our trash bin routine.
1. Go to the IFTTT website and click continue with Google.
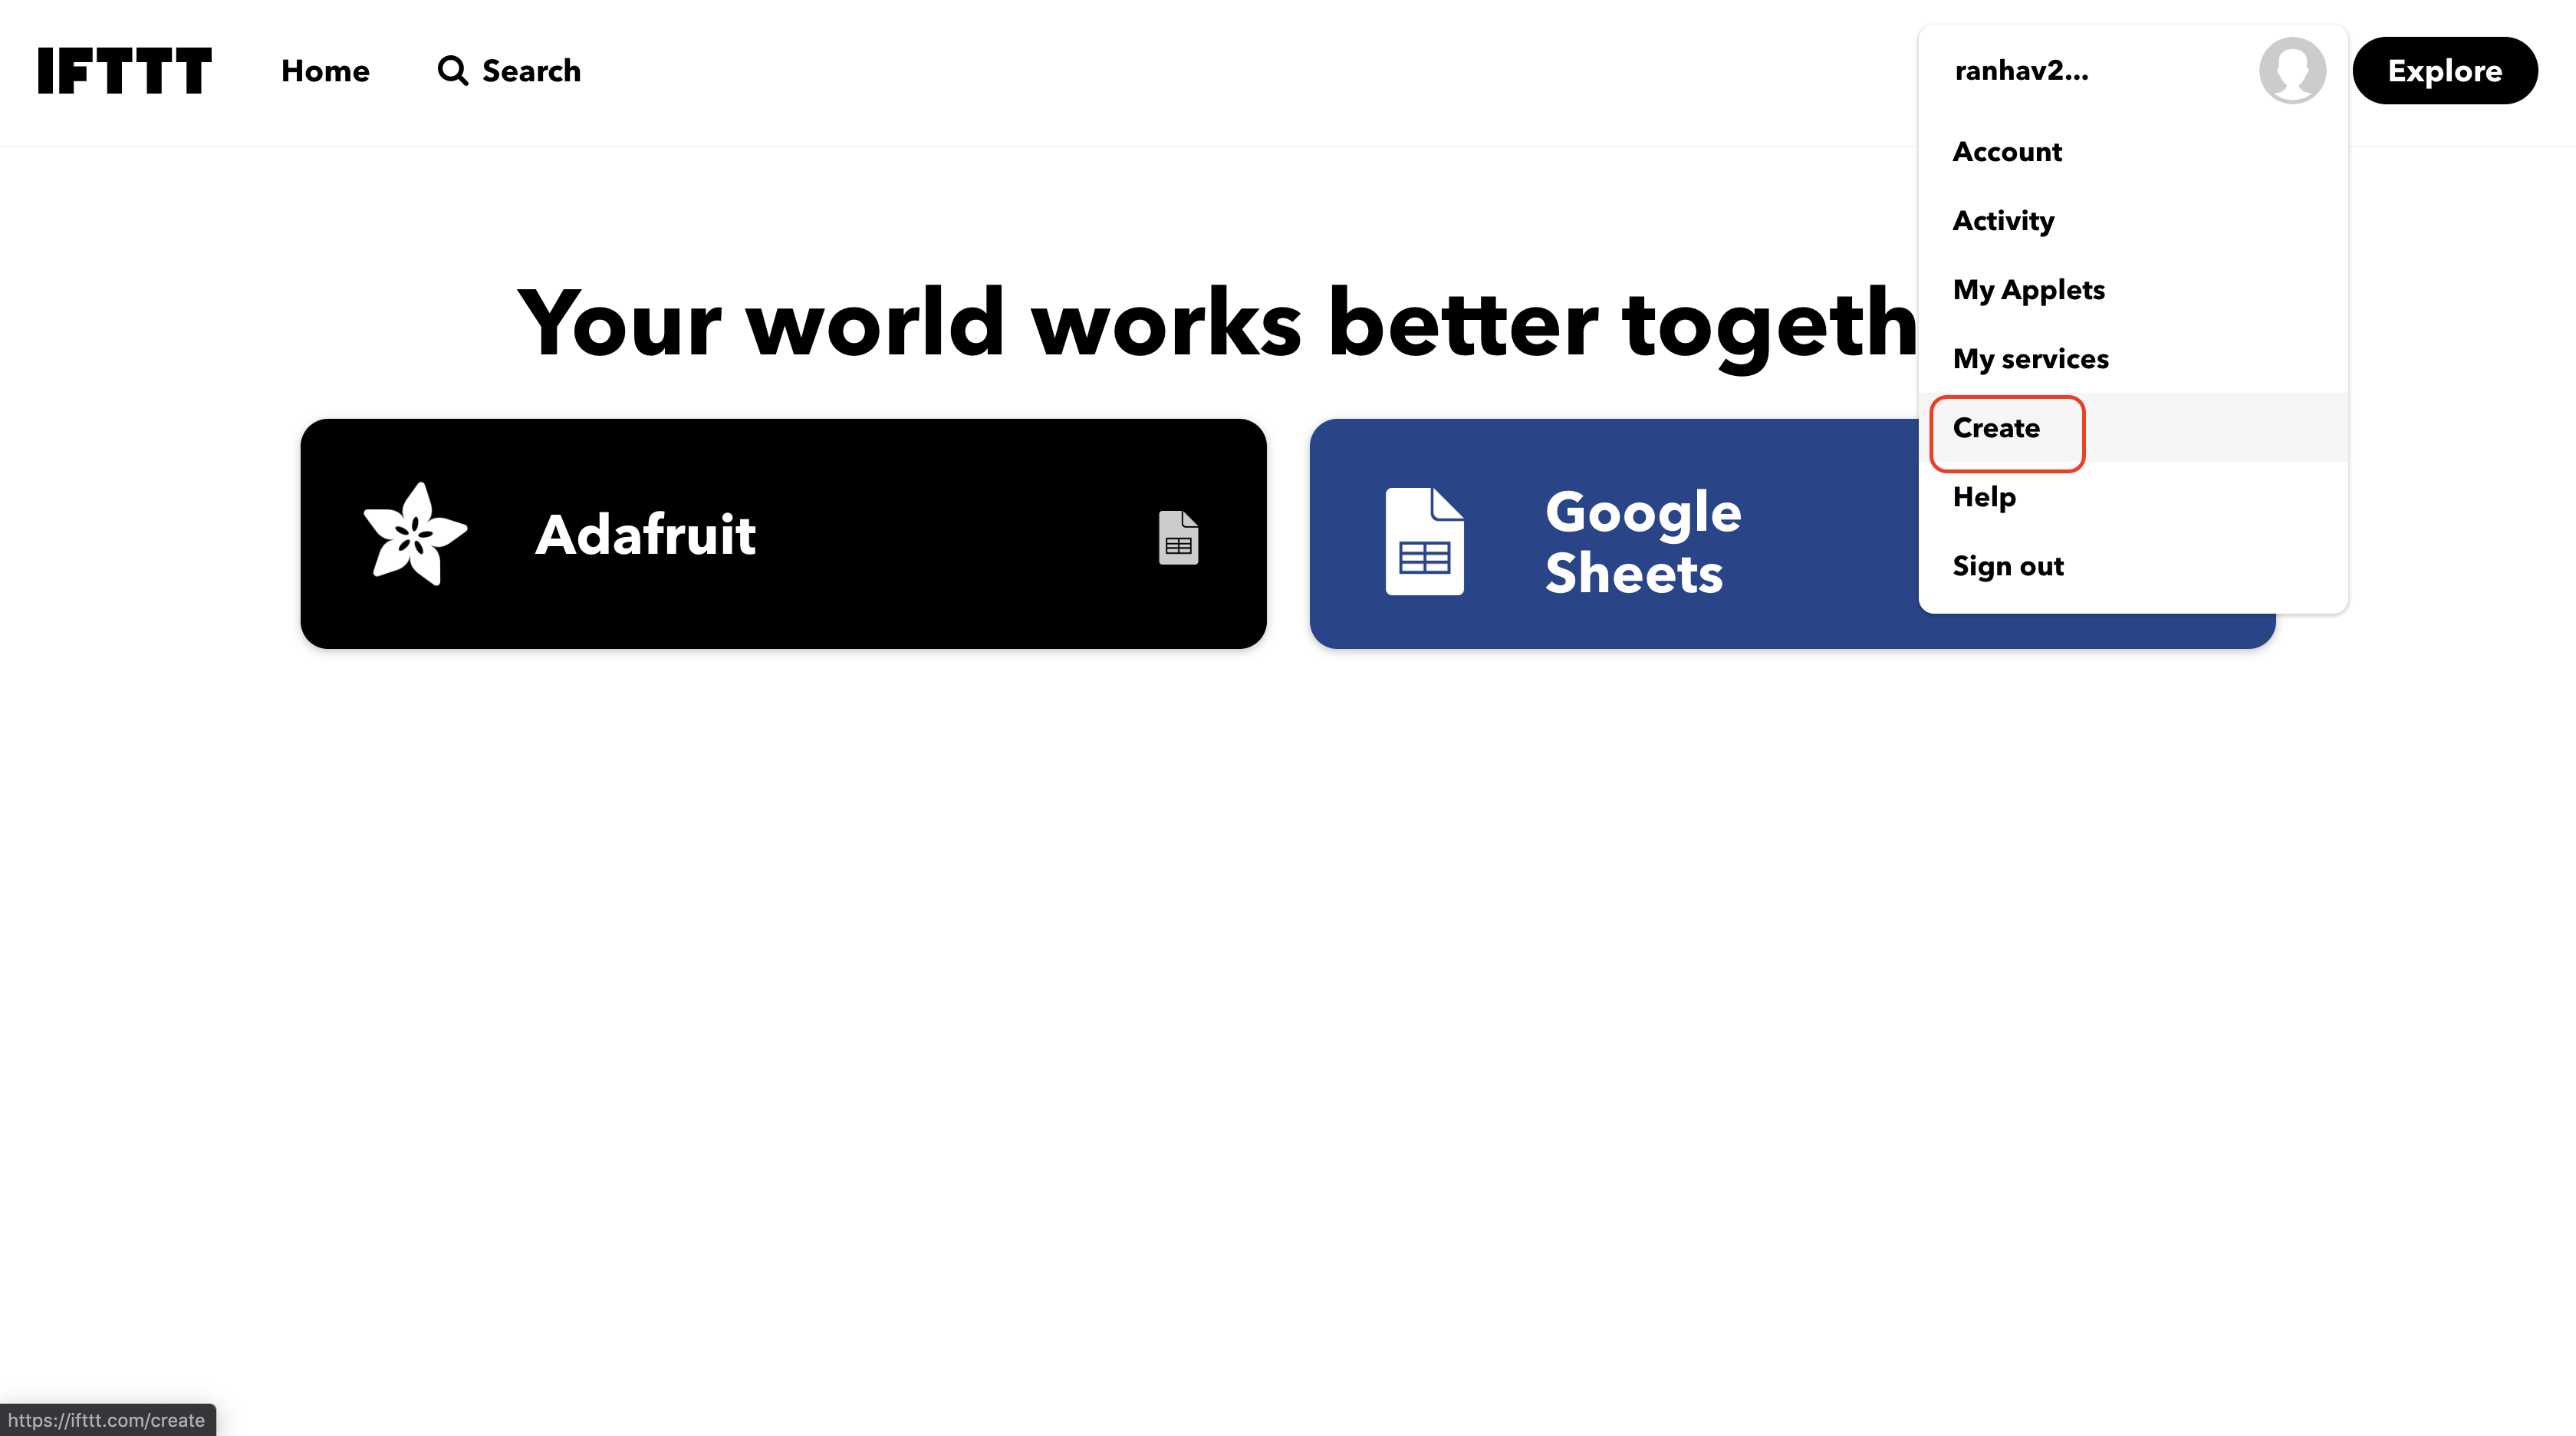
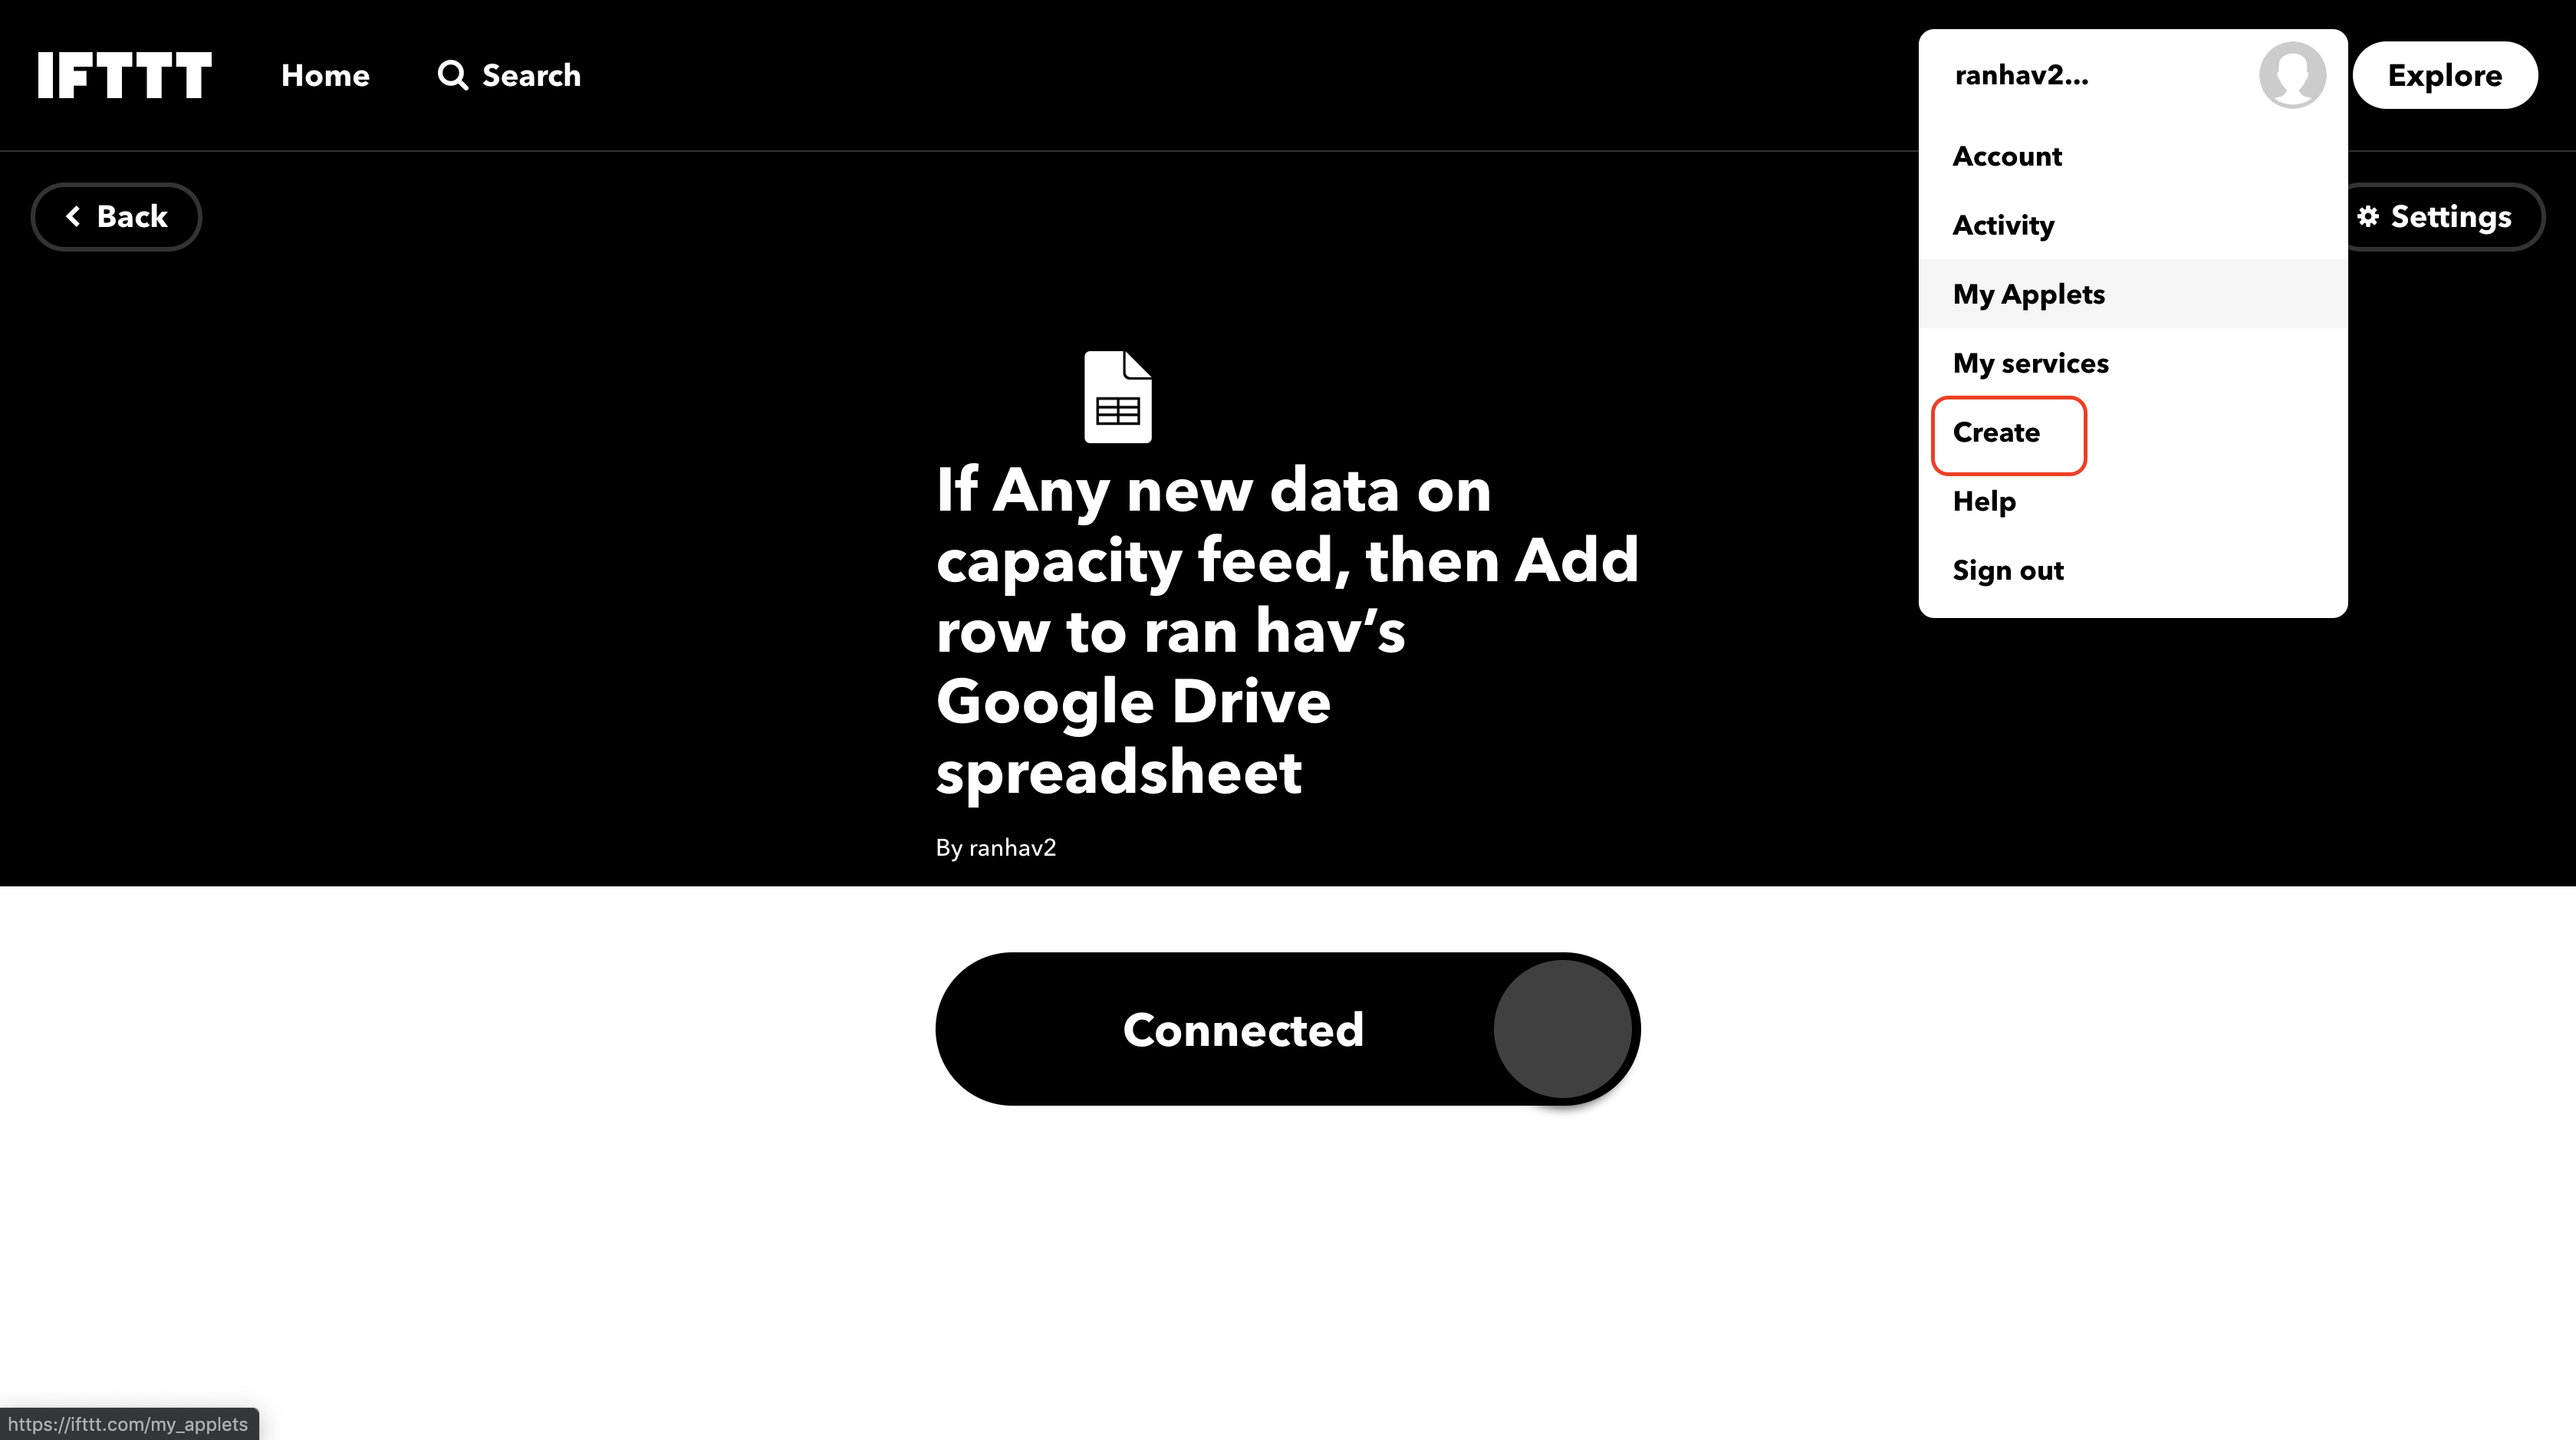
2. On the top right corner click on the "Create" button.
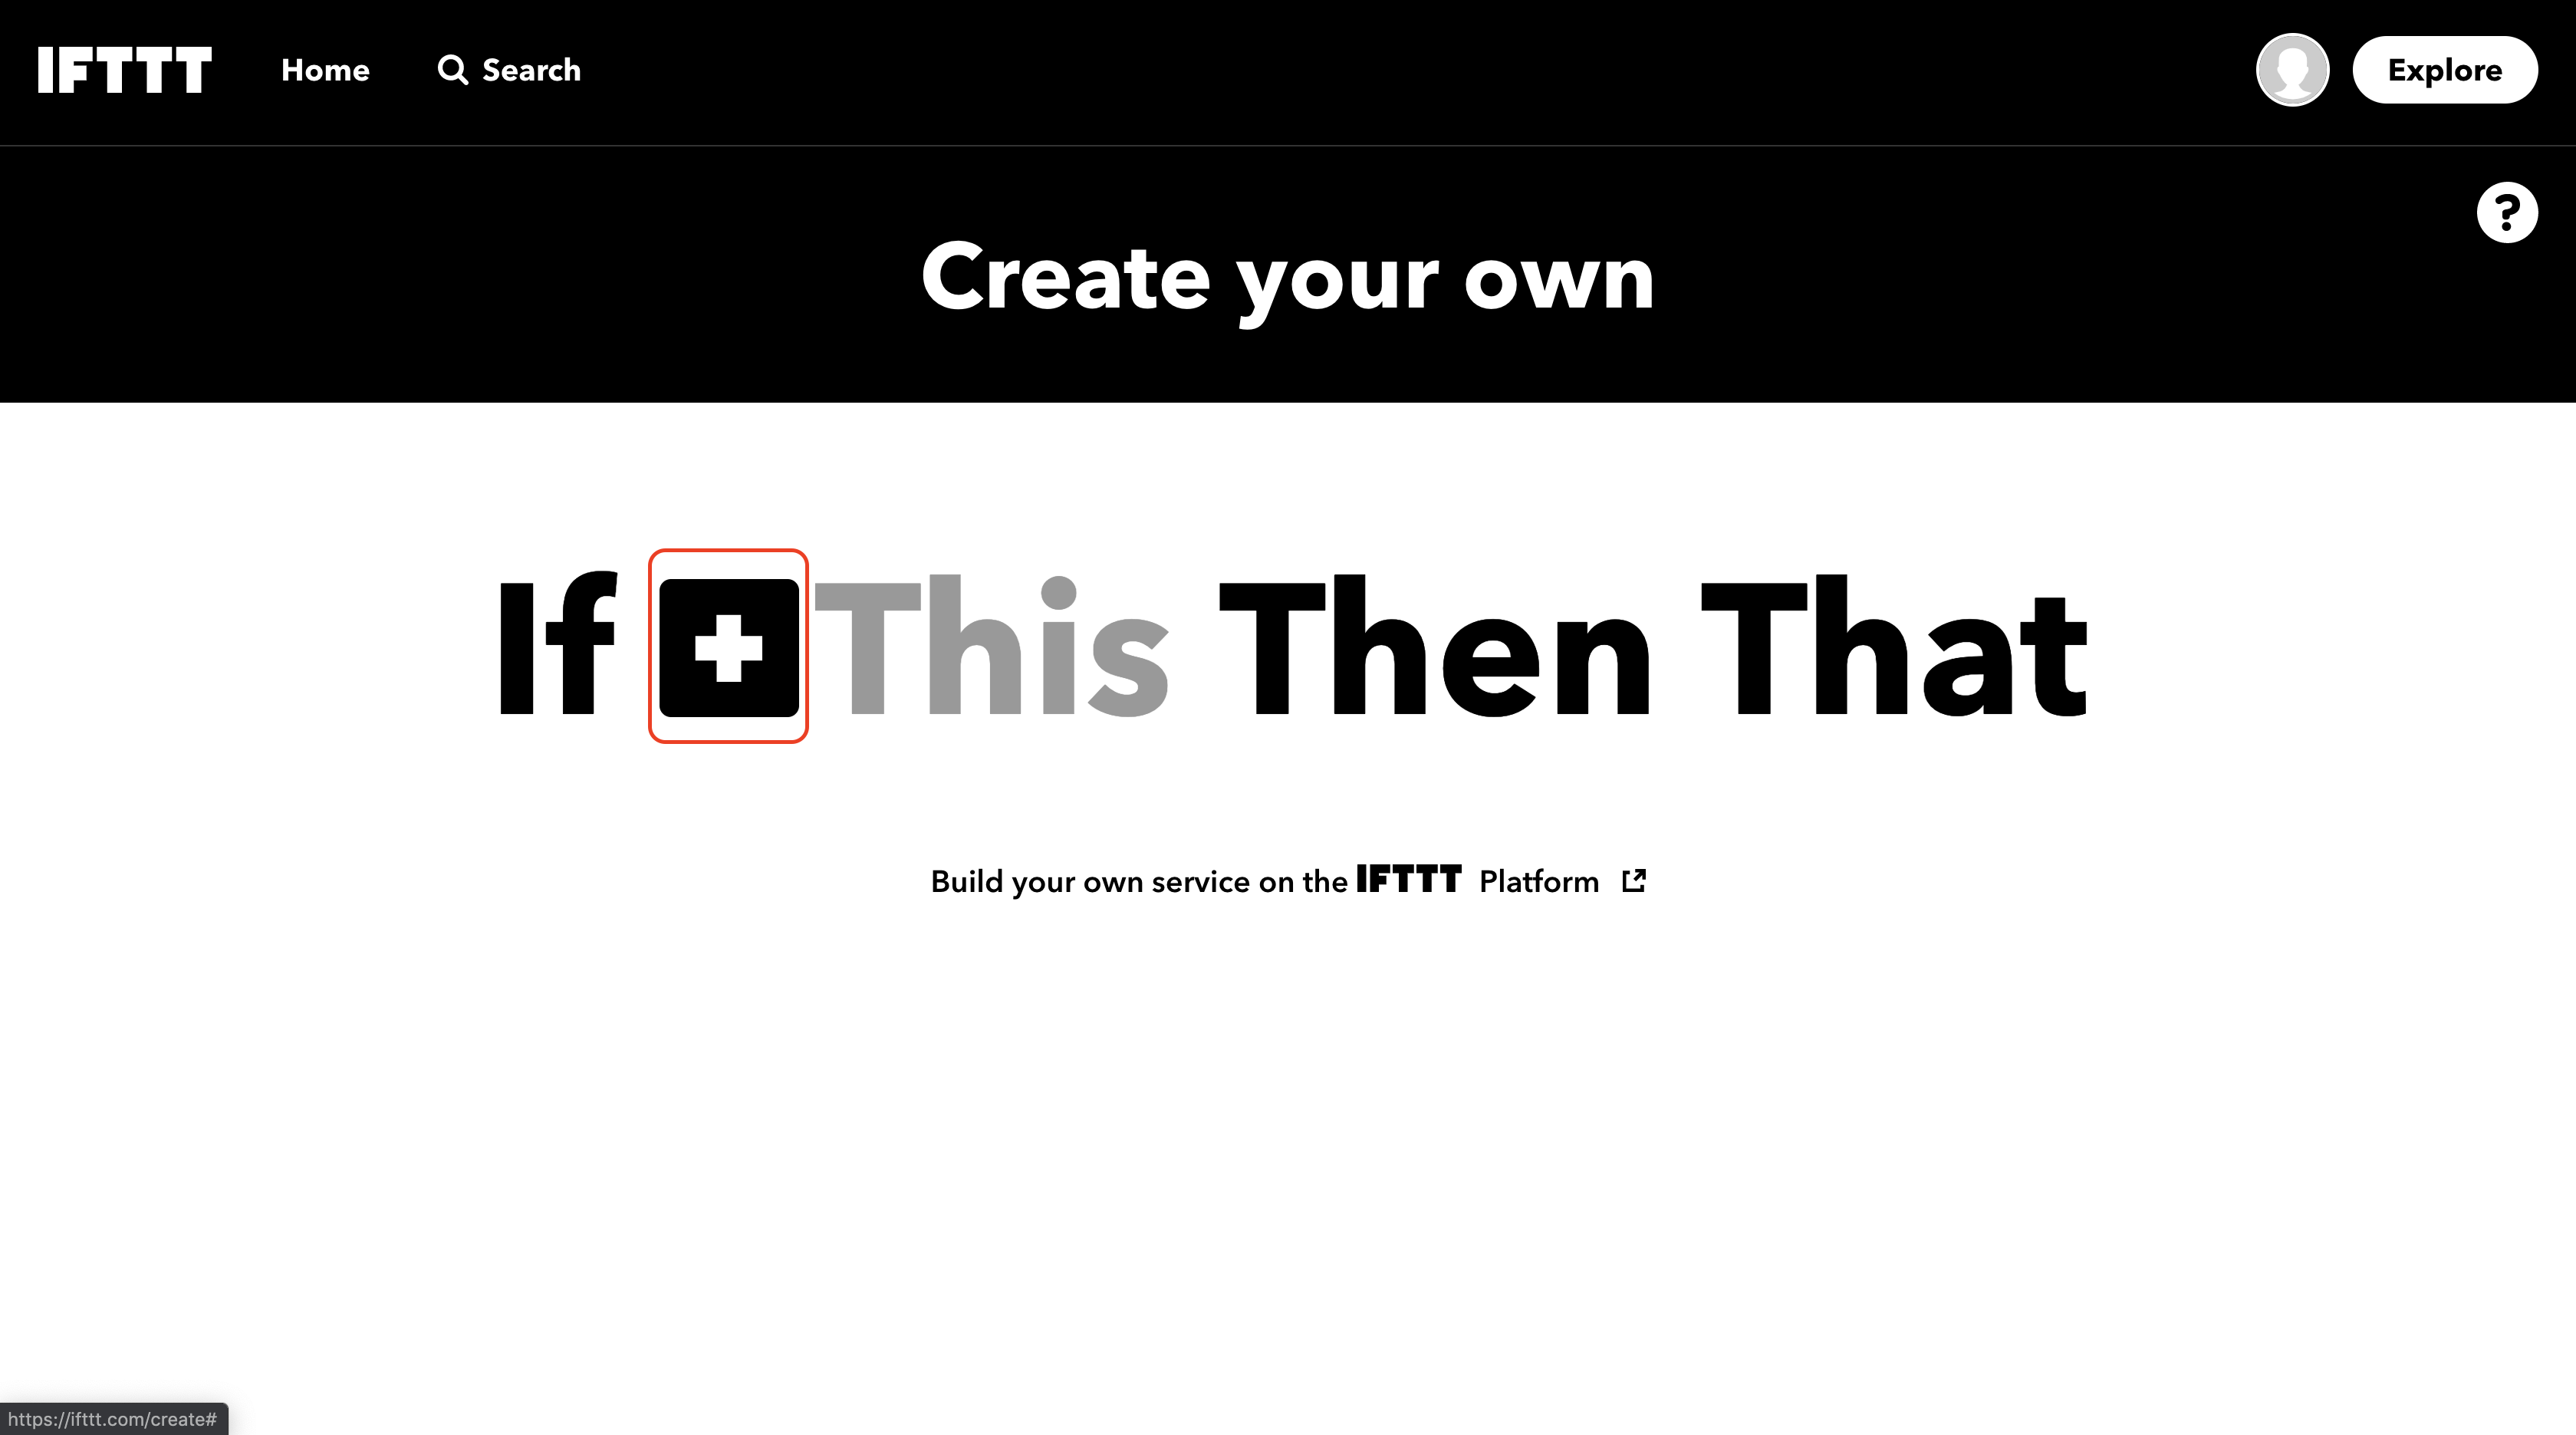
3. Choose an if statement by clicking on the black square with a white plus sign in it.
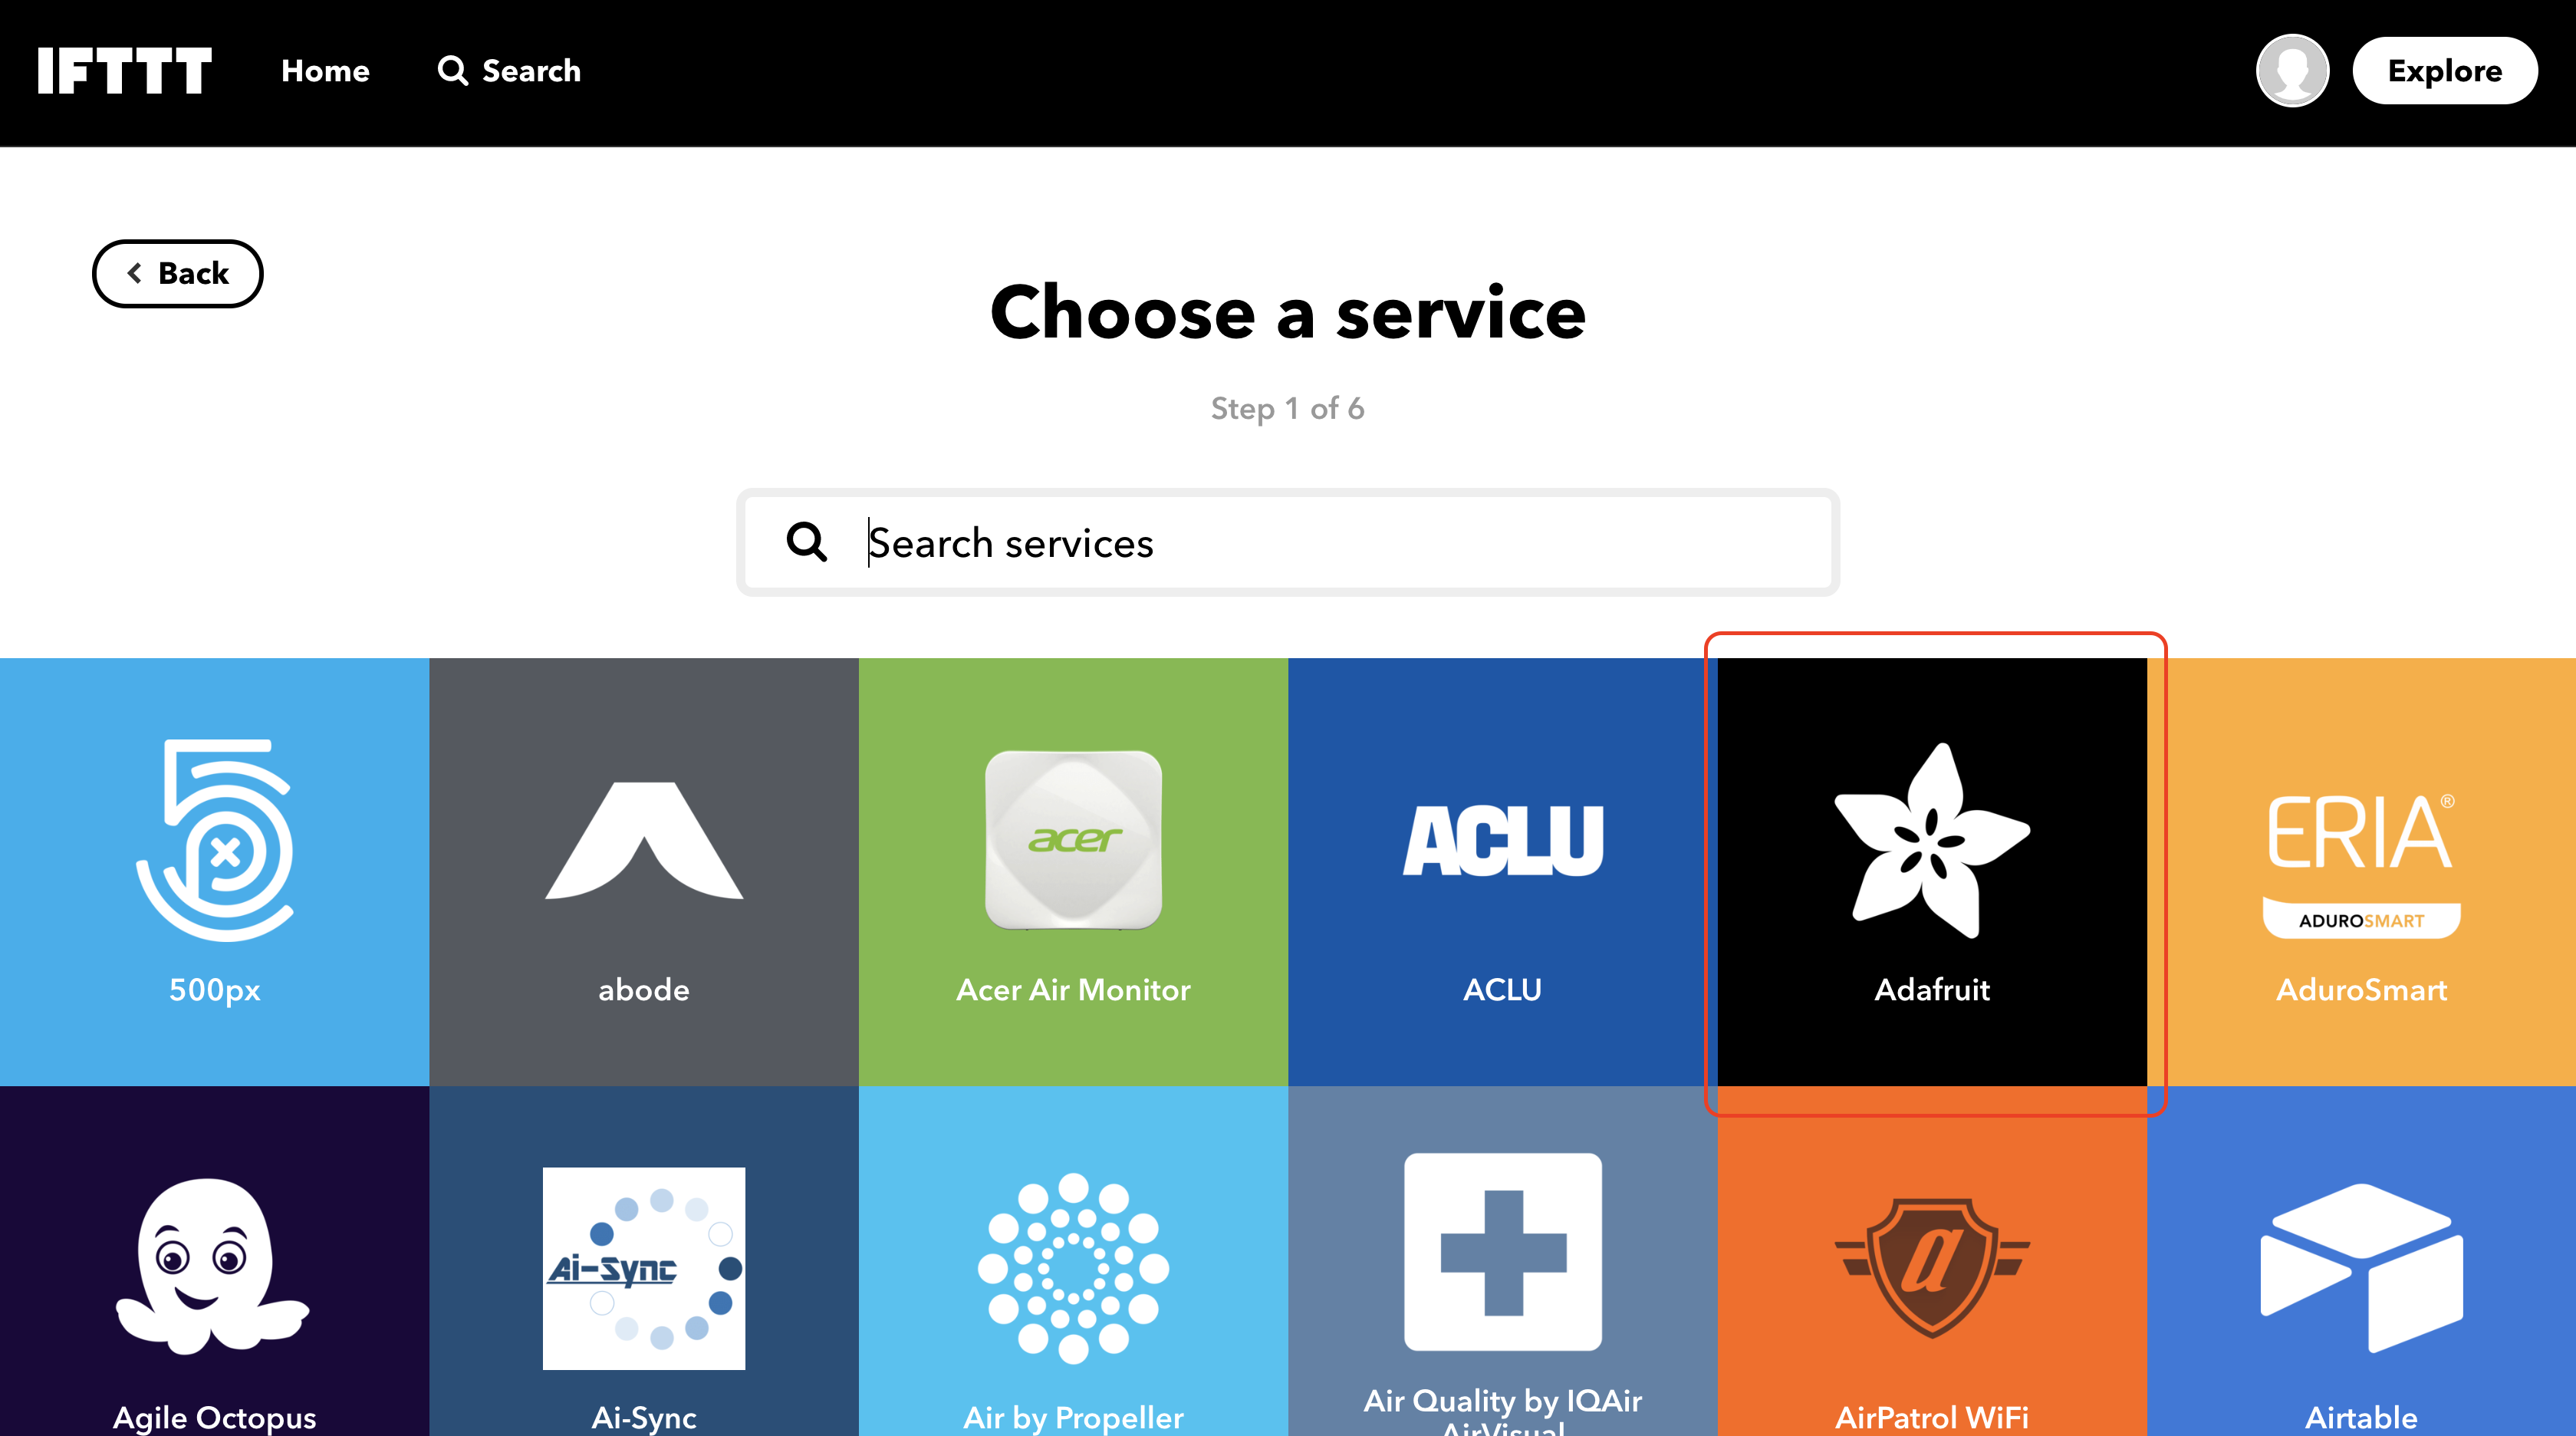
4. Choose the Adafruit service.
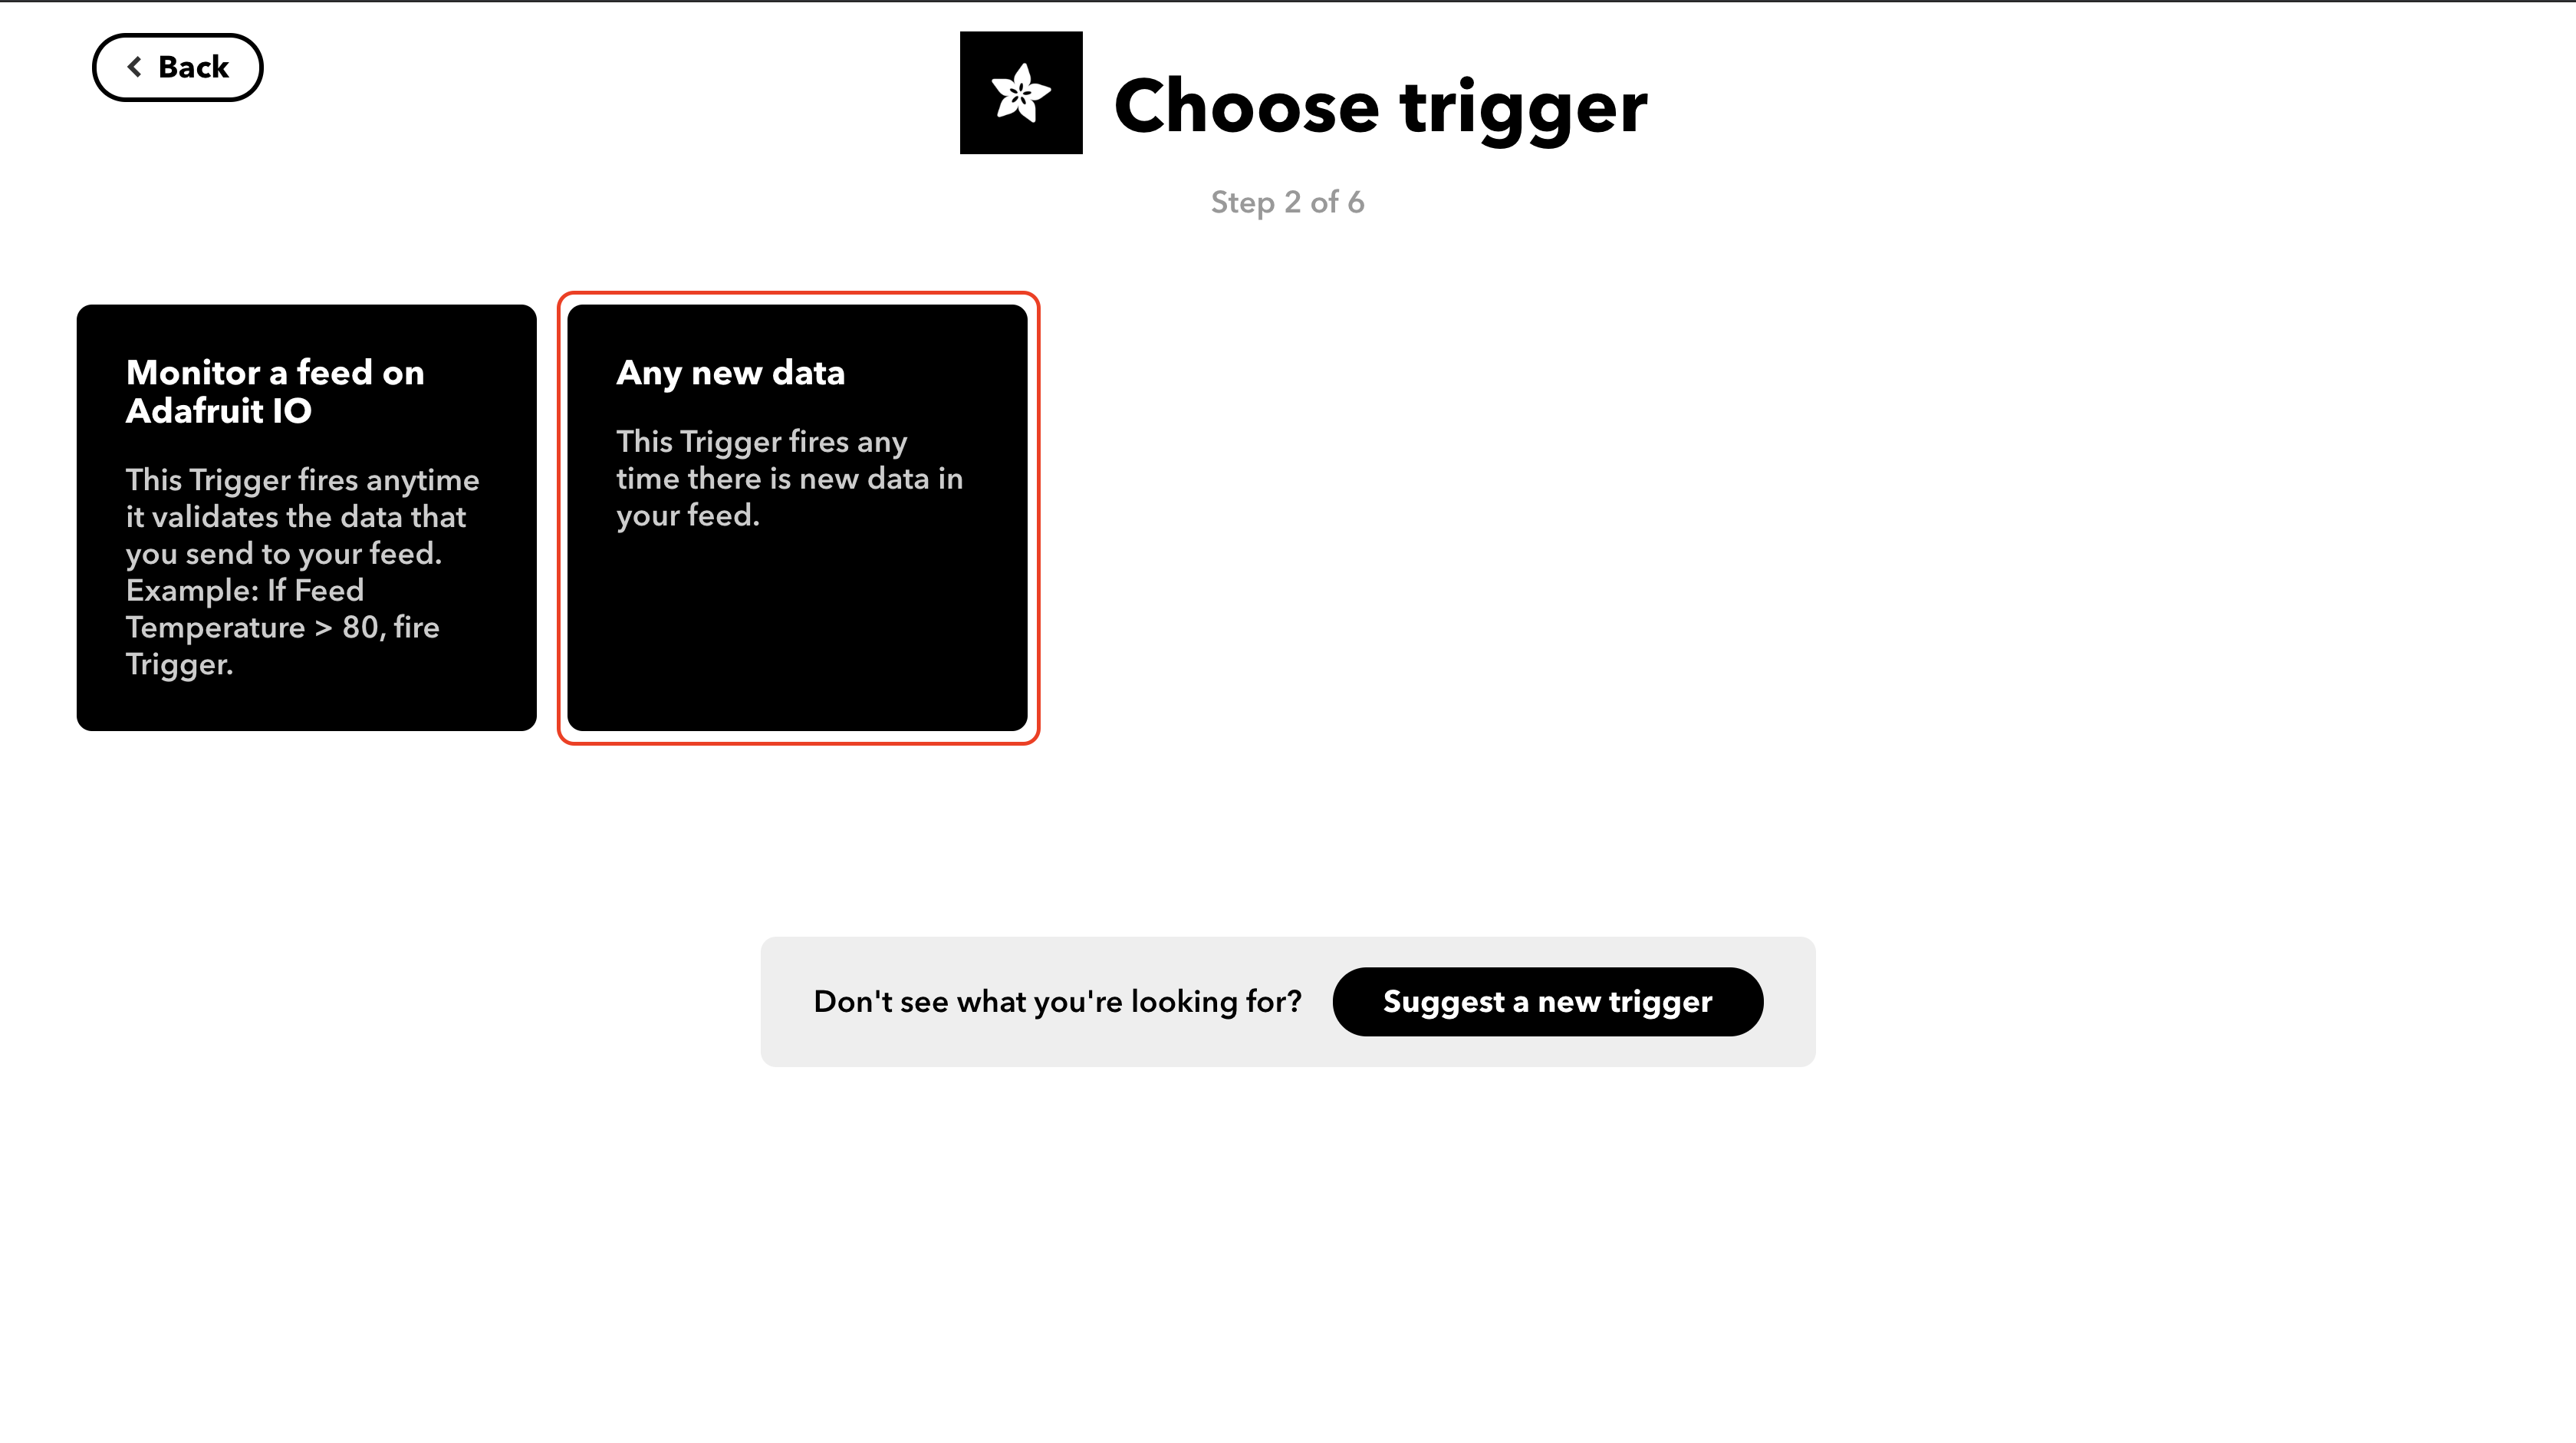
5. Choose the "Any new data square" trigger.
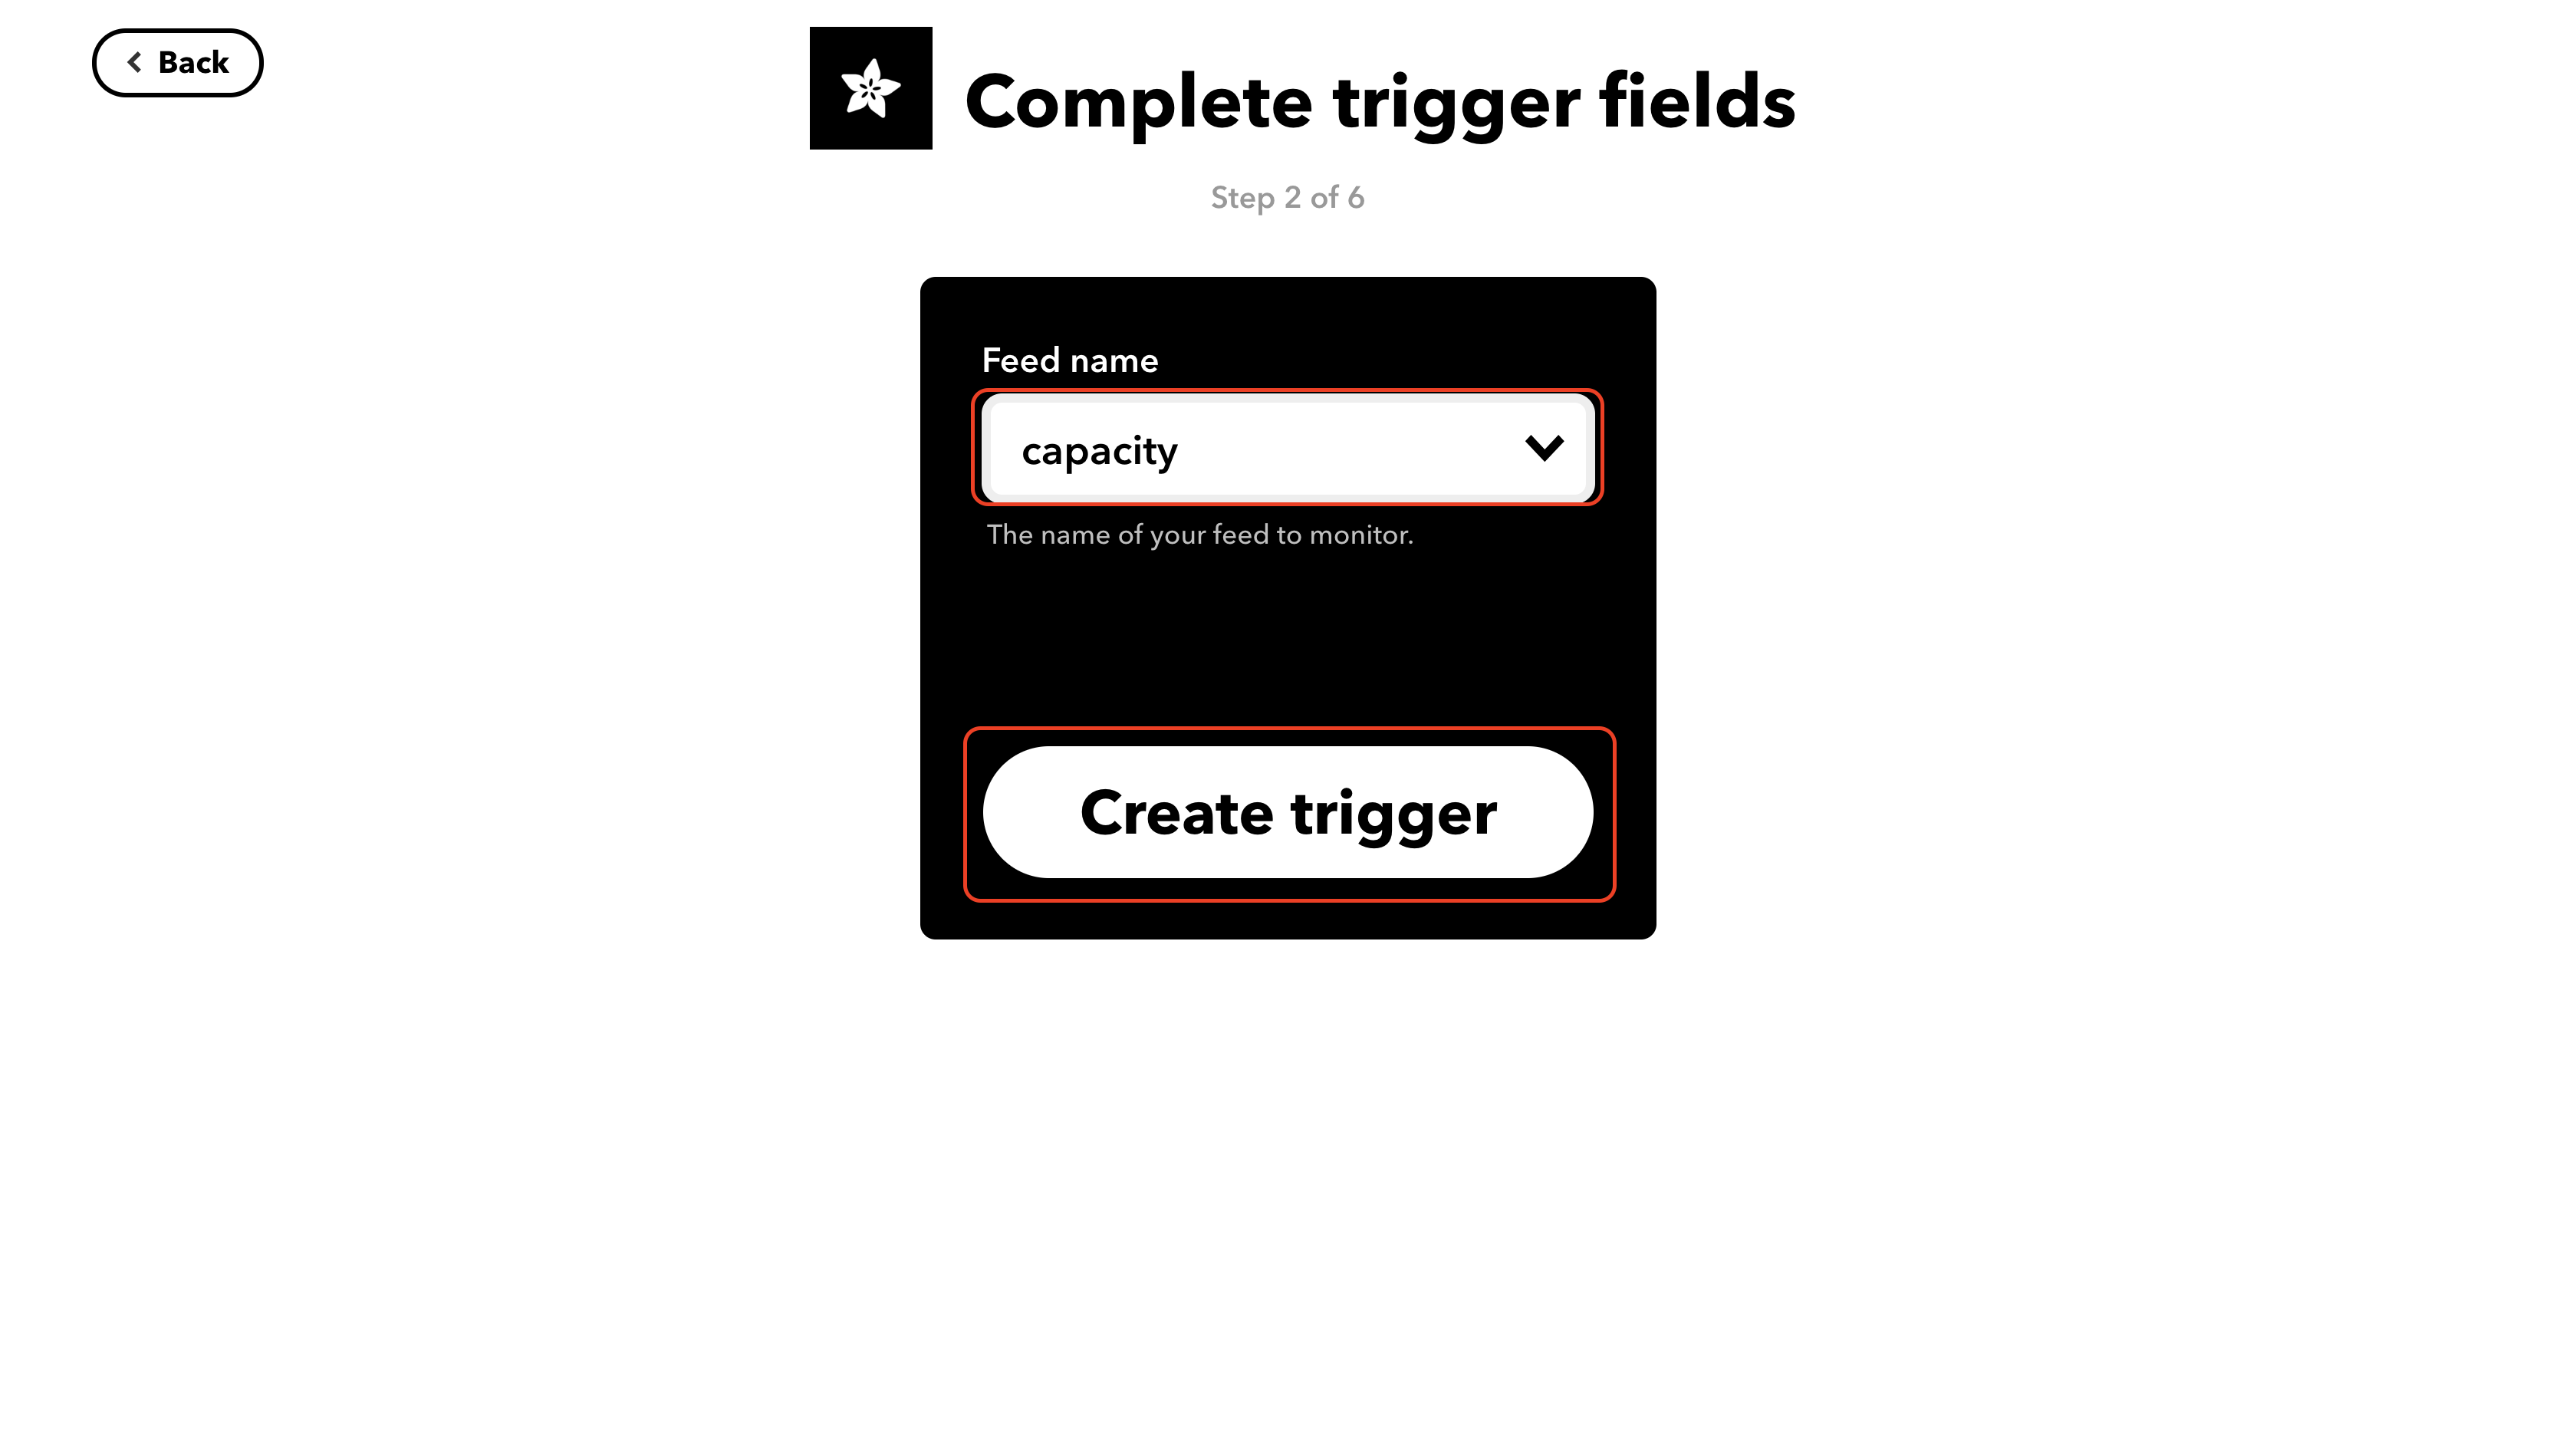
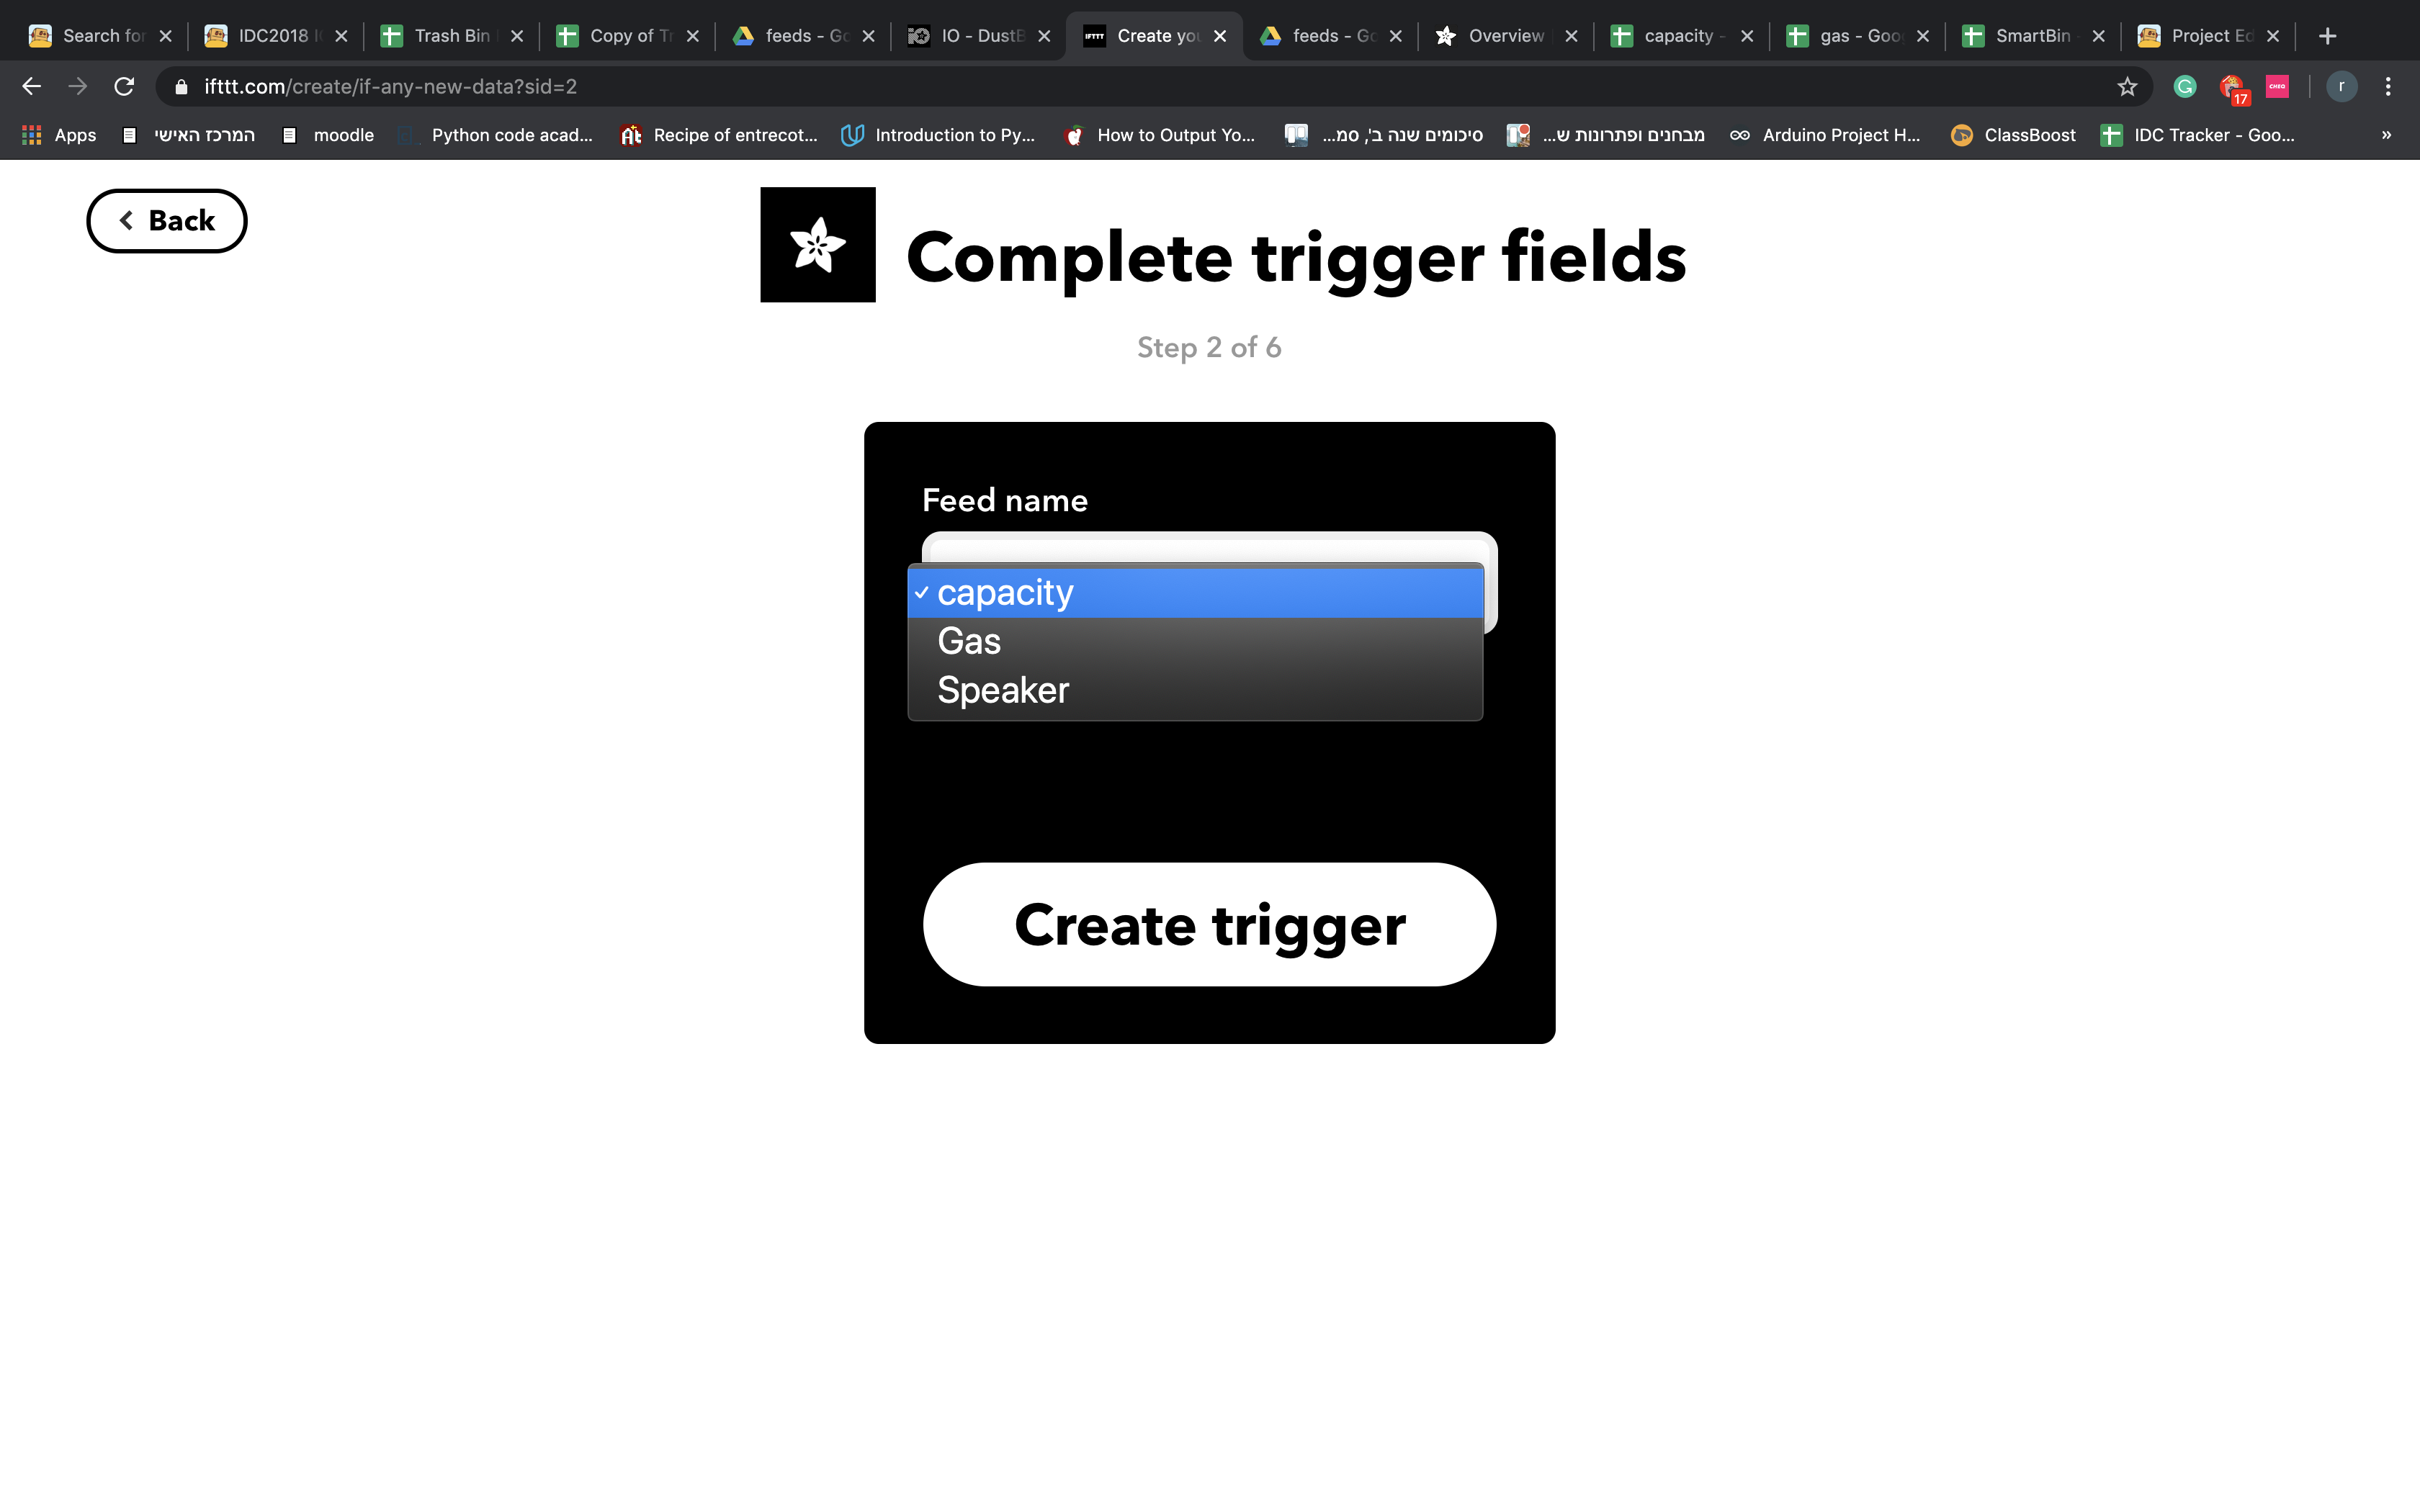
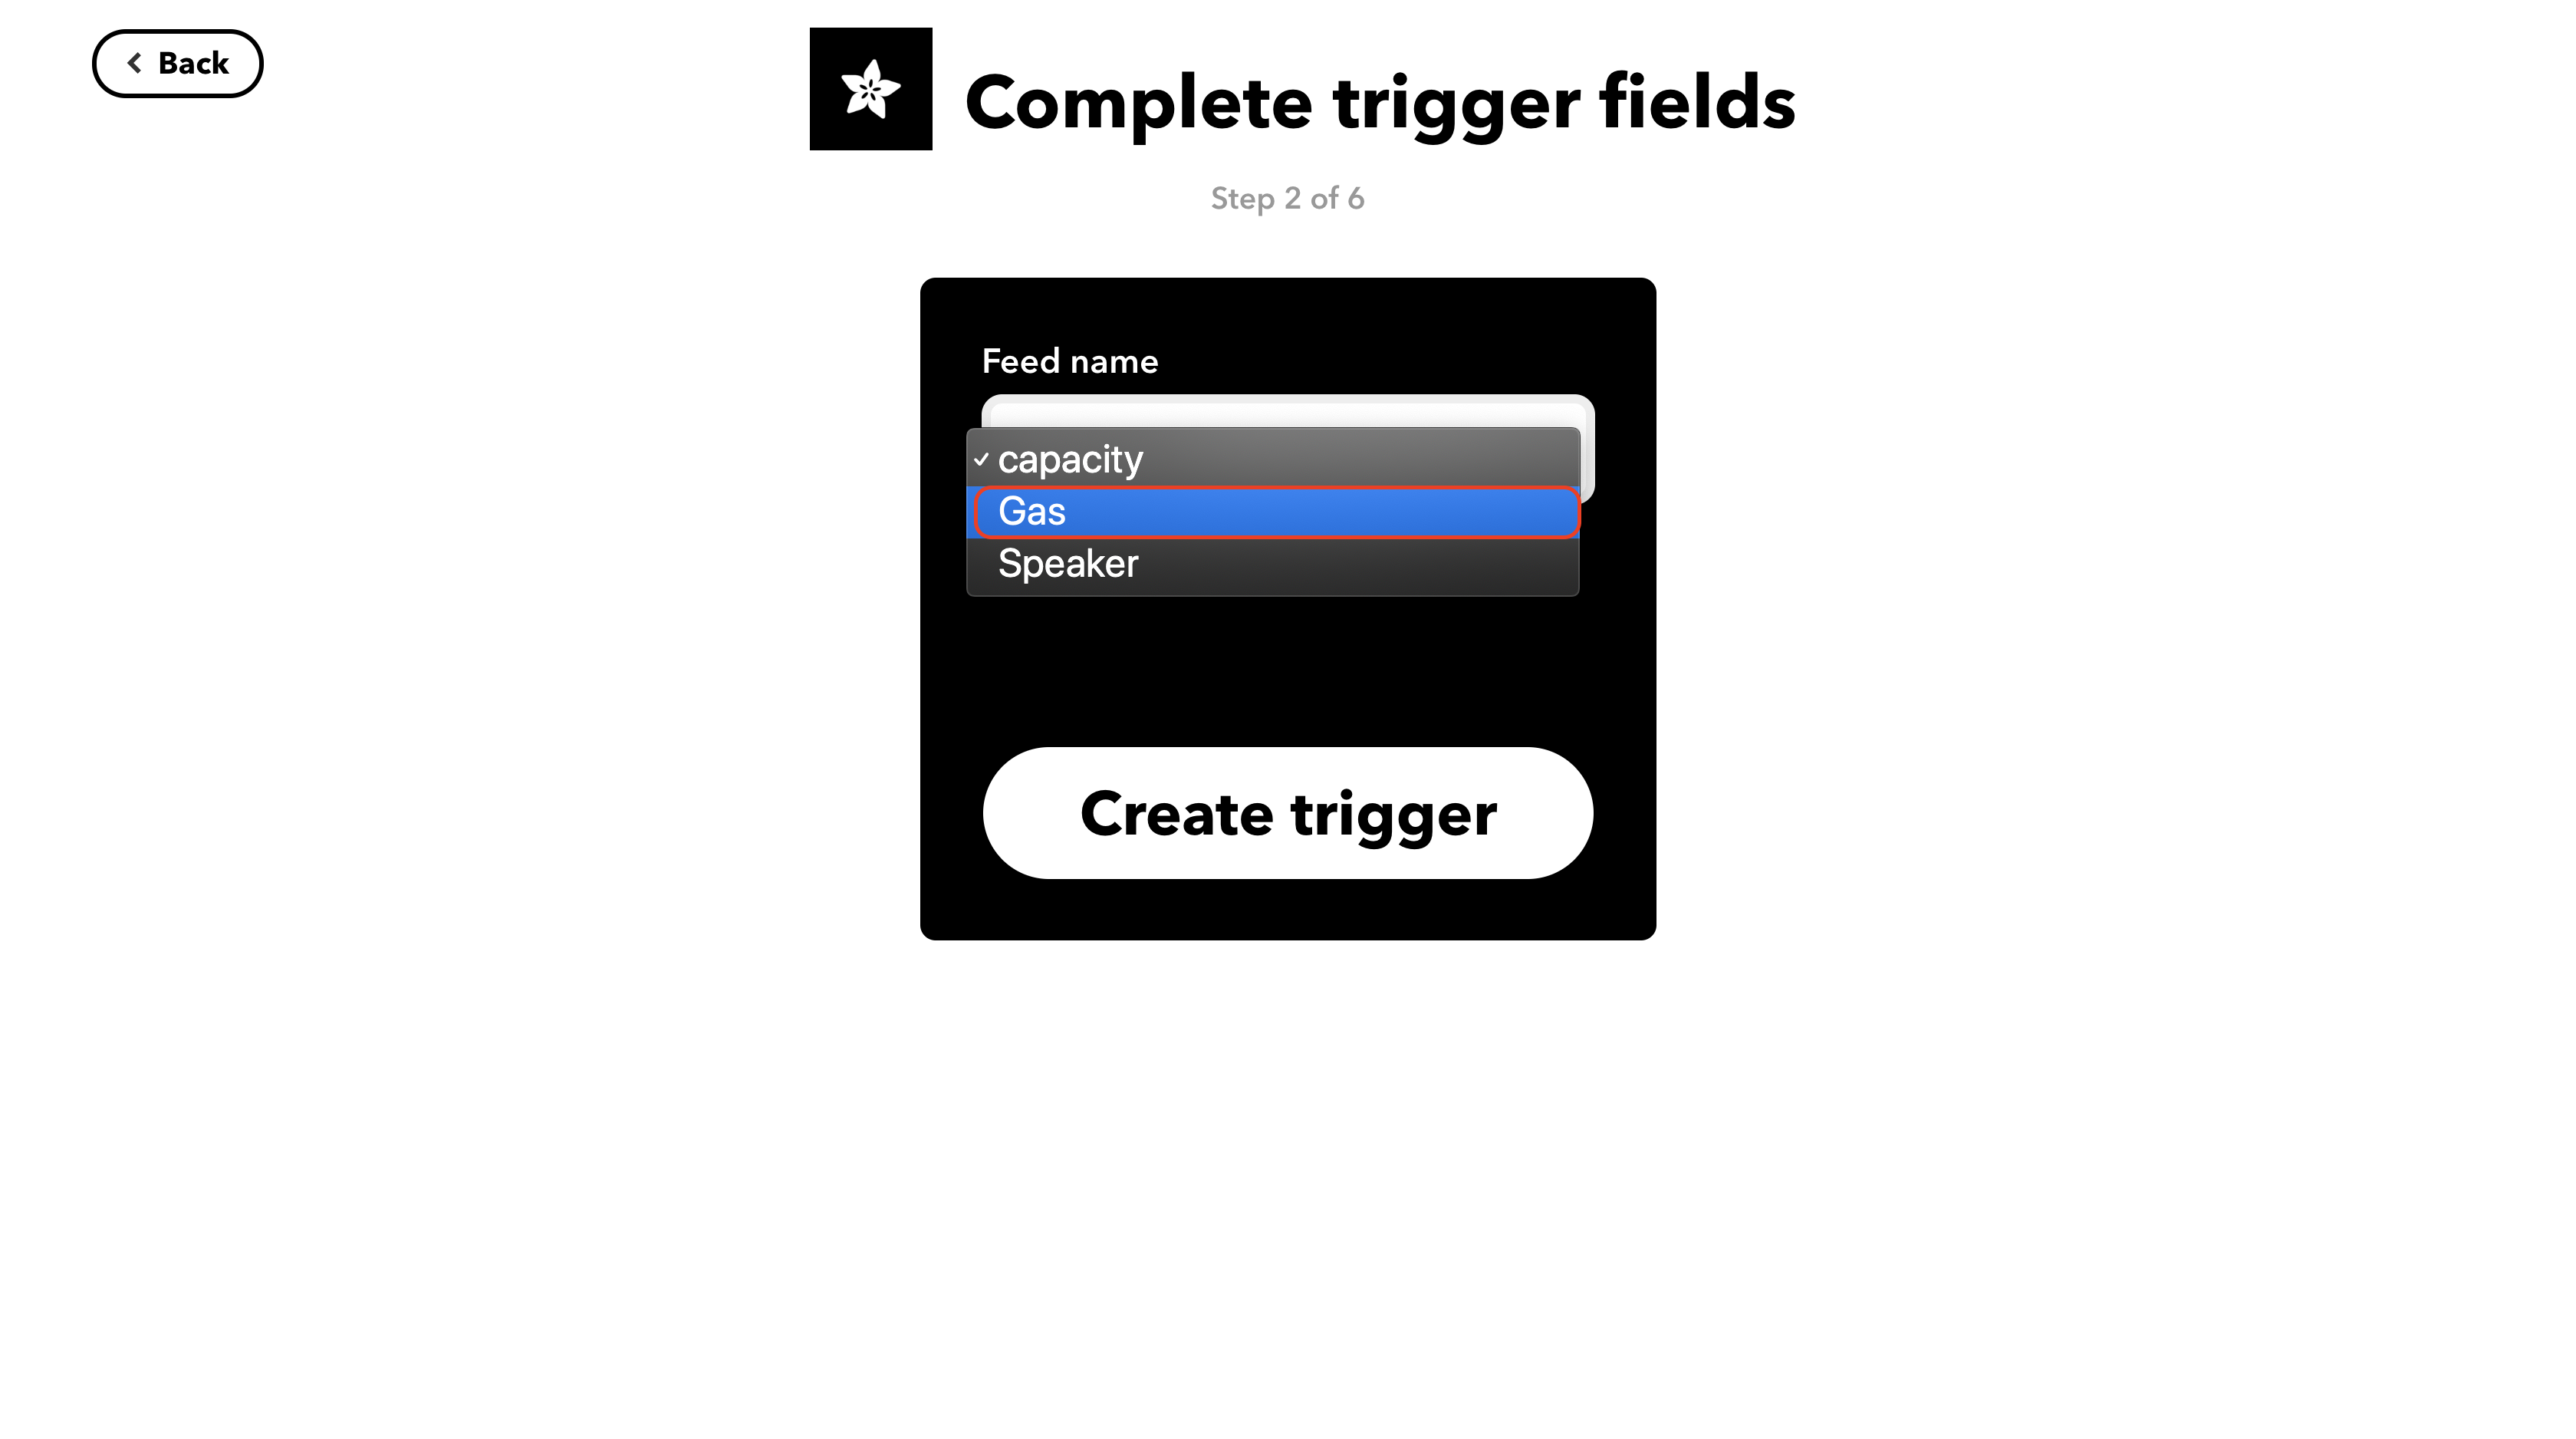
6. Choose the Adafruit feed name ("capacity") - the name you feed to your monitor. and click "Create trigger".
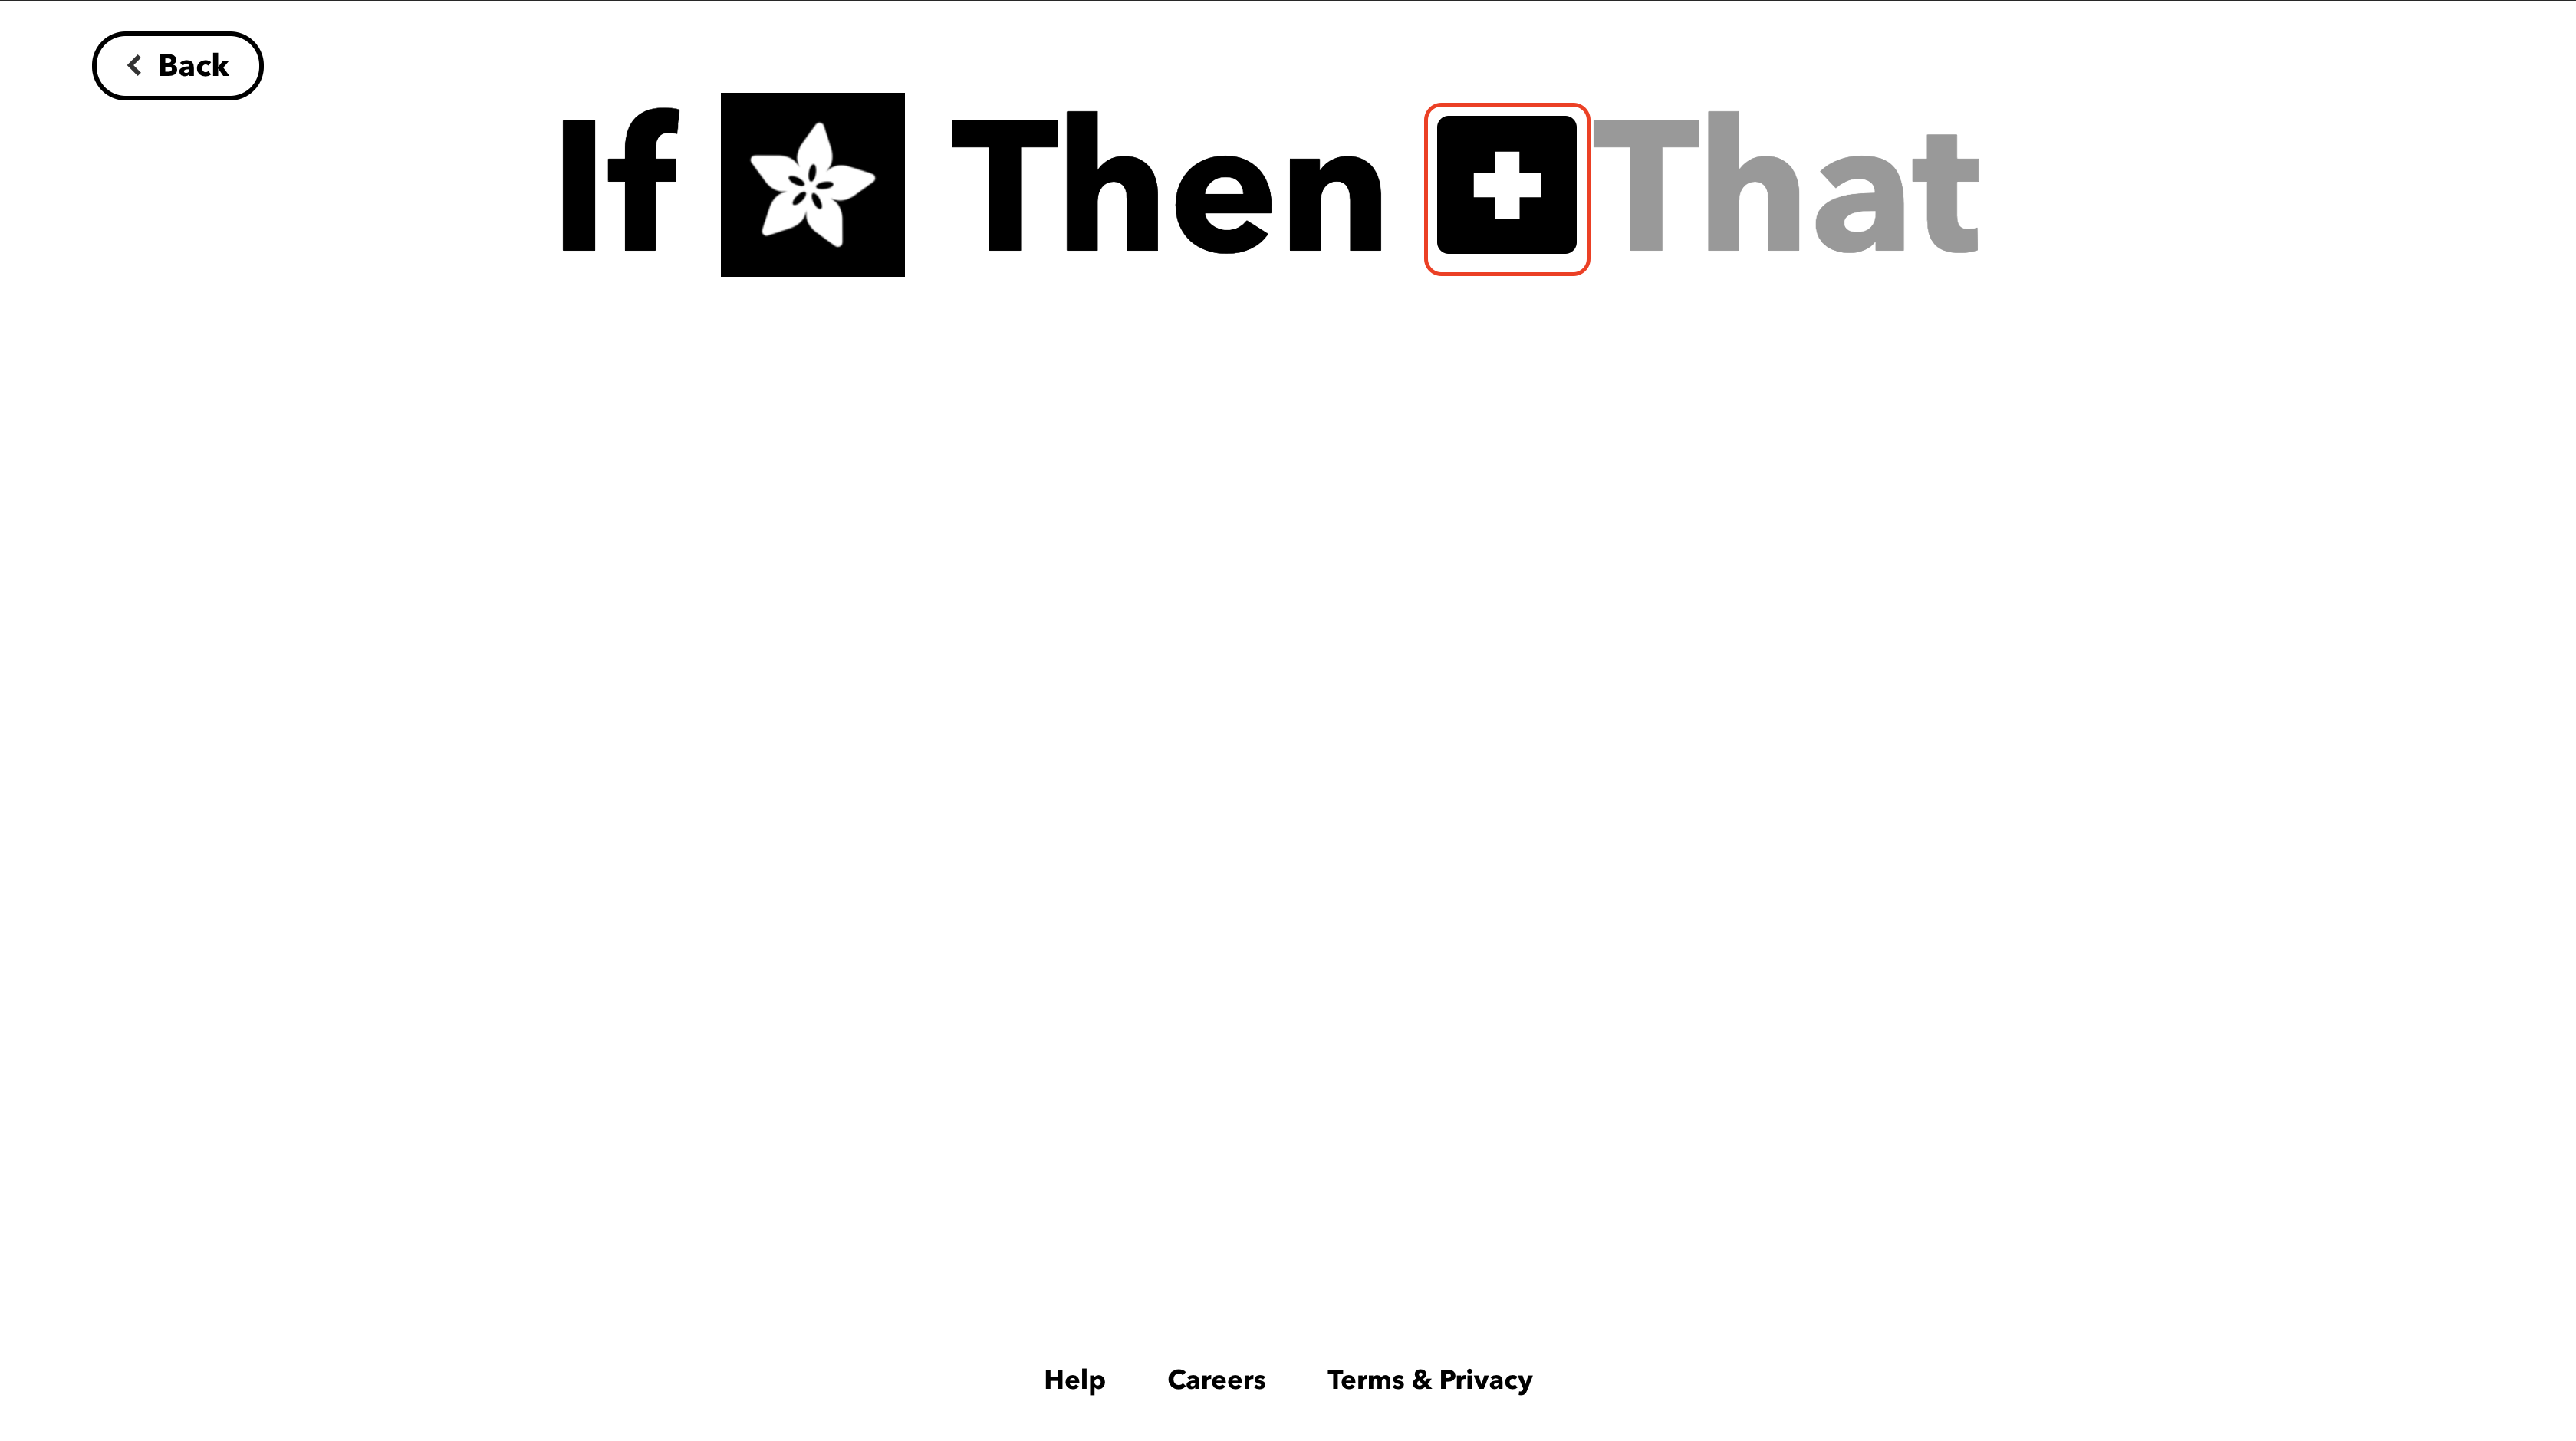
7 .Moving on to the "Then That" part, click on the black square with a white plus sign in it.
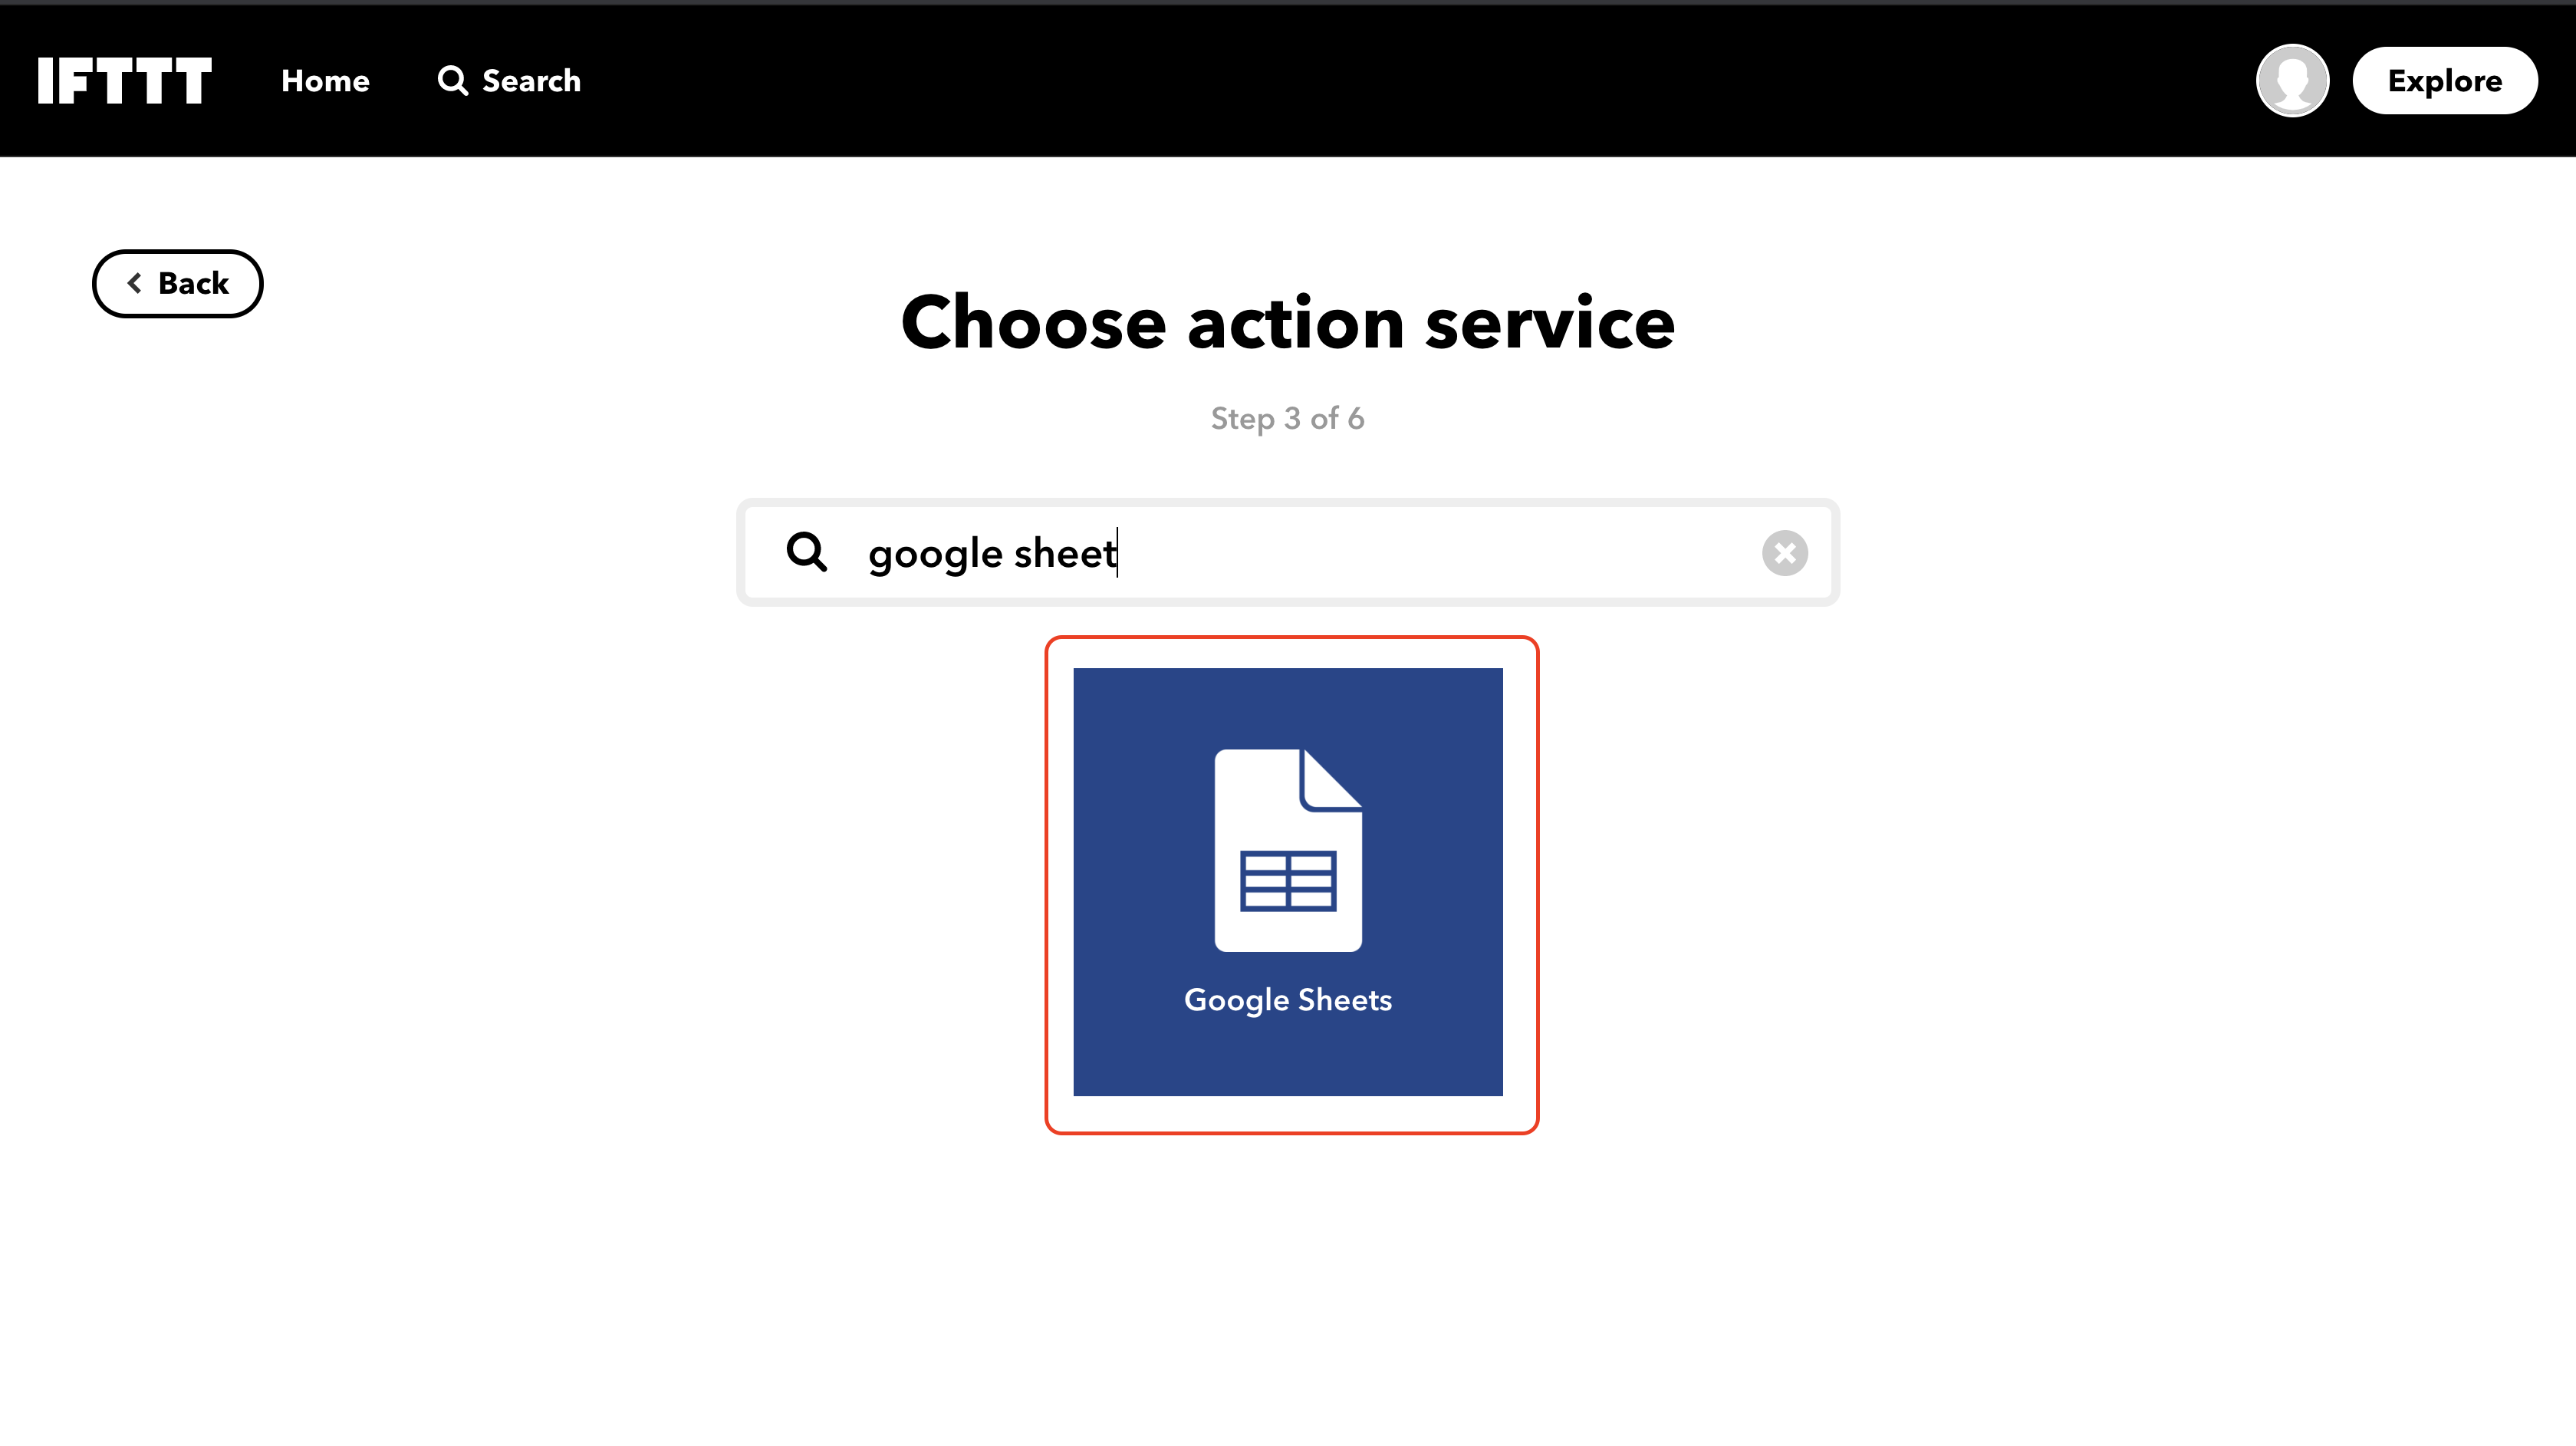
8. Choose Google Sheets service.
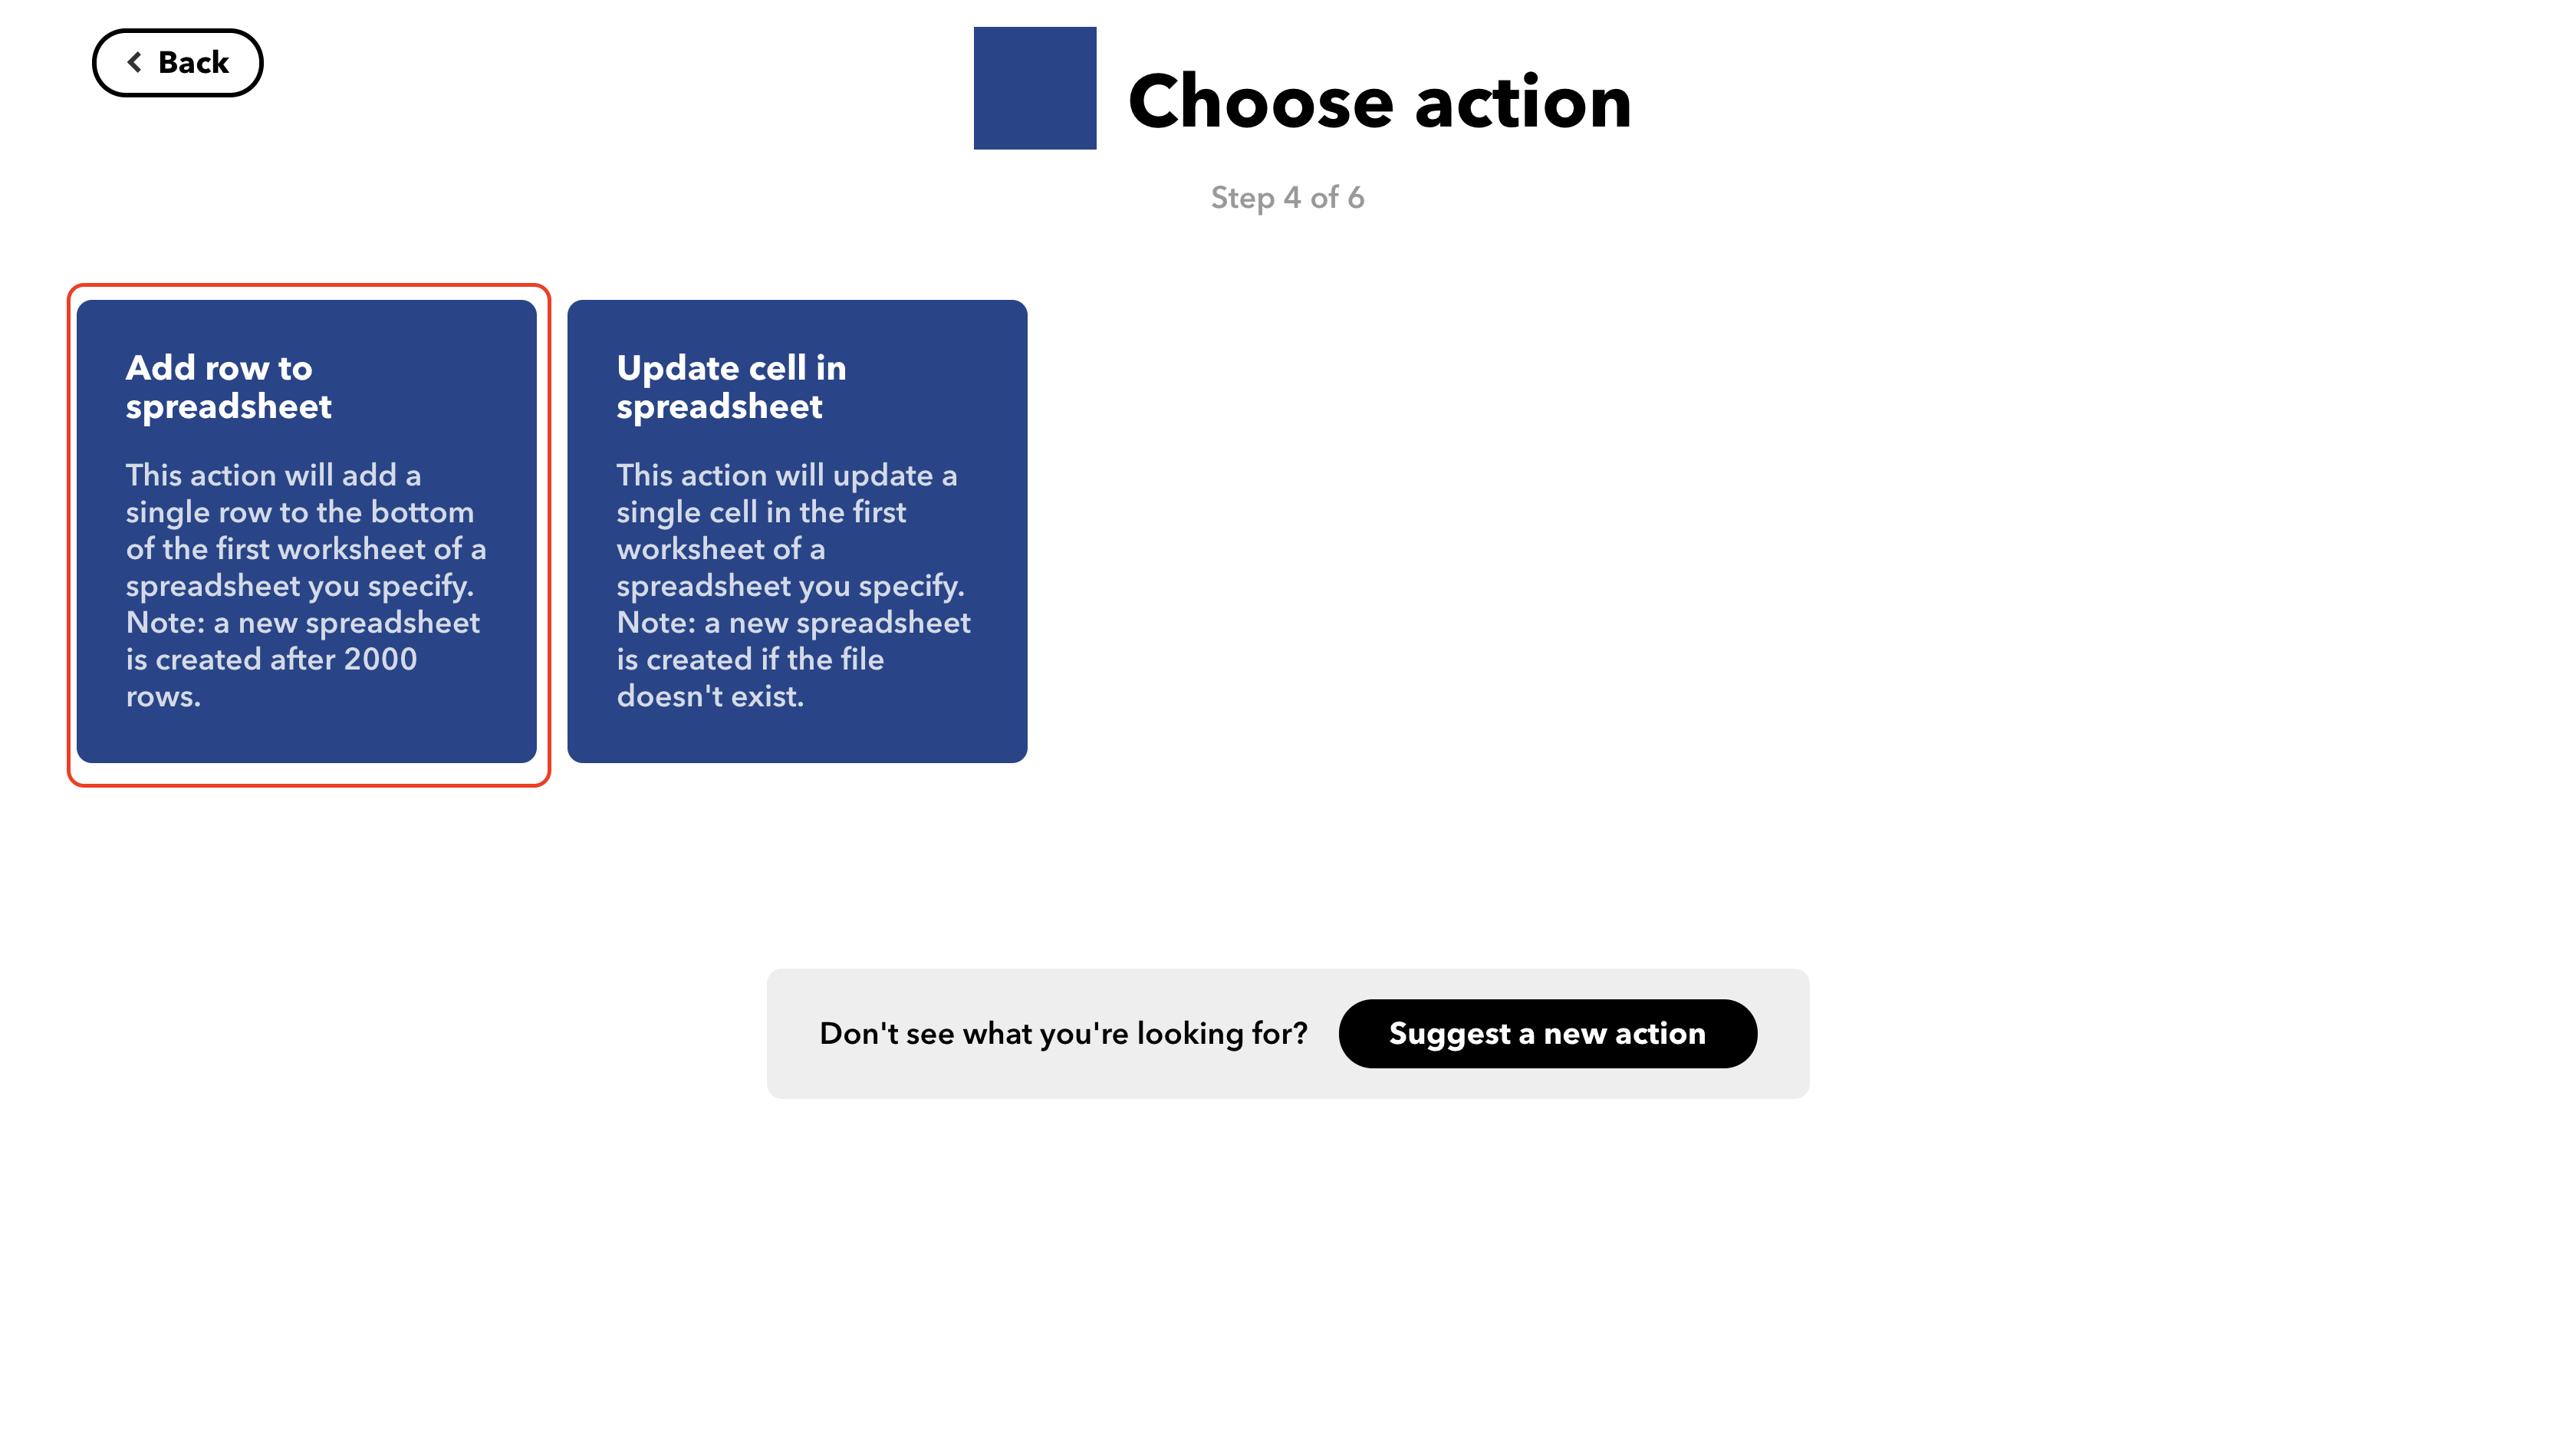
9. Choose the "Add row to spreadsheet" action.
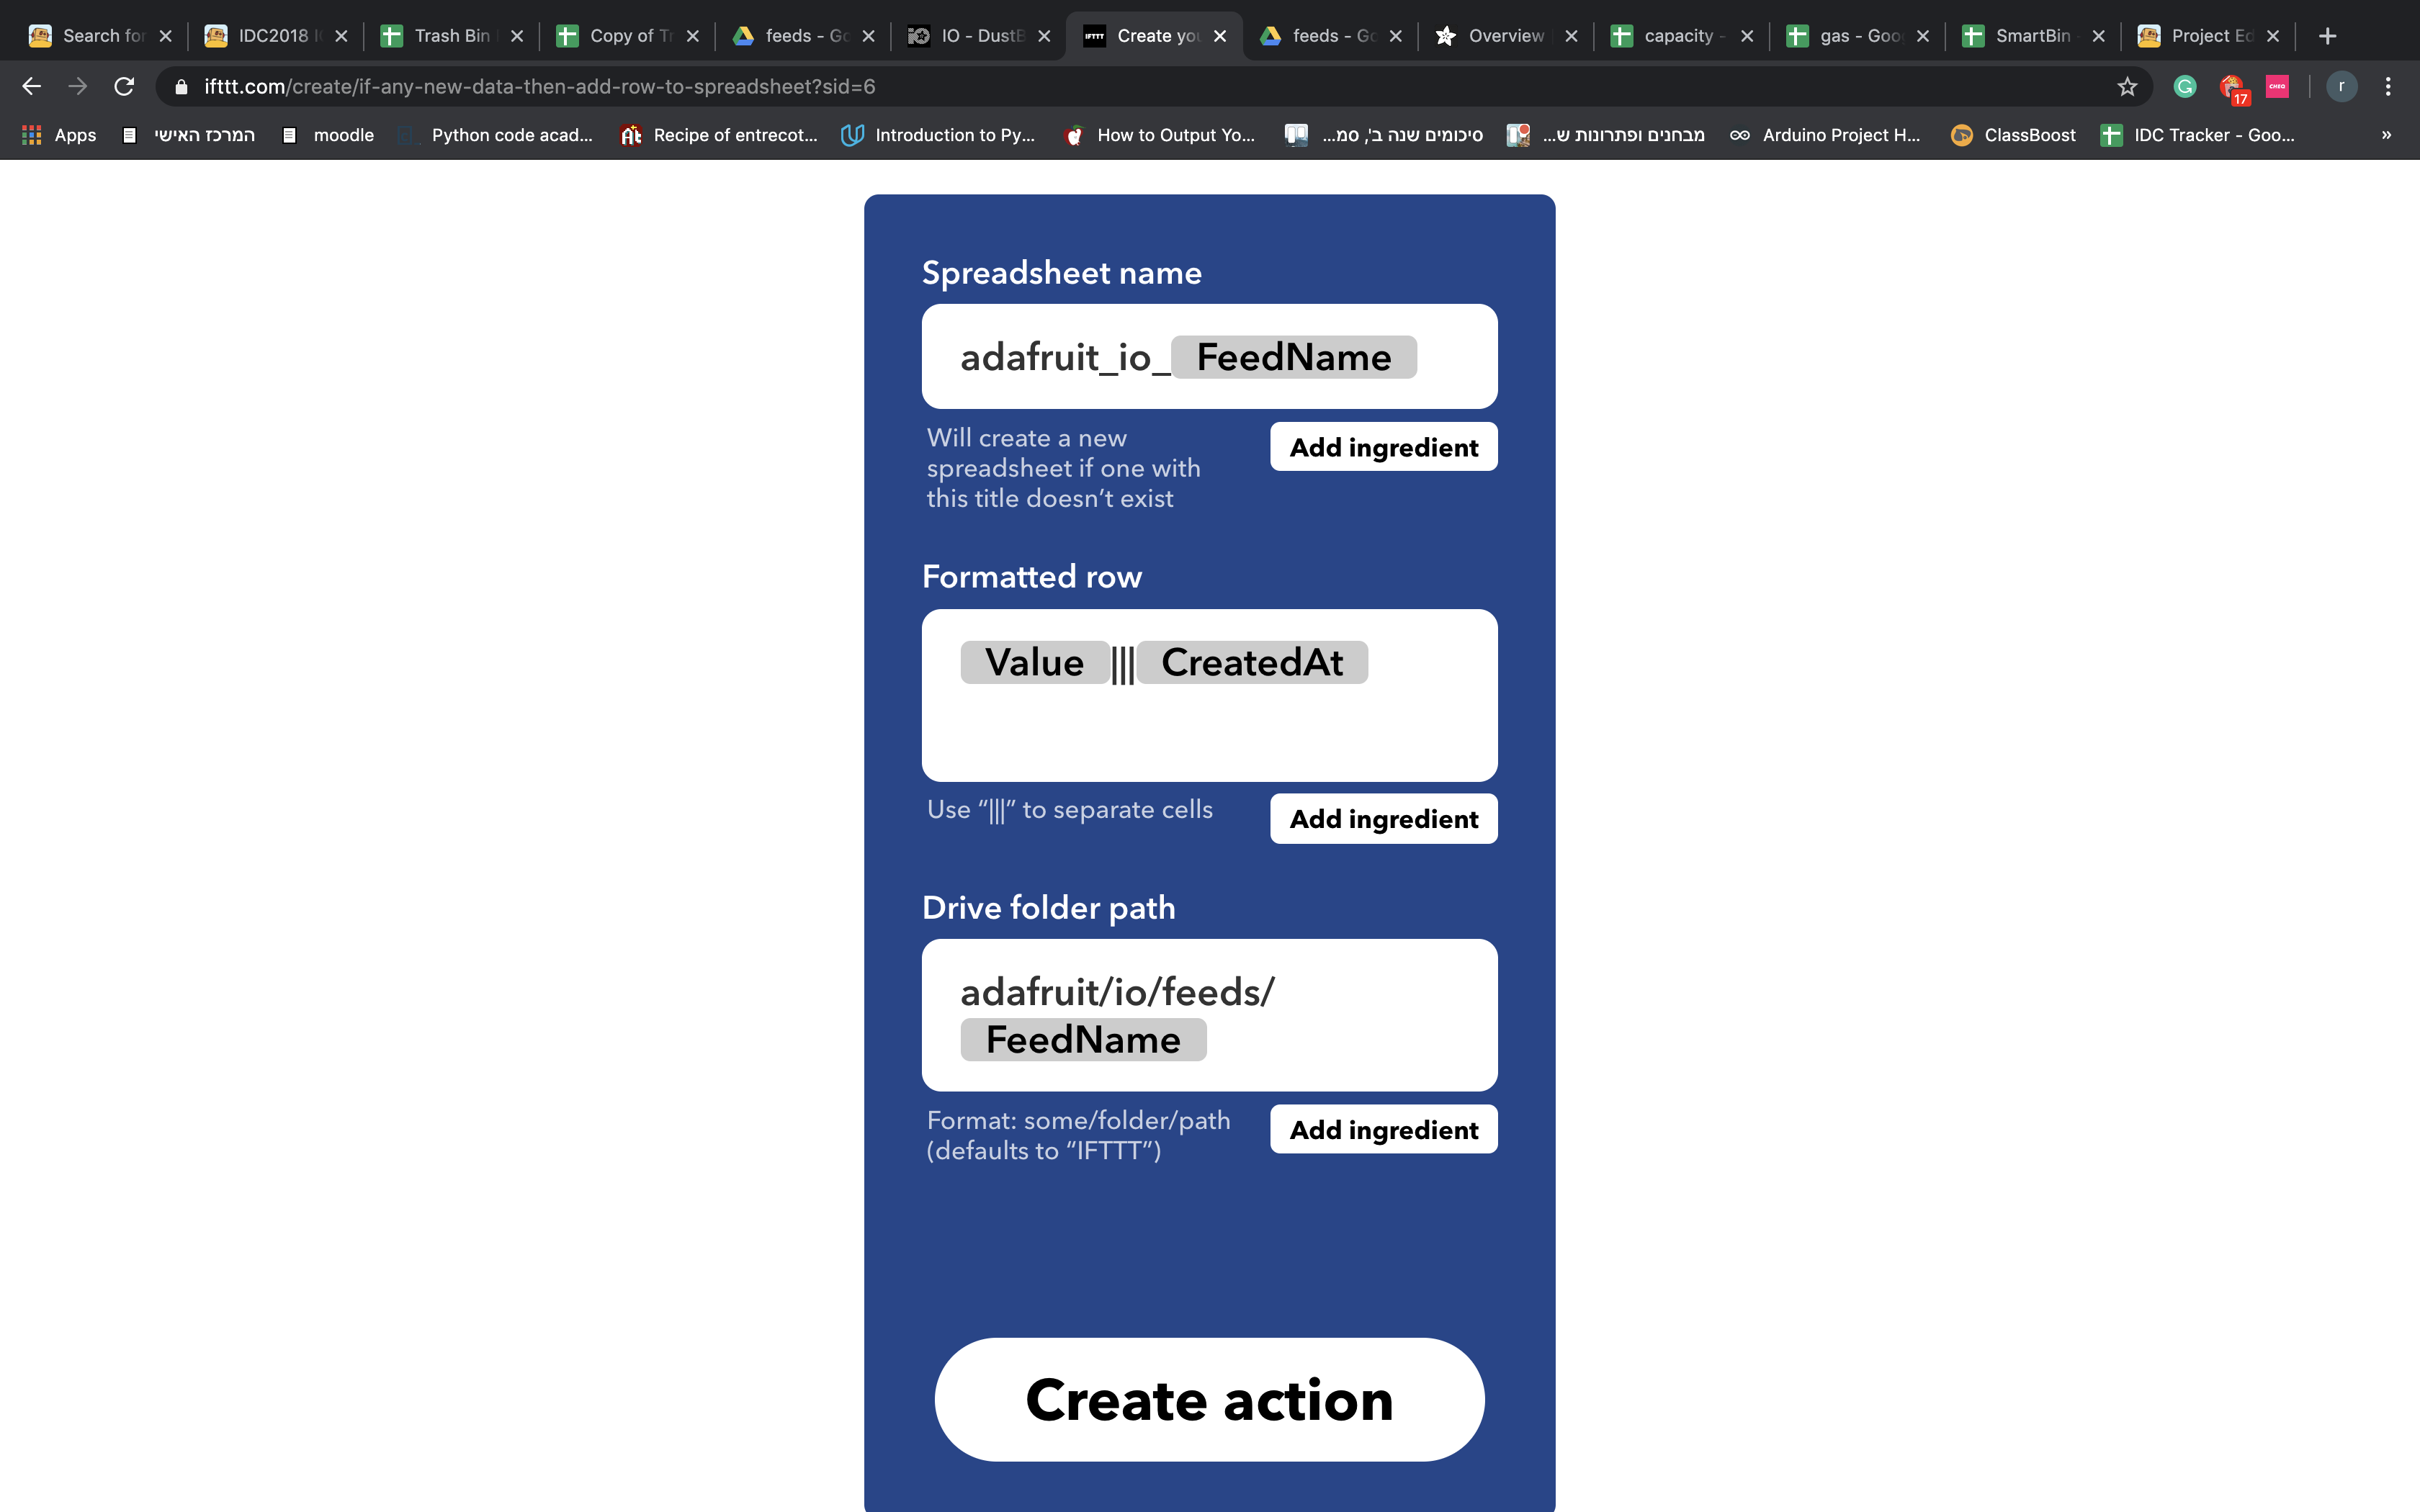
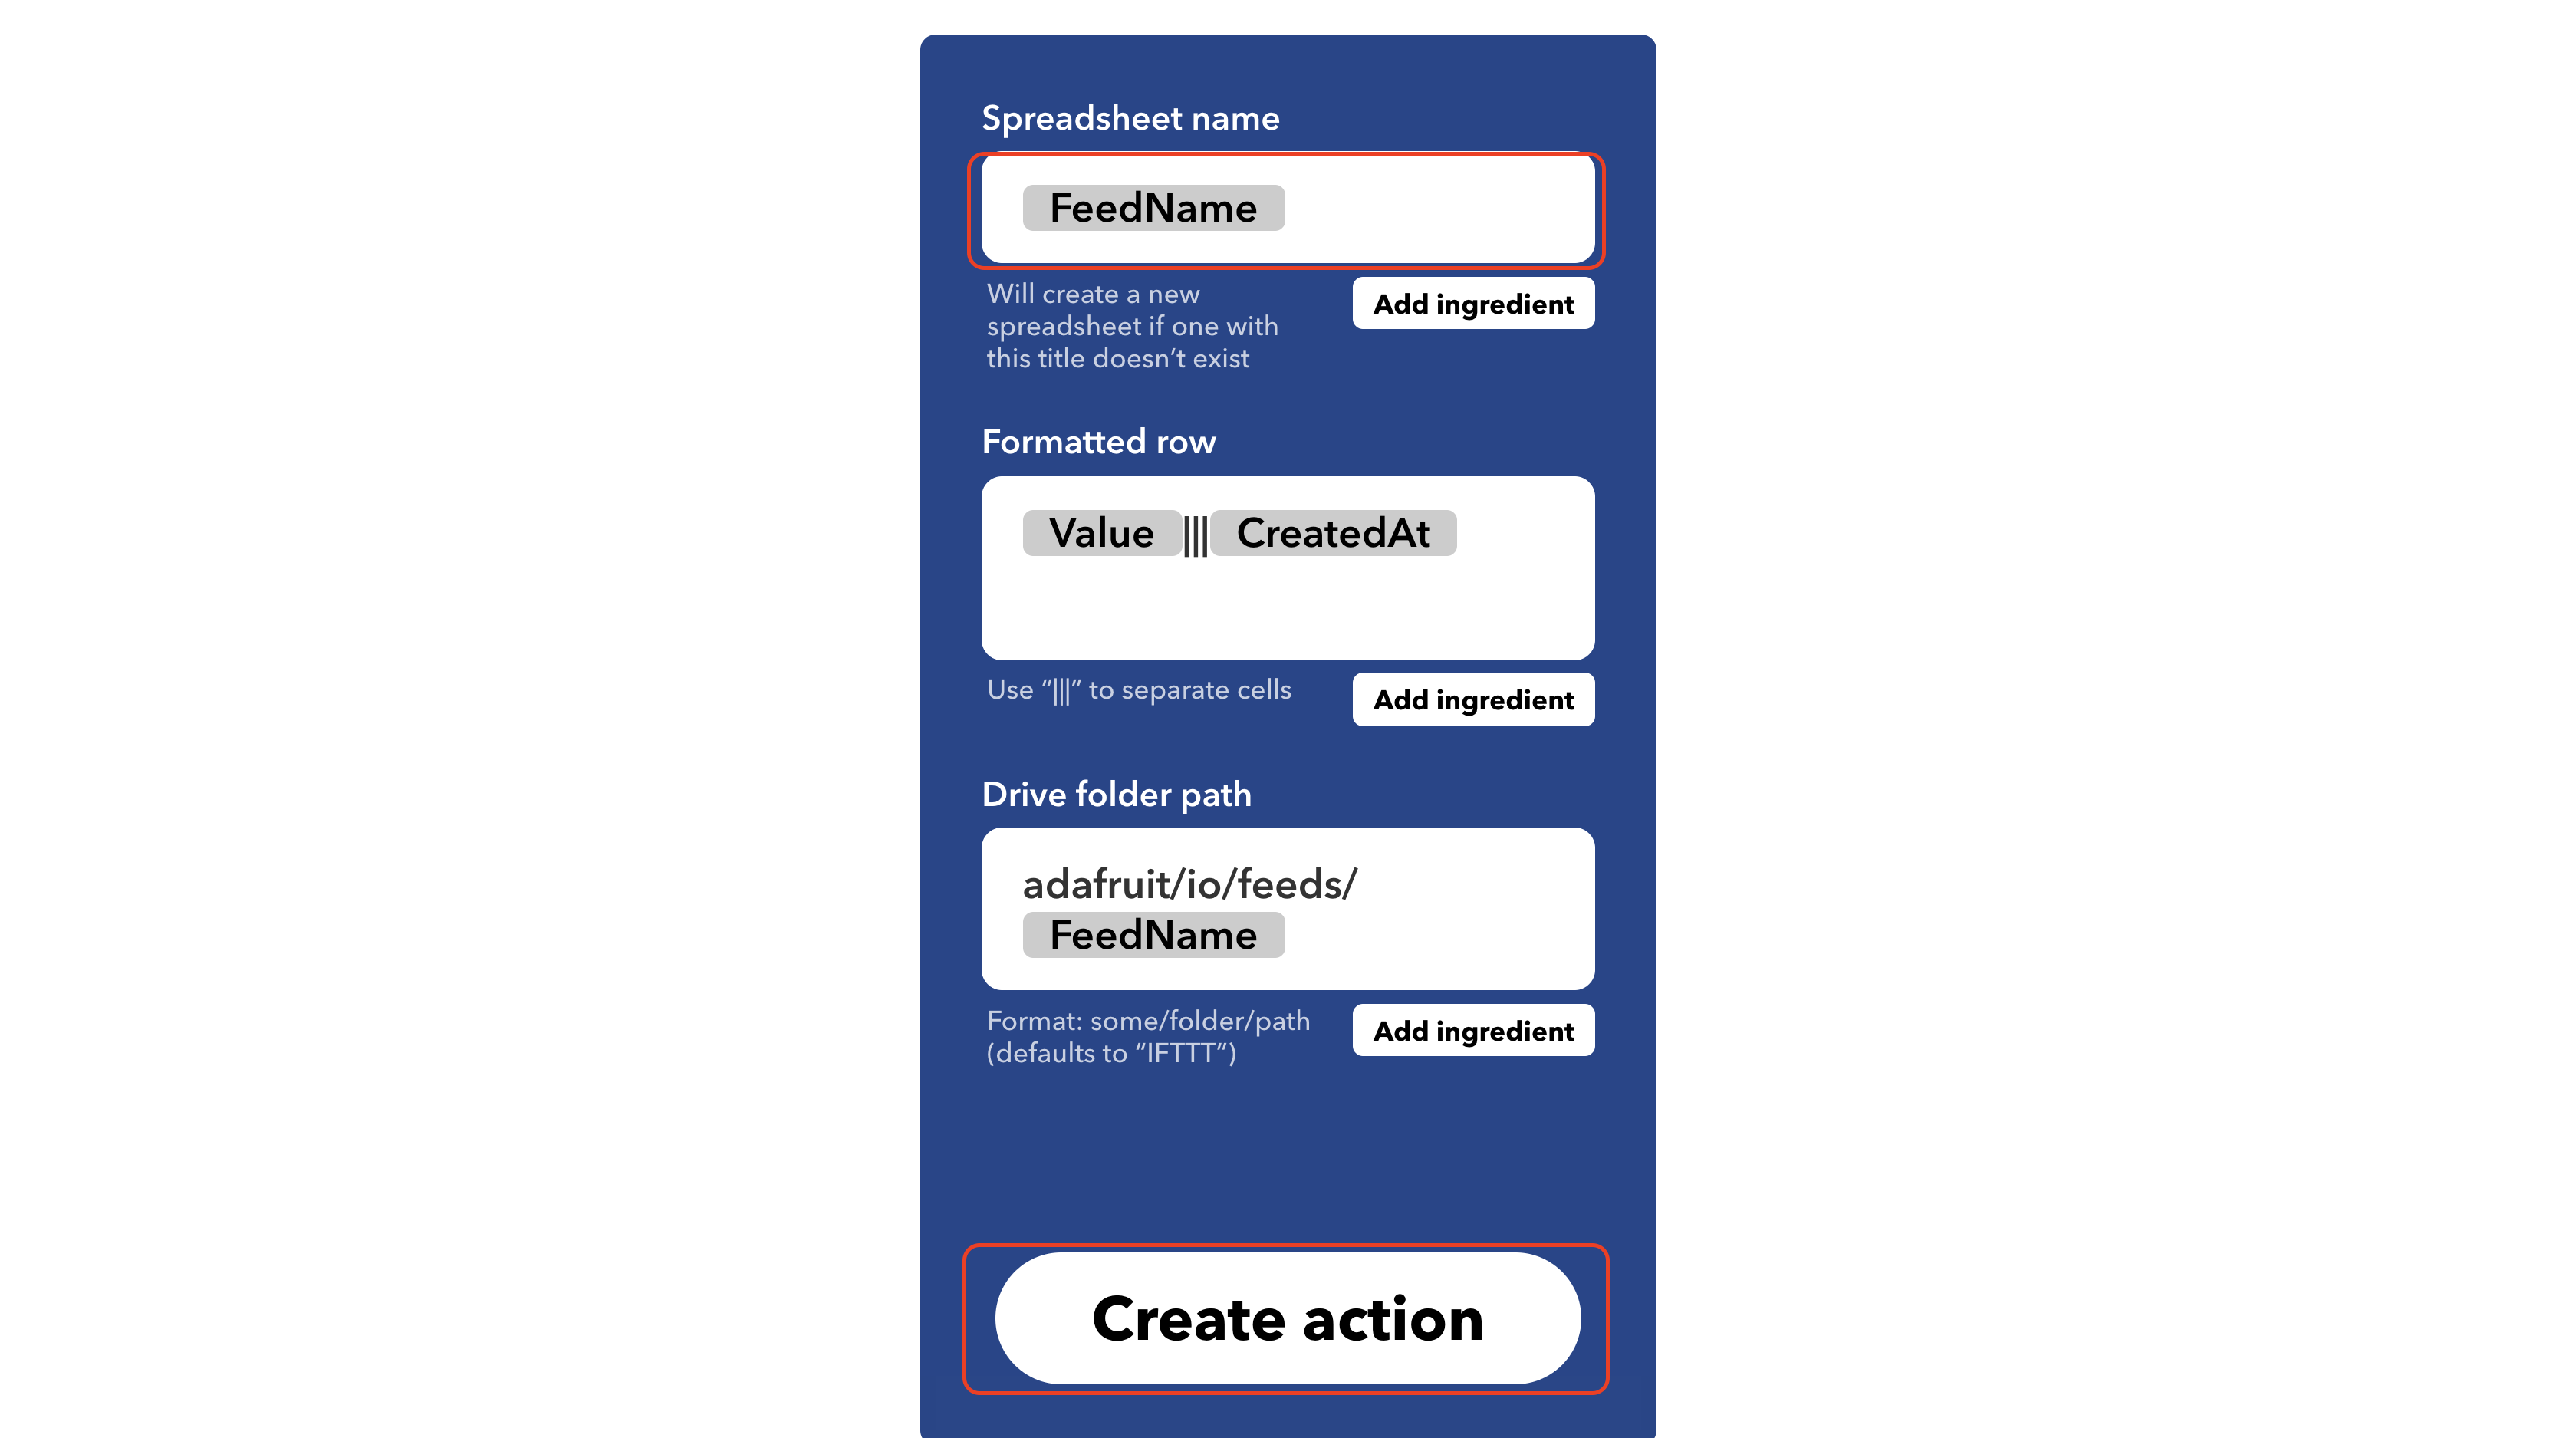
10. Next, change the Spreadsheet name to include only the feed name and click "Create action".
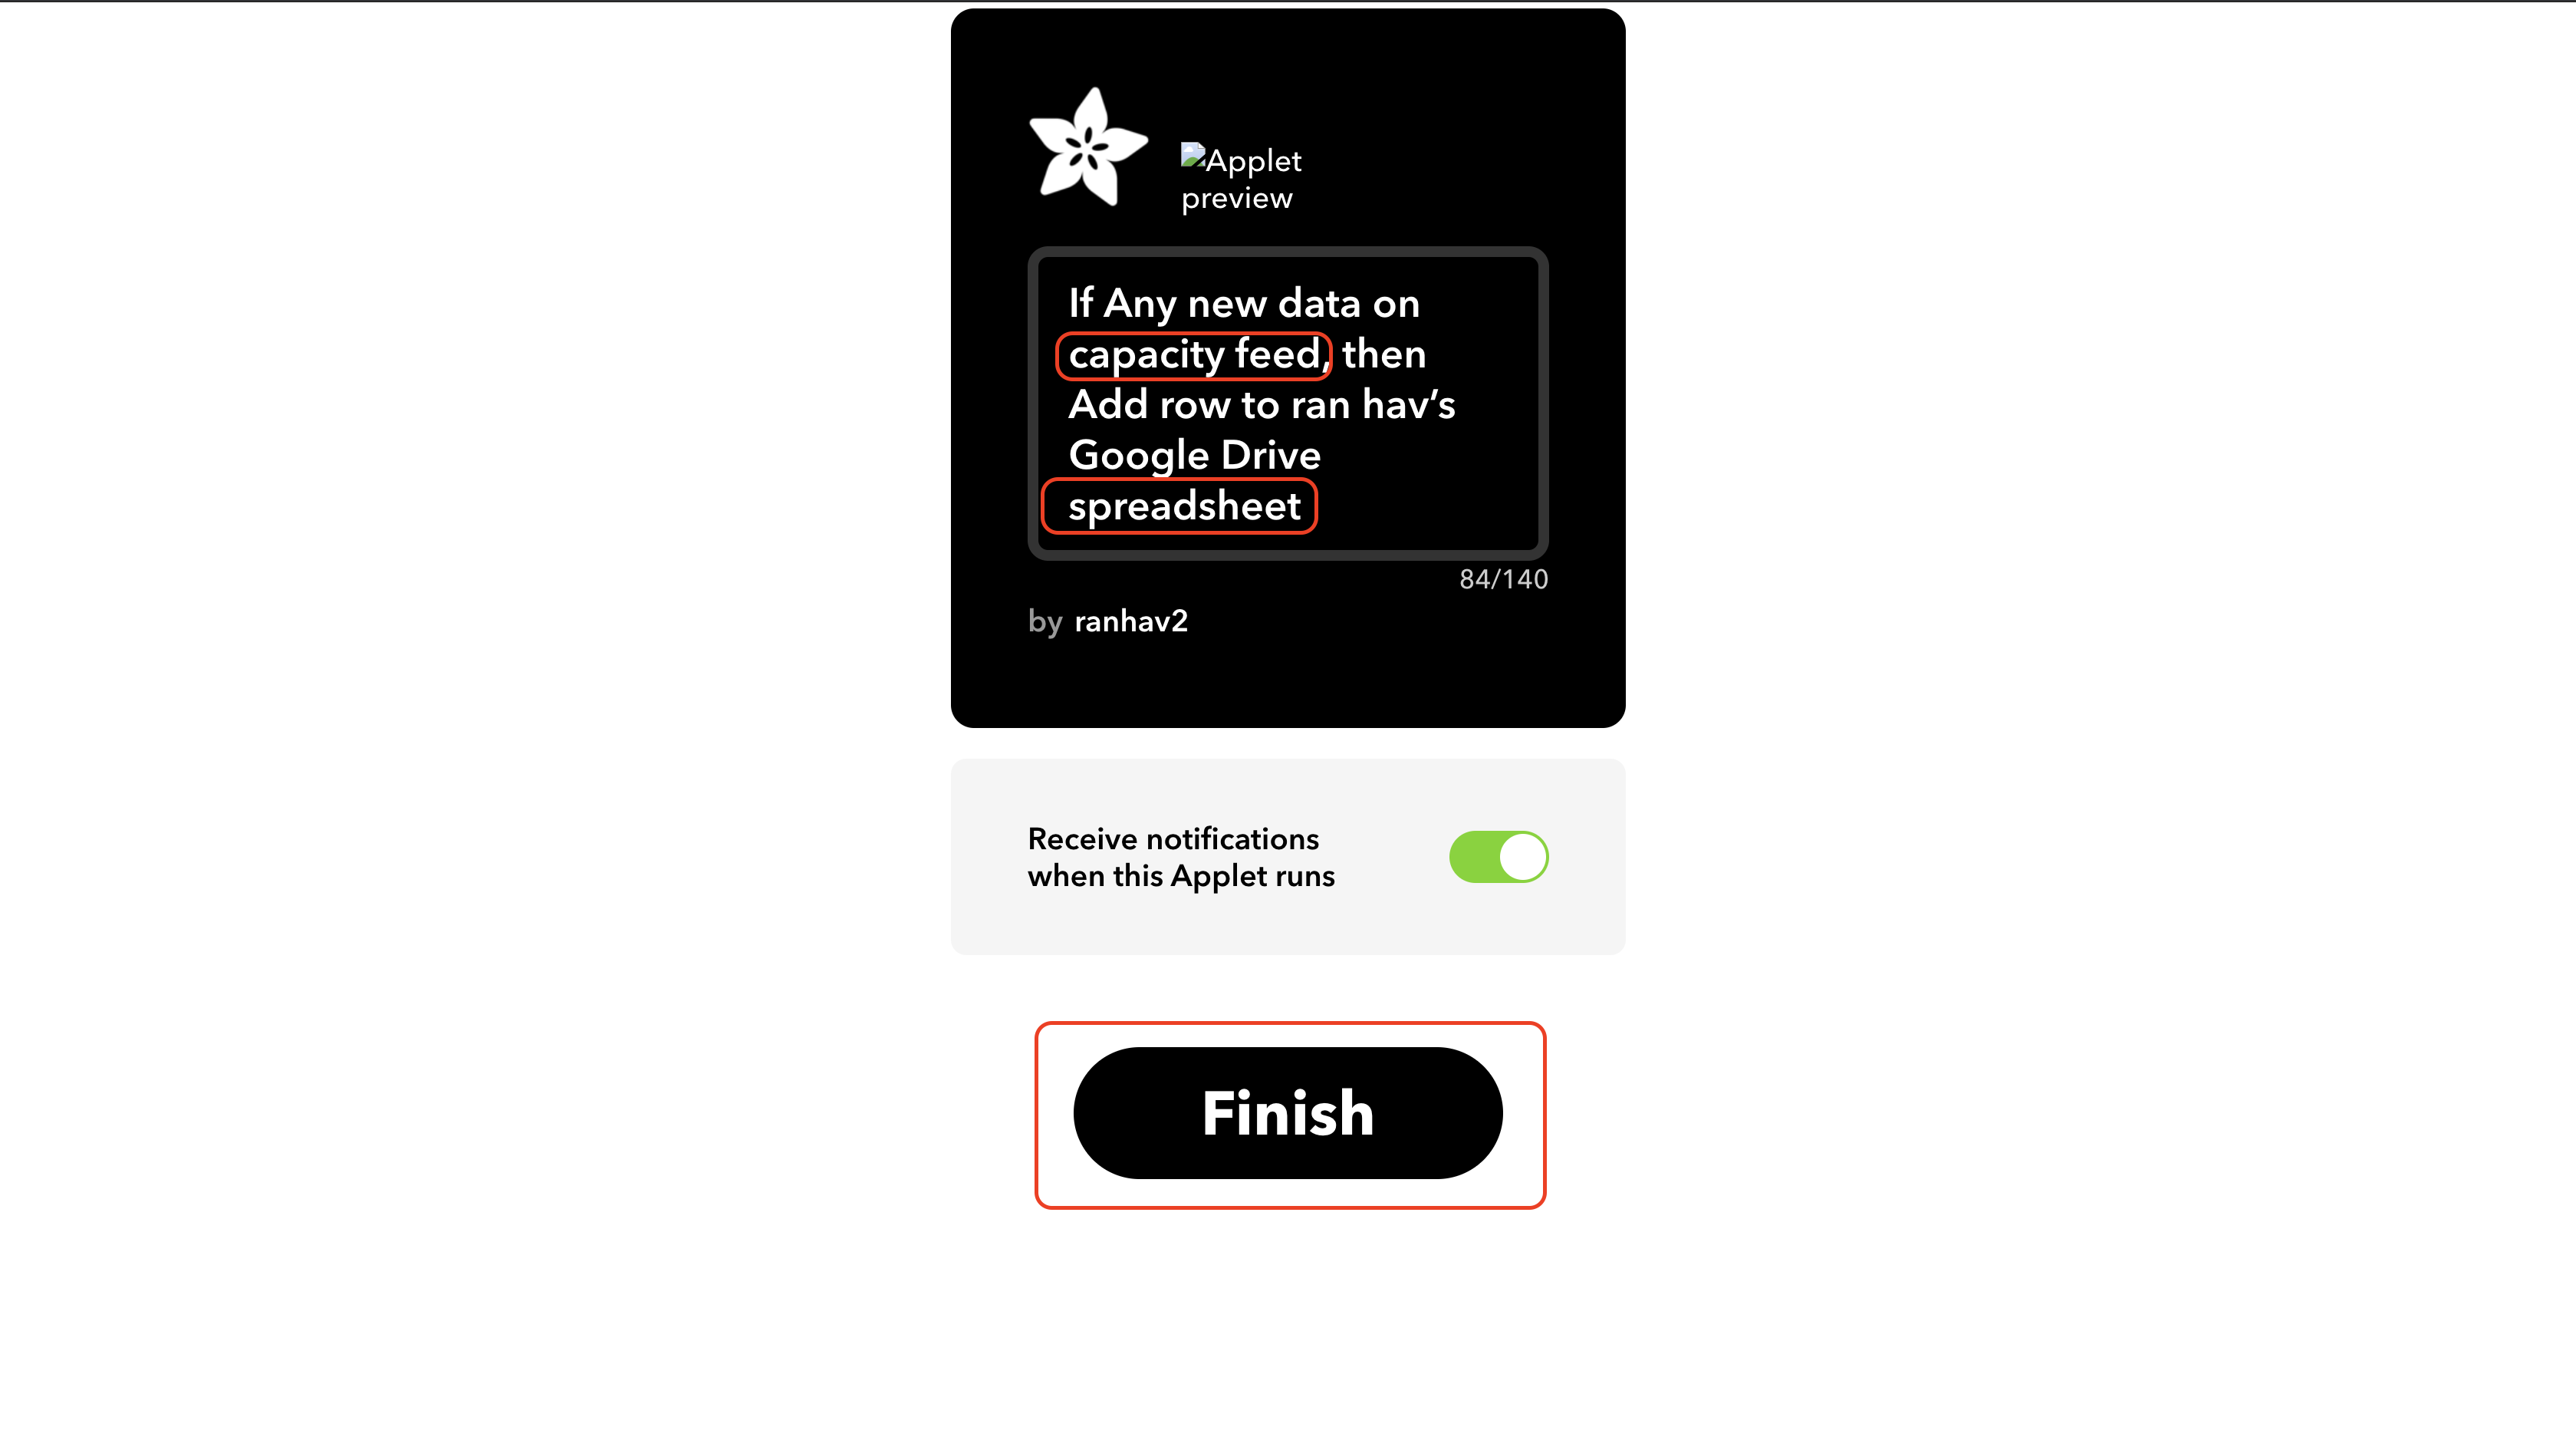
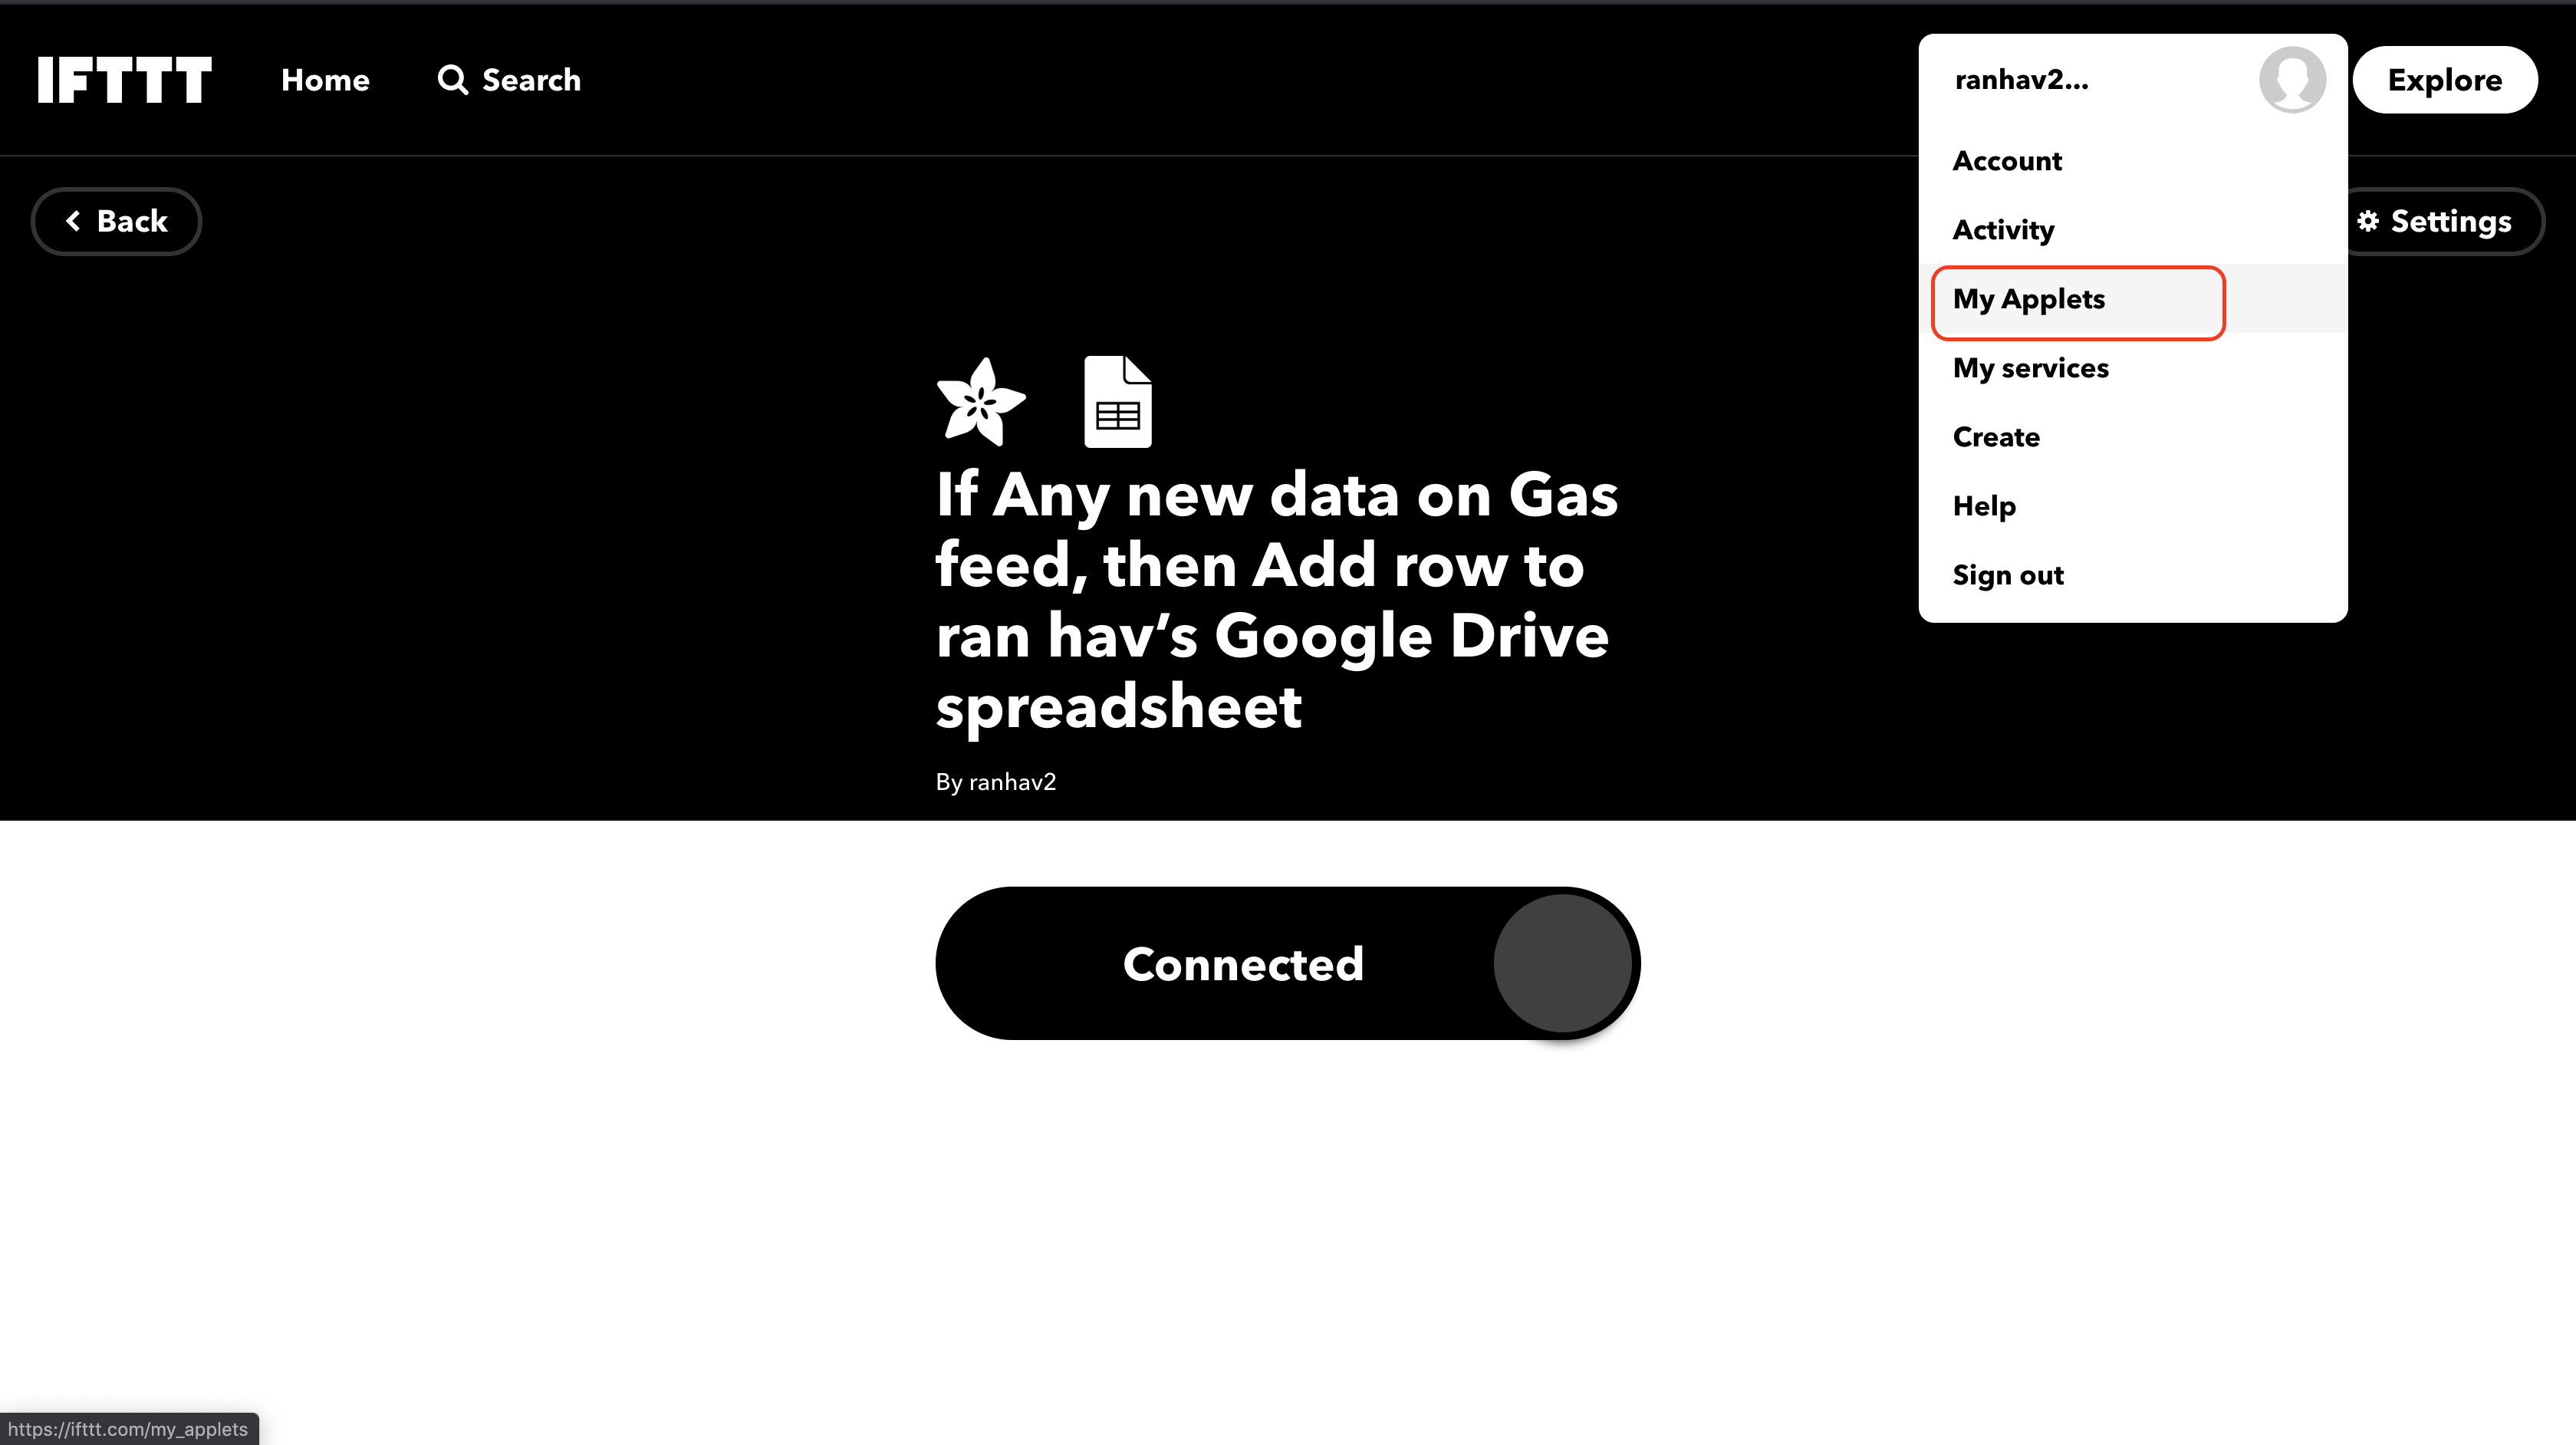
11. Confirm your new applet and click "Finish".
Congratulations! you have just created an IFTTT applet.
Now you can create another one for the "Smell" feed by creating a new applet and in stage 6 choose other Adafruit feed names.
Google Drive
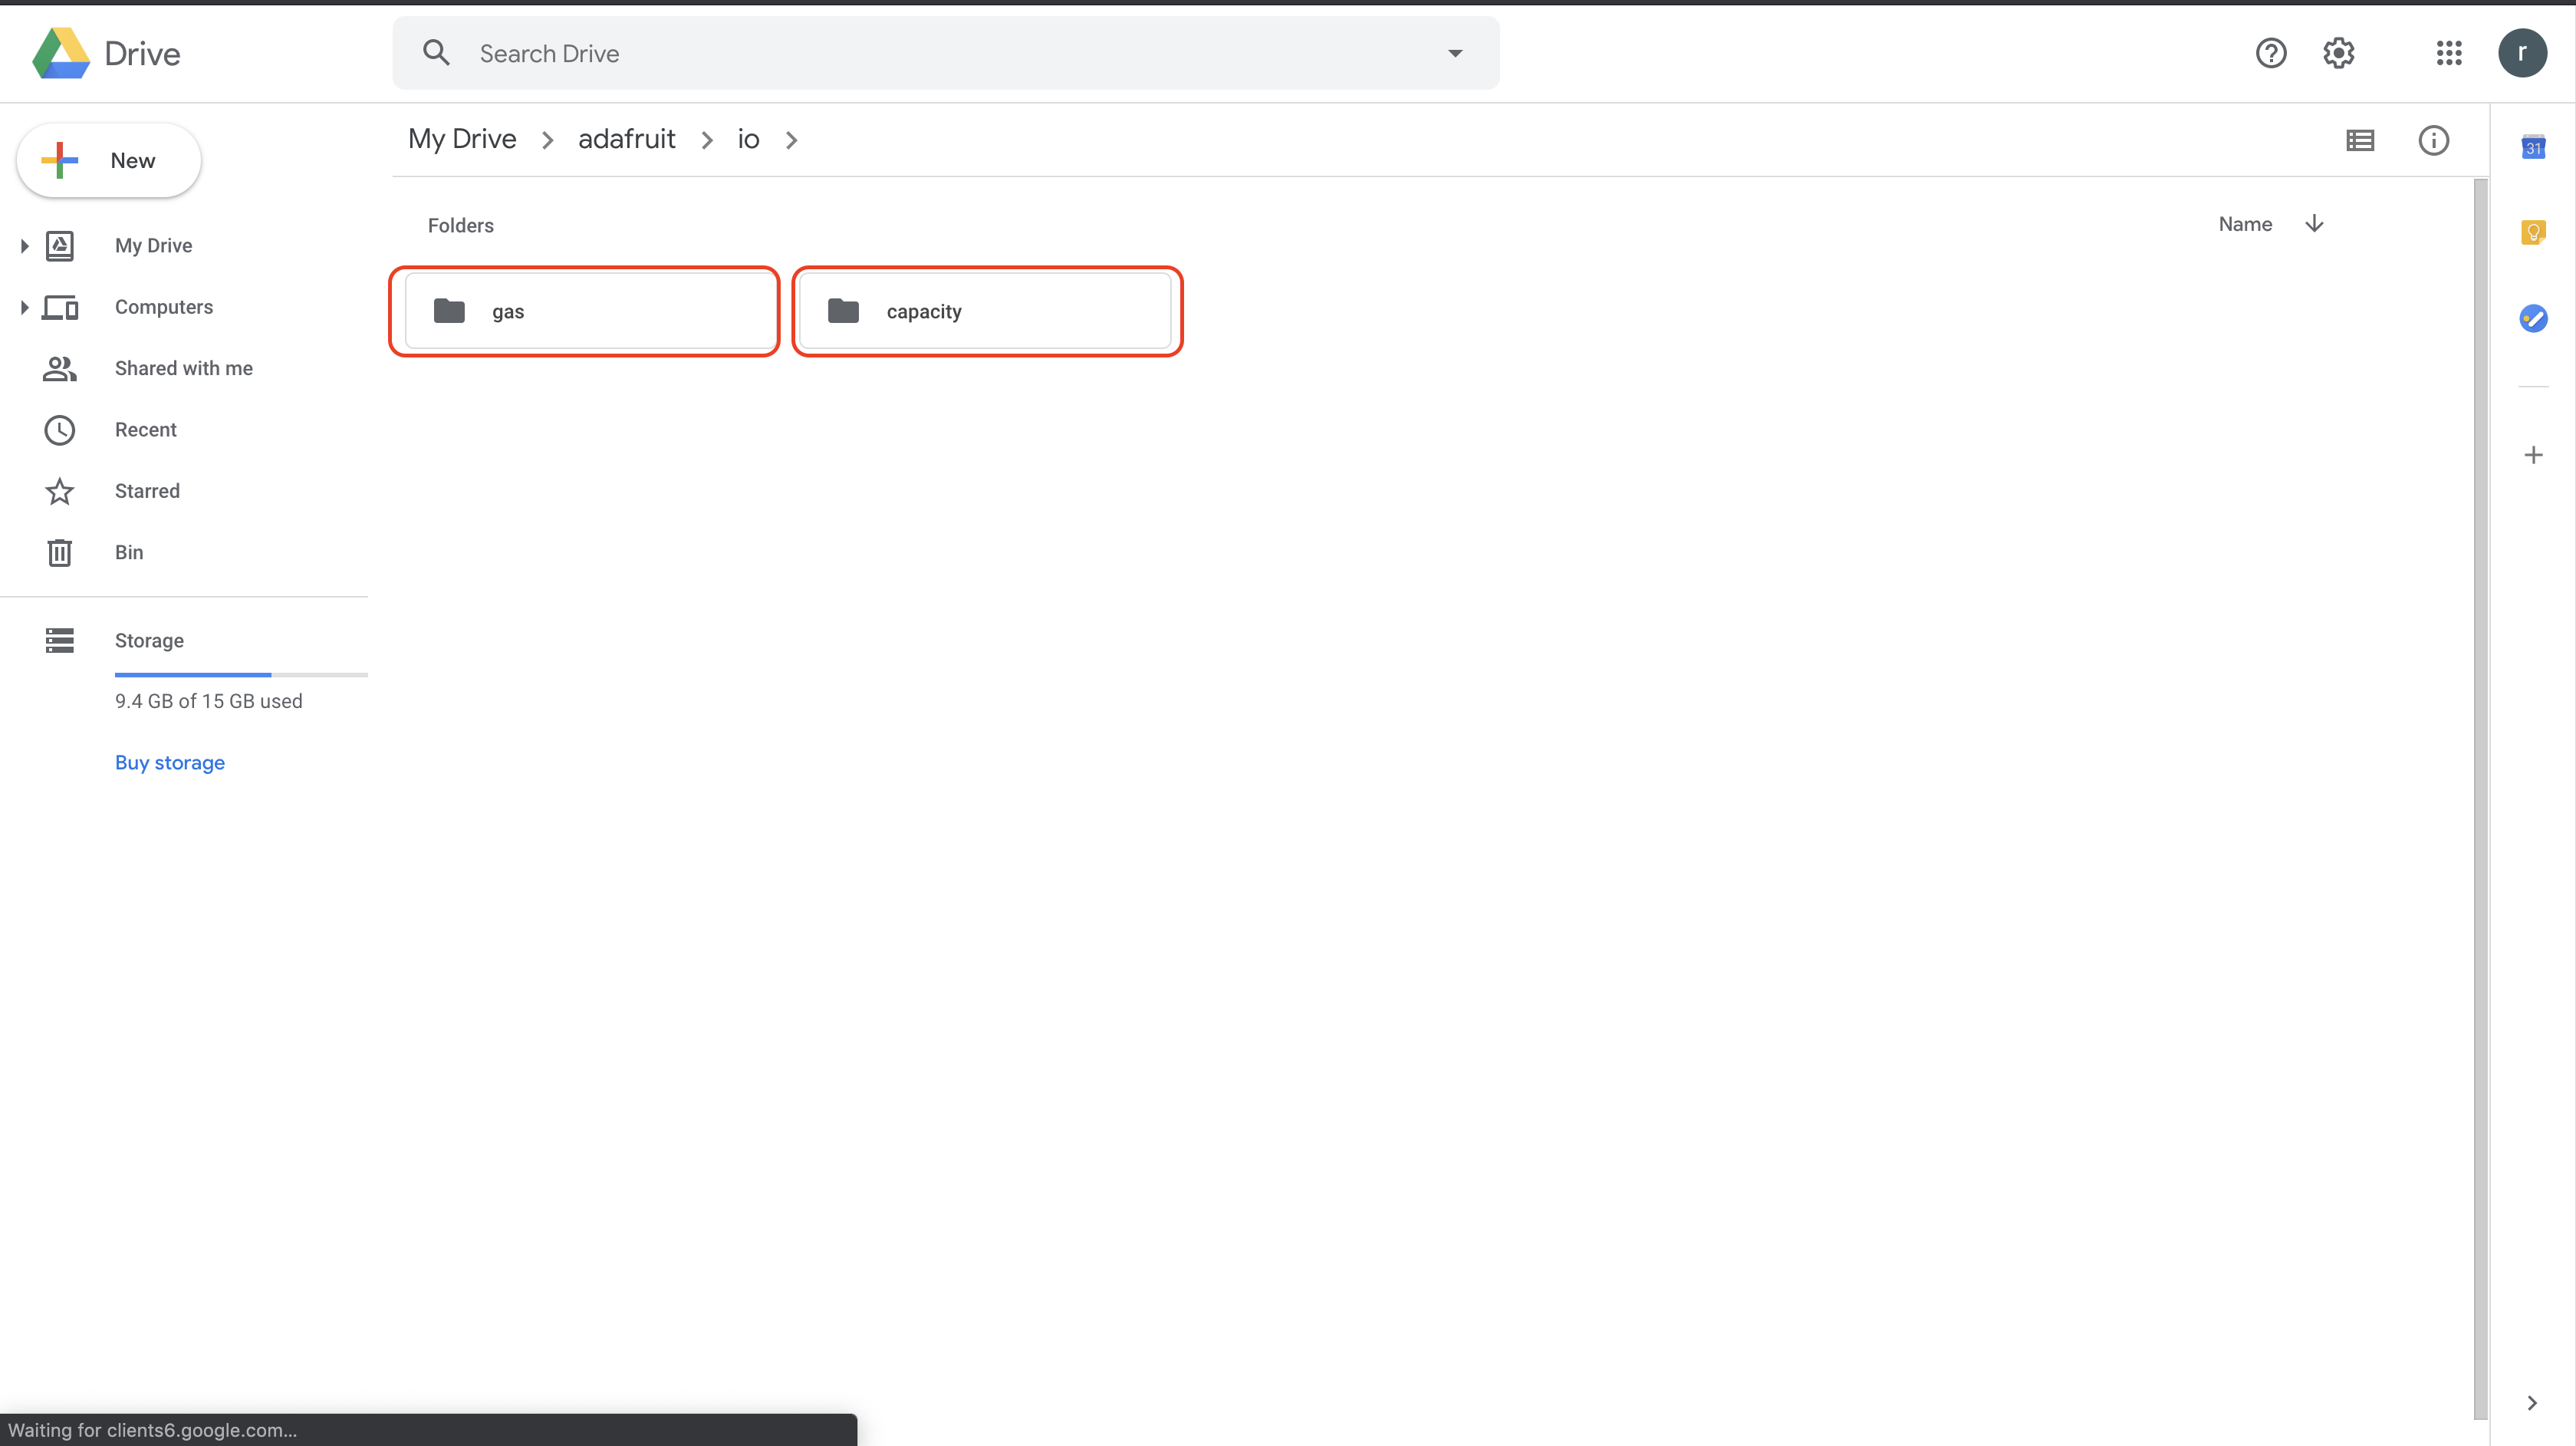
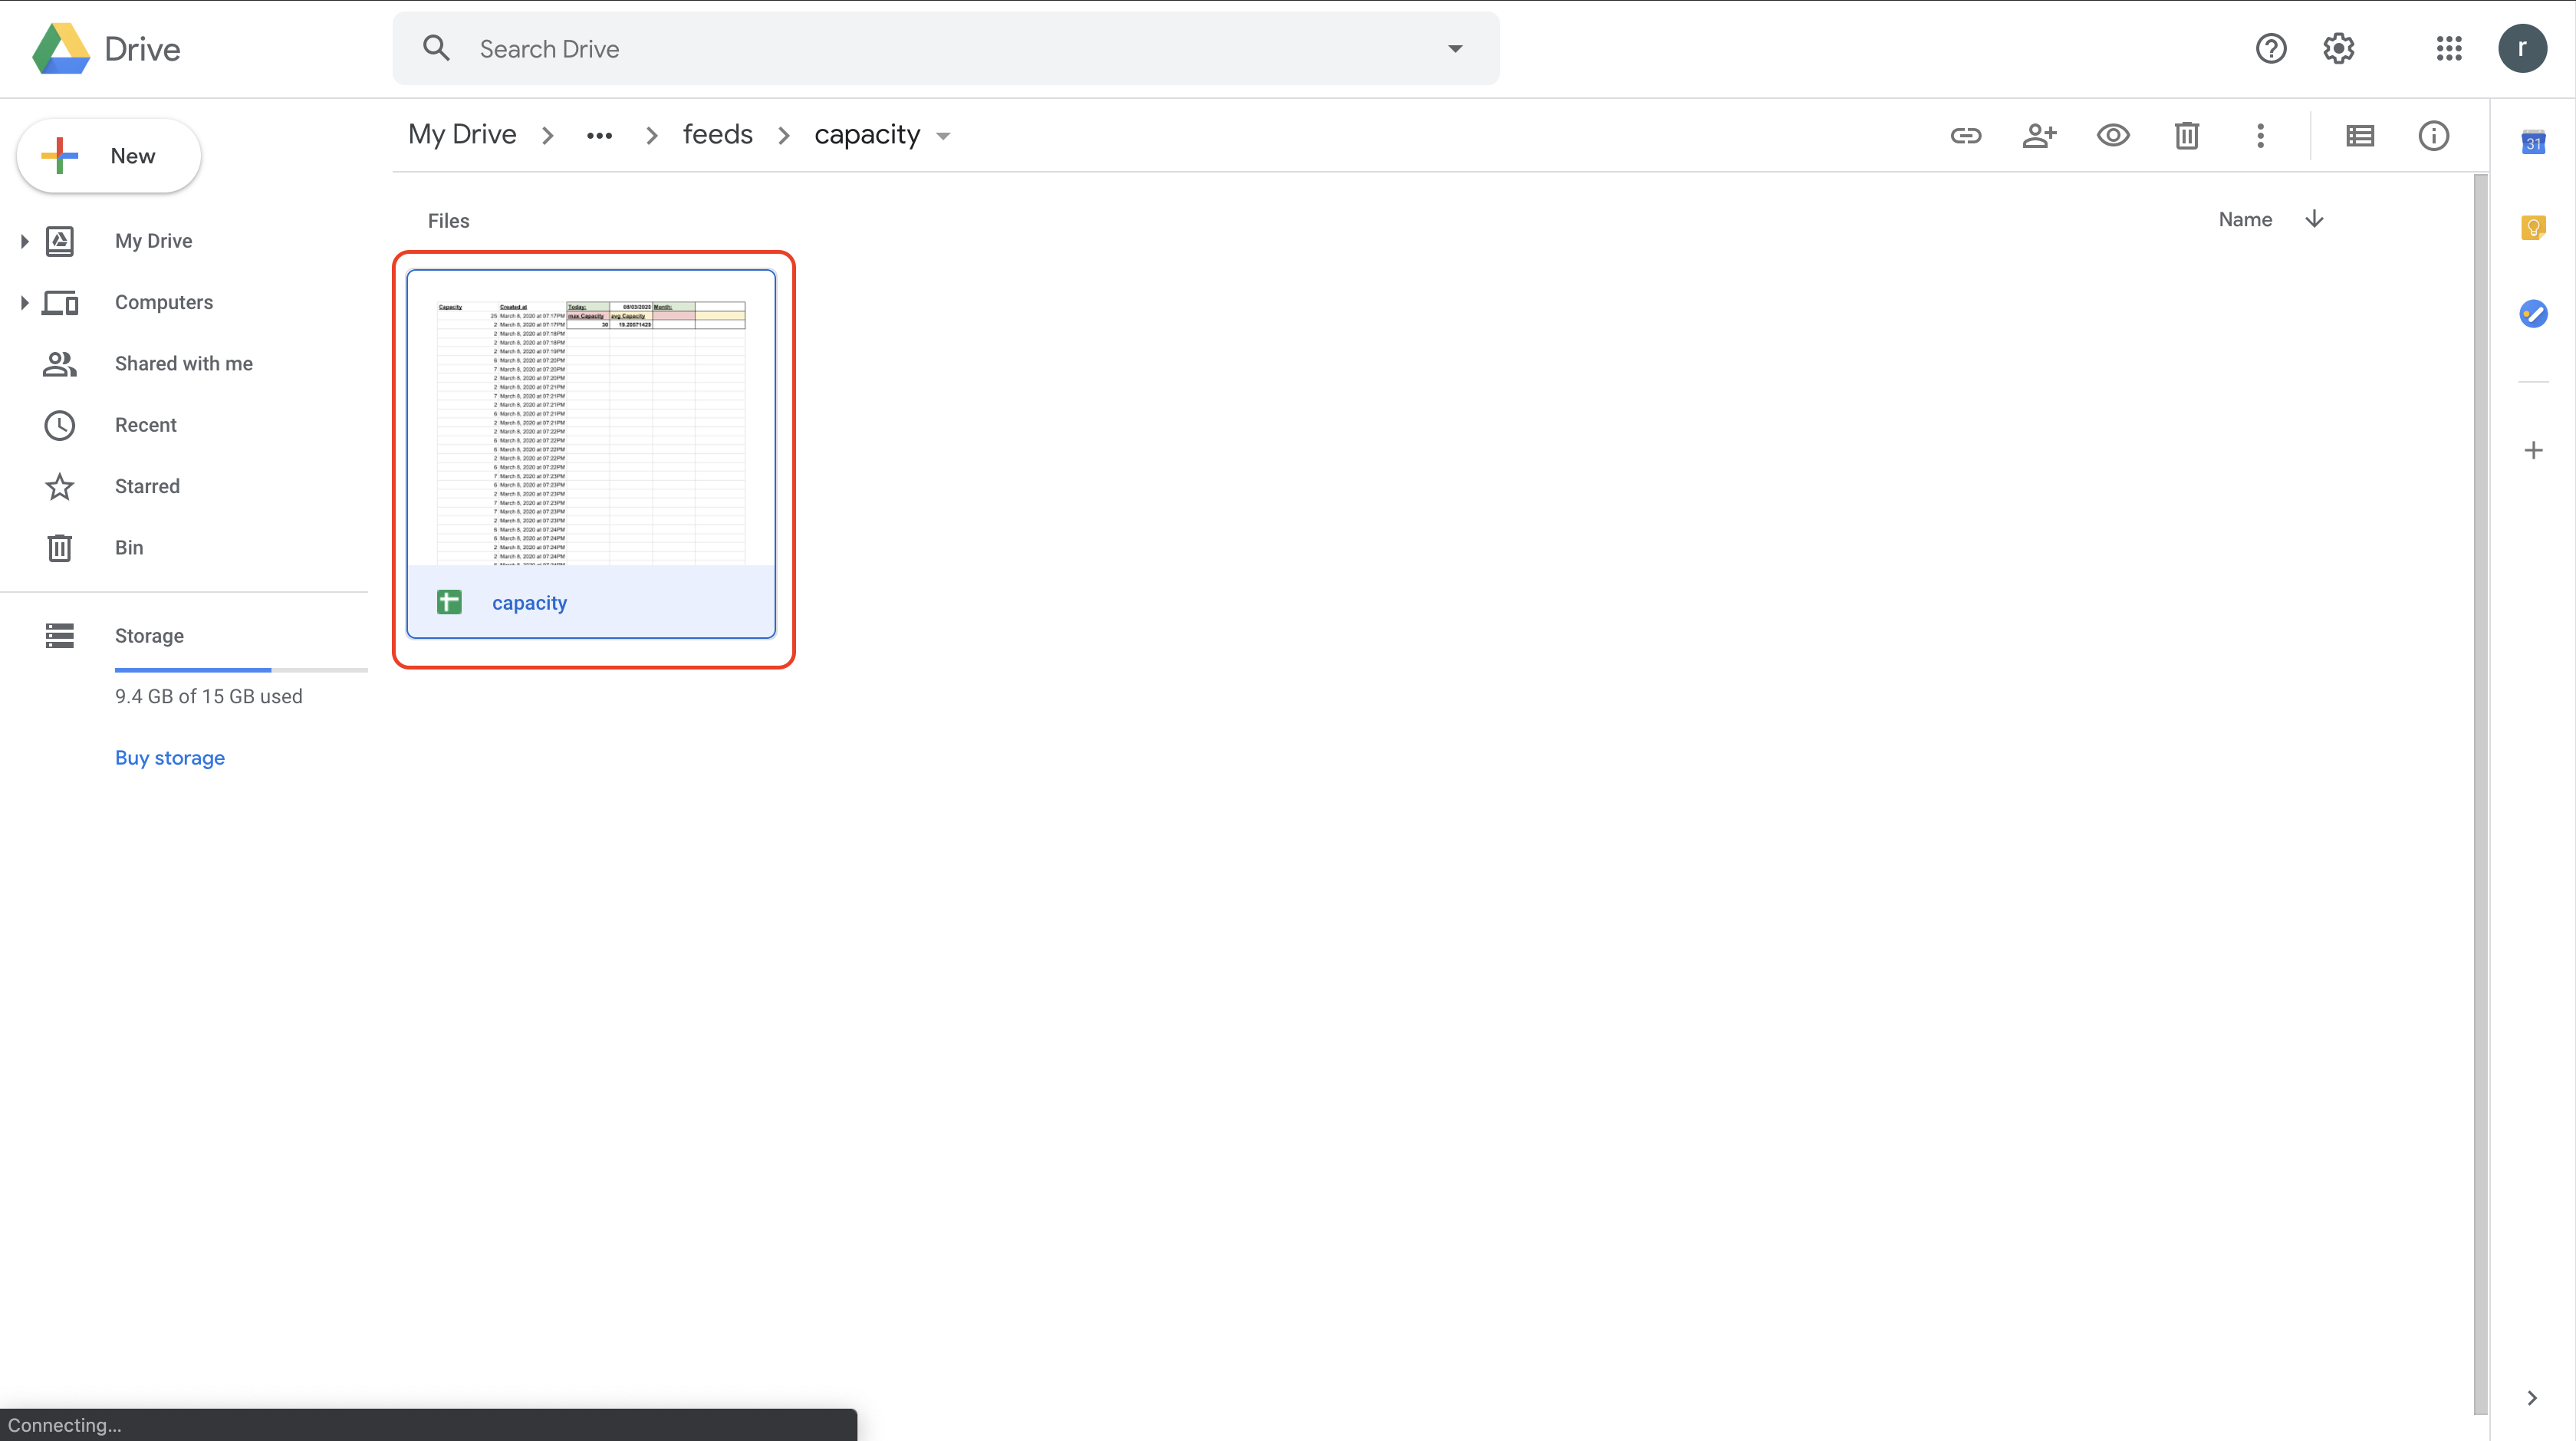
after you created your Adafruit dashboard and the IFTTT's applets go to your Google Drive>adafruit>io
inside you will see the folders with the Adafruit feed names, inside you will have the spreadsheets.
Google Sheets
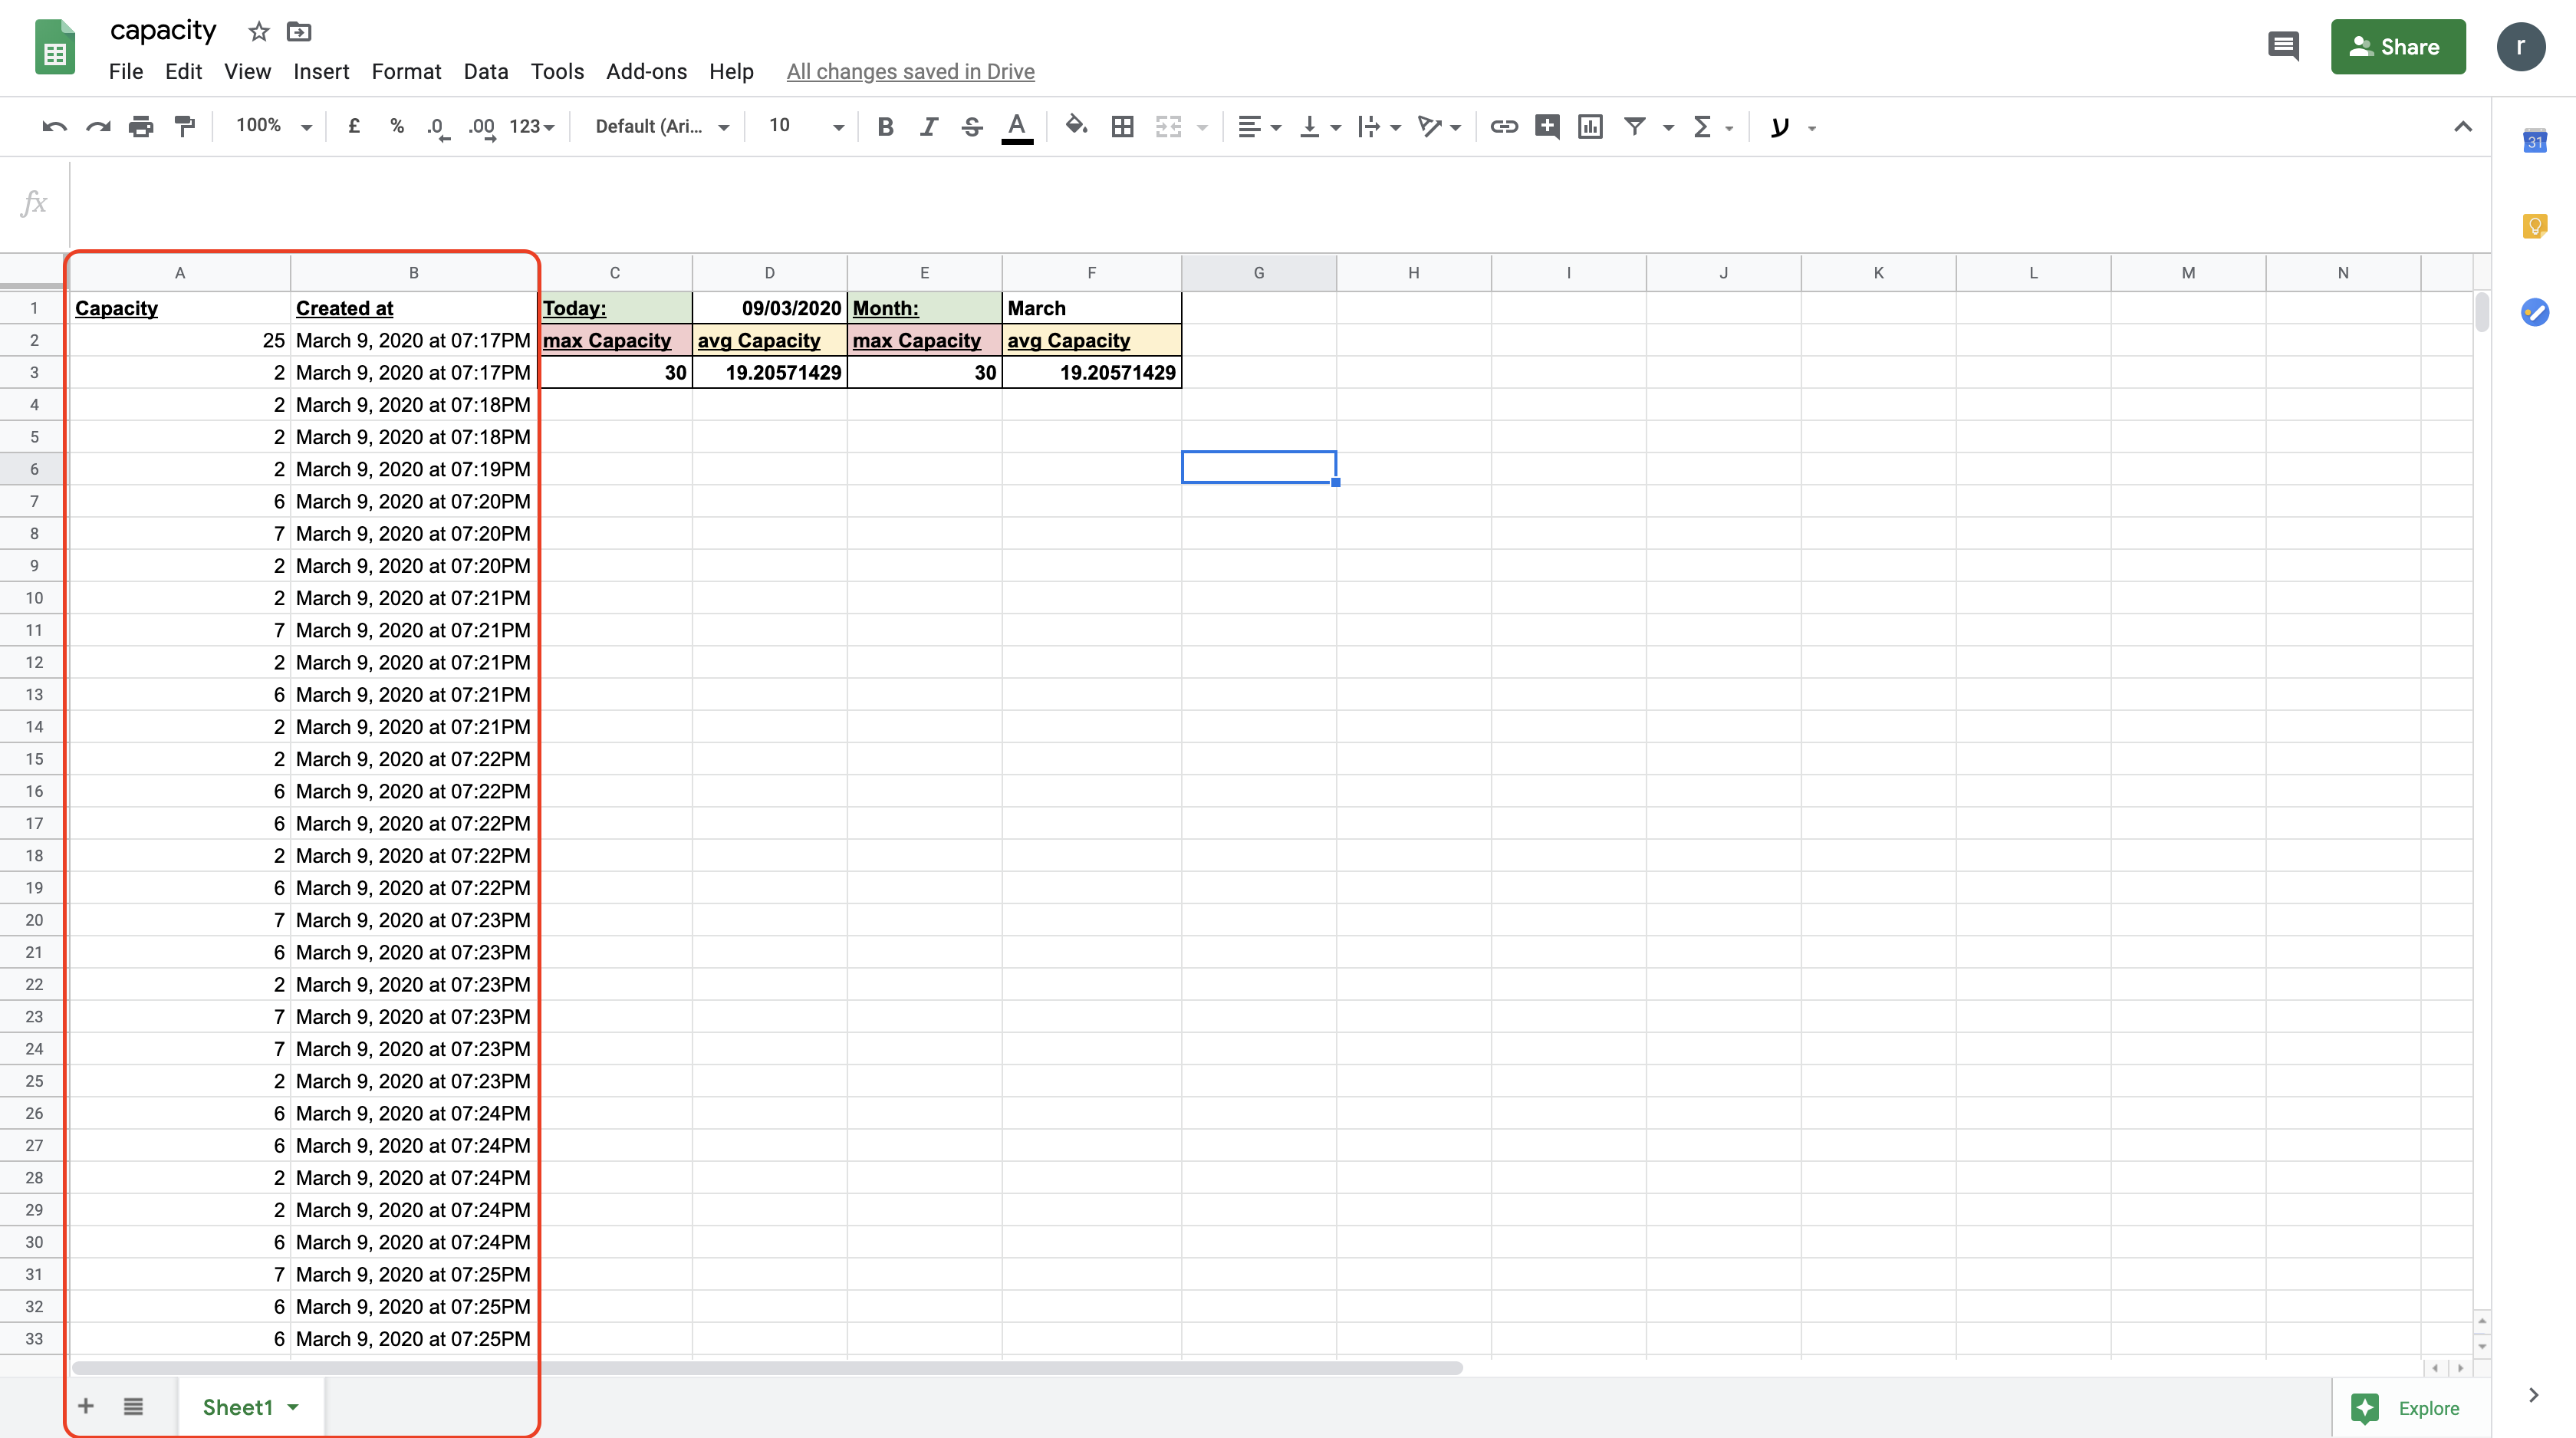
After you created all of the above you can now go and see the data start flow into your Spreadsheet.
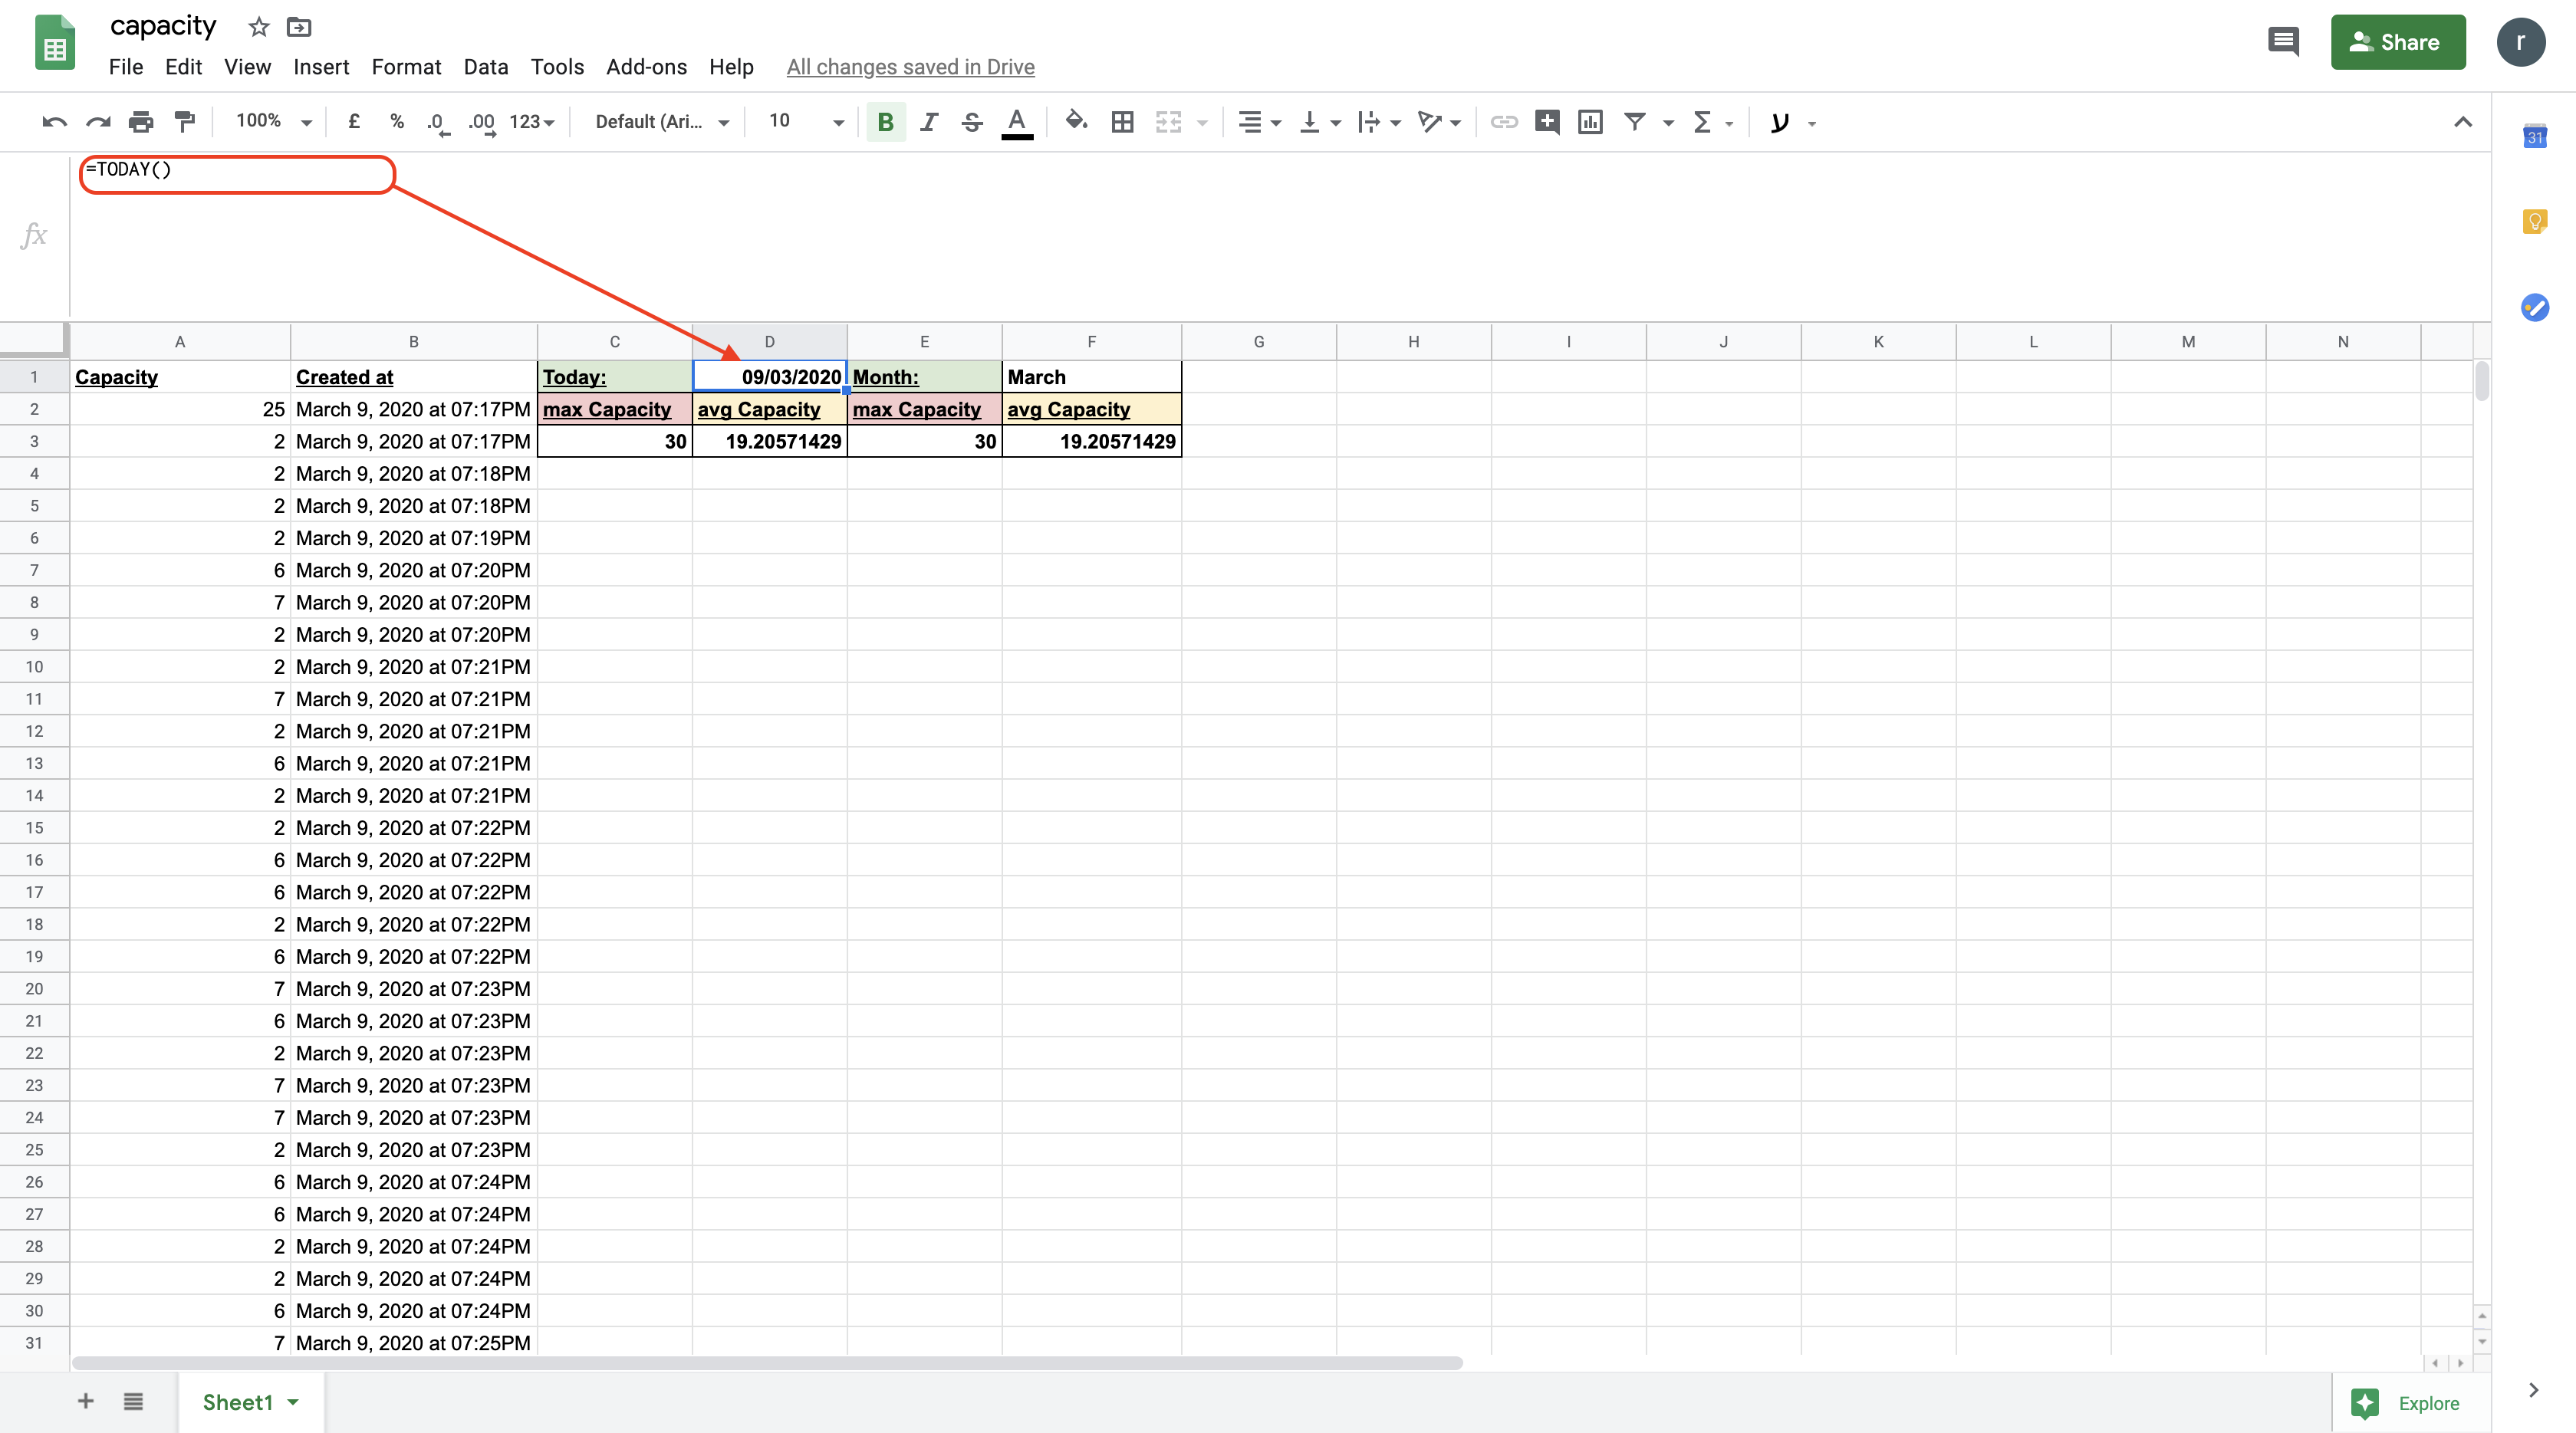
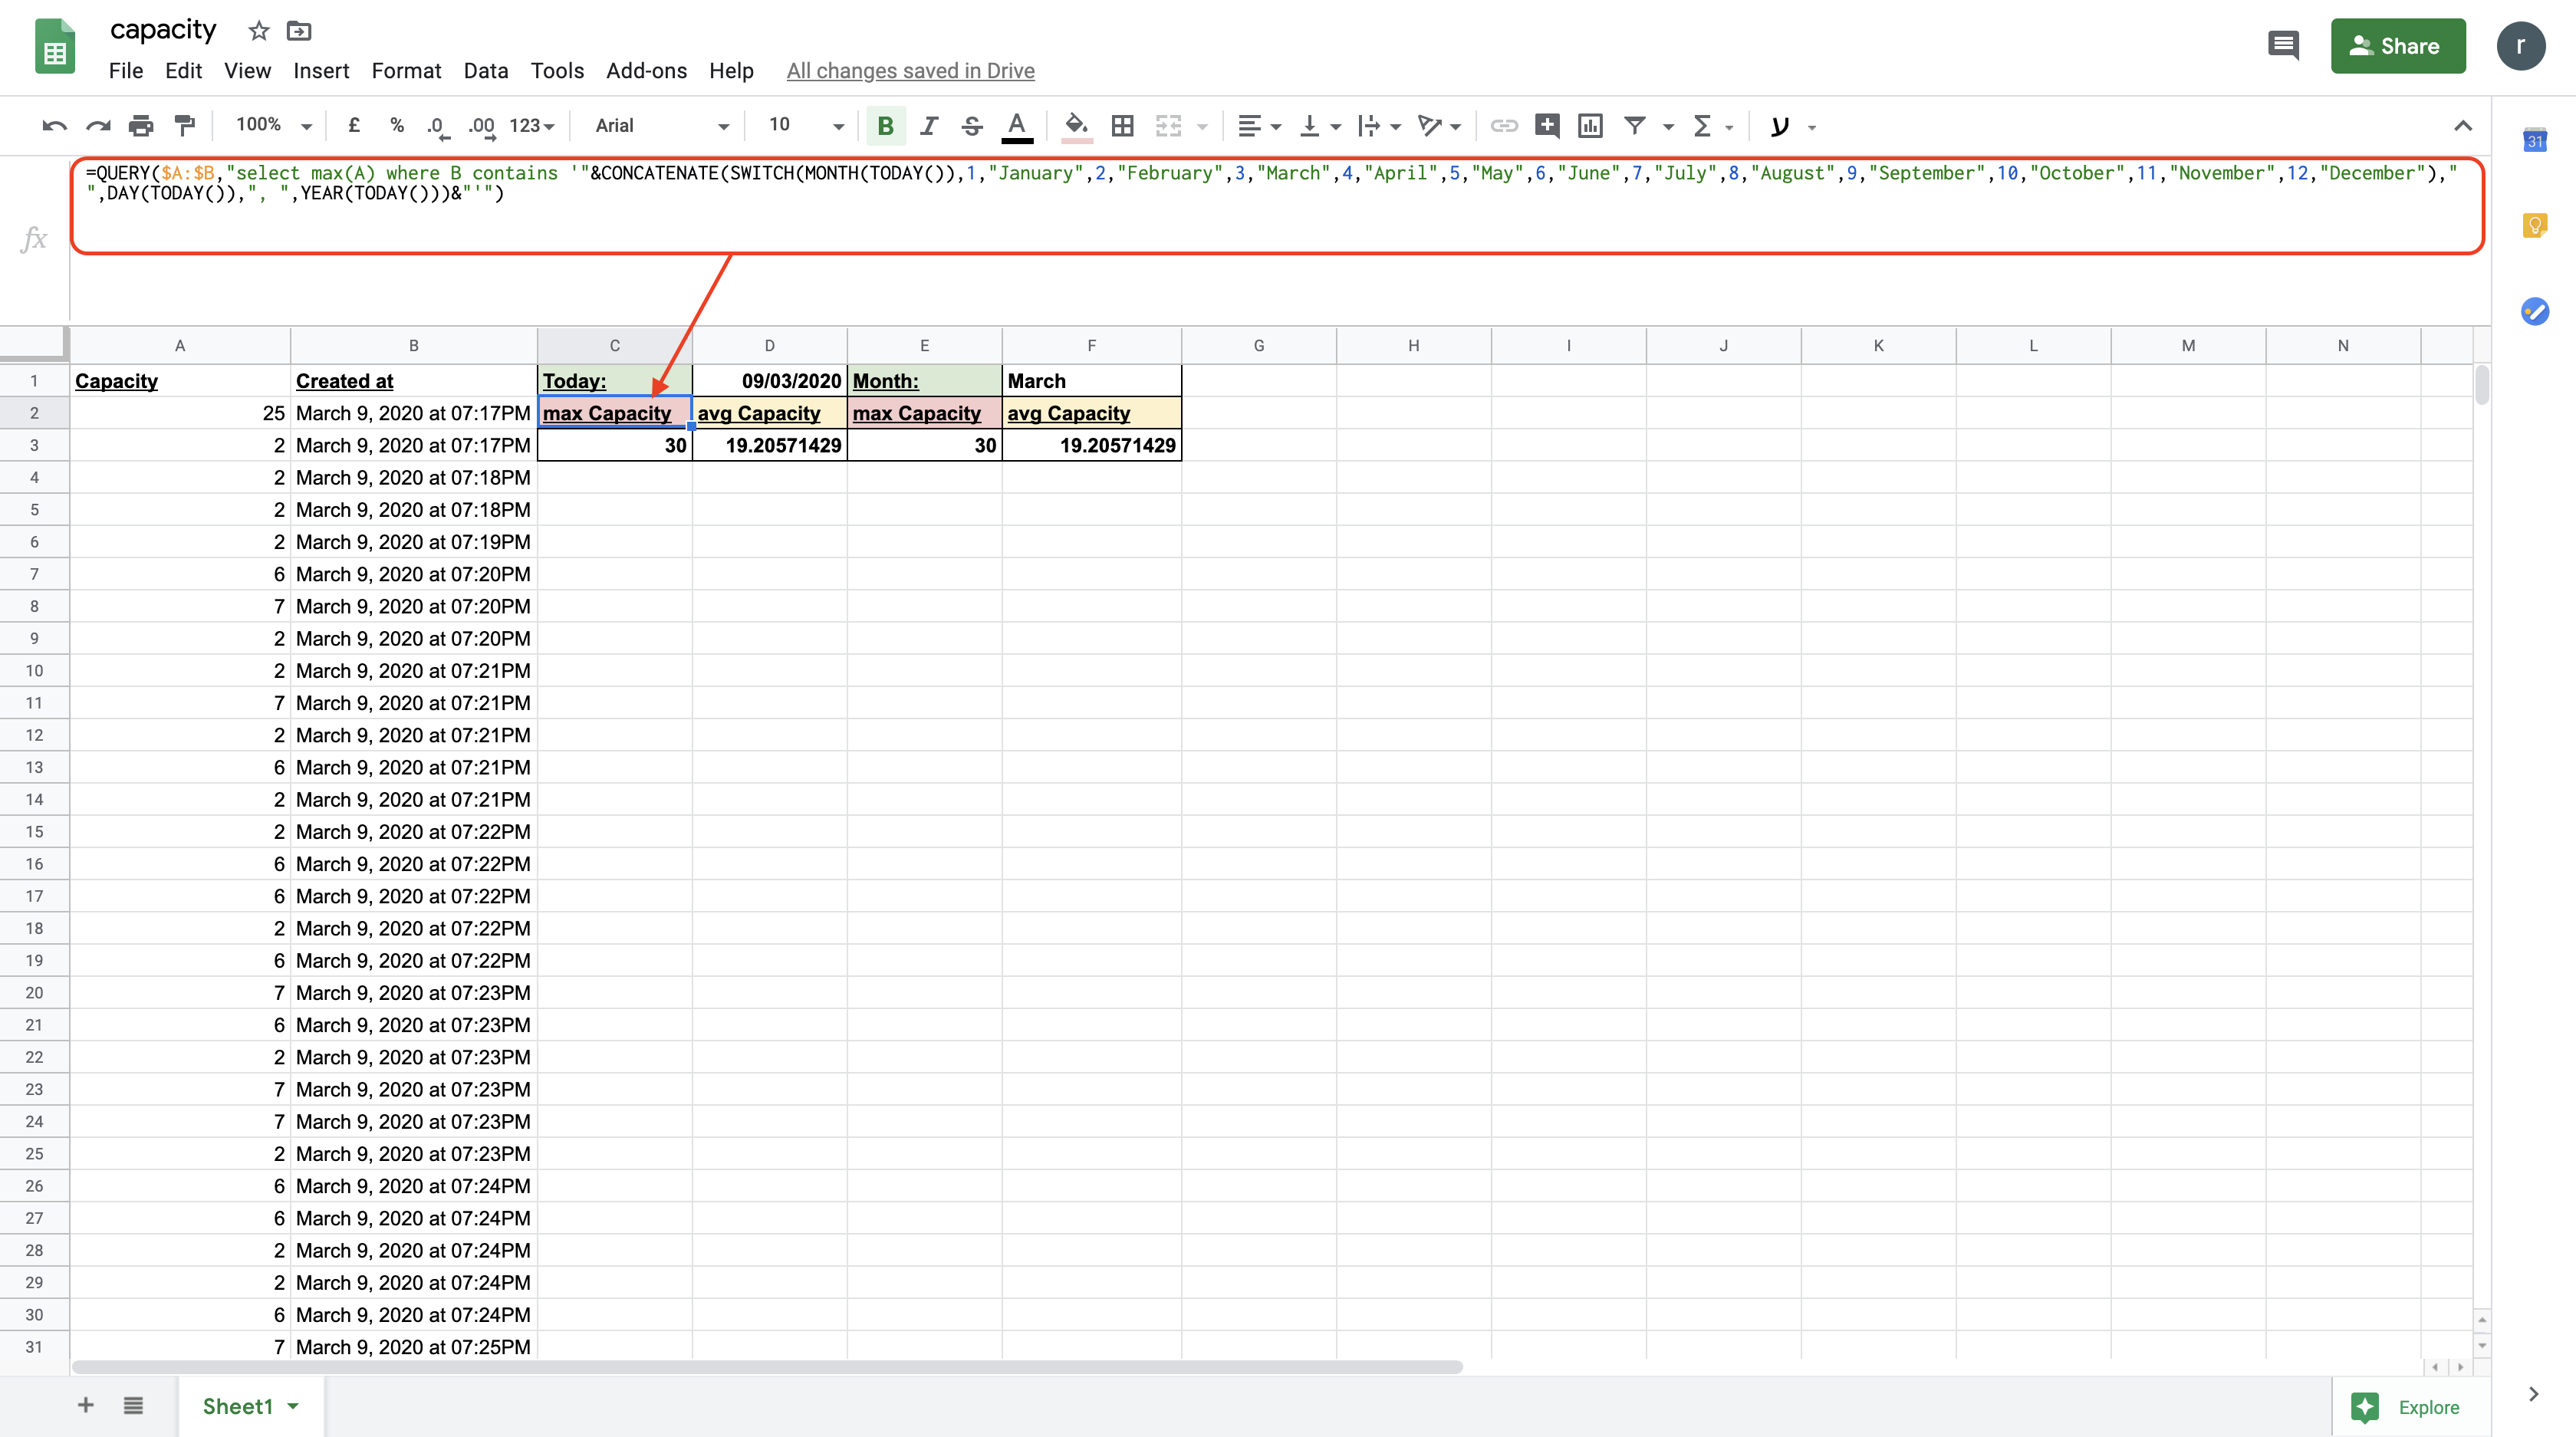
here are some example functions we created that you can copy into your Spreadsheet enjoy.
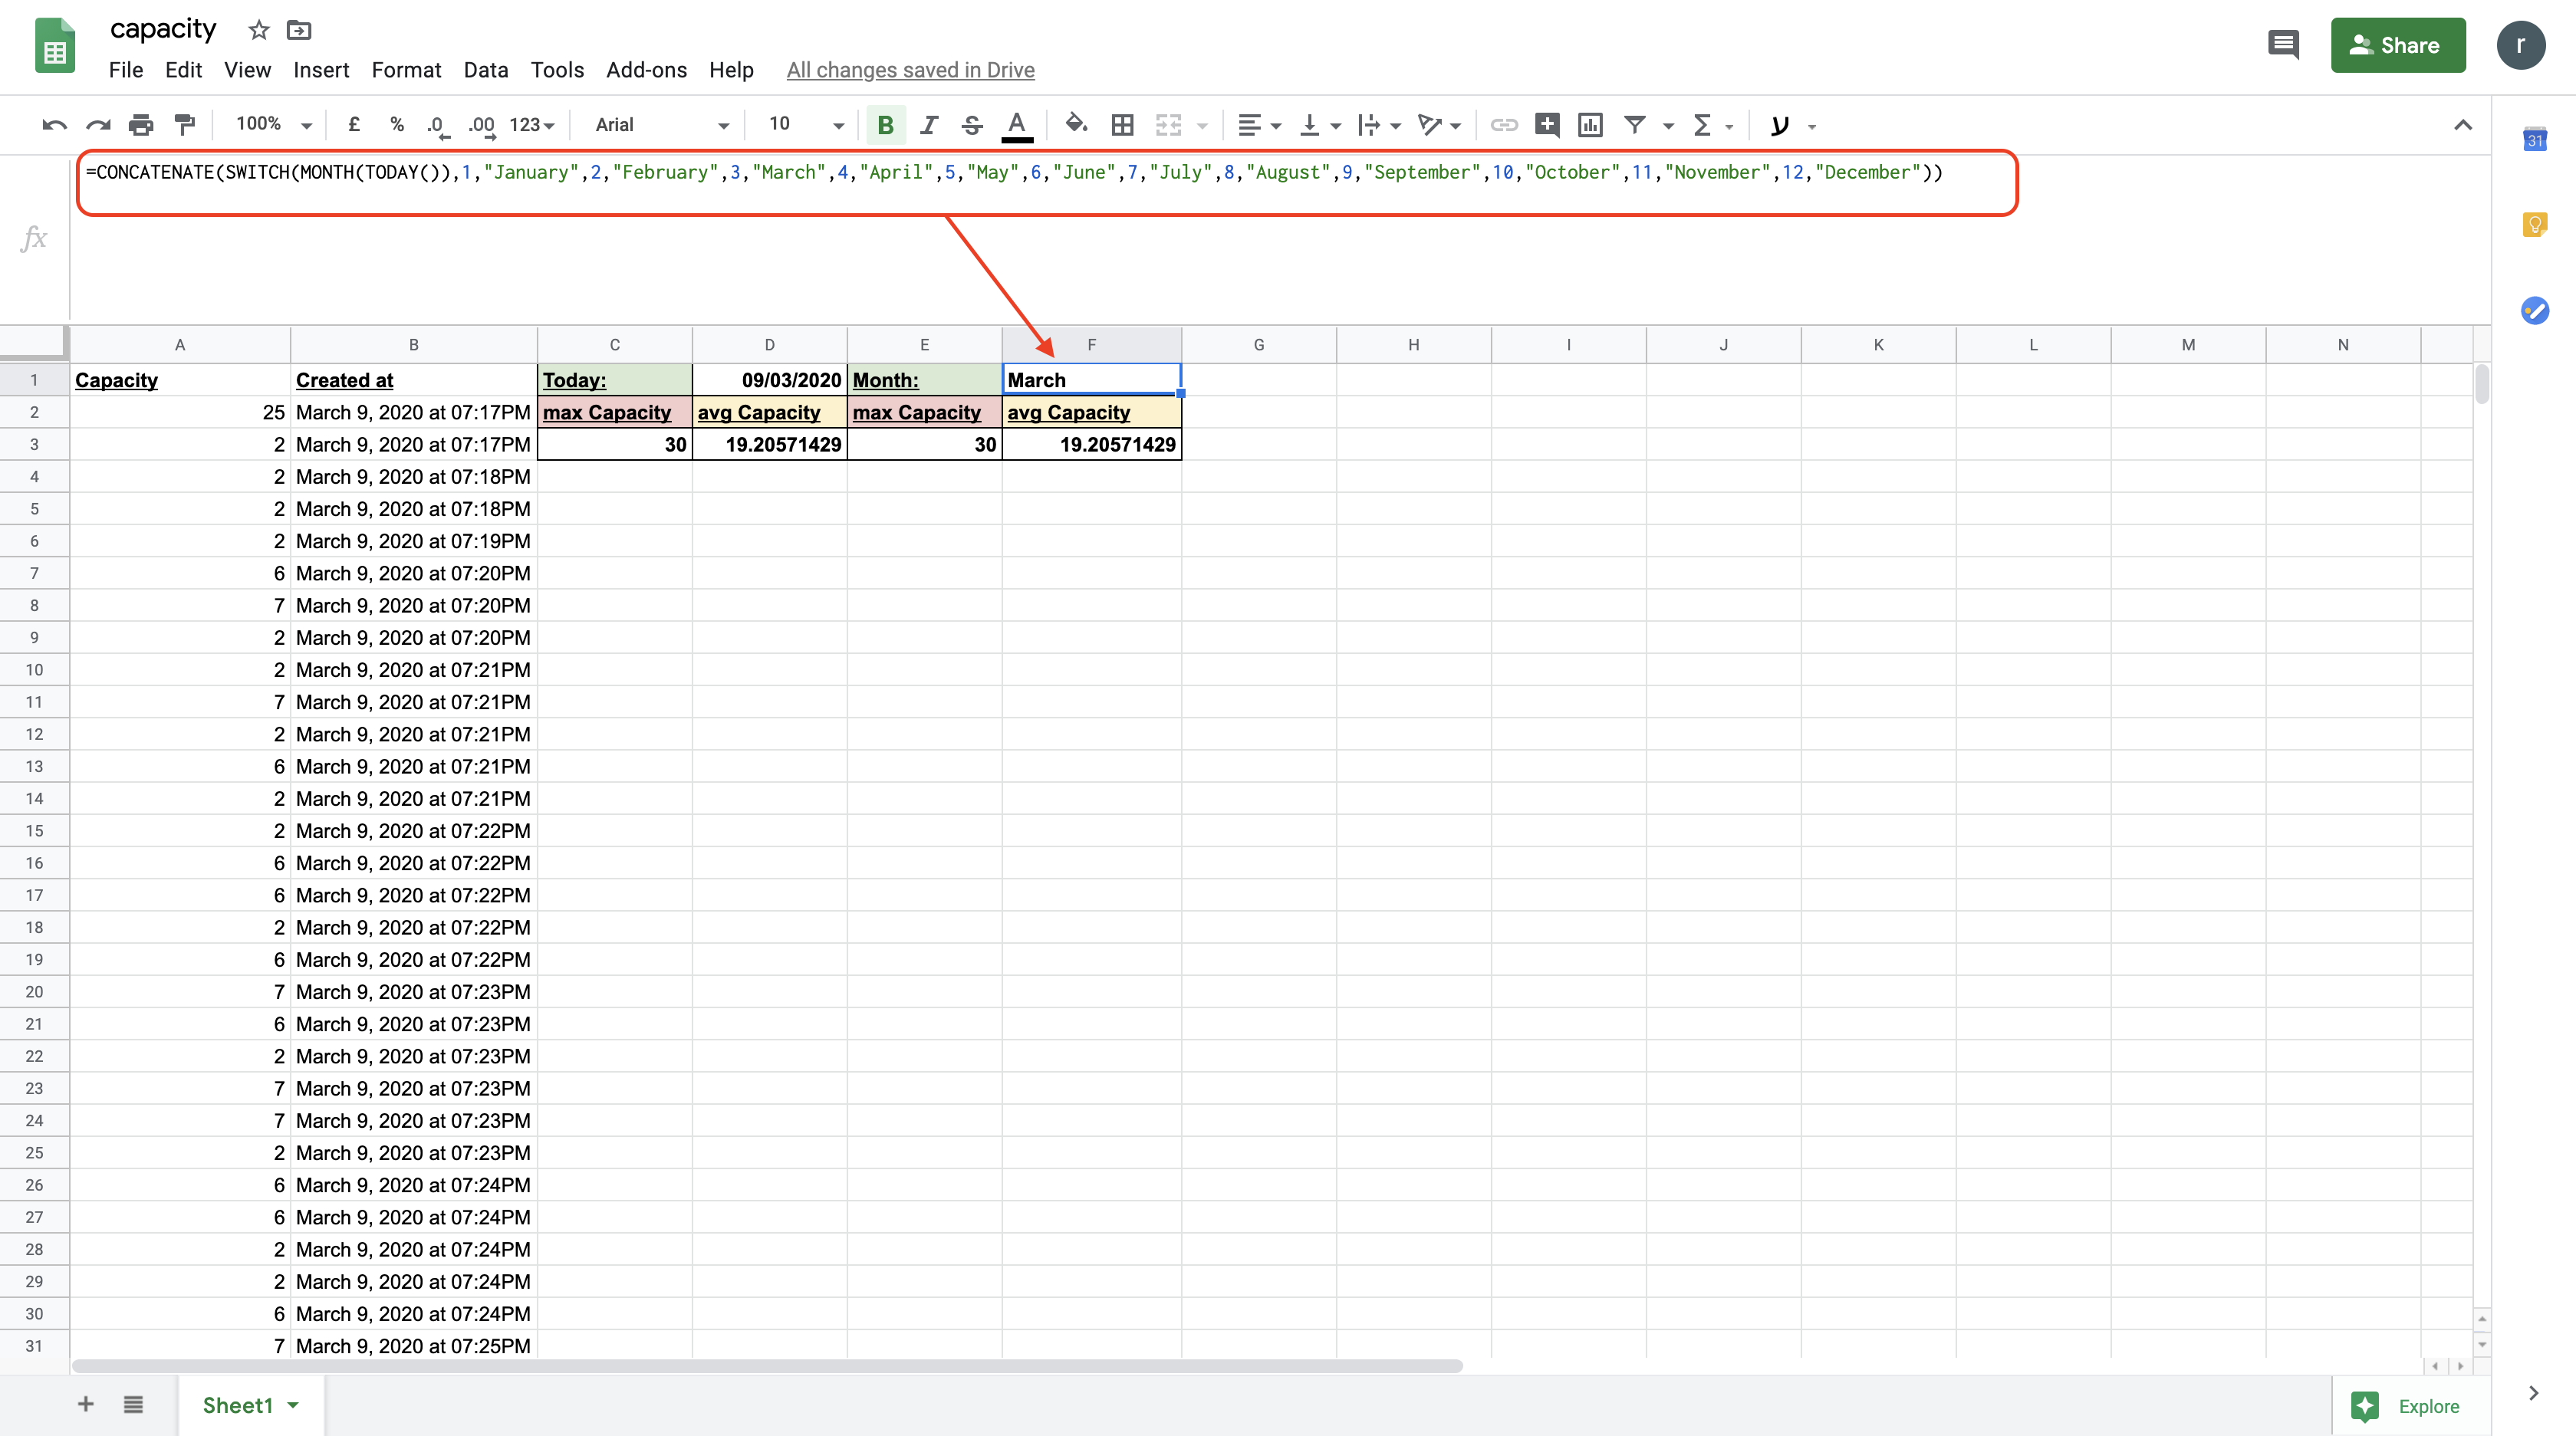
Maximum today {{feed name}}:
=QUERY($A:$B,"select max(A) where B contains '"&CONCATENATE(SWITCH(MONTH(TODAY()),1,"January",2,"February",3,"March",4,"April",5,"May",6,"June",7,"July",8,"August",9,"September",10,"October",11,"November",12,"December")," ",DAY(TODAY()),", ",YEAR(TODAY()))&"'")
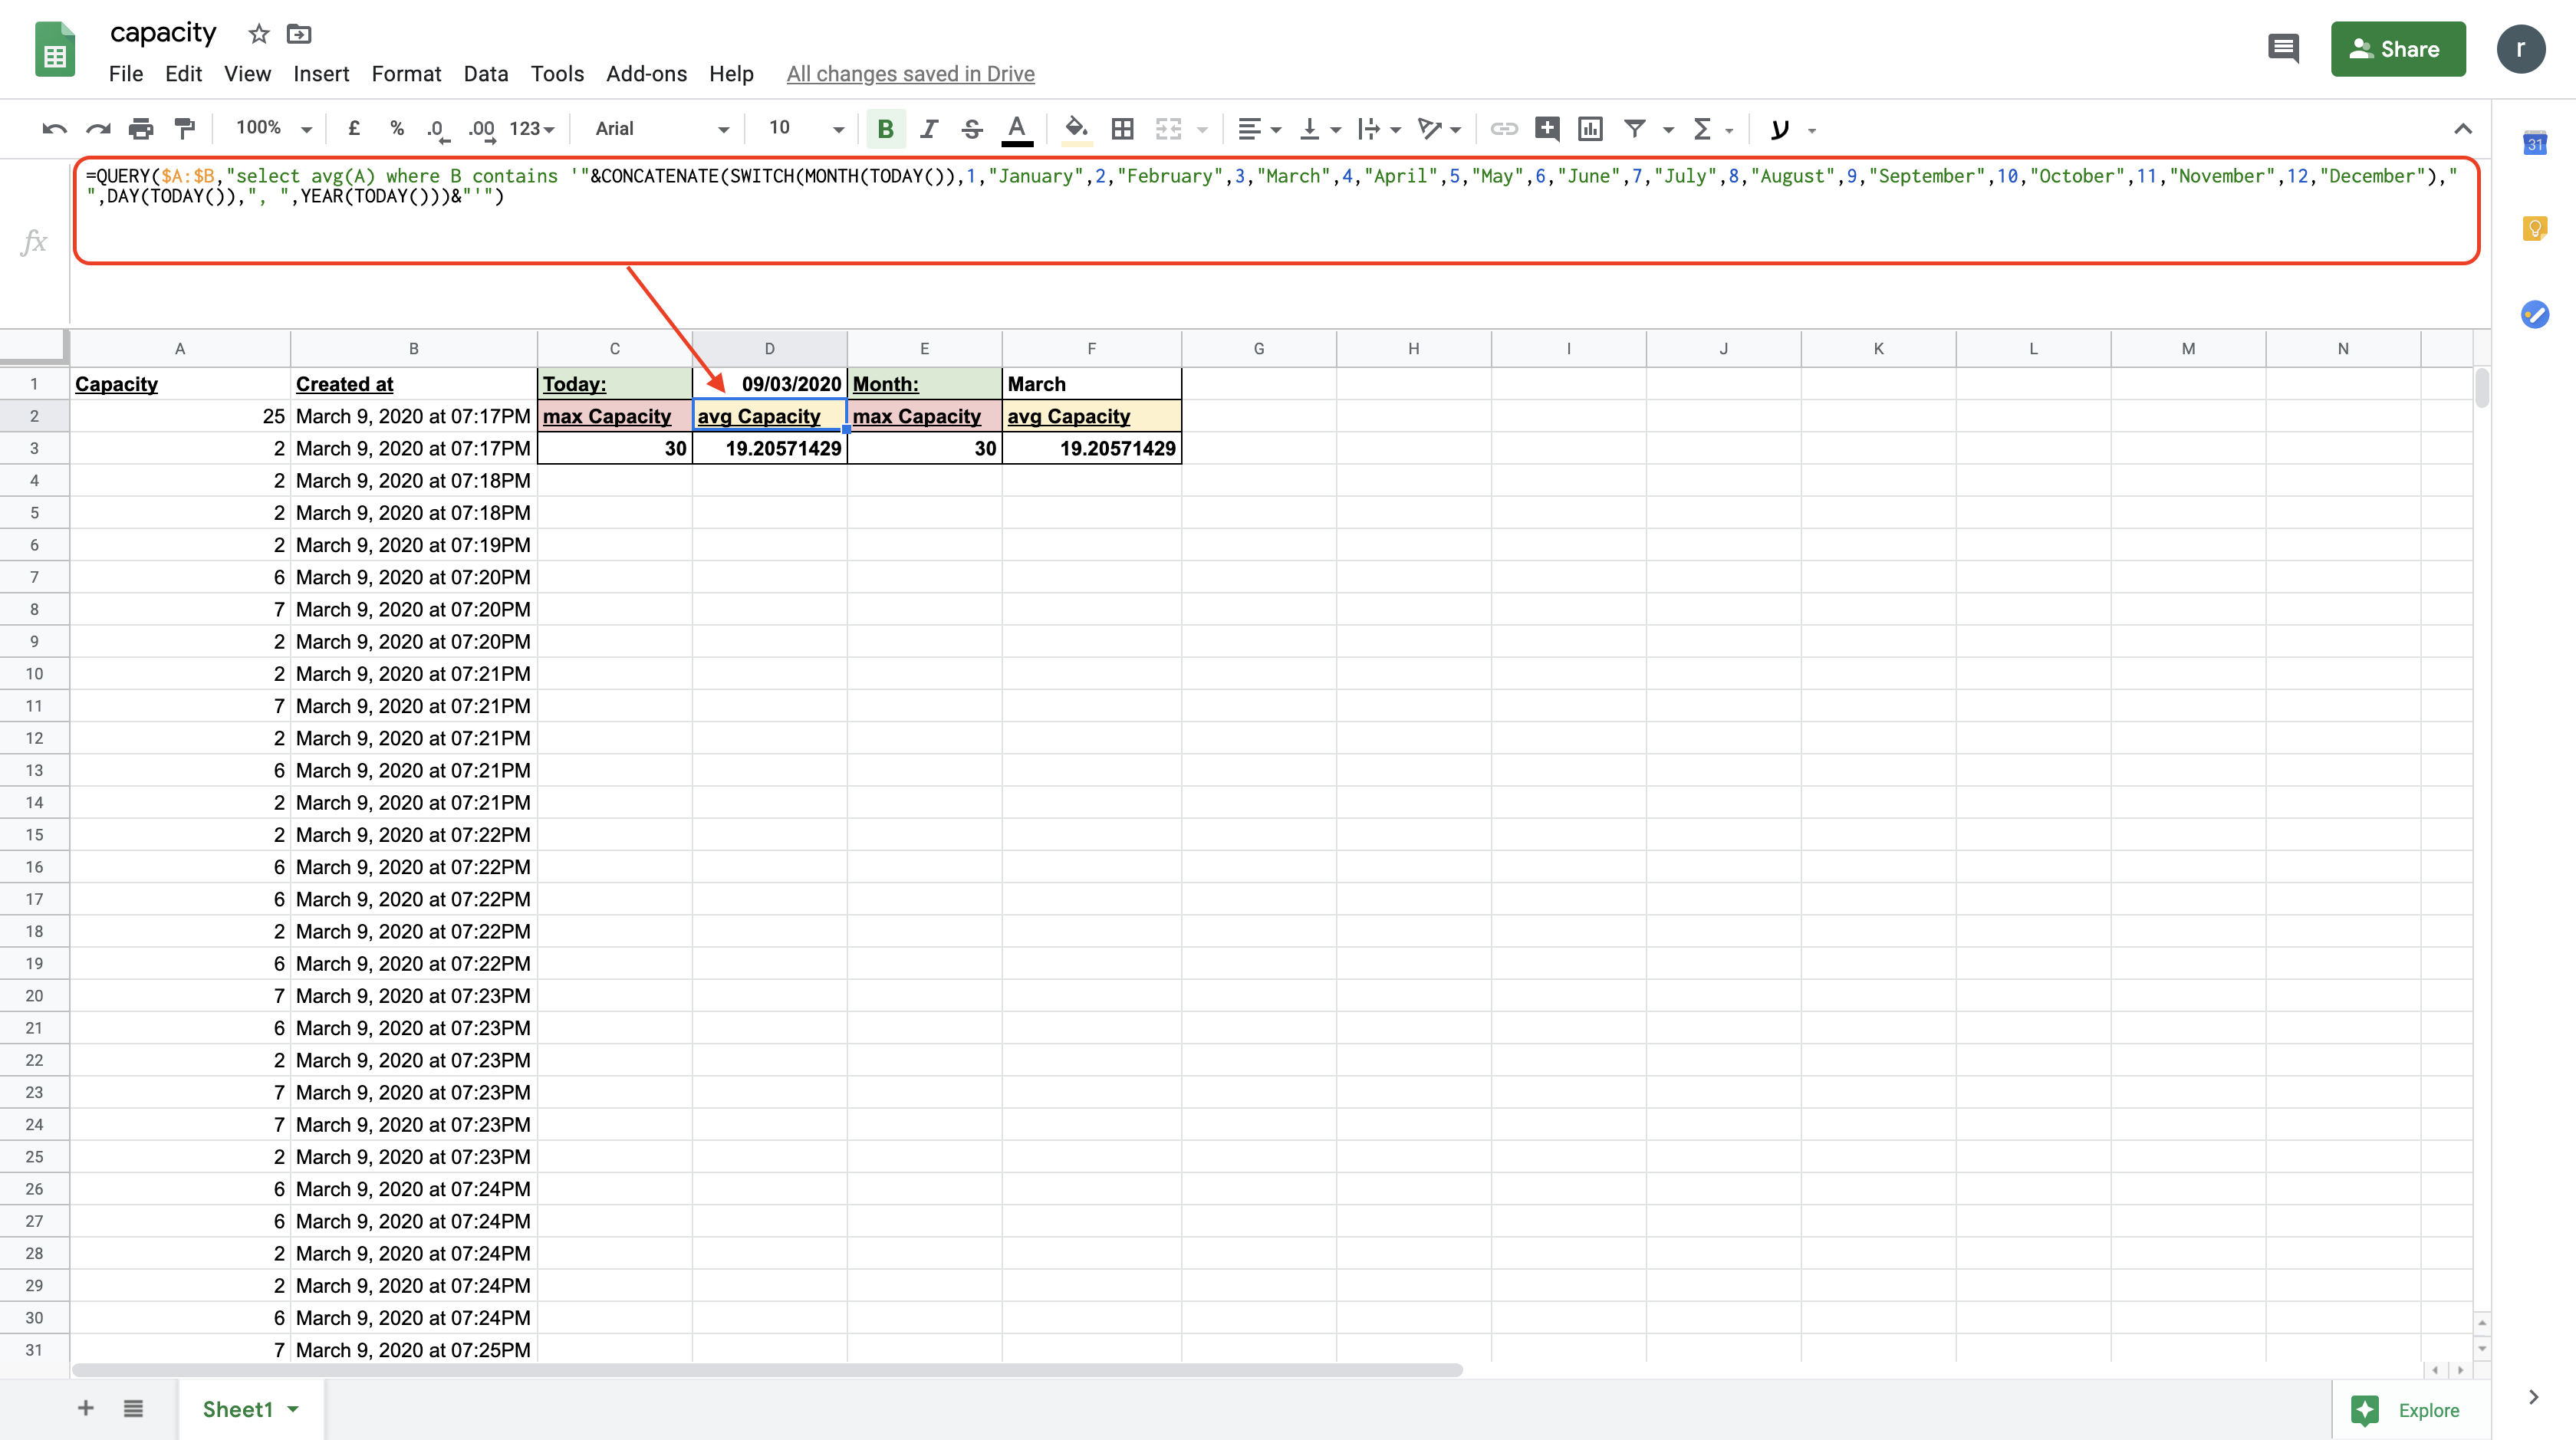
Average today {{feed name}}:
=QUERY($A:$B,"select avg(A) where B contains '"&CONCATENATE(SWITCH(MONTH(TODAY()),1,"January",2,"February",3,"March",4,"April",5,"May",6,"June",7,"July",8,"August",9,"September",10,"October",11,"November",12,"December")," ",DAY(TODAY()),", ",YEAR(TODAY()))&"'")
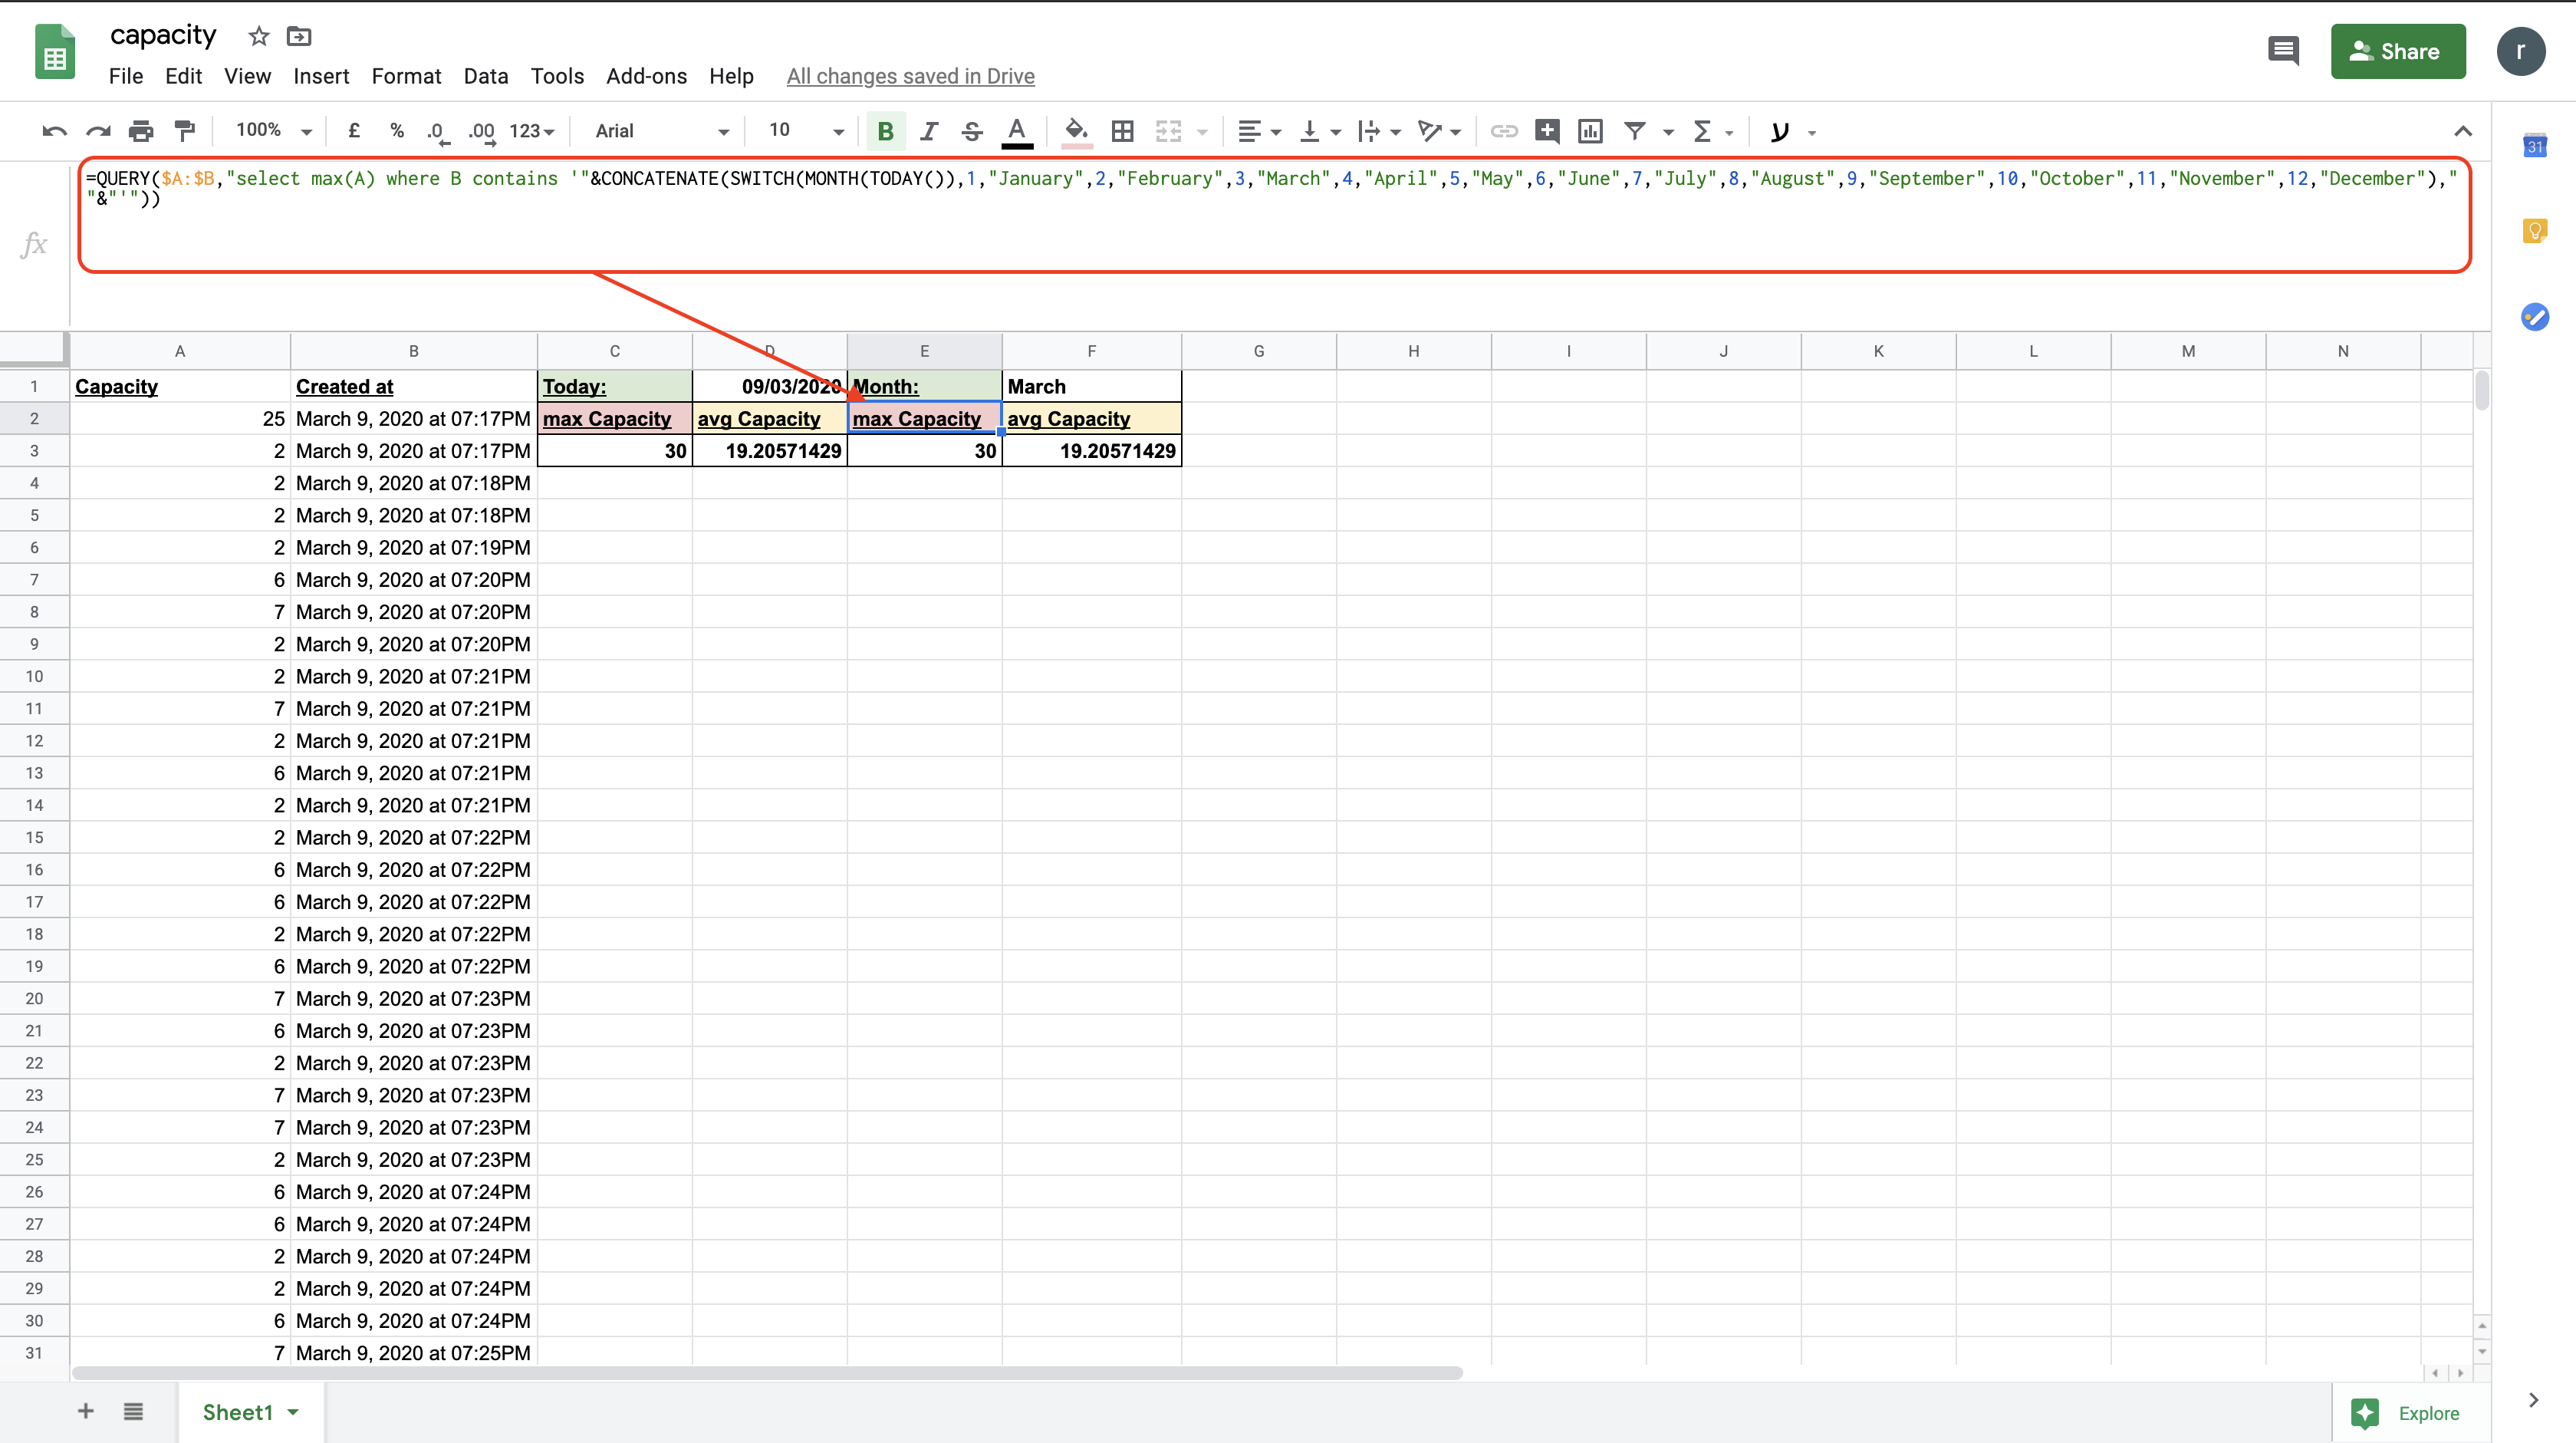
Maximum month {{feed name}}:
=QUERY($A:$B,"select max(A) where B contains '"&CONCATENATE(SWITCH(MONTH(TODAY()),1,"January",2,"February",3,"March",4,"April",5,"May",6,"June",7,"July",8,"August",9,"September",10,"October",11,"November",12,"December")," "&"'"))
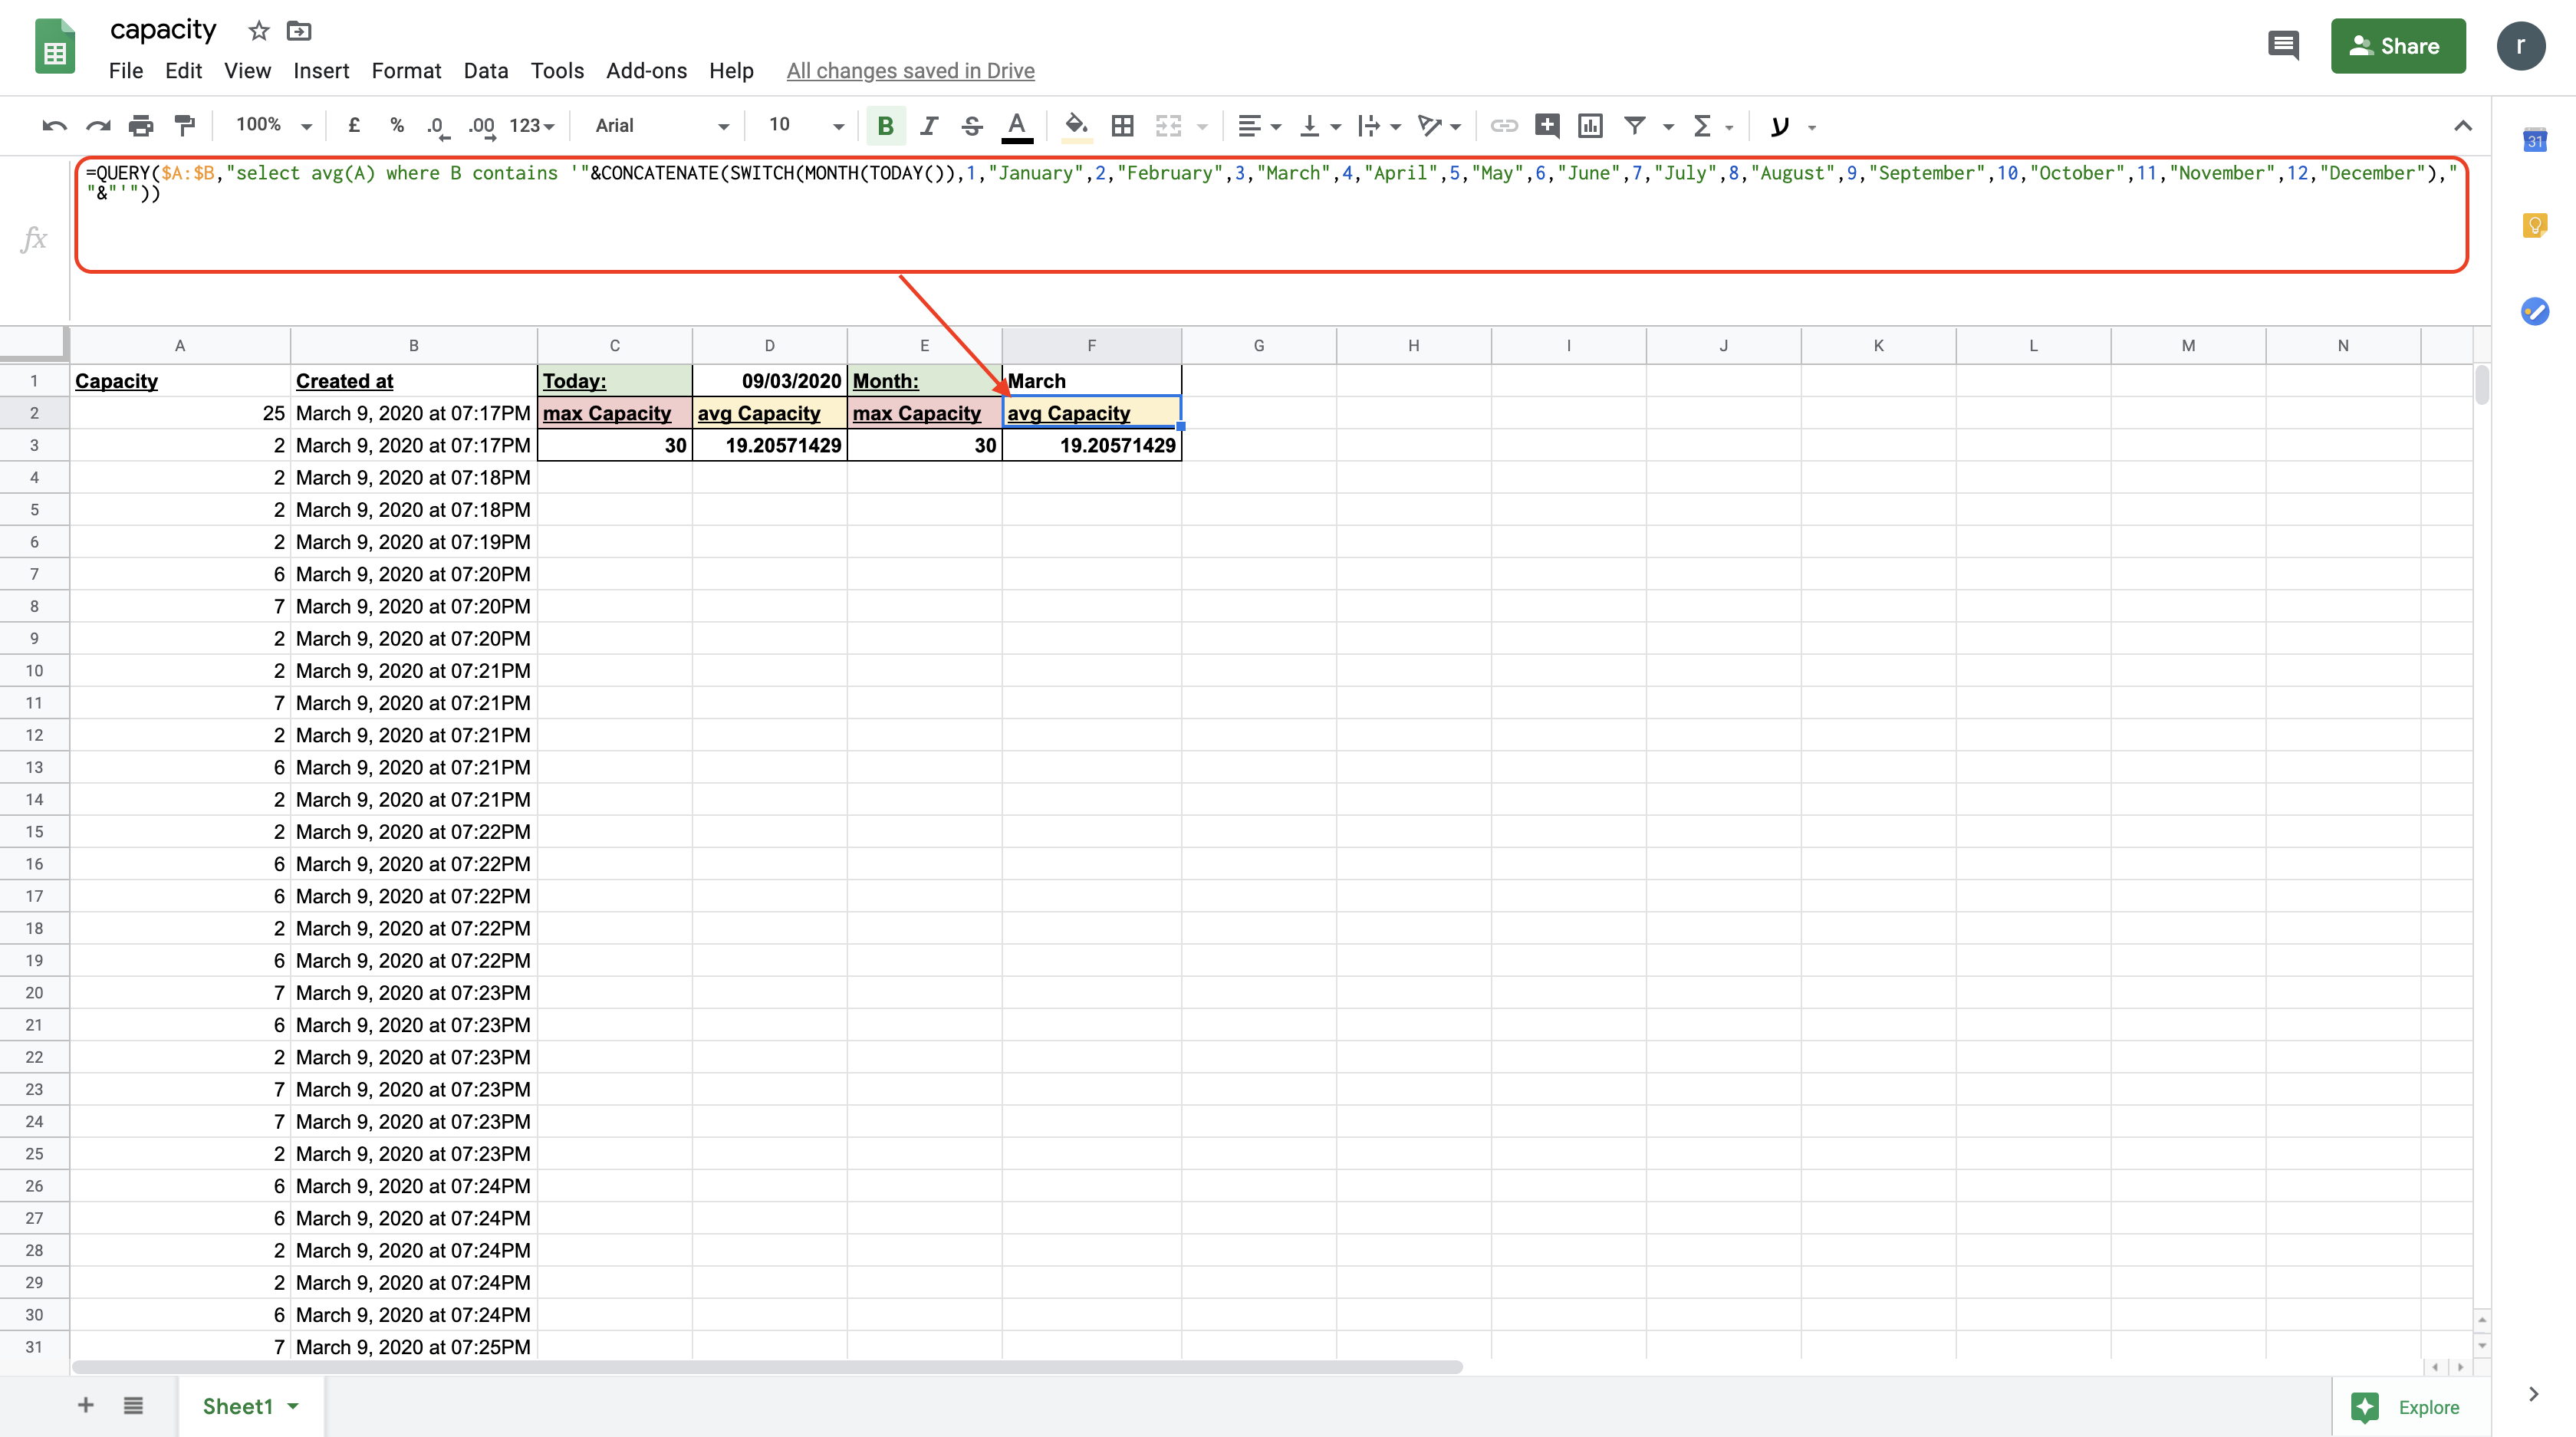
Average month {{feed name}}:
=QUERY($A:$B,"select avg(A) where B contains '"&CONCATENATE(SWITCH(MONTH(TODAY()),1,"January",2,"February",3,"March",4,"April",5,"May",6,"June",7,"July",8,"August",9,"September",10,"October",11,"November",12,"December")," "&"'"))
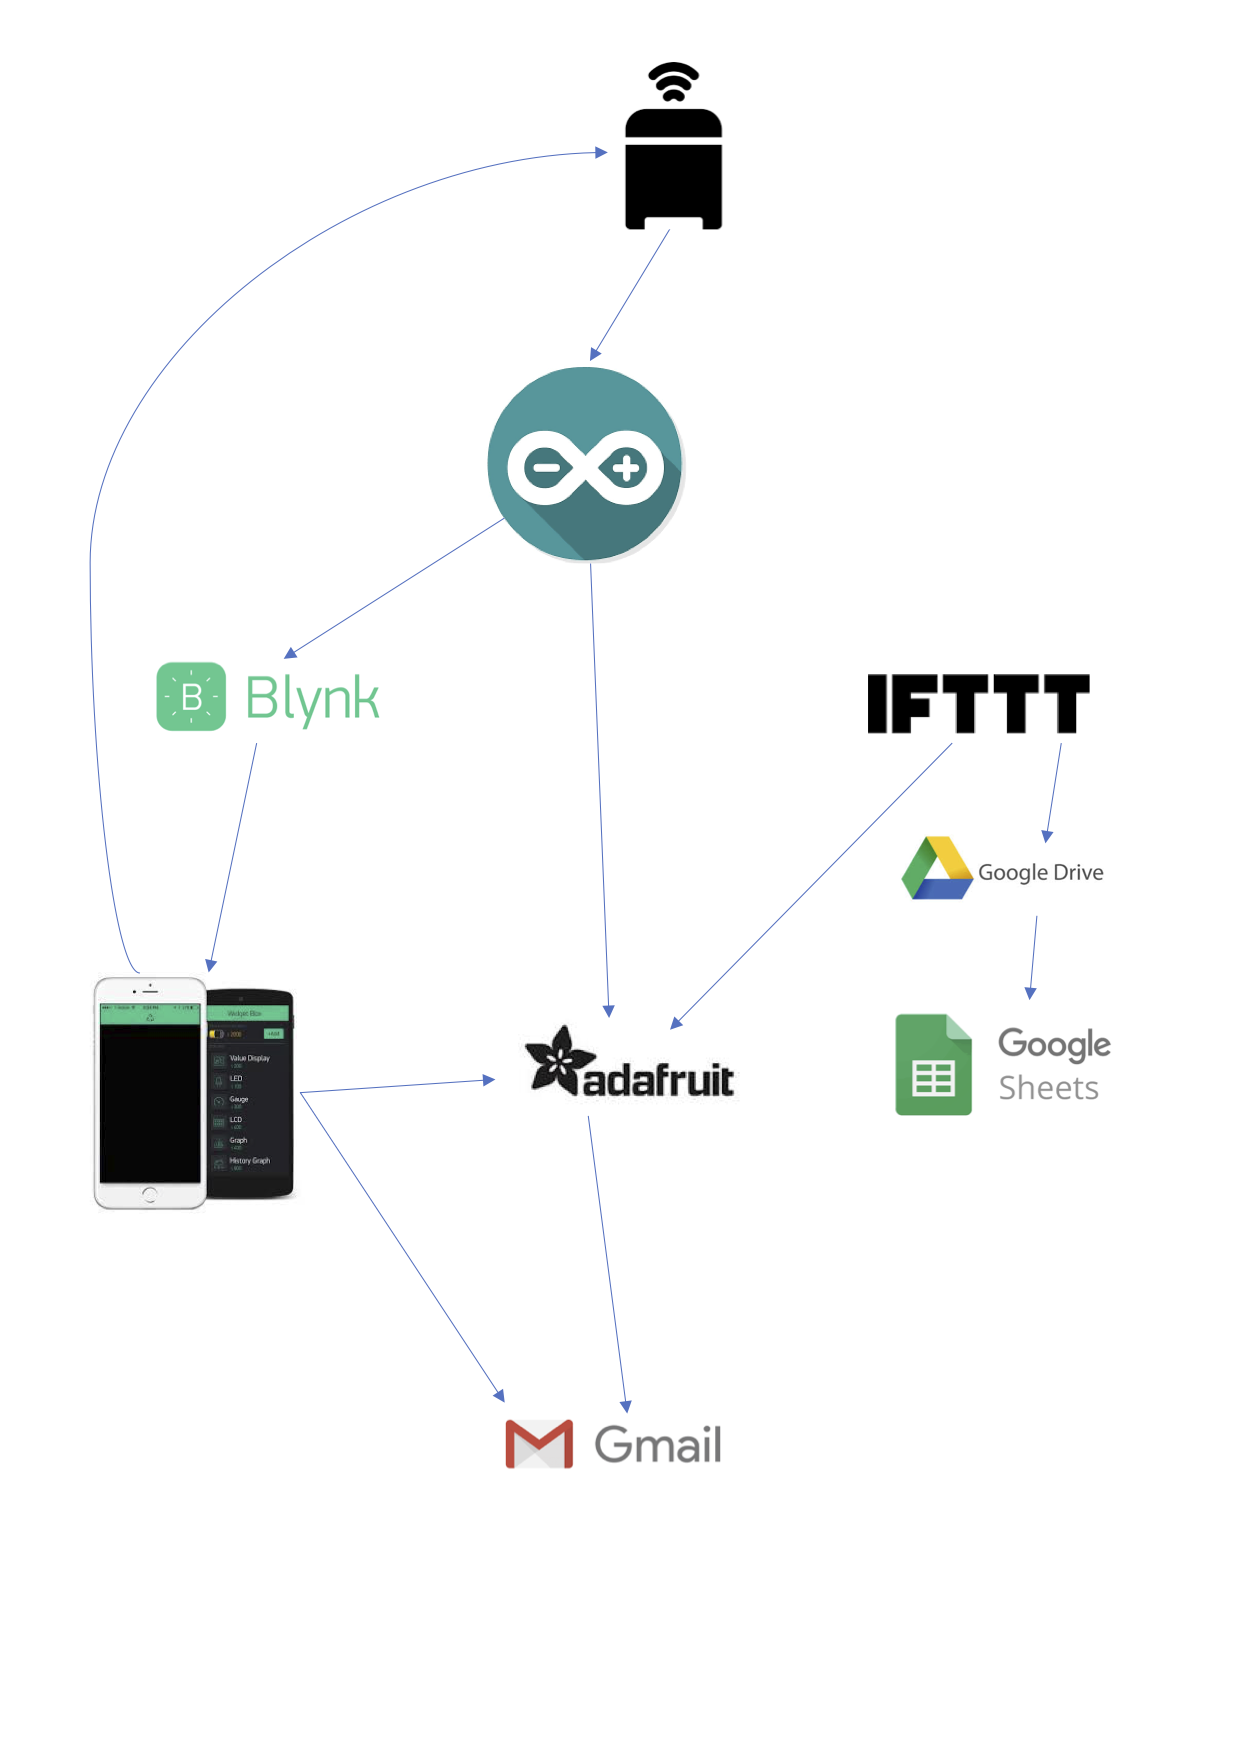
Project Flow
Results
