Slack Status Updater With ESP8266
by bekathwia in Circuits > Arduino
30882 Views, 159 Favorites, 0 Comments
Slack Status Updater With ESP8266
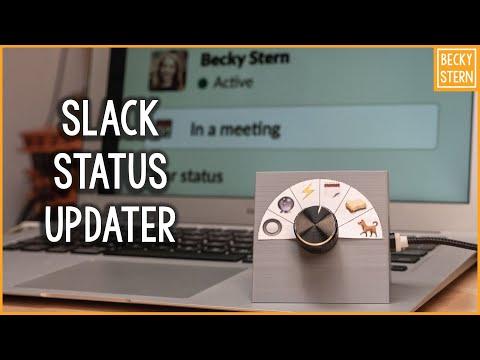
This project helps make your day a little easier if you’re a remote worker using Slack. I’ll show you how to build it using an ESP8266 wifi board. Don't miss the video above for the overview.
Whether you’re new to using Slack or you’ve just been using it a lot more lately, you’ll understand the importance of setting your Slack status. It lets your colleagues know if you’re available to chat, in a meeting, out sick, etc.
Forget to set it when you leave your desk, and you may get interrupted by somebody who thinks you’re available.
I thought it would help me remember to have a physical device on my desk that can set my Slack status for me.
This project is a collaboration with Brian Lough, who’s an ESP whiz and author of many Arduino API libraries including this new one for Slack.
You might remember my YouTube subscriber counter, which was also written using one of Brian’s API libraries.
If you're new to Arduino, try my free Arduino class first.
Supplies
For this project, you will need:
- ESP8266 wifi board such as NodeMCU or D1 mini
- Rotary switch
- Stranded wire
- Multimeter
- Soldering iron
- Wire strippers
- Flush cutters
- Helping third hand tool
- USB cable
- Computer running Arduino software
- Wifi network name and password
- Slack access token (learn how to get this in the next step)
- 3D printer (I used a Creality CR-10s Pro)
- Filament
To keep up with what I'm working on, follow me on YouTube, Instagram, Twitter, Pinterest, and subscribe to my newsletter. As an Amazon Associate I earn from qualifying purchases you make using my affiliate links.
Run Arduino Slack API Library Sample Code

The Arduino Slack API library gets you authenticated and allows the ESP8266 to control an app inside Slack. It’s easy to configure your app and get your key, which you can plug into the sample Arduino sketch and get up and running in just a few minutes. Watch Brian's walkthrough video and check out the library's readme for instructions.
For the purposes of testing, you'll likely want to create a new Slack workspace for this project before setting it loose on your actual colleagues. In many cases, you may have to get your app approved by your company's Slack administrator before you can use it with this project anyway. Fortunately, the app doesn't ask for permission over very much, just your personal status and presence.
Build Circuit
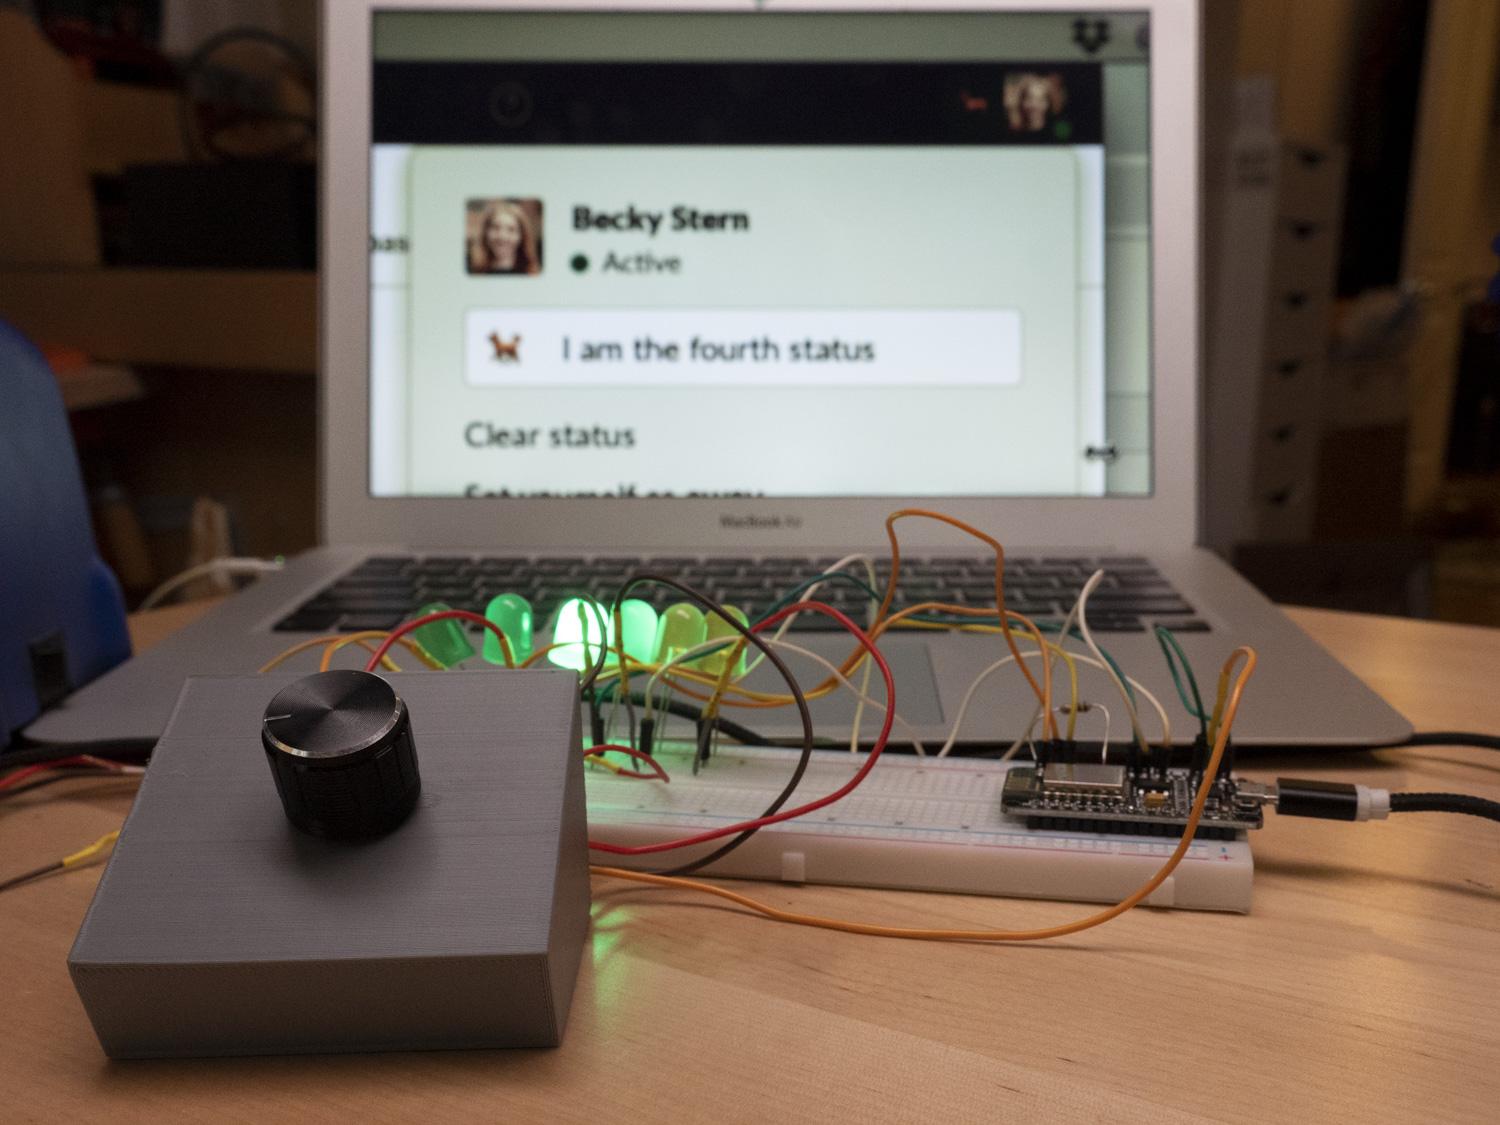
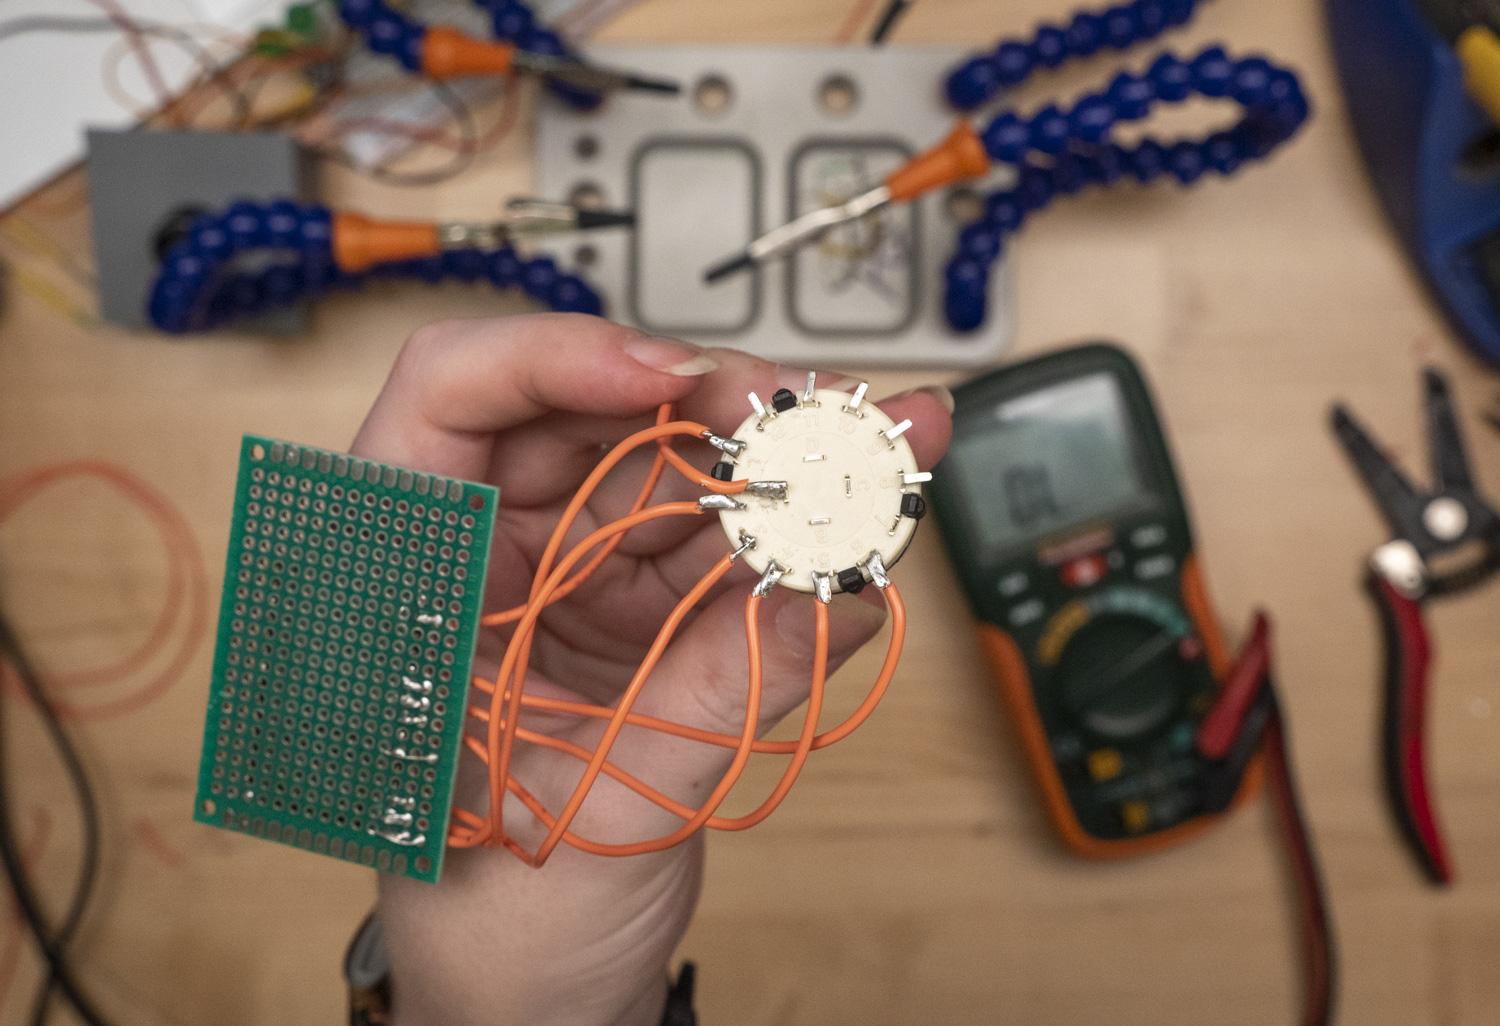
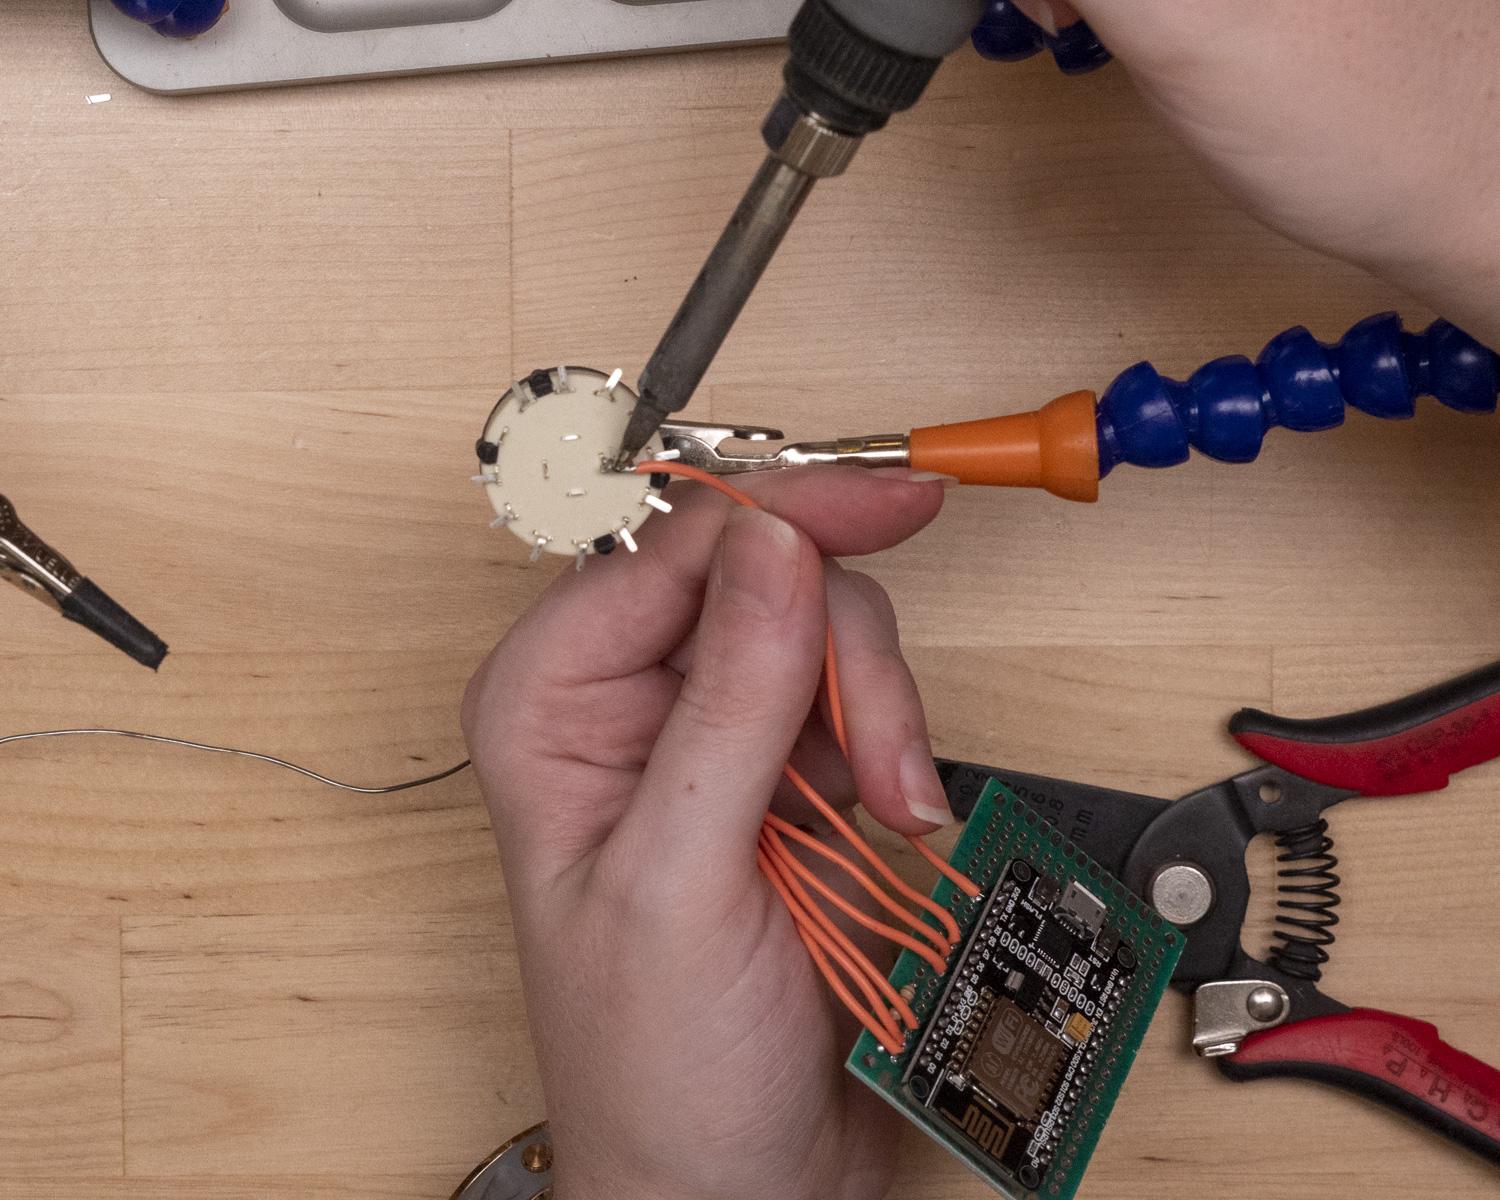
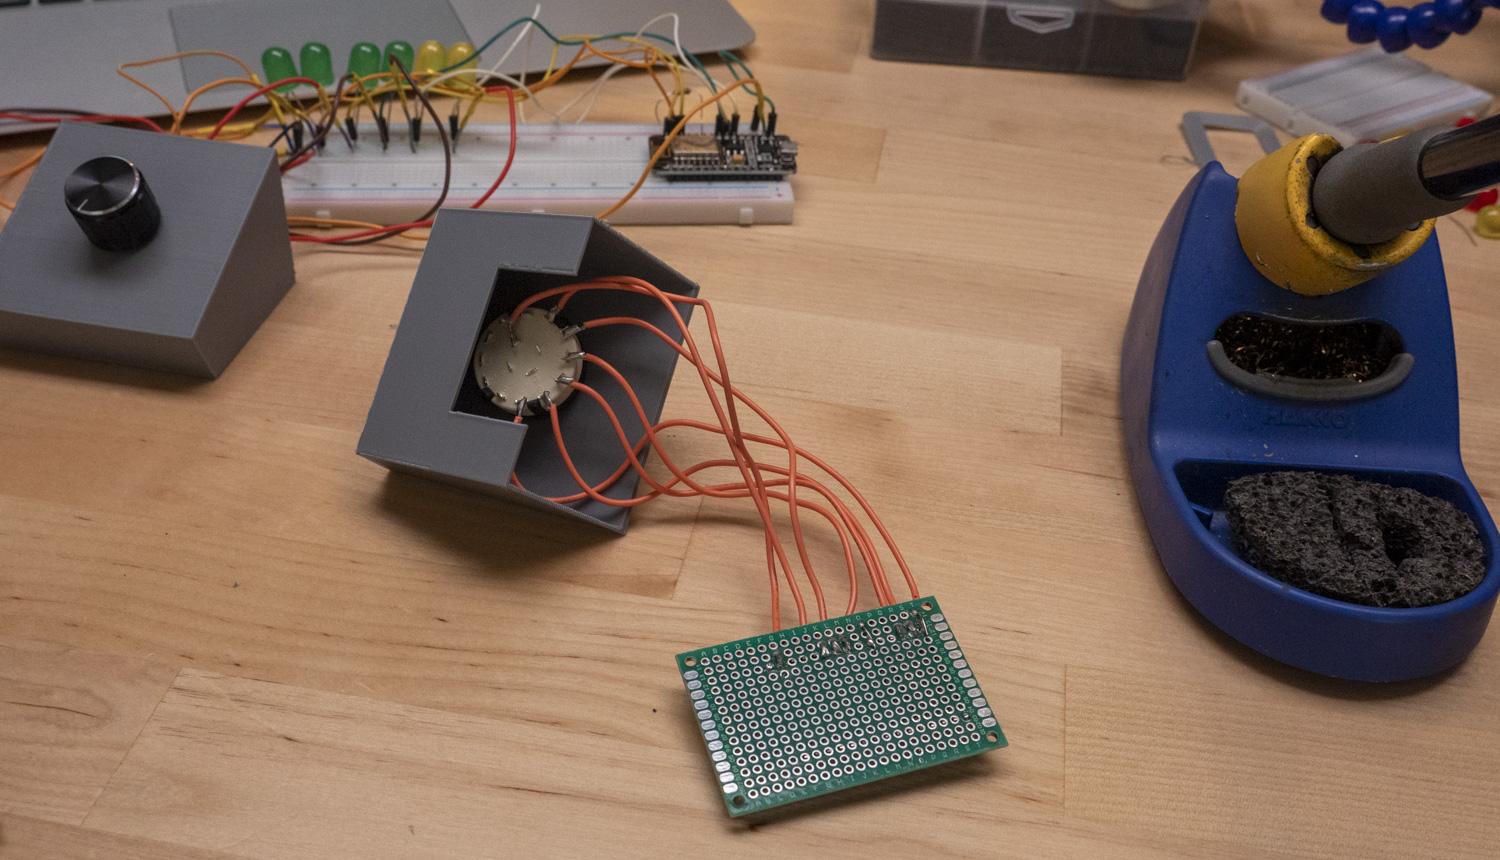
From here, it’s all about the physical interface and what statuses you program it to set for you. I chose to use a rotary switch to dial in my status from a bunch of choices around the circle. I used a multimeter to figure out which switch leads connect to which dial positions.
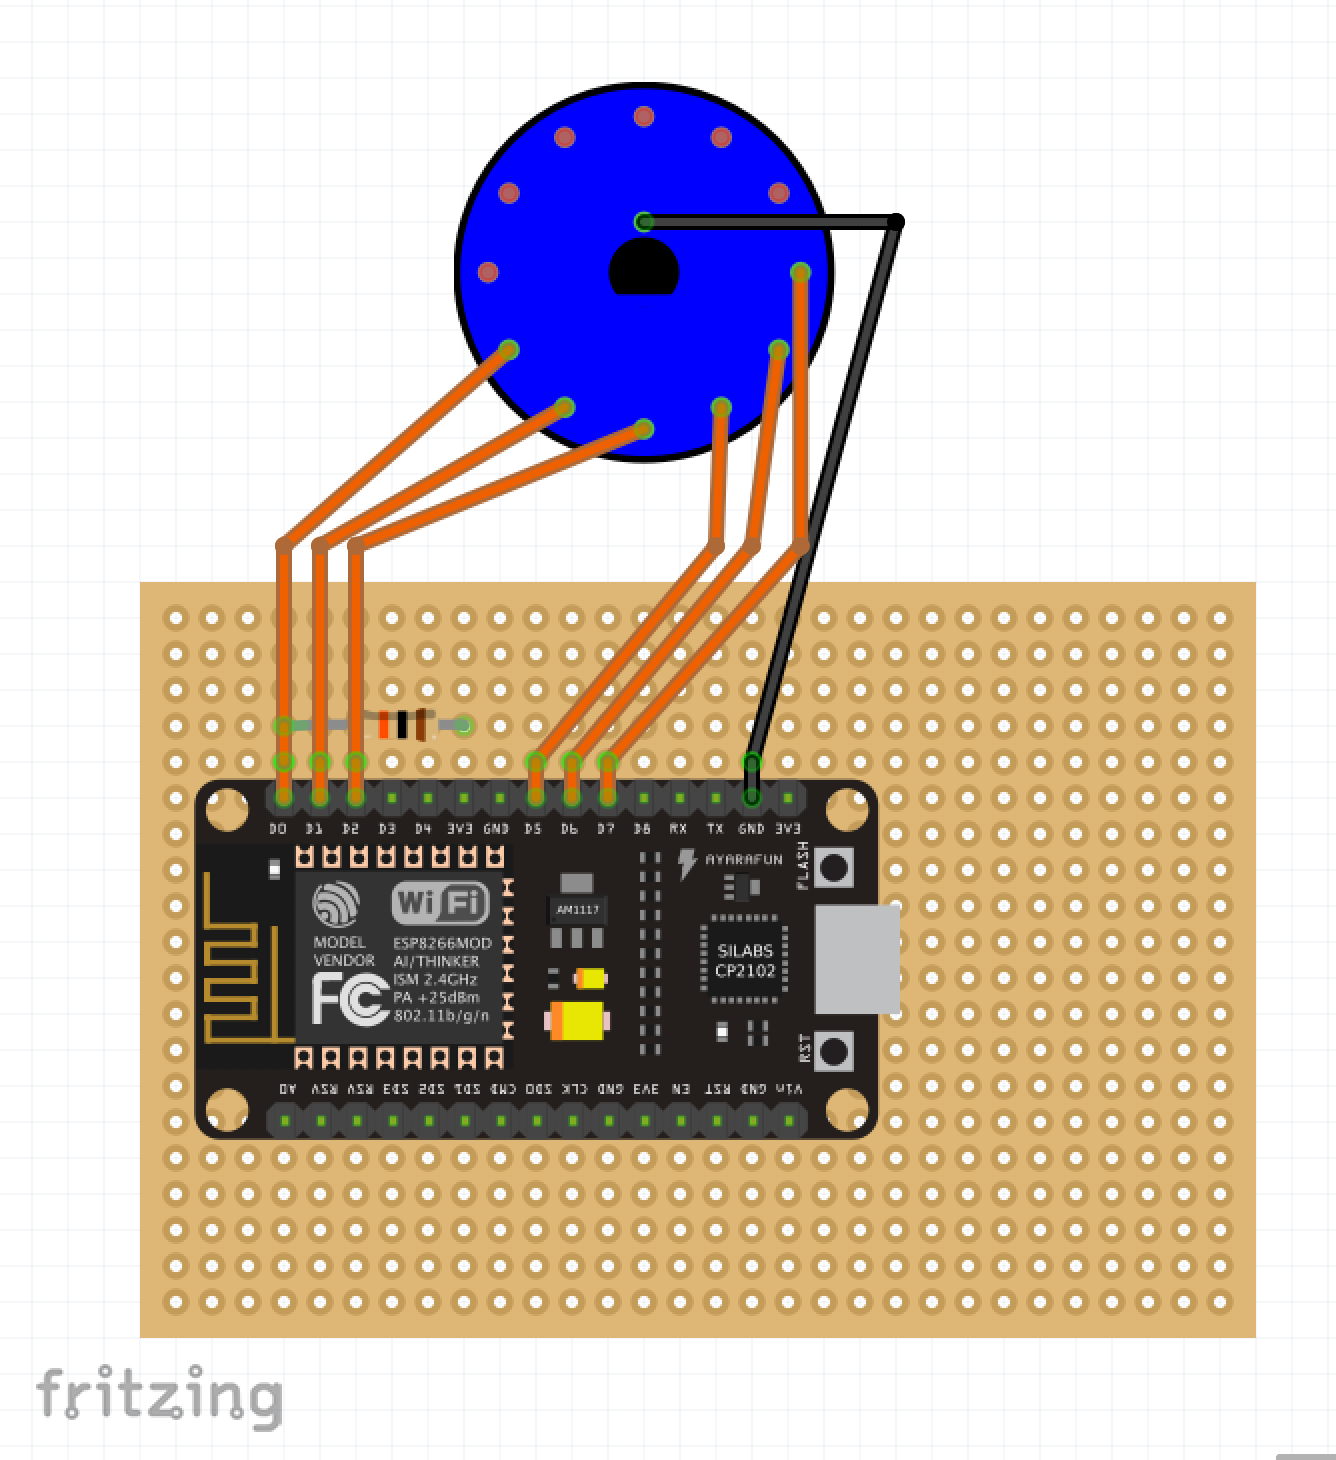
The circuit diagram details the following connections:
- Switch common to ESP8266 ground
- Switch leads to ESP8266 GPIO pins 13, 12, 14, 4, 5, and 16 (NodeMCU pins marked D7, D6, D5, D2, D1, and D0)
- 10K pull-up resistor between pin 16 and 3V (this pin does not have an internal pullup like the others)
I always like to make a solderless breadboard prototype of my projects before committing to the final form. In this case, I also added some LEDs to the prototype to help me debug my code.
I've included the basic rotary switch code for six statuses. Download it from the bottom of this step.
If you want to add more switch positions, you can remove the serial debugging from the code and use RX and TX pins to get two more inputs on the ESP8266, or upgrade to the ESP32 for even more pins.
Downloads
3D Printed Enclosure
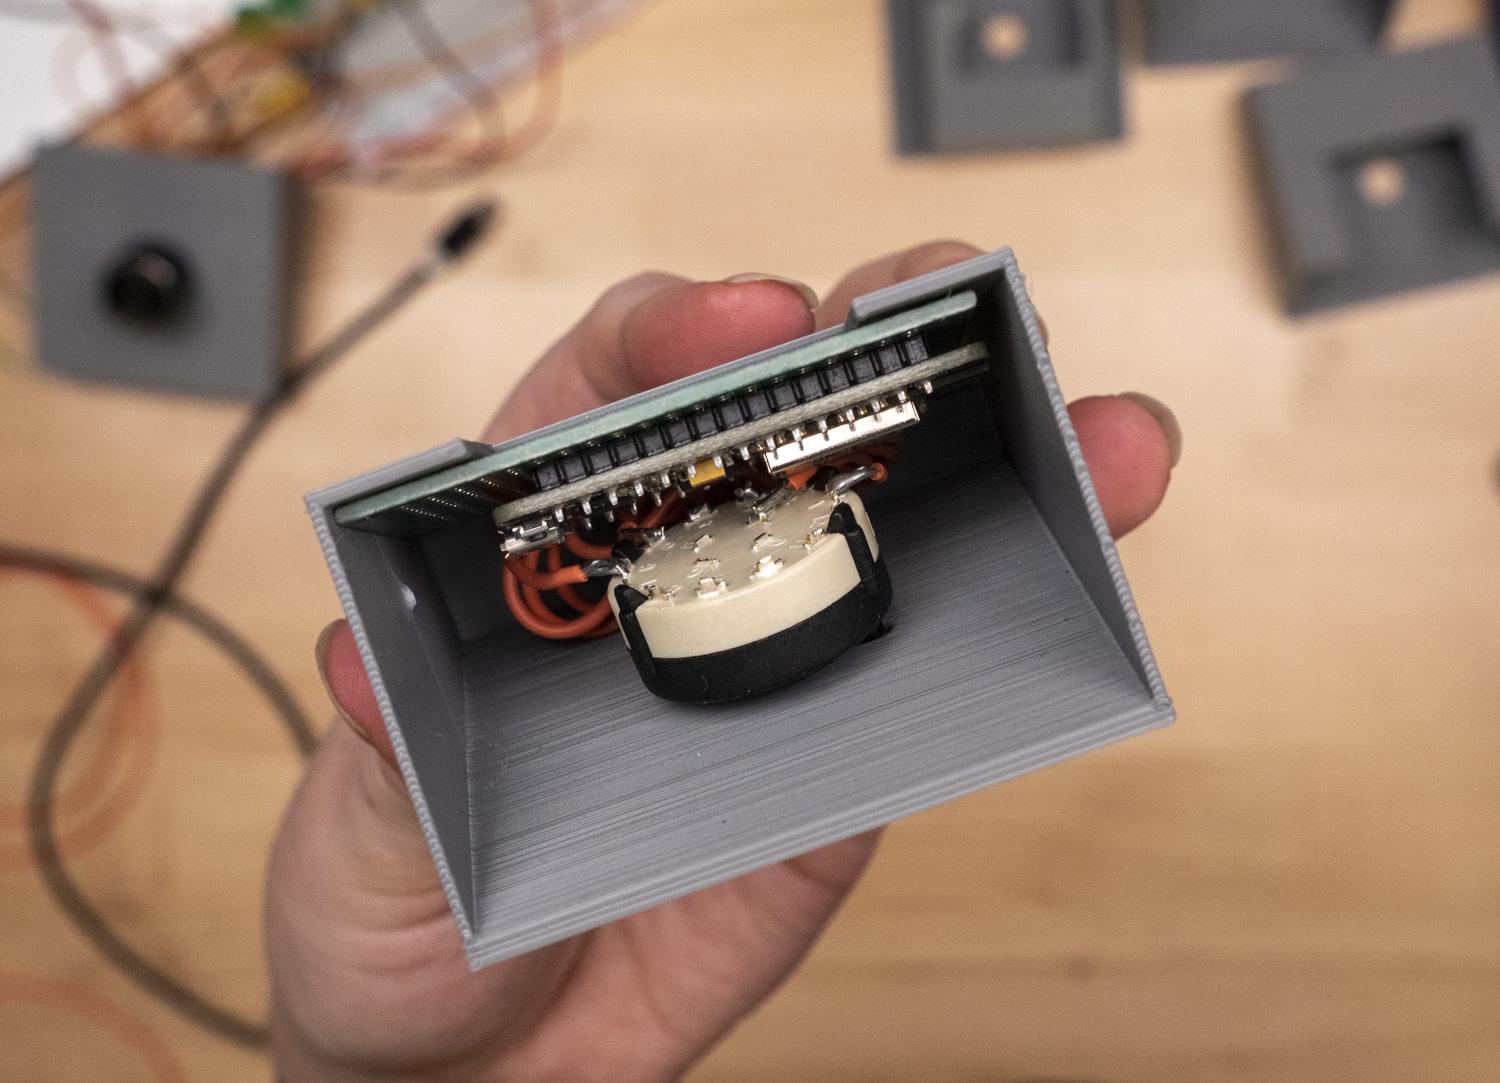
I modeled an enclosure using Tinkercad to mount the rotary switch and circuit board inside.
The USB cable comes out the side. You can copy the Tinkercad design to make your own modifications before printing, or download the STL file directly from this step. I used Cura to slice the STL for my printer.
Disclosure: at the time of this writing, I'm an employee of Autodesk, which makes Tinkercad.
Downloads
Your Statuses and Indicator Graphics
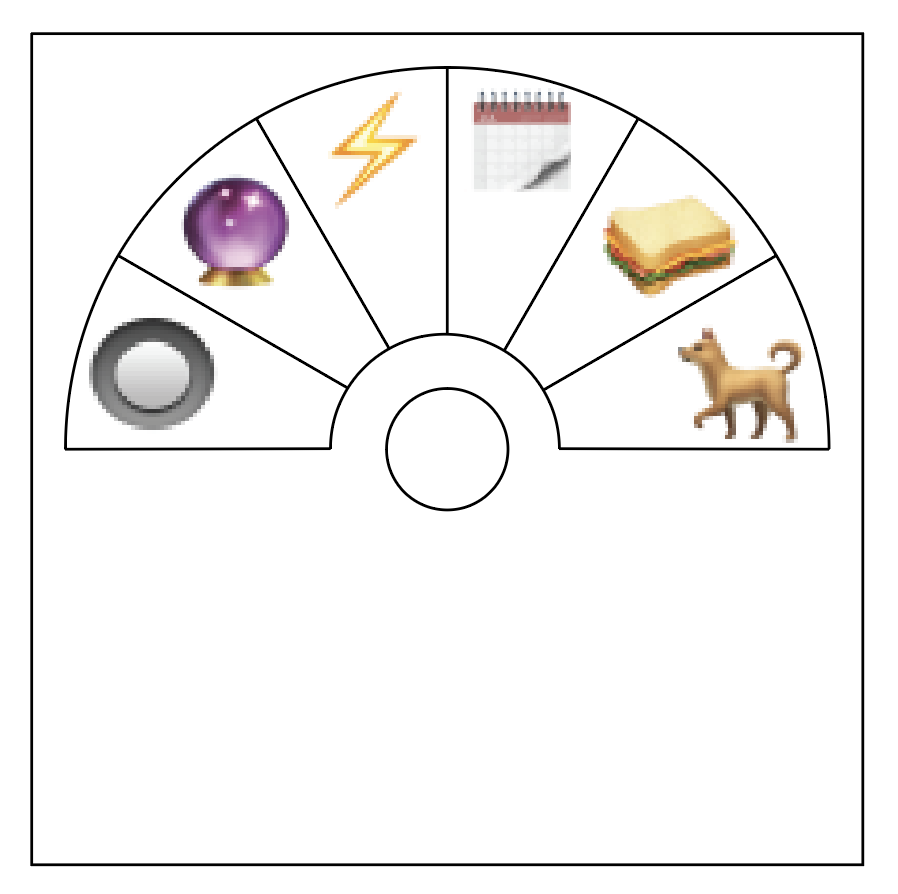
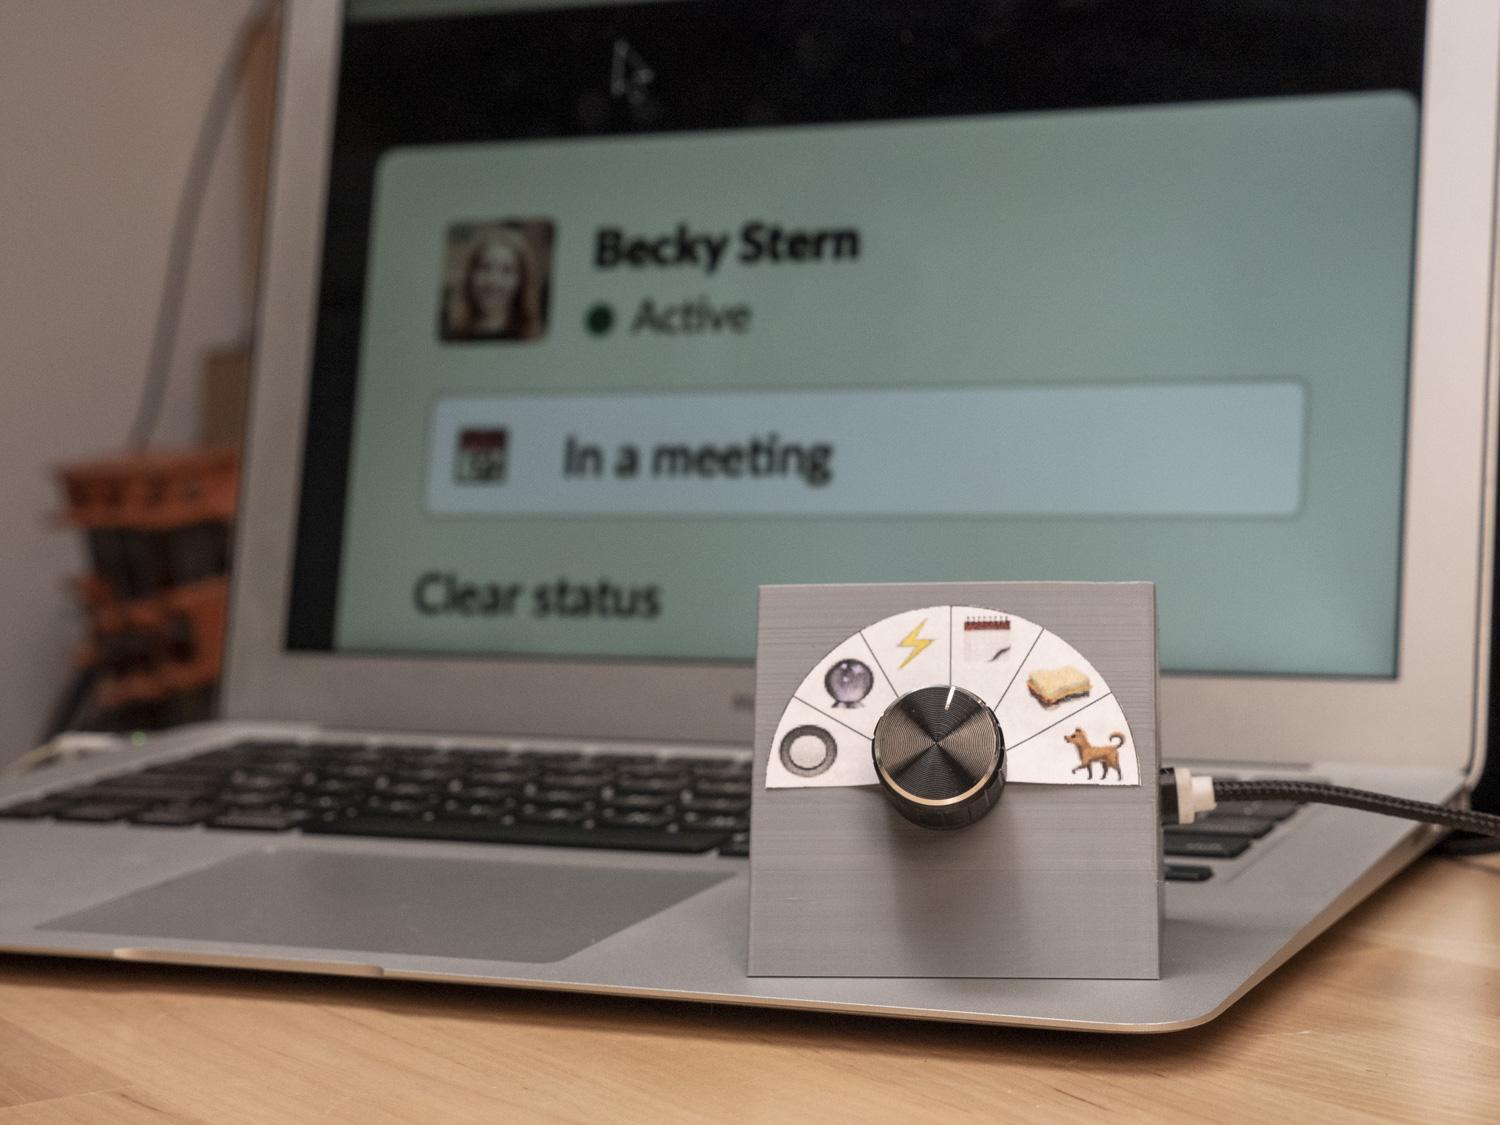
The last step is to decide which actual statuses you want to toggle between and create some indicator graphics to go along with them.
For composing Slack statuses, I found this emoji cheat sheet to be very helpful. But you can use any emoji supported by your workspace--just hover over it in the emoji panel to discover its label, and type it into your Arduino sketch.
I've included the Illustrator file and a PDF template for the graphics I created for this project (letter size paper).
Starting on line 156 of the simple sketch from earlier, you can substitute your desired status for the six listed. Here are mine:
switch (whichStatus) {
            case 0:
              slack.setPresence(SLACK_PRESENCE_AWAY);
              profile = slack.setCustomStatus("Walking the dog", ":dog2:");
             break;
            case 1:
              slack.setPresence(SLACK_PRESENCE_AWAY);
              profile = slack.setCustomStatus("Lunch", ":hamburger:");
              break;
            case 2:
              slack.setPresence(SLACK_PRESENCE_AUTO);
              profile = slack.setCustomStatus("In a meeting", ":calendar:");
              break;
            case 3:
              slack.setPresence(SLACK_PRESENCE_AUTO);
              profile = slack.setCustomStatus("Available to chat",":zap:");
              break;
            case 4:
              slack.setPresence(SLACK_PRESENCE_AWAY);
              profile = slack.setCustomStatus("Lurking", ":crystal_ball:");
              break;
            case 5:
              slack.setPresence(SLACK_PRESENCE_AWAY);
              profile = slack.setCustomStatus("Offline", "");
              break;
          }
Enjoy!
I hope building one of these for your own desk will be fun and useful for you. I'd love to see your versions posted in the "I Made It" section below.
If you like this project, you may be interested in some of my others:
- YouTube Subscriber Counter with ESP8266
- Social Stats Tracker Display With ESP8266
- 3 Beginner Arduino Mistakes
- Internet Valentine
- WiFi Weather Display With ESP8266
Thanks for following along! To keep up with what I'm working on, follow me on YouTube, Instagram, Twitter, Pinterest, and subscribe to my newsletter.