3D Printing a Multi-Material Conductive Touch-Sensitive 3D Printed Controller for Makey Makey With a Single Extruder 3D Printer
by Protopasta in Circuits > Remote Control
4155 Views, 8 Favorites, 0 Comments
3D Printing a Multi-Material Conductive Touch-Sensitive 3D Printed Controller for Makey Makey With a Single Extruder 3D Printer
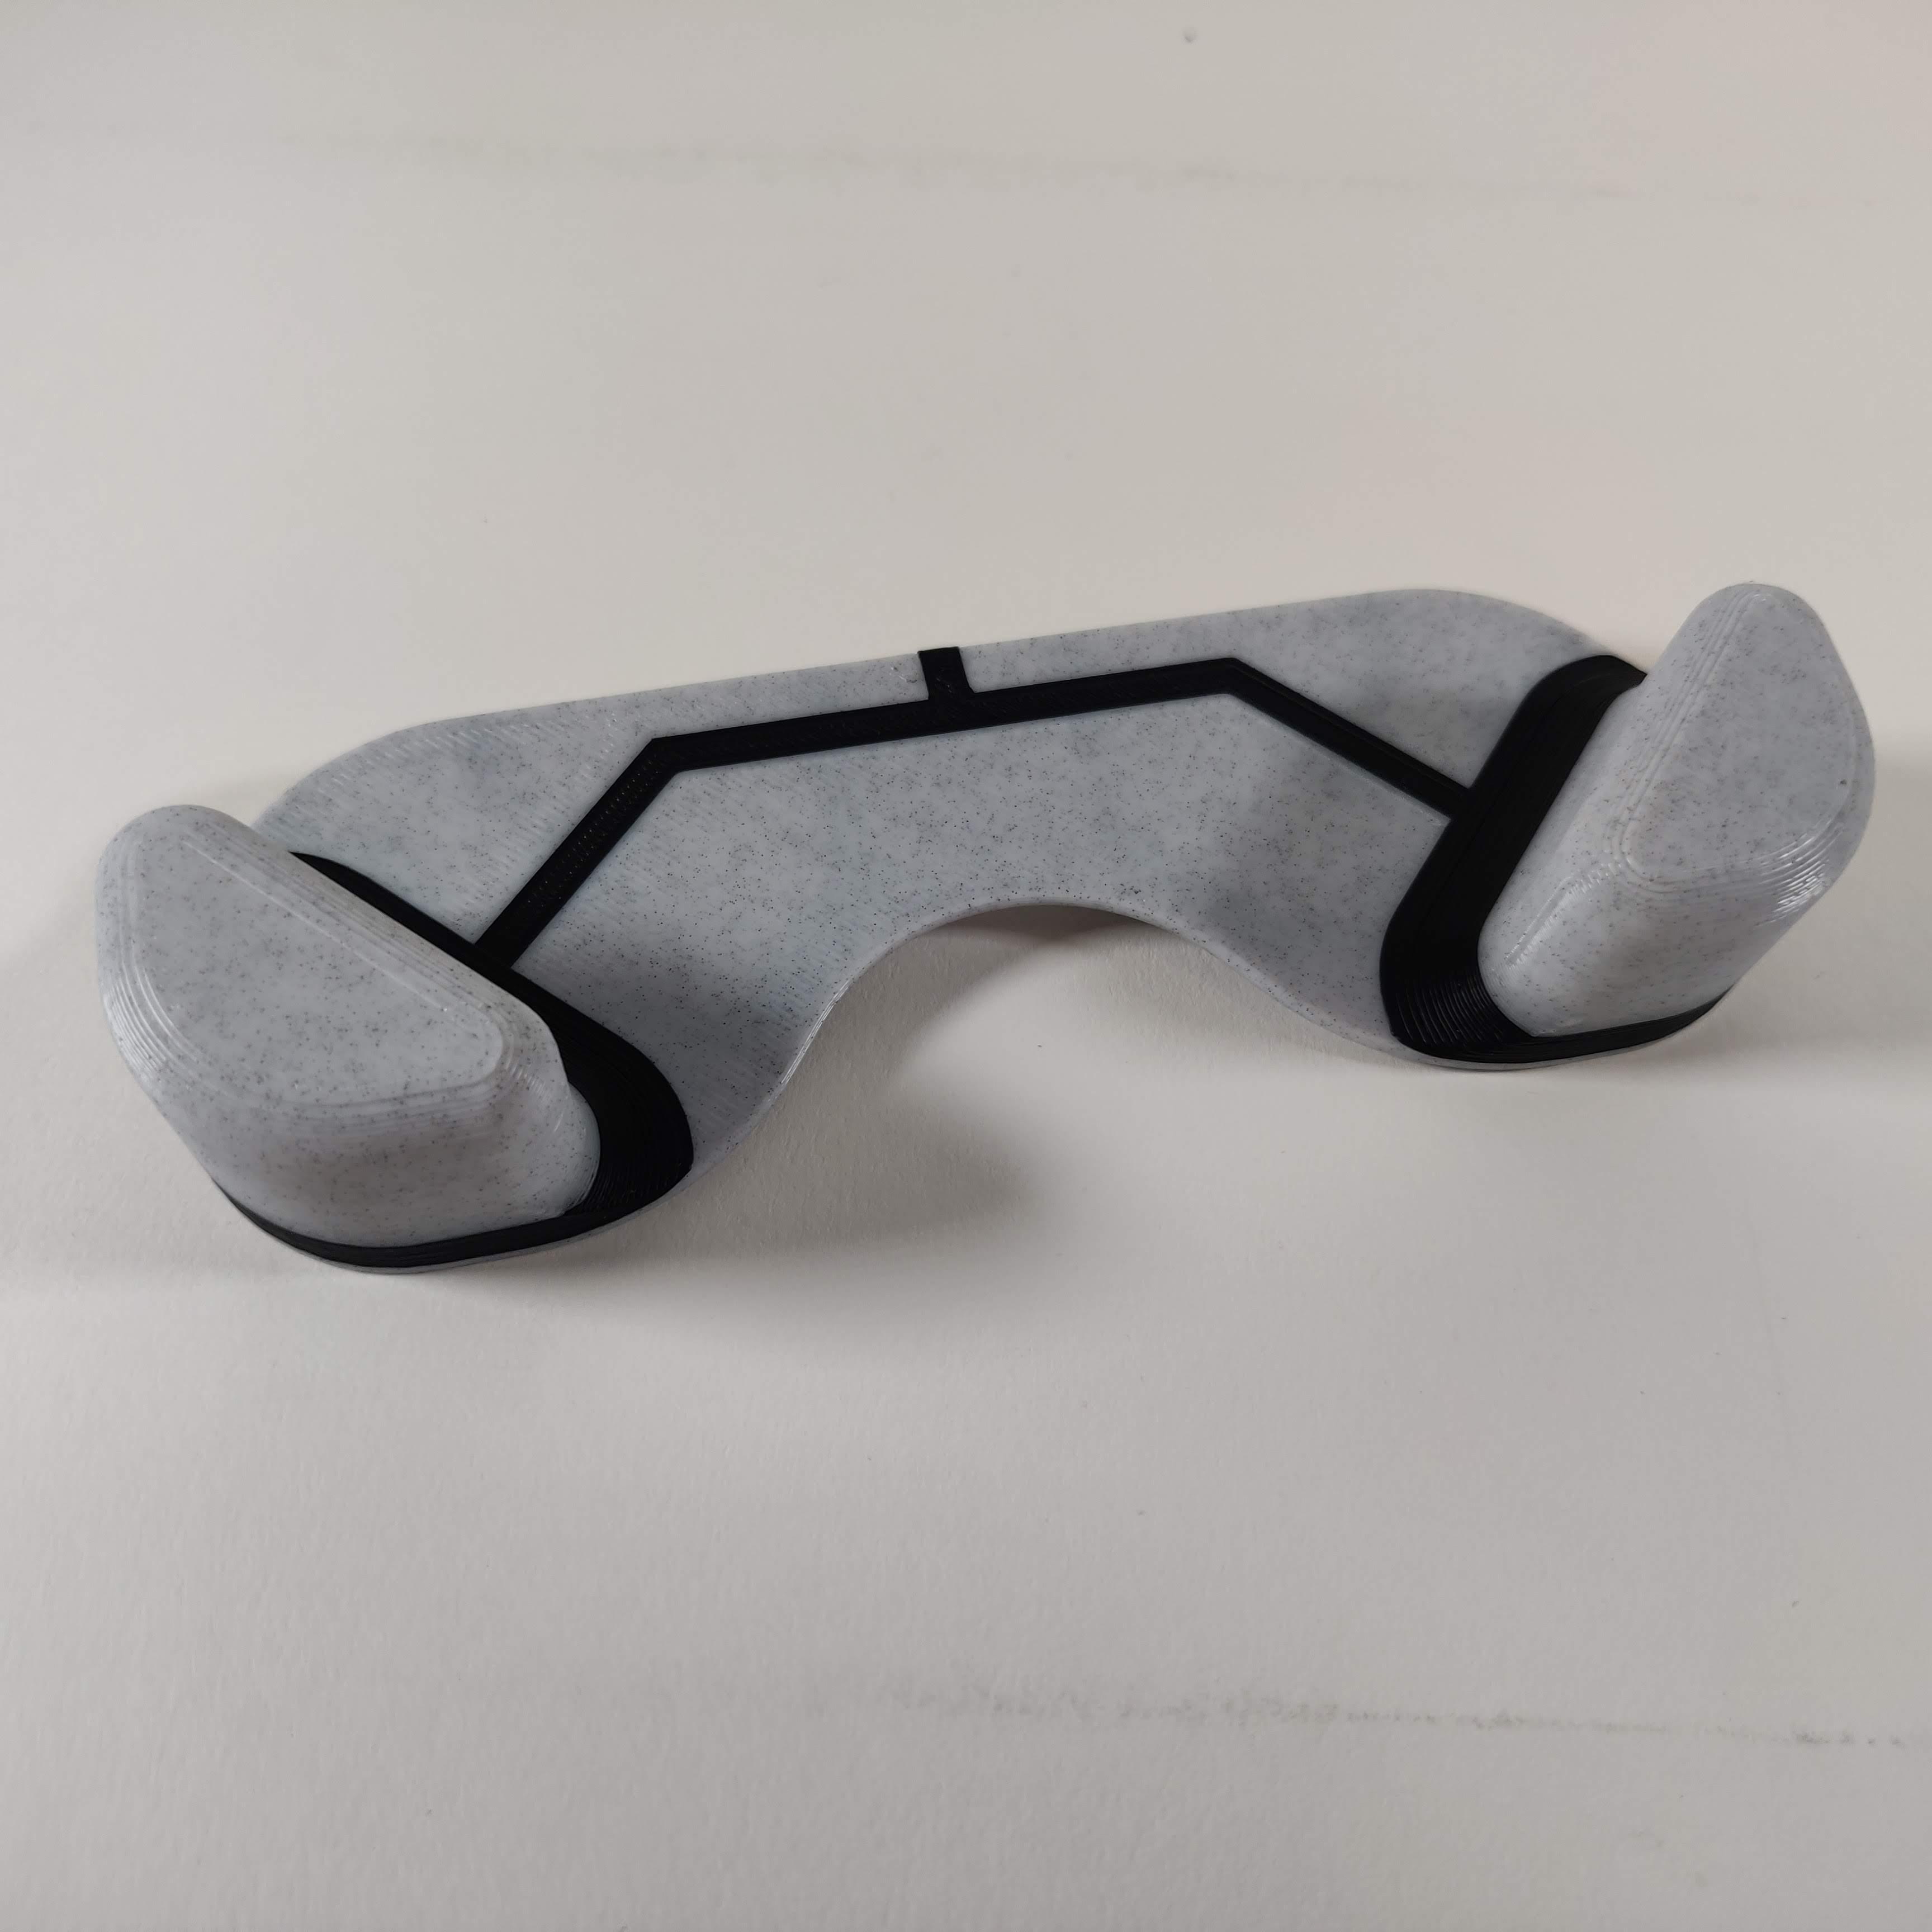
Yes! You CAN use your single extruder 3D printer for multi-material prints! This will be a quick guide focused on using a single extruder printer for multi-material printing of a touch-sensitive Makey Makey controller. While there are plenty of ways to add other colors to your print, we'll focus on using multiple materials on the same layer using PrusaSlicer.
Supplies
- 3D printer
- Protopasta Conductive HTPLA
- Protopasta Marble HTPLA
- PrusaSlicer
- Makey Makey
Slicer Settings
.png)
.png)
.png)
.png)
.png)
.png)
.png)
This is where all the magic happens! It is crucial to follow every step exactly or you may have issues during printing.
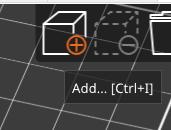
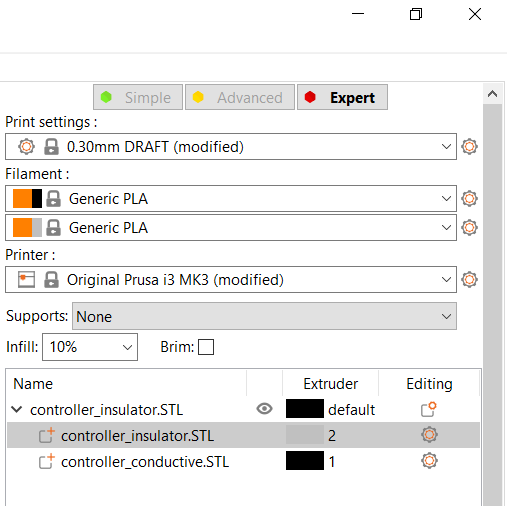
- Import Insulator - Import "Controller_Insulator" by clicking "Add..." and navigating to the file.
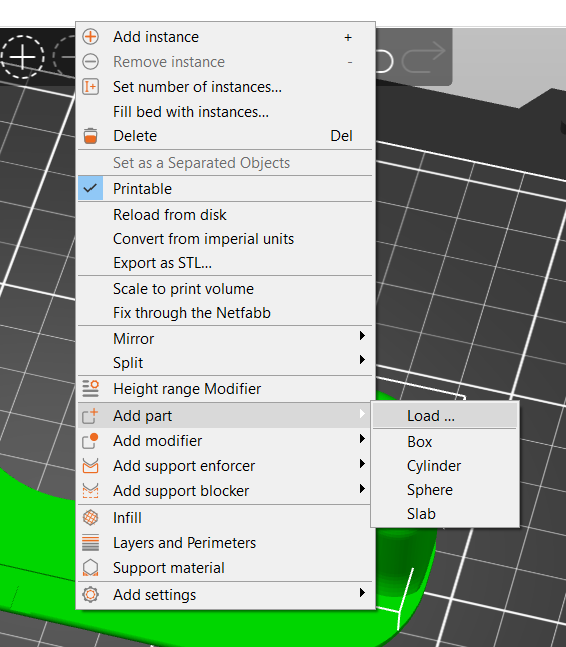
- Import Conductive - Right-click the insulator -> add part -> Load ... navigate to the file and insert it.
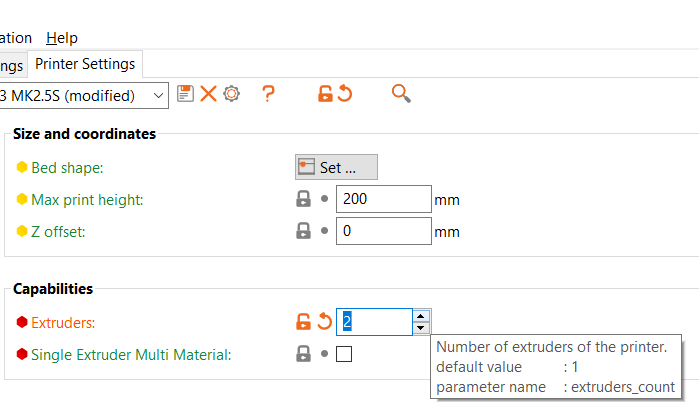
- Add extruder - We'll add an extruder by navigating to Printer Settings -> General -> Capabilities -> Extruders, increase it to two for this print
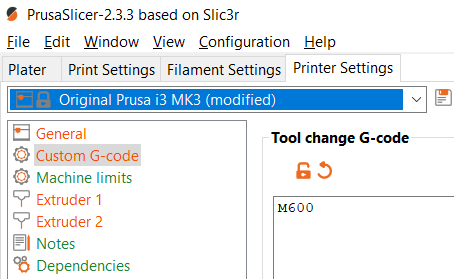
- Add G-code - We need to add a tool-change command to our output G-code, navigate to Printer Settings -> Custom G-code -> Tool change G-code, and add "M600" in the empty box
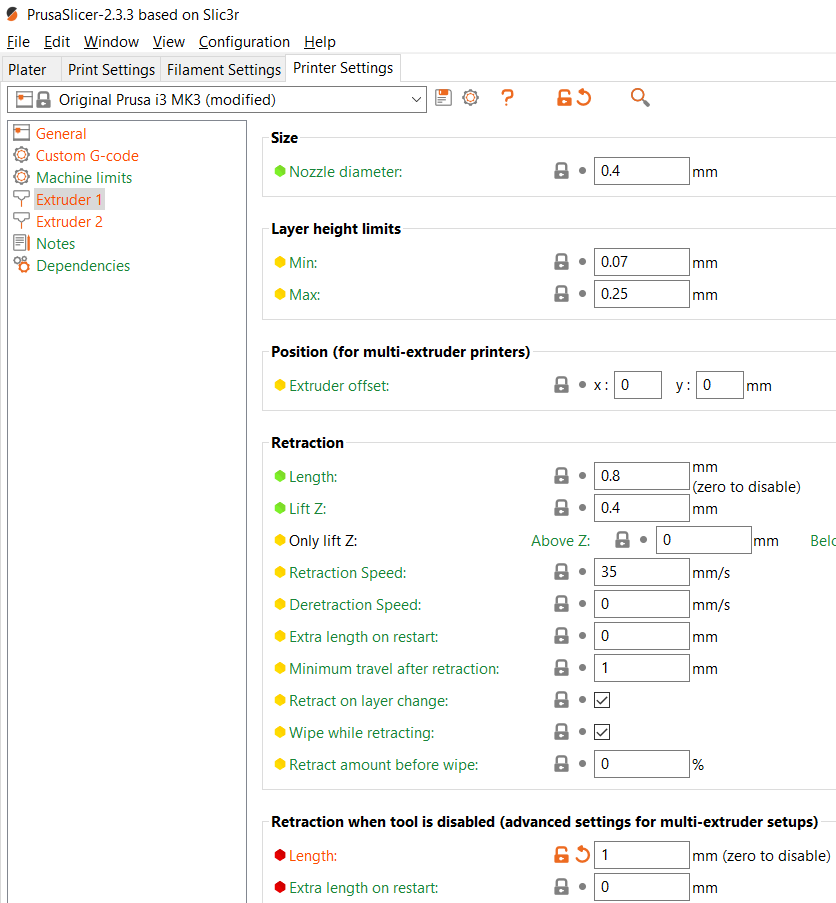
- Shorten Retract length - Navigate to Printer Settings -> Extruder 1 -> Retraction when tool is disabled, change the length to 1mm
- Repeat step 5 with extruder #2.
- Disable wipe tower - Disable the wipe tower by navigating to Print Settings -> Multiple Extruders -> Wipe Tower, and unchecking the "Enable" box.
- Assign Colors - Assign the two parts to different extruders in the main "Plater" menu.
- Slice - Click "Slice Now" and send the G-code to your printer.
Printing
This is the time-consuming part. Since the conductive filament is full of conductive powder it takes a while to purge. Be patient.
- Download the STLs HERE
- Start your print
- It will stop after the initial purge for you to insert the marble filament.
- Once it is done with the marble load in the conductive filament.
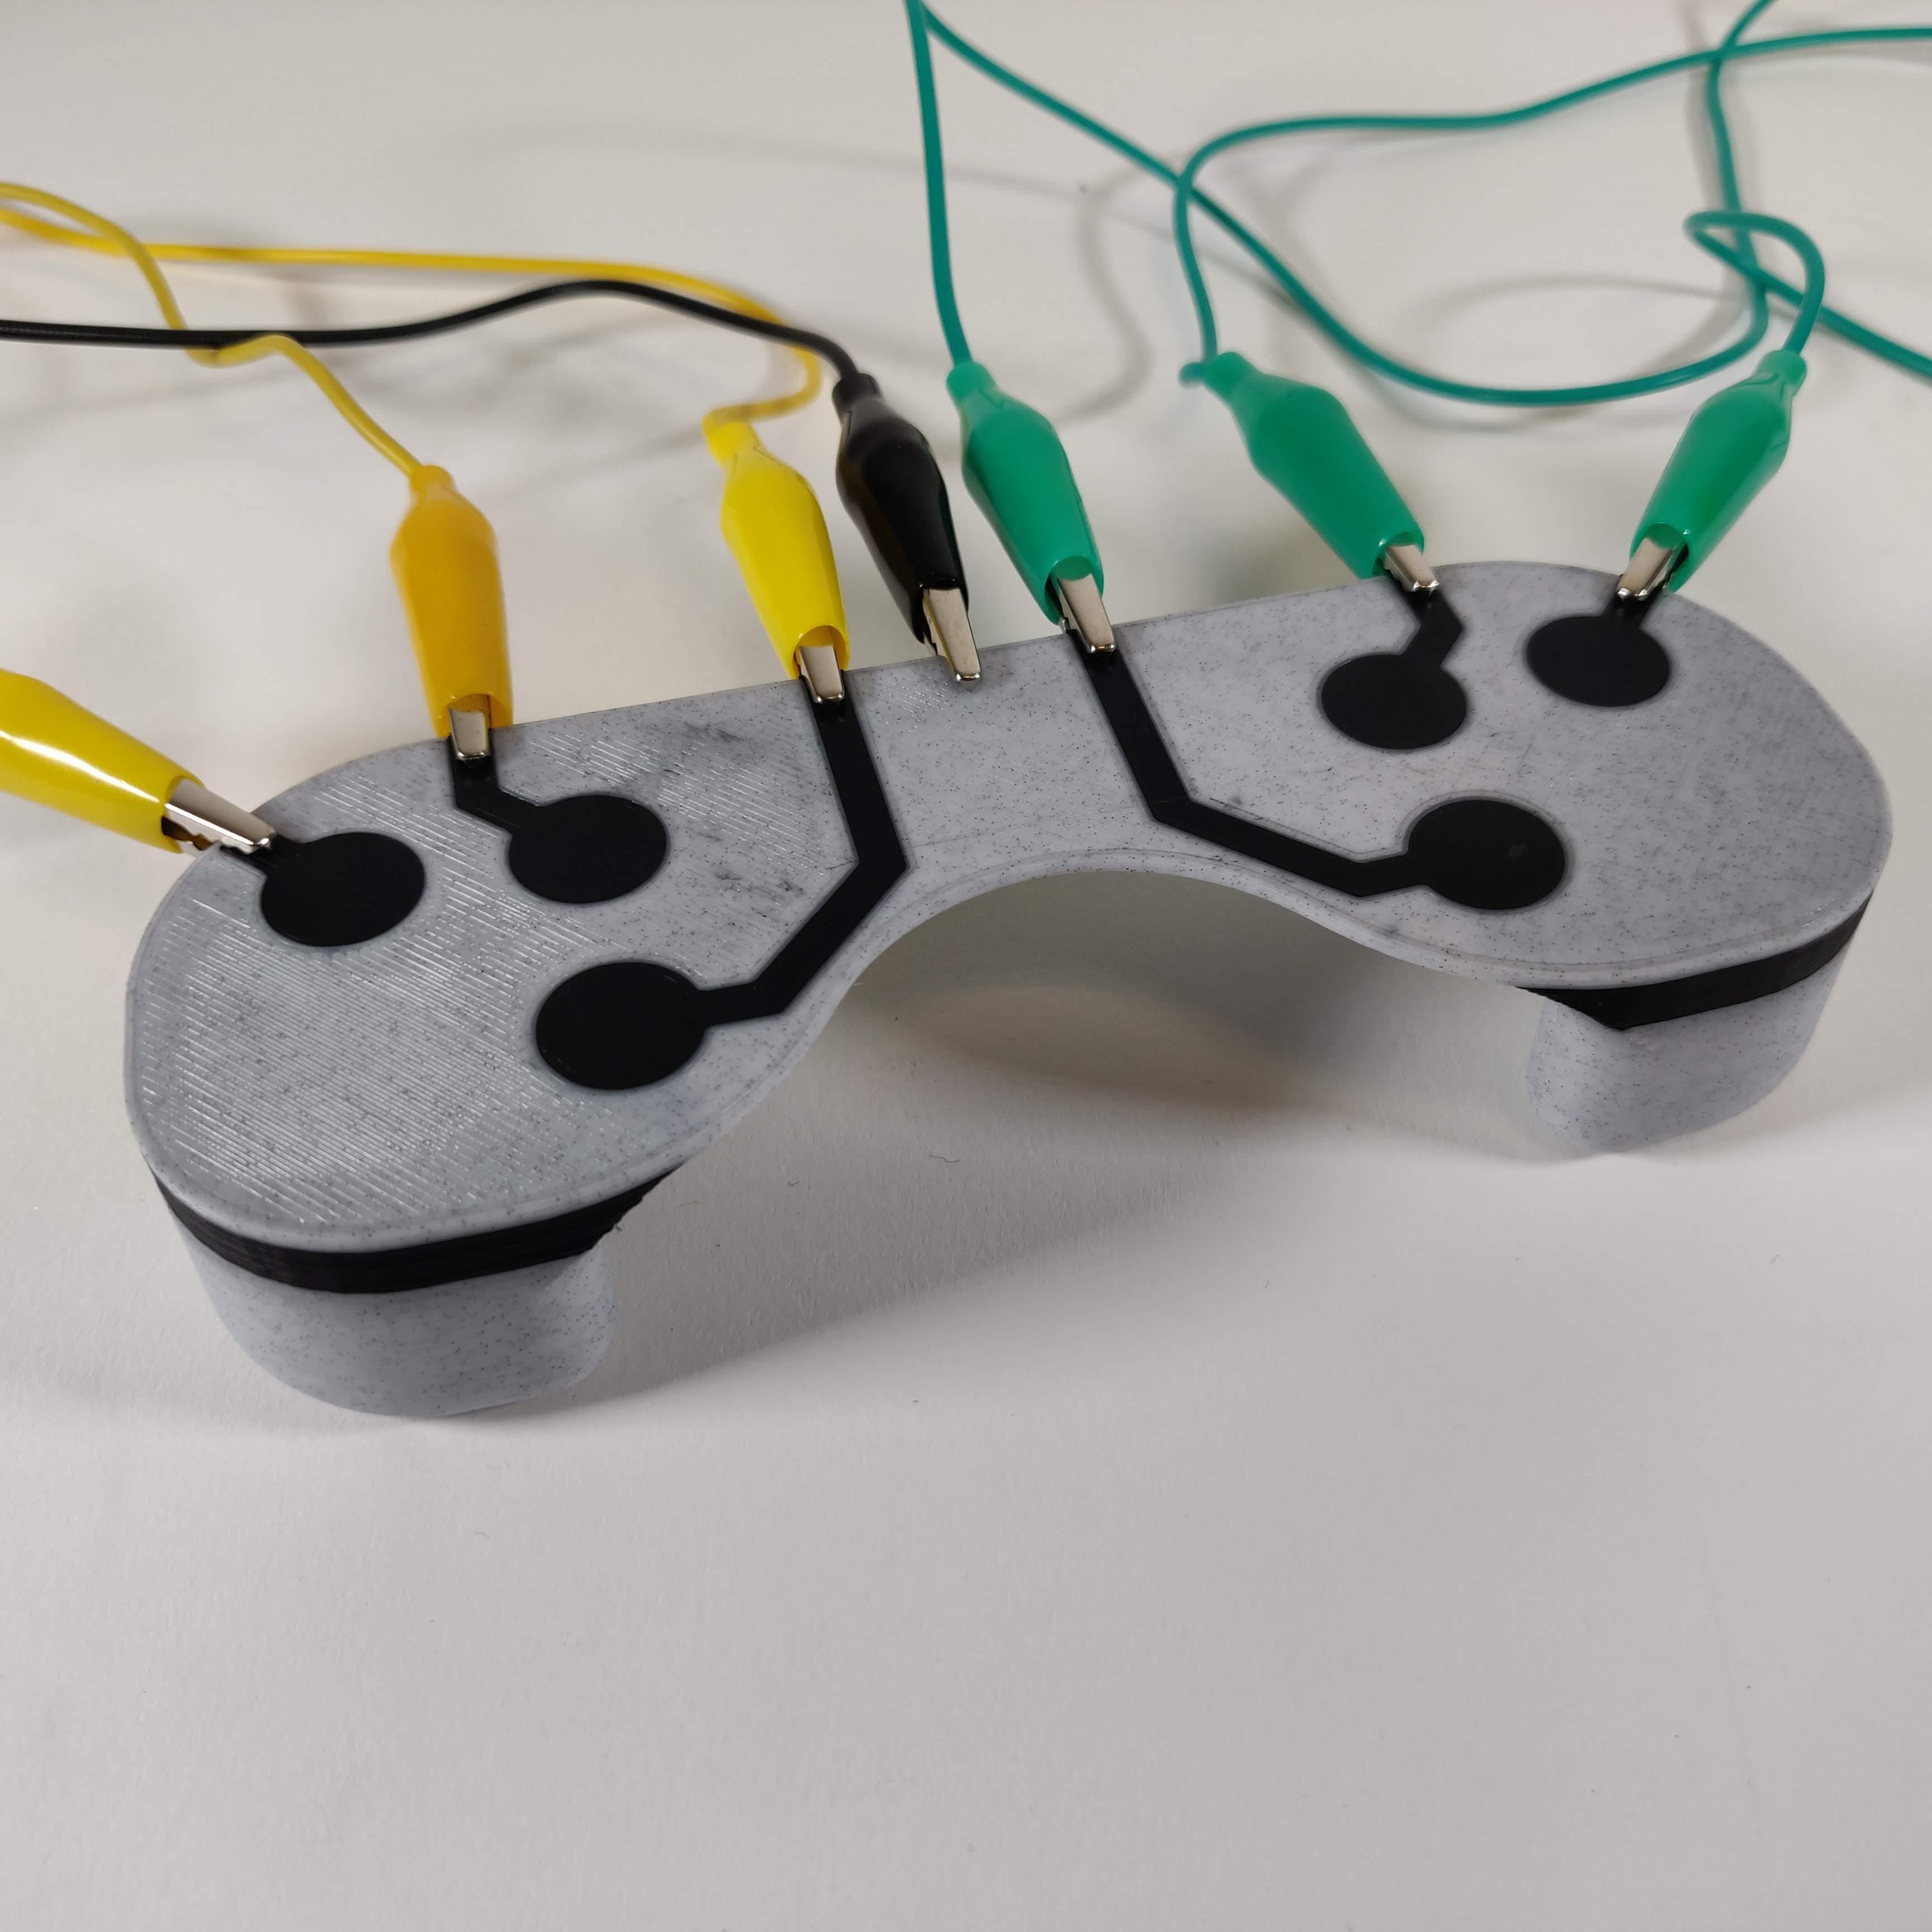
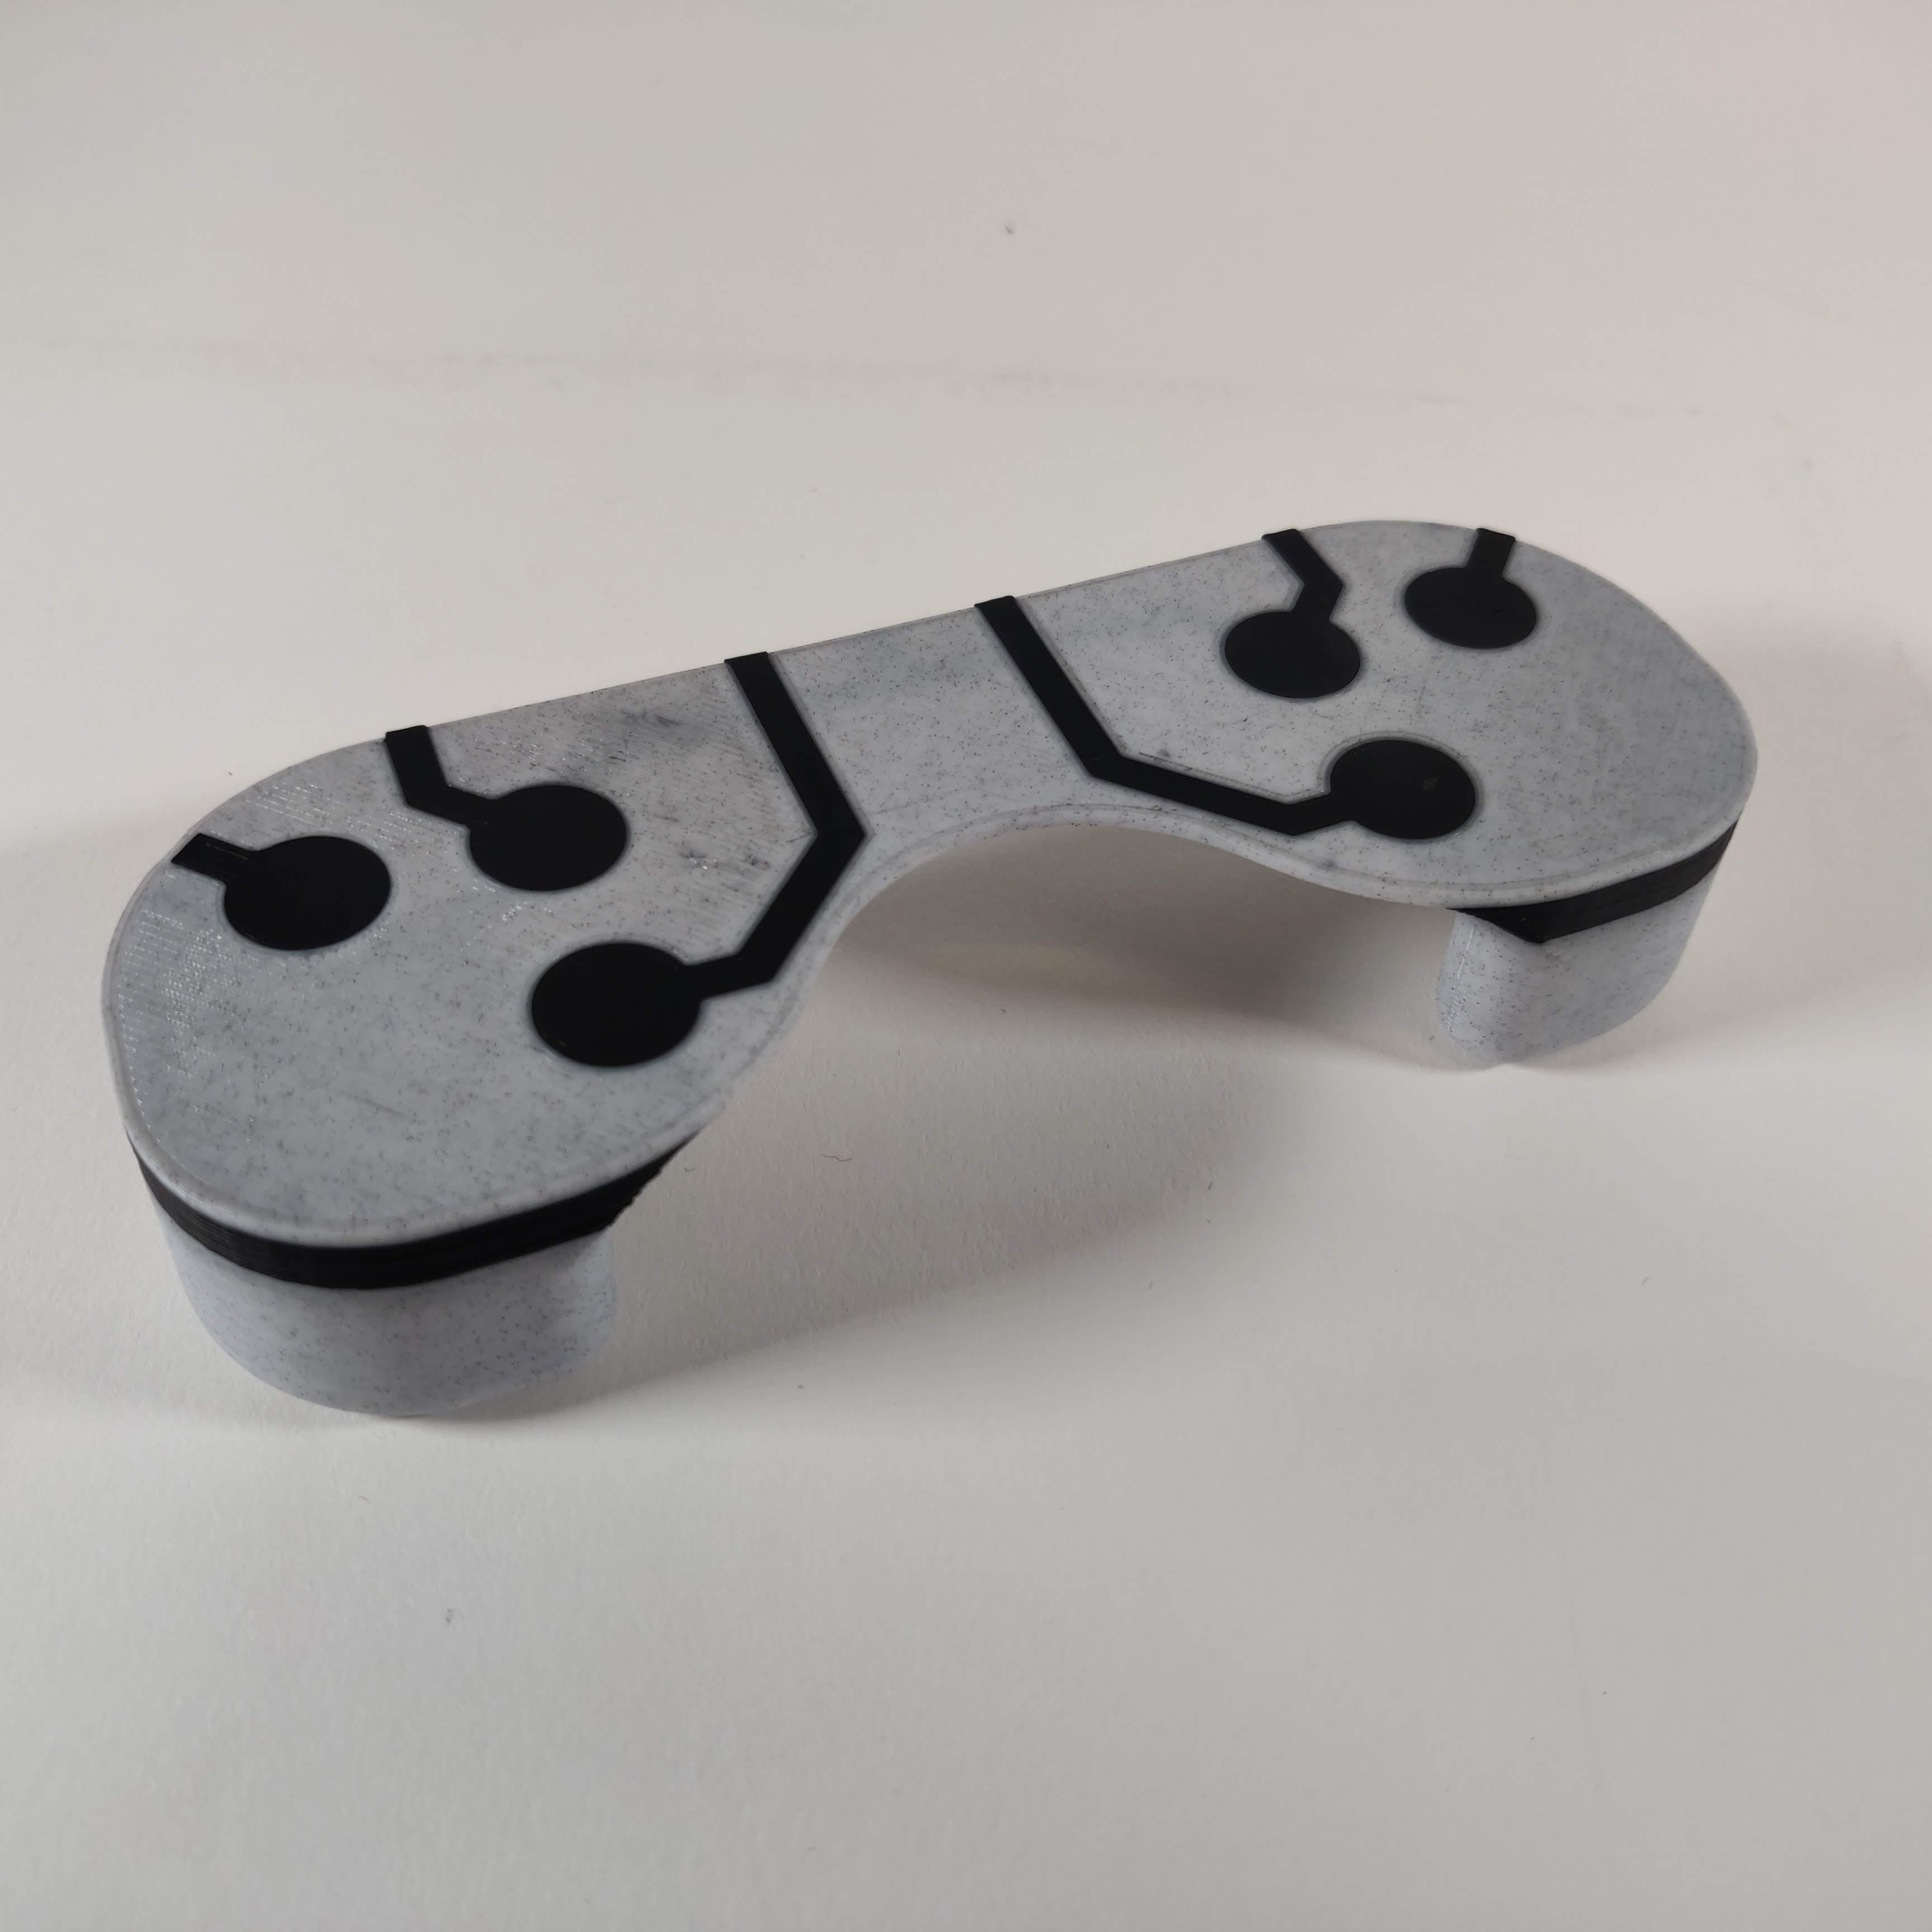
- Simply swap the filament when the printer pauses for you to do so. Soon you'll have a fully 3D printed Makey Makey controller!
- Admire your work!