Simple WF32 Programming Using Arduino IDE
by ArtemS12 in Circuits > Microcontrollers
1893 Views, 5 Favorites, 0 Comments
Simple WF32 Programming Using Arduino IDE
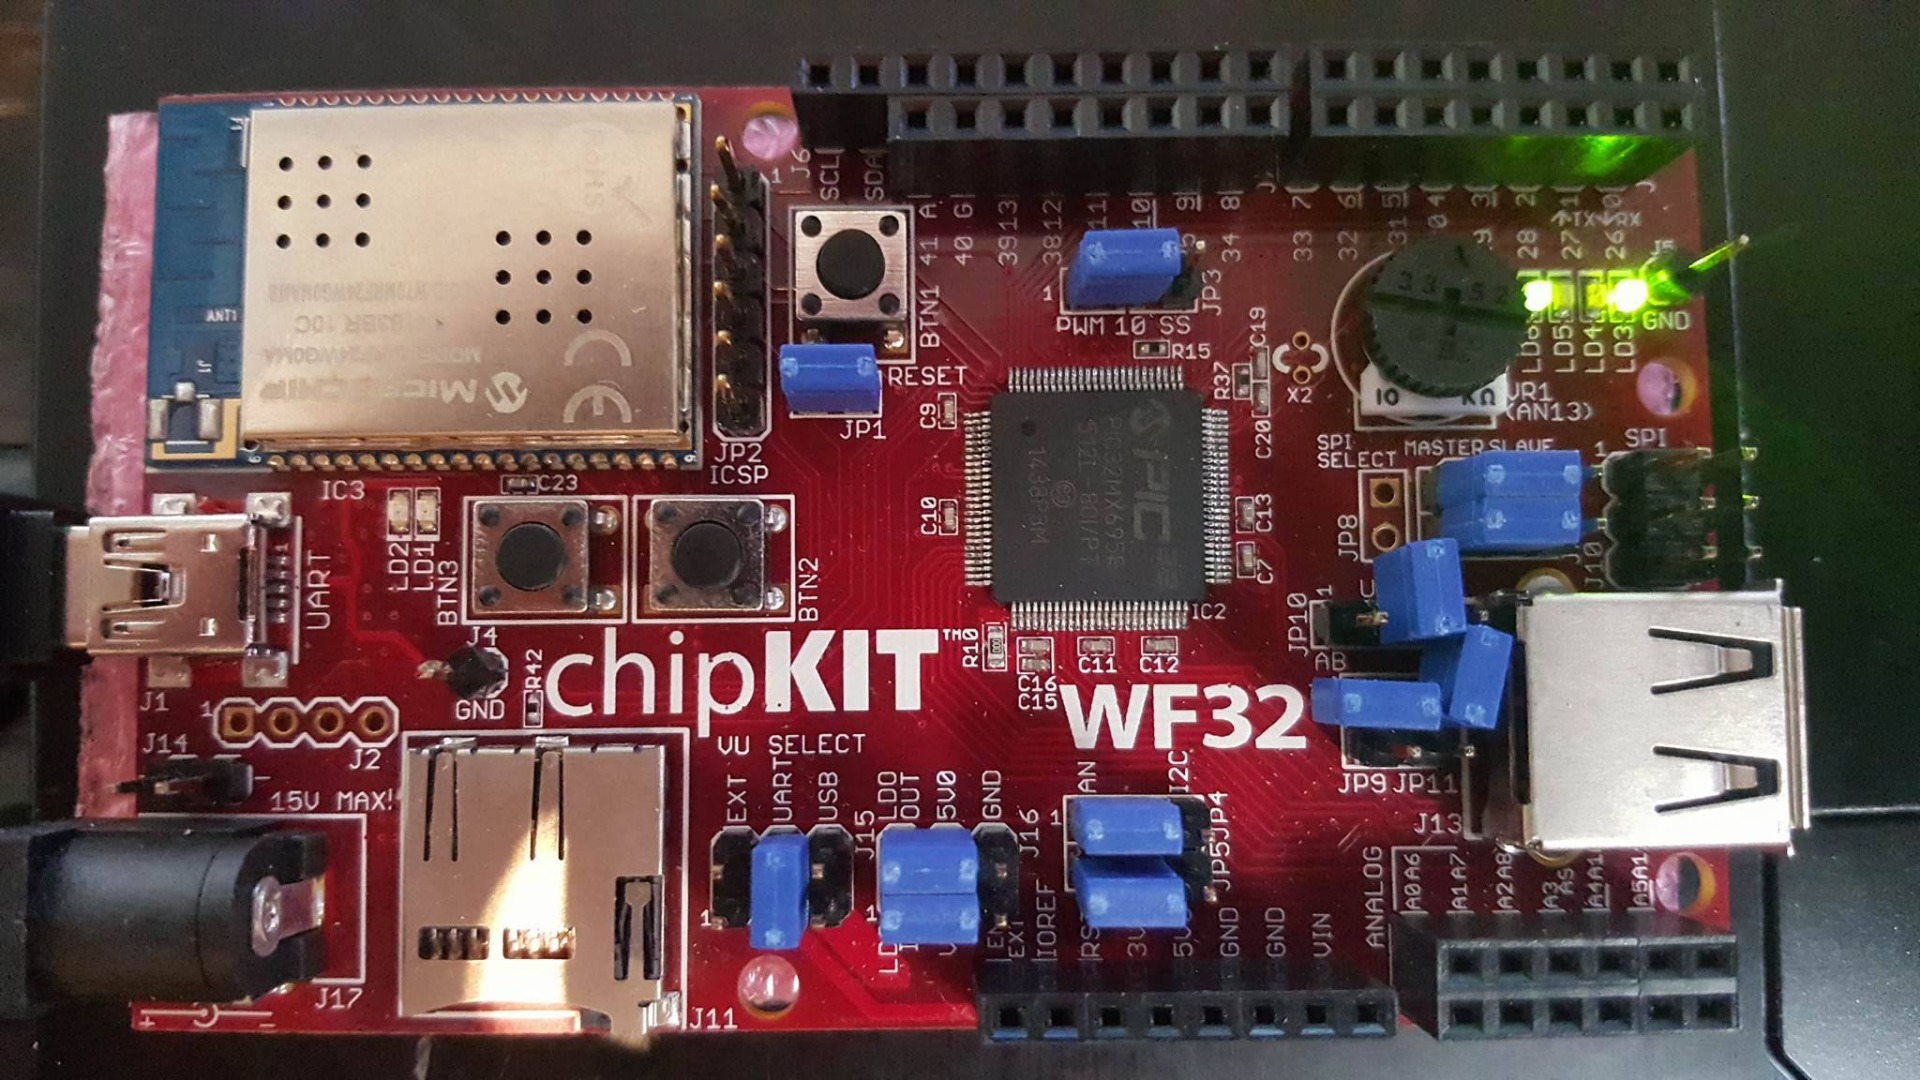
This guide will get you started with basic Arduino IDE programming using your chipKIT WF32 board. Before you can get to programming your board a few steps is needed to set it up.
What you will need is your WF32 board as well as the chipKIT programmer and the necessary cables.
Make sure you also move the jumper on the bottom left of the board to UART (exactly like in the picture)
Installing the Arduino IDE and ChipKIT Core
The first step would be to download the Arduino IDE from this link.
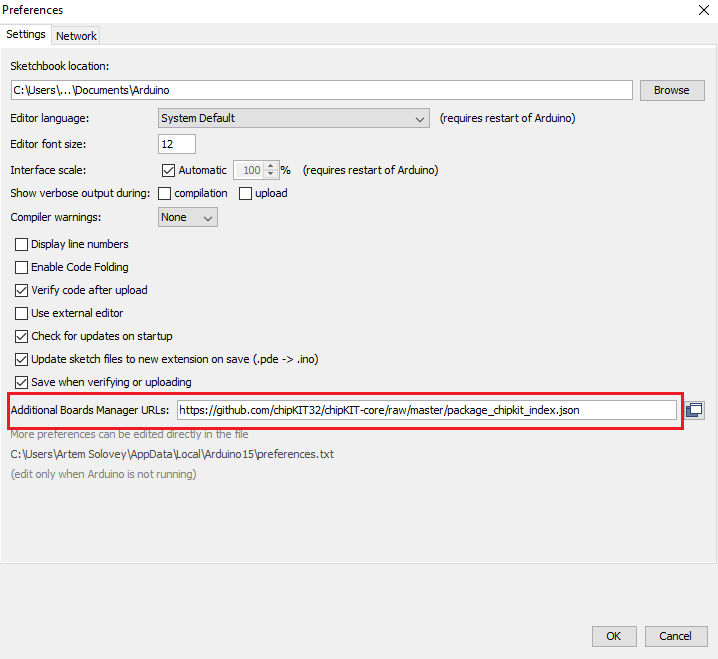
Open the IDE after the installation and click on file > preferences. At the bottom where is says "Additional Boards Manager URLs:" copy and paste this link.
Now go to tools > Board > Boards Manager. In the search bar type in chipkit, then select it and click install.
After the installation go back to tools > Board > and scroll down to select the chipKIT WF32.
Also be sure to select the correct port, Tools > Port. An easy way to find the correct port is to go to Device Manager on Windows and view under the "Ports(COM & LPT)"
Ports may also take a while to load on the Arduino IDE.
Now we need the bootloader.
Bootloader
Proceed to this link and scroll down to Bootloader and click on the ZIP file to download it, then extract it into a folder.
If you do not have MPLAB X installed, you can download it here.
Make sure you connect your board through the chipKIT programmer.
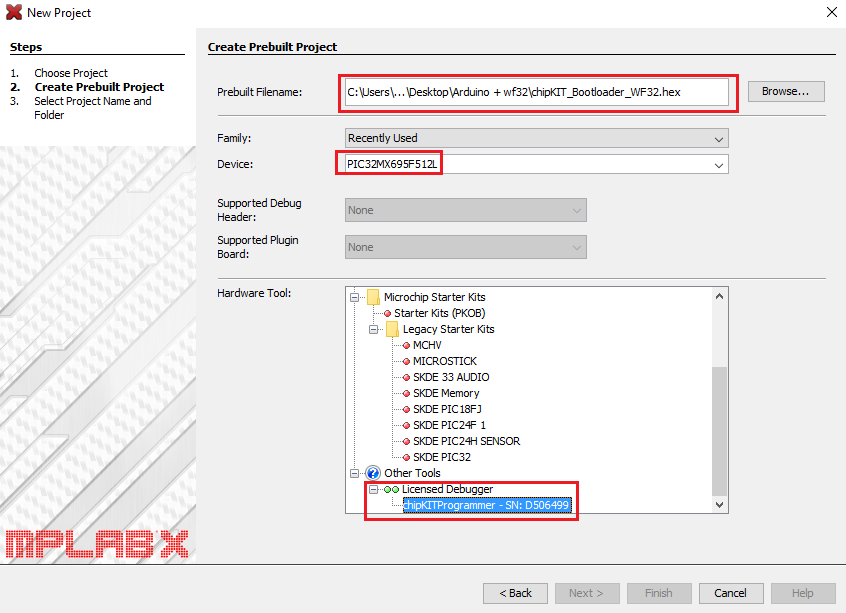
In MPLAB X start a new project and select "Prebuilt(Hex, ...) Project" under Projects.
Select the device (PIC32MX695F512L) and the chipKITProgrammer or your debugger under Hardware Tools.
Click browse on the same screen and select the Bootloader hex file you downloaded earlier.
On the main screen under projects make sure the chipKIT_Bootloader is your main project. Click on the "Make and Program Device Main Project" icon on the top and the bootloader should be loaded onto your board.
To confirm this, you should have a flashing LED (LD6).
Programming on the Arduino IDE
At this point you should be ready to program.
Make sure you now connect your board through the mini usb (UART) on the left side of the board instead of through the debugger.
On the Arduino IDE if you click on File > Examples > Basics > Blink you can test your code with the proper LED pin to see that everything is working correctly before you begin.
One issue I had was when programming without the use of the Serial Monitor, I would have to upload my code then completely close all the Arduino processes until my code started running on my board.
QUICK REFERENCE:
Pin 13 (LD6)
Pin 43 (LD5)
Pin 47 (LD4)
Pin 48 (LD3)
Pin 65 (BTN2)
Pin 66 (BTN3)
In this guide I will show and explain a simple code I made. It might not be optimized, but it is simply for practice and getting to know certain functions such as state change.
LED Binary Representation, Moving Up From 0 to 15 and Down Using Buttons.
A few things before we get to the code.
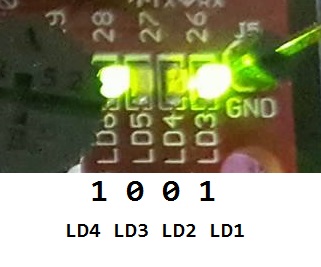
By binary representation, I mean that since there are 4 LED's I use an LED that is off as a 0 and an LED that is on as a 1.
0000 LD6 off LD5 off LD4 off LD3 off
0001 LD6 off LD5 off LD4 off LD3 on
0011 LD6 off LD5 off LD4 on LD3 on
etc..
Also in this code for simplicity and visualization I refer to LD3 as LD1, LD4 as LD2, LD5 as LD3, and LD6 as LD4.
this become LD4 LD3 LD2 LD1 when looking at the board.
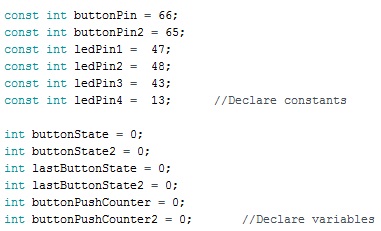
First I start of by declaring the constants and the variables at the very top of my code.
The Code
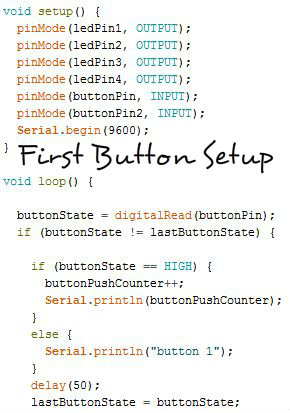
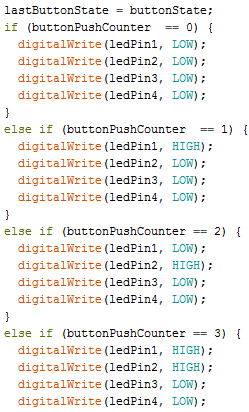
This code is similar and uses many examples from the state change example File > Examples > Digital > StateChangeDetection. A simple example of this code can be found here.
In my void setup() I simply set the LED pins to output and the two buttons to input.
"Serial.begin(9600);" will allow me to use the Serial Monitor Tool > Serial Monitor to track my counters and the buttons pressed.
In the void loop() I first read the input pin, then I compare it to its previous state which right now is 0. If there was a change such as the button was pressed (buttonState == HIGH) I increase the counter and display it on the serial monitor. When I let go of the button (buttonState == LOW) I display what button I pressed for reference. I also add a small delay to avoid bouncing.
After this it is all straight forward assignment of LED's to the counter.
That was for the first button which moves 1 up from 0 to 15.
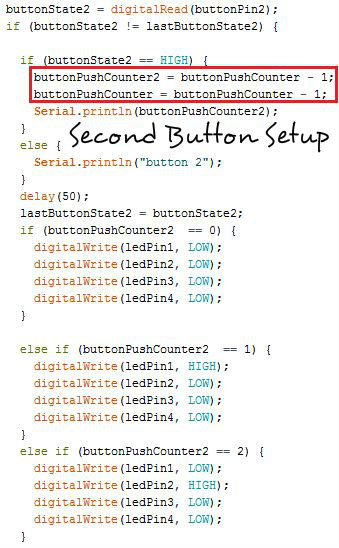
Now the second button we have moves the value down. The tricky part is having it work simultaneously so when we press the second button to decrease the value, the first buttons value and counter gets decreased too. So instead of being at 4, we press the button and move to 3 (in binary), when we press the first button we want to go to 4 instead of 5.
To do this correctly we start the second button just as the first, but this time our button 2 counter will be the counter of the first button minus 1 and then we have to make the first counter decrease by 1 too.
buttonPushCounter2 = buttonPushCounter - 1;
buttonPushCounter = buttonPushCounter - 1;
Everything else is the same, and we copy the if .. else statements.