Simple Servo Arm
Hello,
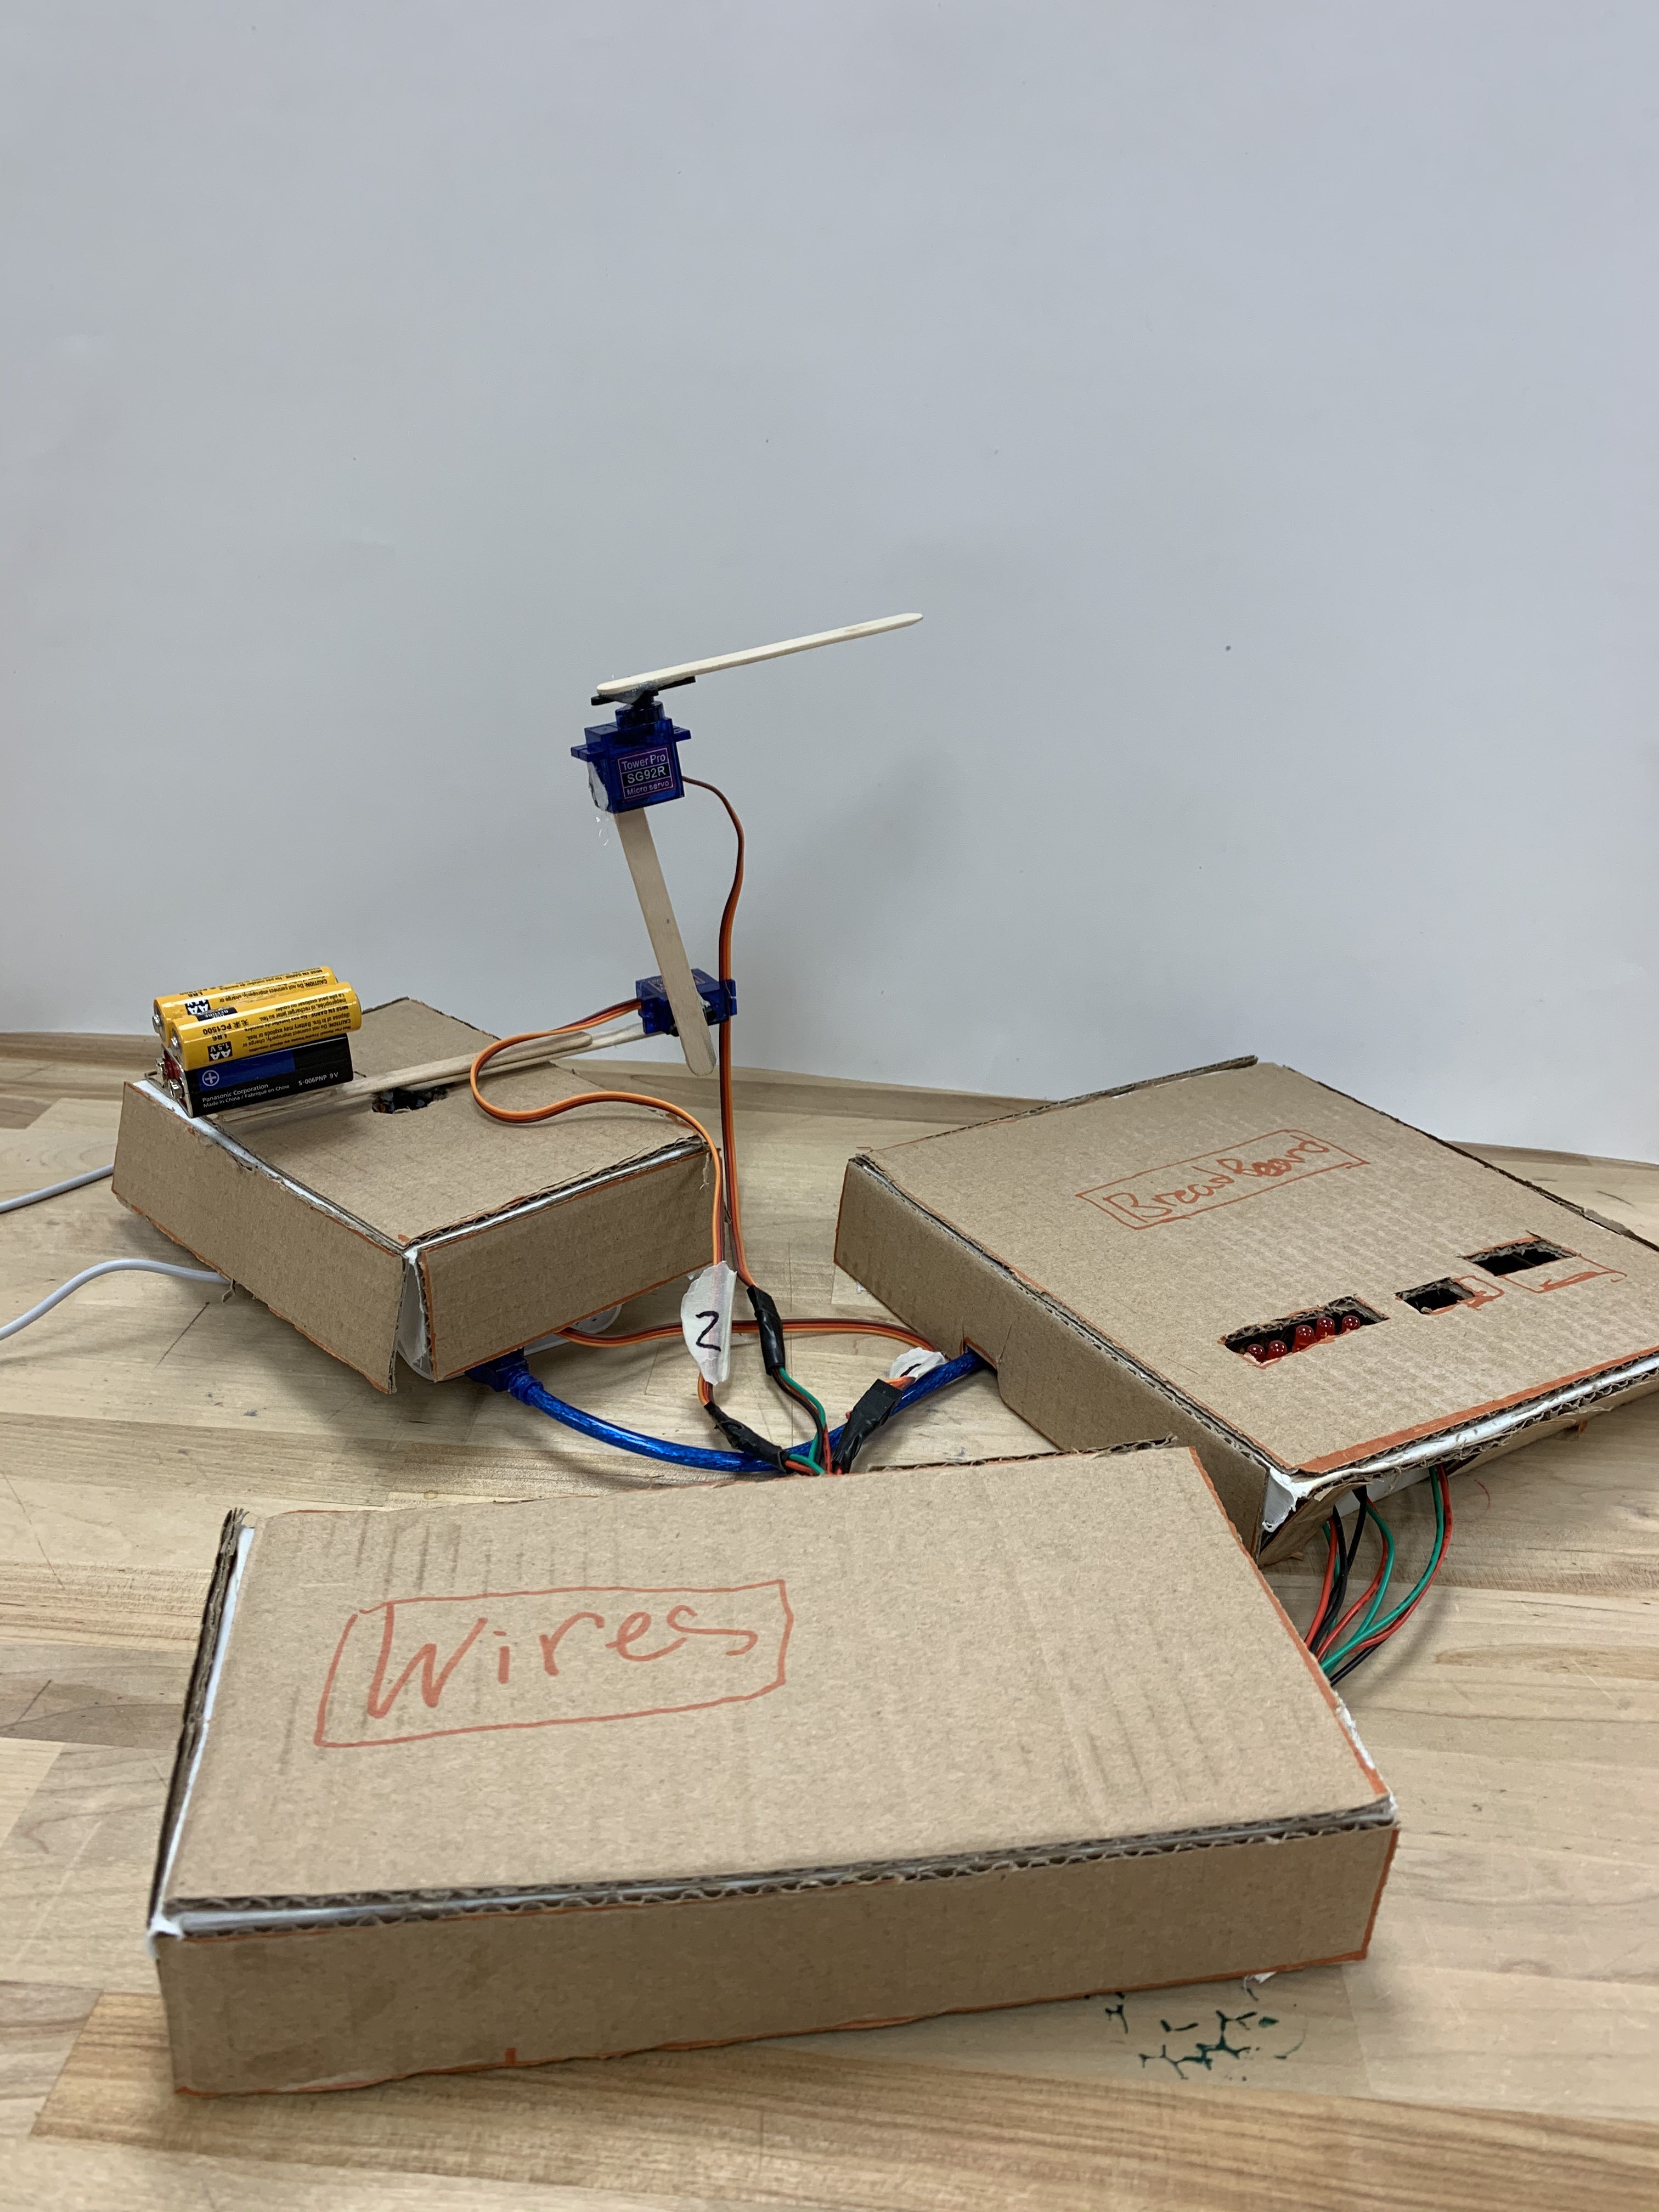
Today I will be instructing you on how to make a simple robotic arm that can be programmed to perform a variety of functions or just simply play golf.
Supplies
- 3x Servo Motors ($4 per motor)
- 1x Bread board ($10)
- 1x Arduino Uno ($21)
- 1x Pack of Jumper Wires (Roughly $10)
- 3x Potentiometer ($6 for 3)
- 2x Push Button (20 cents per 1)
- 5x Red LED ($12 for 300 pcs kit)
- 5x 330 Ohm Resistor ($8 for 100 pack)
- 2x 10k Ohm Resistor ($8 for 100 pack)
Prep.
Set out all of your components on the table in front of you. Check to make sure that you have everything there and make sure your work space is clean. It is important to make sure that you have everything you need so you don't make mistakes or have to stop working on the project.
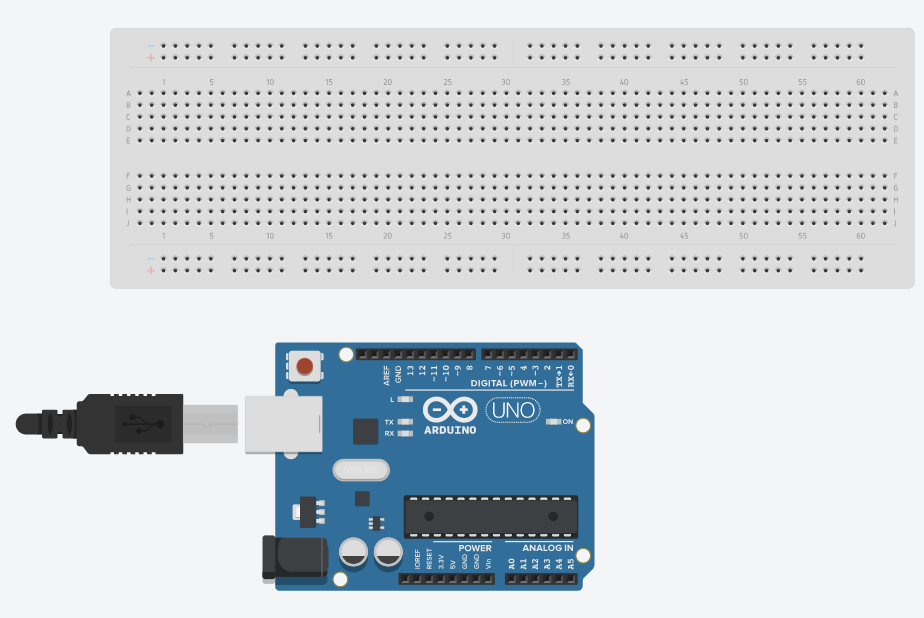
Get your breadboard and put it out on the work space in front of you. Beside it set down your Arduino UNO and the wire that plugs it into the computer.
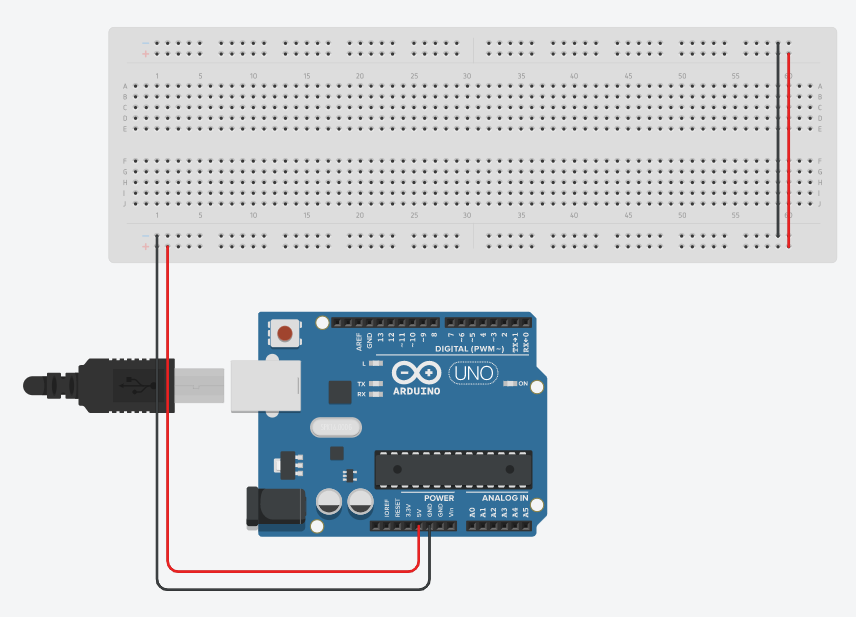
Pull out four jumper wires to begin. First, attach one red jumper from the 5v on the Arduino to the red + side on the breadboard. Then, once that is done, attach one black jumper from the GND on the Arduino to the Black - side on the breadboard. Once those two wires are attached, attach a black wire and a red wire to the opposite power lines on the other side of the breadboard.
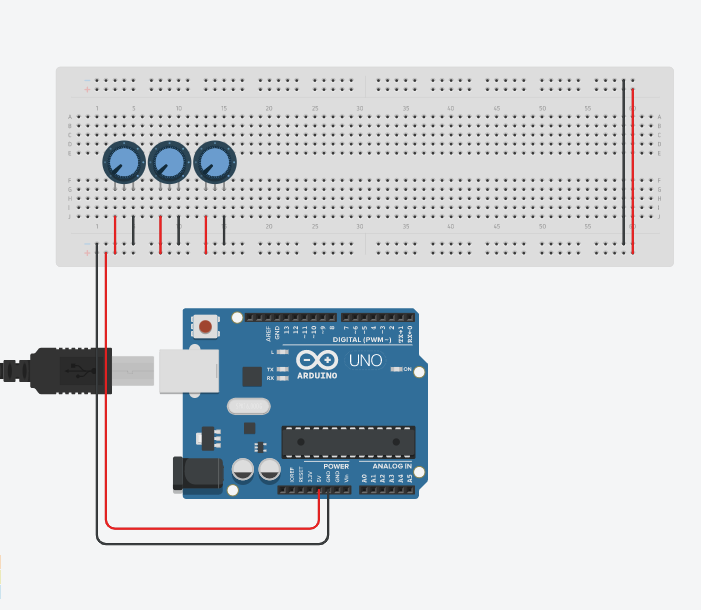
For the next step attach three potentiomiters next to eachother as well as red and black wires coming from their left and right pins in order to provide the components with power and ground. These potentiomiters allow us to control the 3 joints of the arm with 90 degrees of motion.
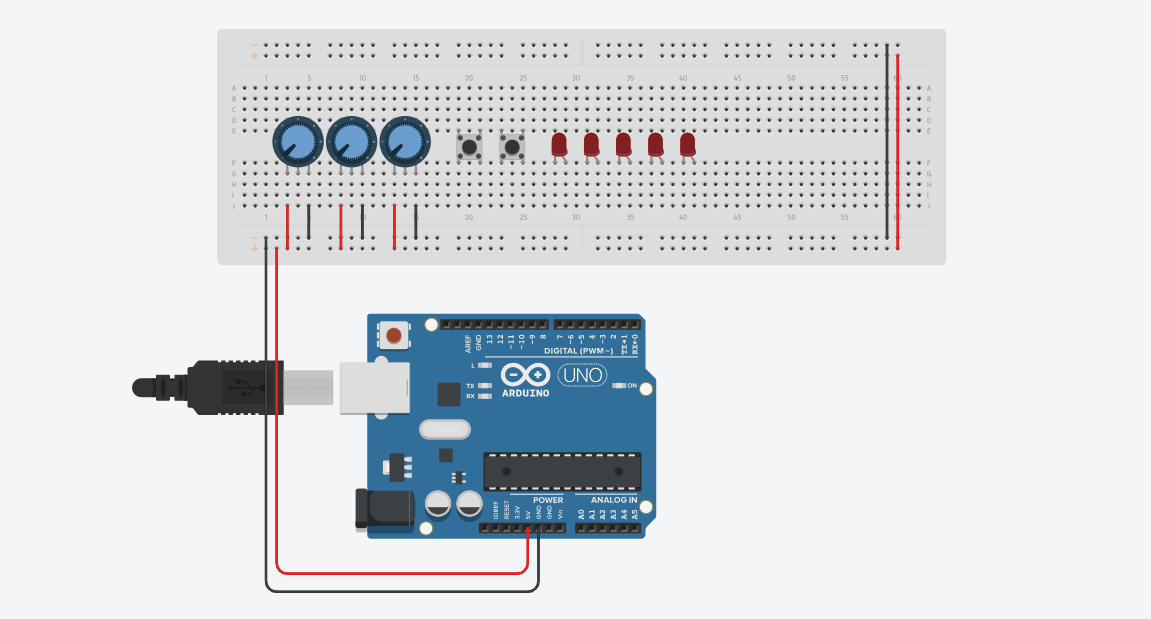
Next, attach two push buttons and 5 led's as shown. These will be used as a method by which to program functions into the arm by just using hardware, no software.
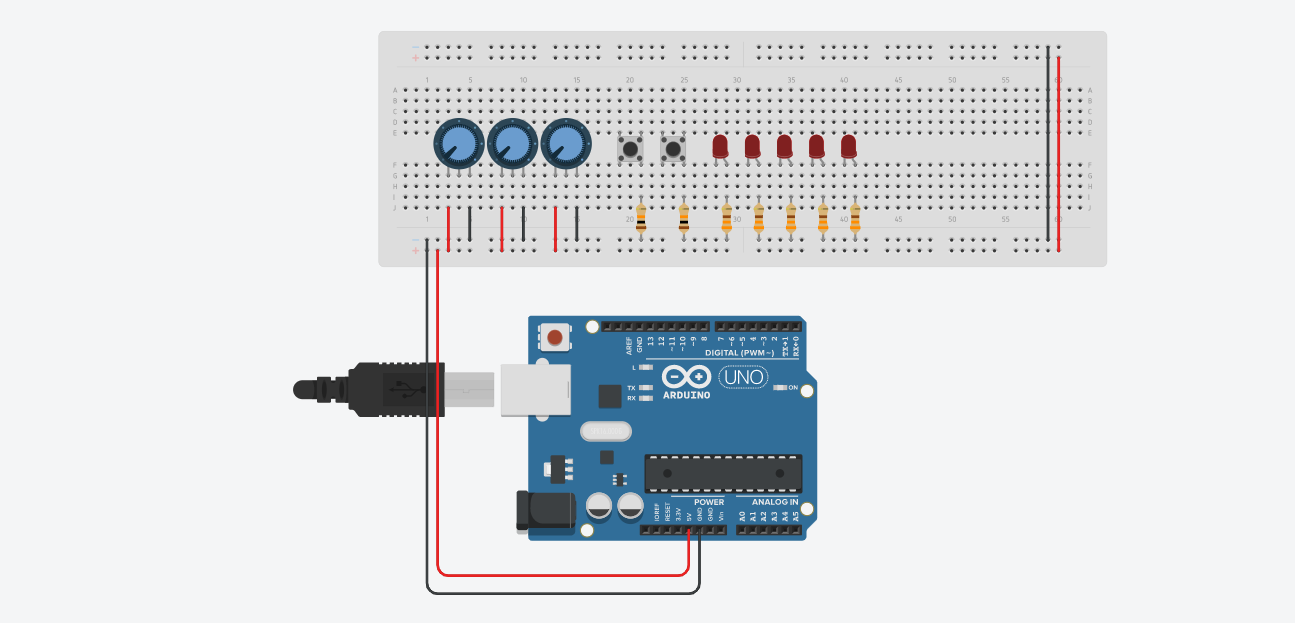
Attach the 7 resistors to the breadboard as shown. Two 10k ohm resistors are connected to the right most leg of each push button and into ground, and five 330 ohm resistors are connected to the right most leg of the red LED's and into ground.
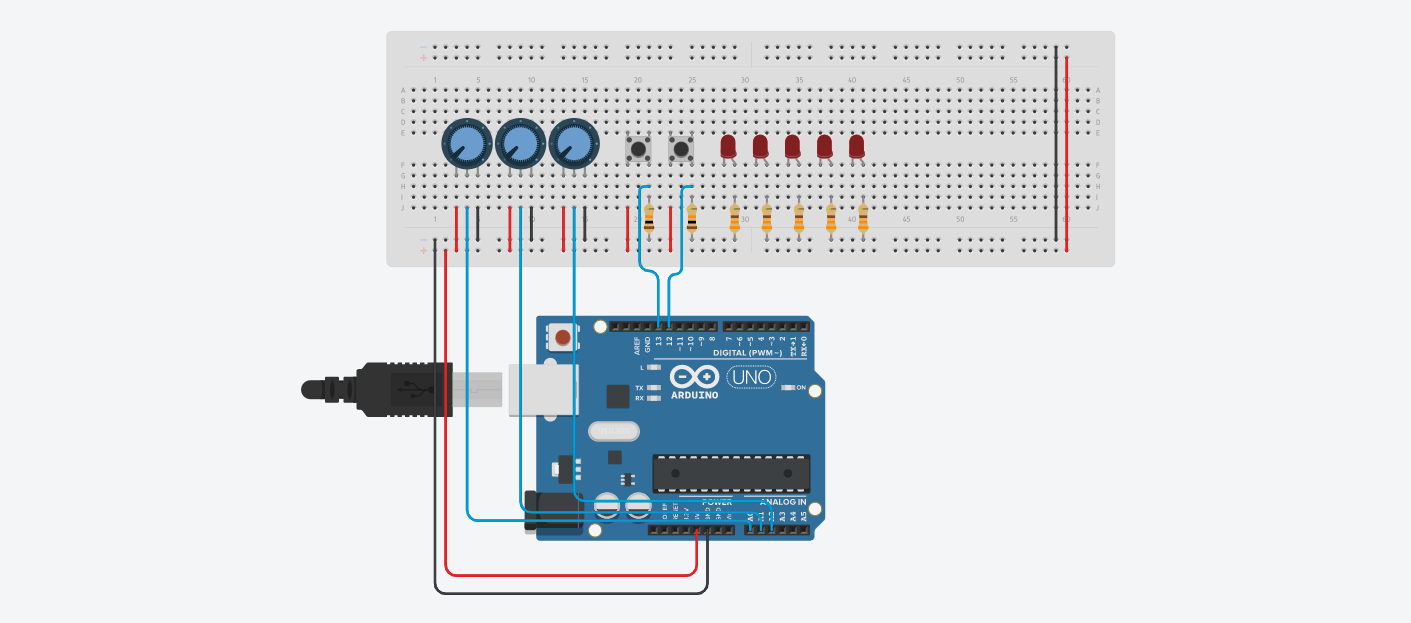
After you have attached the resistors it is time to connect up the potentiometers and the buttons. Follow the diagram as shown and attach a blue wire from each of the middle pins of the potentiometers to slots a0, a1, and a2 on the Arduino. Then proceed to connect power to each of the buttons as shown by the diagram and their signal pins in 12 and 13 just above the resistor as shown.
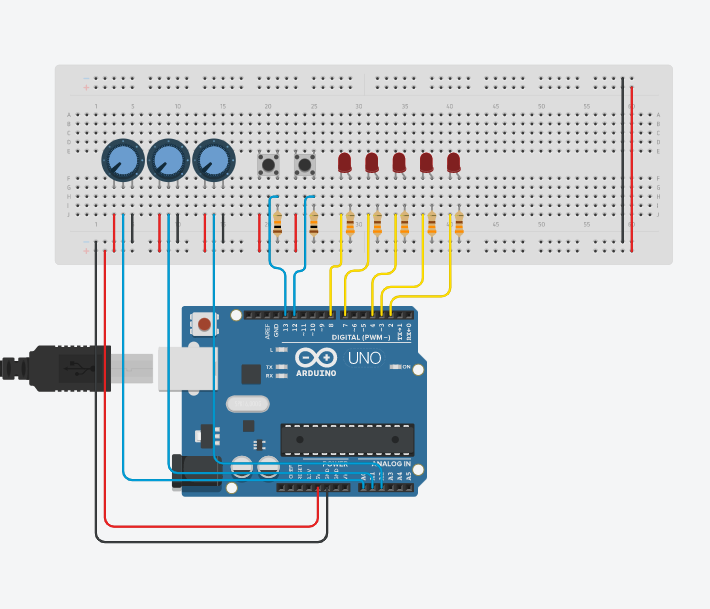
After you have completed step 7 you can begin to attach the signal wires for the red LED's. Attach five yellow signal wires from each left leg of an LED to pins 8,7,4,3 and 2 respectively. Once you are done, proceed to the next step.
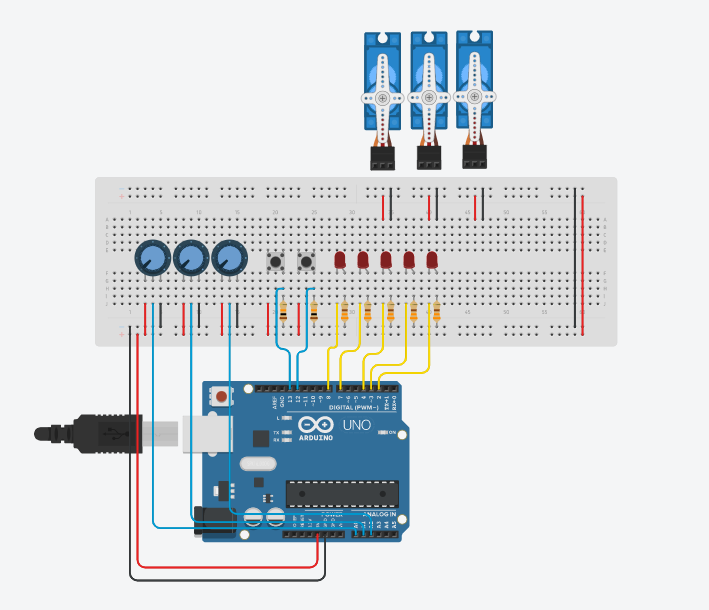
Next, place your 3 servo motors with the connectors facing the breadboard. After doing that, make three sets of connections for power and ground that the servos will use when they are connected to the breadboard. Follow the diagram as shown in order to connect the wires correctly.
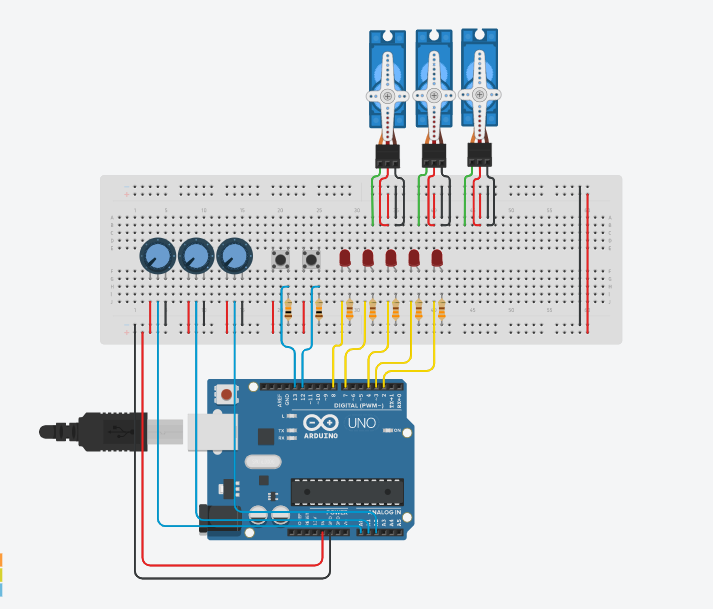
For this step we are attatching the servo motors to the breadboard. Start by connecting the power and ground of each servo to the power and ground connections we made earlier. Then, following the diagram, connect the signal pin of each servo to the left of each power wire so that it may be connected next.
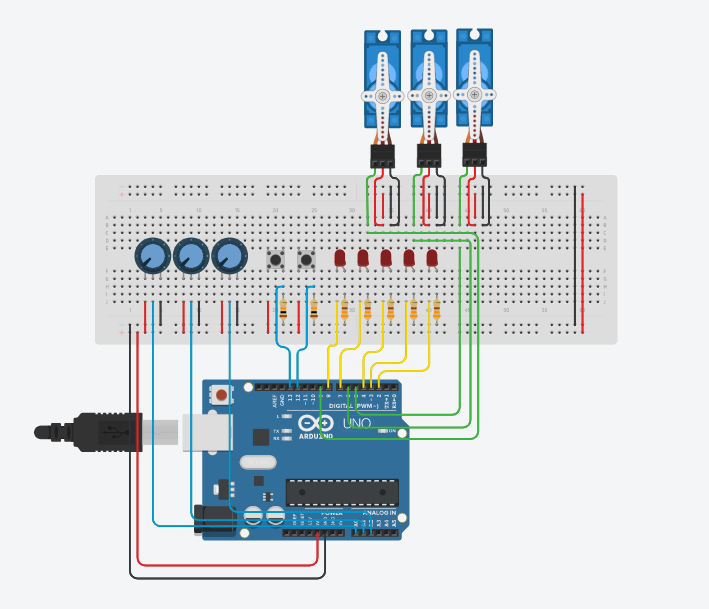
Once you have completed step 10 you can begin to connect the signal wires for the servo motors. Using pins 9, 6 and 5 connect 3 signal wires to the three servos as shown. This will allow the servos to receive an input from the potentiometers through the Arduino.
Now that you have completed the wiring, feel free to take creative liberties with the project. You can follow as I did and make the arm out of Popsicle sticks and hot glue or you can take your own path and design your own arm with other materials. In this step the code is provided, feel free to use it or to make your own.