Simple L.E.D Lamp With Water Switch and Makey Makey
by vanessa.michelis in Circuits > Electronics
2111 Views, 10 Favorites, 0 Comments
Simple L.E.D Lamp With Water Switch and Makey Makey
This project is a simple DIY LED Lamp that does not require coding, complex circuitry or soldering!
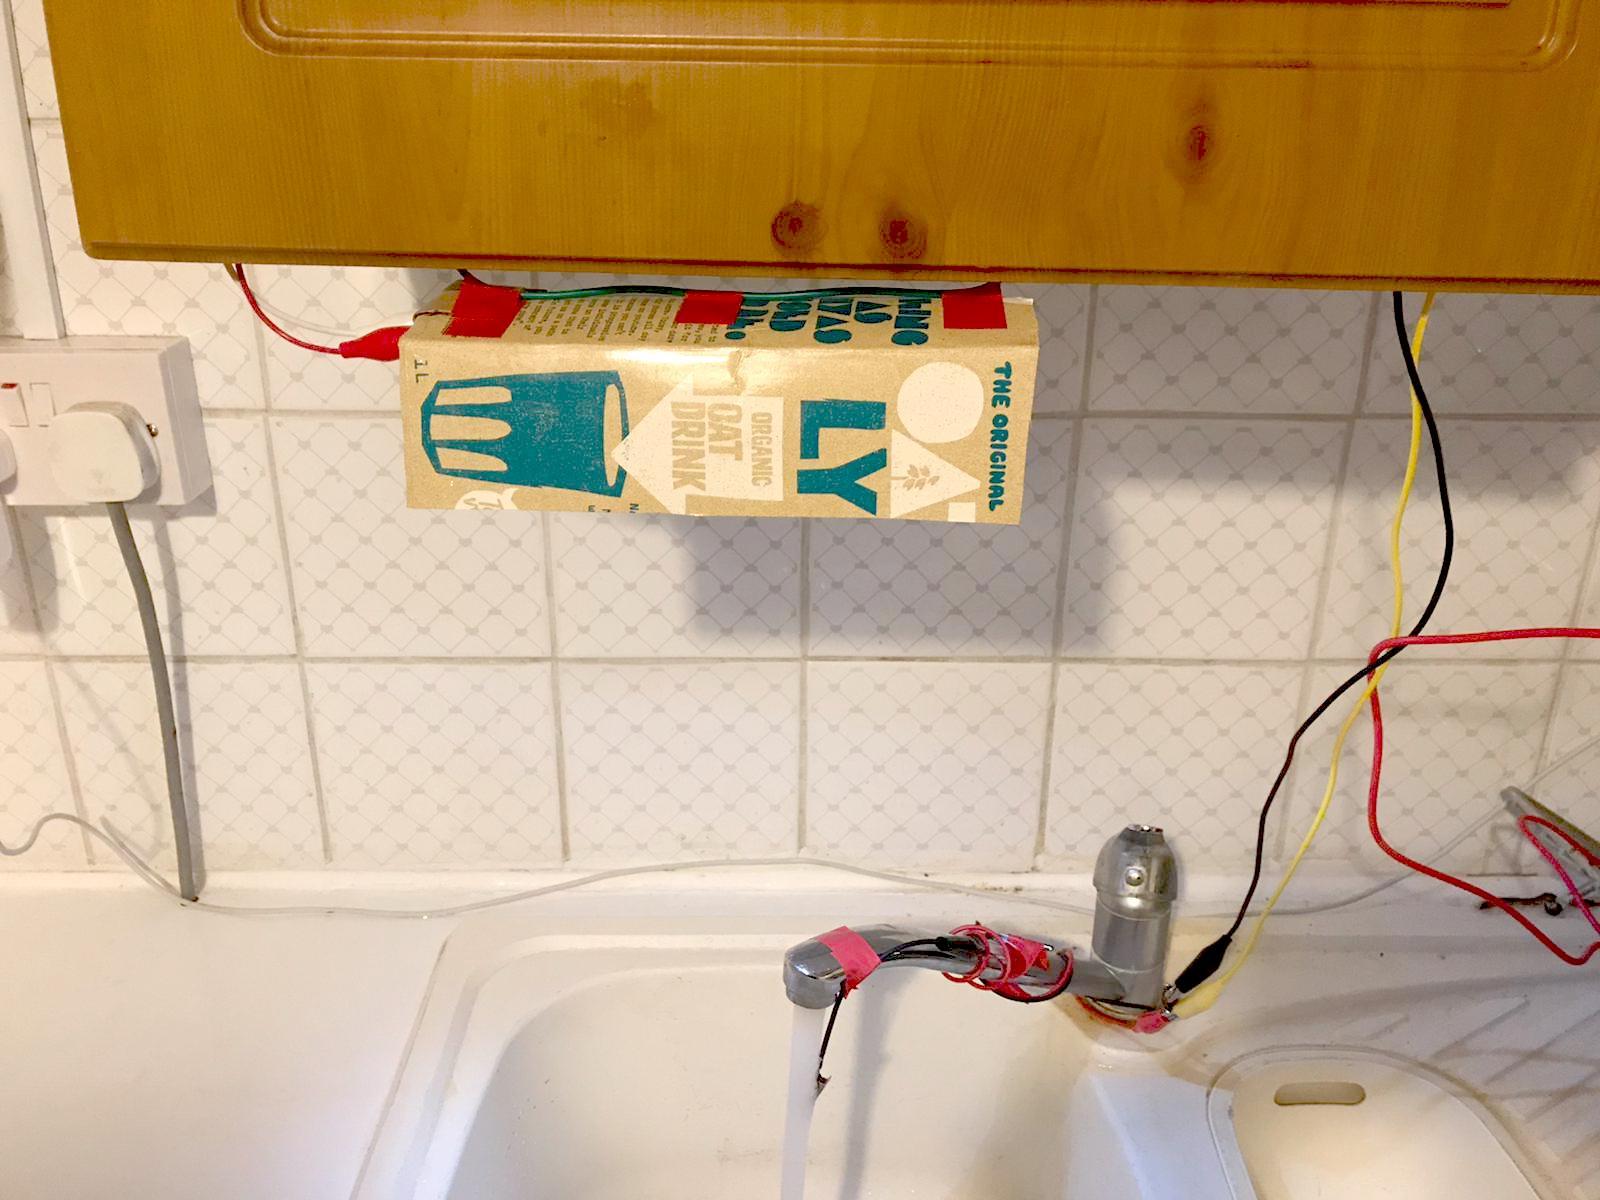
Although this lamp can be used anywhere for a bit of extra light like reading in bed or your working desk, its main motivation was to solve an issue in my kitchen. The kitchen lamp is positioned in such a way that one blocks the light with their body when doing the dishes. In the evening, this gets worse and can lead to bad dishwashing (eg: trouble with your partner and/or housemates!!)
The reason why I chose Makey Makey to run it is because it allowed me (and will allow you) to focus the larger part of the work on MAKING the lamp, rather than on coding and figuring out the best way to power it. In my case, I wanted to focus on testing switches, in specific, a WATER SWITCH. Besides being very appropriated for the motivation behind the project (better dishwashing) I was also inspired by this instructables called Anti-Water Waster.
This lamp is a first prototype, please feel free to modify it. After you've perfect your design, you might decide to power it with a battery pack. However, if you plan to use it for many hours, you might want to find a more sustainable solution than disposable batteries. This could be to continue using micro-controllers like Makey Makey, Arduíno or Micro:bit.
This project was created in London as part of the Makey Makey Educator Training @ Kennesaw University - 2020
Supplies
- 10 x LEDs
- 5 x alligator clips
- 2 x copper strips (15 cm each)
- 2 x jumper wire
- 1 x cardboard sheet or tetra pak (about 20 cm)
- 1 x extra cardboard piece (only required if you choose to use an aluminium coated tetra pak)
- 1 x Insulation tape
- 1 x Sharpie
- 1 x Adult scissors or cardboard knife
- 1 x Makey Makey board (if you don't have a Makey Makey you can use a 3V battery pack)
Step 1: Choose the Base of Your Lamp
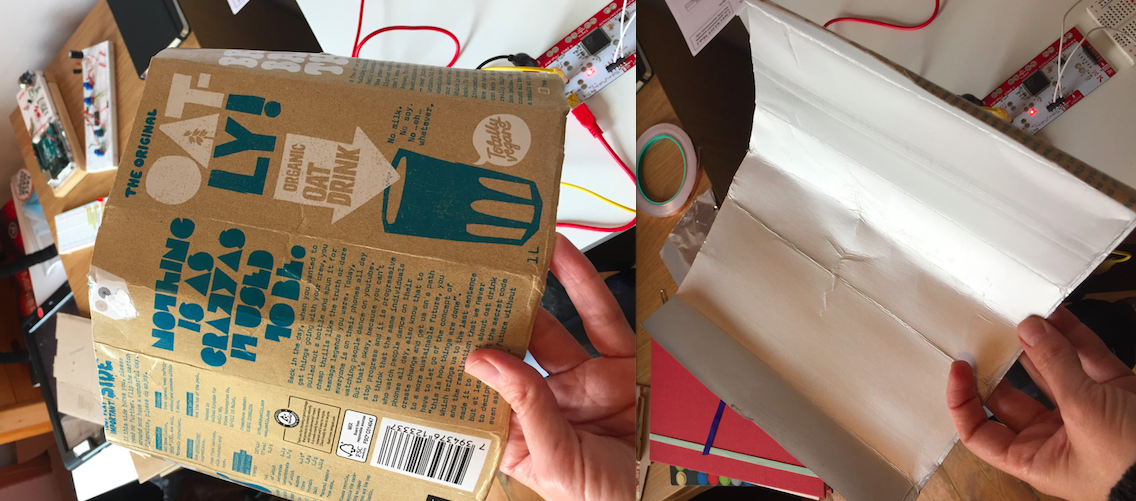
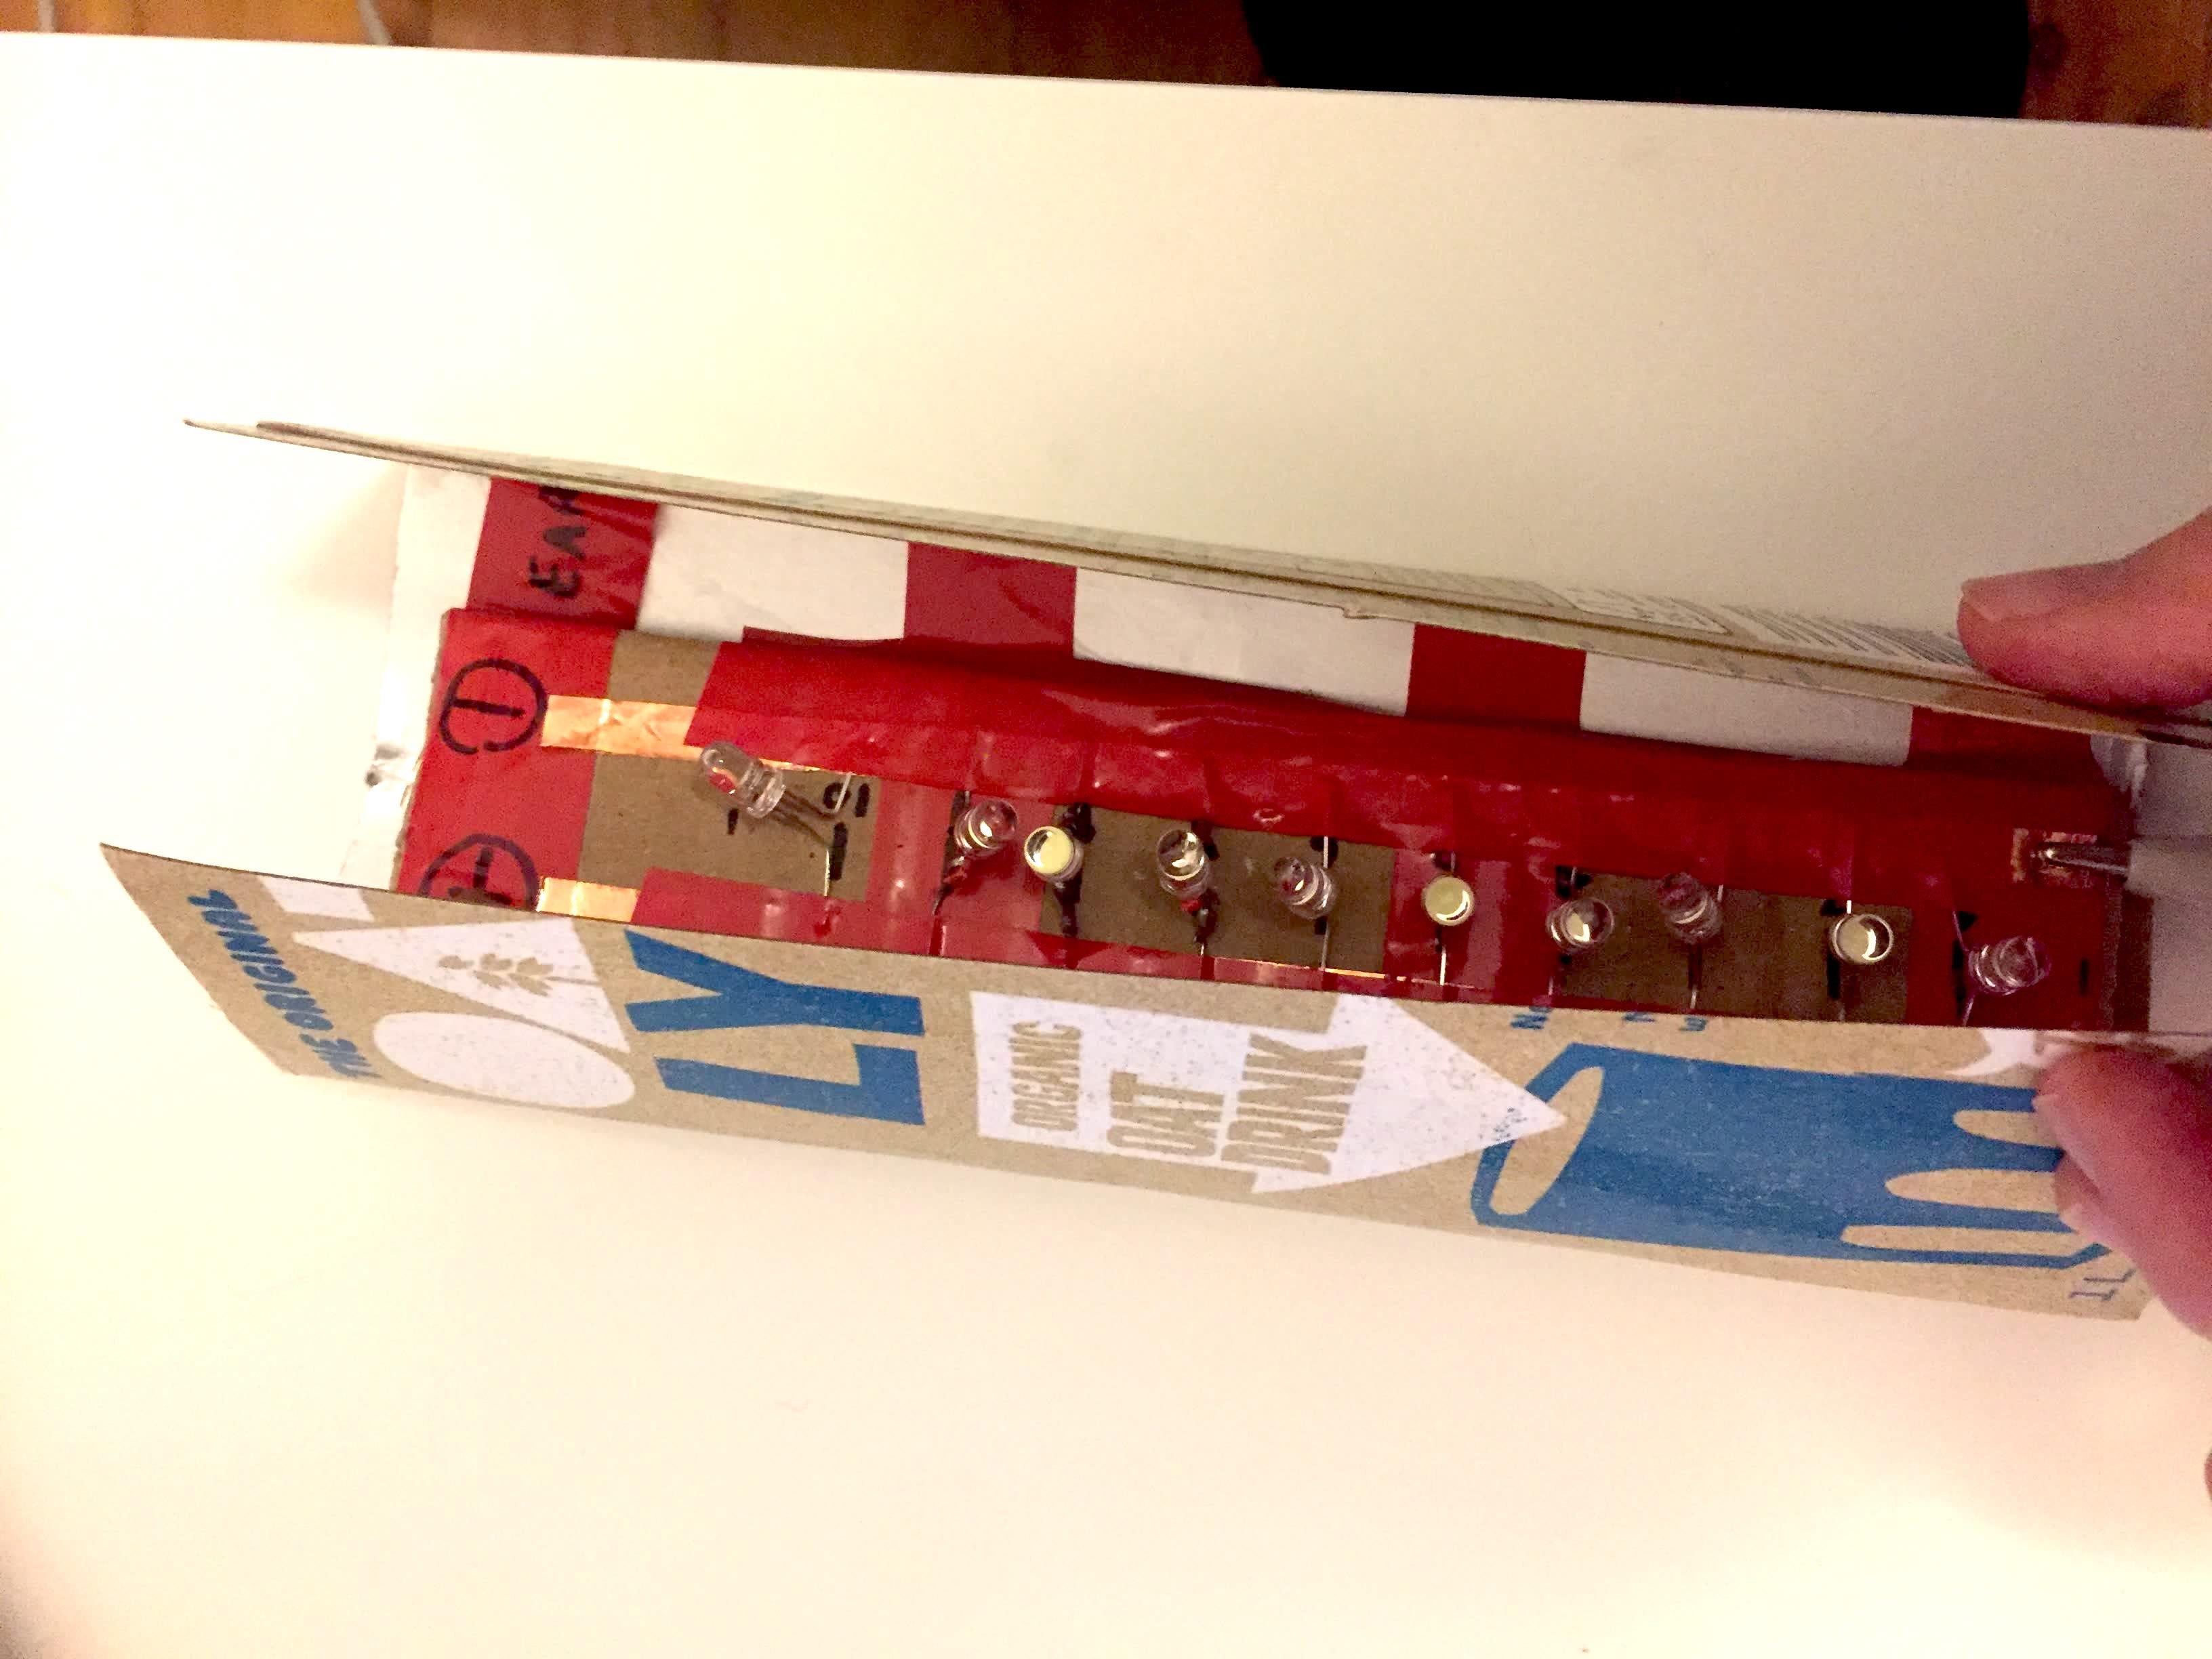
- Pick a foldable cardboard sheet or tetra pack*.
- Check and cut your piece in a way that allows folding the cardboard to generate flaps
- Test folding the flaps inwards. Later on the project this will help direct the light downwards.
* An aluminium coated tetra pak is great for extra reflexivity but you will need to take some extra steps to insulate your alligator clips from touching it otherwise you will short-circuit your lamp. This will be explained in Step 2 and 5.
Step 2: Attach a Cardboard Strip to Your Lamp and the Copper Strips
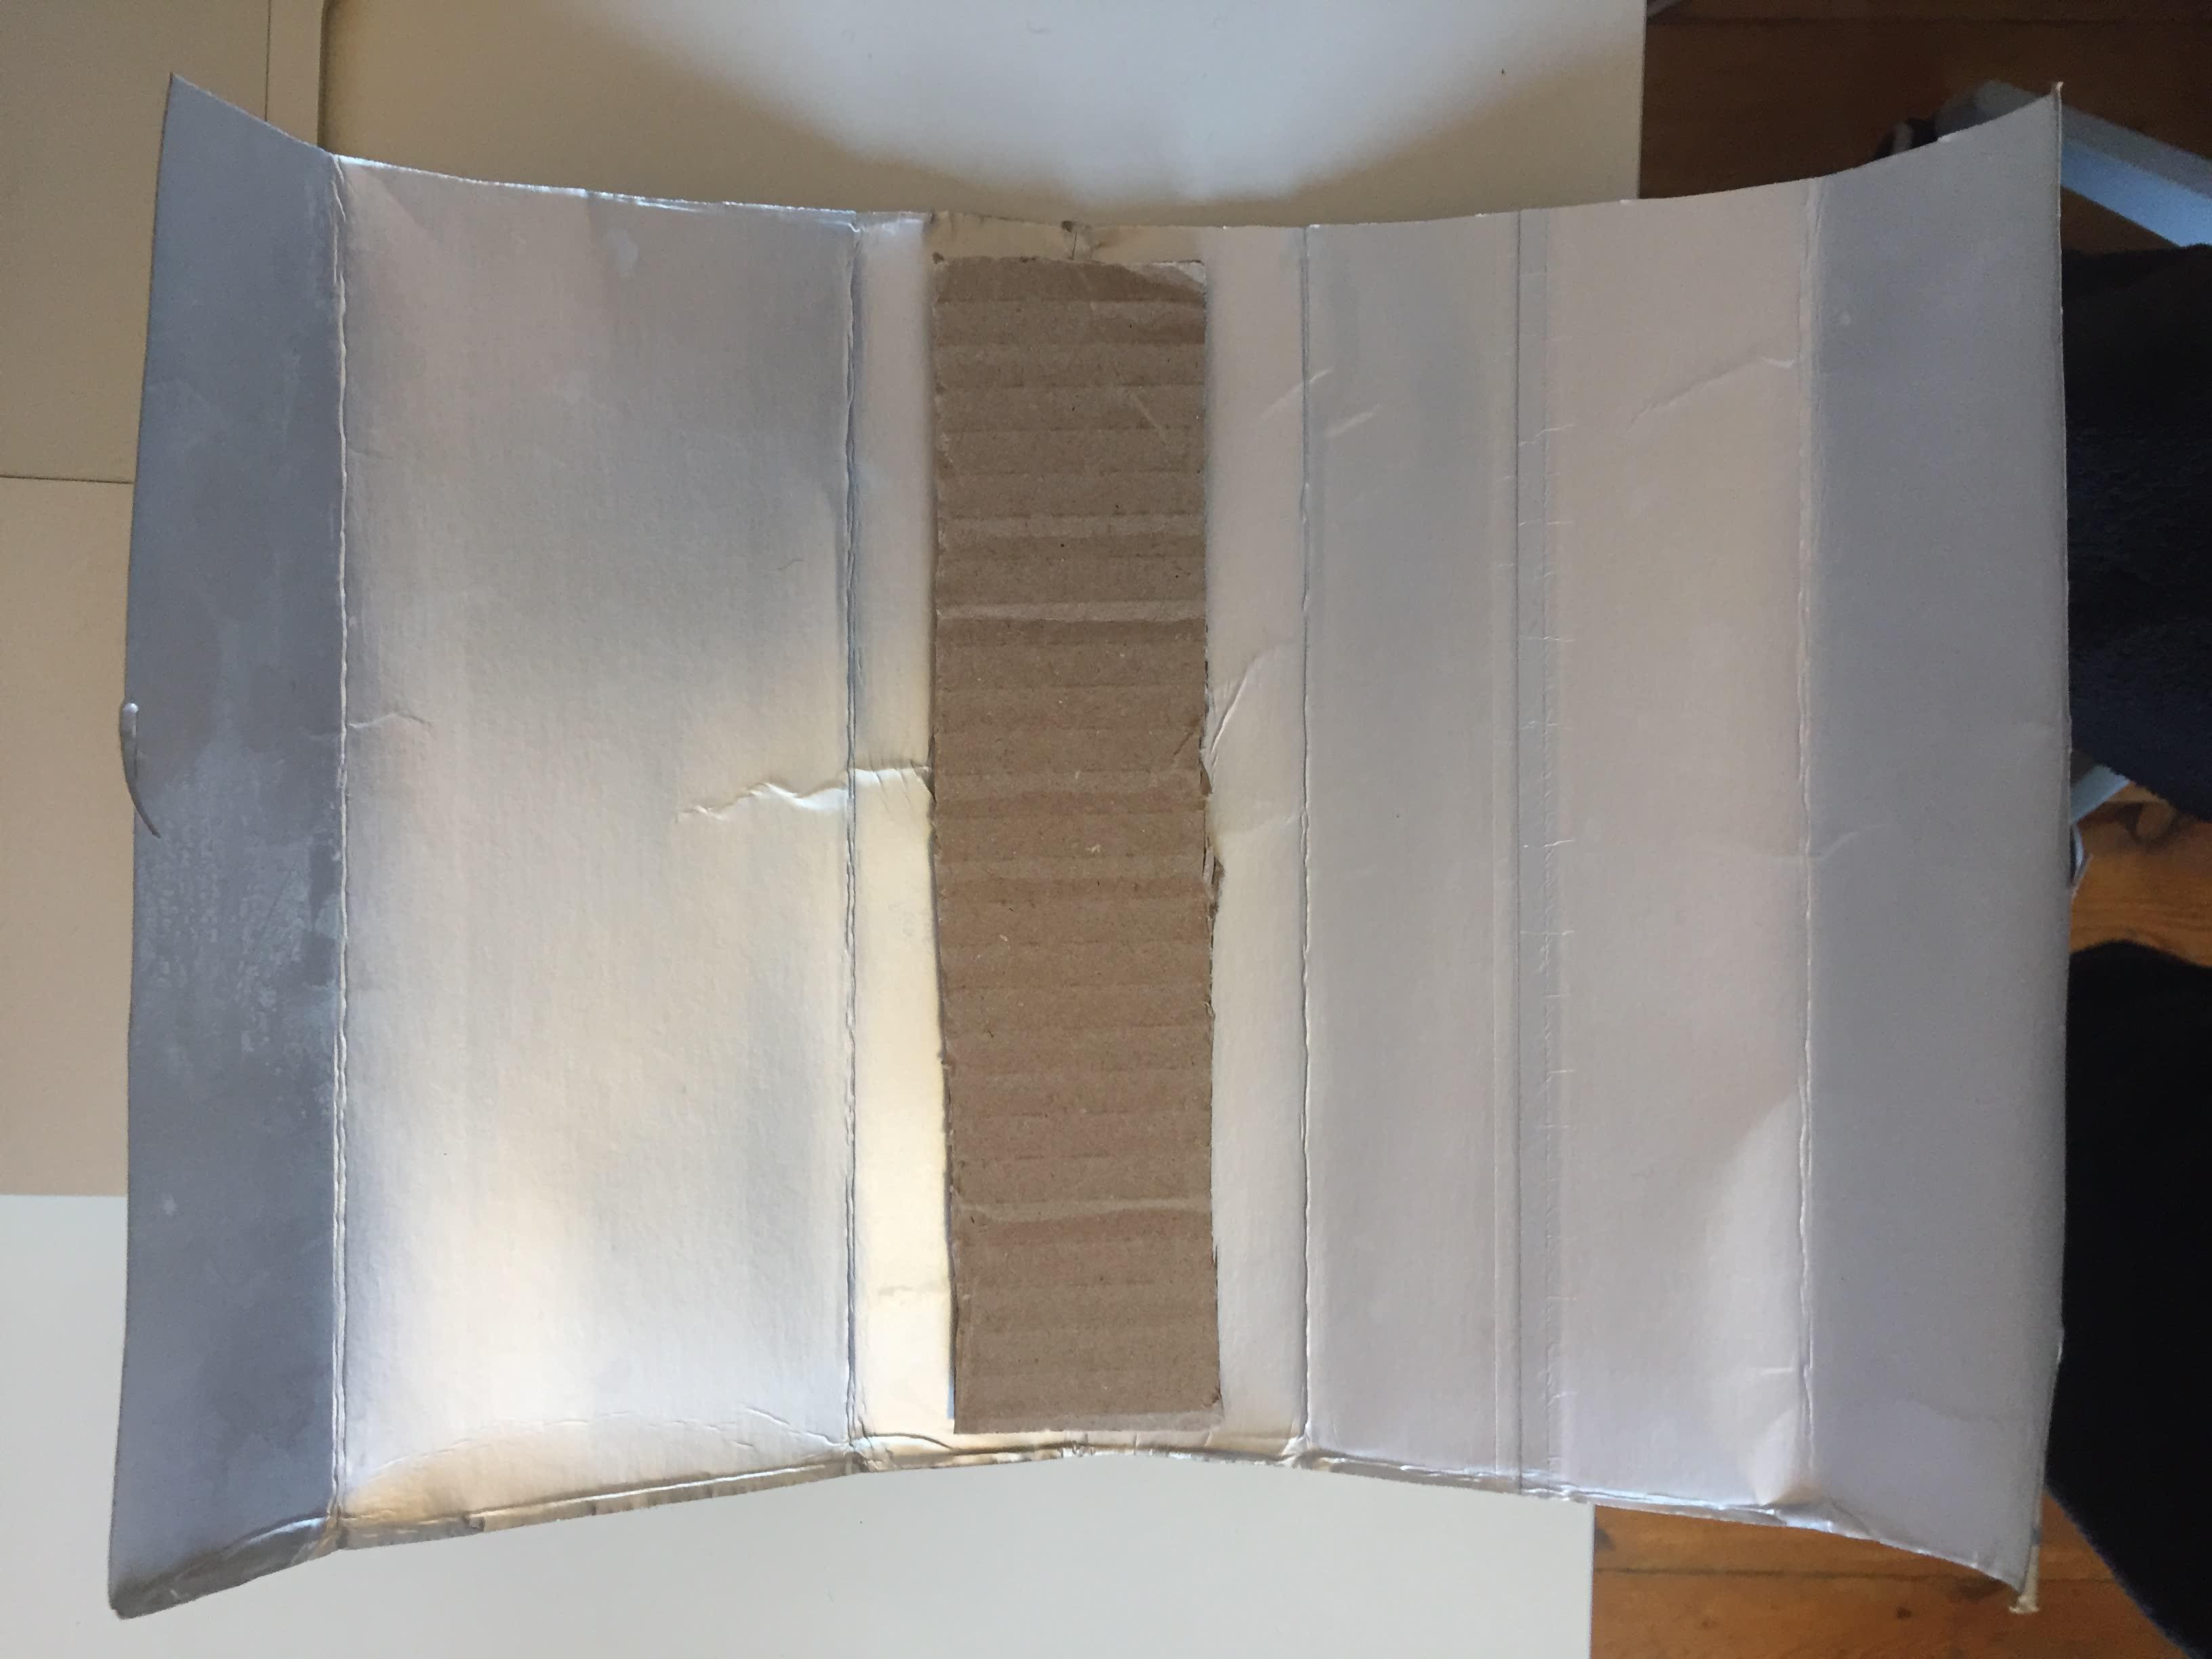
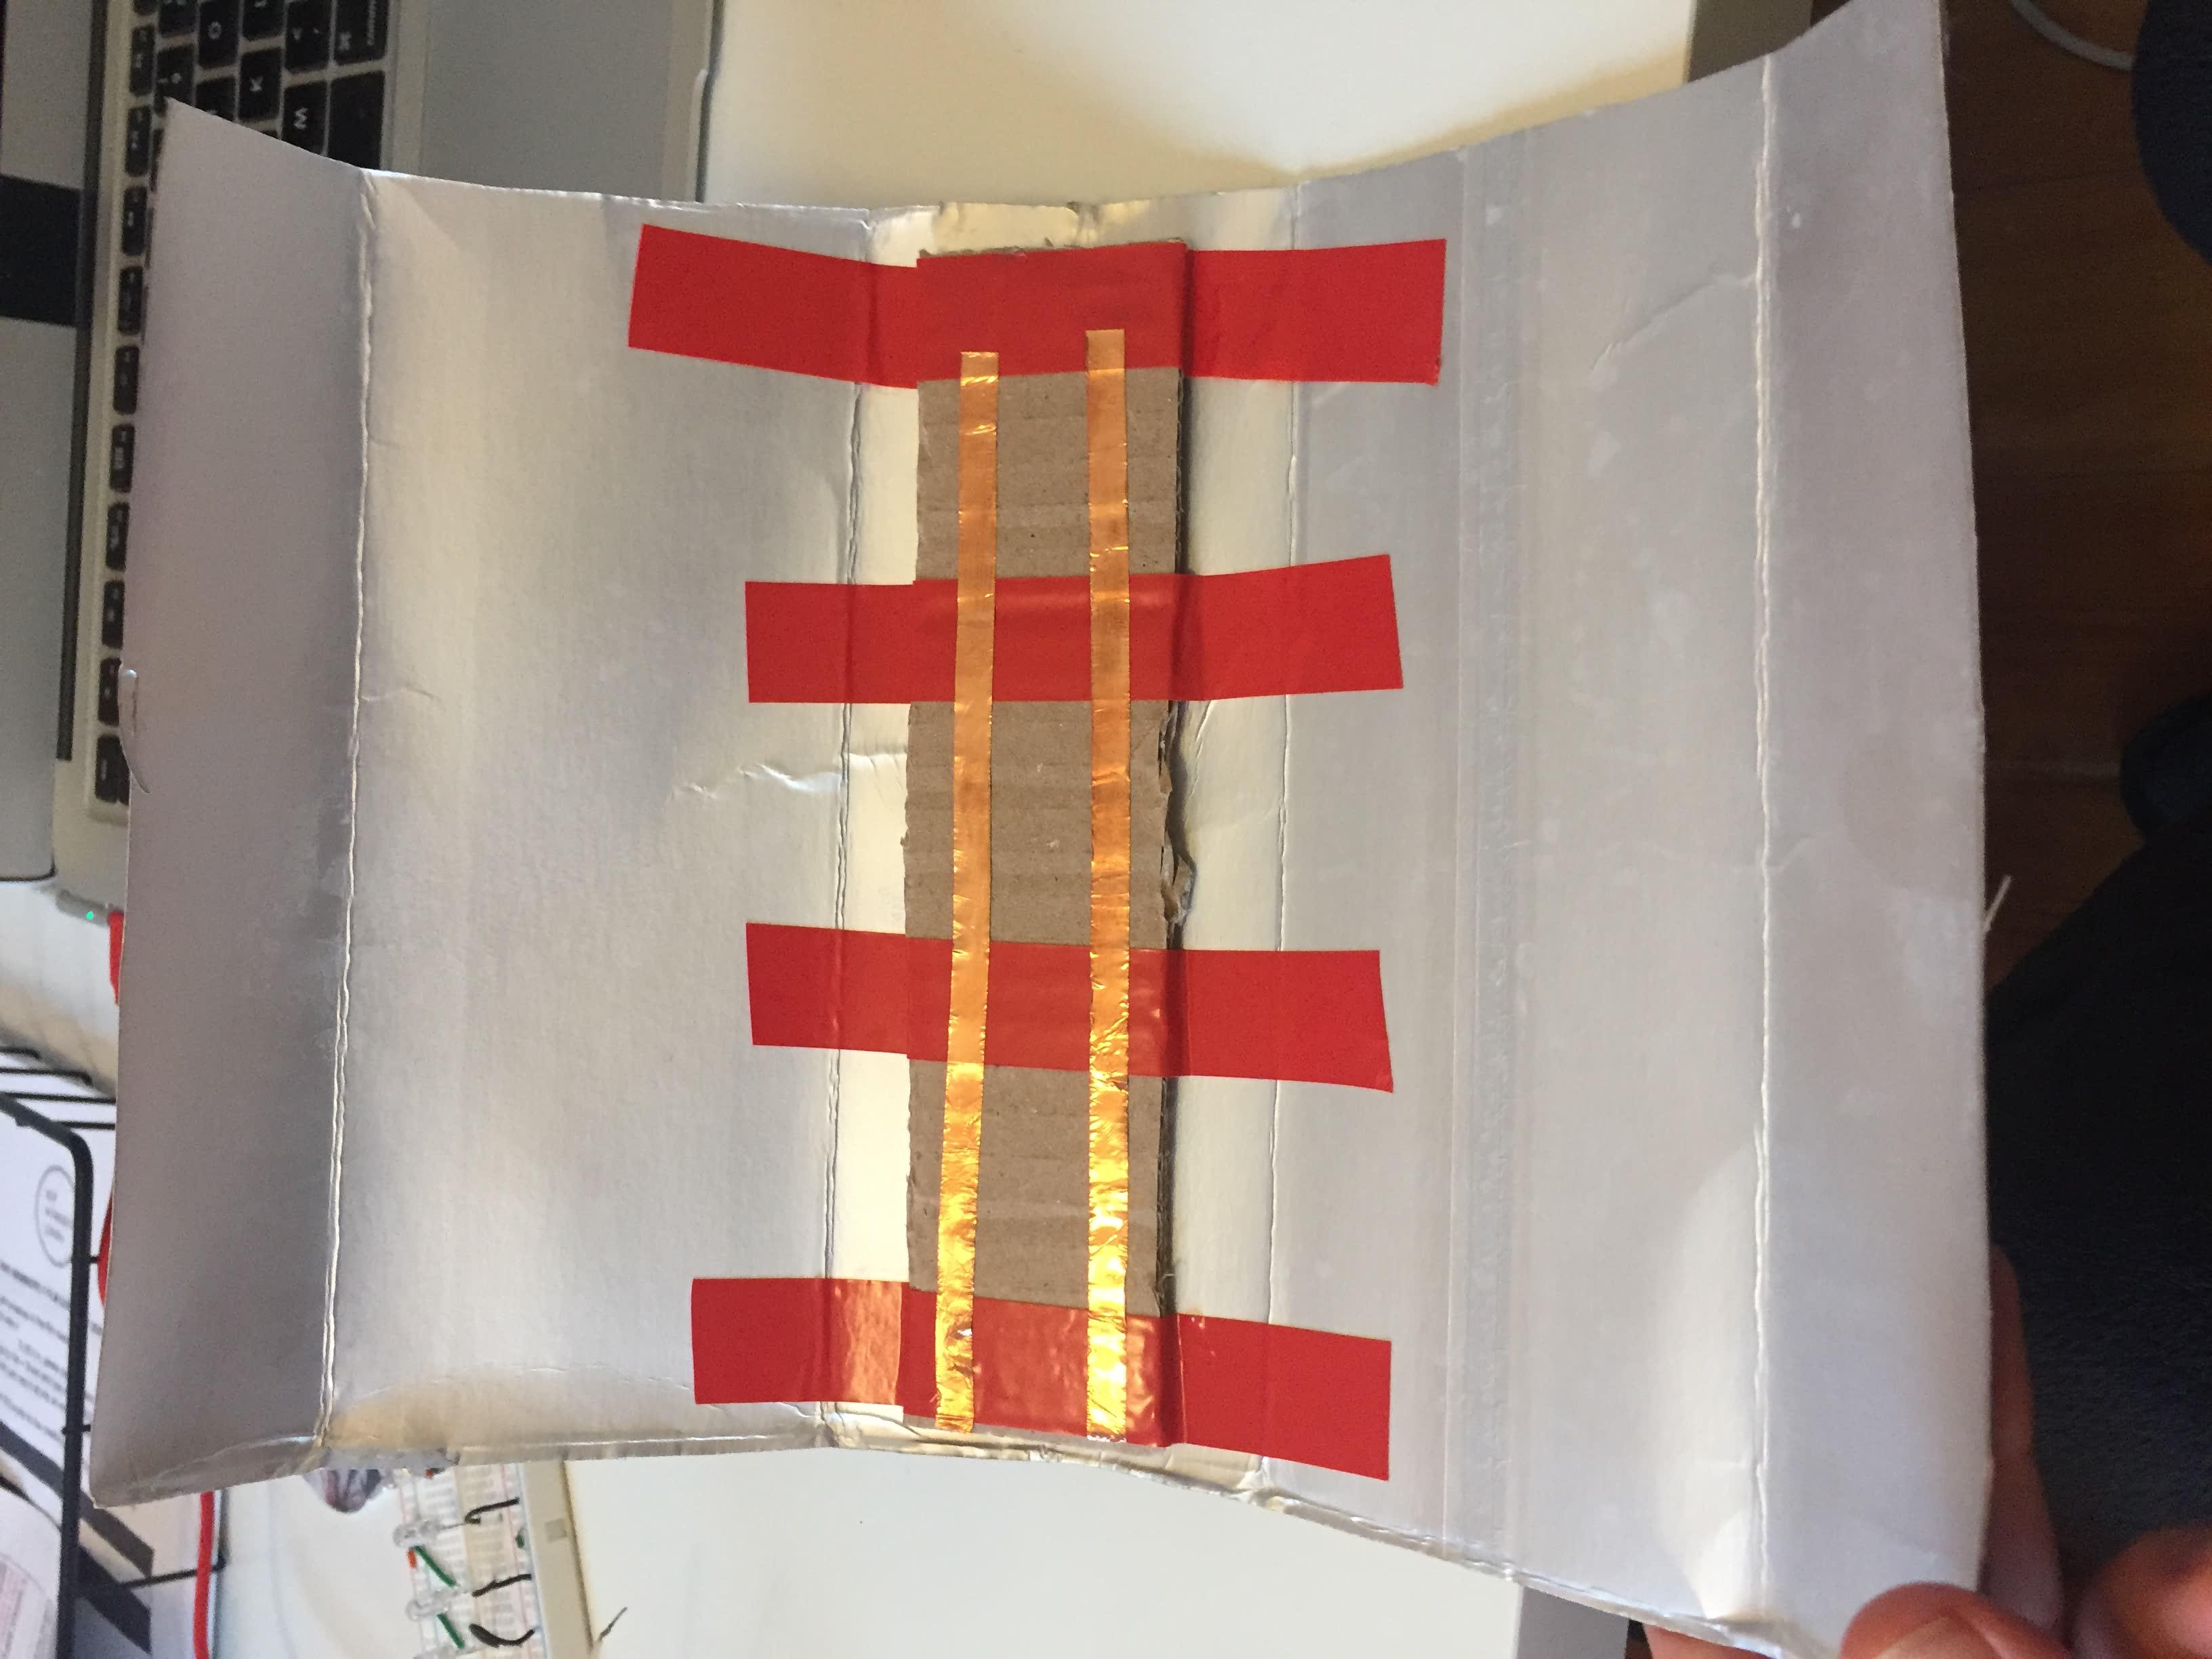
Prepare the base of the lamp, where you will attach your LEDs.
If you are using a tetra pack:
- Attach a piece of cardboard to your tetra pack with tape, shown above (the LEDs can't touch the aluminium coat)
- Attach your copper tapes running in parallel, 2-3cm apart
If you are using a cardboard sheet:
- You don't need to add this extra cardboard piece.
- Attach your copper tapes running in parallel, 2-3cm apart.
Step 3: Label Your Copper Strips and Mark the Position of the LEDs
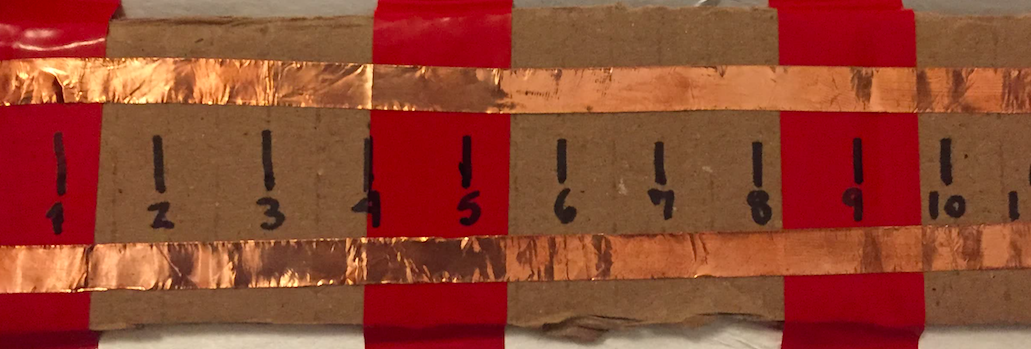
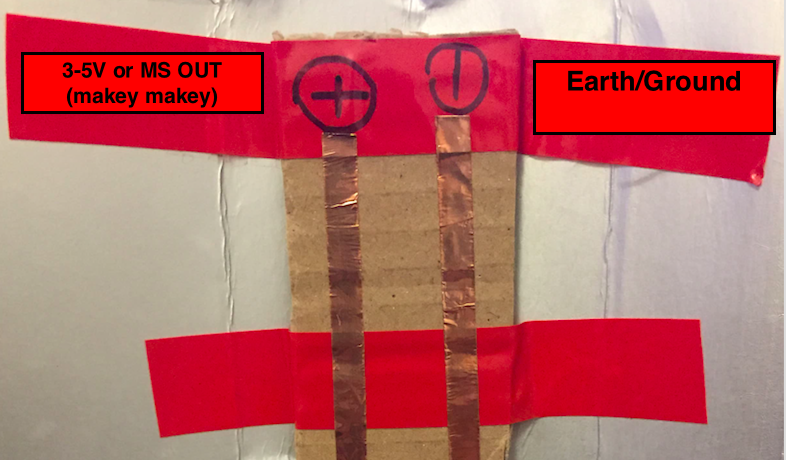
- Make 10 marks between your copper stripes as that's where you'll place your LEDs.
- Make sure there's enough and even space between them (between 1 and 2 cm - mine was 1,2cm).
- Mark your copper strips with the positive and earth/ground signals*.
* The positive (left hand side) was also labelled "MS OUT" to help you remember the connection you will need to make when powering it with your Makey Makey. However, don't worry about it now. Just get familiar with that name. I will explain it in further detail in Step X.
Step 4: Place and Attach Your LEDs to the Base of Your Lamp
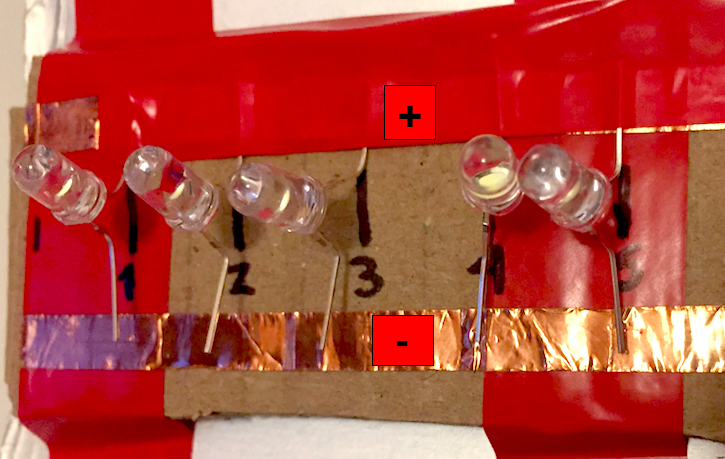
This step requires some manual handling skills as the insulating tape and thin LED legs can get a bit fidly. But after 1 or 2 LED's are fixed you will get the hang of it!
- Pre-fold the legs of your LEDs outwardly so that when placed on your base, they fully touch the copper strip on both sides.
- Make sure the positive LED leg touches the copper strip you assigned as "positive" and vice-versa.
- Cut a large strip of insulating tape (an inch smaller than your copper strips).
- Do only one side first (in the picture I did all the positives first).
- Take each LED and, one by one, attach the positive leg to the the positive copper tape, covering it with the insulating tape.
- Use your finger and nails to make sure the insulating tape is pressing on the LED leg
- Repeat with the other side.
Step 5: Protect and Attach the Alligator Clips
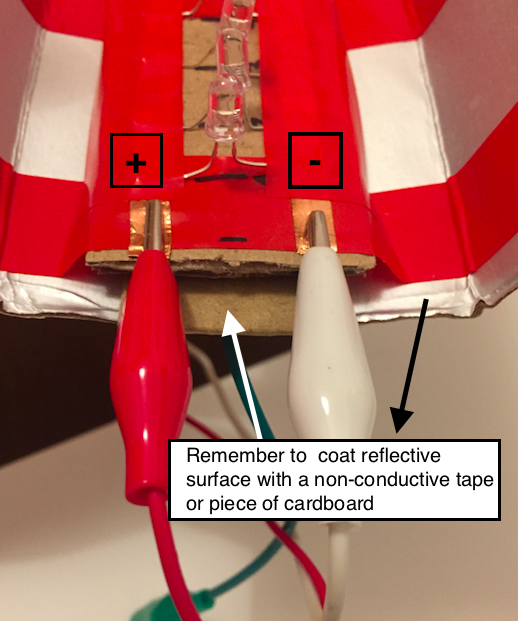
This step is about attaching the alligator clips that will power your lamp!
- Get your alligator clips and attach each one to the designated copper strip ends.
If you are using a 3V battery pack:
All you need to do now is connect the battery pack.
- Attach the red cable from your pack to the positive/red alligator clip
- Attach the black cable from your pack to the white alligator clip
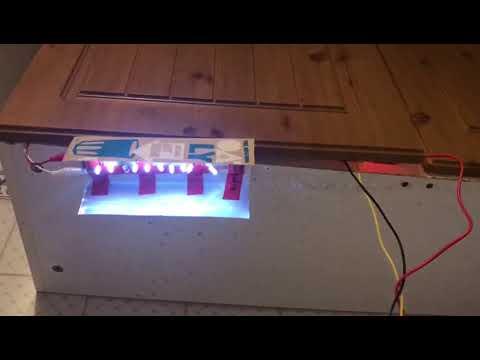
Turn on your lamp!
If you are using tetrapack:
- Please look closely to the picture.
- You will need to use a little piece of cardboard to protect your alligator clips from touching the base.
- Cut an extra piece of cardboard (about 4-8cm) and place it between your cardboard and aluminium base to insulate your alligator clips (check picture).
If you are using Makey Makey:
- Please continue reading on to find out how to use it to power your lamp and to create fun switches!
Step 6: Using the Back of Makey Makey to Power Your LED Lamp
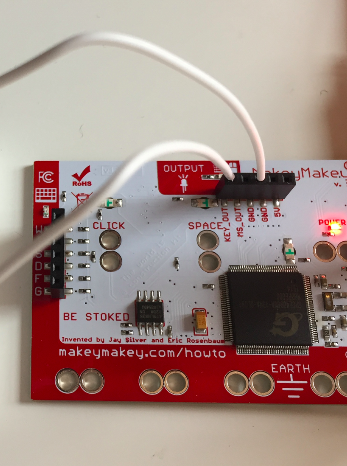
Have you ever used the back of your Makey Makey? If yes, jump to "B":
A) Basics of using the outputs of the back of the Makey Makey board:
The header at the back of the board can provide energy and control outputs, like other micro-controller boards. They are labelled as ground, 5V, KEY OUT and MS OUT. Please see a summary explanation of the output we are using bellow and quick full explanation of all the outputs directly from the Makey Makey tutorial here:
KEY OUT: This will send the same 5V power from the 5V output but only when you press any key on the Makey Makey. (Arrow keys and WASDFG)
B) How to connect your alligator clips to the back of your makey makey
- Connect the first jumper wire to 'ground'
- Connect the other end of your first jumper to the white alligator clip from your cardboard base (which your marked as ground on the previous step)
- Connect one end of the remaining jumper to the MS OUT pin
- Connect the other end of the jumper to your red alligator clip (marked as MS Out/5V previously)
FURTHER HELP:
If this is still a bit alien to you, follow the you tube video below:
Step 7: Switch Your Lamp on and Off and Test Out Switches!
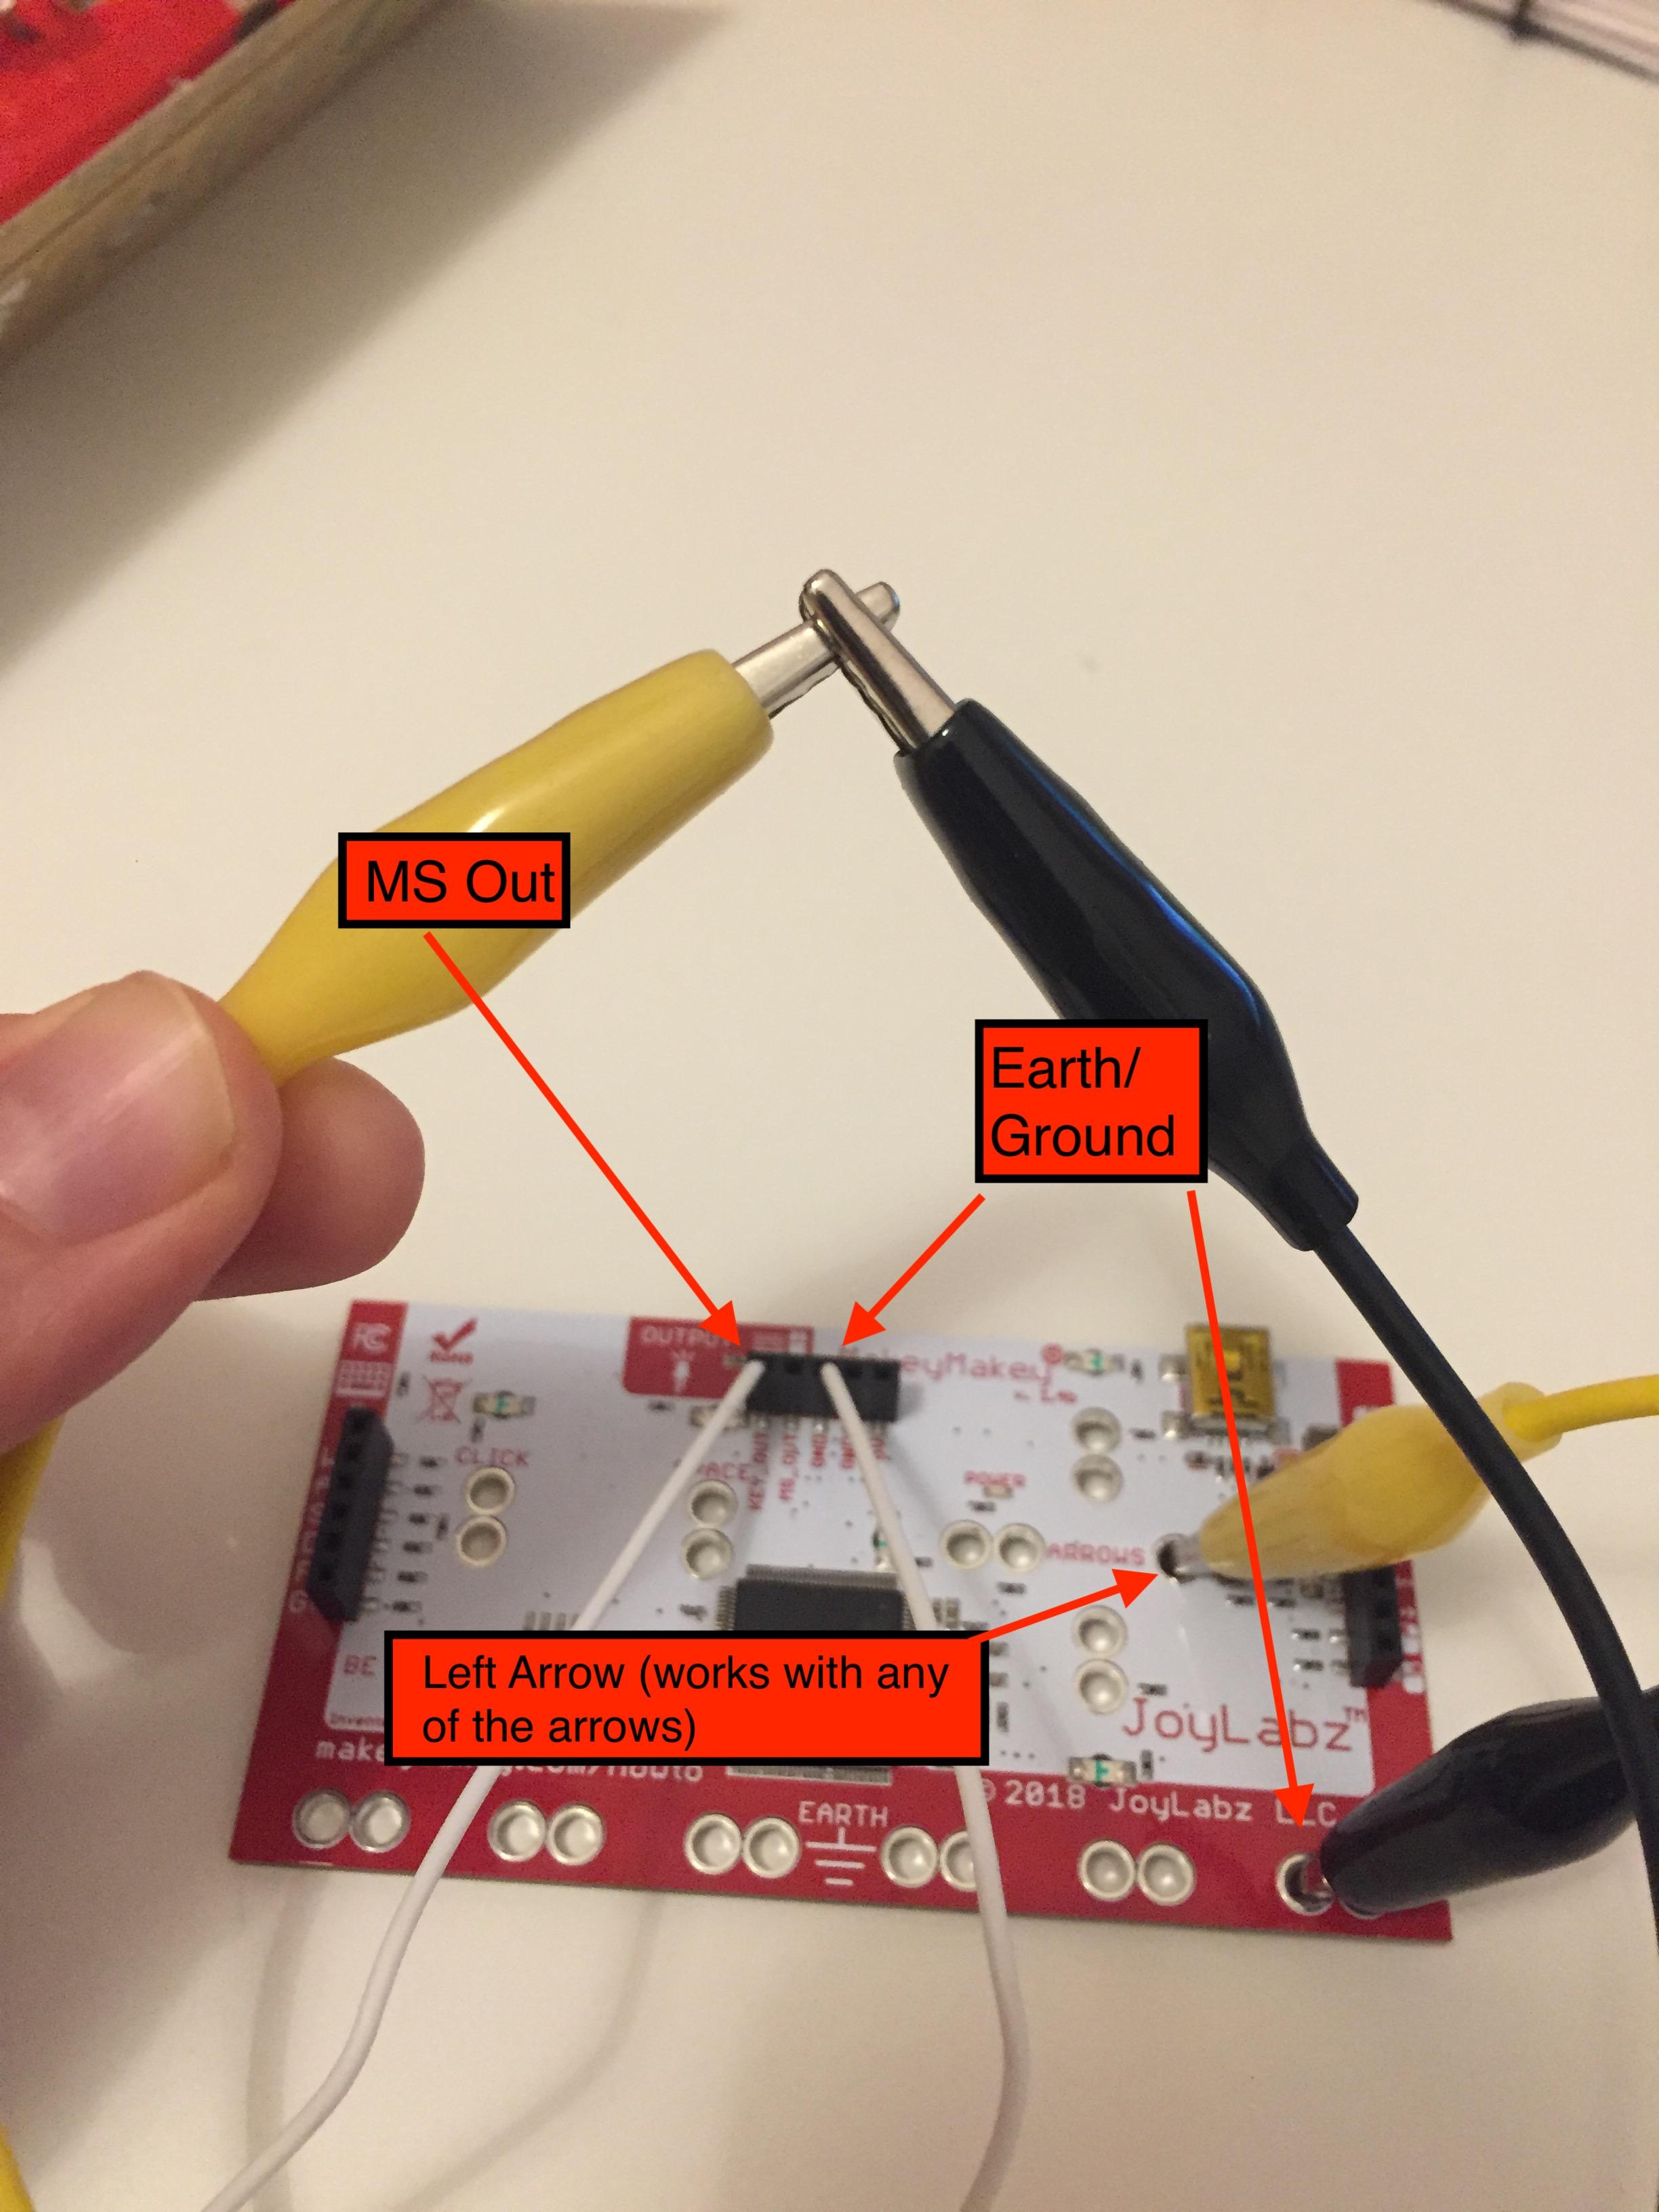
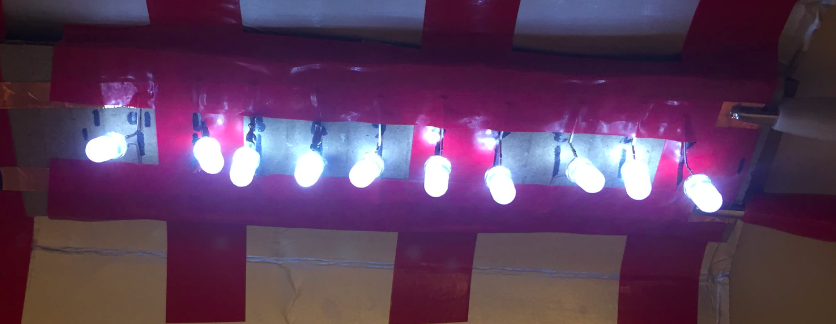
Now it is time to test your lamp by making an alligator clip quick switch (see picture for further details):
- connect your third alligator clip (black in the picture) to Makey Makey ground strip
- connect your fourth alligator clip to one of the arrows (left arrow in the picture)
- touch both remaining ends to create a "switch" that will close the circuit and turn on your LED Lamp*
FURTHER RESOURCES AND INFORMATION:
Experiment with other forms of switches to control your light!
How to connect multiple LEDs to the output in parallel: check circuit demosntration #8 in the Makey Makey circuit challenges here.
Step 8: Make a Water Switch and Finish Your Design
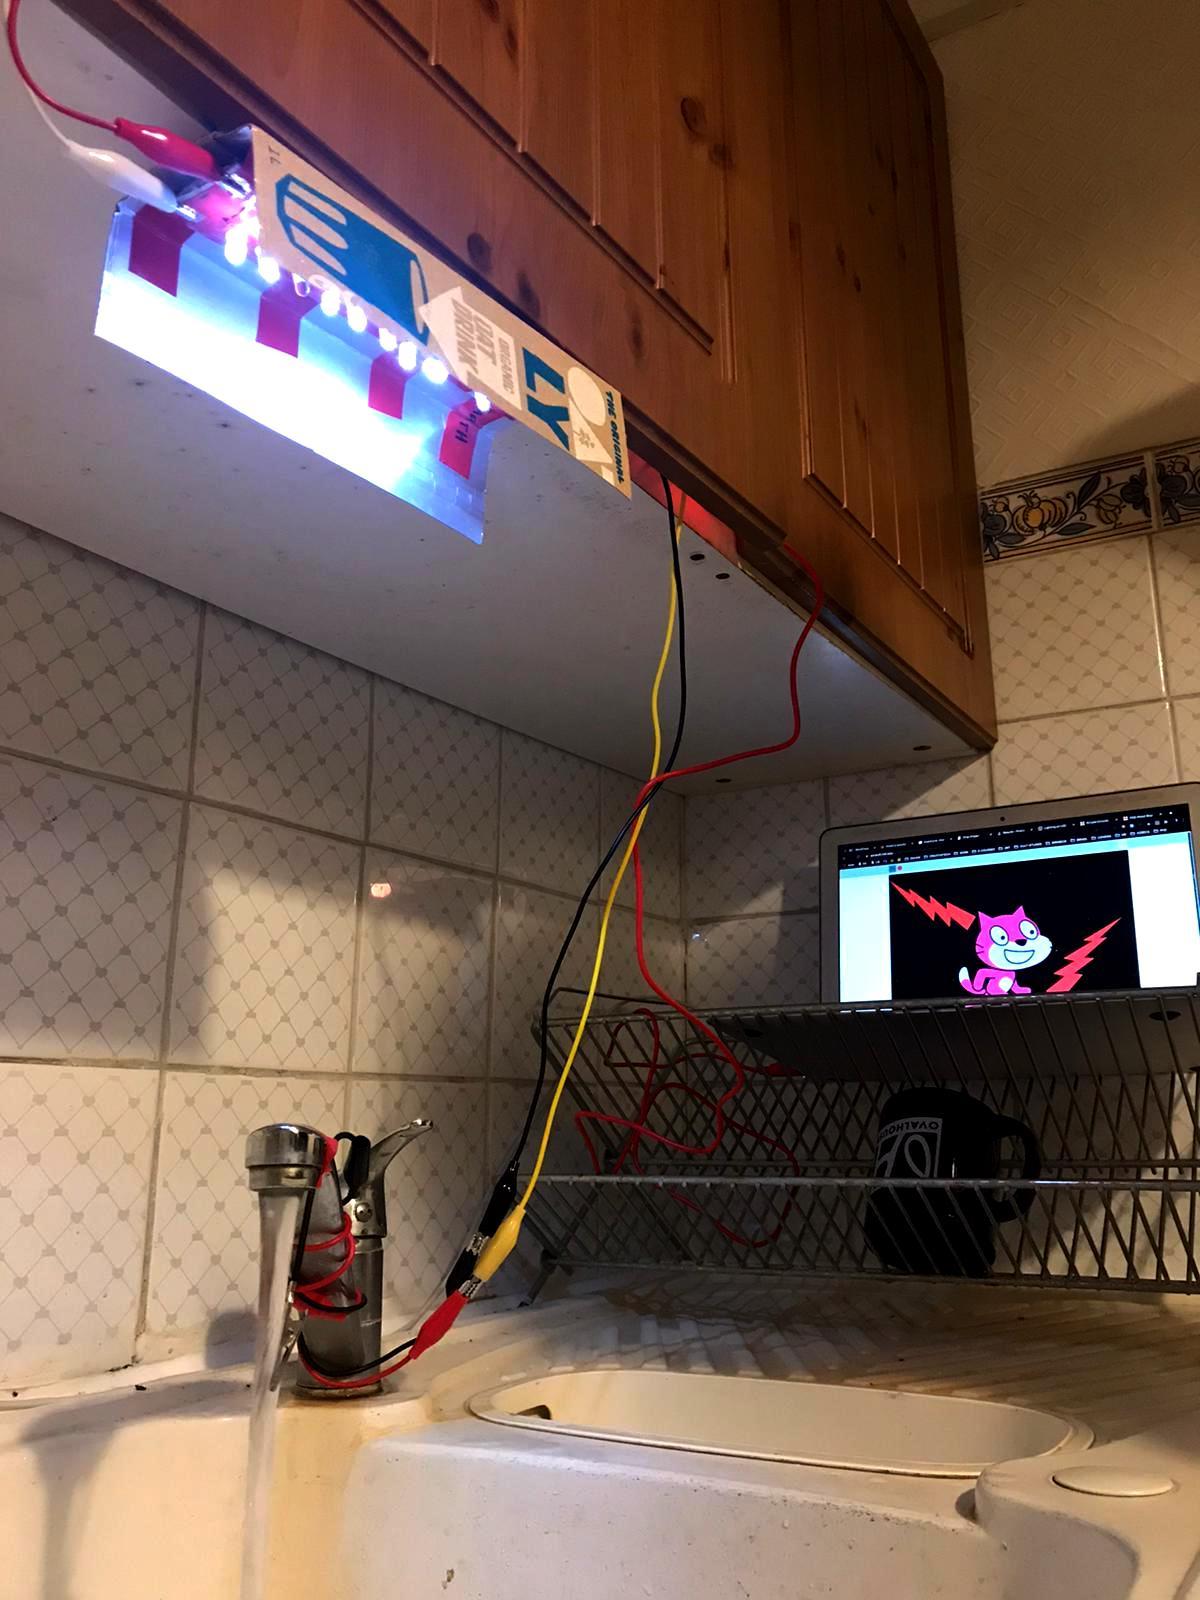
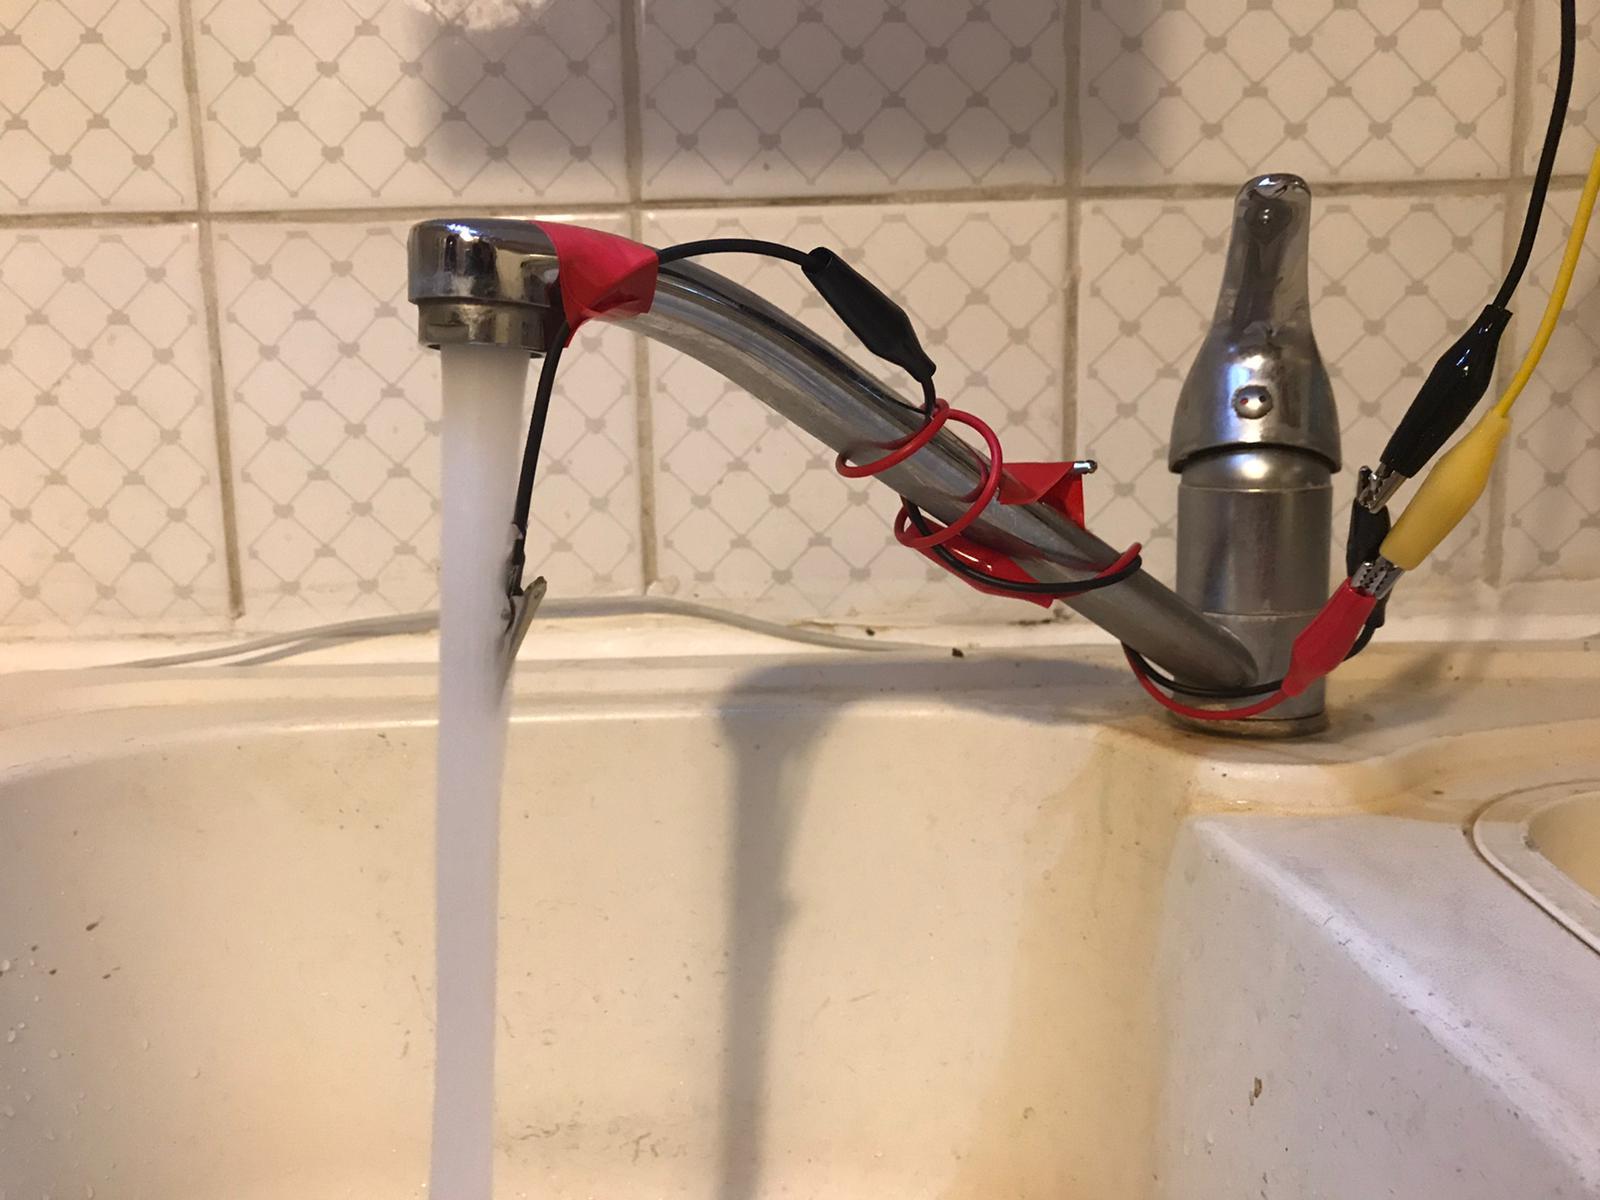
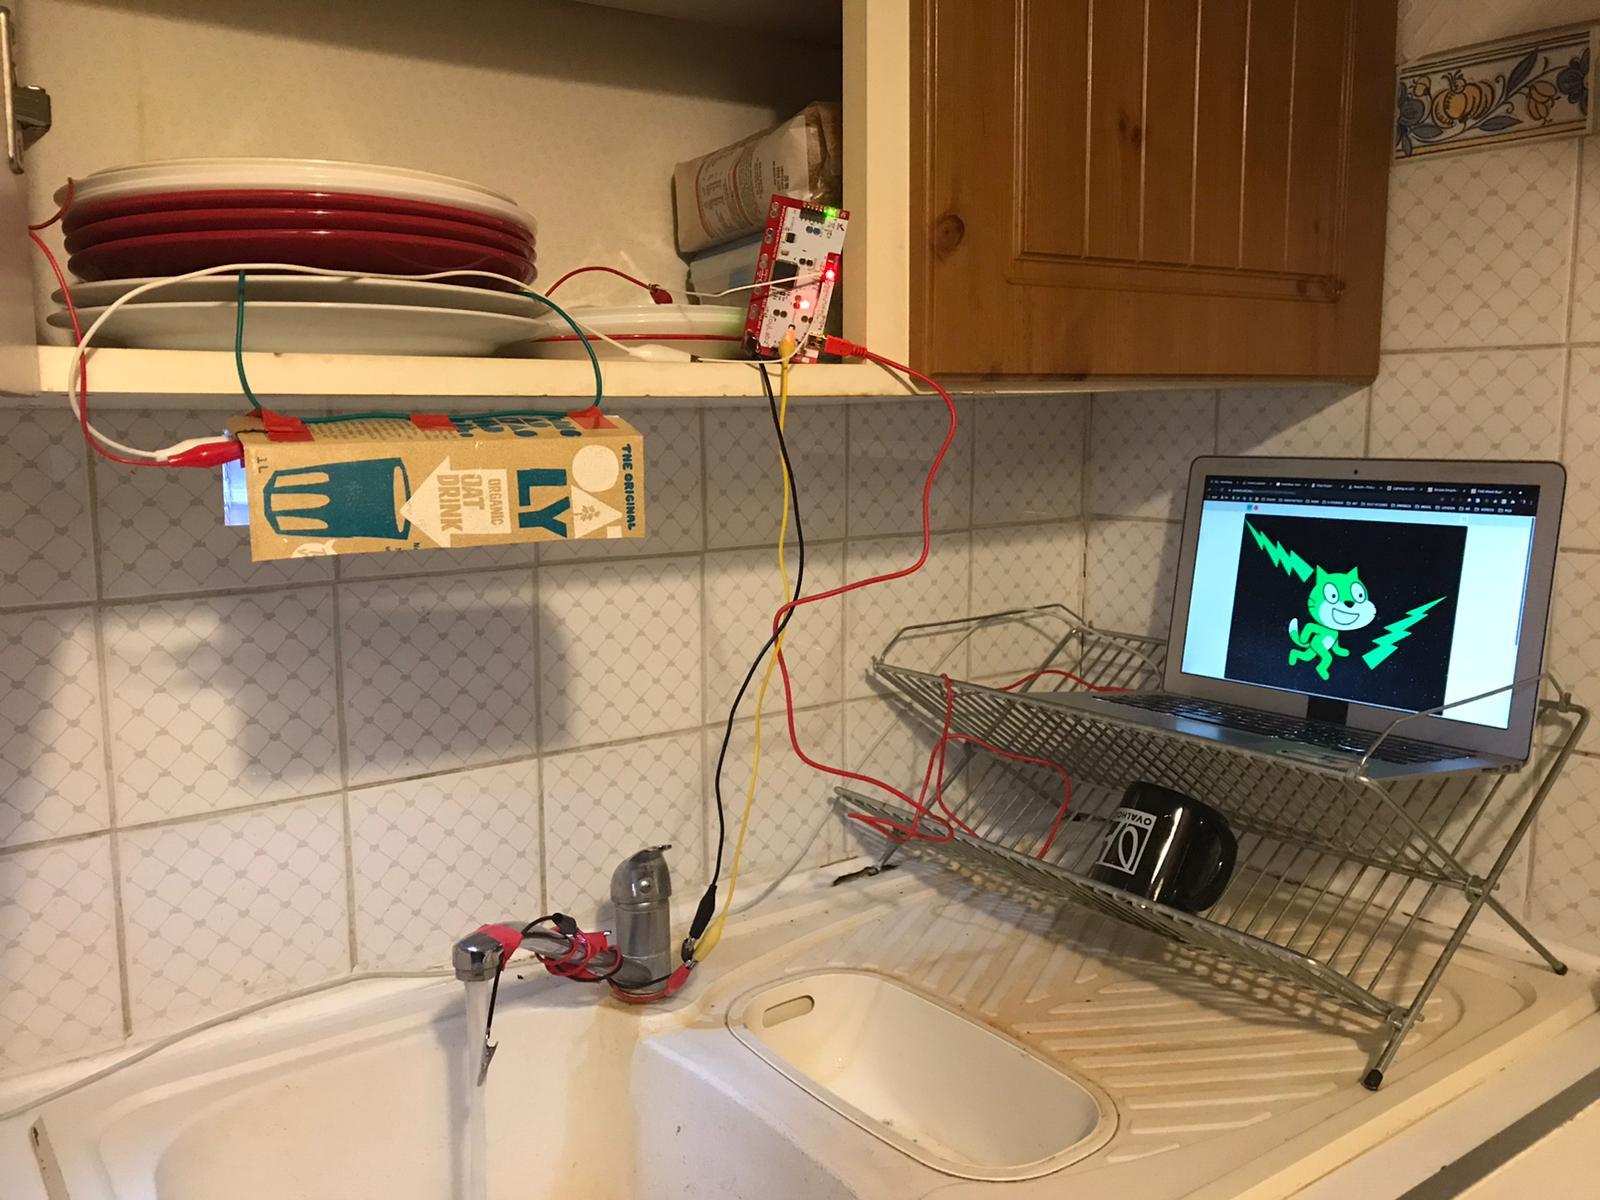
Do you remember that my main motivation was to use the lamp to light up the sink while doing the dishes? Well, it was only natural to find a way of switching my lamp on and off using water!
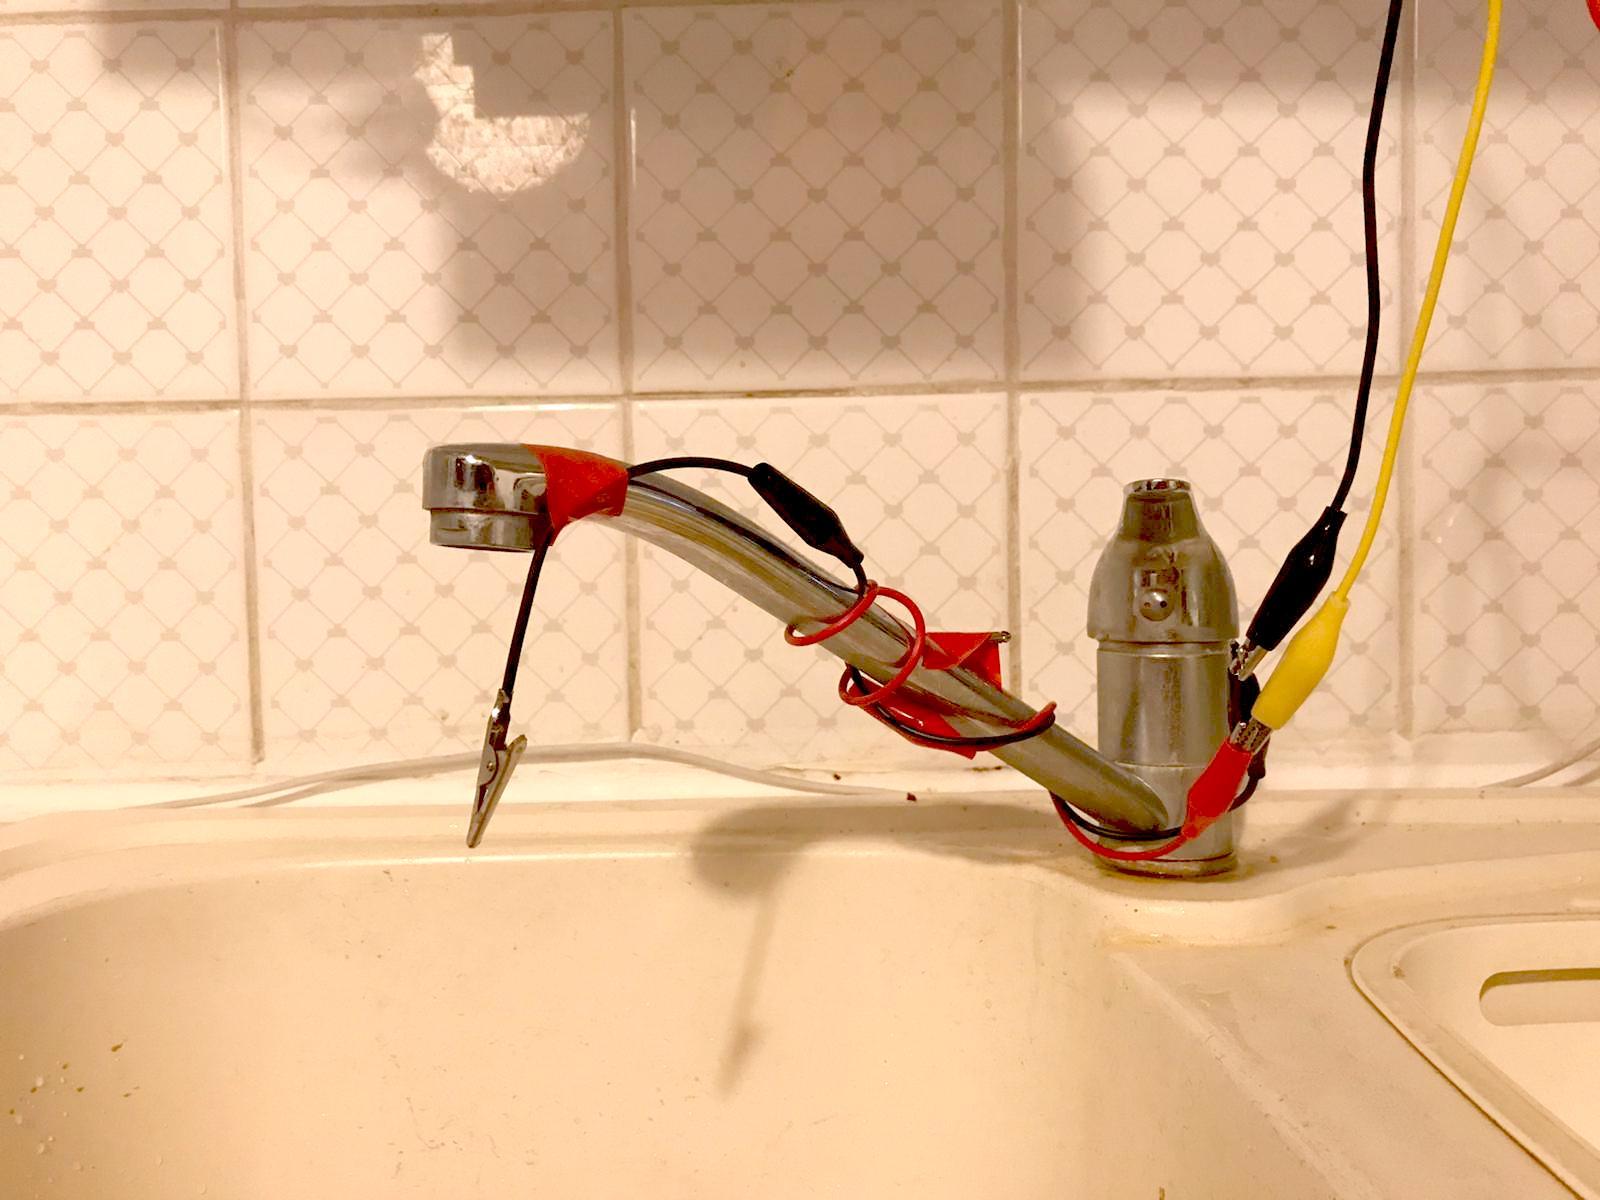
How to use the tap as a switch:
- Refer to the picture above (close up of the tap)
- Connect your ground alligator clip to the metal part of your tap
- Connect the second alligator clip to the tap, in a way that the water will touch the metal (conductive) tip
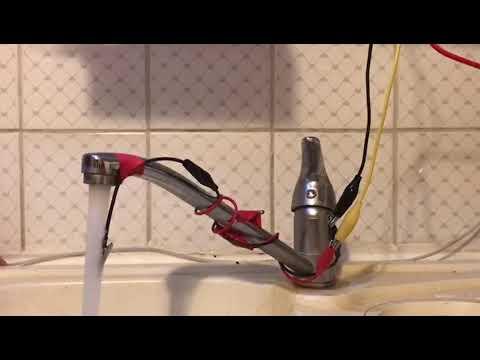
- Turn on the tap and voilá!
ps: the order of the alligator clips (red or black) doesn't matter, as long as they connect through the water.
FURTHER RESOURCES:
- Testing conductivity to create switches, including water:
- One of the instructables projects that inspired this project
References:
Anti-Water Waster
https://www.instructables.com/Anti-Water-Waster/
Lighting an LED with Makey-Makey
https://www.instructables.com/Lighting-an-LED-With...
How to use the back of your Makey Makey (jump to FAQ question #8)
https://makeymakey.com/pages/faq
Parallel circuit simple challenge (Jump to Challenge # 8 of the below page)
https://makeymakey.com/blogs/how-to-instructions/s...
How to write an instructable:
https://www.instructables.com/lesson/Writing-an-In...
https://www.instructables.com/How-to-Create-a-Feature-Worthy-Instructable/