Simple Jewelry Holder
Hi, my name is Aylee, and I made a simple jewelry holder for my mom. My mom has lots of jewelry that doesn't get used or displayed properly and it's been an ongoing problem for years. I decided to help her out and create a small organizer to force her to get rid of the stuff she doesn't wear and display what she has, so it gets used more.
Supplies
To create this project, you will need:
- Computer
- Paper/pencil
- Tinkercad | Dashboard
- Prusa slicer
- 3D printer
- Command hooks
Brainstorming
.jpg)
I started by asking my client 10 questions to formulate ideas to bring this project to life. The questions were simple things like what kind of jewelry you wear more often, what color or material you prefer, etc. I later used these questions to begin prototypes and build my project.
Formulate a Plan
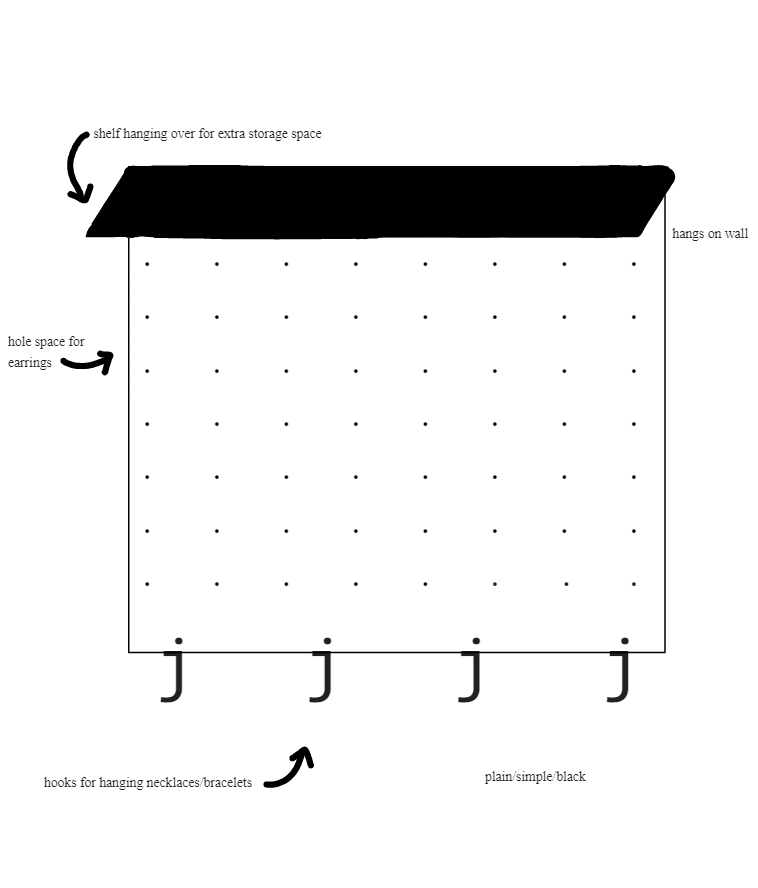
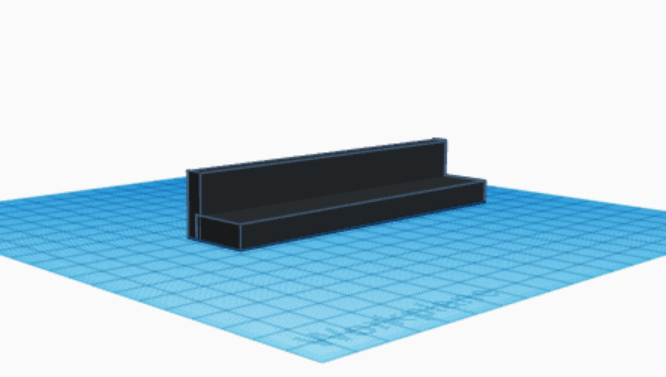
After reviewing the questions from my interview, I drafted some ideas of what this could look like on paper and then later put them into tinker cad. I asked for her feedback during this time and together we came up with multiple prototypes and different design ideas to find the one best for her. After putting my object into Tinkercad, I downloaded it so I could get it into Prusa slicer to get ready for printing.
To download:
- Go to the top right corner and press "Export."
- Export as .STL file.
- Name your file so it is easy to find.
Pick a Prototype
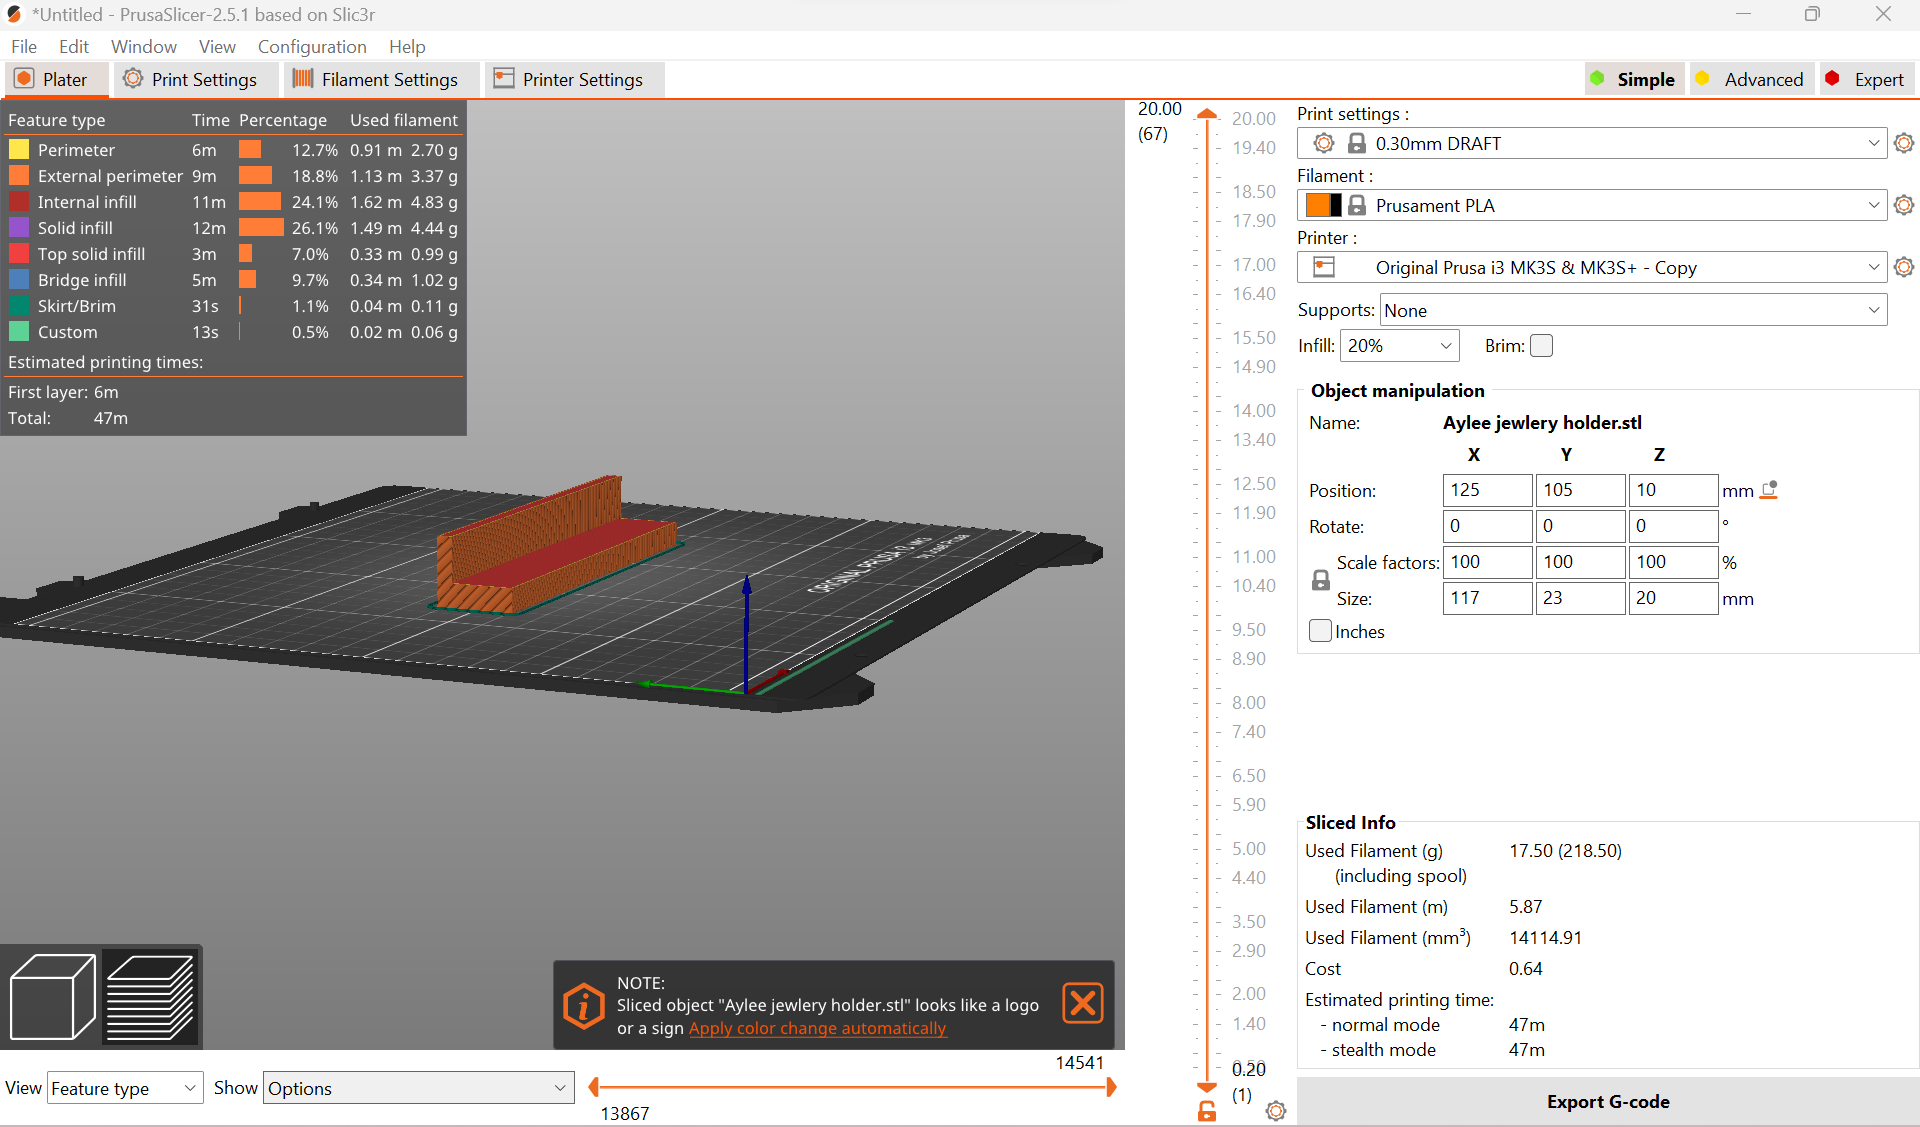
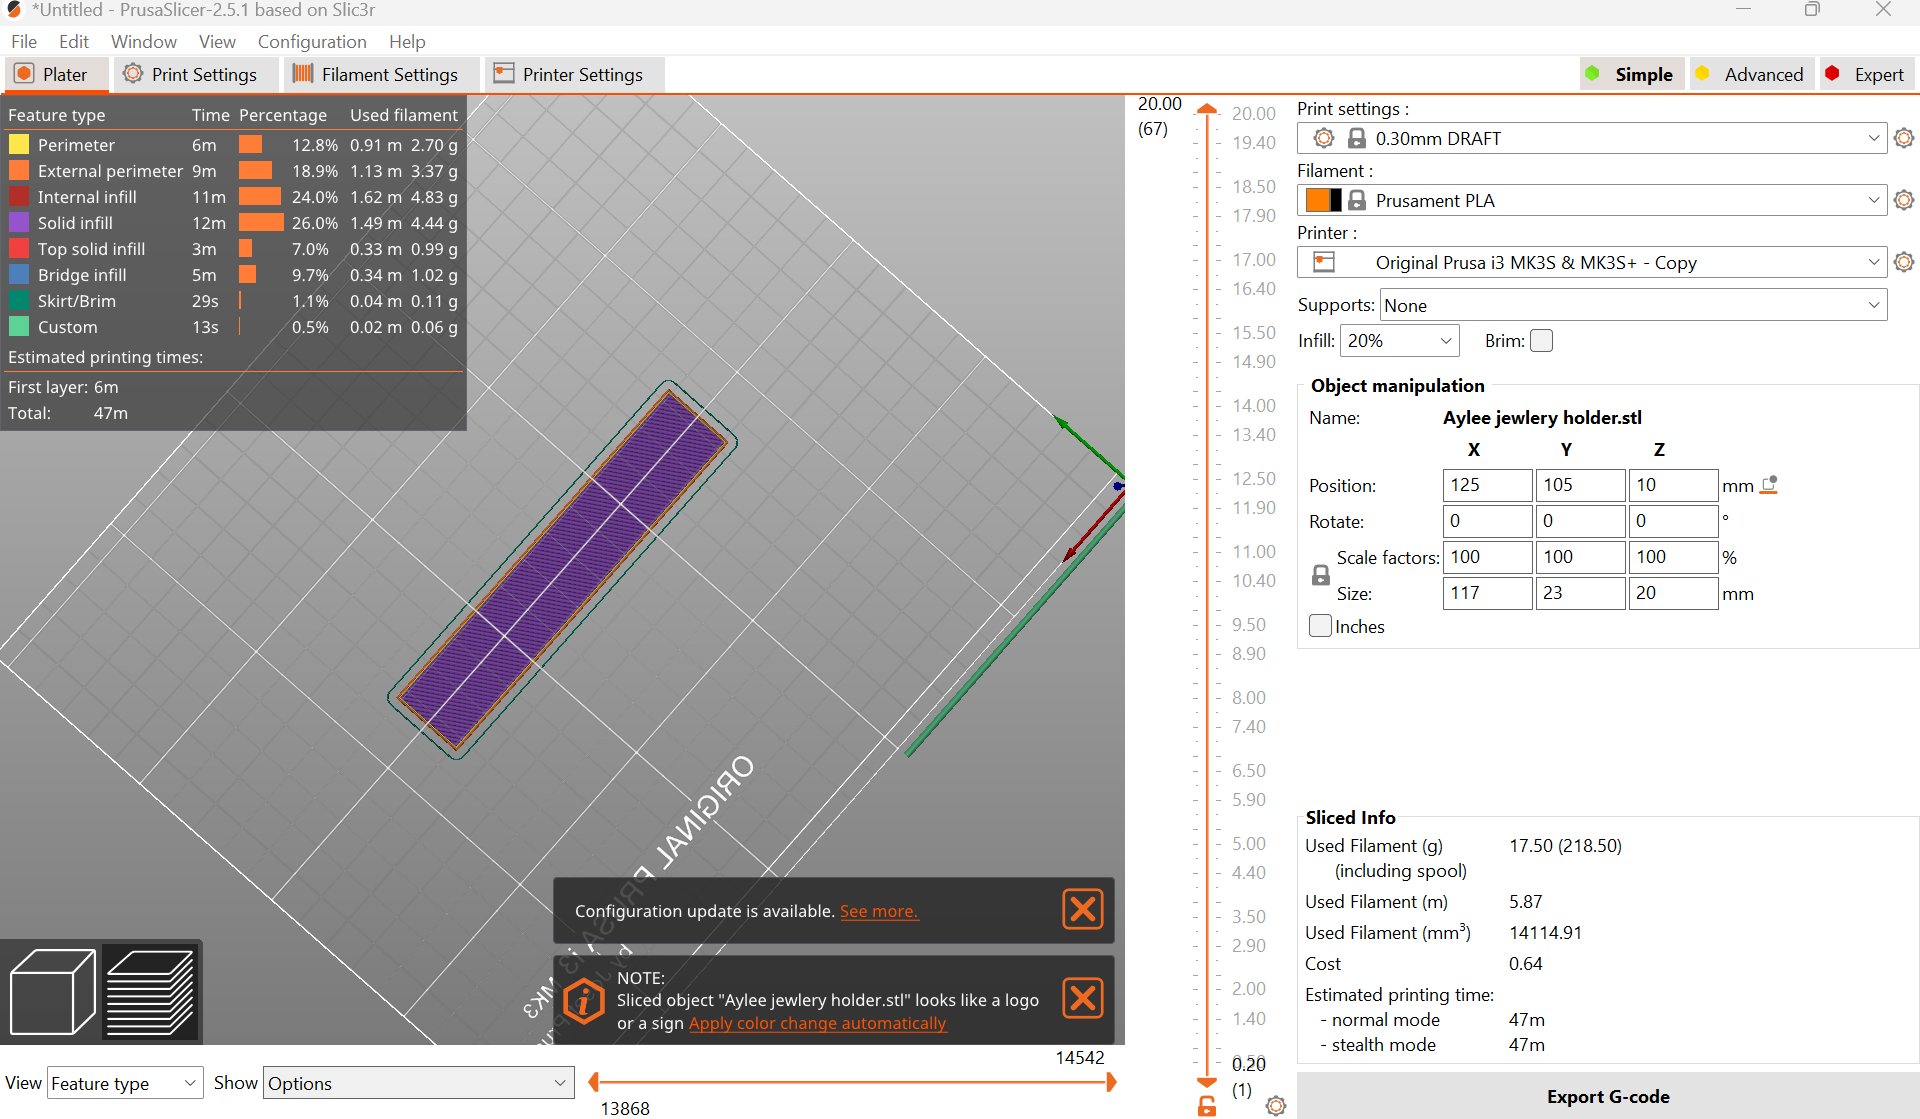
After going over different prototypes with my client, we decided on the perfect one and began to print. To print:
- Download the prototype from tinkercad into the Prusa slicer by pressing "file" - "Import" in the top left corner.
- Slice object in Prusa slicer in the bottom left corner.
- Make sure bottom is purple so you know it will touch the base of the 3D printer and isn't just a floating object!
- Export G-code and download to your computer.
- Download that file onto a sim card from your computer.
- Place sim card into 3D printer.
- Select your file on the printer and print!
It is most important to get feedback from the client along the way to make sure it fits their wants/needs. 3D printing may take a while depending on the size of your project and availability of the printer, so you want to make sure it is perfect before you print. If changes need to be made, do them sooner rather than later. It is best to draw your plan, put it into tinkercad, and then change it if need be before you start printing.
Keep Track of Progress
You should have a place to keep track of your prototypes, interview questions, ideas, etc. I used Home - Canva to draw out ideas and keep track of my progress! You can create designs in here and organize your project using their tools. This step is not necessary but is recommended and can be helpful. This is a good place to look back on to see what you've tried, what works, what doesn't, etc.
Double Check
Prior to printing, you should have gotten feedback and changed anything if need be but it is good to double check and make sure you have everything just as you planned it to be before bringing it to your client.
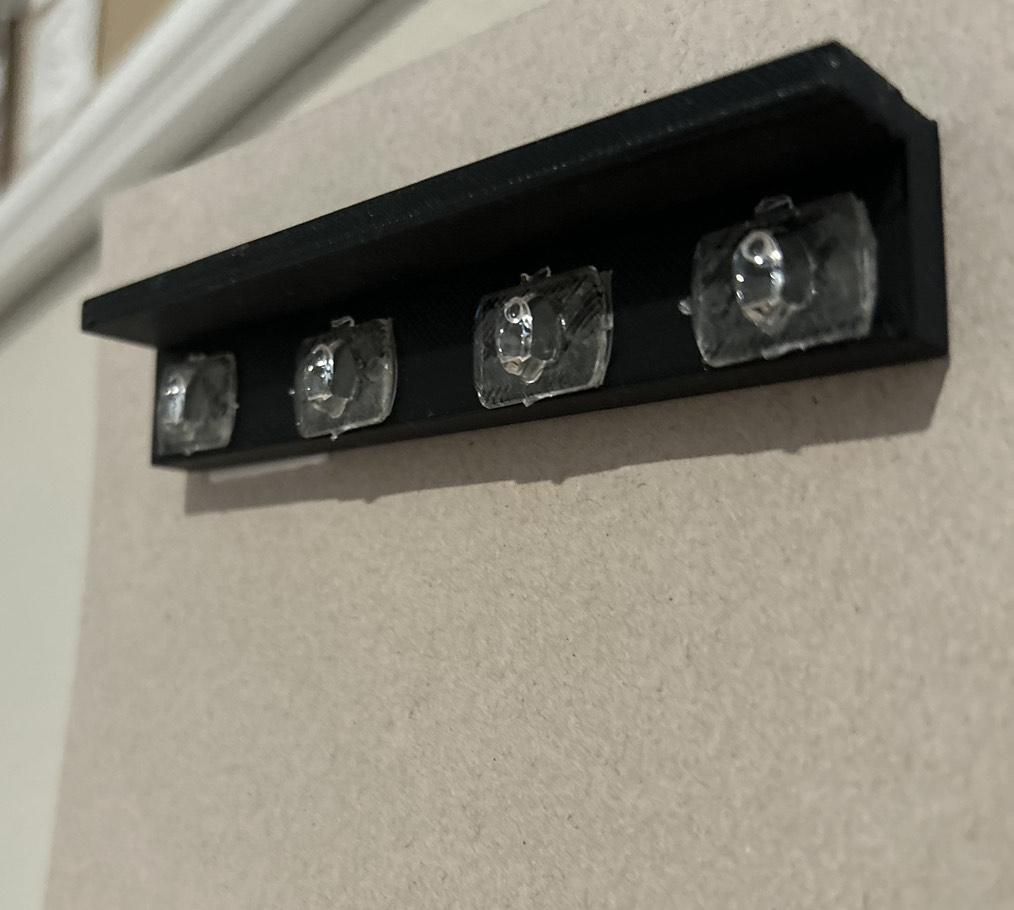
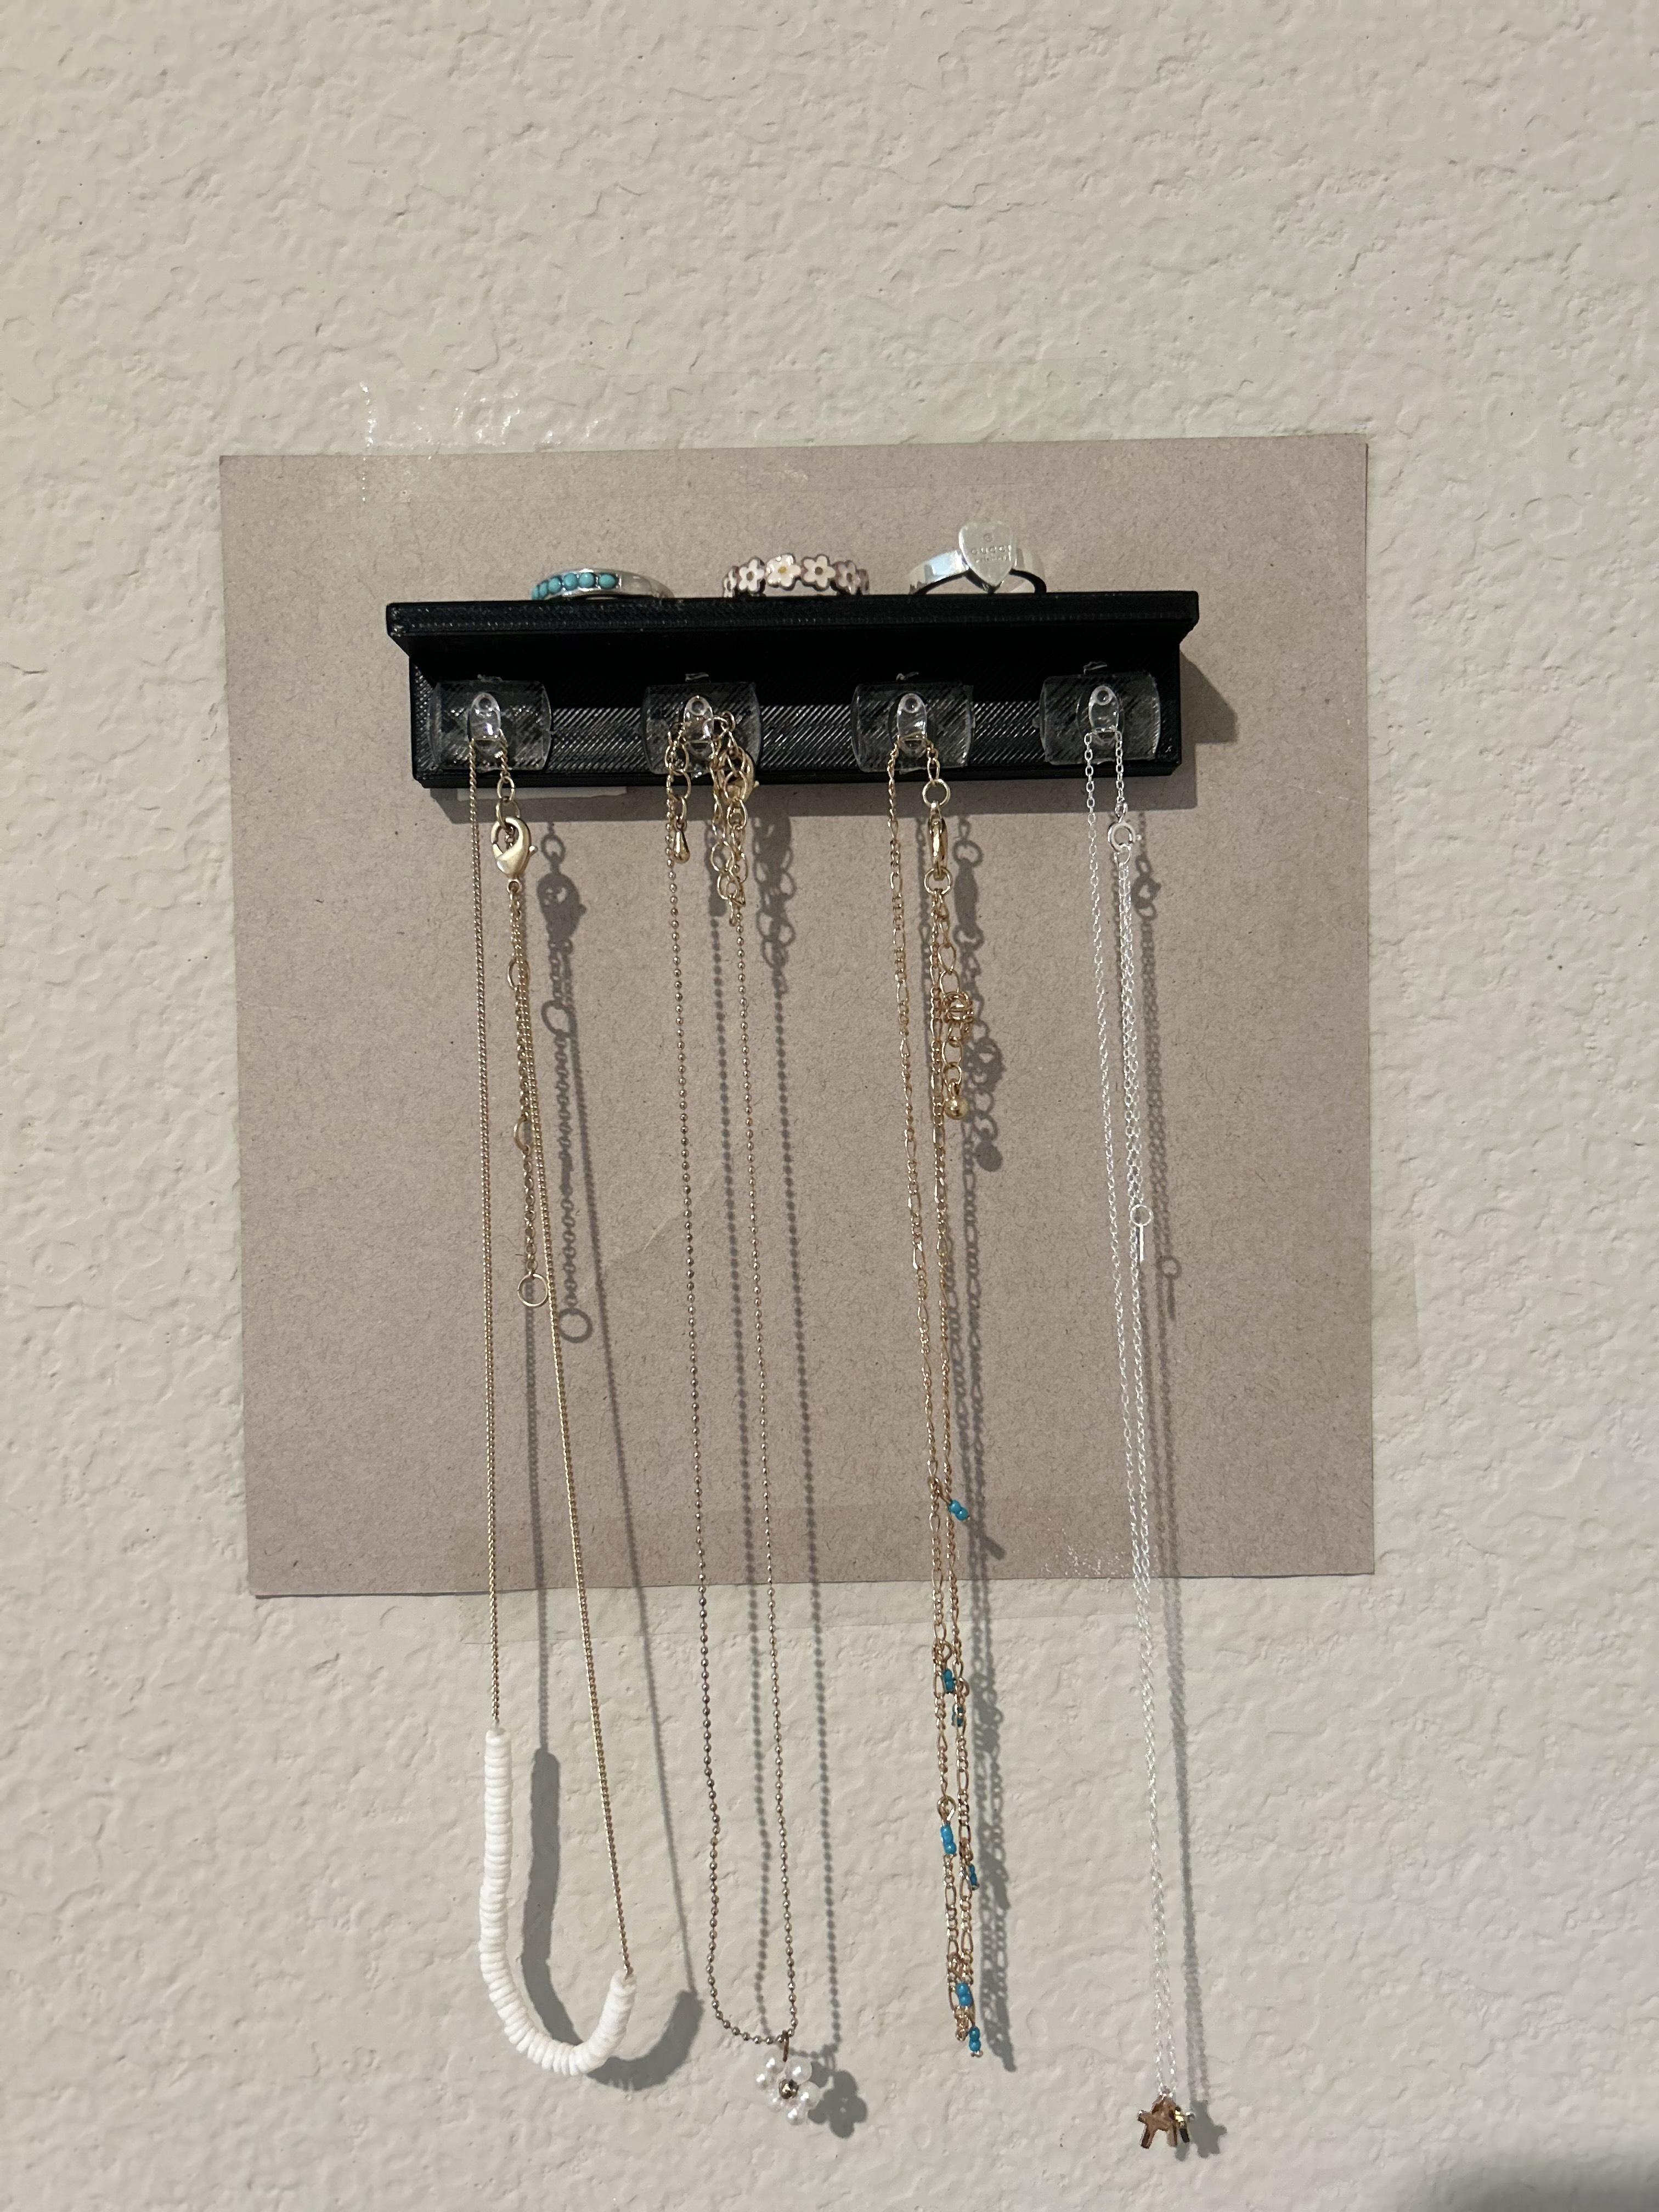
Final Product

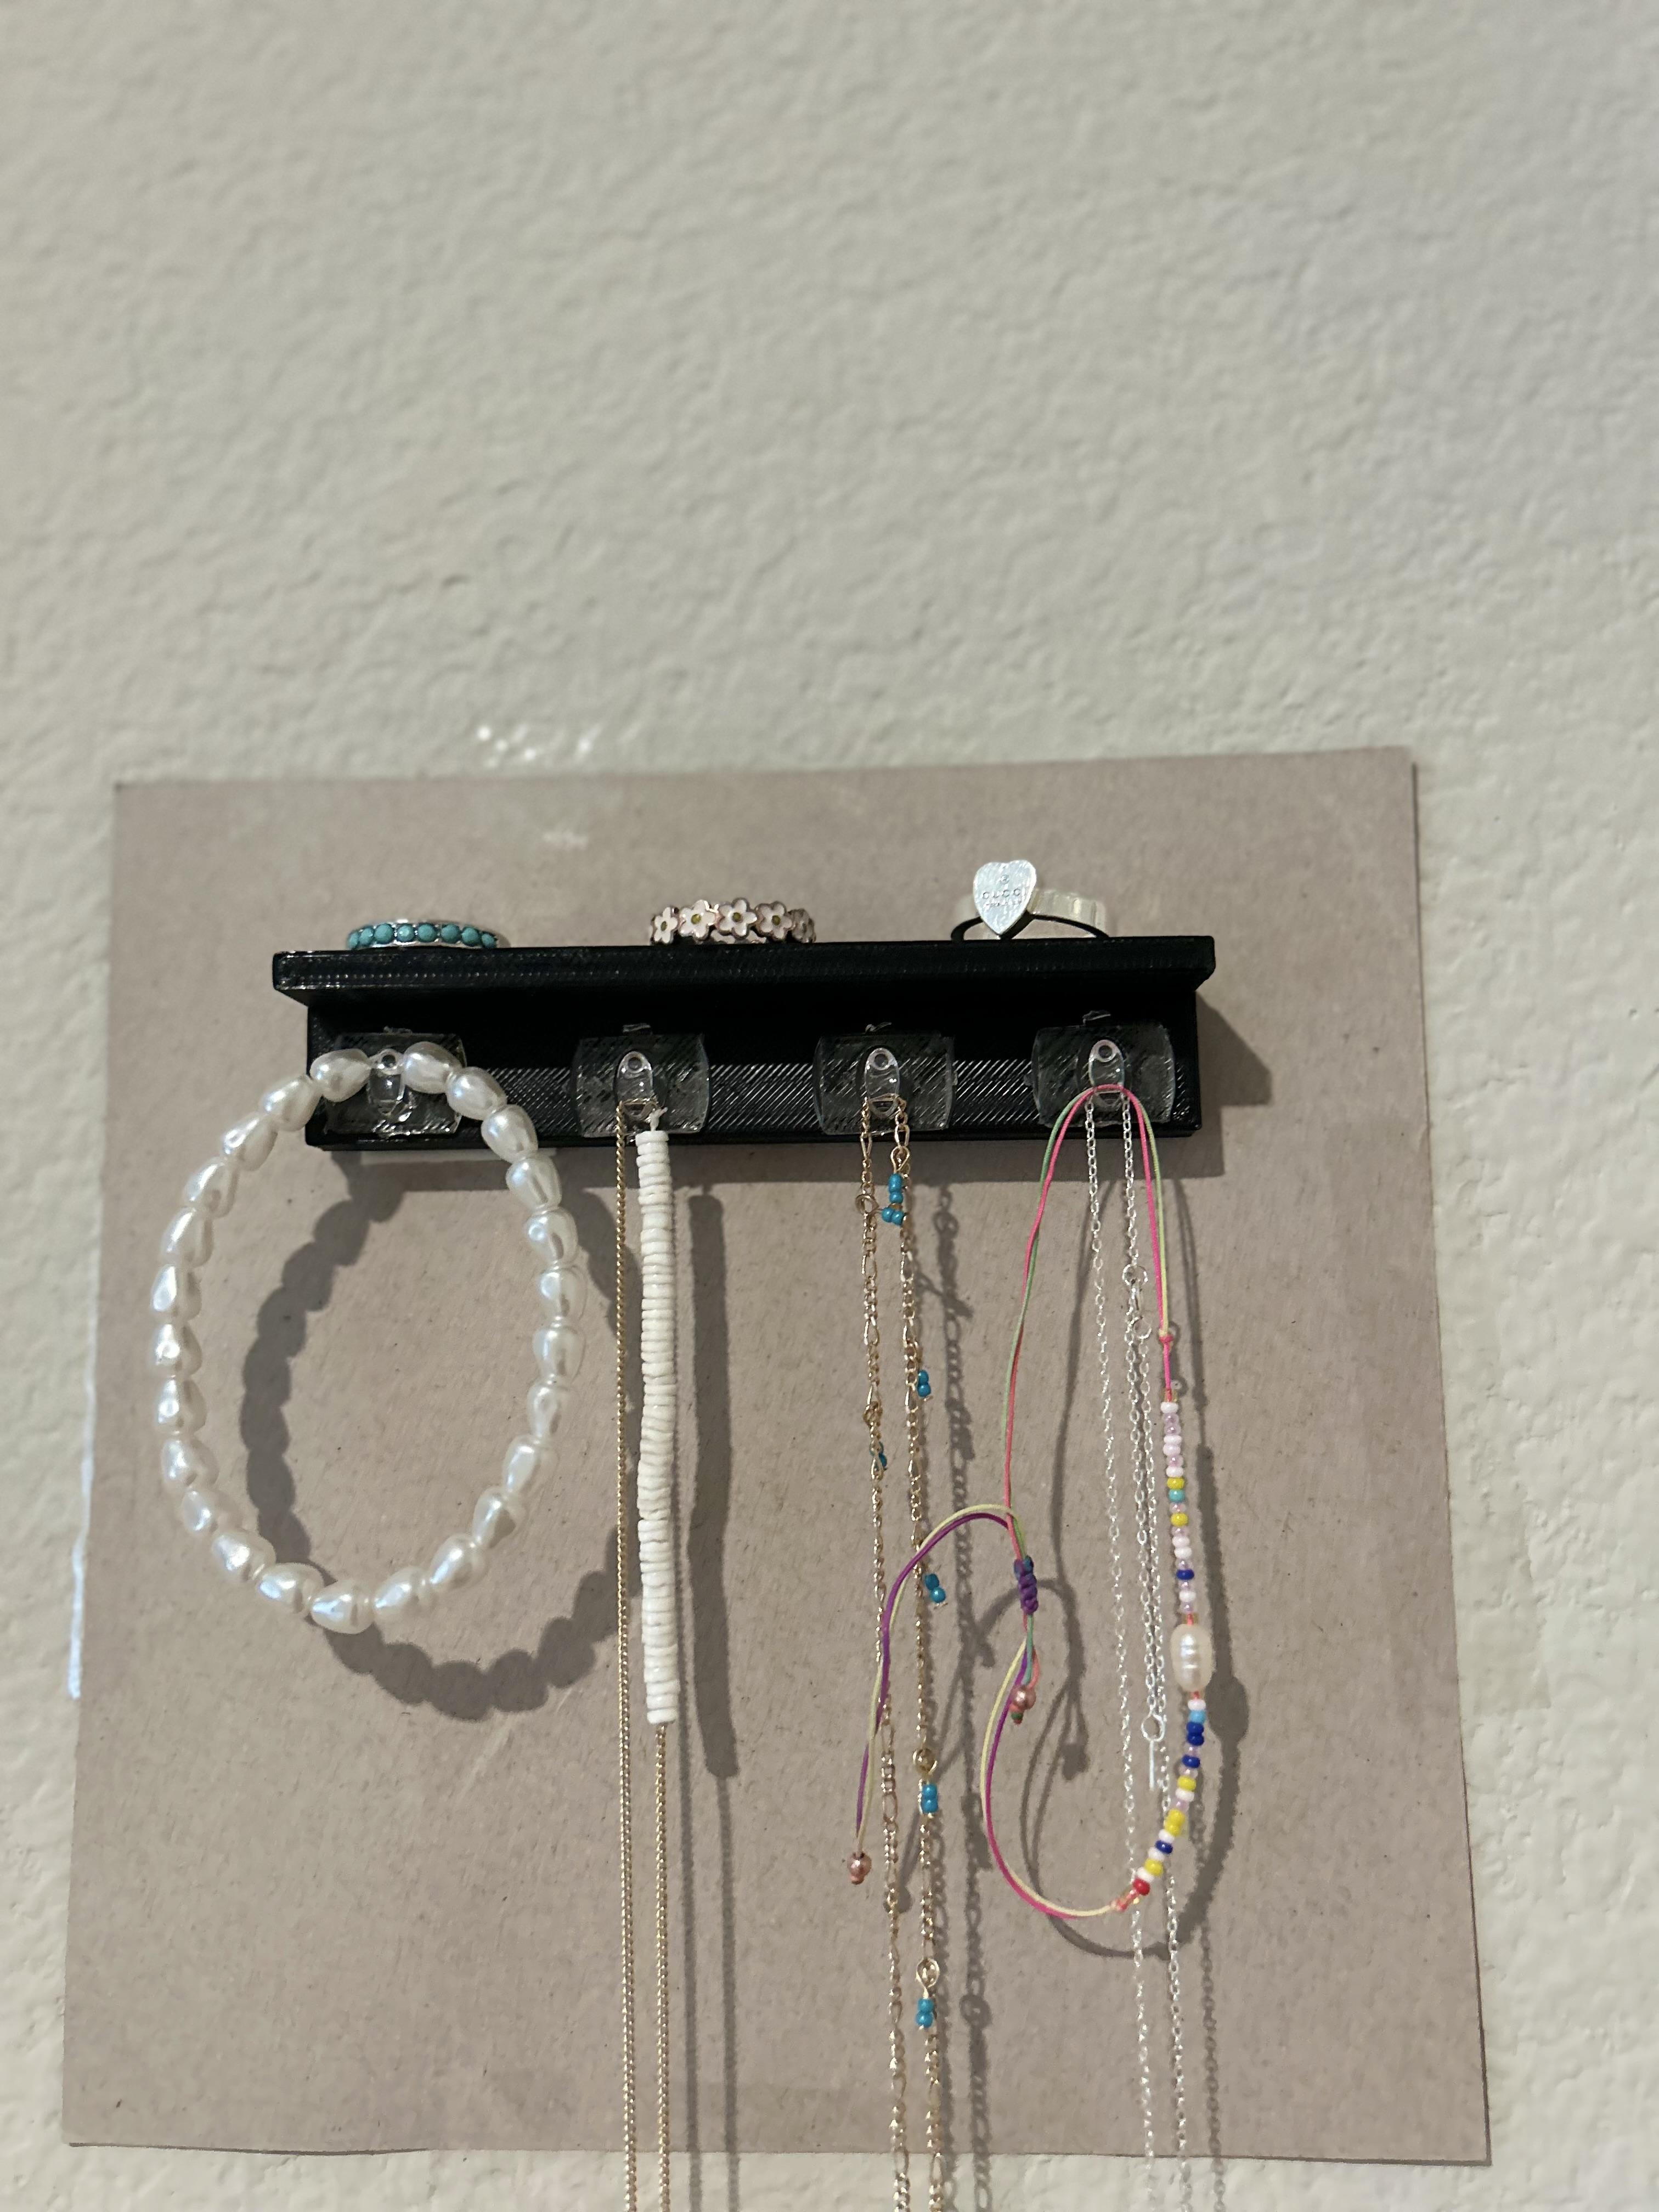
When the printing is finished, add some hooks, made sure everything is just as you planned it to be, and bring it to your client. I brought mine to my mom when this was finished, and she loved the way it turned out and is getting lots of use from it! This project is a good learning experience by teaching you how to build prototypes, ask questions, and use 3D printers.