Simple Arduino Piano
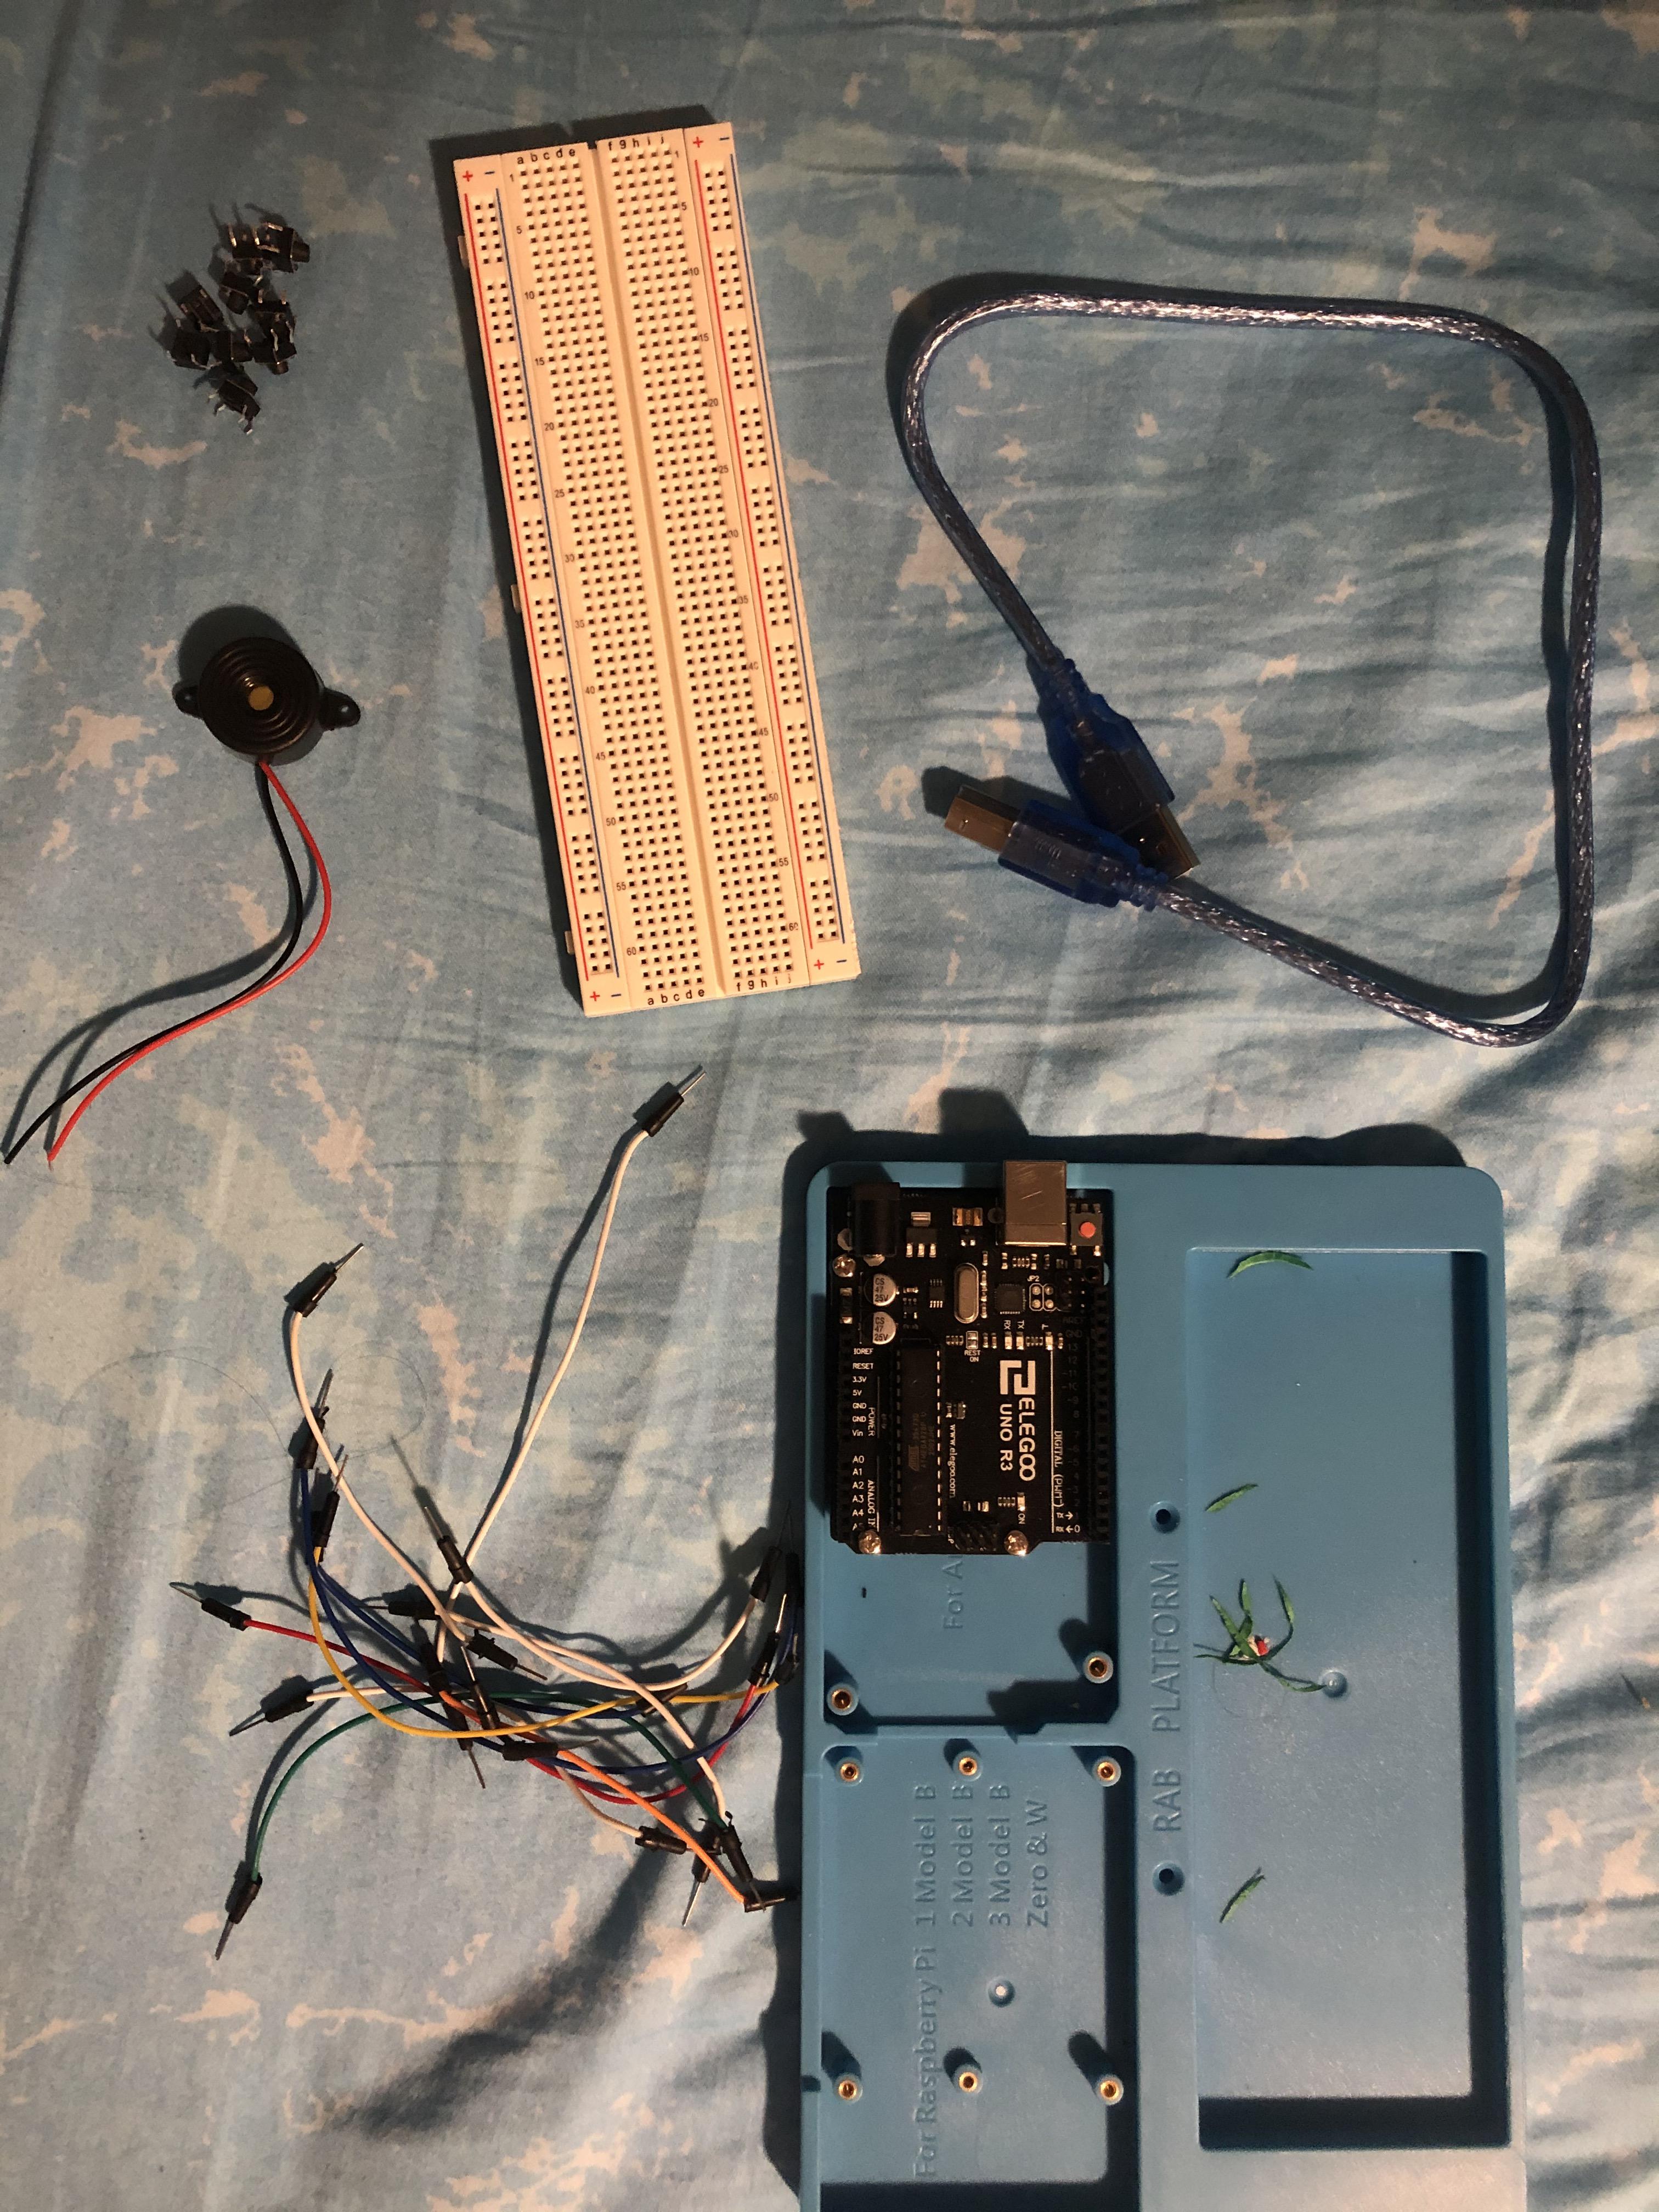
Today we will be creating a simple one-octave Arduino piano, that can be a great starting point for other projects. This project will introduce basic Arduino components and programming at a high school level. While the code is pre-made individuals can change the notes and the pre-made song in the program already.
Target age: 9-12th grade
For high school teachers/home school parents this project relates to the ITEEA Standards for Technocloigal and Engineering Literacy.
Standard 3: Integration of Knowledge, Technologies, and Practices
Technology and engineering are interdisciplinary, relating to more than one content area. The impact and are impacted by Technology transfer with other fields. An example using x-rays in archaeology digs, telescopes to look at the stars, or microscopes to look at microbial life. The knowledge and practices in these fields advance and are advanced by other fields and schools of thought, i.e biomimicry.
This project combines technology and music in the form of a "keyboard" that someone can make.
Practice 1: systems thinking:
For practice one, it promotes systems thinking, where one needs to think. A tool mentioned in this section is the universal systems model which is: input, process, output, and feedback. The input looks into what is needed to create technology. The process is how the technology is made, or what is needed for it to work. The output is the first performance of the technology whether it was good or bad. Feedback takes the process and outputs of the product and see what can be improved such as effects on users, society, and the environment.
Practice 3: making and doing:
Making and doing can occur in many settings, both informal and formal. Making is the act of doing something while doing is broadly defined as using hands-on processes associated with designing, building, operating, and evaluating technological products and systems. There has been a shift from producing pre-designed objects to focus on developing industrial skills to creating innovative solutions to open-ended design challenges in technology and engineering education. By students working on solutions to open-ended design challenges it stimulates their development of higher-order thinking and design skills and integrating content from other disciplines. By students engaging in open-ended making and doing practices, they are experiencing a process similar to what scientists, technologists, and engineers. It is also the educator's duty to teach students safety precautions. With the growing abundance of tools and industry standards, being able to safely use tools and materials is essential in the prevention of accidents. Making and doing also requires the use of the creation of models: conceptual, mathematical, graphical, physical, and virtual. These models set the technology and engineering education apart from other subjects.
This project involves practice 3 Making and Doing as students can learn how to use an Arduino, build this "keyboard" and can build off from this project. Practice 1 Systems Thinking is involved as they are going through the step to create the keyboard.
Context 1: Computation, Automation, Artificial Intelligence, and Robotics
Contexts are can be units within a curriculum as projects, lessons, trips, or other activities. For context 1 it combines, computation, automation, AI, and robotics.
Context 5: Information and Communication
This context involves information and communion which can be represented in the way data is shared or other ways people can communicate such as drawings, images, media, other digital content, and be able to share this information.
Due to the programming aspect of this project, it relates to context 1 Computation, Automation, Artificial Intelligence, and Robotics, and 5 Information and Communication. While the program is provided for you it is a good stepping stone to see how the program works and how it relates to the physical item.
Learning Objectives:
At the end of this students should have a basic understanding of how Arduino works.
Be able to wire an Arduino.
How to change code.
How to upload code.
Supplies
9 button switches
9 1000 ohm resistors (different size resistors will change how strong the current is in the breadboard which affects the sound)
12 jumper wires (can be of any length or color)
1 piezo buzzer
1 breadboard
1 Arduino Uno
1 Arduino Holder (optional is not required will function without it)
1 USB cable
1 computer
Add the Buttons
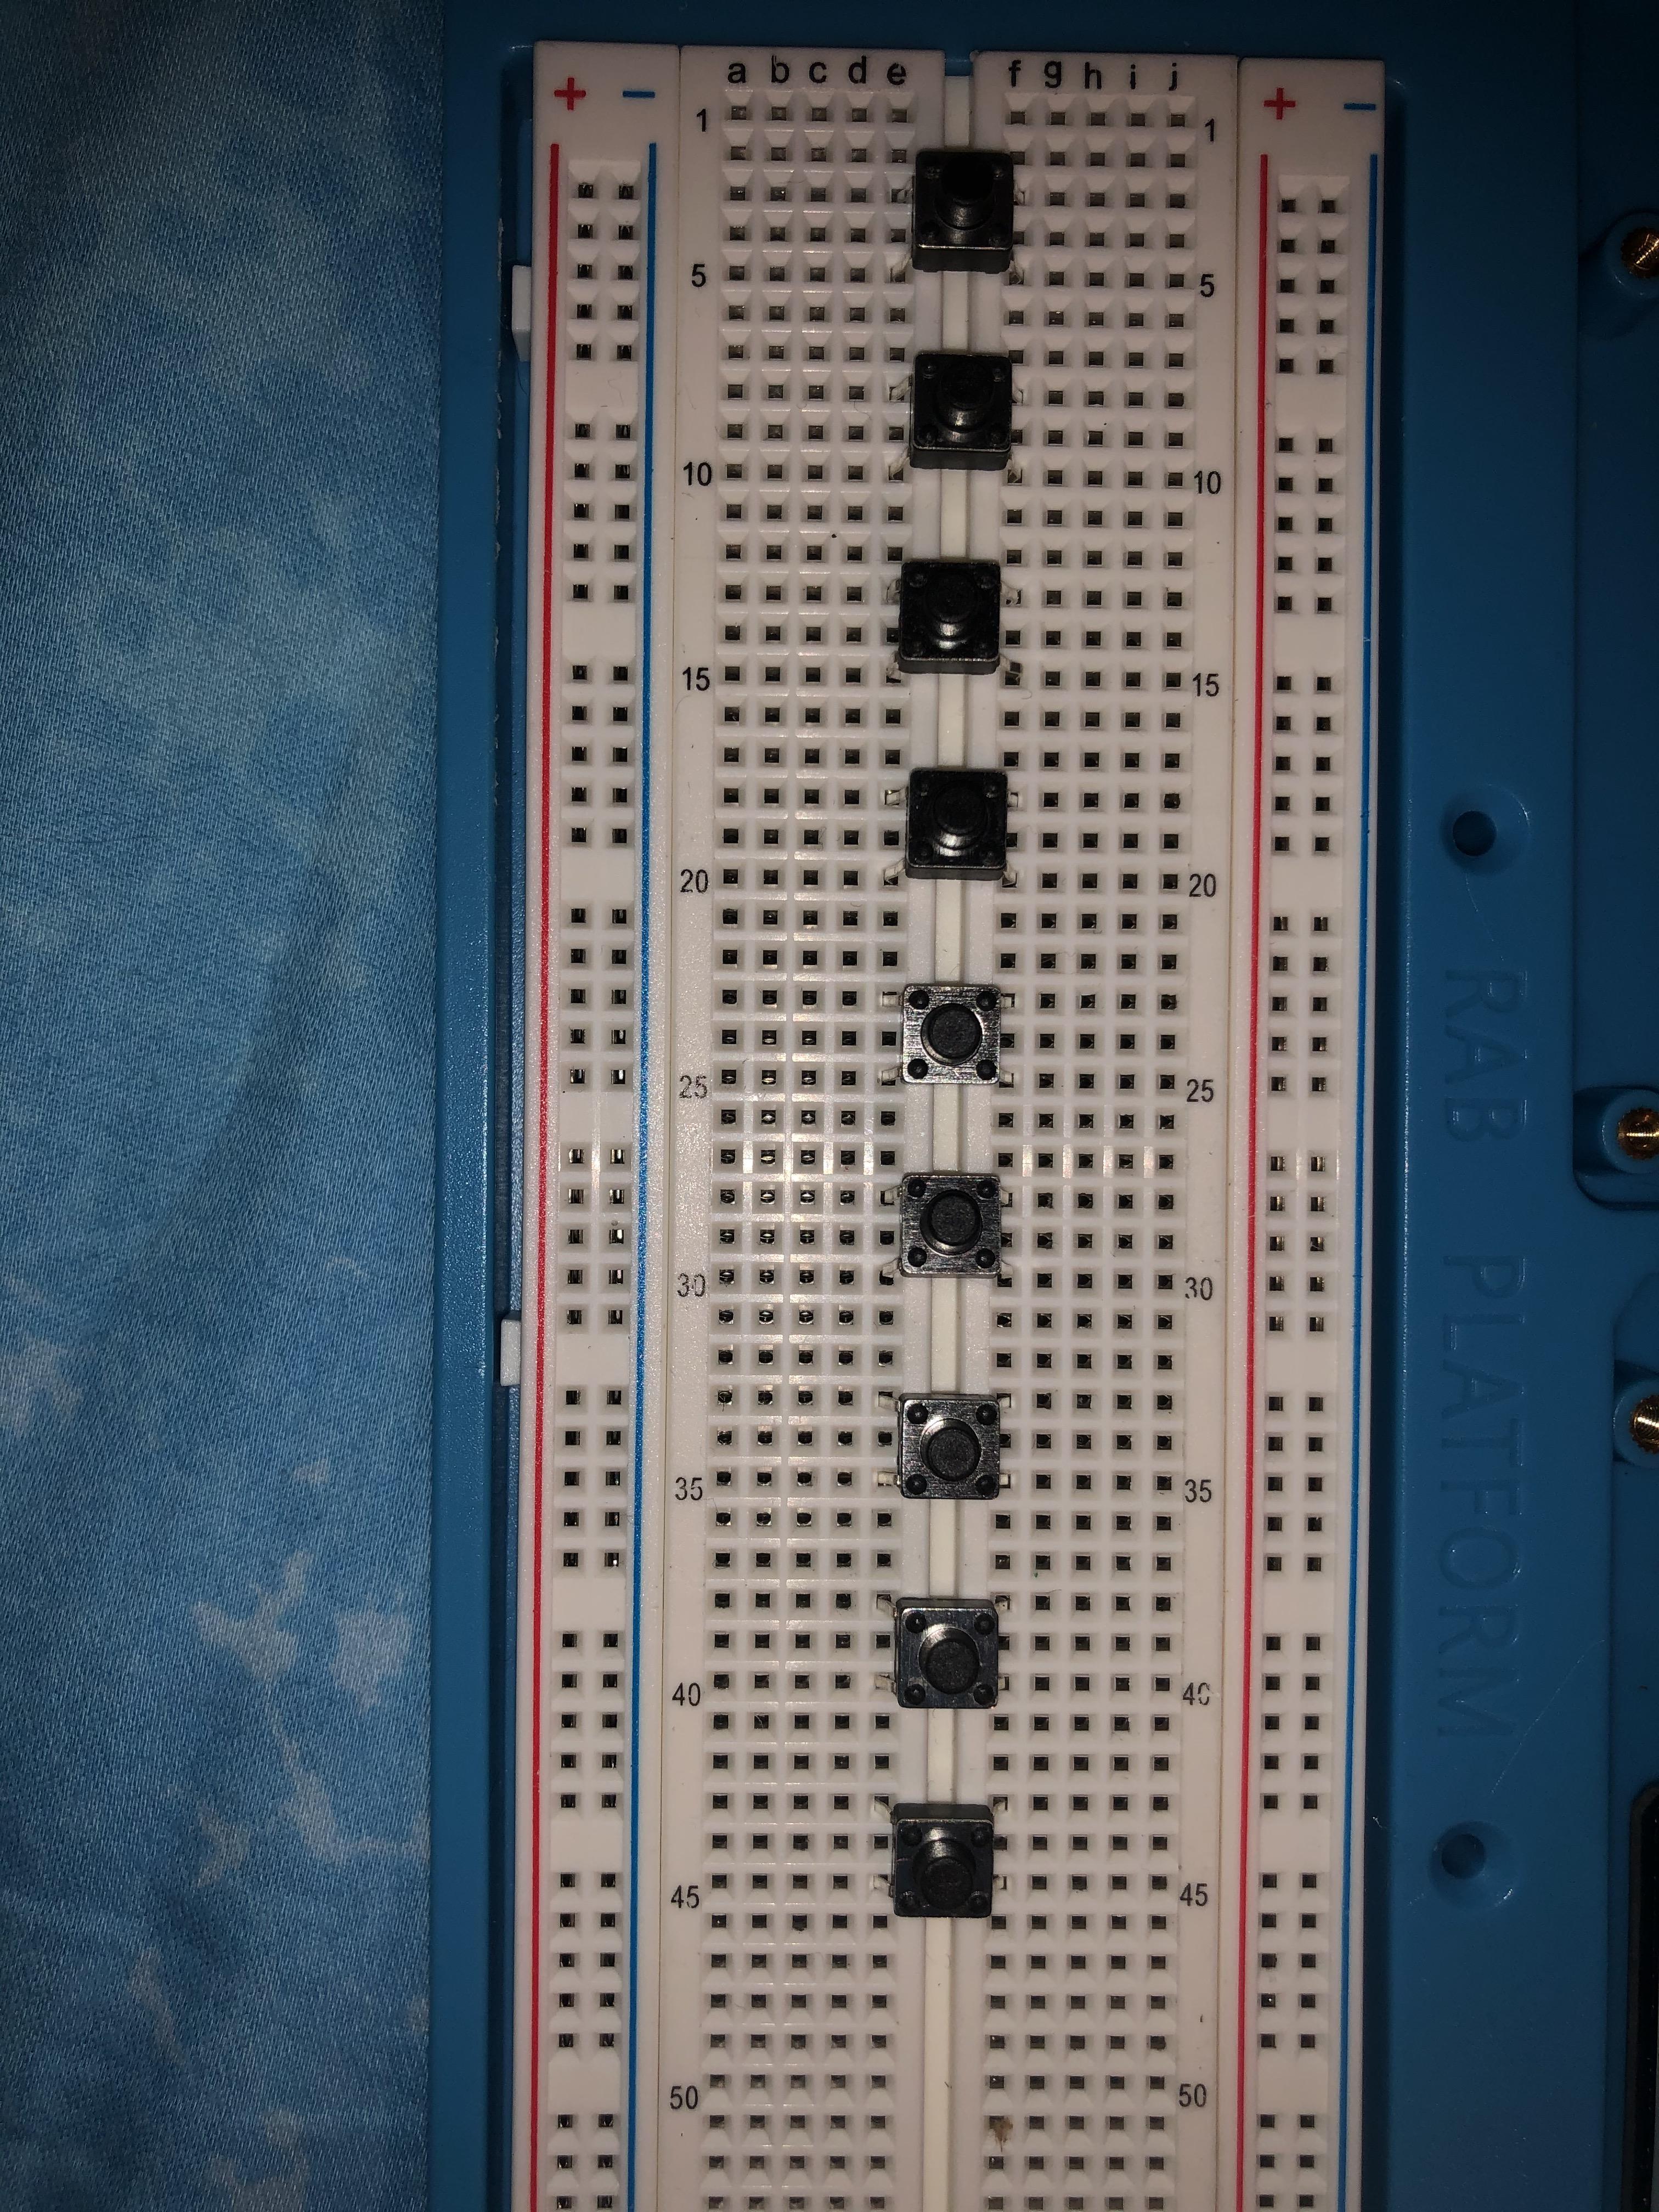
To begin please orient the breadboard like the image above with the position of the letters vertically with the number 1 on top. Place the buttons on the breadboard evenly spaced apart (here I did two space in between). The buttons should be on the bridge between the gap of the breadboard. The right half of the board is positive and the left half is the negative side.
The buttons will send an input (send information) once they are pressed to the Arduino.
Add the Resistors
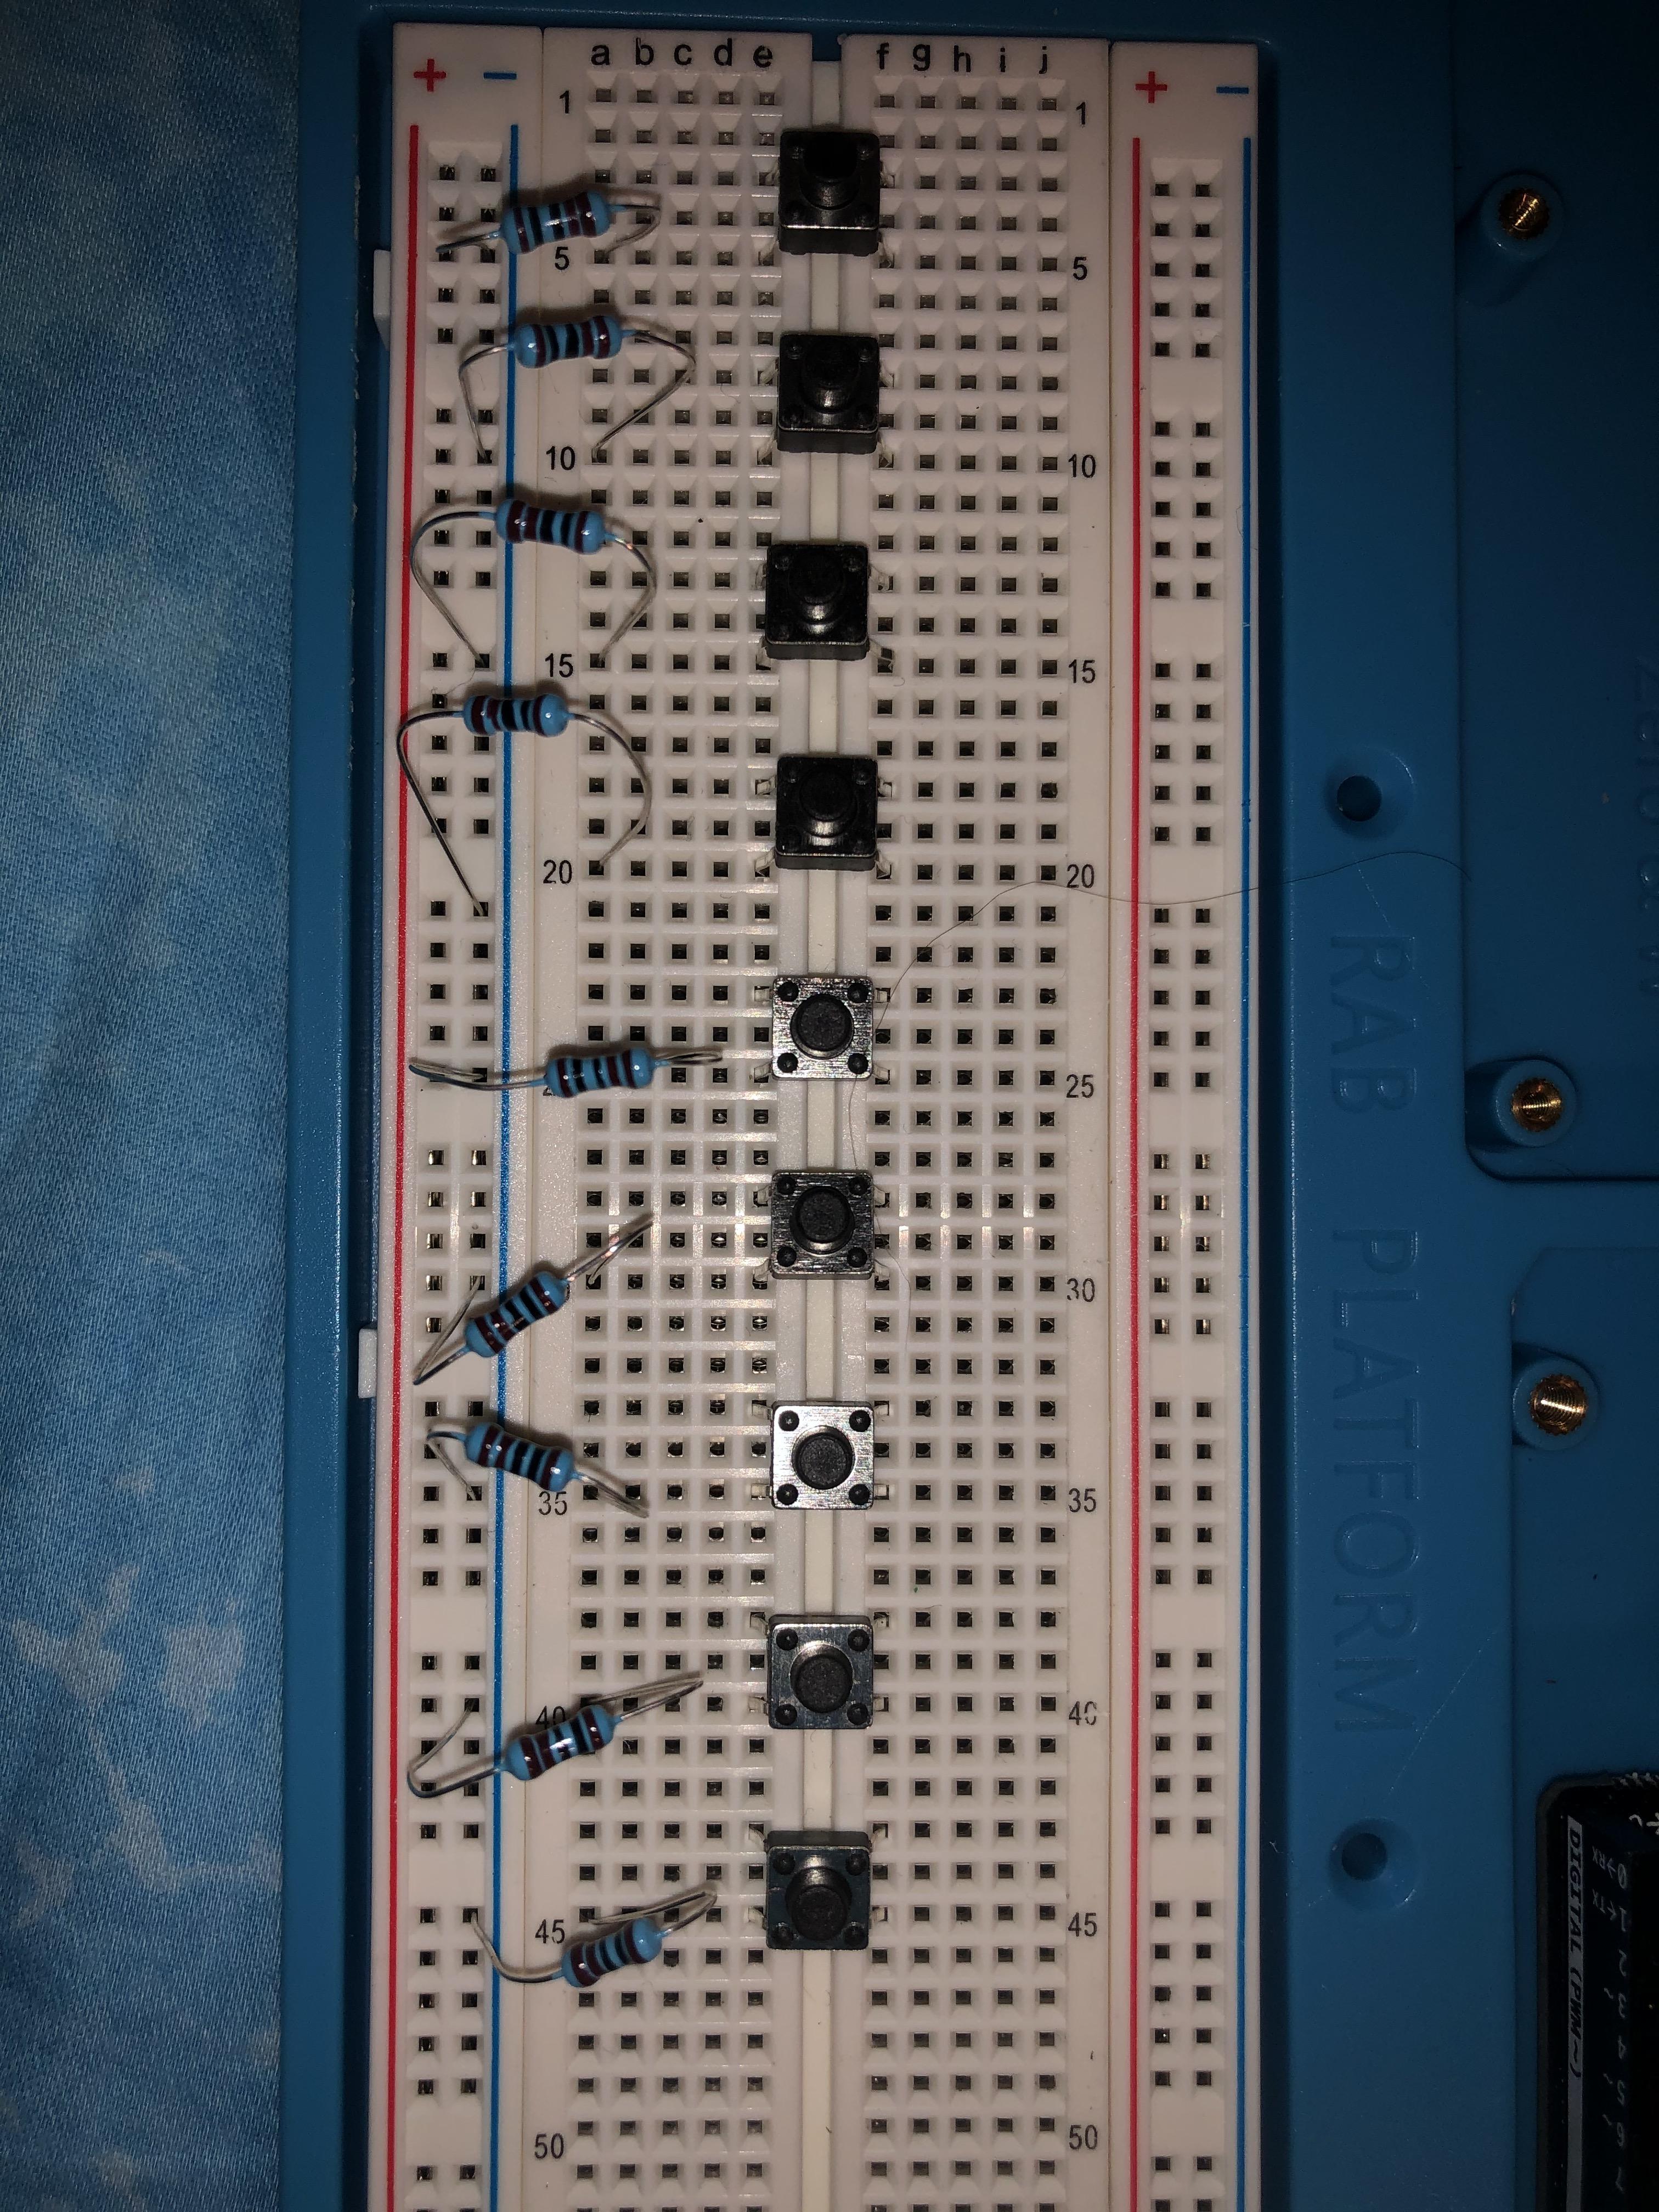
Add the resistors to the bottom side of each button. This is the negative side of the button. The other sides of the resistor will go into the hole with the - (negative) symbol side in the same row of the button.
The resistors send a current through the button through the board.
Add the Buzzer
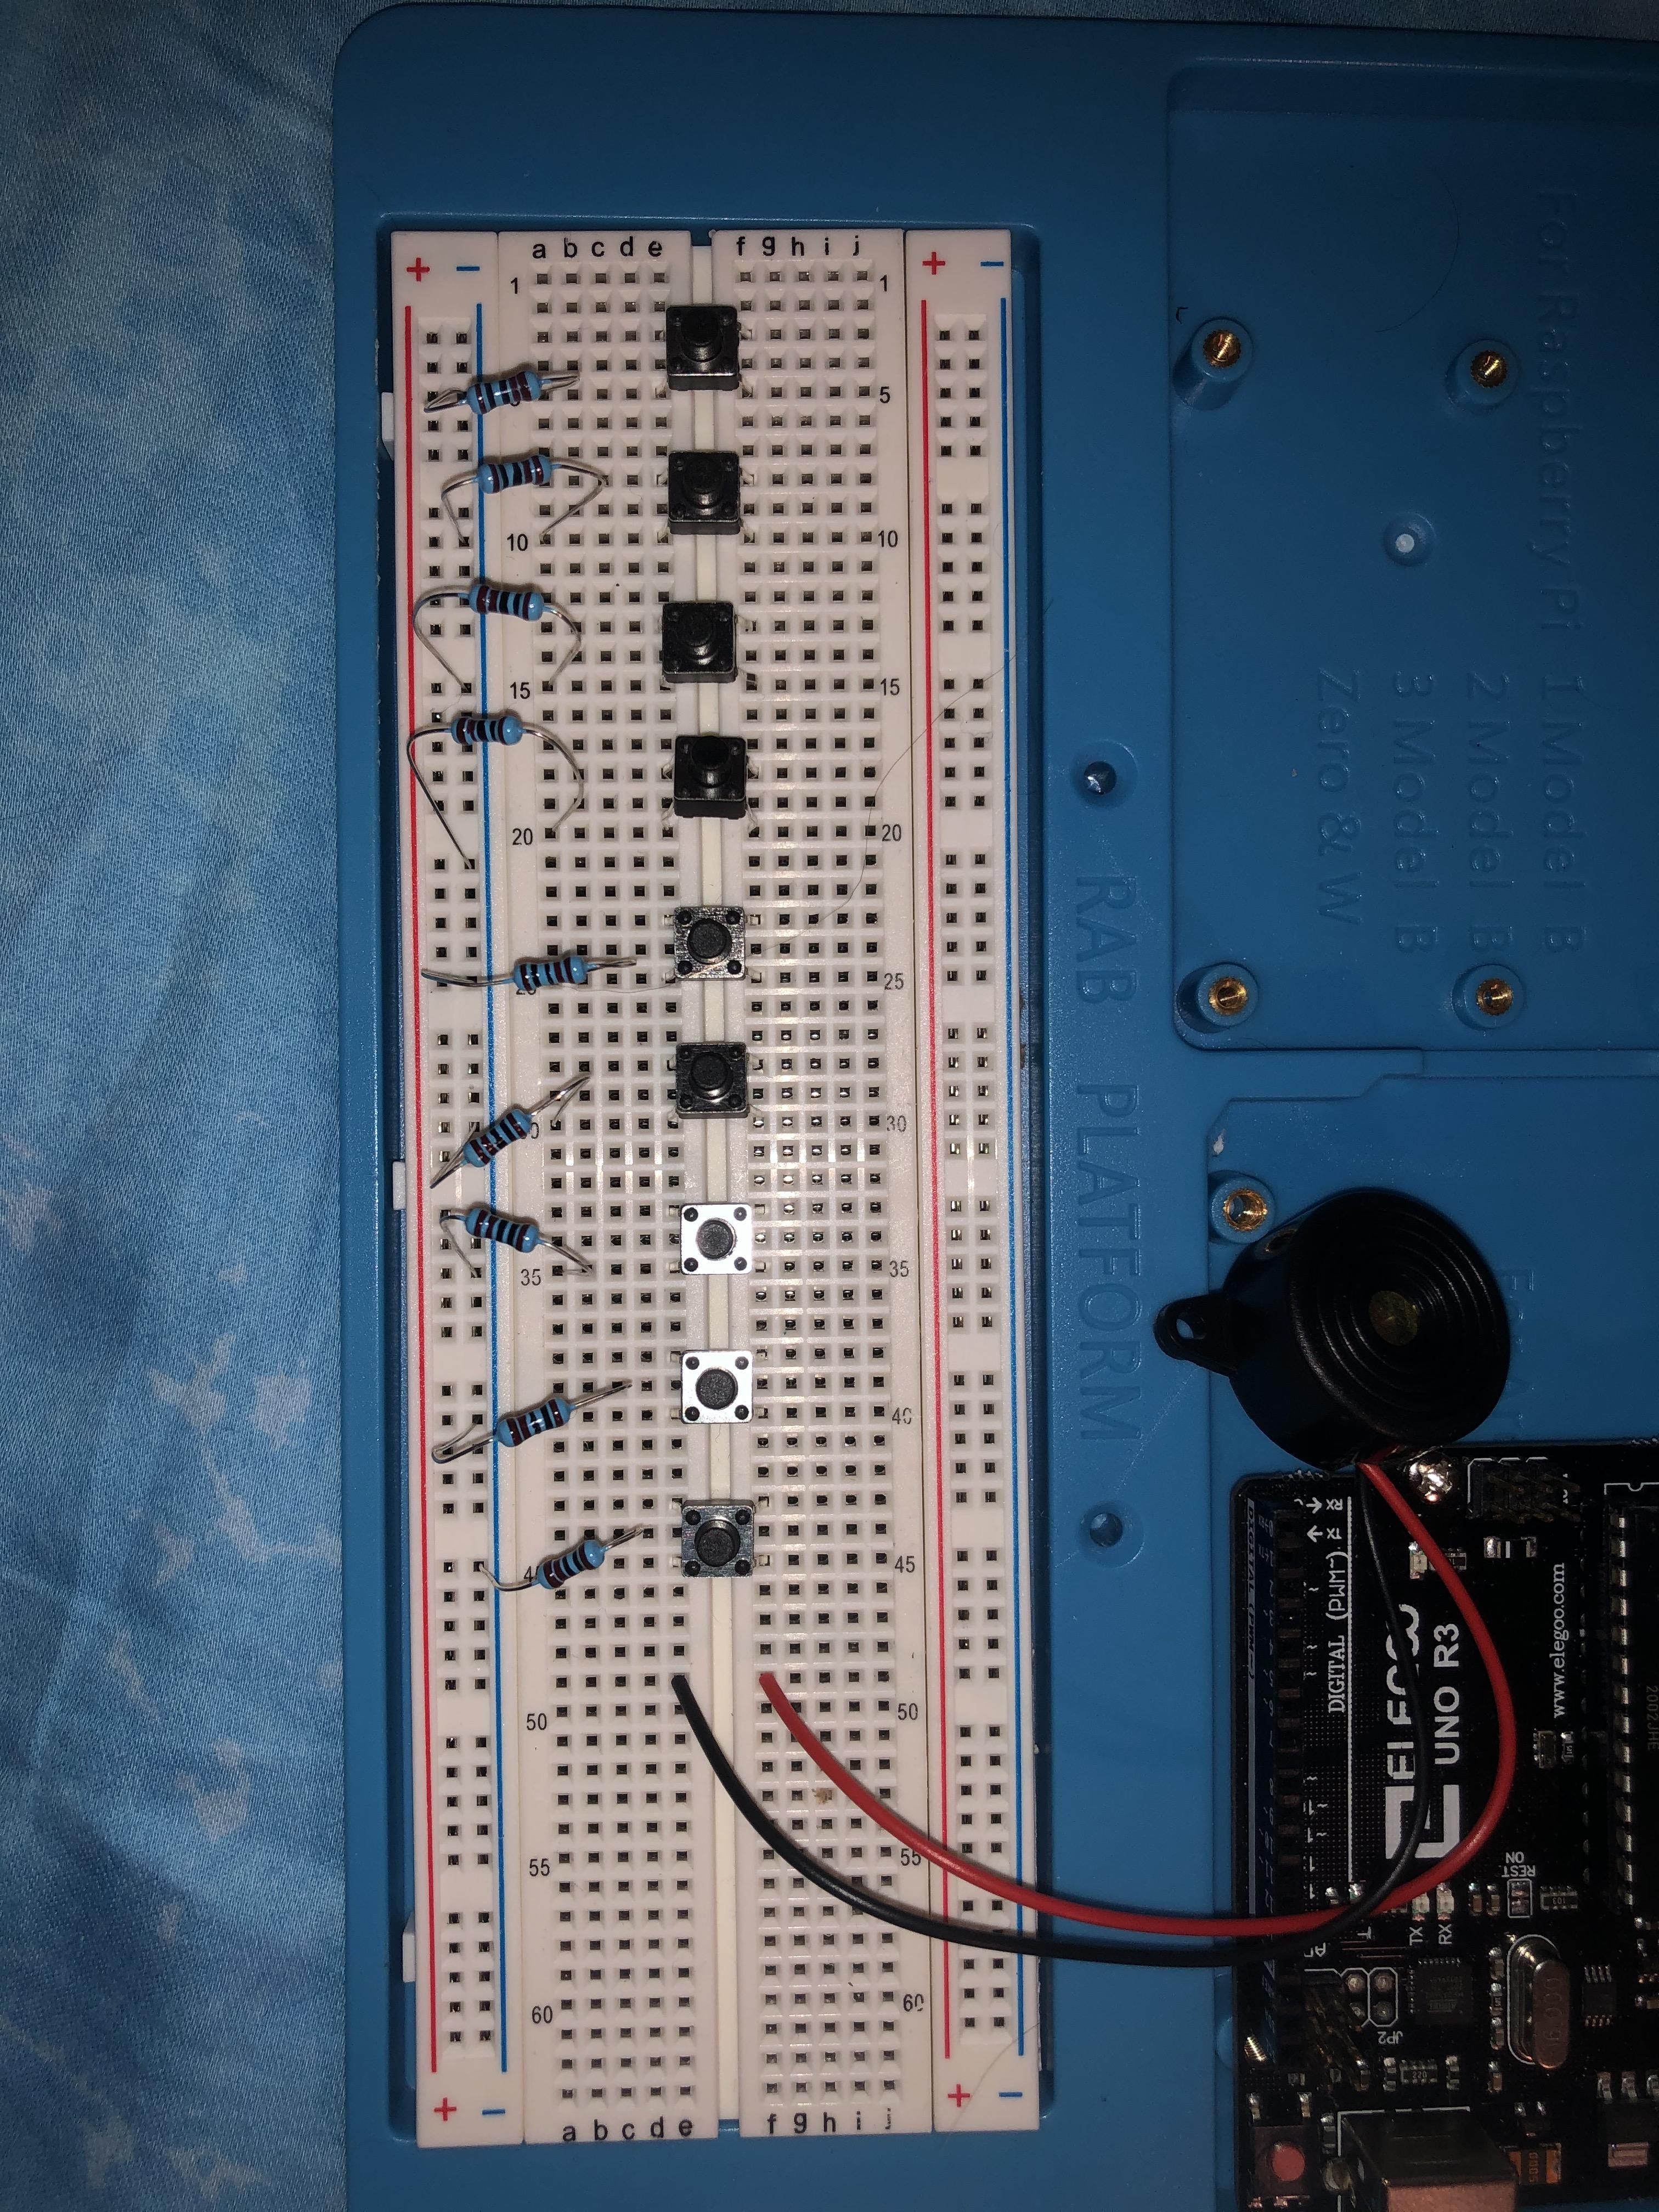
Add the buzzer to the breadboard. Should be the same space apart like the buttons. Plug the red side to the right side and black side to the left.
The buzzer will be what is producing the sound once it receives the button information from the Arduino.
Add the Jumper Wires
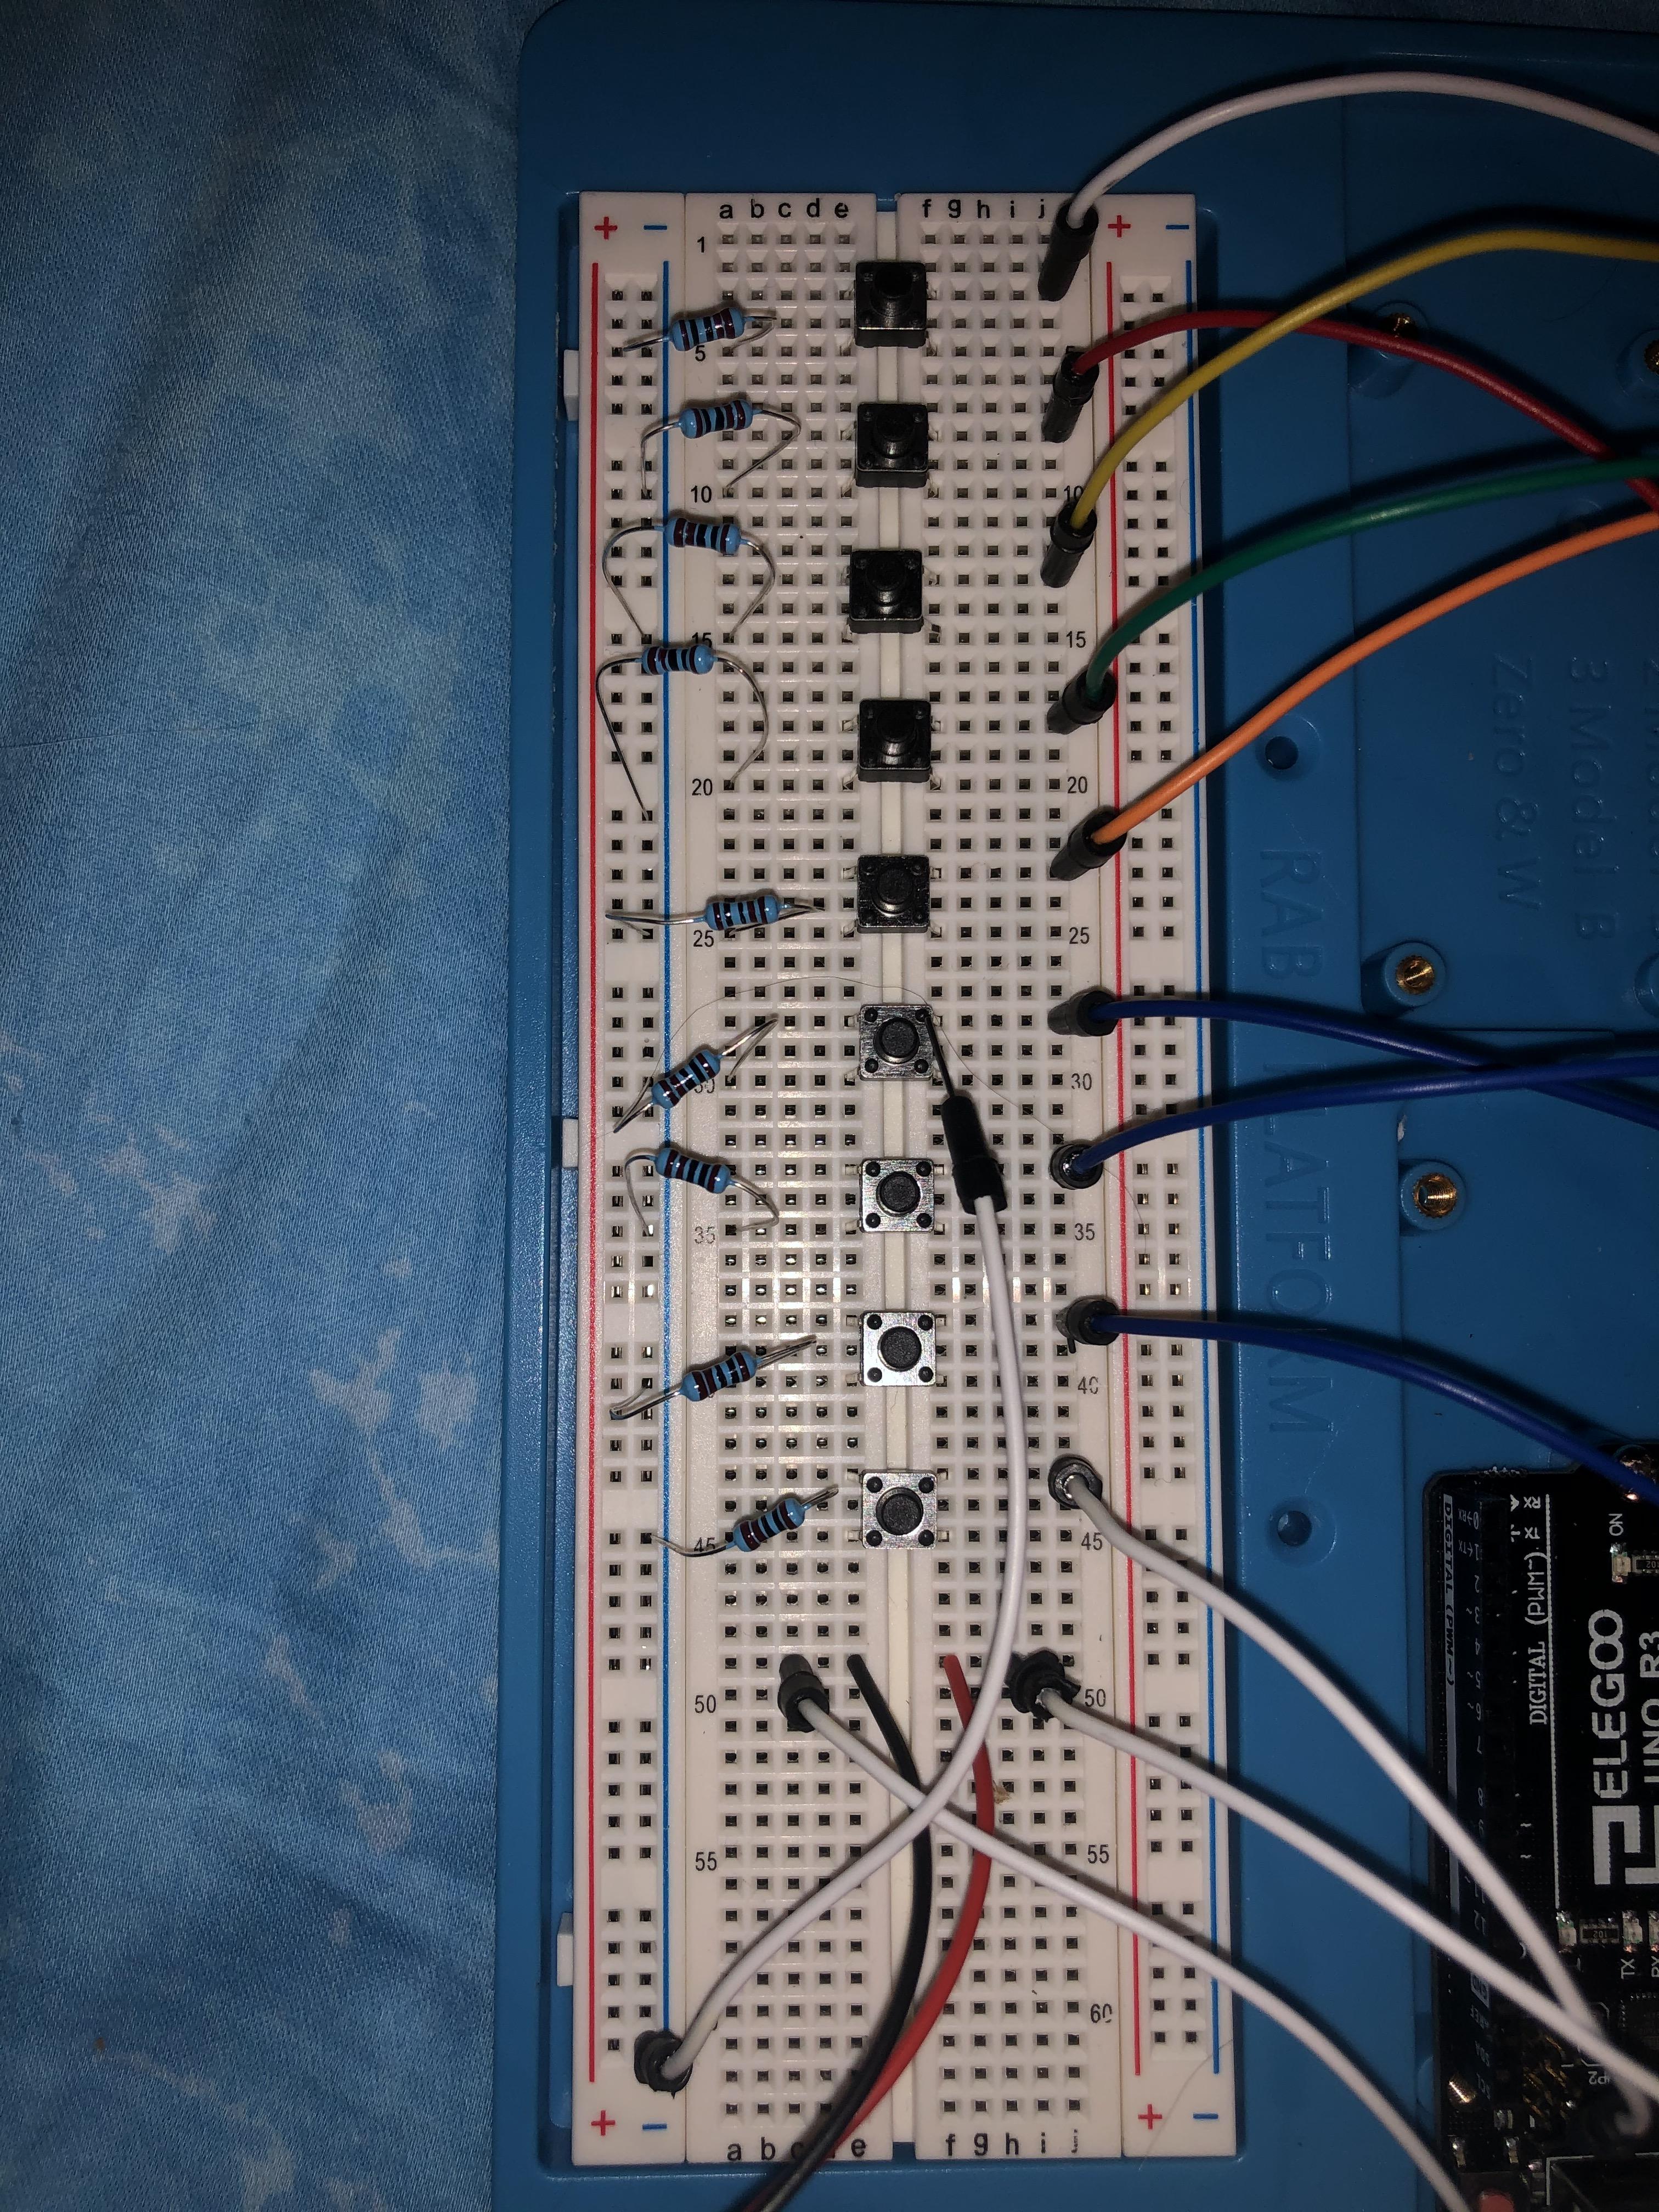
Add the jumper wires to the right side of the button and the top half, this is the positive side. The other side will go into the Arduino on the digital side.
Plug Into the Arduino
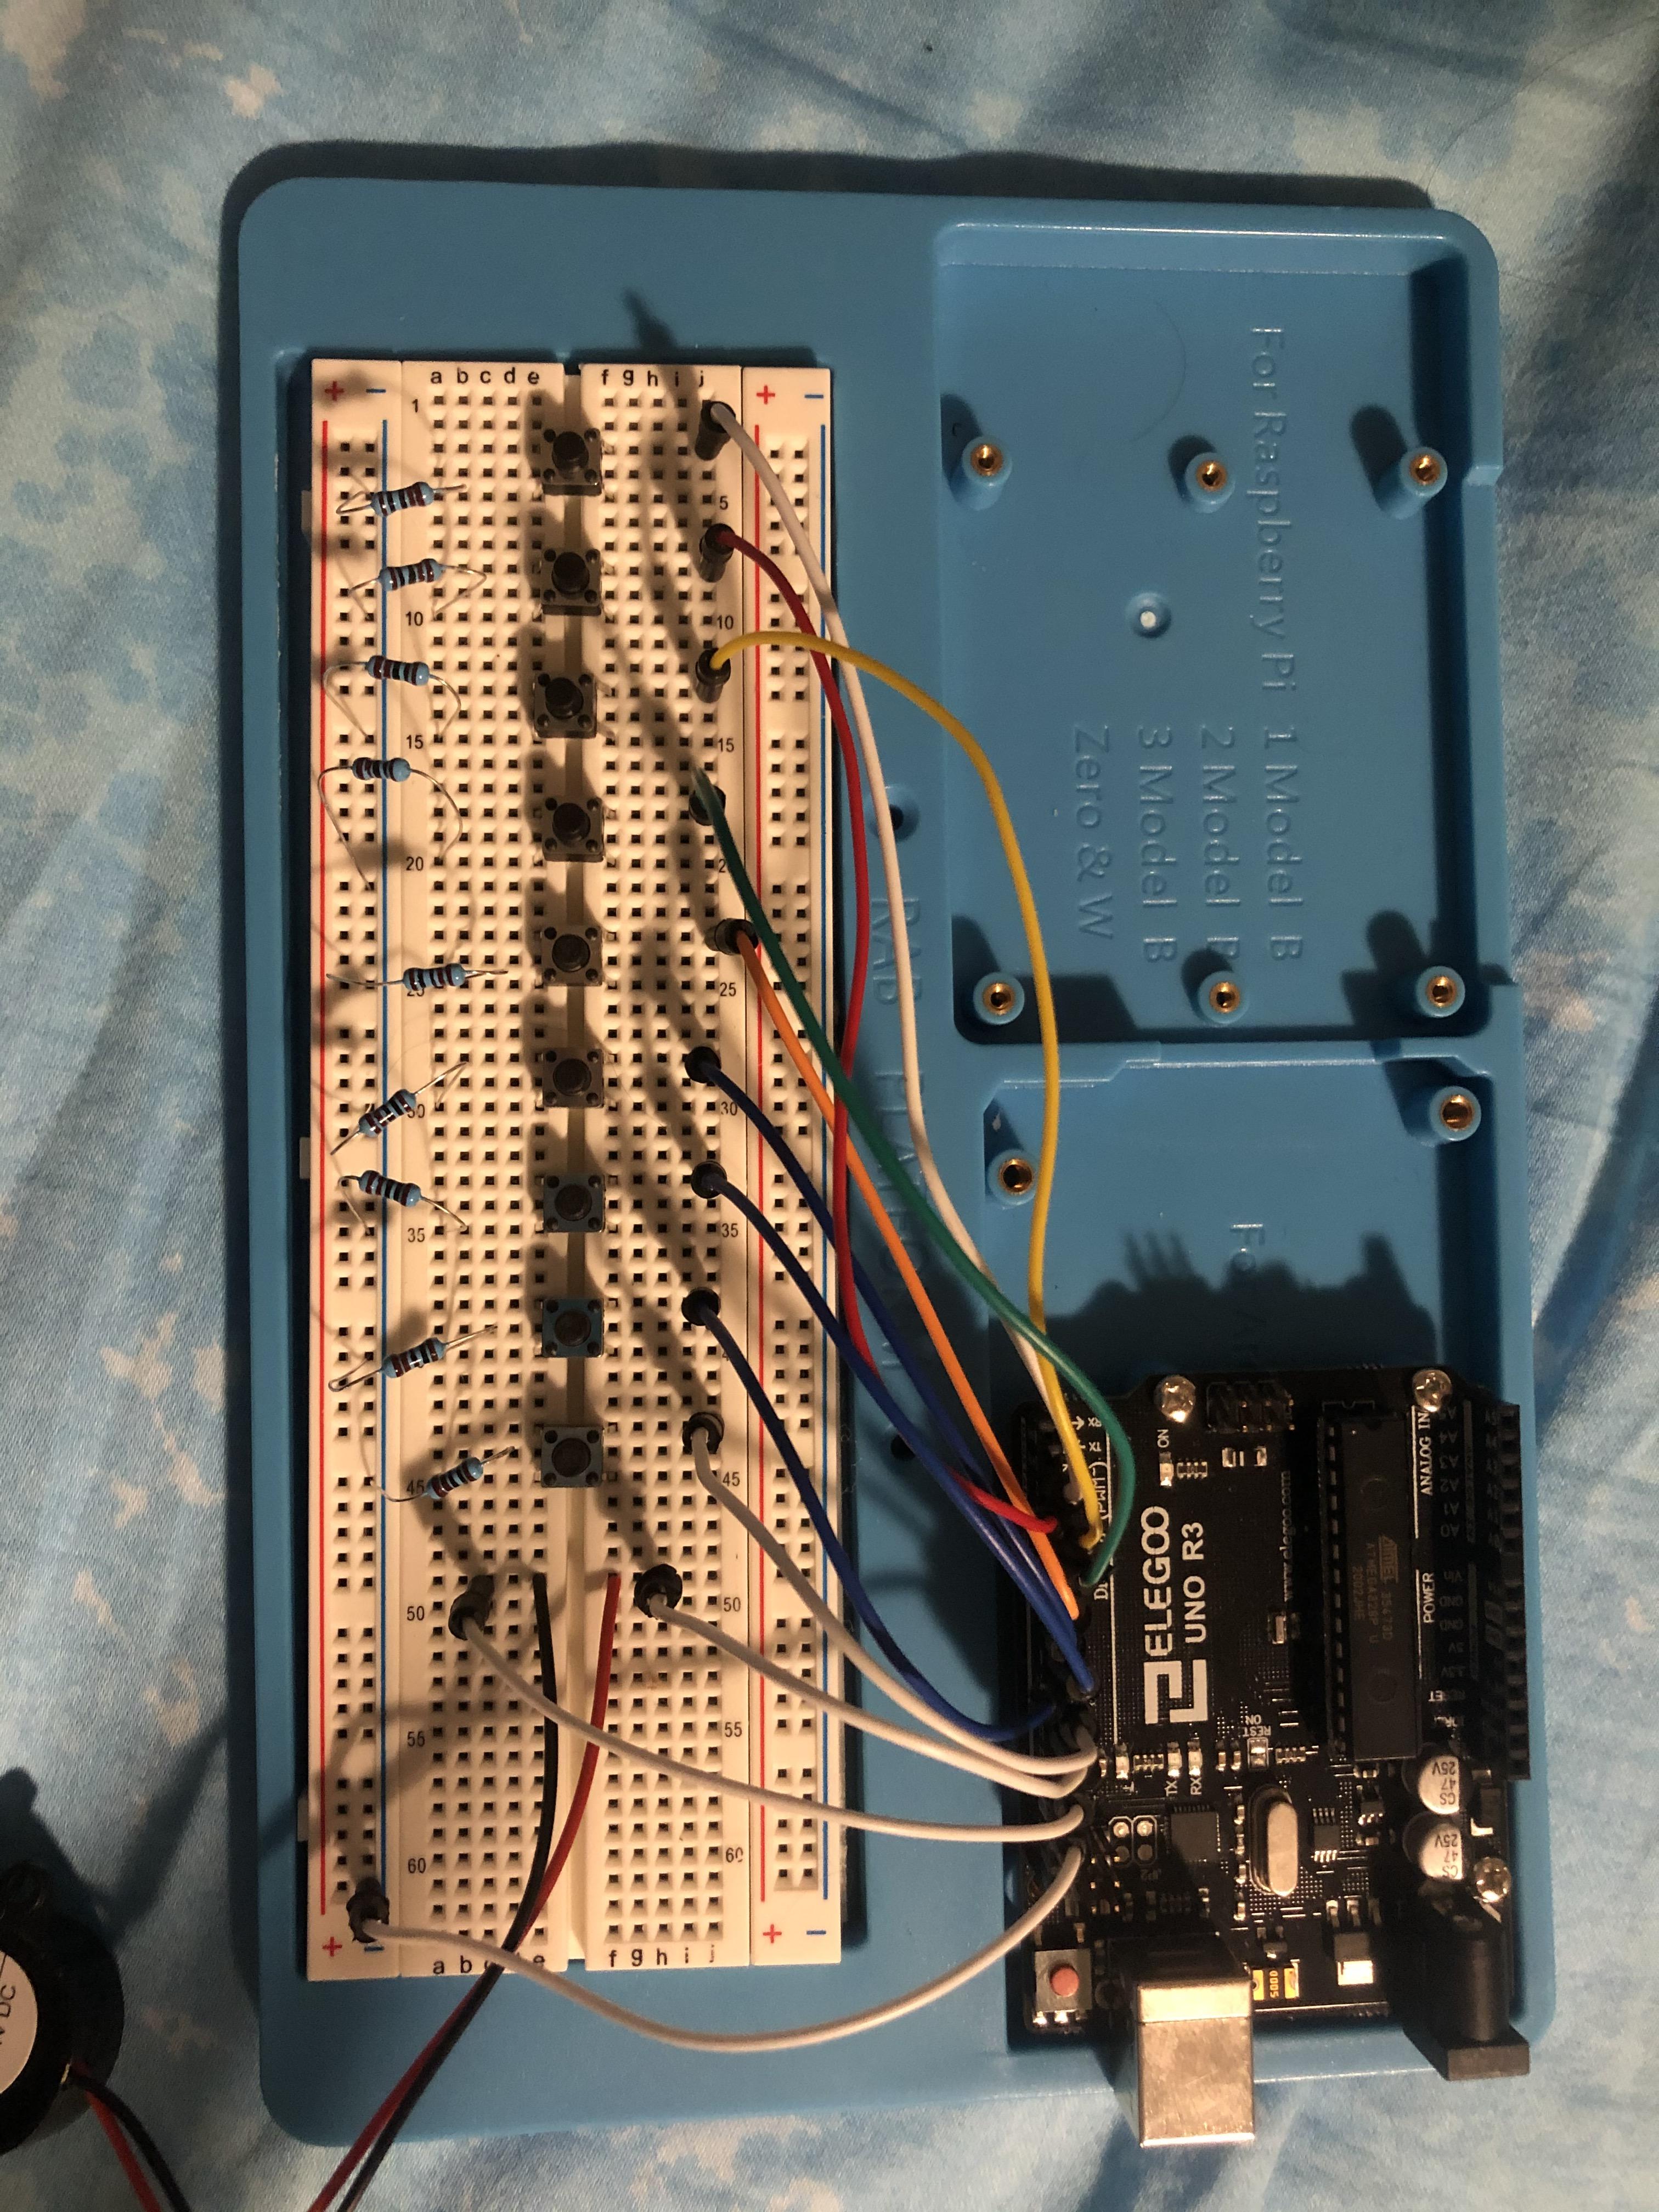
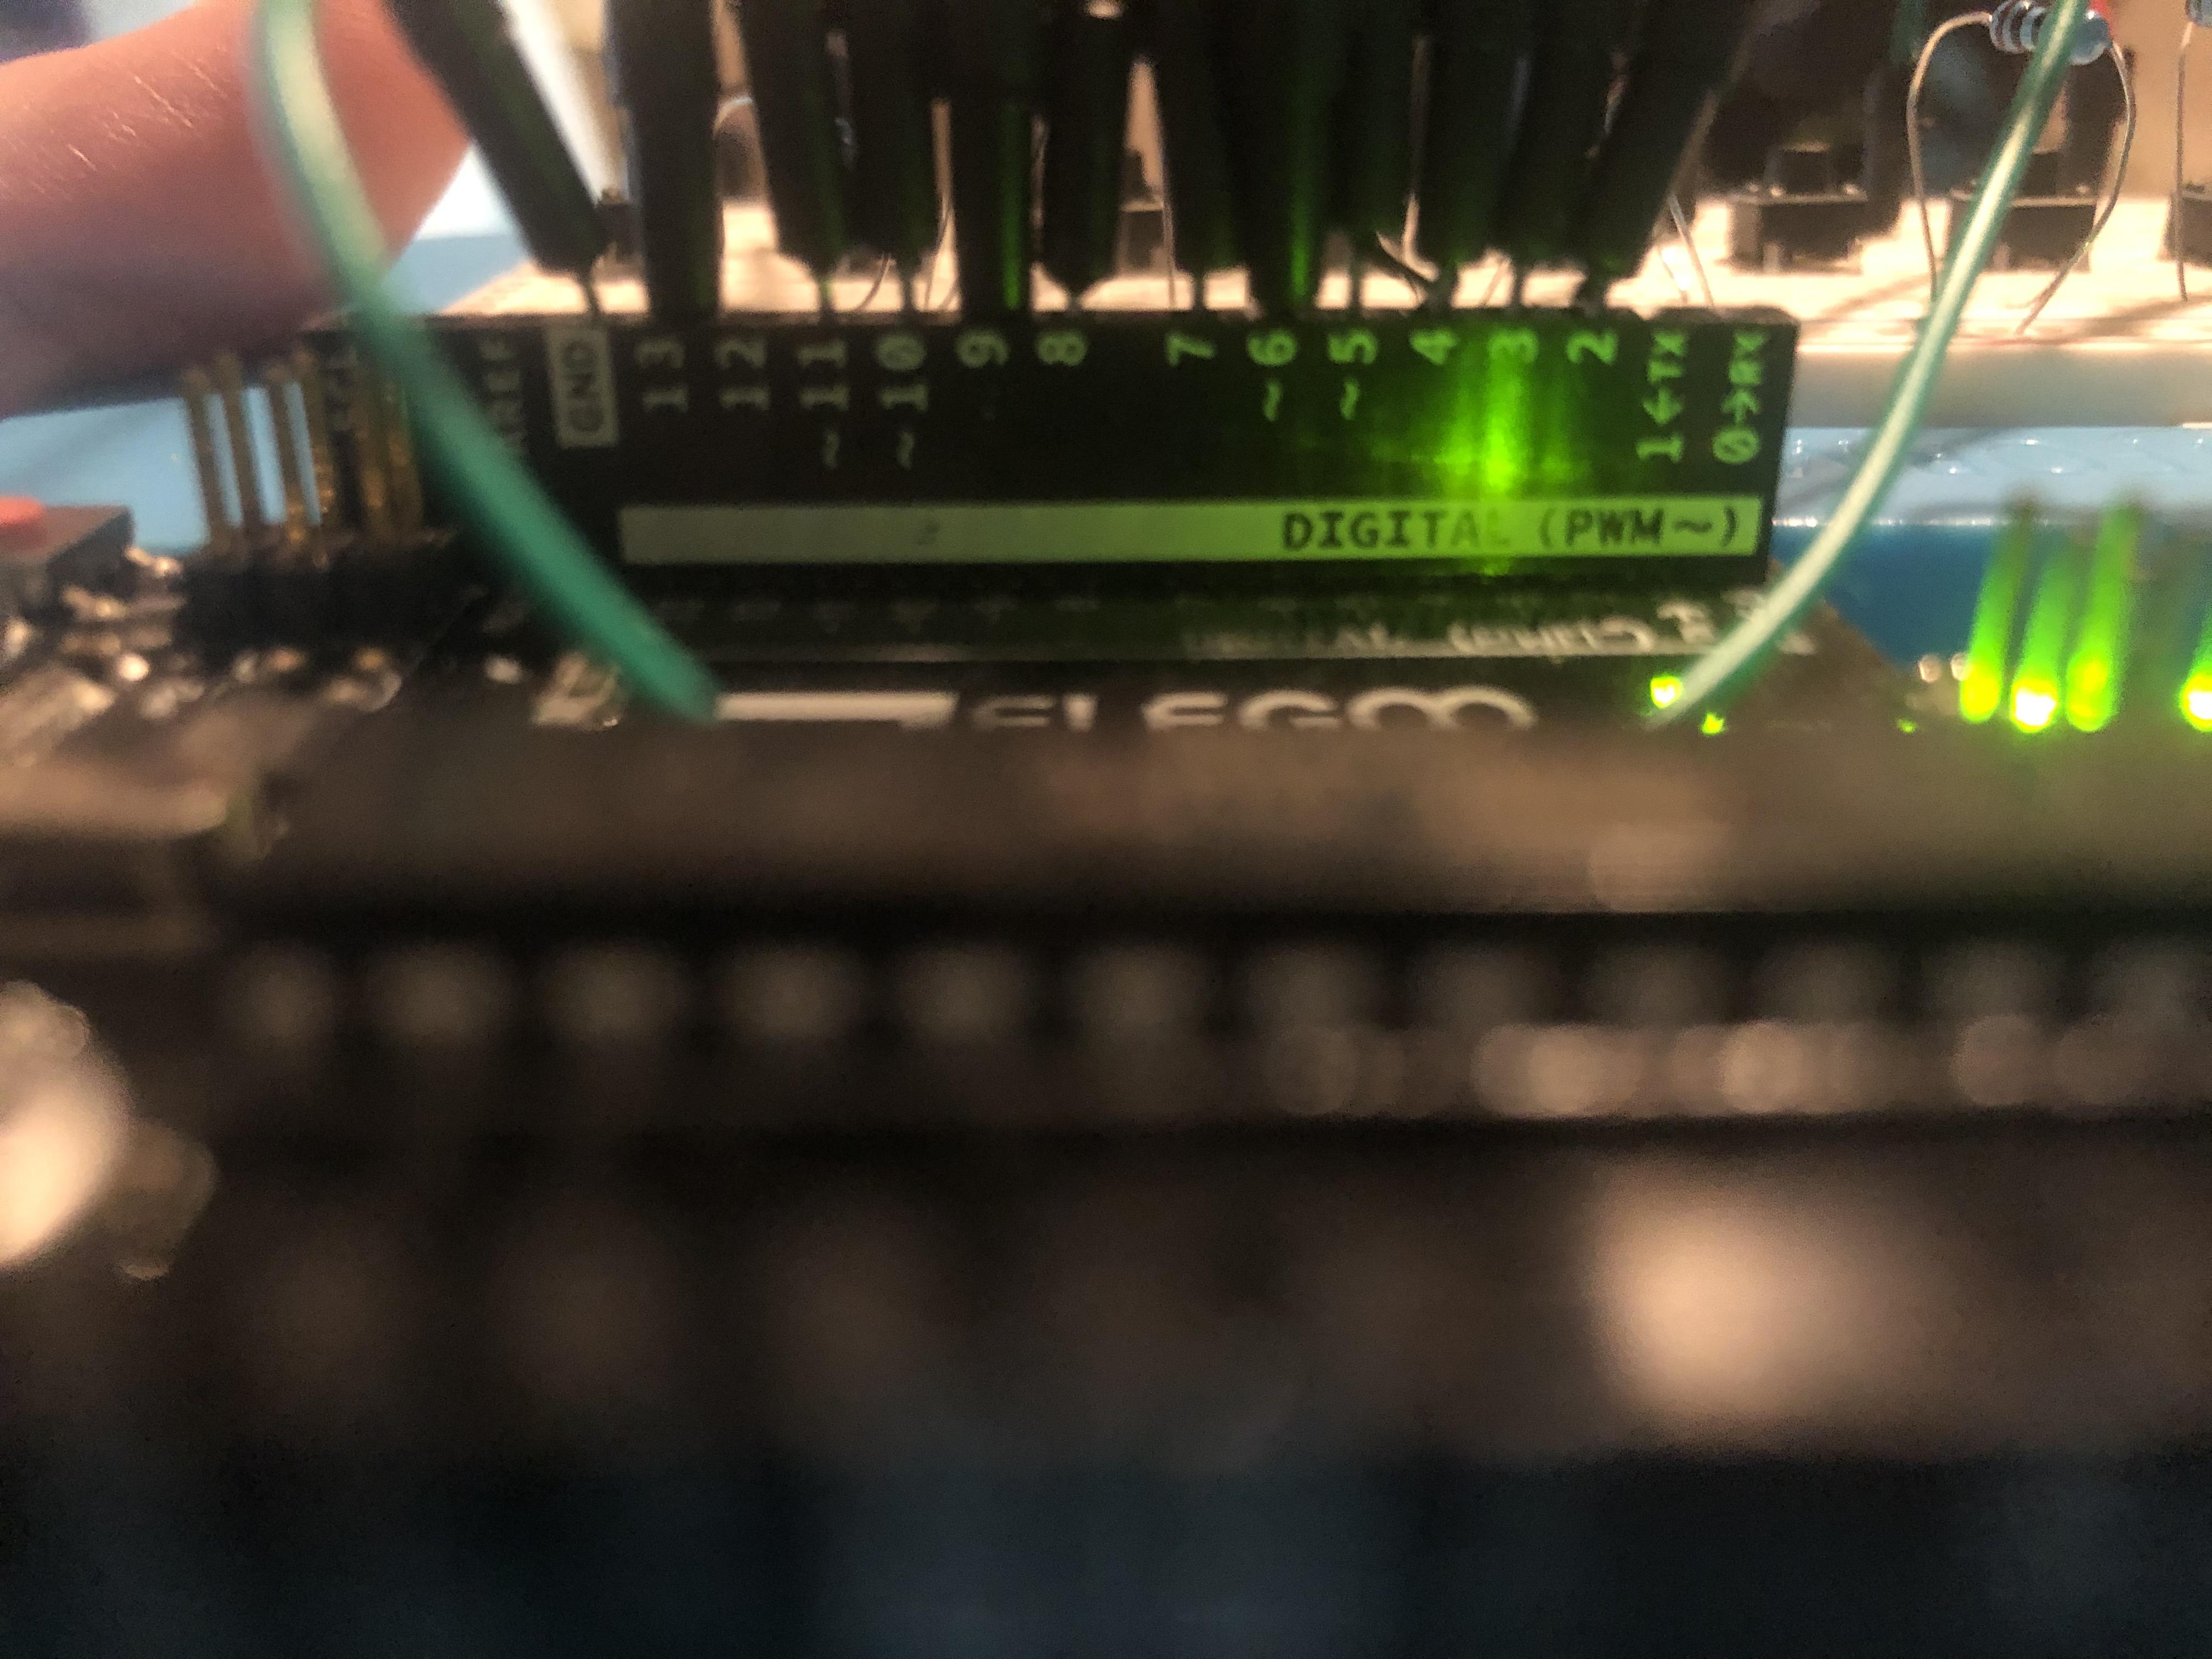
From the top to bottom put them into the ports for 2, 3, 4, 5, 6, 7, 8, 9, and 10. For the buzzer add a jumper to the red side and the black side of the buzzer. These will go into ports 11 and 13 respectively. The last jumper wire will have one side go into the ground port and into a hole in the - (negative) symbol side of the board. The order of the matter of the port as if you open the code it refers to certain buttons in the specified port. The ground port is the same as connecting to something to the ground in a circuit, or in a car. It serves to limit the voltage going through the Arduino and the breadboard.
Download the Software (Skip If You Already Have It)
If you are new to Arduino please click the link below to download the software that will be used for this program. Arduino also now has an online version for your coding need if you do not want to download the software.
Upload the Program
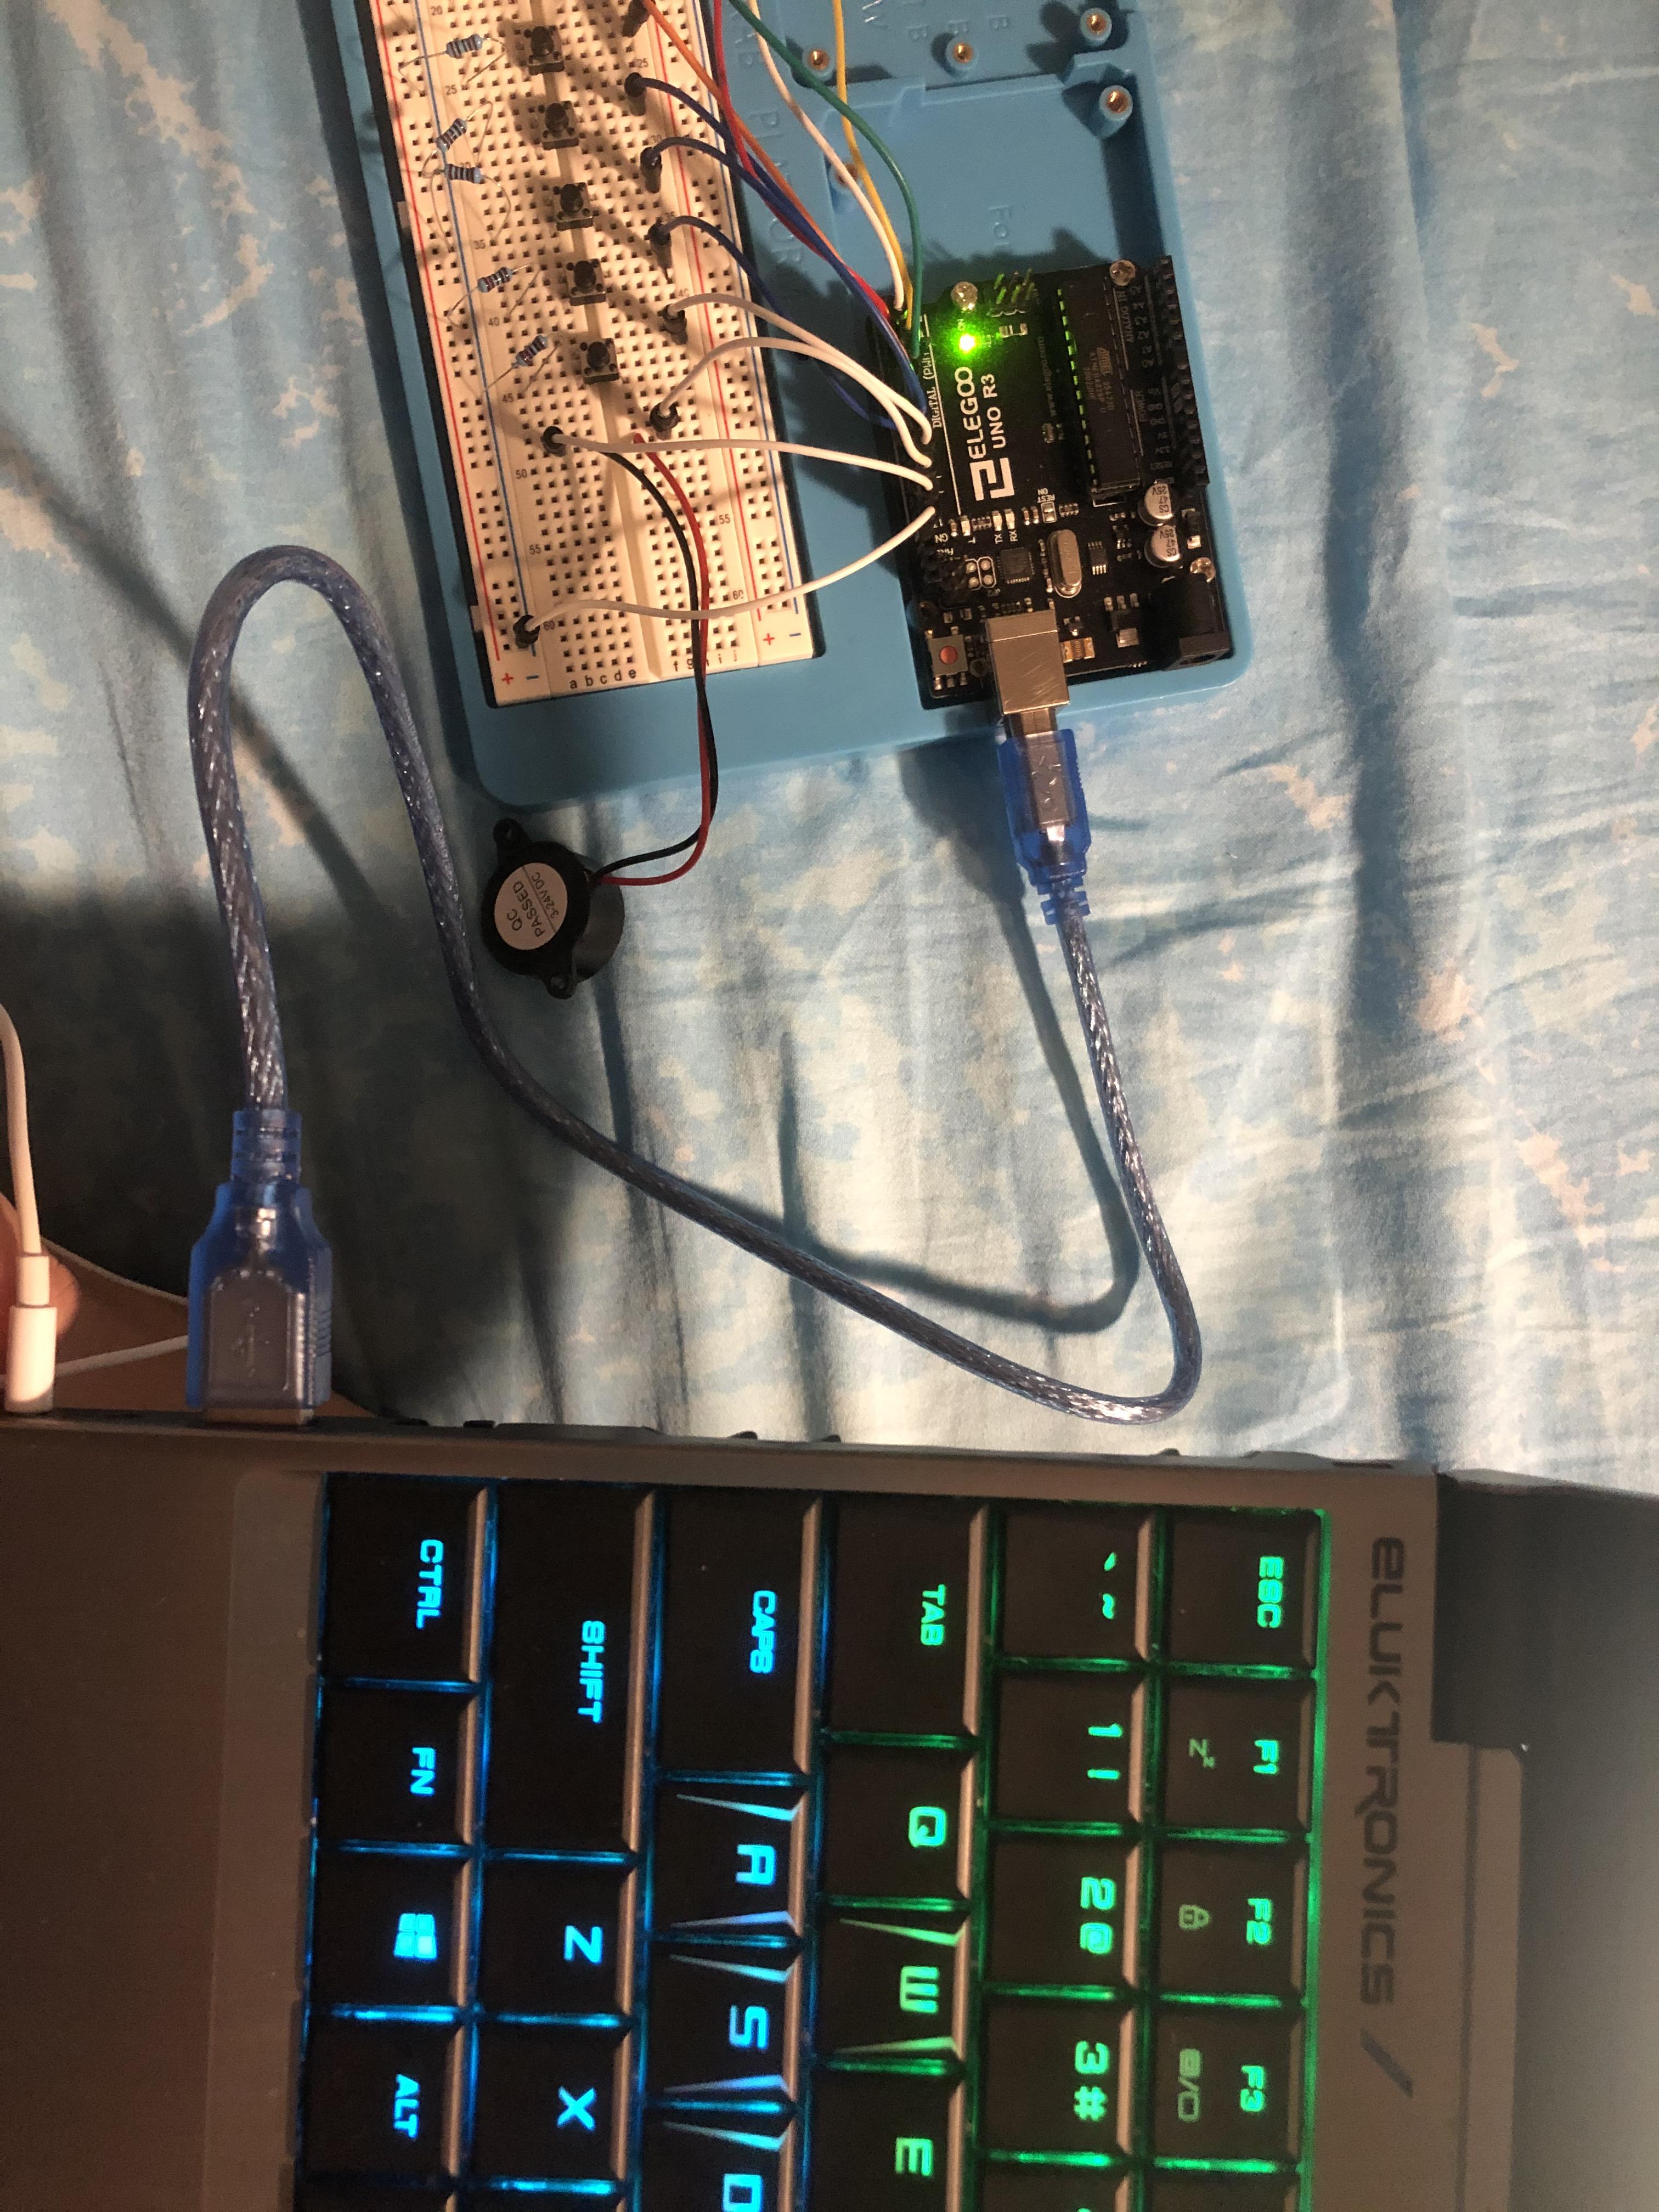
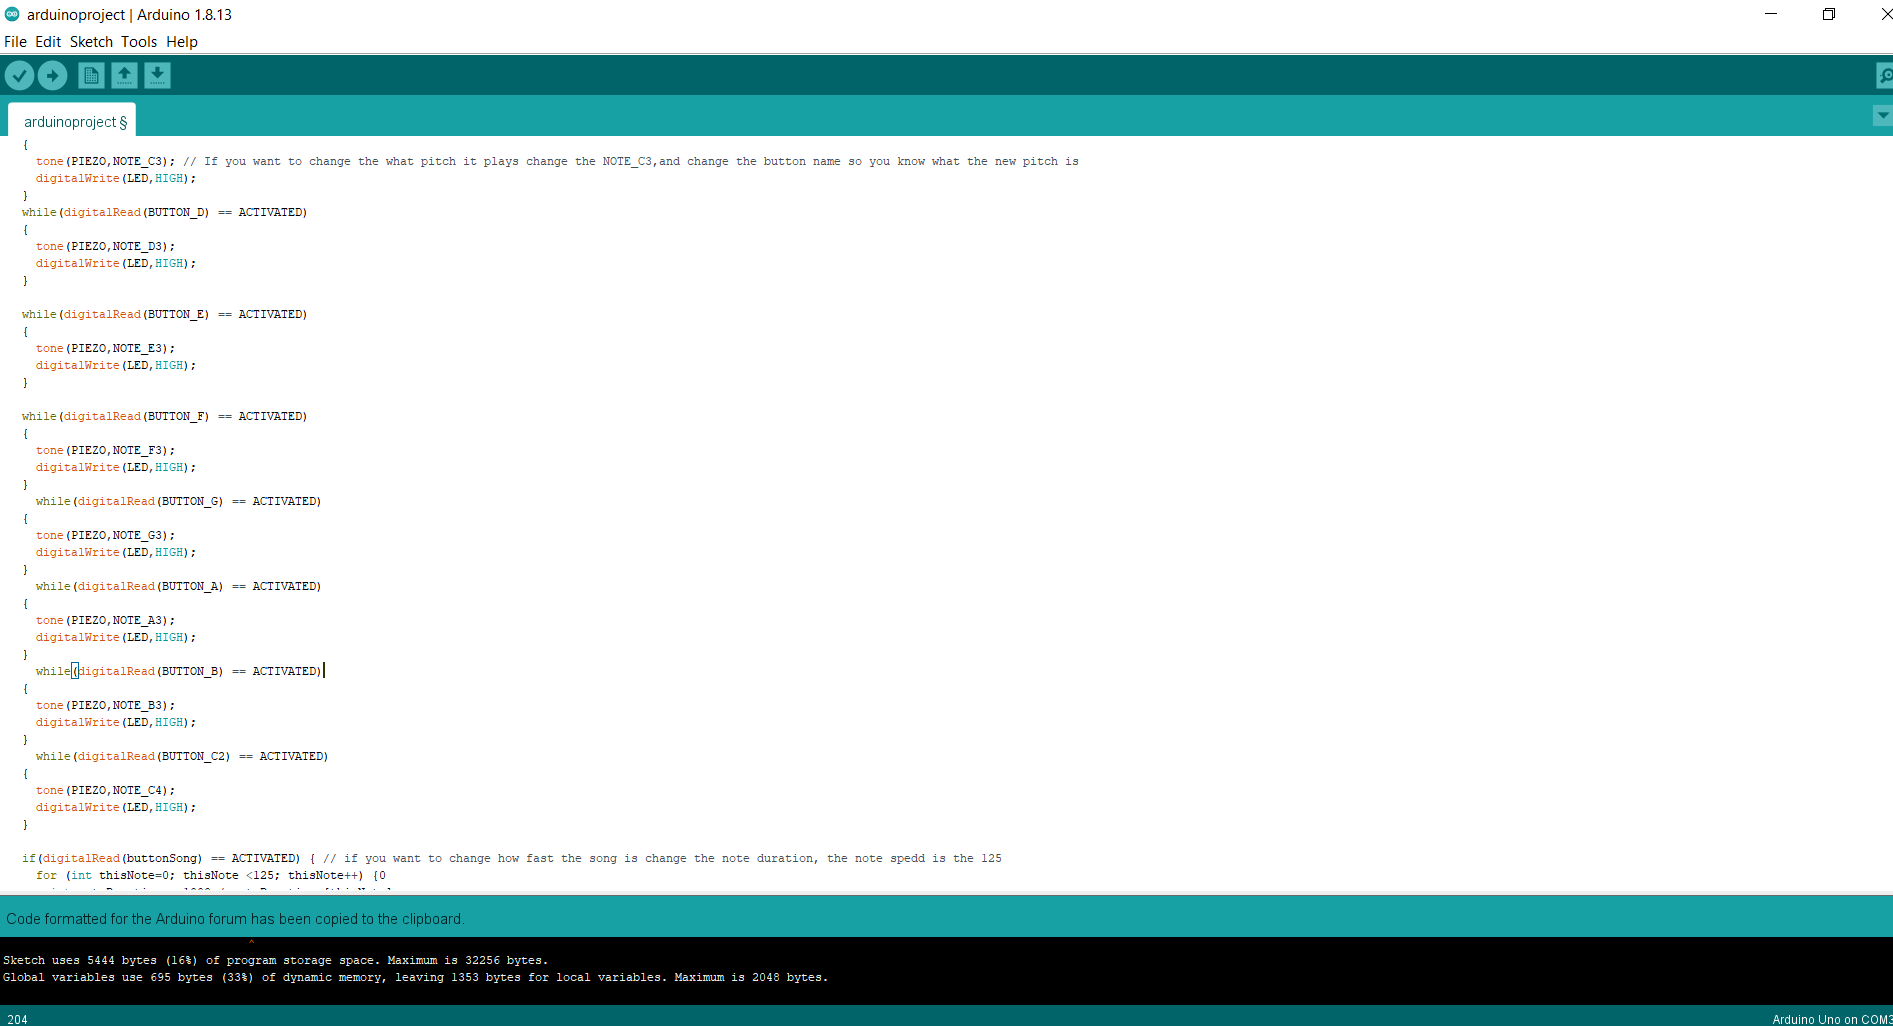
Download the program! Within the program, an individual can change the notes, and the song pre-made in it. There have been comments added within the code to help you understand it better and what can be changed. If you do change anything you will need to read download it into the Arduino by going under sketch and upload or Ctrl + U. Have fun and get creative!
Thinking further:
What about more buttons?
What if I wanted to have two or more preset songs?
Downloads
Troubleshooting
If some of the buttons respond and some do not check the following:
Are all the jumpers plugged in all the way?
Are the resistors all the way in and touching the bottom of the breadboard?
Is the jumper in the right spot of the button? What about the resistor?
If you change the code:
Did it come out the way I wanted?
Are the buttons/buzzer set to the right ports?
Are notes the right length/pitch that I want?