Silver and Walnut Wood Ring
by ZebranoWoodCraft in Craft > Jewelry
5822 Views, 62 Favorites, 0 Comments
Silver and Walnut Wood Ring


In this video I will show you how I made a Silver & Wood Ring with a stone setting from start to finish!
Please feel free to leave me a comment with any questions and subscribe if you want to see more videos like this.
The ring is made with sterling silver sheet, walnut burl and a stone setting that was a Spectralite cabachon. I've tried my best to document every step of the process and I hope this inspires you to experiment with mixed materials in your jewelry design.
Get 2 months Skillshare membership by using the link below:
https://skl.sh/zebranowoodcraft
Find More of My Work
You can follow me on Instagram - @Zebranowoodcraft
Get in touch with me through Etsy:
Cutting a Silver Strip


This ring started life as a sheet of 0.8mm sterling silver. The first task was to cut a length of the silver to form my ring.
I used a formula to figure out how much silver to cut and the jewellers saw made easy work of it. Here's the formula in case you're wondering …
Inner diameter of desired ring size + thickness of silver X 3.14 = Silver needed to make ring in MM
(20.68 + 0.8 x 3.14 = 67.44mm)
Annealing and Pickling


To make the silver soft and easy to form I annealed it using a blowtorch, heating it until it glowed a cherry red.
I gave it a chance to cool down and then I used a round nose pliers to roughly form the silver into a ring shape.
Before soldering I made sure that both edges that would form the seam of the ring were filed completely flat and fit together tightly.
Next I bathed the silver in a pickling solution to make sure it was nice and clean for soldering.
Soldering the Silver Ring


Soldering silver is fun and I'm no expert but this is how I did it.
I put a little soldering flux over the seam of the ring and placed a few tiny pieces of “easy solder” on top.
I moved the flame of the blowtorch around the ring to heat it evenly before concentrating on the seam.
The flux bubbles up, then kind of caramelizes and that's when I focused the flame on the pieces of solder until they melted into liquid like T1000 from Terminator 2.
I probably went a bit over kill but it worked that's what really matters!
After soldering and I put the ring in the pickle for half an hour to get some of the fire scale off. The next step was to size the ring up, polish the inside and get it shaped ready for the wood. Let's go!
Sizing & Shaping the Silver Ring


I made the ring slightly under size so I needed to make it a bit bigger. To do this I annealed it and then hammered it on a metal mandrel until it was correct!
I used a Raw Hyde hammer here which didn't leave any marks on the ring.
The next step was filing and sanding the outside and inside of the ring to clean up the seam and give it a bit of shape.
I used a few grits of emery paper to give the ring a smooth texture and then sanded the edges using a figure of 8 motion on my desk to make the edges nice and even.
Making the Wood Portion of the Ring


With the silver portion made I was back on familiar territory as it was time to make the wood bits. I used a fairly standard “bent wood ring” technique with Walnut burl veneer to make the outside.
I sliced a length of veneer and the wood was plyable enough to start wrapping it around the silver ring right away (win!).
To stick the wood to the silver I used a medium thickness Superglue.
In the end I glued two layers of the wood to the silver ring and evened out the overlapping edges by sanding them on the table with my figure of 8 motion.
I've leveled the sides and sanded them up to 12,000 grit and the ring was ready for inlays ... time to get jazzy!
Carving an Inlay Channel


The first inlay in this ring was a band of silver offset to one side. I scored a line using a marking gauge and then used a triangle file to carve the channel deep enough for my silver wire.
Silver Inlay


I cut just a little too much silver to fit into the channel so I used a file to trim down the edges until it was a nice fit with minimal visible seam.
Next I glued the silver wire into the ring using superglue and sanded it flush with a few grades of sandpaper.
Superglue Finish


With the silver inlay done I applied a full finish to the ring. I used 10 layers of medium thickness superglue over every surface of the wood.
In between each layer I sprayed a very light misting of activator spray which helps to stop the glue from bubbling/cracking/blooming/being evil.
This finishing technique is not for the faint hearted and is tricky to master but it comes over time.
Drilling a Hole for the Stone


With my finish on I drilled a hole using a tiny burr I found in the dusty corners of the workshop. I was scared at this point but I managed not to destroy the ring and made a nice hole ready for the stone setting.
Polishing


I polished the inner silver portion of the ring with emery paper and then used standard wet and dry for the edges and outside of the ring.
To make the superglue finish super shiny I worked my way from 400 grit wet n dry to 12,000 grit micro mesh. This brought it to a ridiculous mirror shine!
Setting the Stone


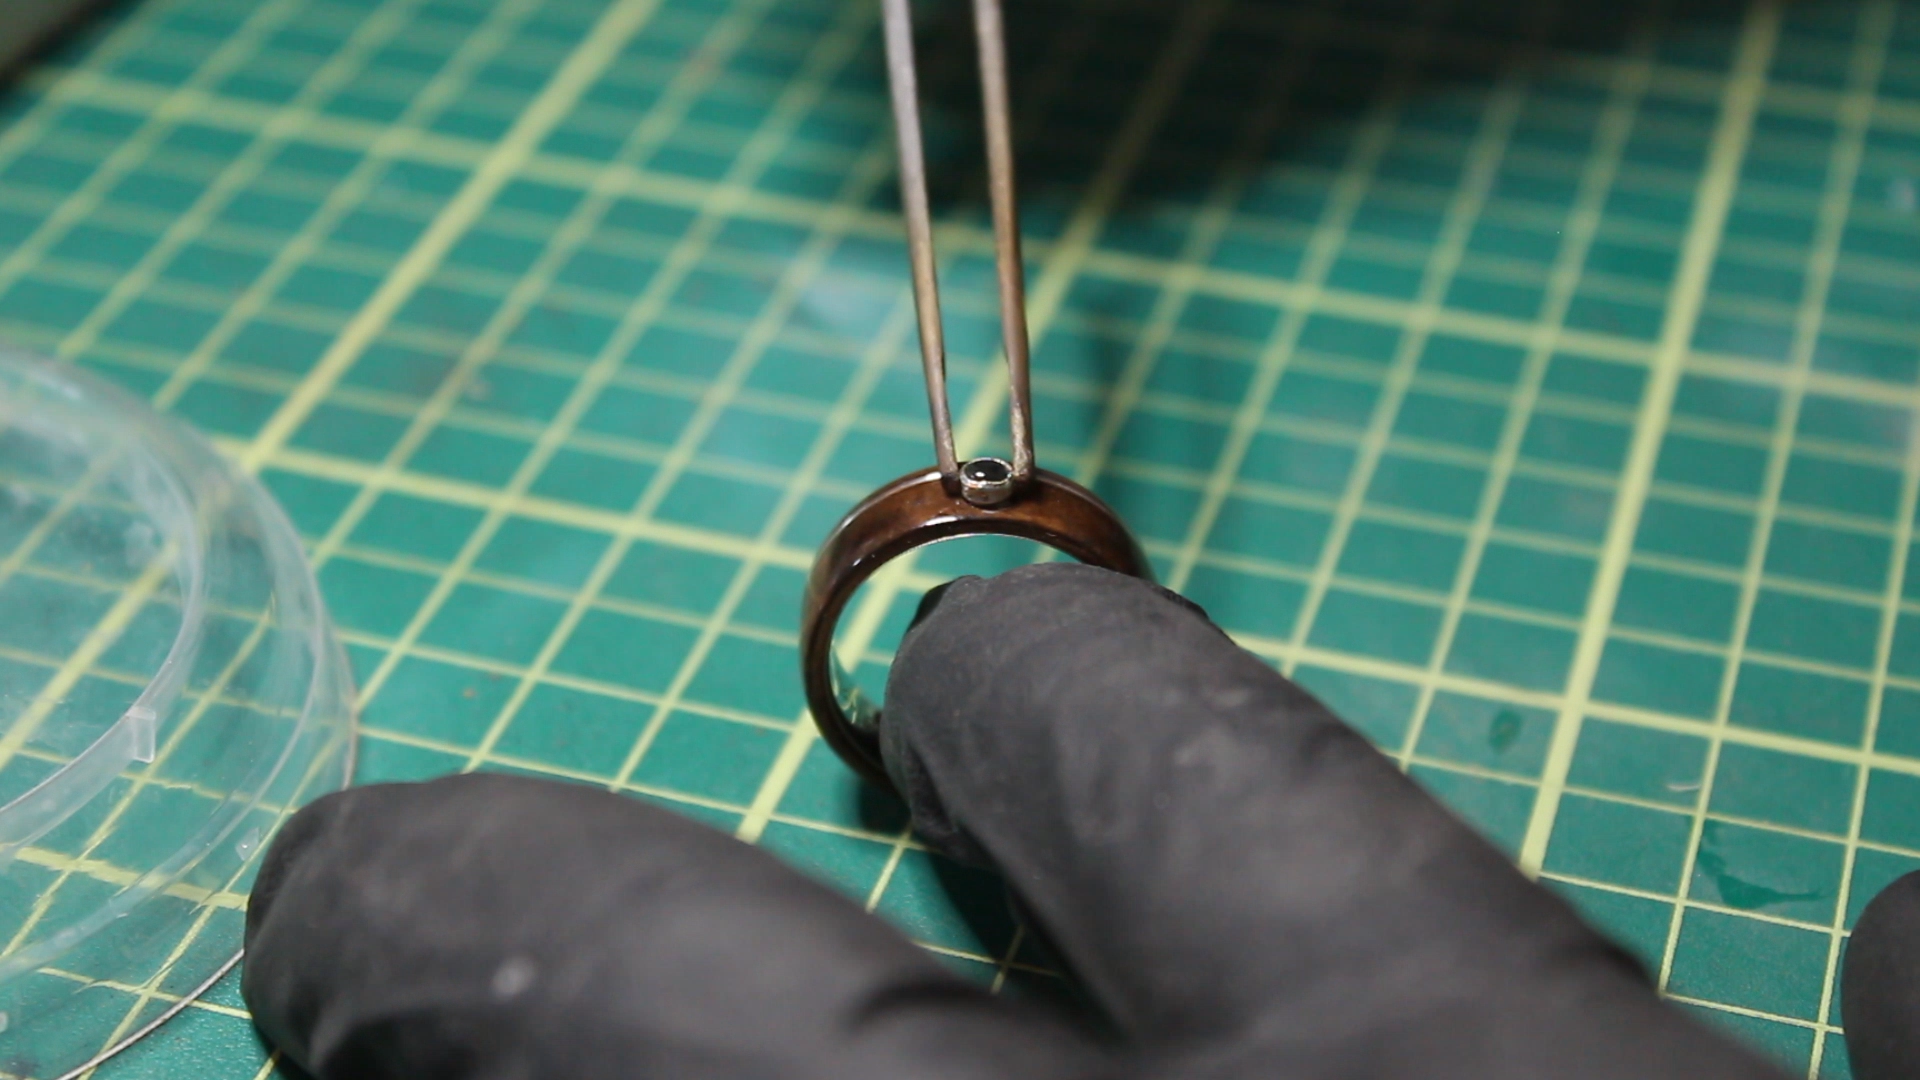

The final stage was to set a stone setting.
I had a piece of Spectralite cut especially for this piece and had it set into a bezel cup so all I needed to do was make a hole big enough for it to fit into.
I set the stone in with epoxy resin cleared away any excess ooze with a paper towel, and waited for it to cure.
After a quick blast of Tripoli and rouge polishing compounds inside, the ring was ready to go to the engravers.
Any Questions?!


That's it for this one – there's a silver ring with walnut burl a silver inlay and a stone setting.
I hope you enjoyed the video - if you did give it a thumbs up and leave me a comment with any questions!
2 Free Months on Skillshare
Get 2 months Skillshare membership by using the link below:
https://skl.sh/zebranowoodcraft
Find More Of My Work
You can follow me on Instagram - @Zebranowoodcraft
Get in touch with me through Etsy: