Shot Dispenser
.png)
Hello All,
I love instructables, but have not made one yet! So this will be my first instructable so bear with me. I am using Tinkercad which is a free online 3-D modeling service. If you've never used a CAD program before or don't have money to purchase one Tinkercad is a perfect start. They even have little projects to get you familiar with how the program works and helps to teach you how to manipulate the workspace.
This project I'm about to show you was a brain child of mine while I was on deployment, so I don't remember exactly why I choose all these dimensions, but for this shot dispenser you will need to measure the bottle neck you wish to place it to get an accurate dimensions so it will fit. The mechanics of it are of good design and is what should ultimately taken from this project.
Thank you, and I hope you enjoy what is to come!
The Base
.png)
.png)
.png)
.png)
.png)
.png)
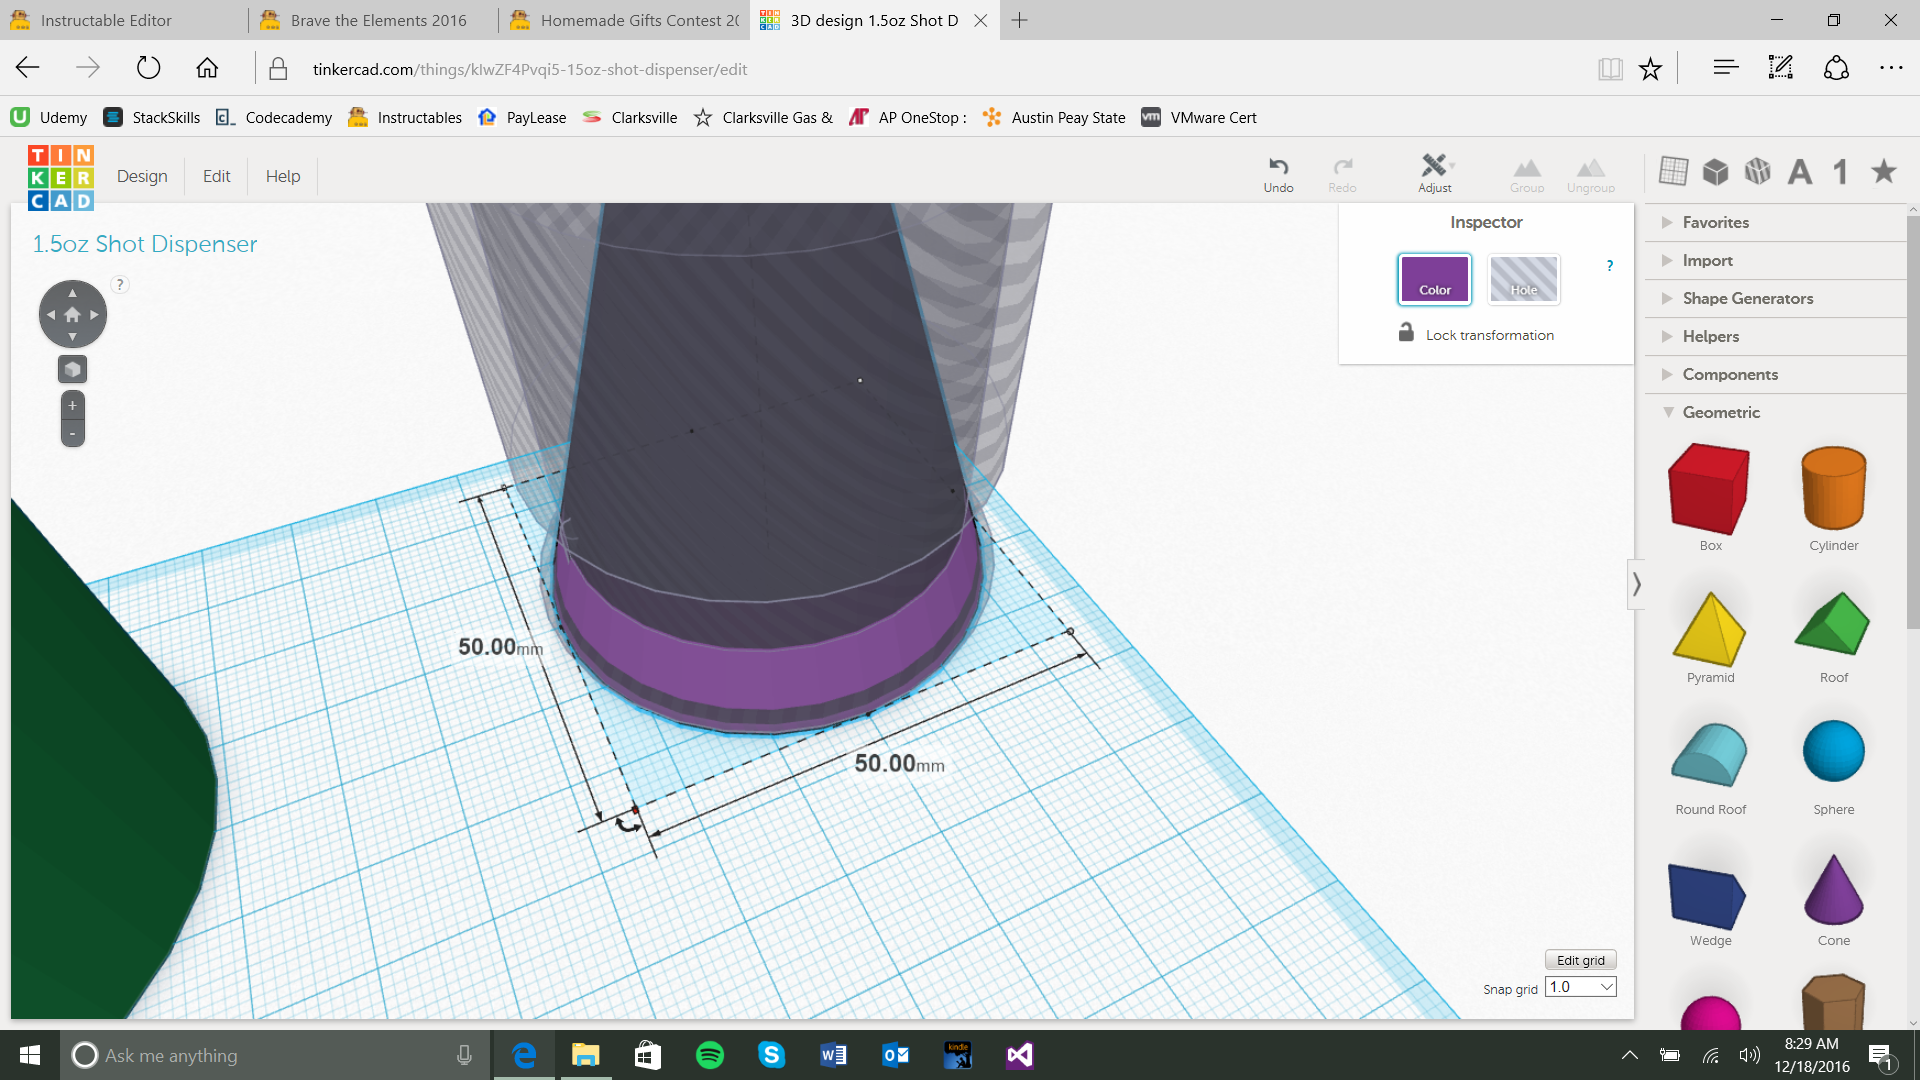
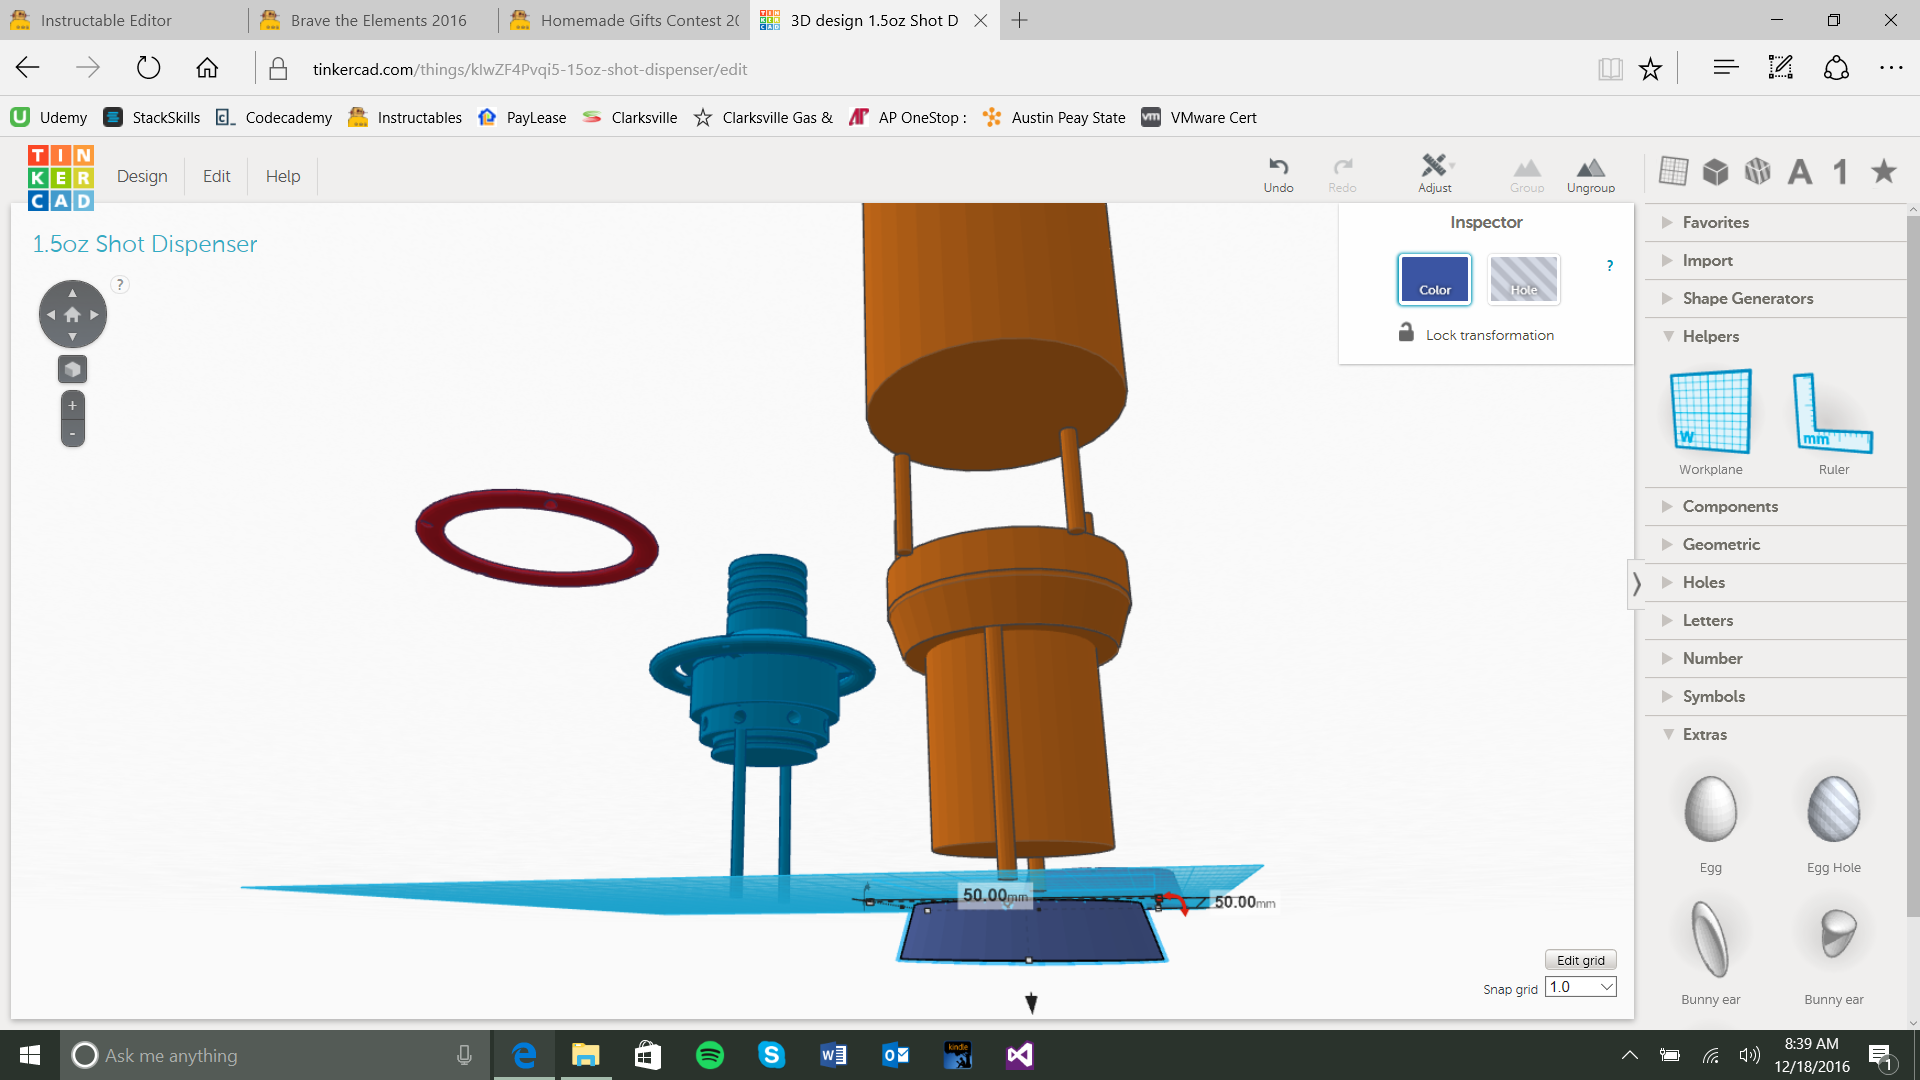
Okay so to make the base you are going to need to drag and drop a cone from the side bar into your working area. The cone is going to need to have a base of 50mm X 50mm (don't worry about height at this point).
Now drag a cylinder from the side bar over to your working area near the cone you just created. Using the top black arrow above the object (you only can view this when the object is selected) move the cylinder to 10mm above the grid. The dimensions need to be 44mm X 44mm and don't worry about the height.
note: If you're having trouble with lining up your objects or achieve certain heights, in the bottom right hand corner there is a snap grid setting you can adjust to different increments so you can fine tune the objects much easier. You also can use the arrow keys to increment the object by that snap setting one button press at a time.
Okay so after you have your cylinder set up center it above the cone object. Once centered above the cone, extend the cones height until the base of the cylinder and the cone come together at the same diameter. You can then extend the cylinders height until it's above the tip of the cone (or simply grab another cylinder as I did and cover up the top of the cone.
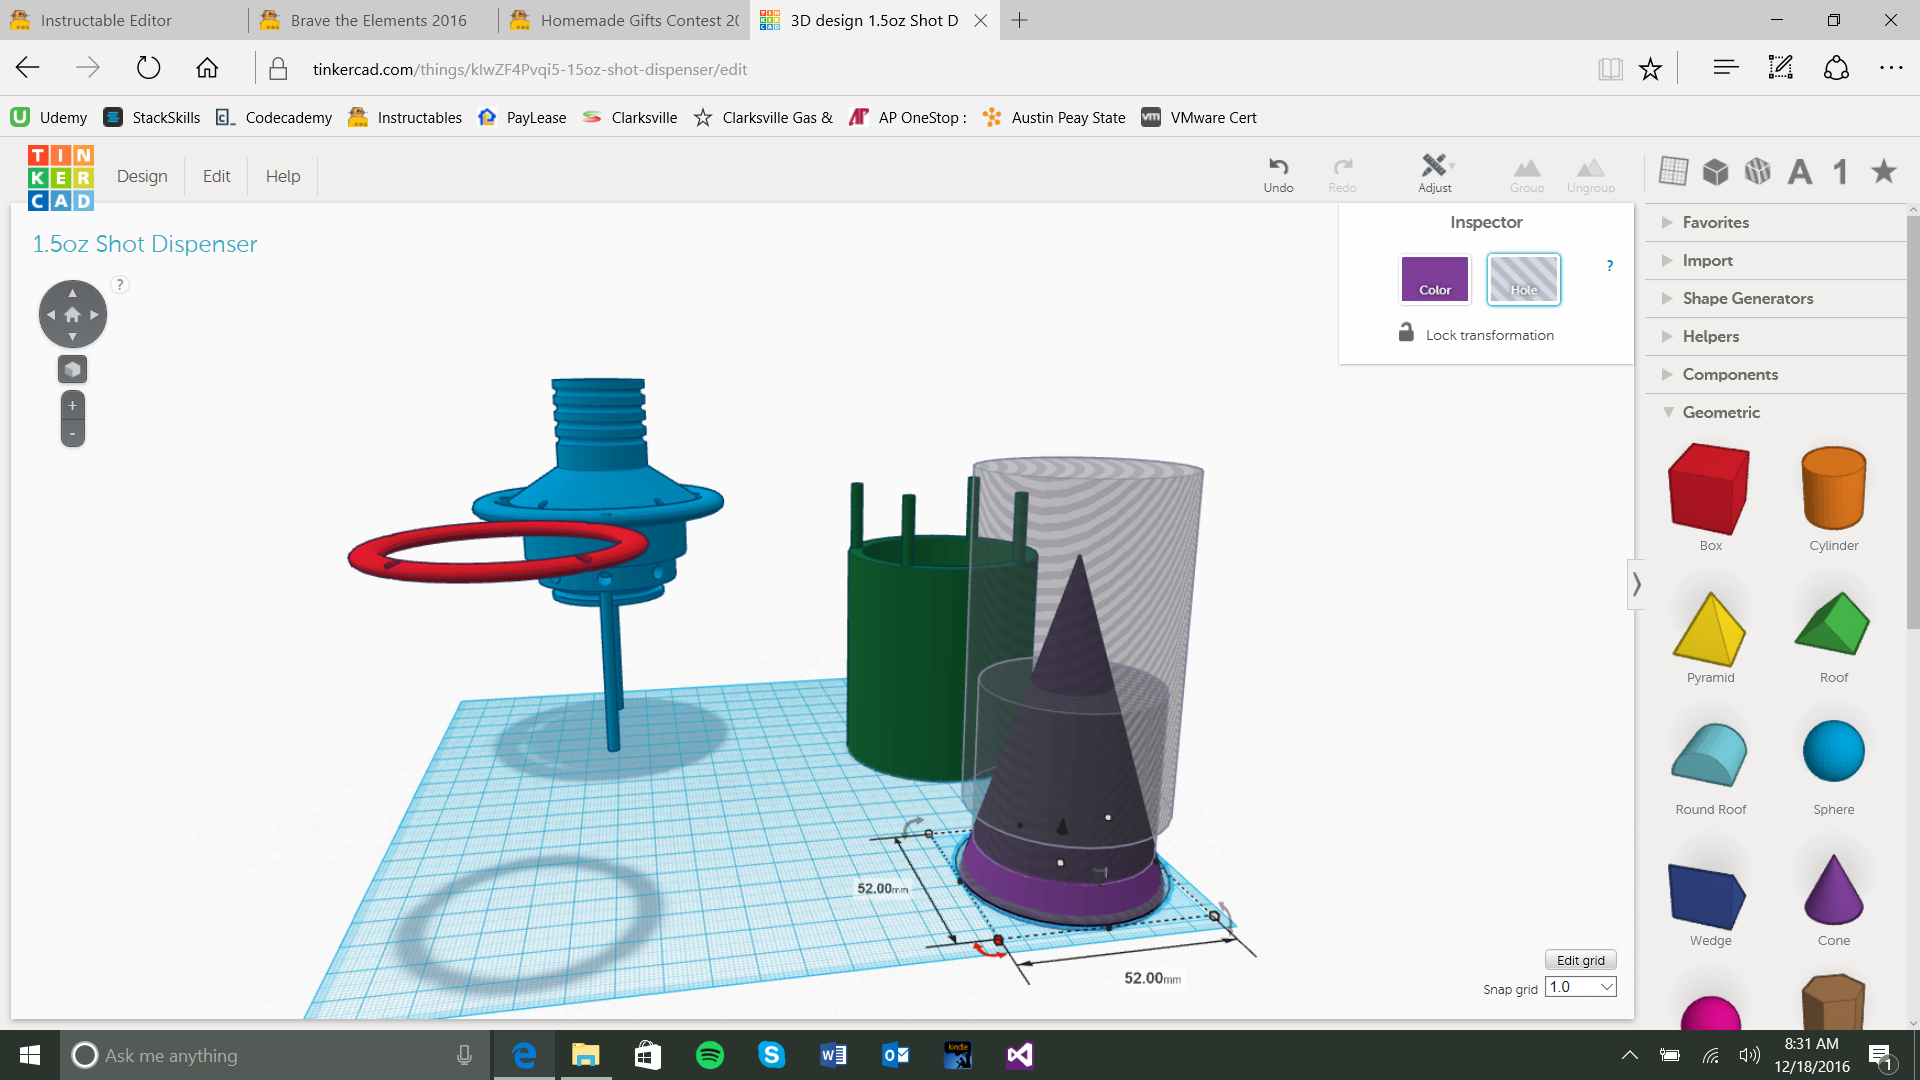
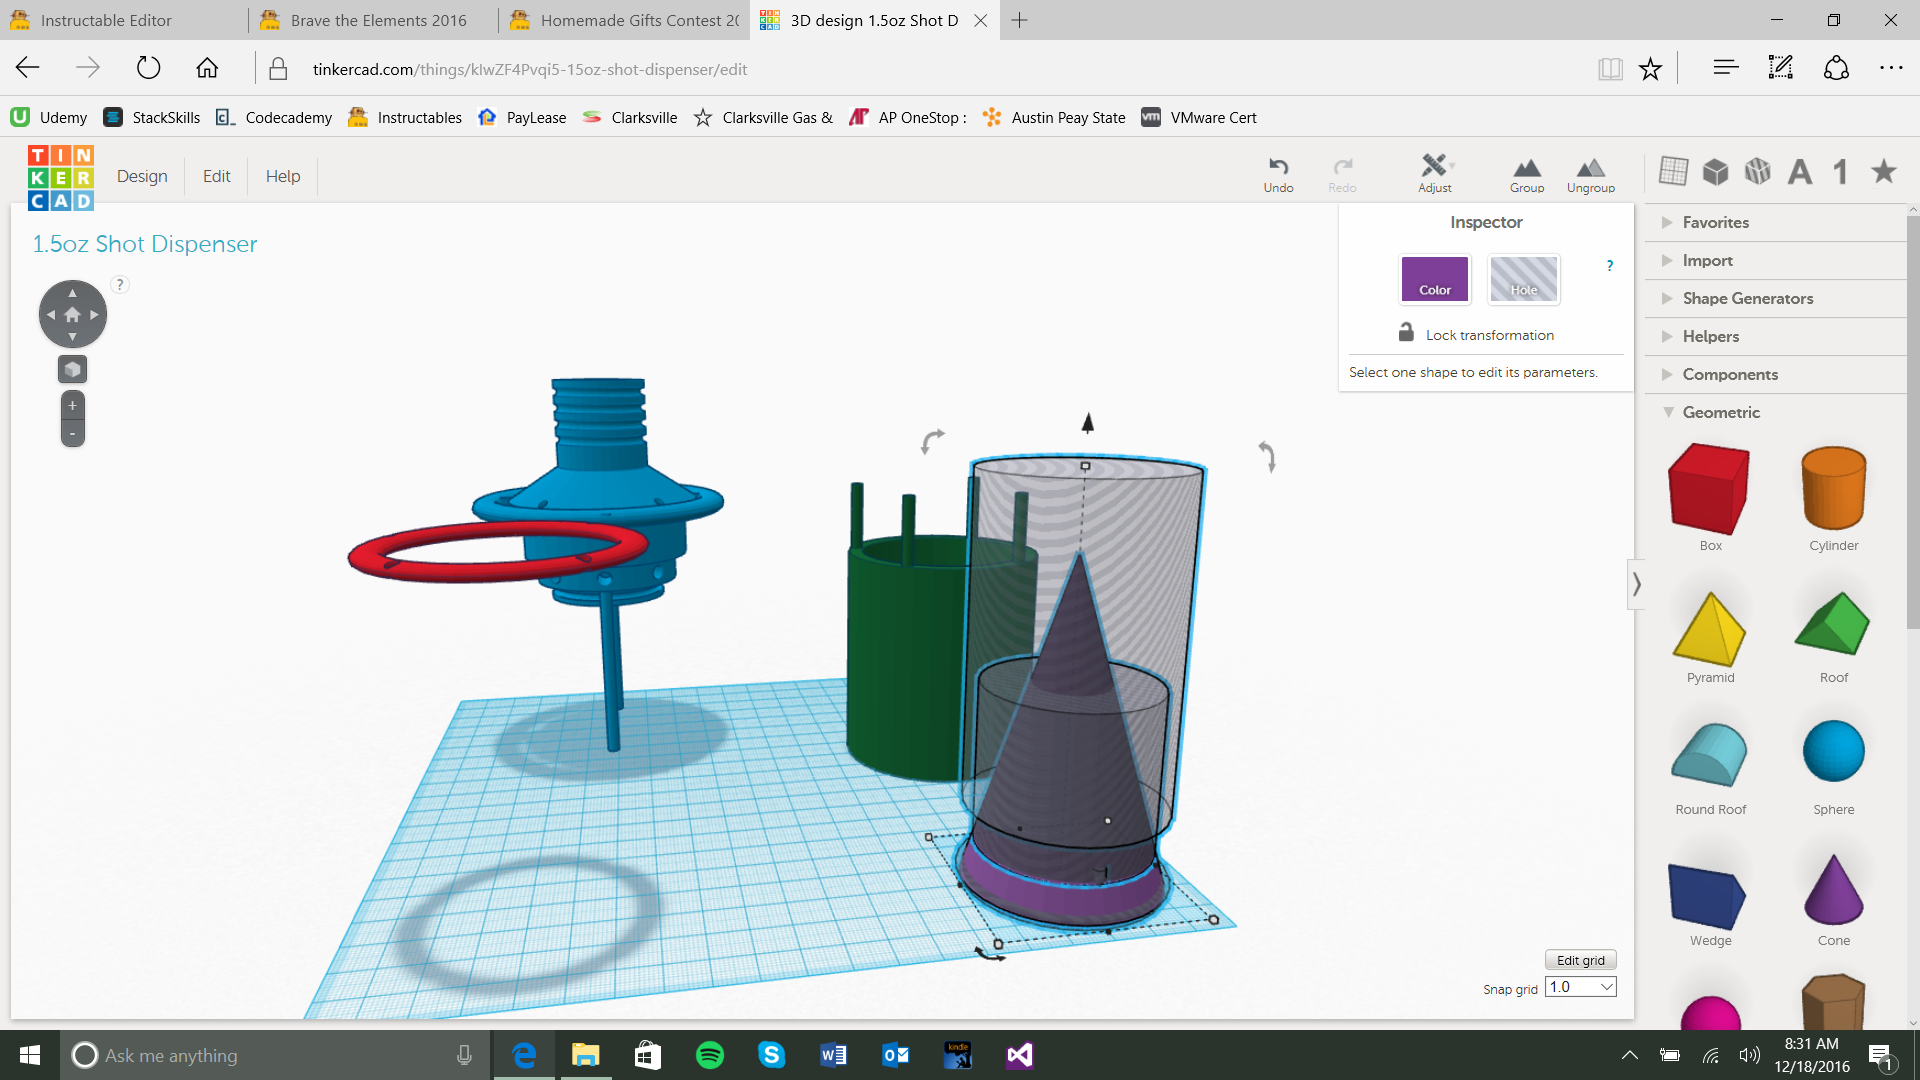
Drag a ring object from your side bar and set it 1mm above the grid and set the dimensions to 52mm X 52mm with a height of 3mm. Now that your O-Ring is set up center it on your cone. This is going to create the indent for an O-ring to be put on after creation.
After all said and done the last couple steps are simple. select your cylinder and in the upper right corner of the workspace click on the hole button and watch your solid object become translucent. Do this to your ring object as well. Grab all of your base objects and group them together with the group button also located in the top right corner of the screen. Now you have one solid object left that is your base!
The Shell
.png)
.png)
.png)
.png)
.png)
.png)
.png)
.png)
.png)
.png)
.png)
.png)
.png)
.png)
.png)
.png)
.png)
This step take a bit more finagling and patience....
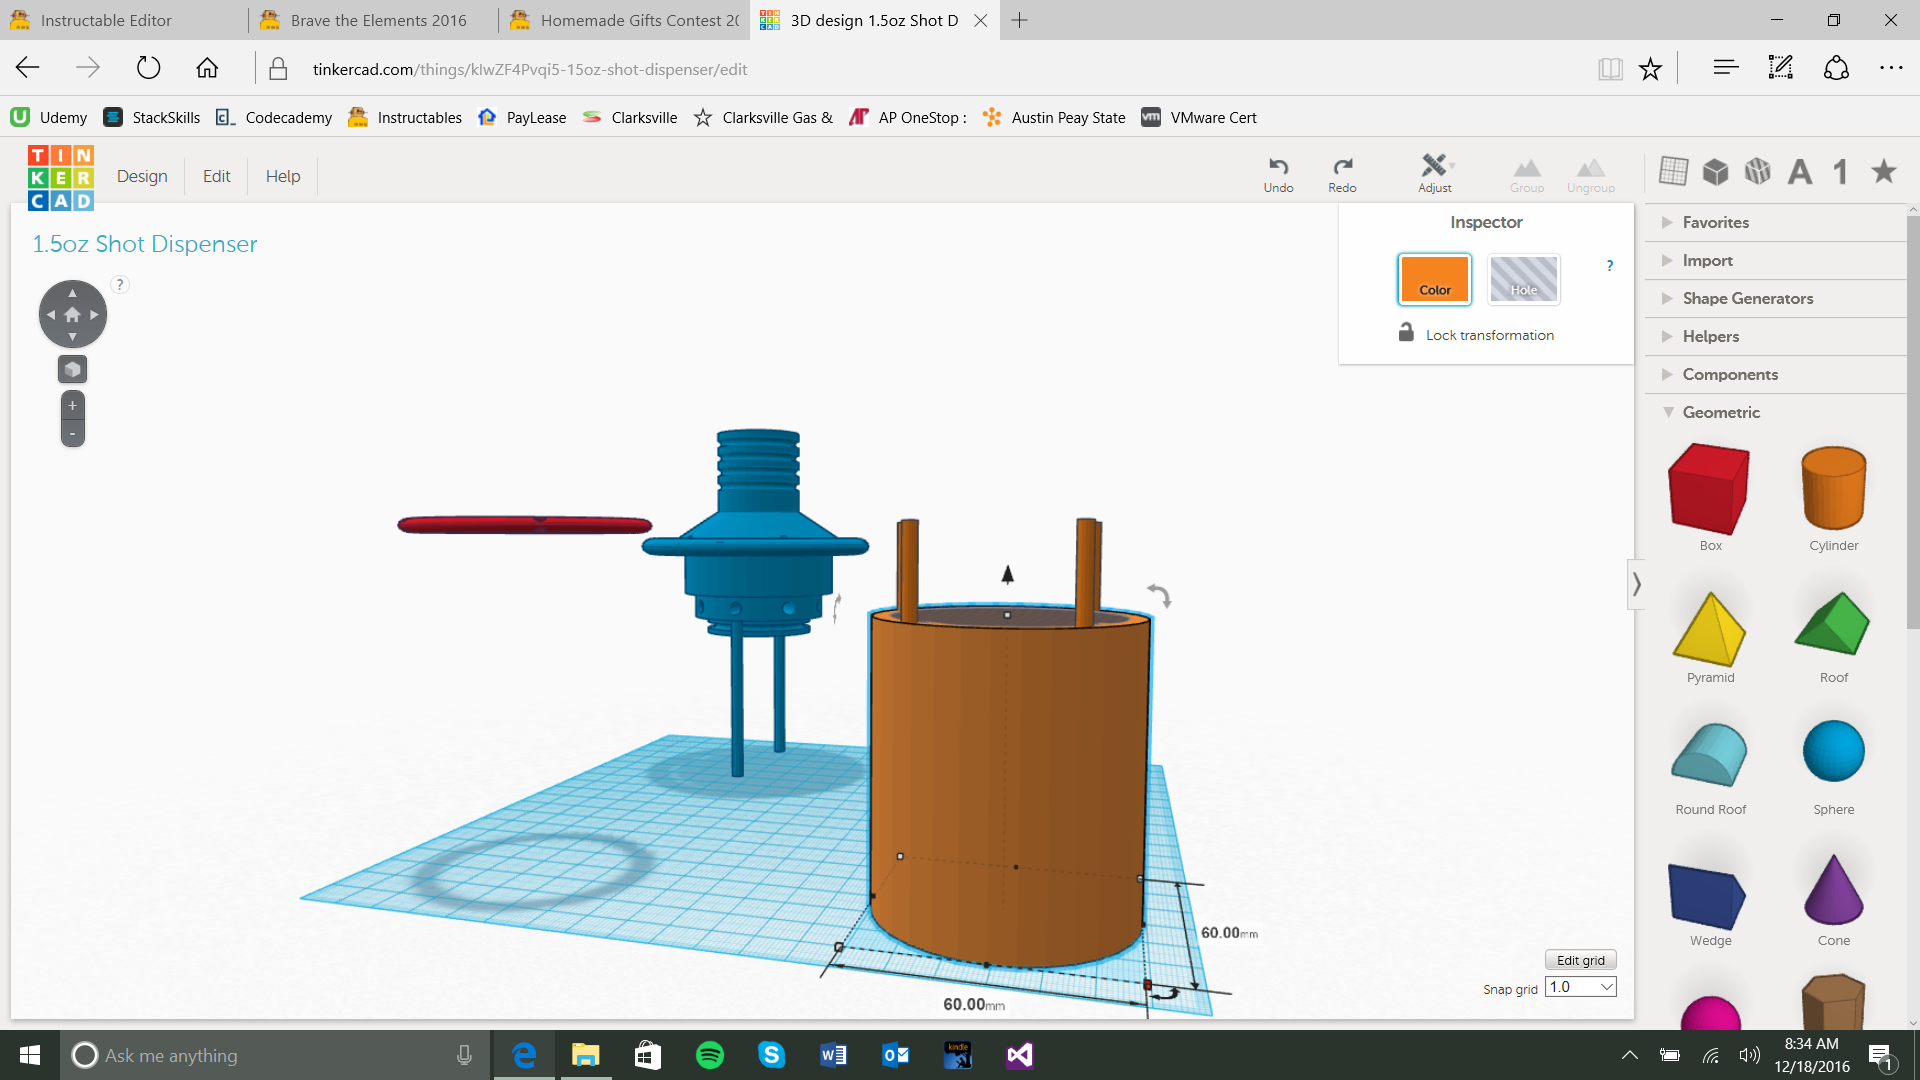
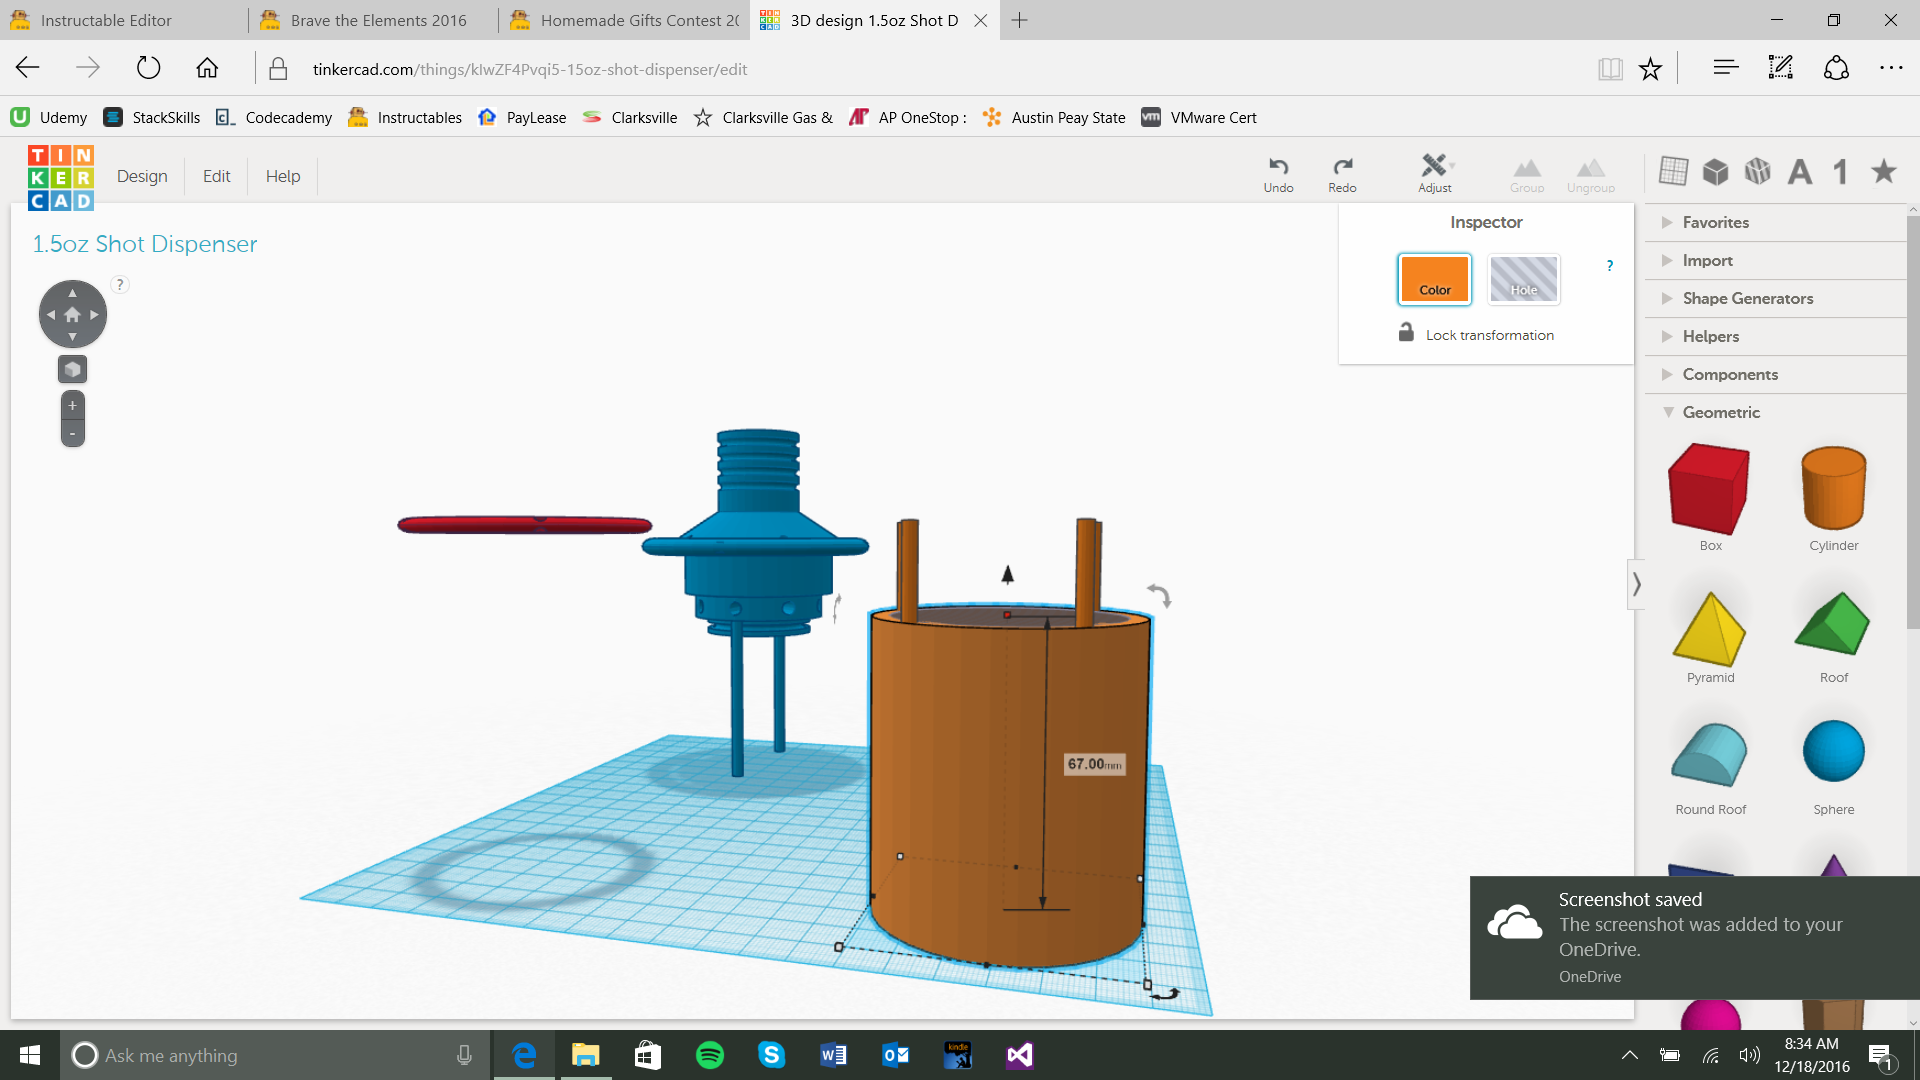
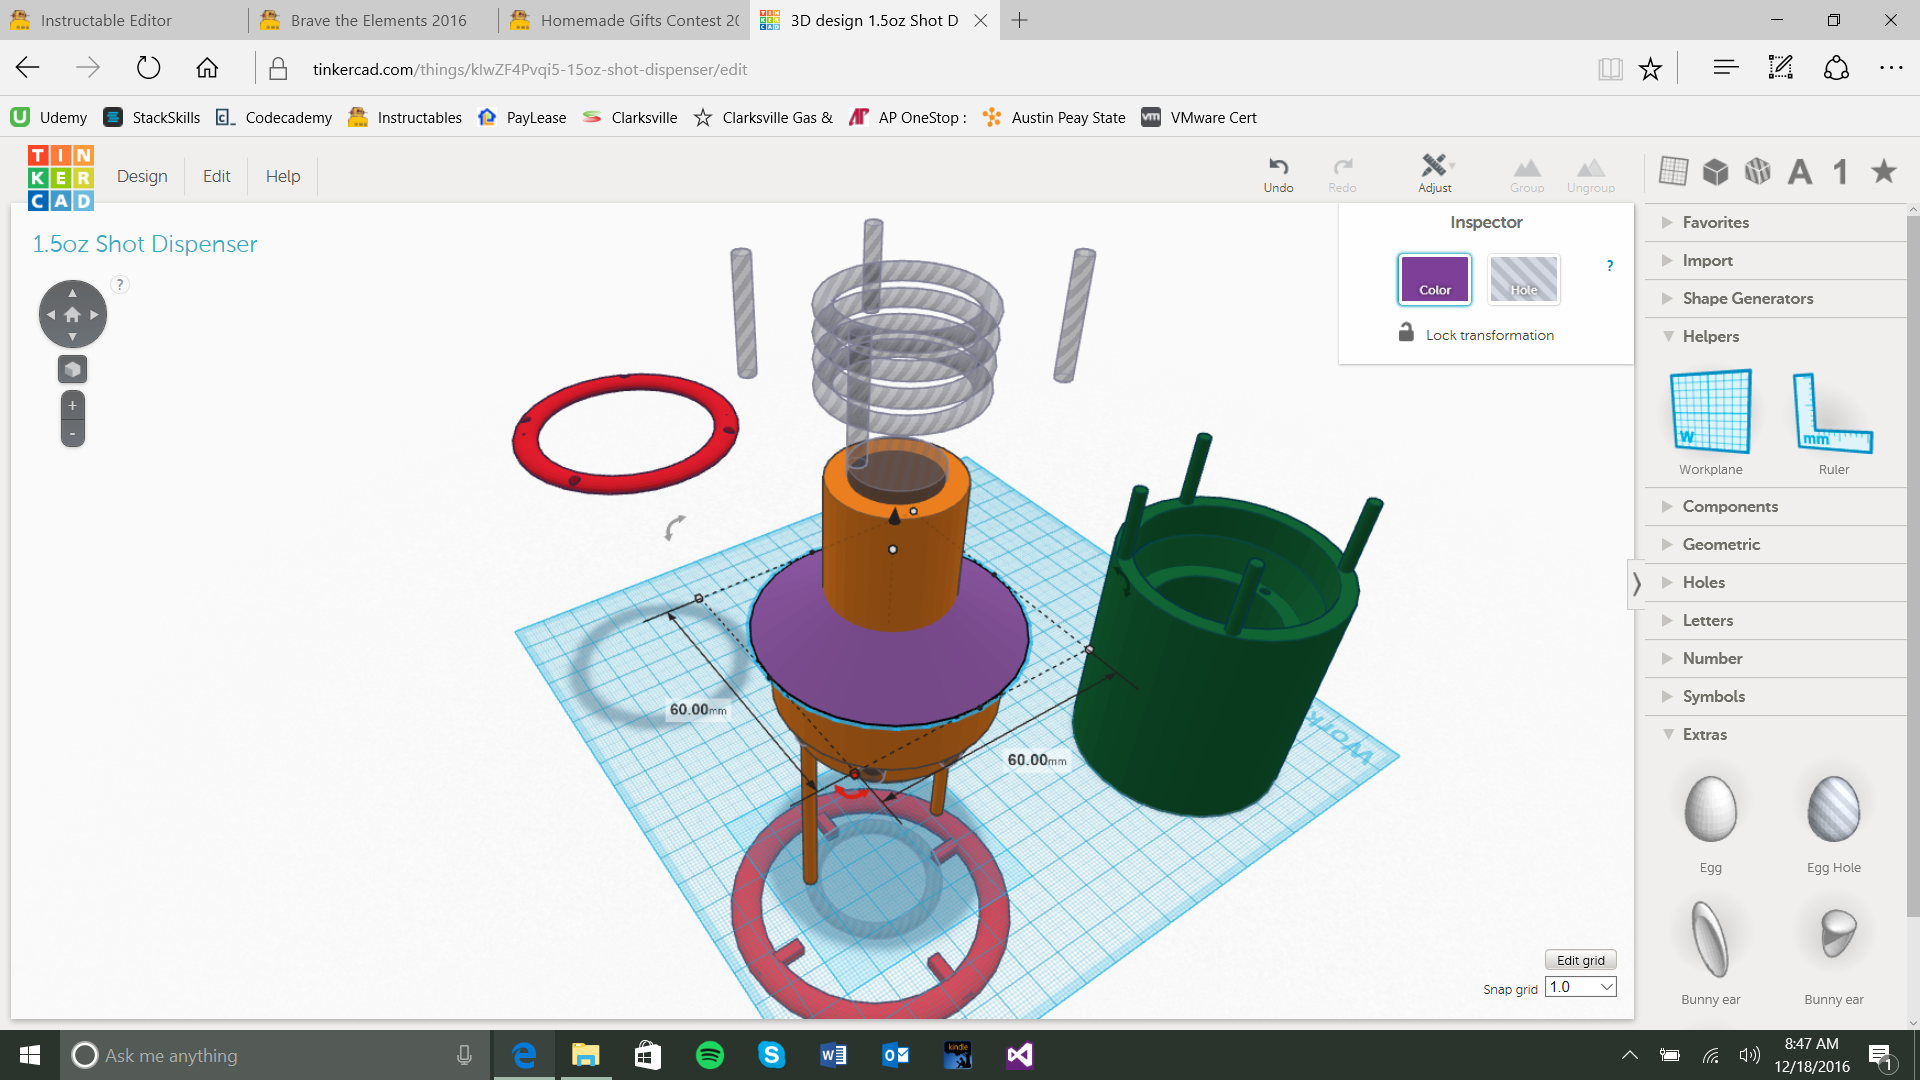
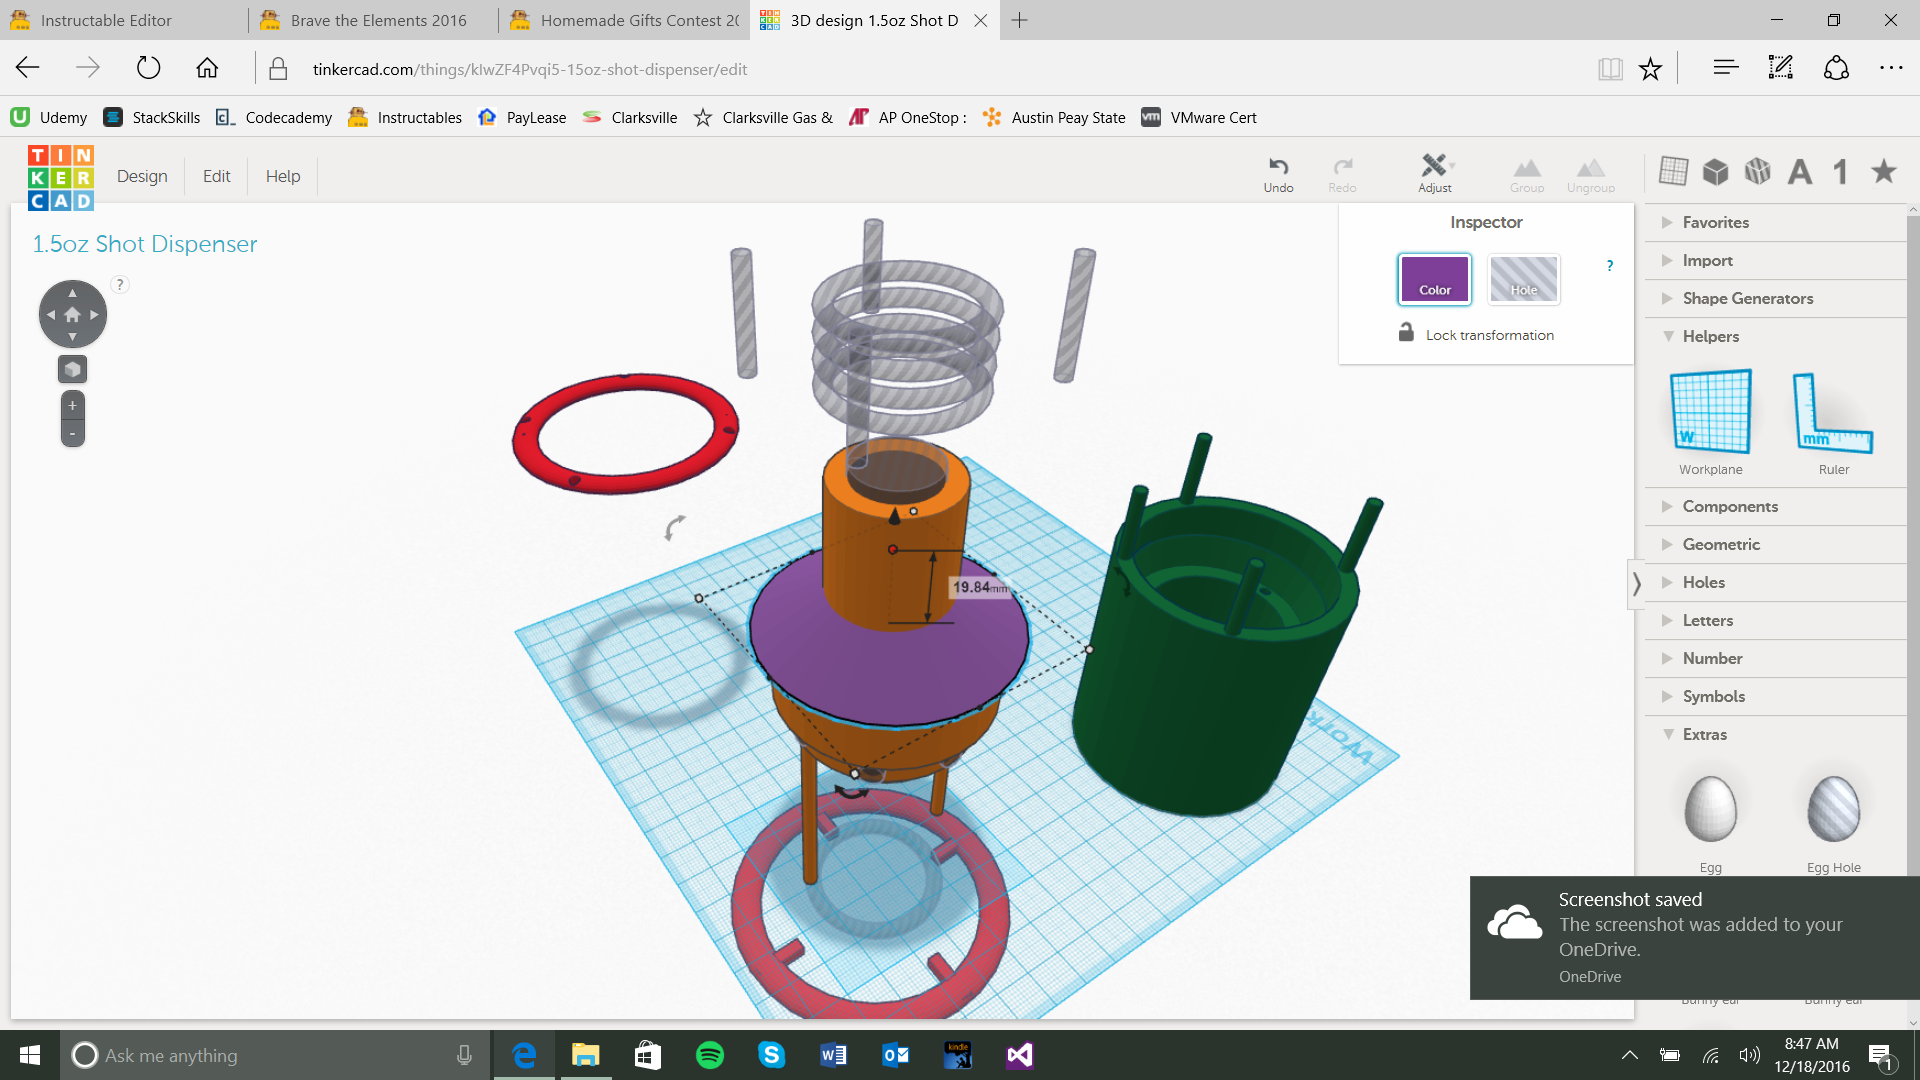
So to start grab yourself a cylinder (We will call this the Shell) and set the dimensions to 60mm X 60mm and a height of 67mm. Now set the Shell to the side.
Grab another cylinder (we will call this the Air Chamber) and set the dimensions to 52mm X 52mm and a height of 10mm. Now set the Air Chamber to the side.
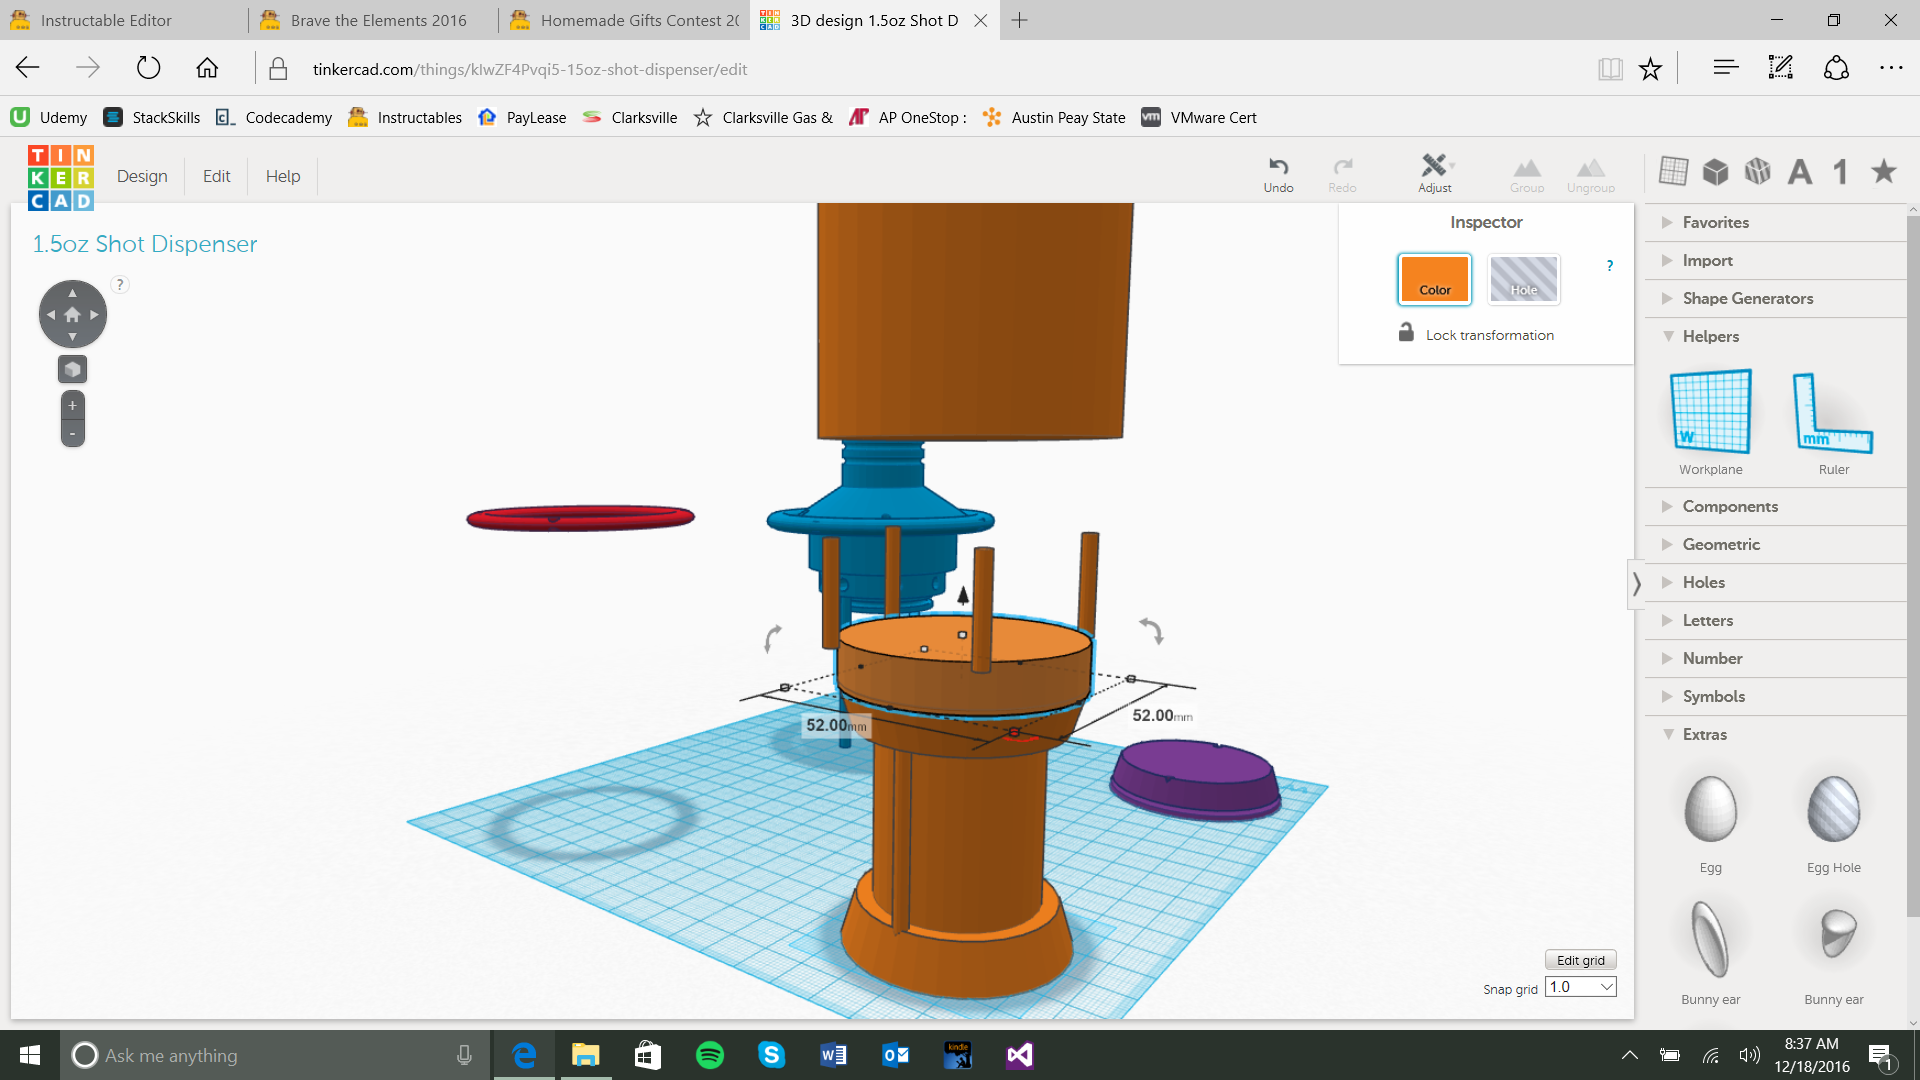
Now select your base from the previous step and right click and copy the object and drag out the dimensions to 52mm X 52mm and flip it upside down. We dragged out the dimensions so when the stopper is in the up position there is enough space for the center chamber to fill up. We will call this the top stopper and set it to the side.
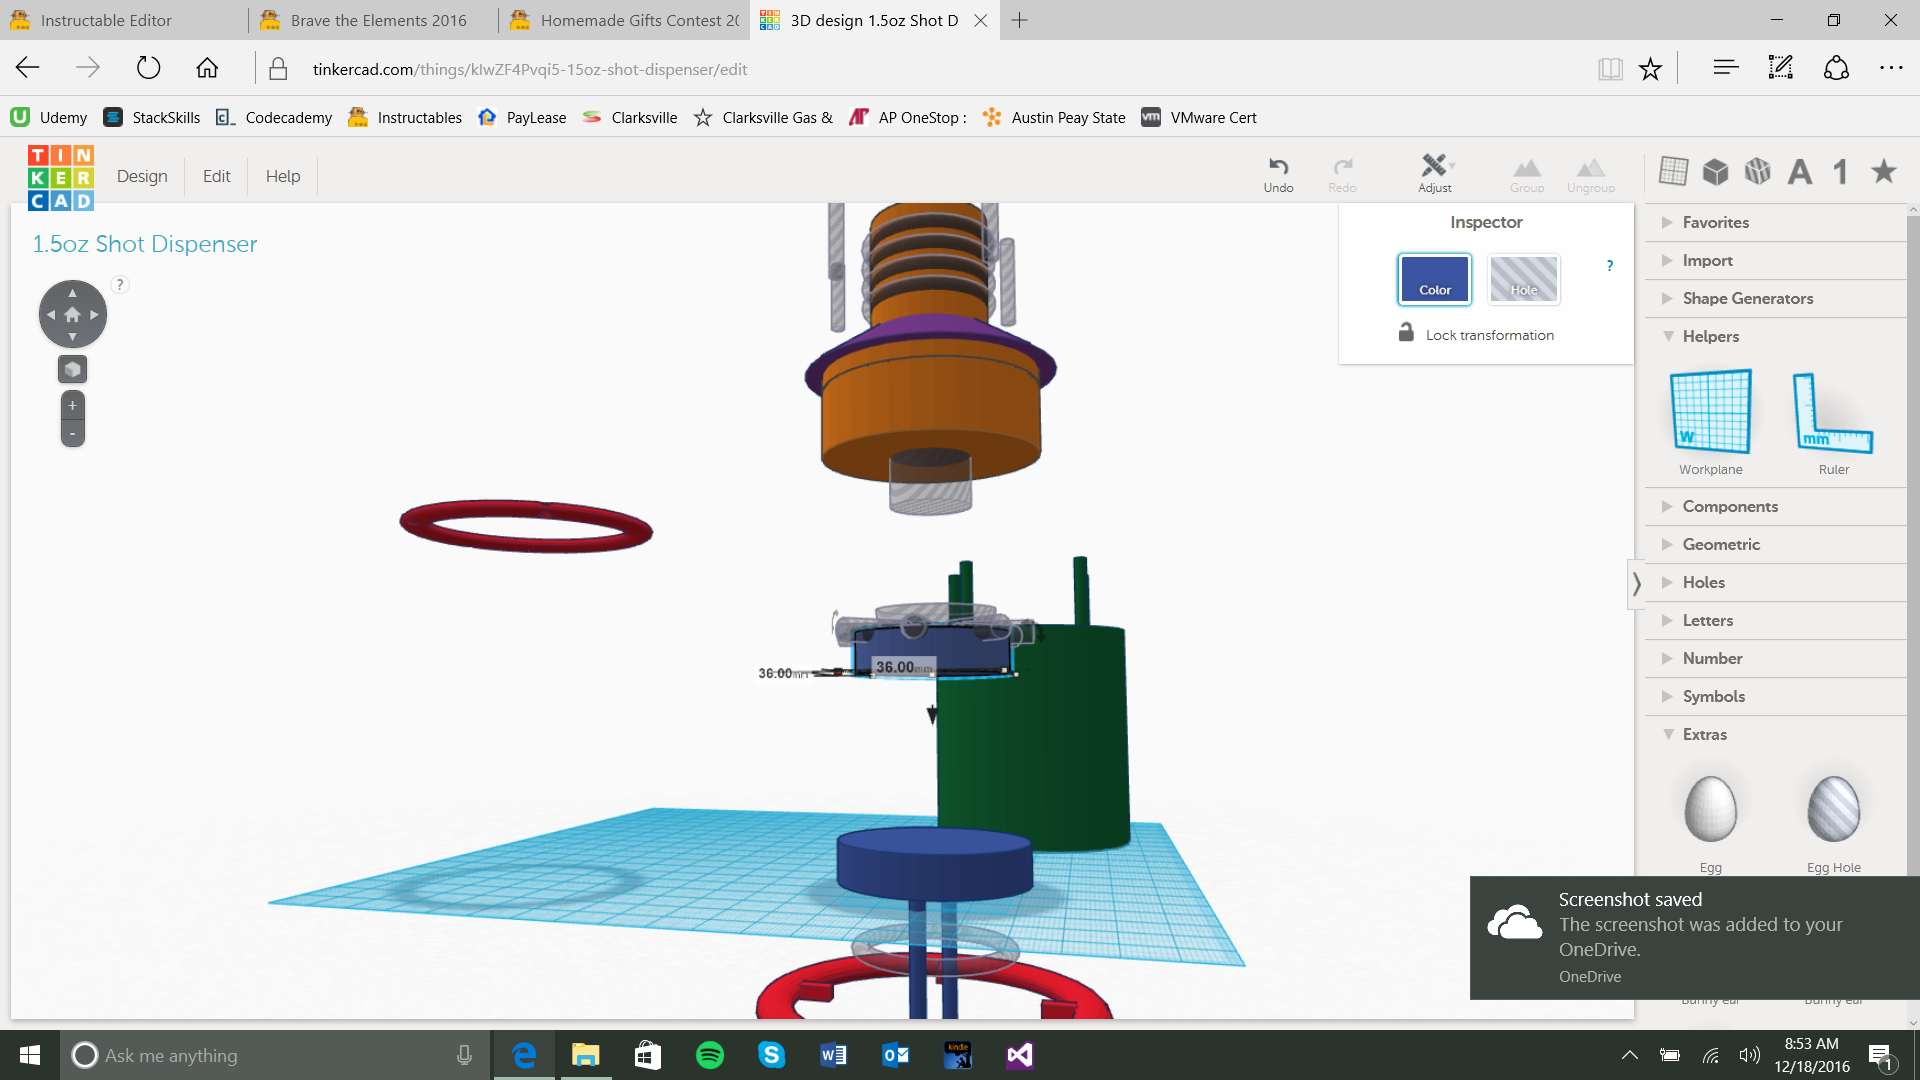
Let's get another cylinder (we will call this the Center Chamber) and set the dimensions to 36mm X 36mm and a height of 42mm. Now set the Center Chamber aside.
Let us make another copy of the base and drag it over to an open part of the work space. This is where we start building up. So drag over your center chamber and place it on top of the base (so raise it 10mm *the height of the base if you will). Once in place you can drag the top stopper (which should be upside) and place it on top of the center chamber and on top of that put the air chamber. Select all the objects and group them together and make them into a hole. We will call this the Chamber Hole
Now that you have uncluttered your work space we can put in the last finishing pieces.
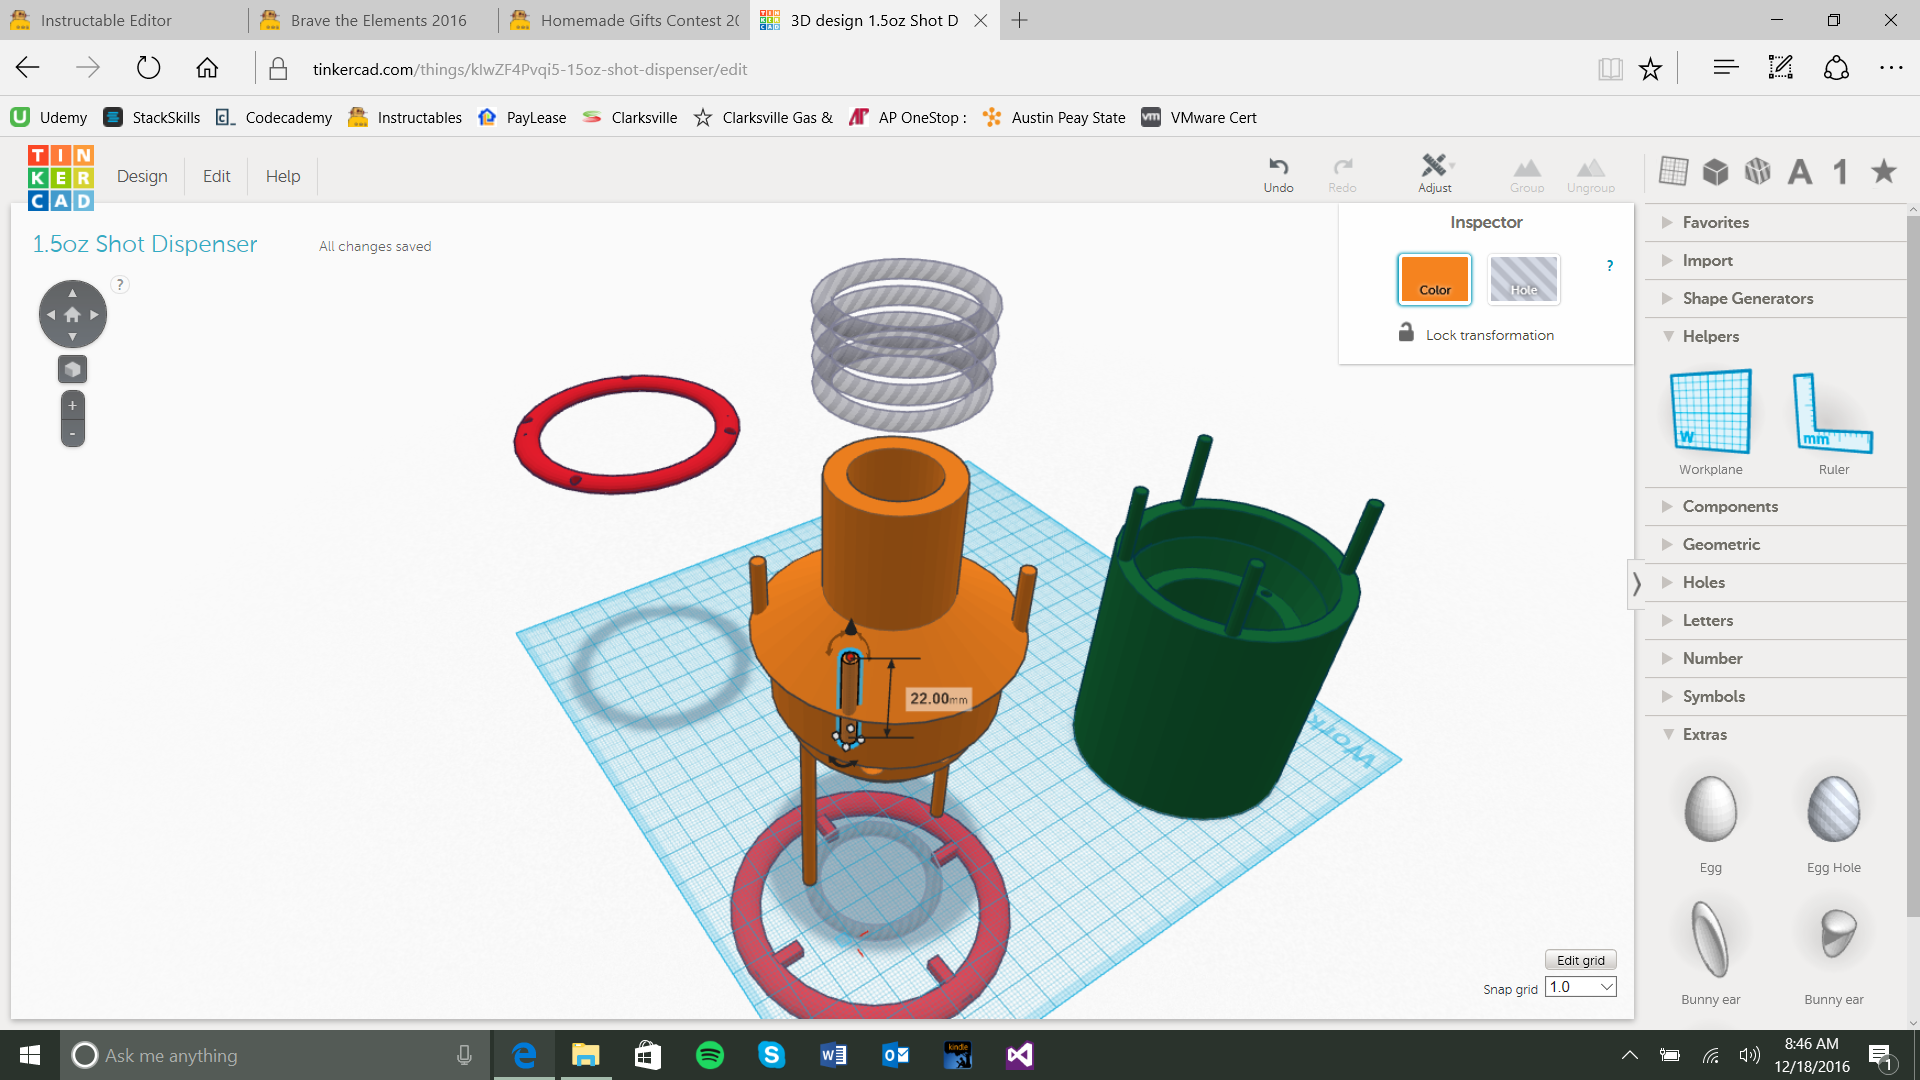
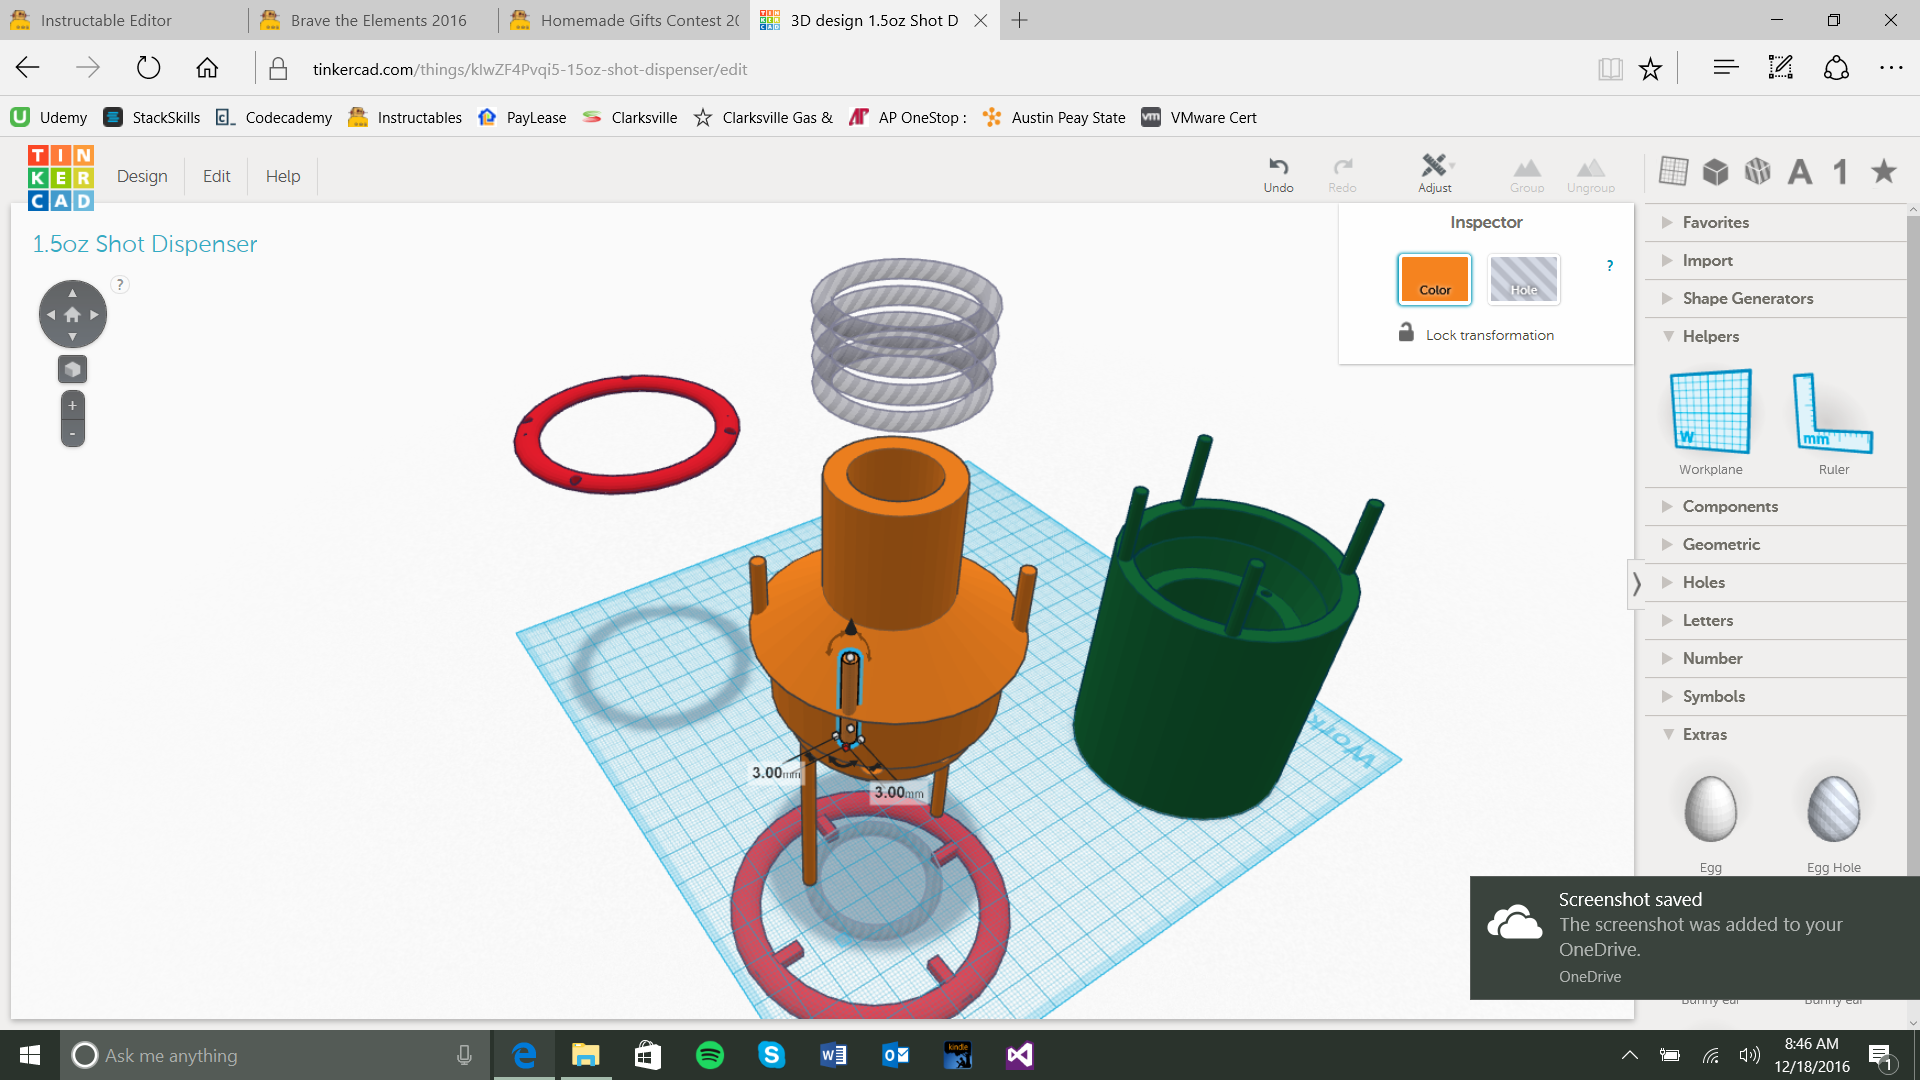
Lets grab ourselves another cylinder and set the dimensions to 3mm X 3mm and a height of 62mm. Copy this cylinder and set them to the side. We will call this the Center Guides.
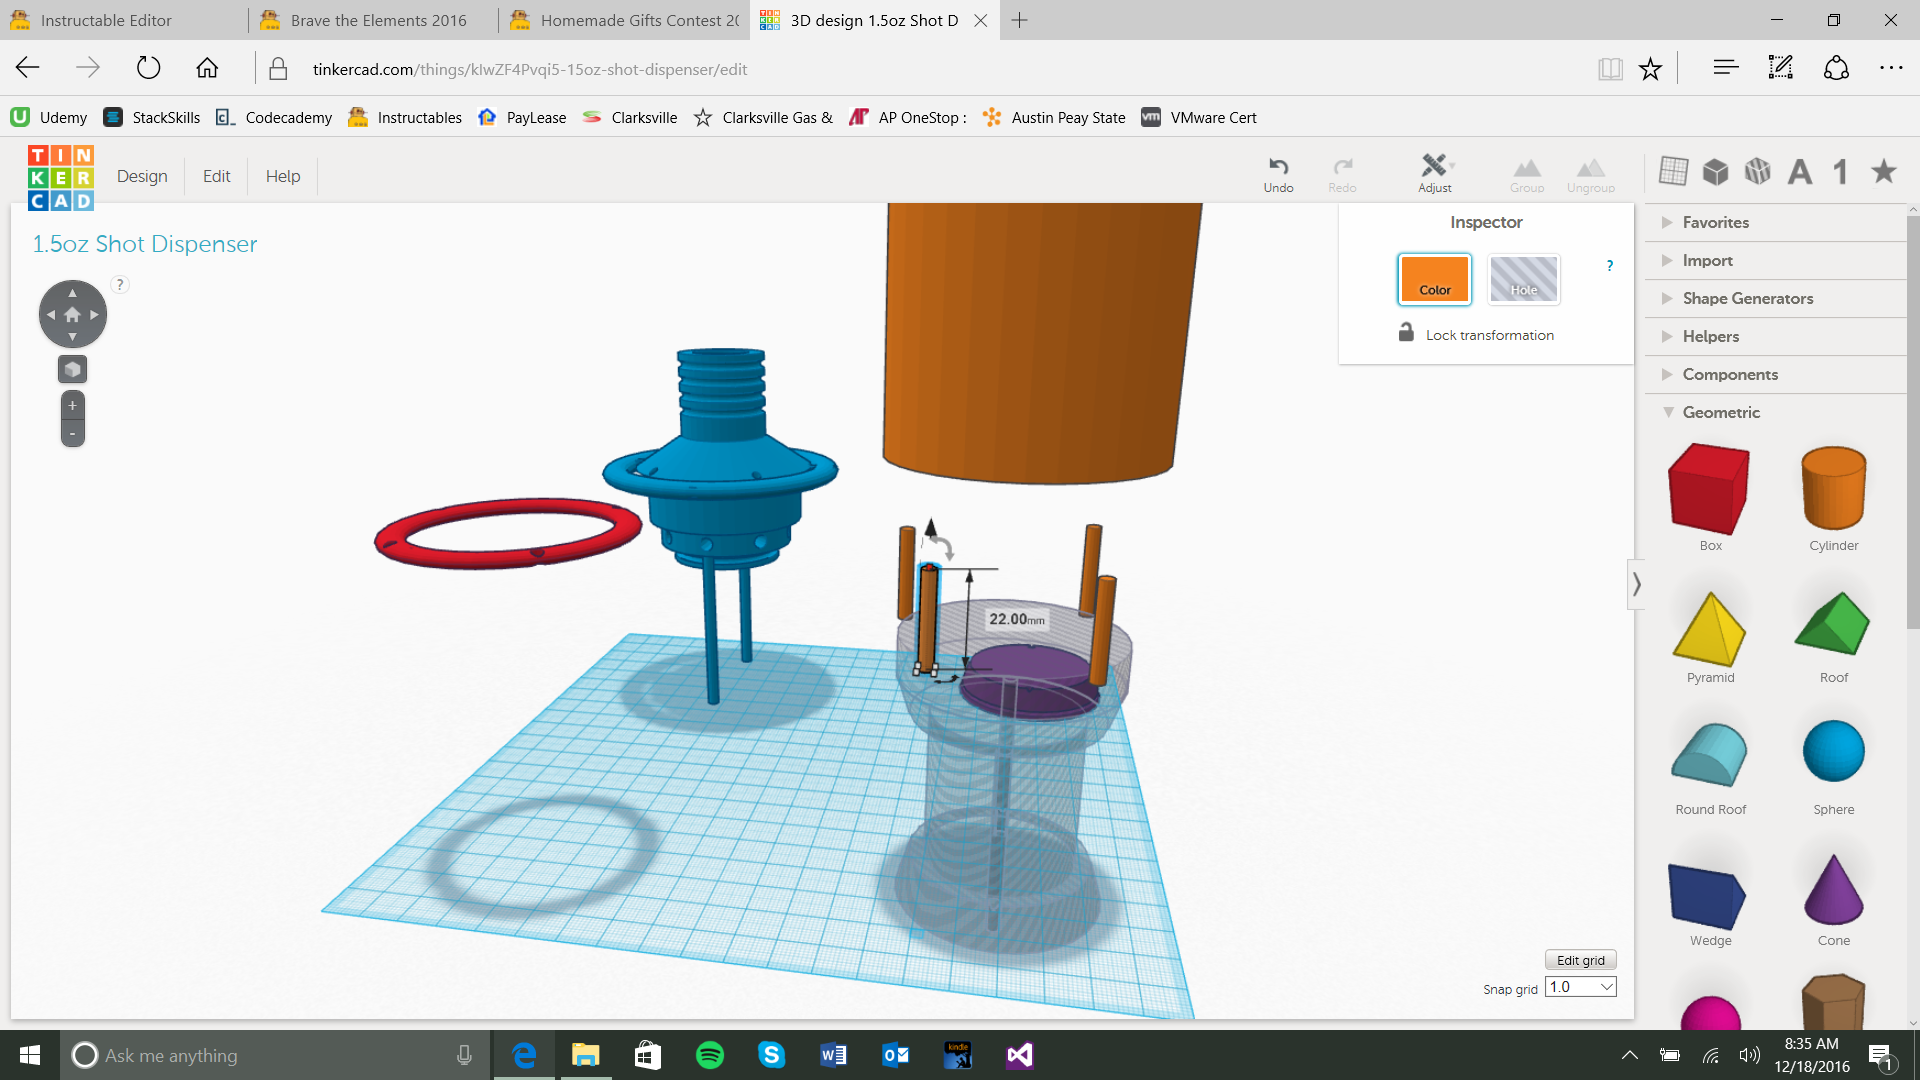
Last cylinder of this step guys and set the dimensions to 3mm X 3mm and a height of 22mm. Make 3 copies for a total of 4 of them and set them to the side for a second. We will call these the Top Guides.
We will now grab our Shell and center it over the Chamber Hole group it together to make your Shell hollow. Now maneuver your view to see down into the Shell. You should see what looks to be a shelf and you will take a single Center guide and place it on the shelf close to the outer wall to leave some meat toward the center. Directly opposite you will put the other Center guide in a similar manner. Select each Center Guide group them together and make them a hole, then group the hole into the Shell securing the guide holes into the object.
Now place your Top Guides in approximately equidistant distance apart on top of the shell (or 62mm above the grid). Each individual Guide needs to be in the middle of the meat of the Shell object. After you placed all your Top Guides group them together and make a copy to set aside. Then group them to the Shell Object to finish the Shell.
The Meat and Potatoes
.png)
.png)
.png)
.png)
.png)
.png)
.png)
.png)
.png)
.png)
.png)
.png)
.png)
.png)
.png)
.png)
.png)
.png)
.png)
.png)
.png)
.png)
.png)
.png)
.png)
.png)
.png)
.png)
.png)
.png)
.png)
.png)
.png)
.png)
.png)
.png)
.png)
.png)
.png)
.png)
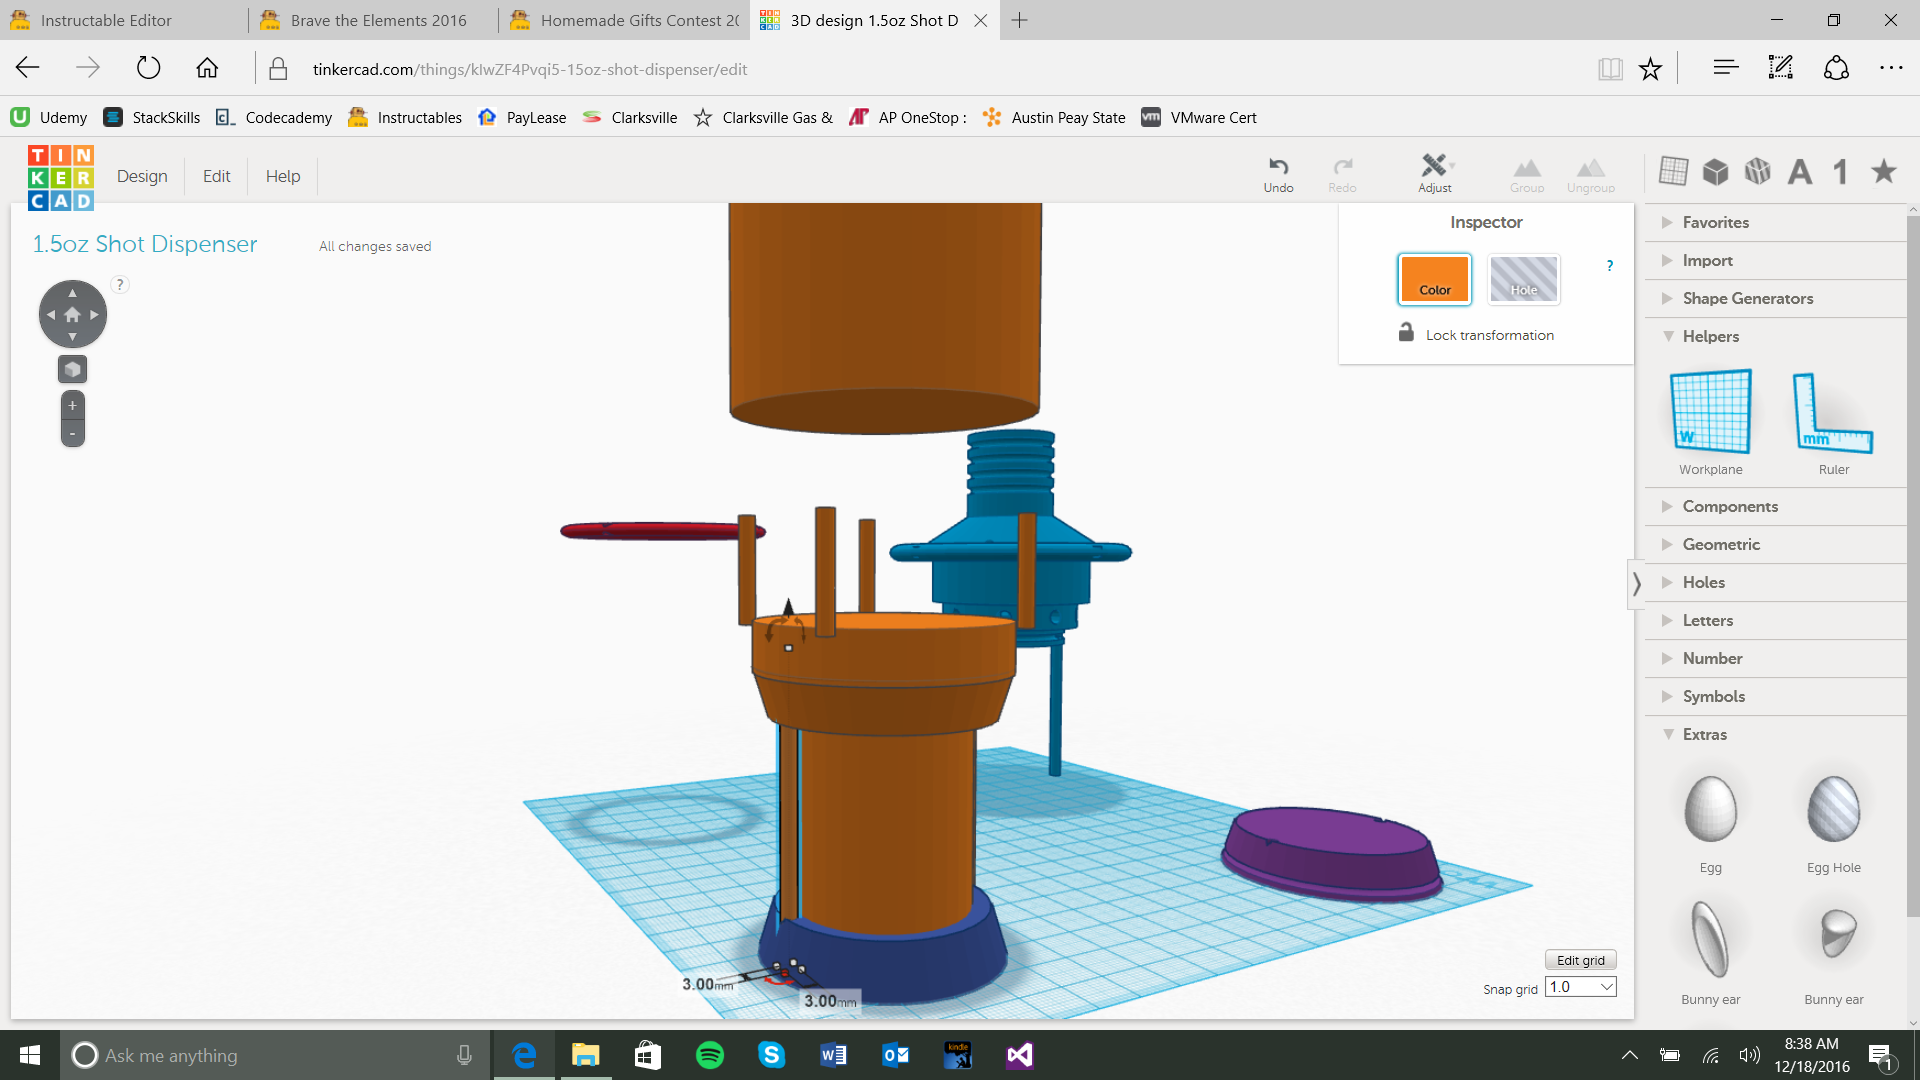
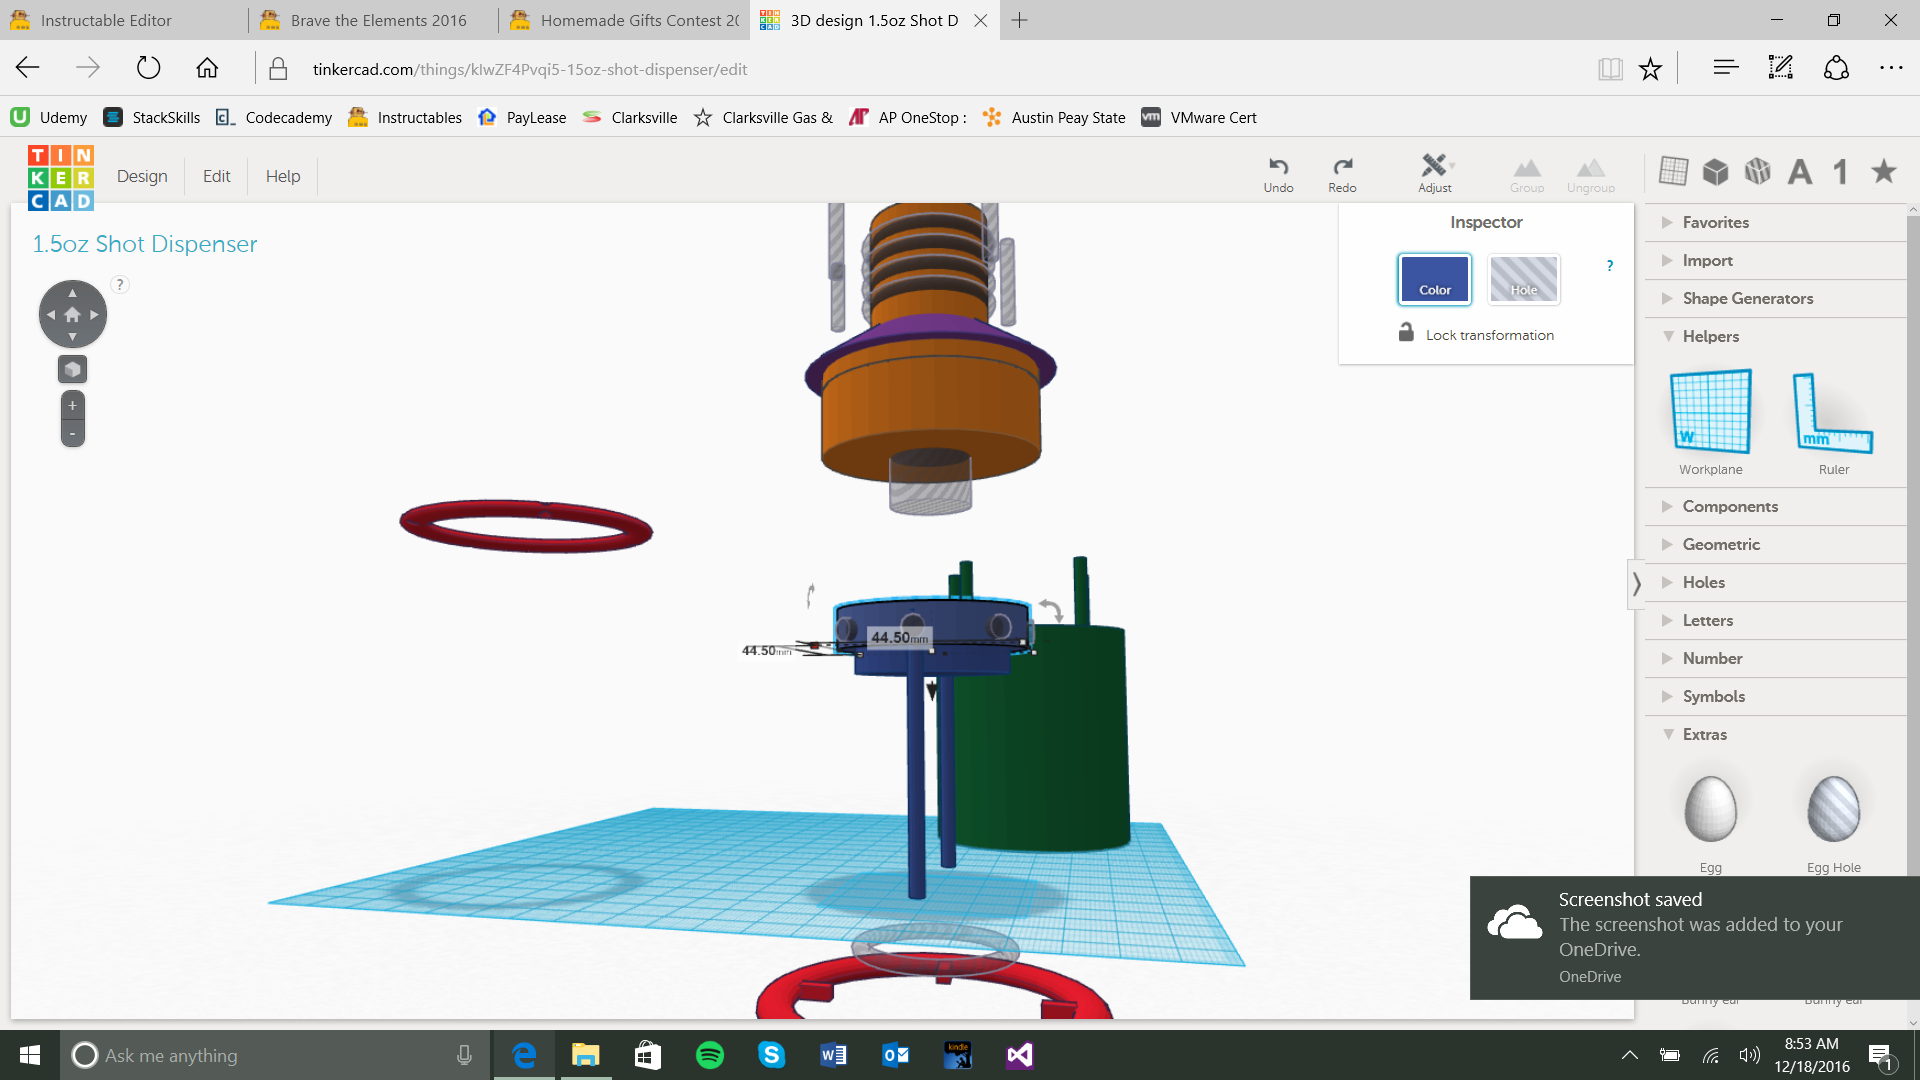
Okay so here's the biggest and most time consuming step of this whole process, this is where things get a little tricky you could say, there are a lot of pieces and you need to keep track of them. To do so we will group them together to make them into one piece.
So to start we will grab a cube and se the dimensions to 3mm X 14mm and a height of 3mm. Make 3 copies for a total of 4 and set aside.
Grab a ring object and set the dimensions to 80mm X 80mm and a height of 5mm. Place your 4 cube objects within the center of the ring equidistant apart and group them together. We will call this piece the Pull Lever.
Next make another ring object with dimensions of 32mm X 32mm and a height of 3mm. Make 3 copies for a total of 4 and set aside.
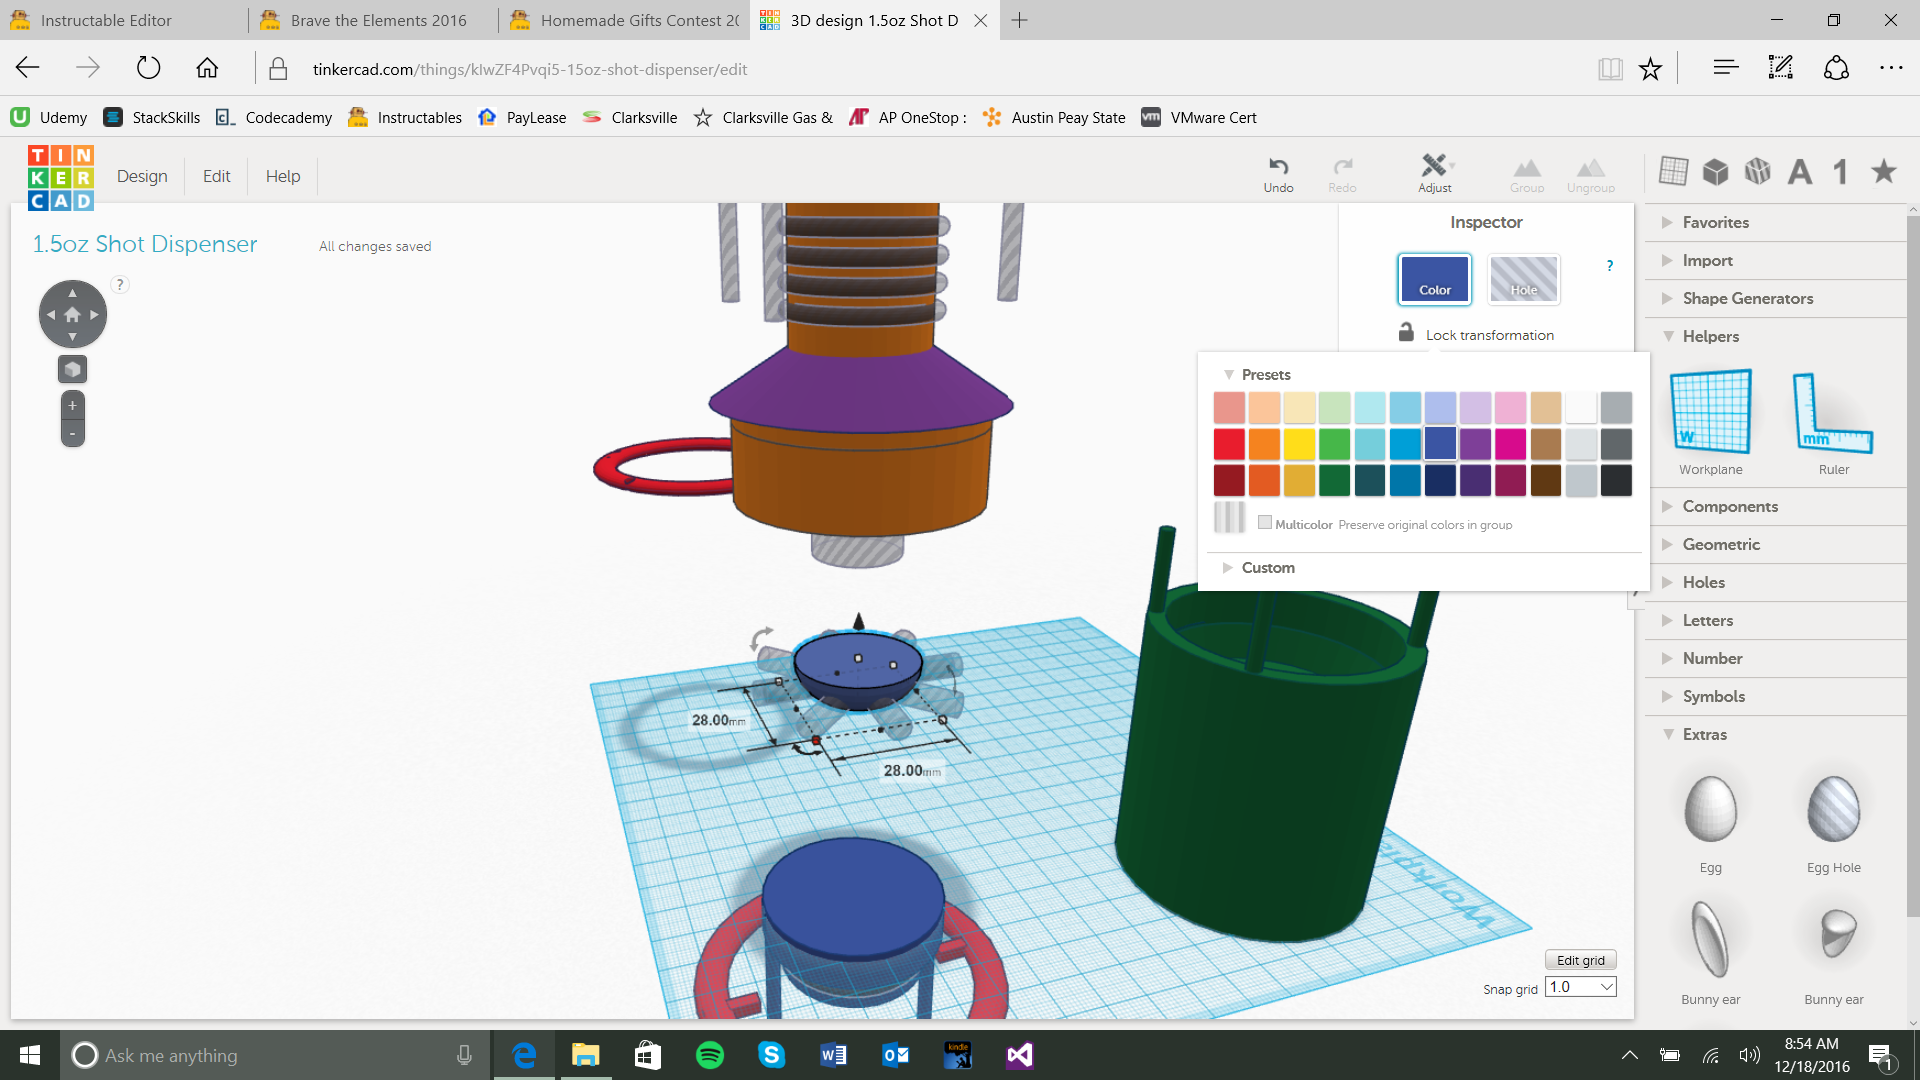
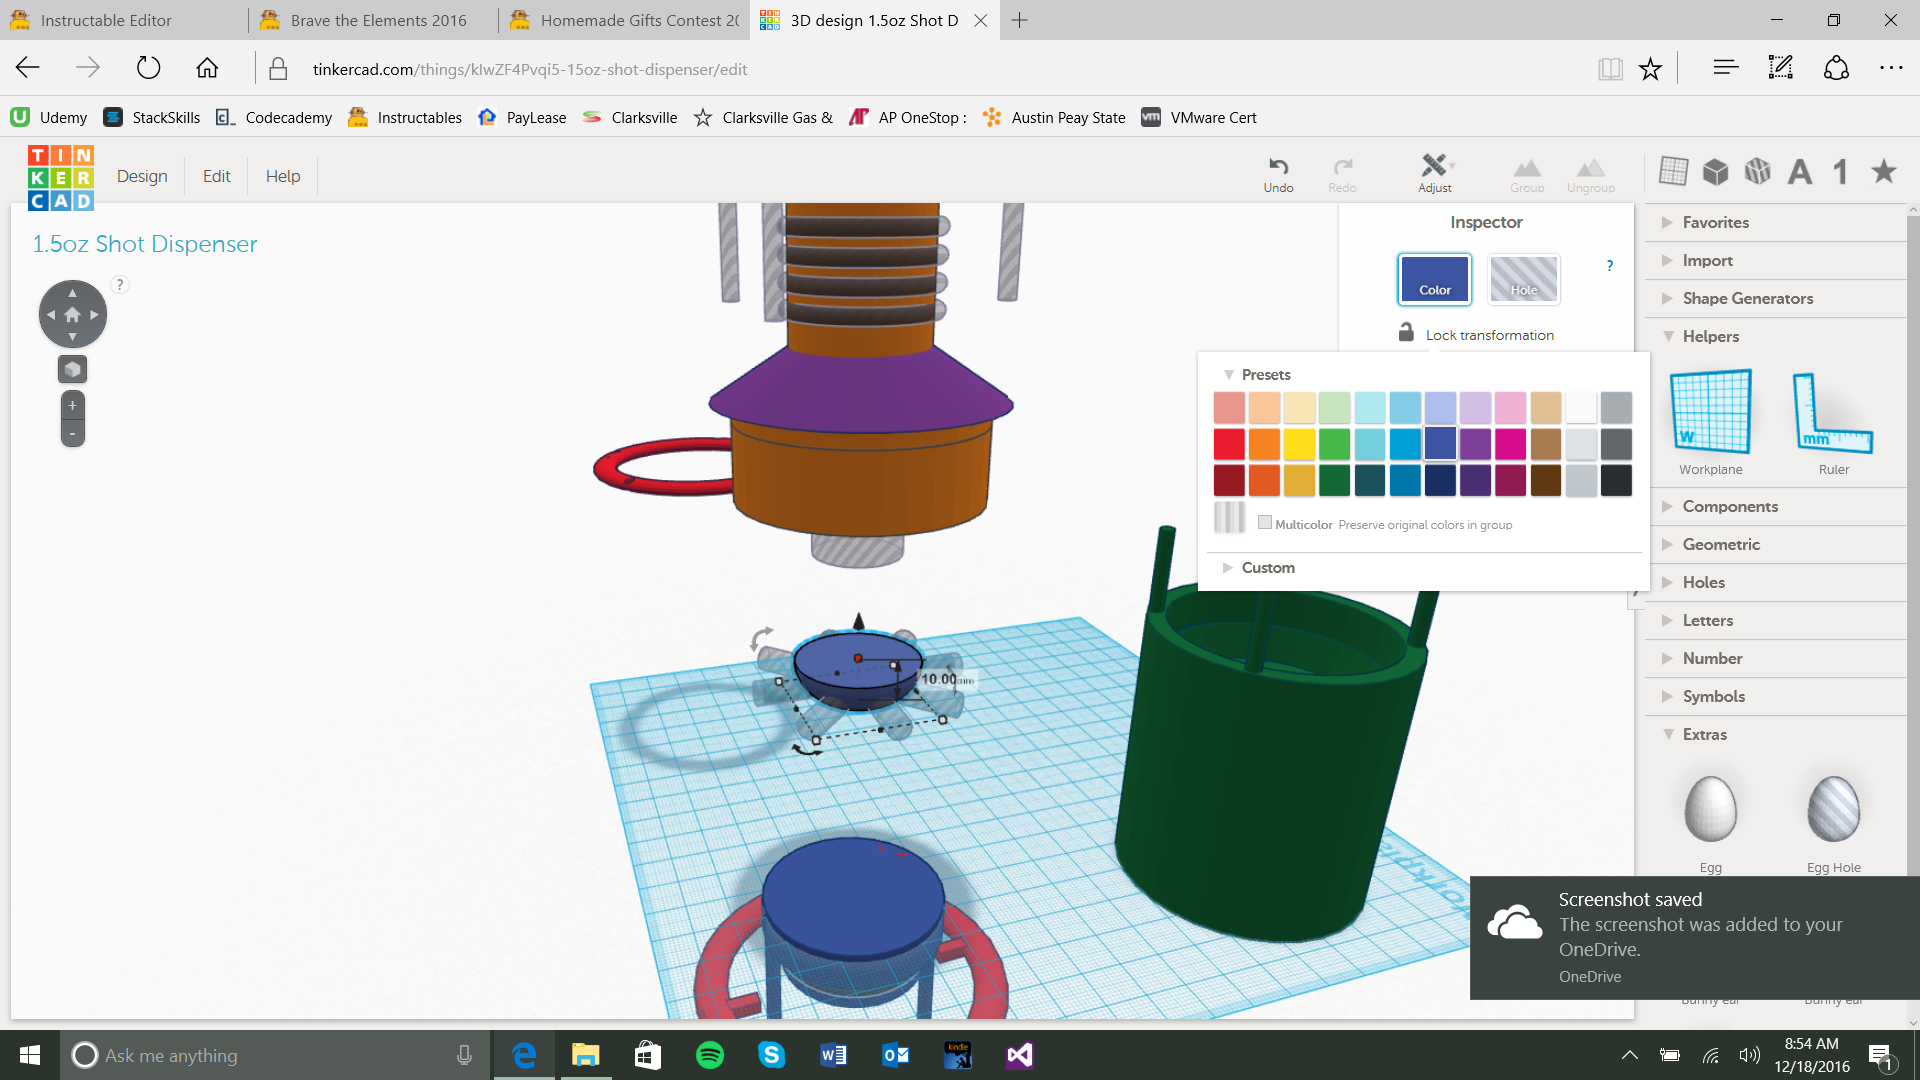
Get a cylinder object and make the dimensions to 28m X 28mm and a height of 28mm. Place one of your 4 ring objects centered on the cylinder 5mm below the top and each other ring object 5mm below the last until all ring objects are placed. Make each ring object a hole and group them all together with the cylinder making the bottle end of this device.
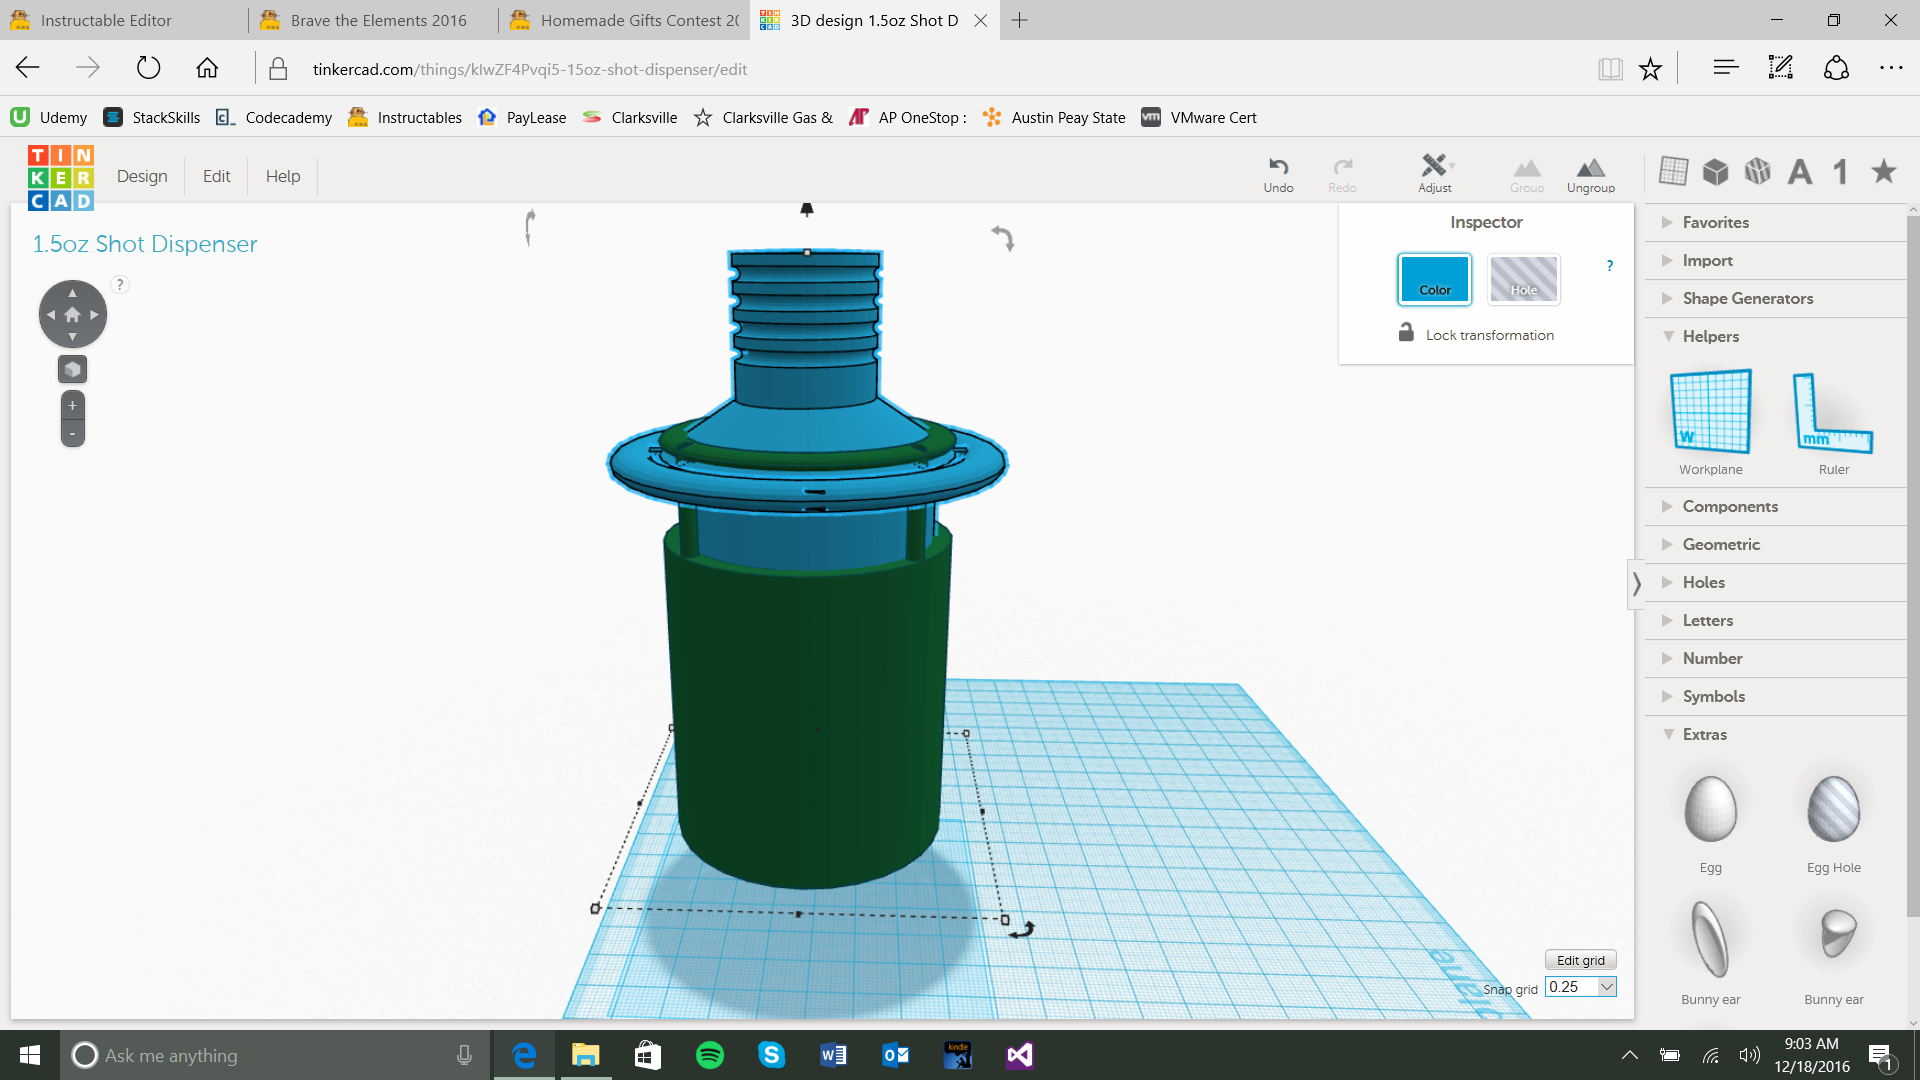
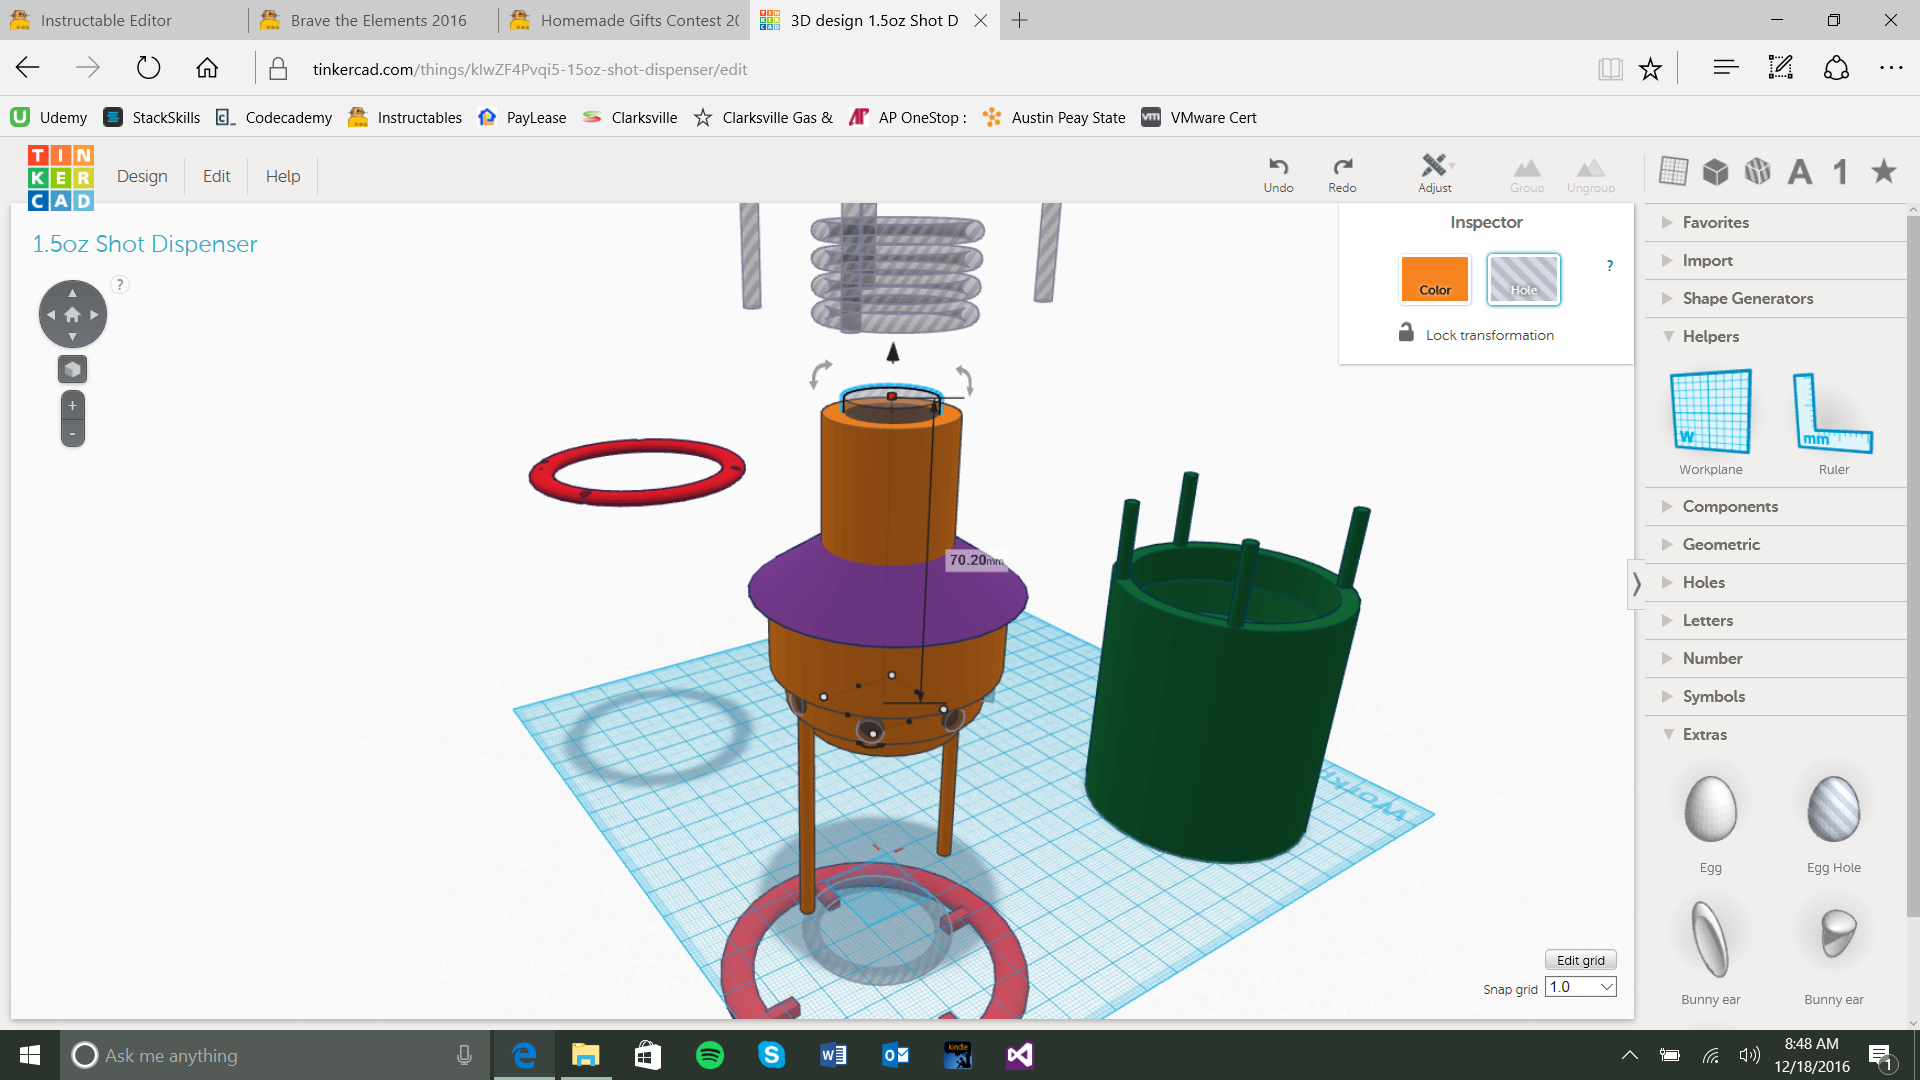
Next grab a cone object and make the dimensions 60mm X 60mm and a height of 20mm. Place your Bottle End on top of the cone so that the bottom of the Bottle End meets the same diameter portion of the cone object and group them together.
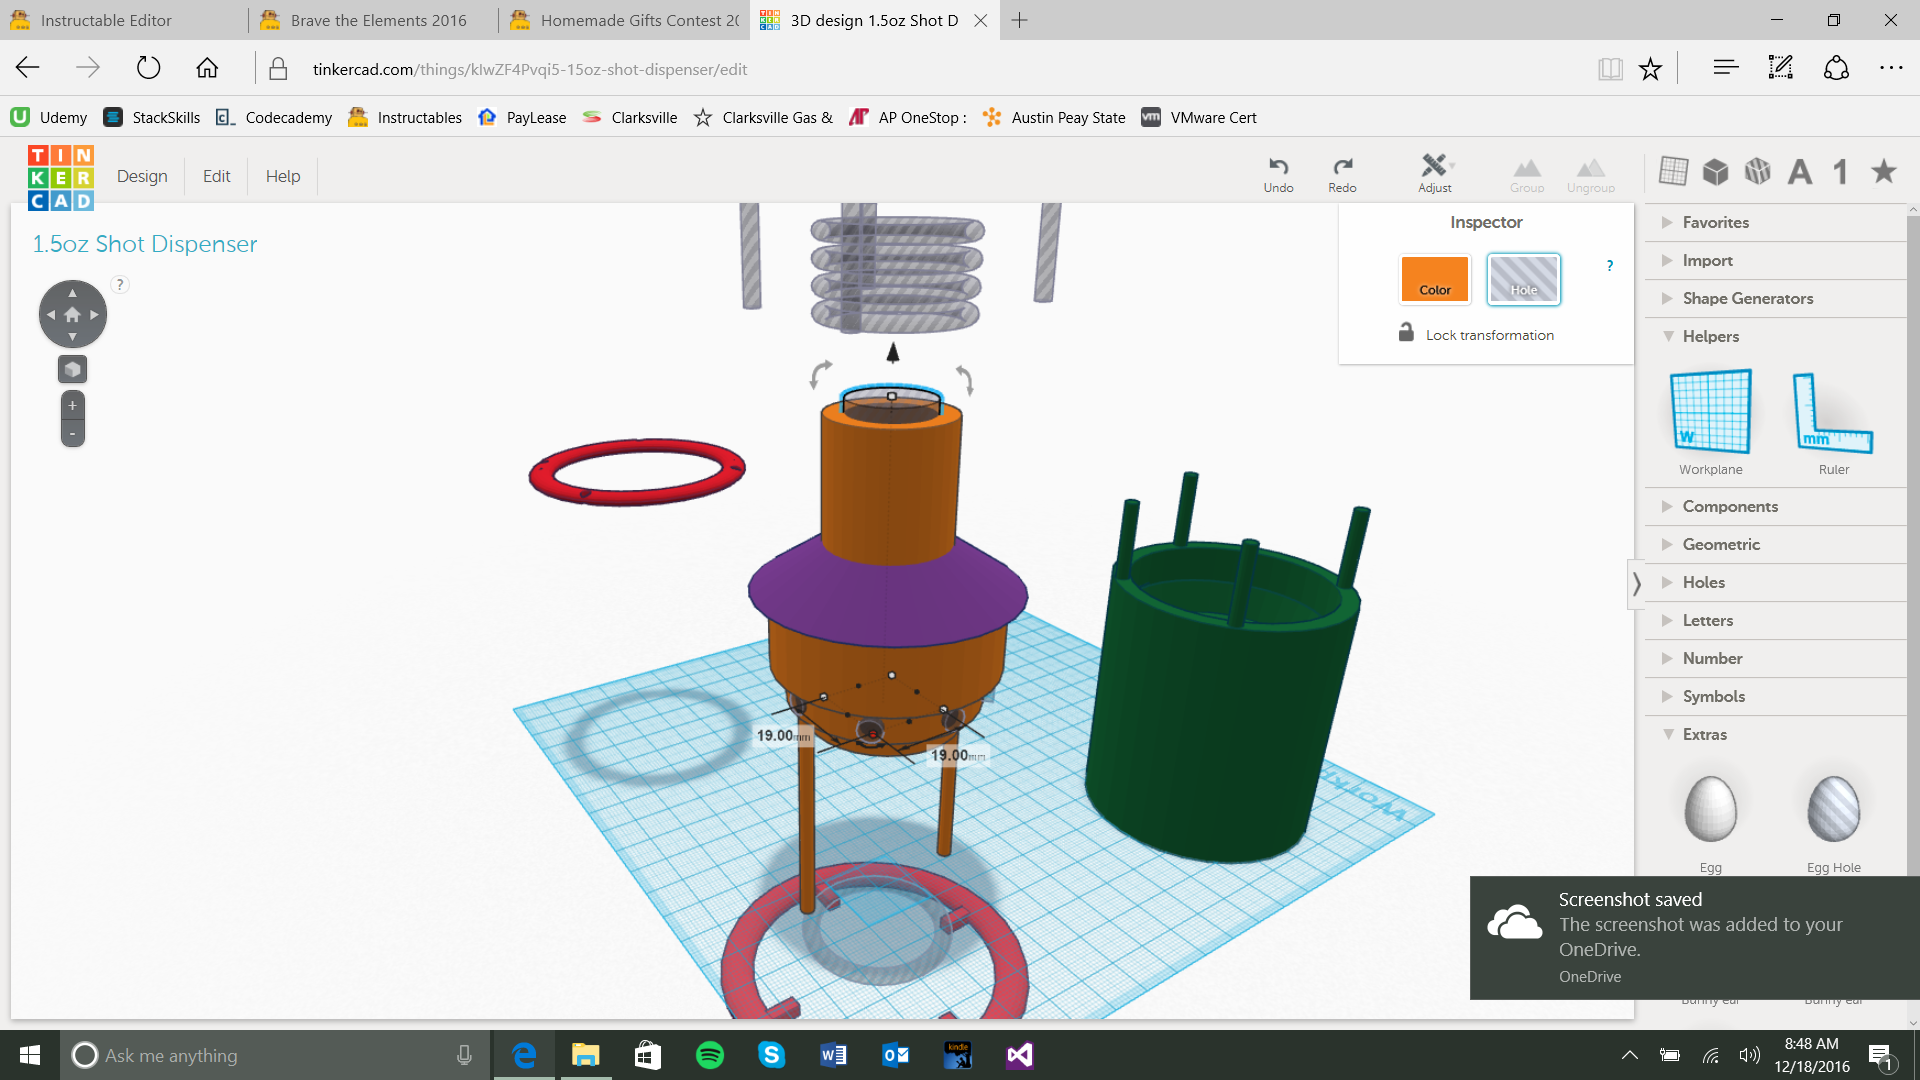
Next grab a cylinder and set it to 19mm X 19mm and a height of 70mm. Center this on the Bottle End, make it a hole, and group the objects together to make it hollow. This piece will now be called the Topper.
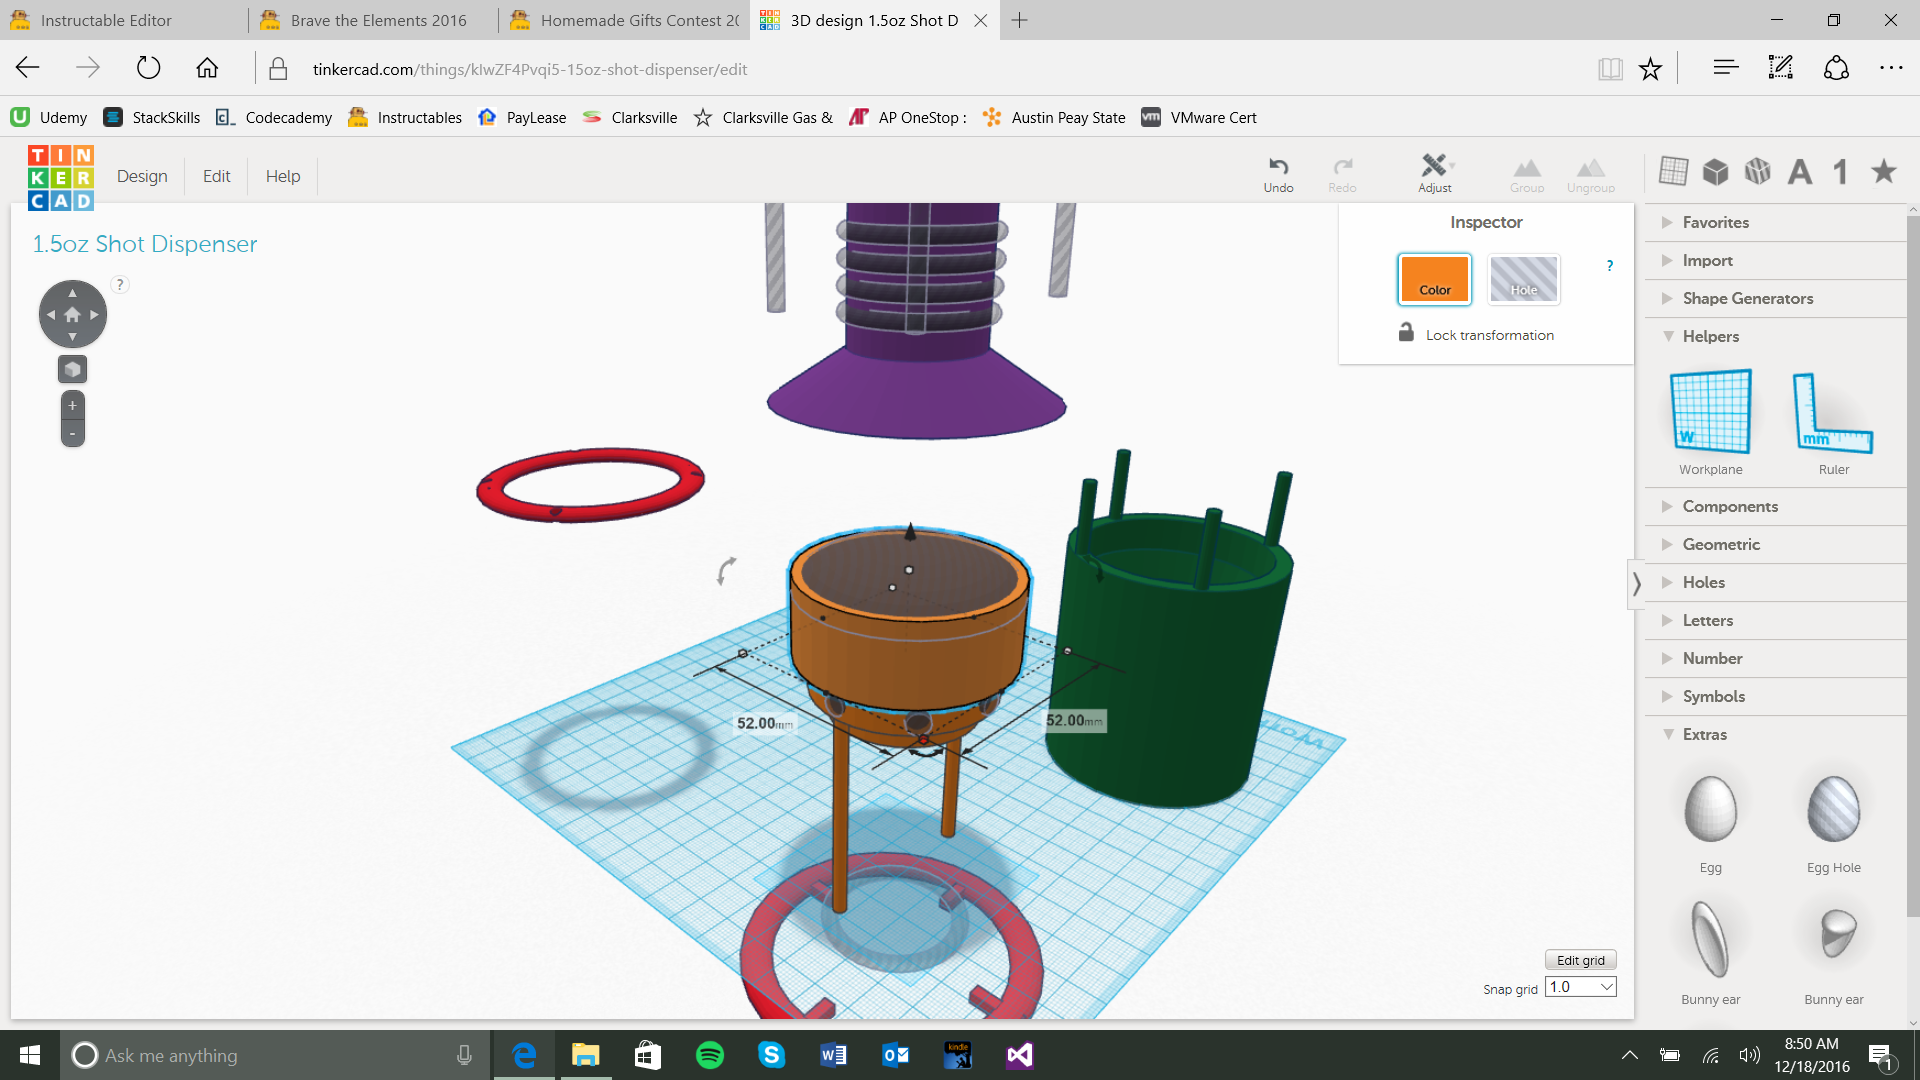
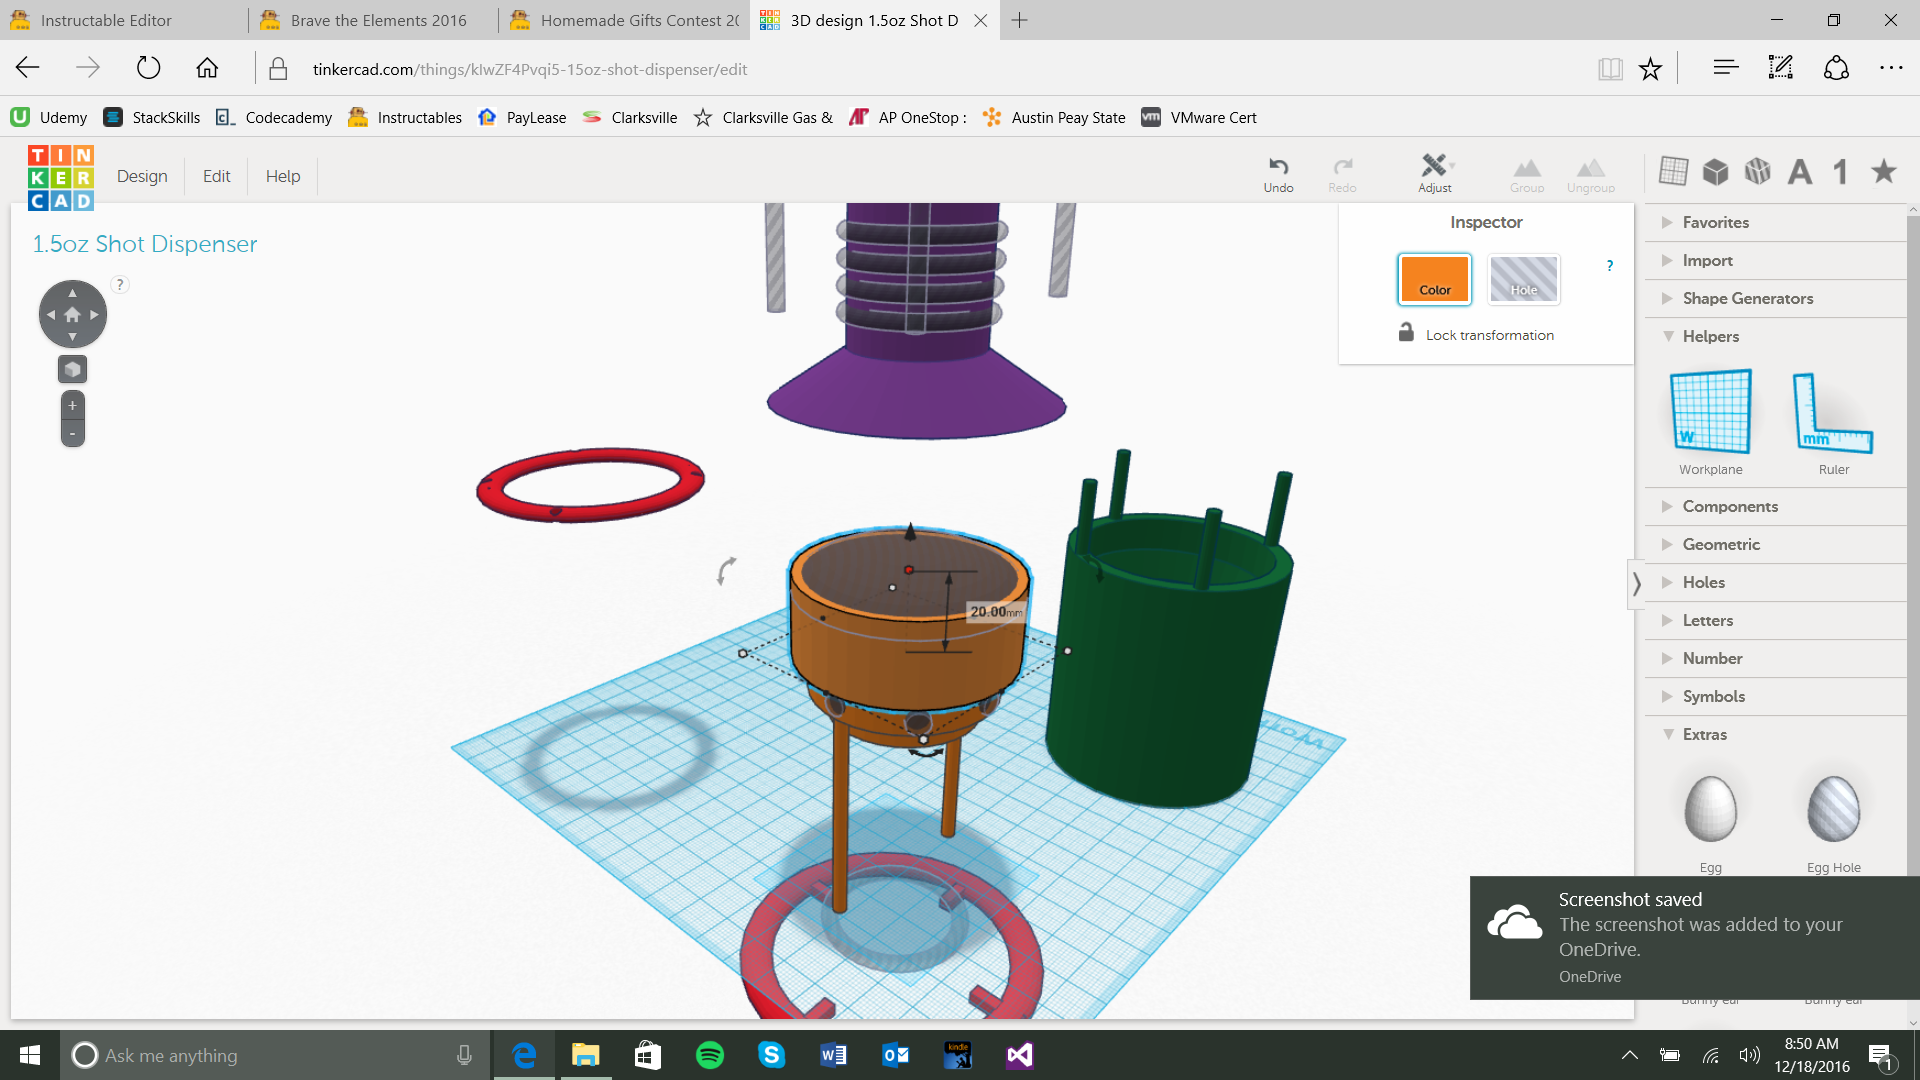
Now grab another cylinder and set it to 52mm X 52mm and a height of 20mm. Place this on the bottom of the Topper. Ungroup the Topper so that the 70mm cylinder hole can penetrate this object and regroup it all together so now you have one piece that is hollow all the way through.
Create another cylinder and set it to 45mm X 45mm and a height of 10mm. On the bottom of this cylinder place another cylinder centered on it to the dimensions of 36mm X 36mm and a height of 10mm. We will call this the stopper, set it aside.
grab a half sphere and set the dimensions to 28mm X 28mm and a height of 10mm. Make it a hole and place it flush and center with the top of the stopper making a concave indent when finished. Set aside.
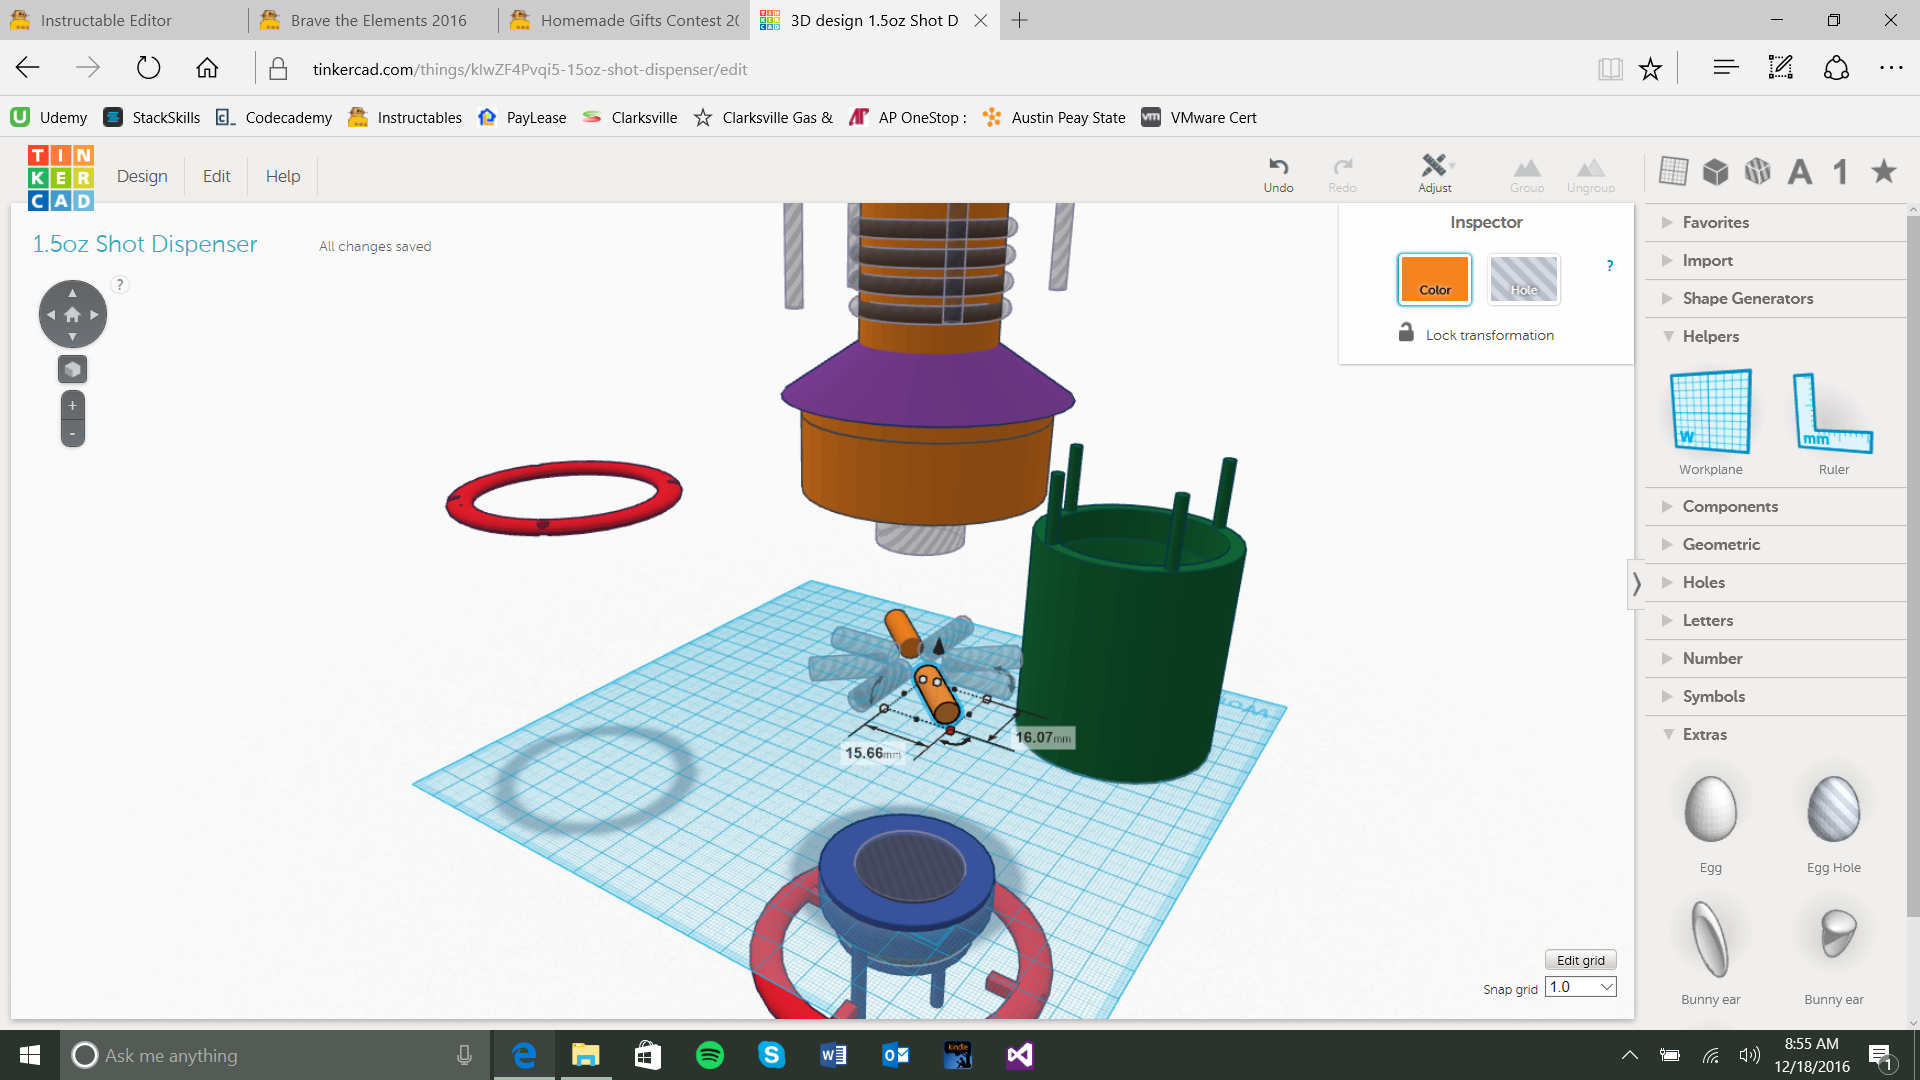
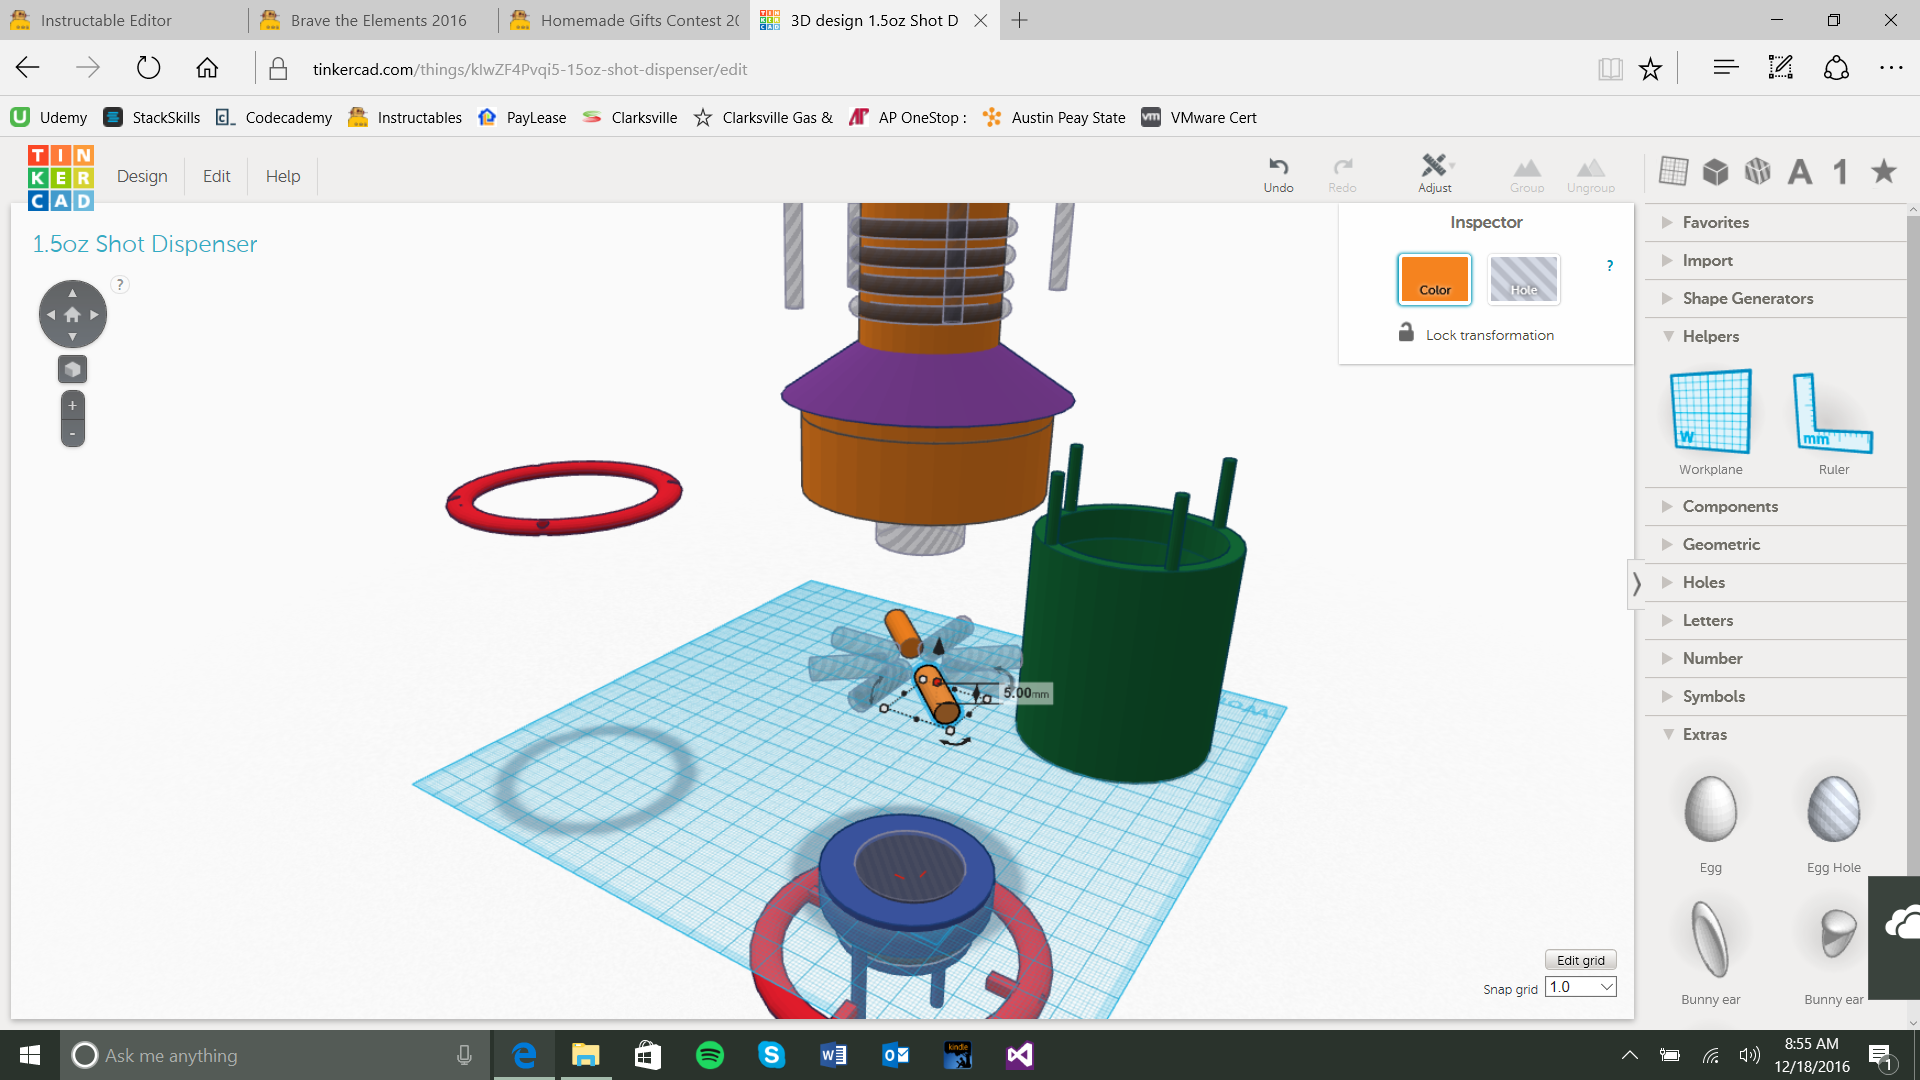
Create another cylinder and rotate it so the flat faces are horizontal, and set the dimensions to 16mm X 16mm and a height of 5mm. Make this cylinder a hole and place it on the top portion of the Topper to penetrate the side wall into the dome area. Make a copy of this cylinder and rotate it 45 degrees. Keep doing this until you have 6 cylinders penetrating the side wall and group it together.
Now take your legs from the last step and place them inside the larger portion of the Stoppers side walls until it almost pokes through and group it together.
Now create a ring with dimensions 38mm X 38mm and a height of 3mm. Center it on the bottom portion of the stopper approximately 5mm from the bottom, make it a hole and group it together for an O-ring indent.
Now place the top of the Stopper flush with the bottom of the Topper and group them together.
Take your Pull lever and place it right below the cone portion of the Topper and group it together.
The leftover cylinders from the last step that should already be grouped together need to be made into holes and placed on top of the Shell's cylinders that are sticking out of the top. The Topper needs to be lined up with the shell and centered. Lower the Topper onto the Shell until the cylinders penetrate the top portion of it. Now move the shell out of the way and group together what's remaining to make the guide holes for the Topper to slide onto the Shell.
And now the Topper is complete. Note that you need to measure the dimensions of the bottle you want to place this on to build the bottle topper properly.
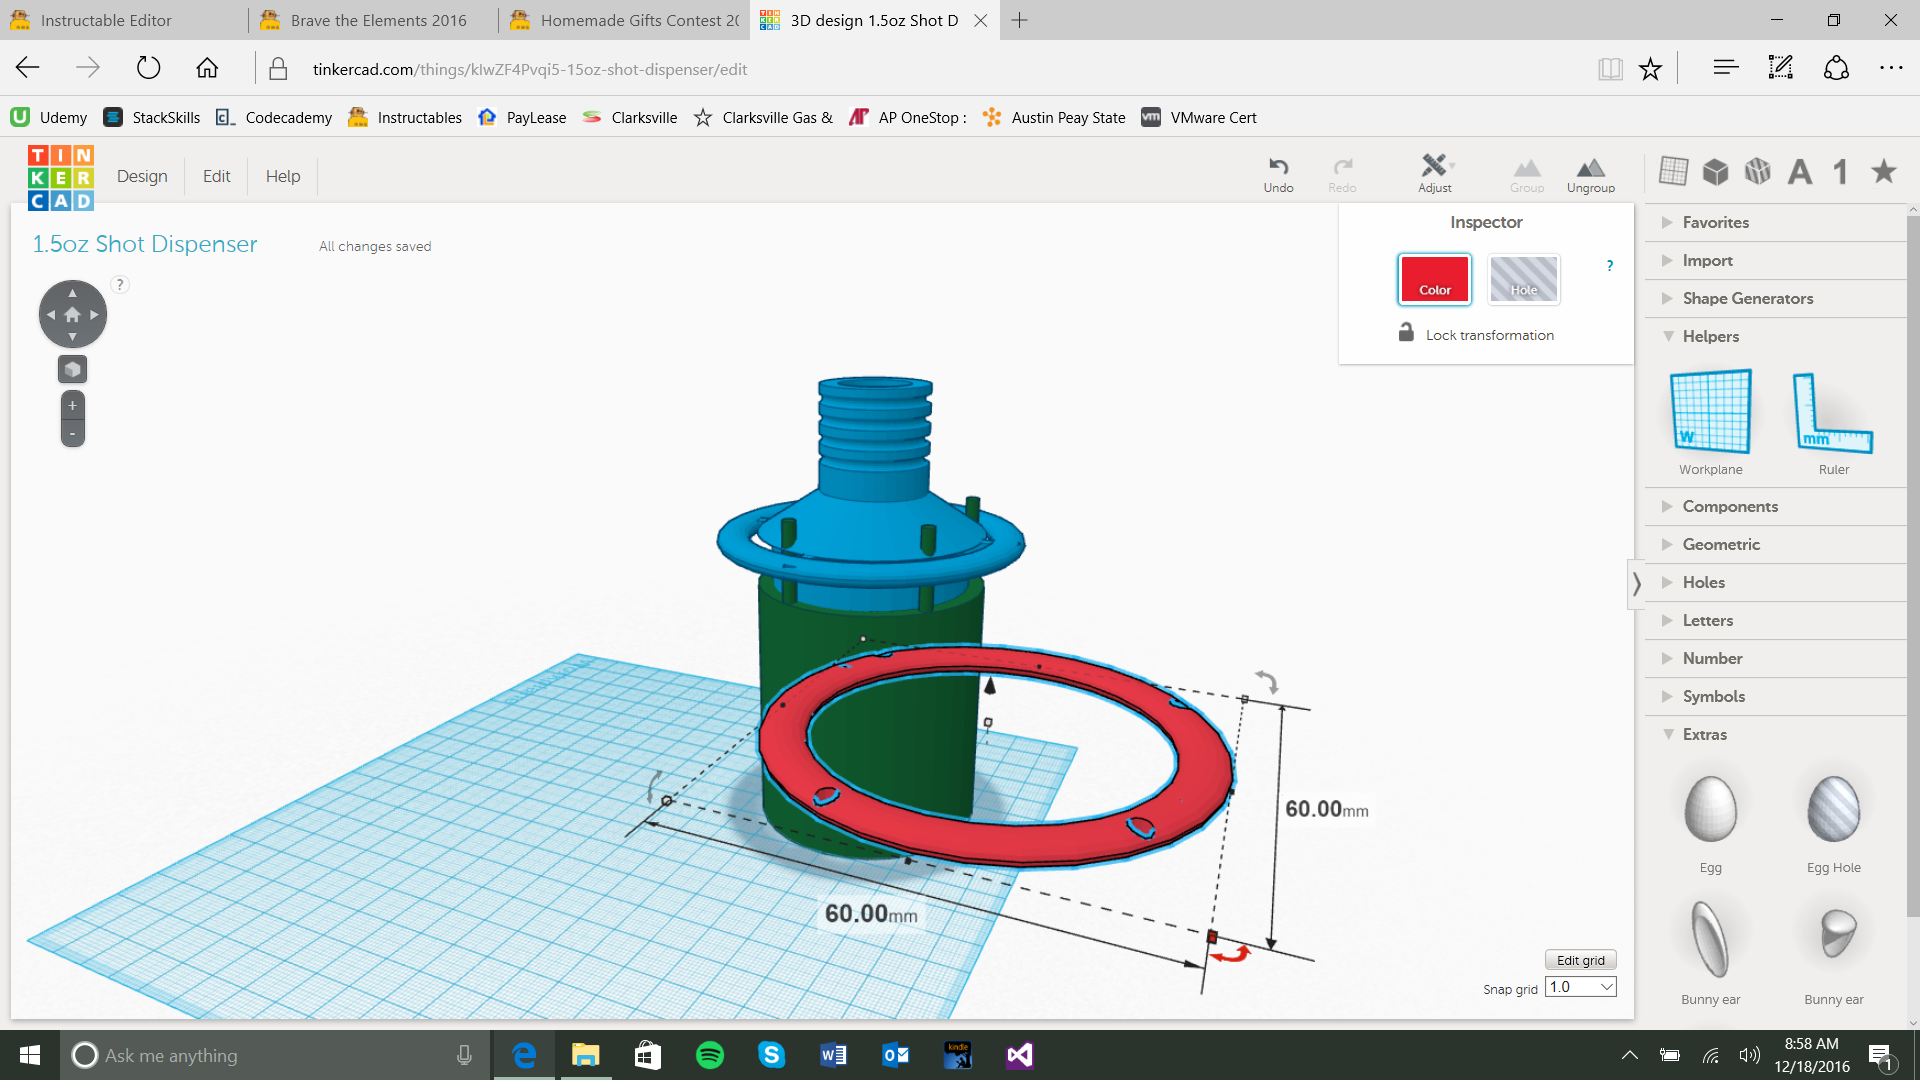
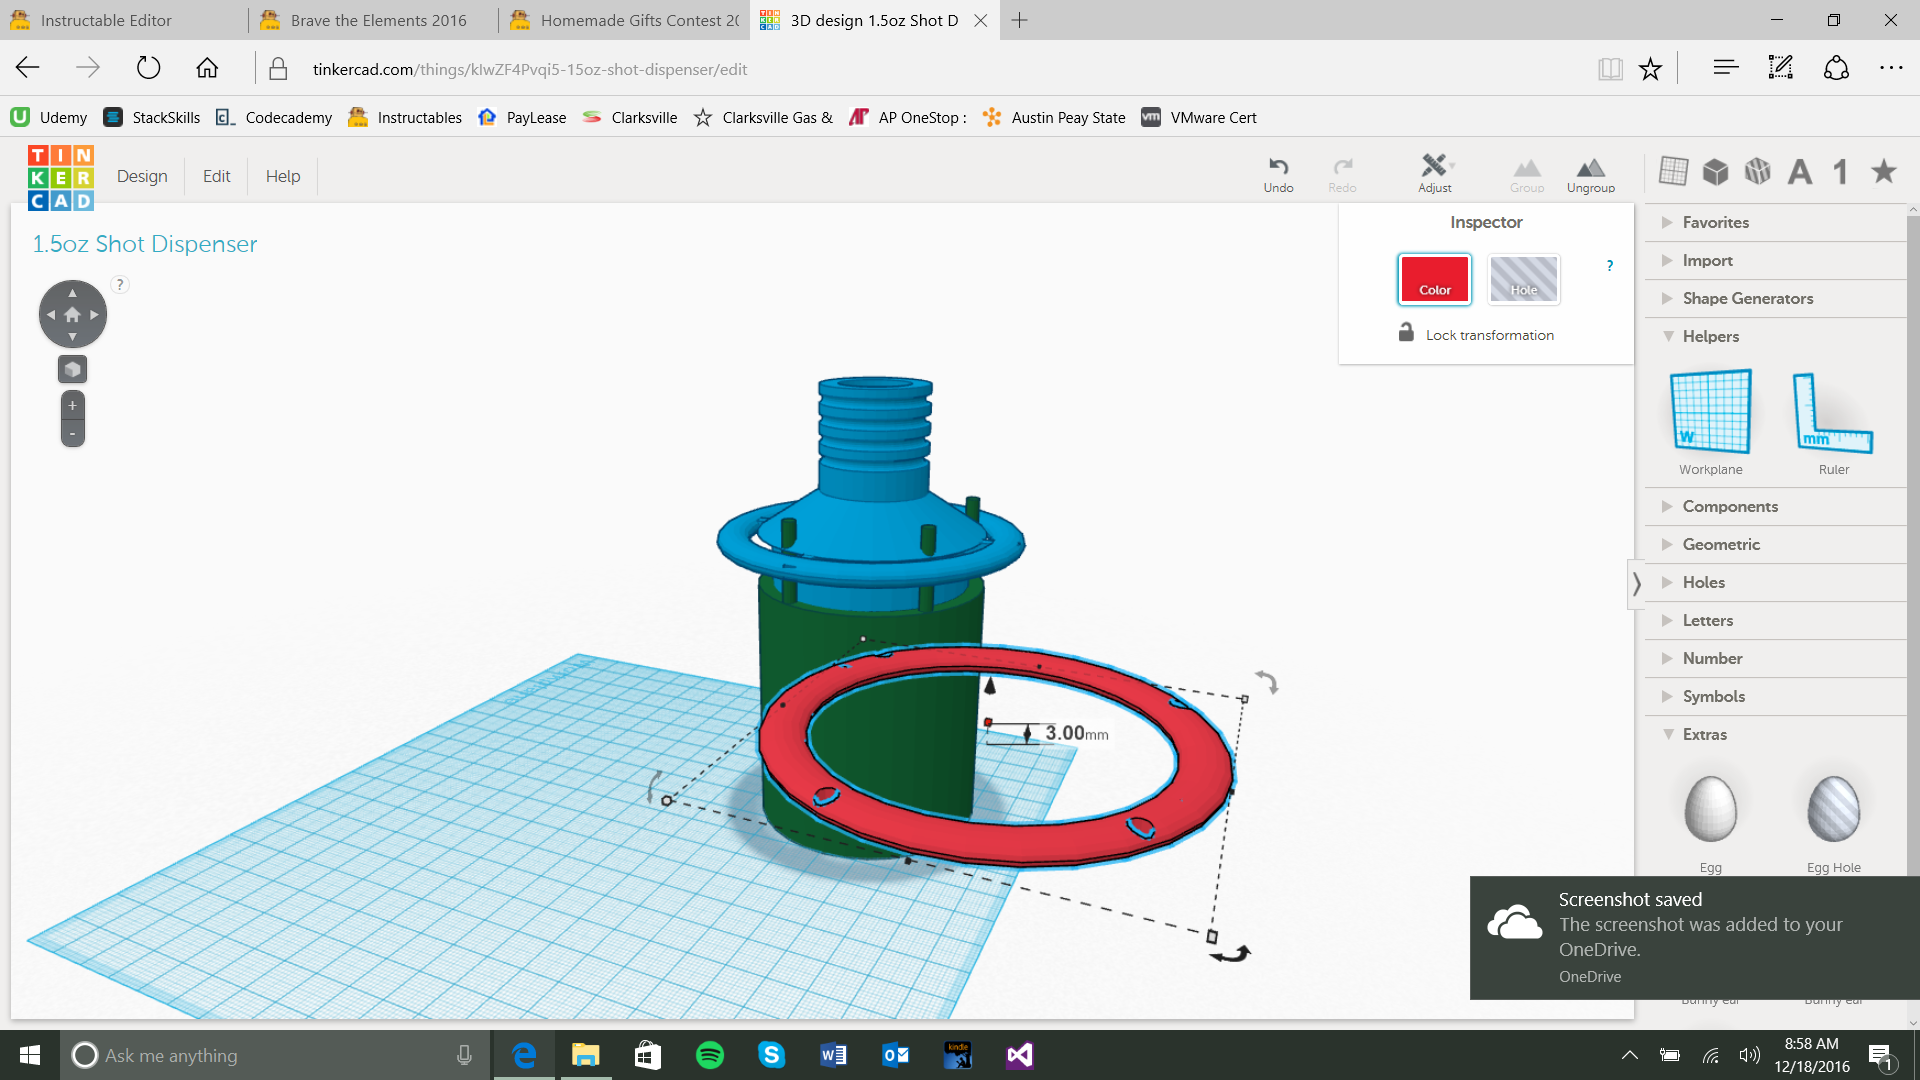
The Securing Ring
.png)
.png)
.png)
.png)
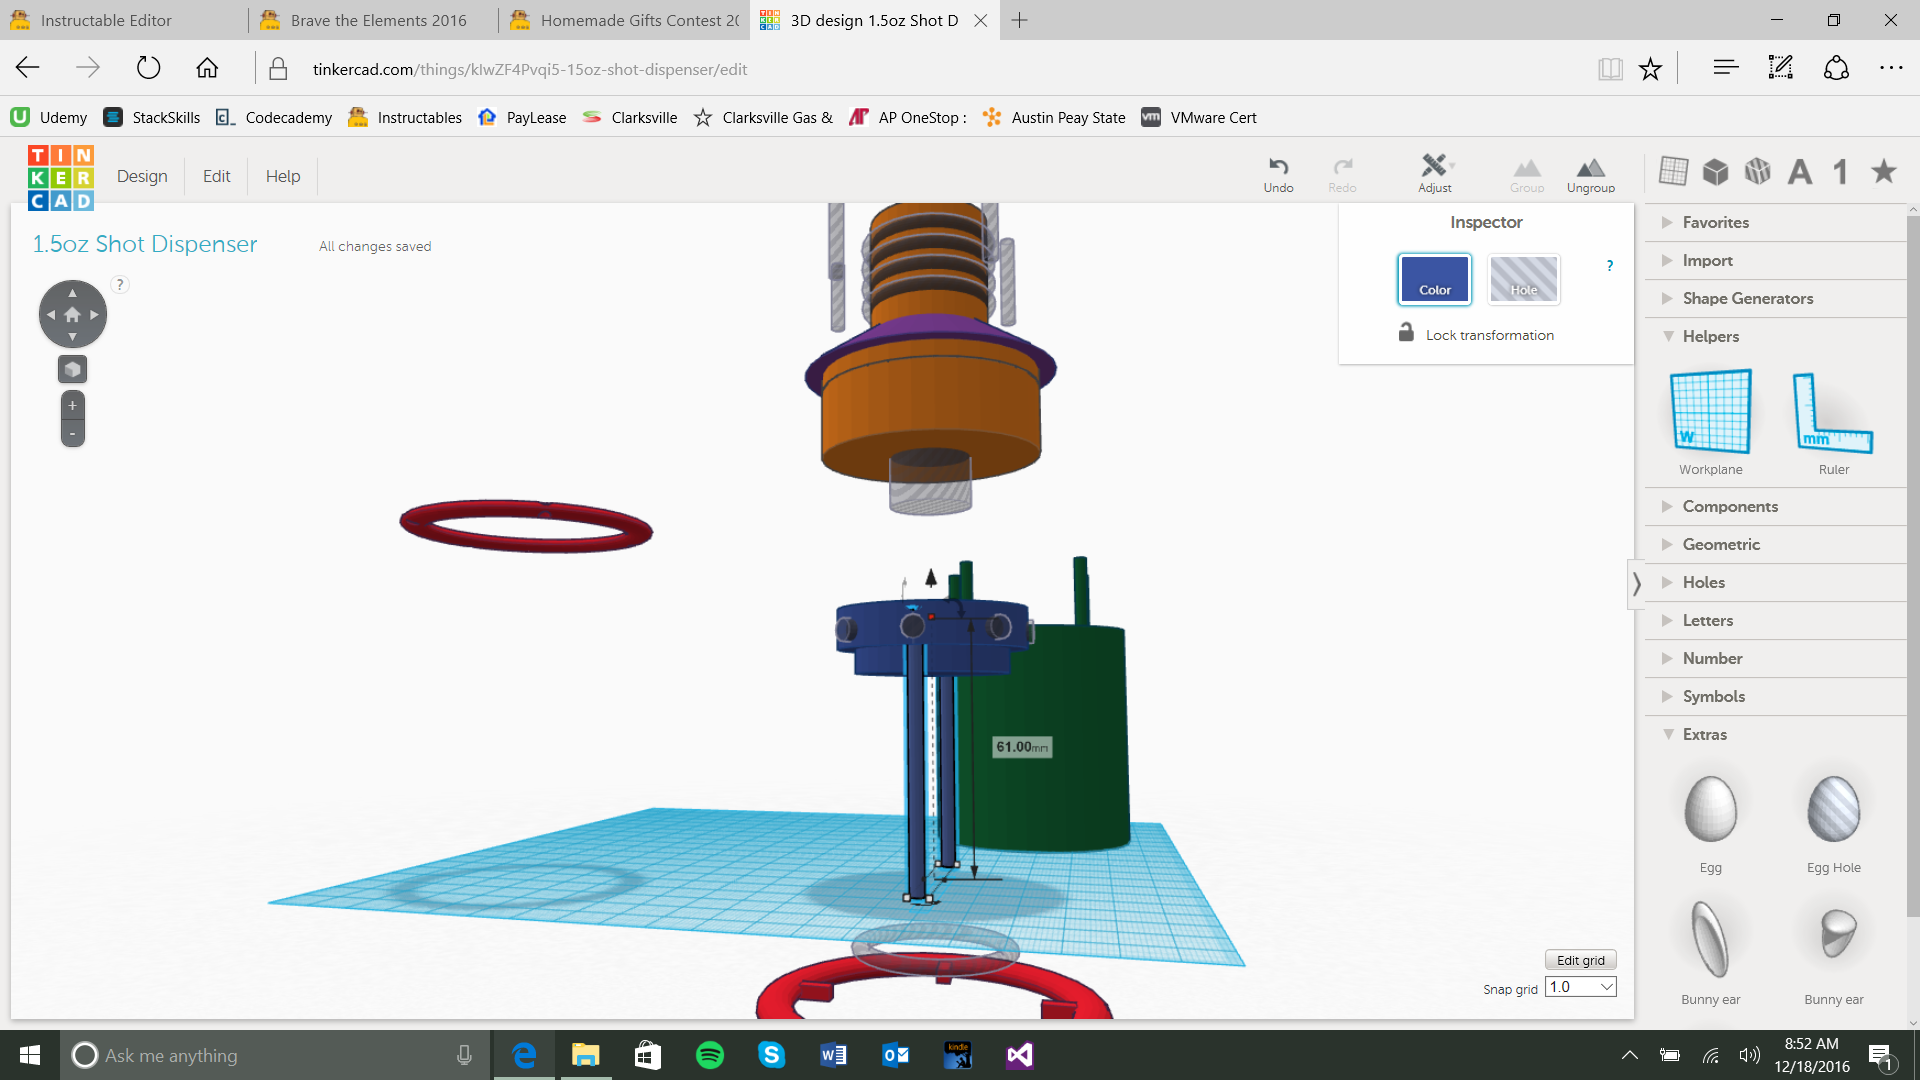
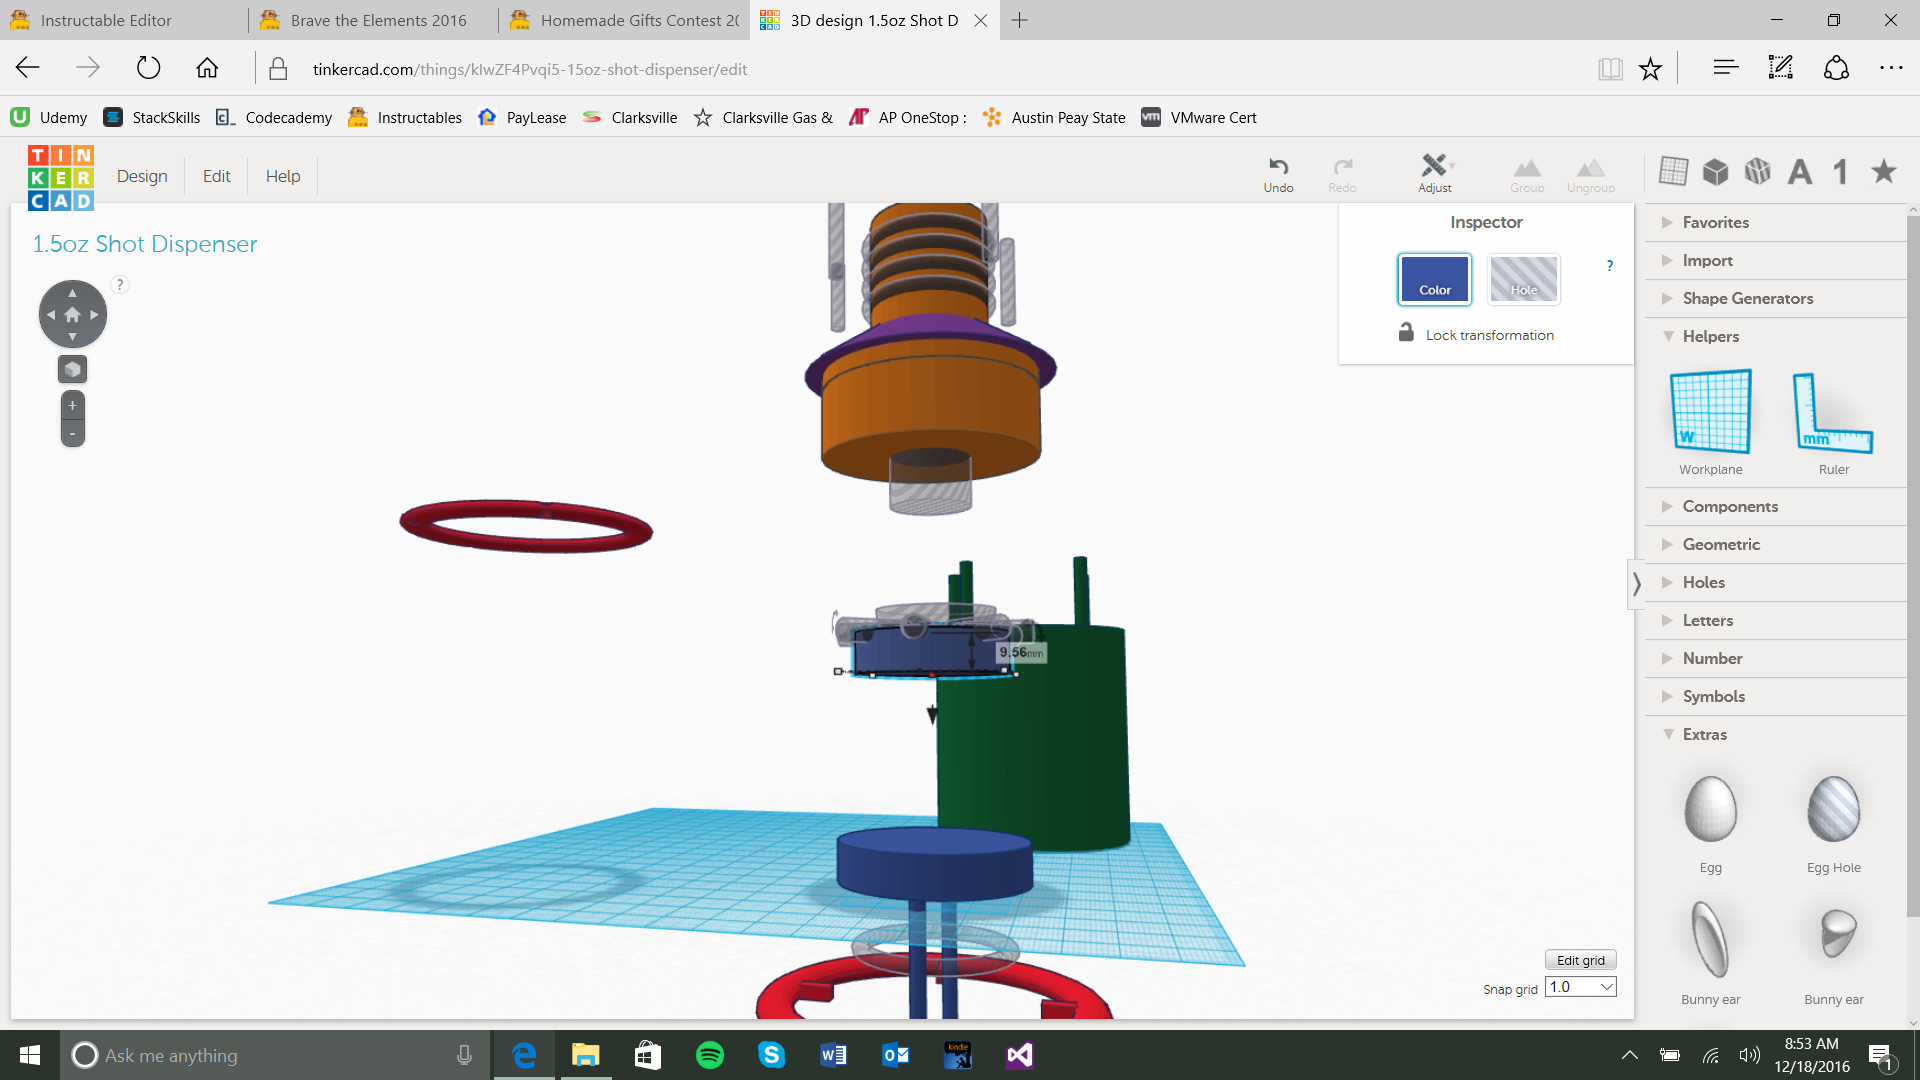
Grab a ring object set the dimensions to 60mm X 60mm and a height of 3mm. Place it on top of the Shell and center it the best you can over the prongs sticking up. Take your last copy of these prongs make it into a hole and line it up with the securing Ring and group together.
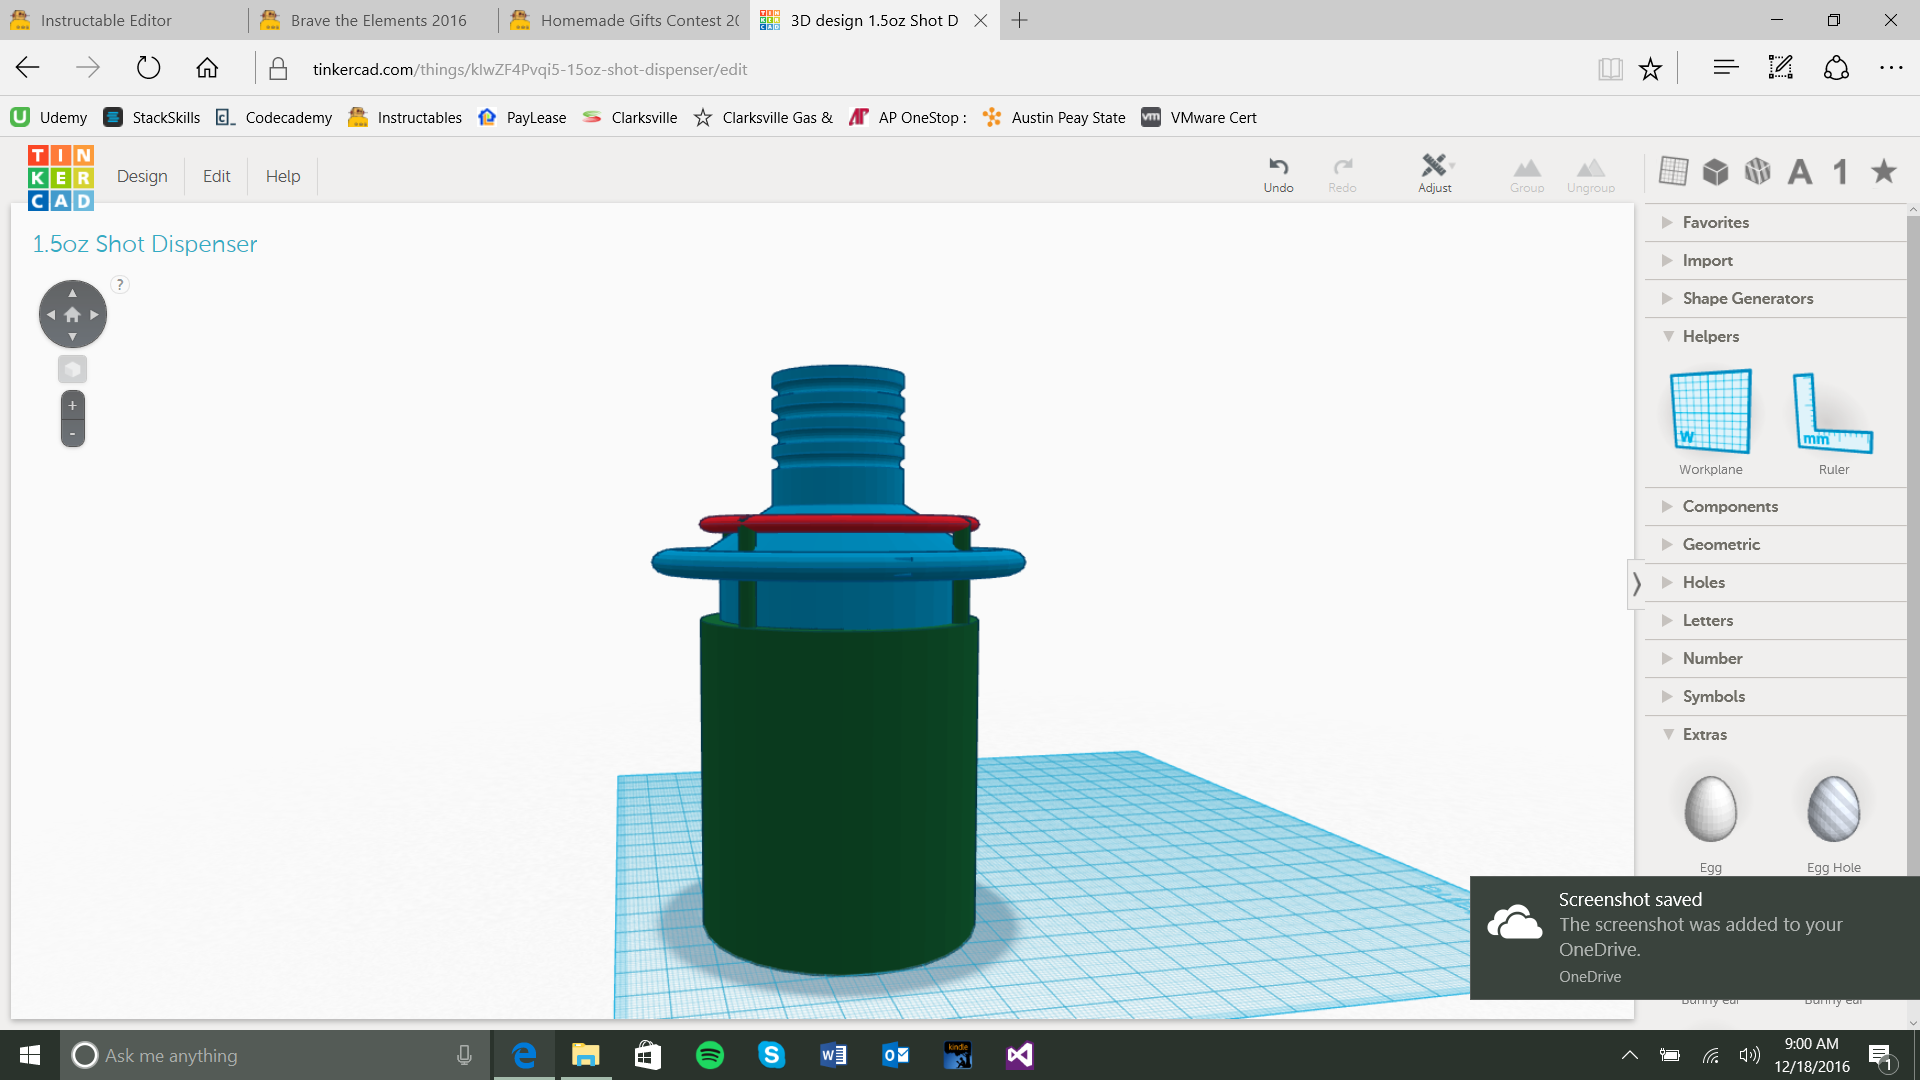
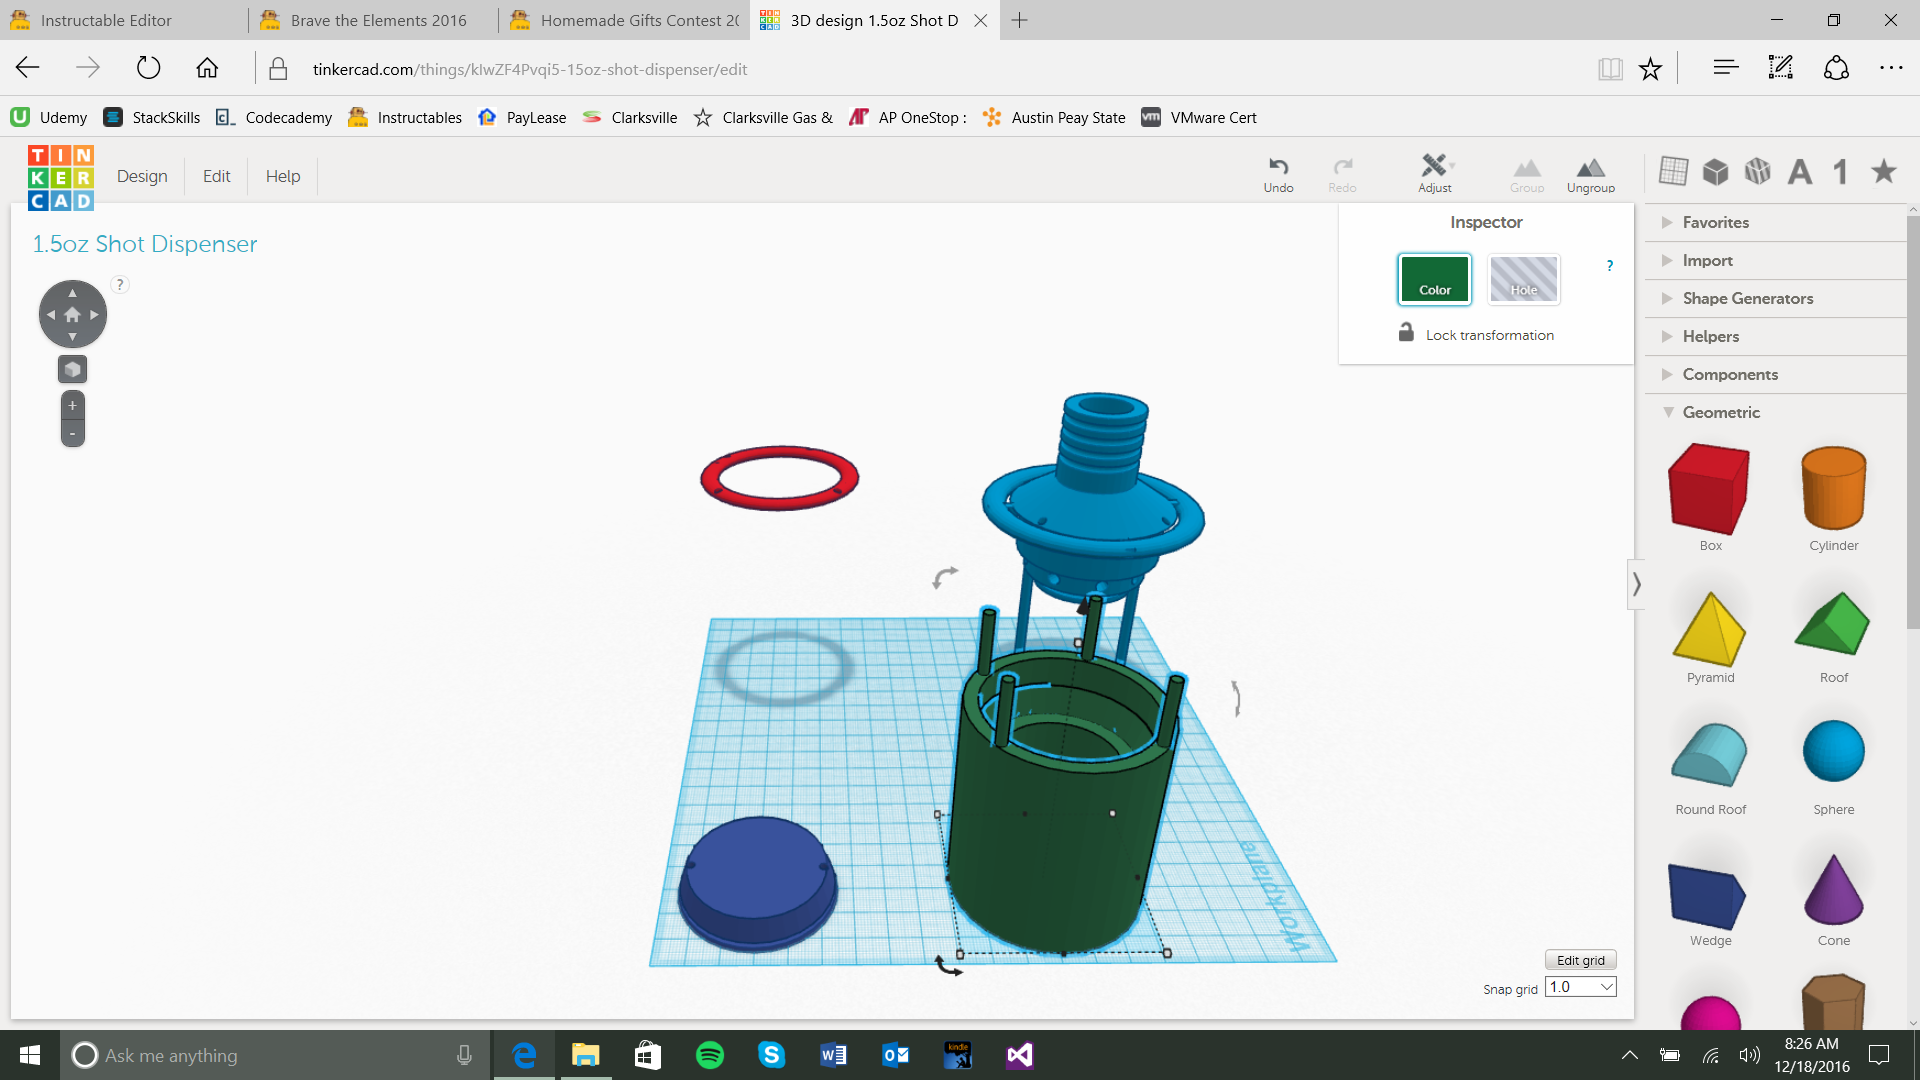
All Put Togheter and the Extra Items
.png)
.png)
.png)
.png)
.png)
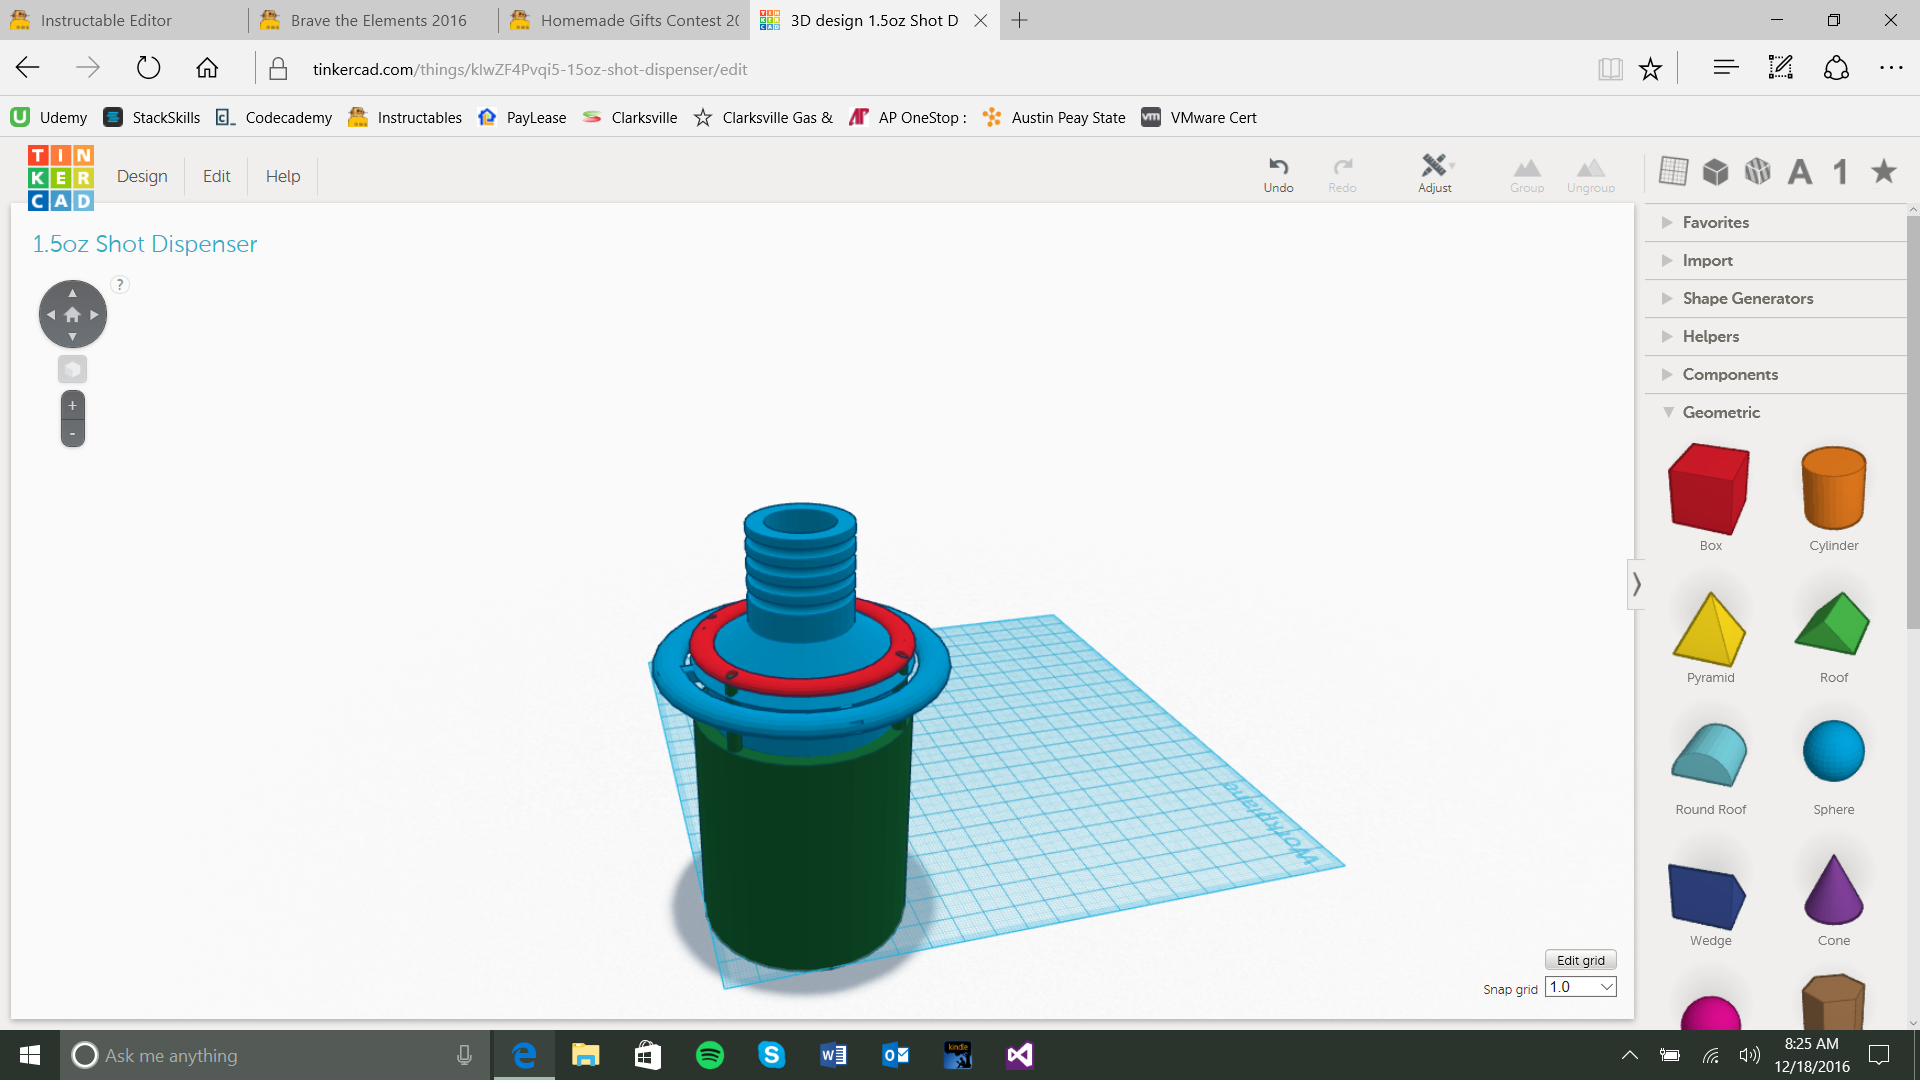
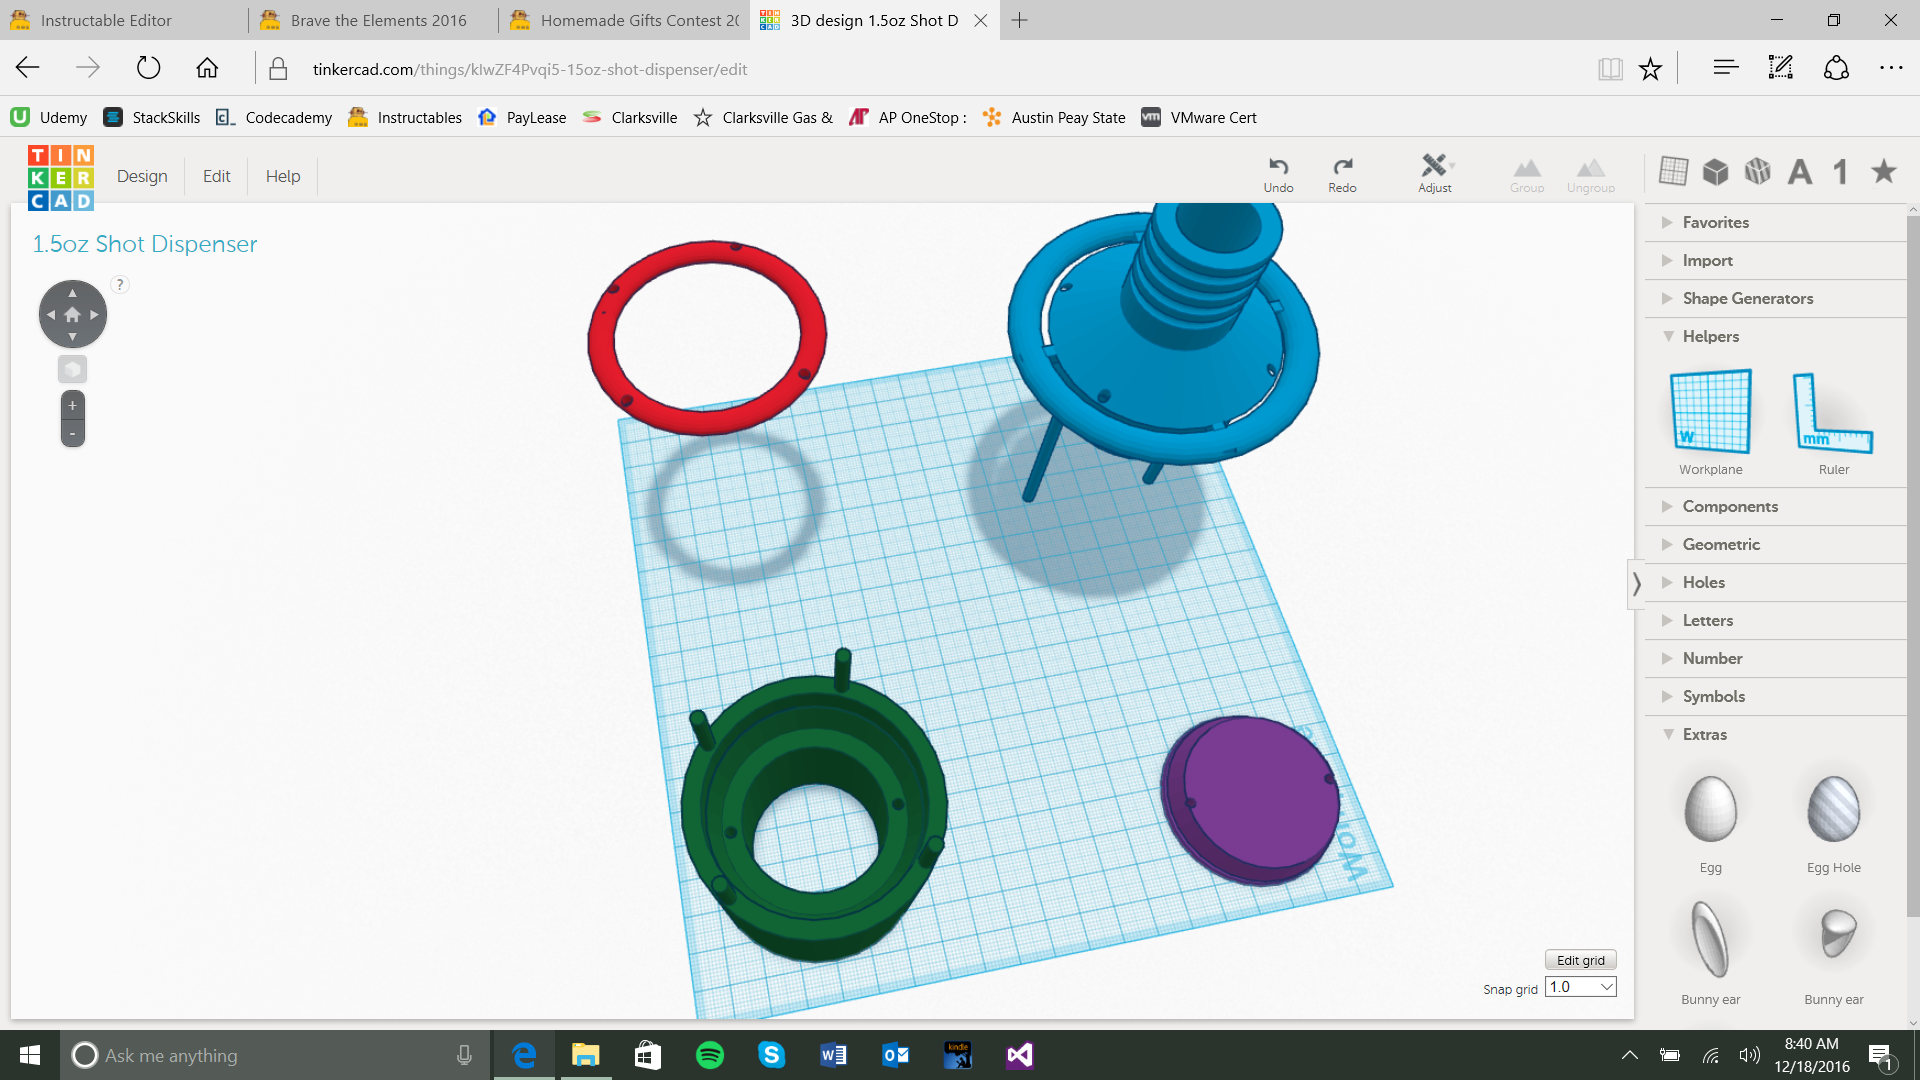
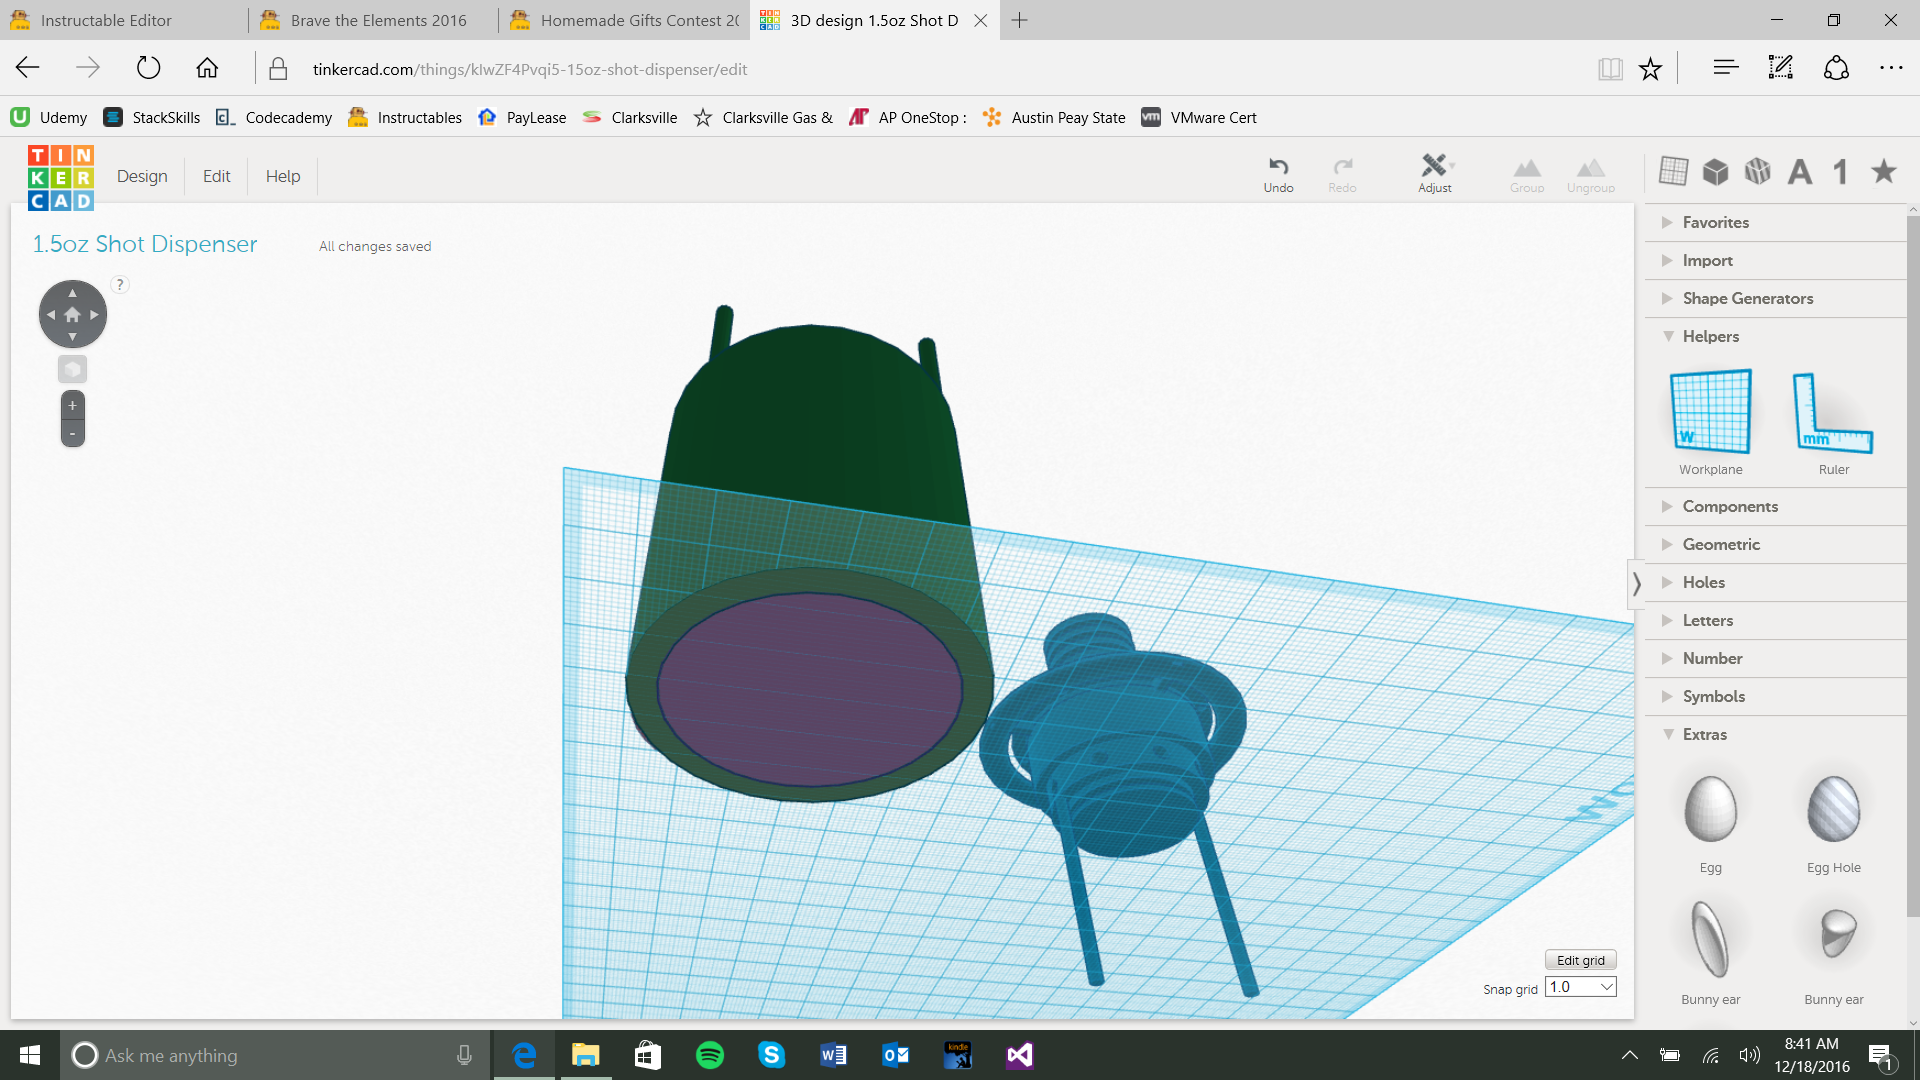
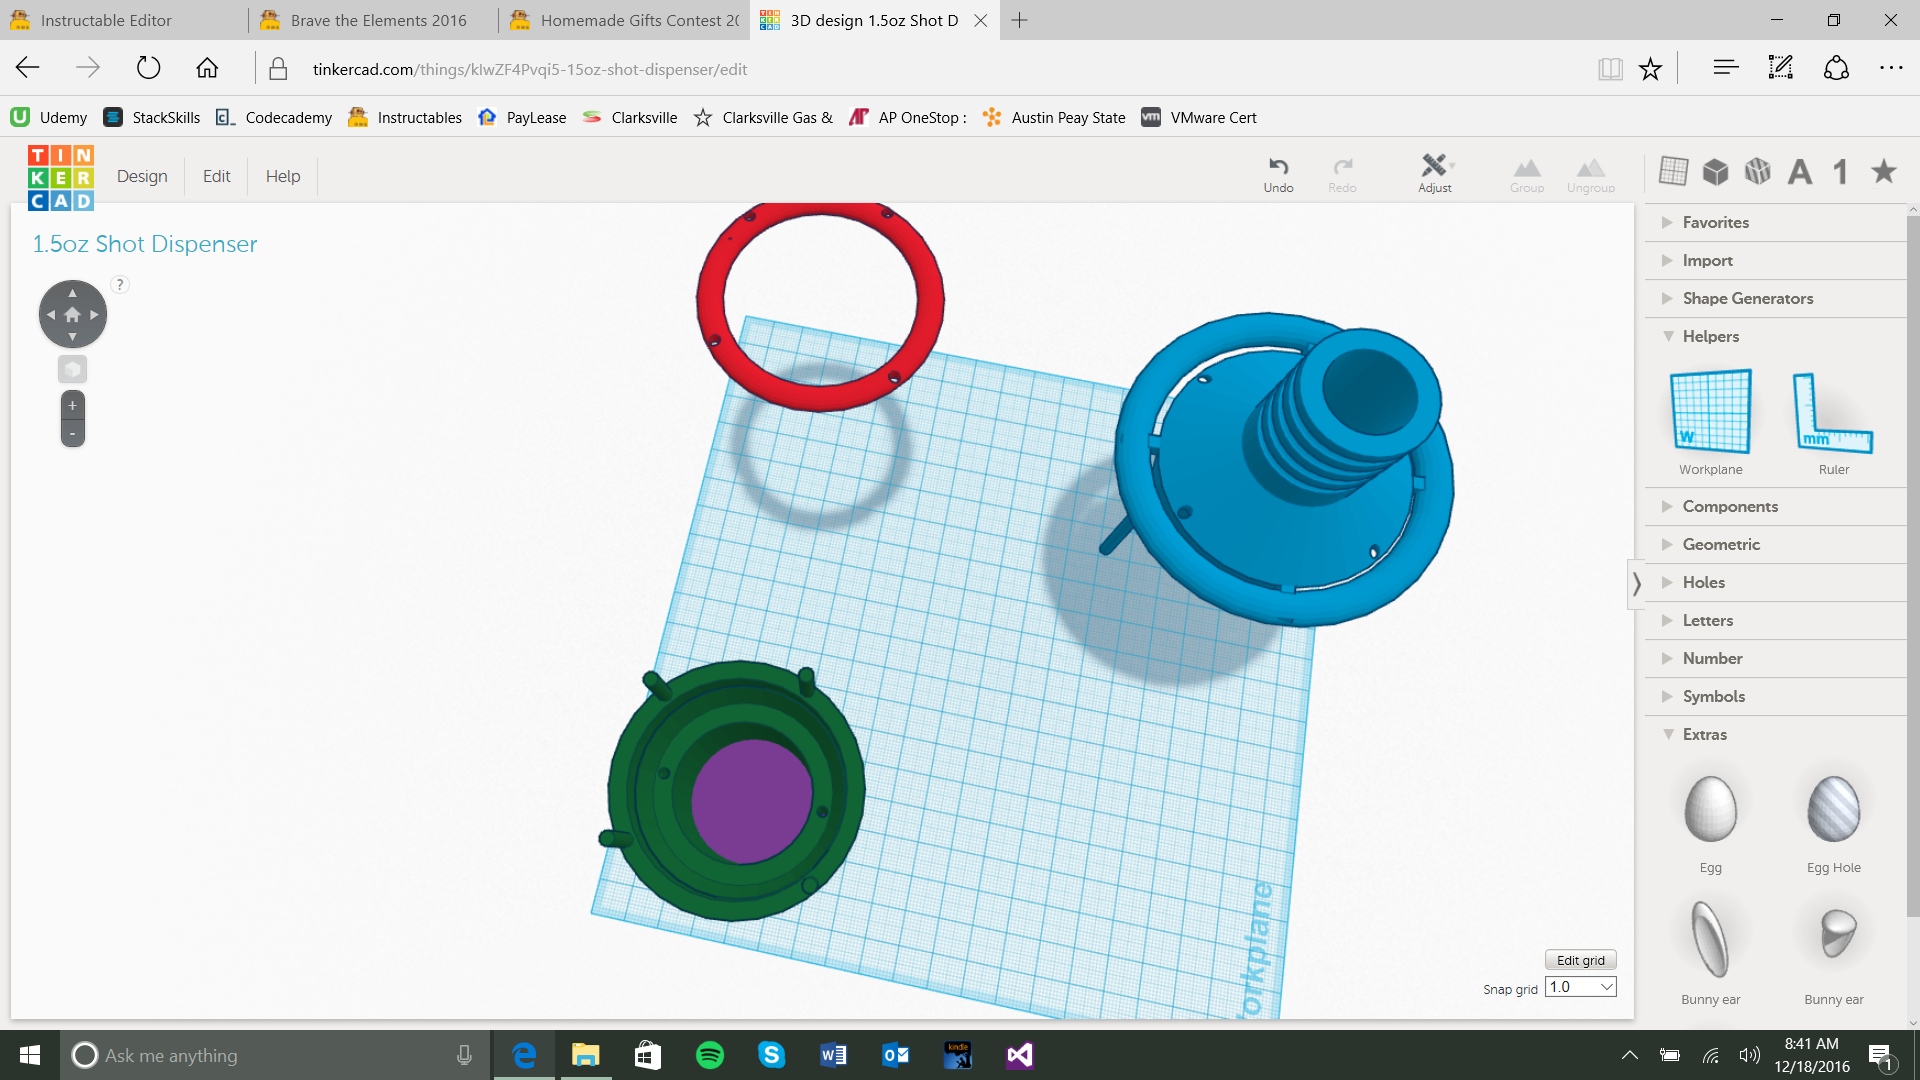
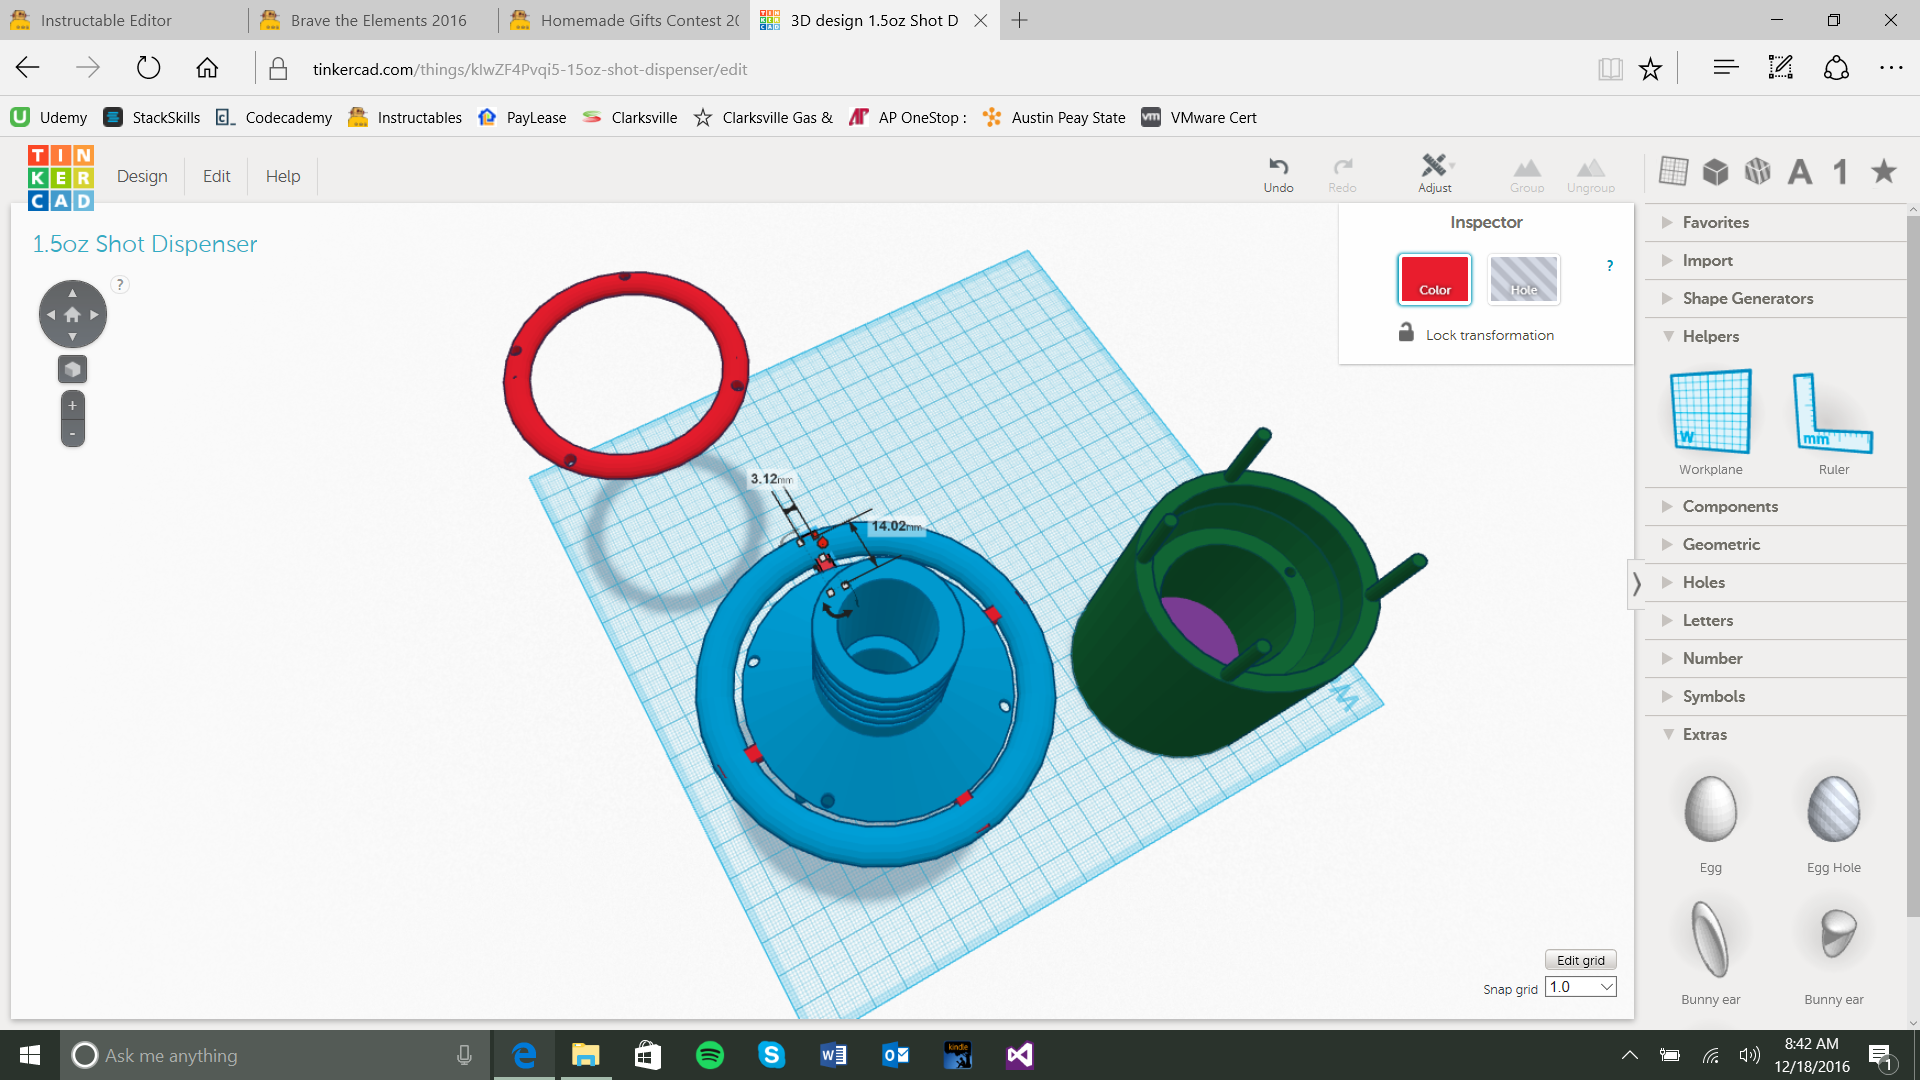
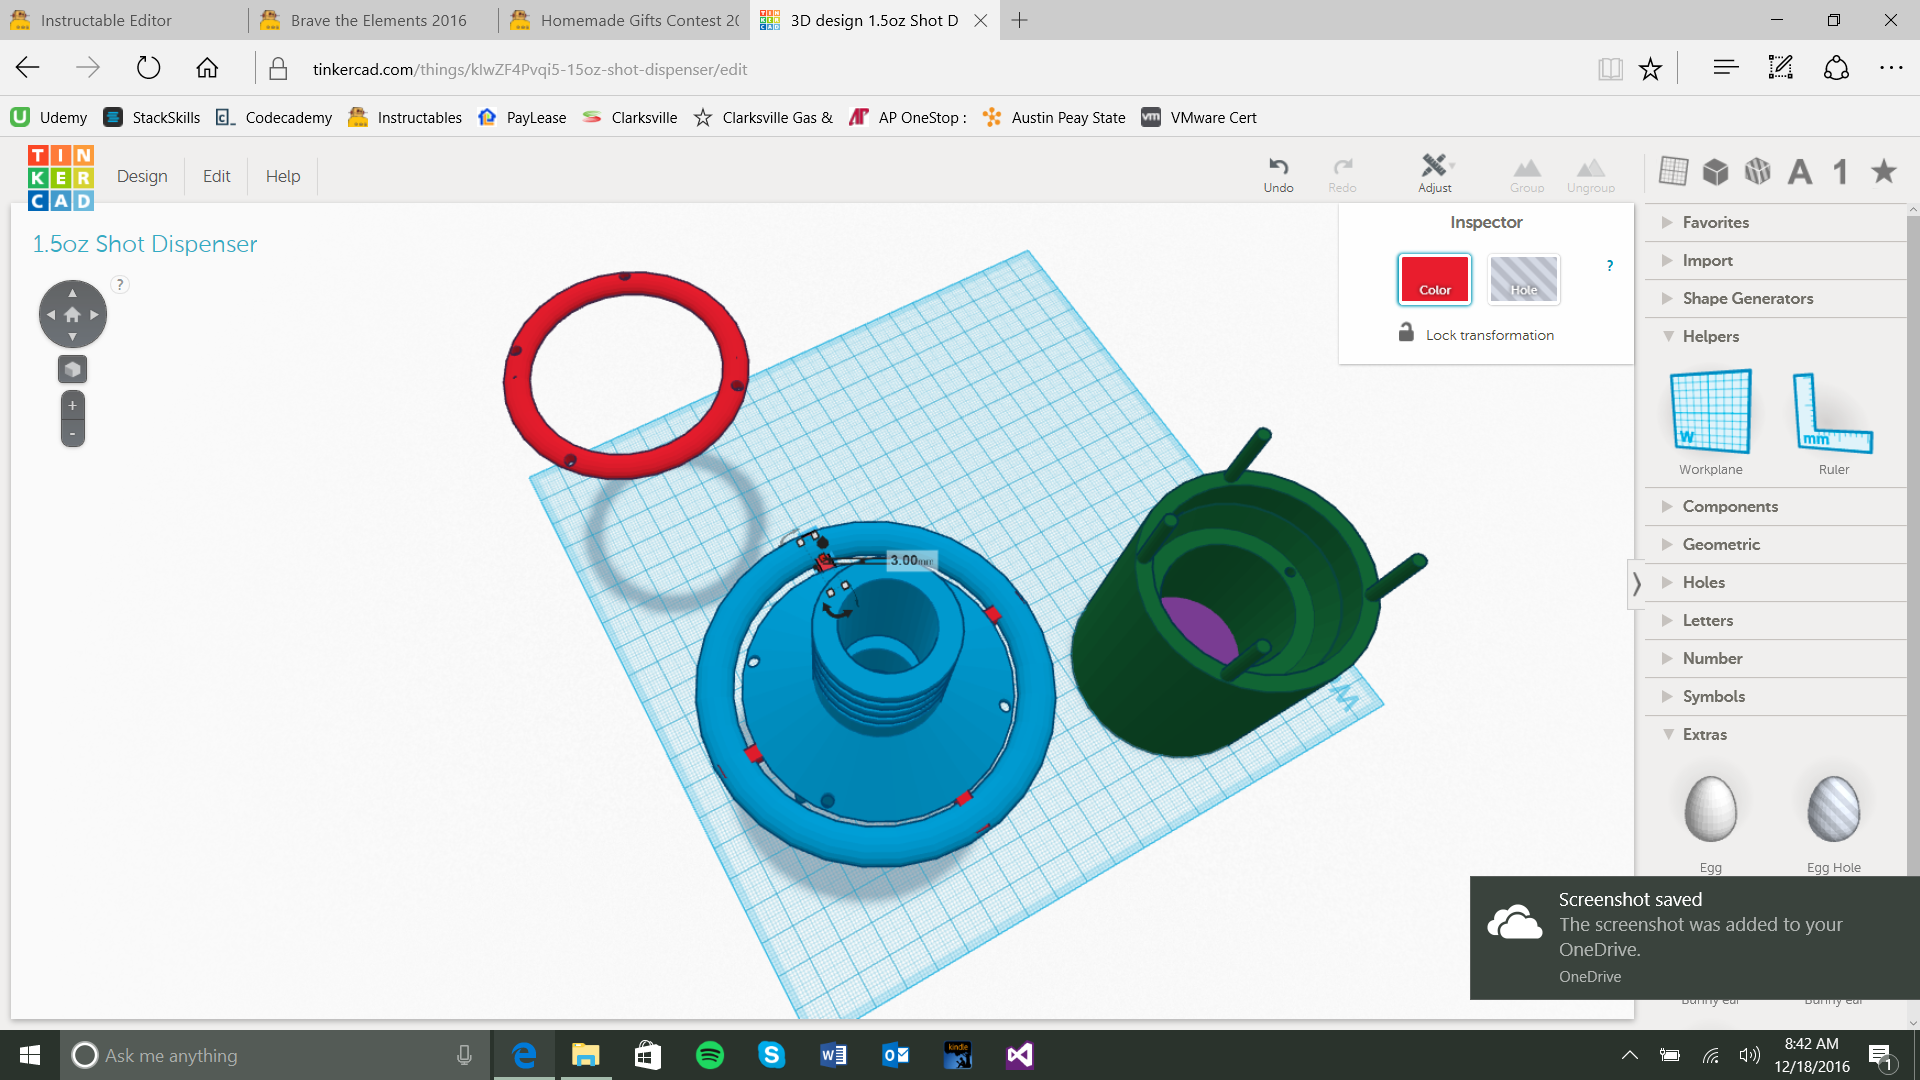
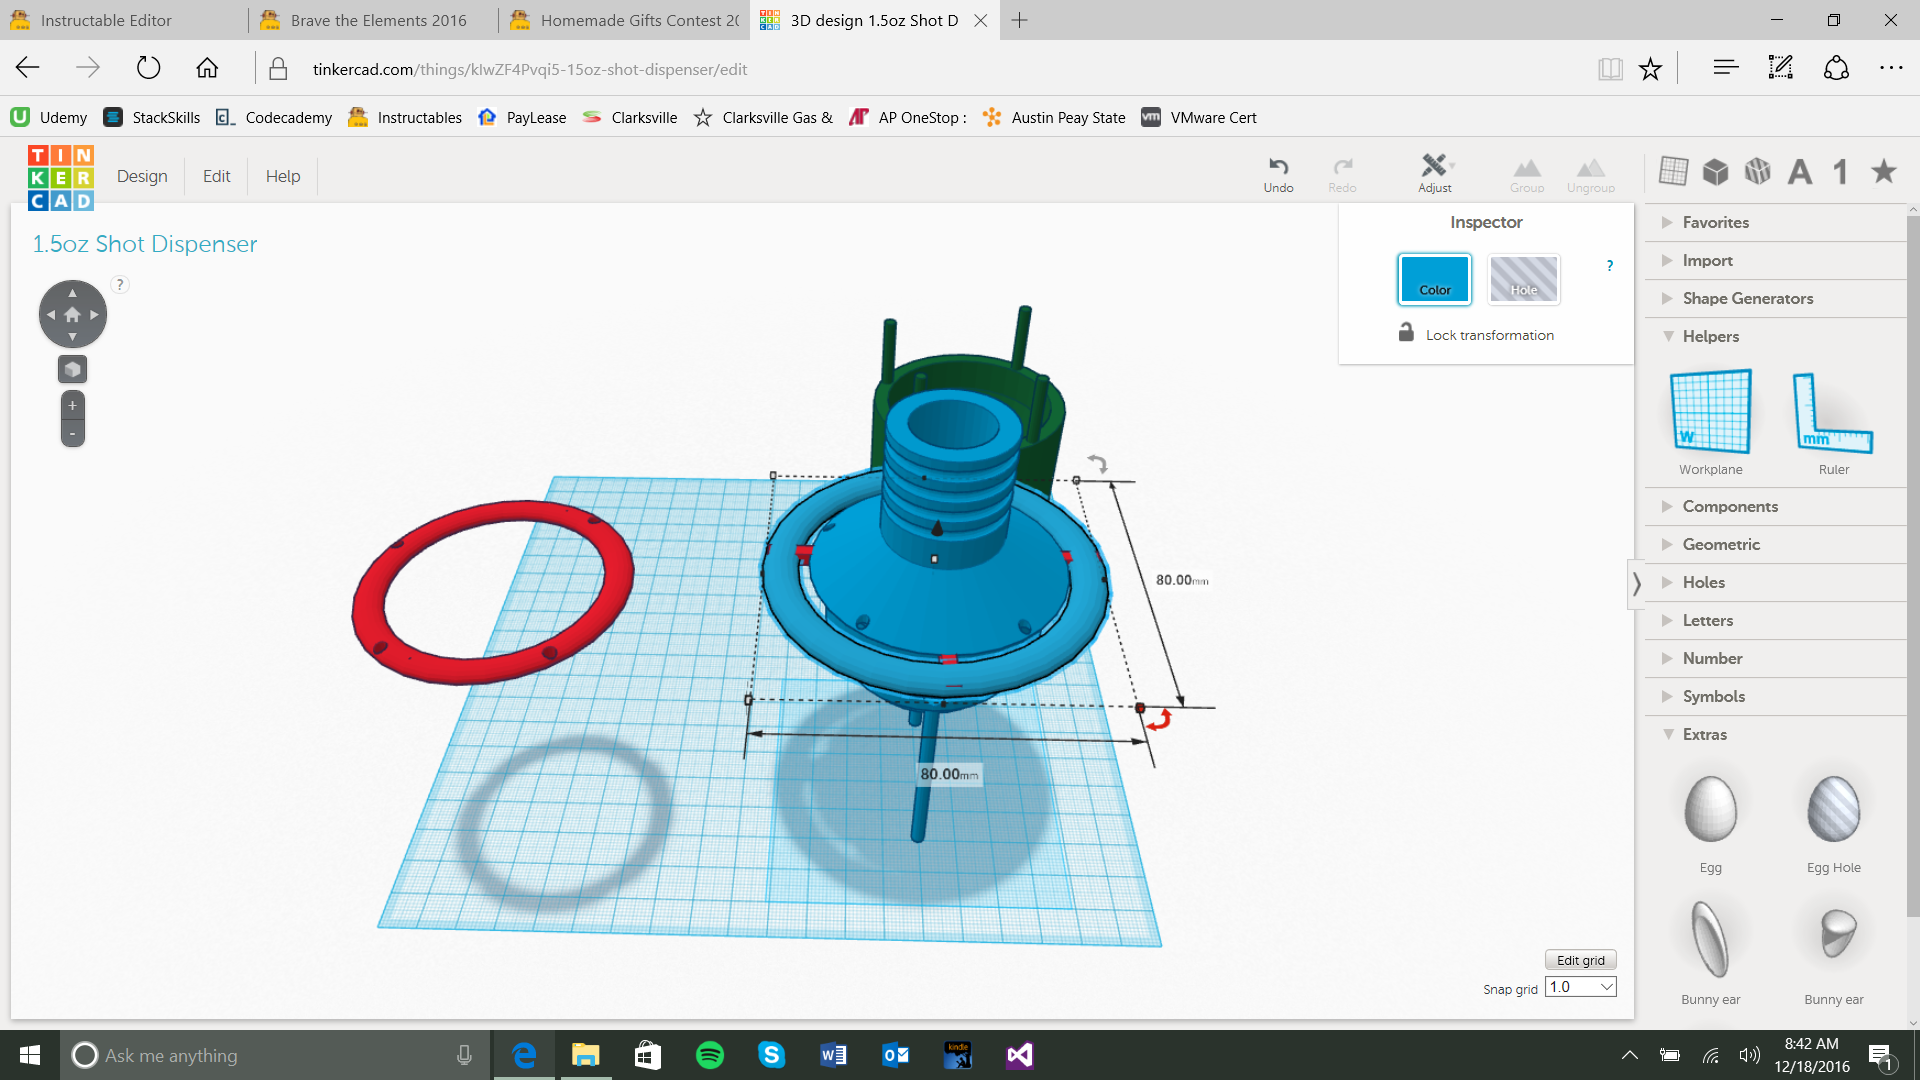
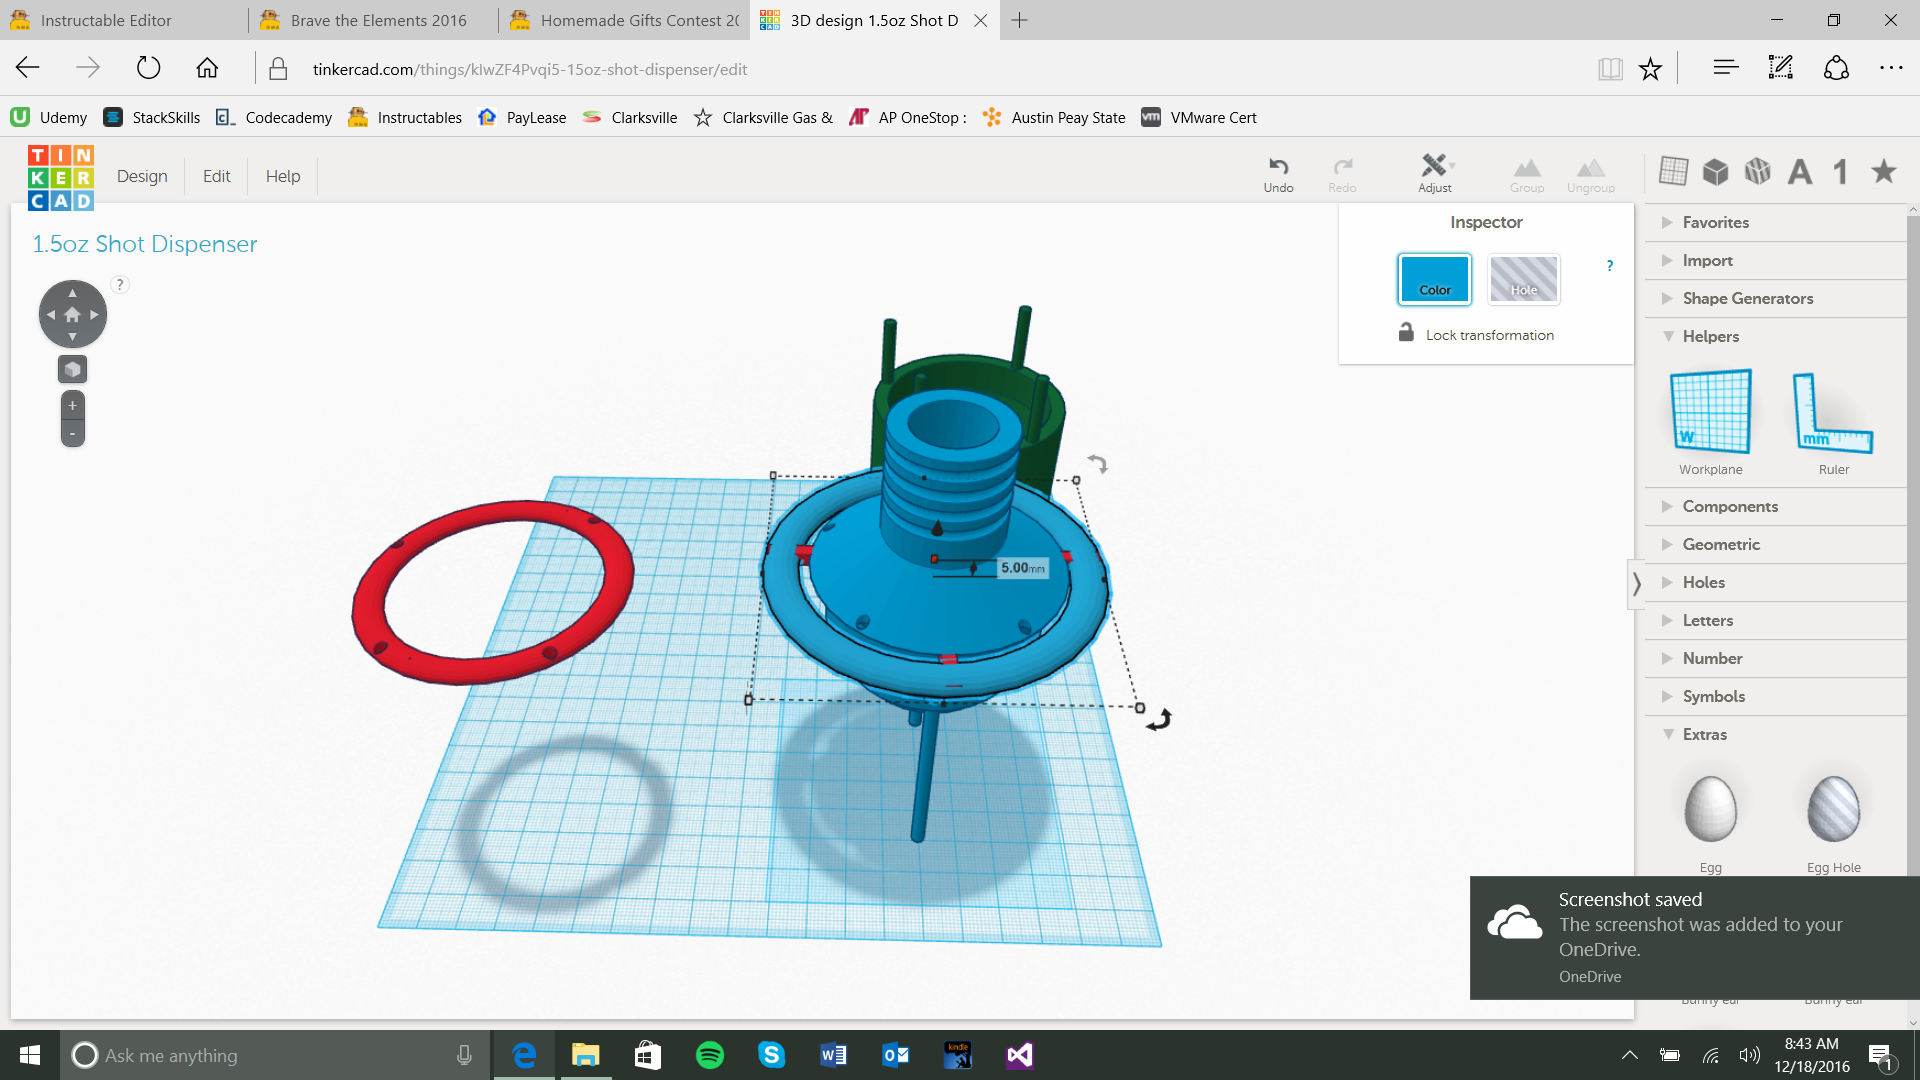
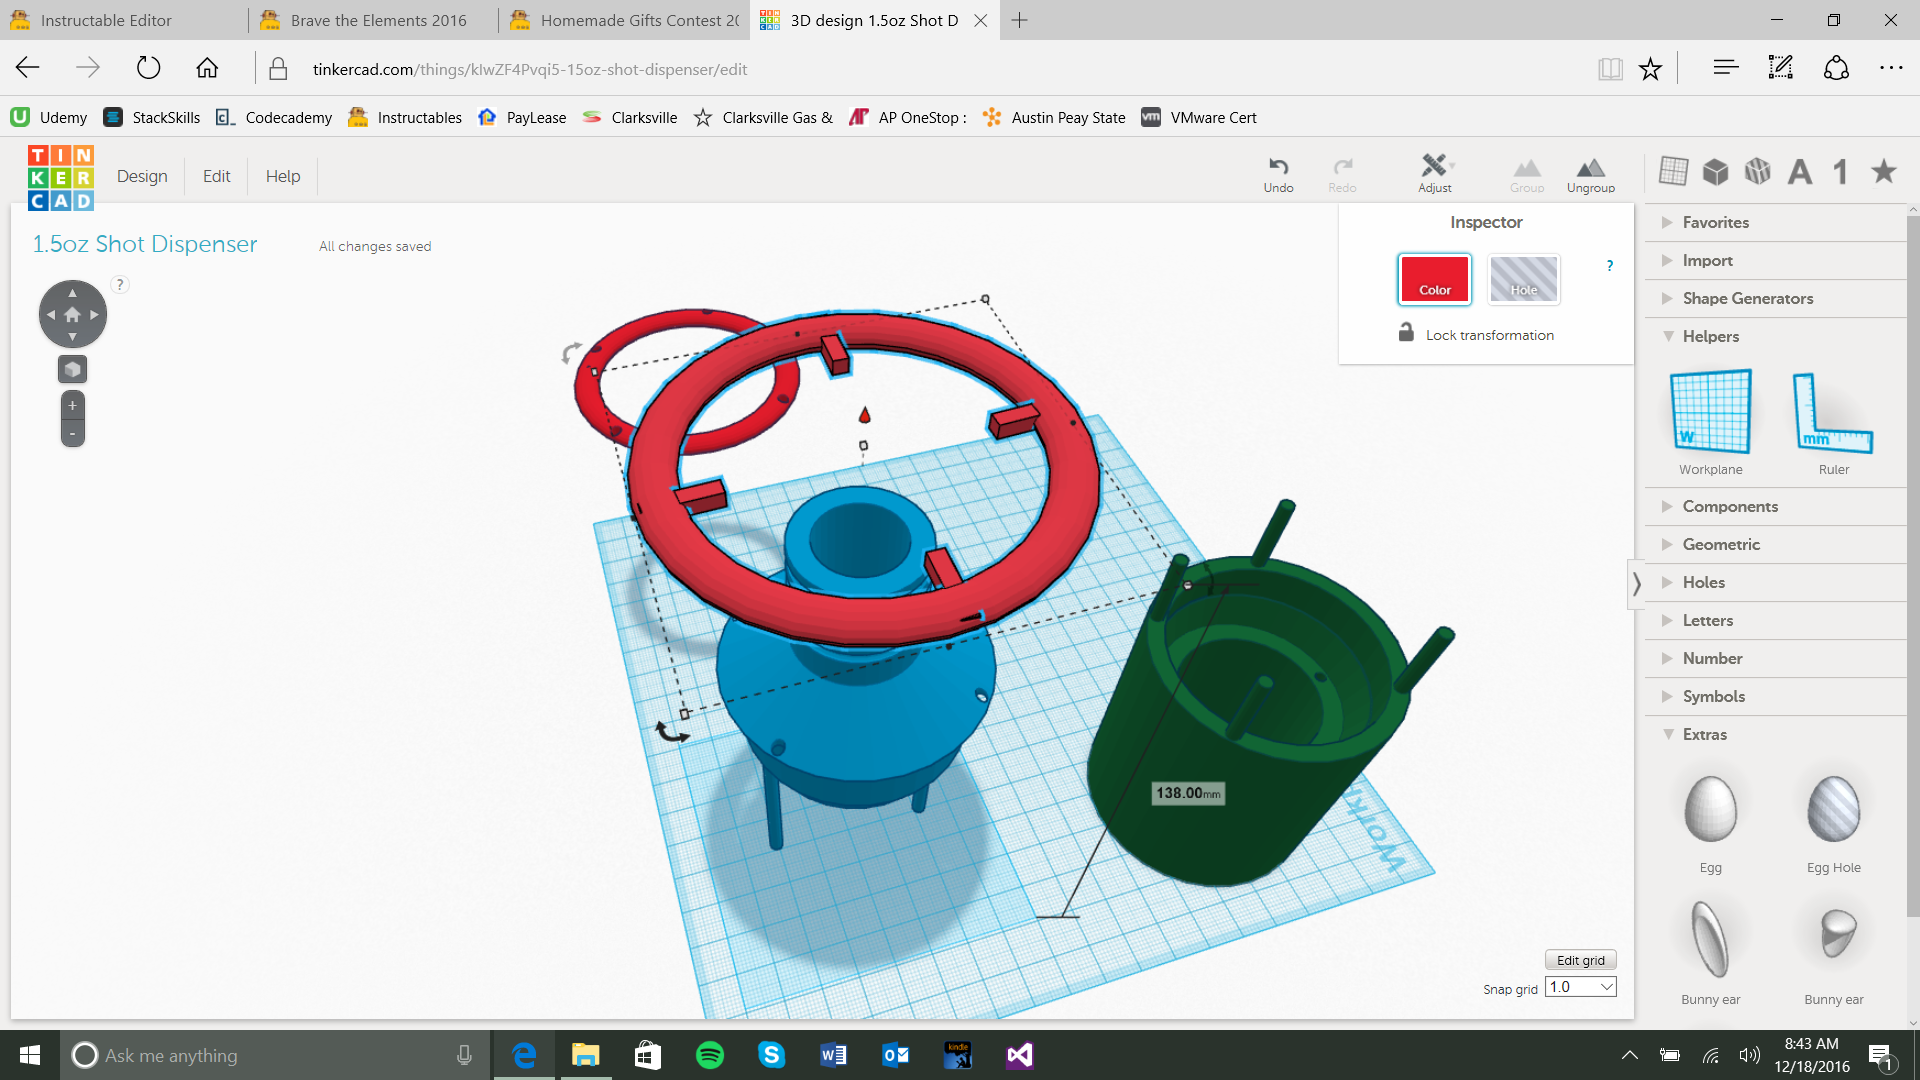
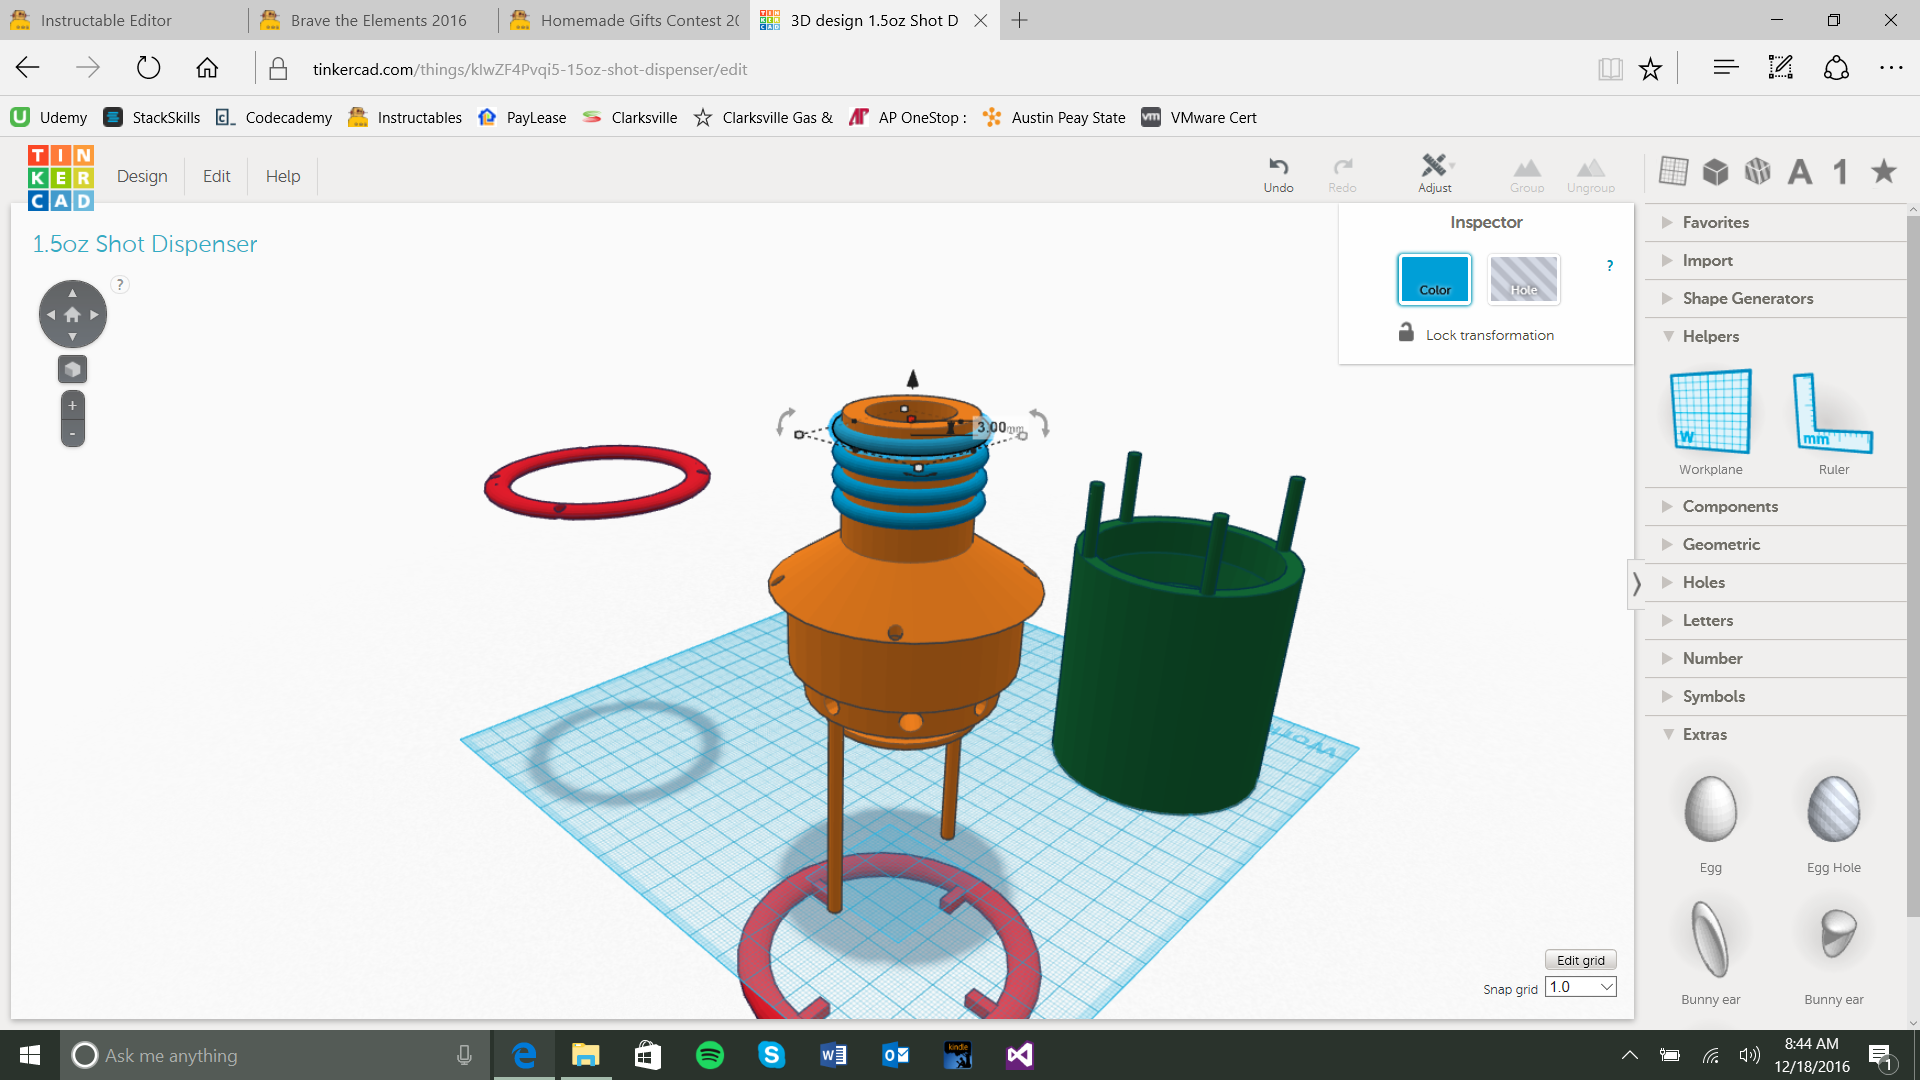
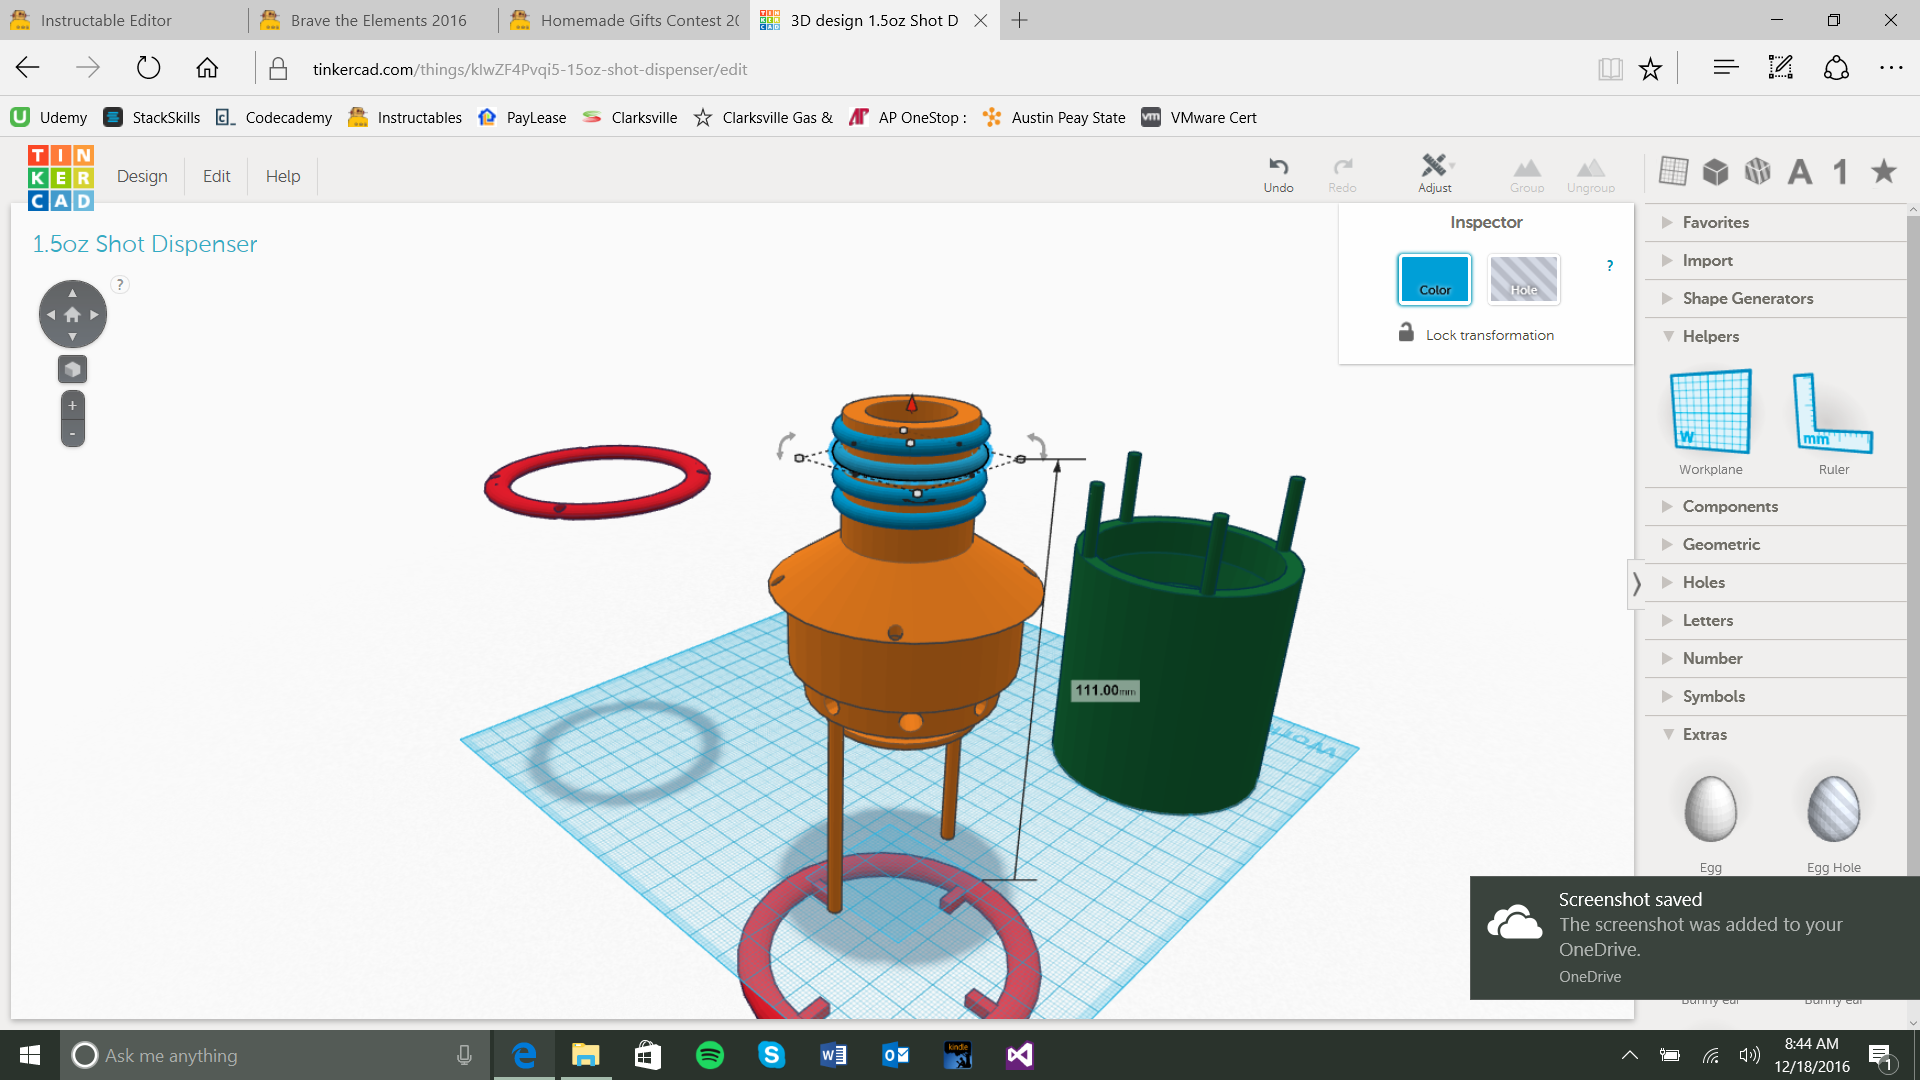
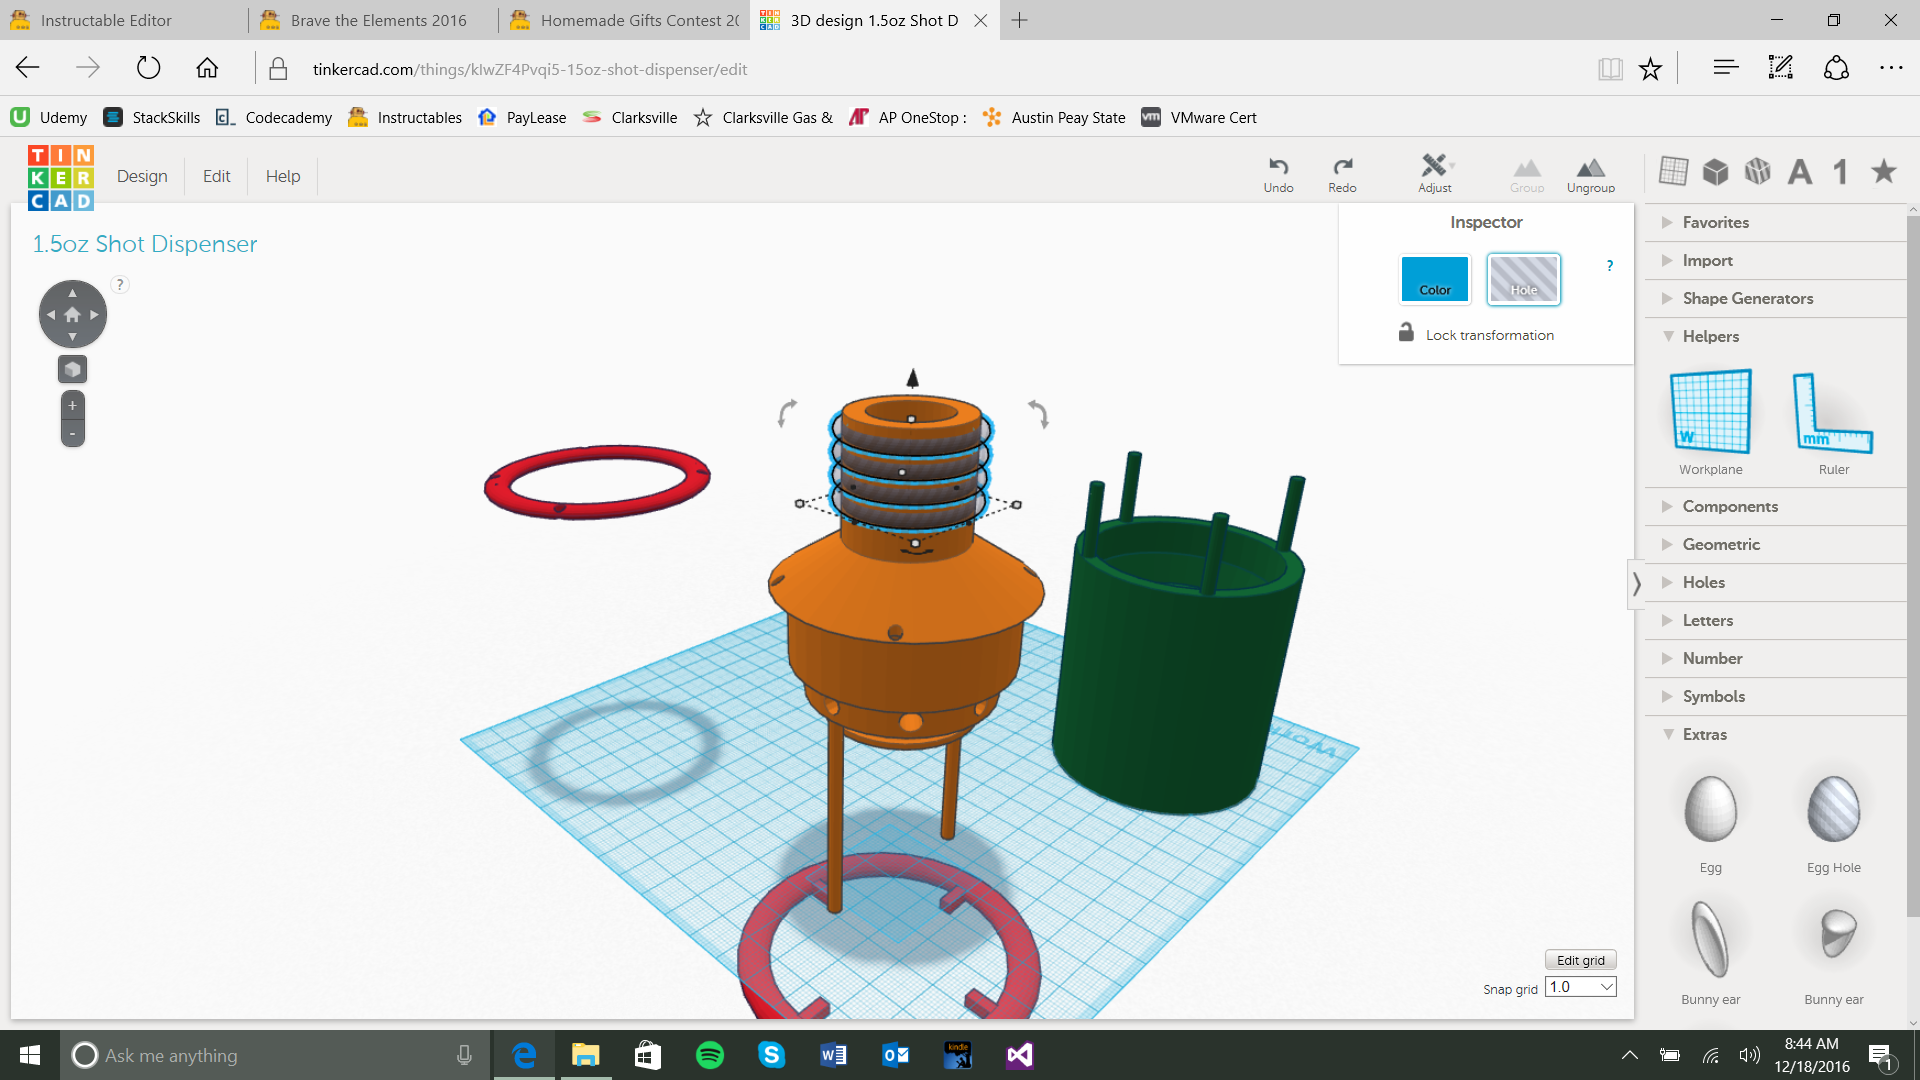
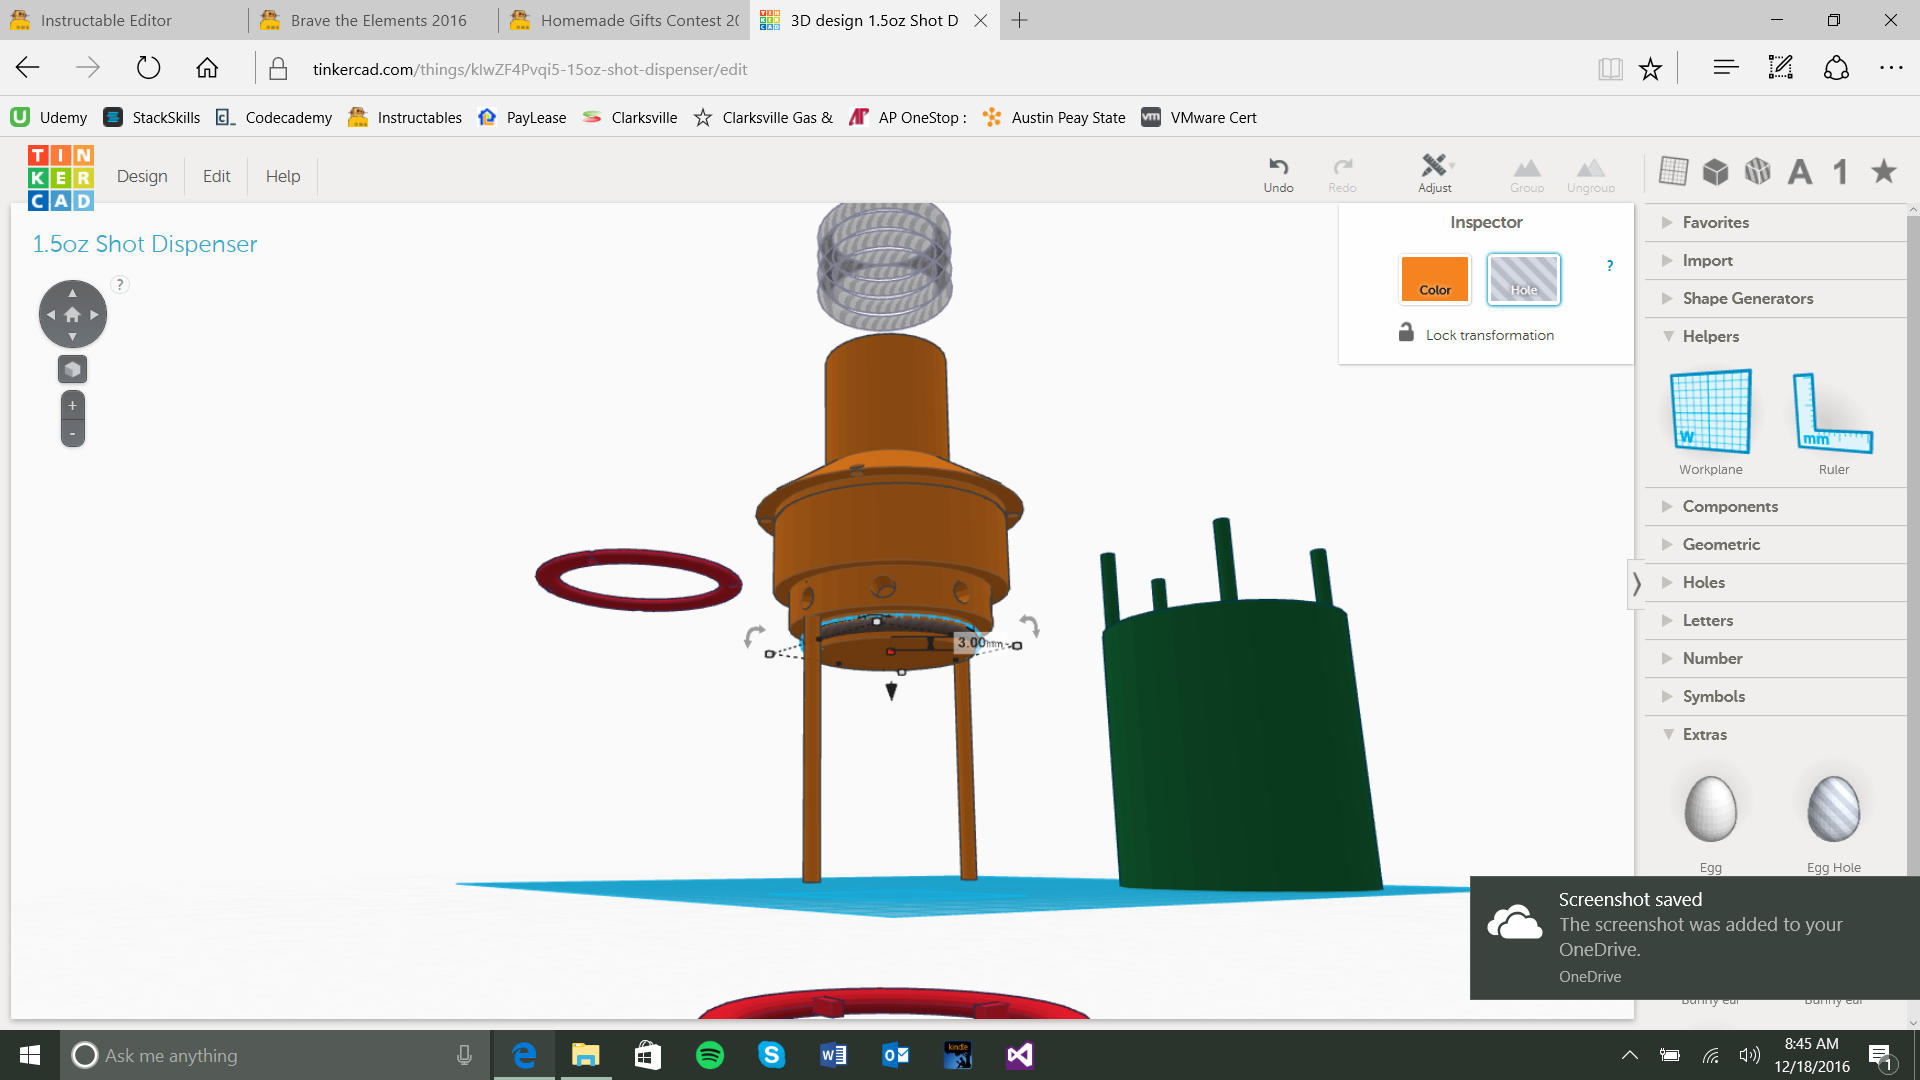
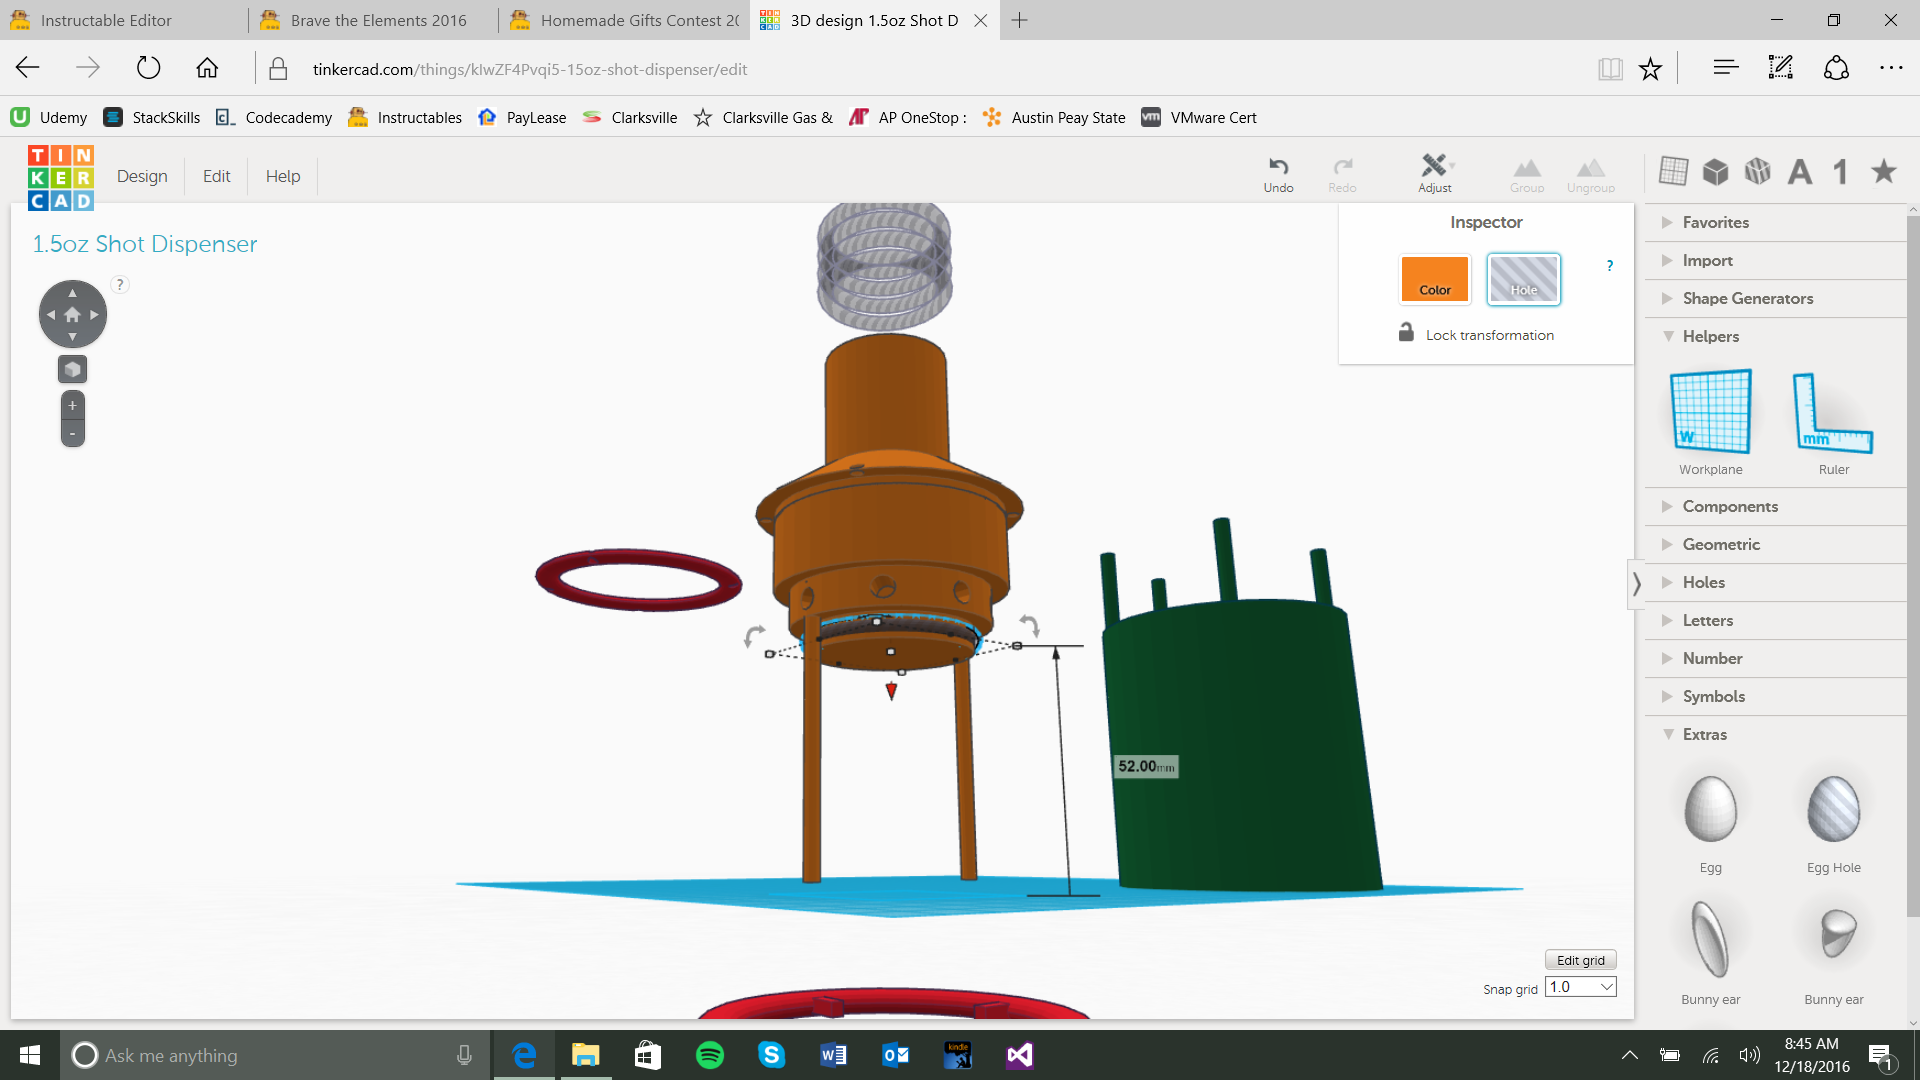
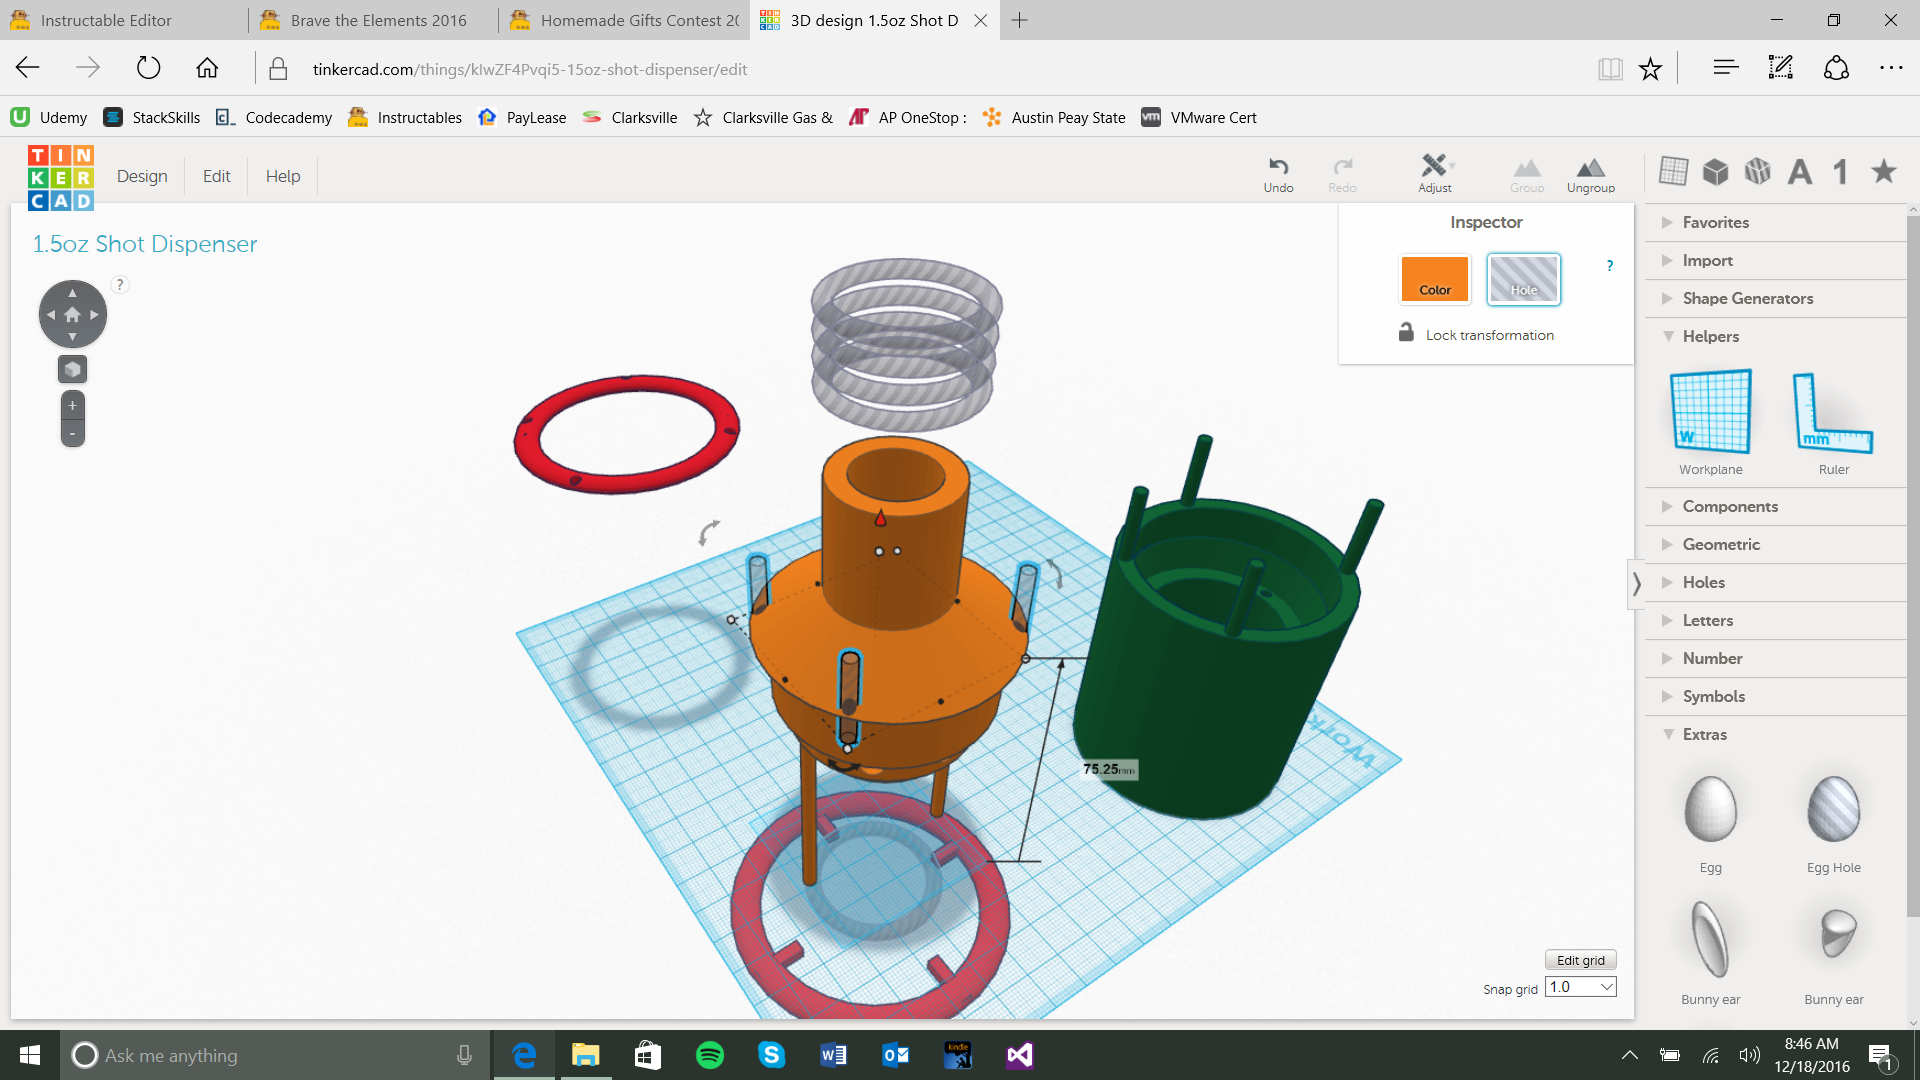
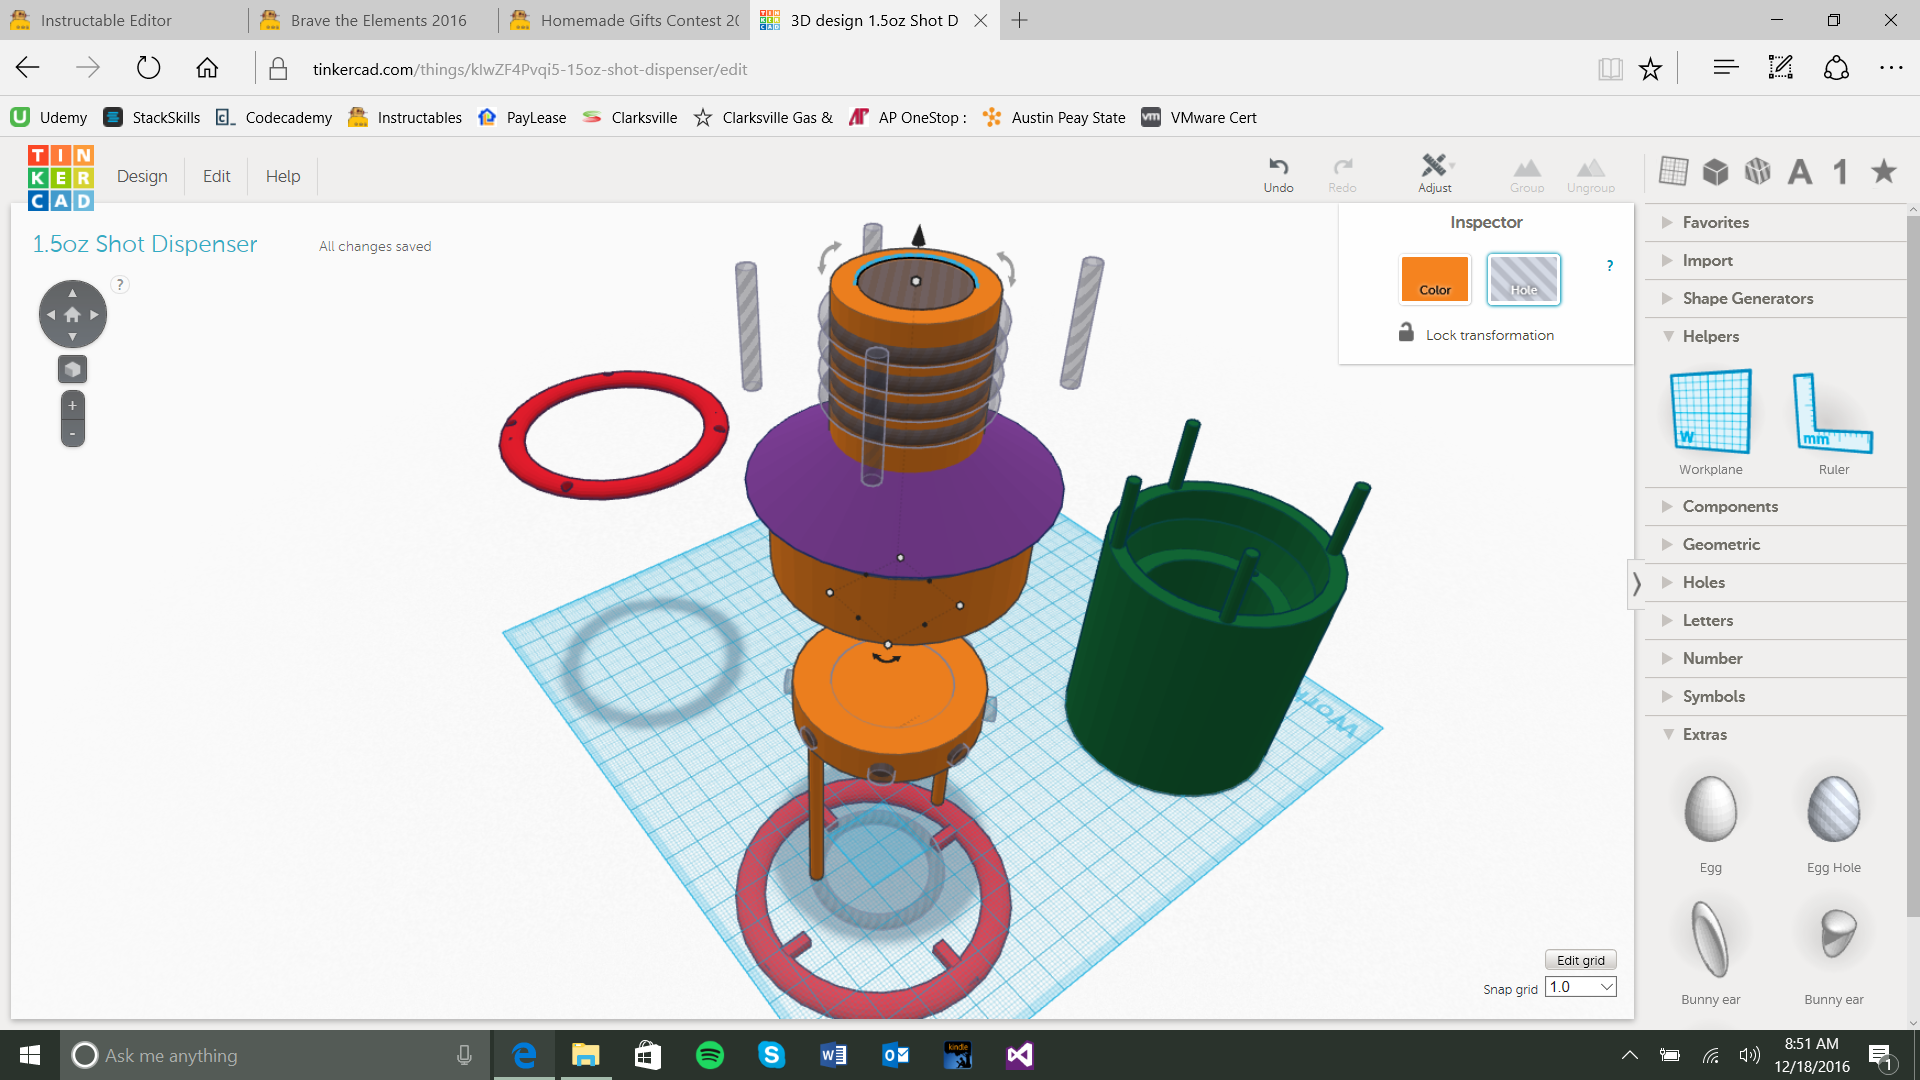
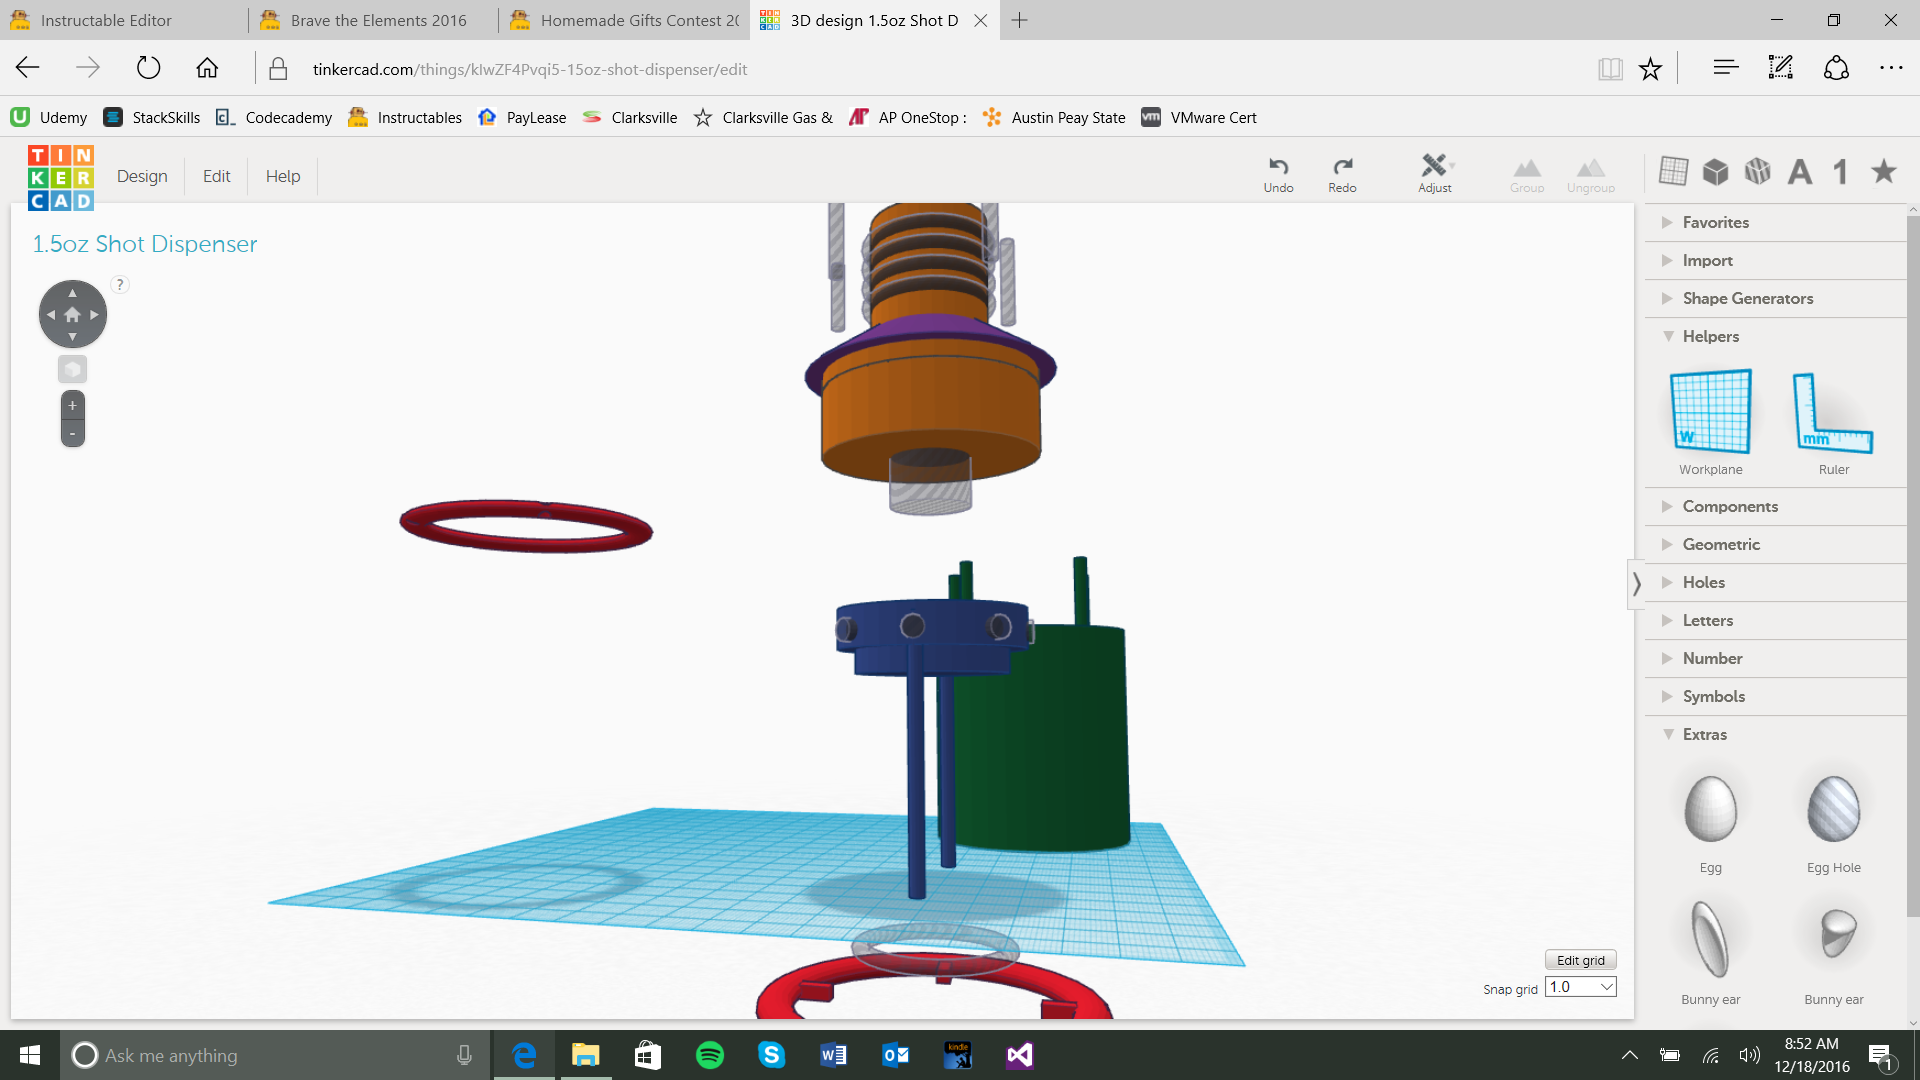
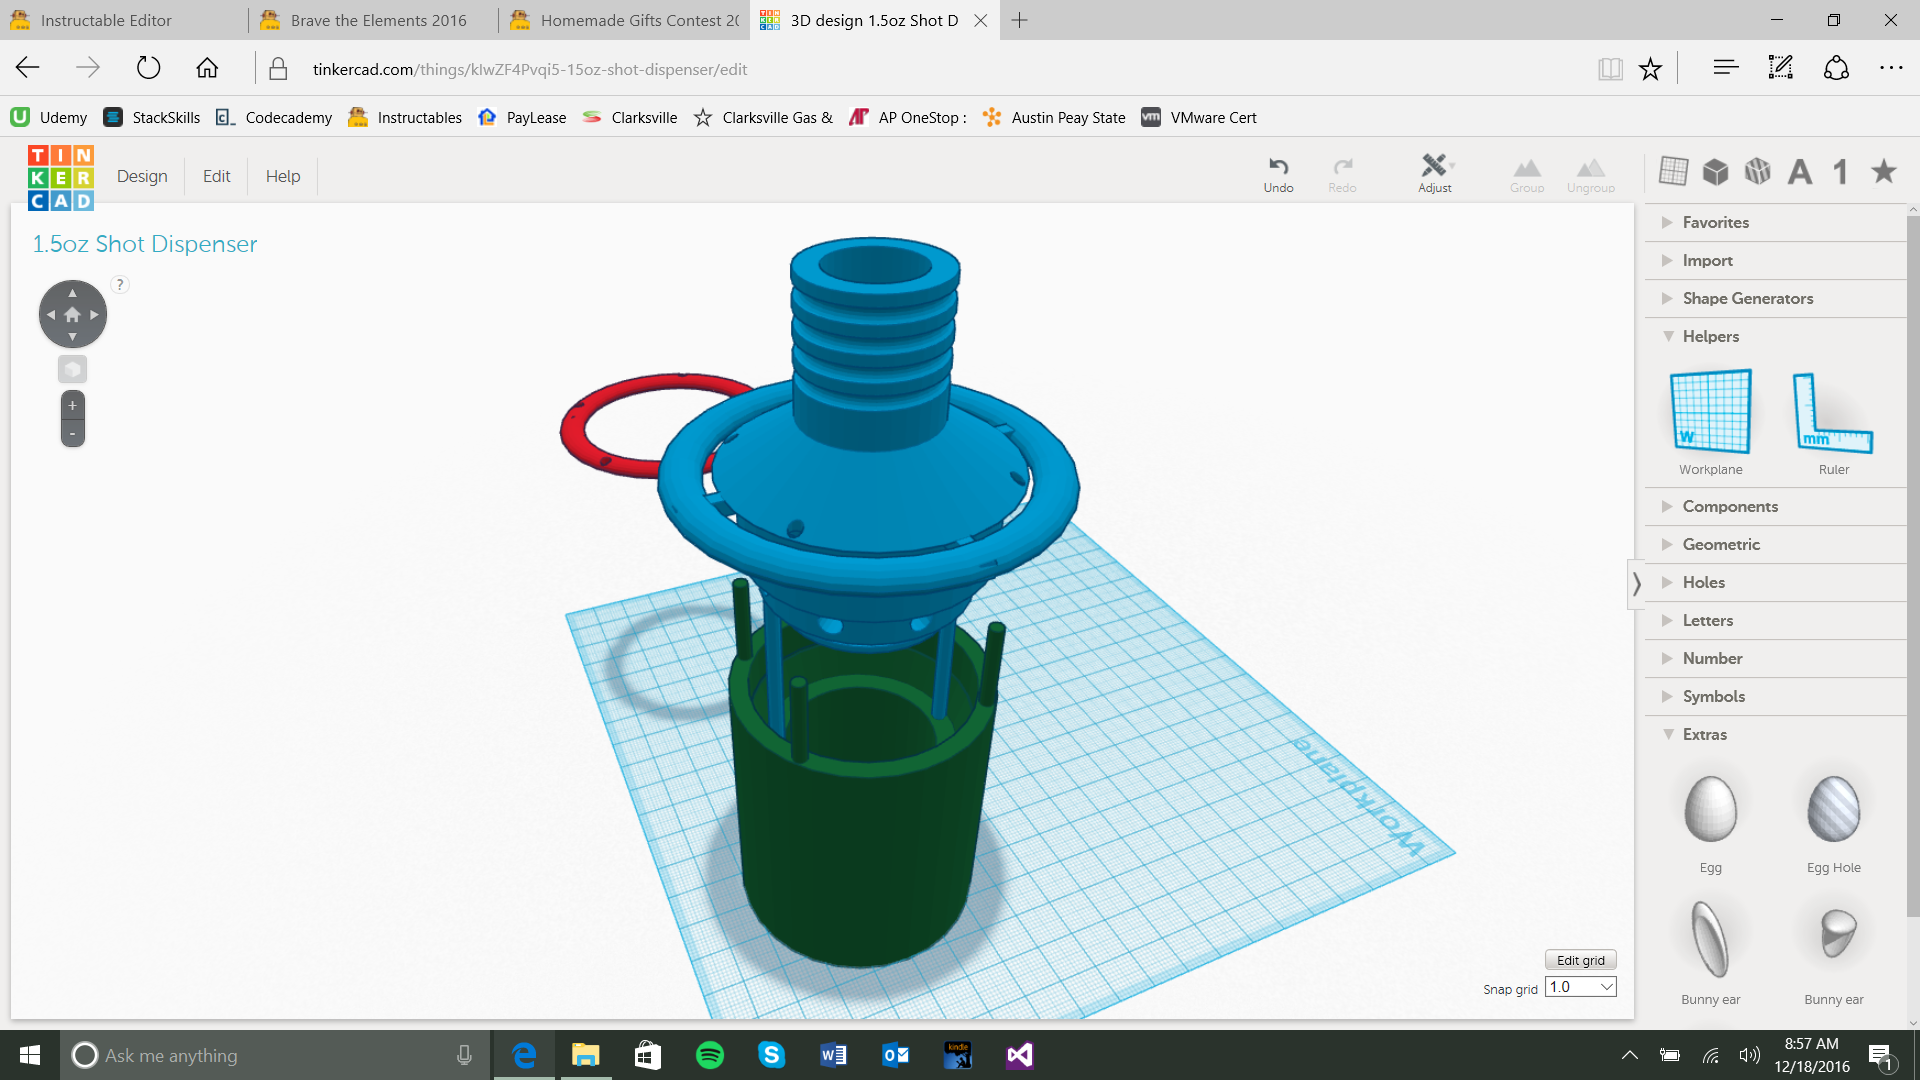
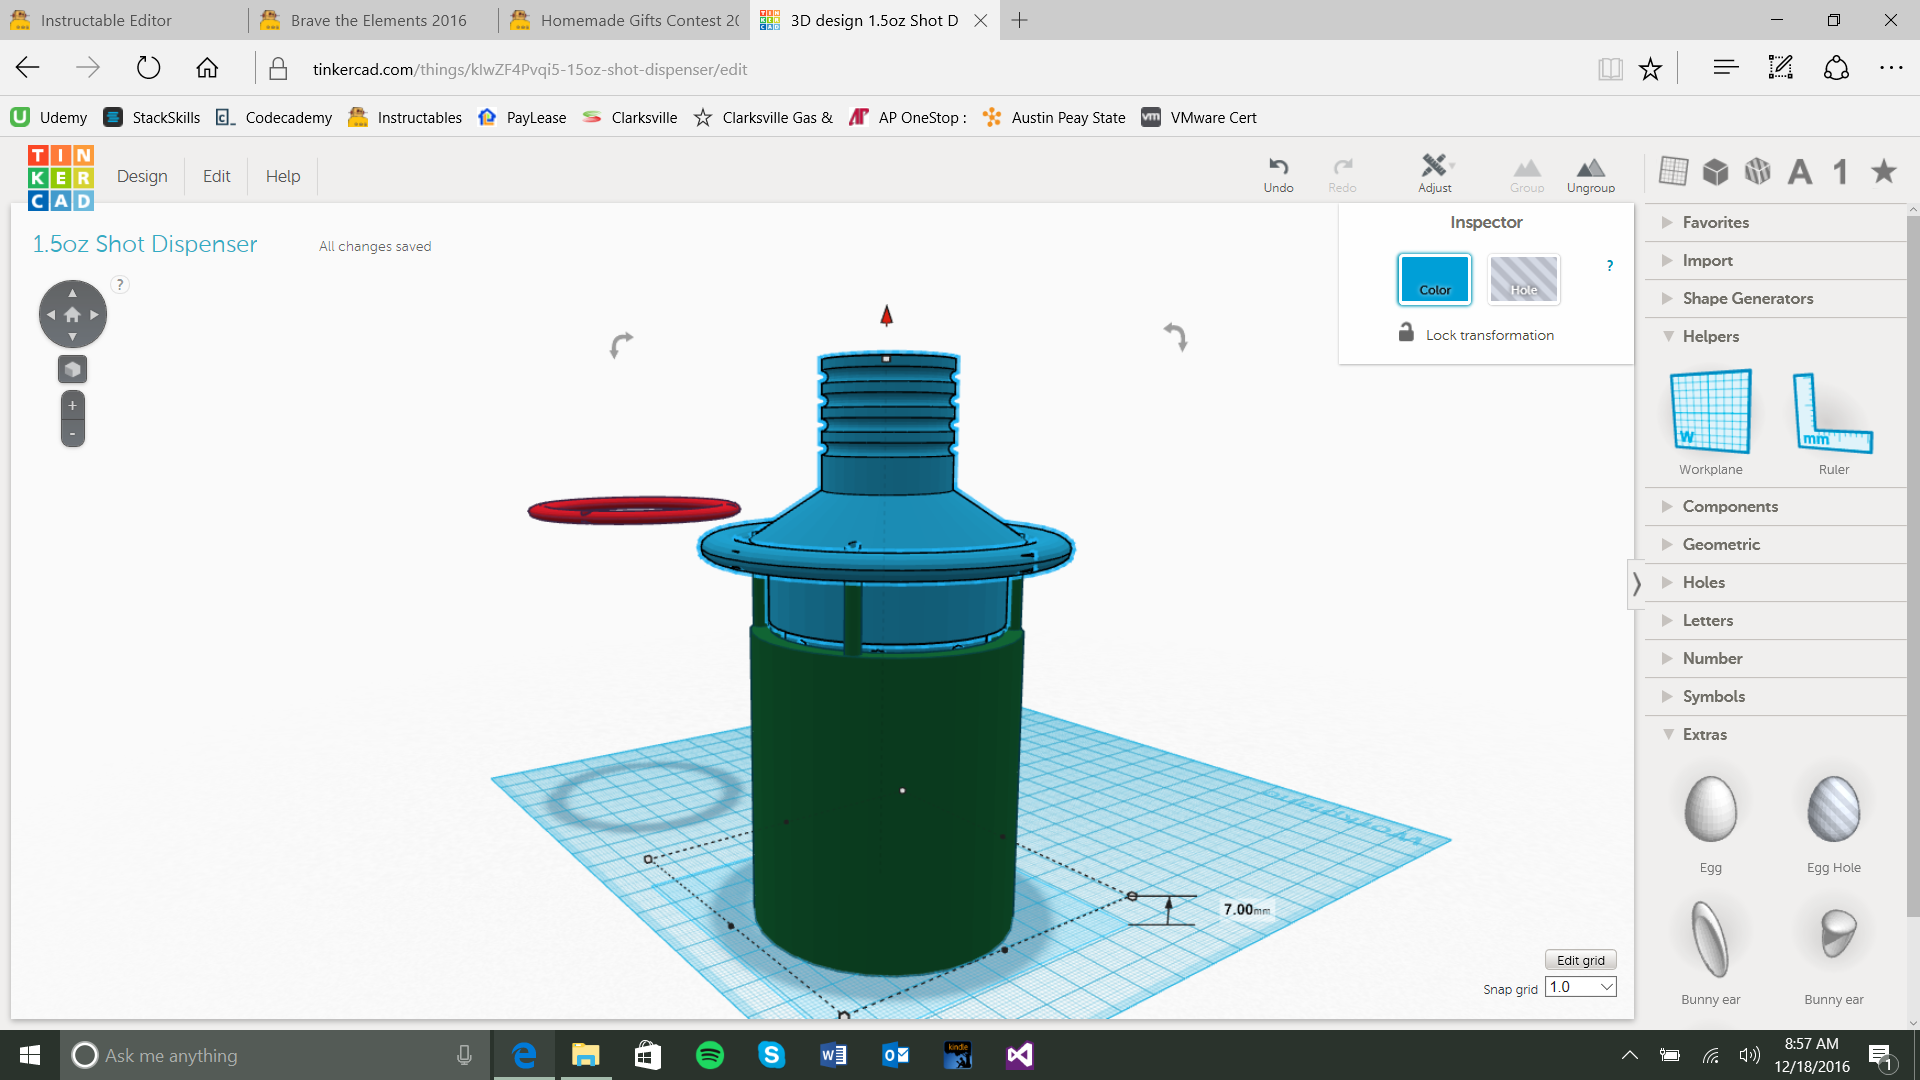
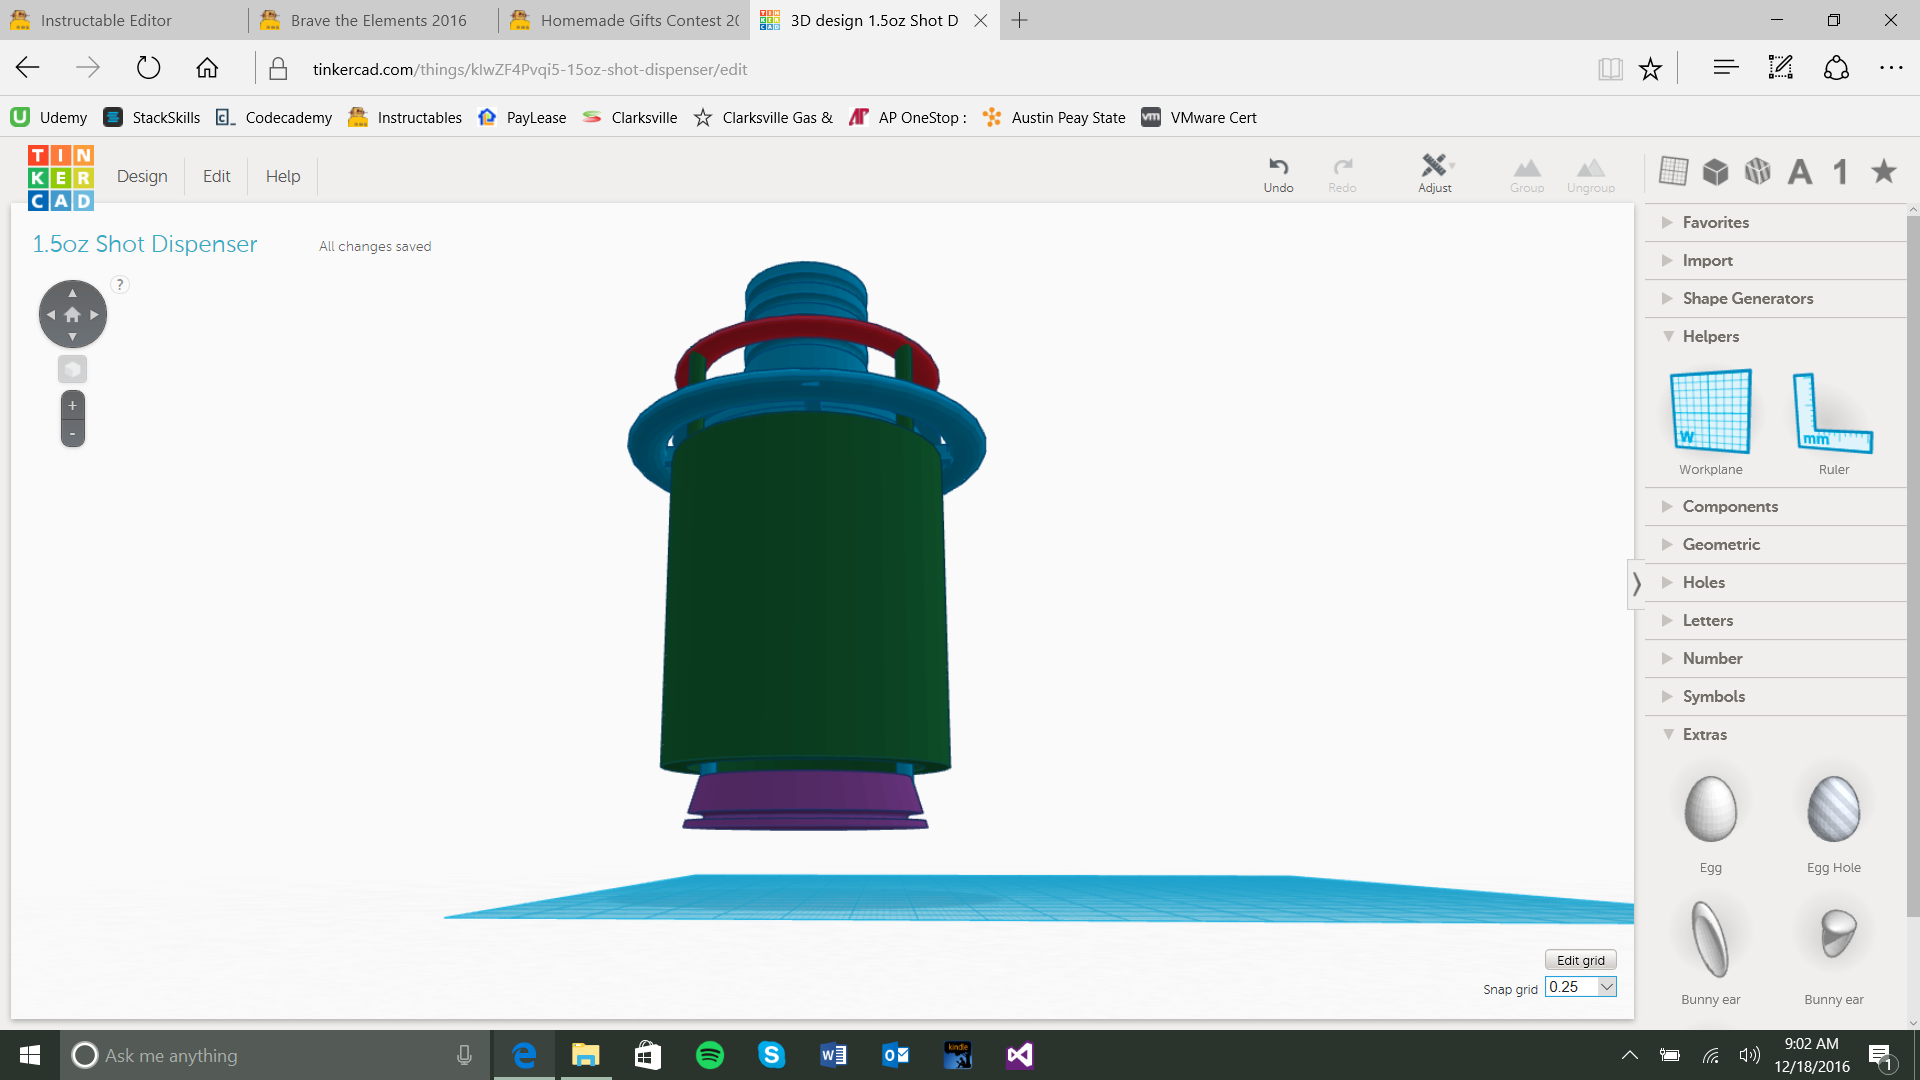
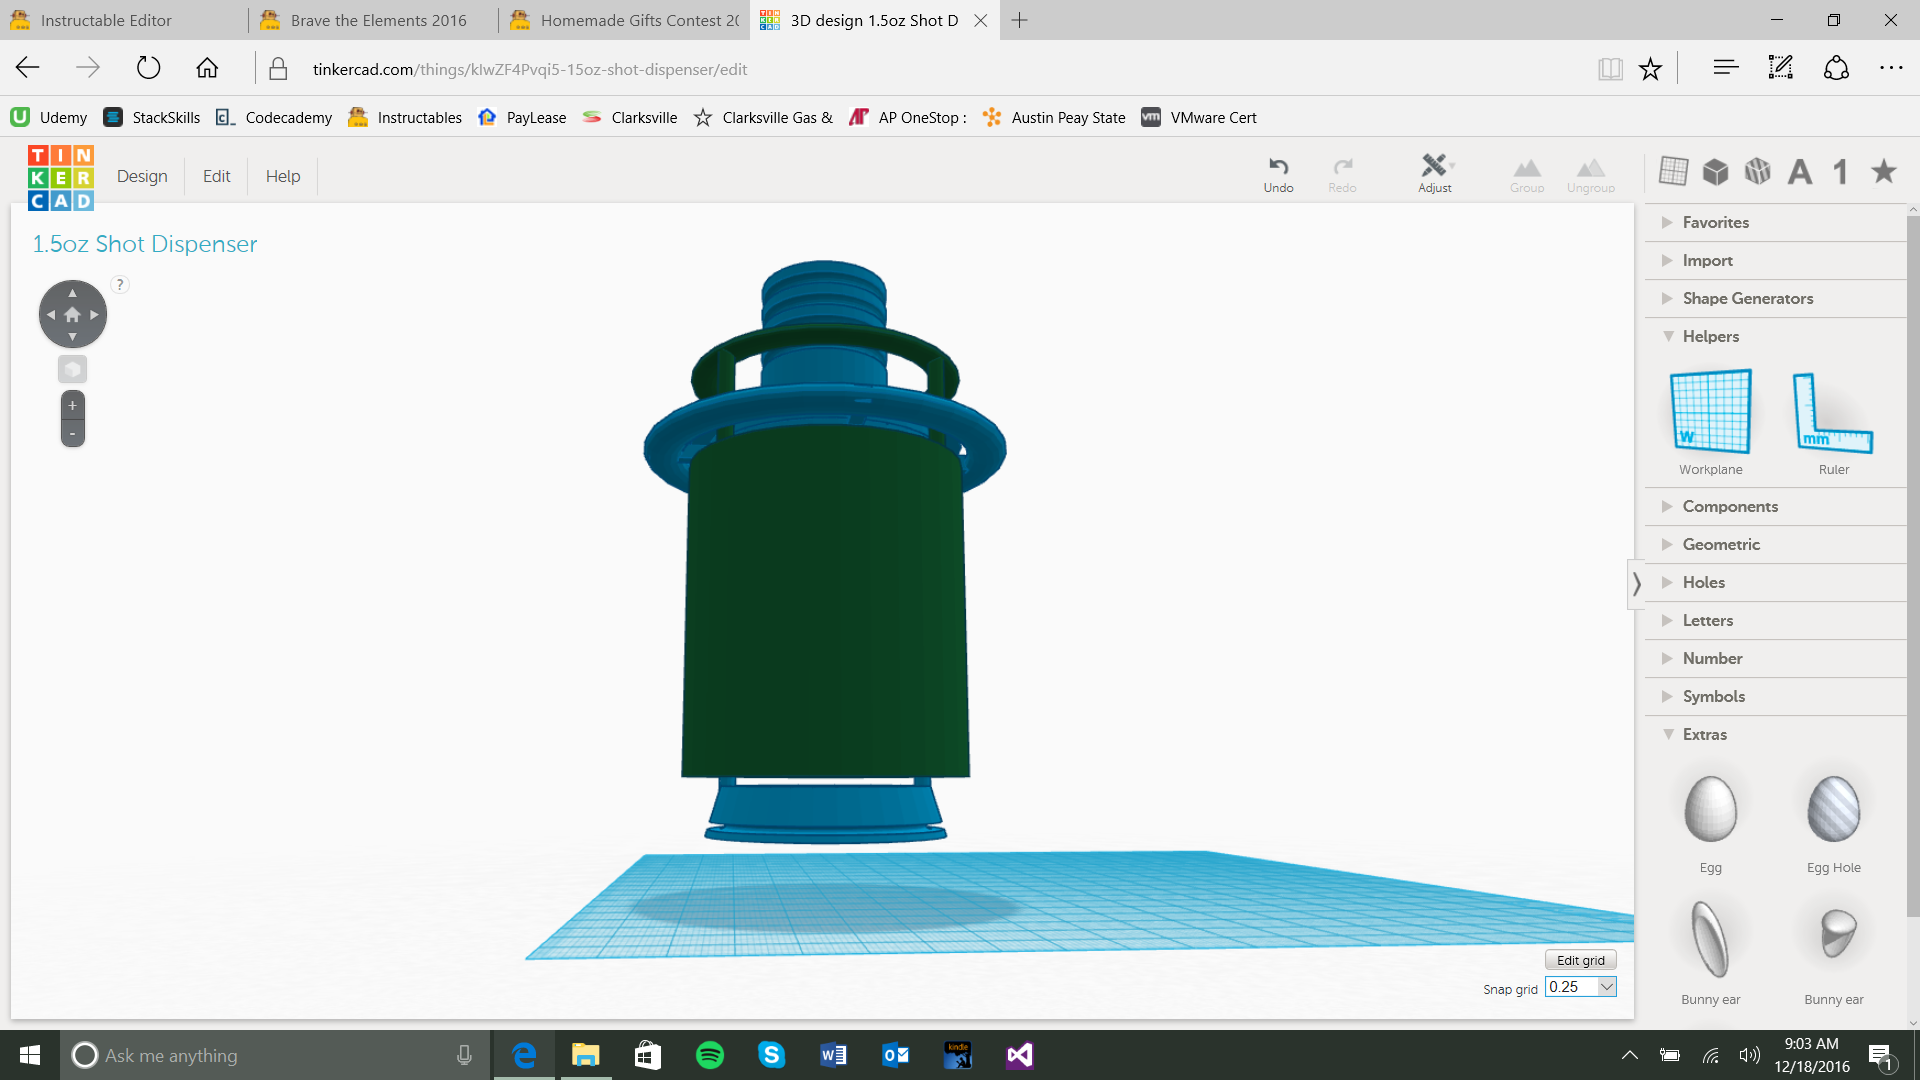
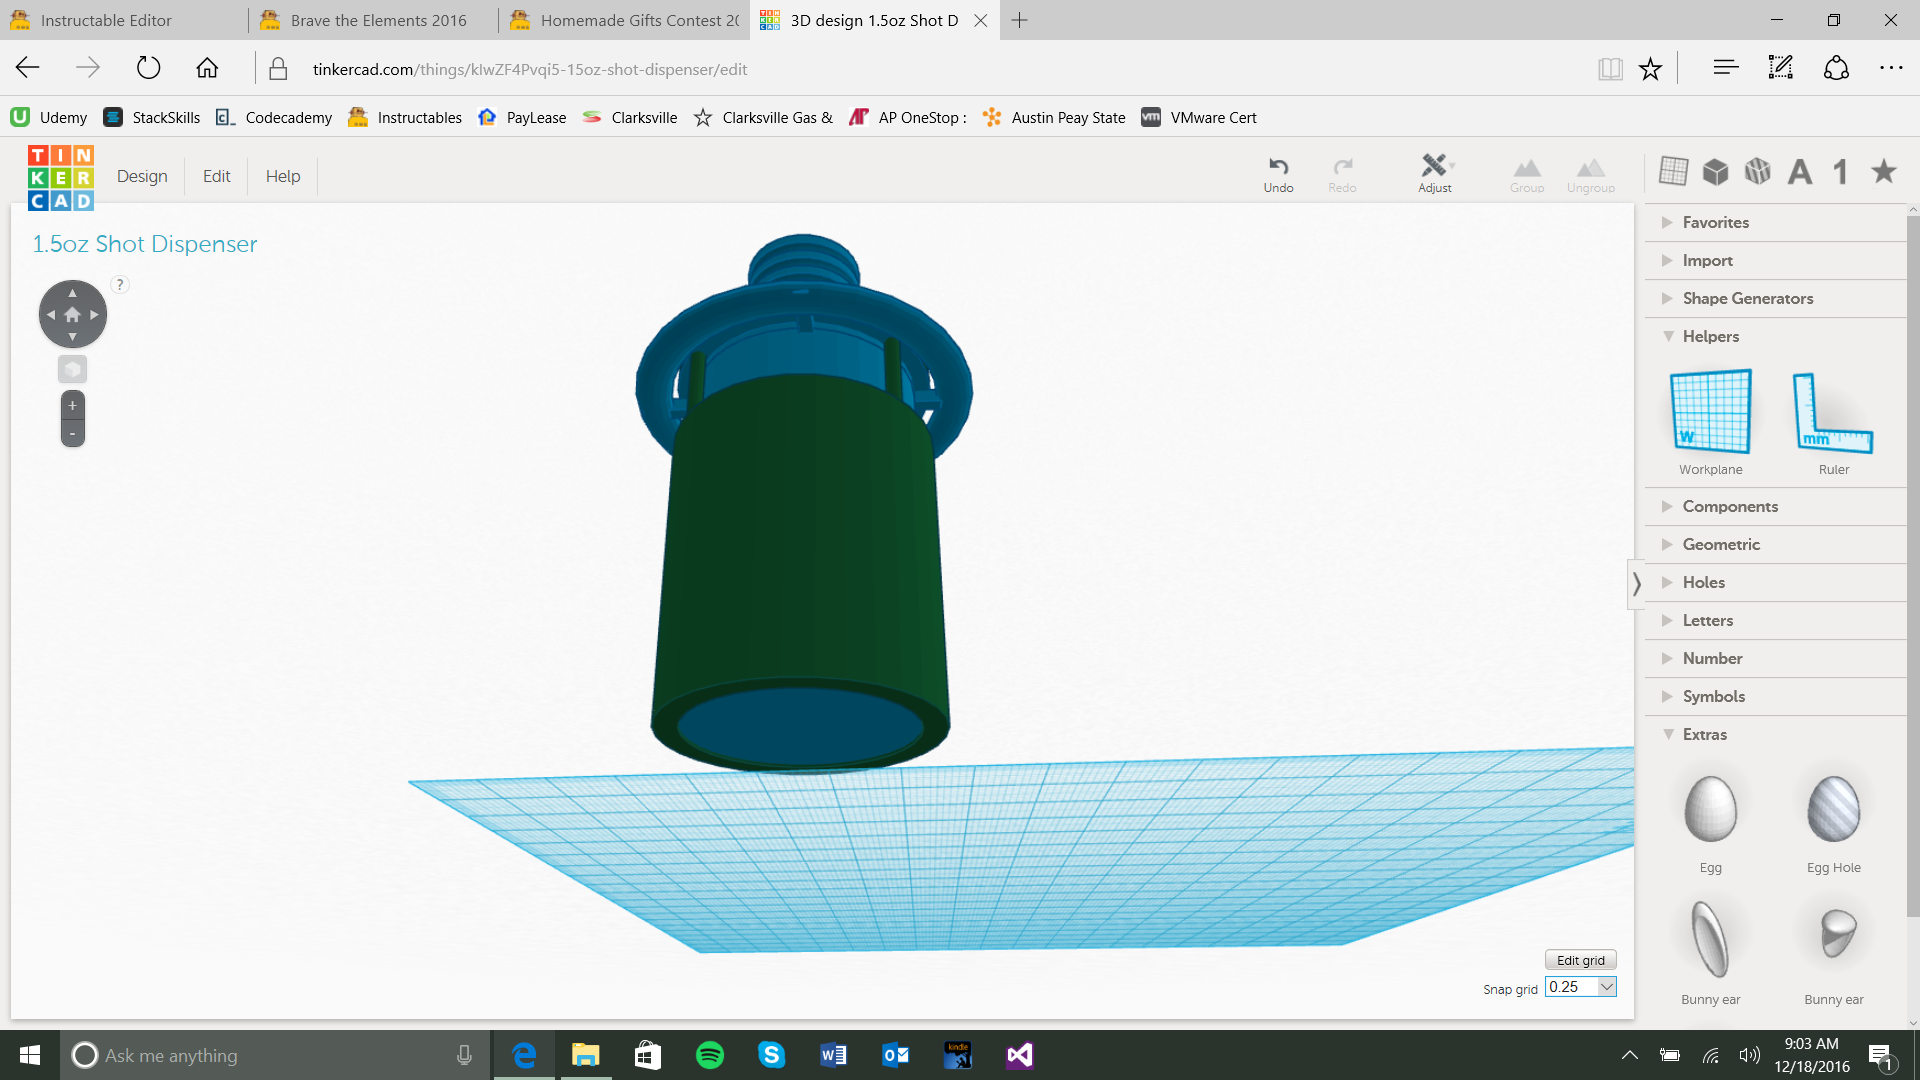
Now just place the piece together and see how it works!
Springs slide over the prongs on the Shell to keep the Bottom Stopper in the up position. When you depress the ring the stopper on the inside gets initiated and stops the flow of liquid from entering the center chamber (which should be approximately 1.5oz) and lets what liquid is in the center chamber to come out of the bottom stopper.
After making this instructable I noticed that I need to make the stopper slide independently so that the end that goes into the bottle doesn't move too. As soon as a figure out how to make this modification I will update this instructable. This theoretically still works just instead of depressing the ring you can simply press on the bottle instead to actuate it.
I hope you enjoyed this little build, please give me some feed back on how to make this a better instructable. In the future I plan on making this instructables pictures a little better, but for now I hope you had fun!