Shark Fin Halloween Prop
This is a detachable shark fin that you can wear on your back!
Supplies
- PC/Laptop with inventor app installed on it
- 3d printer application
- 3d Printer
Creating Shark Fin on Inventor.
- An application called Inventor is a really useful tool in making this shark fin.
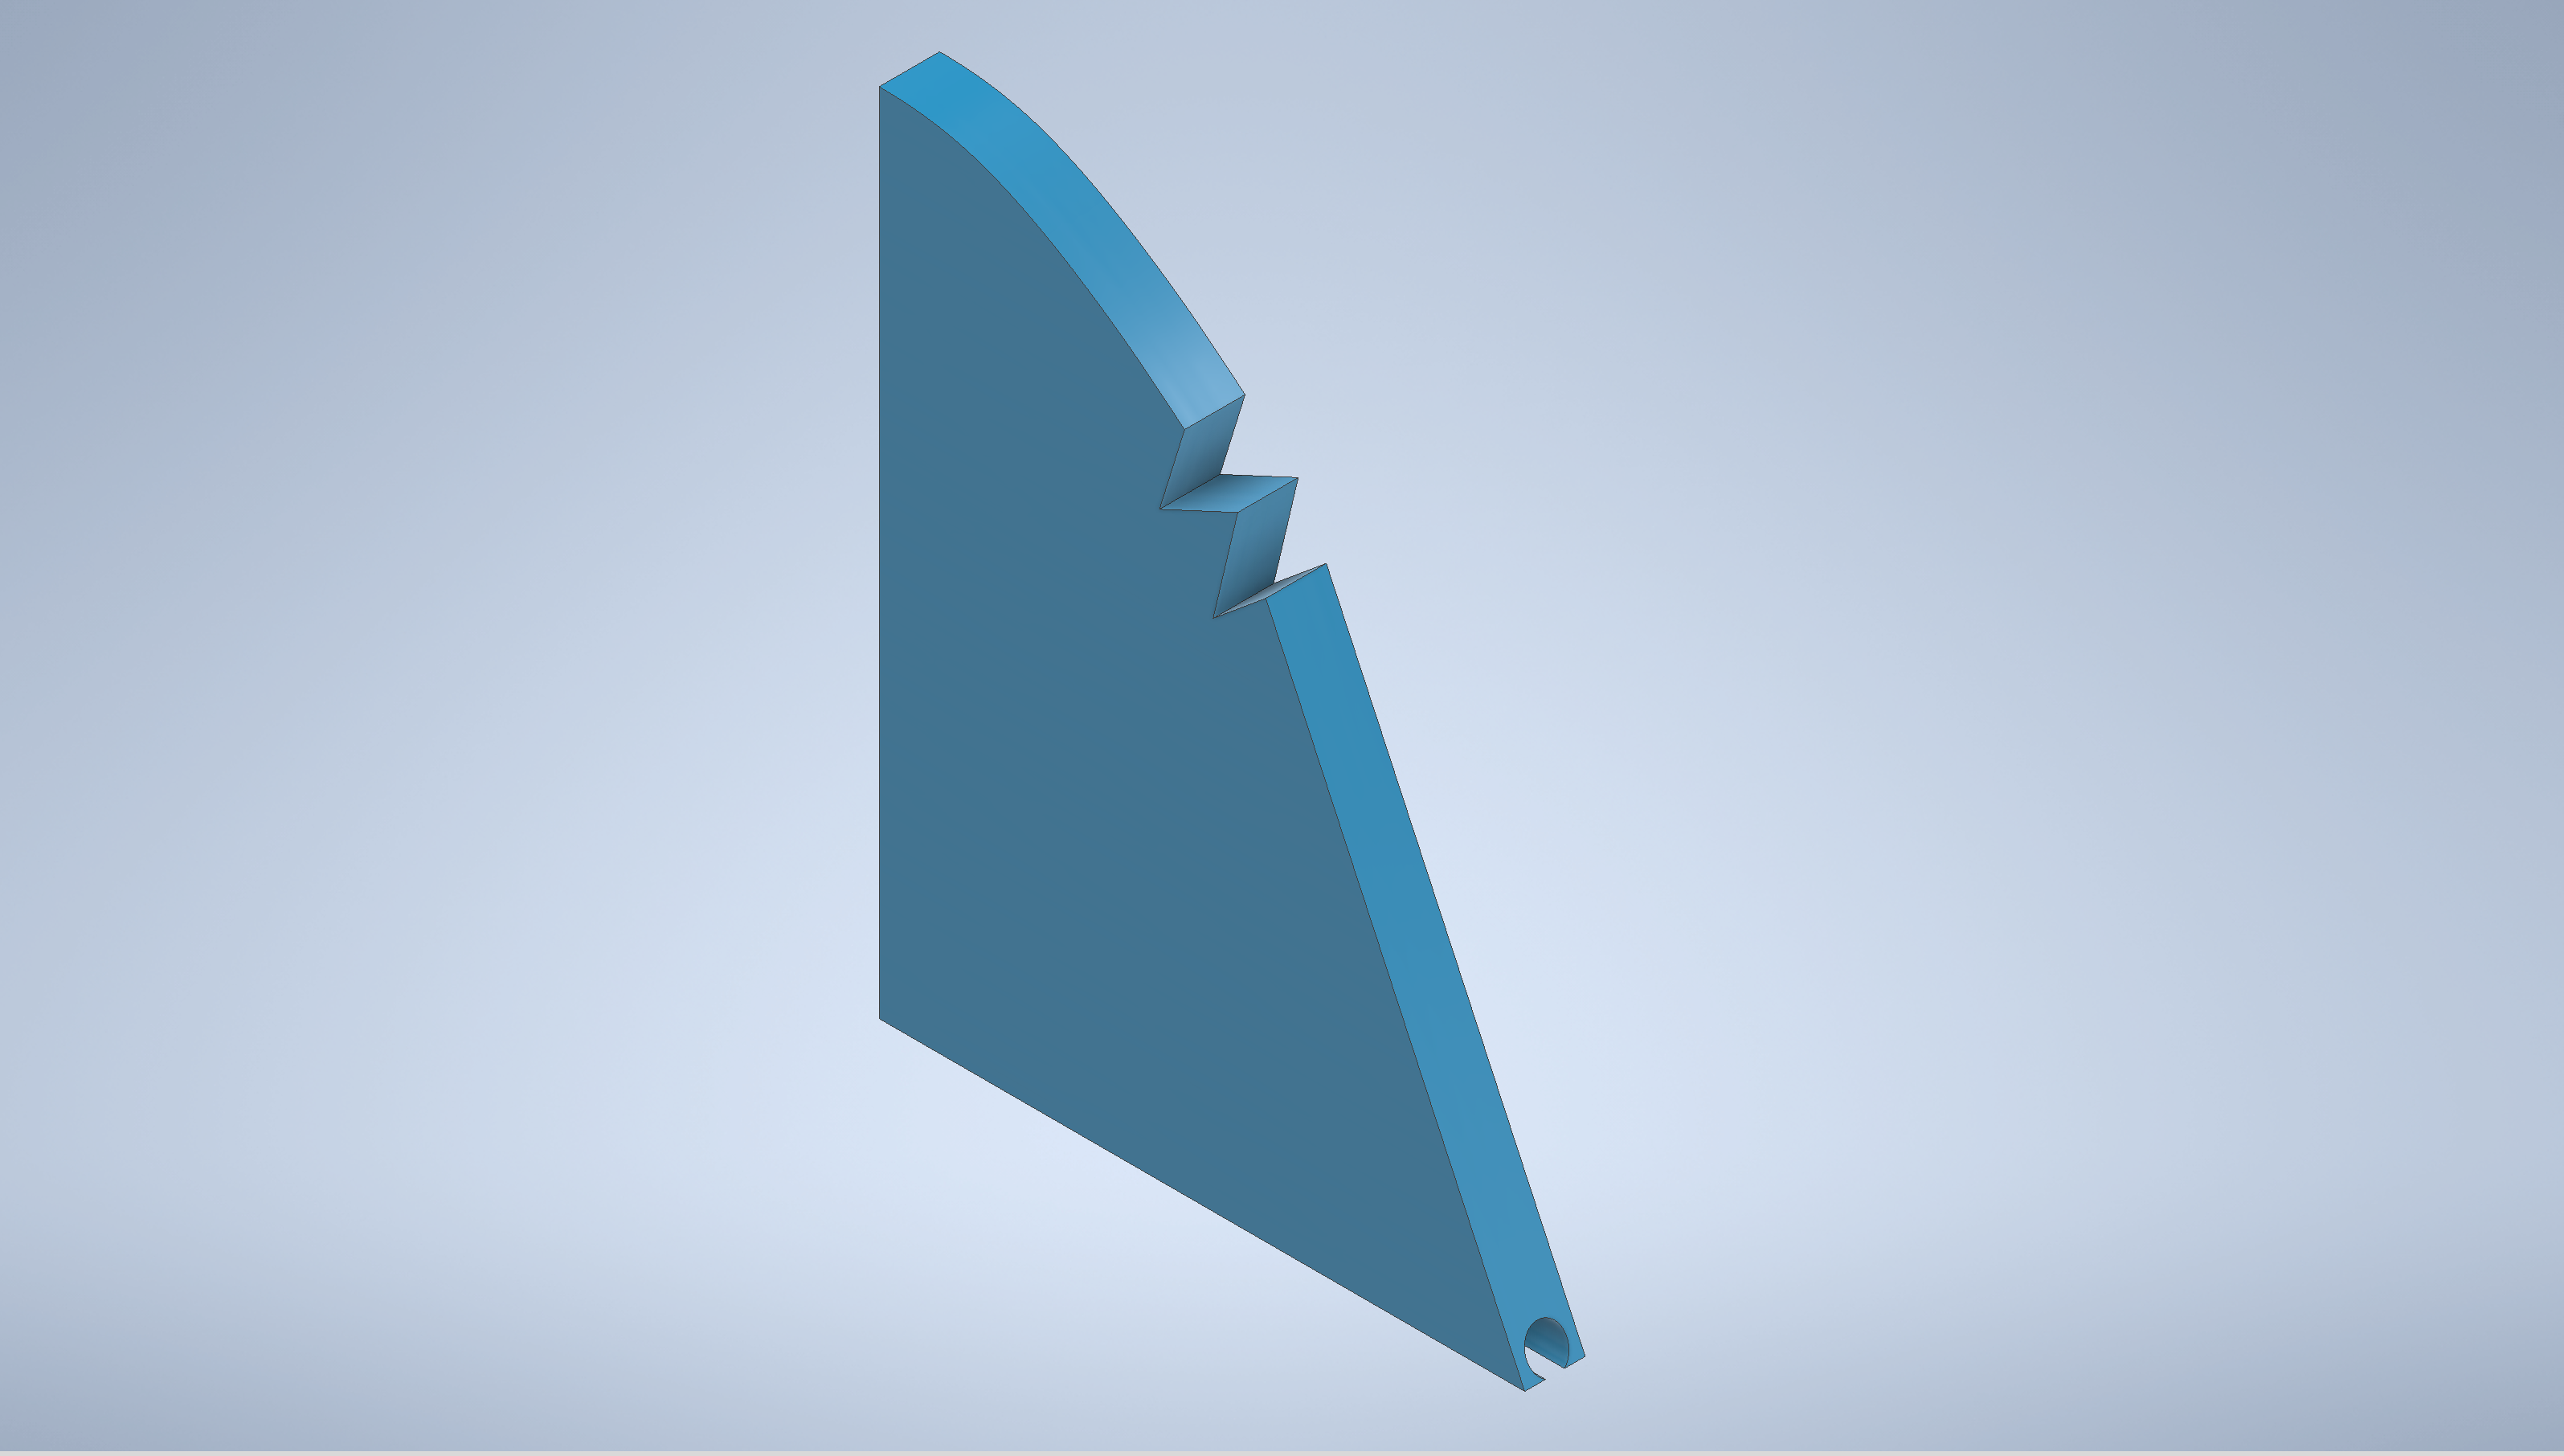
- Create a new part in Inventor, this will be the actual shark fin.
- The fin should be 8 inches tall.
- Make it 4 inches wide.
- Extrude it at 1.5 inches.
- After extruding, add a hole that cuts off at the bottom, this will be where the base slides in.
- Save the part and create a new one.
- The new part will be the base of the shark fin.
Creating Shark Fin Base on Inventor.
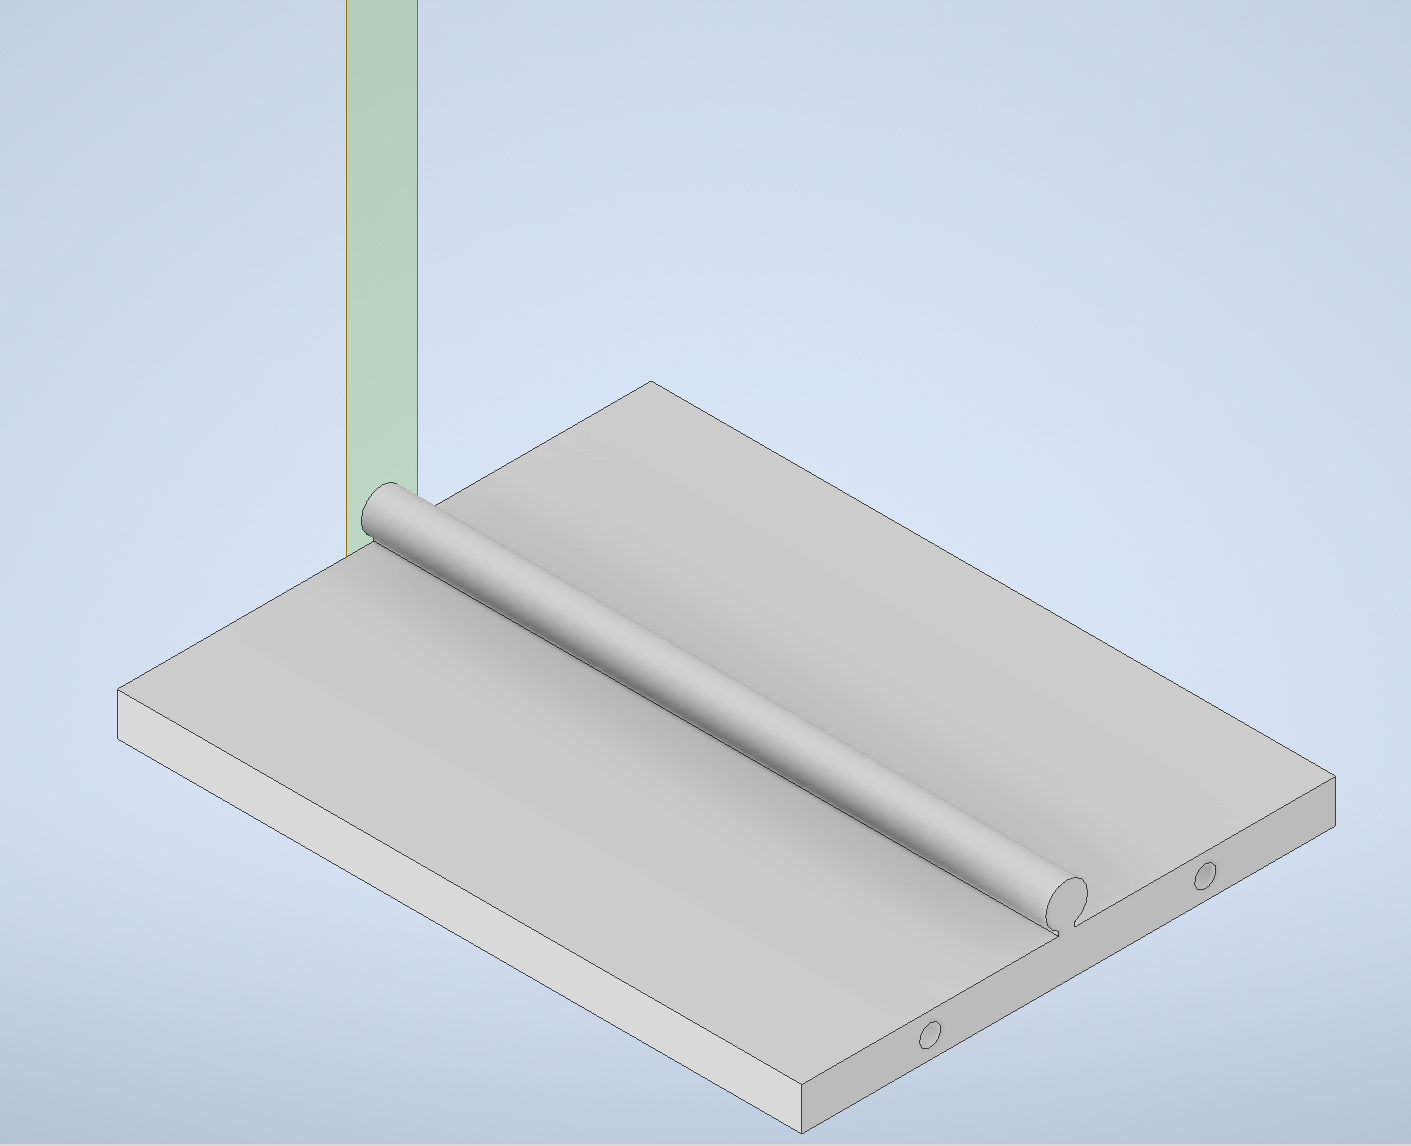
- On the new part, create a sketch.
- Make a 2d plate that is 3 inches wide, and 1 inch tall.
- At the top of the plate, make a circle connected to the plate, this circle should be 1 tenth inch smaller than the hole you made, so it can slide easily through.
- After finishing the sketch, extrude it at 4 inches.
- Create two holes on the plane where you made your original sketch.
- These will be what the straps go through.
Assembling Components on Inventor.

- Create a new assembly.
- Click place, and place both the fin and fin base.
- Constrain them to each other.
- Make them whatever color you would like.
Putting Individual Components on 3d Printing Software.
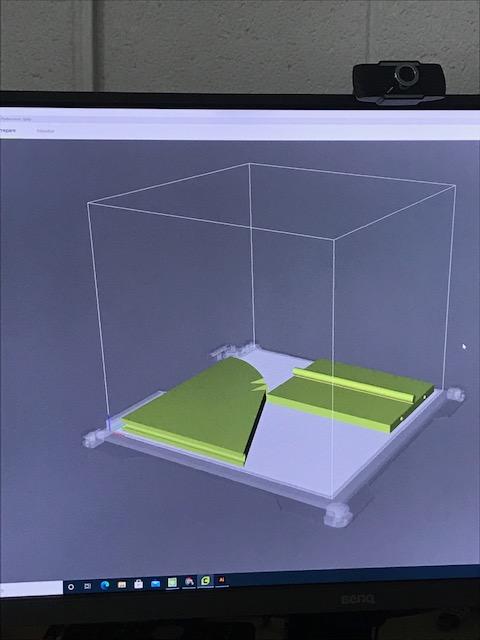
Add the individual 3d sketches onto a 3d printing software that is connected to a 3d printer.
Printing Components.
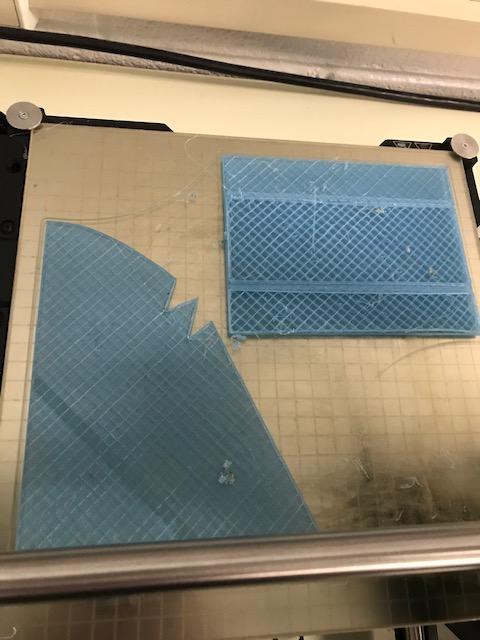
After putting the shark fin on to the printing software, print out your shark fin on the 3d printer.
Stringing Straps Through Holes in the Base.
All you have to do now is string some straps through the holes in the base of the fin, and enjoy your new shark fin!