Absolute Most Bare Bones Arduino - Atmega328P Using Internal Crystal on Breadboard
by JouleTime in Circuits > Arduino
18029 Views, 33 Favorites, 0 Comments
Absolute Most Bare Bones Arduino - Atmega328P Using Internal Crystal on Breadboard

A breadboard Arduino will require an Atmega328P controller for these instructions. Note the “P” at the end of the name. You cannot use an Atmega328 because it has a slightly different device id number. It will require a different board configuration. Instructions for that are outside of this tutorial.
Go to the Arduino tutorial website to get the board file to add to your sketchbook folder, Breadboard Tutorial Site.
You download the file, Breadboard.zip. Unzip the text file, boards.txt. If it is not in a folder called “Breadboard”, then create the folder and move the text file into it.
The photo shows the ultimate bare bones system. Power, ground, and one digital out. Anything less and what is the point.
Please note the cool BoostMicro power supply. It provides a steady 5 volts even as the batteries drain. It is available from Amazon, BoostMicro - Assembled Link.
Move the File to Your Sketchbook
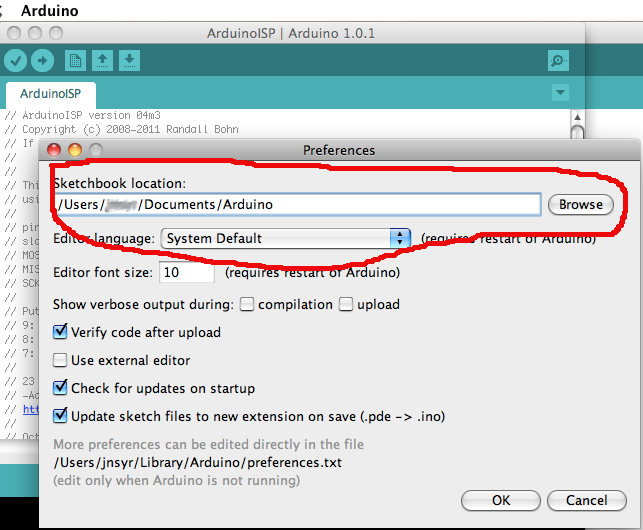
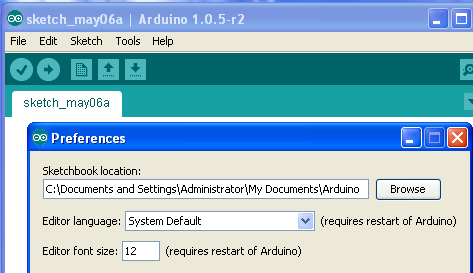
Find the sketchbook folder for your Arduino programs. This folder is usually listed in the preference menu. Go to the top toolbar, select Arduino, scroll down and pick Preferences... The popup window should show the file path to the sketchbook folder.
The photos shows how this would look on MacOSX and Windows XP.
Hardware Folder Holds New Board Configurations
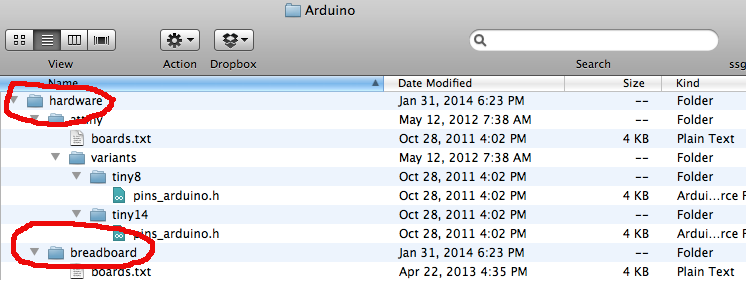
Open the sketchbook folder and look inside for a “Hardware” folder. If there isn’t one, then create a new folder and name it Hardware.
You can also find the folder by searching your computer hard drive for Arduino. The files are normally in your Documents folder.
Open the Hardware folder on your desktop, and close the Arduino software.
Move the Breadboard folder into the Hardware folder.
Re-launch Software to Get Breadboard to Show
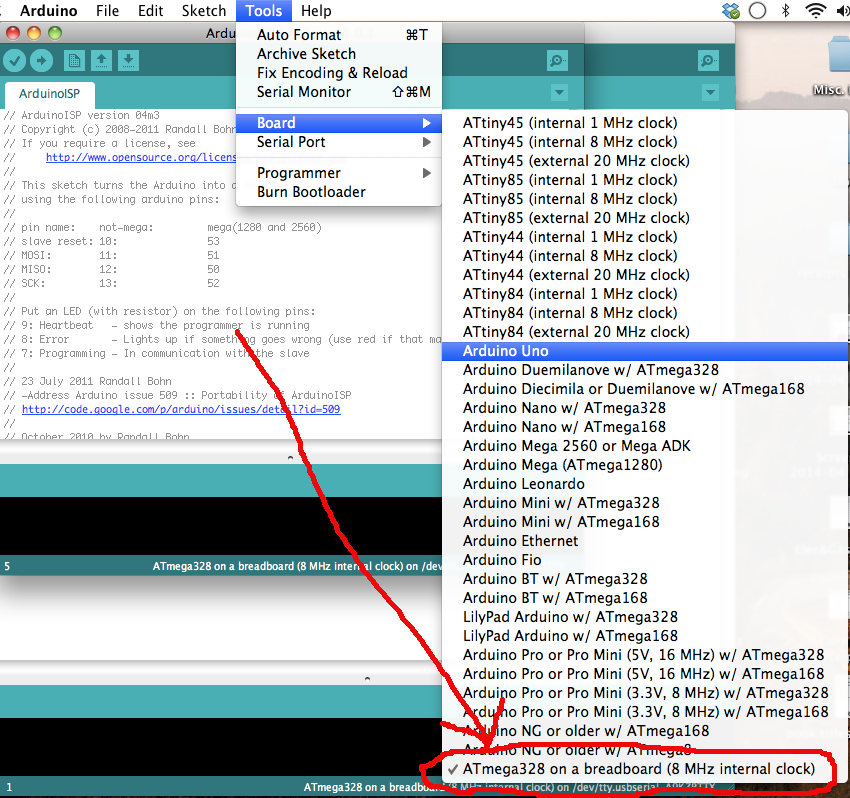
Re-launch the Arduino software. Click on the top toolbar, select Tools, and scroll down to Boards menu. At the bottom of the list, you should see a choice for “Atmega328 on a breadboard (8 Mhz internal clock)”. Select this option.
Use This Board to Burn Bootloader

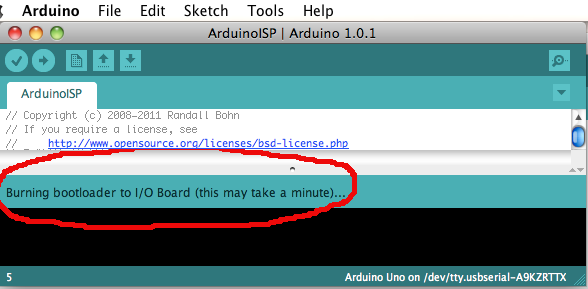
Now when you burn bootloader, it will set the fuses to look for the internal clock instead of the external clock.
Note the images for the Breadboard tutorial on the Arduino website do not show a capacitor in series with reset. I use a 100nF capacitor to help with the bootload and serial communication process. See this link for more discussion, Capacitor on DTR/Reset.