Setting-up to Cut a Recess in a Trapezoid Using the Shopbot
by togo1919 in Workshop > Woodworking
2600 Views, 6 Favorites, 0 Comments
Setting-up to Cut a Recess in a Trapezoid Using the Shopbot
I recently had a need to place an aluminum panel in a trapezoid for a mantelpiece. I decided to use the Shopbot so I could ensure a consistent depth for the recess.
The attached video shows the recess being cut.
I do my work over at the Techshop in San Jose...
Start With a Trapezoid Image Which Has the Same Dimensions As the Piece of Wood
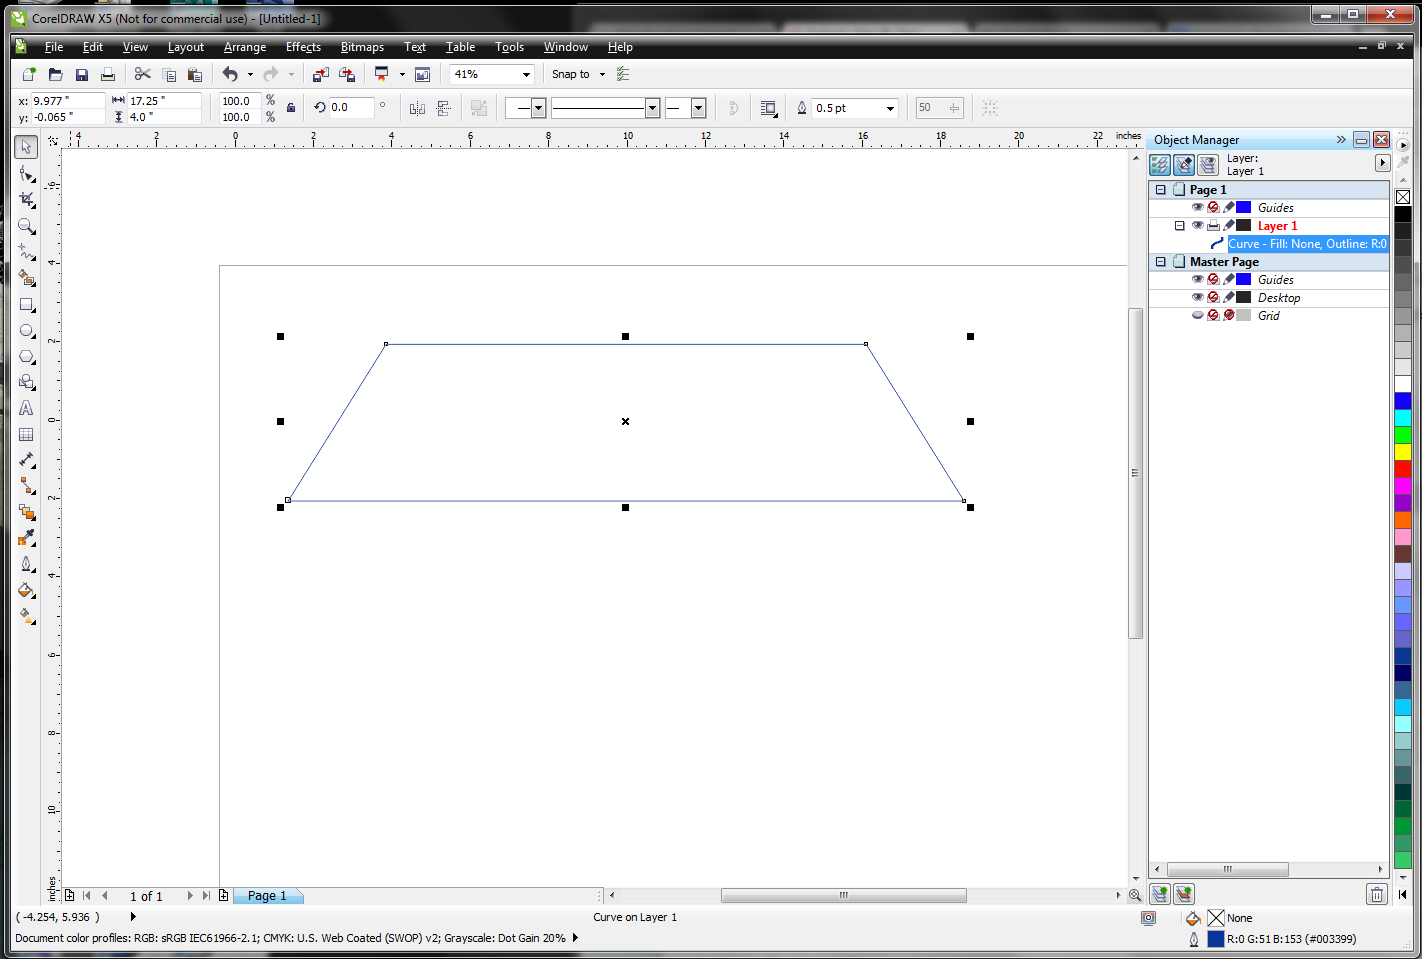
For preparing drawings for the Shopbot, I generally start with CorelDraw. Mainly because I'm most familiar with it.
The tool I used is called the Contour tool. I made a 1-step internal Contour, about 1/4" from the original.
Select the Object (trapezoid) --> Effects --> Contour. Alternatively, you can select CTRL + F9 to get the Contour tool.
The tool I used is called the Contour tool. I made a 1-step internal Contour, about 1/4" from the original.
Select the Object (trapezoid) --> Effects --> Contour. Alternatively, you can select CTRL + F9 to get the Contour tool.
Apply the Appropriate Contour
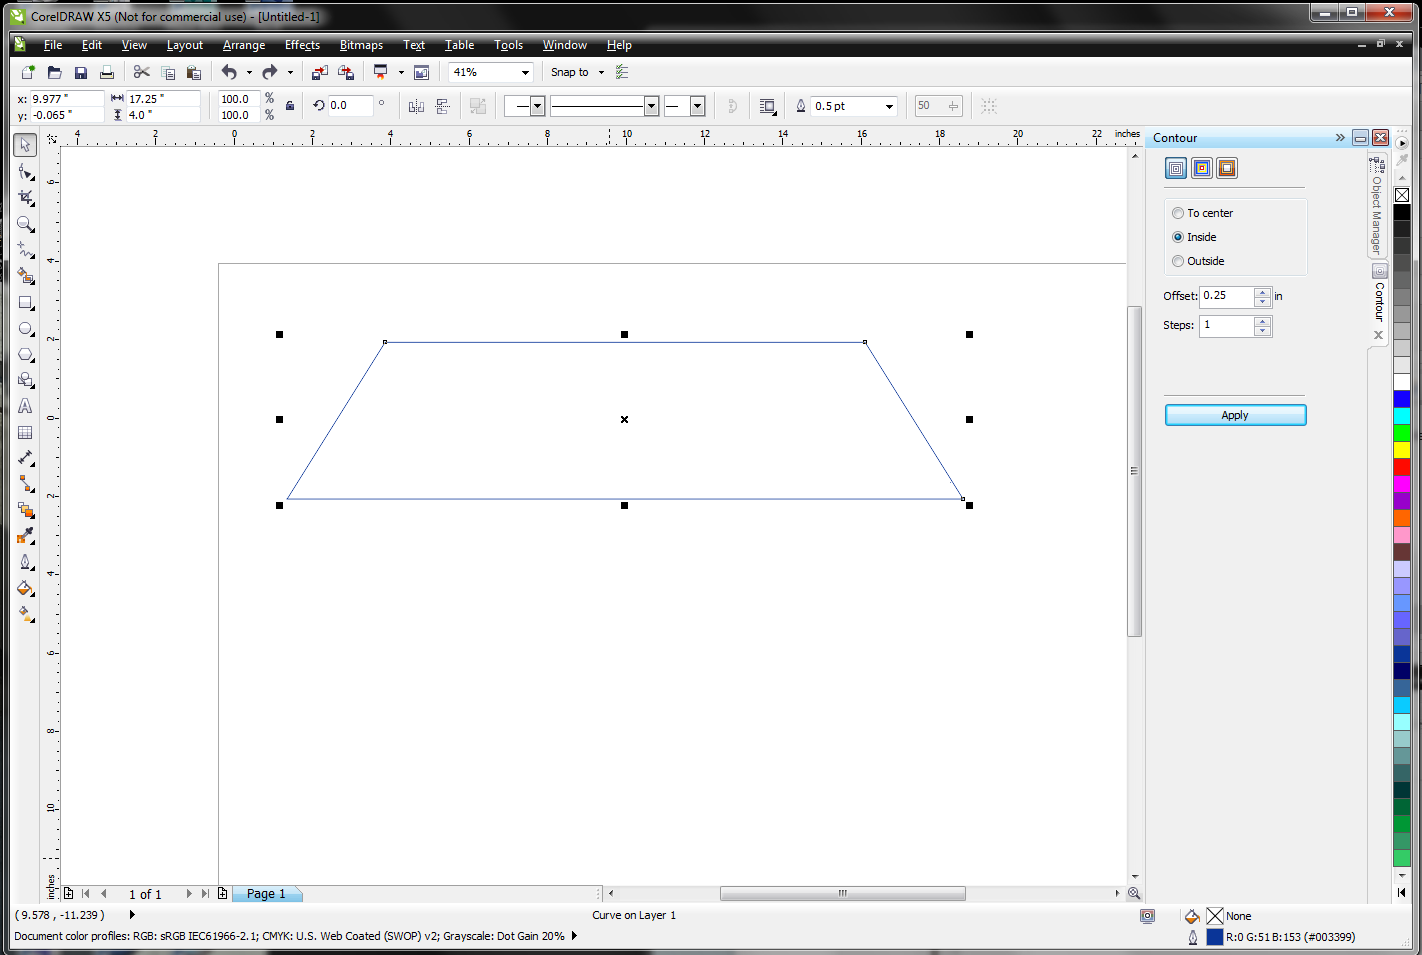
This process is pretty straightforward, especially since I wasn't worried about the colors or gradients or anything along those lines.
With the object (trapezoid) selected, I chose the following:
Inside
Offset - .25"
Steps - 1
Then I selected Apply.
And We Have Our New Trapezoid, a Quarter-inch to the Inside of the Original
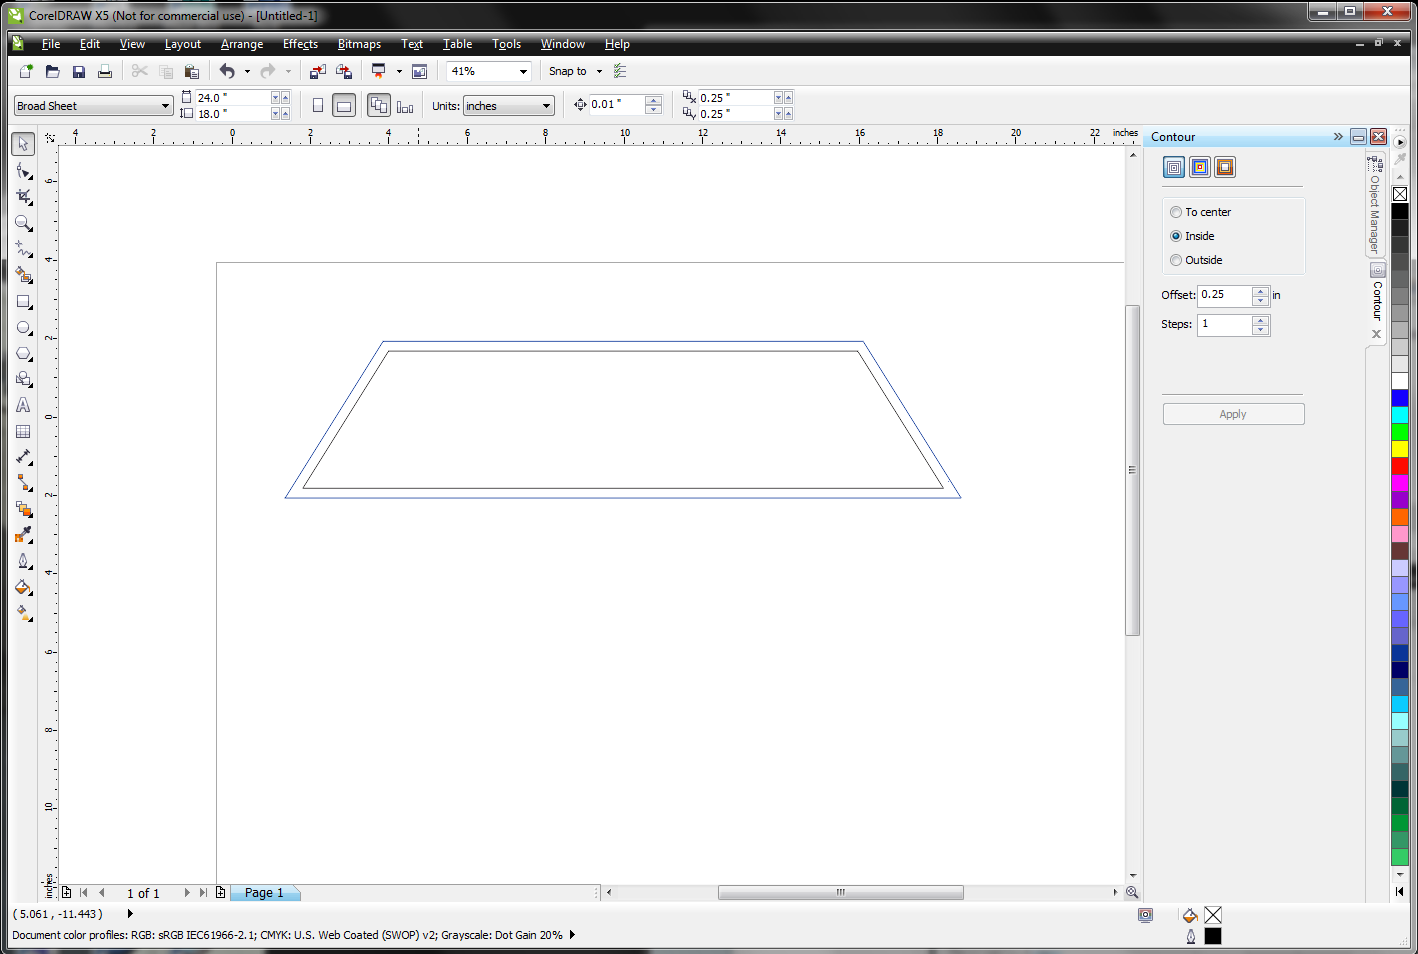
This is the new trapezoid I was looking for.
Now, CorelDraw allows you to separate the two trapezoids, but I did not want to do it. So, I went ahead and added a curve (set of lines) that matched the internal trapezoid to use for my eventual export. The next step shows this new curve.
Use the 2-point Line Tool to Make a Copy of the Internal Trapezoid
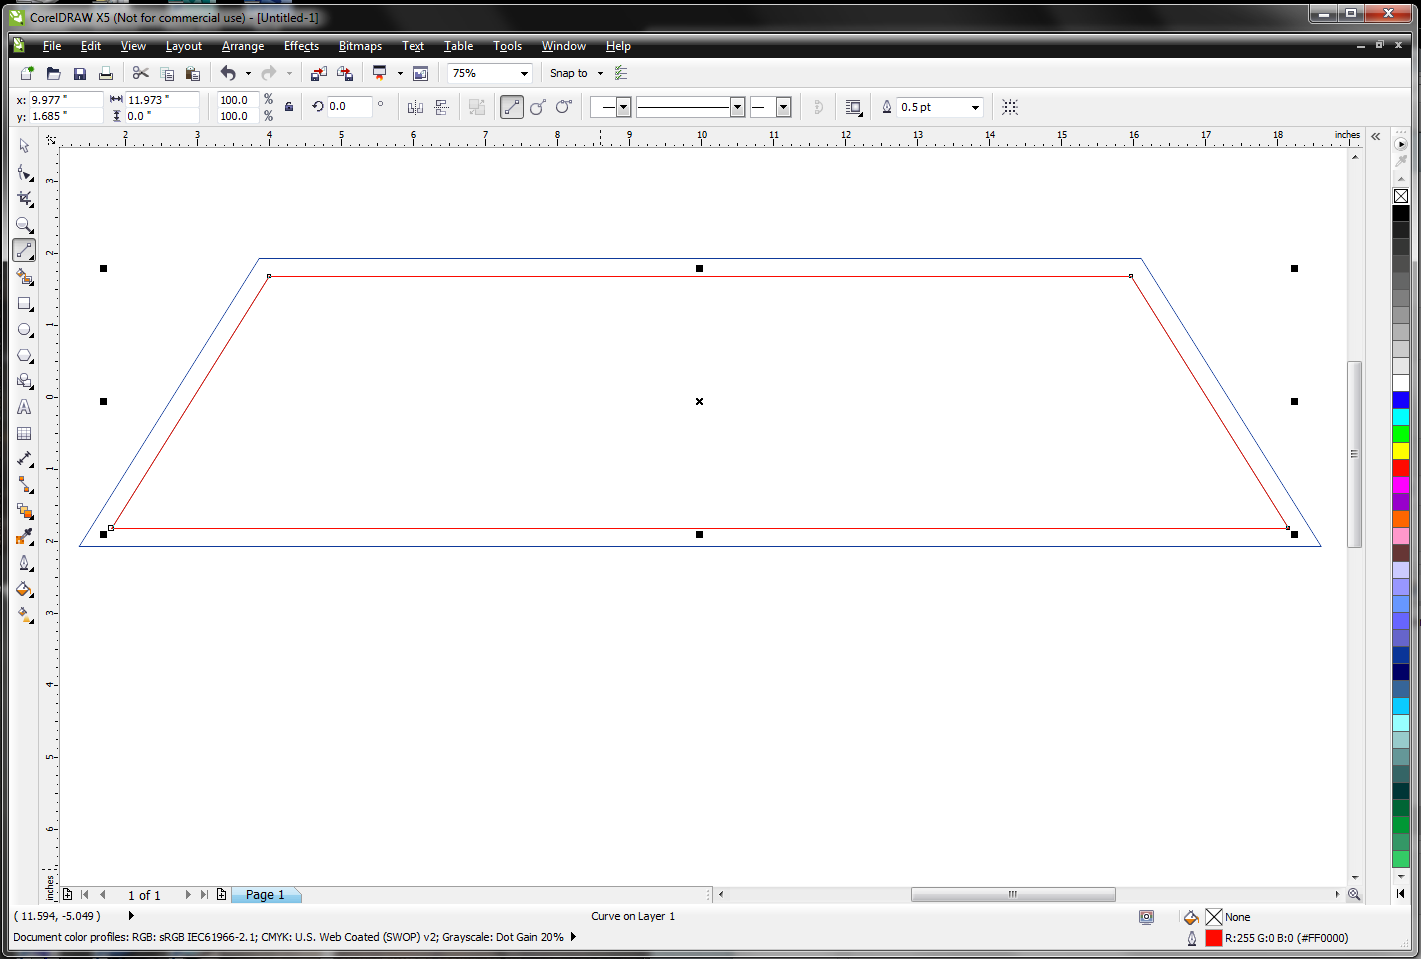
I drew lines from node-to-node on the internal trapezoid. I changed the color to red to make it easier to see.
This curve is the shape I needed to export to VCarve to prepare a file for the Shopbot.
I could have simply ungrouped the Contour pair (probably saving some time), but chose not to do so.
This curve is the shape I needed to export to VCarve to prepare a file for the Shopbot.
I could have simply ungrouped the Contour pair (probably saving some time), but chose not to do so.
Move the Red Trapezoid to a New File, and Export for Vcarve
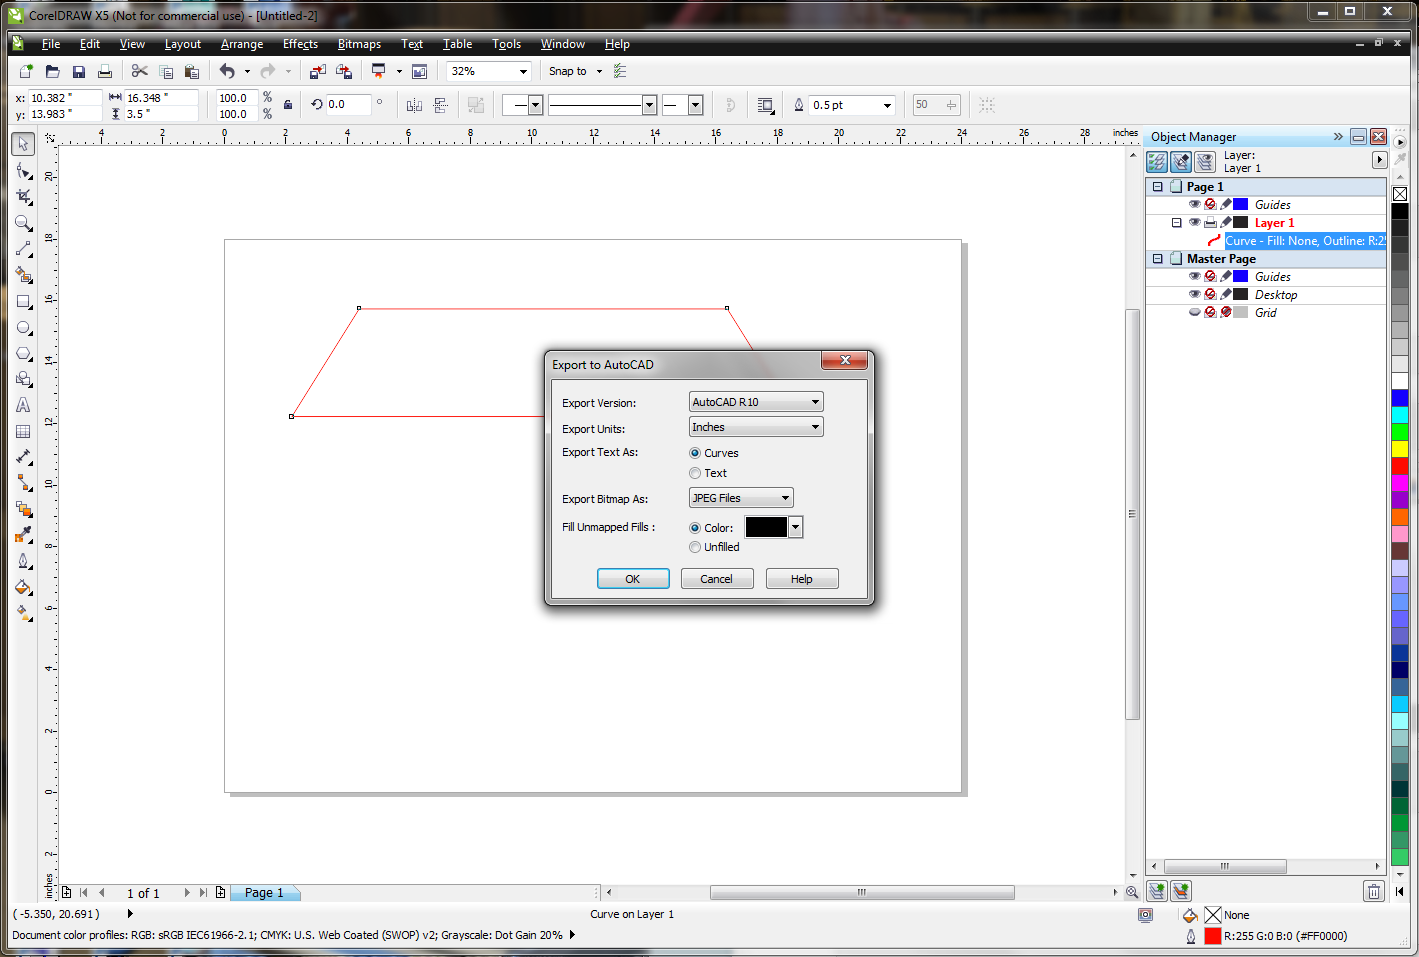
I opened a new file and added this new trapezoid.
I then went to File --> Export --> Save as Type --> DXF (using the AutoCad R10 option)
I then went to File --> Export --> Save as Type --> DXF (using the AutoCad R10 option)
I Opened VCarve Pro to Get Ready for My Drawing.
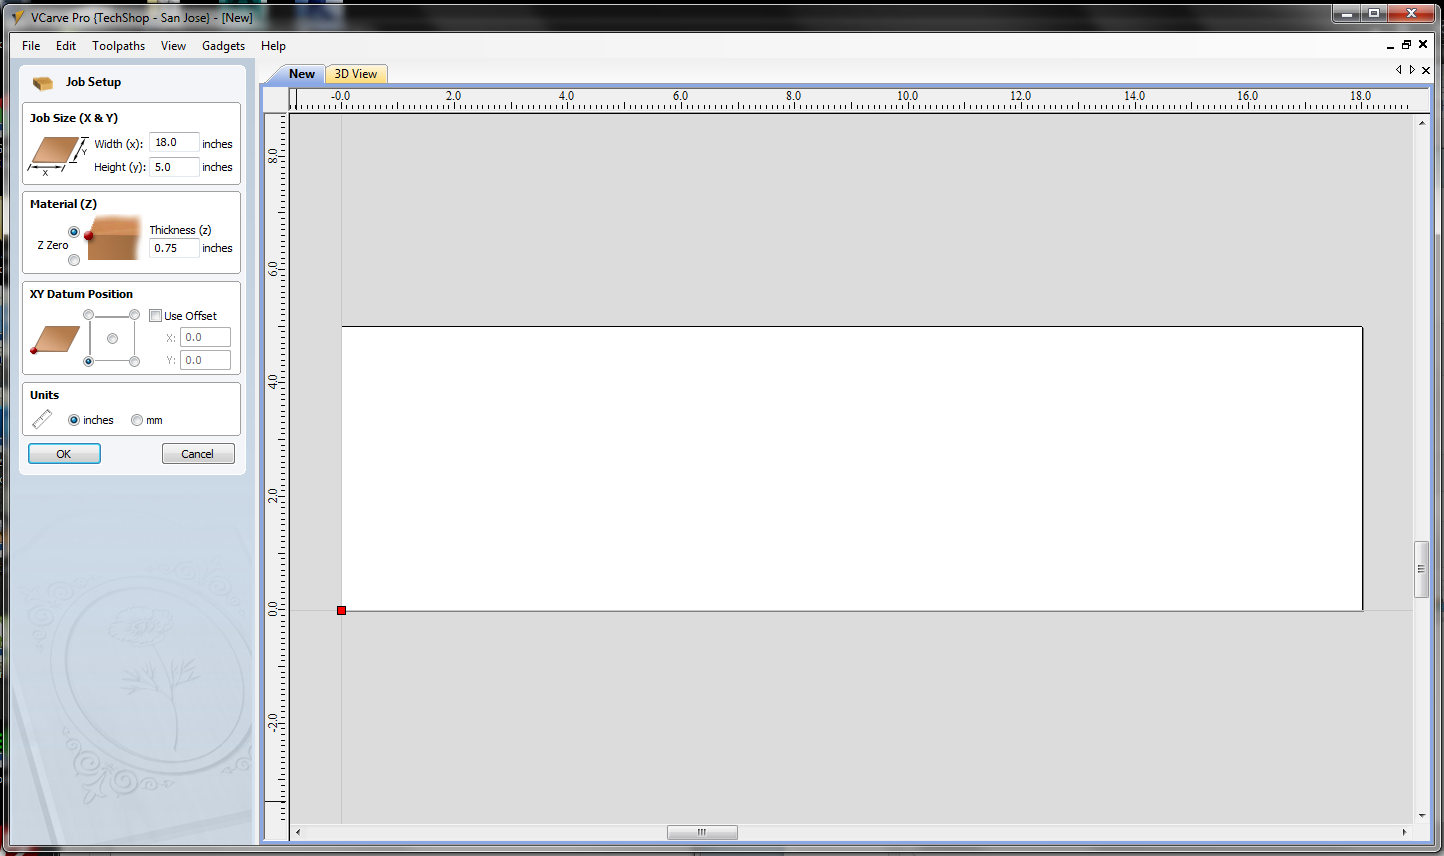
I set the following in VCarve Pro for my piece to be cut.
Job Size
Material Thickness
XY Datum Position
Units
This data matched the piece I was using - your needs may be different.
Job Size
Material Thickness
XY Datum Position
Units
This data matched the piece I was using - your needs may be different.
I Imported My Trapezoid
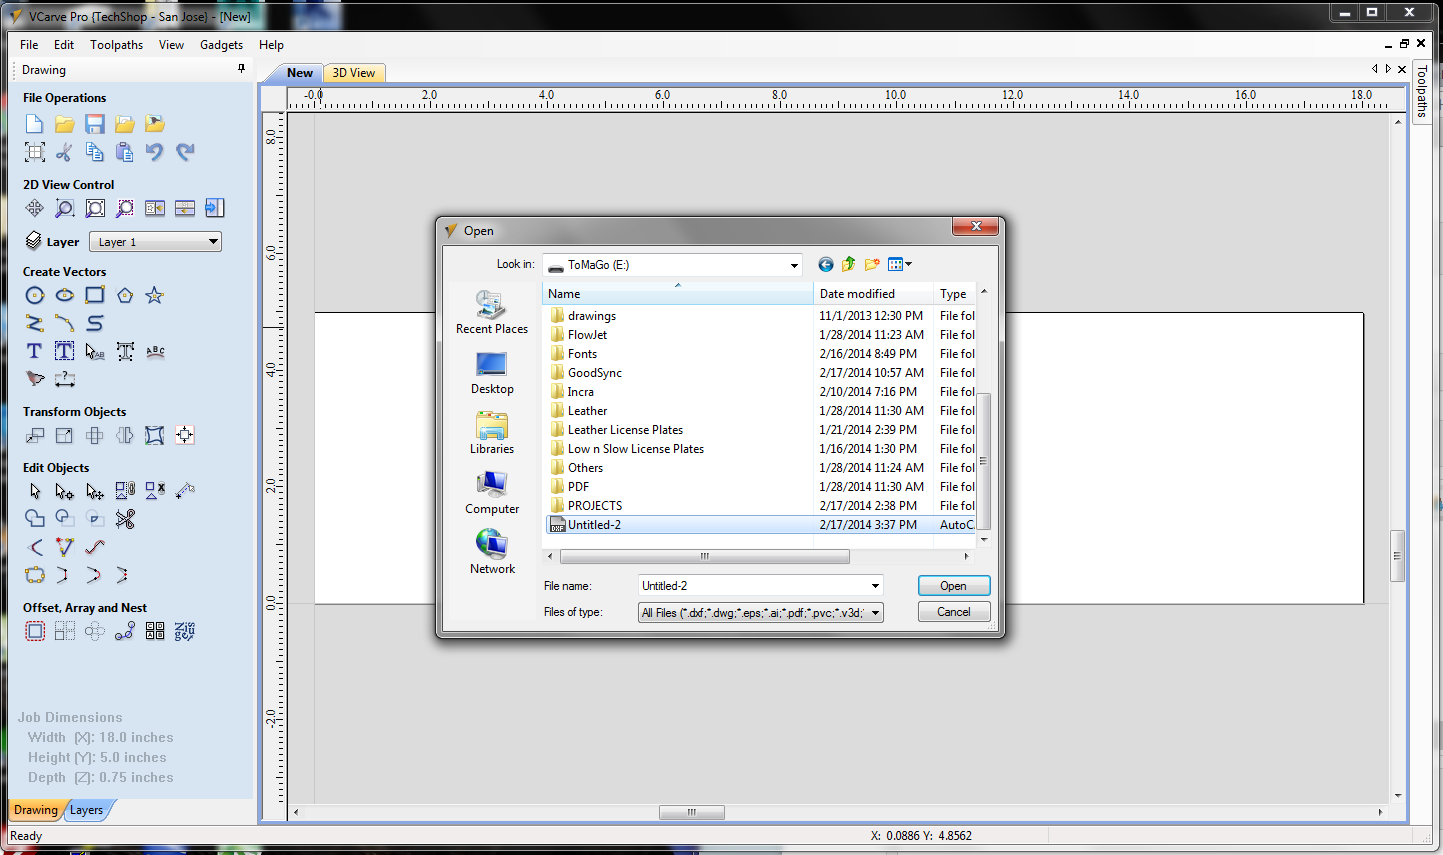
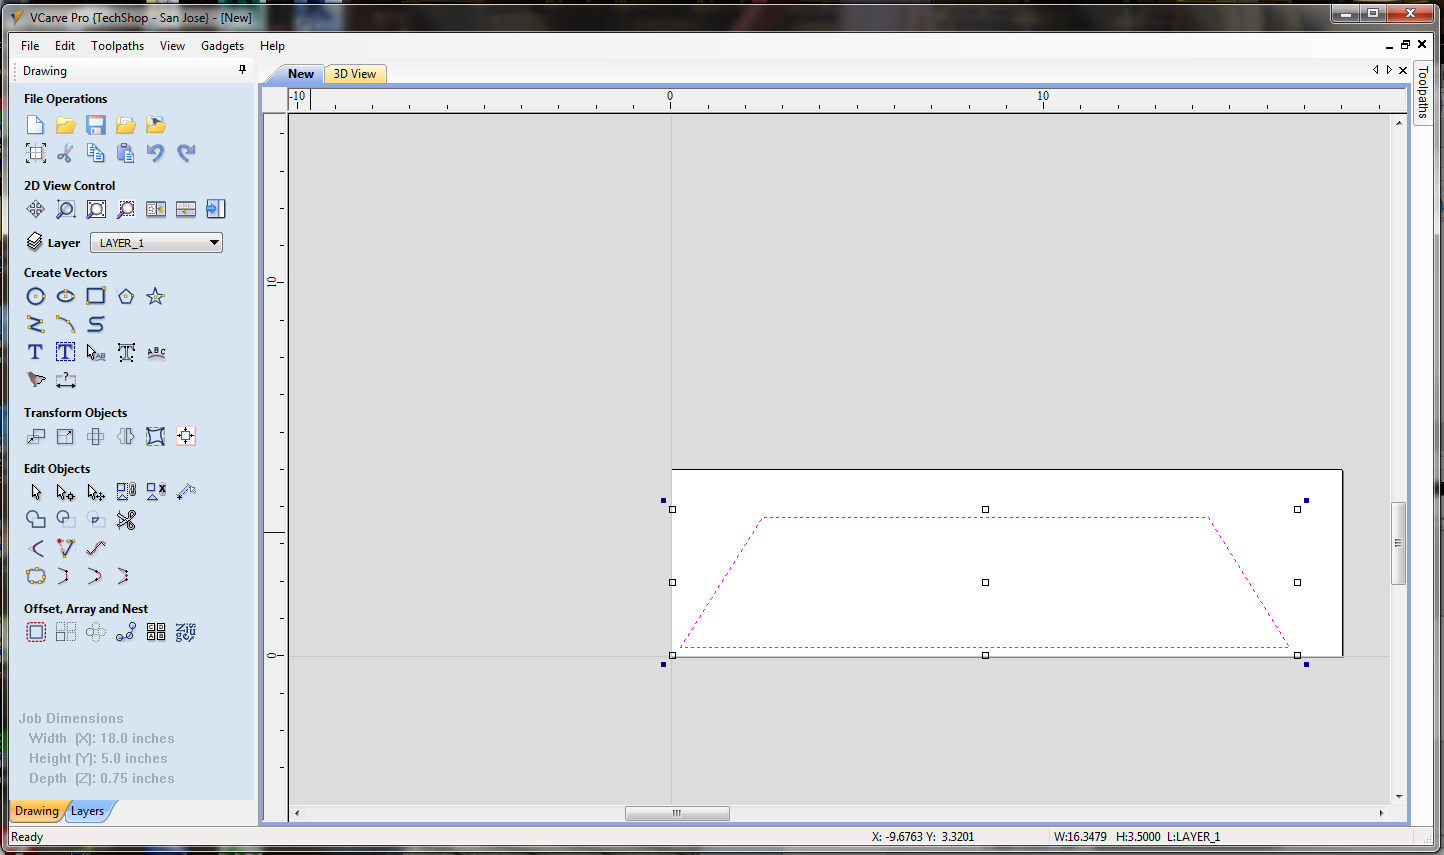
File --> Import --> Import Vectors
I selected the dxf I created in previous steps.
And I Prepared a Toolpath
Once I'd imported and moved the trapezoid onto the VCarve canvas, I created a toolpath.
Since I was using a 1/8" router bit, I used this info to set up the Pocket Toolpath, and carved down to 1/8".
The output file was a Shopbot Arc (inch)/with speed .sbp file.
Since I was using a 1/8" router bit, I used this info to set up the Pocket Toolpath, and carved down to 1/8".
The output file was a Shopbot Arc (inch)/with speed .sbp file.
And I Cut My Recess.
After aligning my piece and testing the alignment with some sacrificial pieces, I was able to cut a very nice recess.
I had to use a knife and chisel to complete the corners which had a 1/8" radius, since I wanted sharp corners.
I had to use a knife and chisel to complete the corners which had a 1/8" radius, since I wanted sharp corners.