Setting Up the Ultimate Mac Mini
by brawns214 in Circuits > Apple
61764 Views, 26 Favorites, 0 Comments
Setting Up the Ultimate Mac Mini

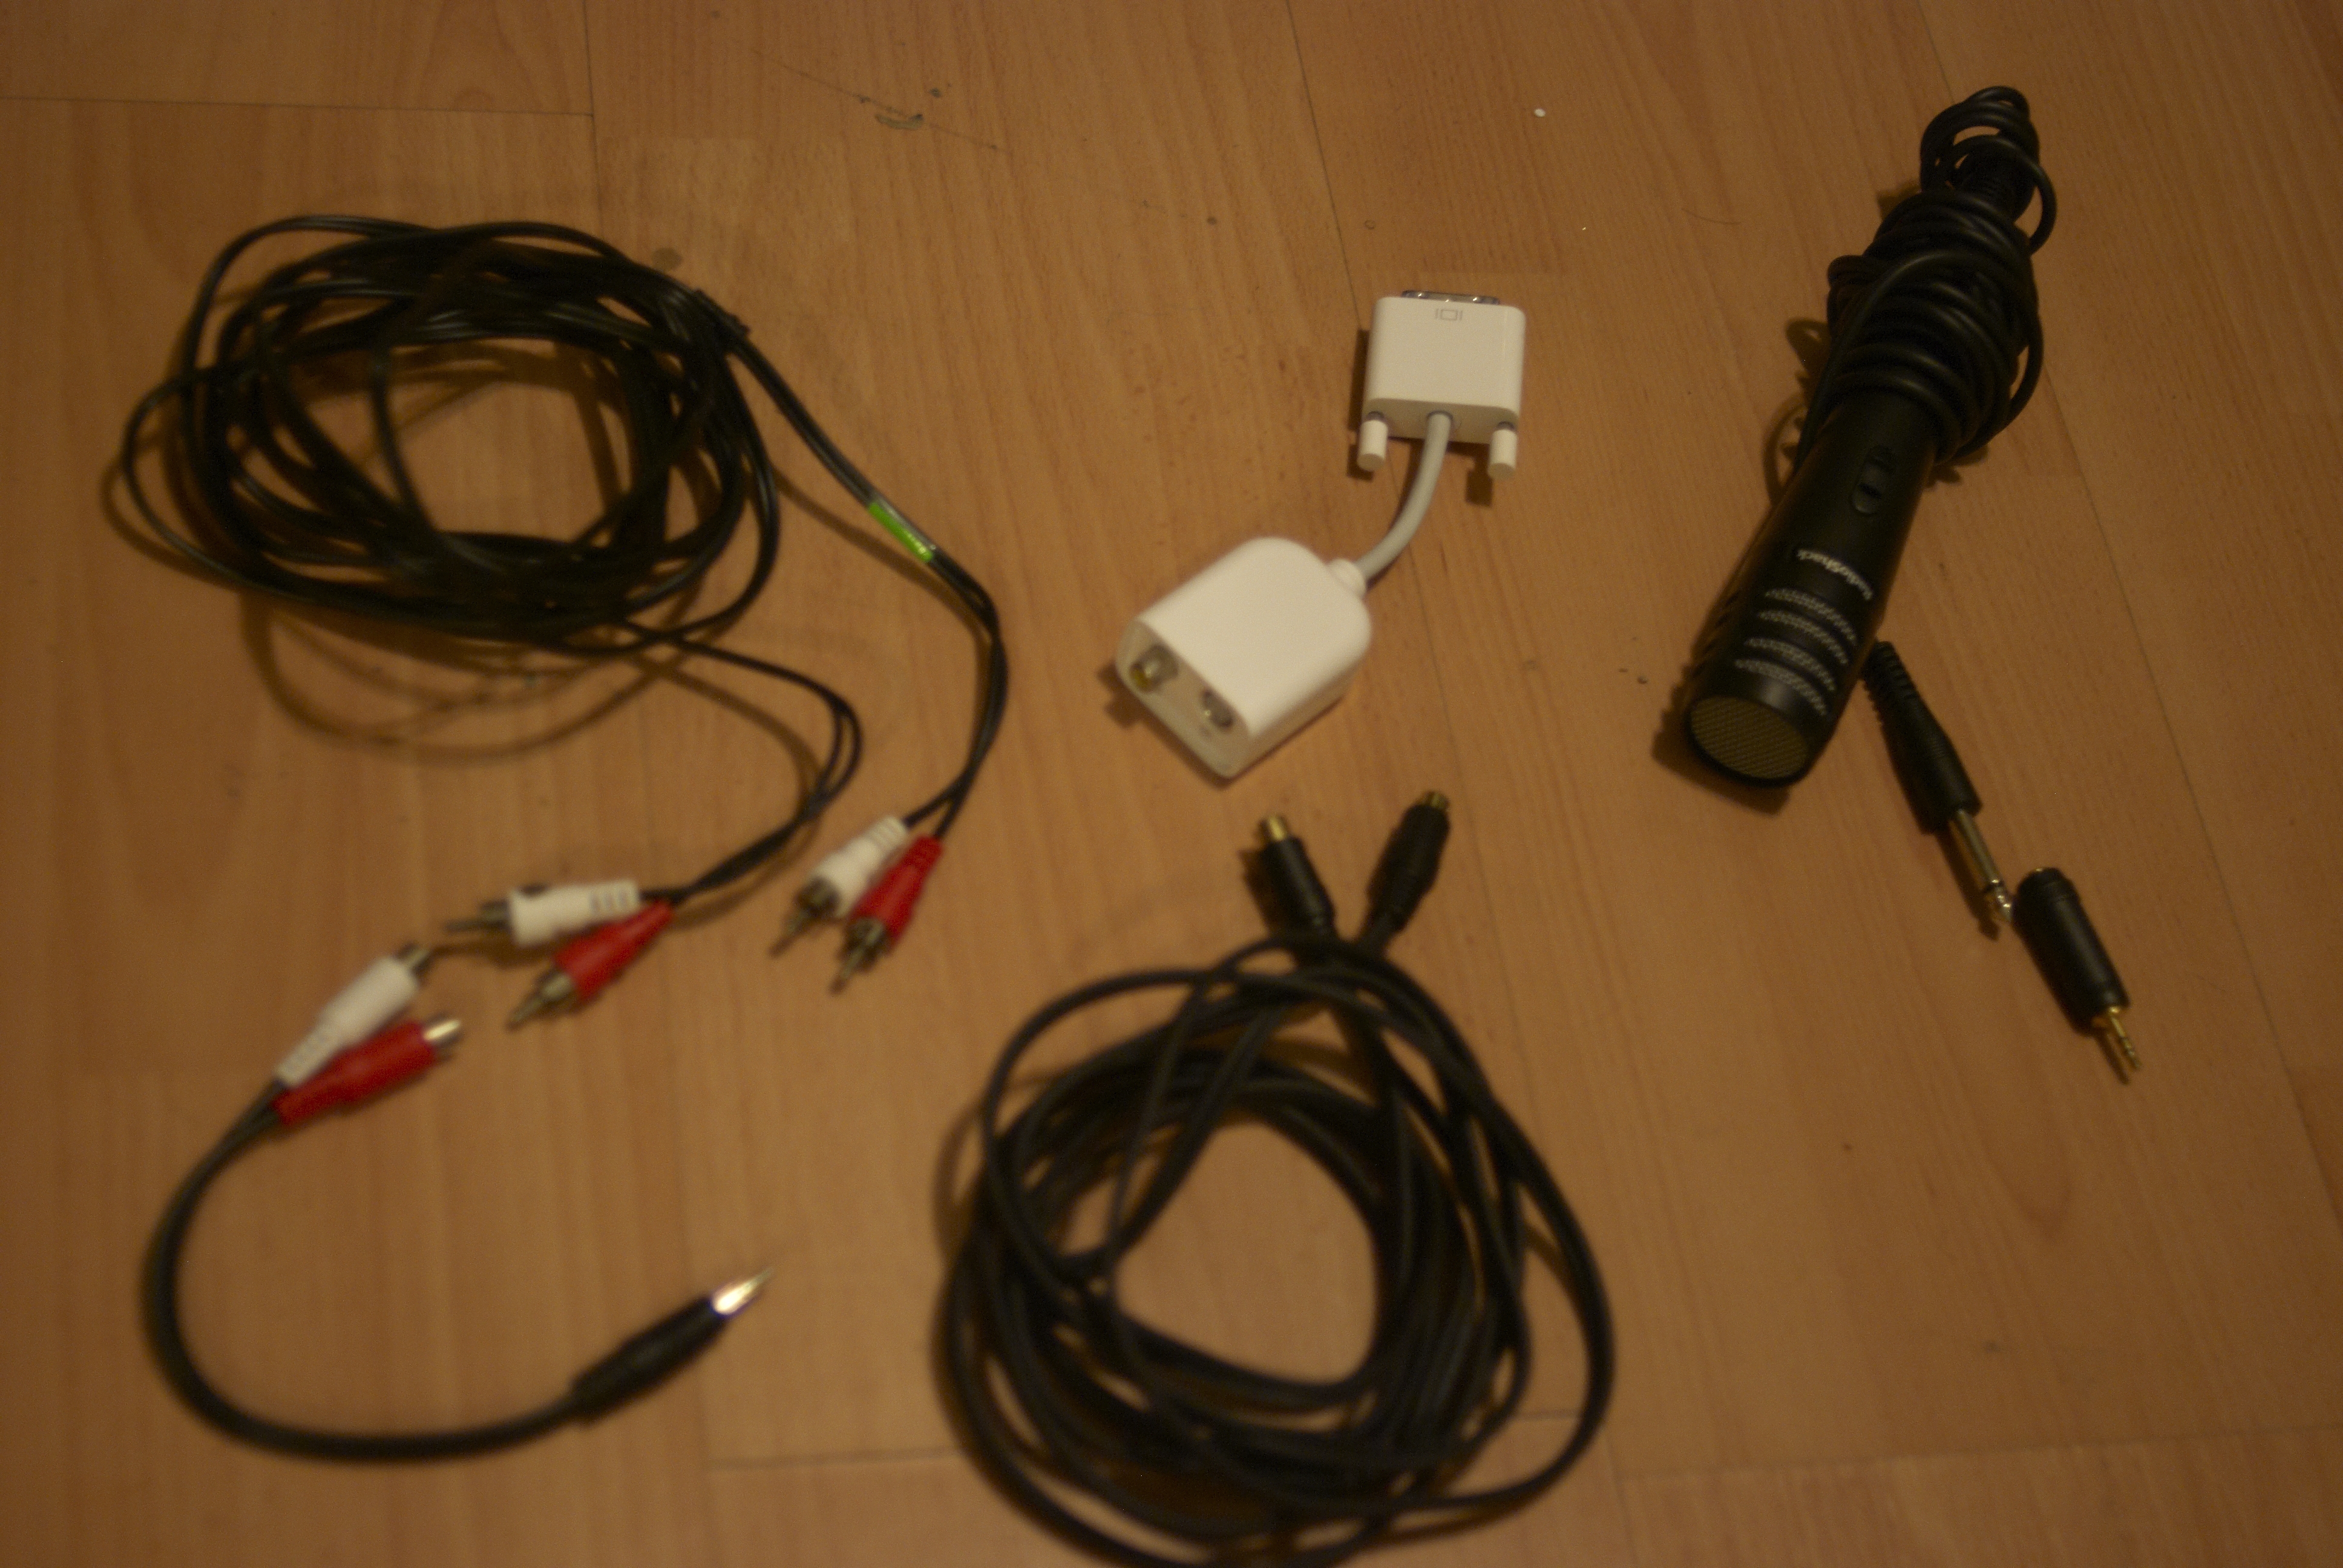
This is the boring part. Just getting things up and running so we can continue to play around with this thing later. Well its probably exciting for you because its a new computer and you probably can't wait for all the cool things to do. For me its boring because I'm just telling you how to do something I find trivial, and yet I need to provide clear instructions and interesting pictures. Aaargh the harsh demands.
So before we start...well I mean now that we've started....except we haven't.
Materials needed:
Mac mini - buy from refurbished or clearance at the apple store. For my money, I found the best deal on apple's refurbished store. People somehow believe that their 4 year-old mac mini with a power pc chip is still worth $300, or that last years model is worth $500 because it was upgraded at the time of purchase. In my mind, its only worth premium money if it comes with a year warranty, has an intel core two duo chip and technology from the last two years. Also the newest model has a mini-dvi so only buy one if you know you're getting a mini-dvi to dvi connector (this will come in handy when connecting to a tv).
Kickass Hard Drive, read largest possible mtf'n harddrive available at the time. It has to be a Sata hard drive and it also has to be 2.5" form factor. Typically largest 7200 RPM drives are smaller than their 5400 RPM compatriots. Since we're going for hard drive space, just go for the 5400 one. Get from newegg.com
Some ram - you don't have to max out here. It will do fine with 1-2GB total, but you'll have to make sure you find the right stuff. Not all mac minis use the same ram, so be sure you know what you are doing. Also get from newegg.com
If connecting to an HD tv, buy a DVI-HDMI connector from the apple store or elsewhere. ~$30
http://store.apple.com/us/product/TR843LL/A?mco=NDY5ODgwOQ
If connecting to a standard tv, buy a DVI-video connector. Somehow the mac mini has an above standard DVI connection that allows you to buy this cheap adapter instead of decoding the digital signal and spending $100. Apple doing something that is cheaper than the average computer???Strange indeed! It won't look good, but blame that on your aging TV. You'll also need an s-video cable or single RCA component cable. Adapter is $19 from apple, cable is anywhere from free to dirt cheap.
http://store.apple.com/us/product/M9319G/A?mco=NDcwNDc5MA
If connecting to a stereo or if you actually want sound on your tv, you'll need a 1/8" stereo to RCA adapter and a 2-port RCA cable. Cheap at any electronics store, or you can buy overpriced Monster cables (please don't they don't get good reviews anywhere).
Software to download:
Update to the most recent version of OS X by running "Apple Menu>Software Update".
Xcode, Developer Tools - you'll need to sign up as a developer for mac. Free!
https://developer.apple.com/mac/
Fink
http://www.finkproject.org/download/index.php?phpLang=en
Xquartz - just get the latest download
http://xquartz.macosforge.org/trac/wiki
Perian - allows playback of non-quicktime movies with quicktime supported applications.
http://perian.org/
Firefly media server
http://nightlies.fireflymediaserver.org/version.php
MAMP - preconfigured webserver
http://www.mamp.info/en/downloads/index.html
http://www.zenphoto.org/index.php
This part of a compendium. Check out the other parts at:
https://www.instructables.com/id/READ-ME-FIRST-How-to-setup-the-ultimate-Mac-Mini-/
https://www.instructables.com/id/Setting-up-the-ultimate-Mac-Mini/
https://www.instructables.com/id/Different-ways-to-connect-to-your-Mac-Mini/
https://www.instructables.com/id/How-to-access-your-music-from-anywhere-with-your-M/
https://www.instructables.com/id/How-to-share-your-photos-from-your-mac-mini-on-the/
https://www.instructables.com/id/How-to-Setup-the-Ultimate-Media-Player-with-the-Ma/
Install Hard Drive and Ram Components
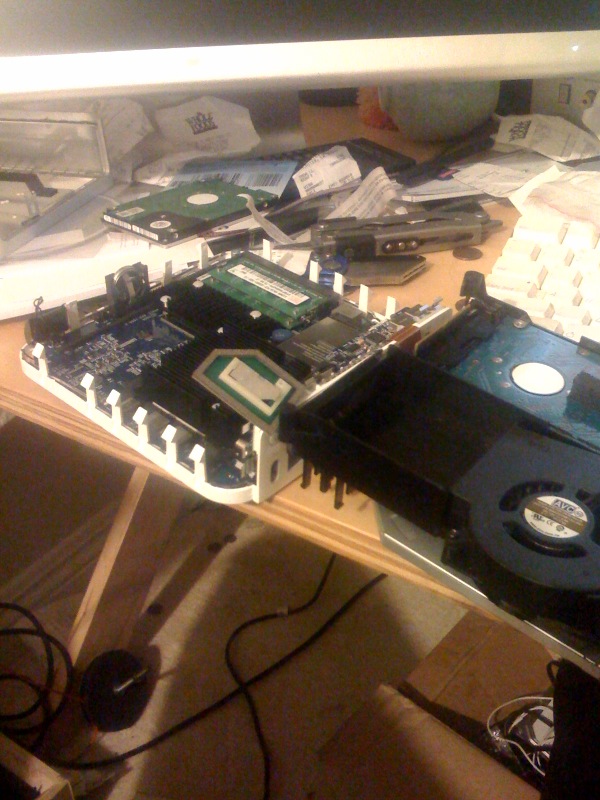
Because I didn't document the whole process I went through to swap out the HD, just follow this how to. Its a really good guide, and I feel I wouldn't be able to do much better. While you have your computer apart, you should be able to switch out the RAM.
http://soledadpenades.com/2007/11/01/diy-replace-your-intel-mac-minis-hard-disk-drive/
If this becomes a dead link, then it shall be preserved here for awhile
http://74.125.155.132/search?q=cache%3Ahttp%3A%2F%2Fsoledadpenades.com%2F2007%2F11%2F01%2Fdiy-replace-your-intel-mac-minis-hard-disk-drive%2F&ie=utf-8&oe=utf-8&aq=t&rls=org.mozilla:en-US:official&client=firefox-a
Connect Up Your Mac Mini
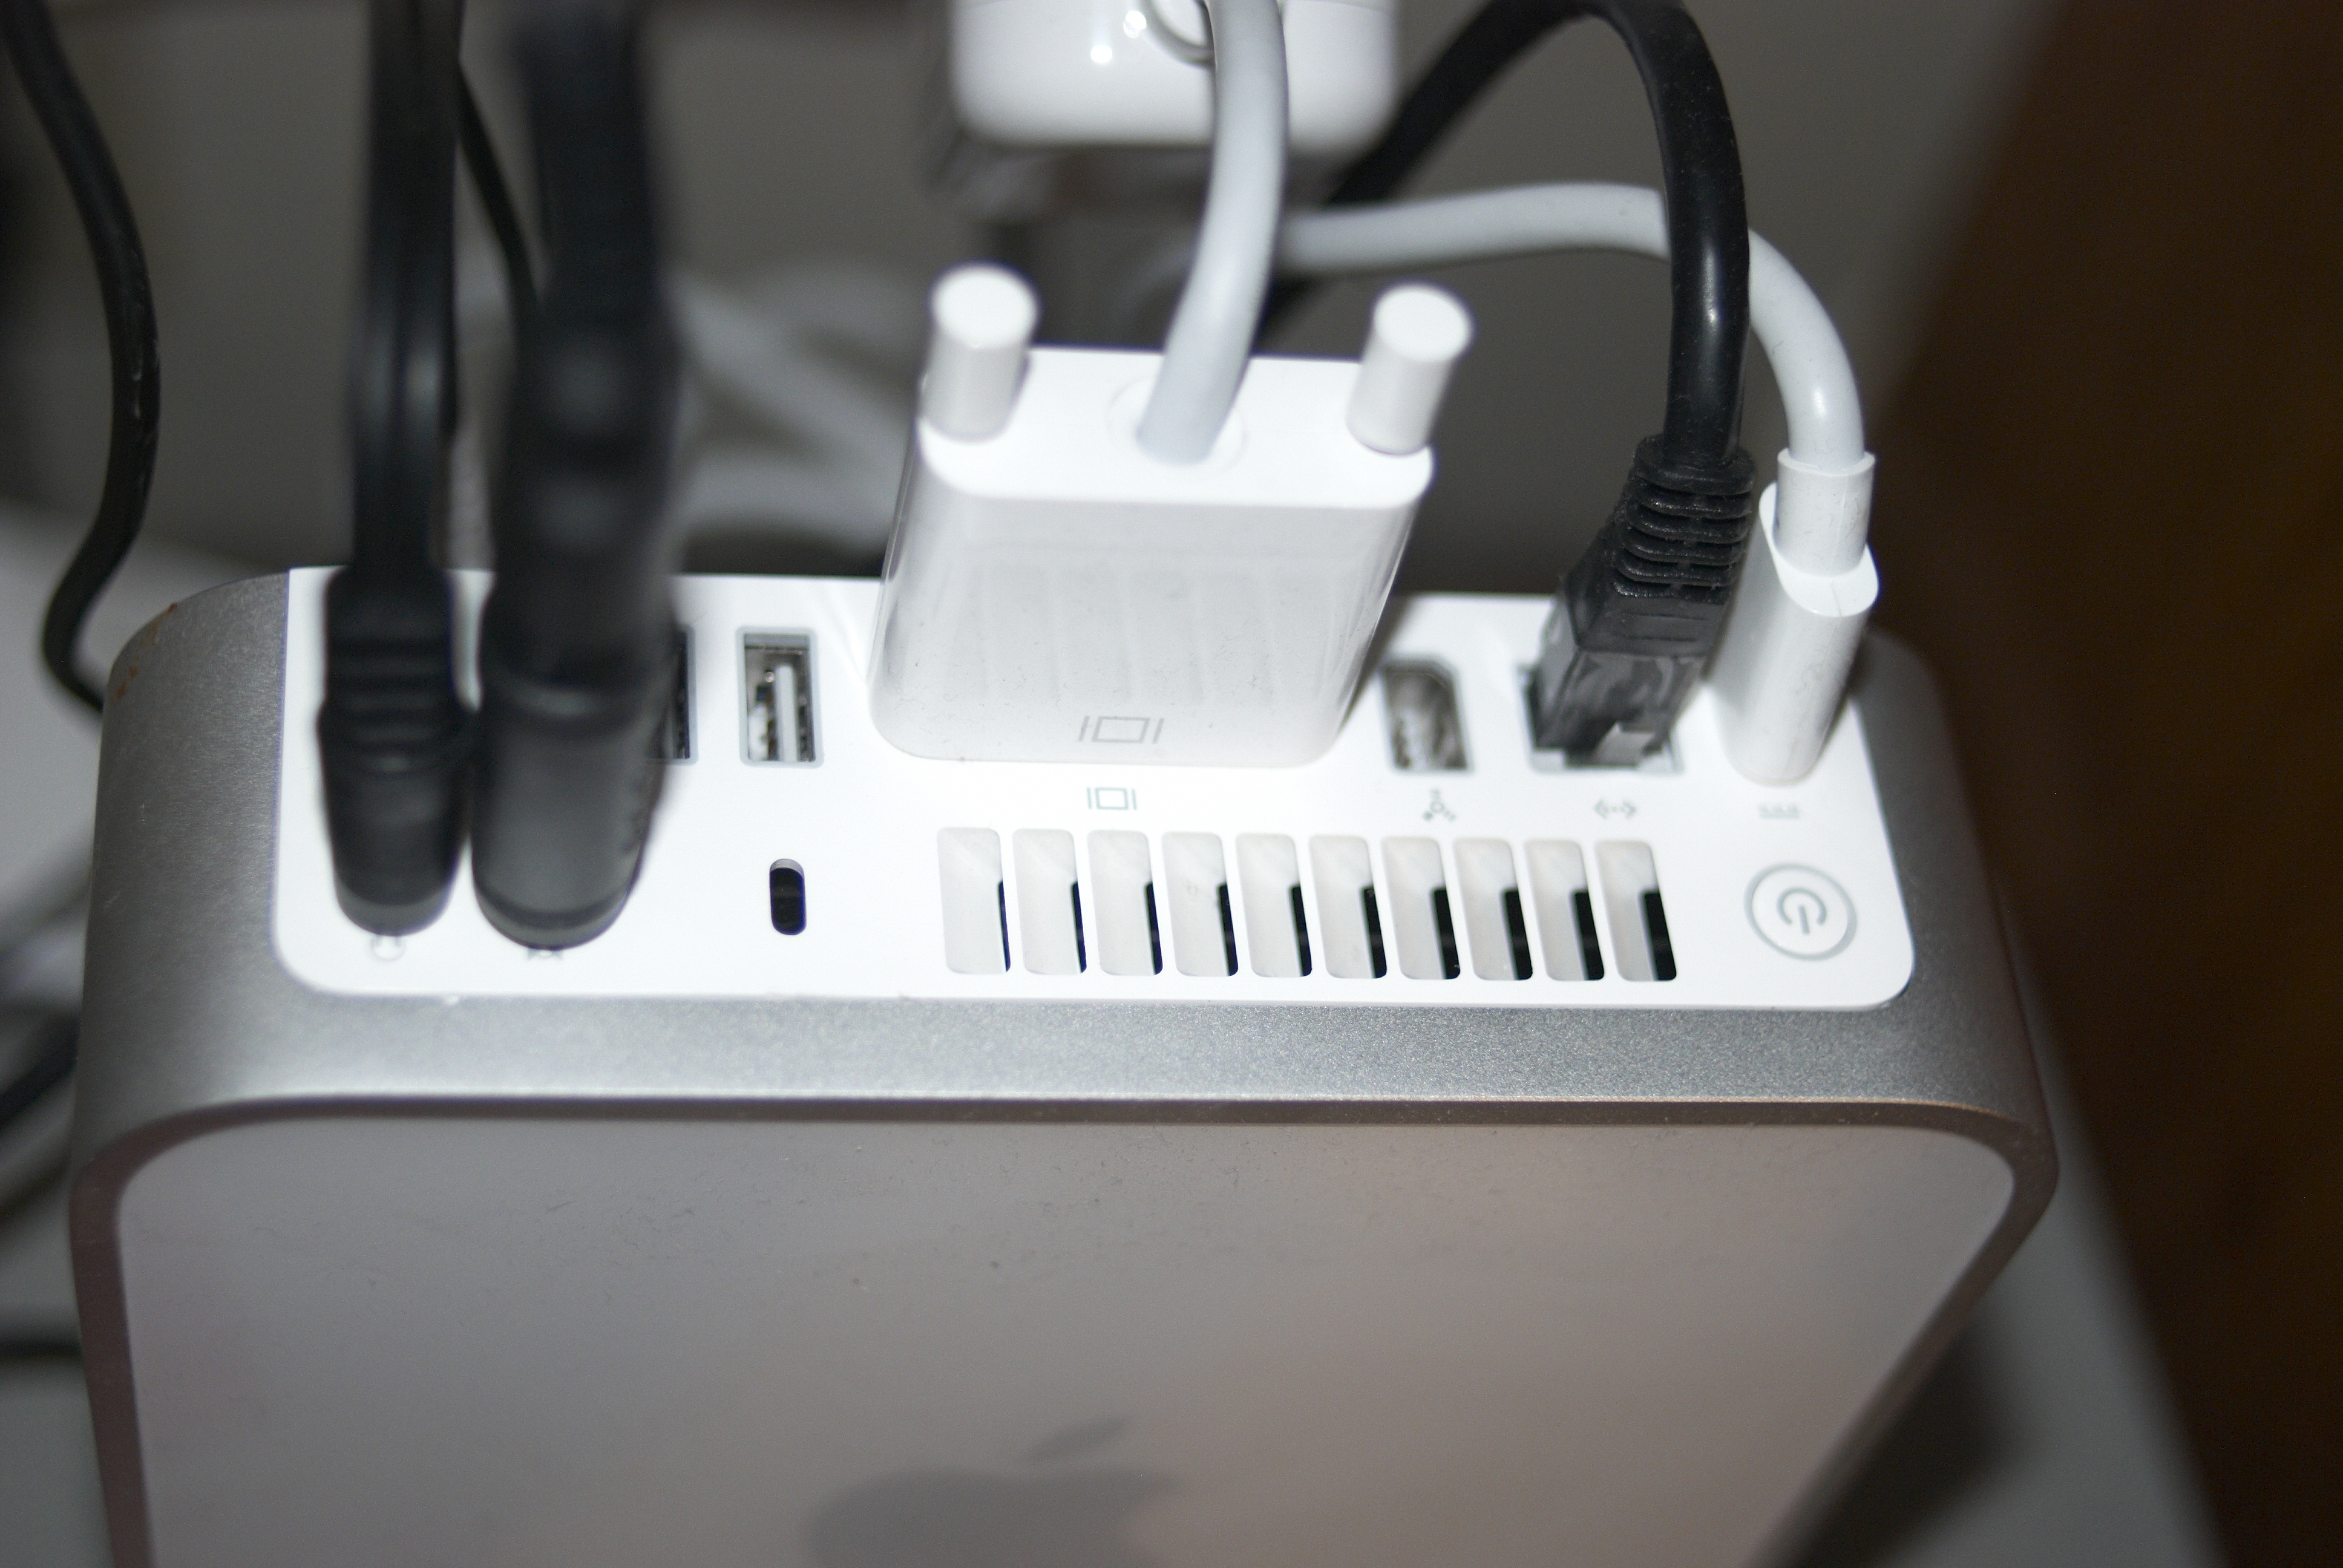
Pretty straight forward here,
You want the mac mini to be located close to your TV if you're going to connect them up. That way, you can use your mac mini remote as if it was going to your TV. It also limits your cables somewhat.
Find a dedicated power connection. Its very easy to unplug the mac mini with just a kick of the foot, or an errant roomba so be sure you have it set up well.
Connect your mac mini to your wifi router physically with an ethernet cable. This will allow you to have a very reliable persistent internet connection.
Connect the DVI port to your proper video adapter, then connect to the proper port on your TV. This would be also the time to connect your audio connection if you're not using HDMI. Use that 1/8" adapter I talked about.
You might notice at this point you have three long cables going very different directions. You should make sure things are logical, i.e. don't have your router, TV and power outlet in very opposite directions and in different rooms.
Installing Software
Despite what may have been implied in the last step, its worthwhile to connect a keyboard, mouse and monitor (instead of the TV) to the mac mini so you can make changes easily at this time.
Installing Developer tools (once downloaded that is) is very straight forward, it just needs to be done first, well second after running software update.
https://developer.apple.com/mac/
Installing the latest bleeding version of X11 build for mac os x has become super easy, it used to be more painful for some reason. Just run the installer and you'll be good. FMI http://xquartz.macosforge.org/trac/wiki
Installing Perian is straight forward, no need for explanation. Just double click the prefpane that comes up when you mount the .dmg file. Oops gave an explanation.
http://perian.org/
Everything else gets its own page, though its all pretty easy so don't sweat it. Just click next...go for it!
Set a Static IP Address for Your Computer
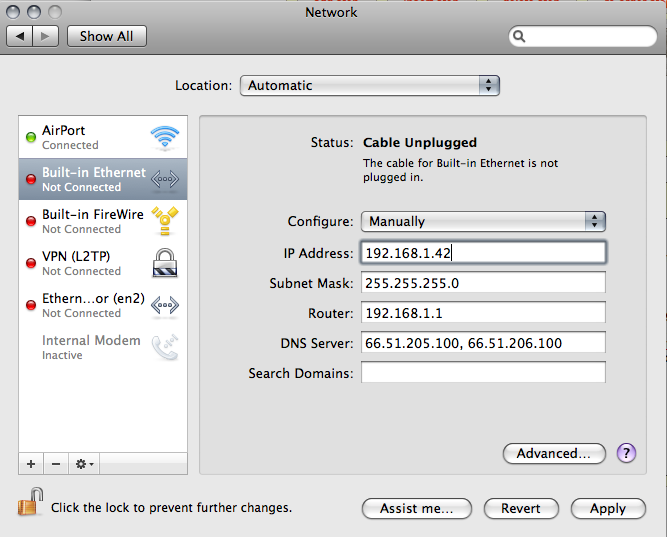
This is sort of a necessary step.
Go to System Preferences>Network and click on "Ethernet" on the left. If you have this plugged into your router, it should be green. Change it to DHCP and click apply (if it hasn't already). Write down the Subnet Mask, Router and DNS Server numbers that come up.
Change "Configure" to Manually then enter an IP Address. Depending on the router, this could vary. By default the IP address range for D-link routers is 192.168.1.xx where xx is anything between 0 and 99. Look in your router manual, or search online for the static ip addresses available with your router. Go ahead and choose something you like, and then enter the "subnet mask", "router" and "DNS Server" information you just copied down. Click apply, and it should all work out...Hopefully.
After you get it working, turn off airport.
Installing Fink
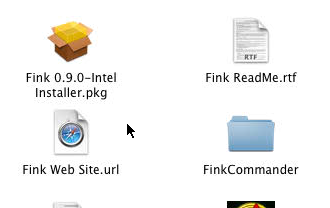
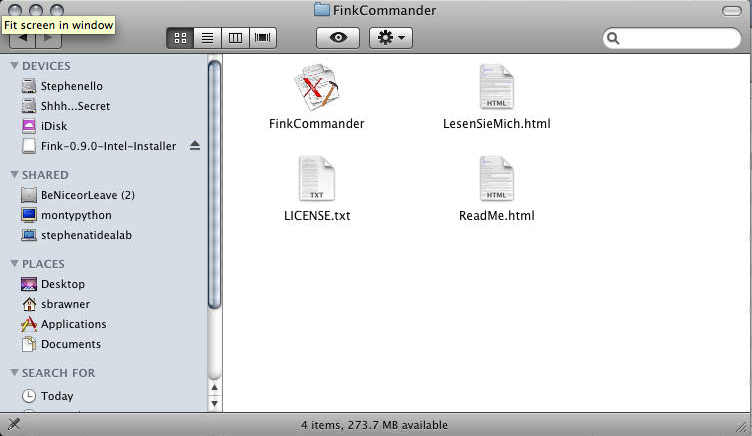
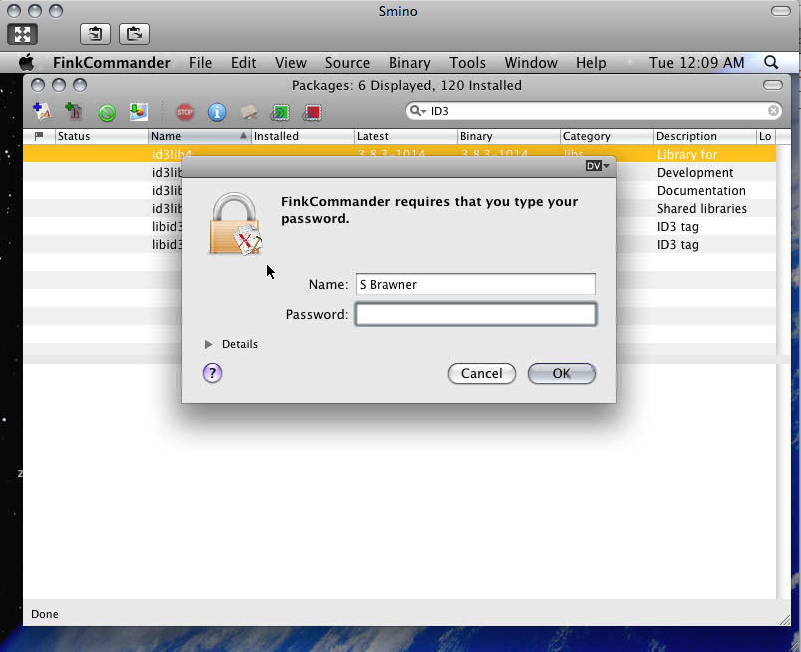
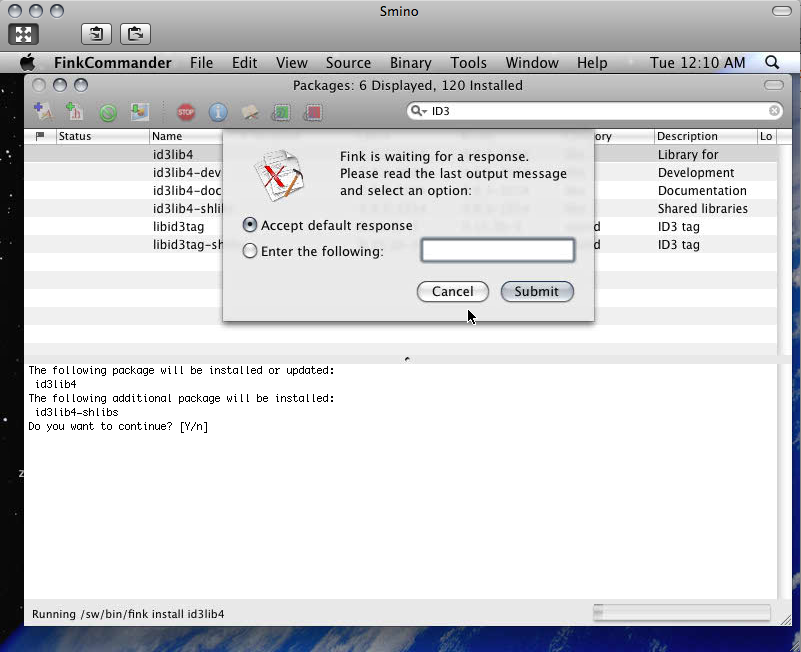
Really easy! Just double click the downloaded file to mount the .dmg file. Then run the 'installer.pkg' file.
Also copy over the FinkCommander located in the FinkCommander folder to your applications folder.
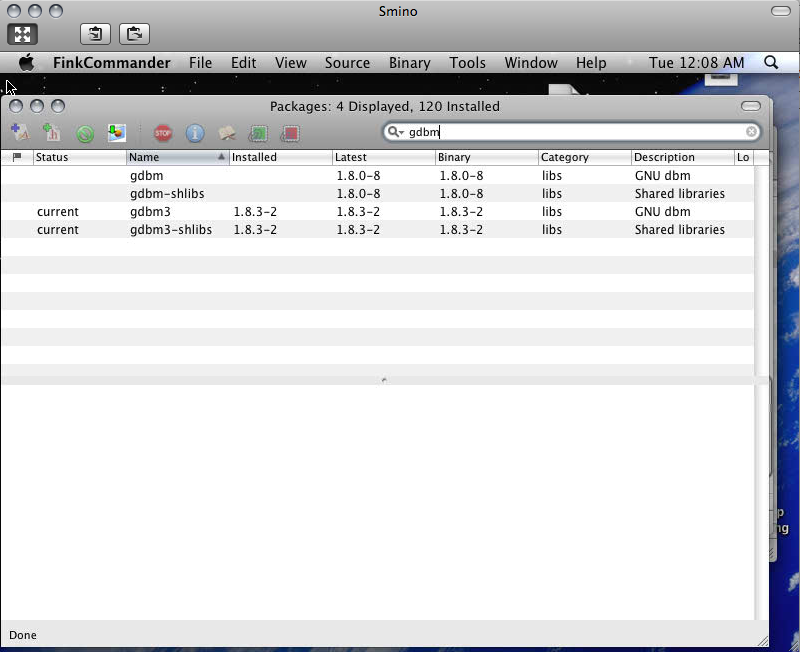
After installing and after copying FinkCommander, run FinkCommander from your applications folder. Do a search for "gdbm" and install both the gdbm3 and the gdbm3-shlibs packages from source (its the button with the .h and + sign).
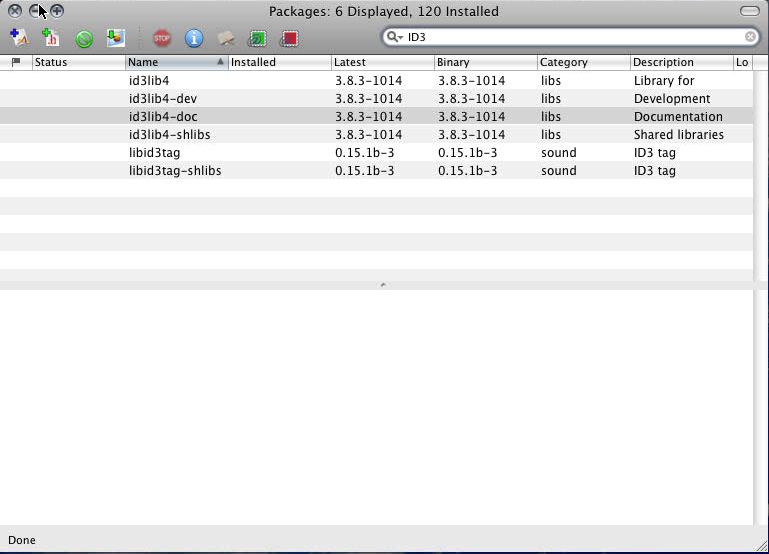
Then do a search for libid3tag and install both the libid3tag and the libid3tag-shlibs.
Thats it for now, if you want to install other open source goodies, nows a great time.
Get a Dedicated DNS Host Name, or Your Own Domain Address
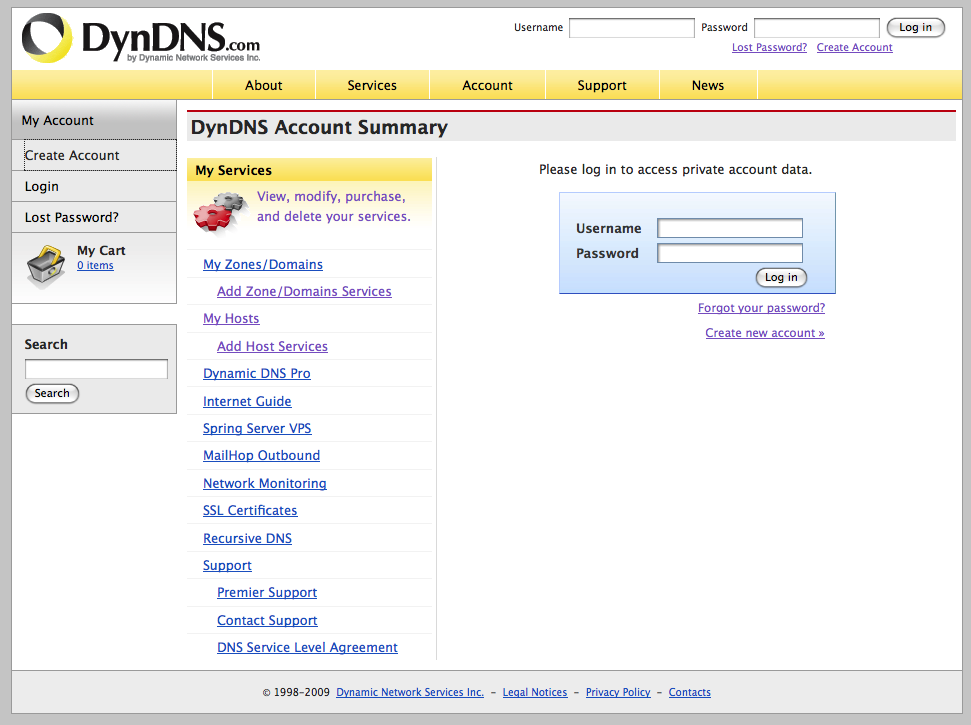
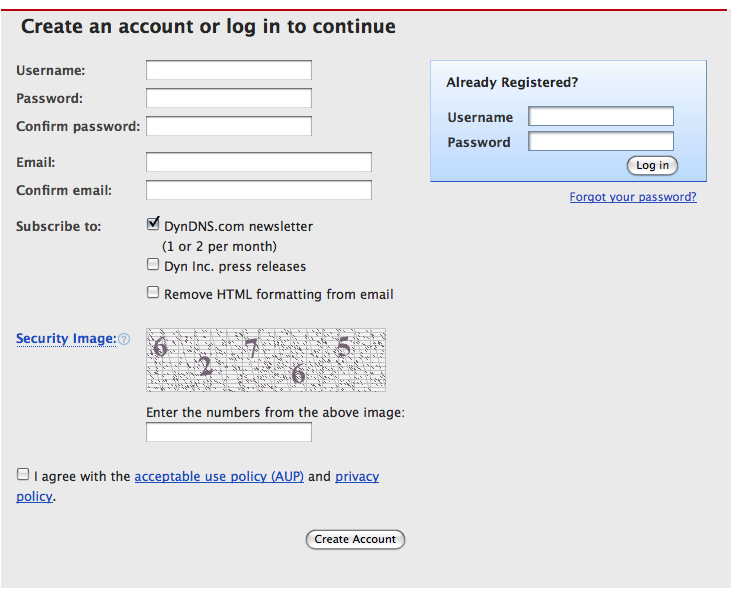

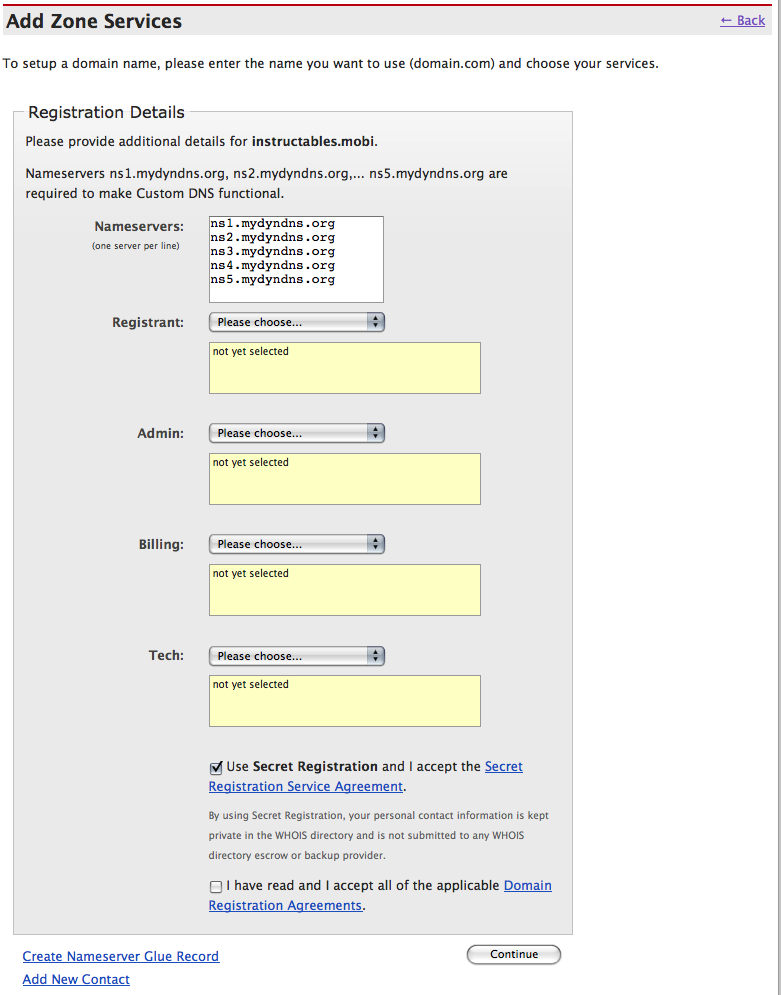
This will be used so you never have to memorize IP addresses, instead it will be things like ladada.org. Also since IP addresses change a lot many times, this helps there too!
There is a distinction here to make. Registering a domain name costs money (usually $15-$50 depending on the goodies). Registering a host is free, but you don't get a choice of the full name. So your domain could be lalala.com, but your host would be lalala.gotdns.org where the gotdns.org is one of several choices you can get. Registering a domain requires contact info, which you can hide for a small fee. You can somewhat fudge this info, but they have a right to revoke it if its not correct (i think). Just check it out for more info, will ya!
Go to: https://www.dyndns.com/account/
and click on "Create Account". Fill in the necessary information, agree to the terms, and click the Create account button at the bottom.
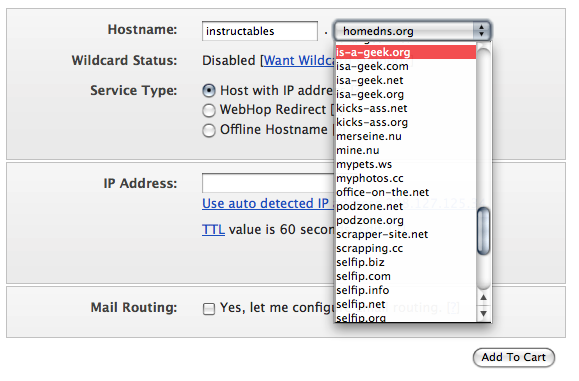
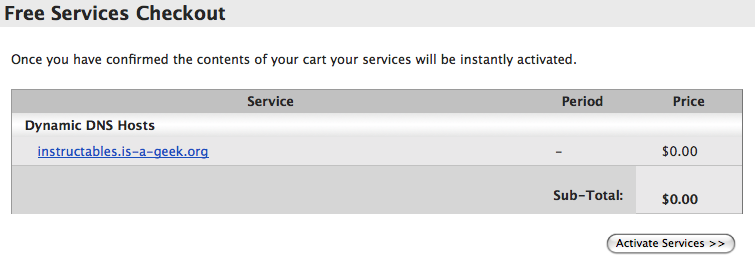
After logging in, click on Add Host services. Fill in the hostname and choose a tag-on. See, your address has to have some fubar.net that you must use. Some of them are clever, others plain and easy to remember. You can click "Use Auto Detected IP address nnn..." if you so wish. If you haven't been following, this one is free. But you still need to click "Add to cart". See, Price=$0.00, I told you! Then click on "Next >>". Now click "Activate Services >>"
Ha ha! Instructables.is-a-geek.org is now mine. what social commentary. *update. I released this domain back into the wild. Enjoy
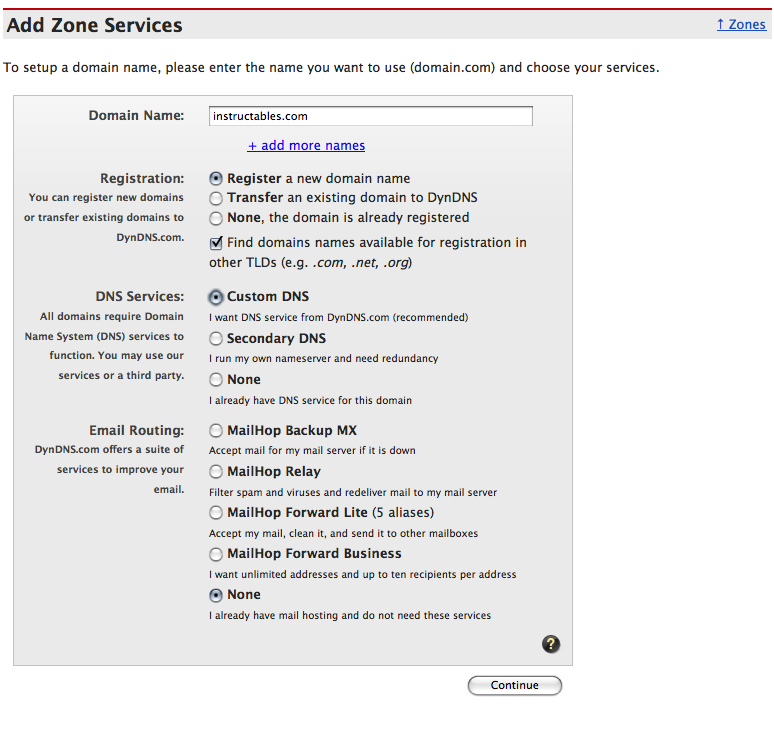
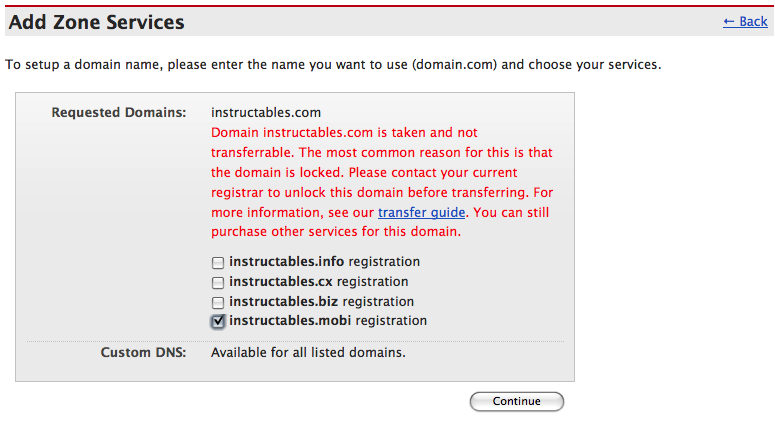
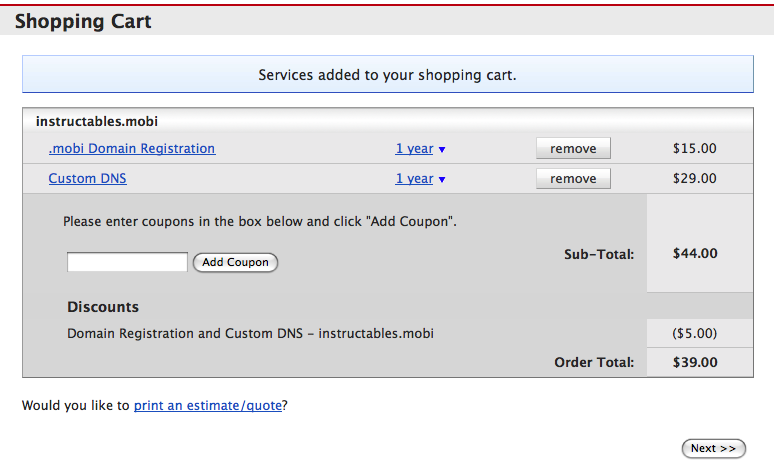
To register a domain, click on "Add Zone" or "Register Domain". You can now enter whatever you address you want in the form of mywebsite.com (or .net, .org .biz, etc). Click the "Find domains names available..." if you want to choose from a whole slew of (.com, .net, .org etc). In my example, instructables.com is taken (phooey) but instructables.mobi was not! If you find one you can use, press Continue and fillout the appropriate registration information. Select Secret Registration if you don't want the general public to find this information. If you don't anyone can run the command "whois yadayada.com" and find out this registration information. It costs a small amount though. You also probably need the custom dns service. Click "Continue" then "Next" then pay and your good to go!
Check out the next step so that your computer can always be gotten to with this address.
Use DynDNS Updater to Stay Ahead of DHCP
DHCP, it stands for Dynamic Host Configuration Protocol
Basically it means it changes your IP address routinely so that people can't always target you at the same IP address. This makes it a little safer if your computer is configured properly. Hopefully ours is, so we'll be good to go. Both your router and your ISP might use DHCP, so your ipaddress changes regularly (probably daily).
This is a problem because DynDNS needs to know your ip address in order to direct requests for your domain/host (blahblah.yada.not) to the actual IP address. Its sort of like giving directions to a specific address when your friend asks how to get to Bob's Pizza. If Bob's Pizza keeps moving locations, it better notify someone so people can continue to find it. Good thing for us, Bob's Pizza uses DynDNS updater!
DynDNS has a free utility here:
https://www.dyndns.com/support/clients/
Keep this application open all the time, and it will notify DynDNS when your IP address changes.
They have a pretty good tutorial on how to install it, so check it out and save me some time (so I can sleep jeez!)
https://www.dyndns.com/support/clients/dyndns-updater-guide-mac.html
Port Forwarding!!!
Port Forwarding *yaaaawn*...sorry just saying port forwarding *yaaaawn* makes me bored and start to nod off. If I add several exclamations it helps...some.
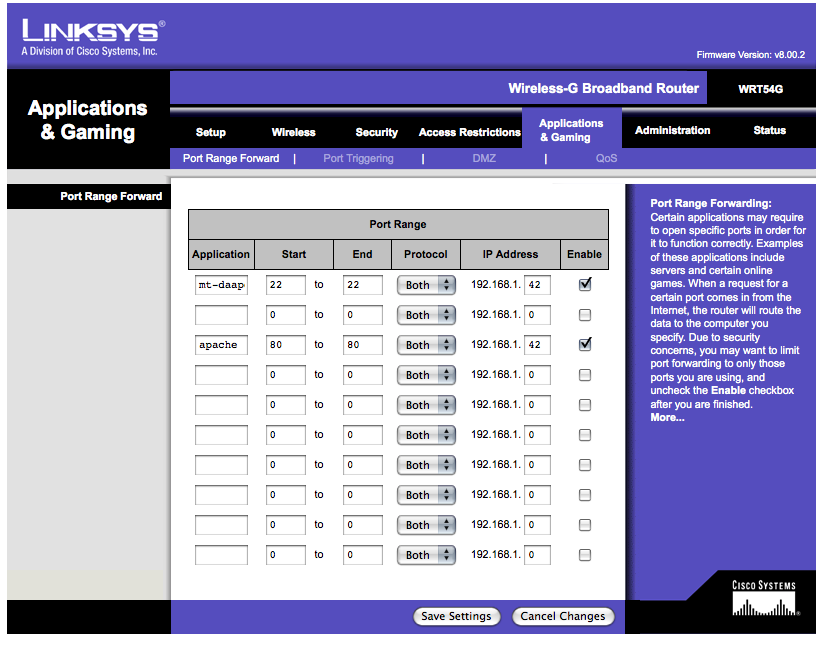
Anyway, if you use a wireless router in your home, it handles the ebb and flow of your internet traffic. It will transfer your request and direct external traffic to your computer. It could also handle DHCP and junk. But if there is a request on certain ports for their respective services (like 80 webpage requests) to your home network, it doesn't know where to send it. Its not about to probe every computer on this port (mostly for security reasons) so it just denies requests of this nature. To change that, you need to setup port forwarding *yaaaawn*. Darnit, yawned again.
If you use a d-link router, go to:
http://192.168.1.1
for netgear (i think...)
http://192.168.0.255
for airport, open the utility (not sure here)
Because this is the router i have, the following only deals with D-Link routers, but all wireless routers should offer this.
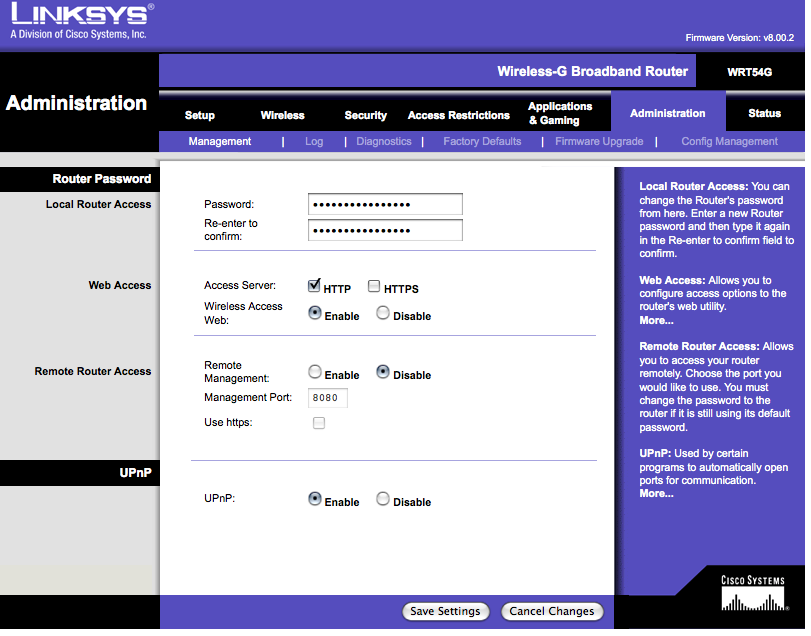
It should prompt you for a user and a password. On ALL d-link routers the default is user:admin, pw: admin. So if this still works, you should change the admin password NOW.
Go to: Security and change the Password to something good and strong.
Go to "Applications & Gaming>Port Range Forward" and setup a port range for 22 (thats ssh) and another for 80 (web hosting). Point them toward the static IP you chose for your computer.
Installing and Running MAMP
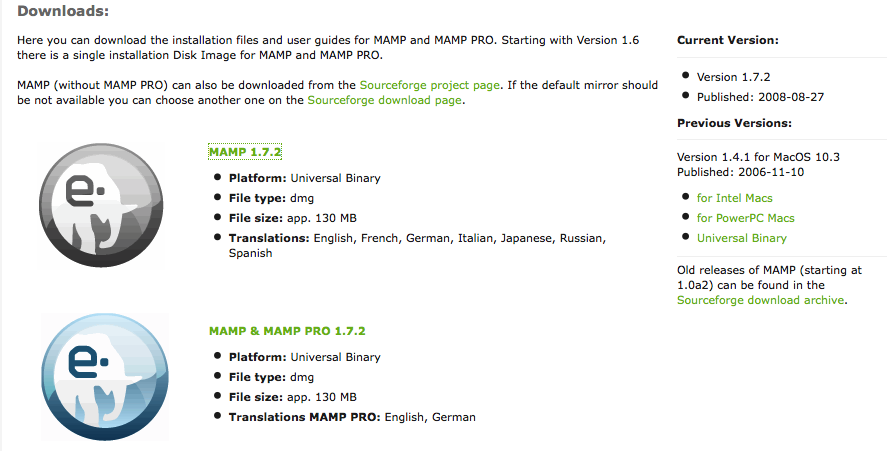
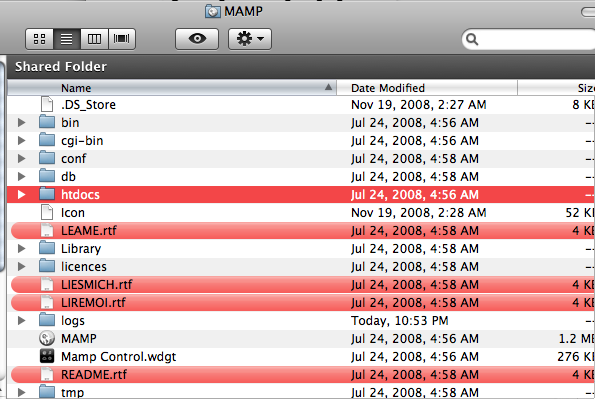
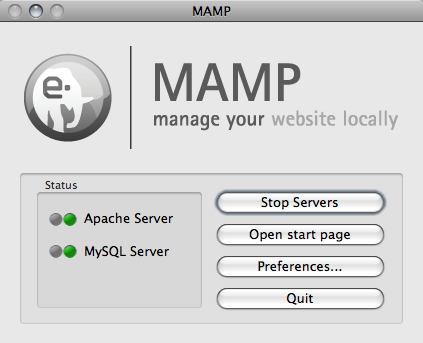
OK, this one is easier then the last. Just mount the .dmg file and drag the MAMP folder to your applications folder. Inside this folder is the MAMP application, the htdocs (which is your web pages root), the needed bin files and pretty much everything needed for running a webserver using Apache, MySQL and PHP. Don't worry about what those mean unless you are interested in designing your own website, in which case you could easily develop a stomach ulcer worrying about them.
To get things set up, open up the MAMP application
Setup the following in the preferences dialog, see pictures below for more info.
Under start/stop, set "Start servers when starting MAMP"
Unclick "Stop servers when quitting MAMP"
The other two are up to you.
Under Ports
Set them to default. This will make things simple when trying to browse to them in a web browser.
Under Apache
Nothing to change here, just note that this is where your web documents root is. THat is, this is where the web browser looks first when you go to www.website.com. It then builds builds the directory in relation to here.
Firefly Media Server
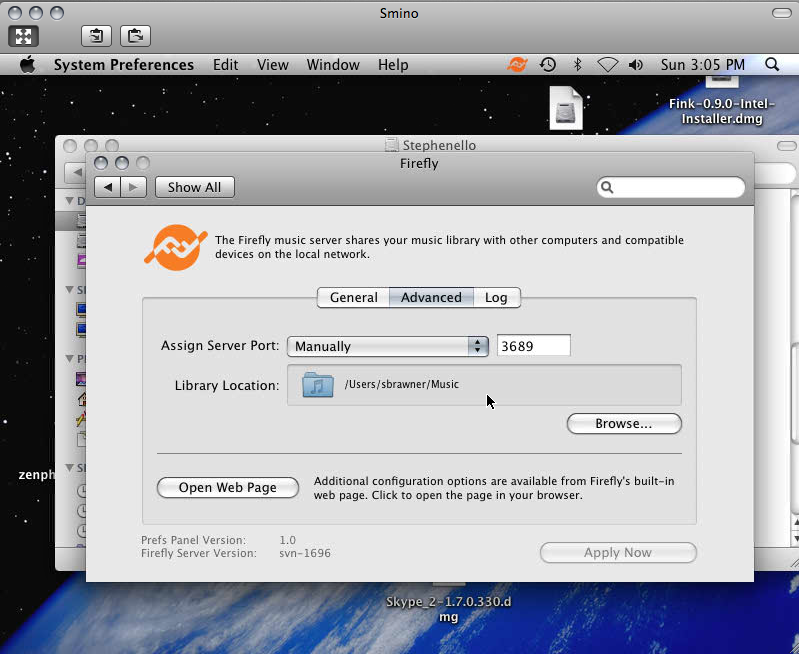
A lot of stuff to do here, so it has its own instructable. Check it out!
https://www.instructables.com/id/How-to-access-your-music-from-anywhere-with-your-M/
https://www.instructables.com/id/How-to-access-your-music-from-anywhere-with-your-M/
Installing and Configuring ZenPhoto
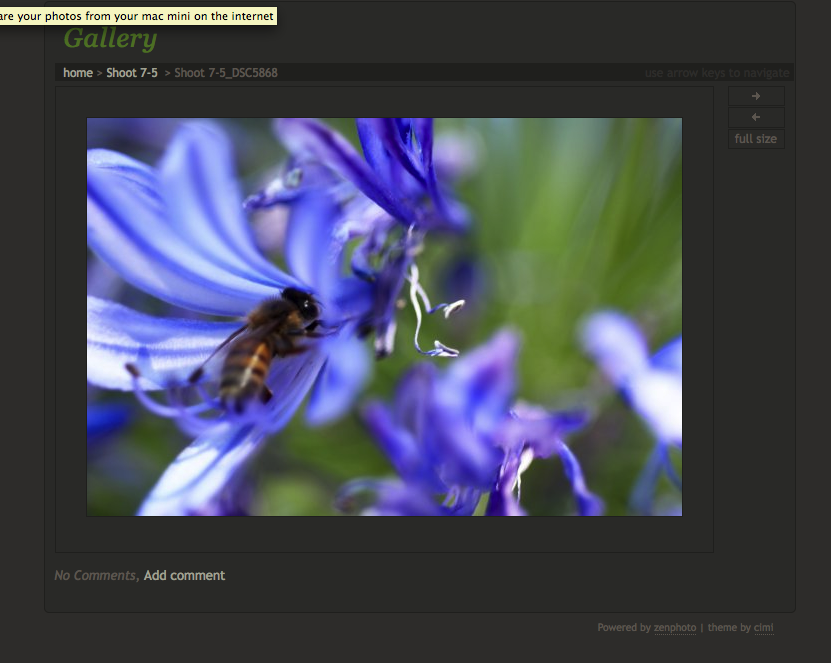
Did I just create another empty step by referring to another instructable?
Yes I did!
check it out!
https://www.instructables.com/id/How-to-share-your-photos-from-your-mac-mini-on-the/
Yes I did!
check it out!
https://www.instructables.com/id/How-to-share-your-photos-from-your-mac-mini-on-the/
Done for Now...
So we haven't really accomplished anything, though we just spent all this time setting things up. Take a break and then head on to your next instructable on the subject of Mac Mini server. You've earned it!
This part of a compendium. Check out the other parts at:
https://www.instructables.com/id/READ-ME-FIRST-How-to-setup-the-ultimate-Mac-Mini-/
https://www.instructables.com/id/Setting-up-the-ultimate-Mac-Mini/
https://www.instructables.com/id/Different-ways-to-connect-to-your-Mac-Mini/
https://www.instructables.com/id/How-to-access-your-music-from-anywhere-with-your-M/
https://www.instructables.com/id/How-to-share-your-photos-from-your-mac-mini-on-the/
https://www.instructables.com/id/How-to-Setup-the-Ultimate-Media-Player-with-the-Ma/