Setting Up LinkIt ONE Code Environment After Arduino 1.5.6 Update
by ptkrf in Circuits > Electronics
474 Views, 7 Favorites, 0 Comments
Setting Up LinkIt ONE Code Environment After Arduino 1.5.6 Update
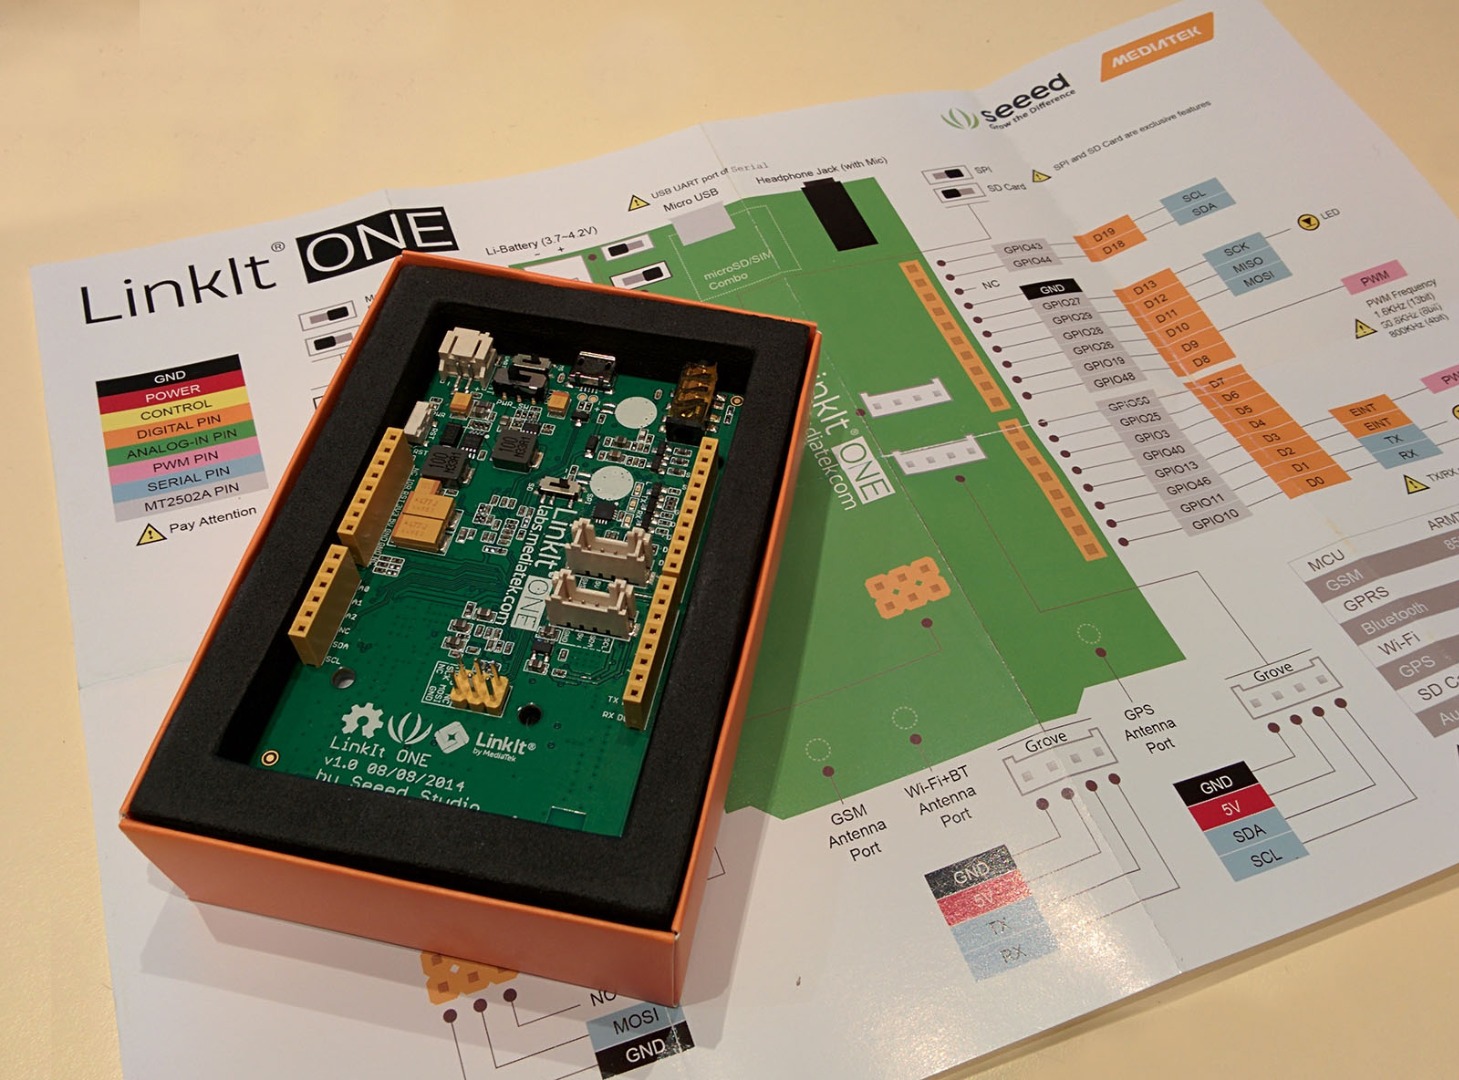
Last month has been full of MediaTek LinkIt ONE board instructables. I counted three general "getting started" 'ibles and why am I making a third one? Let's just say Arduino had a big update on how new boards are added to their IDE and Methods described in all previous 'ibles are not of any help any more (if you don't count installing older version of Arduino software).
Here I will show you how to set up your LinkIt ONE board to work with newest Arduino IDE.
Installation
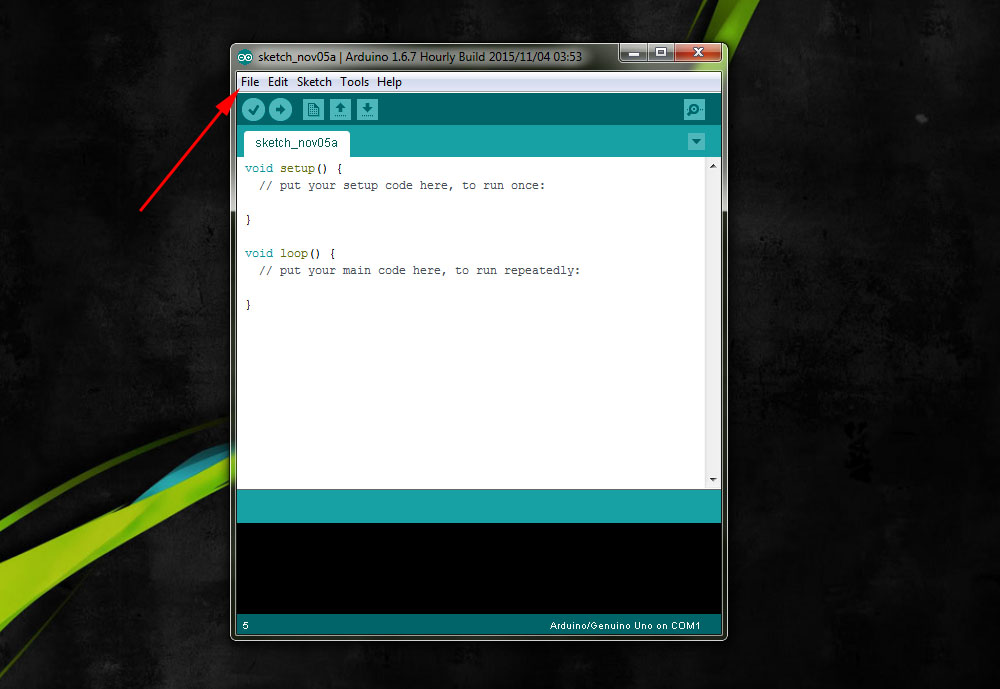
It won't come to you as big surprise that you must first acquire latest Arduino IDE. You can take installer or .zip file as both will work.
What is not same as it used to be regarding LinkIt ONE SDK is you can't install it through official installer. Now you must do it through Arduino IDE.
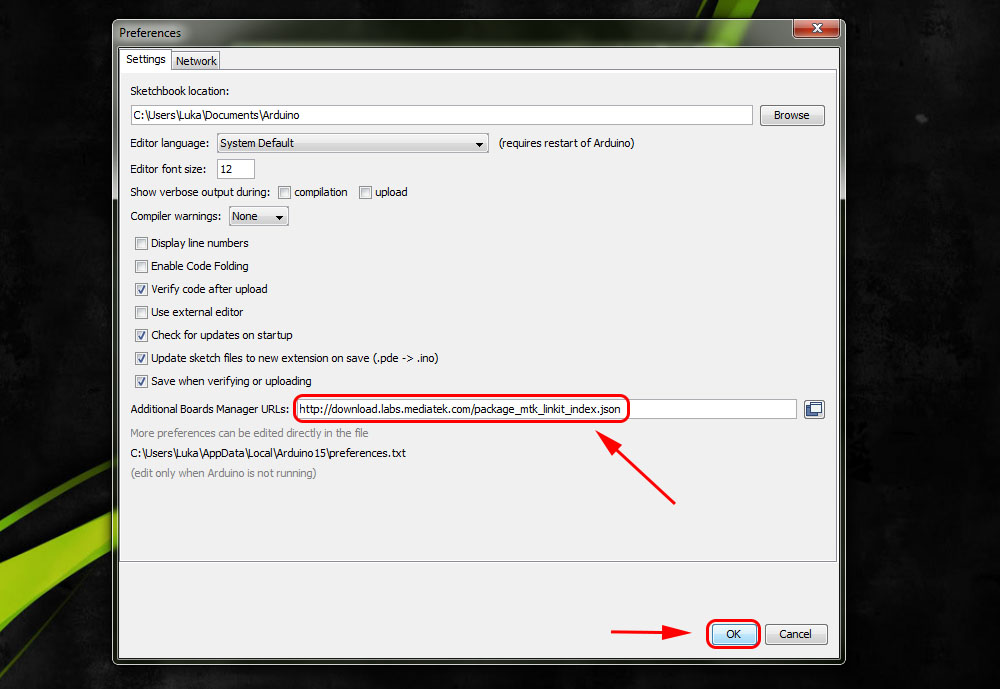
http://download.labs.mediatek.com/package_mtk_linkit_index.json
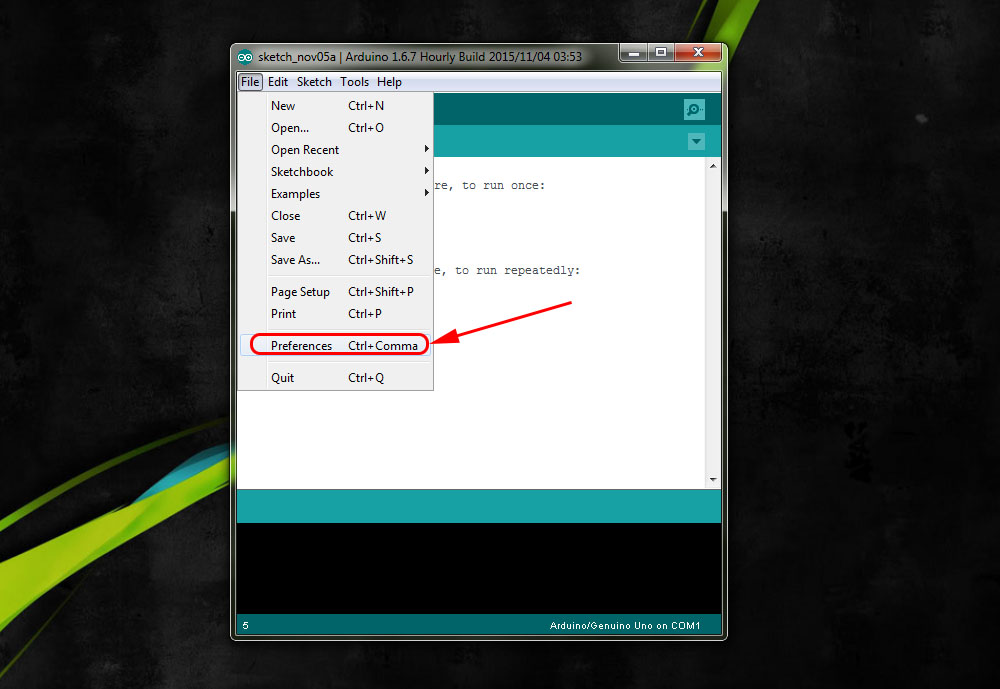
Go to File -> Preferences and paste above link in "Additional Boards Manager URLs" and hit OK. If you already have a link there, click on icon to the right and paste this ink in window that pops up.
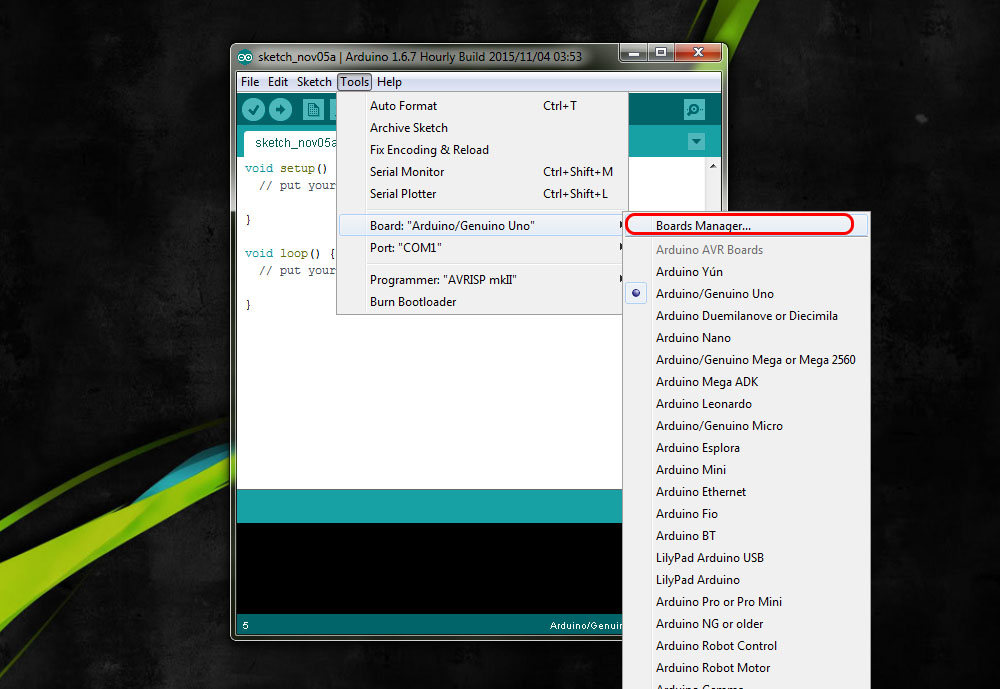
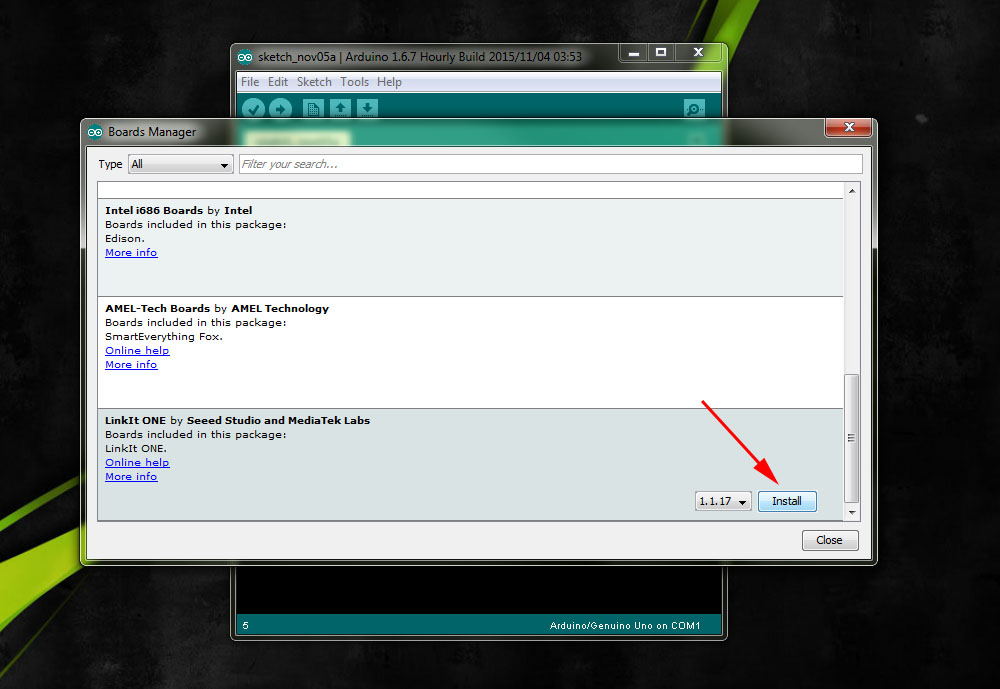
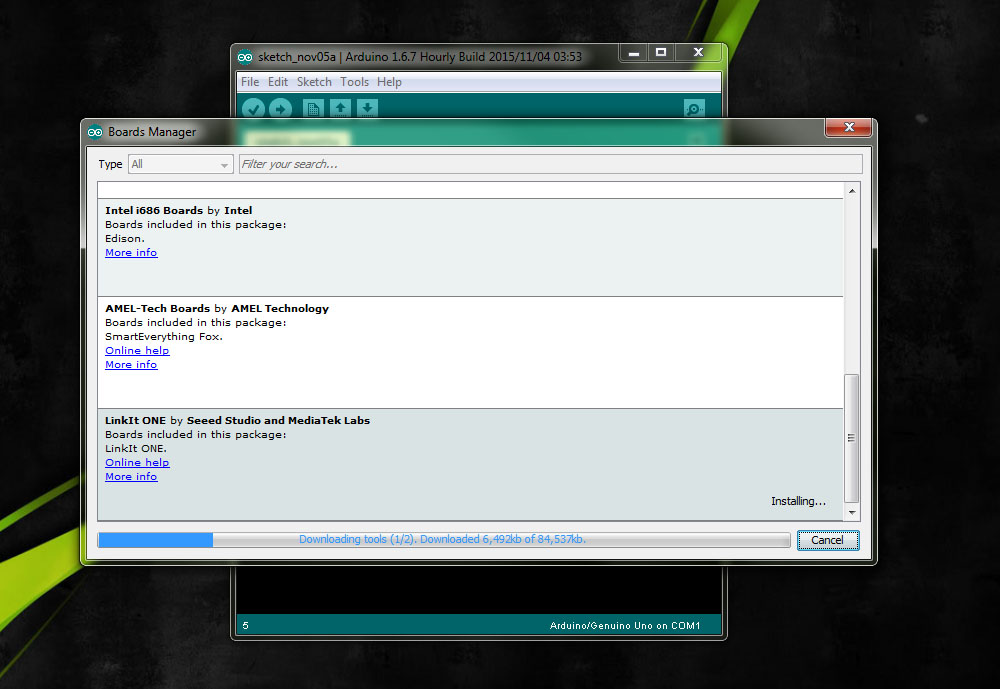
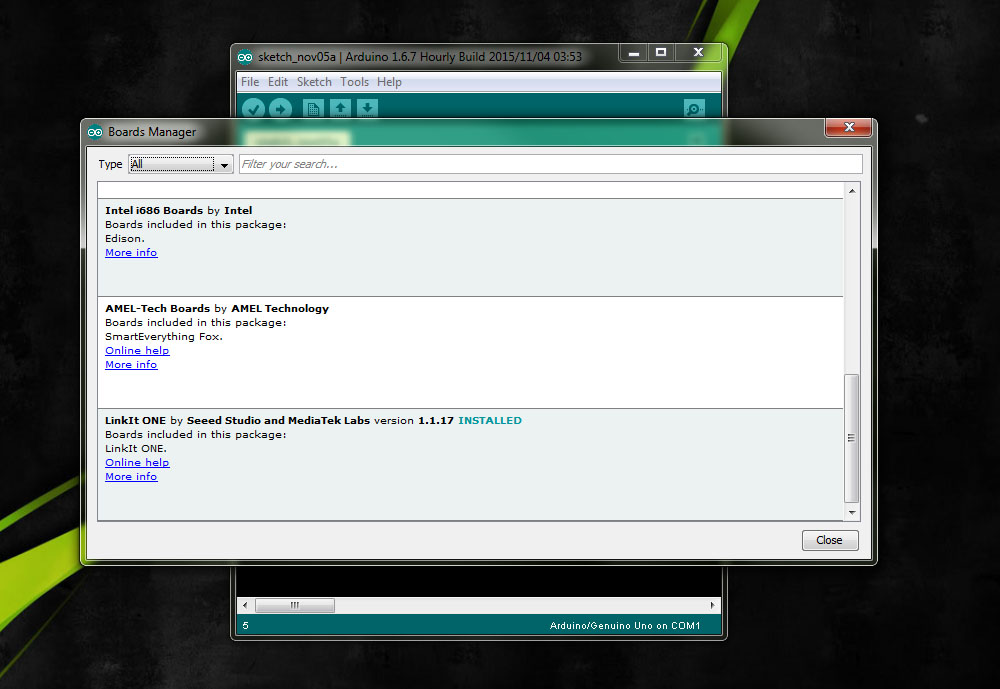
Now go to Tools -> Board: "something" -> Boards Manager... A new window will pop up. Scroll down to LinkIt ONE and click "install" (if you don't see "install" button first click on box and button should appear). Wait a bit for for library to download (shouldn't take long as it is less than 90 Mb in size).
You will also need to install COM port drivers for LinkIt ONE. You can get those from here.
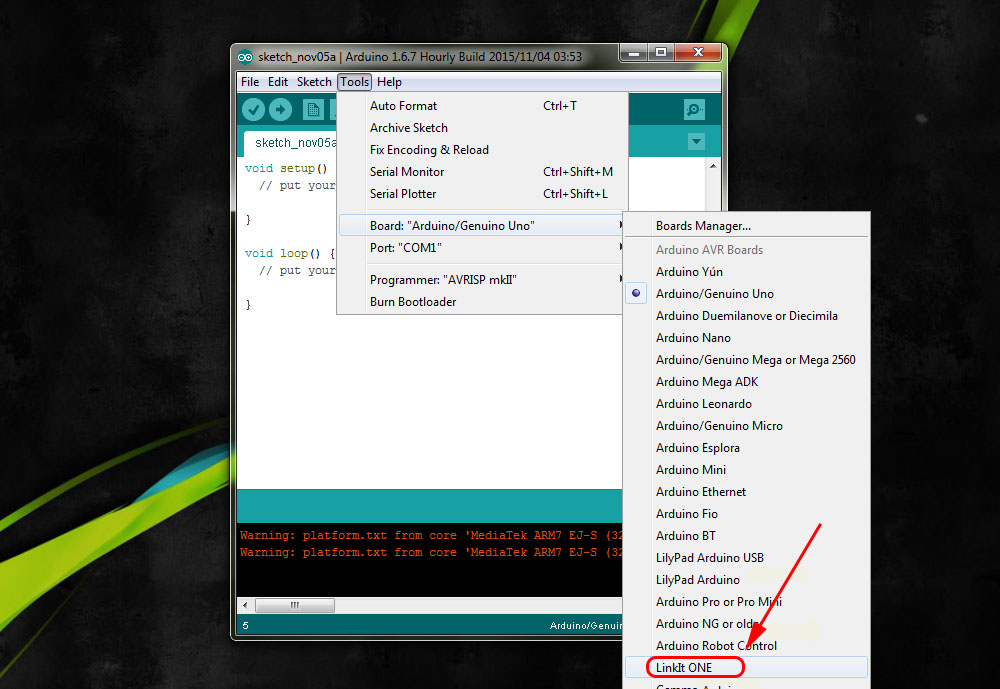
Now he hard part is done. All there is left to be done is to select LinkIt ONE board under Tools -> Board: "something" -> LinkIt ONE and begin coding!
I strongly recommend you take a look at official documentation or at least skim through API reference.
Hope I saved you some trouble setting up your LinkIt ONE board.