Setting the DS3231 RTC (Real Time Clock) Accurately, Fast and Automated Using Java (+-1s)
by LsHallo in Circuits > Microcontrollers
21879 Views, 14 Favorites, 0 Comments
Setting the DS3231 RTC (Real Time Clock) Accurately, Fast and Automated Using Java (+-1s)

This Instructable is going to show you how to set the time on a DS3231 Real Time Clock using an Arduino and a small Java application that uses the serial connection of the Arduino.
The basic logic of this program:
1. The Arduino sends a serial request.
2. The Java program looks what day/month/... the arduino requested and sends the relevent data back.
3. After all needed information is gathered the arduino stores the data in the DS3231.
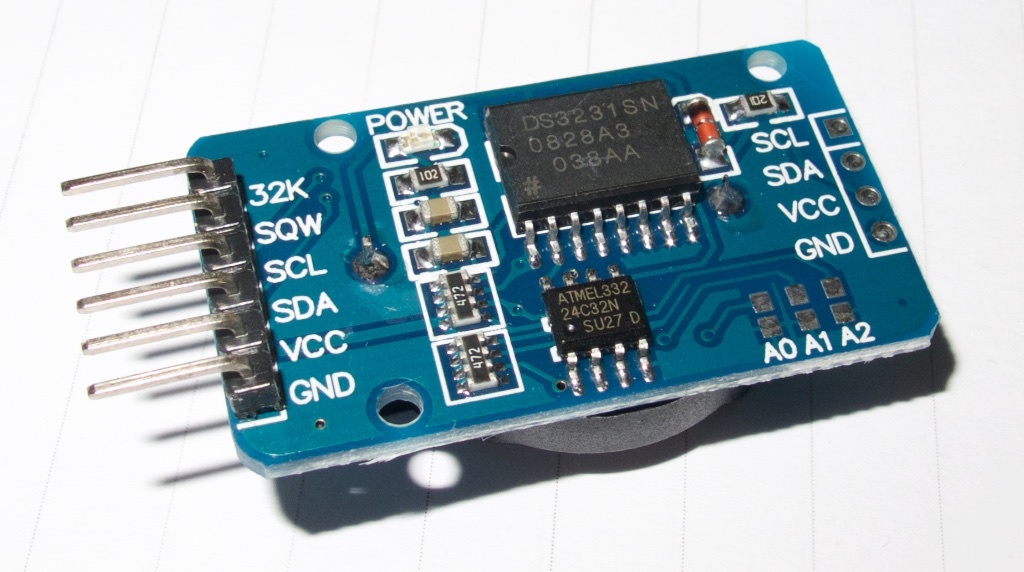
The DS3231 RTC Module
The DS3231 RTC Module is a relatively cheap RTC module with a high accuracy. (a few mins a year)
There are different varieties whose basic functionality is the same with only minor differences.
Detailed comparison can be found here: DS323x Comparison | maximintegrated.com
Buy DS3231: DS3231 | ebay.com
Datasheet: DS3231 Datasheet | maximintegrated.com
Datasheet: DS1307 Datasheet | maximintegrated.com
Parts Needed
1x Arduino (Nano, Uno, MEGA, etc.)
4x Jumper Wires
1x DS3231 Module (DS1307 Module)
Wiring

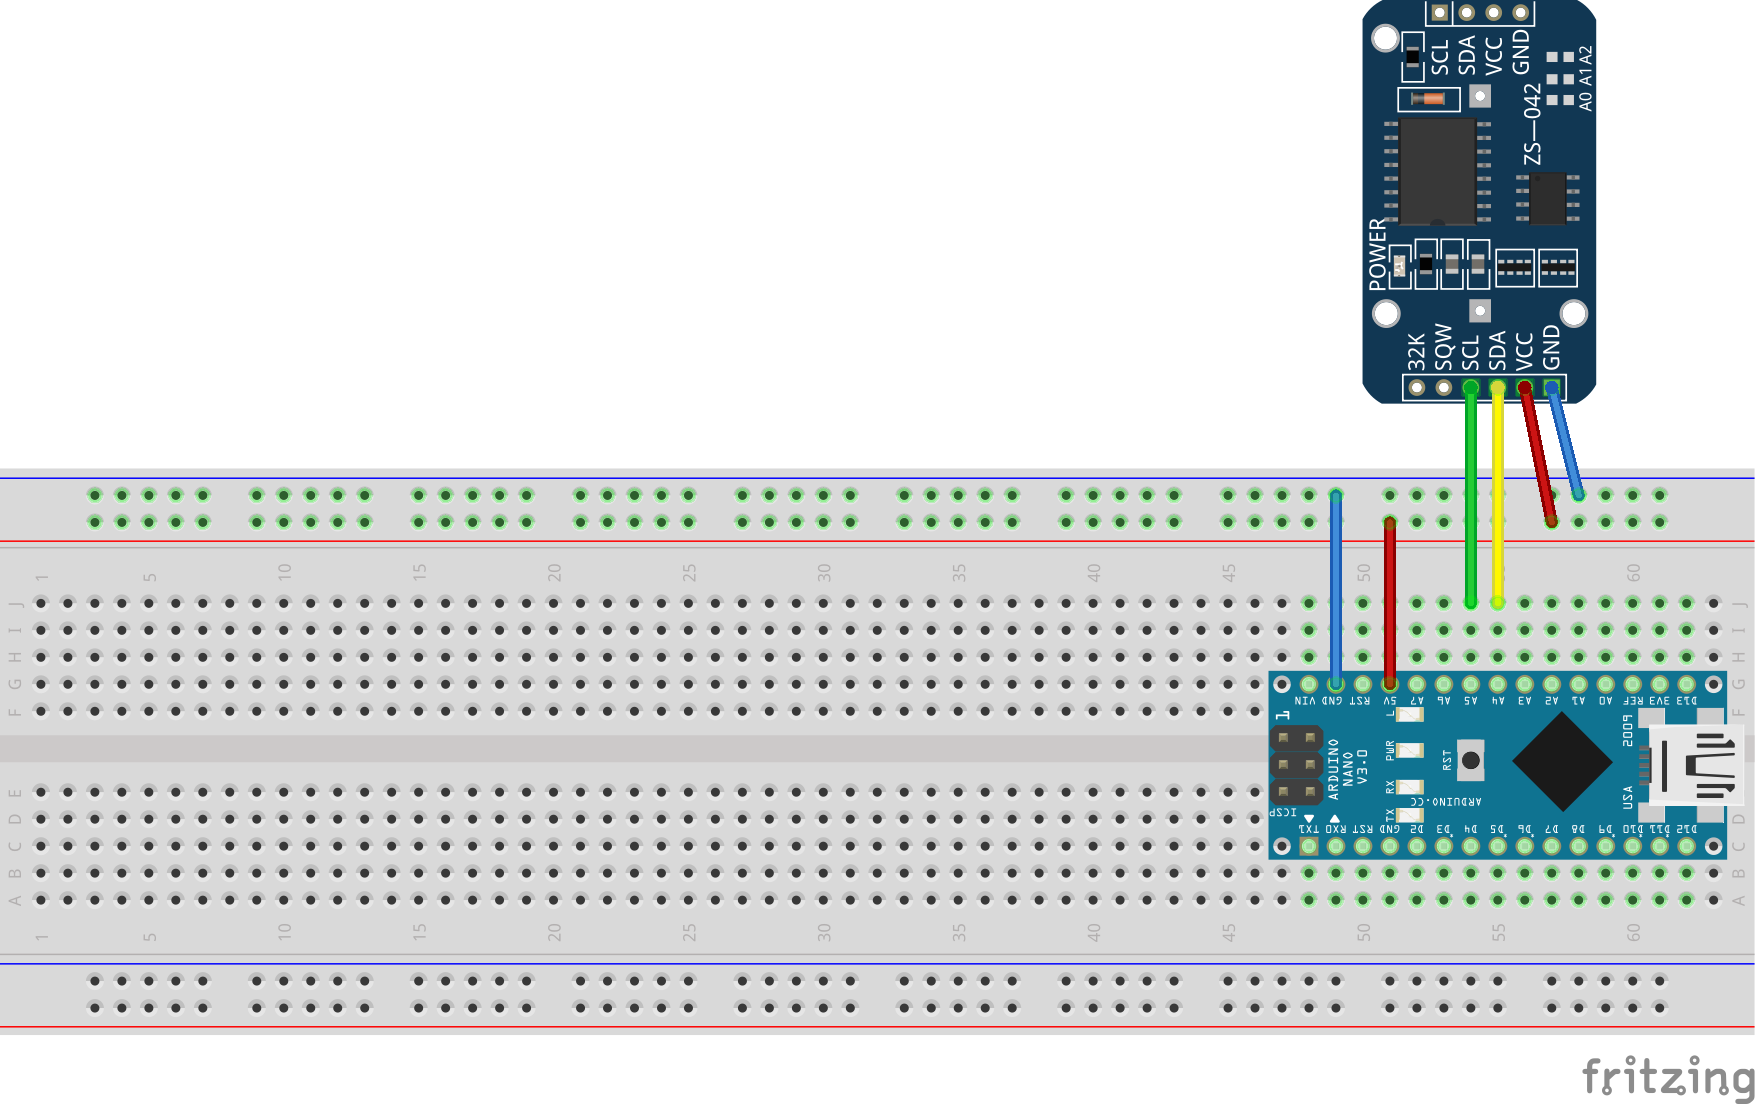
Wire the DS3231 as shown in the image above. Of course you can do it without the use of a breadboard, but it will be a bit messier. I've used an Arduino Nano for demonstration but an Uno or a MEGA should work aswell. (Others might also work but i'm to lazy to confirm)
- Arduino -> DS3231
- A4 -> SCL
- A5 ->SDA
- 5V -> VCC
- GND -> GND
The Arduino Code

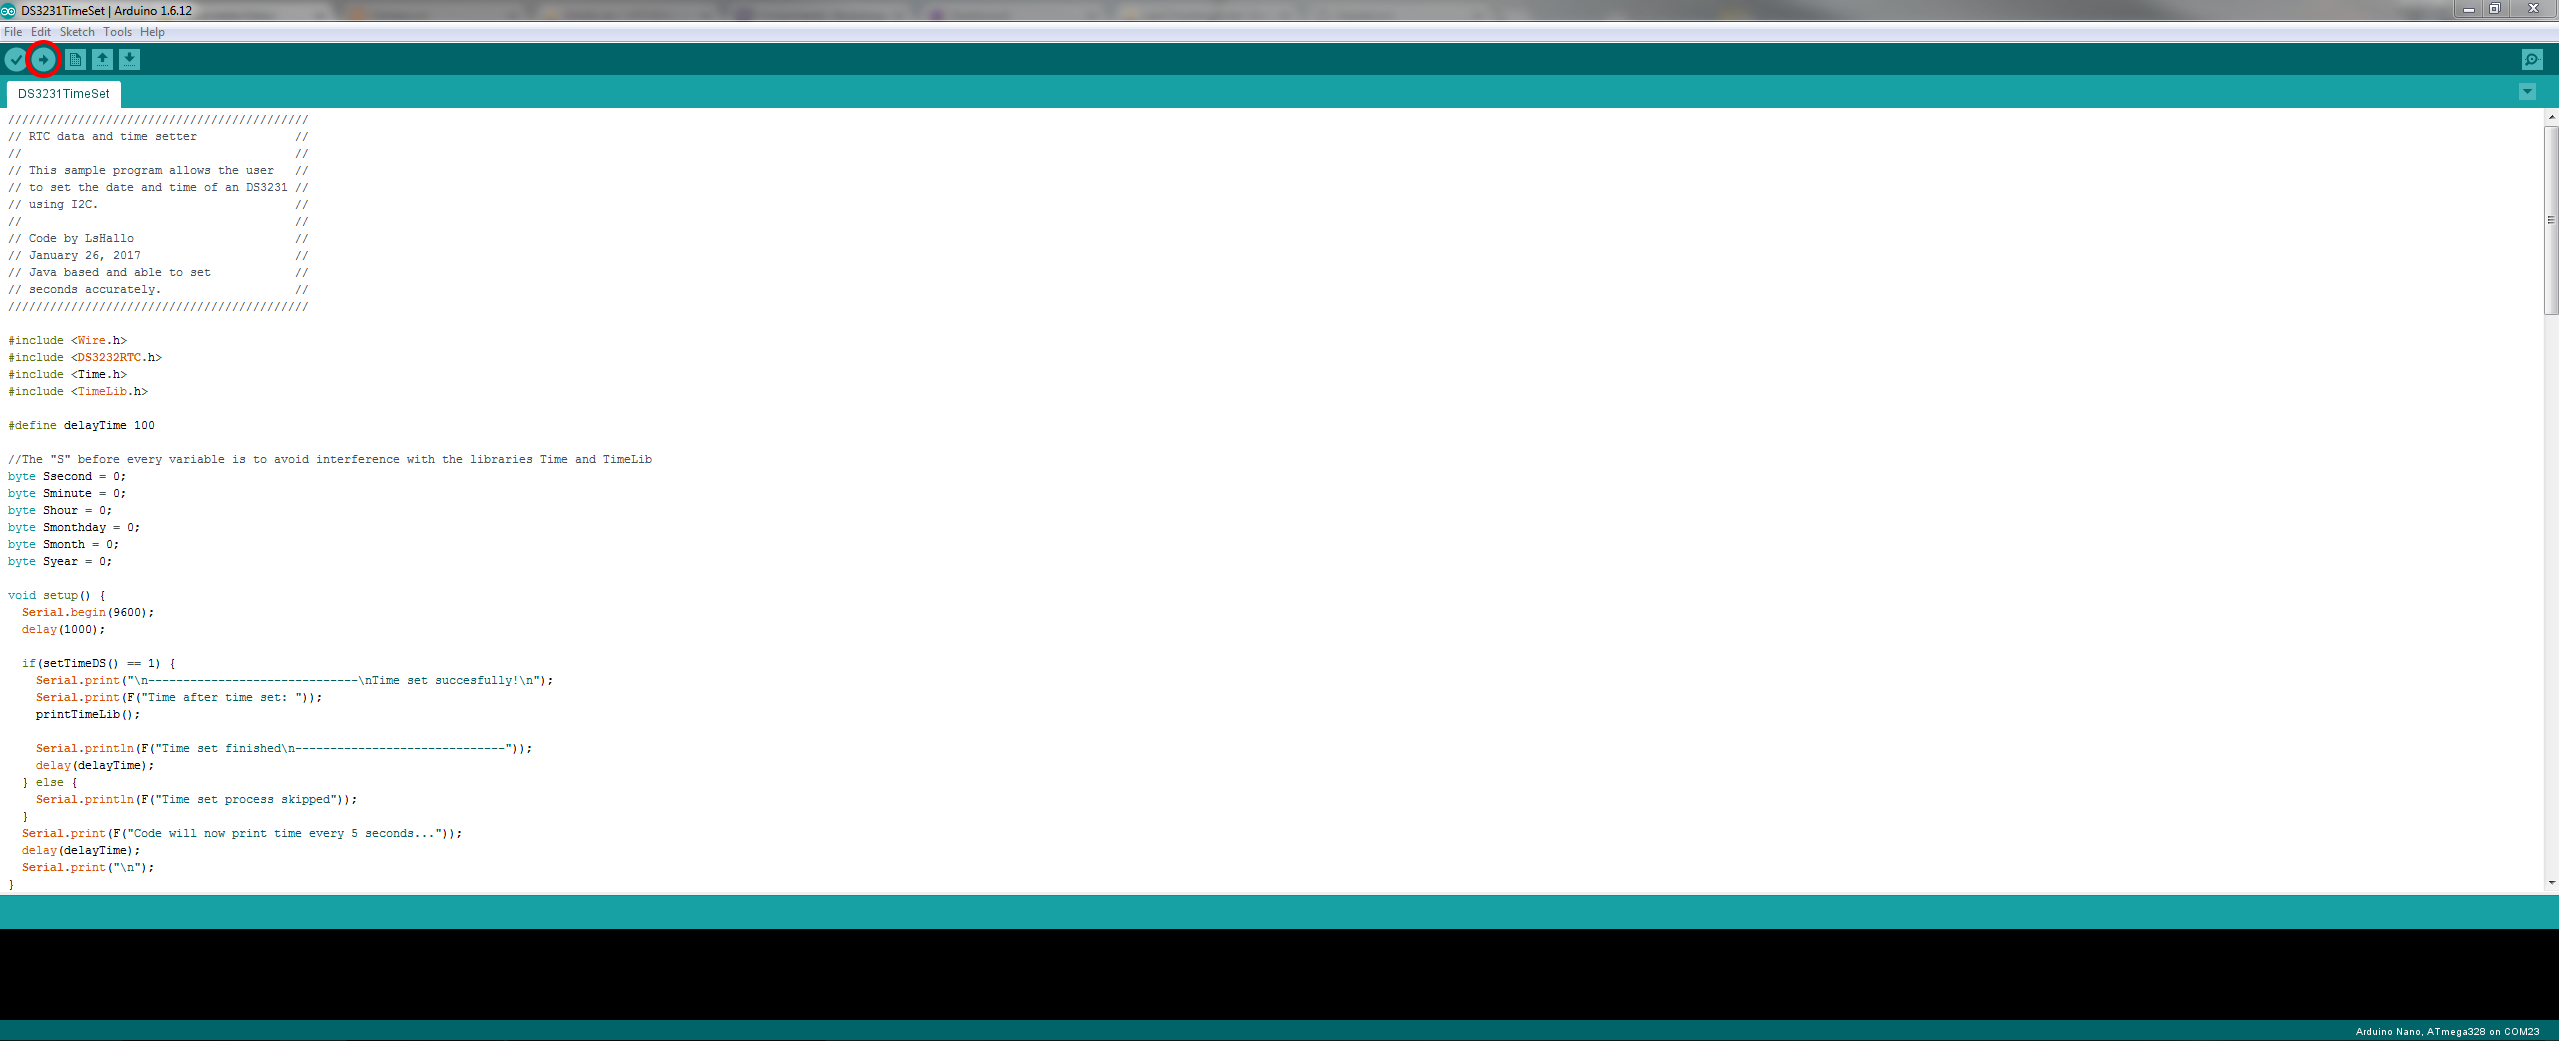
Download the .ino file from below and upload it to your Arduino (in my case a Nano).
The sketch needs the following libraries installed to work correctly:
https://github.com/PaulStoffregen/Time
https://github.com/JChristensen/DS3232RTC
A tutorial on how to upload code to your arduino can be found here (arduino.cc).
In the Arduino IDE verify that the code was submitted correctly. (Done uploading)
Your Arduino is now ready to receive time information.
Download the code here: DS3231TimeSync.zip (mediafire.com)
Download the source here: DS3231TimeSyncSRC.zip (mediafire.com)
GitHub repository: DS3213 RTC Time Sync (github.com)
Bitbucket repository: DS3231 RTC Time Sync (bitbucket.com)
The Java Application

1. Run "DS3231Sync.jar" downloaded before by double clicking it.
2. A small dialog will open asking you for the port of your arduino.
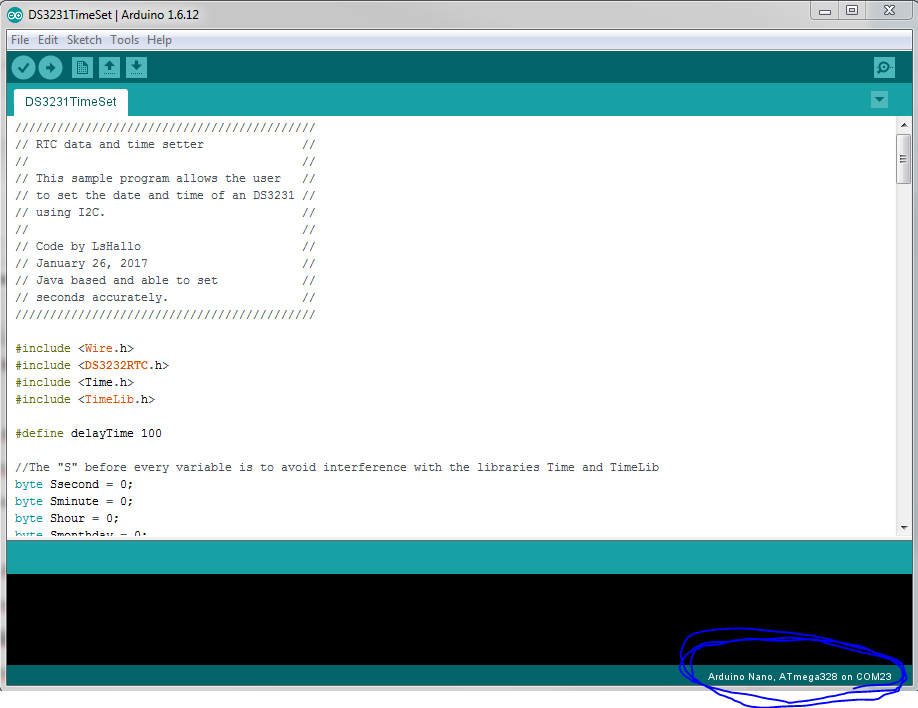
Should you be uncertain about the port used by your arduino take a look in the Arduino IDE on the bottom right.
(See images above)
3. Another dialog will open and ask you for a time zone offset.
The offset is relative to the local time of your computer. To set the RTC to your local time just enter +00:00.
It is critical that you enter the time zone offset in a specific format!
The general format is +hh:mm or -hh:mm. Always include leading zeros!
(E.g.: -03:00; -06:00; +09:00; +02:30)
4.The Java Application will launch a small window with console output.
Keep an eye for confirmation messages like: "Time set finished"
When the time set process finished the code will print the current time on the DS3231 every 5 seconds. You can confirm that the time is set correctly.
Should you not get any output after ~20s push the reset button on your arduino and wait again.
If it is still not working verify the sketch on the Arduino and/or upload it again. (Important: Close the Port in the Java application before uploading to the Arduino; Otherwise it will block the serial port!) Then reset the connection in the Java program.
(The Java program is using LocalDateTime to get the current date.)
The time is now set. Have fun!
Shoud you have any unsolvable trouble setting the time please comment below and share your log.txt (in the same folder as the jar) with me. Thanks a lot!