Setting Up Simmons Titan 50 Drum Kit
by shadaclay in Living > Music
523 Views, 0 Favorites, 0 Comments
Setting Up Simmons Titan 50 Drum Kit
These instructions provide clear and concise guidance for assembling and setting up your Simmons Titan 50 electronic drum kit, allowing you to start playing and enjoying your music.
Supplies
- Simmons Titan 50 Drum Kit
- Headphones or AMP
Unbox
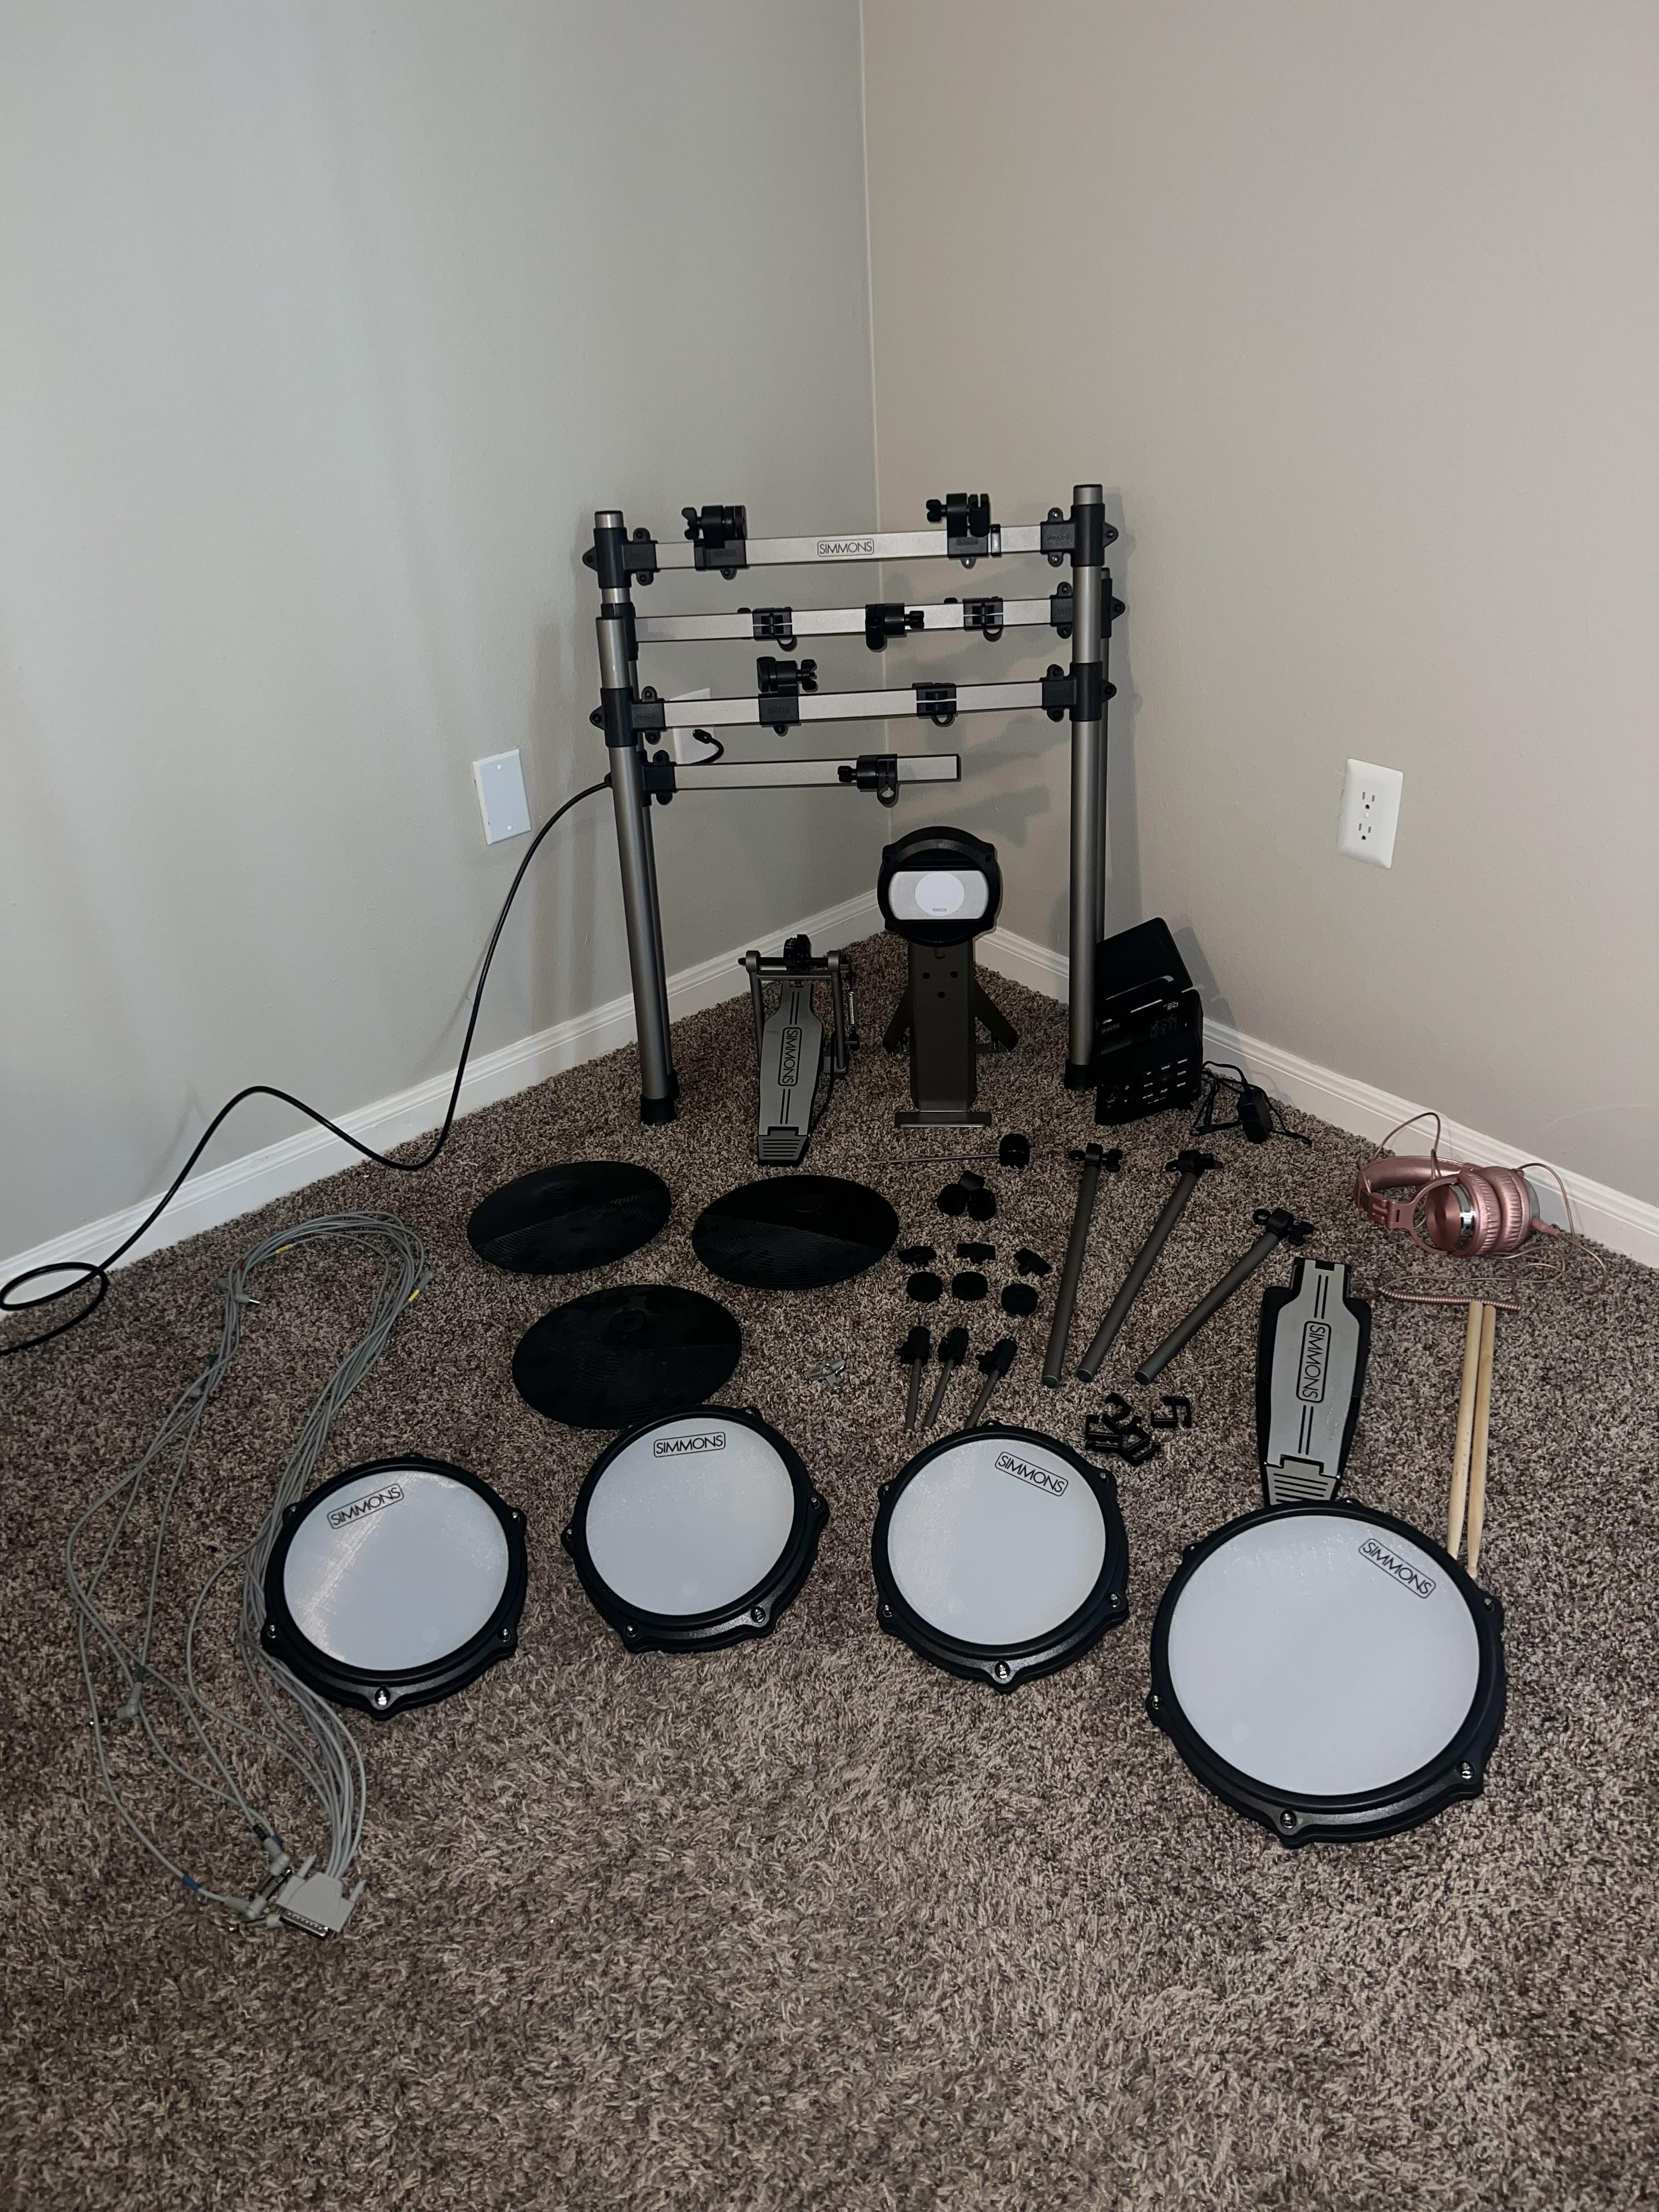
Remove all components from the packaging, ensuring no parts are missing.
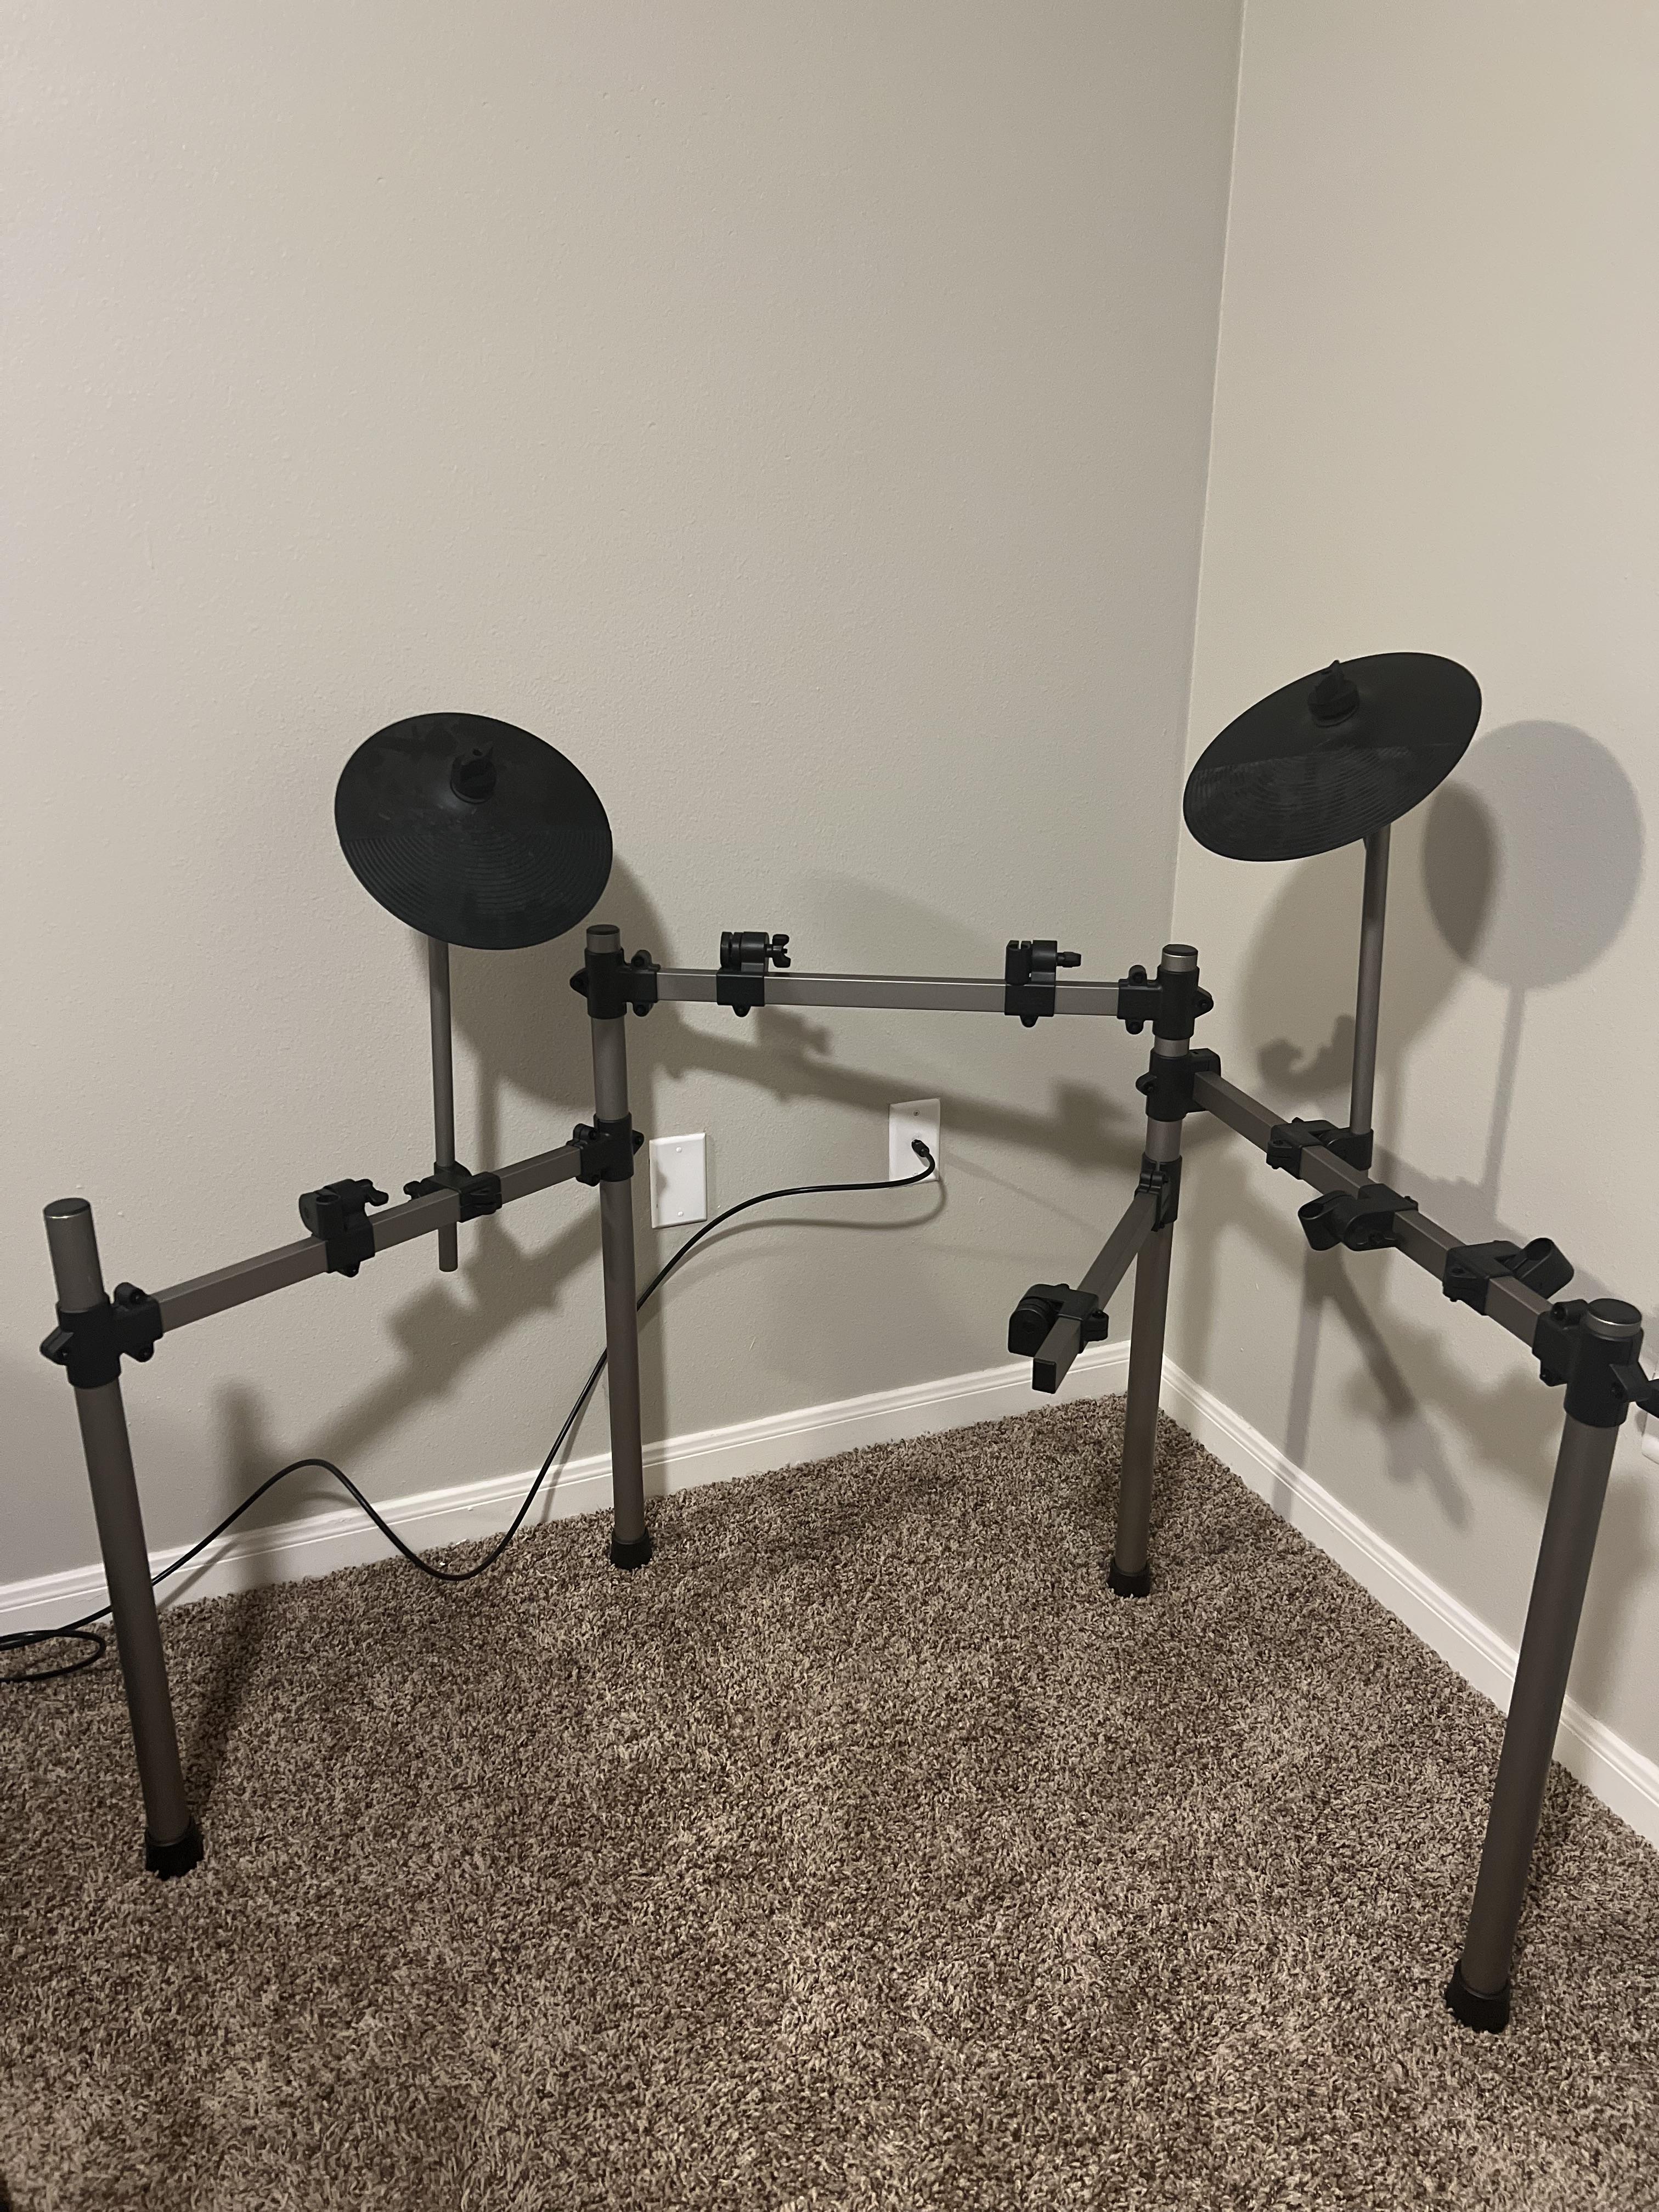
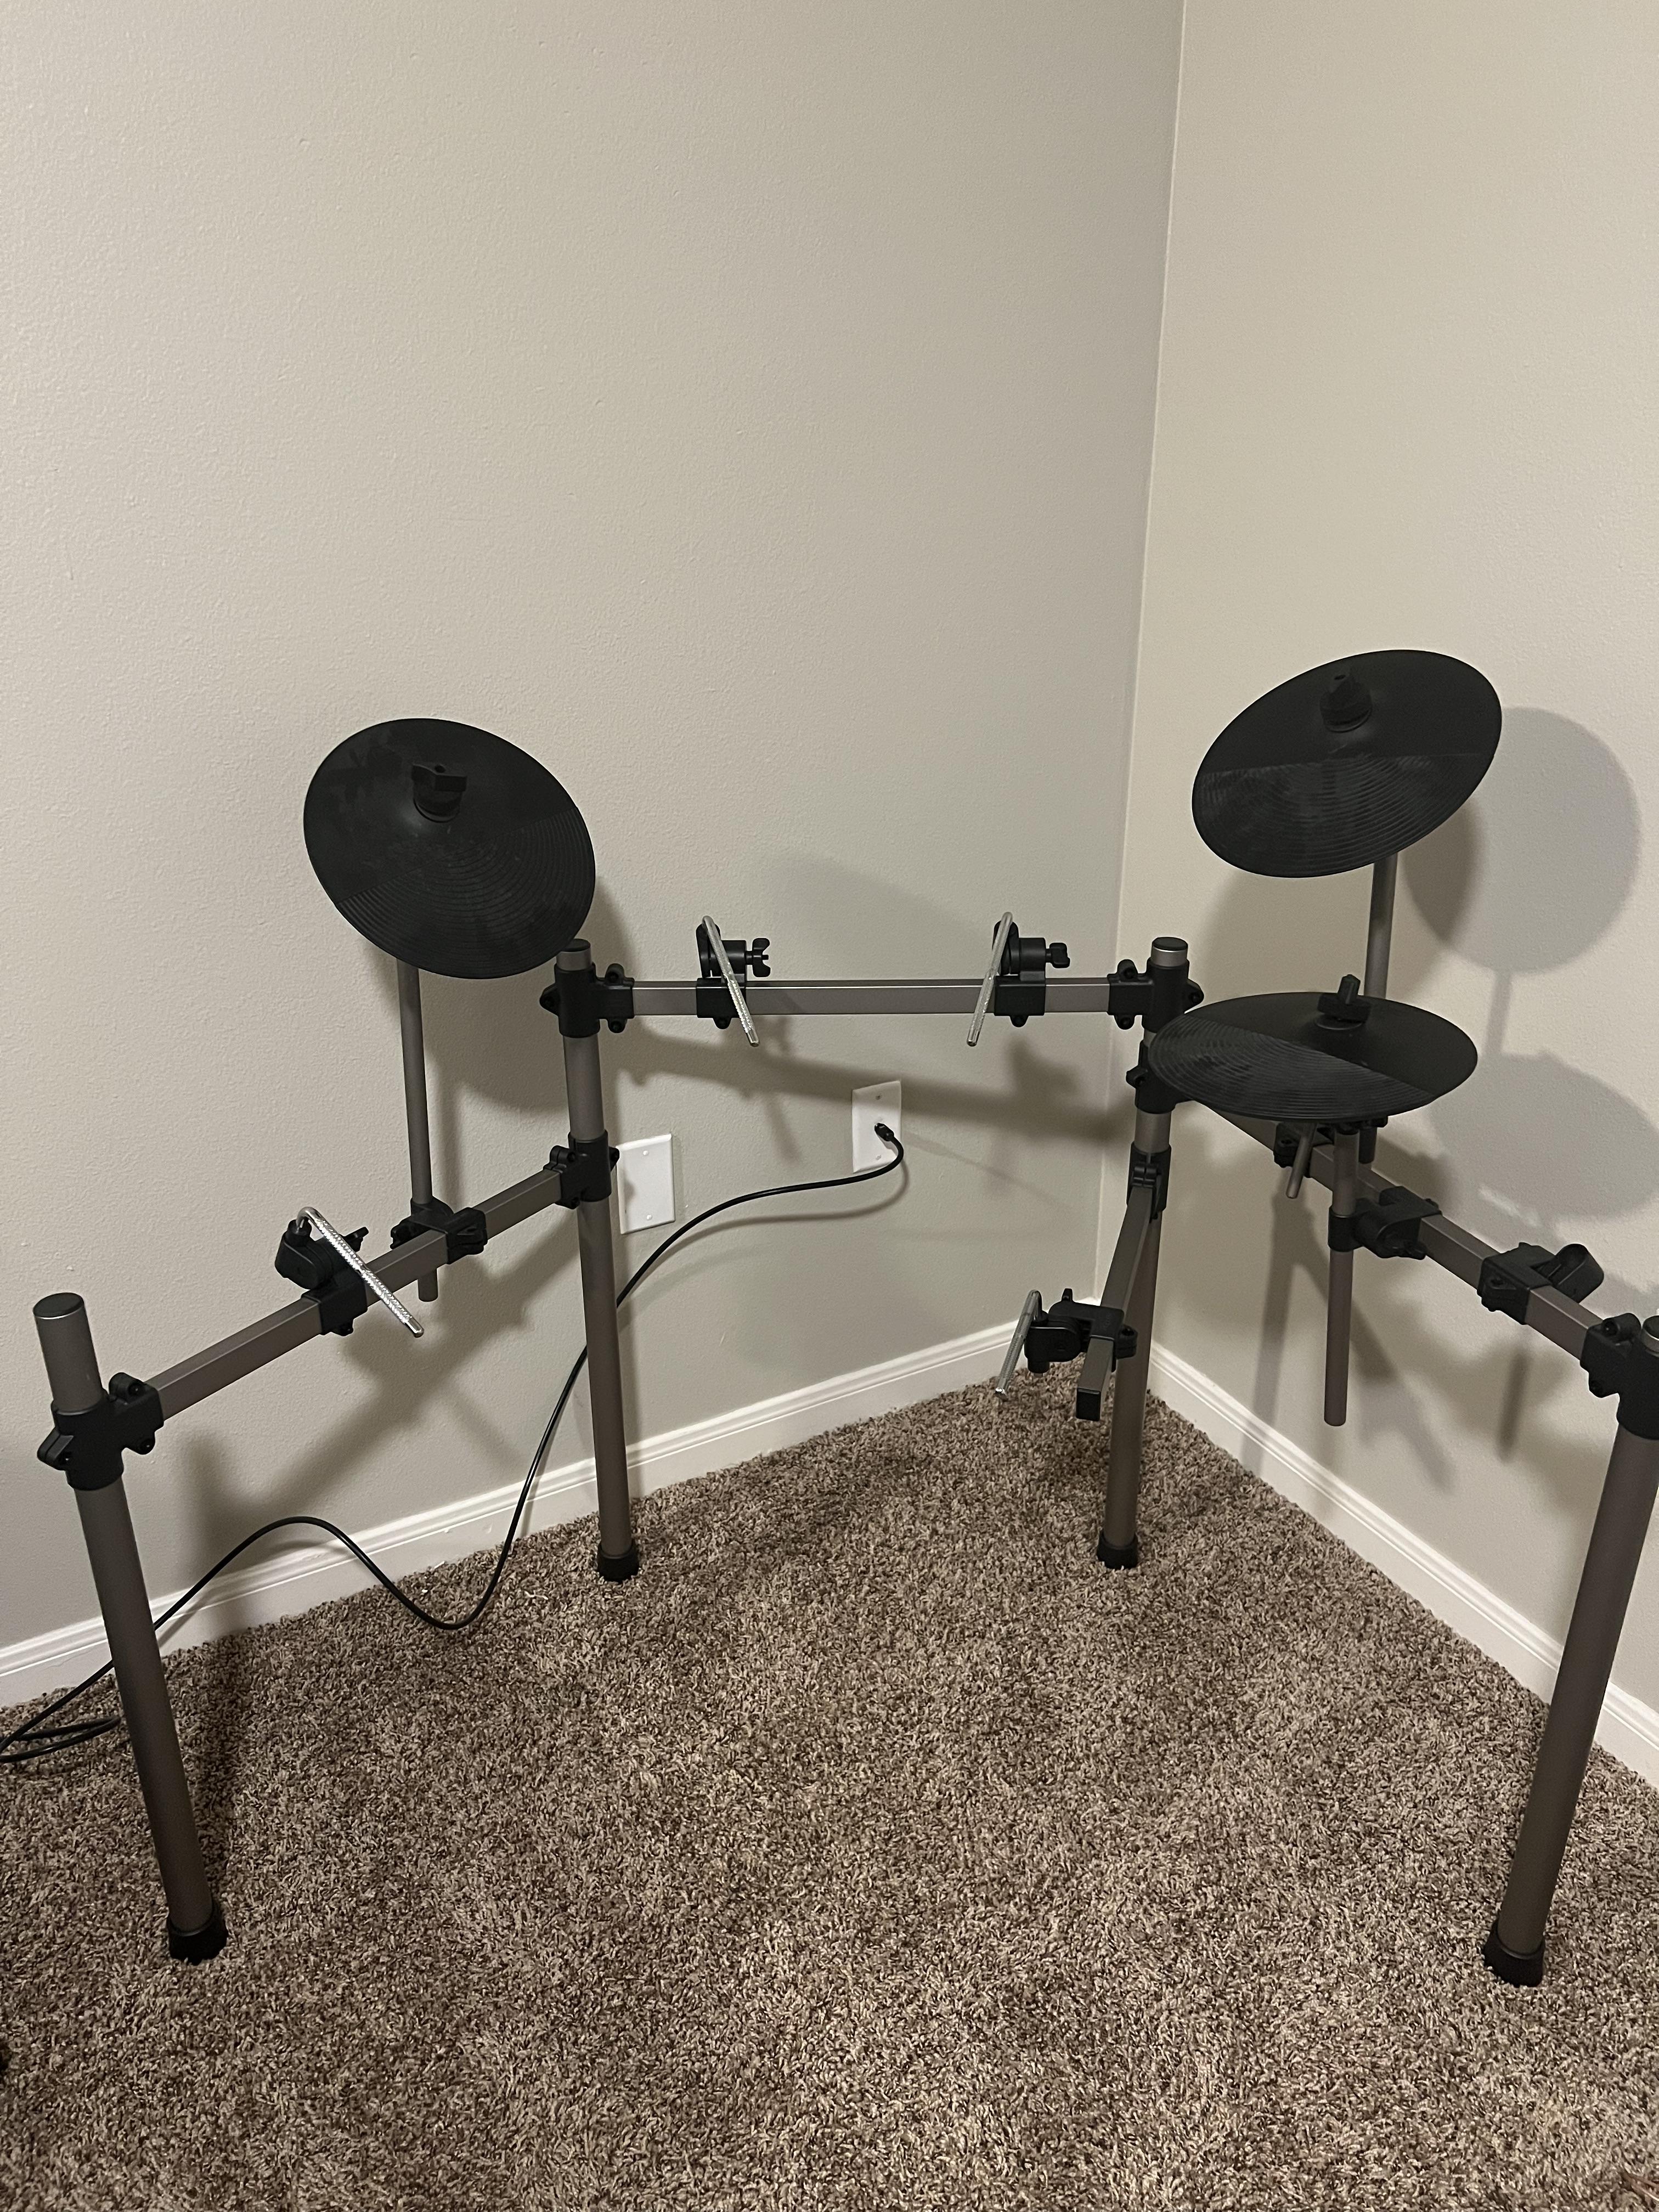
Unfolding the Rack
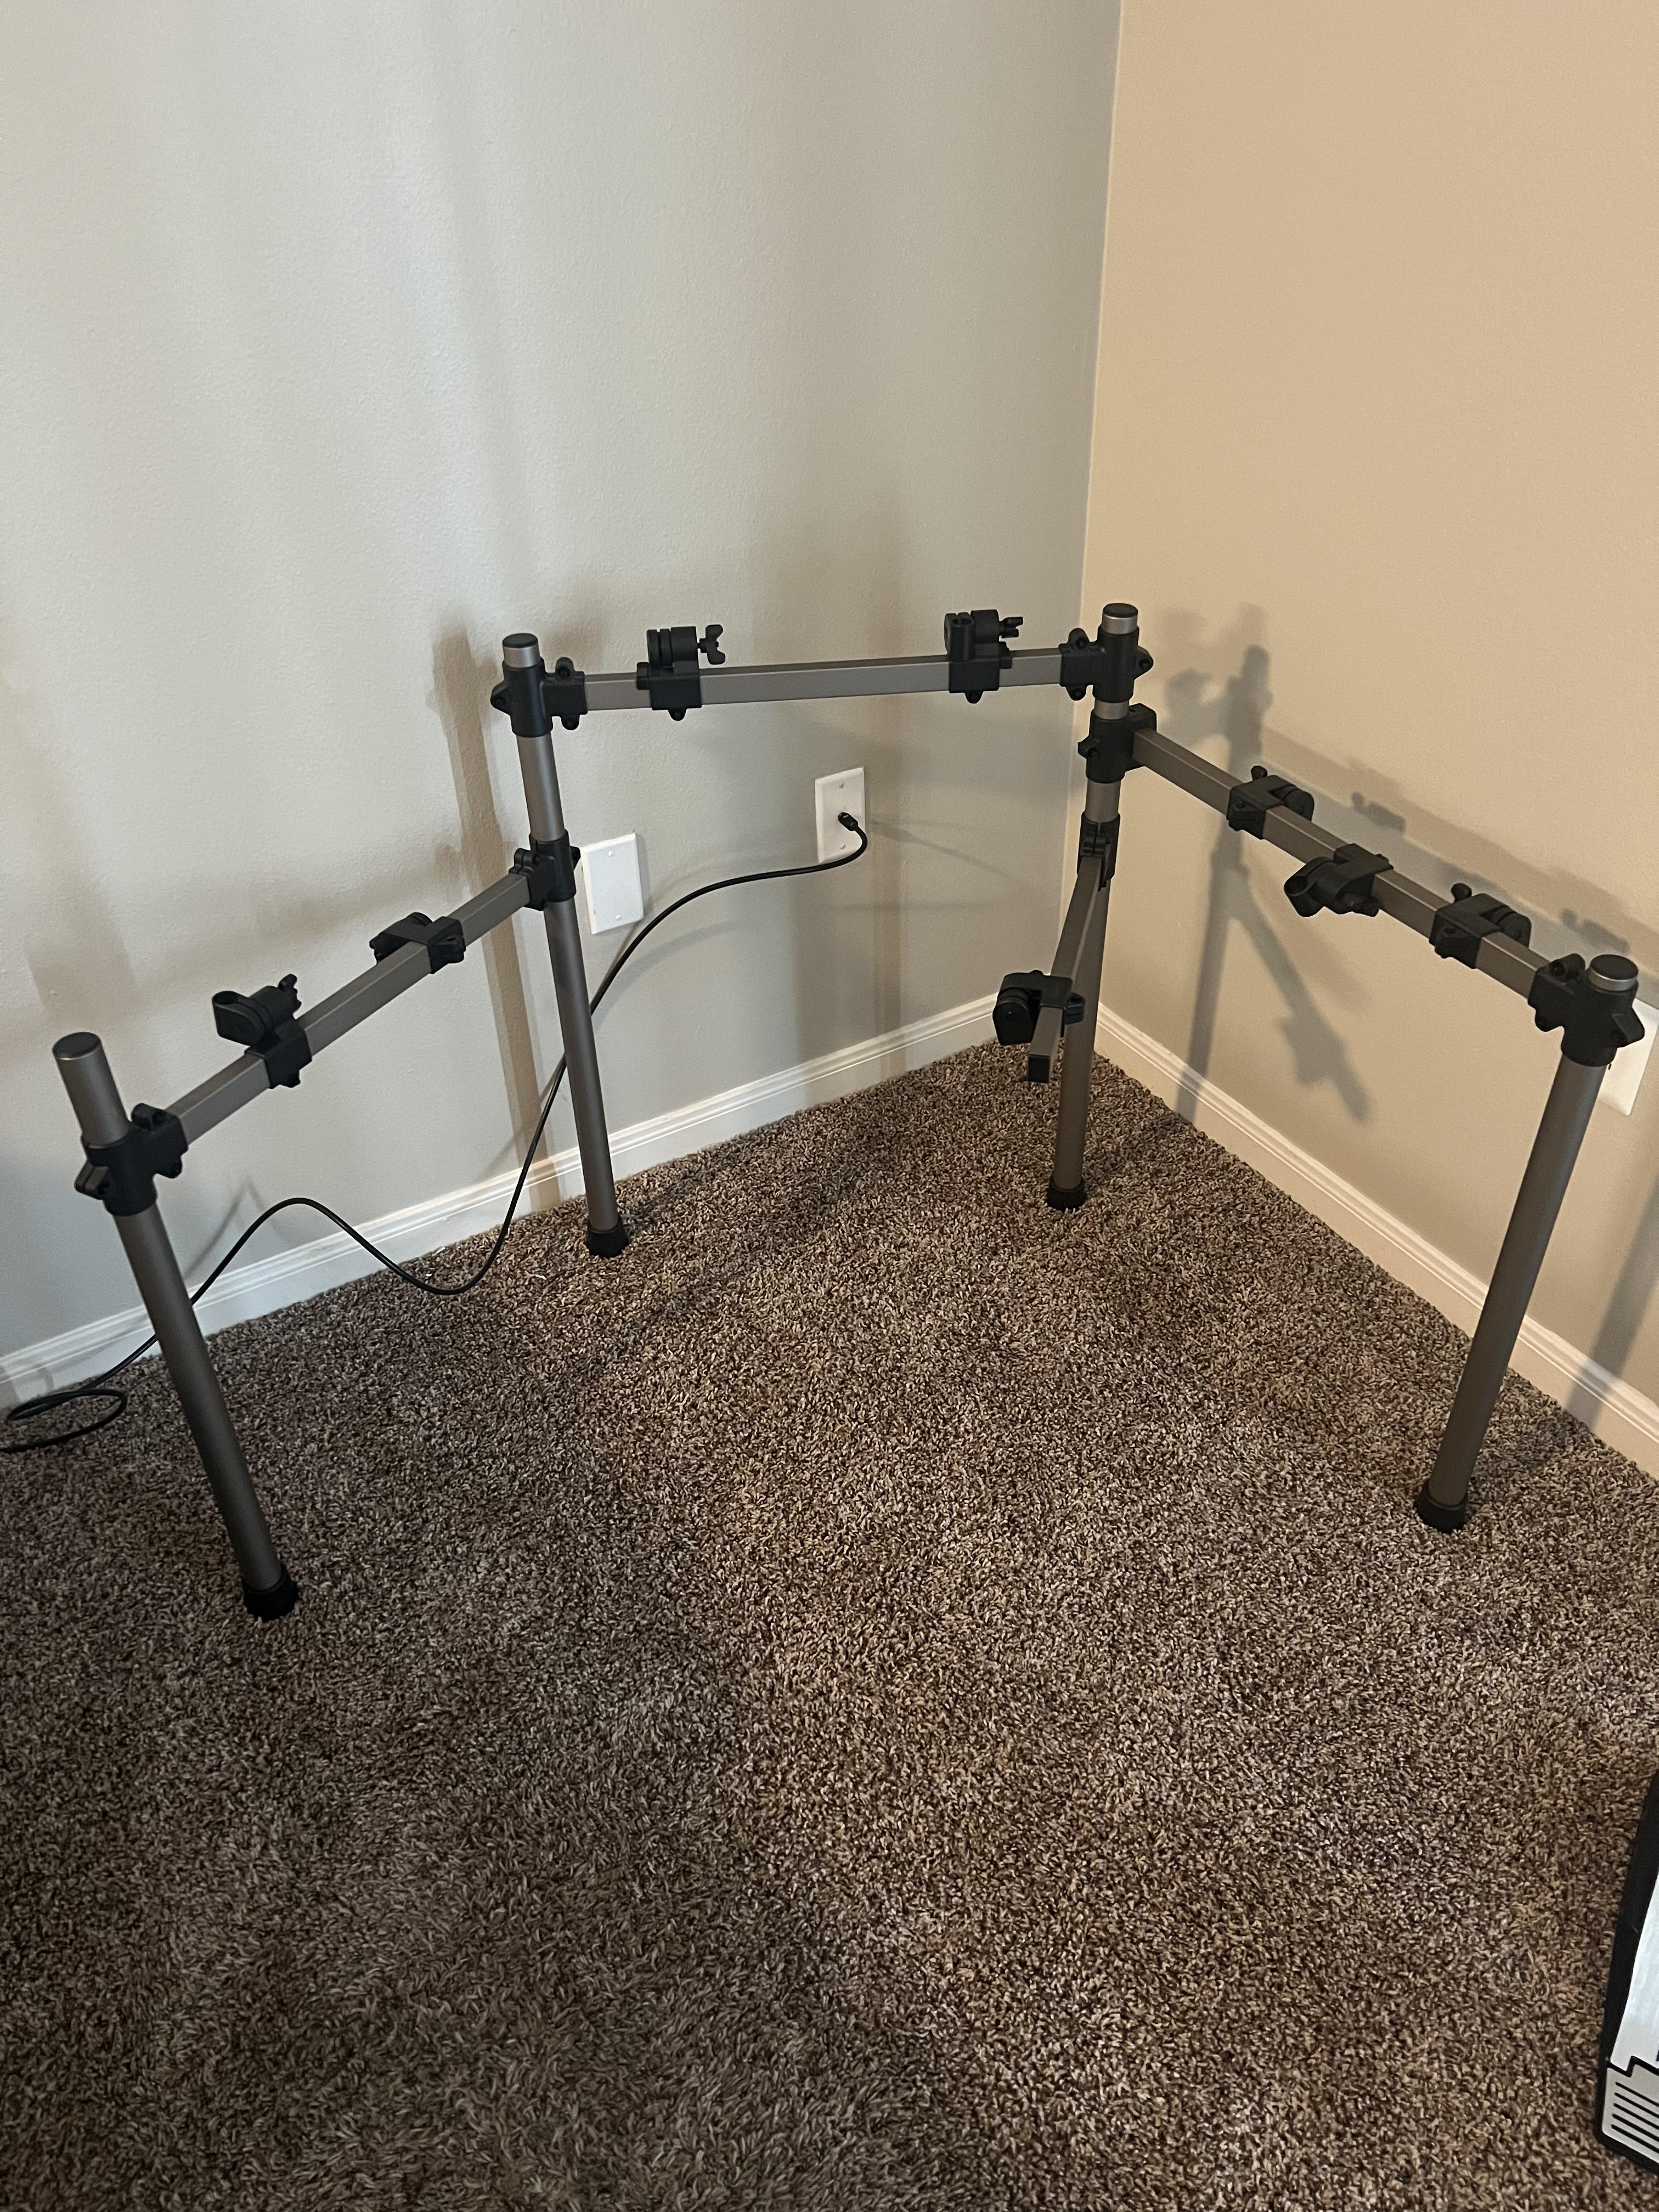
Unfold the rack making sure the Simmons logo faces away from the drummer.
Putting Together the Cymbals
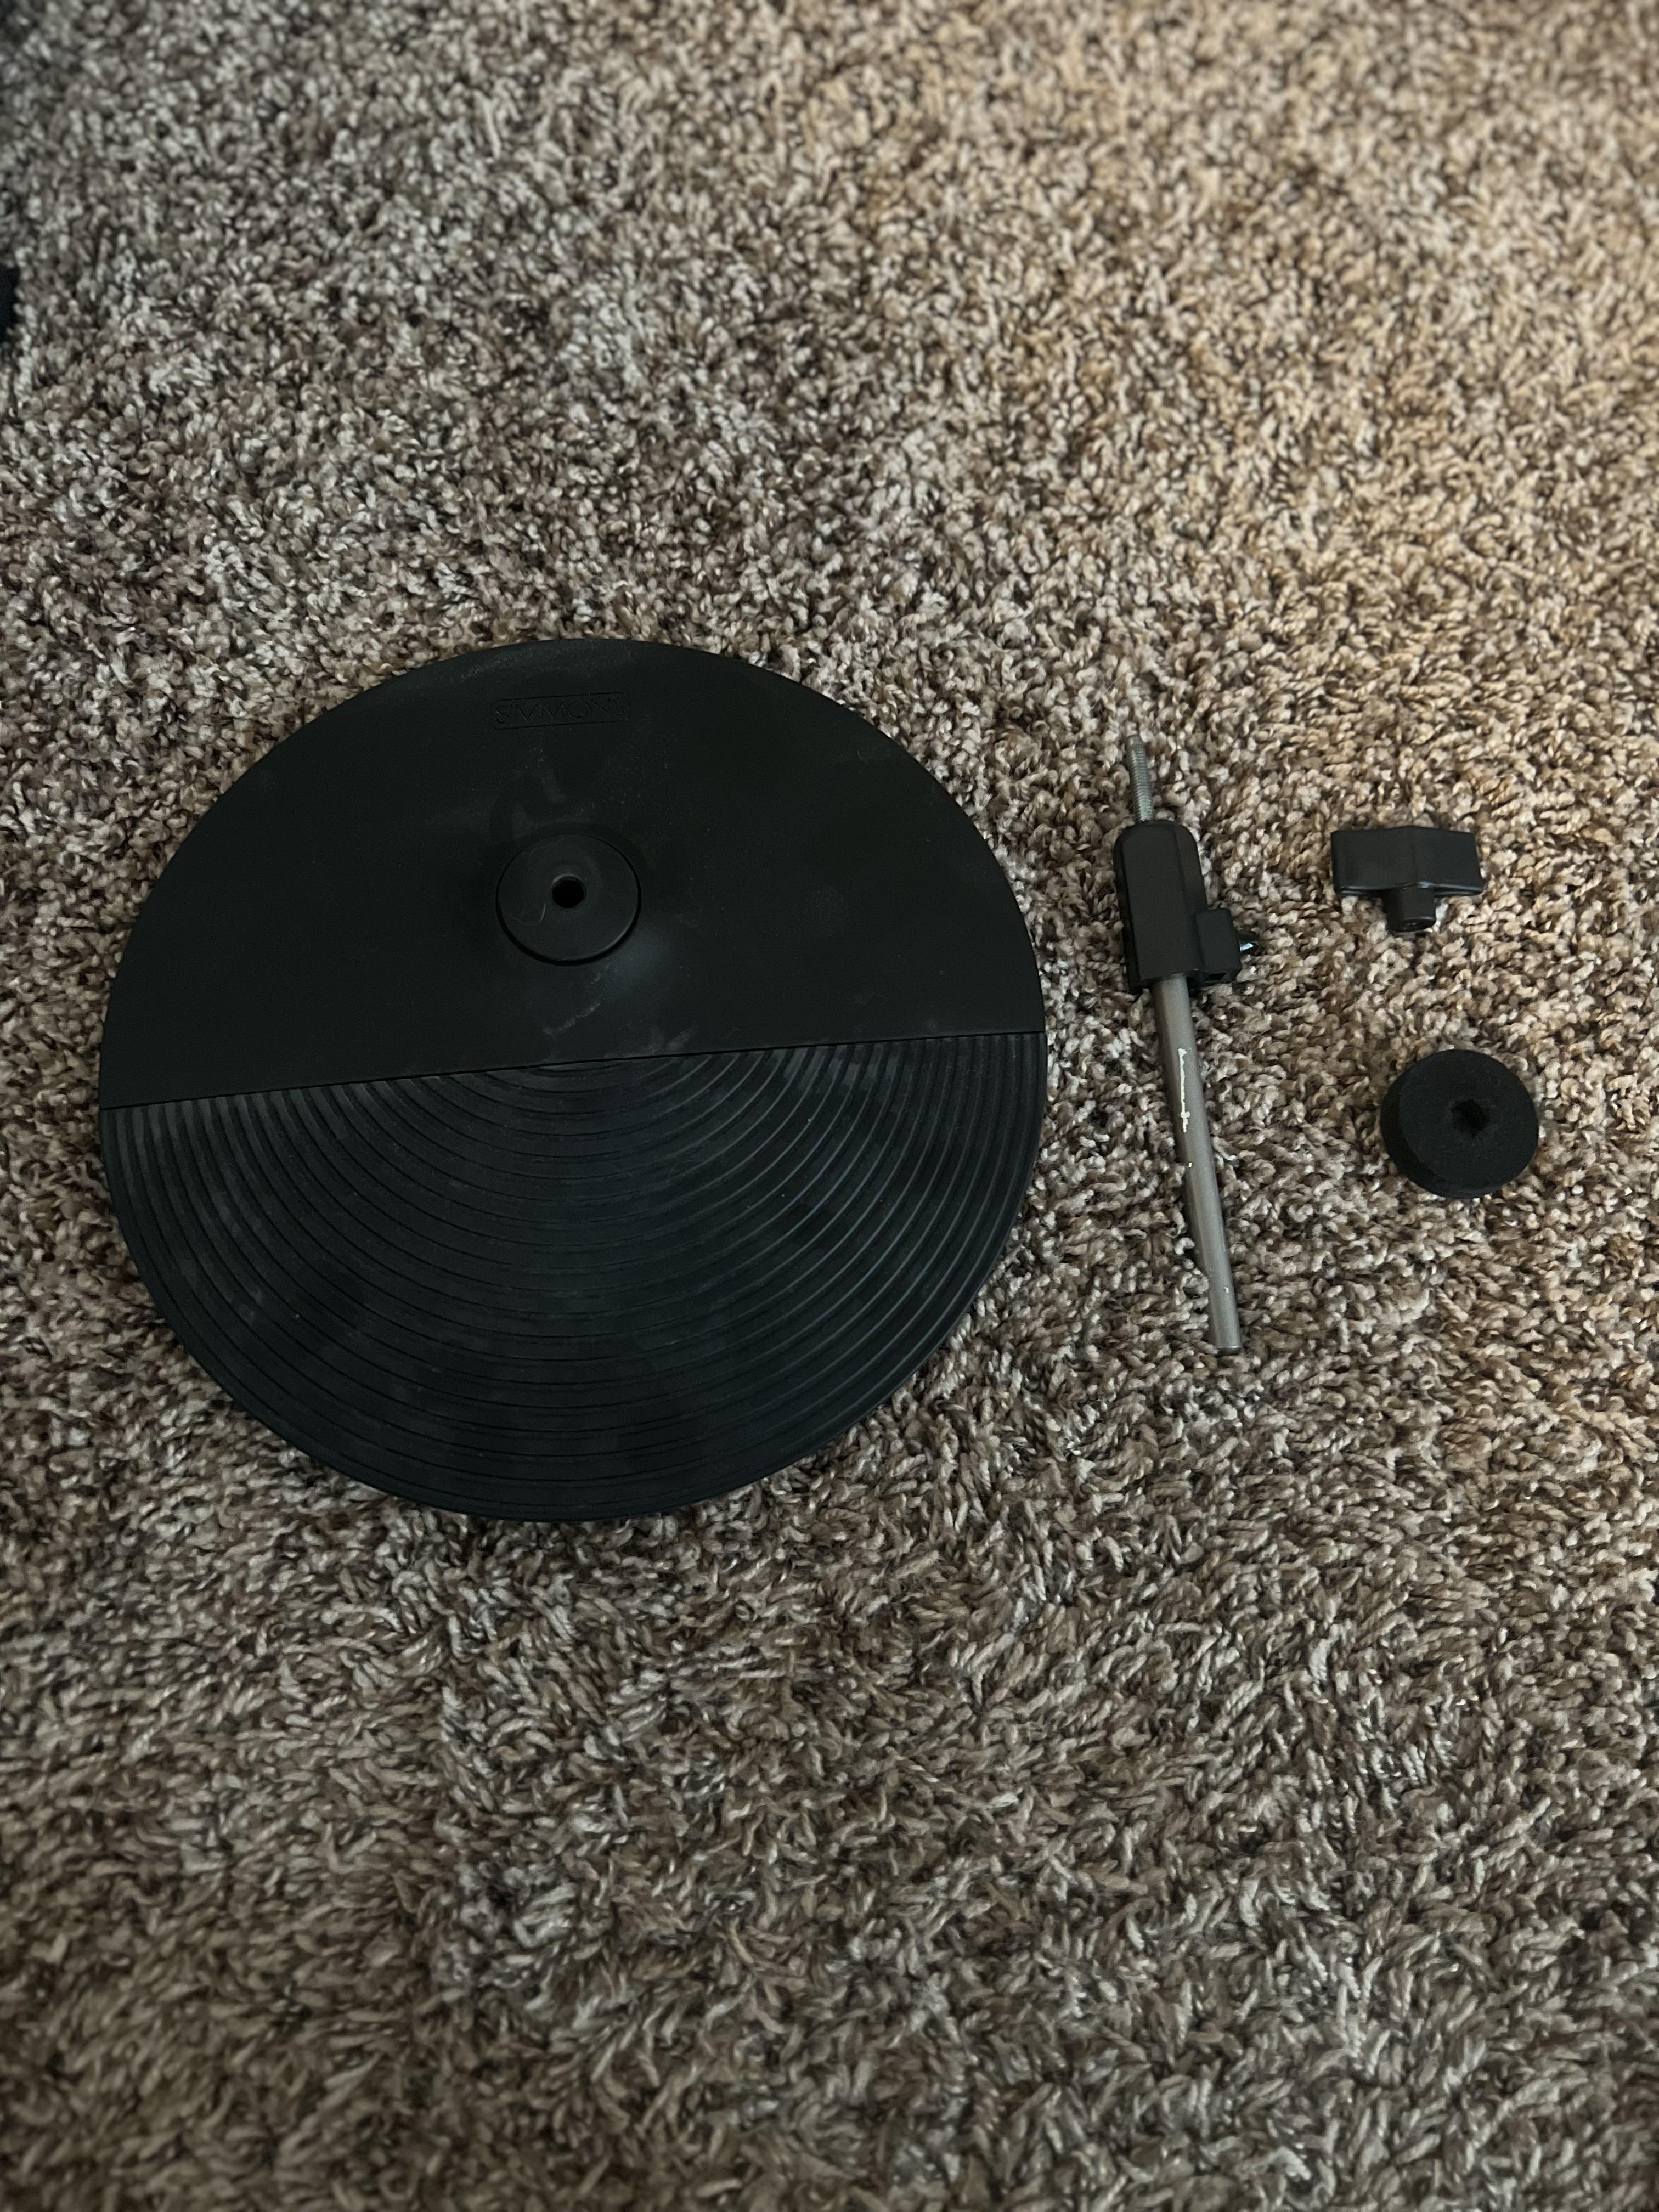
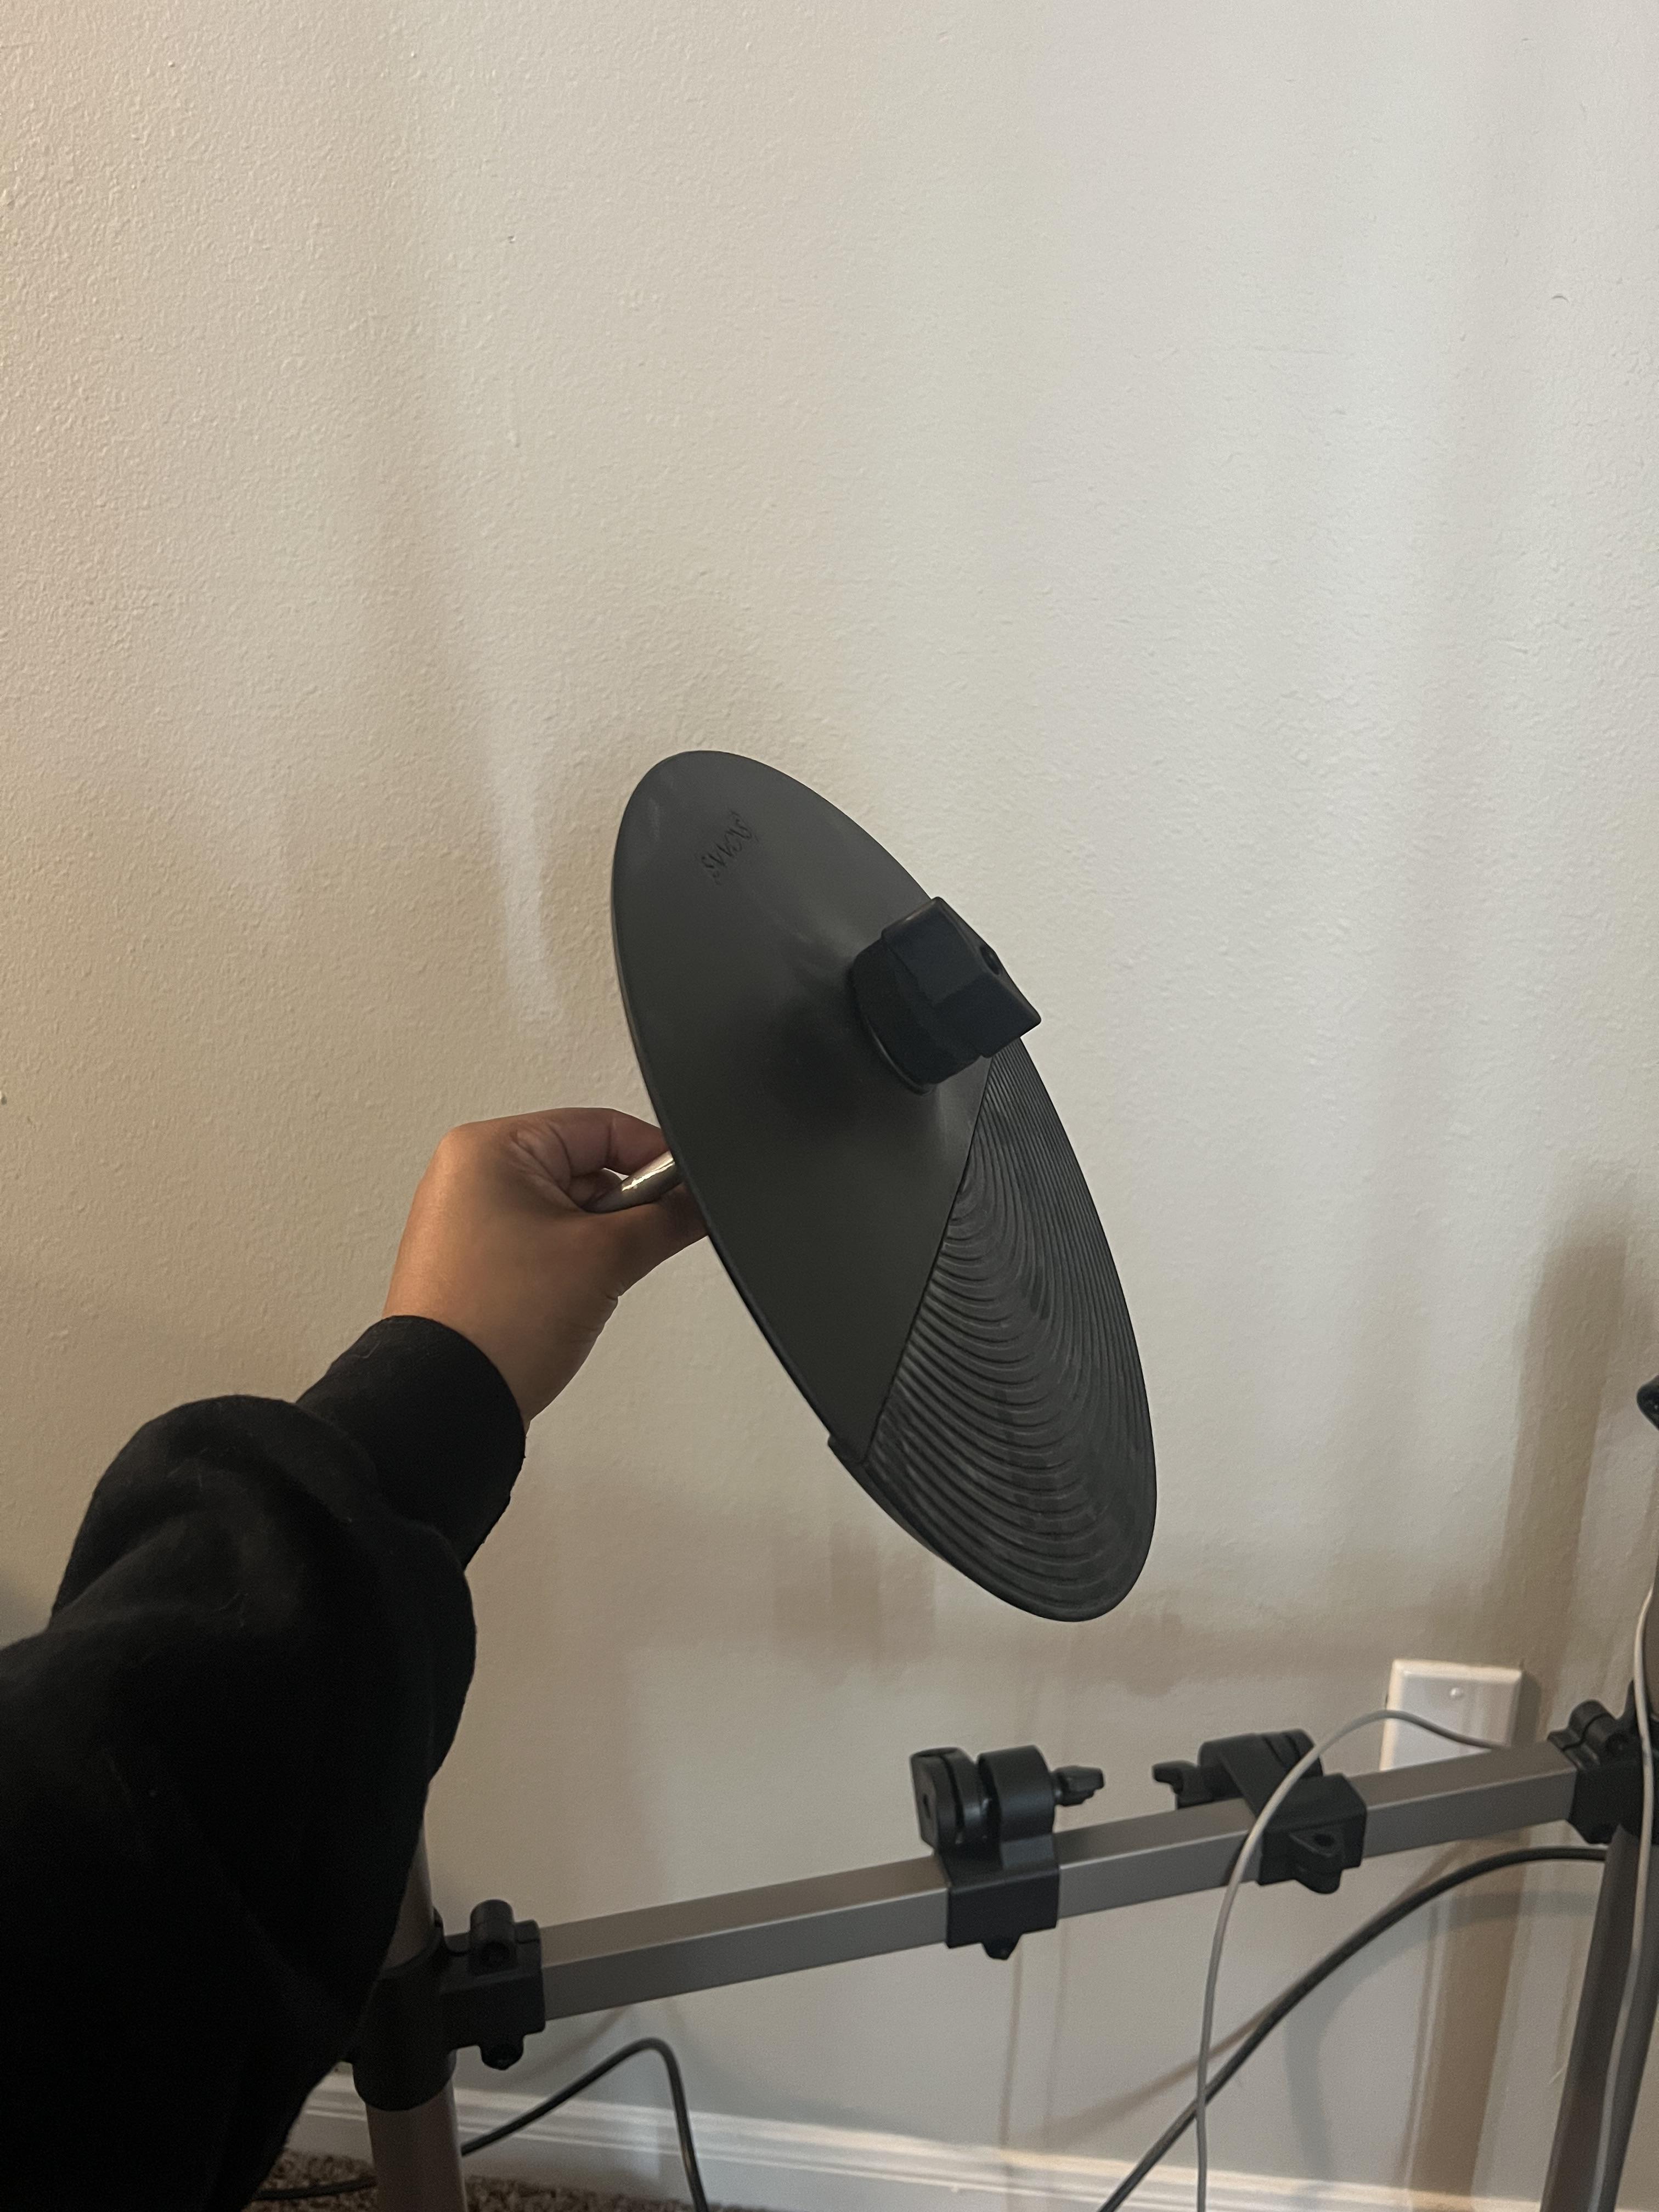
Place each cymbal pad under the felt and nut.
Note: Don’t overtighten, the cymbals should move a bit when hit.
Inserting the Cymbal Arms

Insert the arms of the cymbals. The two longest arms go in the clamps closest to the vertical post. Twist the clamps to tighten the arms in place.
Note: The flat clamps are for the cymbals and the angled clamps are for the drum pads.
Inserting the Drum Rods
.jpg)
Insert the drum rods. The L rod goes into the angled clamps, with the metal end facing the drummer.
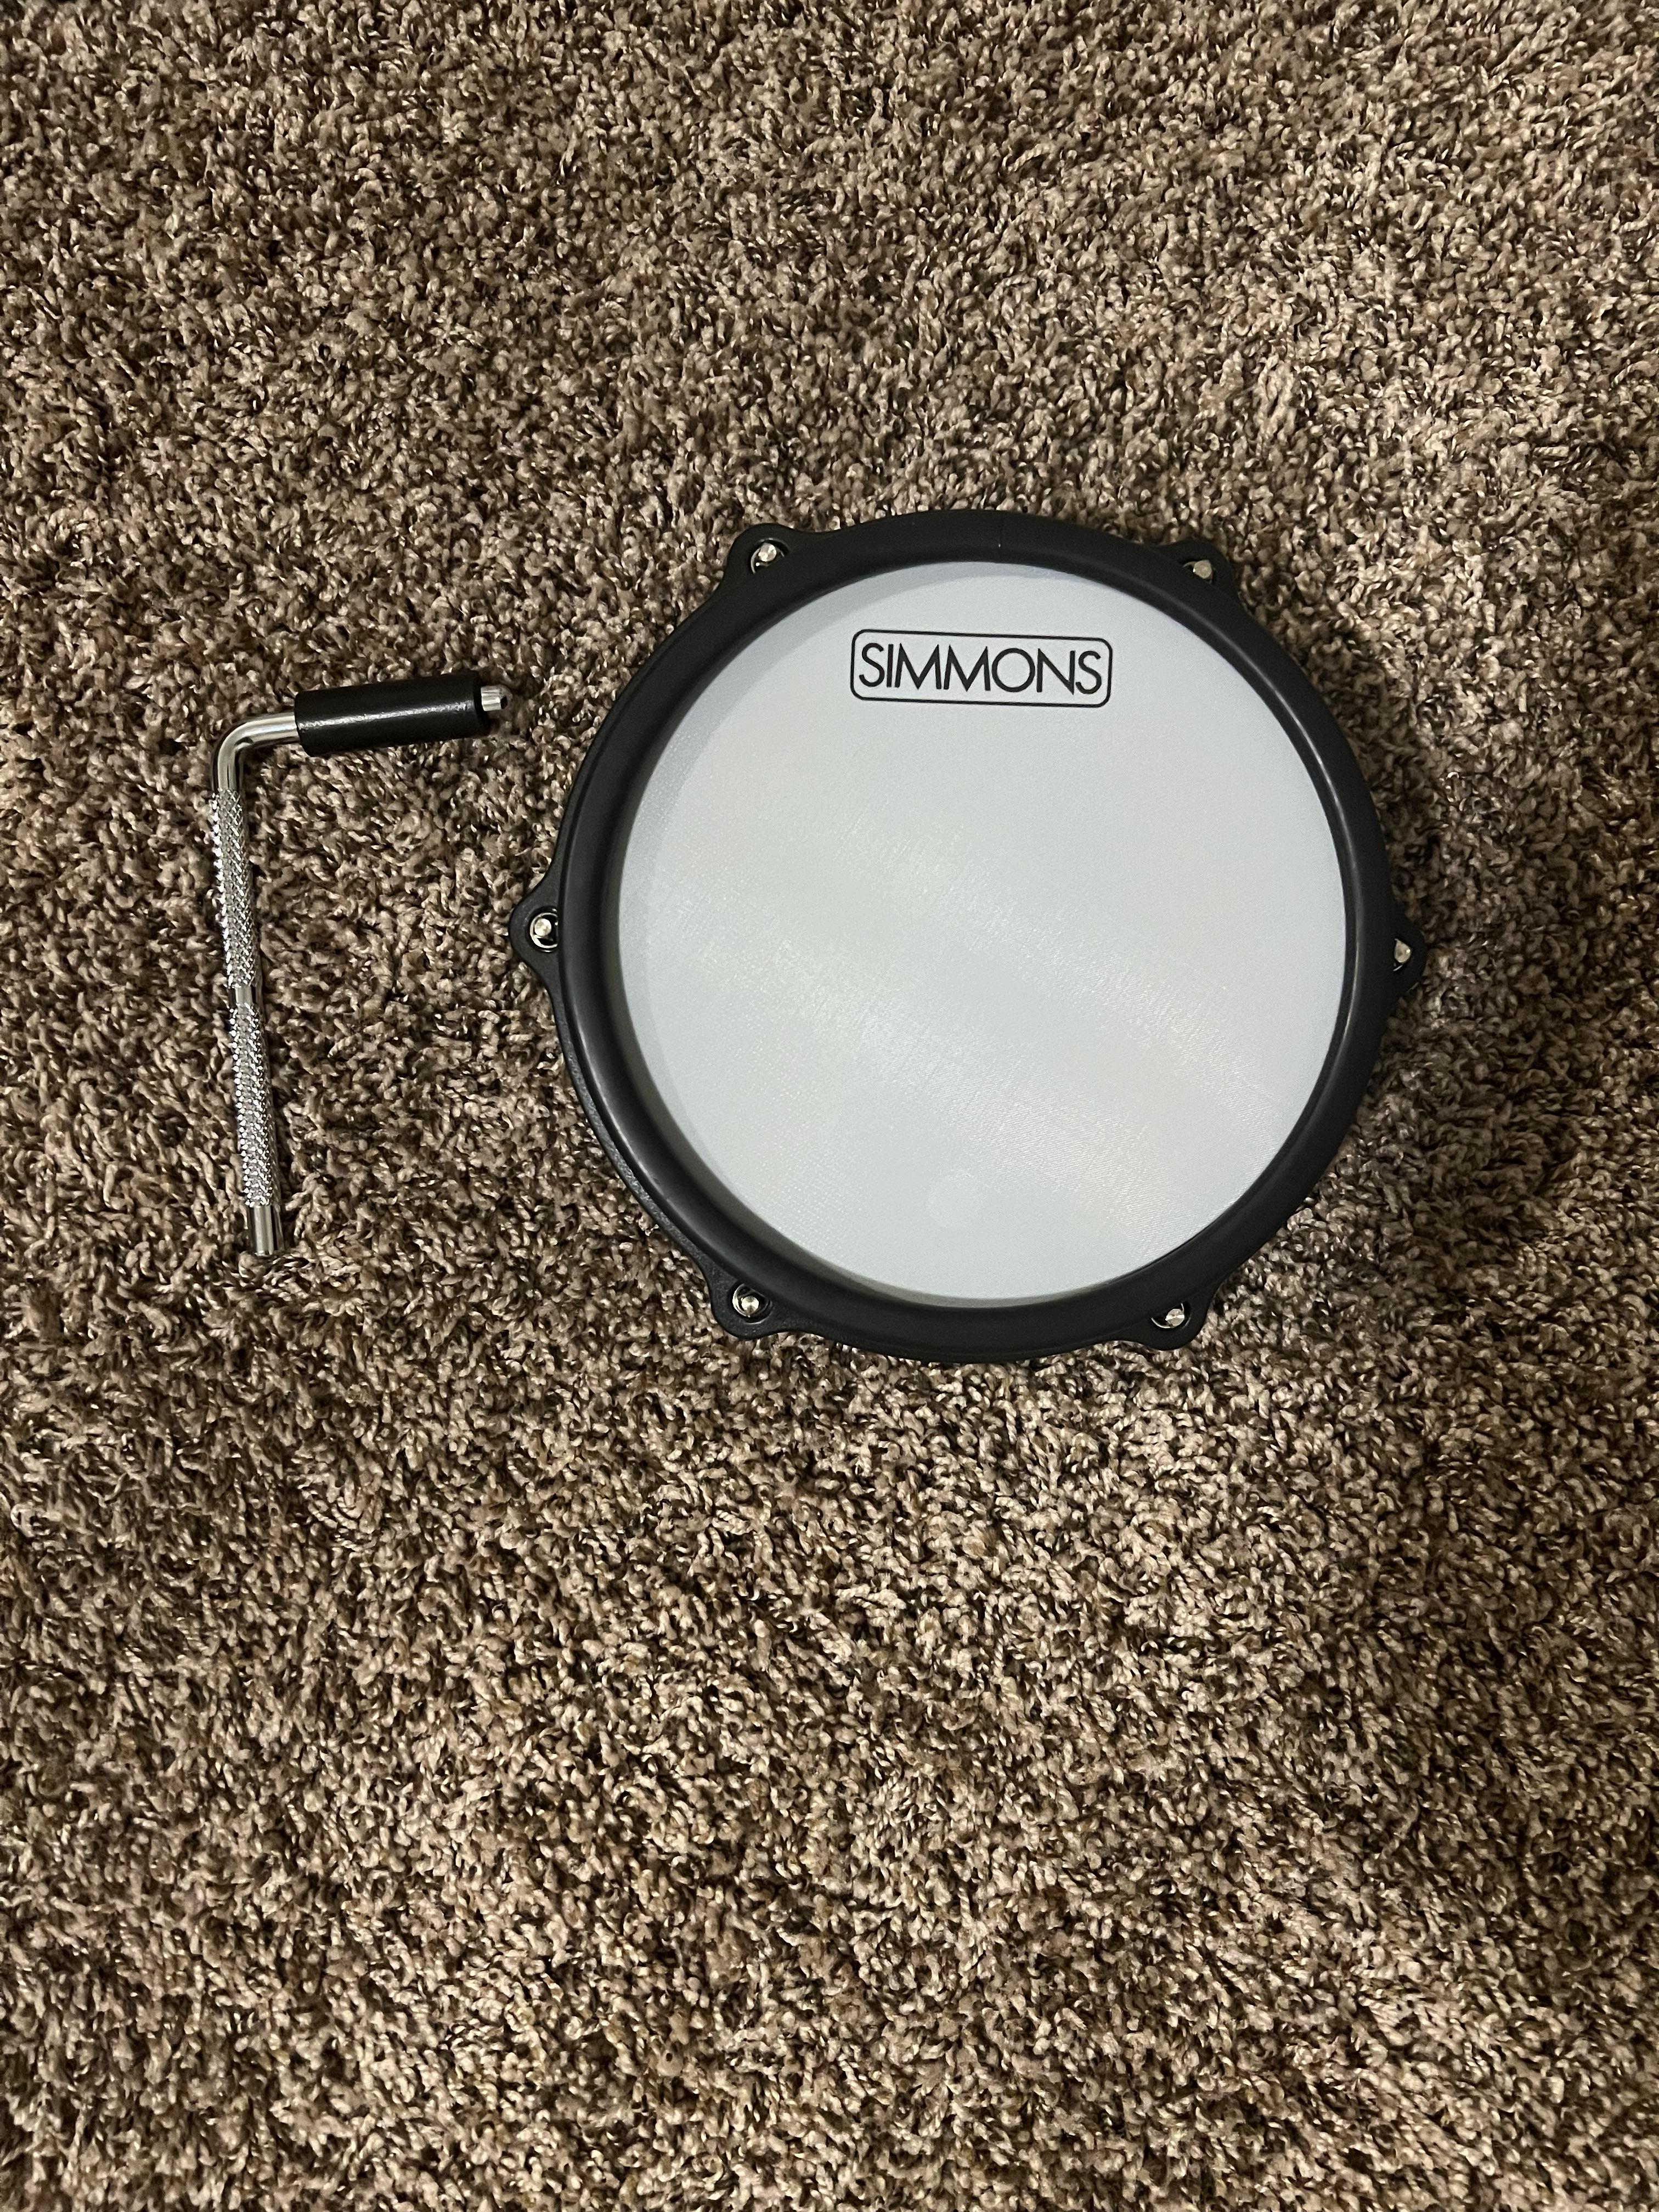
Attaching Drum Pad to Rod
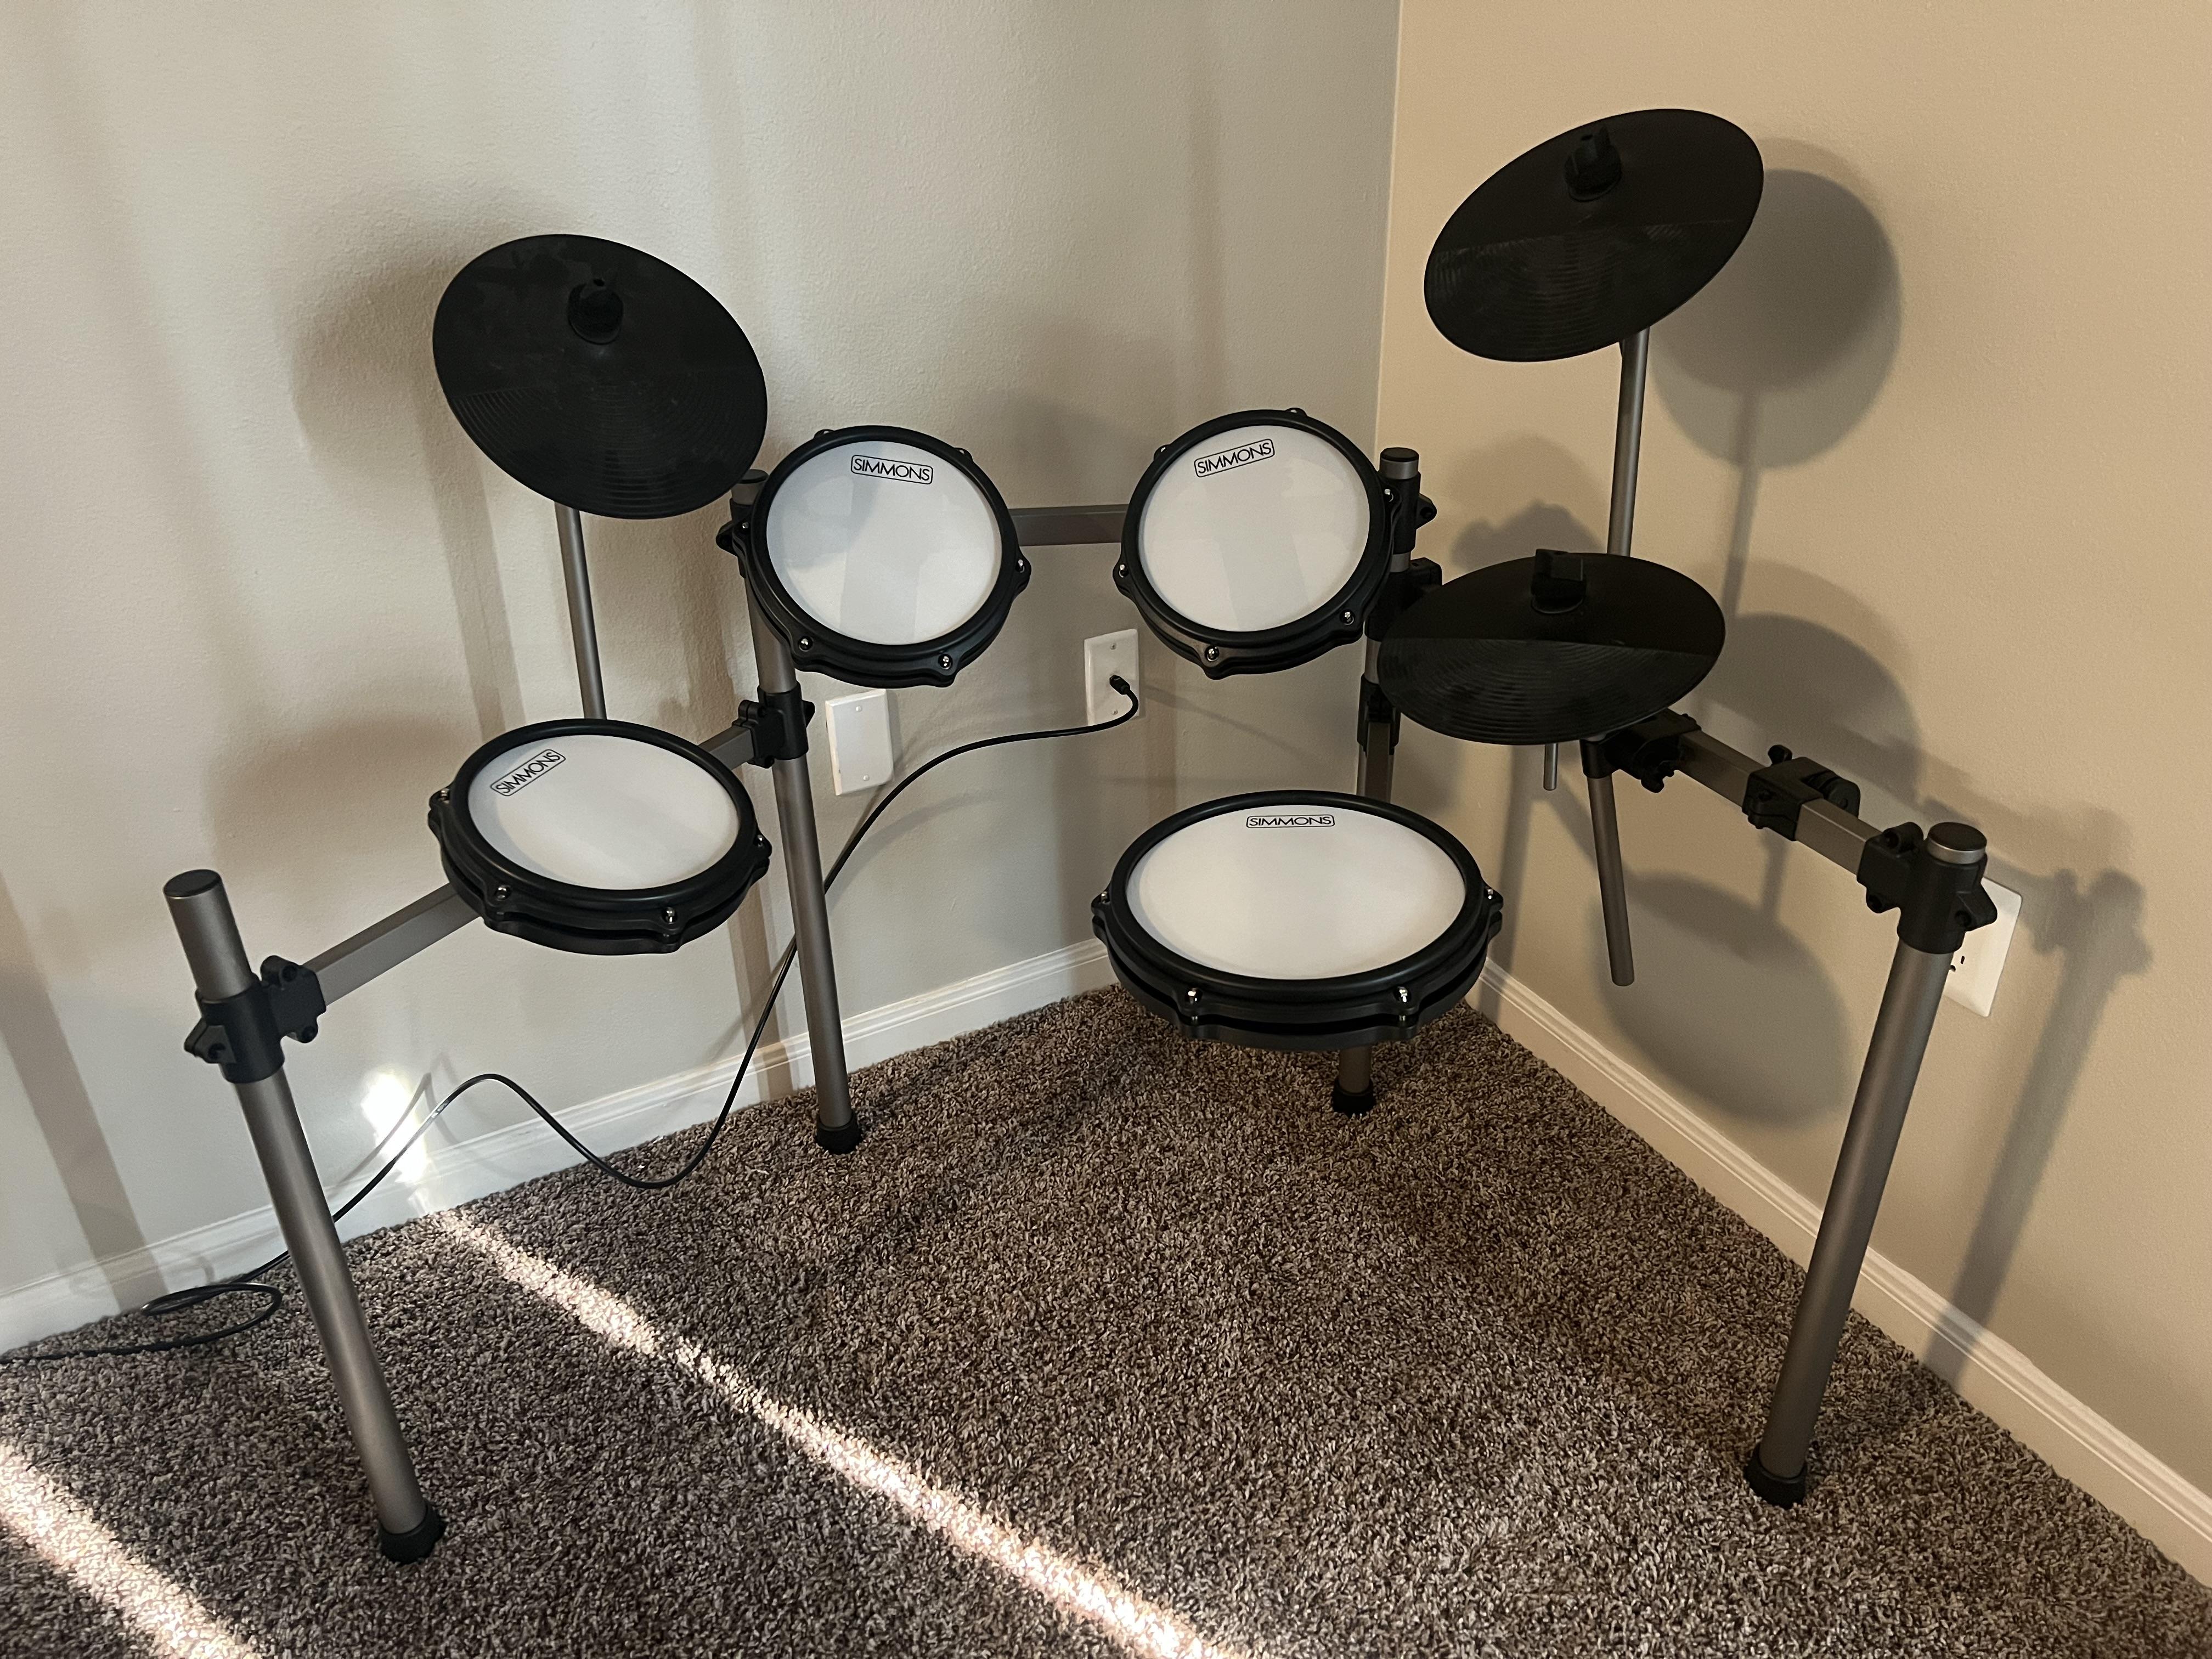
Place the L-rod into the pad and tighten the nut on the bottom.
Note: The largest pad goes on the snare arm.
Attaching the Kick Pedal

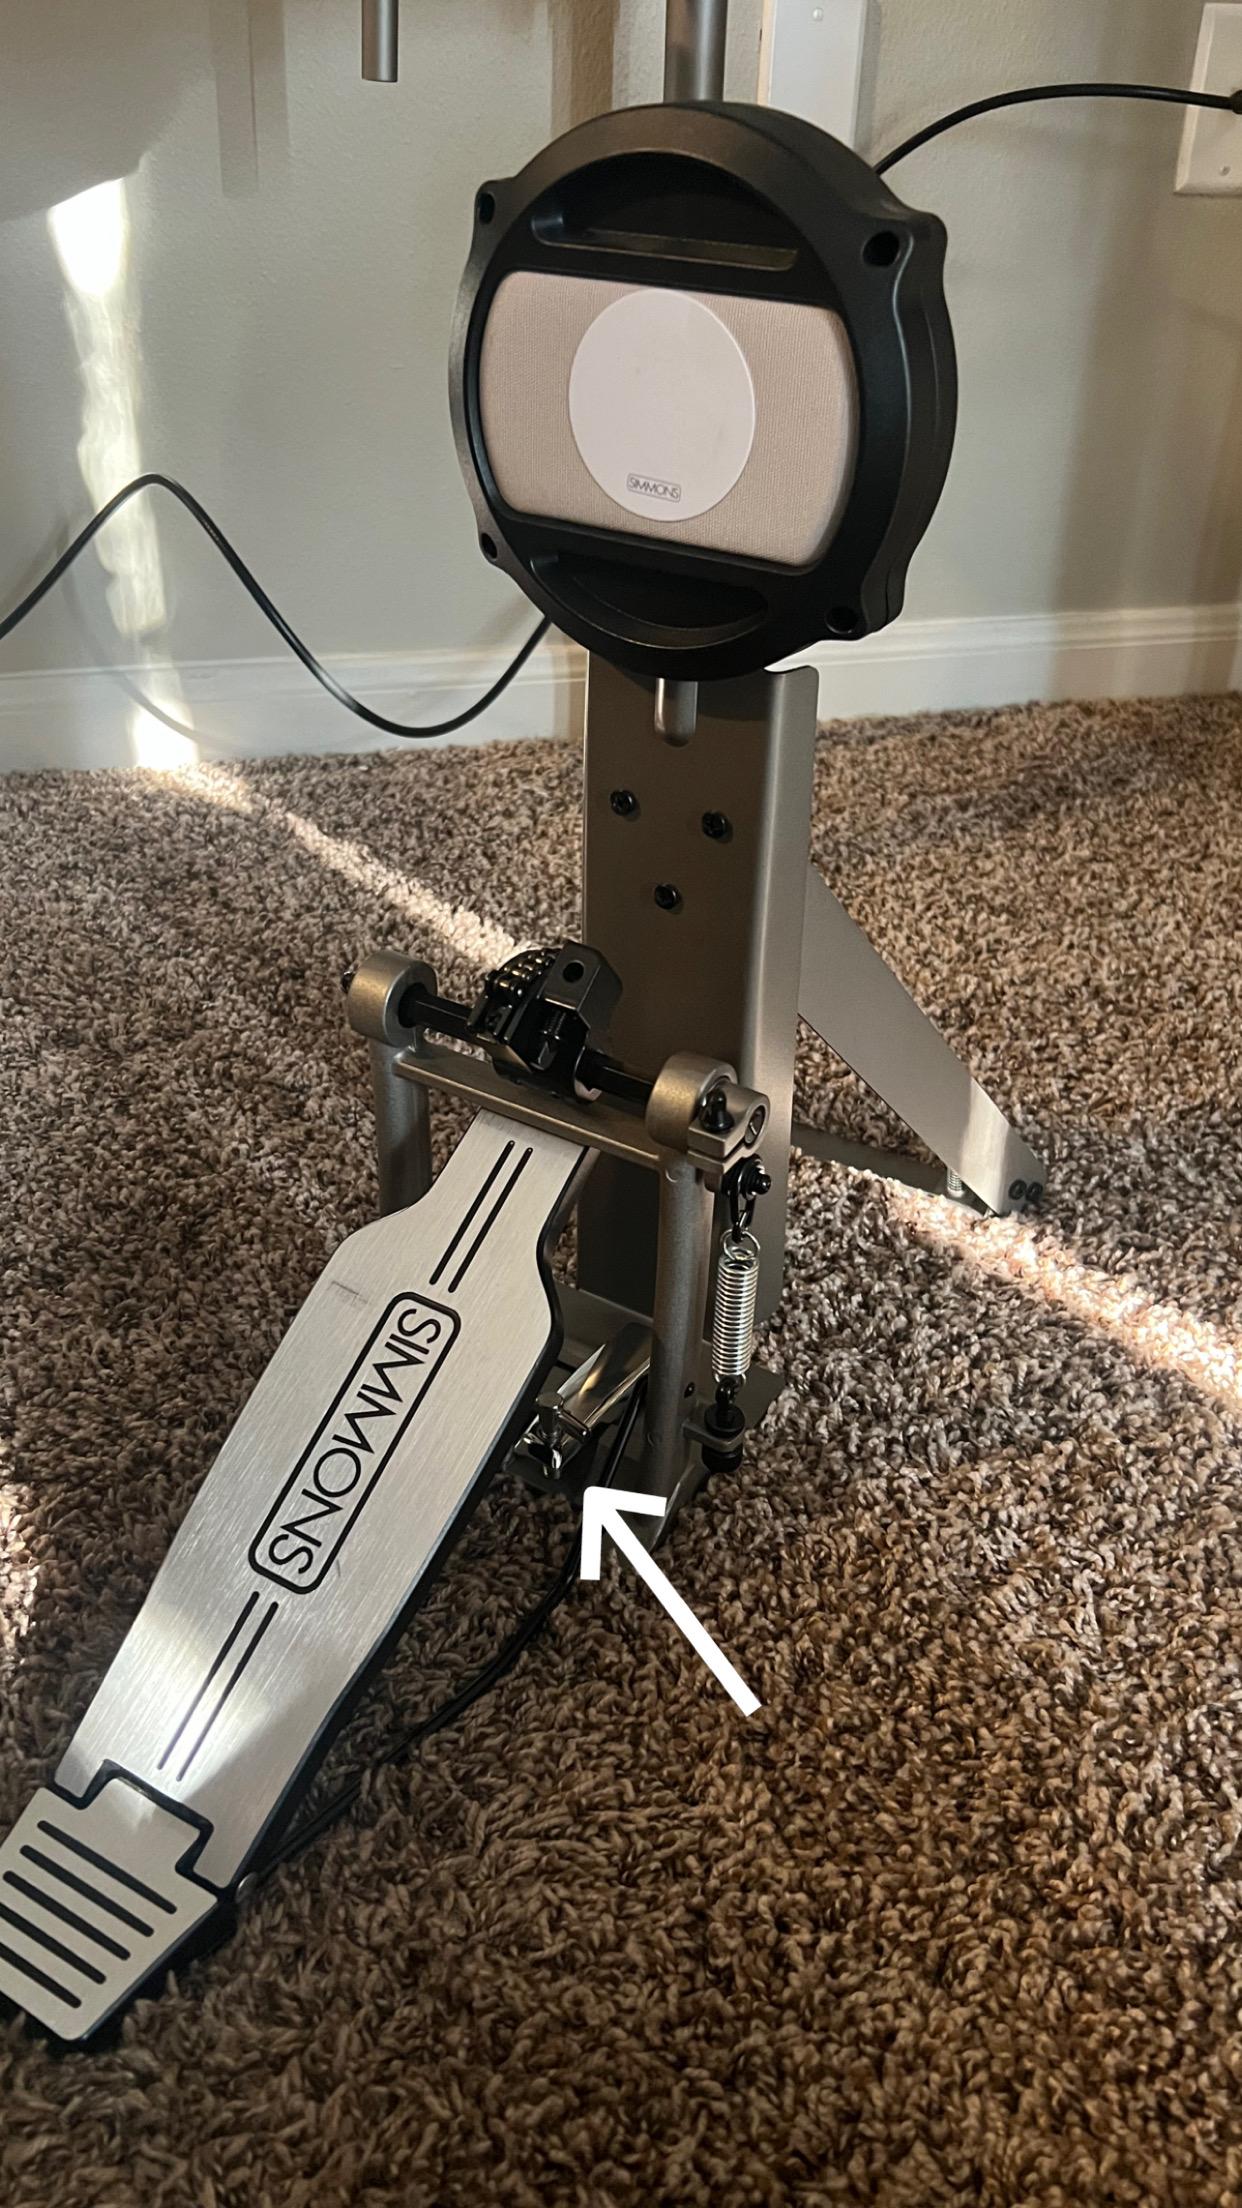
Attach the kick pedal to the kick pad.
Note: Look for the latch to attach the two.
Attaching the Beater
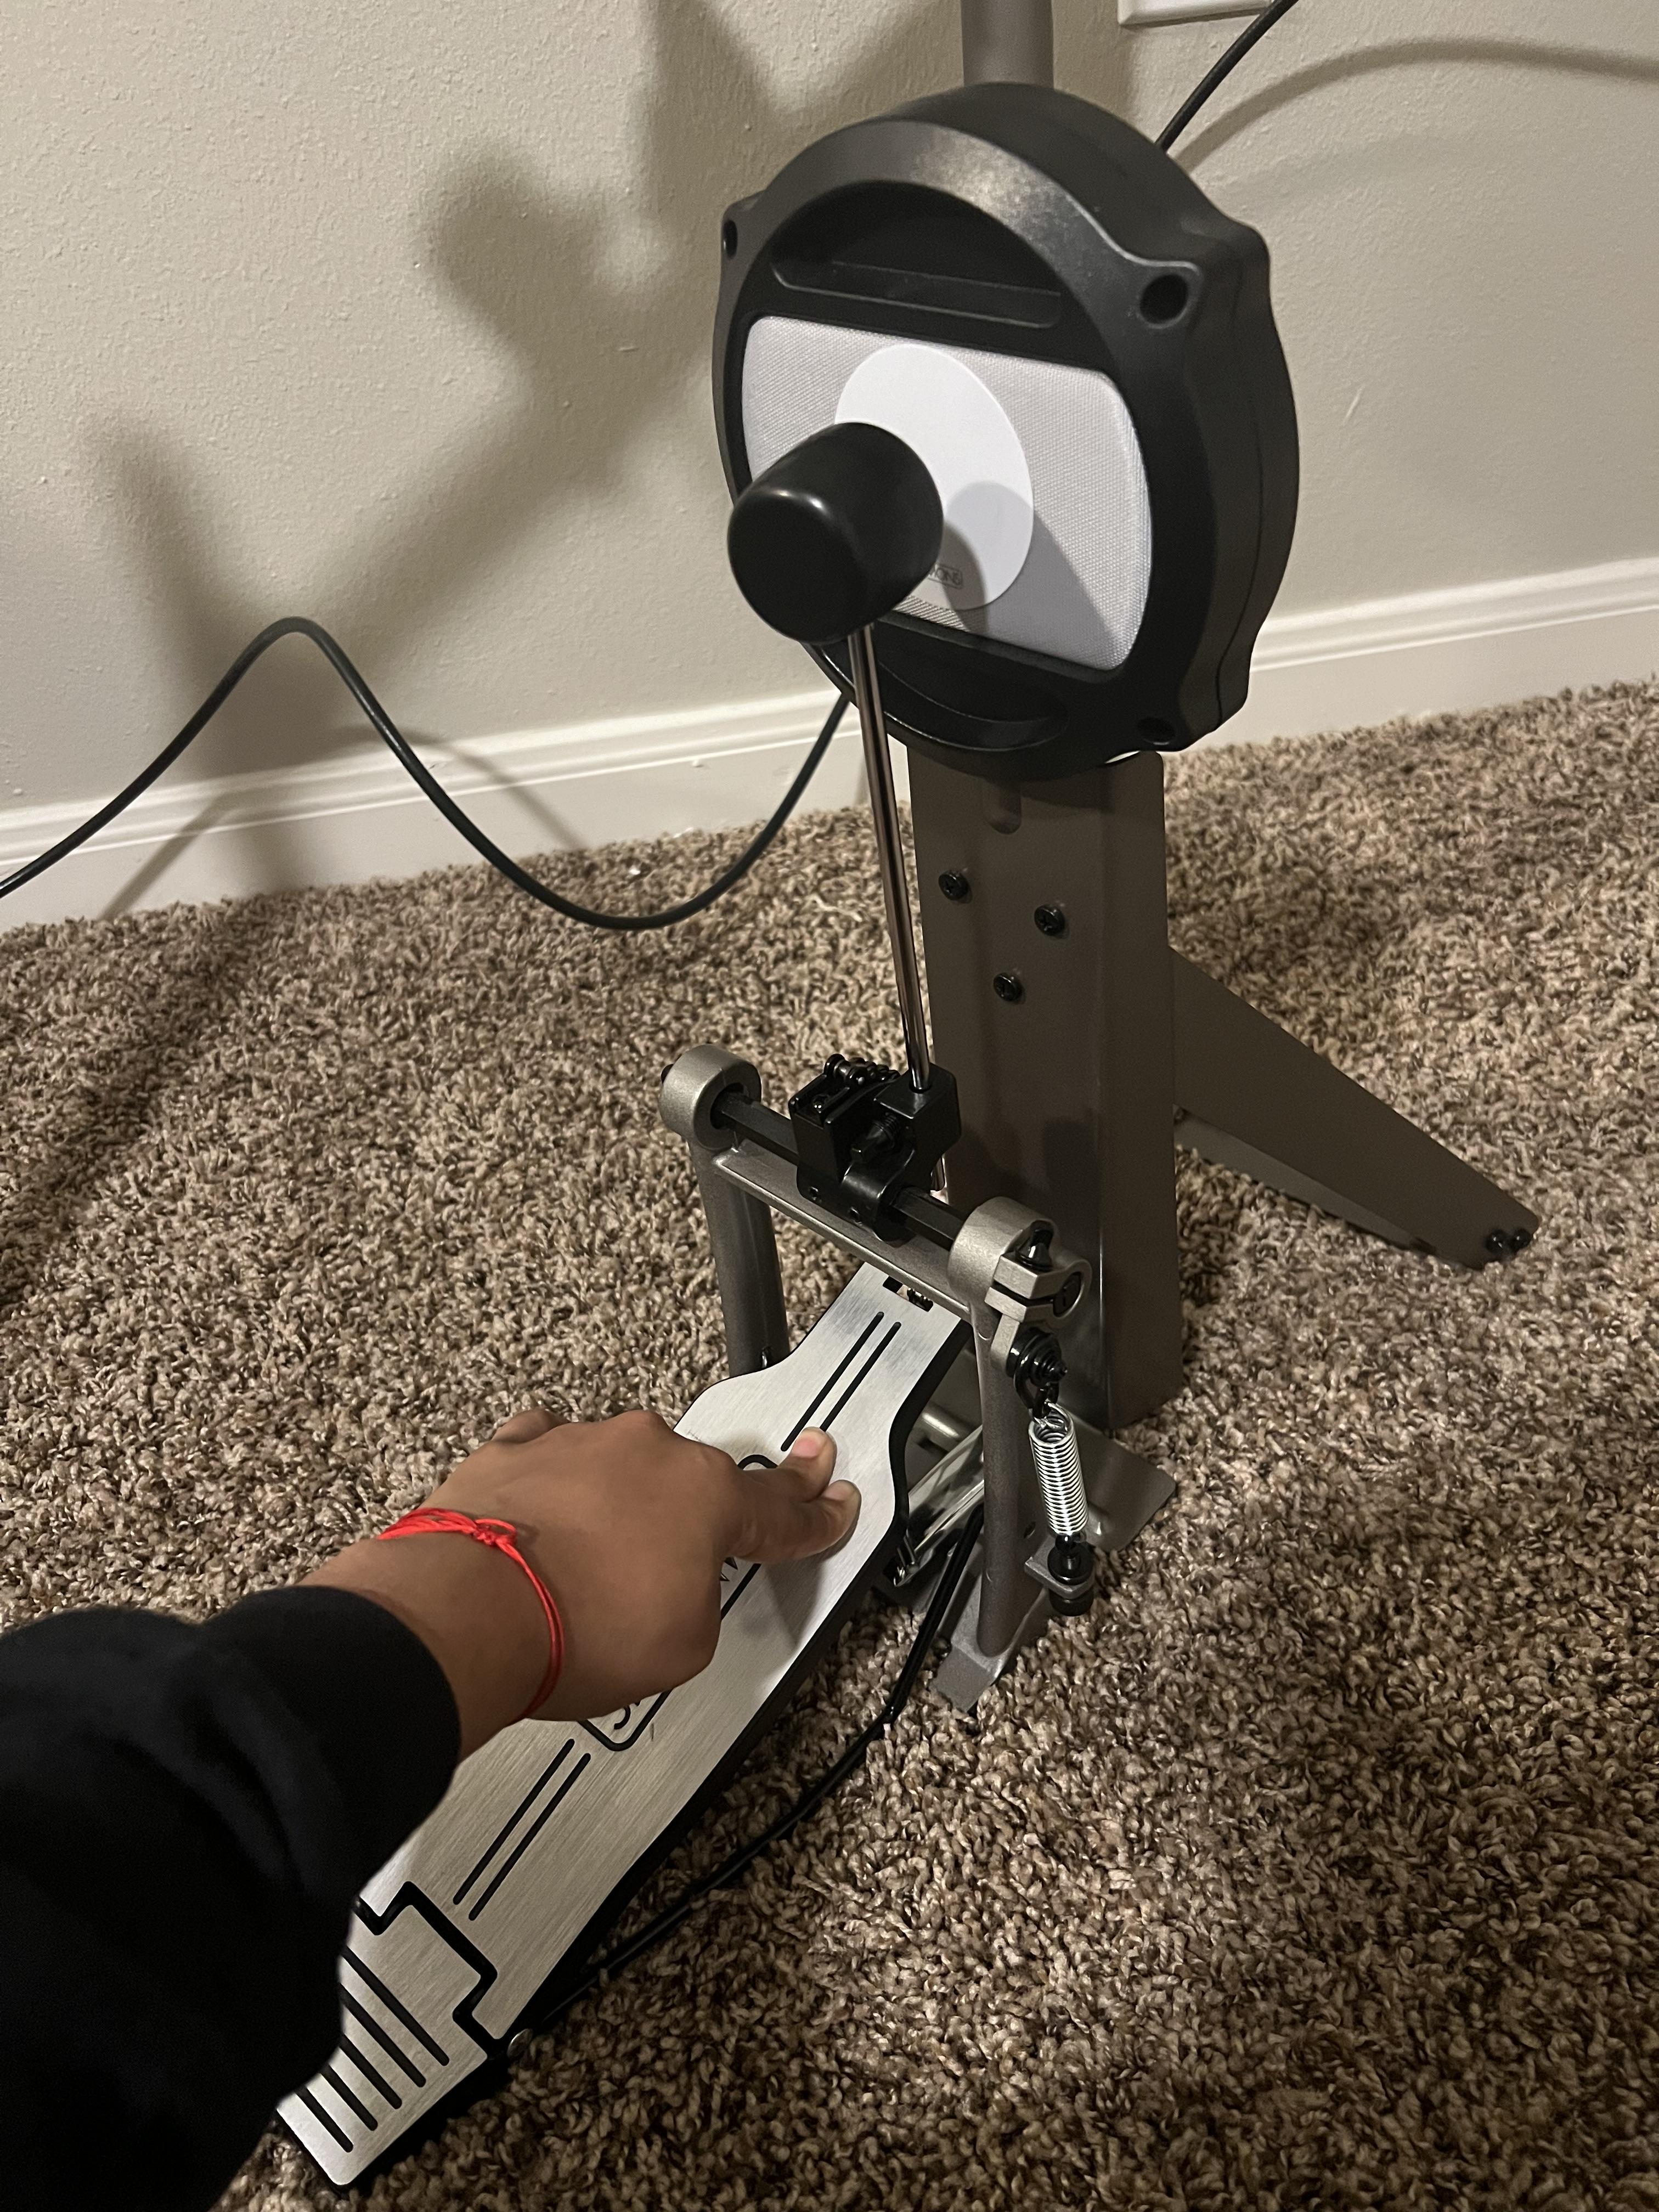
Attach the beater to the kick pedal. Set the length so that it hits the center of the pad.
Note: Use the drum key provided to loosen or tighten the bolt.
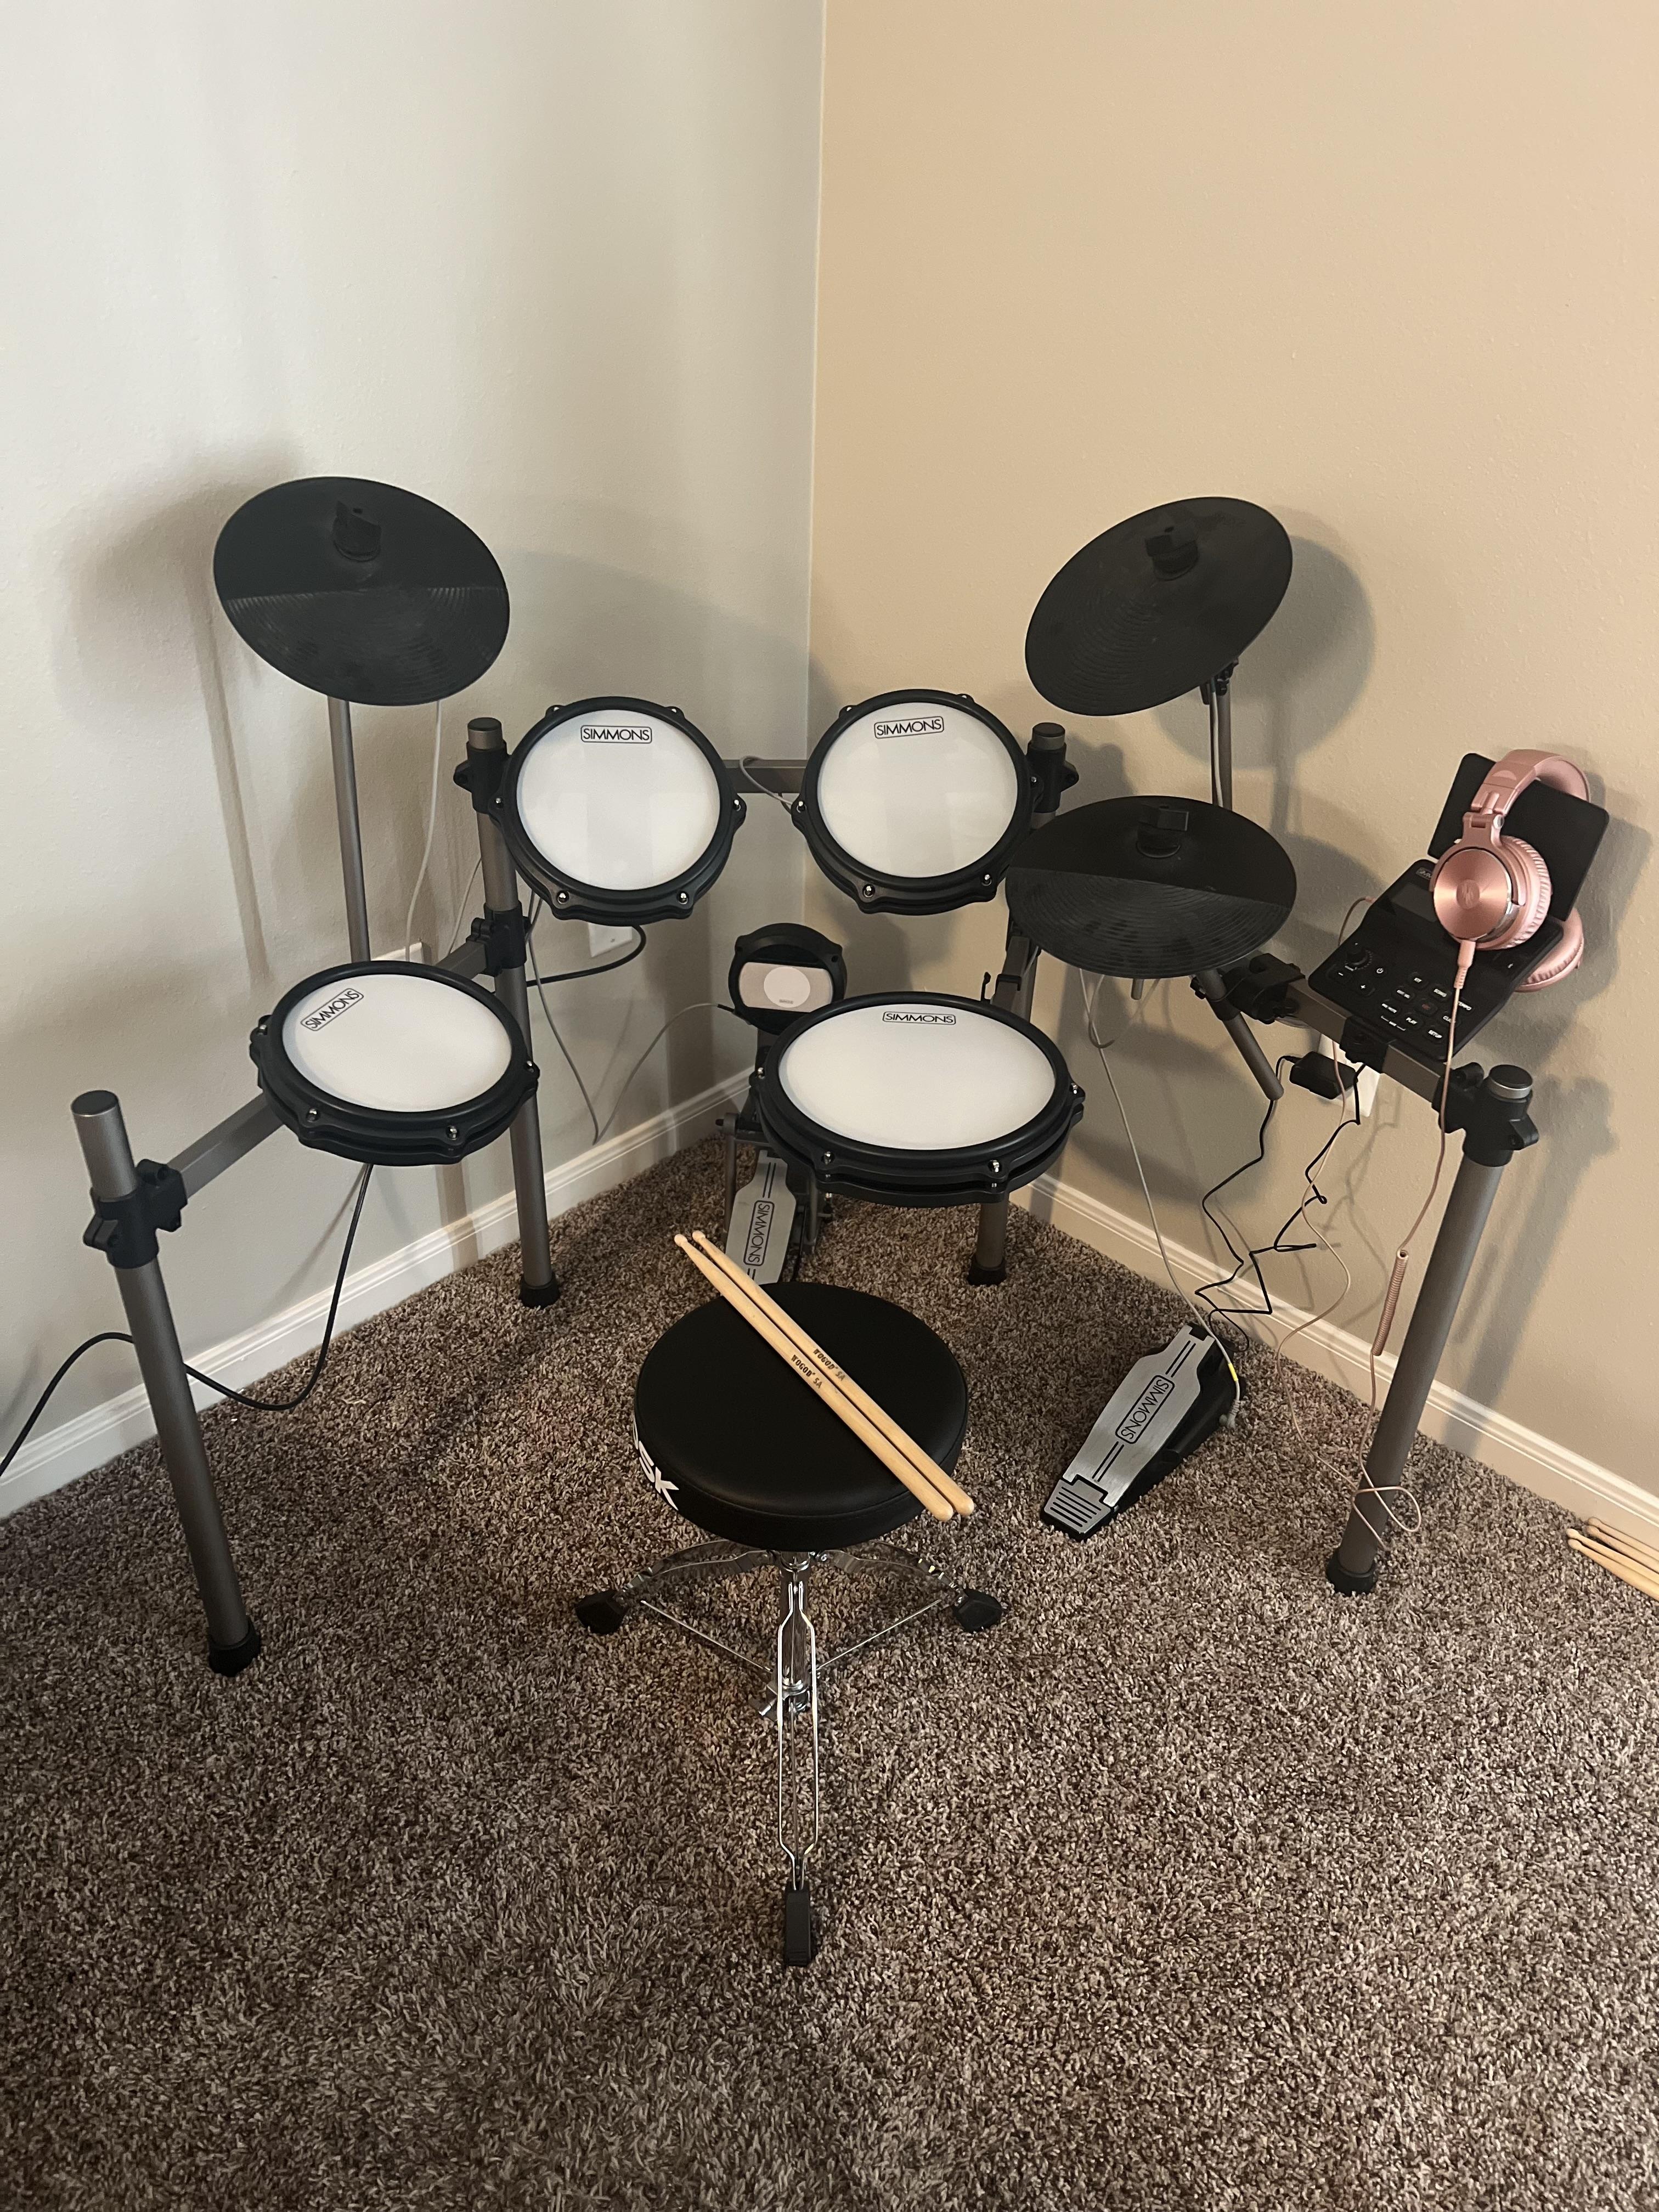
Placement
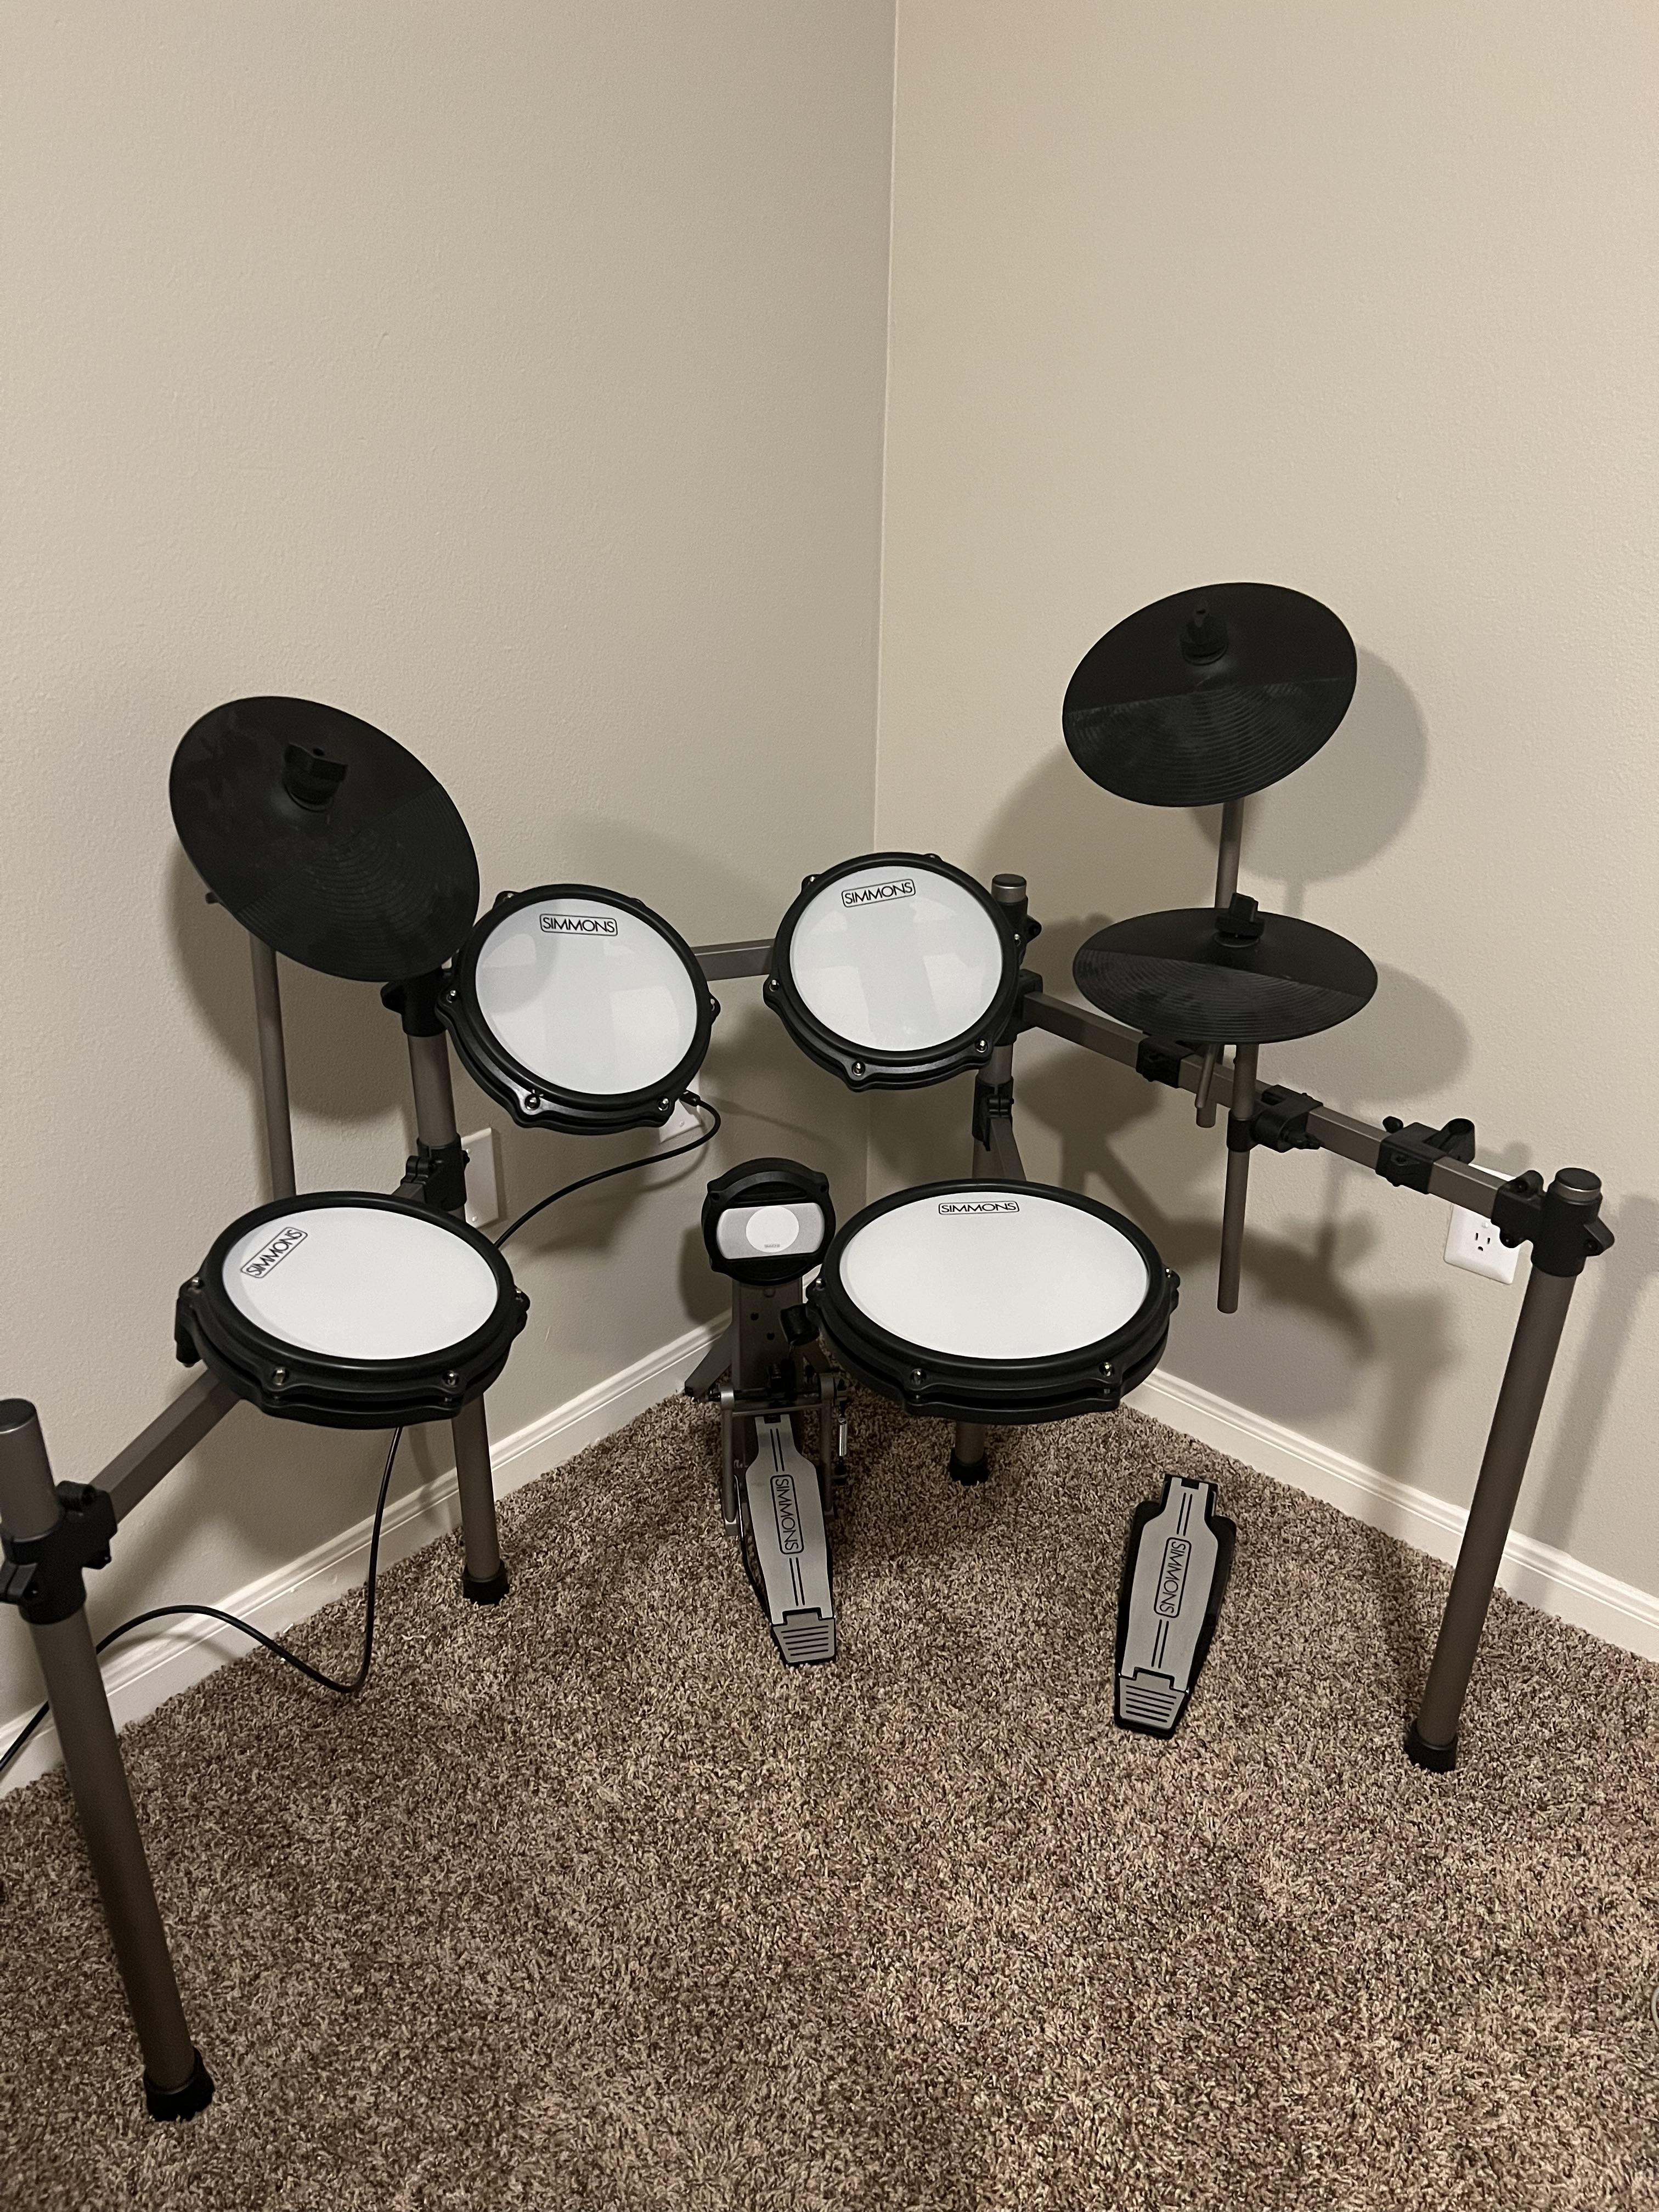
Place the high-hat pedal under the hi-hat cymbal and place the kick pedal in the middle of the kit. Adjust the drum kit as needed.
Plugging in the Cable
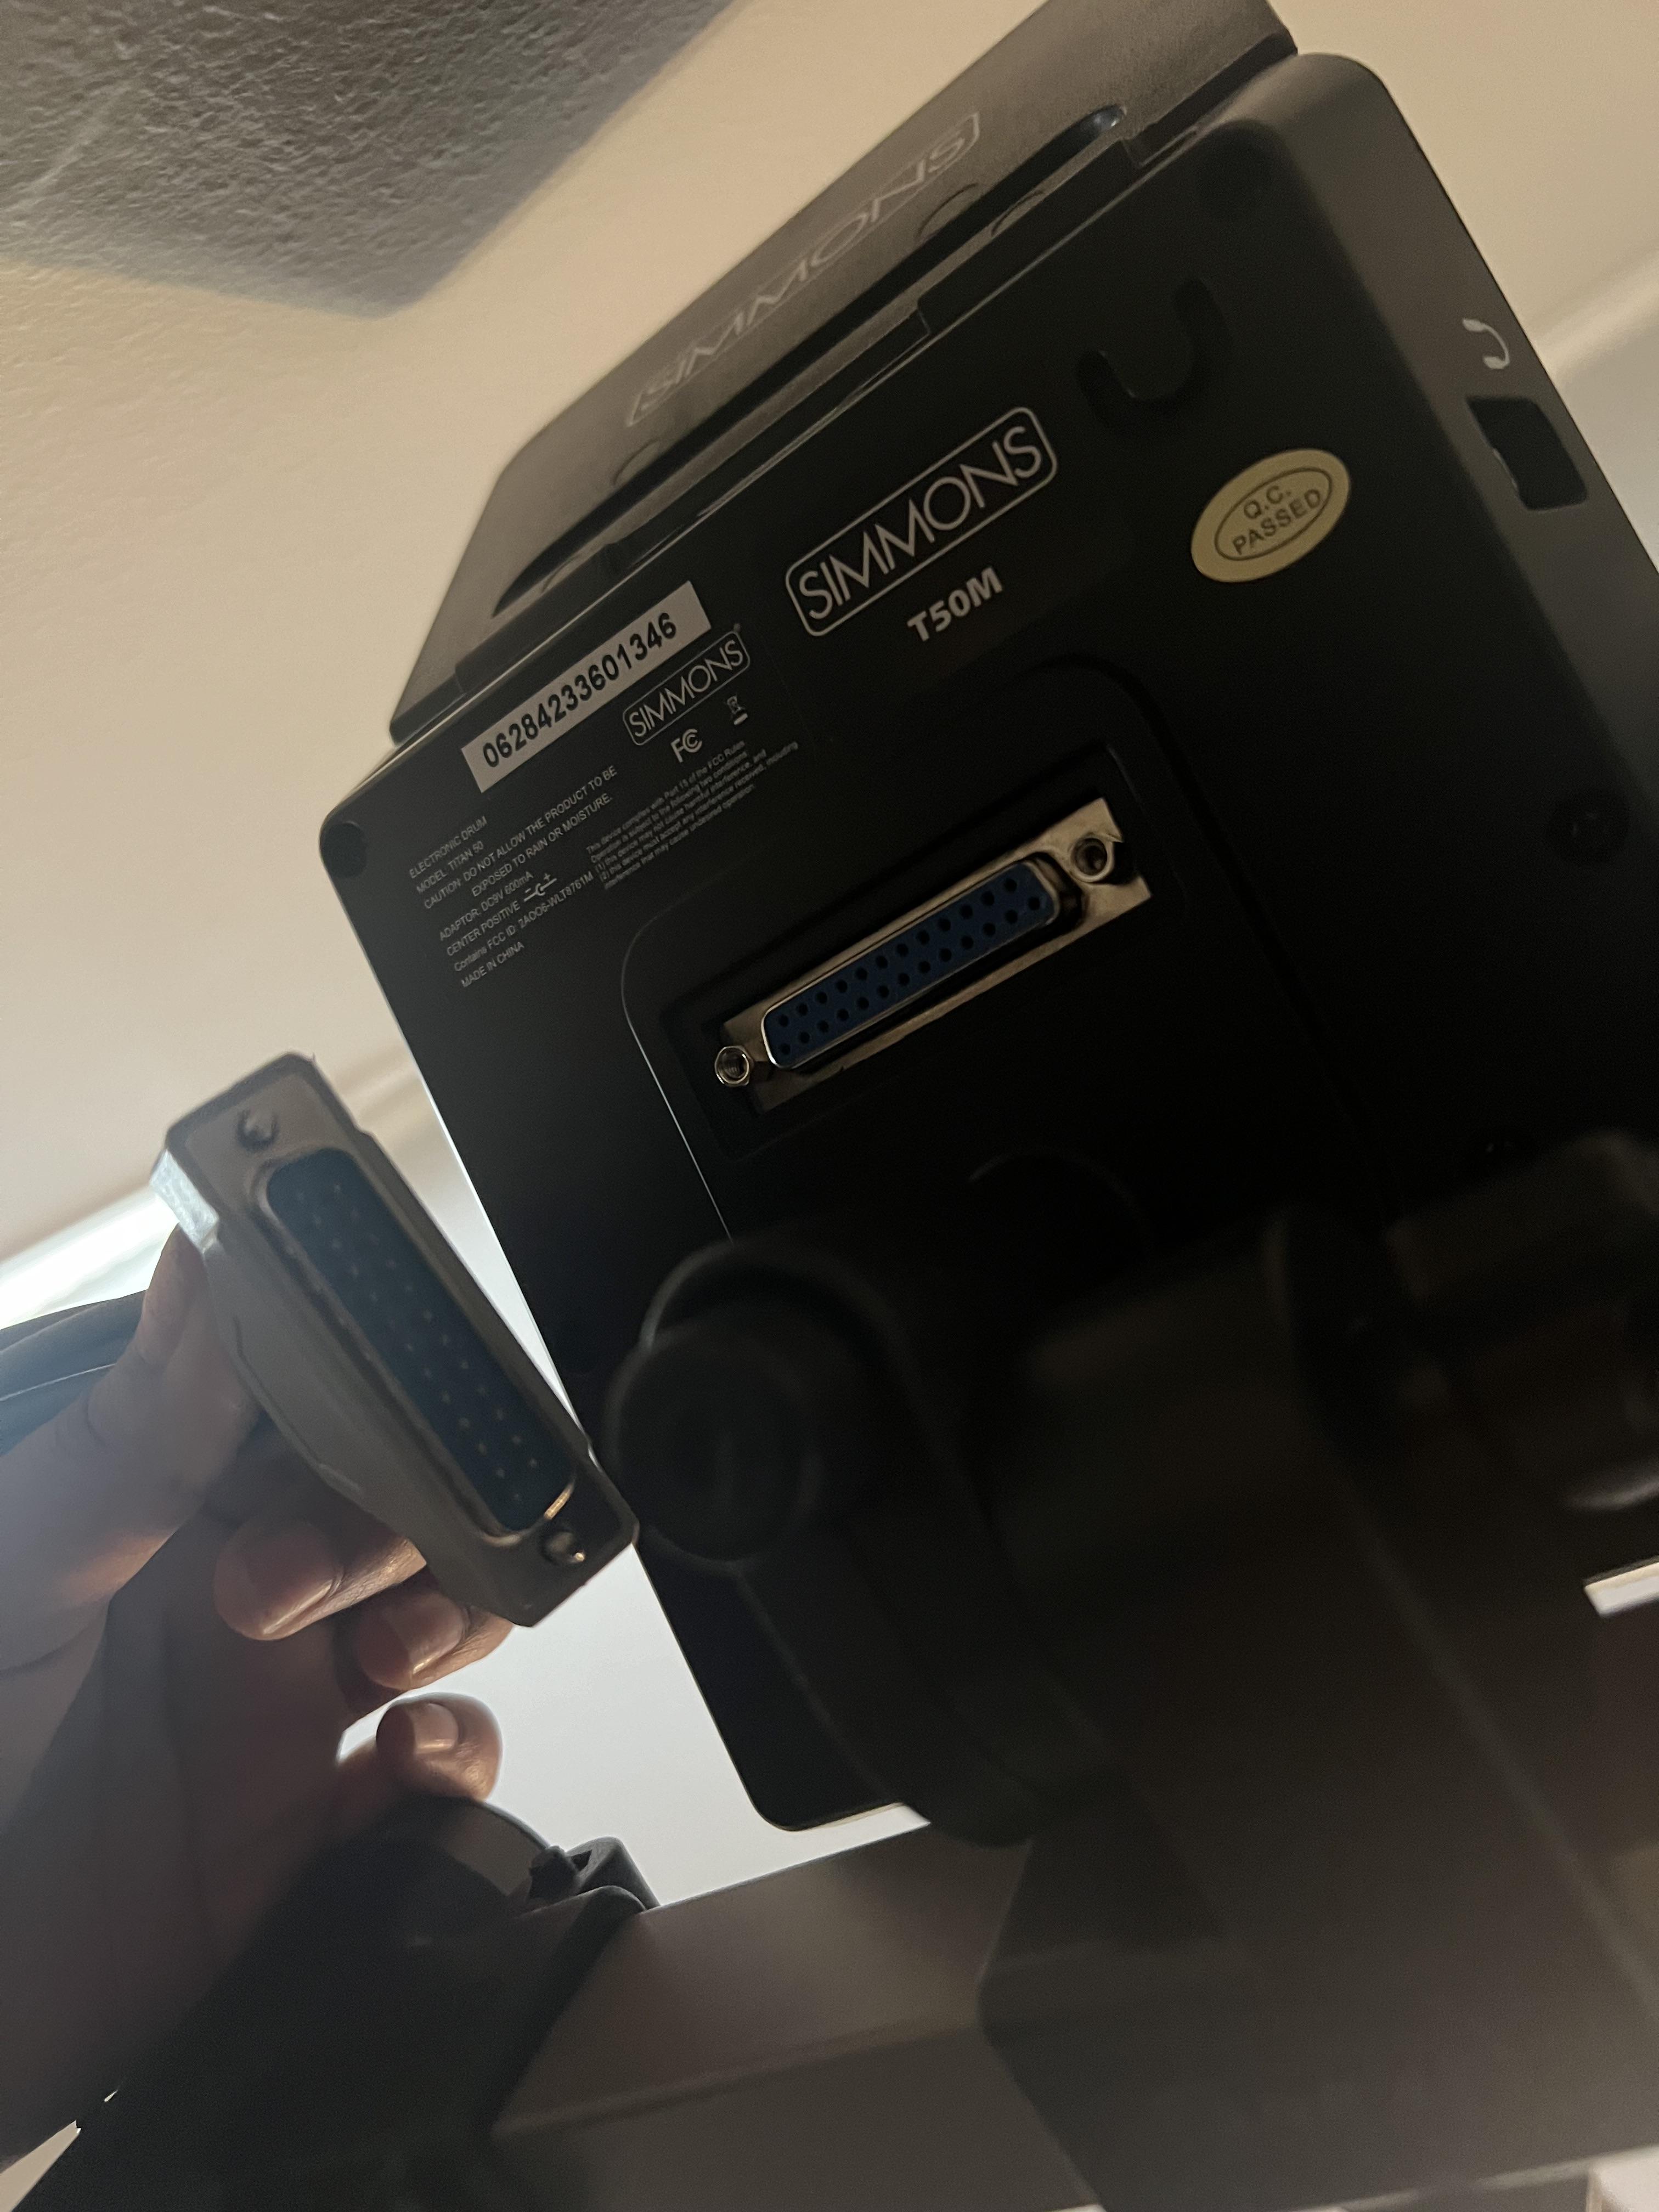
Attach the multi-pin cable connector to the bottom of the drum module and screw in the connections.
Plugging in Pads
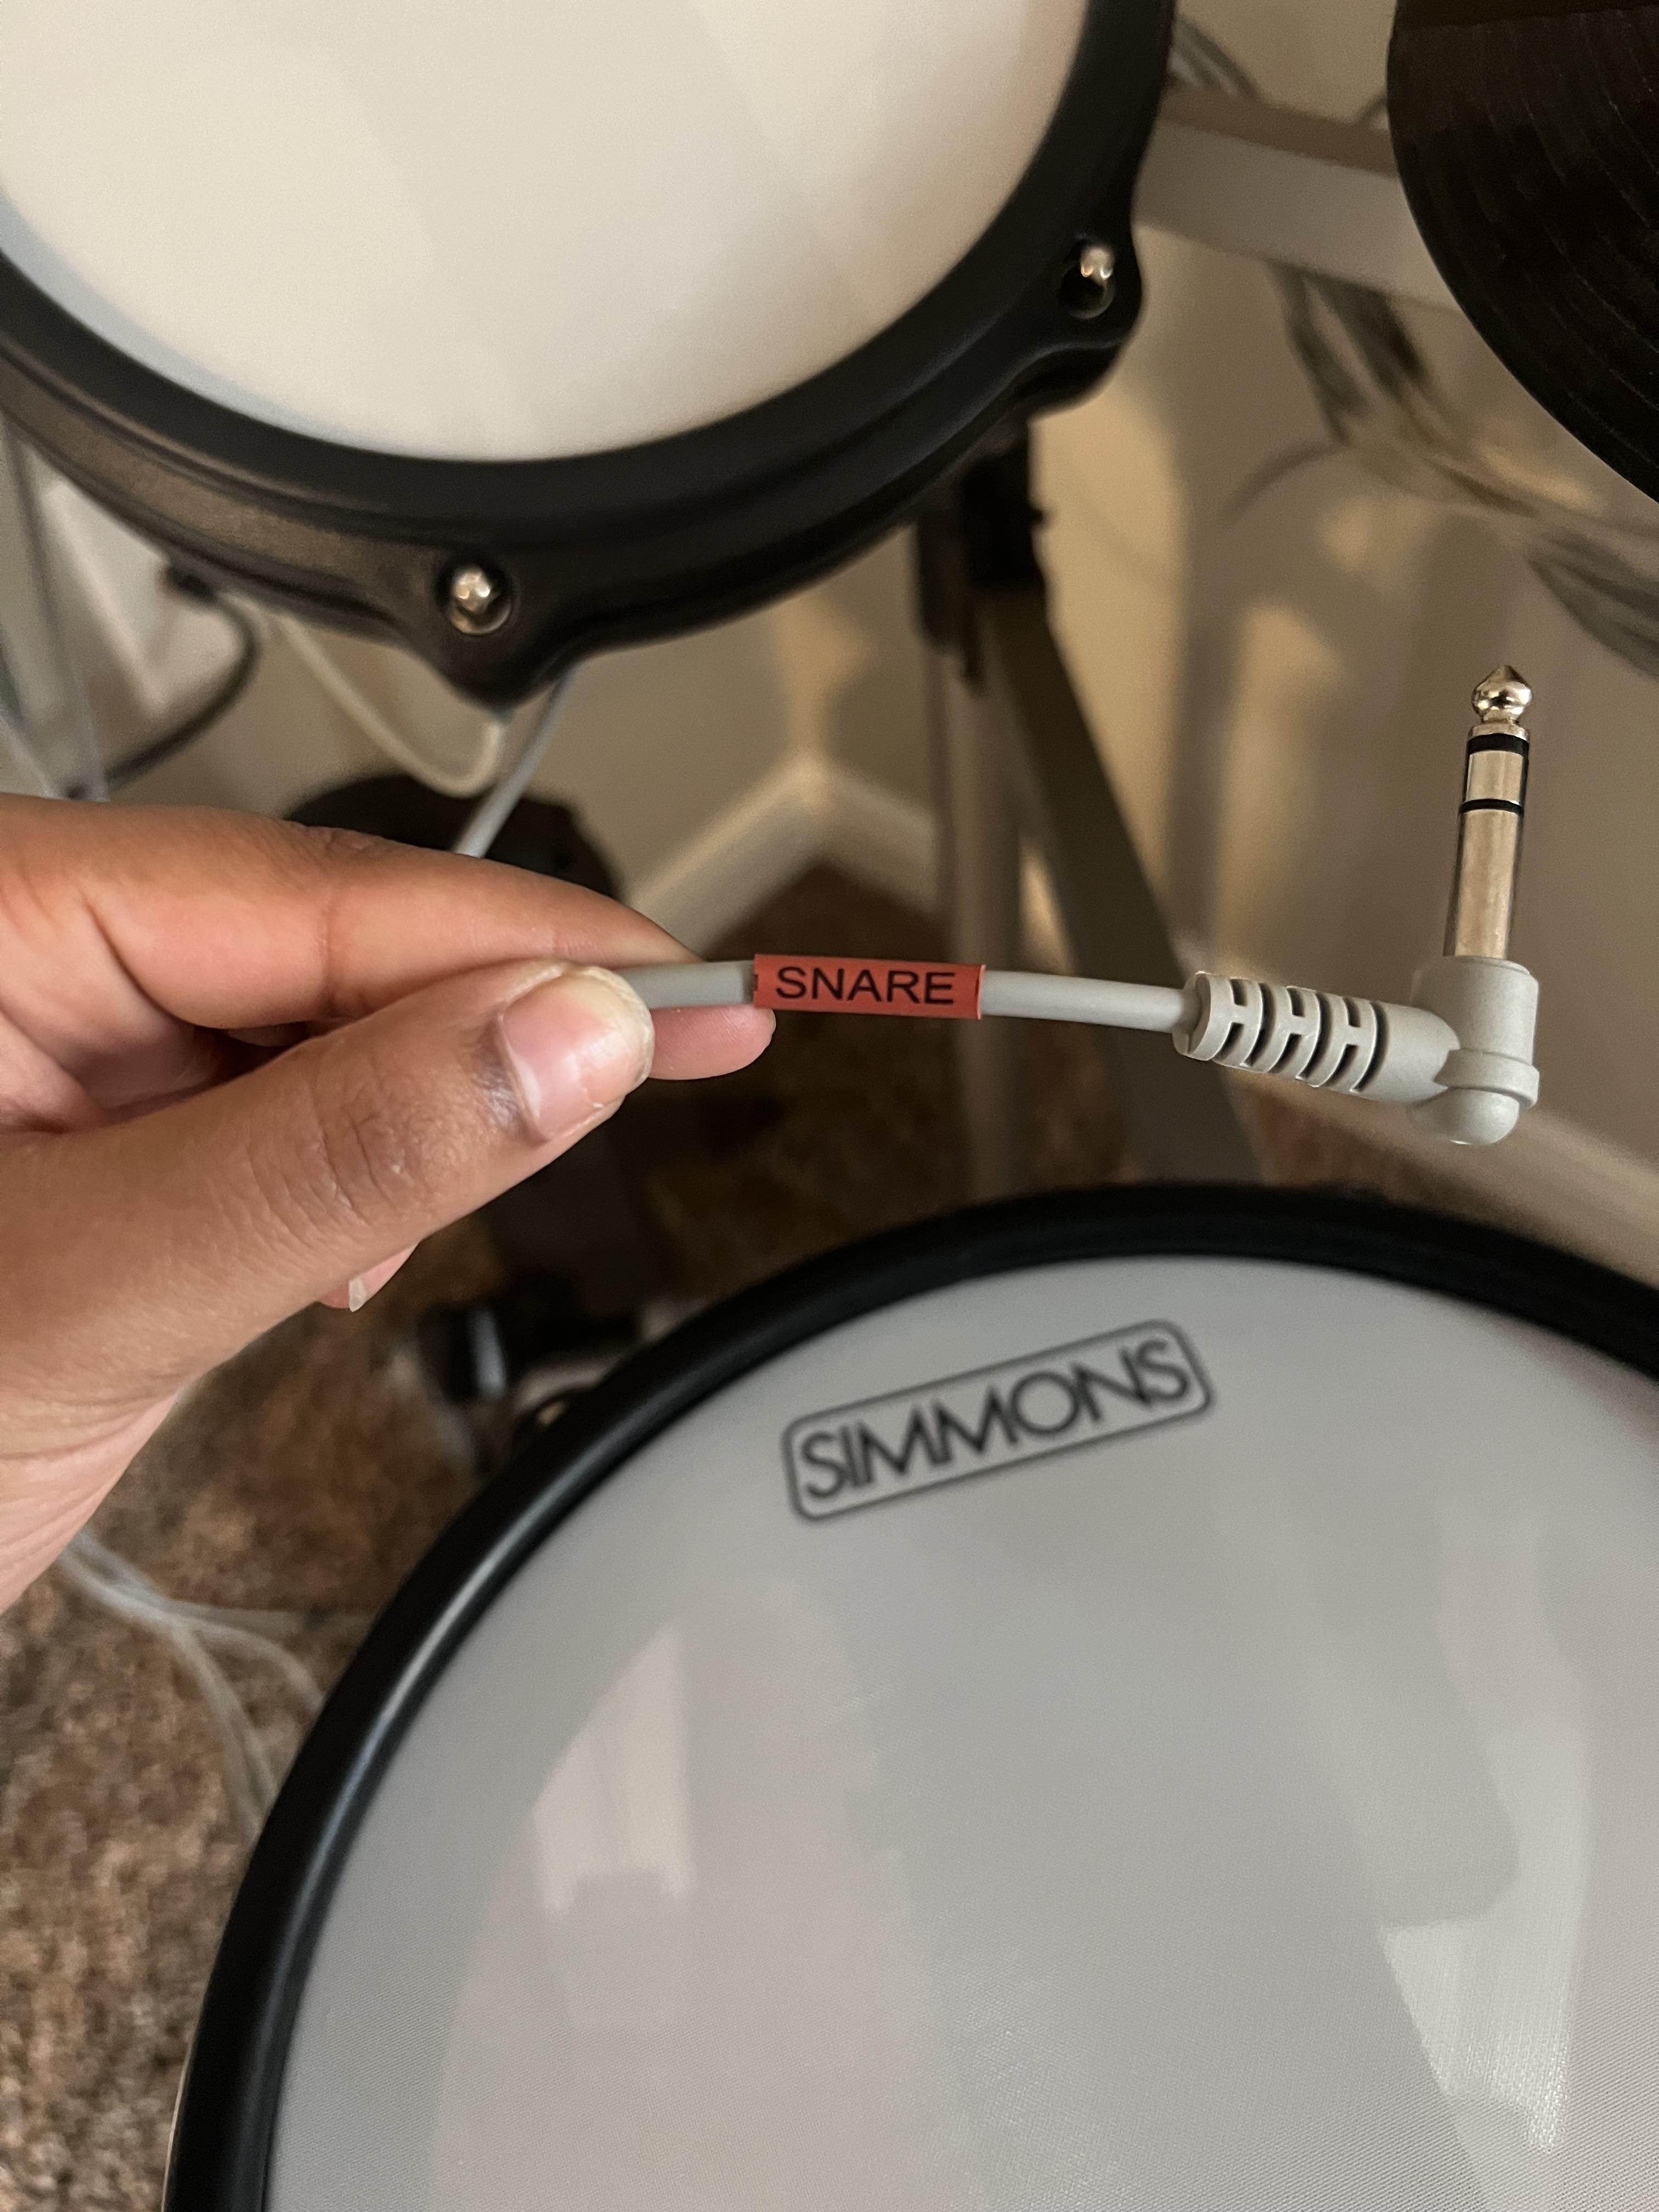
Attach the other connectors to the pads as labeled.
Plugging Into Outlet
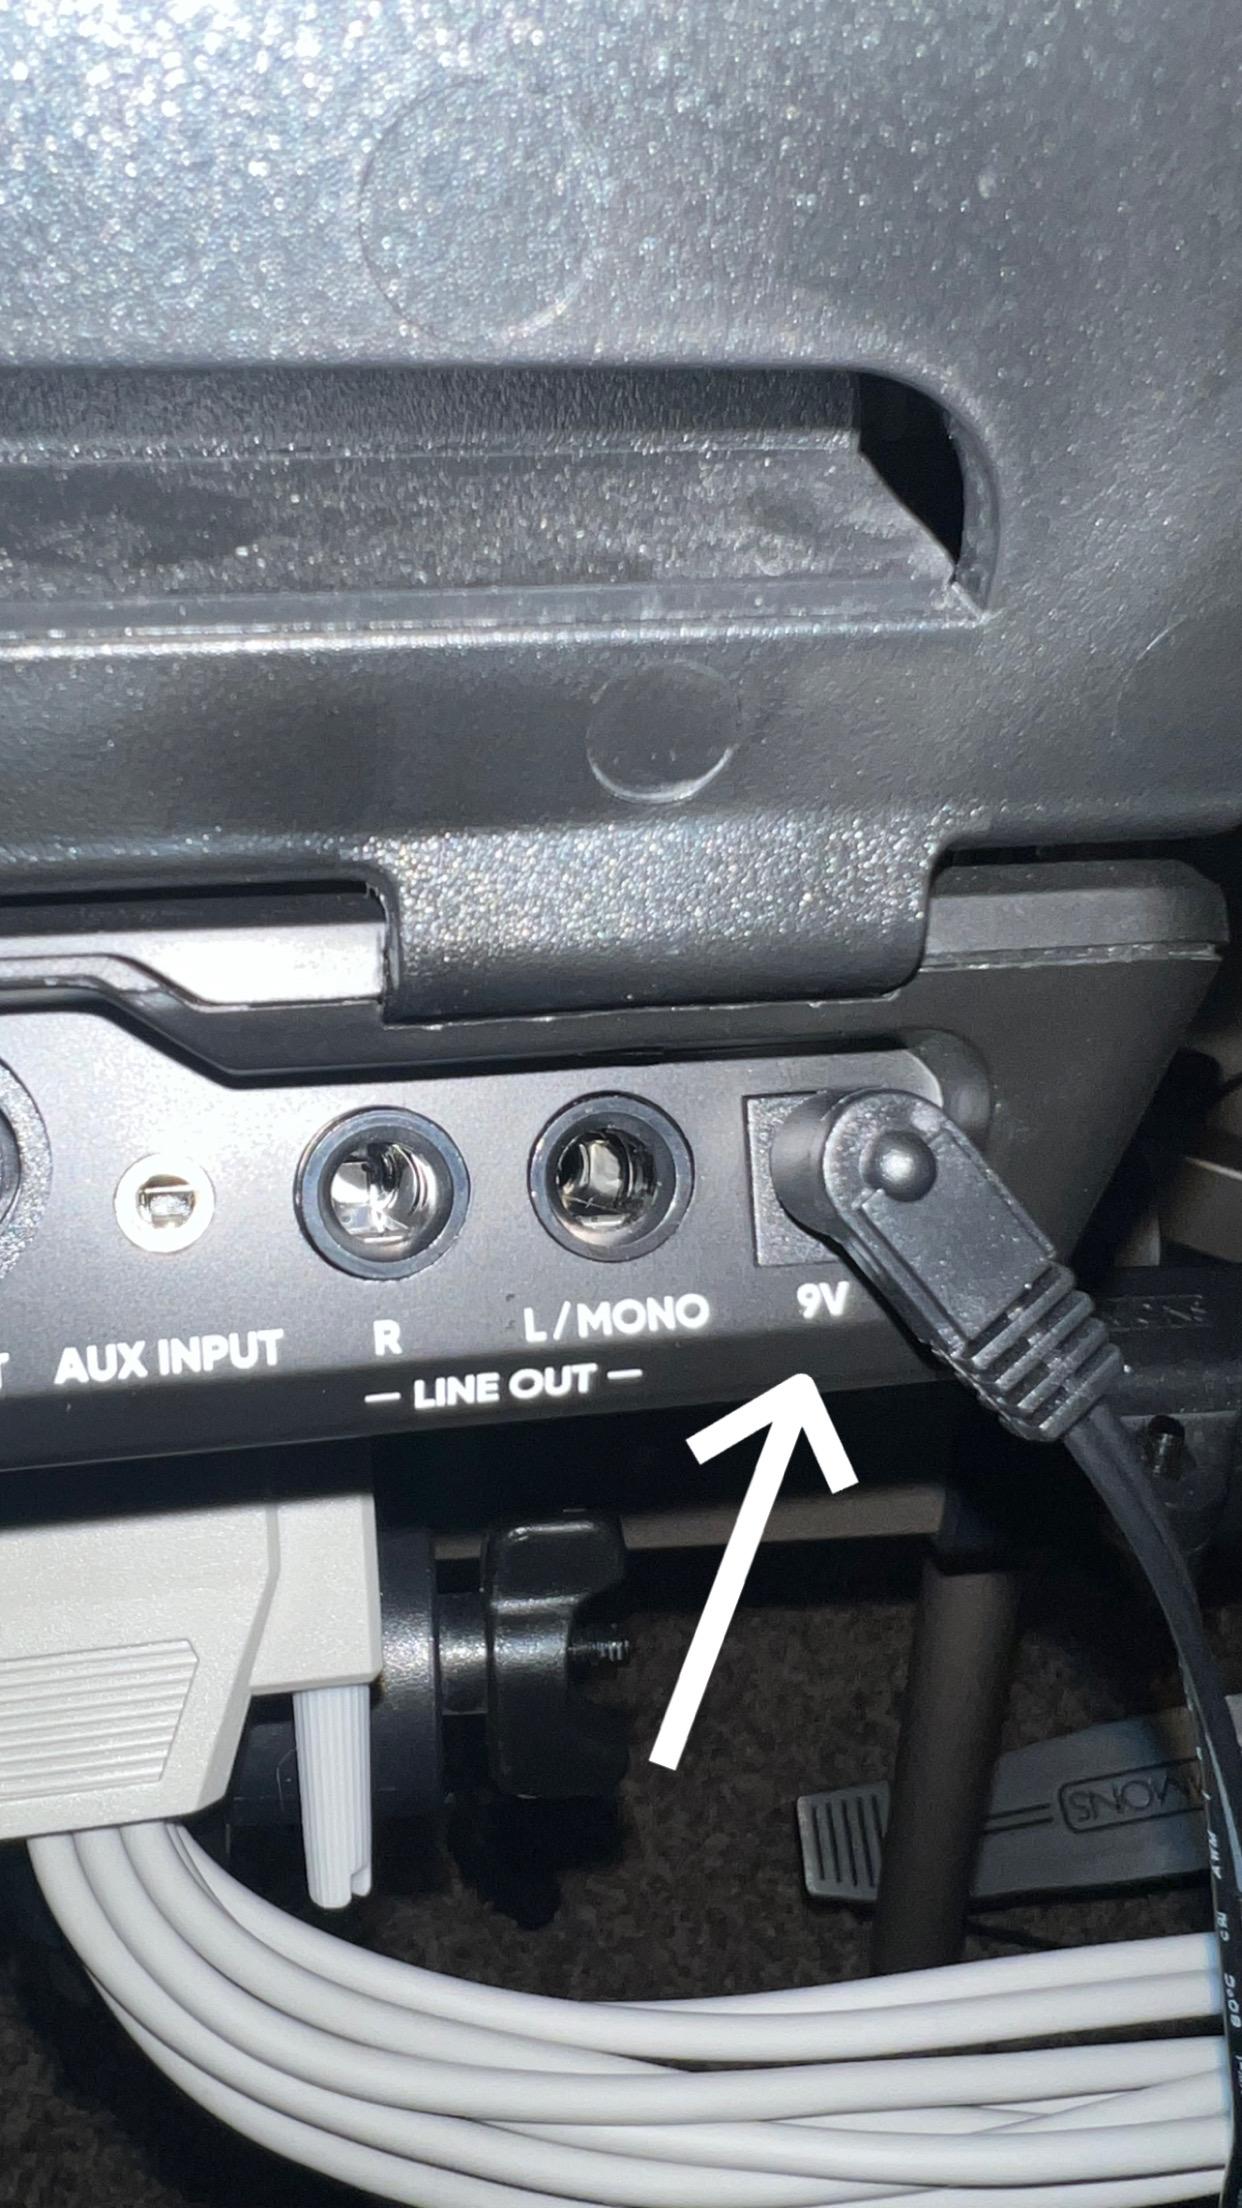
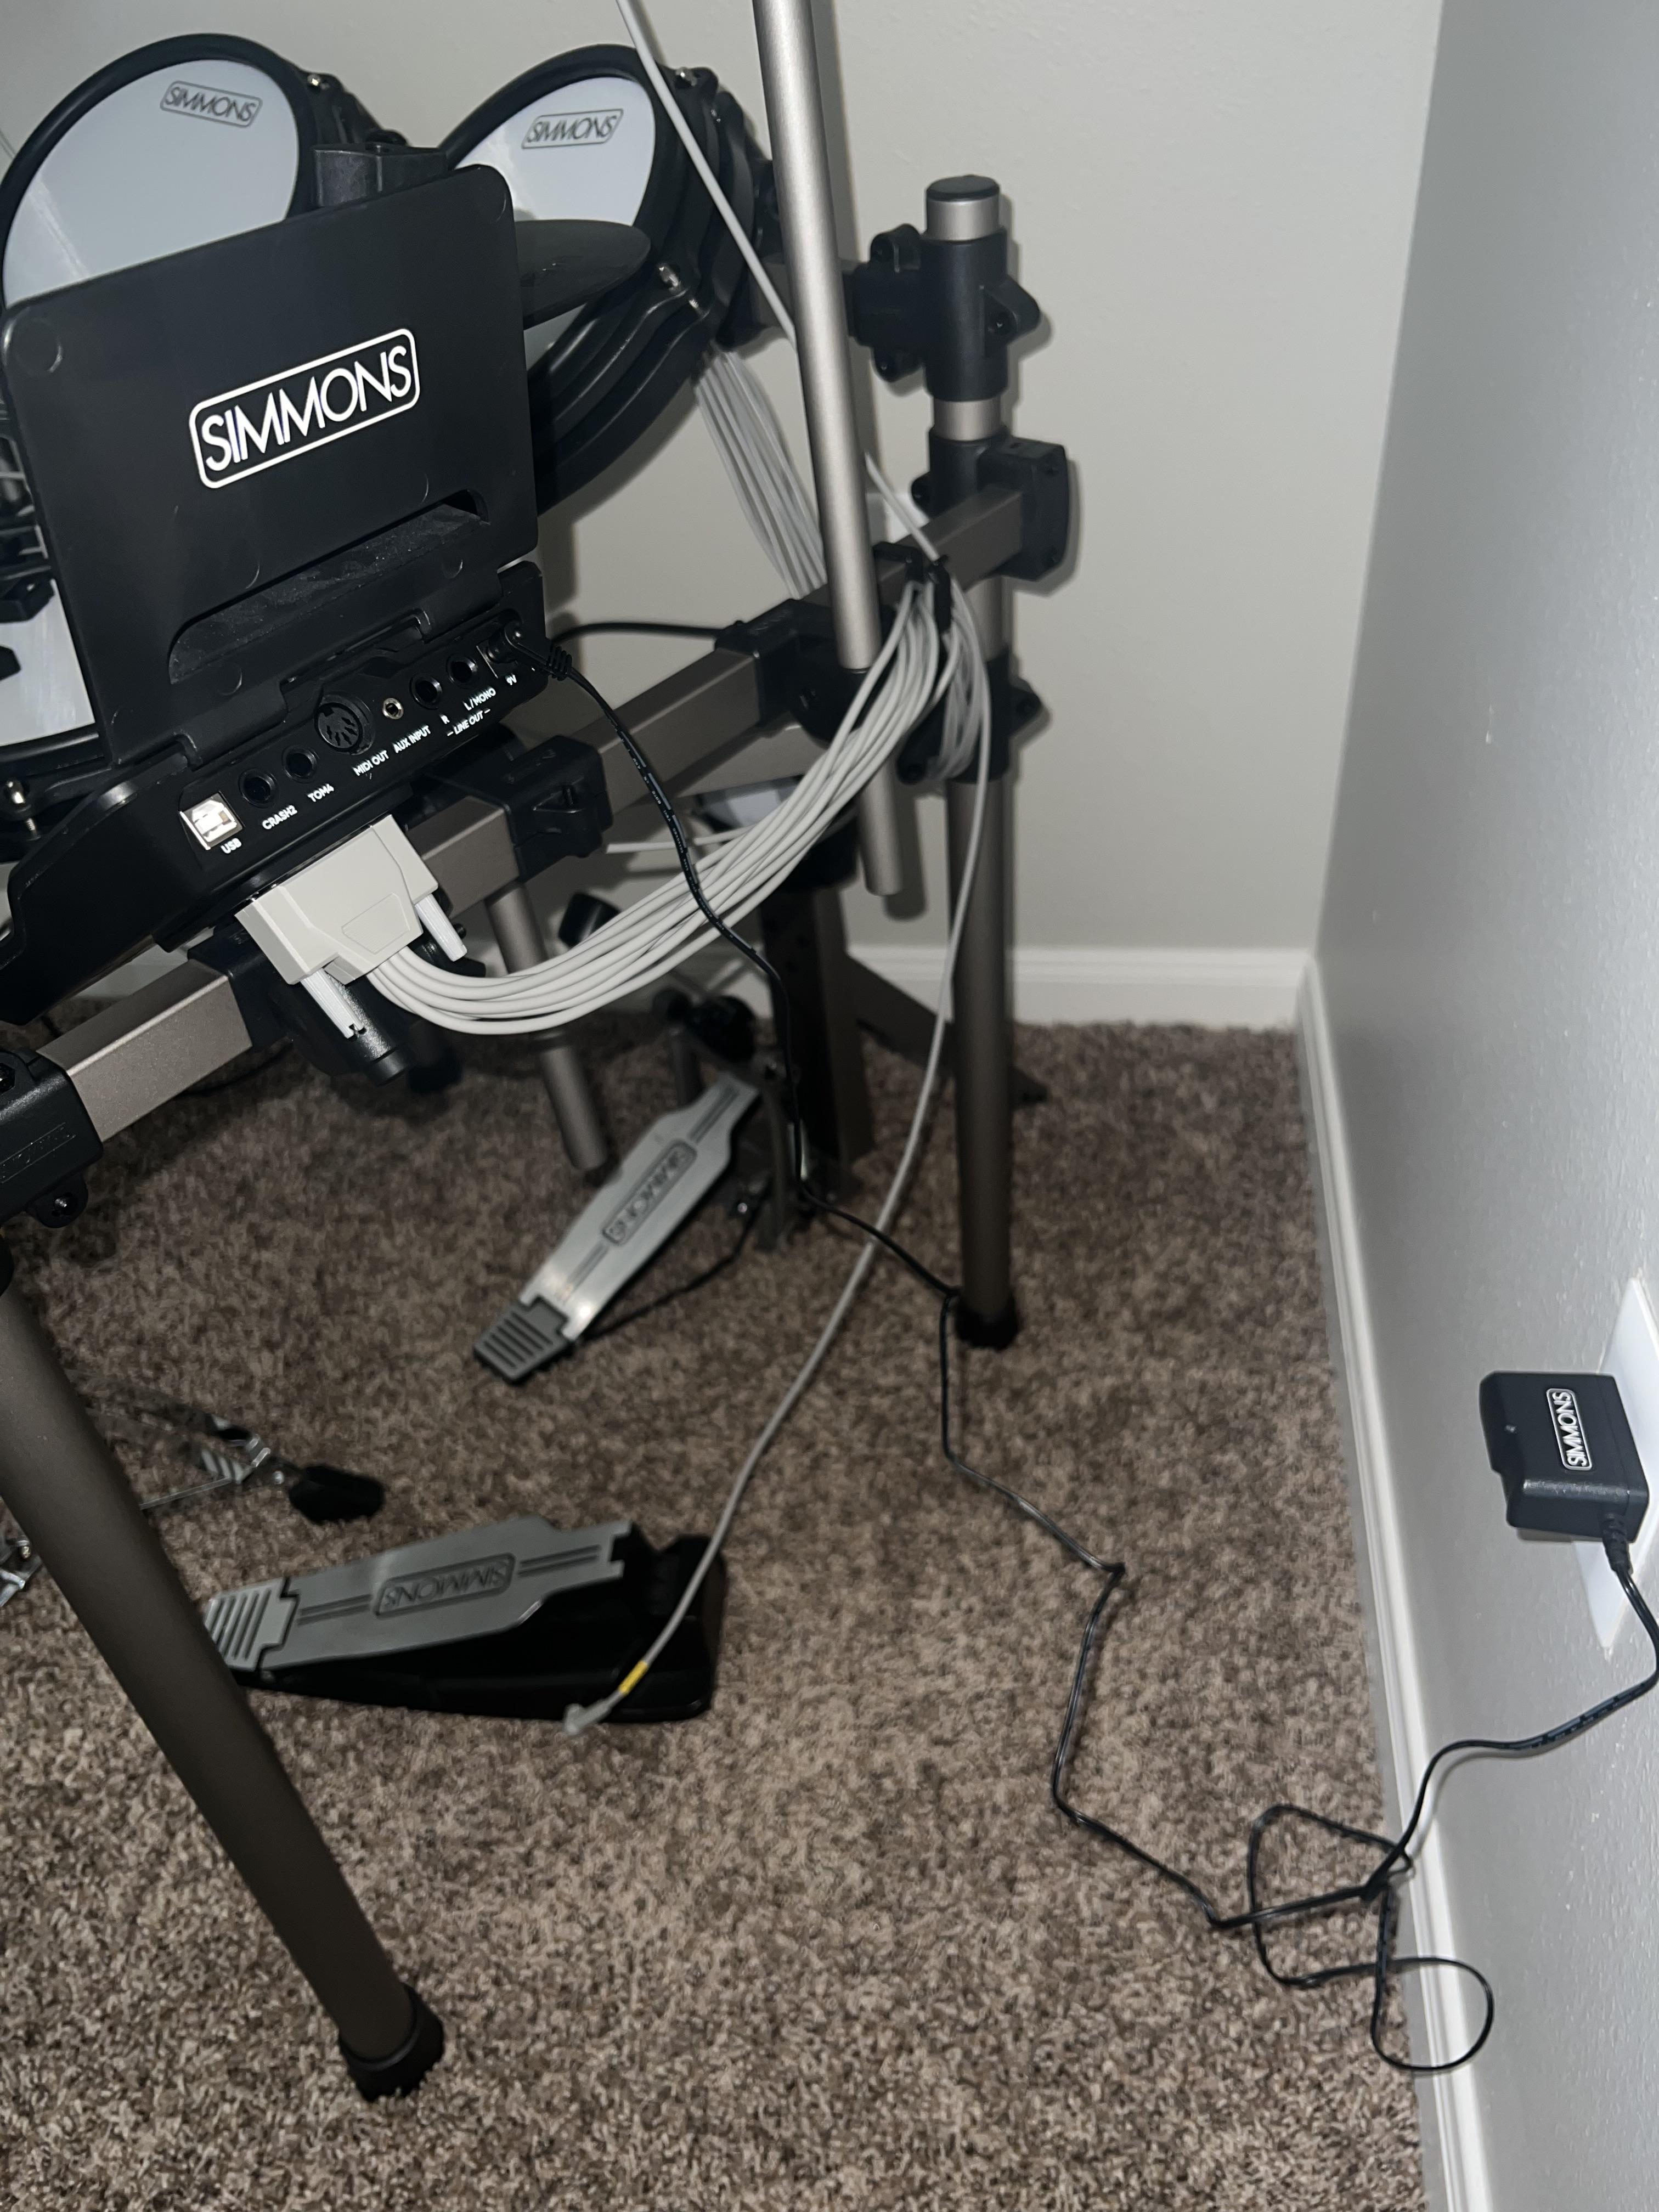
Attach the power adapter to the module and plug it in. Input is labeled "9V".
Enjoy!
Turn on the drum module with the power switch.
Connect headphones for personal listening or use audio cables to connect the module to external speakers.
Note: Headphone output is on the side of the drum module.