Servo Positoning With a Keypad
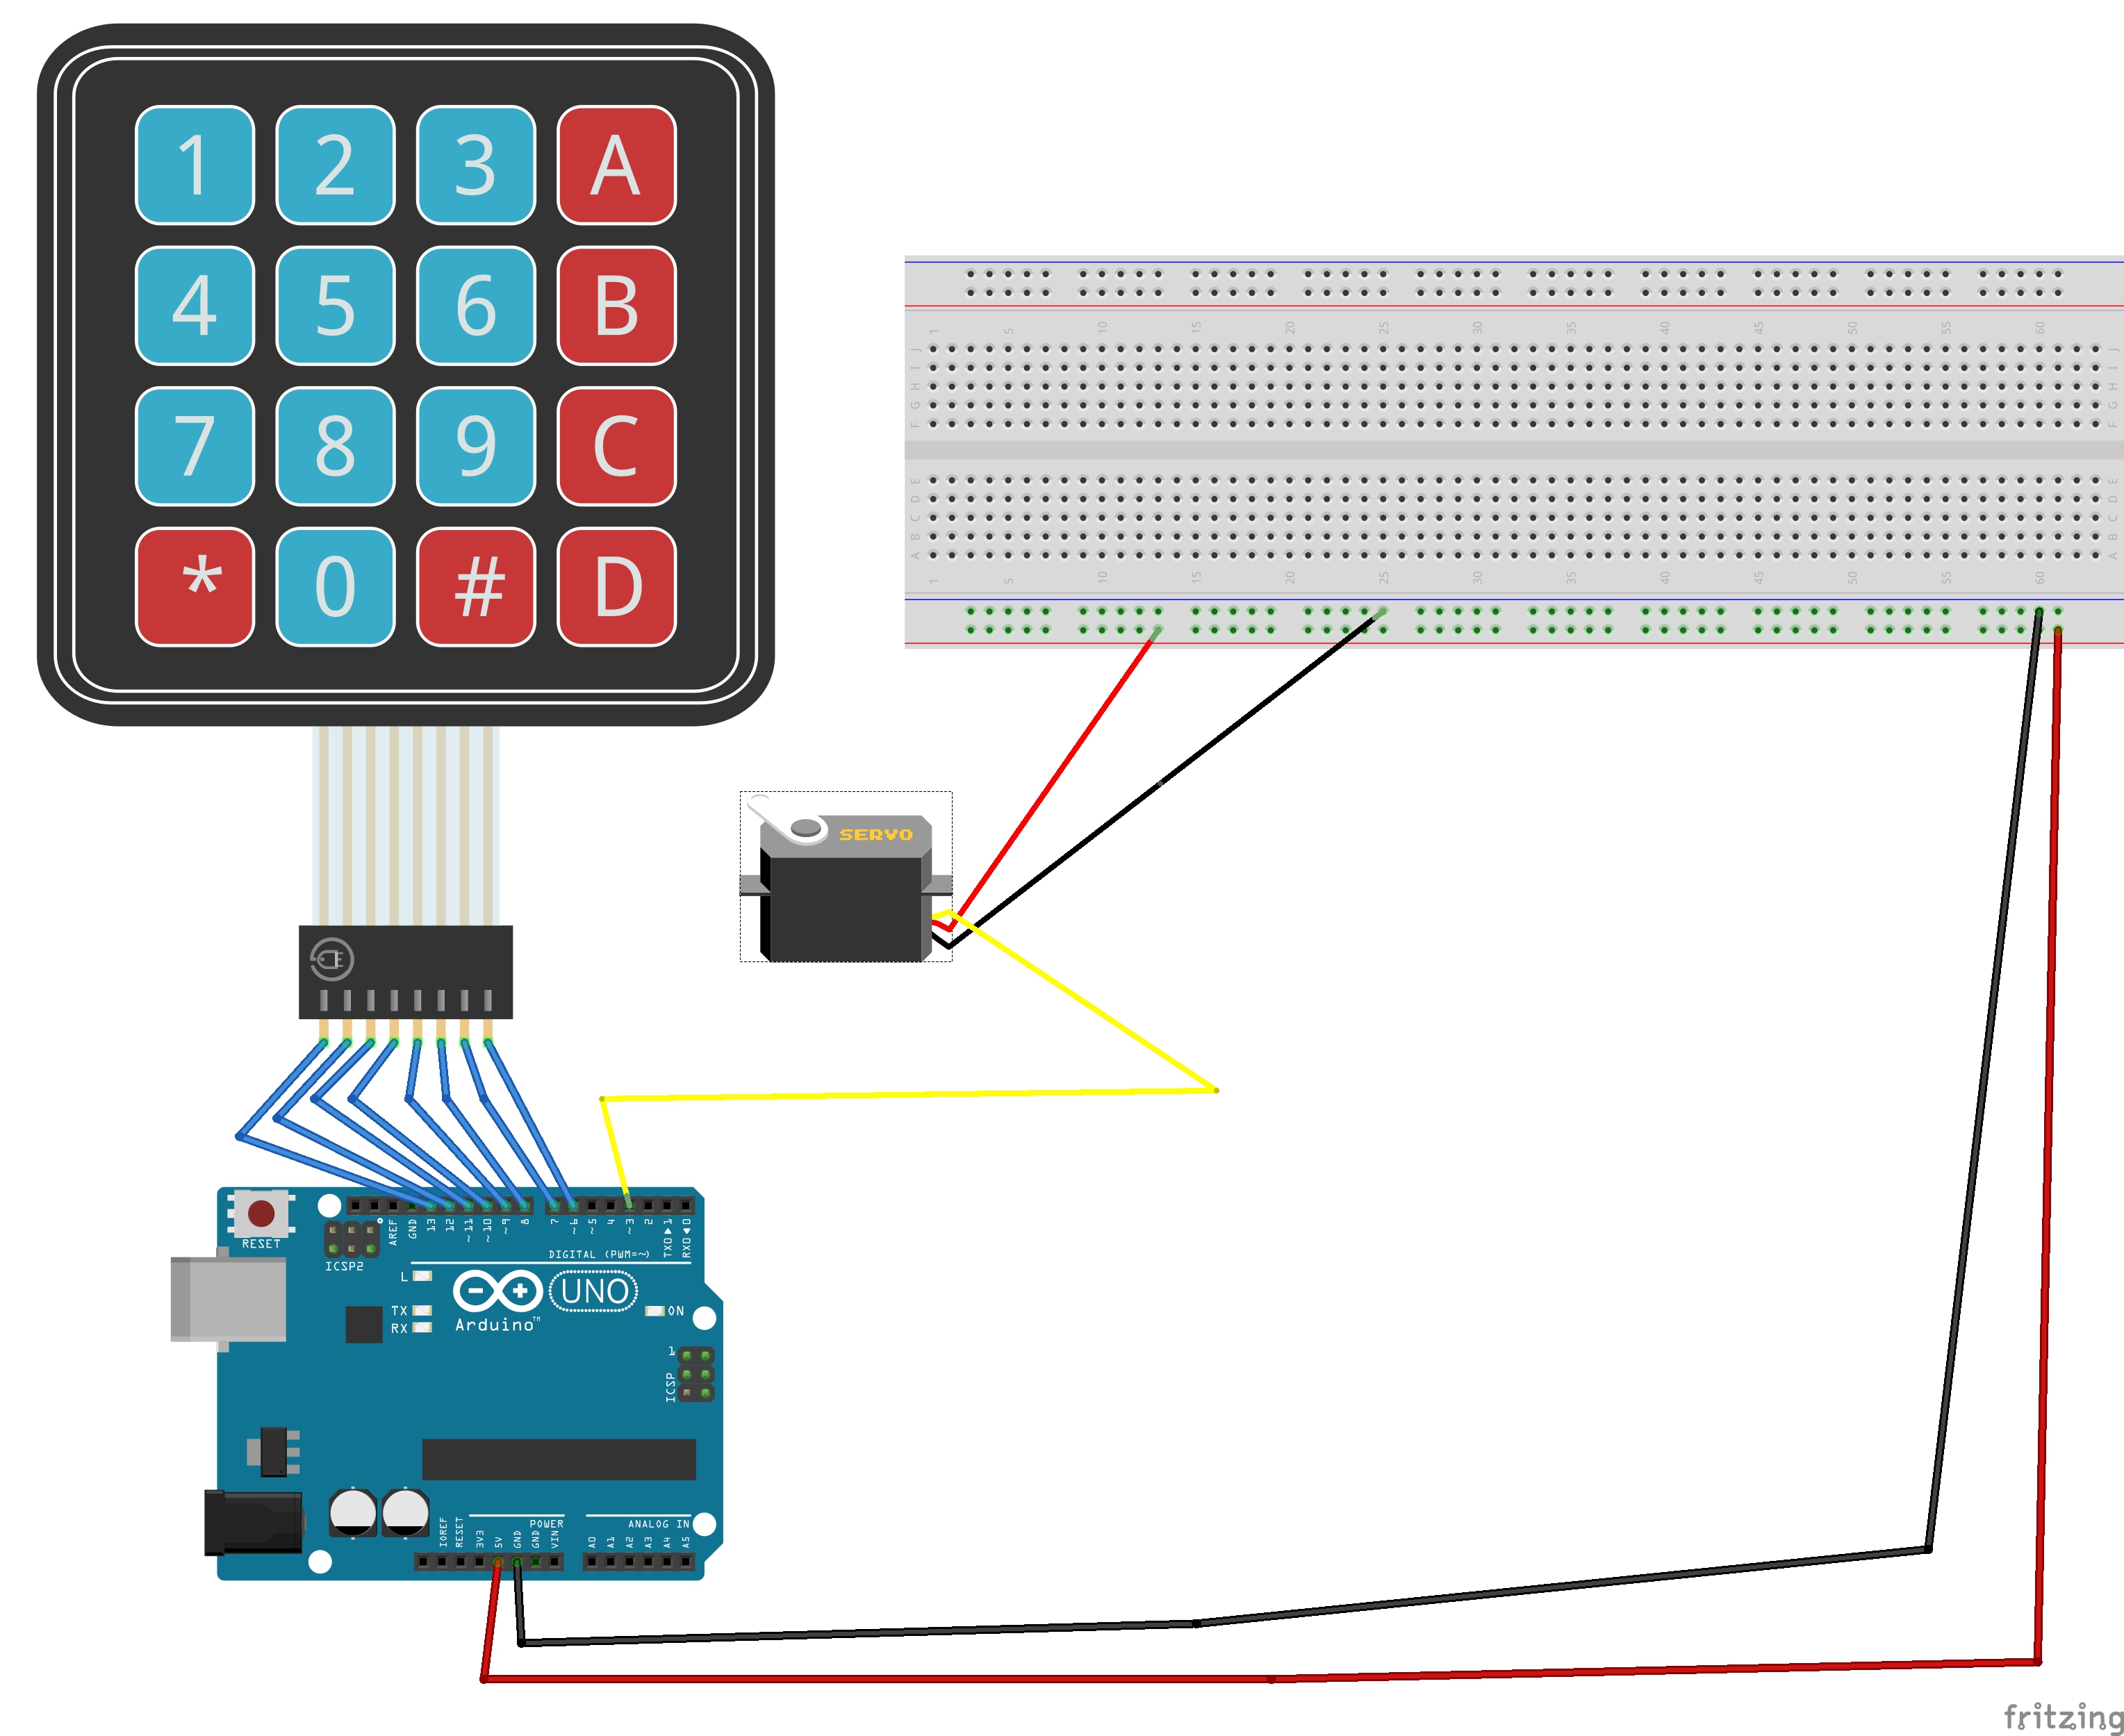
In this instructable we will be creating a project that will control a Micro-Servo with a keypad running it with an Arduino Uno.
Materials Used:
Arduino Uno
Breadboard
4x4 Keypad
Micro-Servo
Wire the Keypad
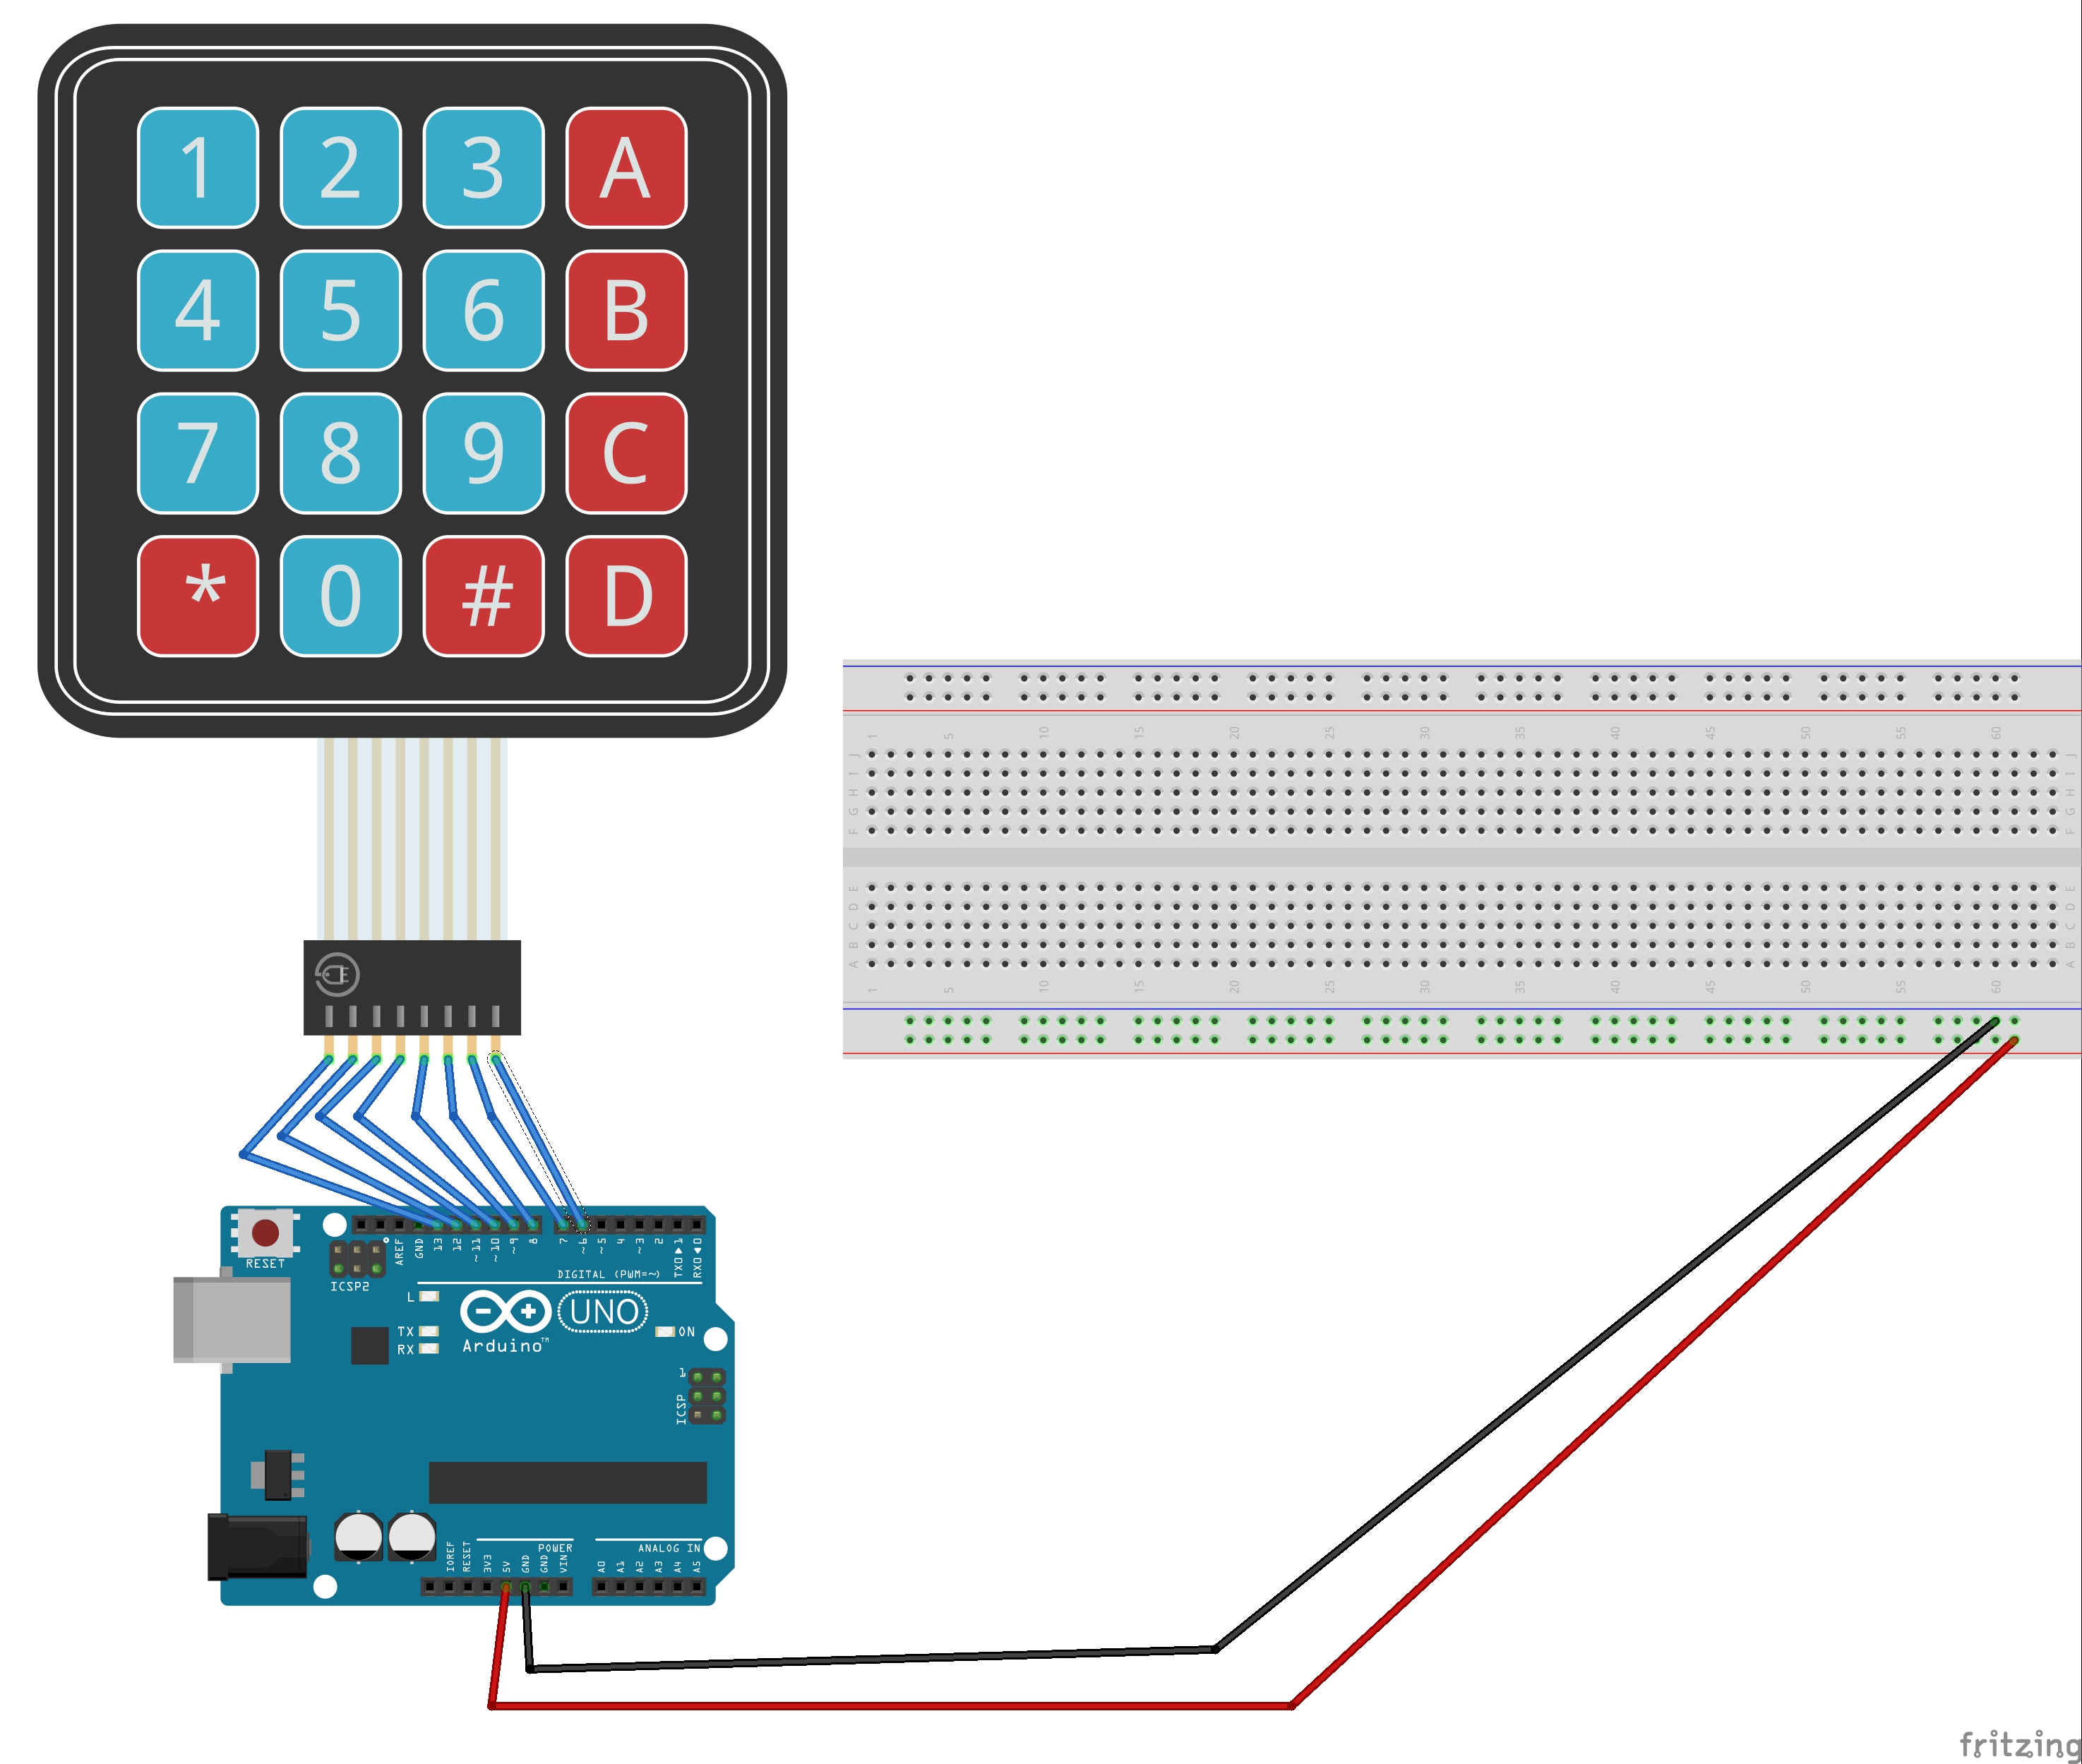
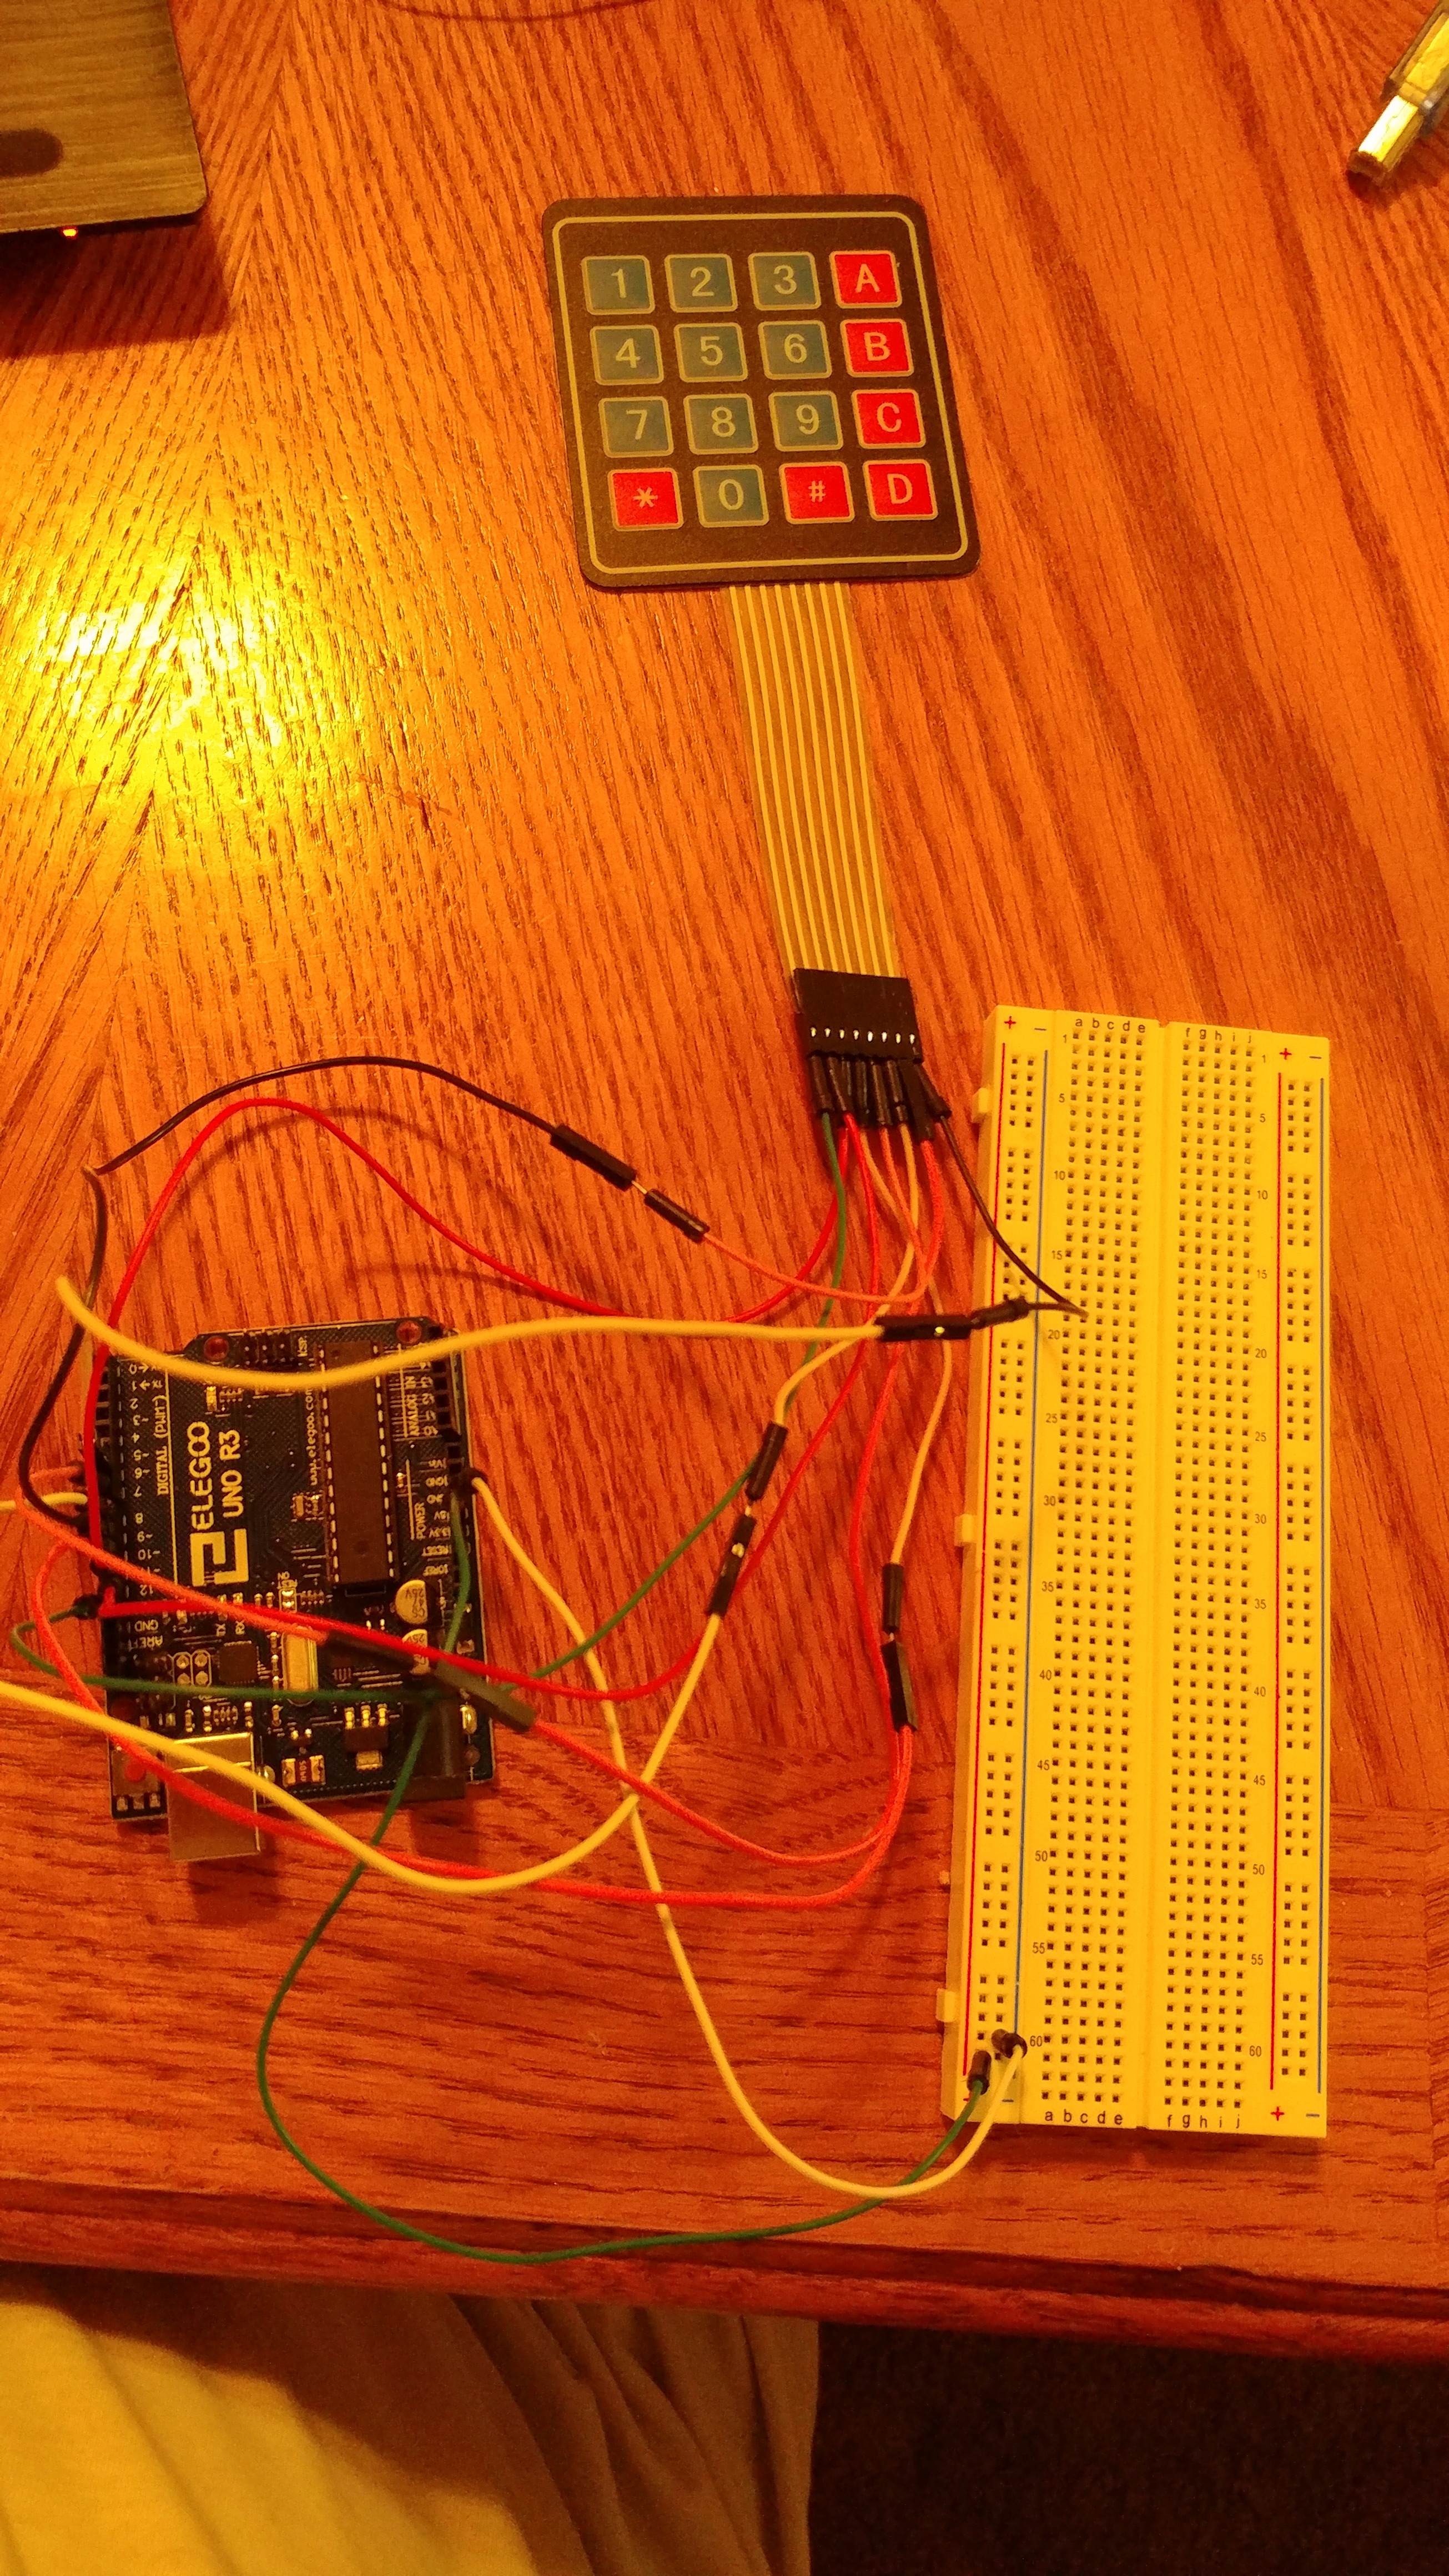
The very first think you need to do is to wire the power rail and grounding rail on your breadboard from your Arduino
- Connect the 5V pin to the power rail(red)
- Connect a Ground pin (GND) to the grounding rail(blue)
Now that the breadboard has power and is grounded, we can start wiring up our components.
Wiring the Keypad is easy but you need to take note of the pins on the keypad and arduino. It will come in handy when we turn our attention to our code.
Remember to start on the left when using your wires!
- First pin goes to 13
- Second pin goes to 12
- Third pin goes to 11
- Fourth pin goes to 10
- Fifth pin to 9
- Sixth Pin to 8
- Seventh Pin to 7
- Eighth Pin to 6
When wiring the keypad, remember to keep a digital pwm pin open. We will need it for the micro-servo
Before we get to the code, make sure that you have installed the Keypad Library. It can be found in your sketch, then sketch tab, include library. You won't be able to use the keypad without it.
Now lets turn to the code and make sure the keypad works and gives the attended values
Quick Notes: Make sure you have the if statement to check the keypad, otherwise it wont work. Also be carefuls of delays, they will mess with buttons being registered from the keypad
#include <Keypad.h>
const byte rows = 4; //four rows since the keypad is full
const byte columns = 4; //four columns, same as above
char buttons[rows][columns] = {
  {'1','2','3','A'},
  {'4','5','6','B'},
  {'7','8','9','C'},
  {'*','0','#','D'}
};
byte rowP[rows] = {13, 12, 11, 10}; //row pins of the keypad
byte columnsP[columns] = {9, 8, 7, 6}; //column pins of the keypadKeypad pad = Keypad( makeKeymap(buttons), rowP, columnsP, rows, columns ); //create keypad
void setup(){
   Serial.begin(9600);
}
void loop(){
char buttonPressed = pad.getKey(); //get the char from the keypad
if(buttonPressed) //show what button was pressed on the keypad
{
Serial.println(buttonPressed);
}
}Add the Micro Servo
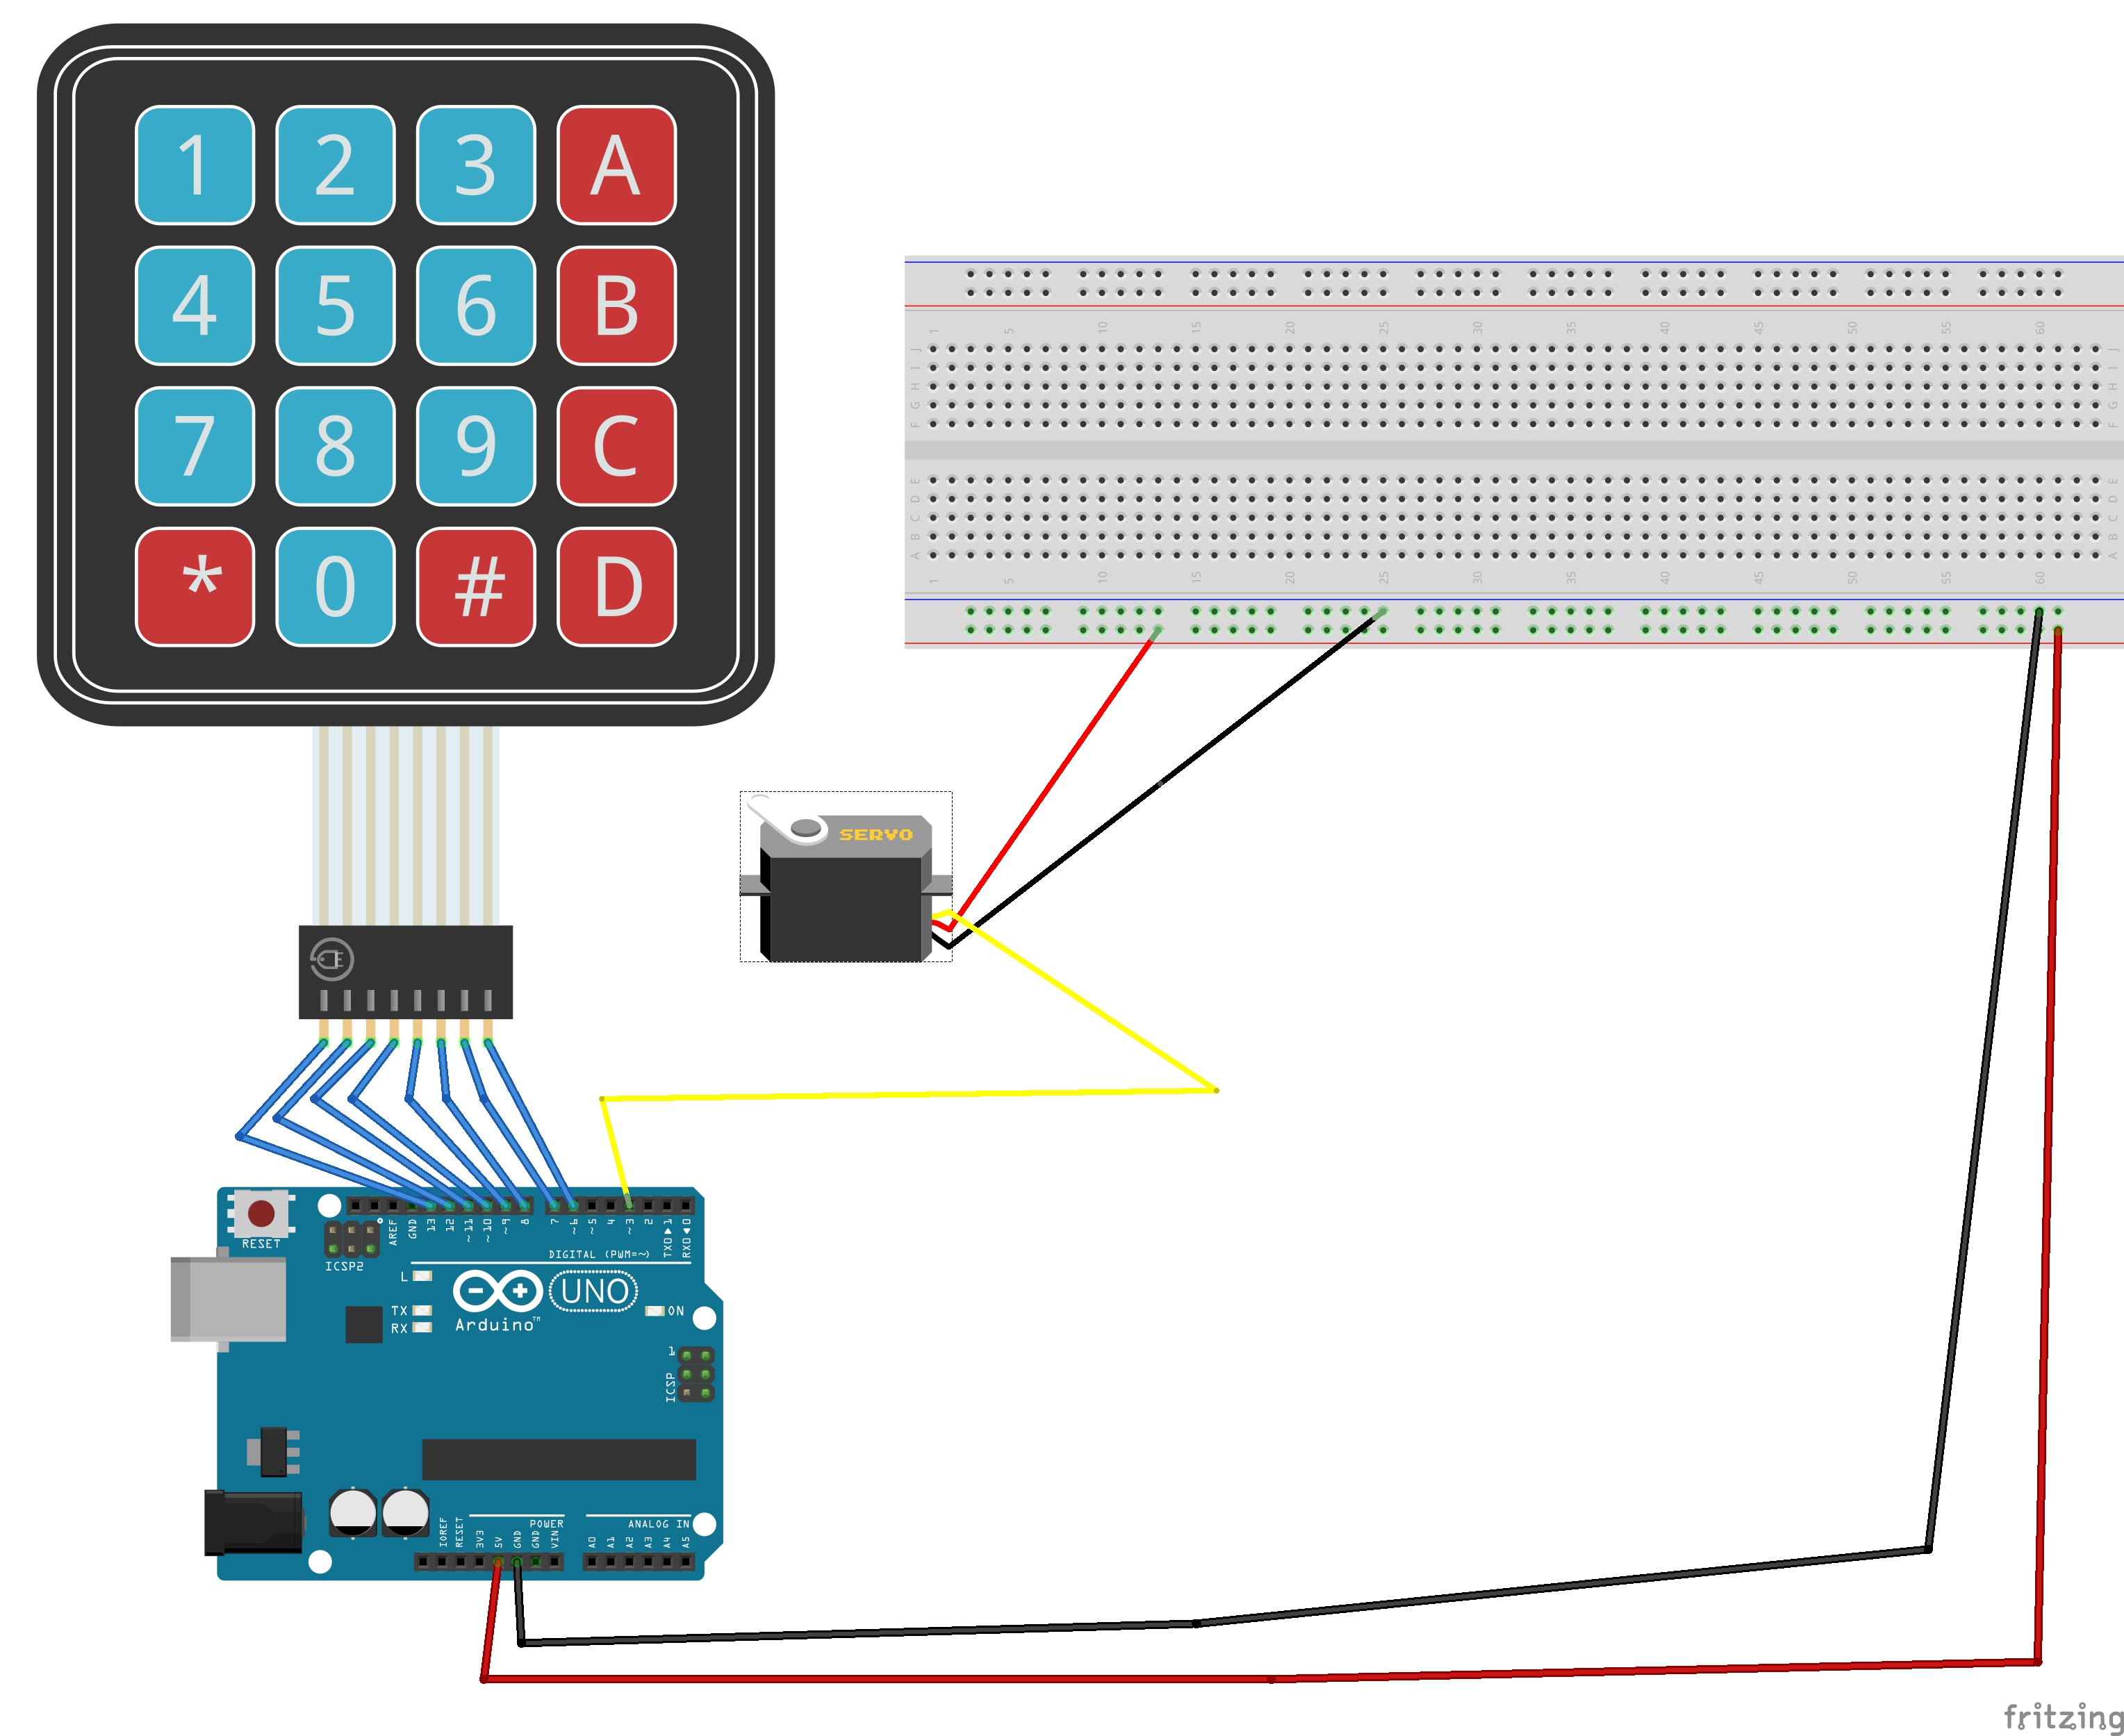
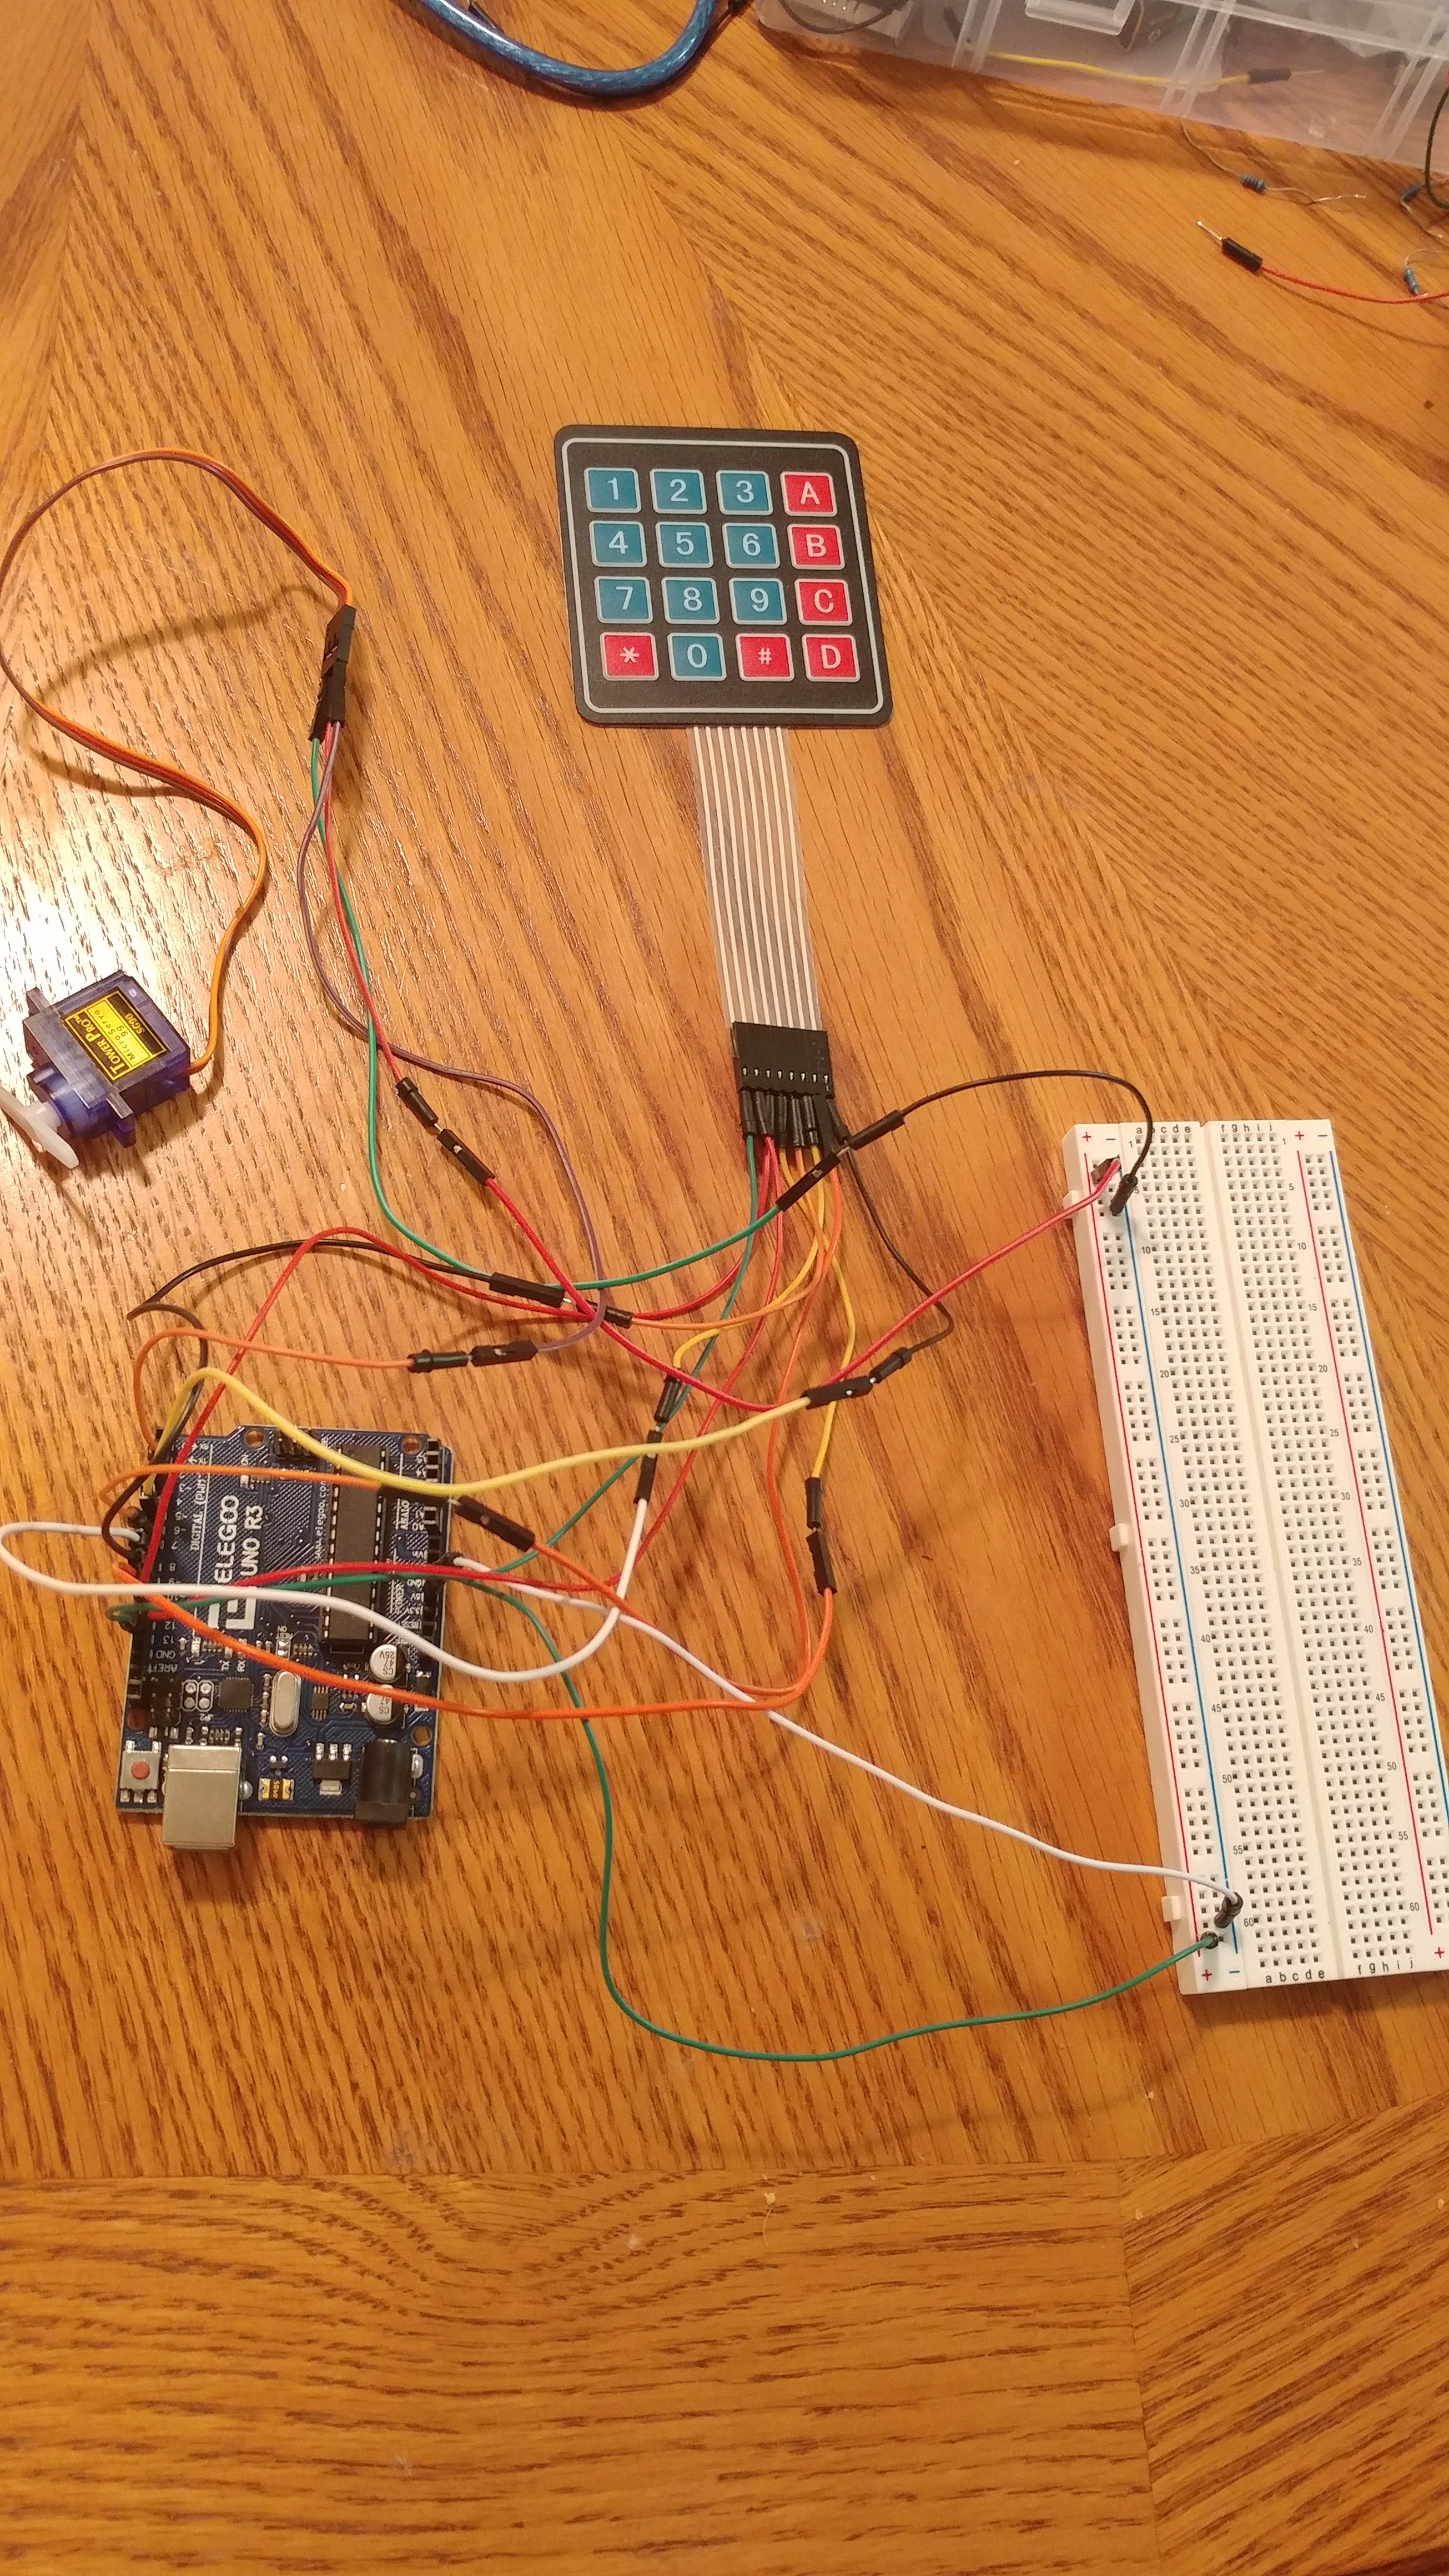
Now lets add the servo motor. This one is really easy to add to our current project since the micro server only has three wires.
- Brown wire goes to grounding rail on the breadboard
- Red goes to the Power rail
- Orange goes to Pin 3 on the Arduino. Remember the micro server has to have a PWM pin on the Arduino. This is due to the servo using TIMER2
Now lets just make sure that we wired the micro servo right and that it moves
#include <Keypad.h>
#include "Servo.h"
const byte rows = 4; //four rows since the keypad is full
const byte columns = 4; //four columns, same as above
char buttons[rows][columns] = {
  {'1','2','3','A'},
  {'4','5','6','B'},
  {'7','8','9','C'},
  {'*','0','#','D'}
};
byte rowP[rows] = {13, 12, 11, 10}; //row pins of the keypad
byte columnsP[columns] = {9, 8, 7, 6}; //column pins of the keypadKeypad pad = Keypad( makeKeymap(buttons), rowP, columnsP, rows, columns ); //create keypad
Servo currentServo;  // create servo object to control a servo
// twelve servo objects can be created on most boards
int pos = 0; // variable to store the servo position
void setup(){
   Serial.begin(9600);
   currentServo.attach(3);  // attaches the servo on pin 9 to the servo object
}
void loop(){
  char buttonPressed = pad.getKey();  //get the char from the keypad
  if(buttonPressed)                   //show what button was pressed on the keypad
  {
  Serial.println(buttonPressed);
  }
currentServo.write(95);
}
Modify Code to Use the Keypad on the Servo
Know we are going to modify our code so that when we press a particular button on the keypad, the servo moves to a particular position. A thing of importance first. The servo position for 0 was weird. Since I had a continuous rotation servo, whenever it got close to 0, the servo just started spinning. The number I put in the code was as low as i could go without that happening. Anyways, heres my final code:
#include <Keypad.h>
#include <Servo.h>
const byte rows = 4; //four rows since the keypad is full
const byte columns = 4; //four columns, same as above
char buttons[rows][columns] = {
  {'1','2','3','A'},
  {'4','5','6','B'},
  {'7','8','9','C'},
  {'*','0','#','D'}
};
byte rowP[rows] = {13, 12, 11, 10}; //row pins of the keypad
byte columnsP[columns] = {9, 8, 7, 6}; //column pins of the keypadKeypad pad = Keypad( makeKeymap(buttons), rowP, columnsP, rows, columns ); //create keypad
Servo myServo; //
void setup(){
   Serial.begin(9600);
   myServo.attach(5);  // attaches the servo on pin 9 to the servo object
}
void loop(){
char key = pad.getKey(); //get the char from the keypad
if(key == '0')
{
myServo.write(11);
Serial.println("0");
delay(15);
}
if(key == '1')
{
myServo.write(12);
Serial.println("1");
delay(15);
}
if(key == '2')
{
myServo.write(24);
Serial.println("2");
delay(15);
}
if(key == '3')
{
myServo.write(36);
Serial.println("3");
delay(15);
} if(key == '4')
{
myServo.write(48);
Serial.println("4");
delay(15);
} if(key == '5')
{
myServo.write(60);
Serial.println("5");
delay(15);
} if(key == '6')
{
myServo.write(72);
Serial.println("6");
delay(15);
} if(key == '7')
{
myServo.write(84);
Serial.println("7");
delay(15);
} if(key == '8')
{
myServo.write(96);
Serial.println("8");
delay(15);
} if(key == '9')
{
myServo.write(108);
Serial.println("9");
delay(15);
} if(key == '*')
{
myServo.write(120);
Serial.println("*");
delay(15);
} if(key == '#')
{
myServo.write(132);
Serial.println("#");
delay(15);
} if(key == 'A')
{
myServo.write(146);
Serial.println("A");
delay(15);
} if(key == 'B')
{
myServo.write(158);
Serial.println("B");
delay(15);
} if(key == 'C')
{
myServo.write(170);
Serial.println("C");
delay(15);
} if(key == 'D')
{
myServo.write(180);
Serial.println("D");
delay(15);
}
}