Bluetooth - Serial Port Redirection Using Matlab/simulink
by hamdanoid in Circuits > Tools
22119 Views, 61 Favorites, 0 Comments
Bluetooth - Serial Port Redirection Using Matlab/simulink
Ooh ...!!
I have a project must done within 2 months ,
my project Requires the " HC-05 " Serial Bluetooth module , which i don't have , So I was thinking of using the built-in Bluetooth in my laptop.
so I tried many programs without any results.
finally: I succeeded by using the simulink.
to simplify this idea , I will explain it in a small example.
Android Mobile With Arduino Example

Bluetooth-based Android Controller for Arduino ,
REQUIREMENTS
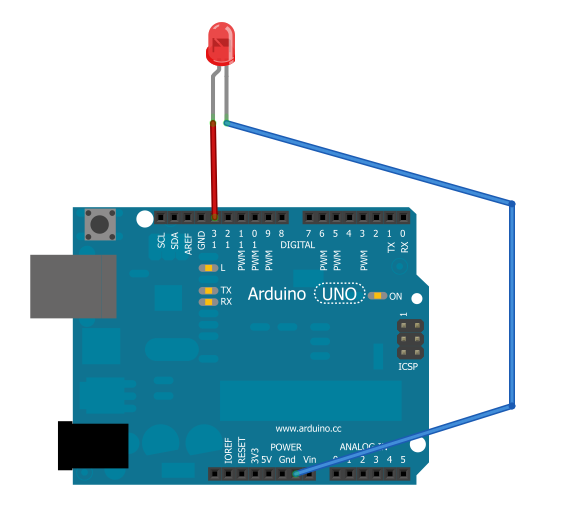
* Breadboard wiring and electronics skills.
* Arduno Uno.
* Laptop include Bluetooth or USB Bluetooth adapter .
* Matlab program on PC.
* Android Bluetooth terminal like:
- TerminalBT : https://play.google.com/store/apps/details?id=main.terminalBT
Preparation of Simulink
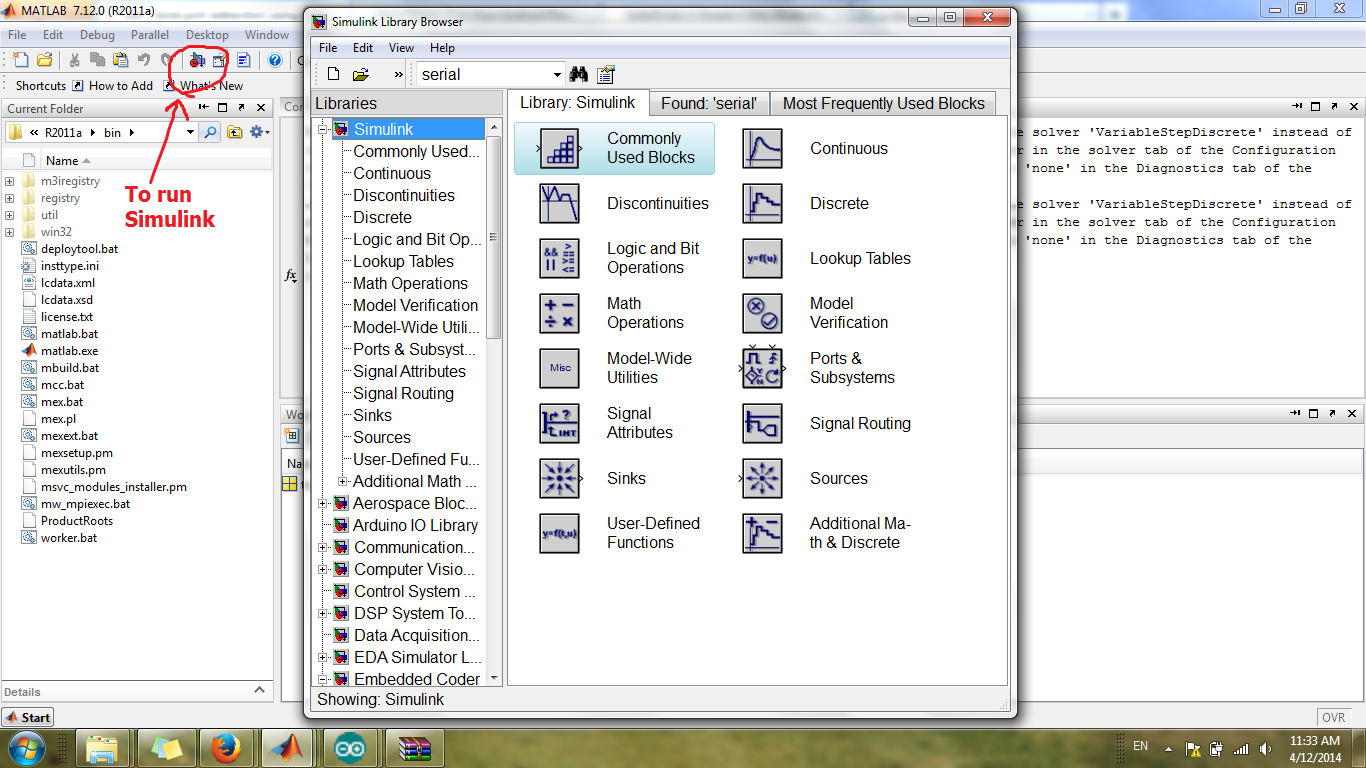
Open MATLAB program and run the simulink.
- Make a new model
- select " Instrument Control Toolbox " from Library / Or search for "Serial"
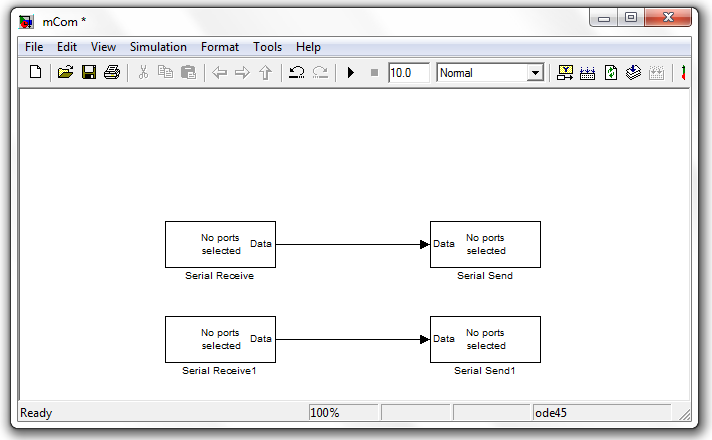
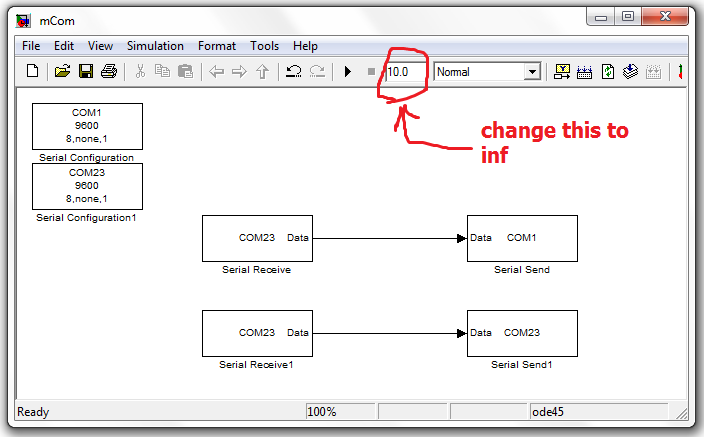
- drag and drop the blocks: serial send and serial receive , like in the photo.
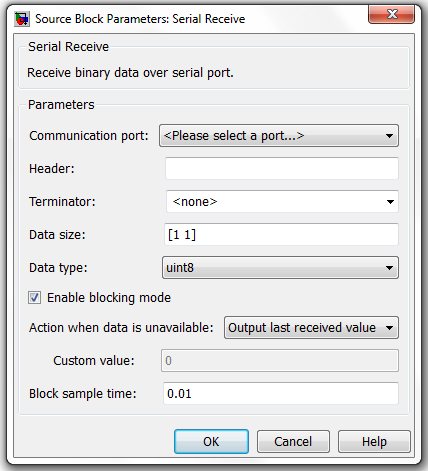
- Double click on the block to configure the source block parameters and select ports for Arduino and Bluetooth
- Save it
Preparation the Arduino
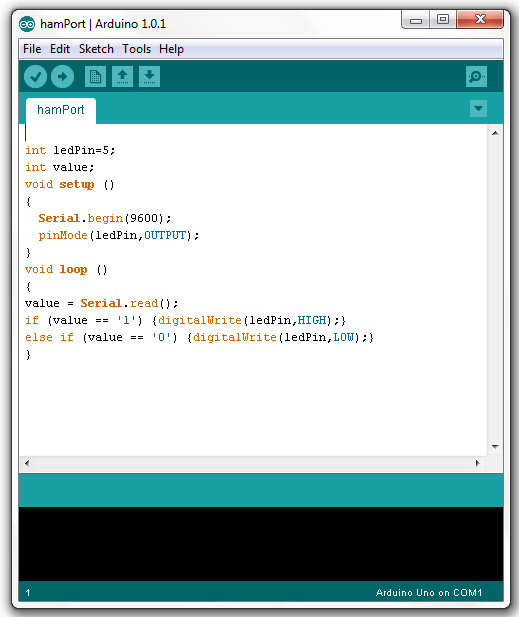
This is a small code to test the example:_
int ledPin=13;
int value;
void setup ()
{
Serial.begin(9600);
pinMode(ledPin,OUTPUT); }
void loop ()
{ value = Serial.read(); if (value == '1') {digitalWrite(ledPin,HIGH);}
else if (value == '0') {digitalWrite(ledPin,LOW);}
}
--------------------------------------------------------------------------
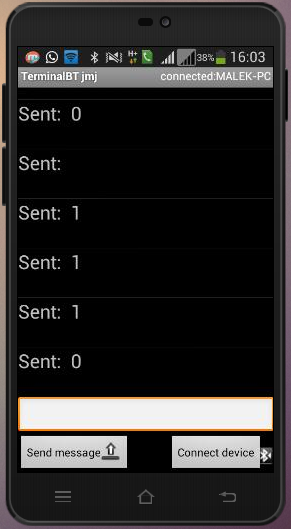
When you send number " 1 " from your serial terminal , the Pin 13 will be 1 (5V) so the LED will turns ON.
and when you send number " 0 " , the Pin 13 will be 0 (0V) so the LED will turns OFF.
Test..!

Now
Close all programs and disconnect the Arduino (to avoid some problems).
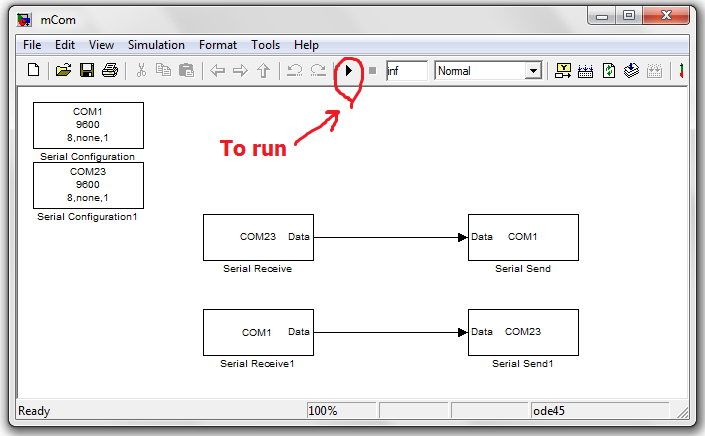
* Re connect the Arduino with PC and run MATLAB / simulink.
* Open the saved simulink file and press the play button.
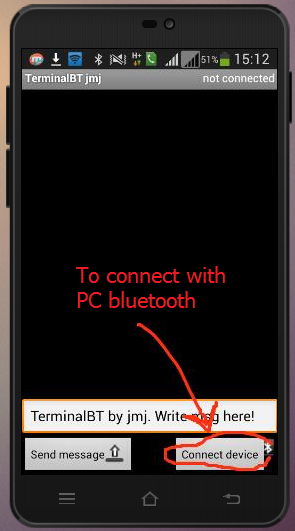
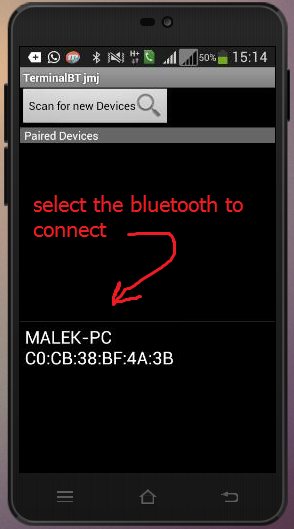
Run Terminal App on a smart phone and connect it with PC Bluetooth.
send "1" and "0" to make sure that the connection works well
Thanks,
Malek Hamdan