Separating Colors: DIY Instructables Robot Shirt
by watchmeflyy in Design > Art
3496 Views, 81 Favorites, 0 Comments
Separating Colors: DIY Instructables Robot Shirt
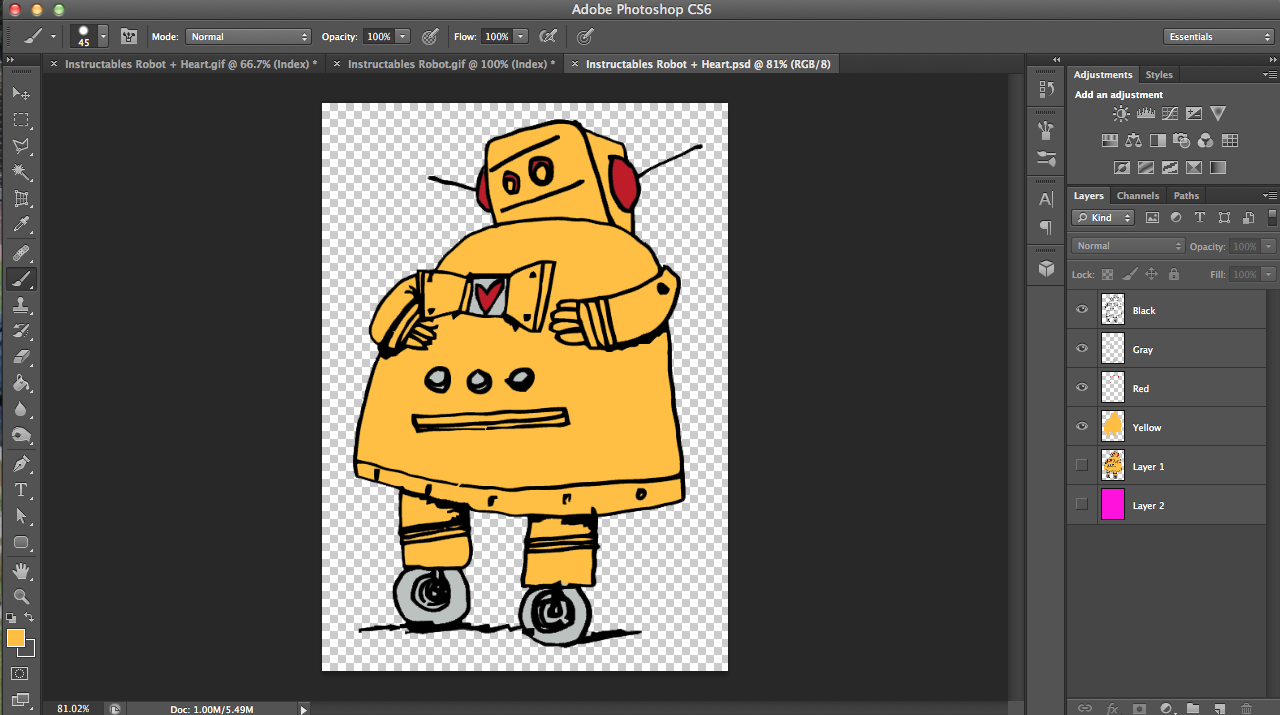
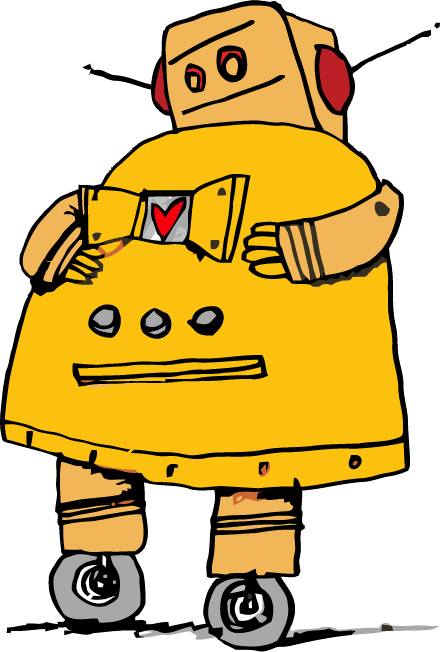
Anyway, I've been cutting out designs on iron-on paper to test out my photoshop and Cricut machine skills and wanted another design to try out. What better design to use (and to celebrate this account's anniversary) than the instructables robot? :3
This tutorial goes through steps to isolate colors using photoshop because I need virtual images for Cricut design space, the software associated with my Cricut explore. Alternatively you could use this technique for screen printing, isolating colors to cut into stencils for each color.
You can also go the low tech way (not trying to discredit my way though...); just trace the shapes onto different pieces of paper, cut along the lines, and then use them as stencils to apply fabric paint or fabric markers.
If you've ever wanted an Instructables robot on a tank top, sweatshirt, or anything that isn't a shirt that you can win from a contest, here's your chance.
Note: I haven't actually cut out and ironed the pieces onto clothes yet; I'm at university and my Cricut machine is at home. I'll post pictures once I've finished though!
Materials
- Adobe Photoshop or similar software to isolate colors in the image
- screen printing materials (fabric paints, etc.) or iron-on transfer paper and Cricut machine
- apparel that you want the robot on (in my case, tank top)
Getting Rid of the Background

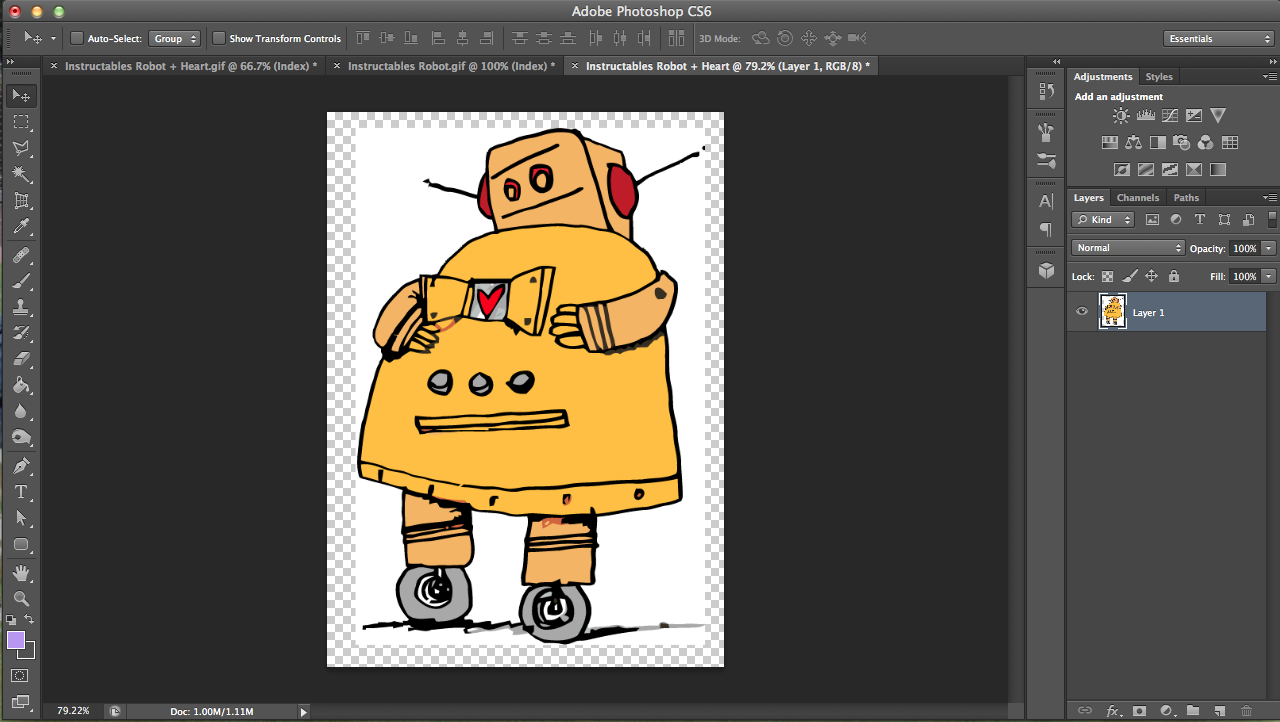
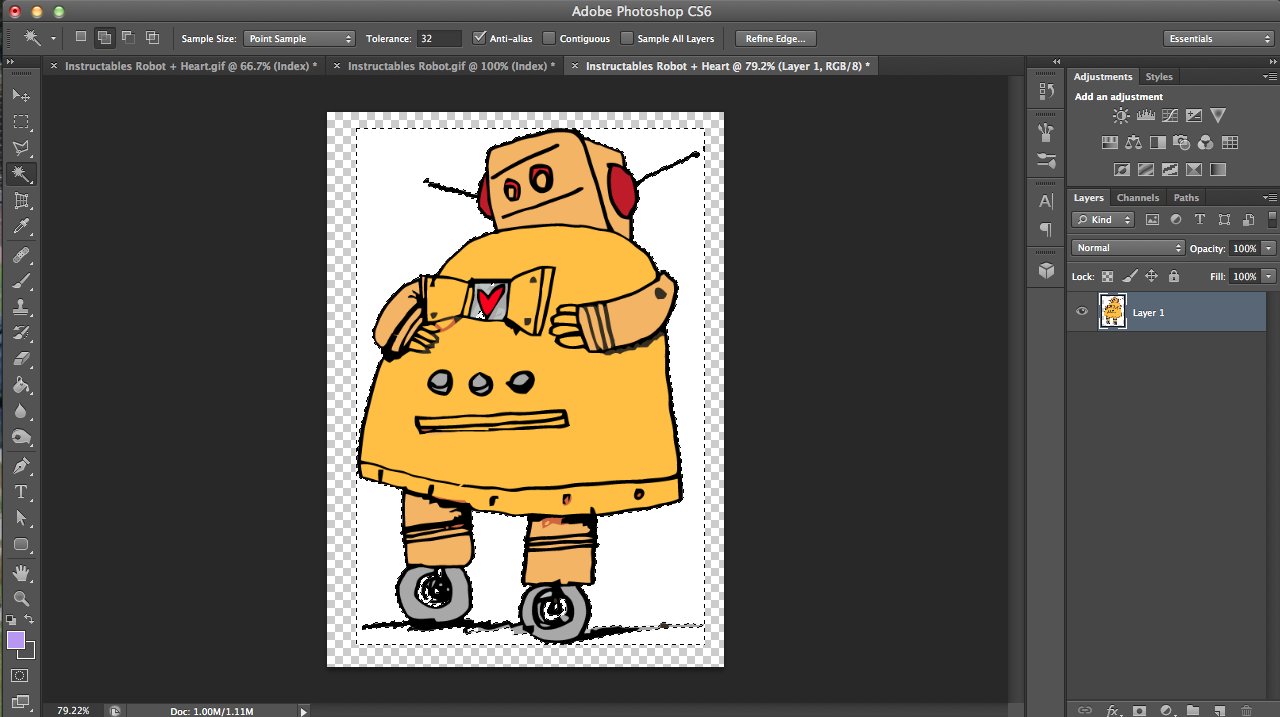
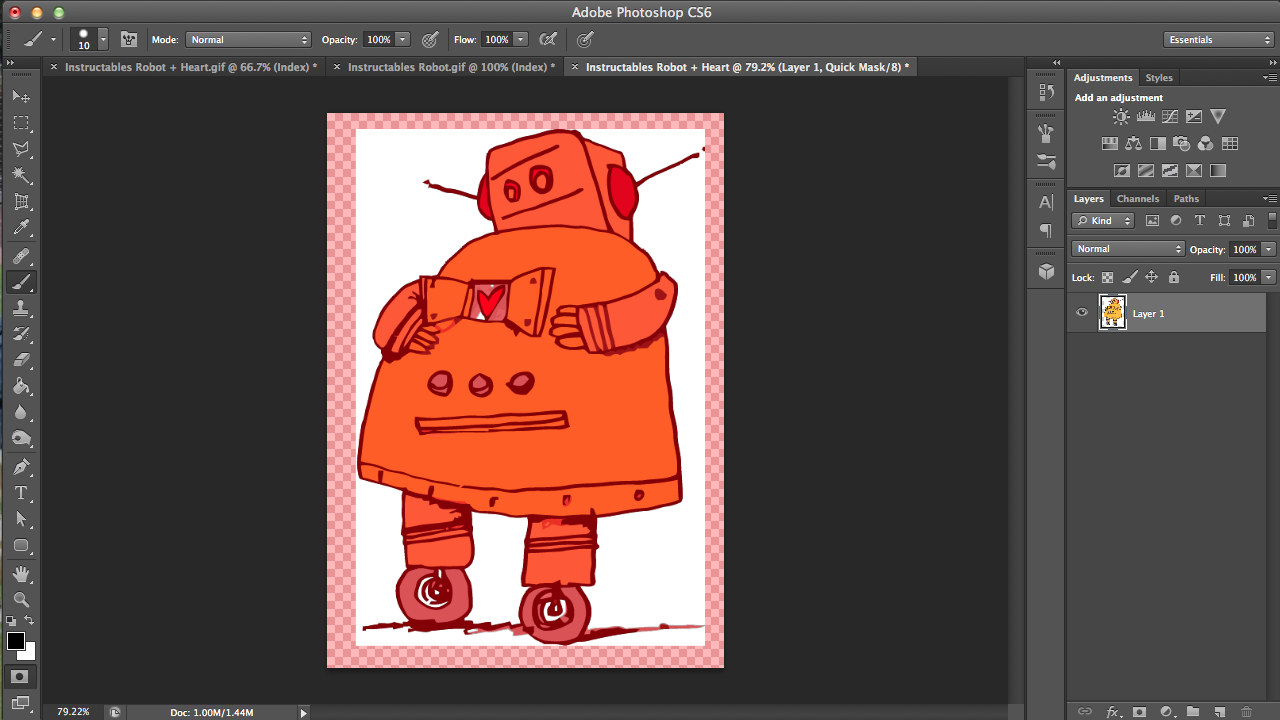
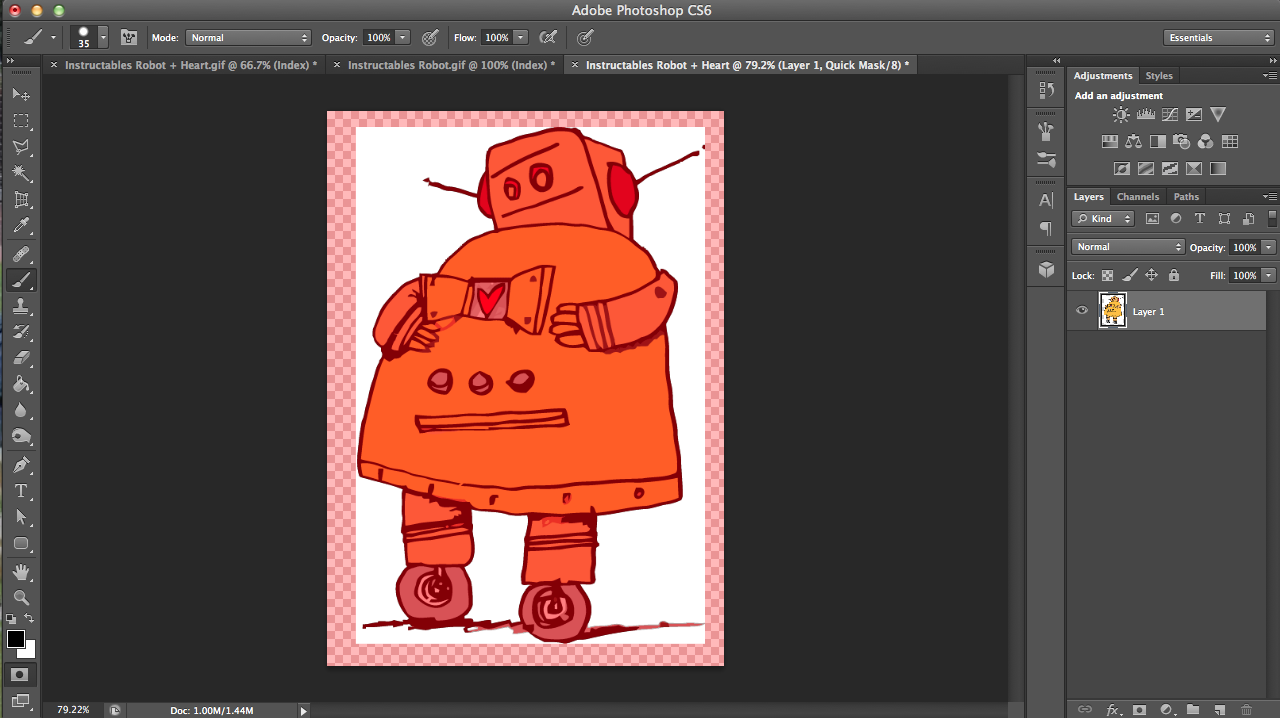
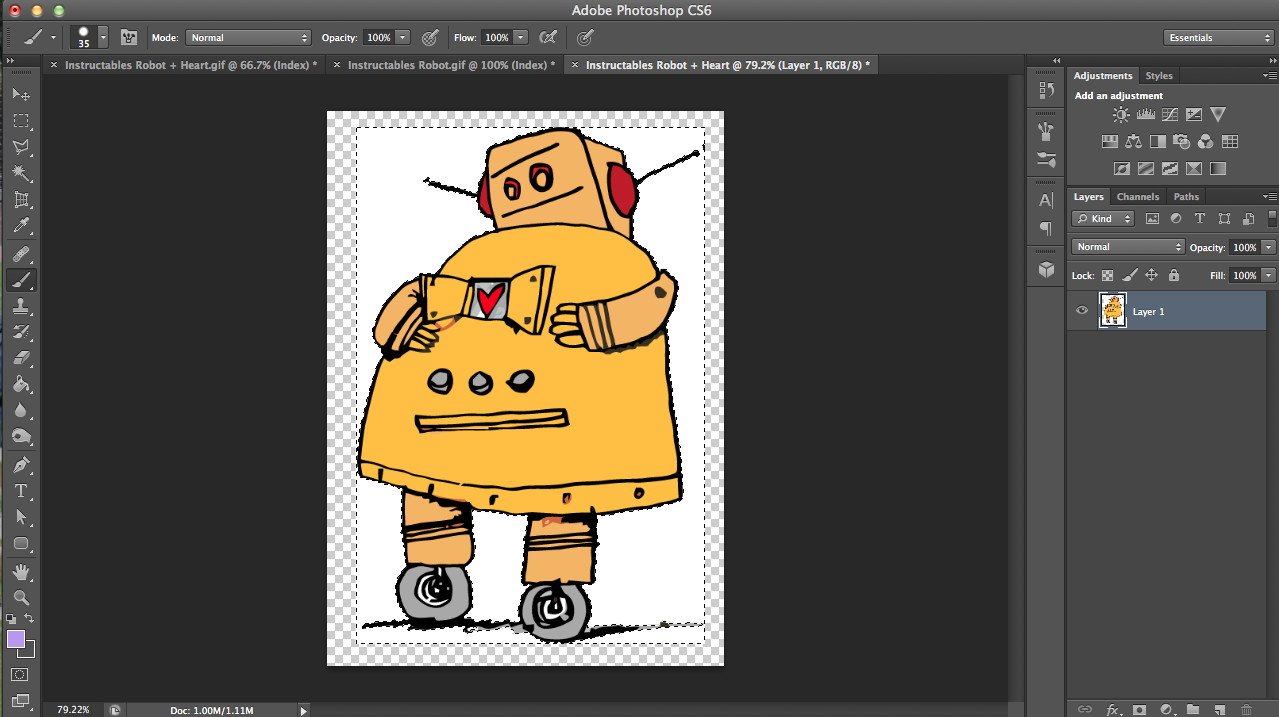
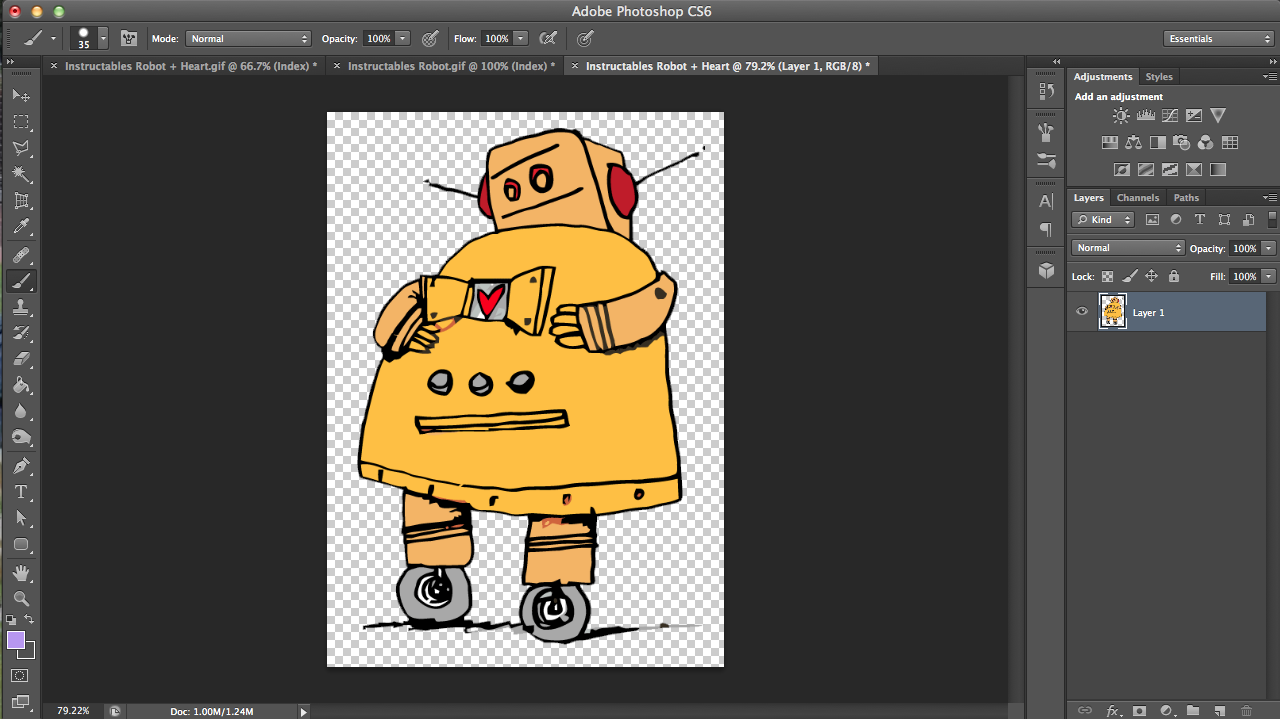
Click the pictures above for step-by-step instructions; the words typed below are just copied from those notes. The pictures are more accurate though, so I'd suggest following the pictures' notes instead.
- Open up the image on photoshop and make sure that your canvas size is larger than the image.
- Use the magic wand tool to select all the white background of this image (just click any white area). You'll notice that some white in the wheels is selected too; we don't want to get rid of in though so...
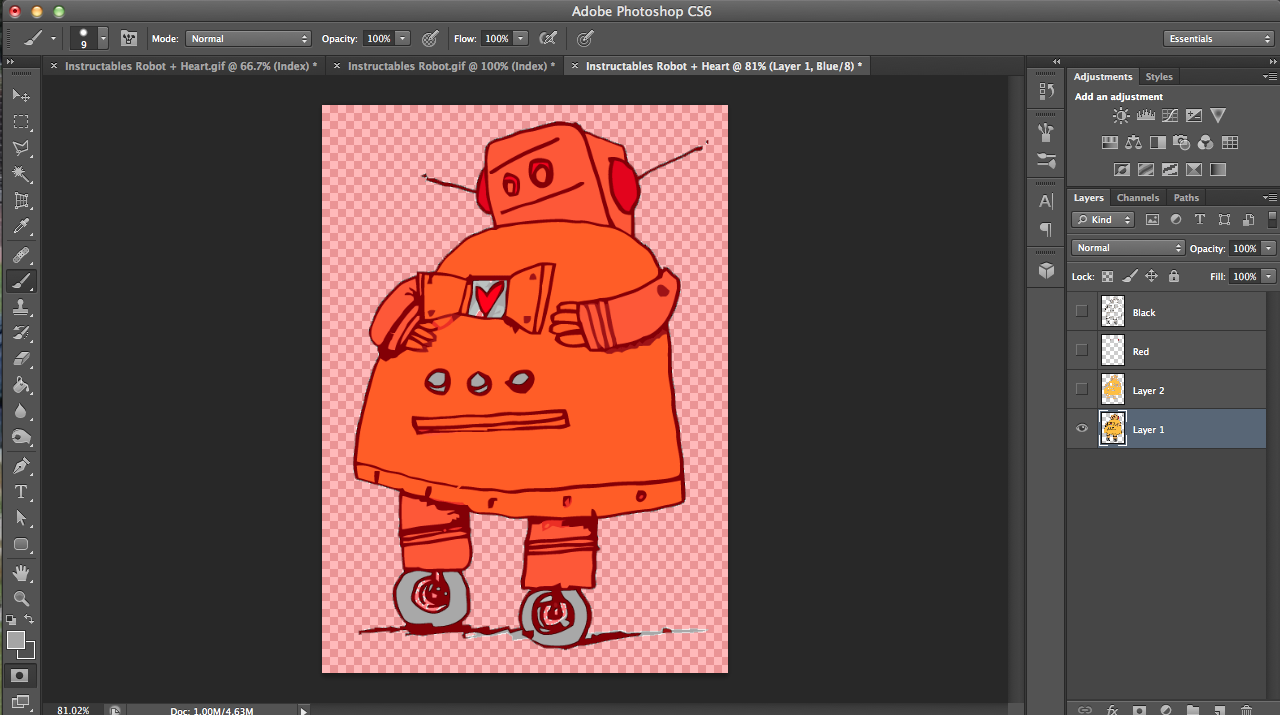
- Click the quick mask button and then select the brush tool.
- Making sure that the foreground color is black, color in the wheels. There's also a part near the heart that you should color in.
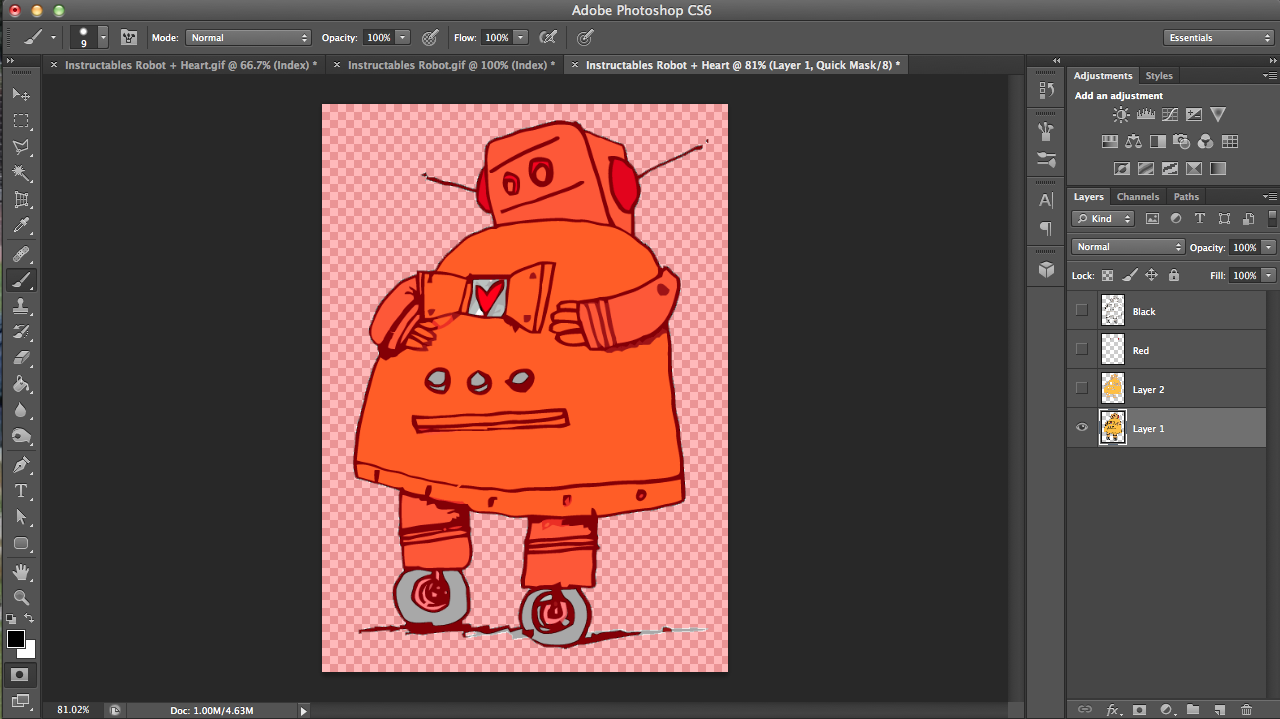
- As you color in, you'll notice that your brush won't color in black; it'll just turn red, meaning that it will be unselected.
- Click the quick mask button again to exit, and now nothing inside the robot should be selected.
- Press backspace or delete on your keyboard to get rid of the background.
Isolating Colors
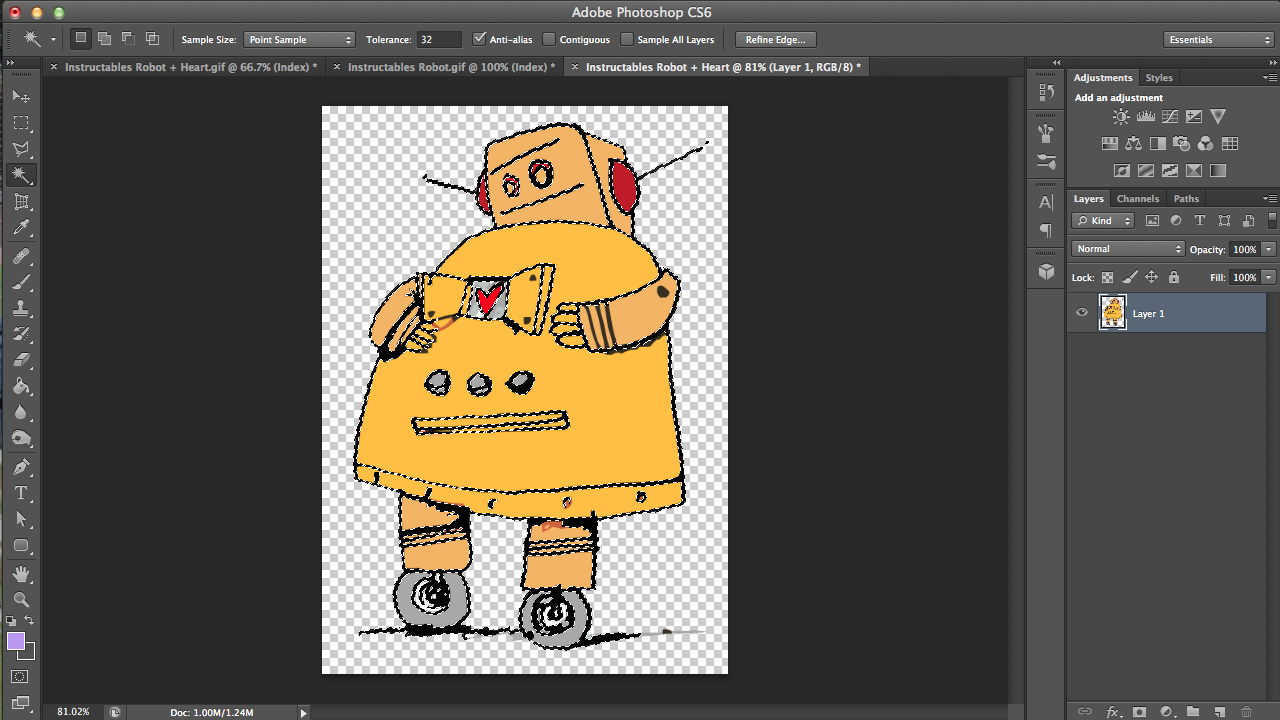
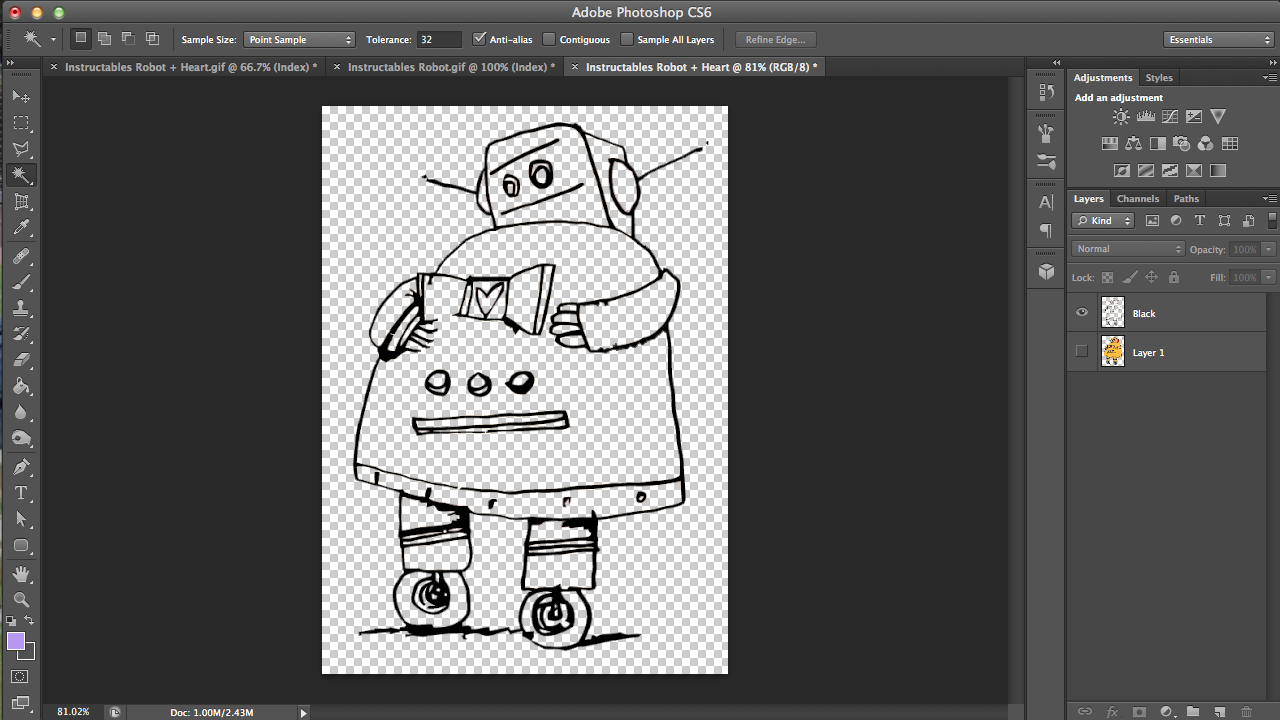
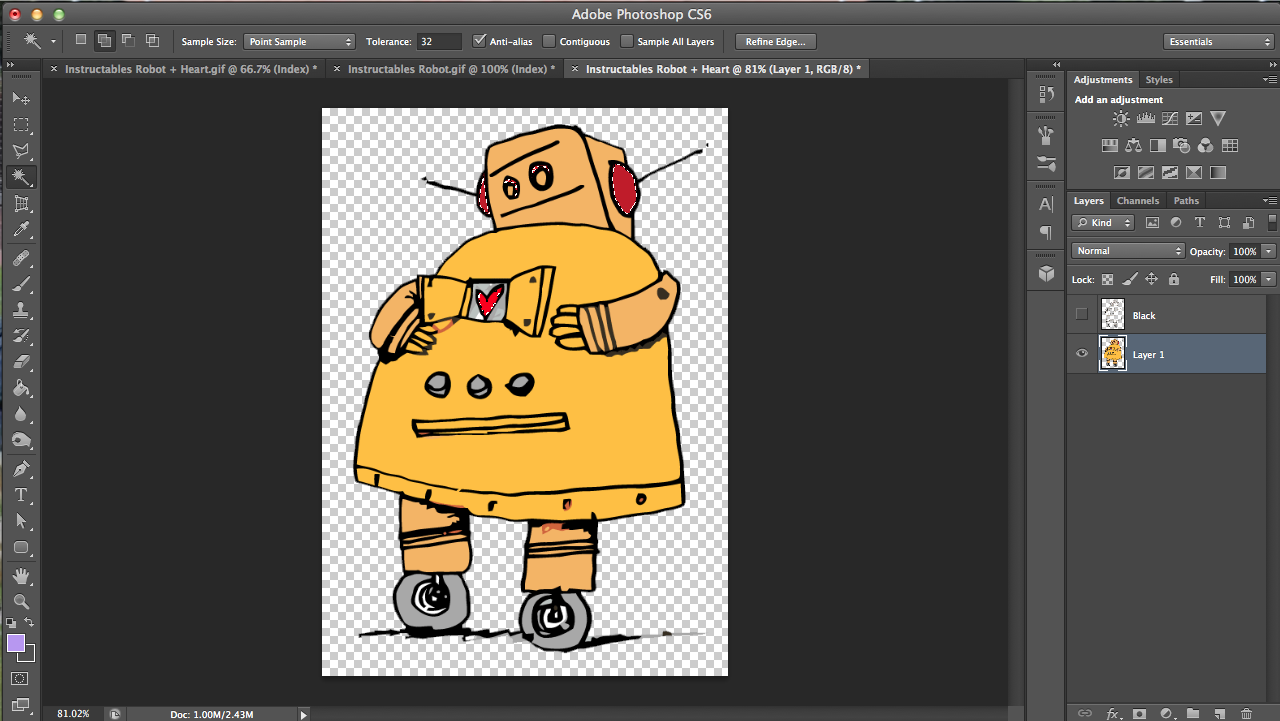
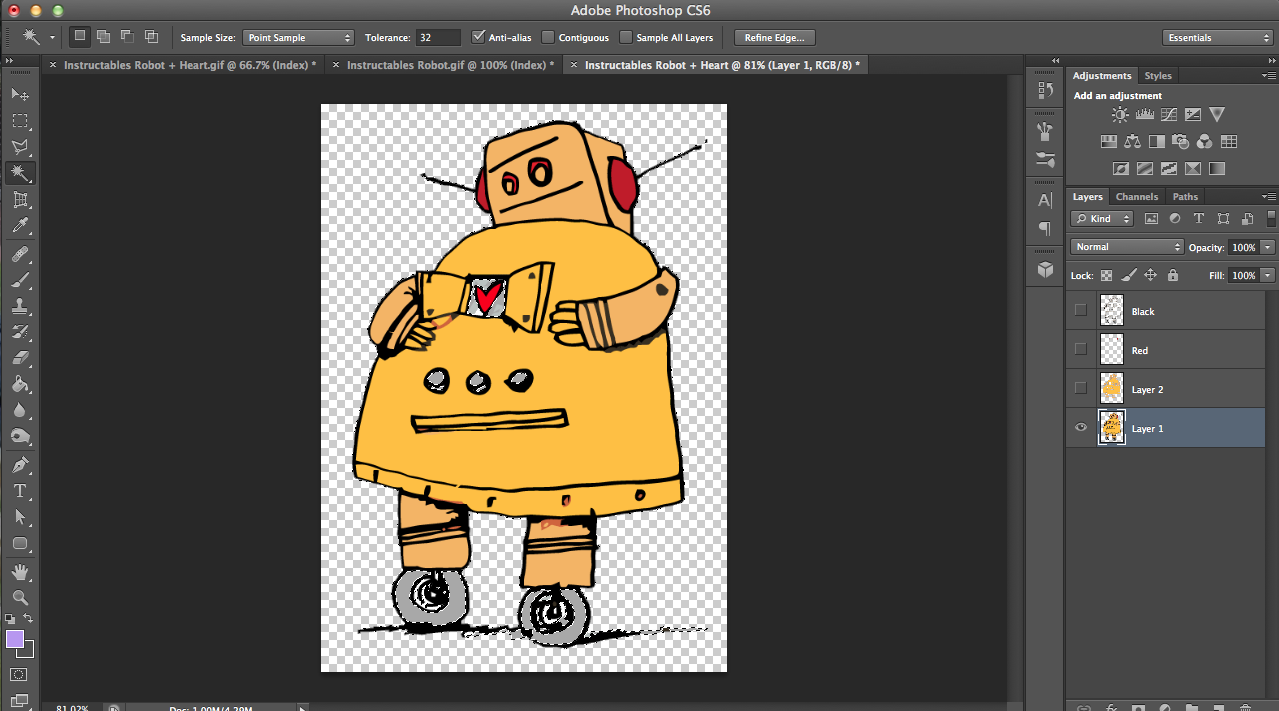
- With your magic wand selected, click any black part of the robot to select the black lines.
- Click the new layer button here and then rename the new layer "black." Copy and then paste the black lines into the layer you named "black."
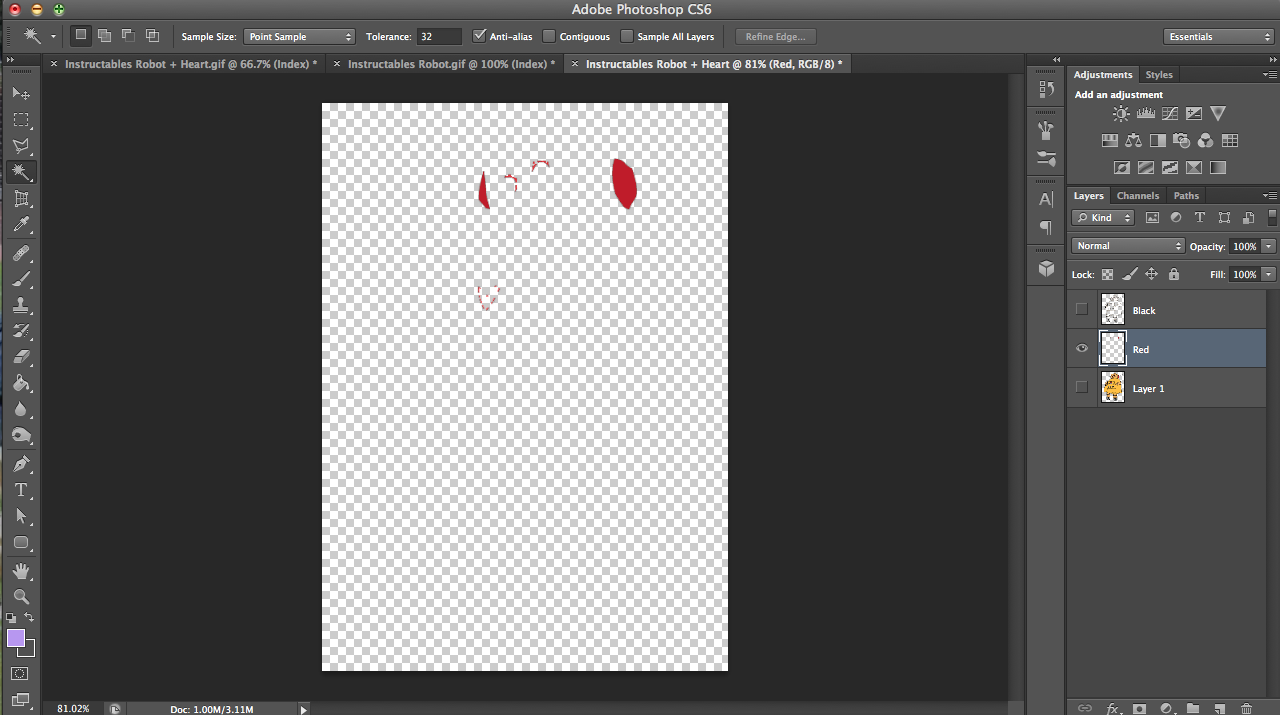
- With your "layer 1" and magic wand selected, click any of the red parts to select all red areas.
- Create another layer, renaming it "red." Copy and then paste the selected red areas into the new red layer.
- Repeat for the yellow areas. For the yellow, you'll have to click both the body shade of yellow AND (hold down shift while clicking) the yellow of the head (b/c if you look closely, they're different shades).
- For gray, if you click on gray (with magic wand) you'll notice that there's a small white section near the heart that you actually do want to be gray also (well, at least I do; I don't want to use white iron-on..). So...
- Click the quick mask button and this time make sure that white is your foreground color, not black.
- That little white dot near the heart is tinted red meaning it's unselected), but once you use your brush to color it white, it'll be white (so now it's selected).
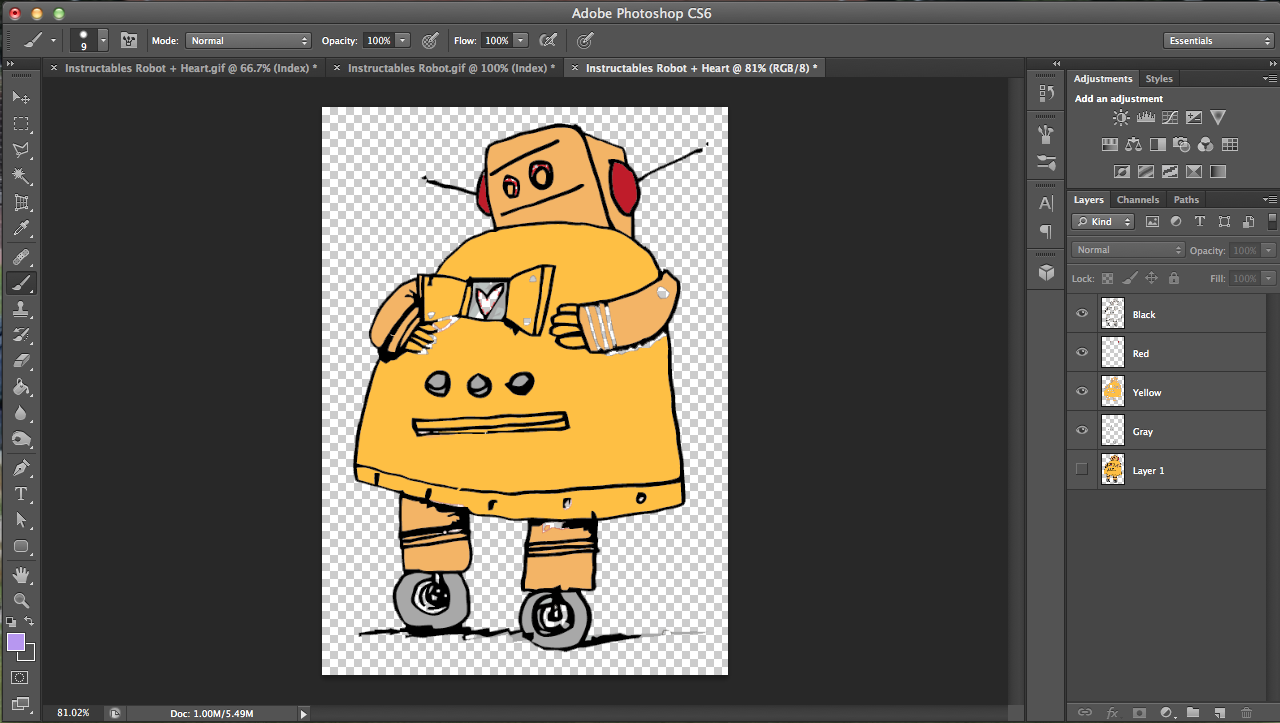
- Once you've isolated all your colors, make the original layer invisible and all other colors visible to see your progress thus far. You'll notice that some parts need fixing.
Selecting Pixels and Filing Them
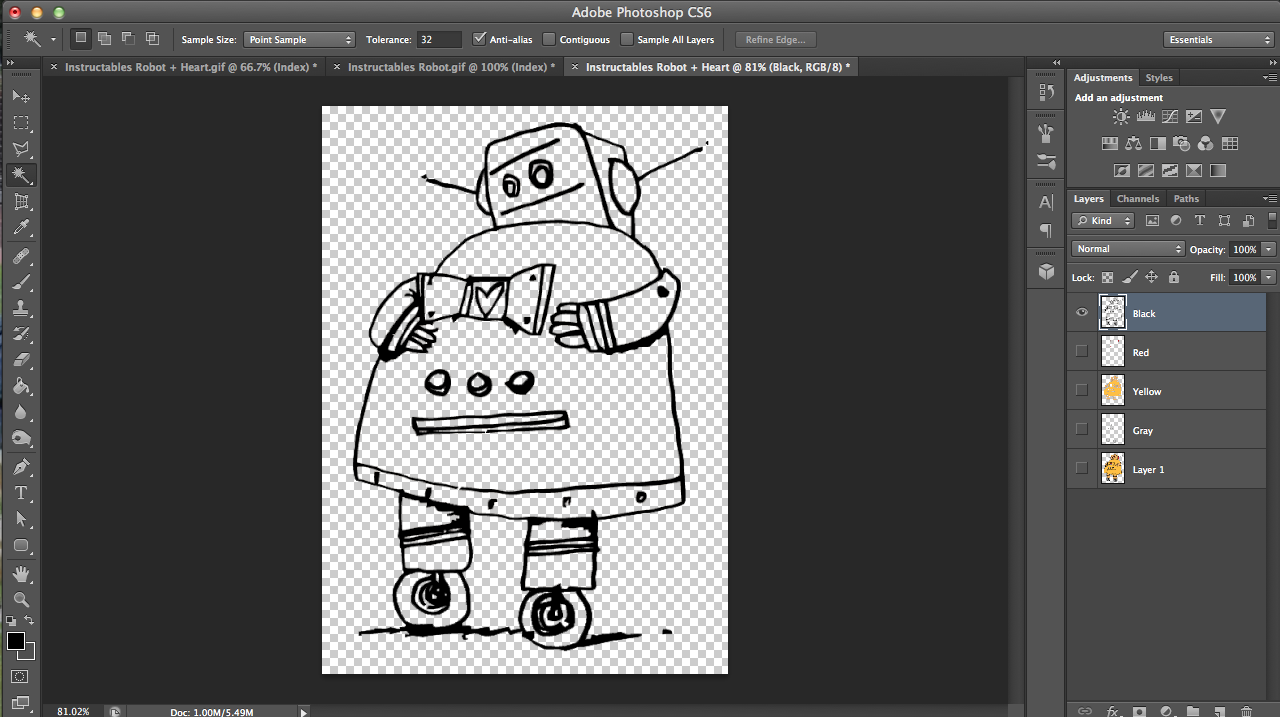
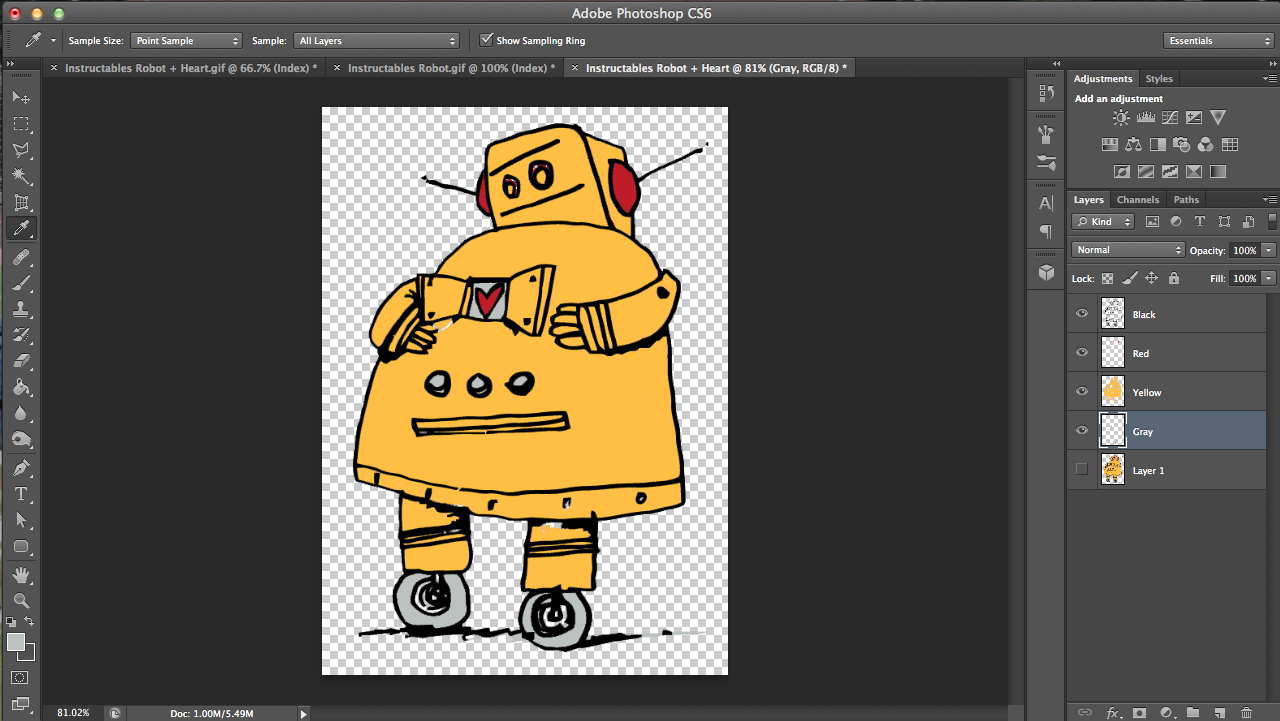
- I don't have a picture for this, but you'll notice that the previous robot picture was missing black lines at the arms. That's because those lines are dark gray, not black, and thus the magic wand didn't pick it up. Redo your black layer, making sure that this time the lines are also selected. Delete your black layer, use the magic wand to select any black part, and then hold shift and click the dark gray lines at the sleeves to select both types of black/gray before isolating them as like before.
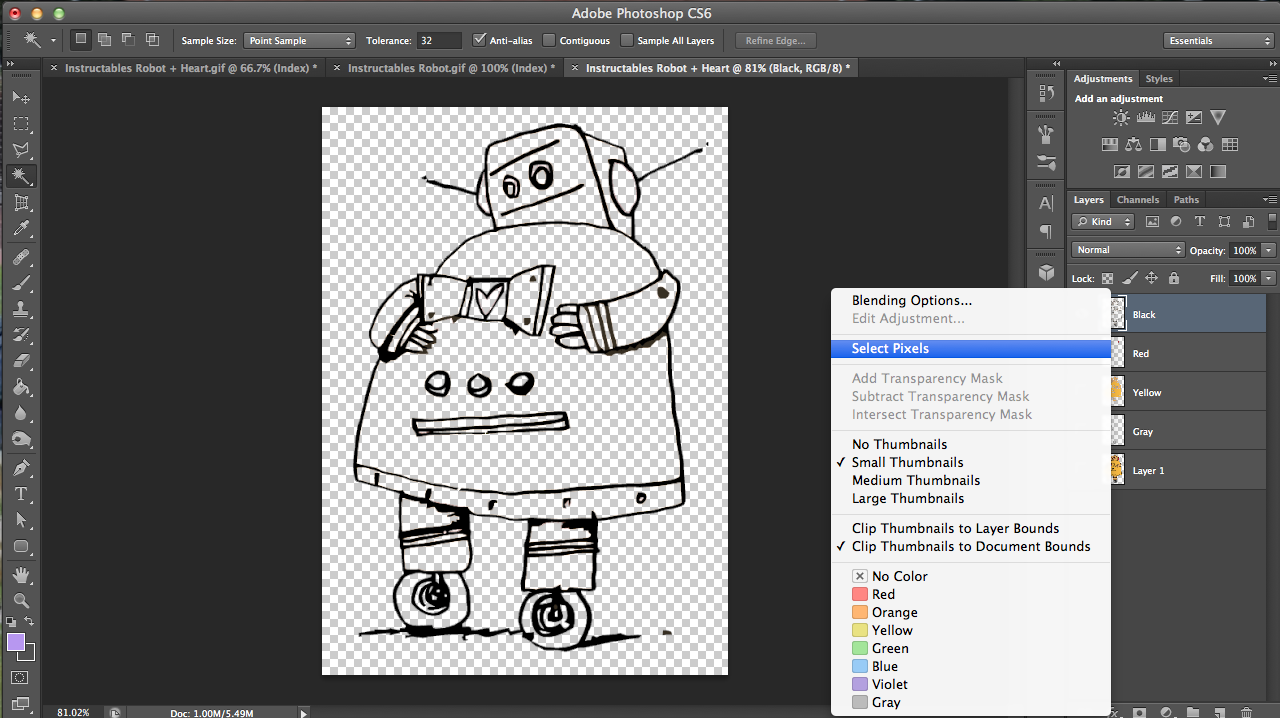
- With only the black layer visible, right click the black layer and click "select pixels."
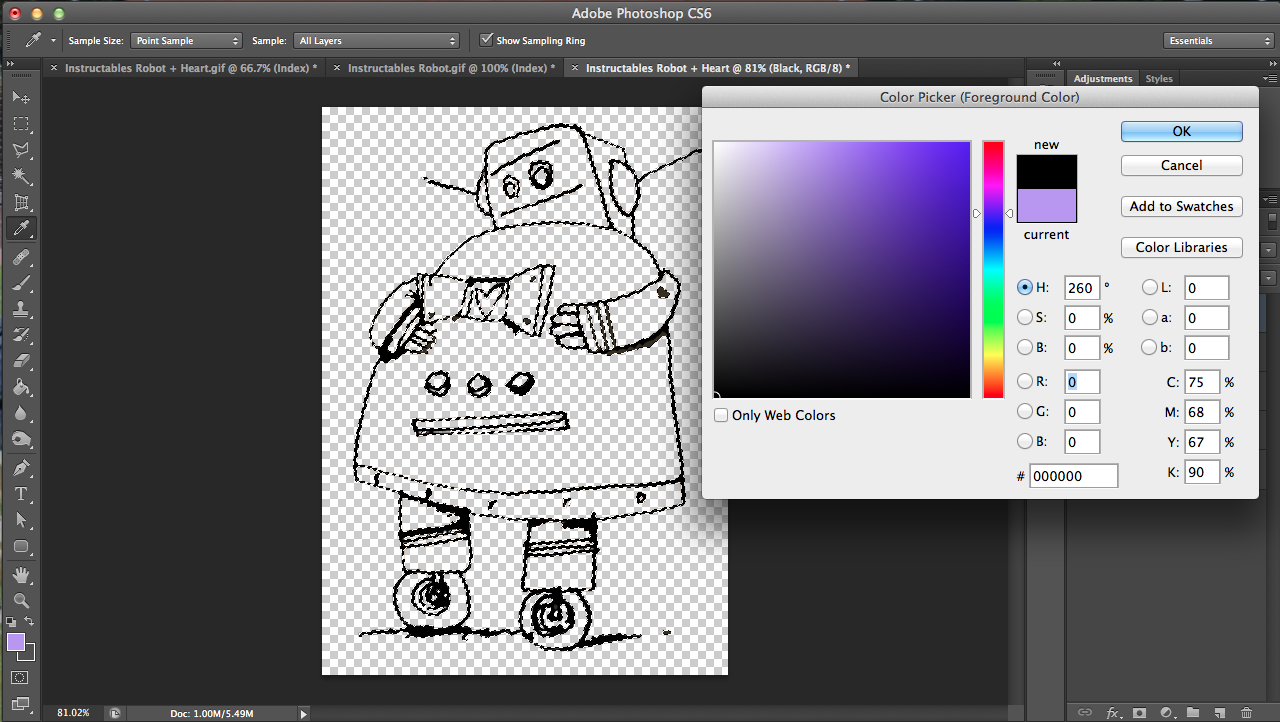
- Click on your foreground color and change it to black (click the foreground color and the drag the circle to the lower left corner before pressing "OK"). This ensures that all of the lines are a single, solid black.
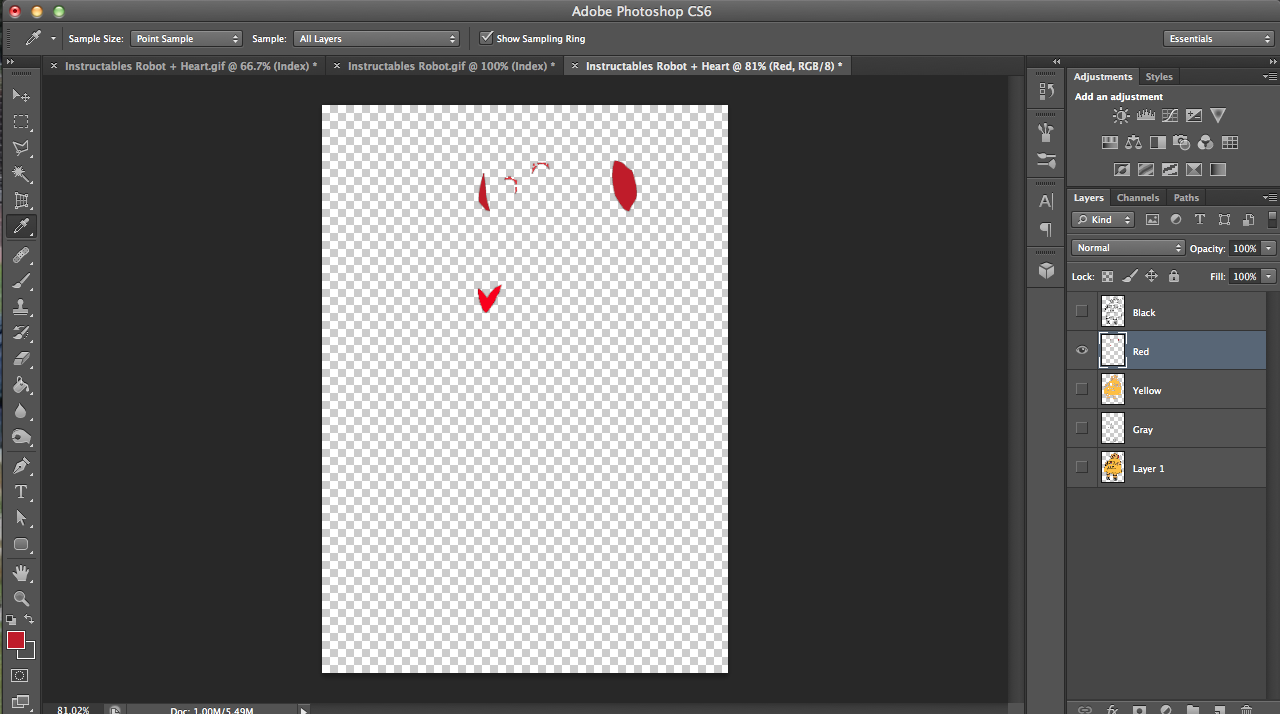
- If you remember, the robot picture I showed earlier was missing the red heart. Redo your red layer, making sure that this time the red heart is also selected. I didn't notice that the ear pieces and the heart were different shades of red, so delete your red layer, use the magic wand to select the ears, and then hold shift and click the red heart to select both types of red before isolating it as like before.
- Use the eyedropper tool to select the shade of red of the ears as your foreground color. Then, like you did for the black areas, fill the red areas with that solid red for continuity.
- Repeat for yellow and gray.
Using an Atrociously Colored Layer to Fix Your Colors
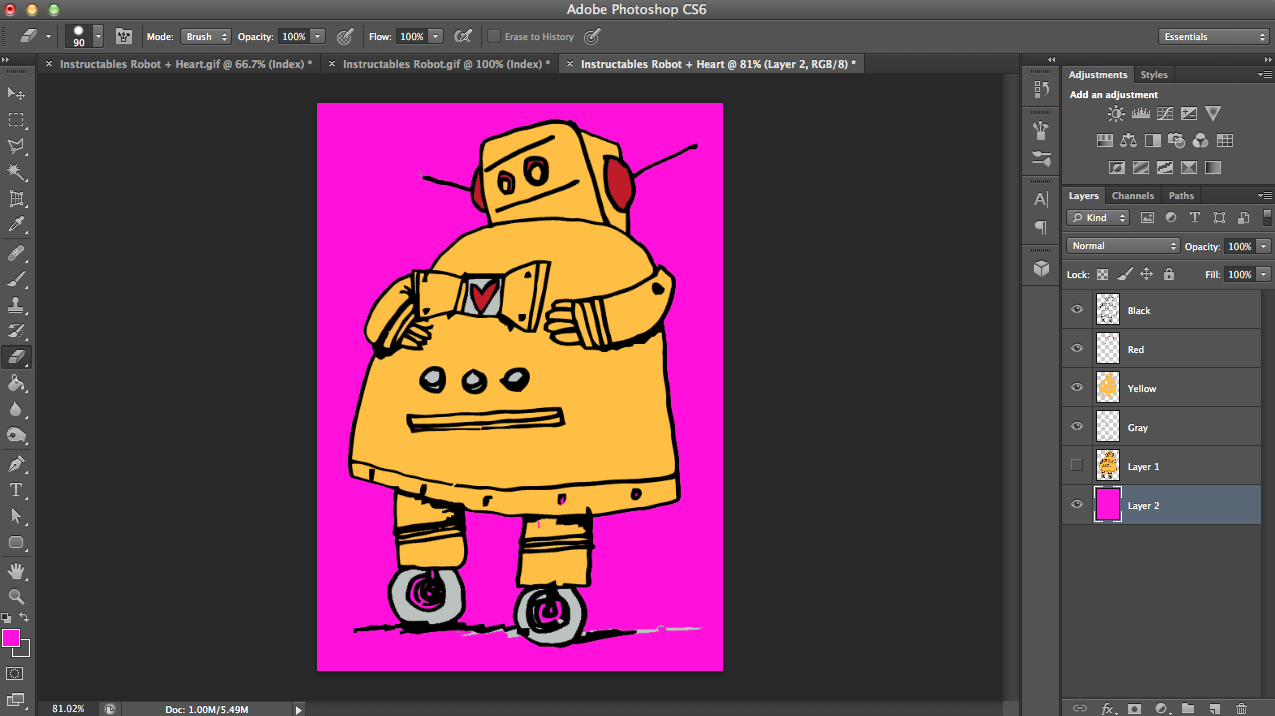
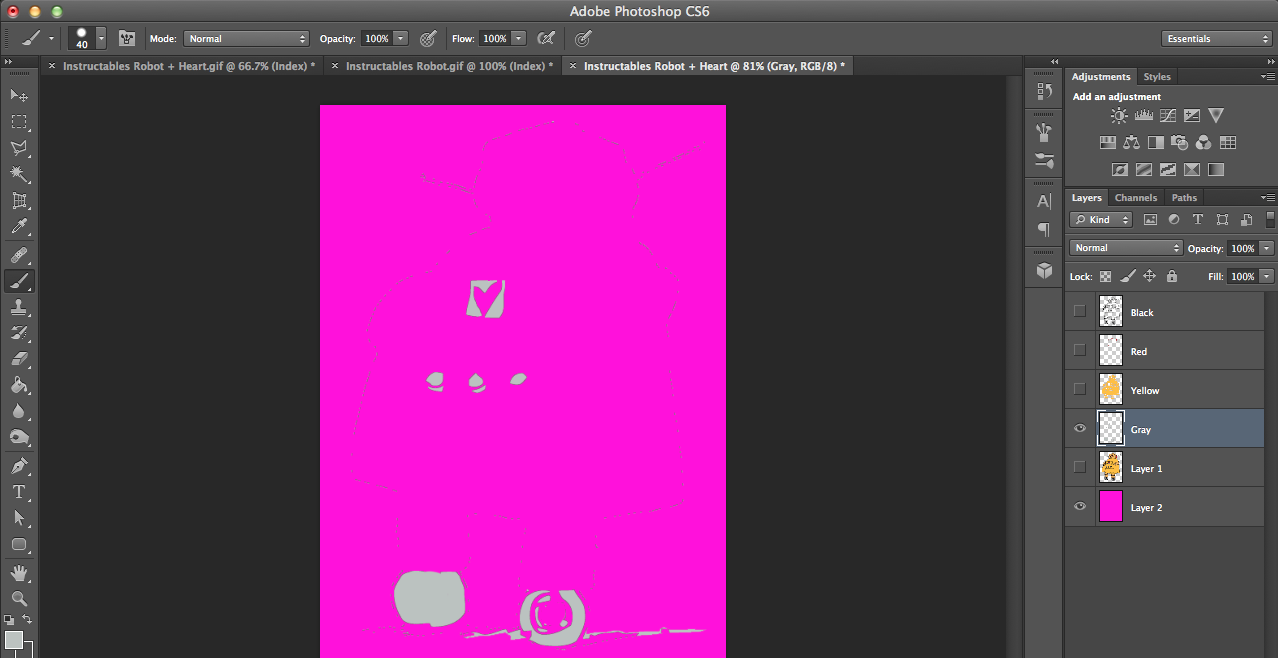
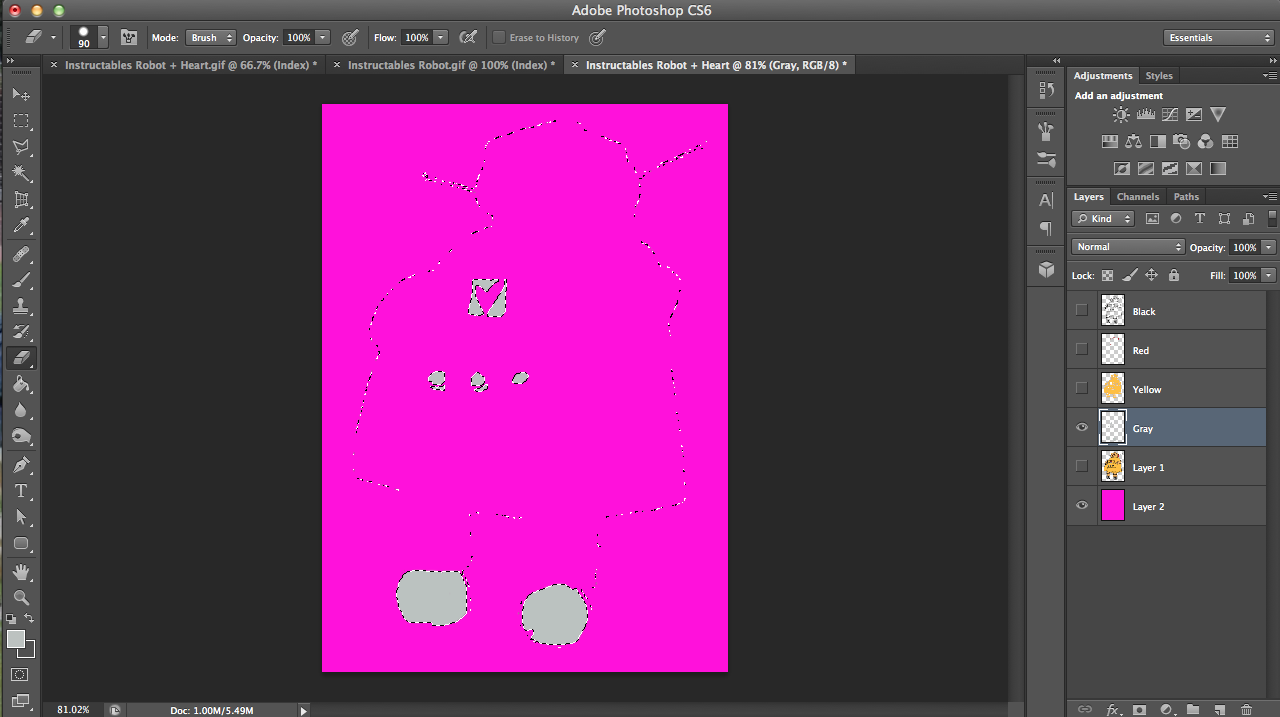
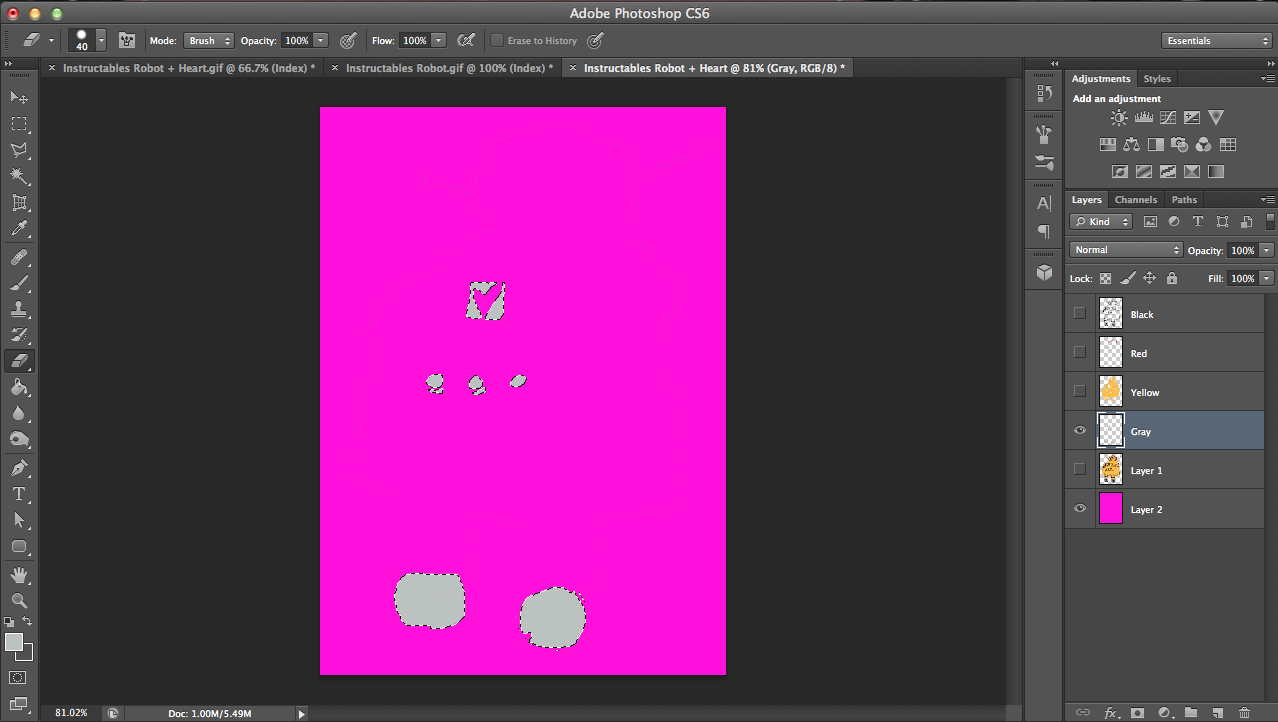
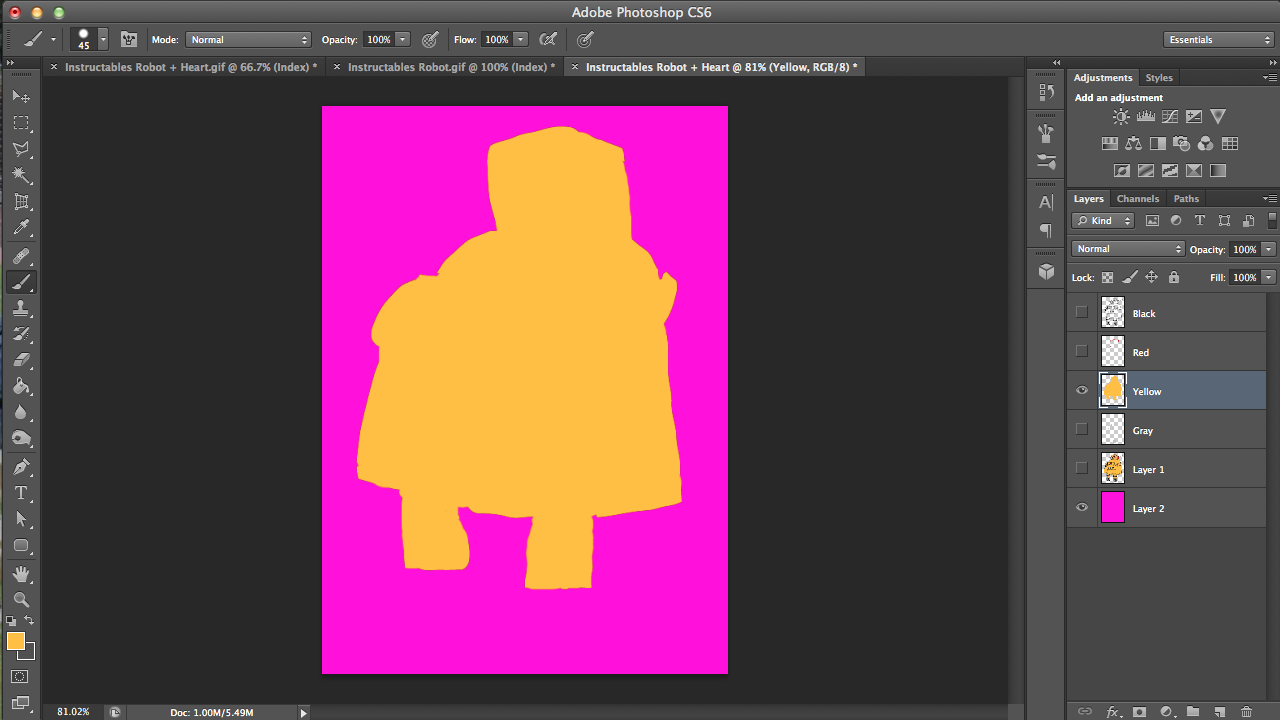
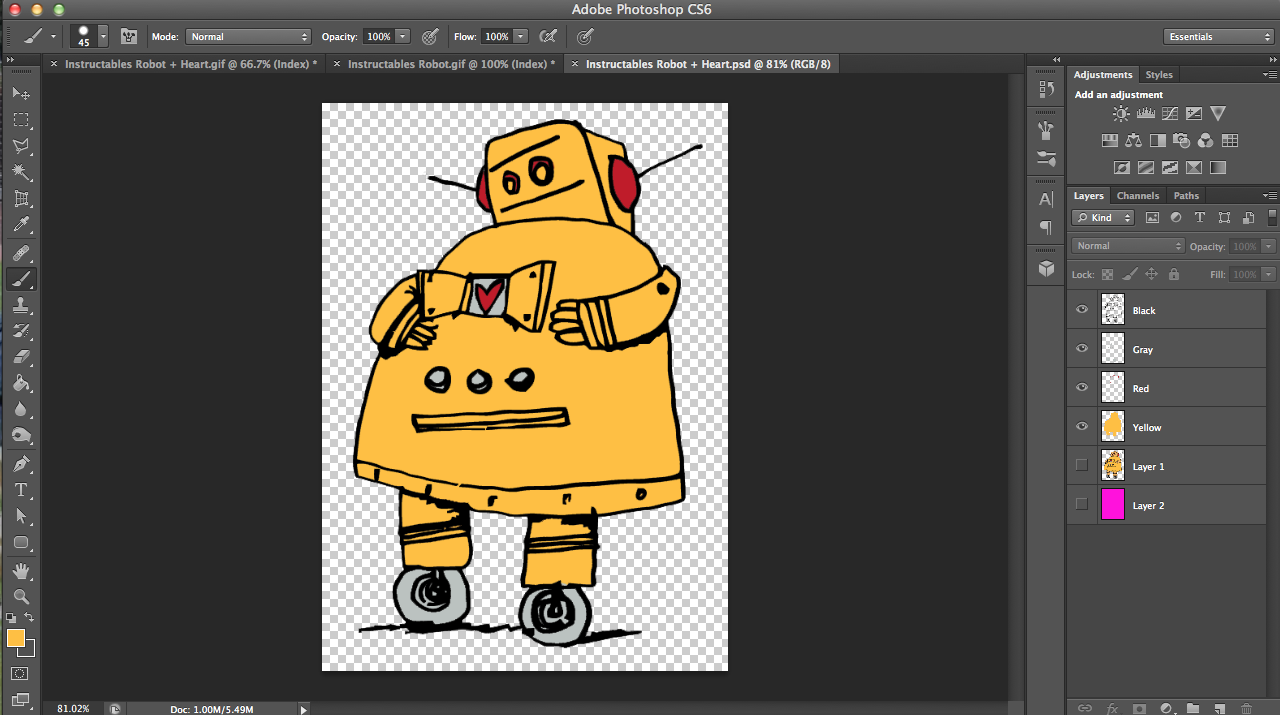
- Create a new layer, drag it to the bottom of the layers pile, and fill it with a color that stands out against your other colors. I chose a hot pink/magenta for visibility. To do this, change your foreground color with an atrociously visible shade and press command/ctrl + delete/backspace to fill the new layer with the color.
- Make only the gray layer visible and use the eyedrop tool to copy the gray shade and then use the brush tool to fill in the wheels.
- Right click the gray layer to select the pixels like before and you'll see the phantom outlines of your robot, which you don't want. Use the eraser tools to erase the lines away, and then press ctrl/command + D to deselect and ensure that everything looks fine. I also got rid of the squiggles around the wheels.
- Go to the yellow layer and make only that layer visible. Then use the eyedropper tool to copy that shade of yellow. Select the brush tool and then color in the entire body. The little holes and whatnot will just be covered with black later, so it's all good. ;)
- Repeat with your other colors, tweaking as you like. I erased some parts of the black layer (antenna and ground parts and colored in some funky looking parts in the red layer (the eyebrows needed help..).
- Make only your four colors visible to check on your robot. Also, make sure that your layers are stacked in this same order: black, red, gray, yellow.
If you're still not satisfied, tweak to your heart's desire.
Saving Colors As Jpegs
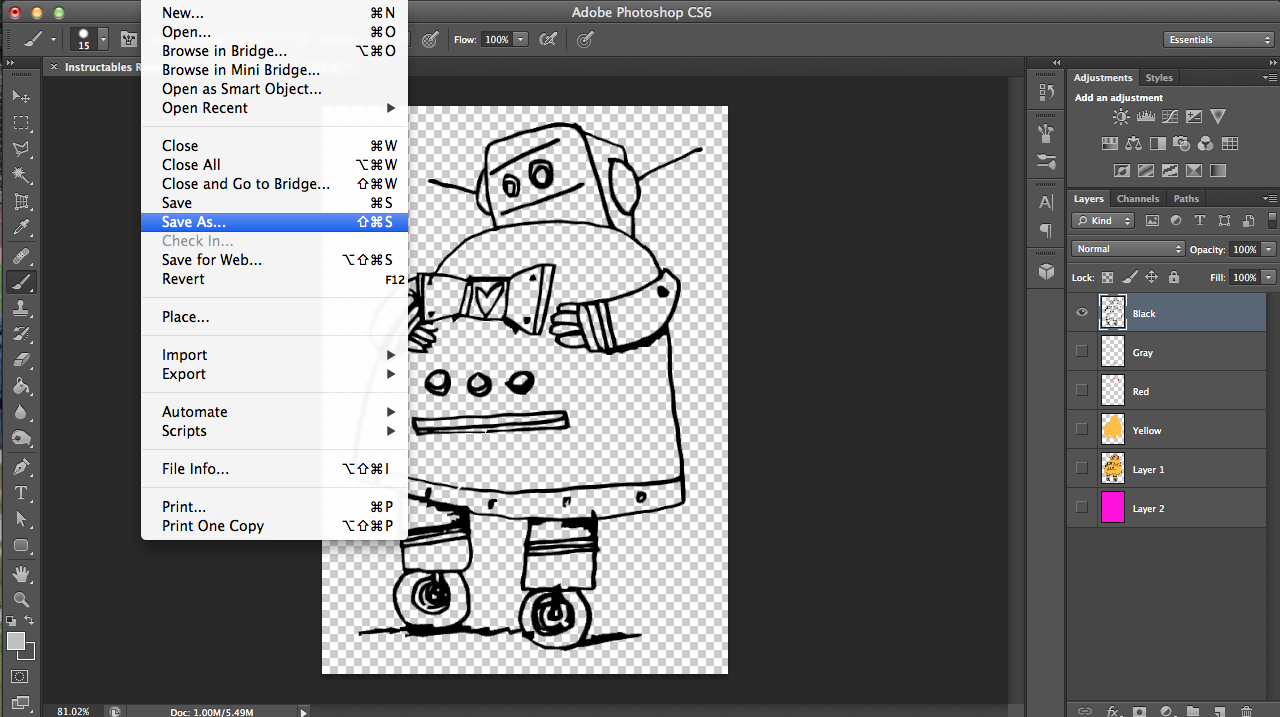
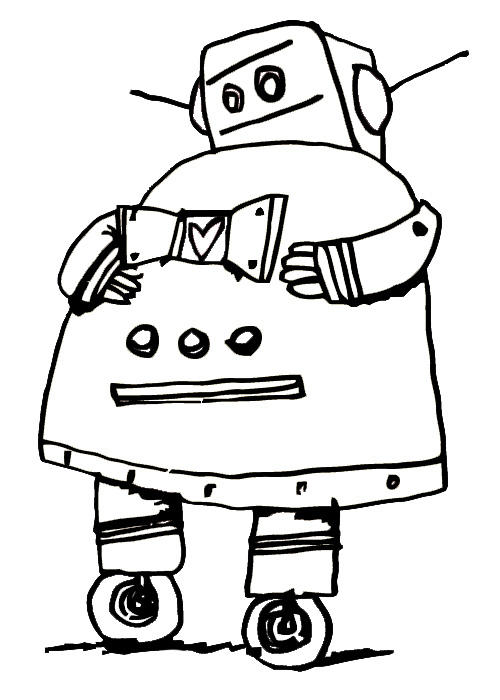


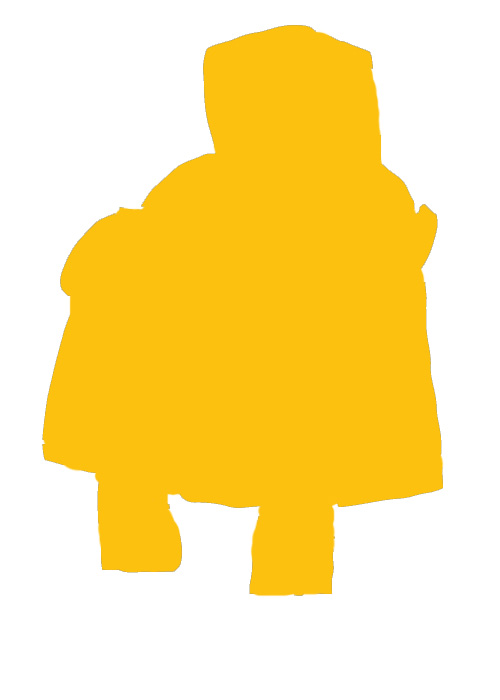
Isolate each layer of color and then go to file-->save as.. to save the color as a jpeg.
Transferring Parts Onto Shirt
You can use any method to transfer the colors onto your shirt, but I just used my Cricut explore to cut out the parts onto iron-on and ironed them onto the tank top of choice. Alternatively, stenciling and screen-printing make for great methods.
You may not have won a contest for this shirt, but I'd say you're a winner all the same. ;)