Sentient Spacecraft Enclosure for Alexa Echo Dot Using Tinkercad
by thecooltinkerman in Workshop > 3D Printing
1473 Views, 1 Favorites, 0 Comments
Sentient Spacecraft Enclosure for Alexa Echo Dot Using Tinkercad
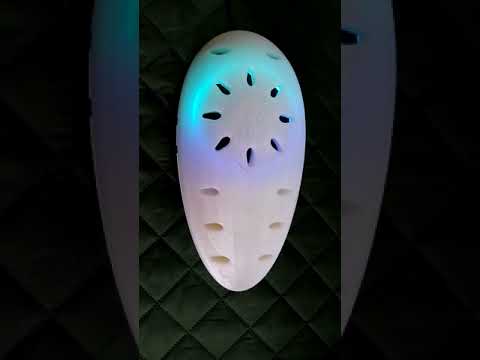
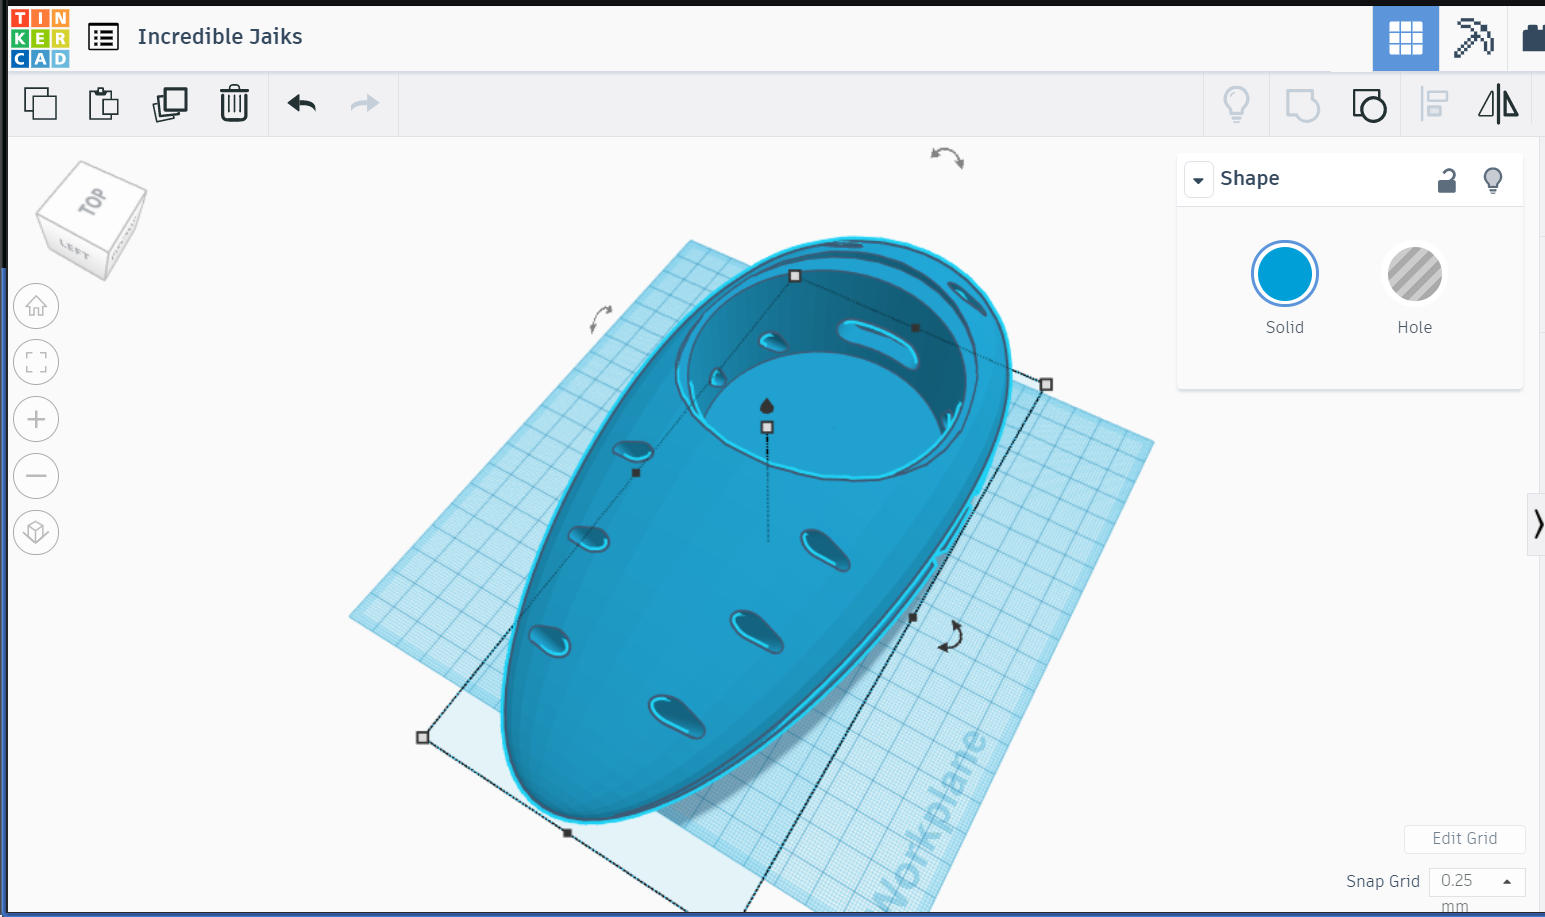
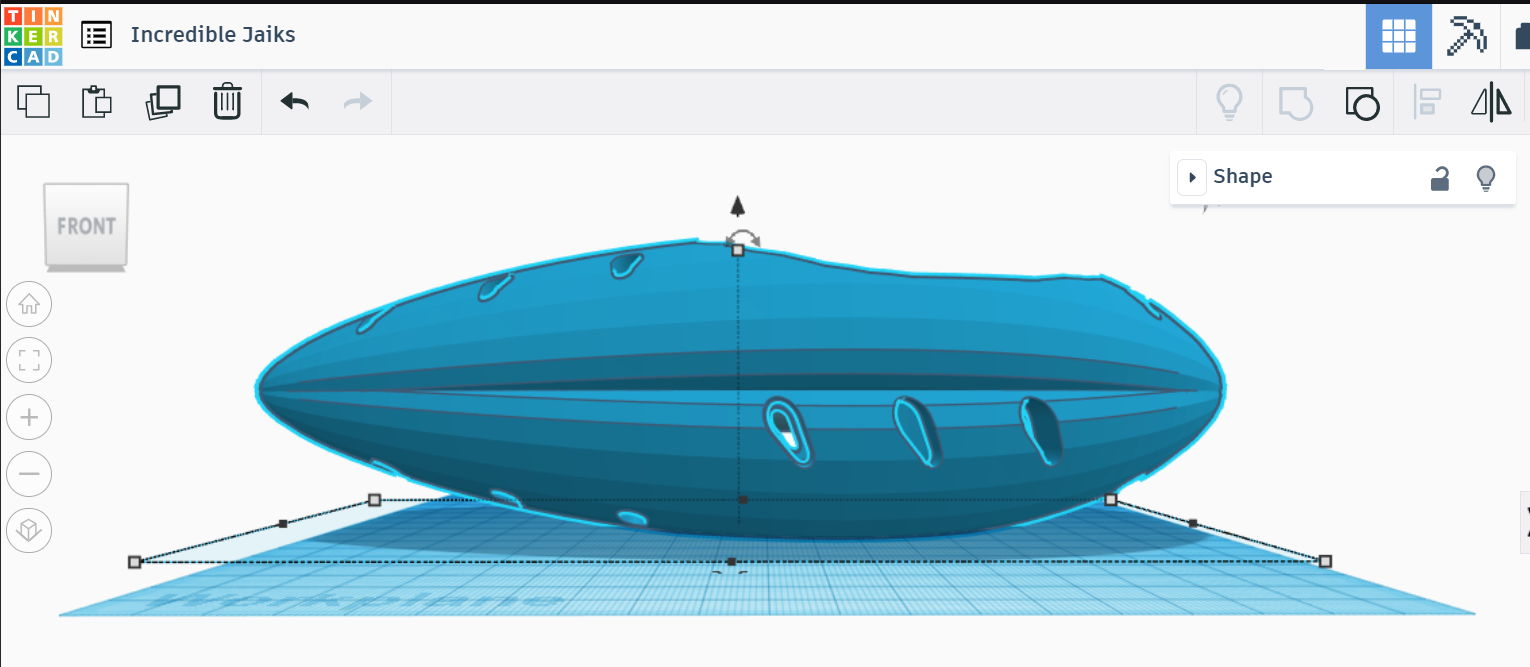
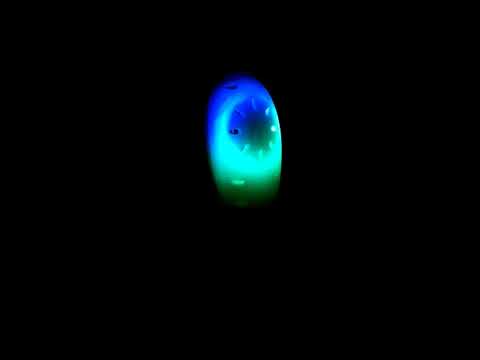
I've been using Tinkercad as my primary design software for creating objects for 3D printing for a few months now. Along the way, I've been wanting to design something different from the usual forms composed of basic shapes such as Squares and Circles from the Tinkercad Basic Shapes collection. This led me to a few videos on YouTube about creating "Organic Shapes".
As the first shot, I decided to create a simple enclosure for my Amazon Alexa/Echo Dot sitting in my living room looking quiet plain.
Back in the 80s, I had watched a movie named the "Flight of the Navigator". From bleak memories of that movie and the fact that Echo Dot is sort of an A.I. system, I decided to design an enclosure that resembled a Sentient Spacecraft.
In this IBLE, I will walk you through my very first effort of creating one such organic looking object in Tinkercad.
Prerequisites, If Applicable
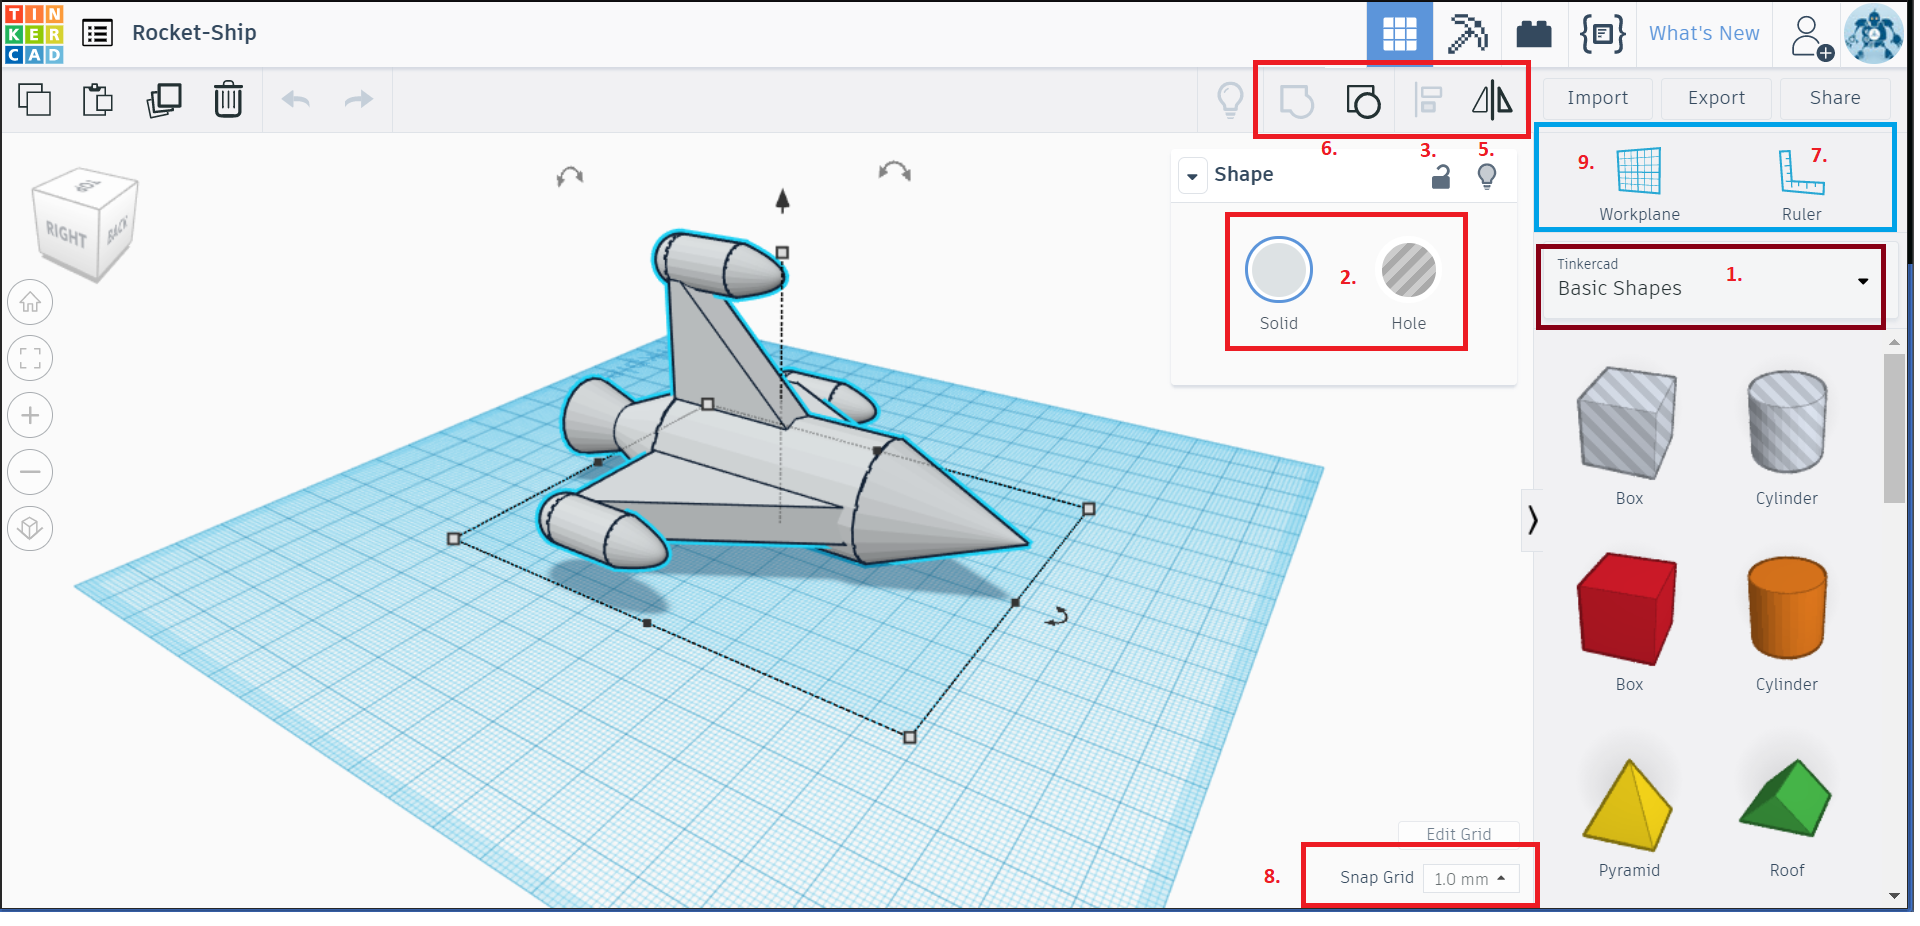
This IBLE requires readers to have a fundamental understanding of Tinkercad, which luckily is easily acquired by signing up for a free Tinkercad account and learning the following concepts:
- Creating simple designs with Tinkercads basic shapes such as Cubes, Spheres, Cylinders, Cones and Wedges
- Creating hollow objects by using the Hole tool
- Aligning objects using the Align tool
- Rotating objects with the Rotating tool
- Flipping objects along axes using the Flip tool
- Grouping or Ungrouping multiple objects into a single solid or separate shapes using the Grouping/Ungrouping tools
- Placing Rulers on workplane and positioning objects along X, Y, Z axes by typing in measurements
- Changing the resolution of the Snap Grid from the default 1 mm and move objects on the work plane using the Arrow Keys on the keyboard
- Placing one object on another object by switching workplanes using the Workplane tool
These are super fun and super easy concepts to learn and most novice users will find the learning experience quiet addictive!
Laying Out the Fundamental Design Elements
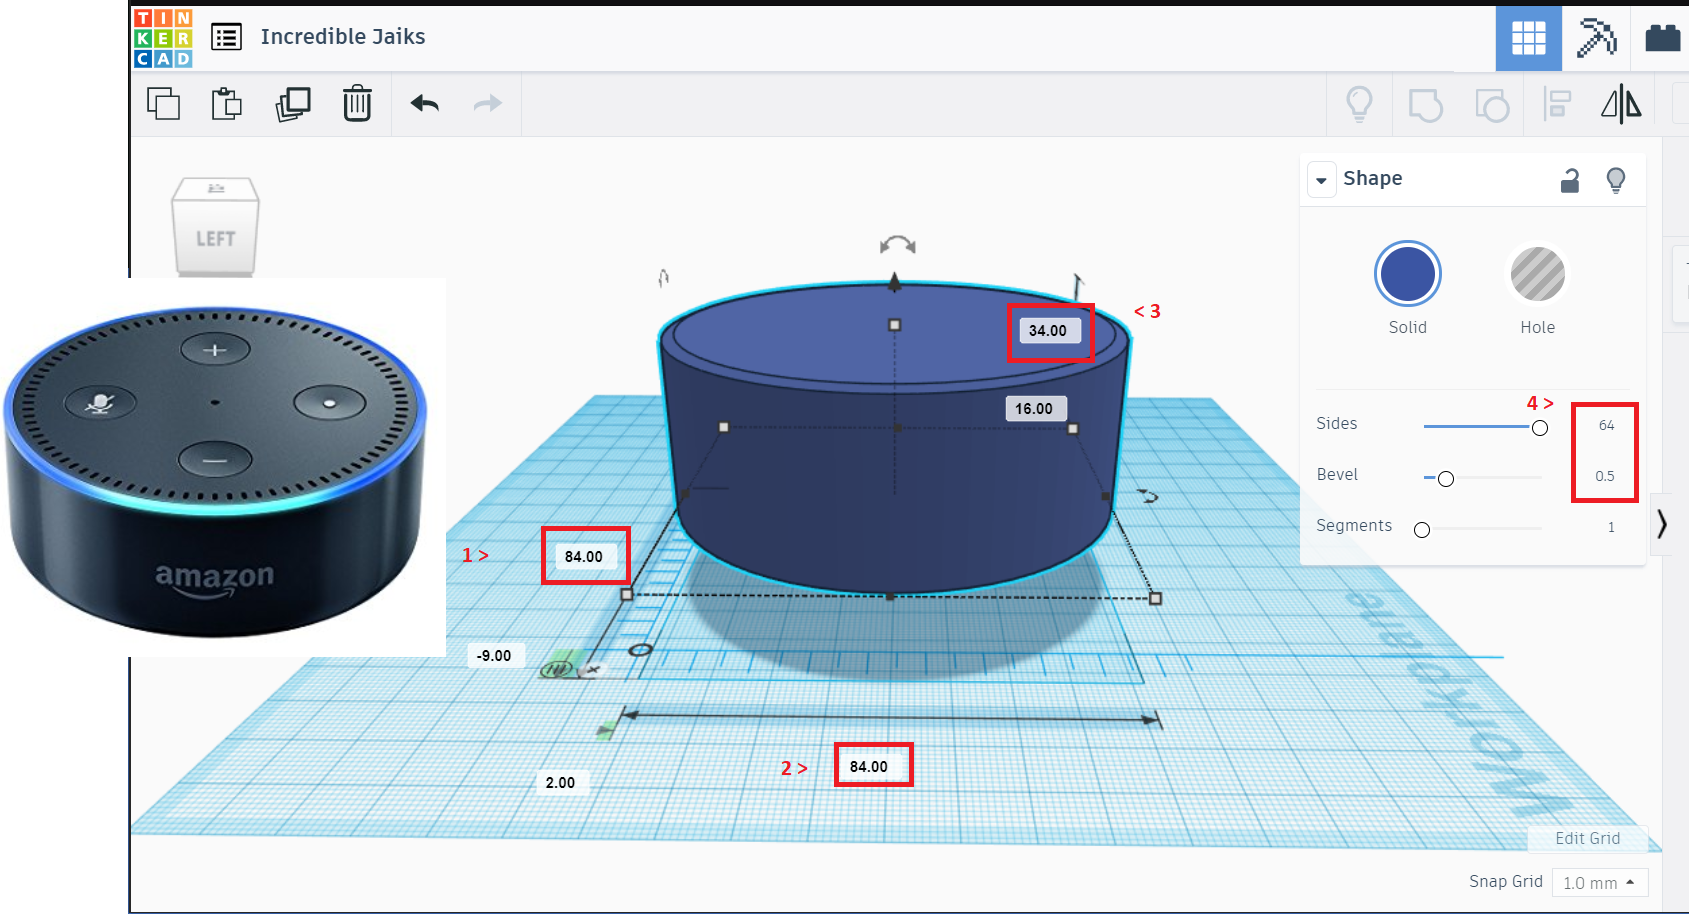
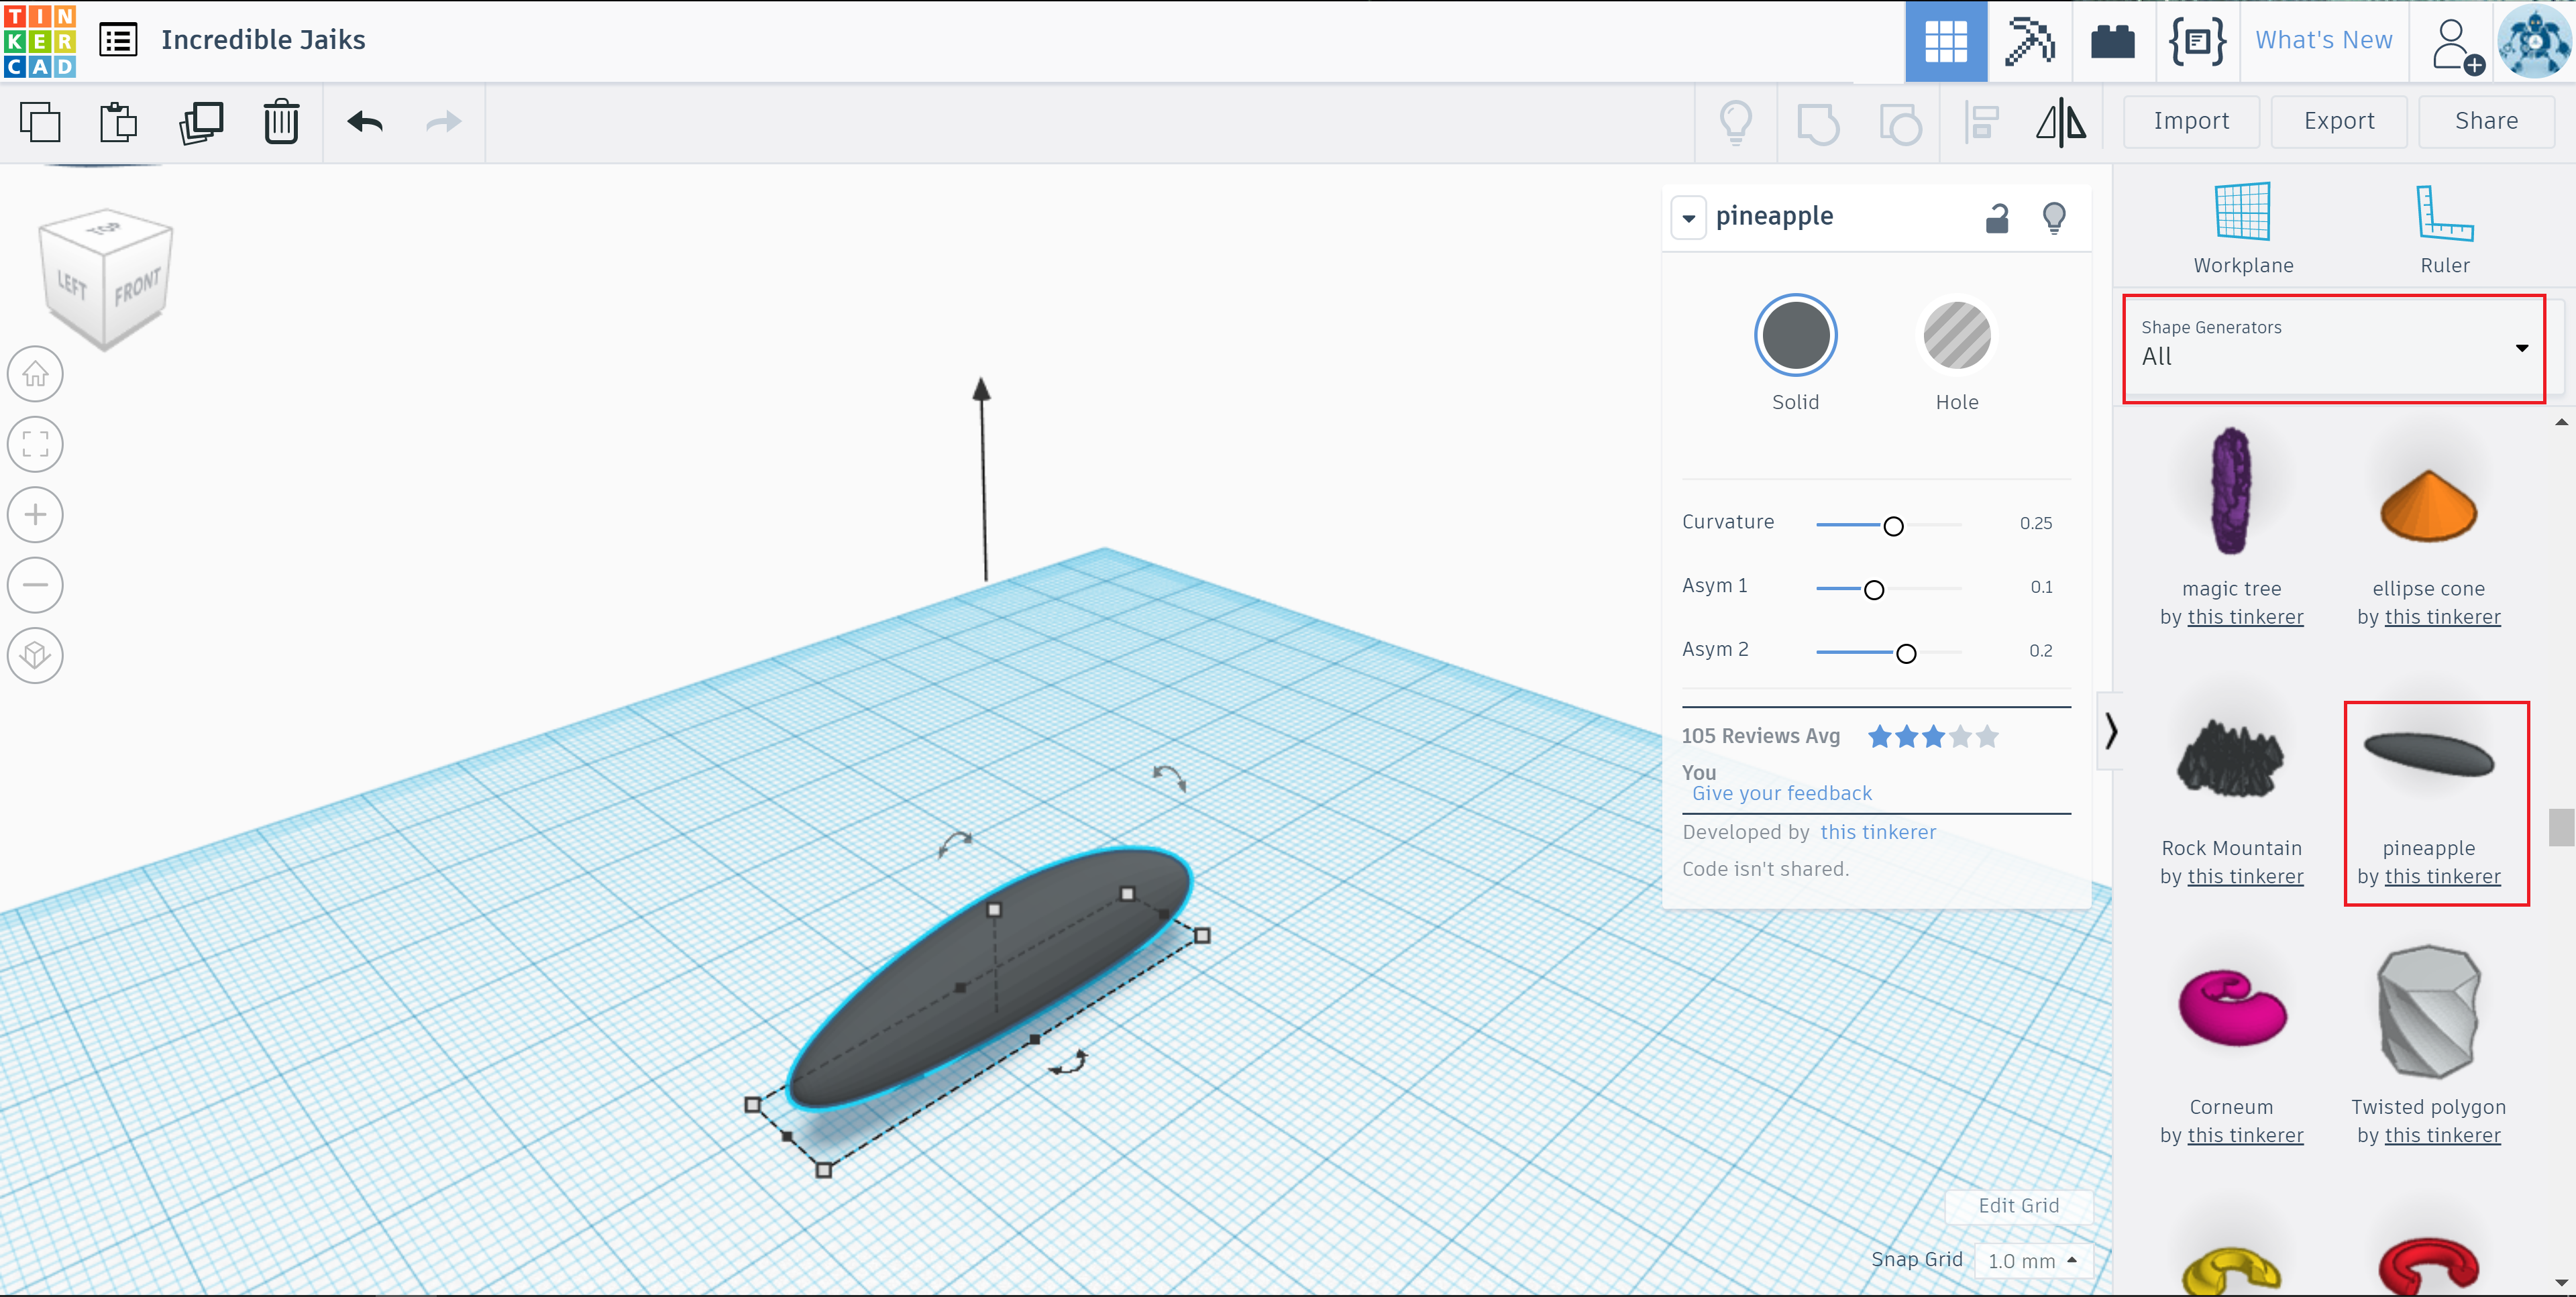
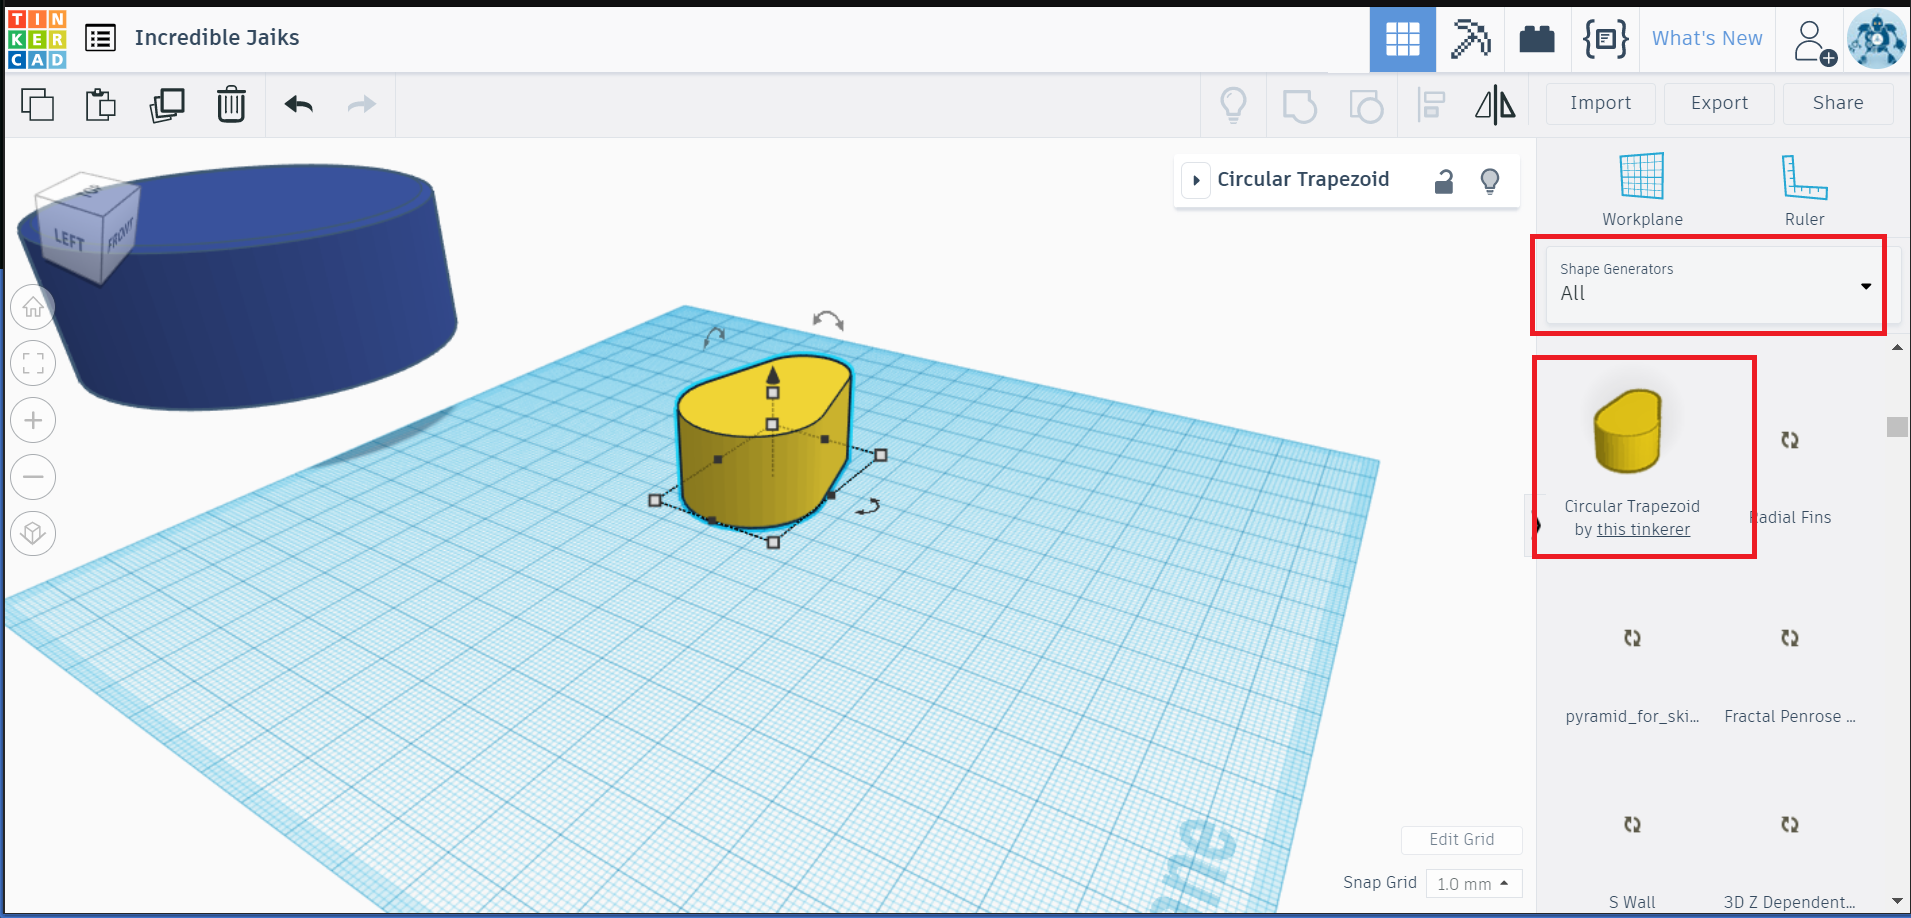
With the rough idea swimming in my head I laid out a few basic things that I was going to work with so that the design process stayed on track and delivered tangible results.
On the new designer workplane, I started by creating a 1:1 scale proxy of the Echo Dot with the measurements available online. This was a simple cylinder with Beveled edges that was pretty easy to get through.
As the goal of the design was to stick to the "organic" theme, I selected a couple of shapes from the Tinkercad shape collection that best fit my idea:
- A shape named Pineapple
- Another, a Circular Trapezoid
NOTE
Both these shapes are listed in the "Shape Generators" section and not the default "Basic Shapes" .
Designing the Fuselage - There Is No One Right Answer
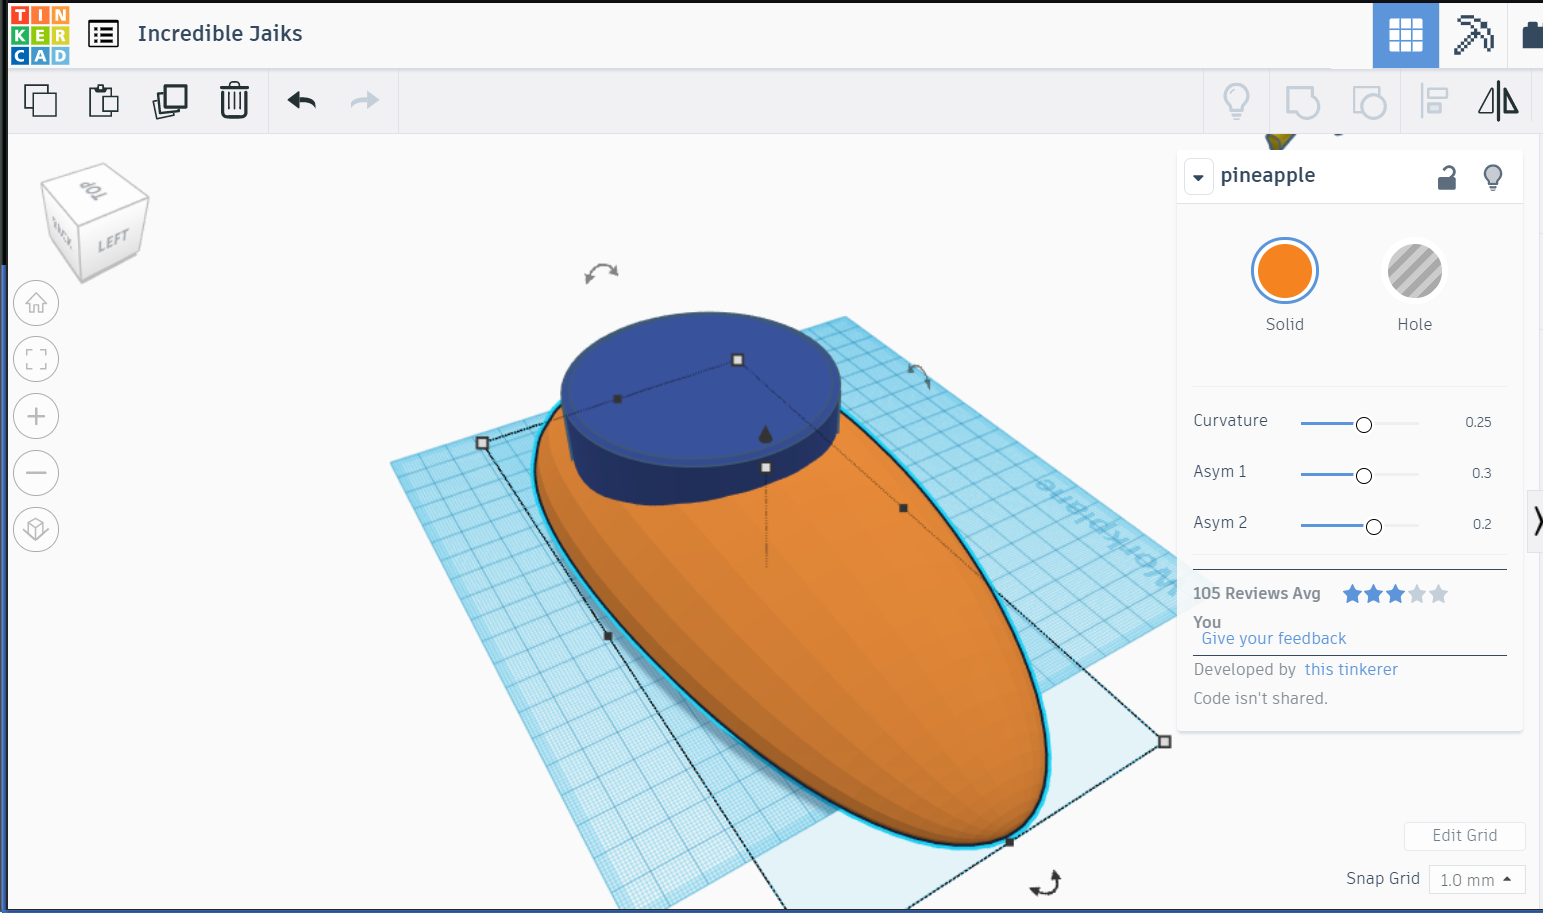
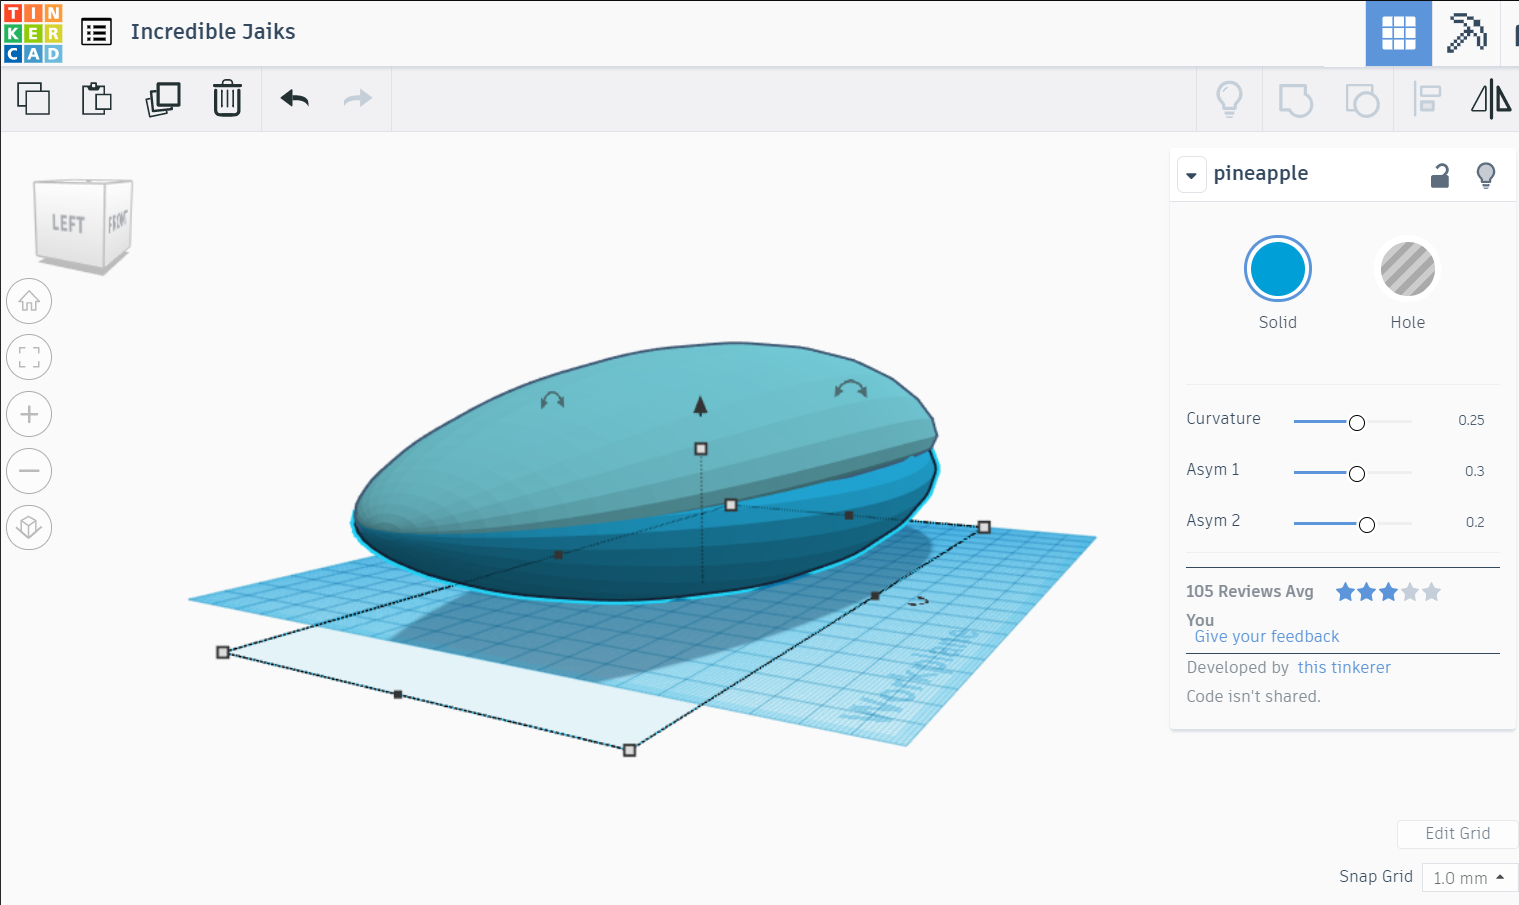
Obviously, I used the Echo Dot proxy as the central element to drag and stretch the fuselage around it.
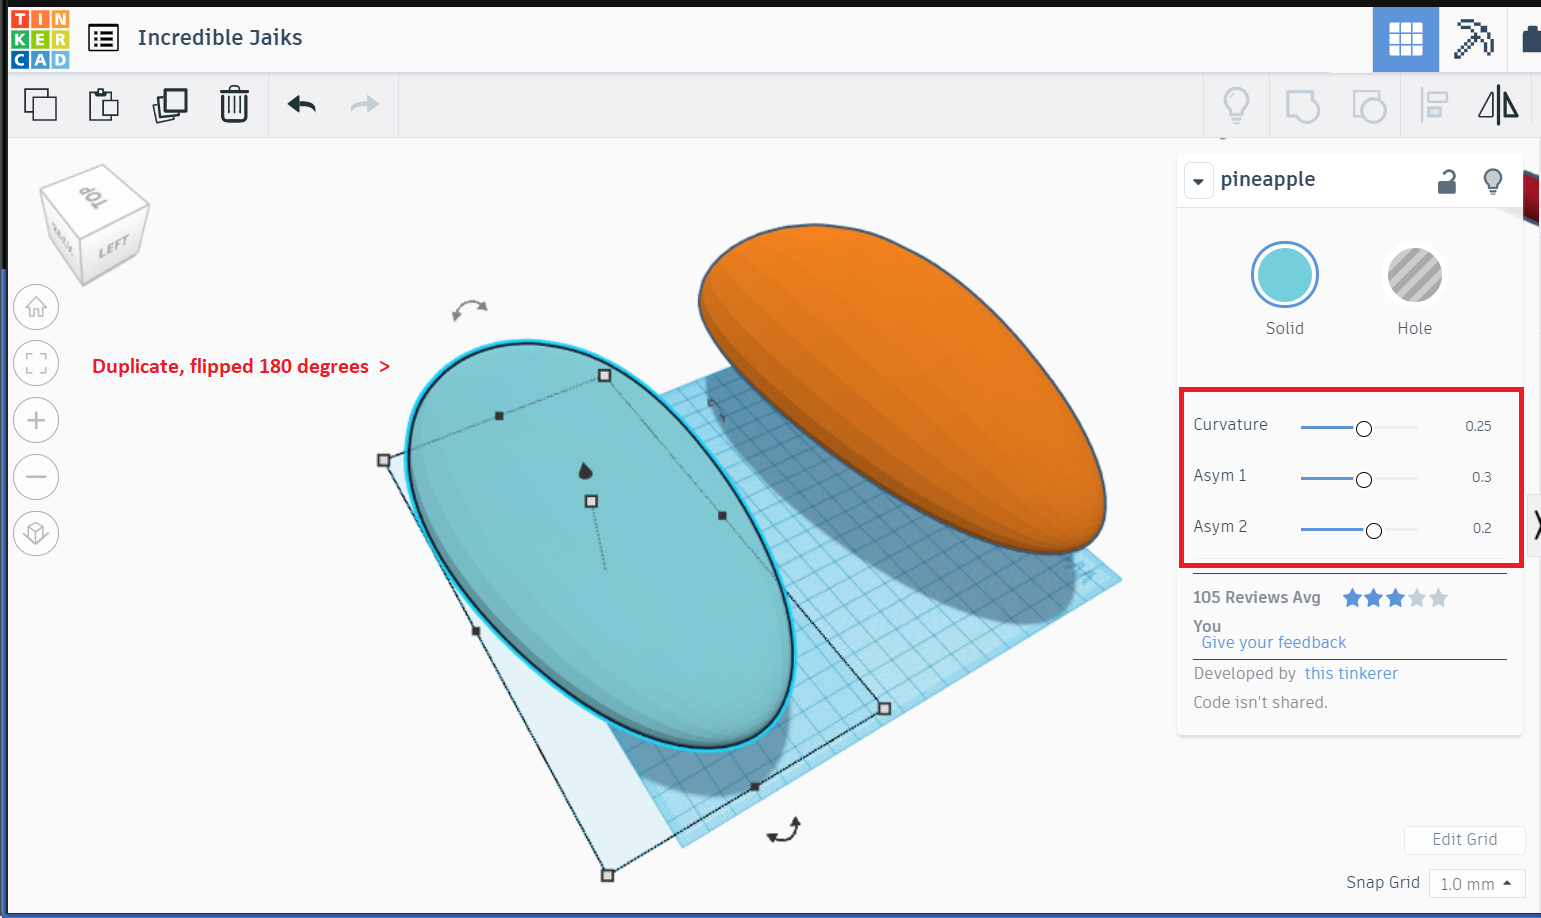
There is really no one right answer to how the final shape came to be. I repeated the stretching and pulling process until I felt I had something that conformed to the idea in my head. In the end, you can see from the properties window, the shape is defined by values defined for the following attributes:
- Curvature
- Asym 1
- Asym 2
The next few steps were to fully form the initial shape of the Spacecrafts fuselage:
- The initial shape was duplicated and flipped 180-degrees to form the second shape
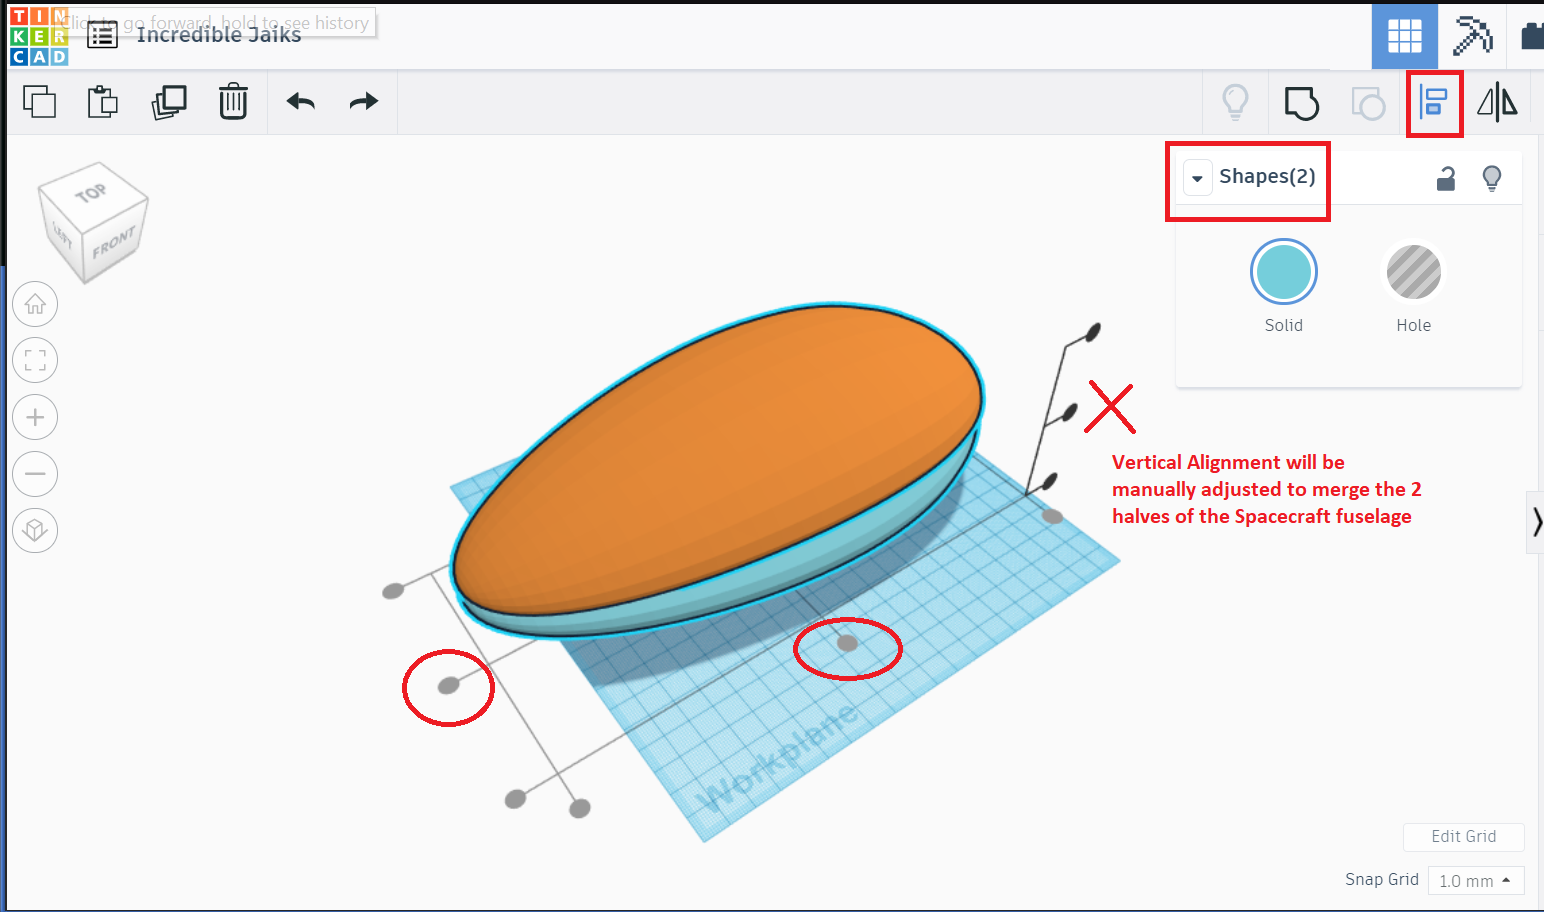
- Using the Workplane tool, and the Align tool, both the shapes were stacked on top of each other and aligned in the X and Y horizontal planes, but not in the vertical Z plane
Why?
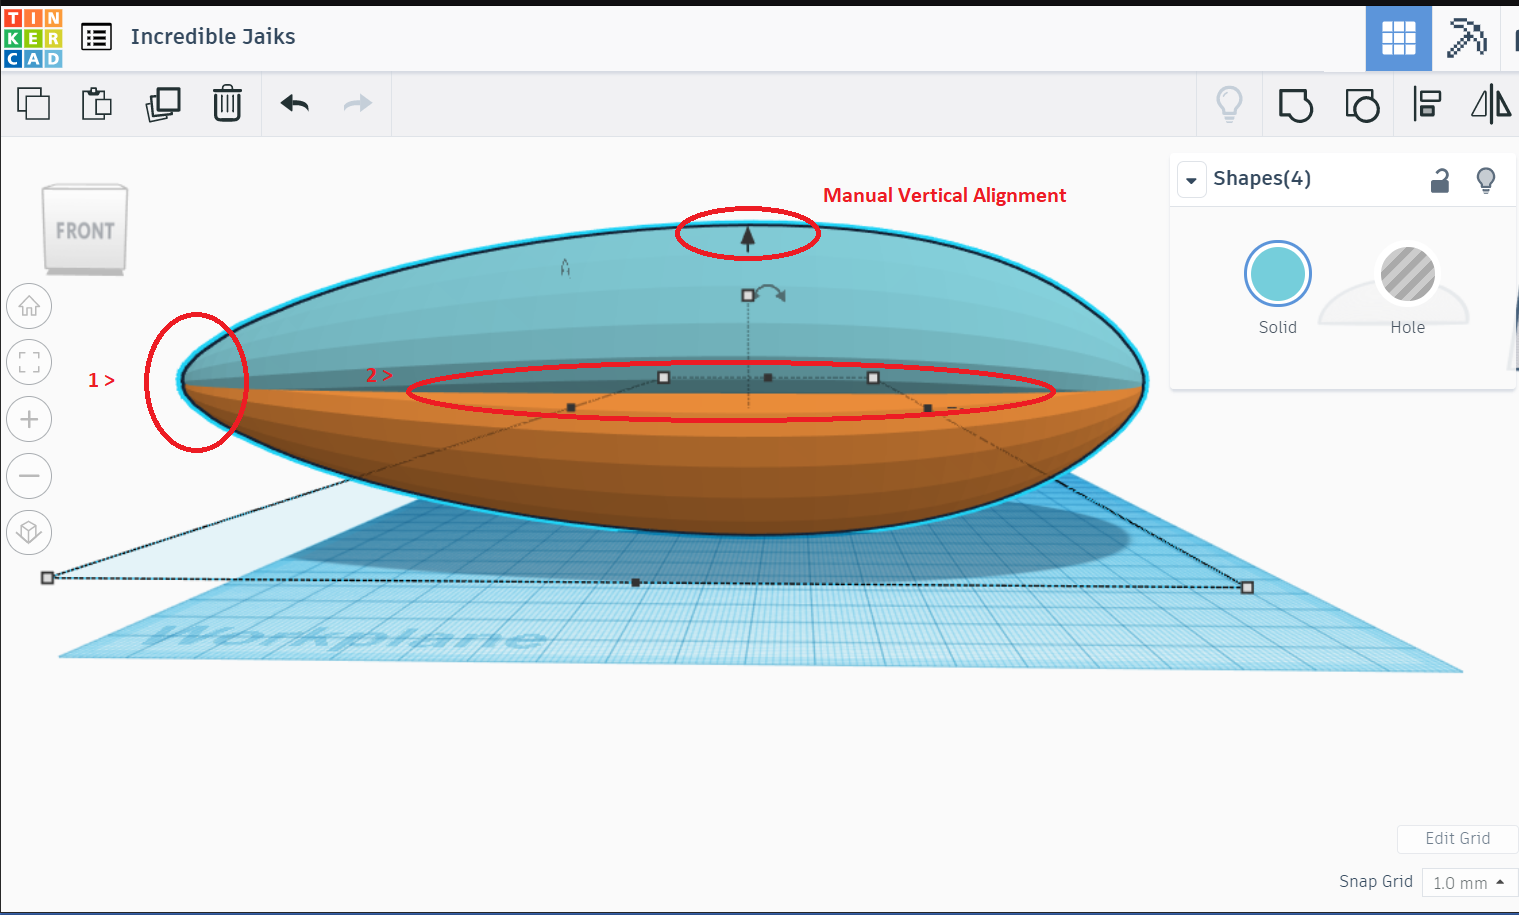
The shape is nearly, but not completely flat on the bottom - therefore I had to manually lower and raise the top half of the fuselage in the Z-plane to remove the space in between and also get the nose sections merged perfectly.
Once I was satisfied with the manual positioning, the 2 halves were selected and grouped into a single solid using the Group Tool.
Creating the "Echo Chamber" in the Sentient Spacecraft
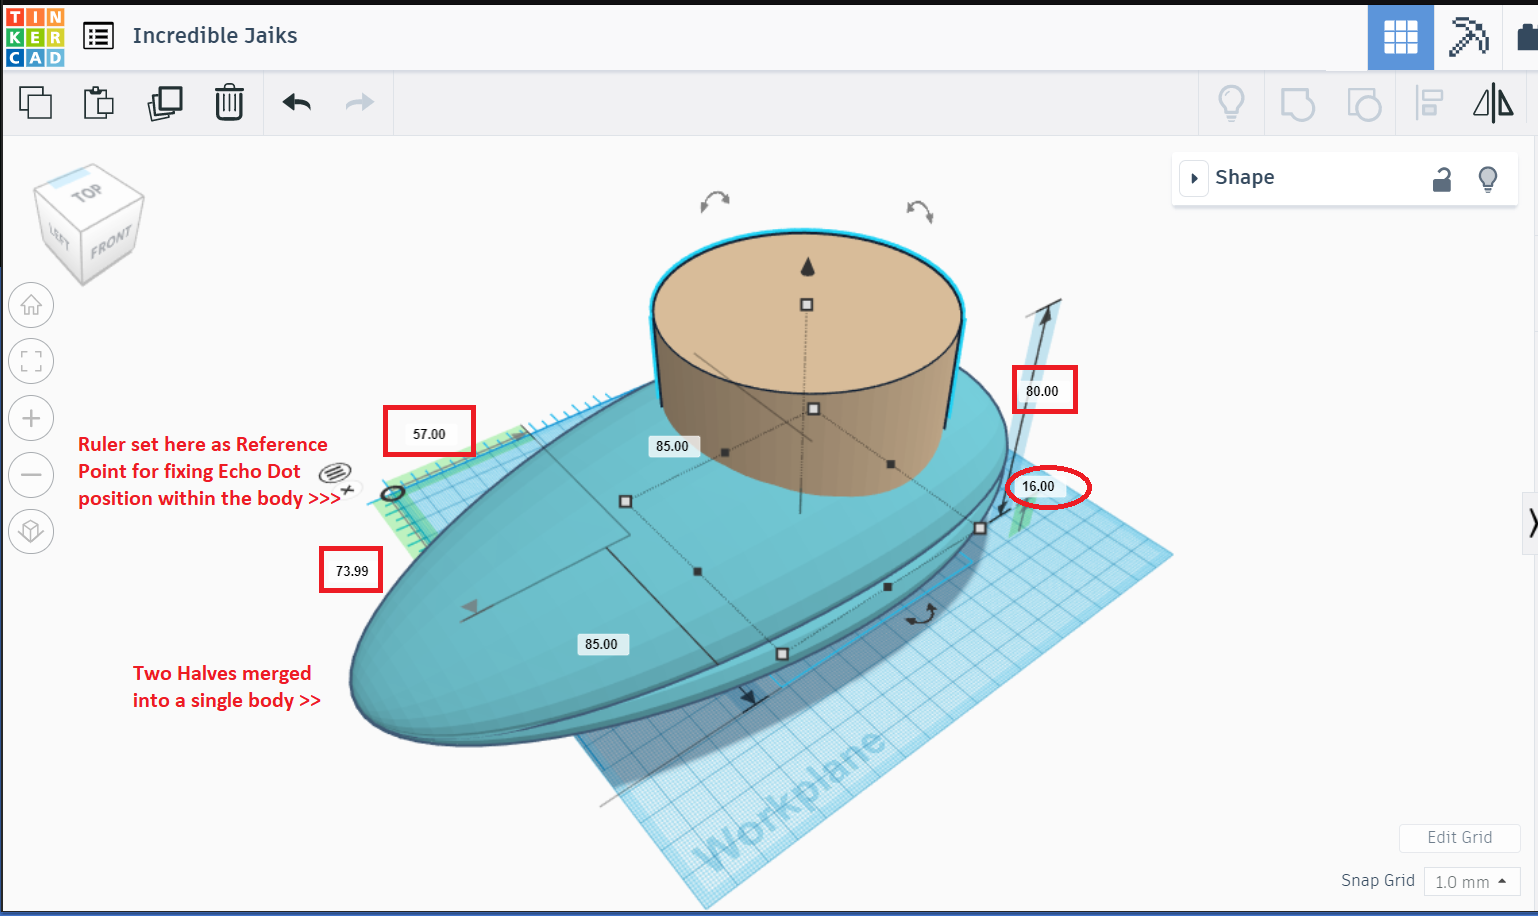
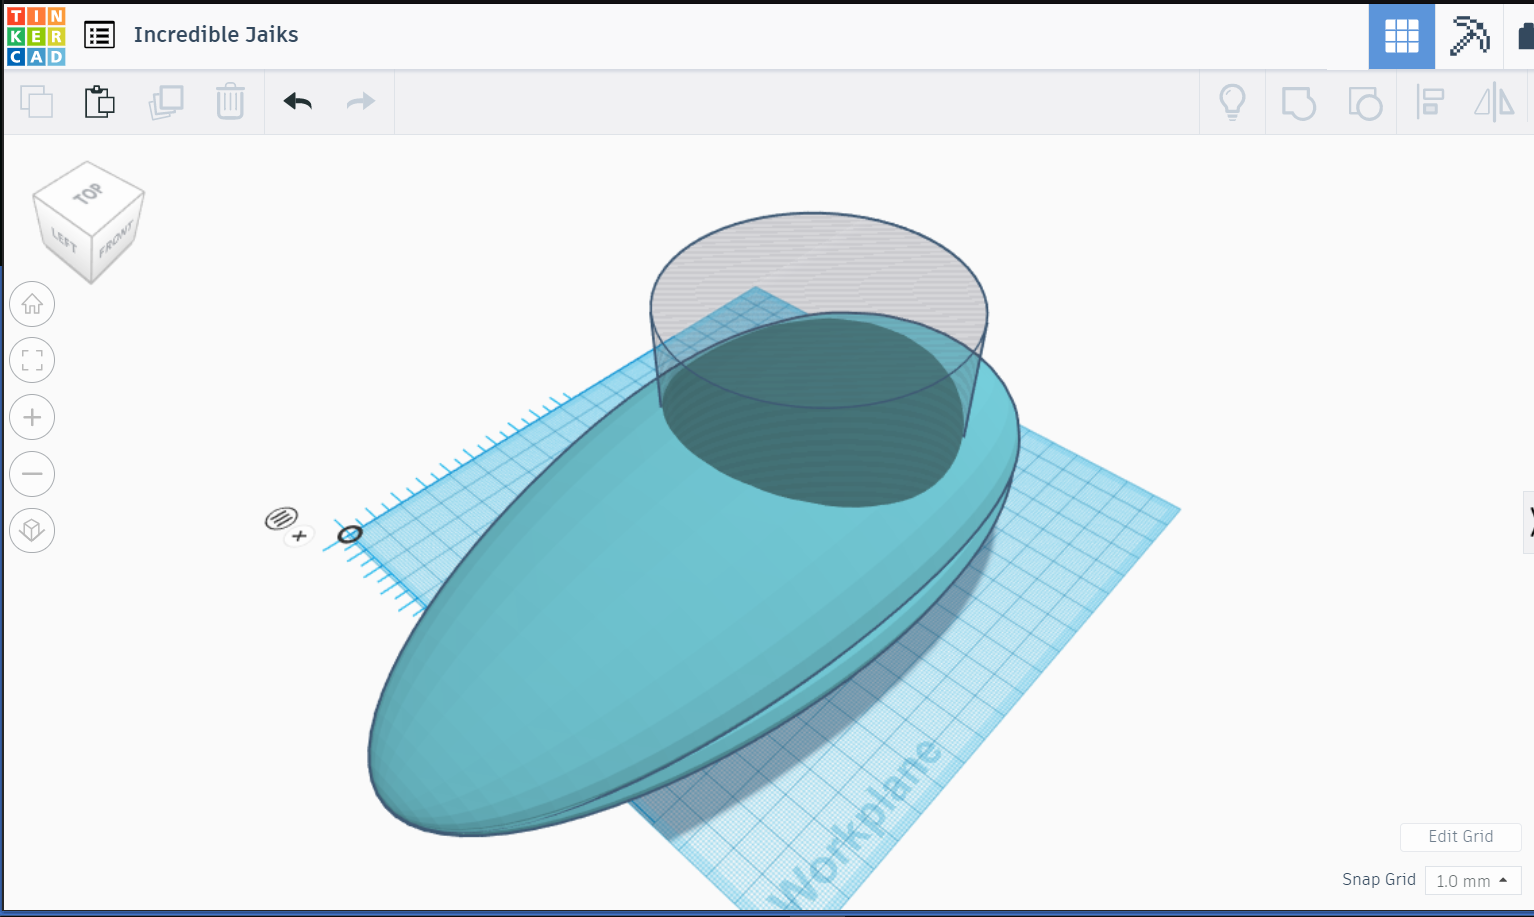
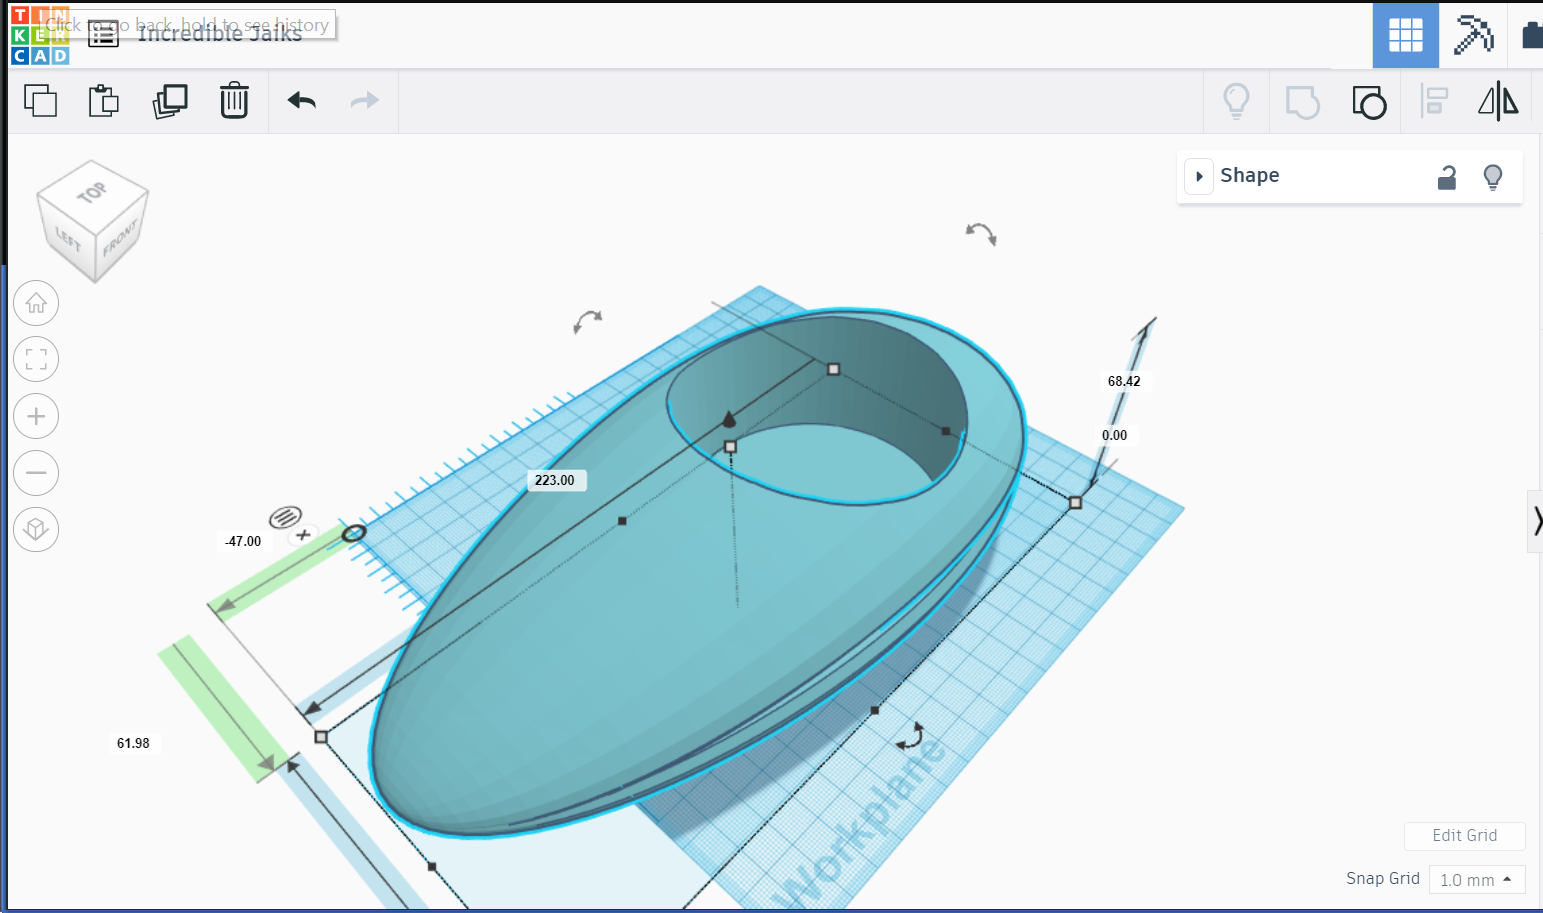
This was relatively a simple exercise. With a ruler placed on the corner of the work plane, I created a cylinder with a diameter slightly over-sized than the Echo Dot proxy and a height that was highly exaggerated.
The additional height made it easy to move the cylinder around for positioning inside of the fuselage. Observe that the cylinder is not touching the workplane, but is levitating about 16 mm over the surface.
NOTE
Once I had the cylinder where I wanted it, I made a note of the position of the cylinder in the X, Y, and Z planes. In case I messed up down the line, I would be able to restore the cylinder back to its originally set position and start all over again.
With its position set, I converted the cylinder into a Hole followed by grouping all of the components into a single solid using the Group Tool.
The result is a neat little "Echo Chamber" cut out for the Dot inside the body of the Spacecraft!
Testing Echo Dot Seating Inside the Echo Chamber
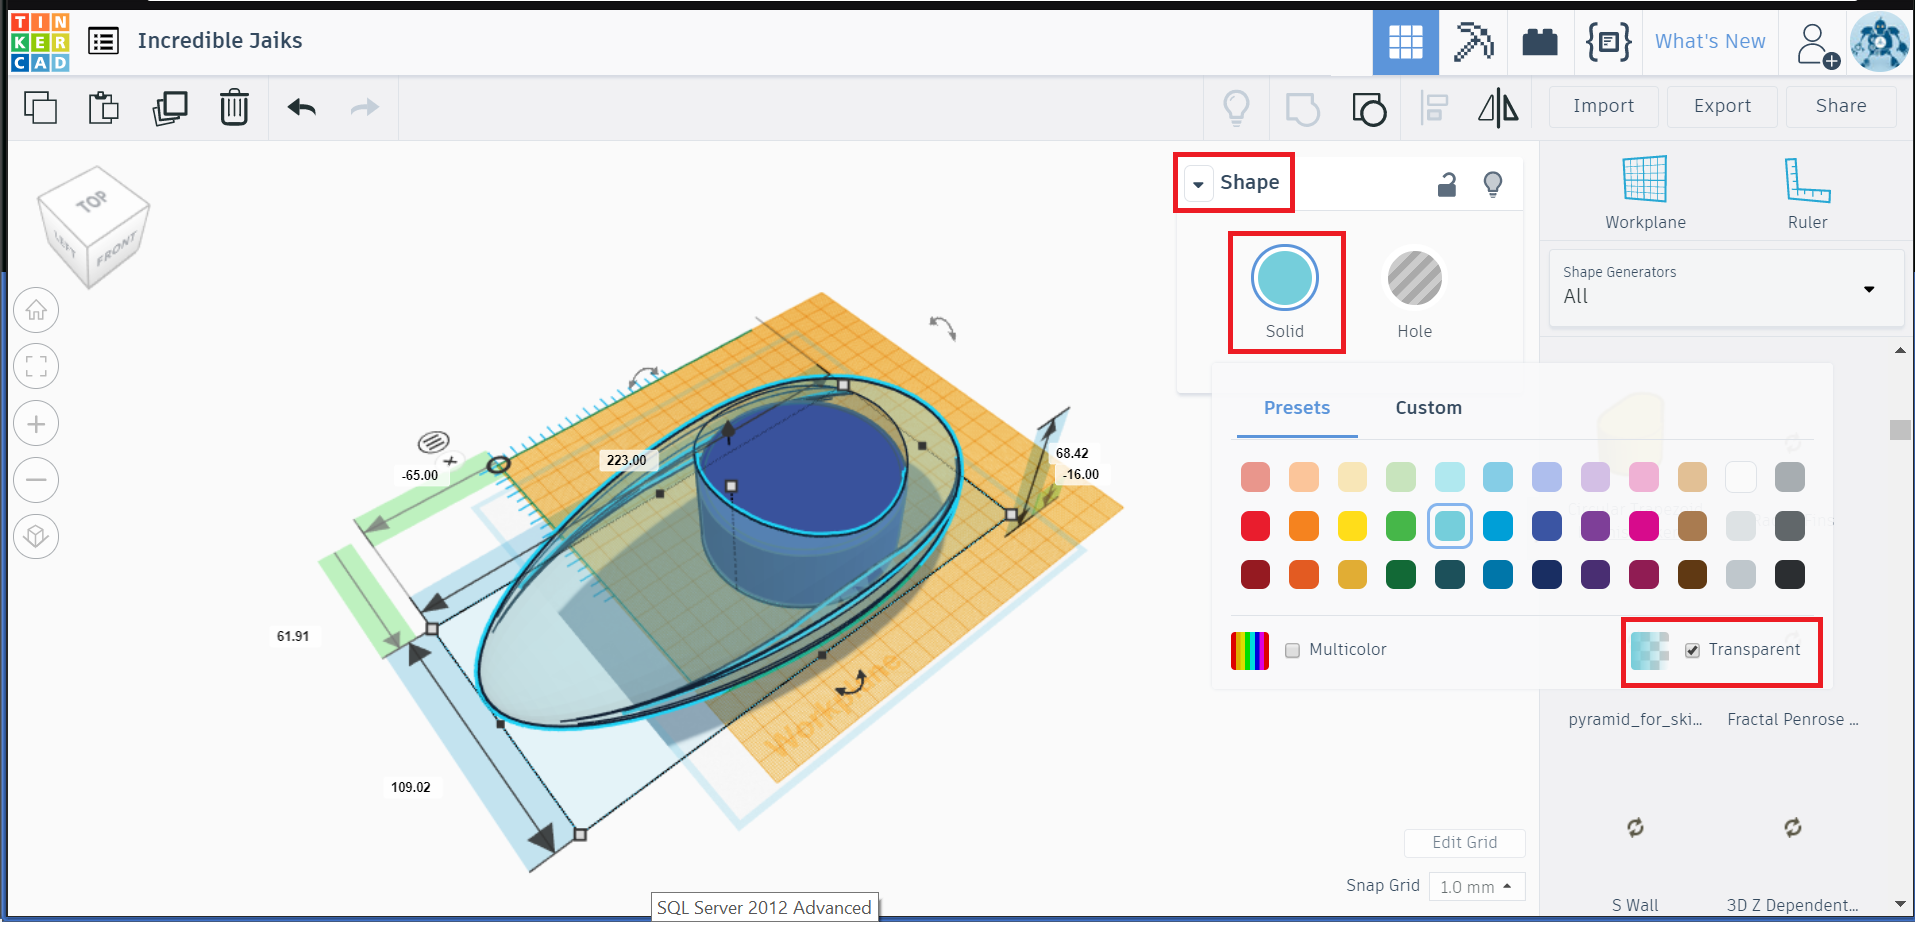
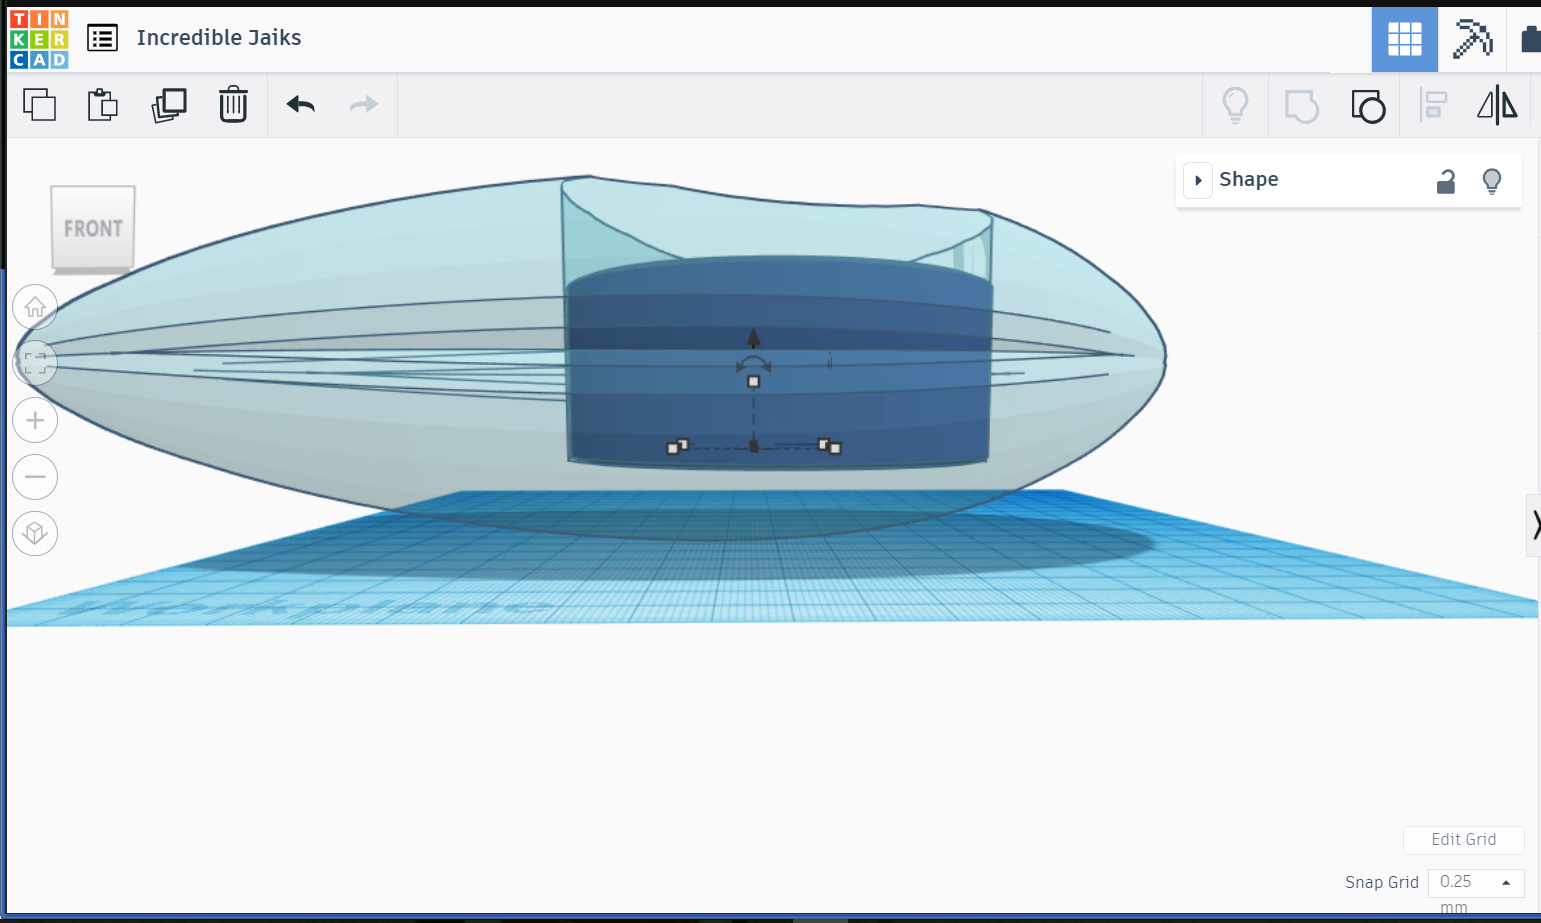
Now that the Echo chamber has been created, it was time to do a quick testing of how the Echo Dot would sit inside the space created for it.
Again, Tinkercad makes this super simple. Using the Workplane tool, I moved my work plane on to the bottom surface of the Echo chamber and positioned the Echo Dot proxy on the new work plane.
Remember, the position of the large cylinder that I noted in the last step?
I took those dimensions and typed them into the Ruler tool to approximately position the Echo Dot to the center of the Echo chamber.
To help fine tune the position, I changed the surface of the spacecraft fuselage to Transparent - this allowed me to peer through the body in order to position the Dot as close as possible to how it would sit in the real world.
So far, so good!
Making the Spacecraft Look Sentient
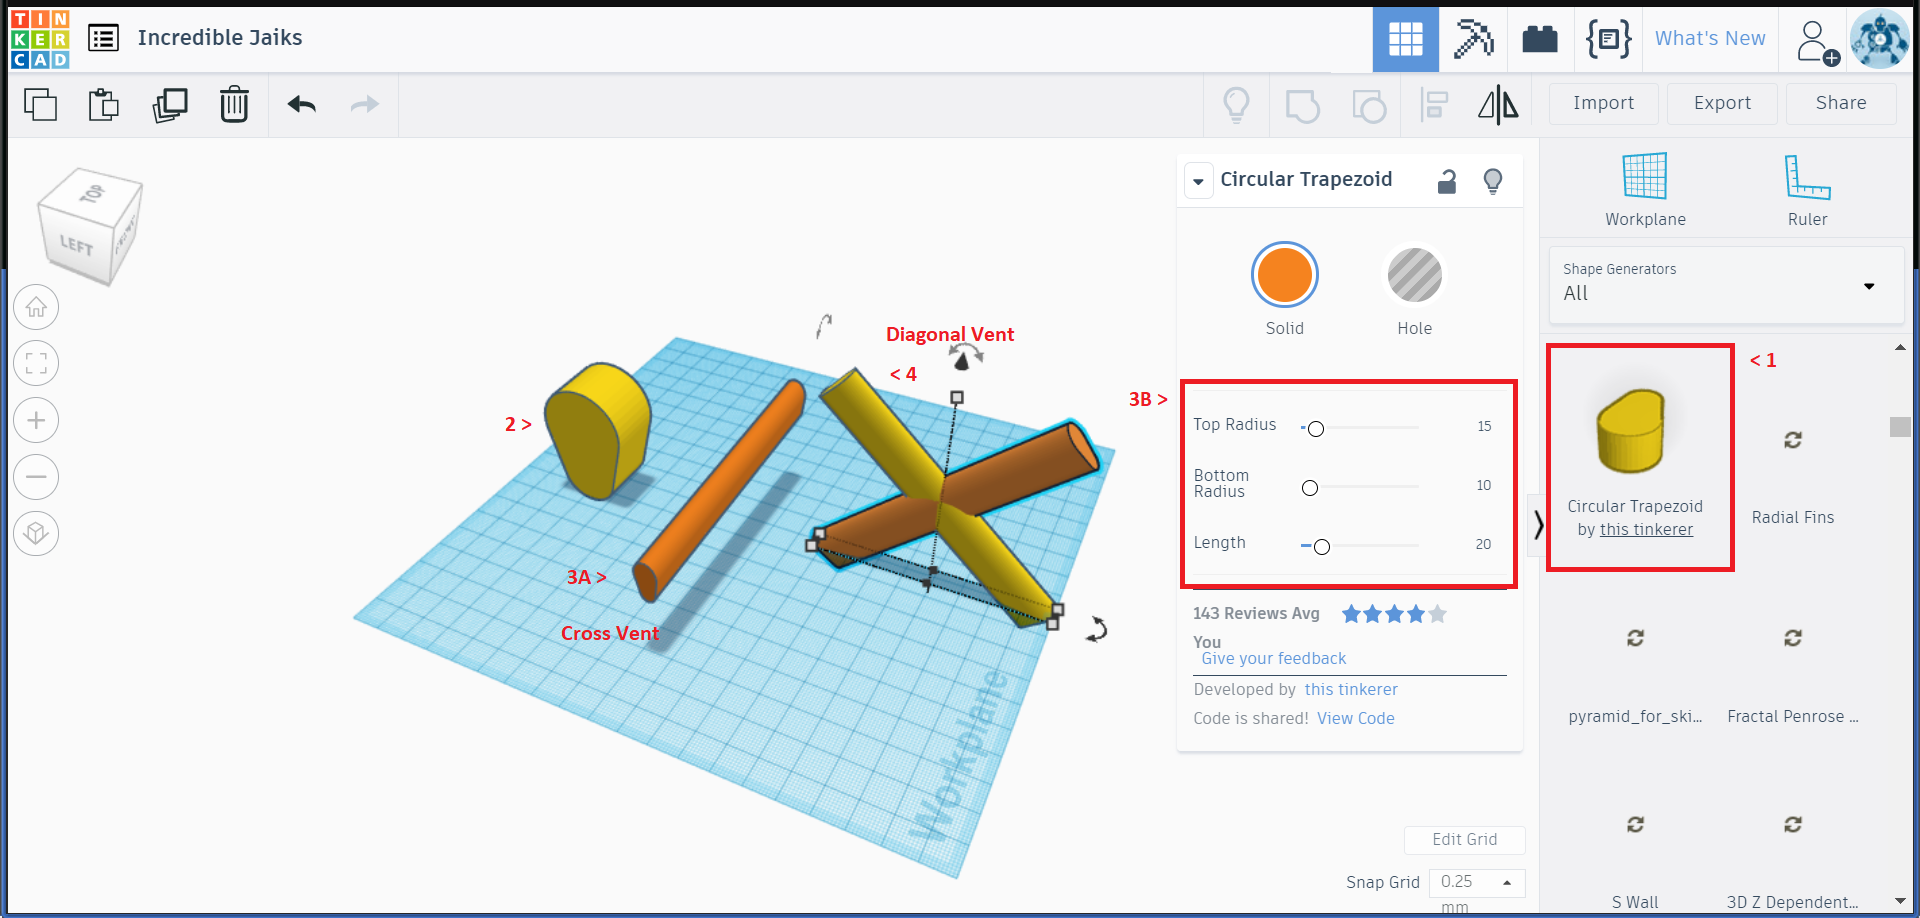
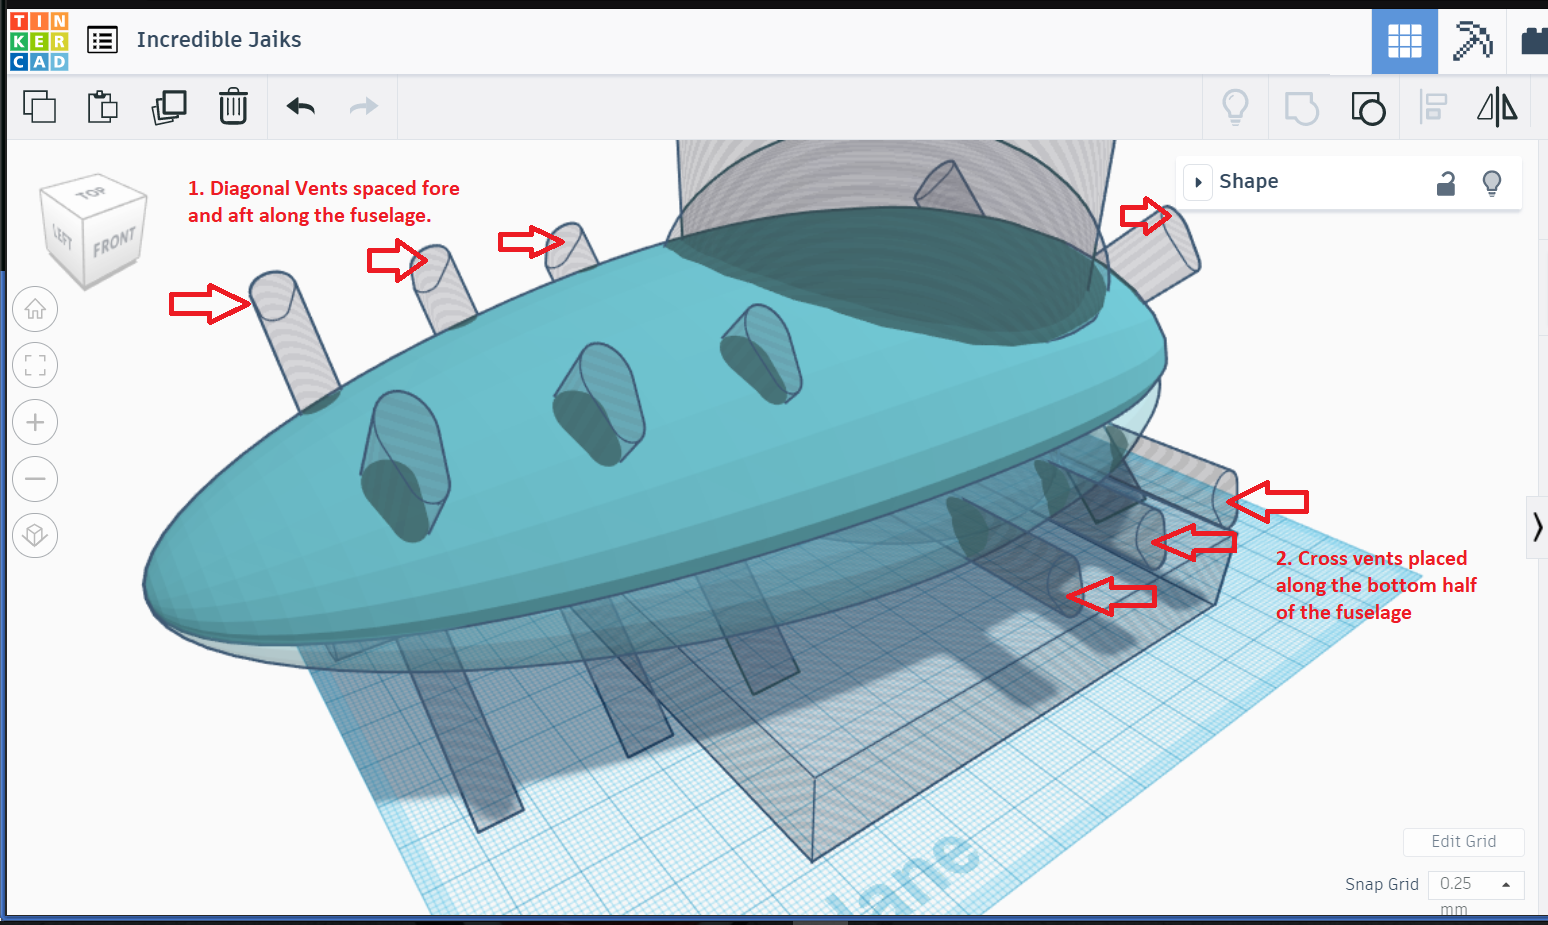
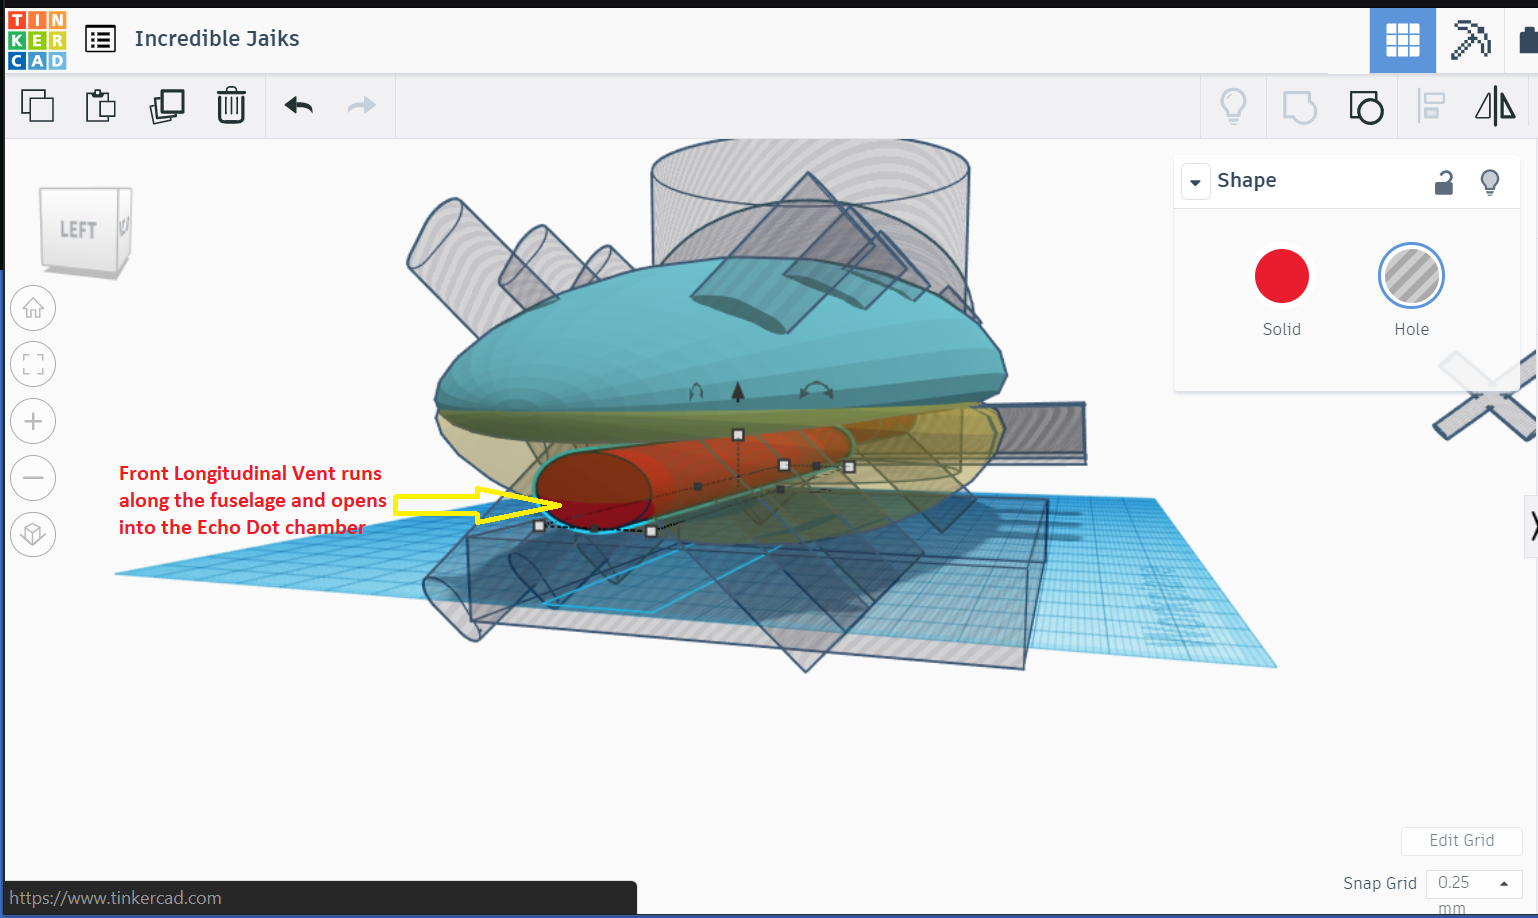
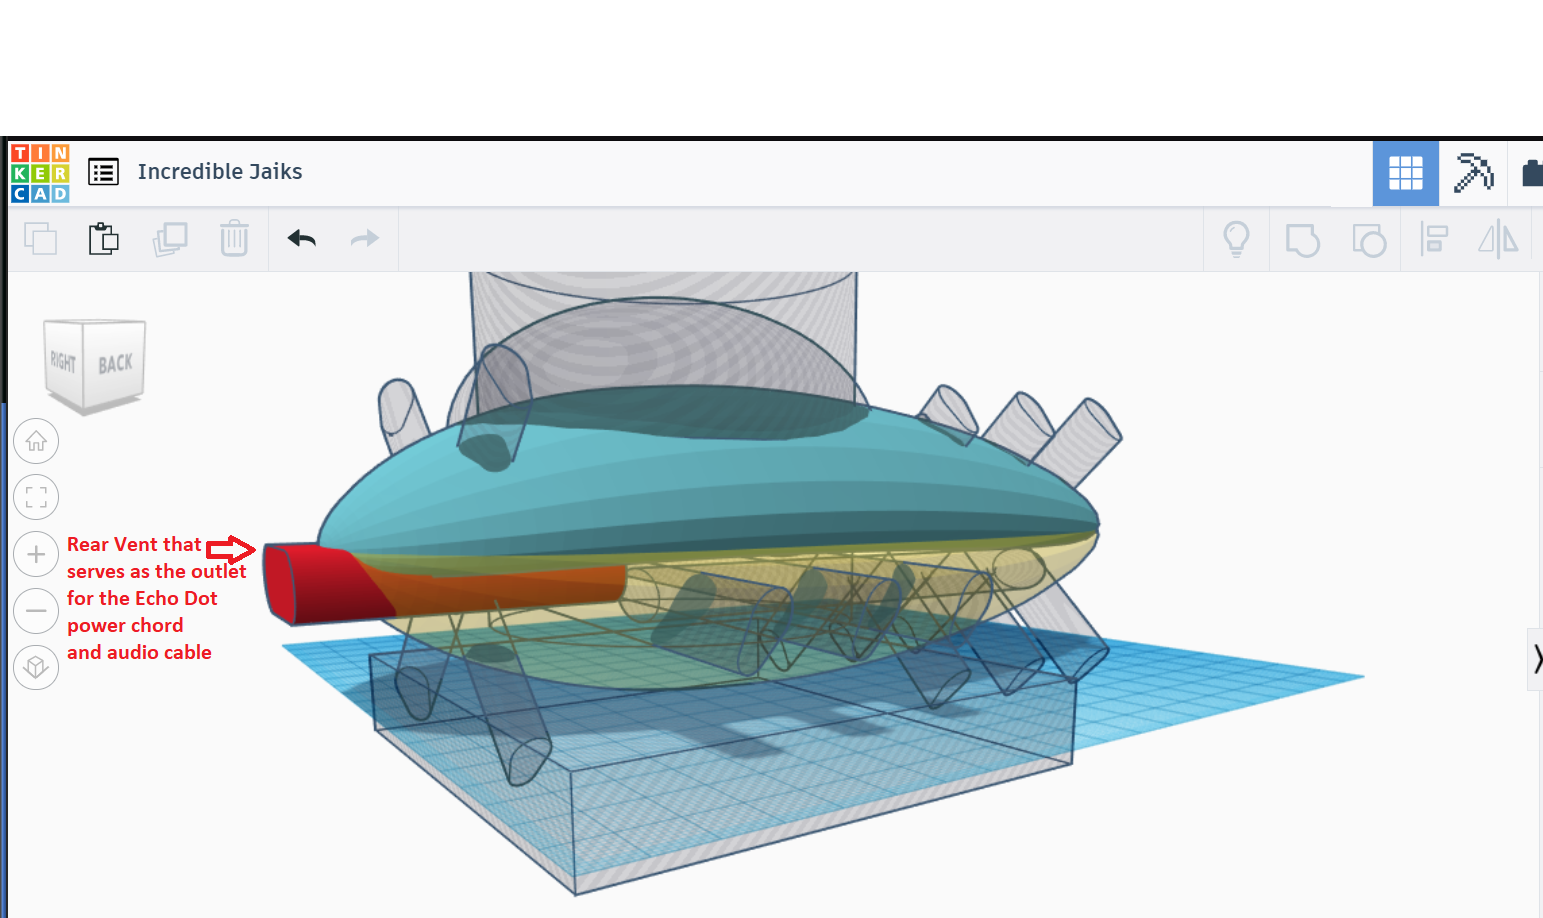
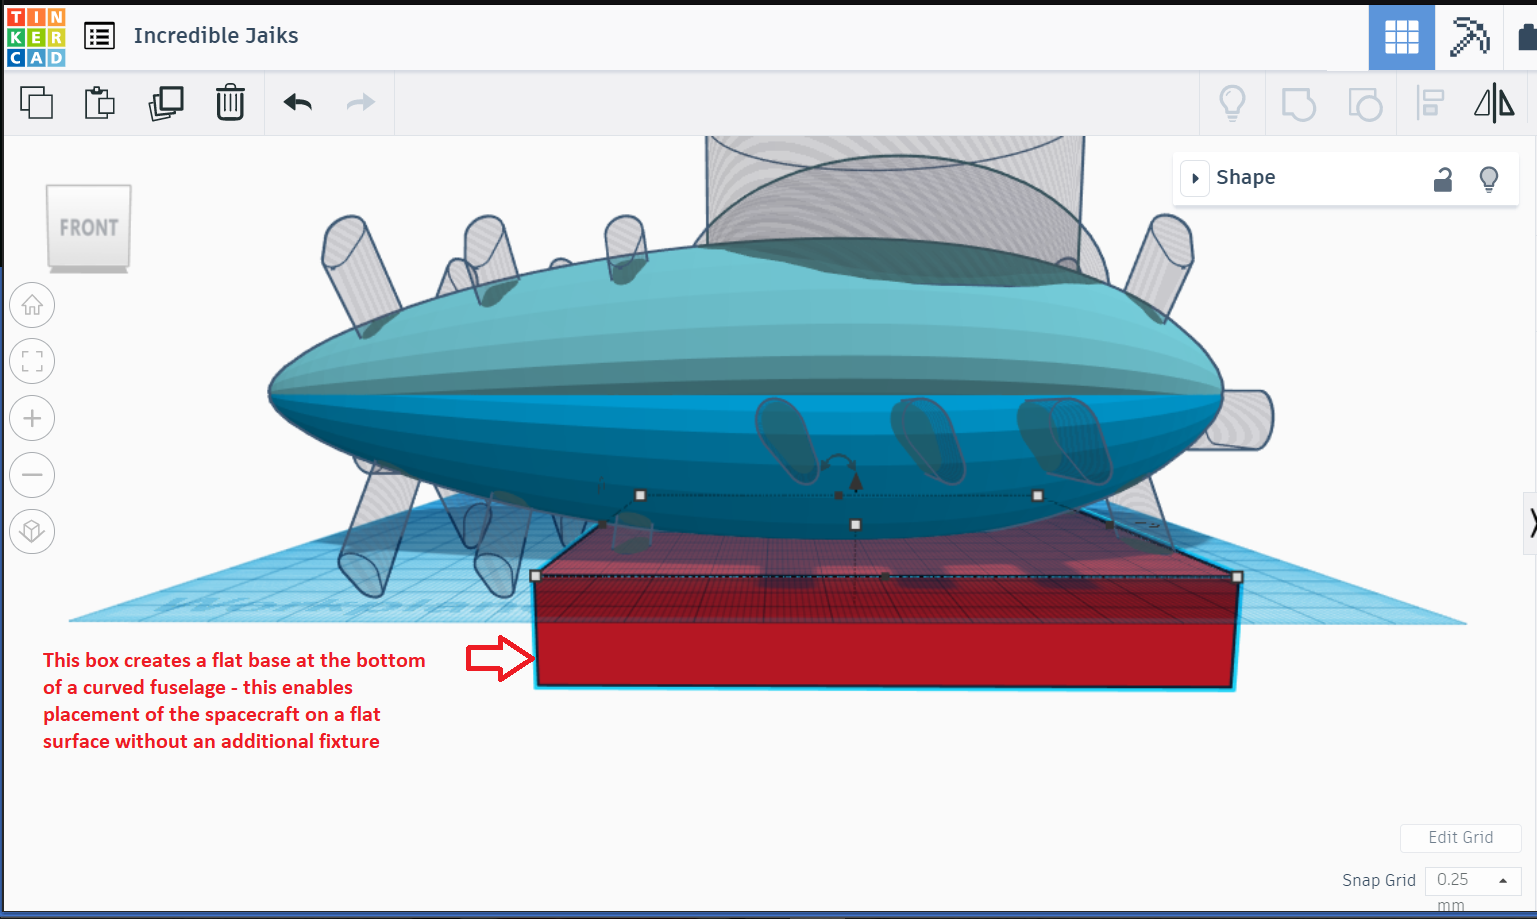
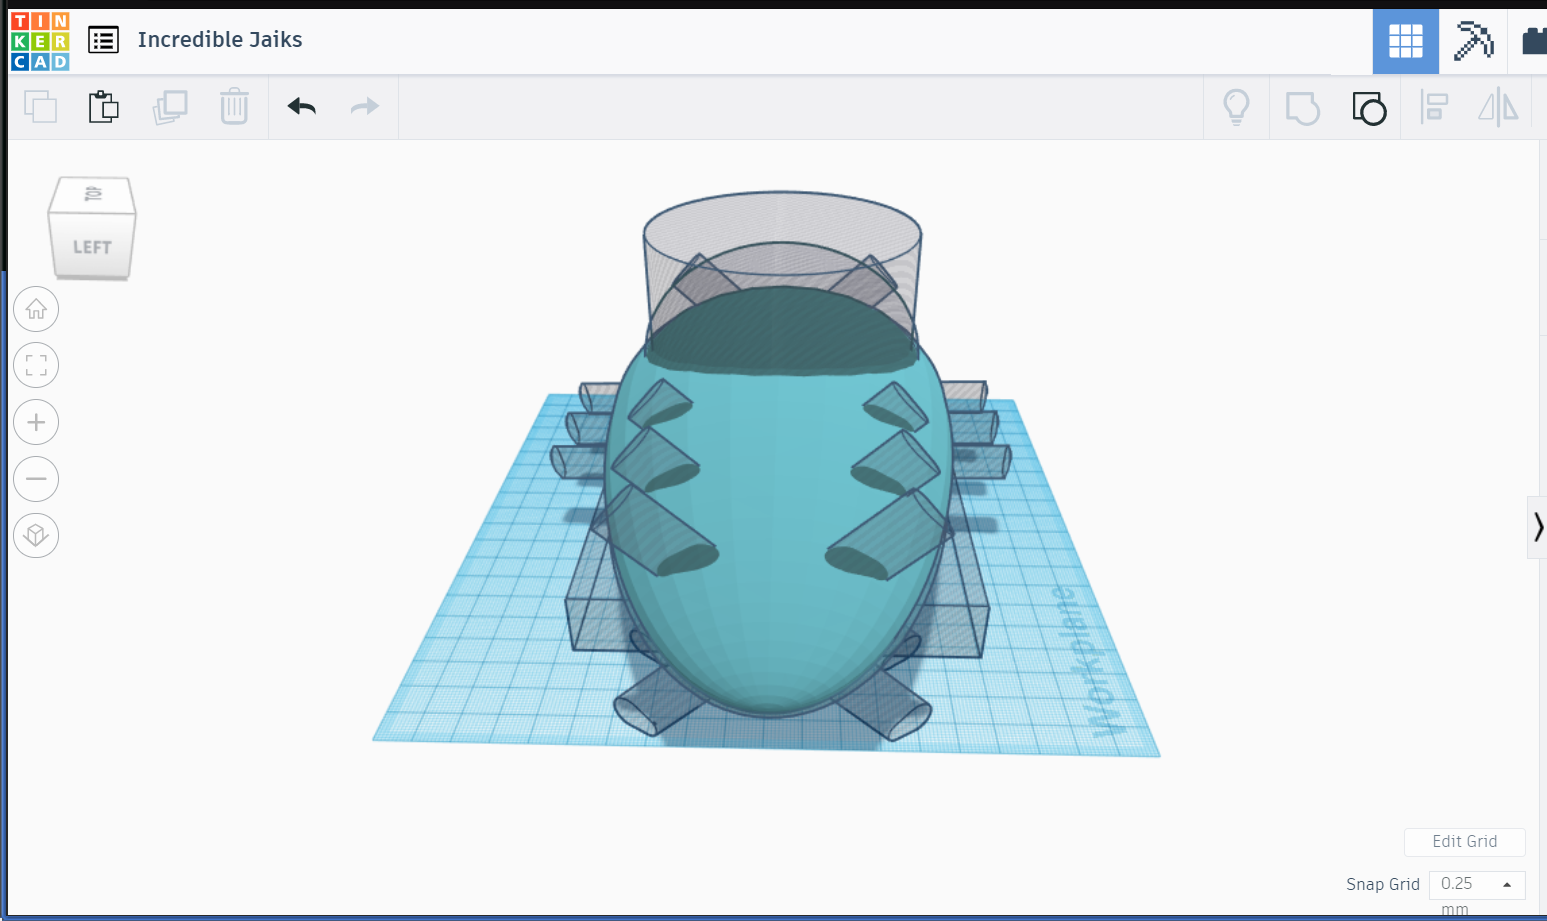
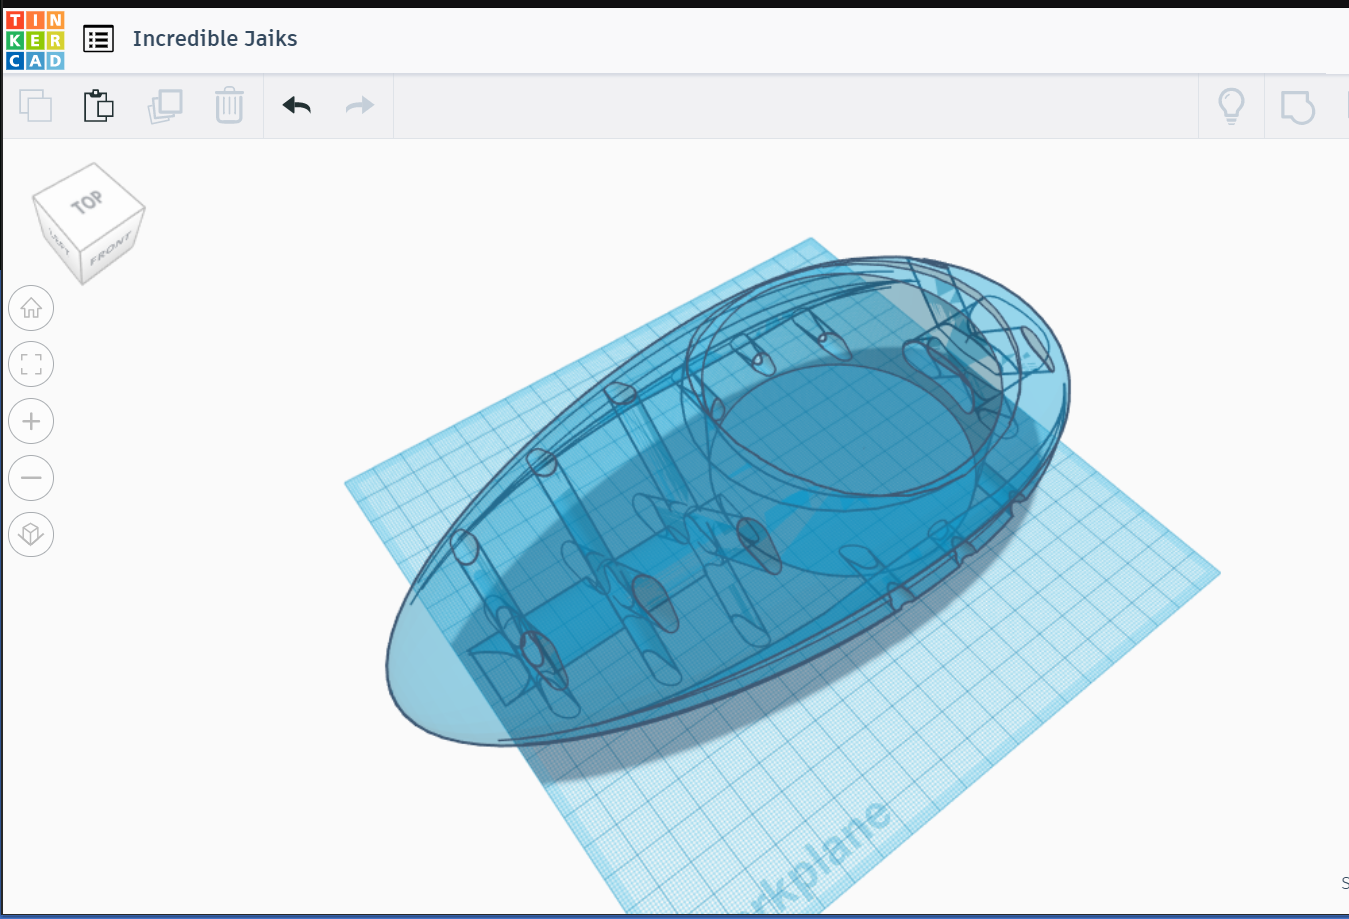
Simply making the outer shape curvaceous wouldn't cut it. I needed to add features that would make the spacecraft appear to a living and breathing sentient being. Going back several steps, I had picked out the Circular Trapezoid that fit my idea of how these features would look.
Again, just by the seat of my pants, I resized this object and shaped it down to make a straight member that would form the basis for creating "breathing vents" that would make the spacecraft look alive. Functionally, these vents would allow the Echo Dot to "breathe" by ensuring air flow around it inside the spacecraft.
To summarize, I went through a series of the following steps to create these additional features:
- The straight vent was modified, duplicated to create an X-vent - both shapes were duplicated several times
- The X-vents were again manually positioned fore and aft of the fuselage to form diagonal vents
- Similarly, the straight vents were placed along the bottom stern of the fuselage - all look and feel!
- I quickly created a couple of rectangles with rounded corners and ran them along the fore and aft along the length of the hull
- Both vents open into the Echo Dot chamber and the rear vent would serve as an outlet for the power chord and the audio cable
- Obviously, the spacecraft wouldn't sit on a flat surface if it has a curved underside - I created a rectangular box and positioned the hull into the box until I had a small flat area on the underside of the spacecraftFinally, all the vents and the box were converted into Holes before the shapes could be grouped into a single solid.
The last screen grab shows the result - once again, I set the fuselage surface to be "Transparent" to see how the vents travel through the fuselage of the spacecraft.
NOTE
Positioning the X-vents was an iterative exercise. Before they could be duplicated and positioned, the angle between the arms of the original X-member was progressively adjusted until the vents cut diagonally across the fuselage satisfactorily.
The straight vents were positioned along the bottom stern and then rotated along their axes to to make them aligned backwards to go along with "forward-racing" appearance of the spacecraft.
Sentient Spacecraft - the First Version
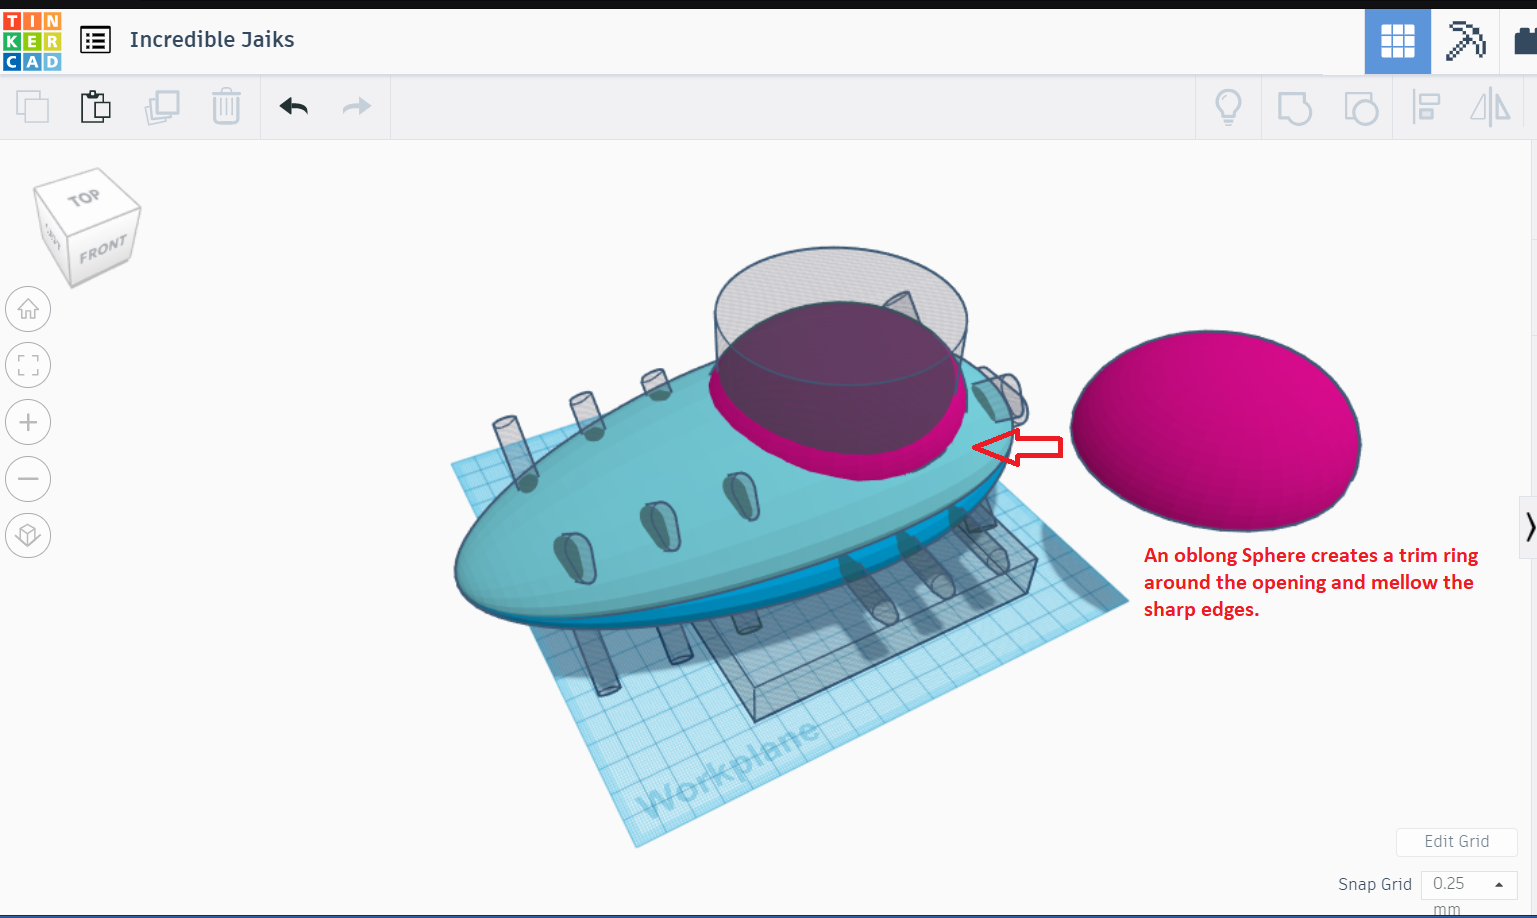
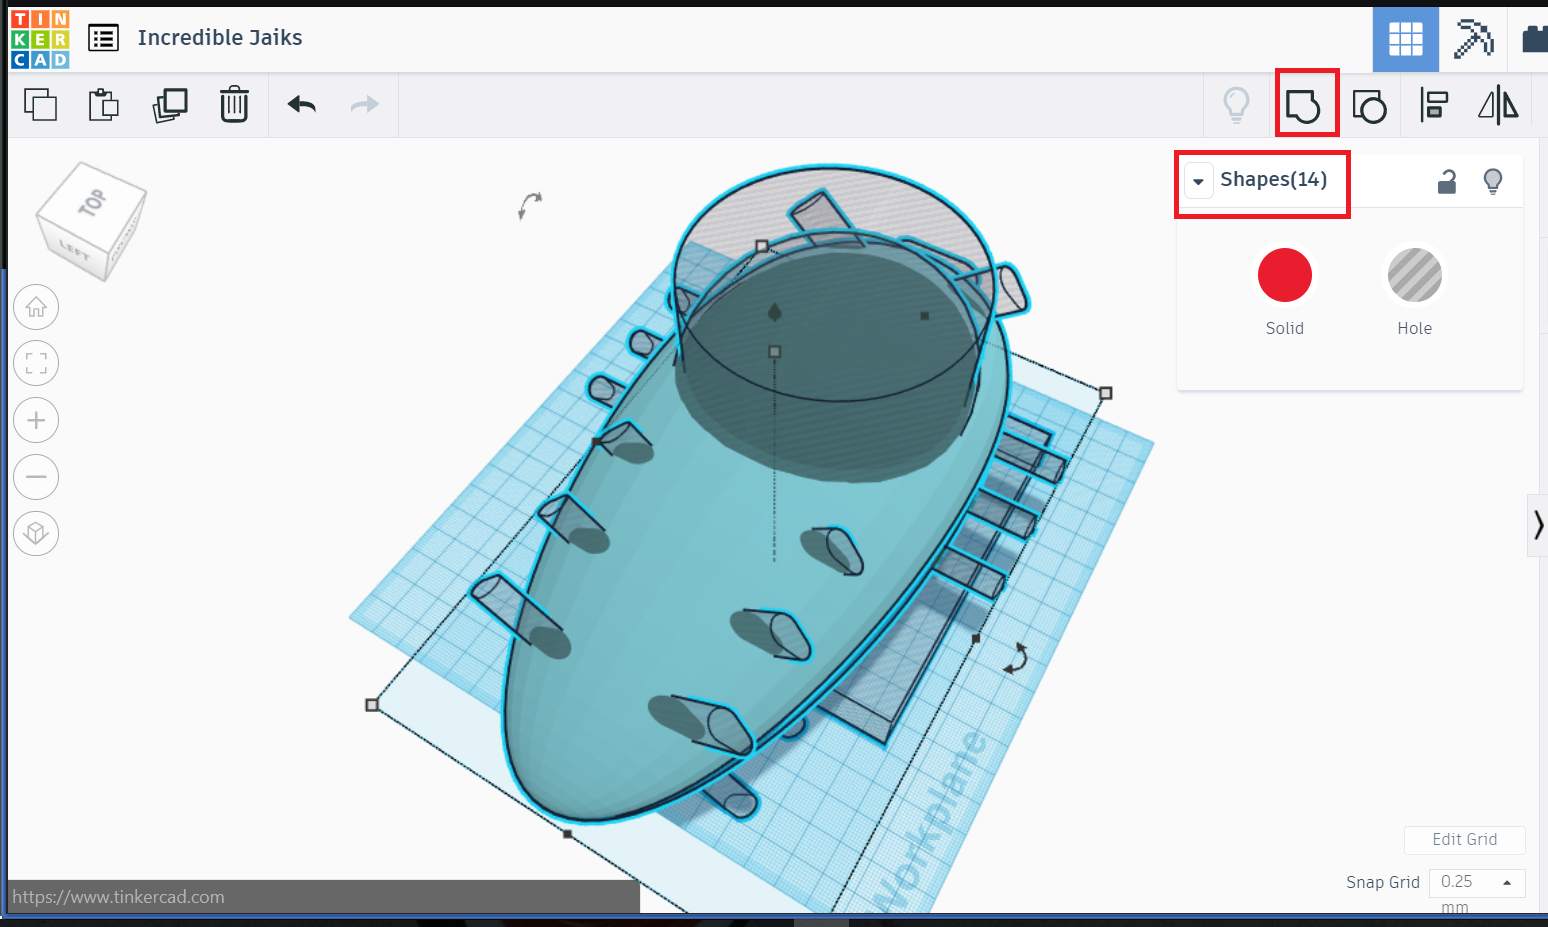
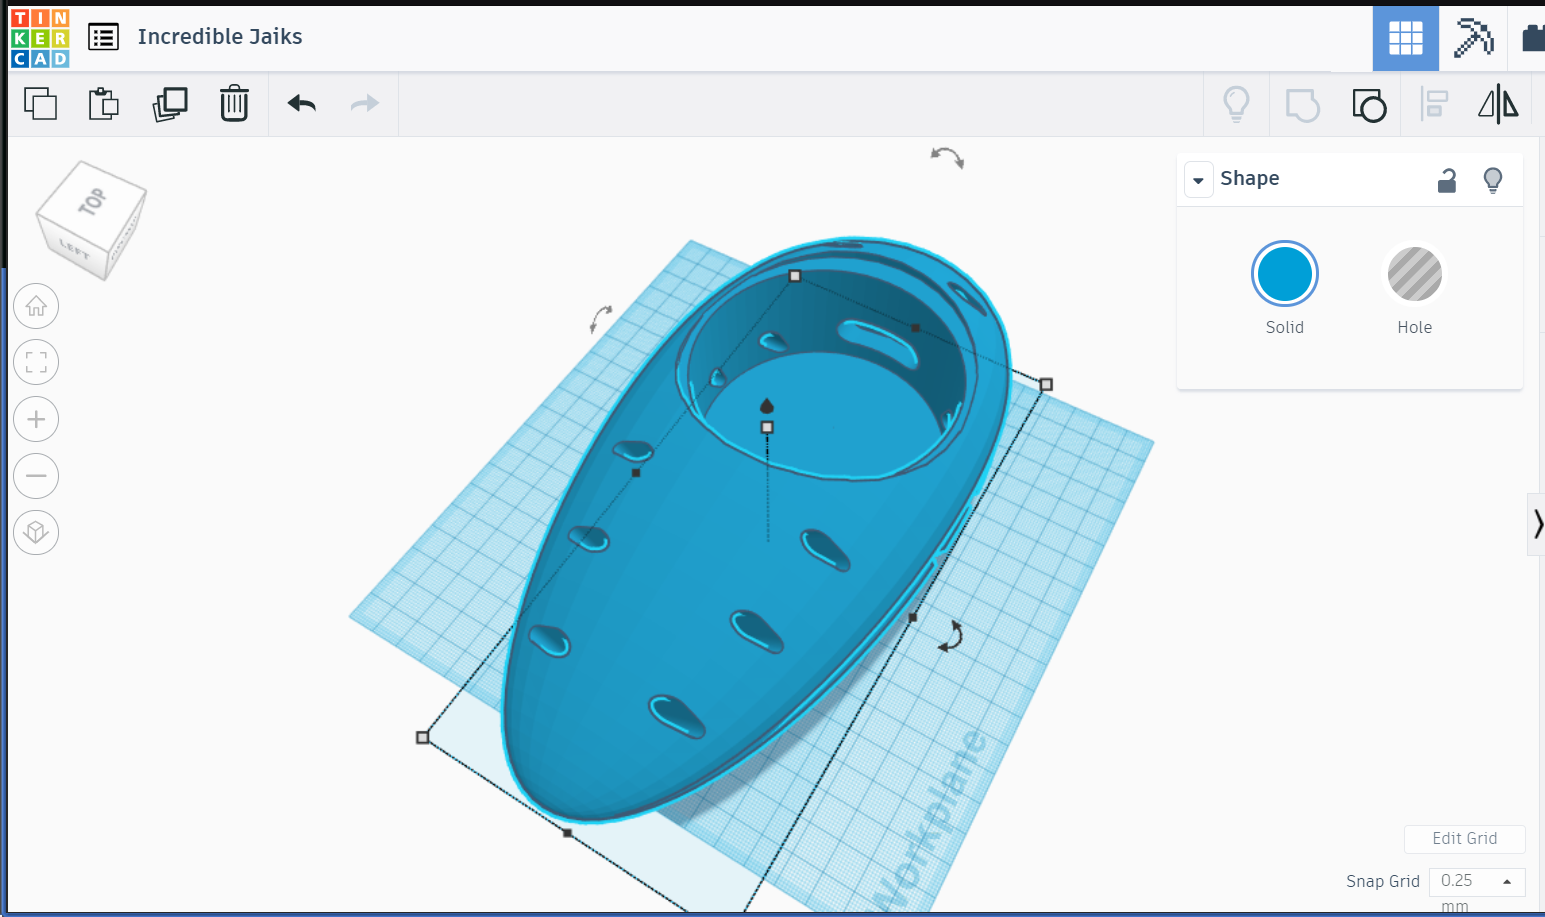
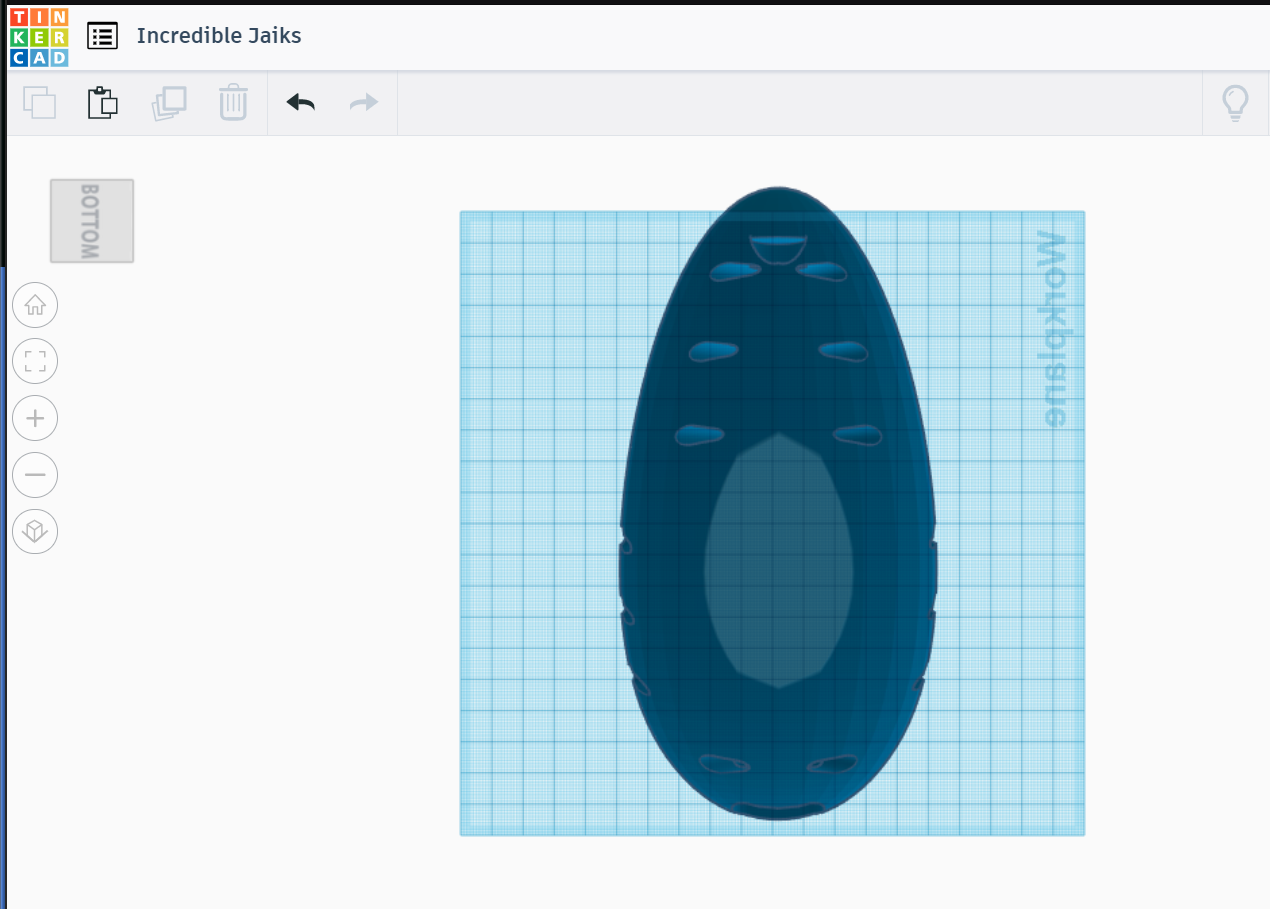
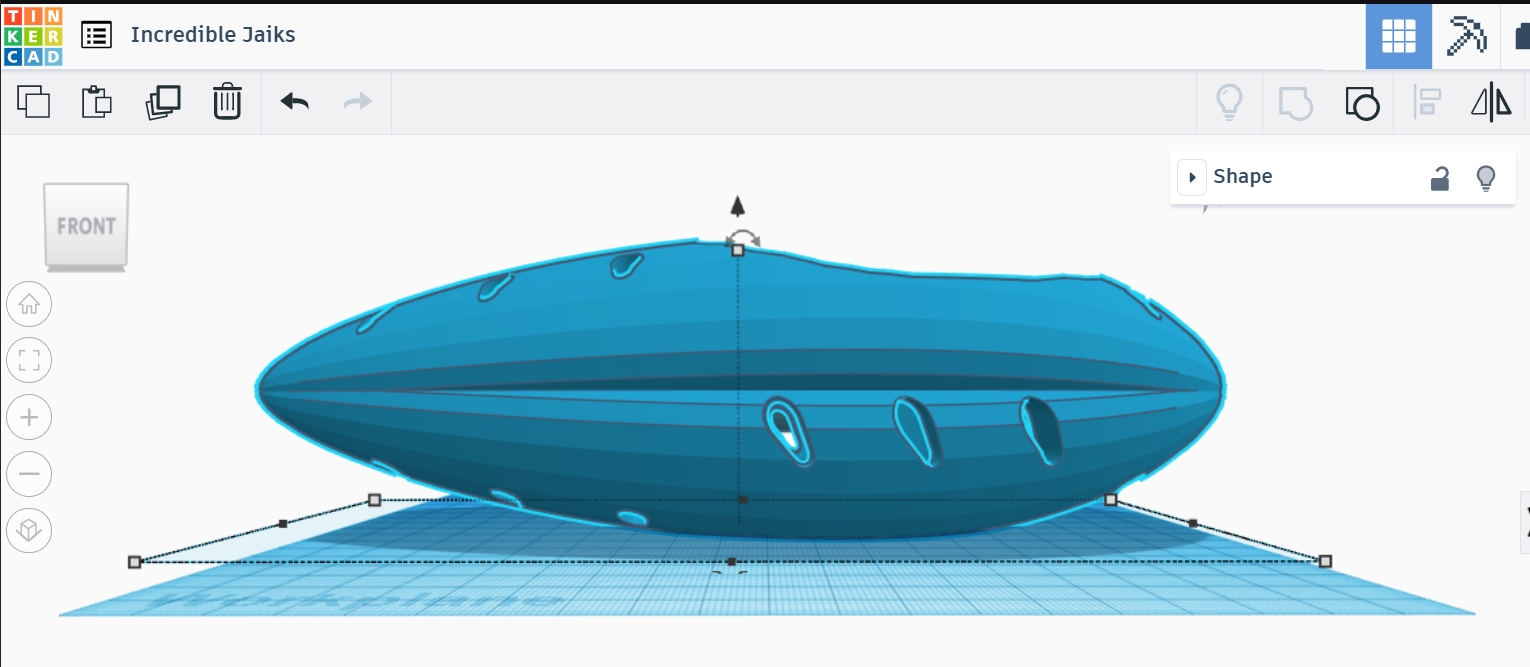
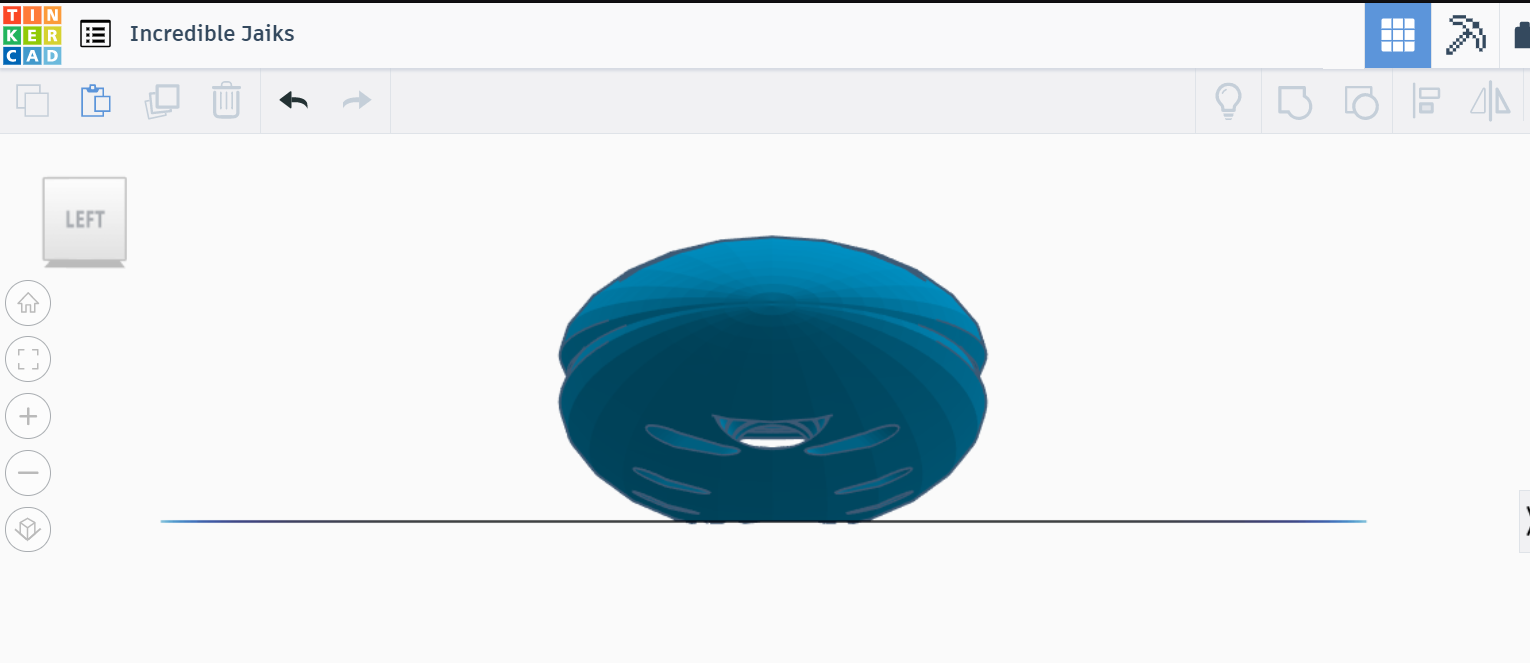
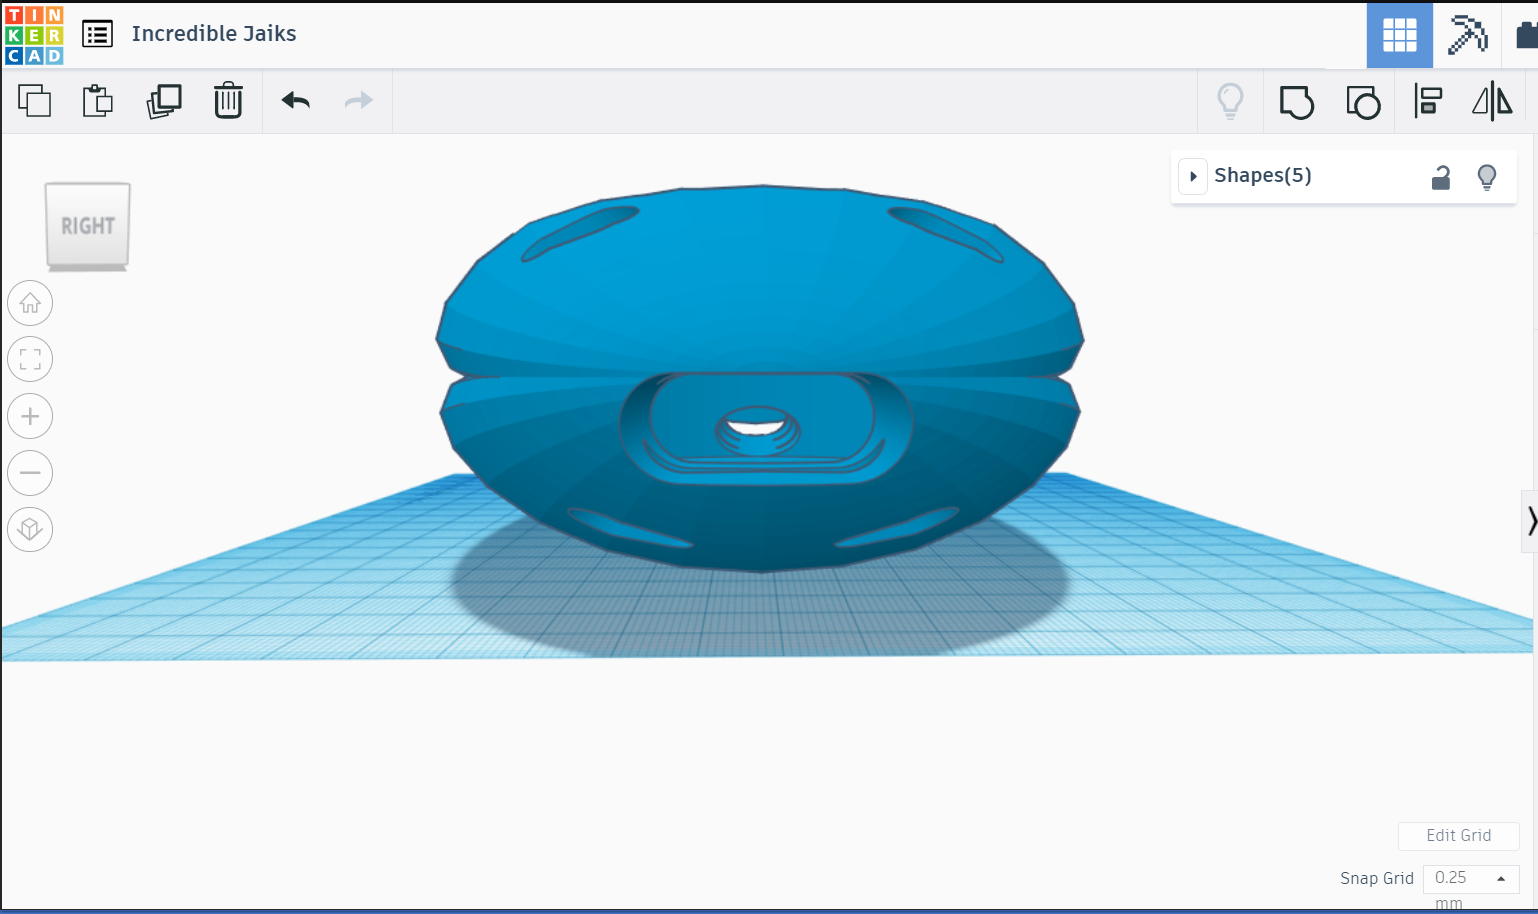
The edges of the Echo Chamber looked a bit too sharp and "edgy" for an otherwise curvaceous spacecraft. These sharp looking edges of the Echo chamber needed a bit of mellowing.
An oblong sphere that was shaped to fit around the edges helped solve the problem. A hollow half-sphere was created and positioned around the opening of the Echo chamber.
The Sphere was converted to a Hole followed by a grouping operation that created a neat trimmed surface around the opening of the Echo chamber!
NOTE
If you've observed, the design looks completely Ungrouped in every step. When possible, I try to minimize grouping down to one single step. This way it's easier for me ungroup all the objects in a single move making the individual components immediately available for manipulation.
This is my personal practice, and may or may not be applicable to fellow Tinkercad enthusiasts.
Sentient Spacecraft Version 1
- I really liked where I ended up with this design - good enough to call it Version 1
- I set the color of the fuselage to Cold-Steel Blue, something that is associated with the chilling cold of space
The last 5 screen grabs show the various views of the Spacecraft and how the vents flow across the body of the spacecraft
Proofing the Version 1 3D Print
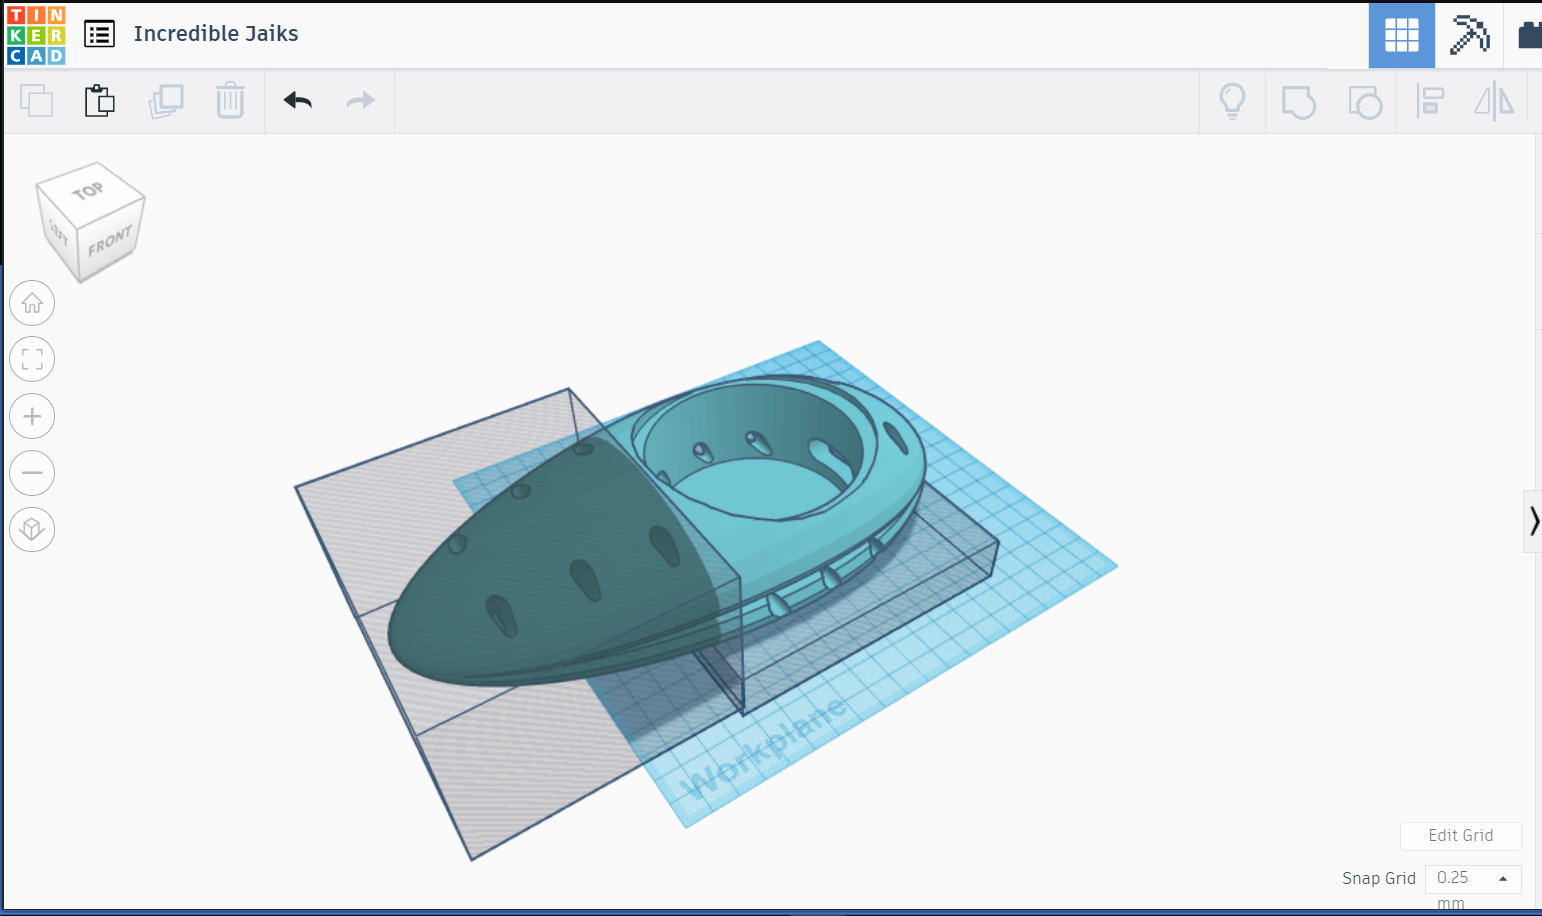
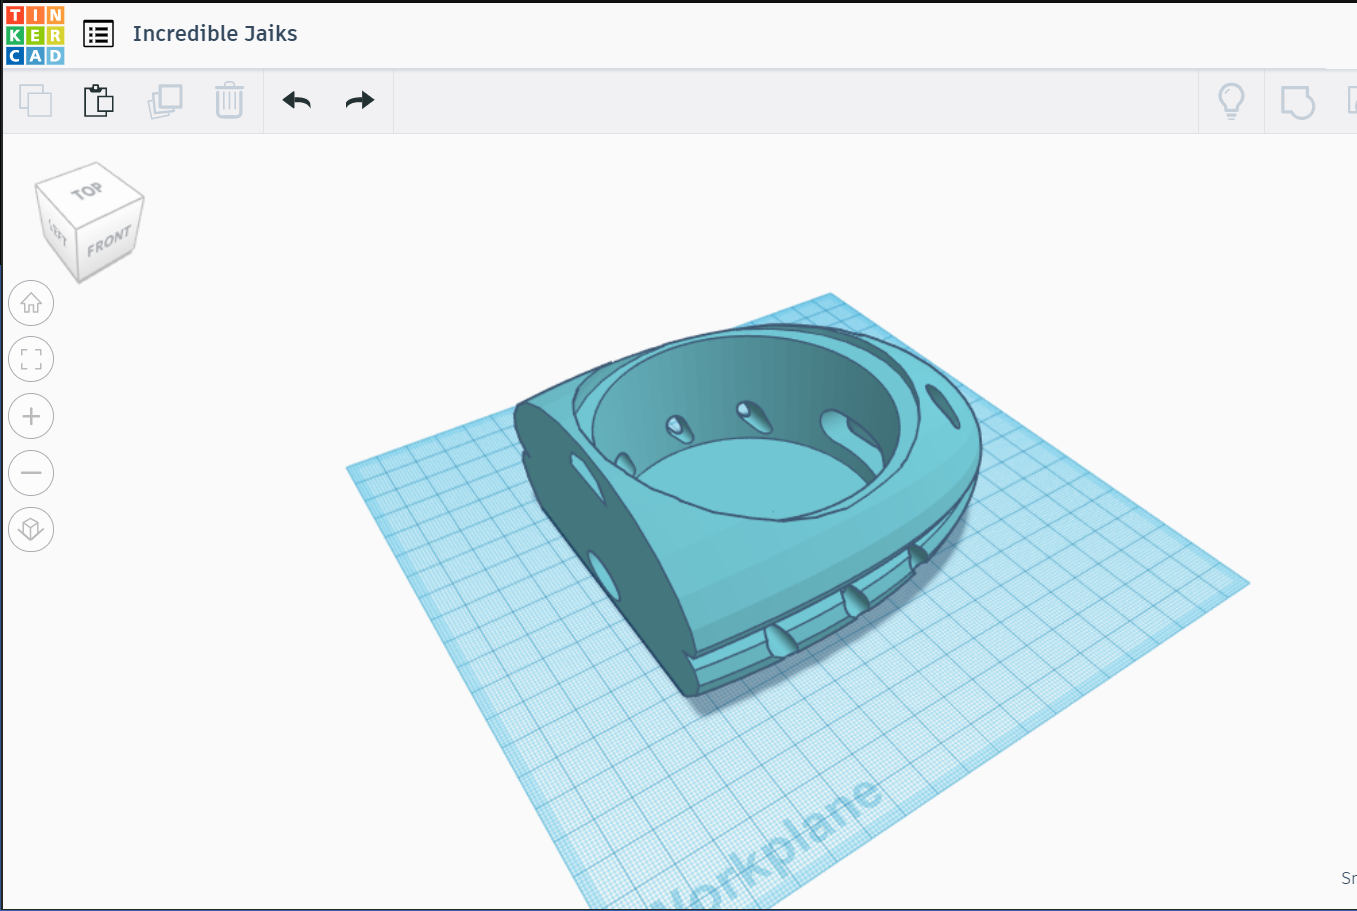
As much as I like what I see, I'm a bit pragmatic about the time I spend 3D printing something because desktop 3D printing isn't exactly a speedy process.
Practical 3D Printing Problems
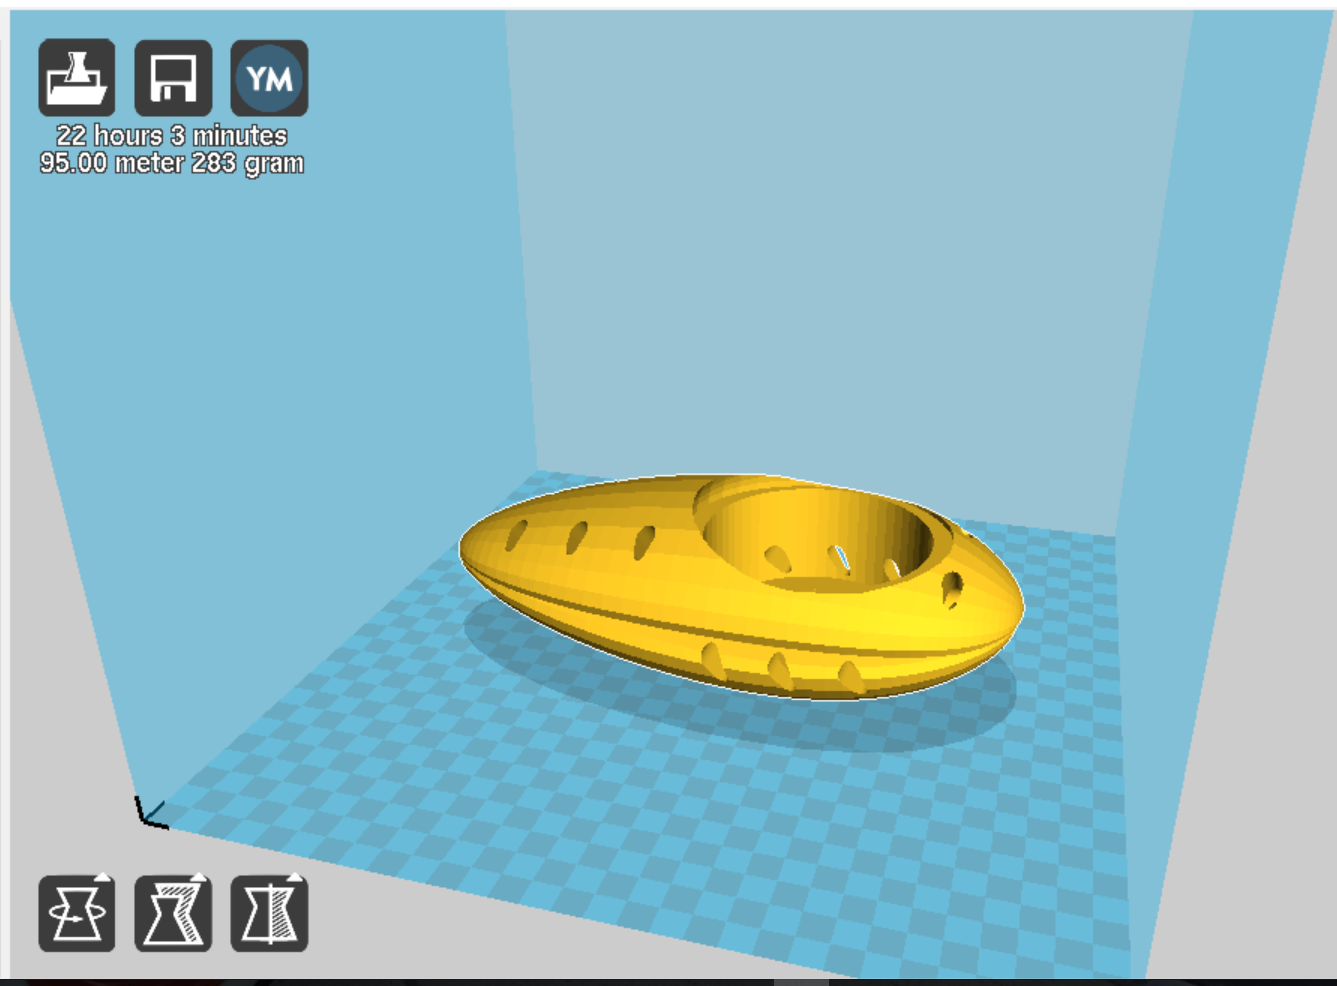
Exporting out the STL file from Tinkercad and pulling it into Cura quickly revealed the following:
- The print is pretty large and complex - printing with a 0.2 mm layer height and Raft-enabled would take almost 24 hours
- Given that the underside of the craft is curved, slicing in Cura revealed that the underside of the craft required enormous amount of Rafting
- What if the object printed right, but then I have design flaws? The Echo Dot not sitting in the chamber or if I'm unable to plug in the cable or audio jack into the Echo when it's seated inside the craft?
- On the other extreme, what if the print ran for several hours and failed for some technical reason?
All of these scenarios lead to the same place - enormous waste of time, energy and material!
Proofing the Print to confirm Functionality
When printed, the Echo Dot must be properly seated and powered up and if that isn't possible, then this design would be just an over-sized plastic paperweight. Therefore, I decided to go the extra mile to proof the print by creating a highly chopped down version of the original craft
What I ended up with,when printed, would allow me to confirm the following:
- The dimensions of the Echo Dot chamber is correct, and the Dot could be put in and taken out of the spacecraft
- All the vents meant to open into the Echo chamber, do so
- The rear vent is sized and positioned correctly so that the power cable and/or the audio jack could be plugged in
- The curved section of the body is printable, and the quality of the vents cutting through the fuselage is acceptable
The Proofed Print
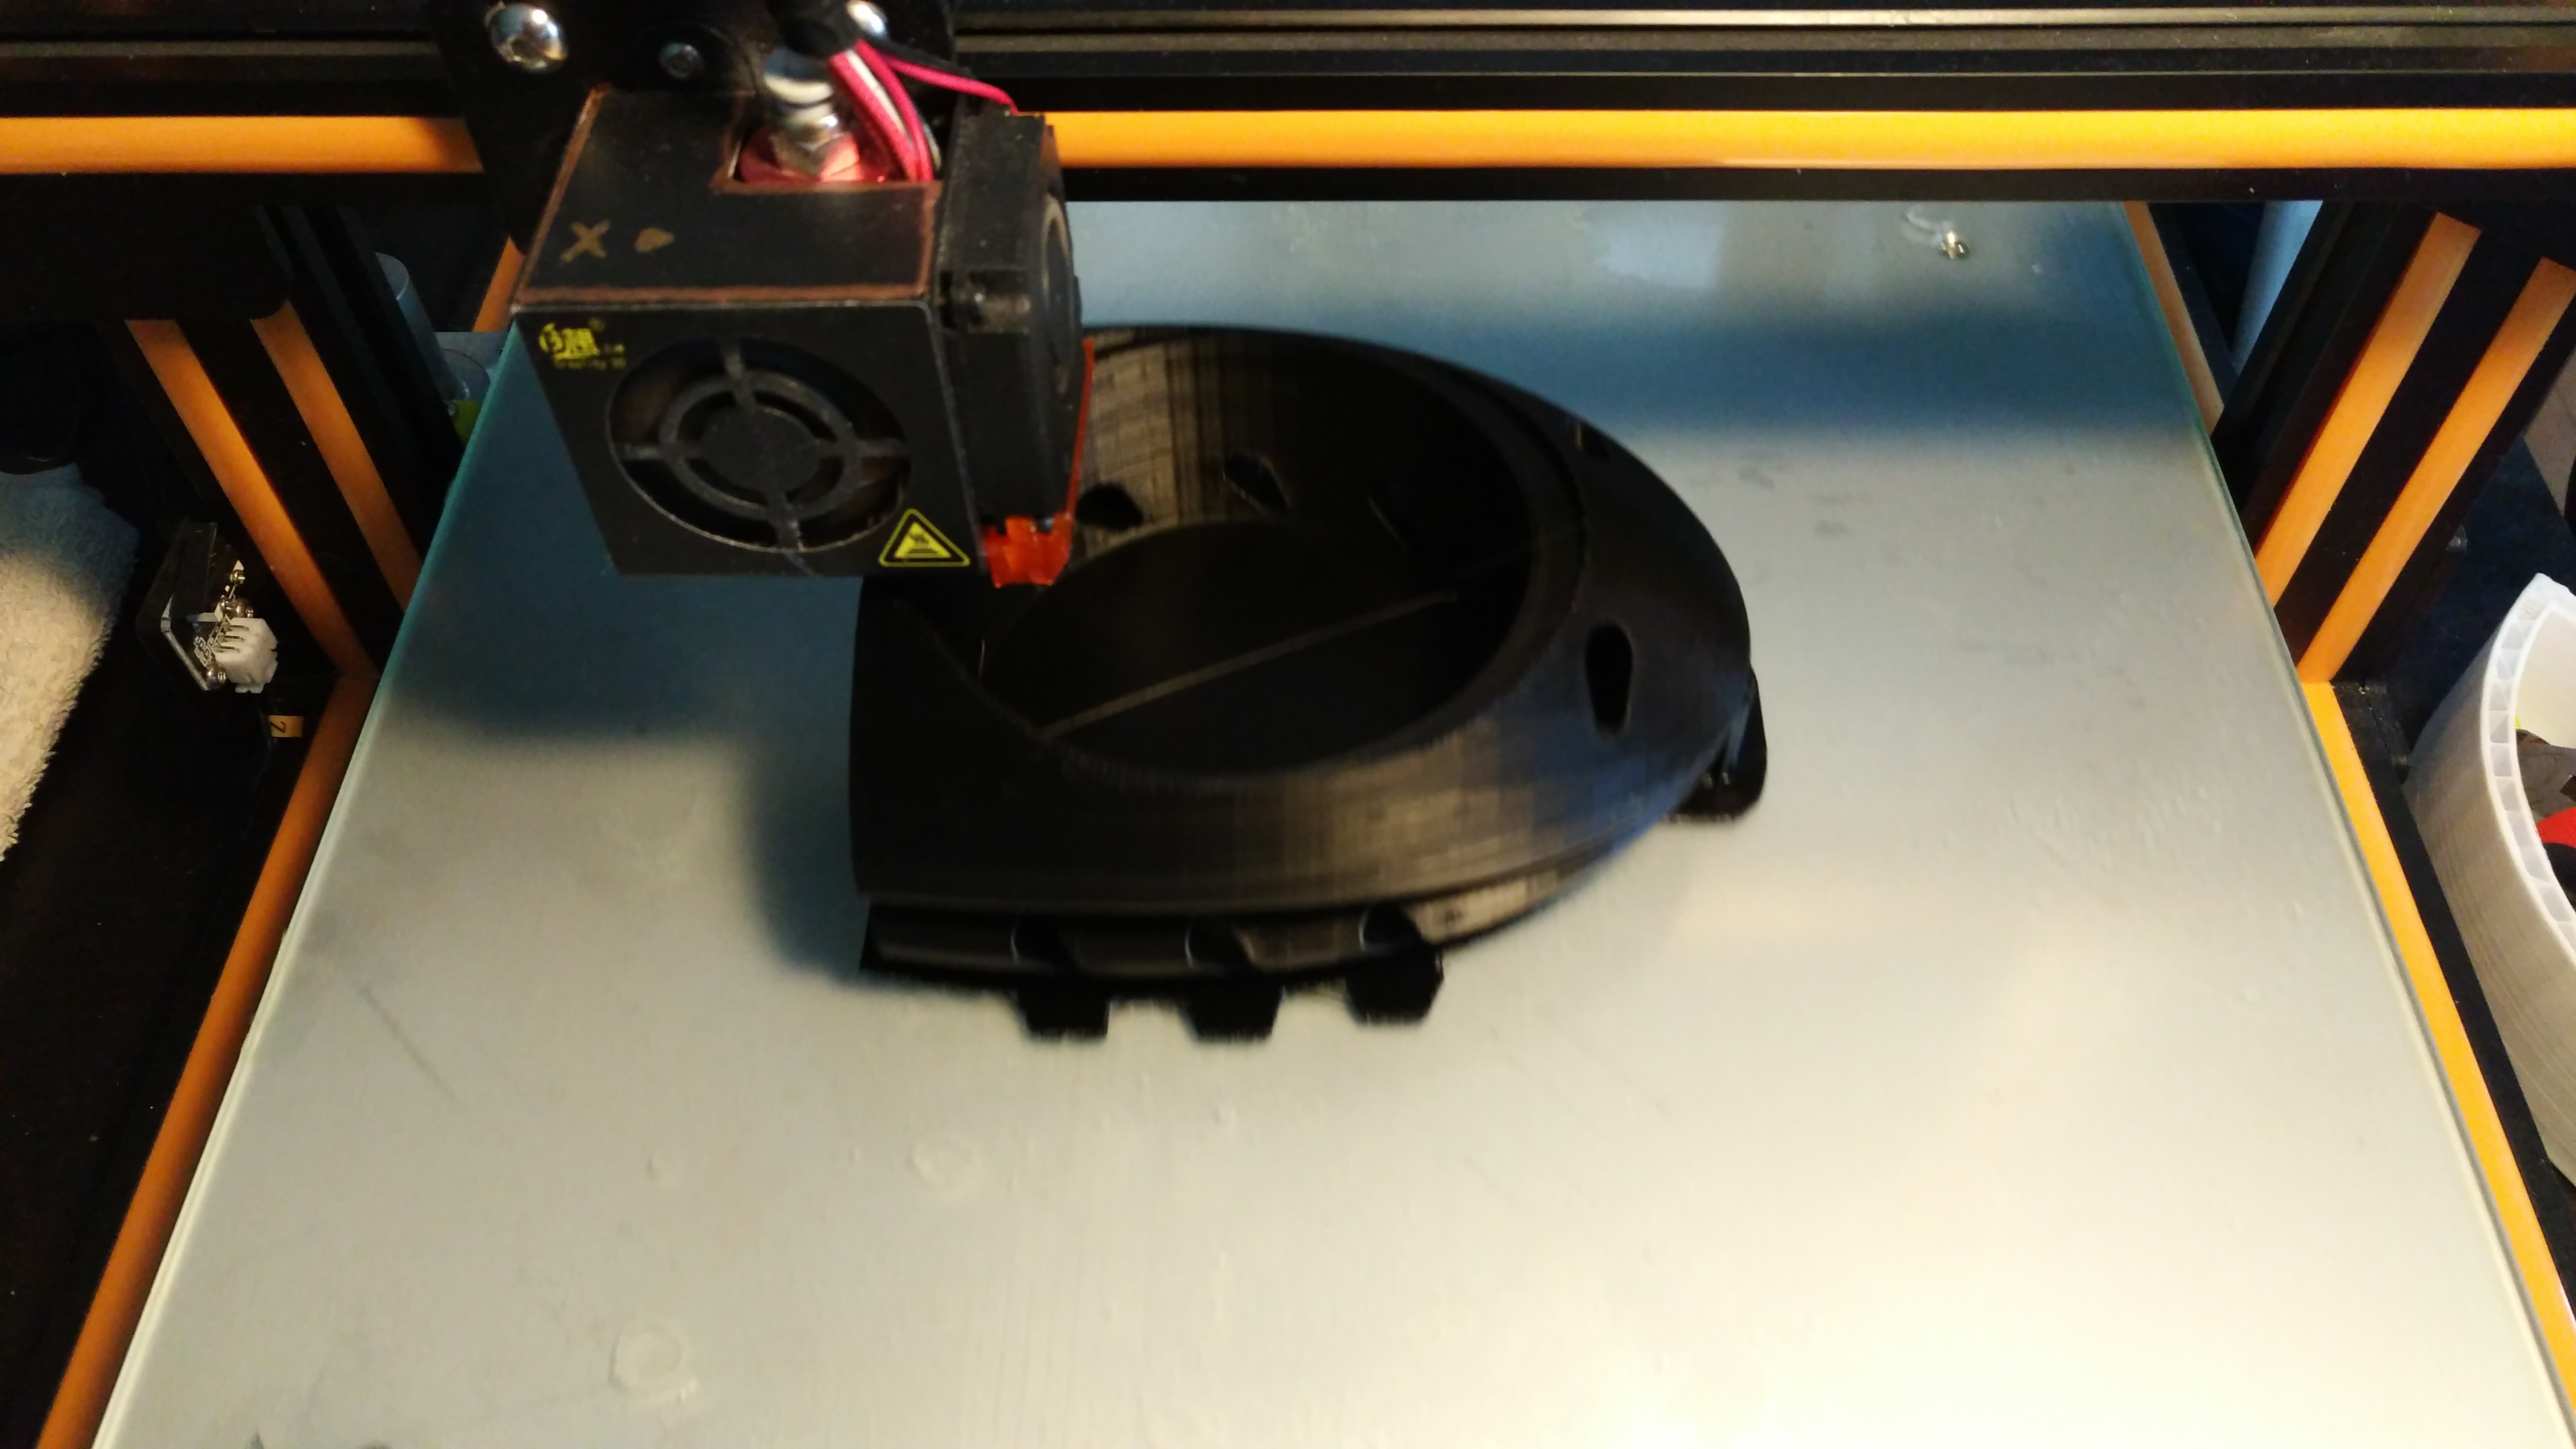
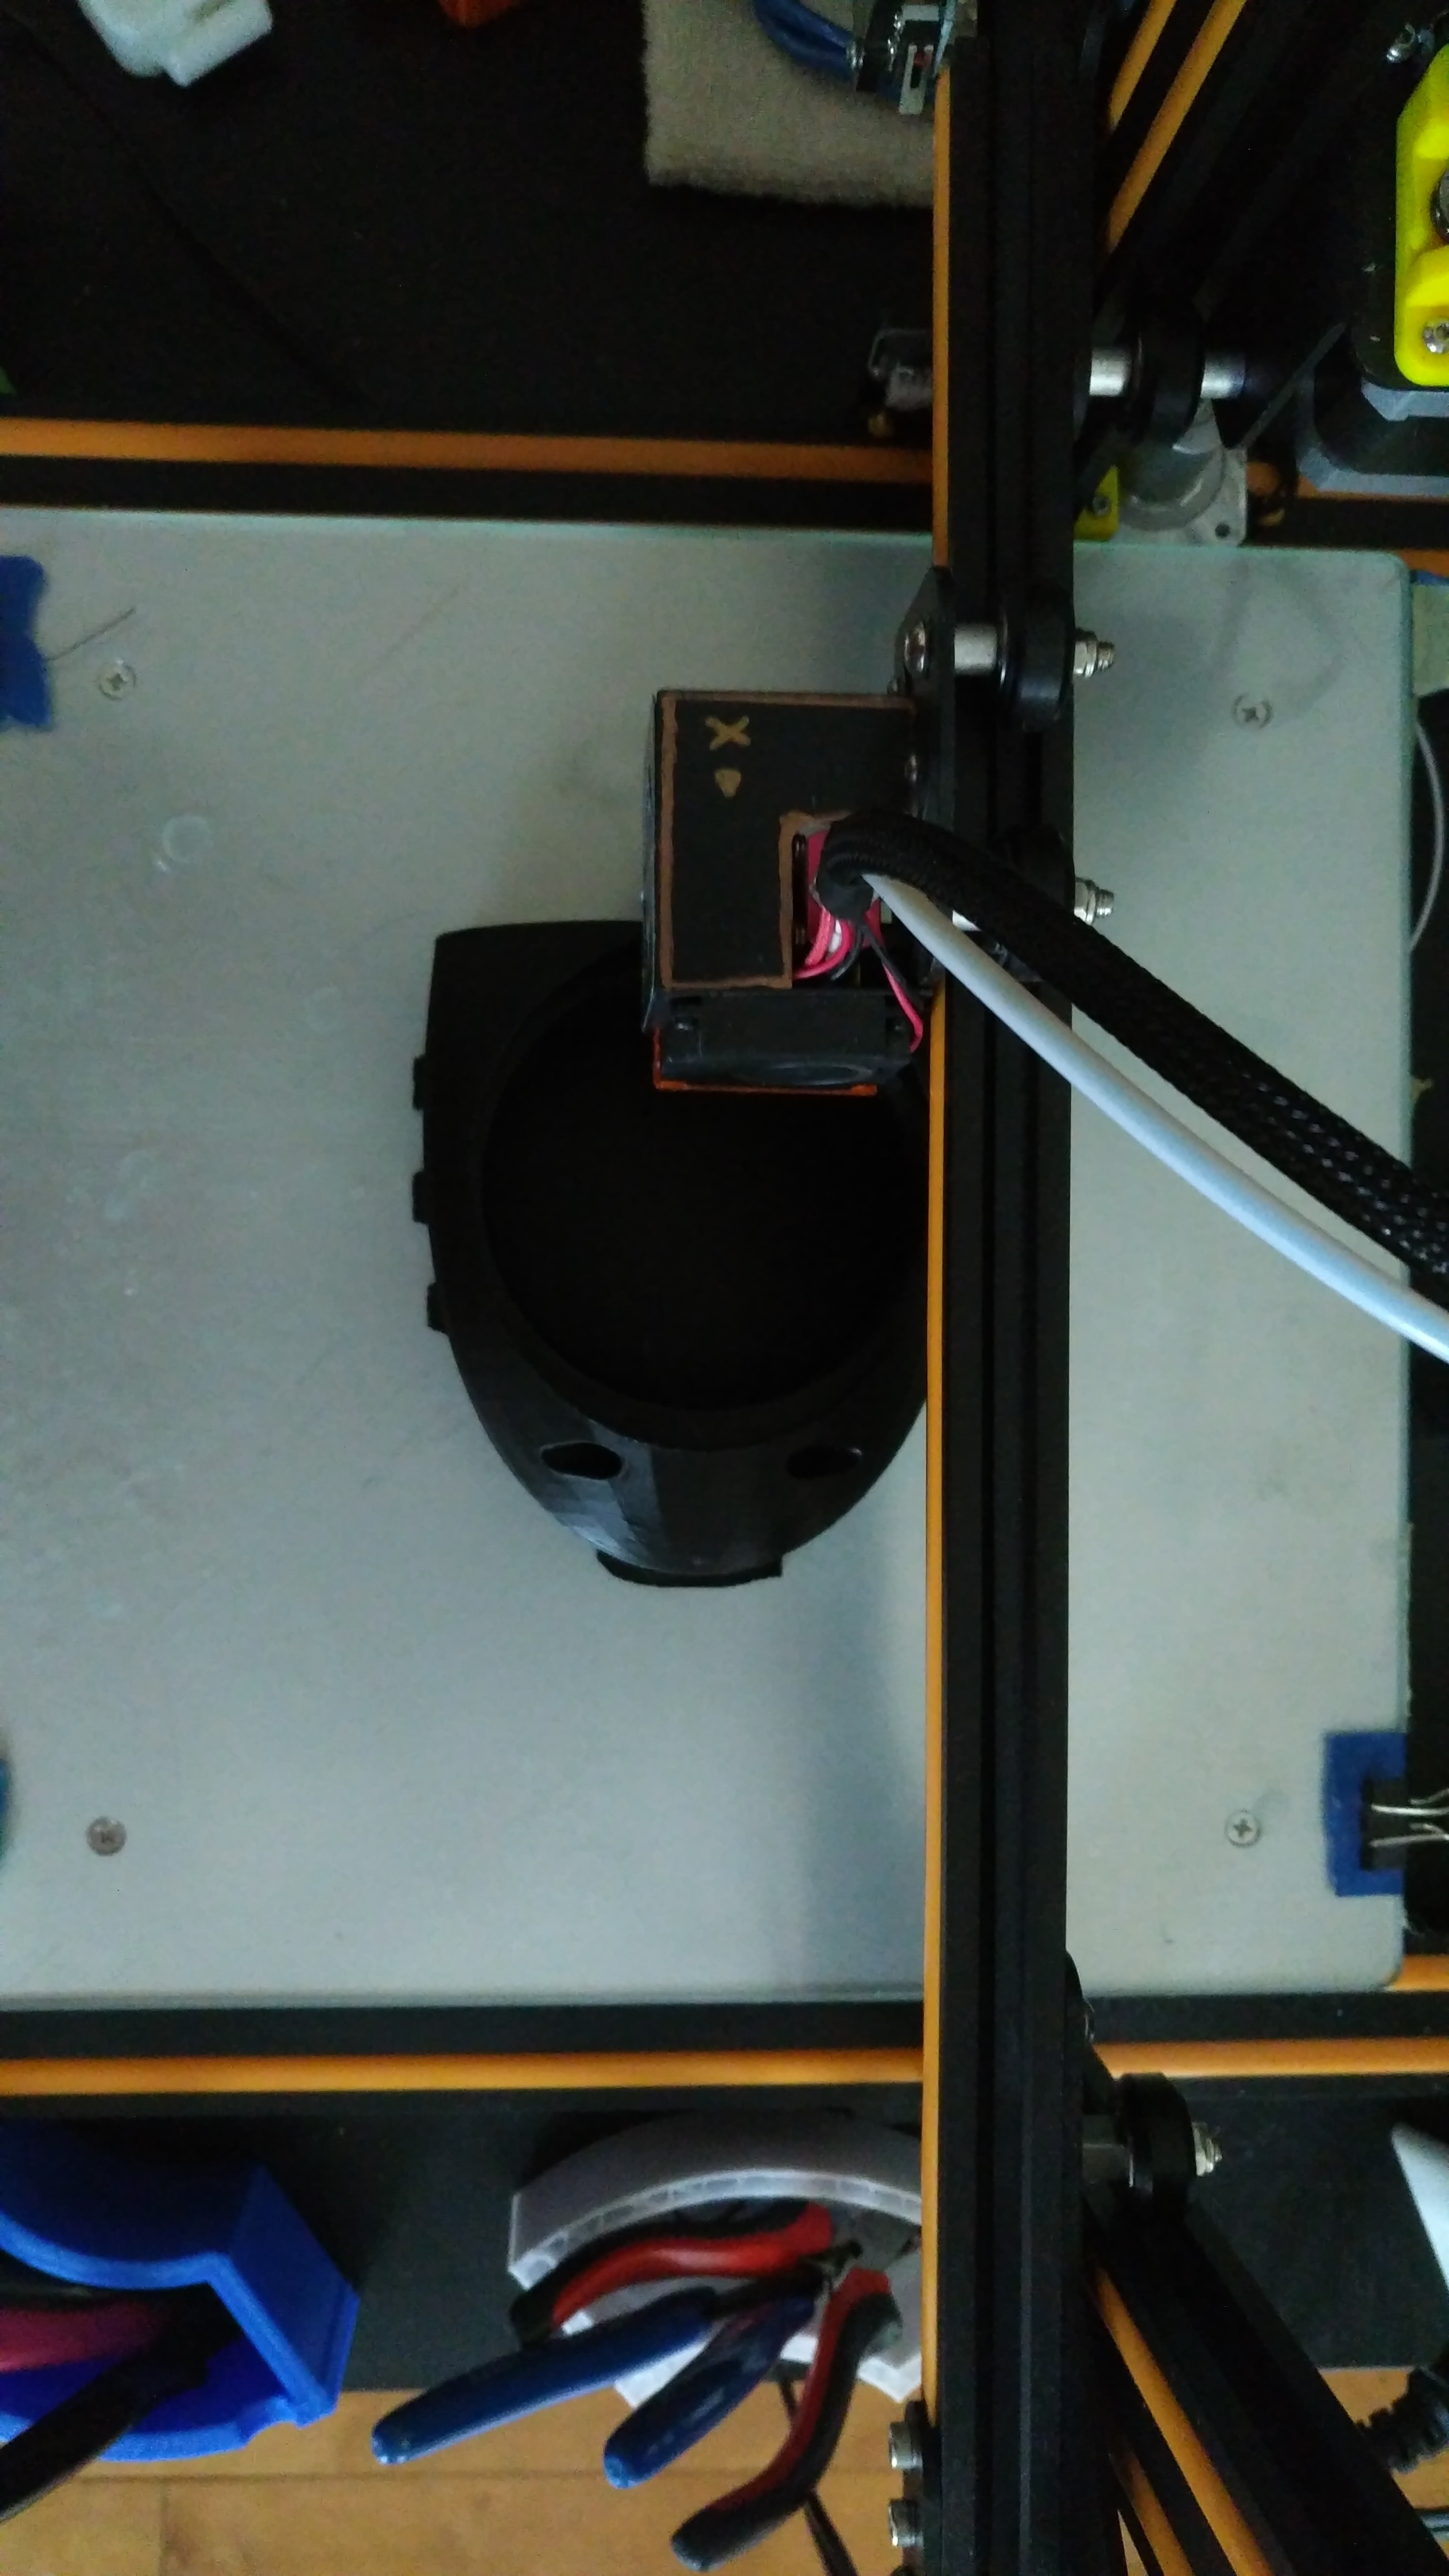
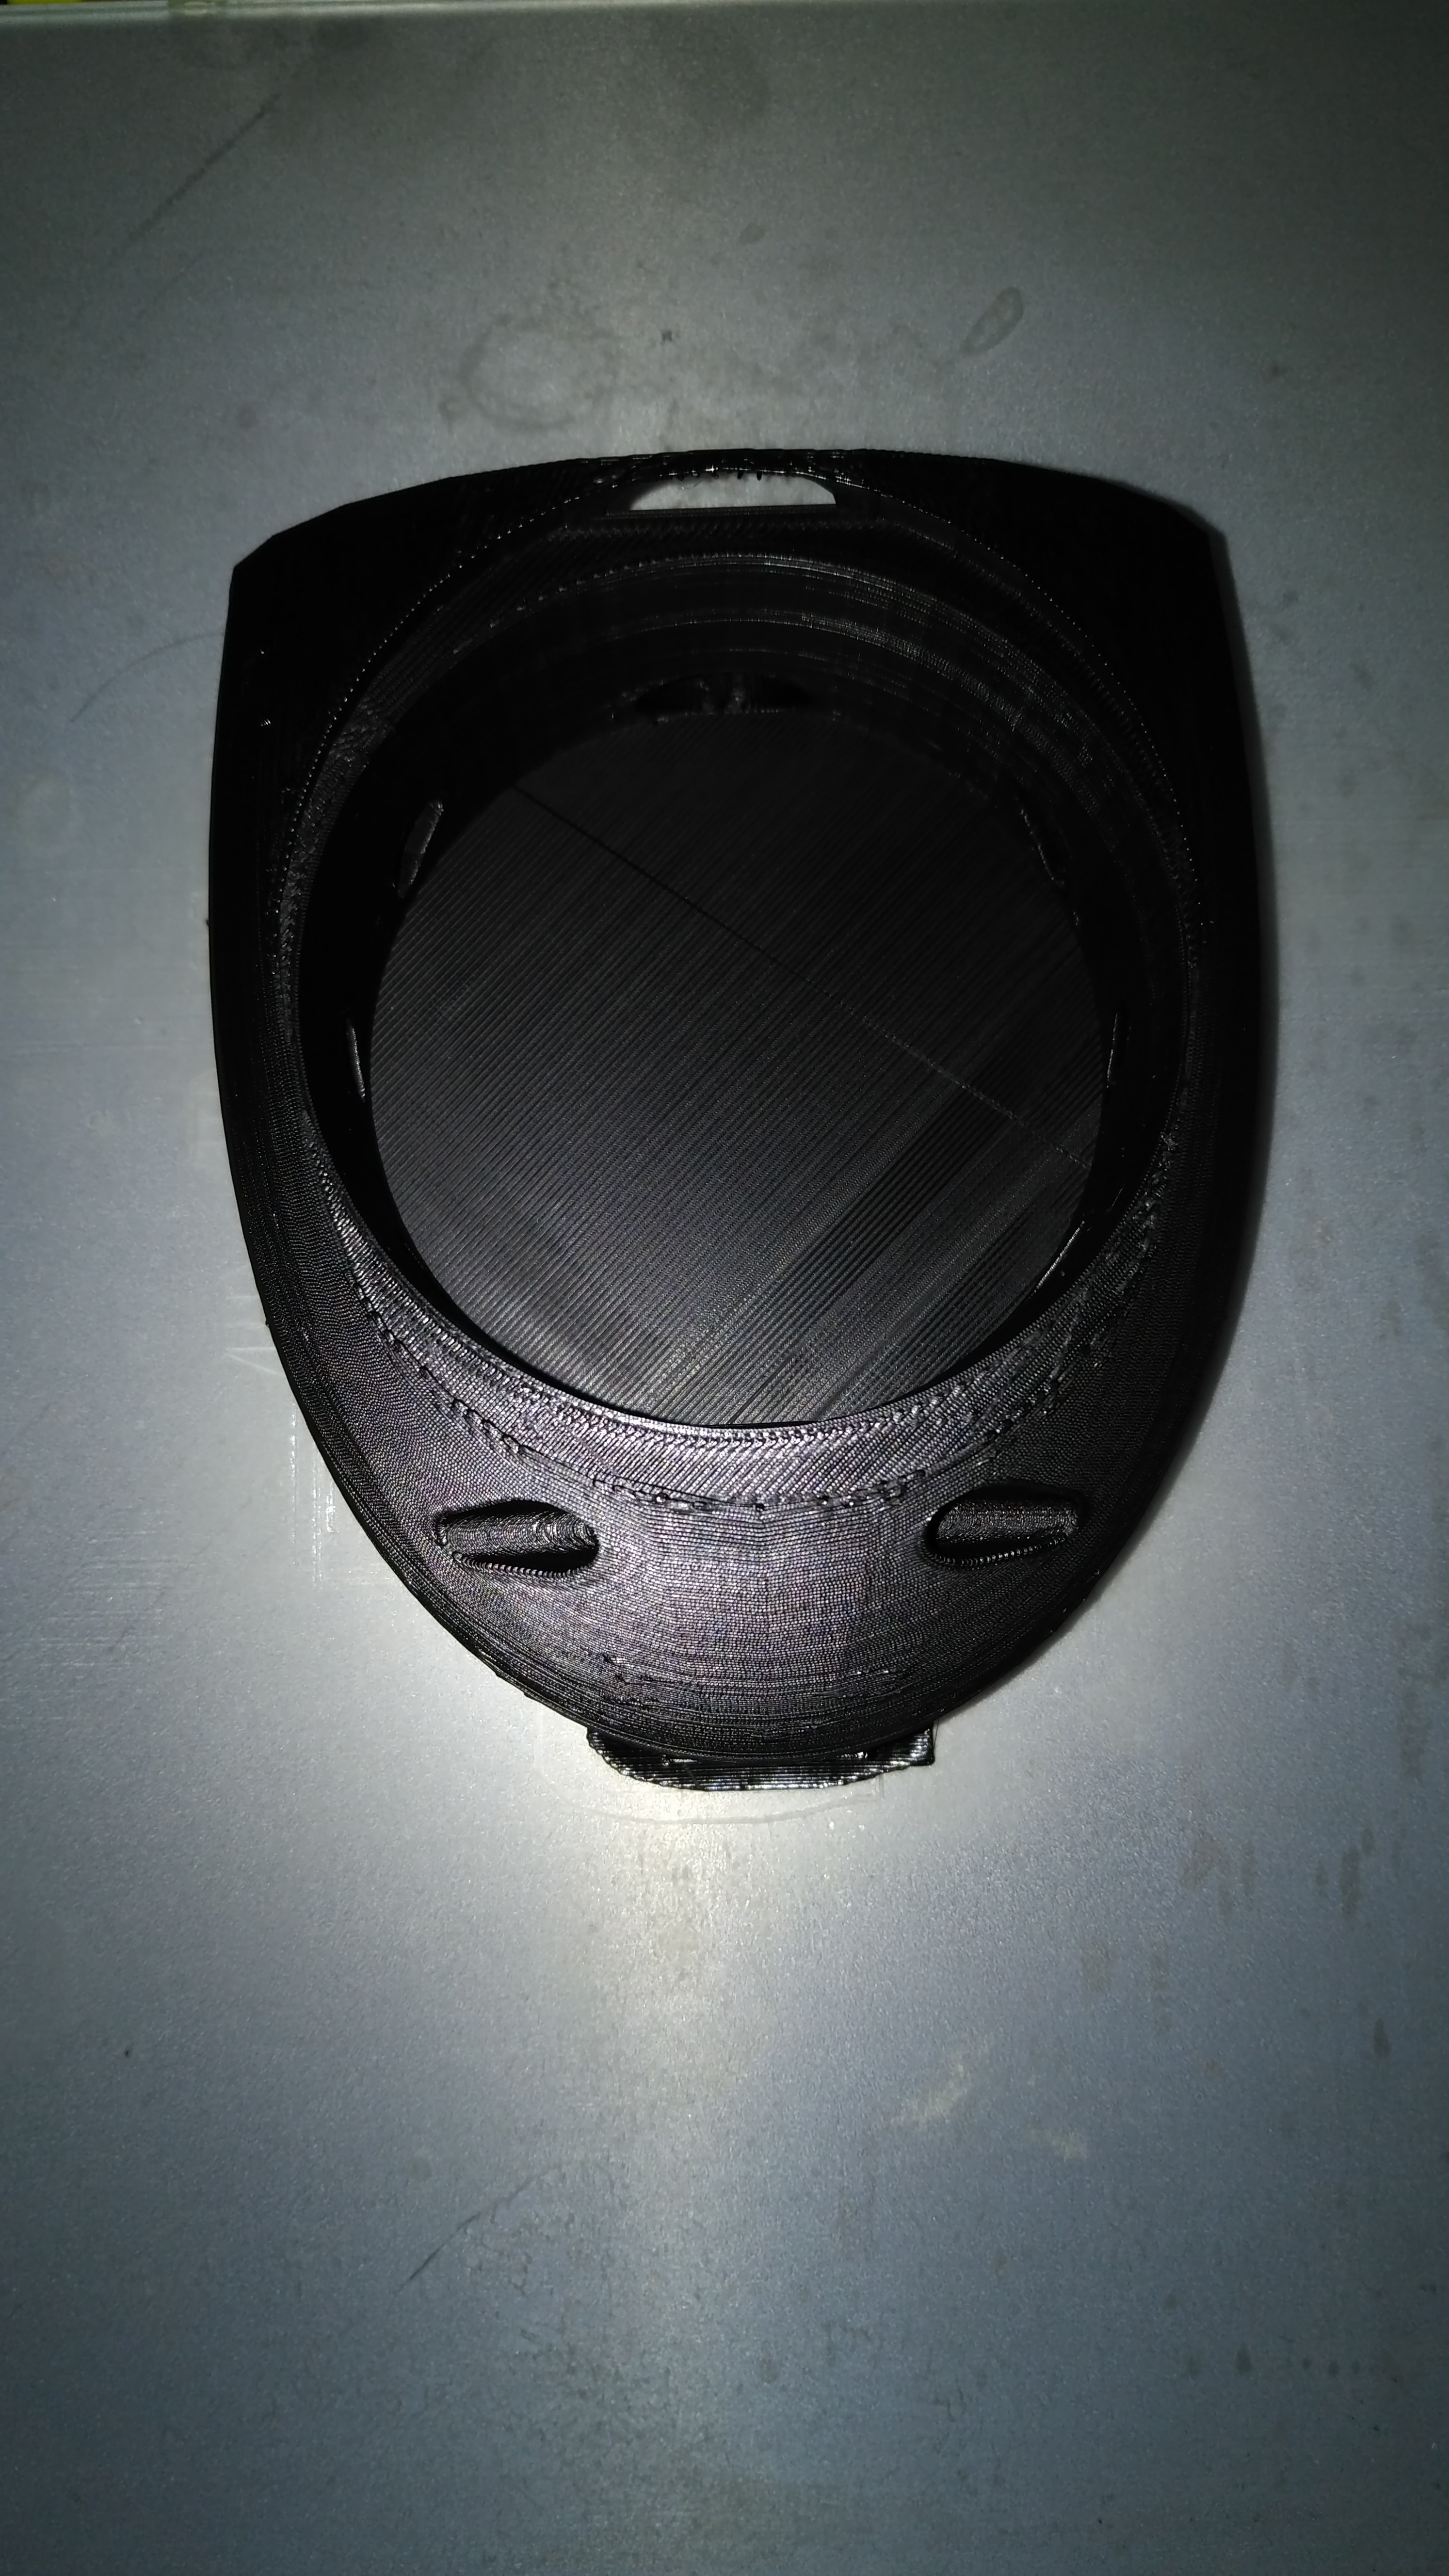
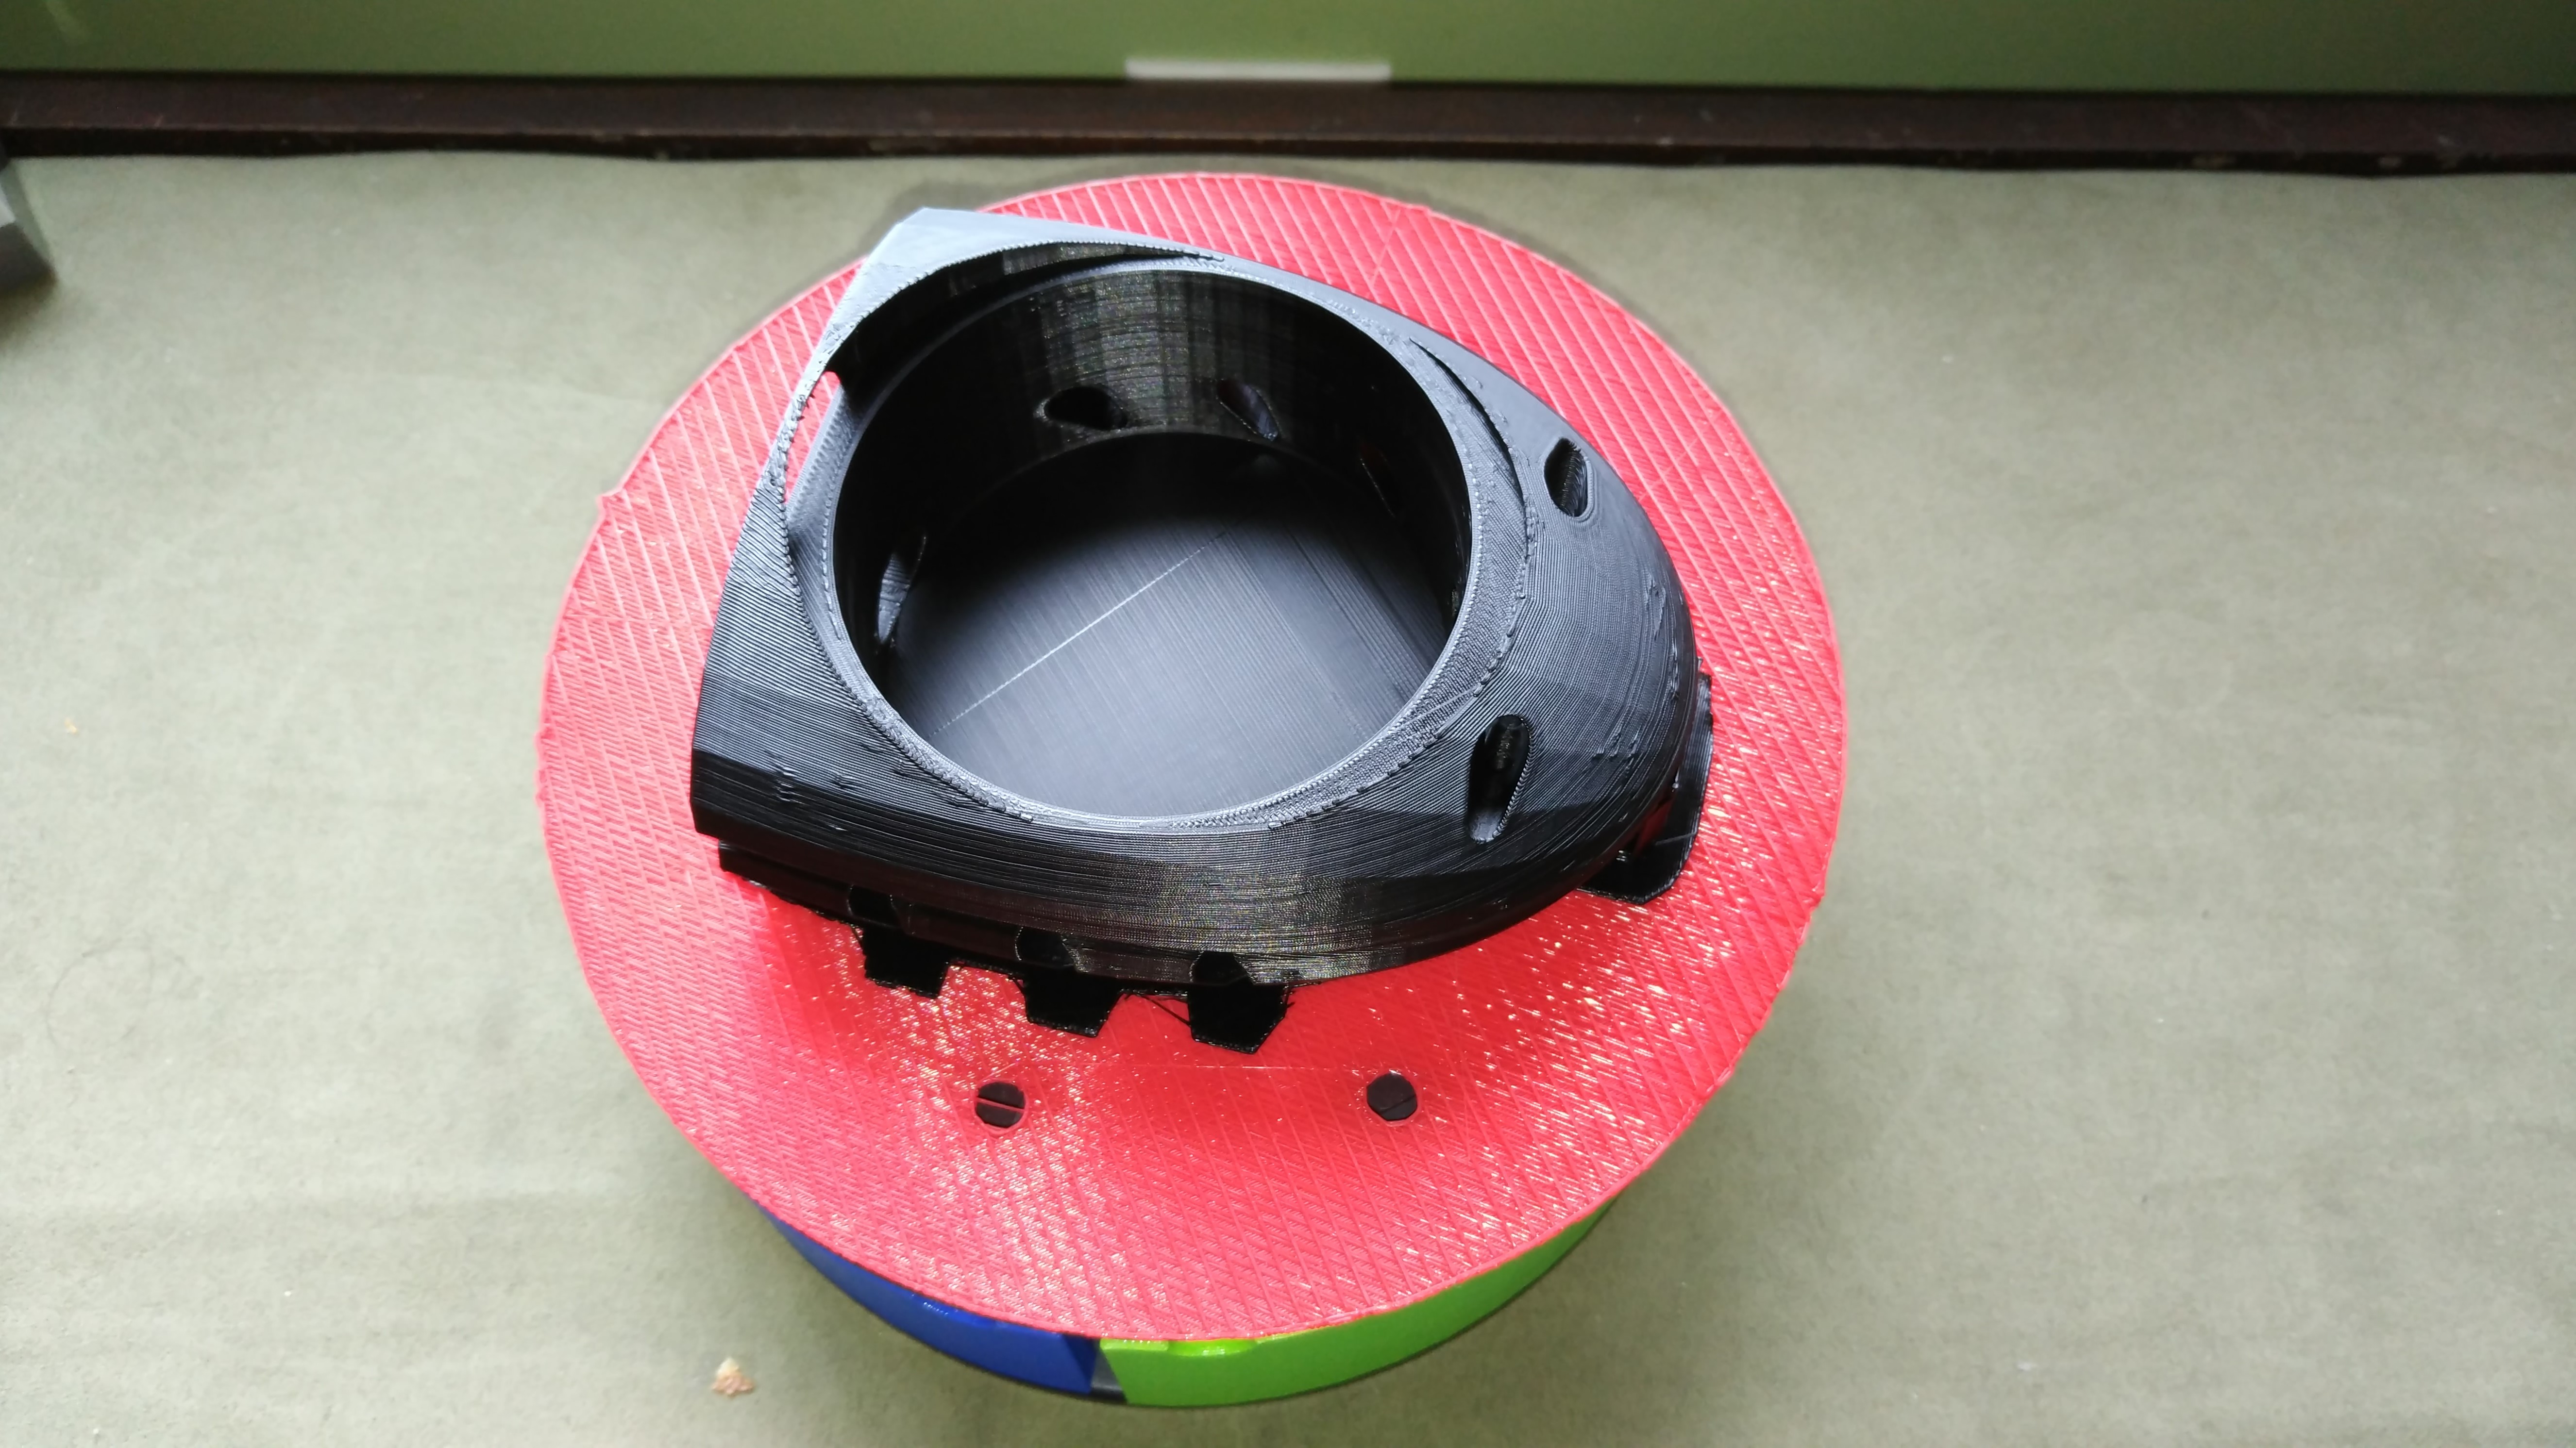
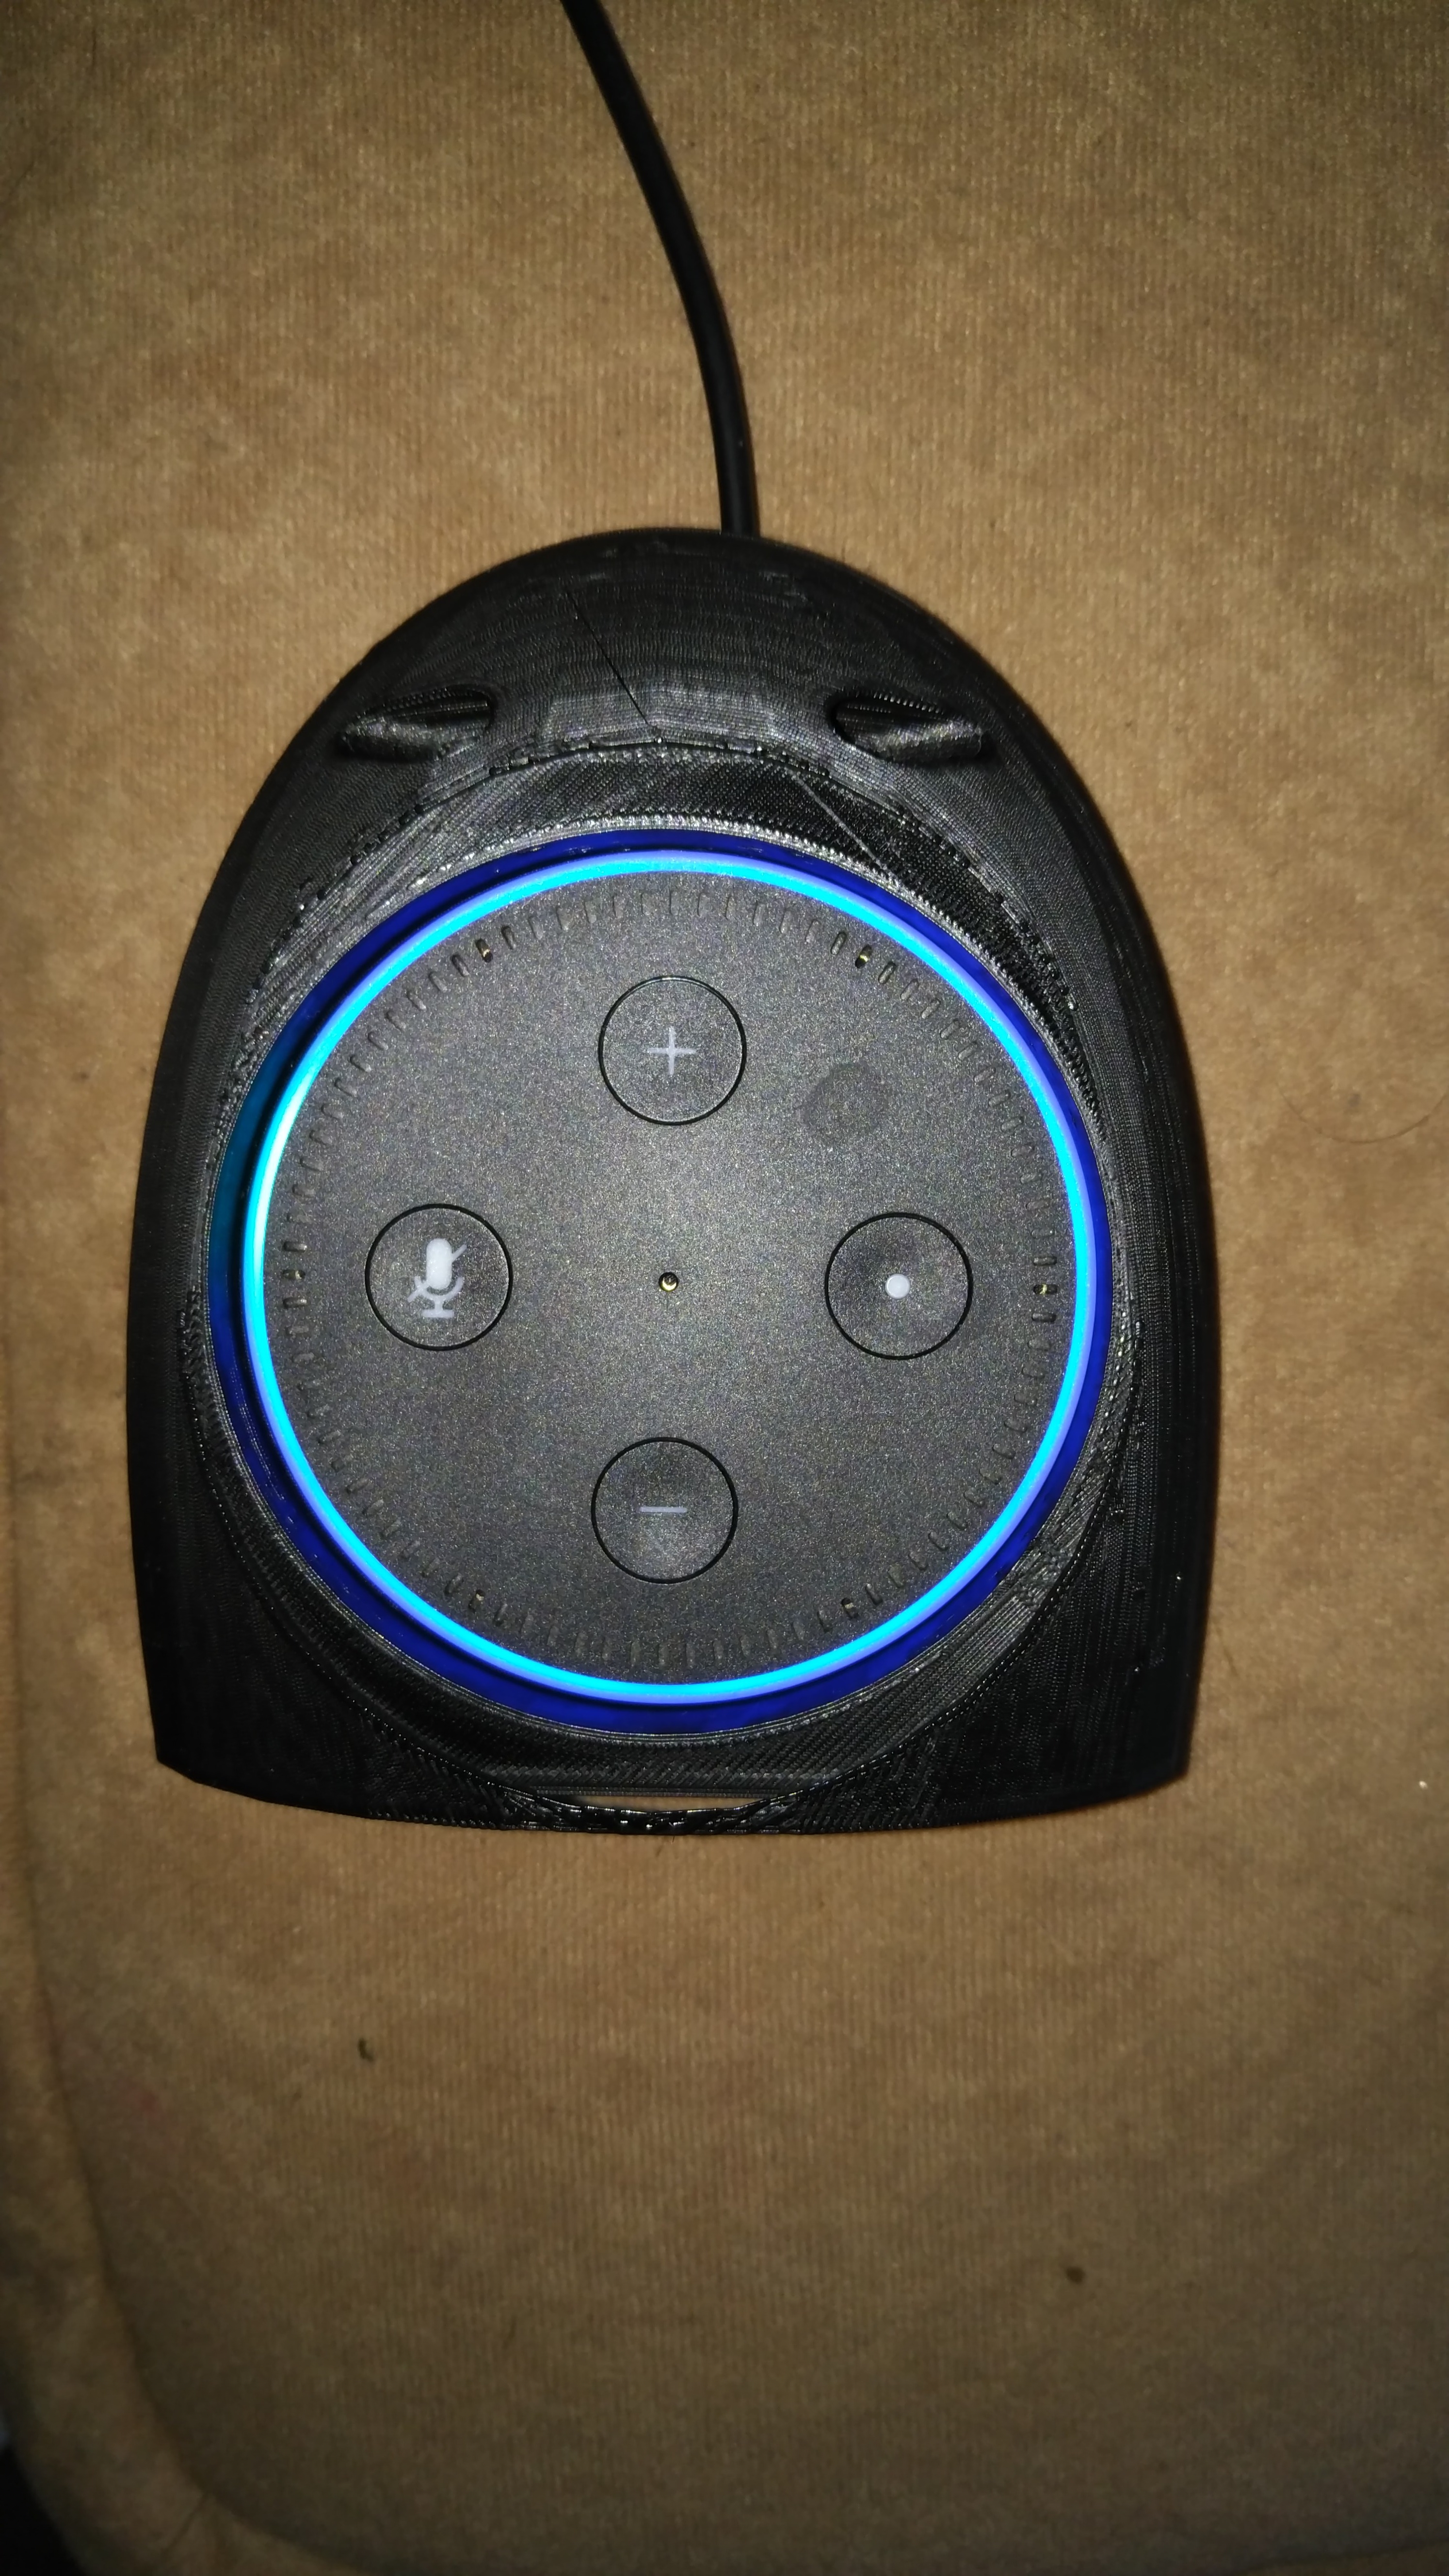
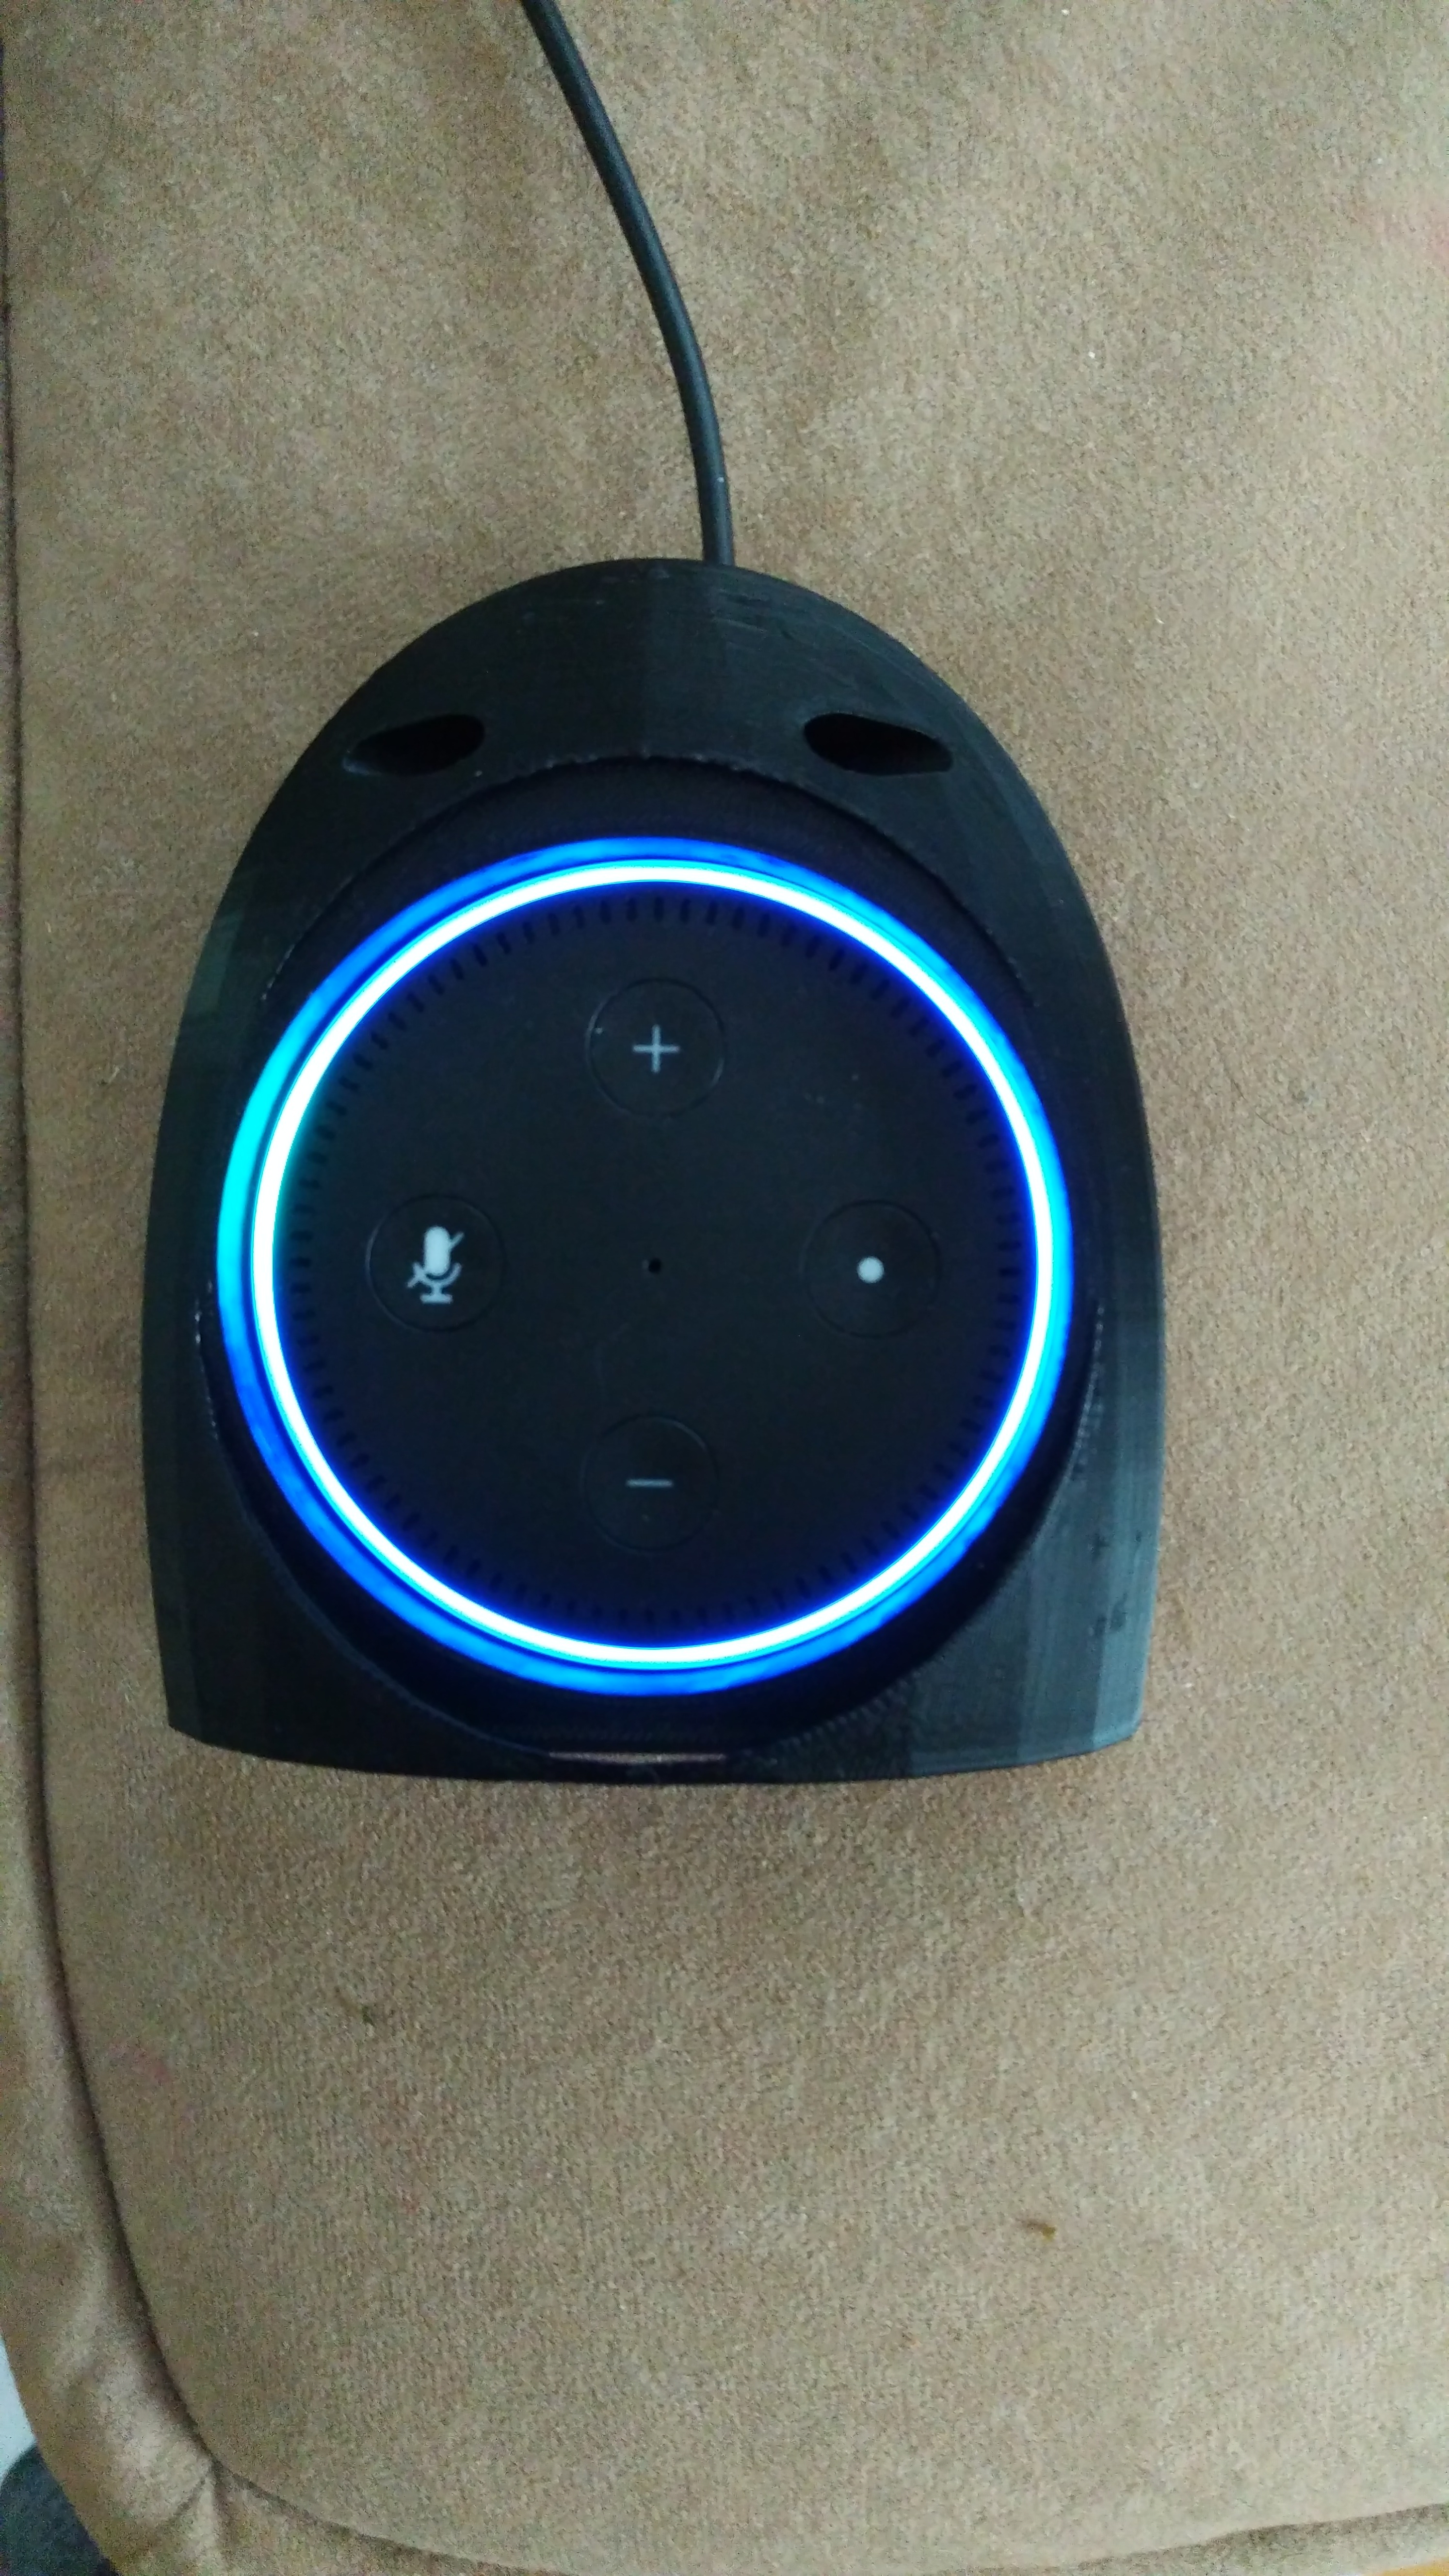
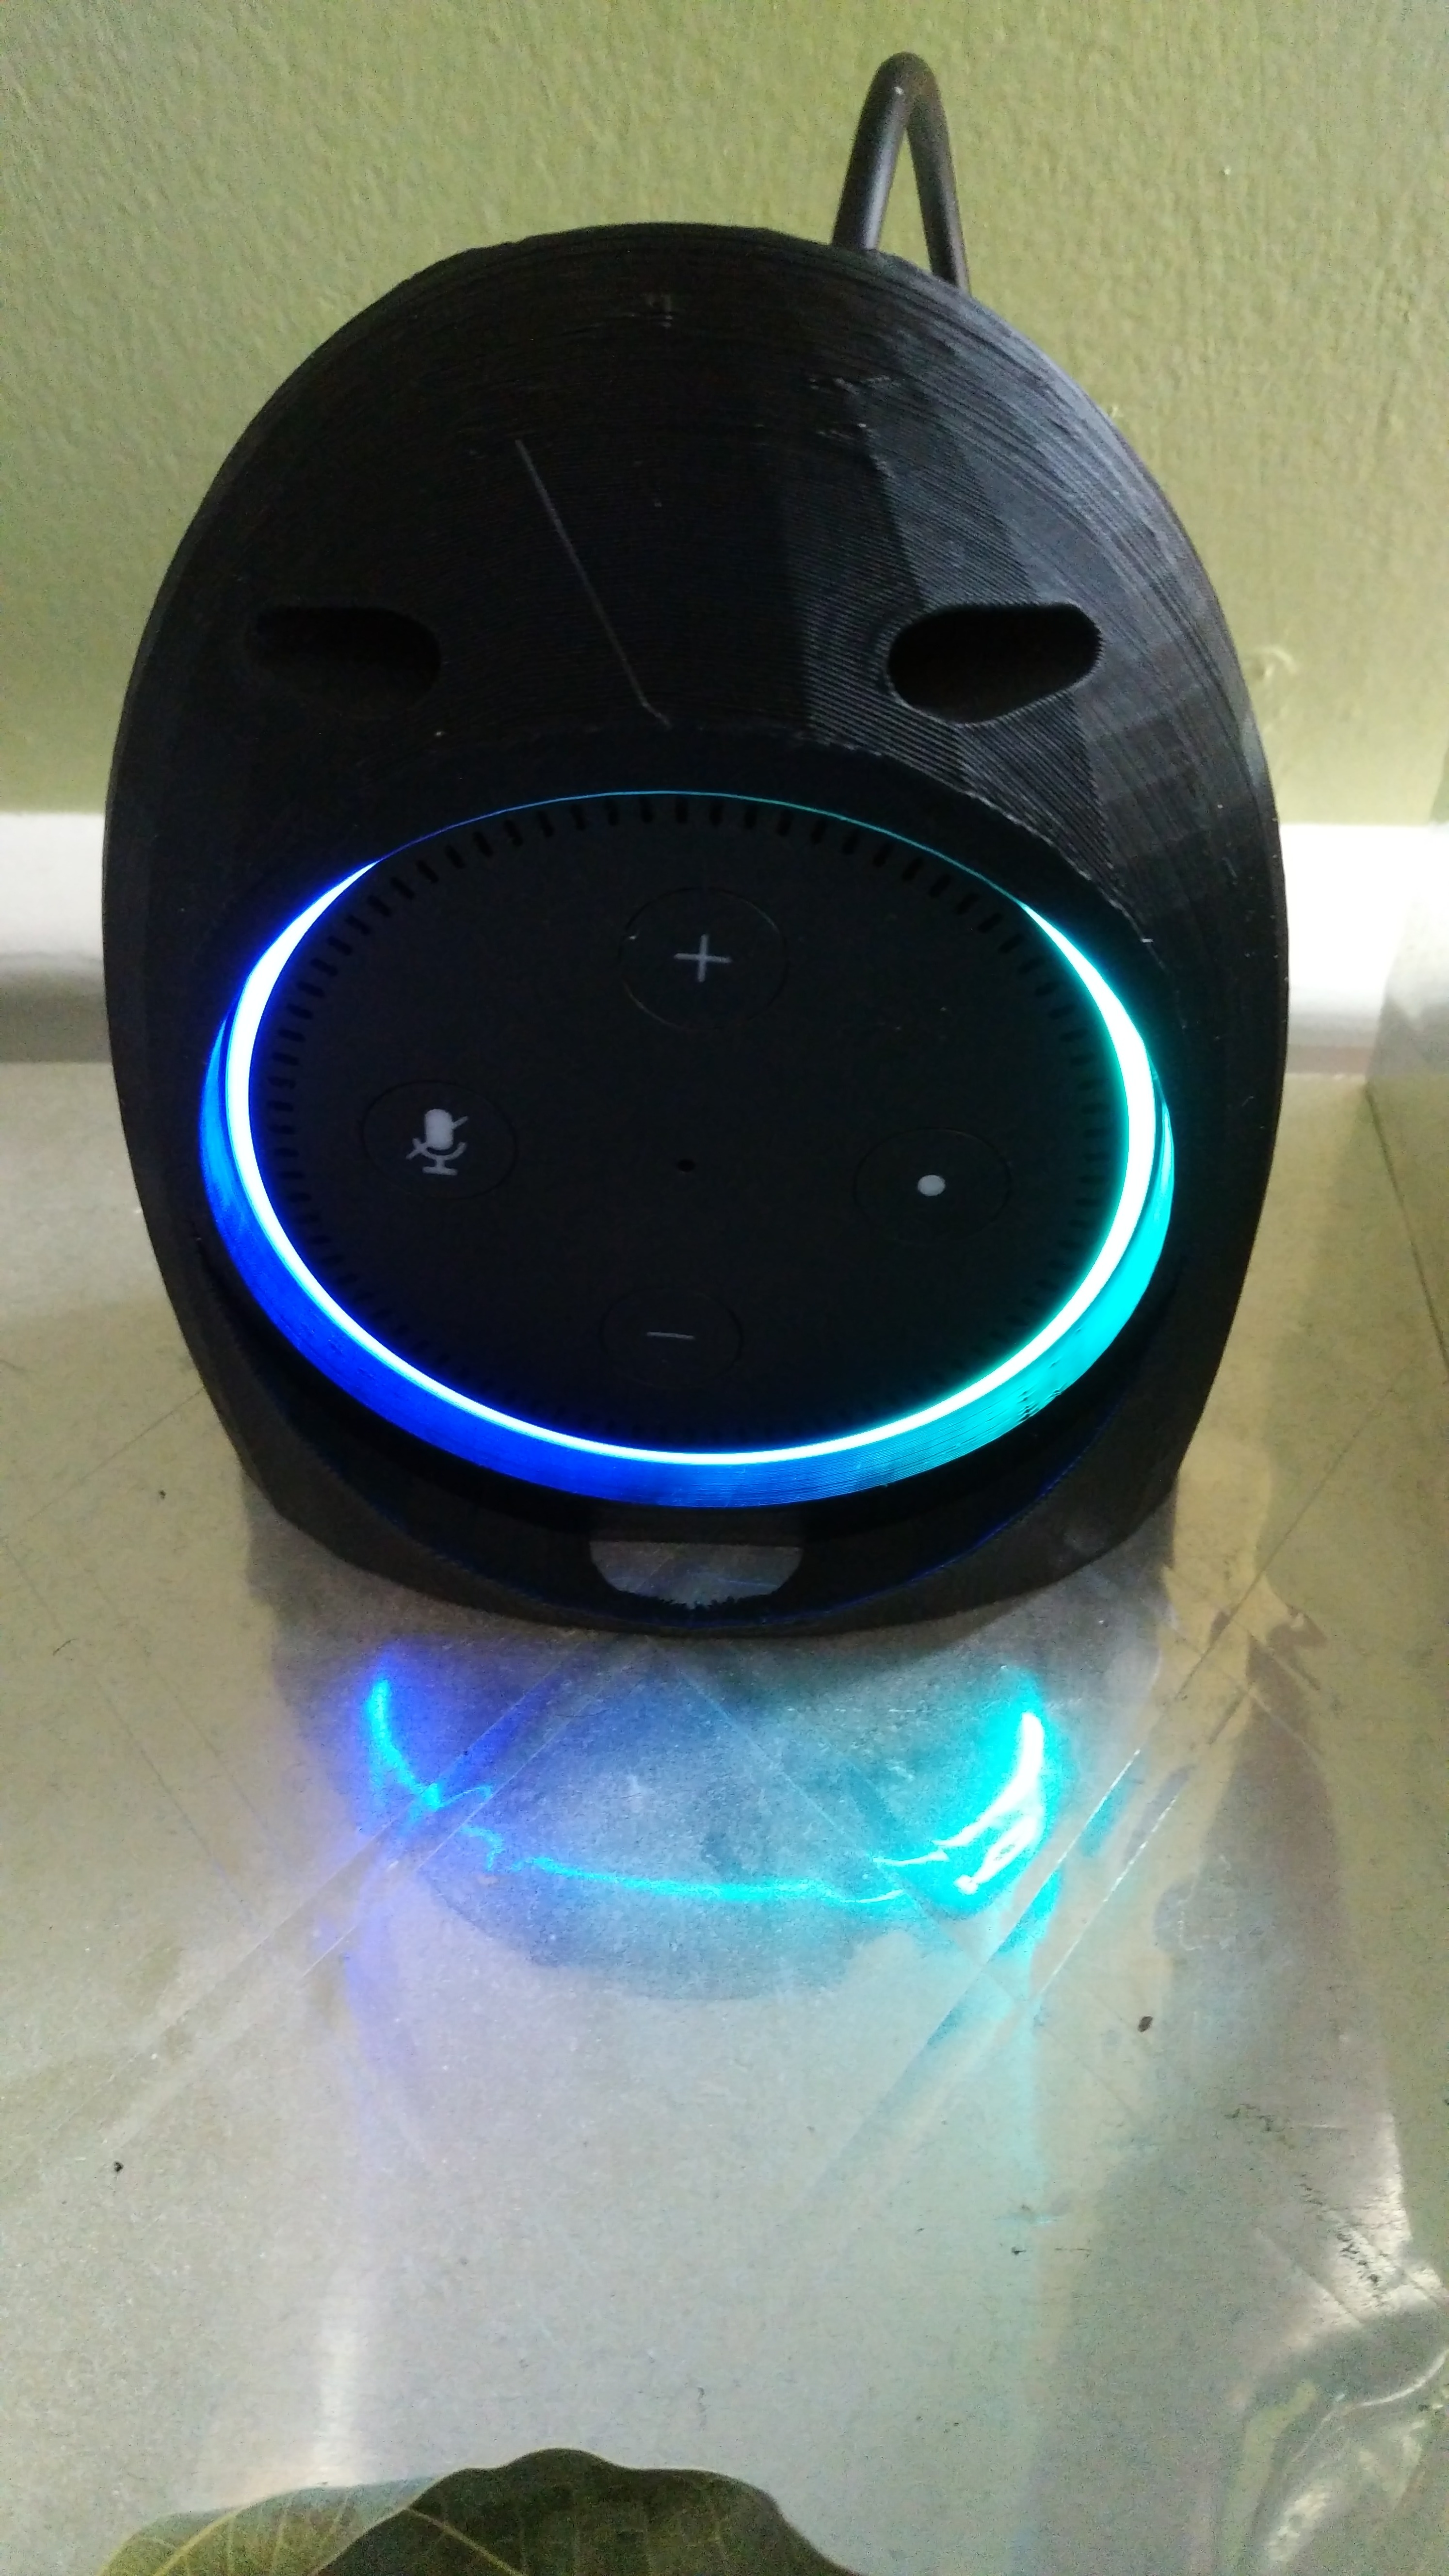
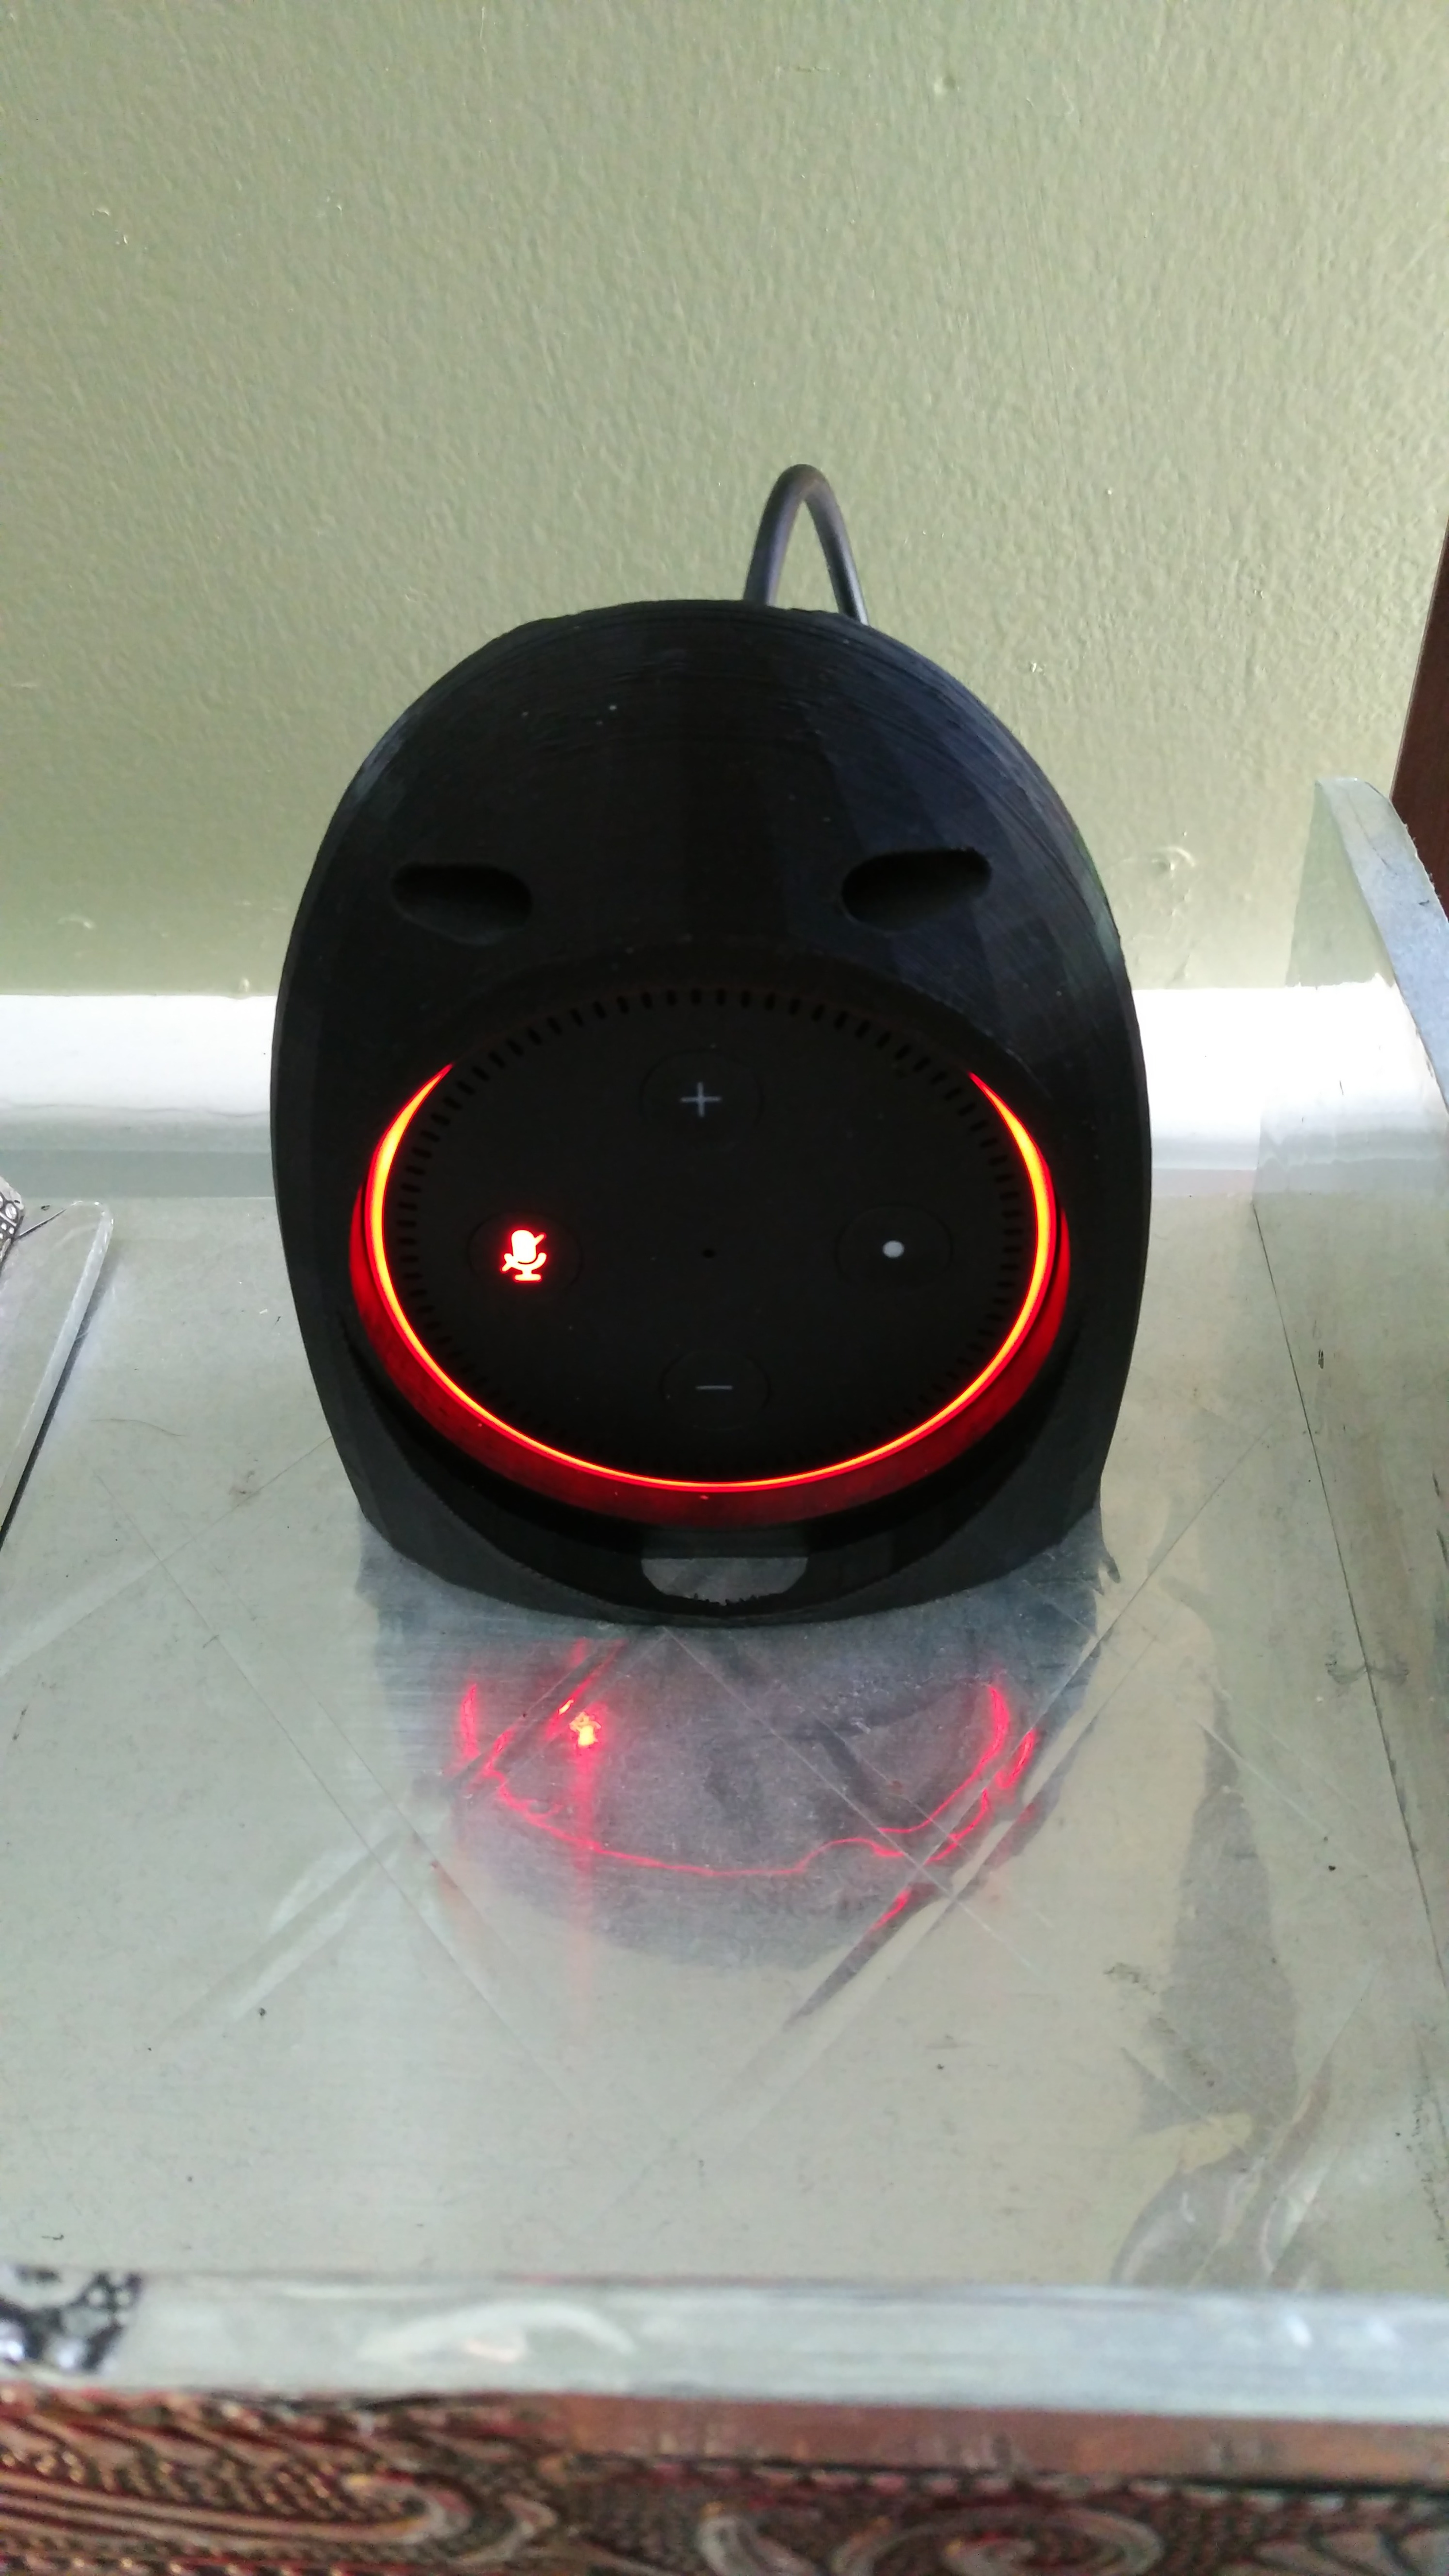
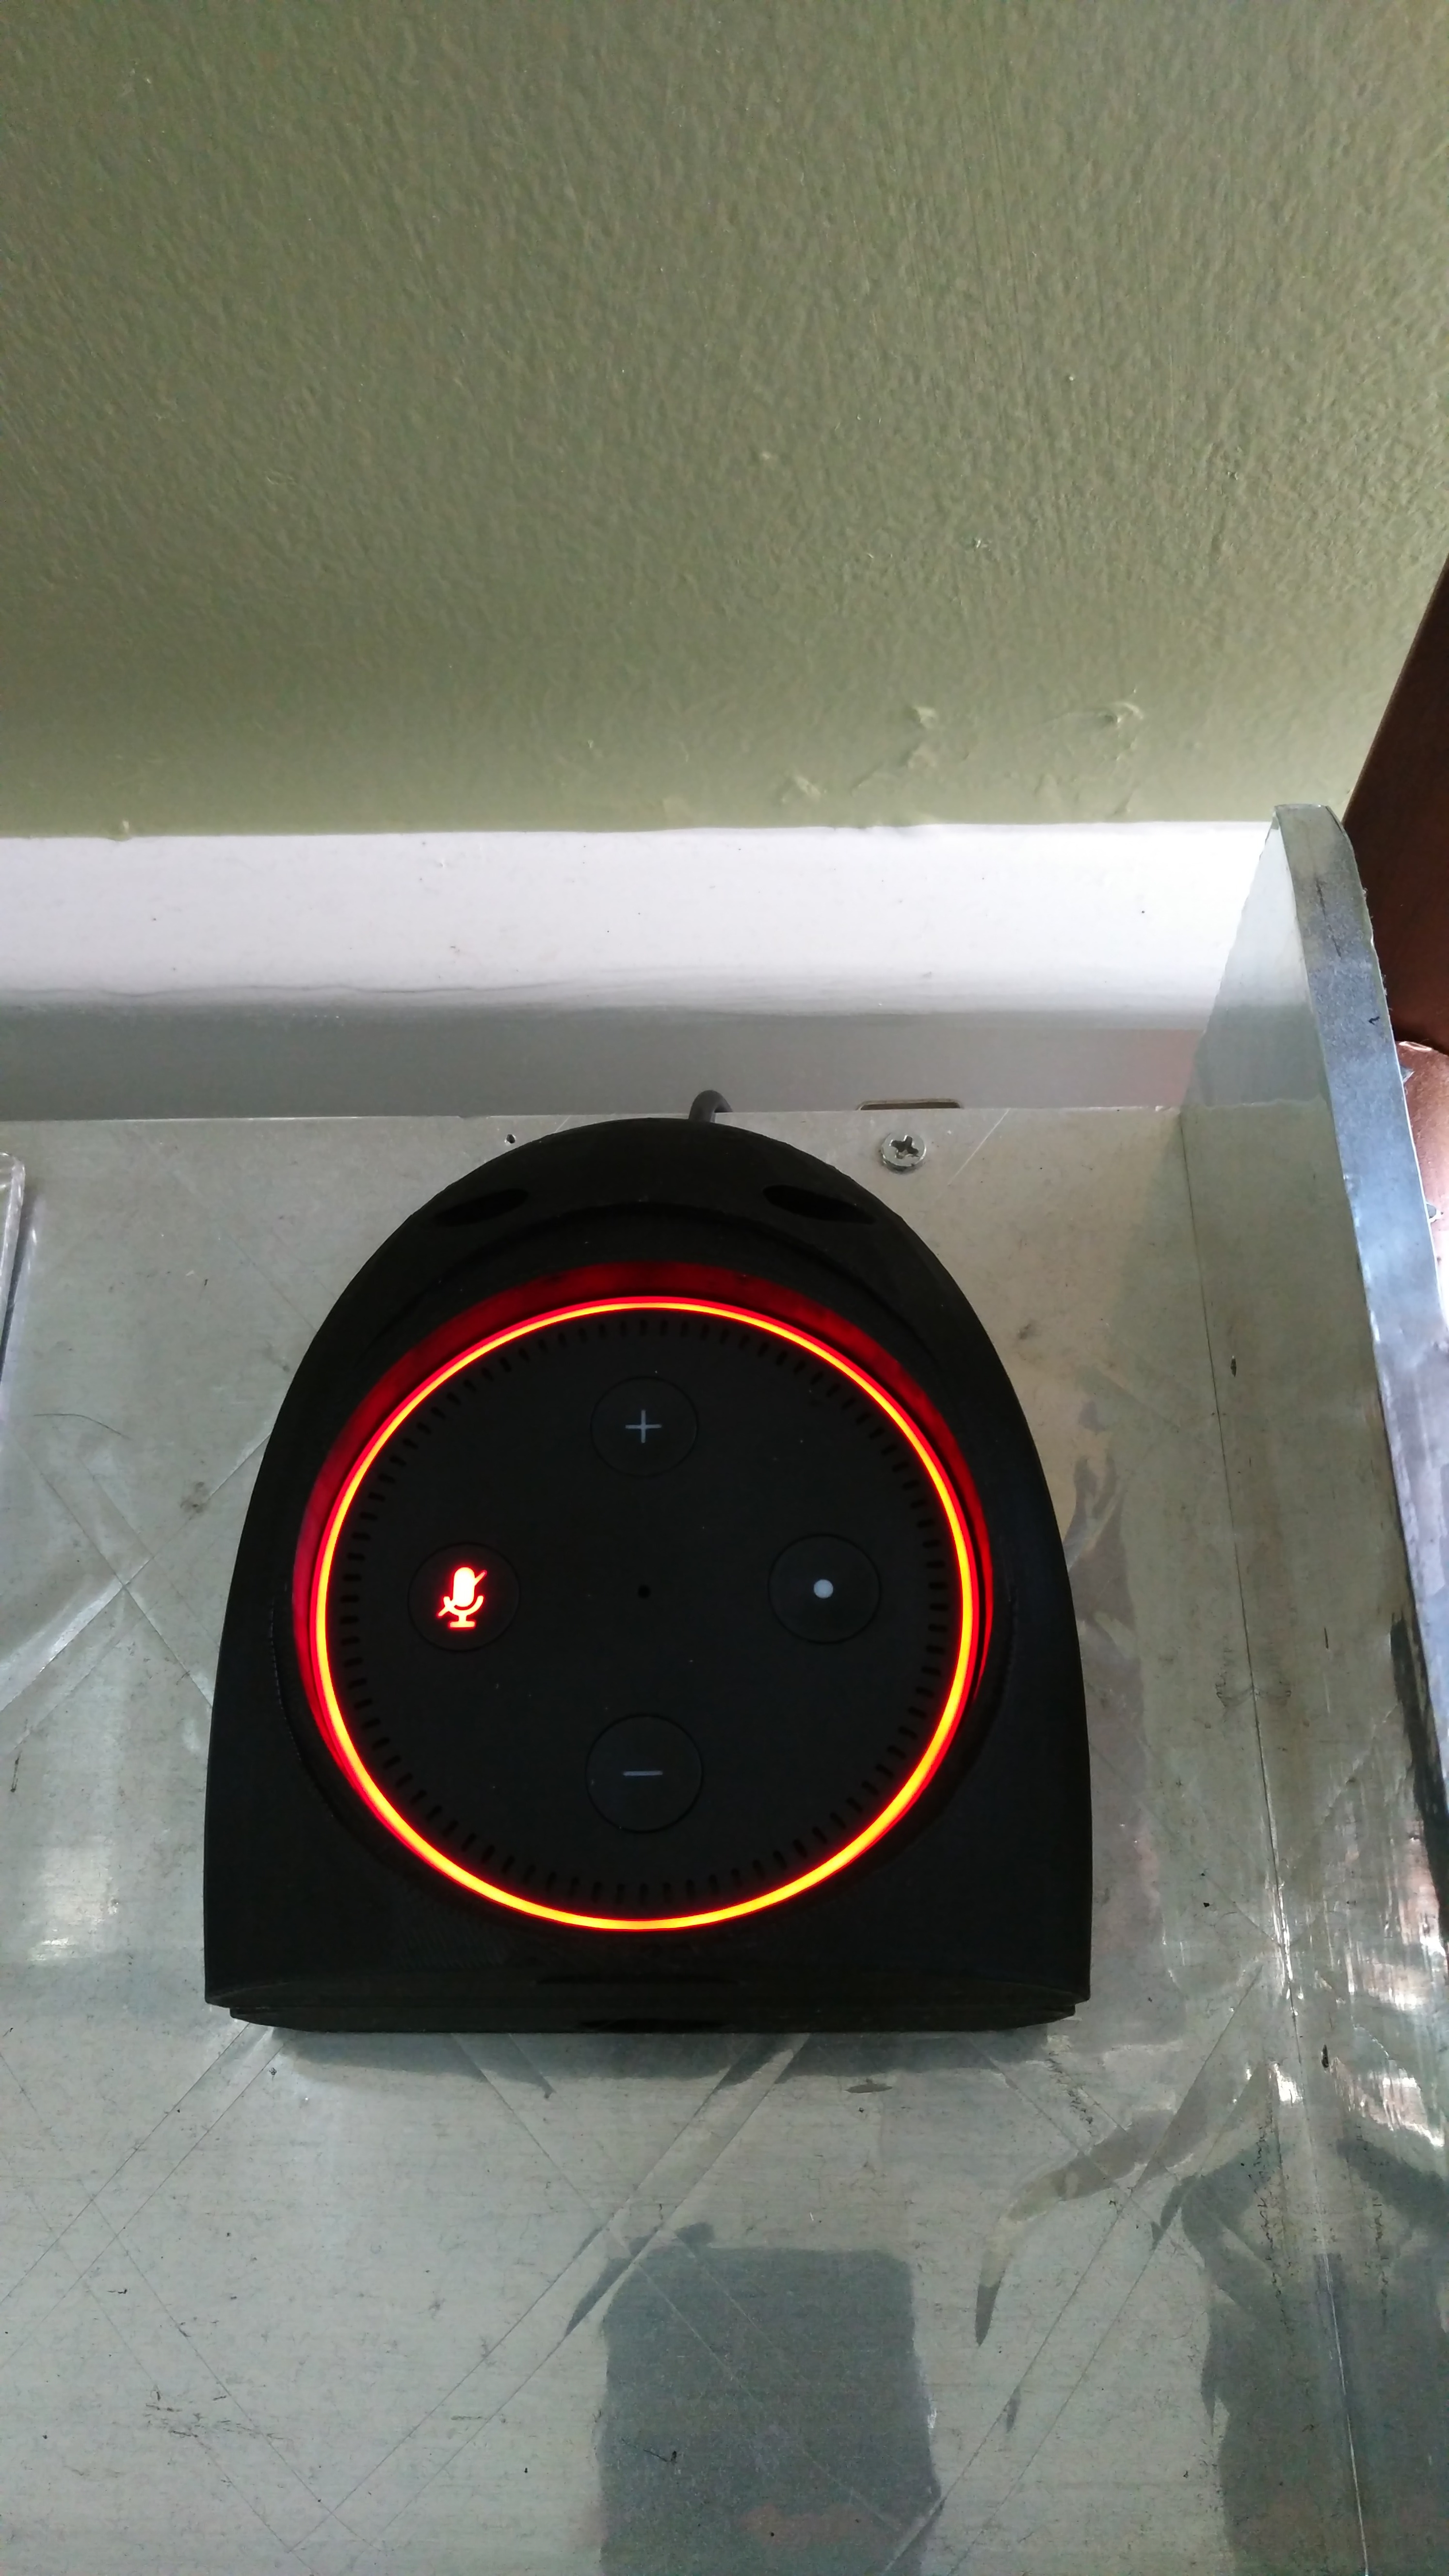
And the trimmed version took a solid 12 hours to print on my star printer, the Creality CR-10.
I used Printrbot Black PLA which I use exclusively for prototyping before I print the final version in a different color.
- The print isn't without its minor flaws, but I sure liked what I saw!
- Everything fit and worked well - it can be laid flat or can be placed vertically
- The vents opening into the chamber makes the set up look really cool!
- Although a proofed part, this will be used to mount at least one of my Echo Dots in another part of the house!
I will allow the pictures to speak for themselves.
Creating a Printable Model
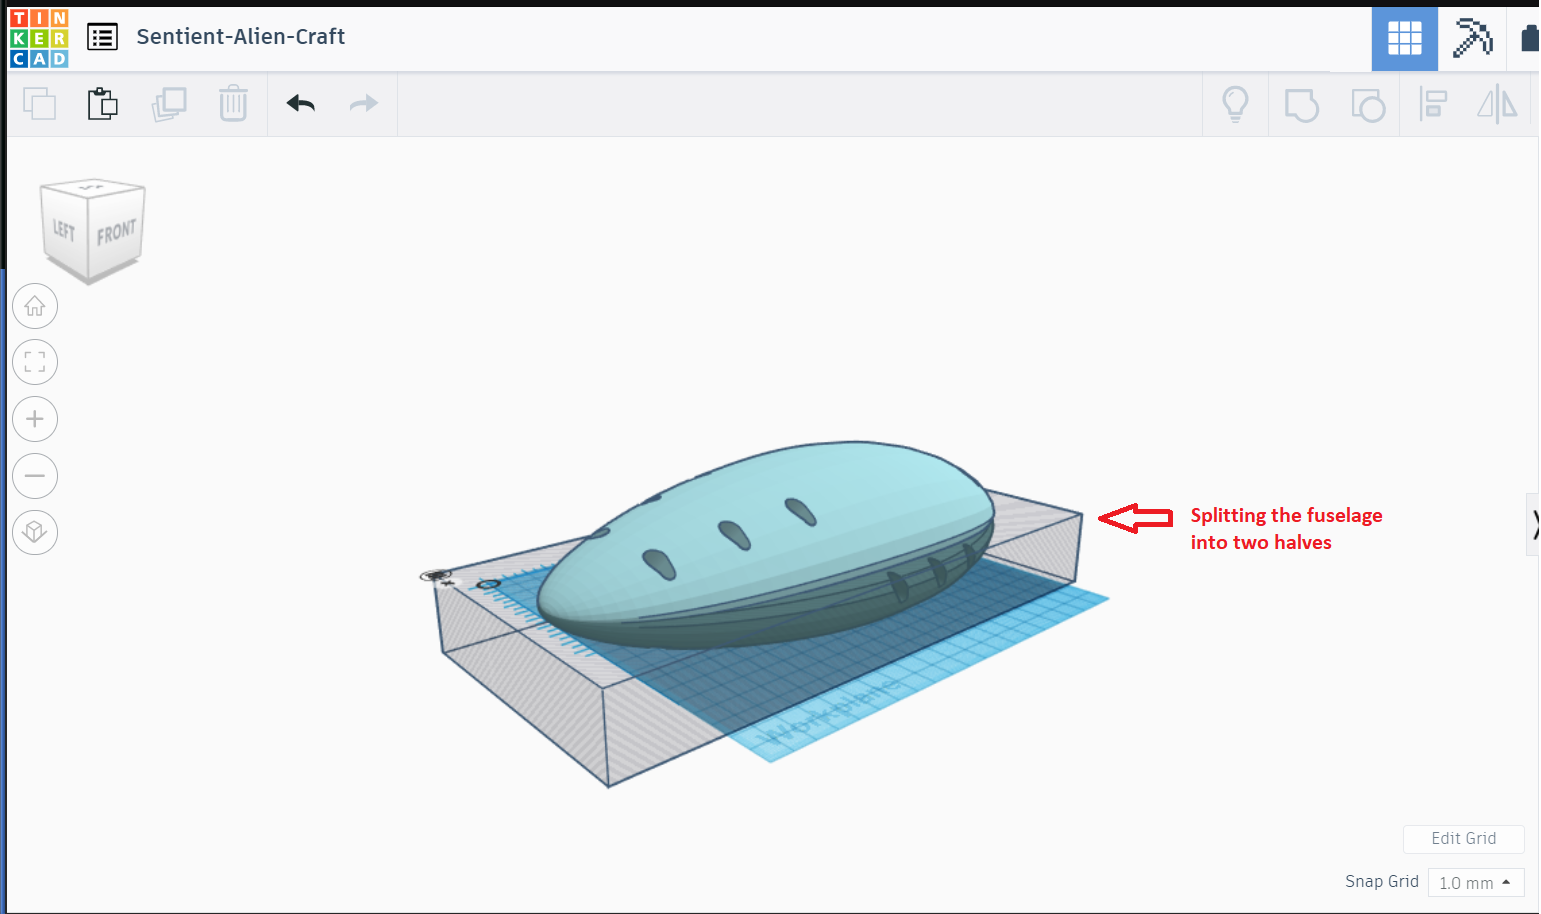
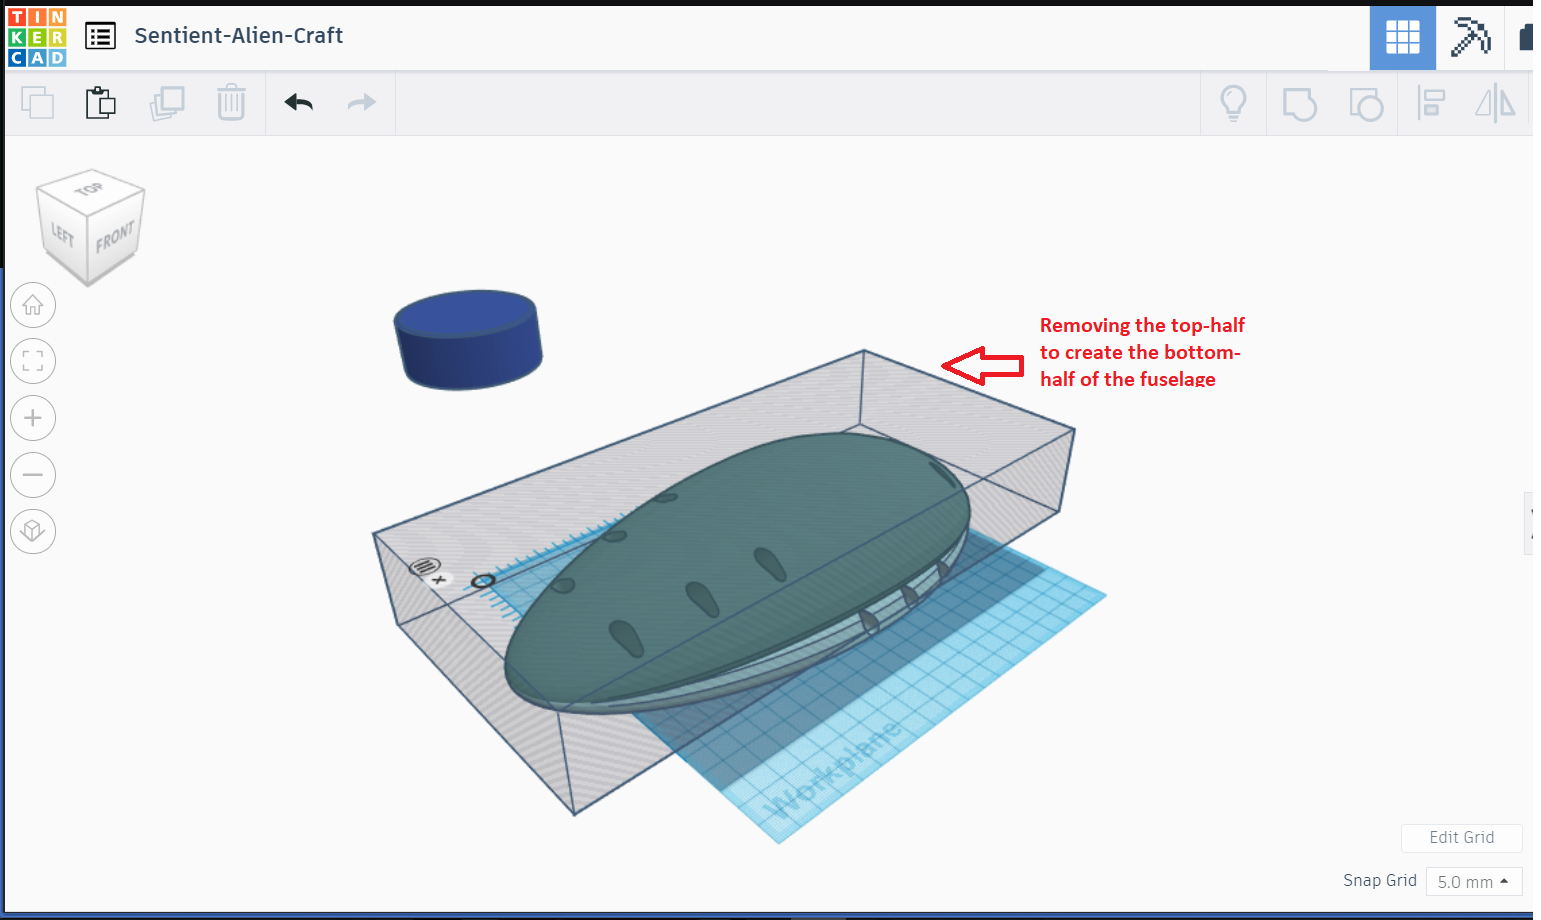
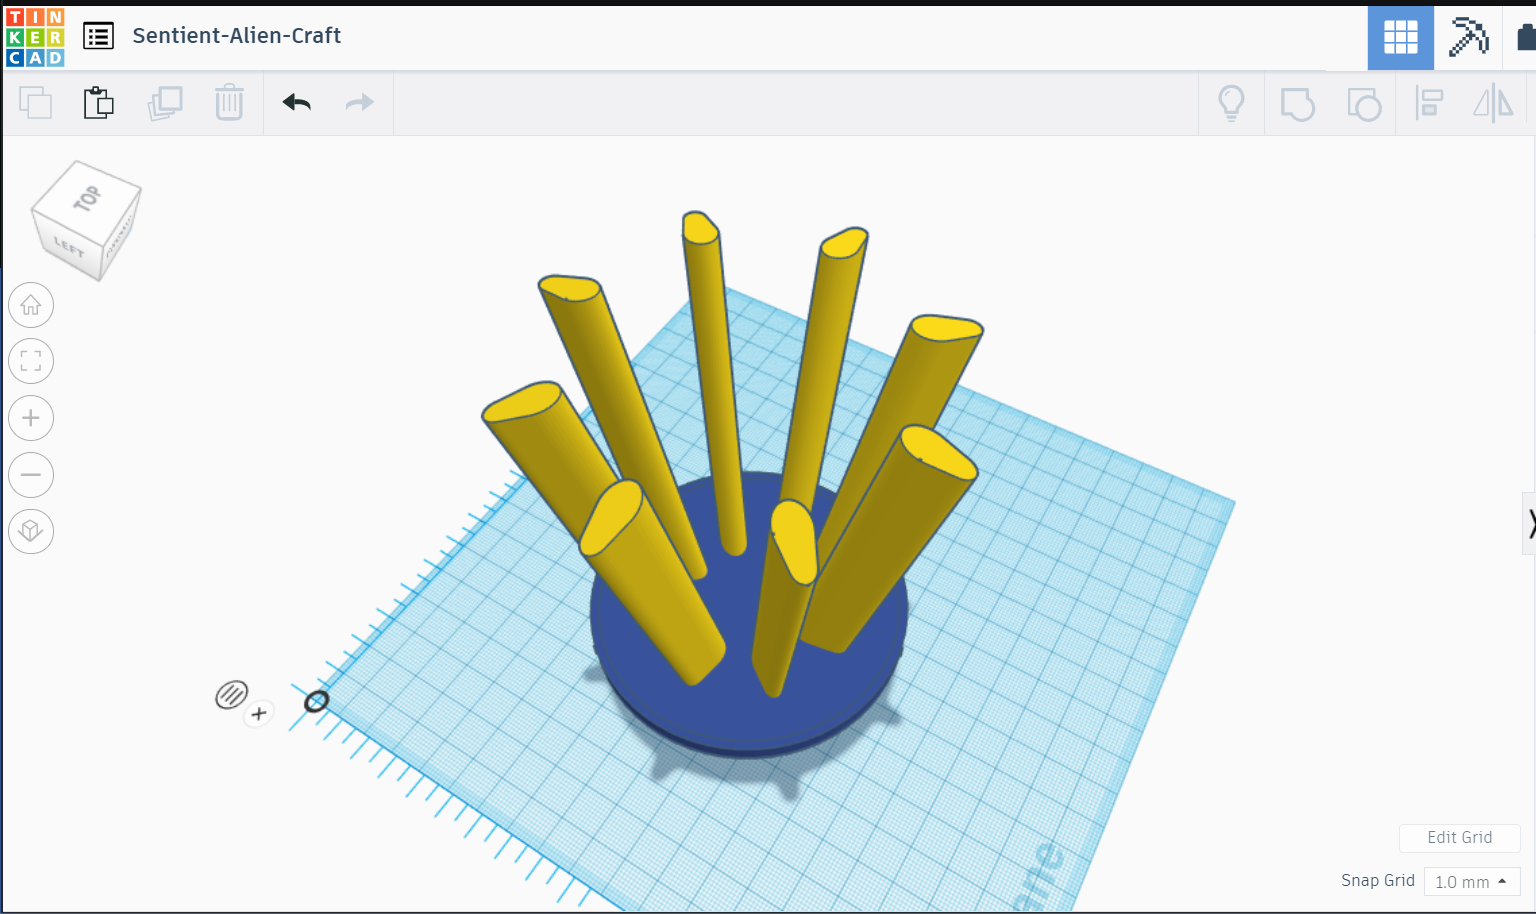
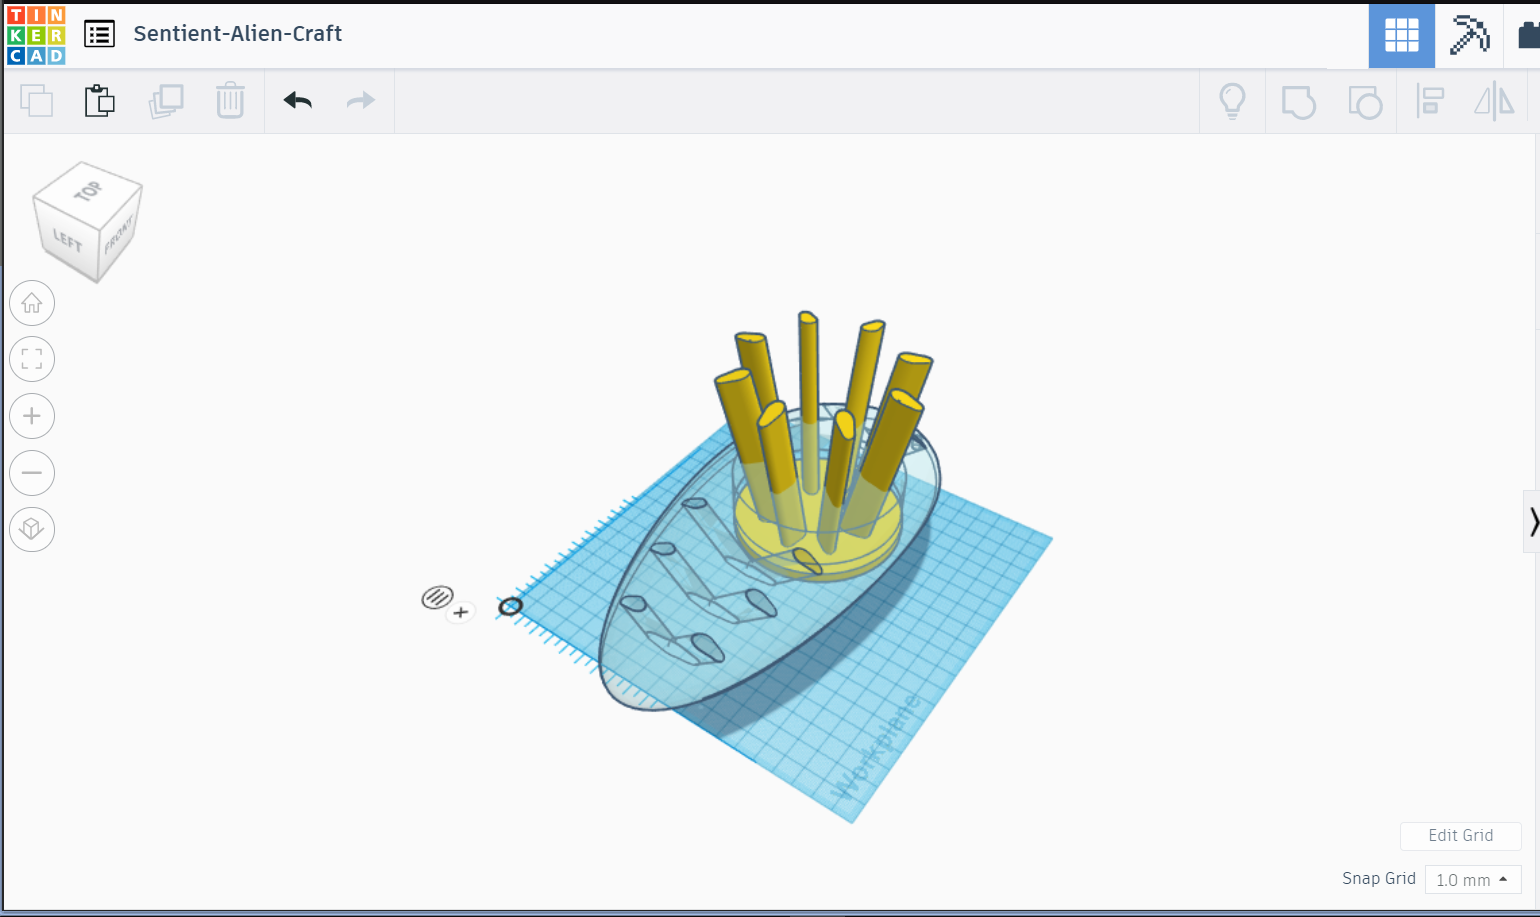
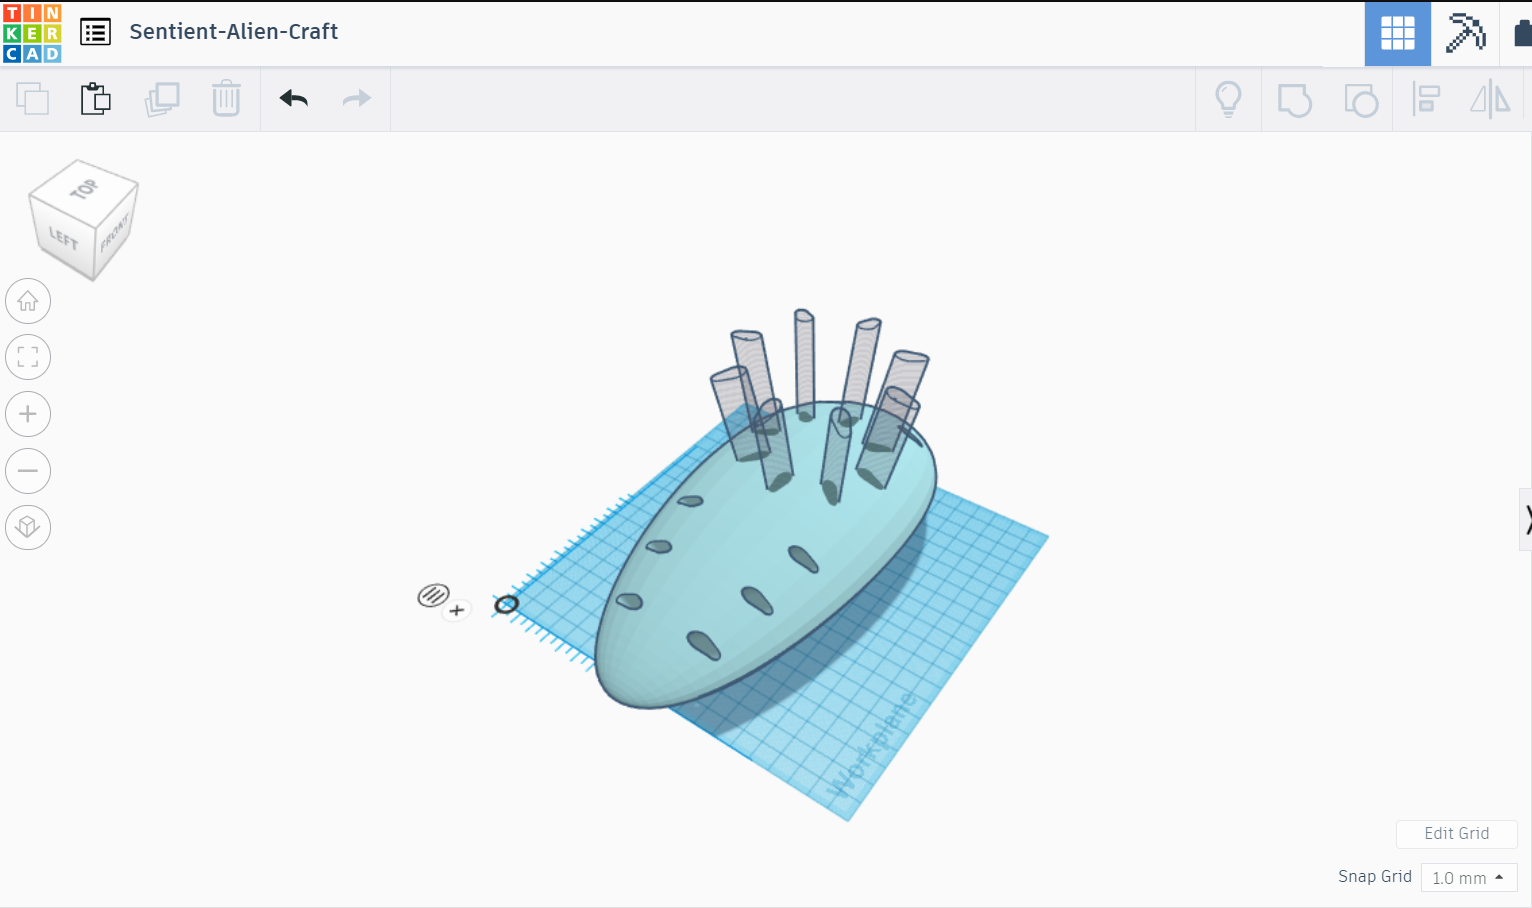
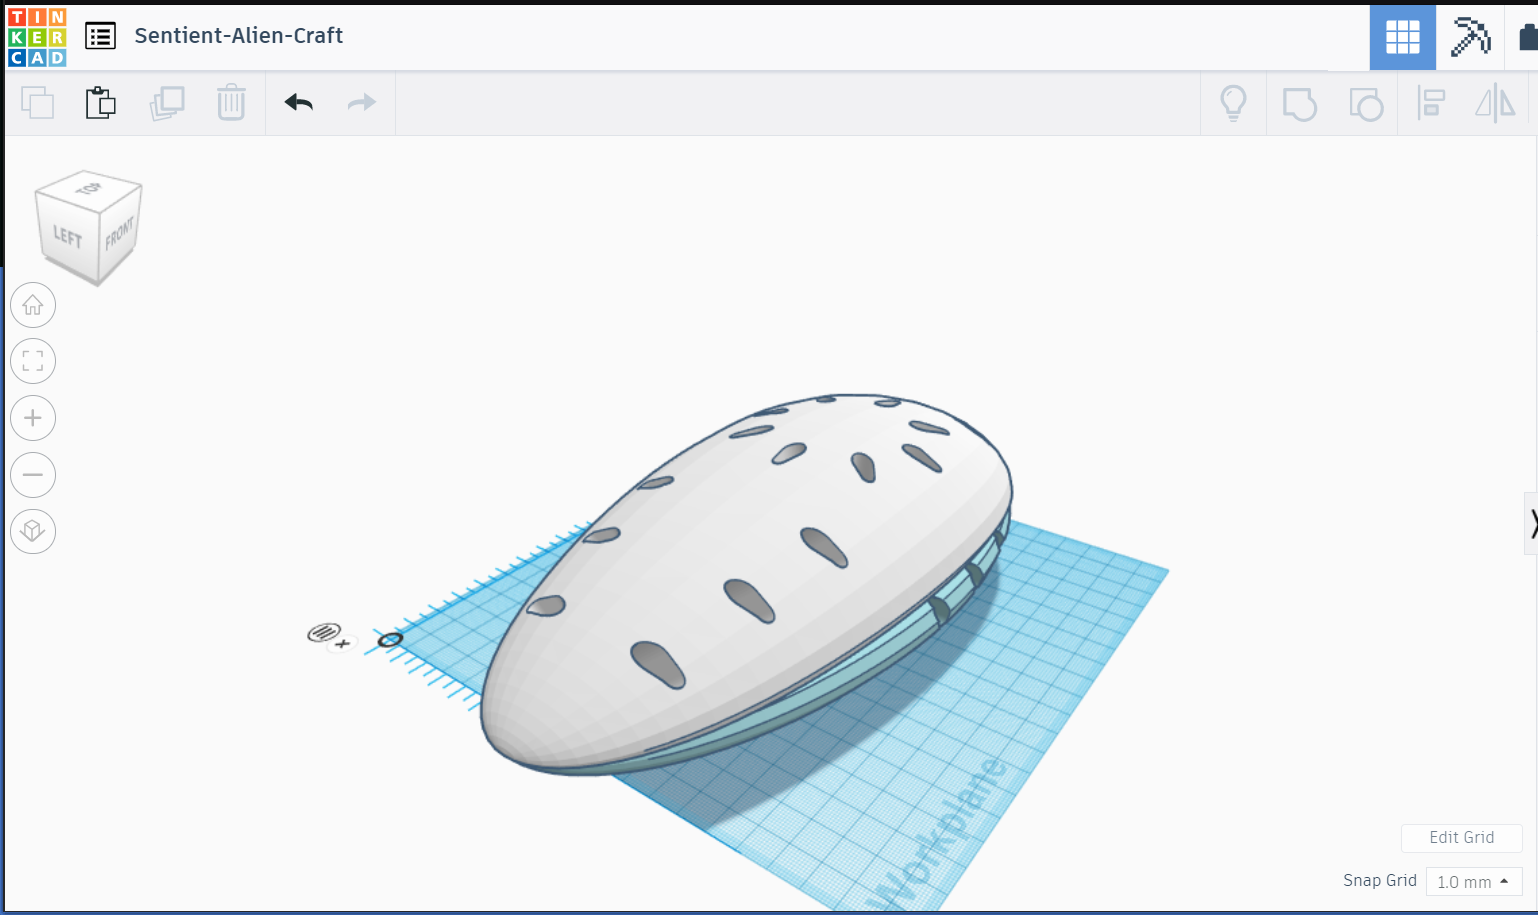
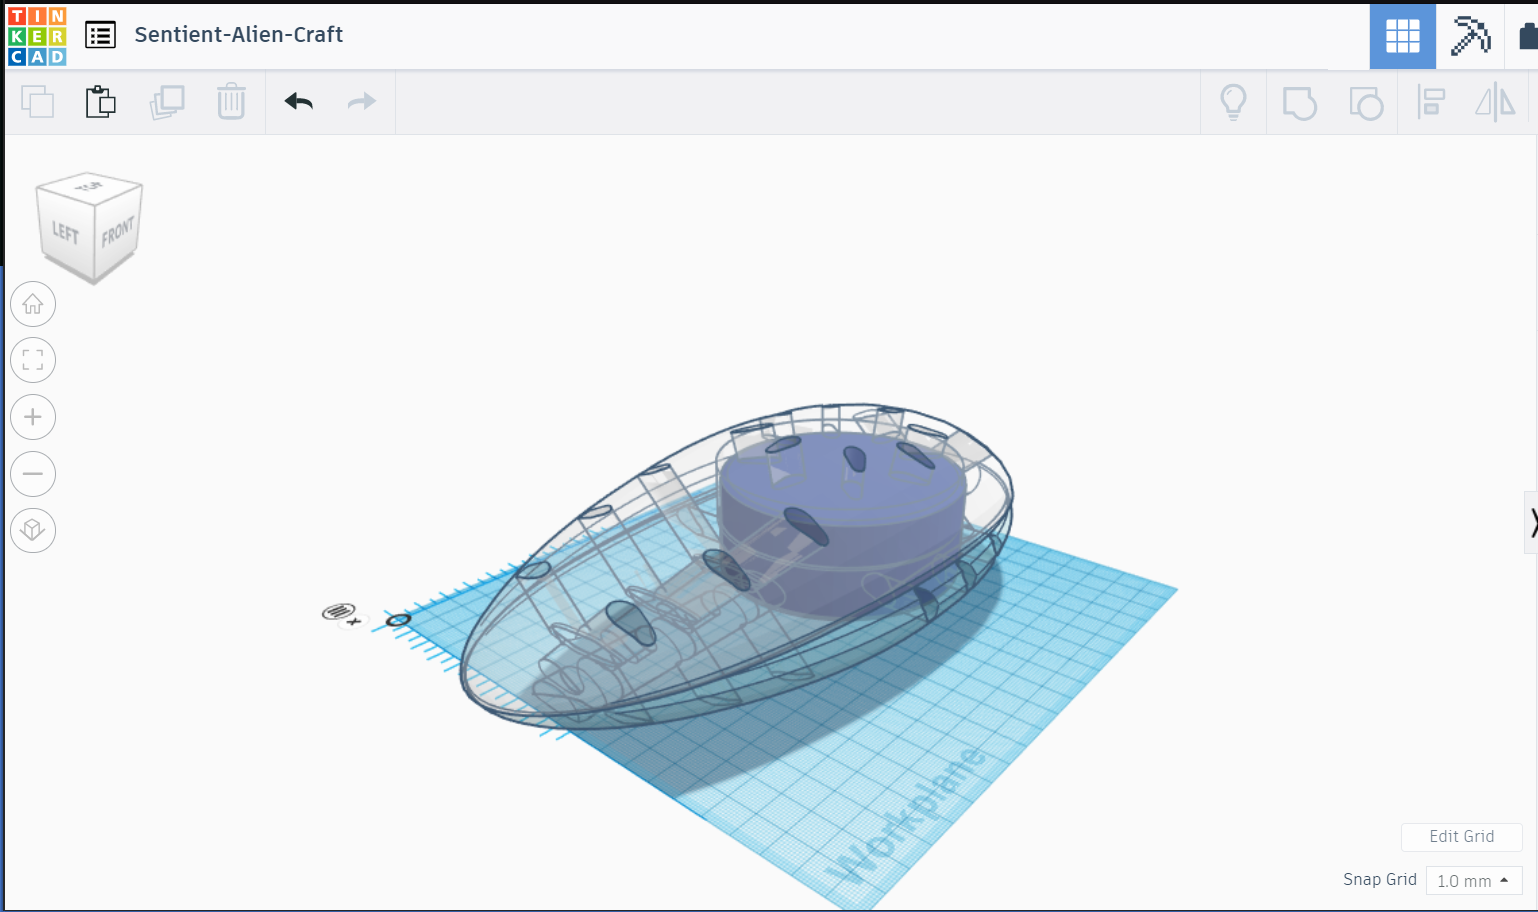
I retraced several steps back and closed off the Echo chamber - it would now be concealed inside the body, and duplicated the model. That said, I will now be highlighting the changes I made to arrive at version 2, a printable model in the order of the visuals presented:
- I split the fuselage along the horizontal seam on one copy of the model to create the top-half of the fuselage
- Similarly, I created the bottom-half on the second copy by subtracting the top using a box-shaped Hole
- Next, I created a new shape with a circle and several copies of the horizontal vent structures that kind of looked like an upside down 8-legged bar stool - the angle of the legs was set for aesthetic and practical reasons as seen in the end
- The bar stool was placed on the bottom half of the Echo chamber and positioned in the center (using the positions noted in the earlier steps)
- The shape was then converted into a hole - to be merged with the top-half only!
- Grouping the top-half with the bars tool shape created a set of vents on the top-half of the fuselage, located centrally on top of the Echo chamber
- Lastly, the Echo Dot proxy was positioned back inside the Echo chamber to make sure everything lined up as expected
Creating Additional Features
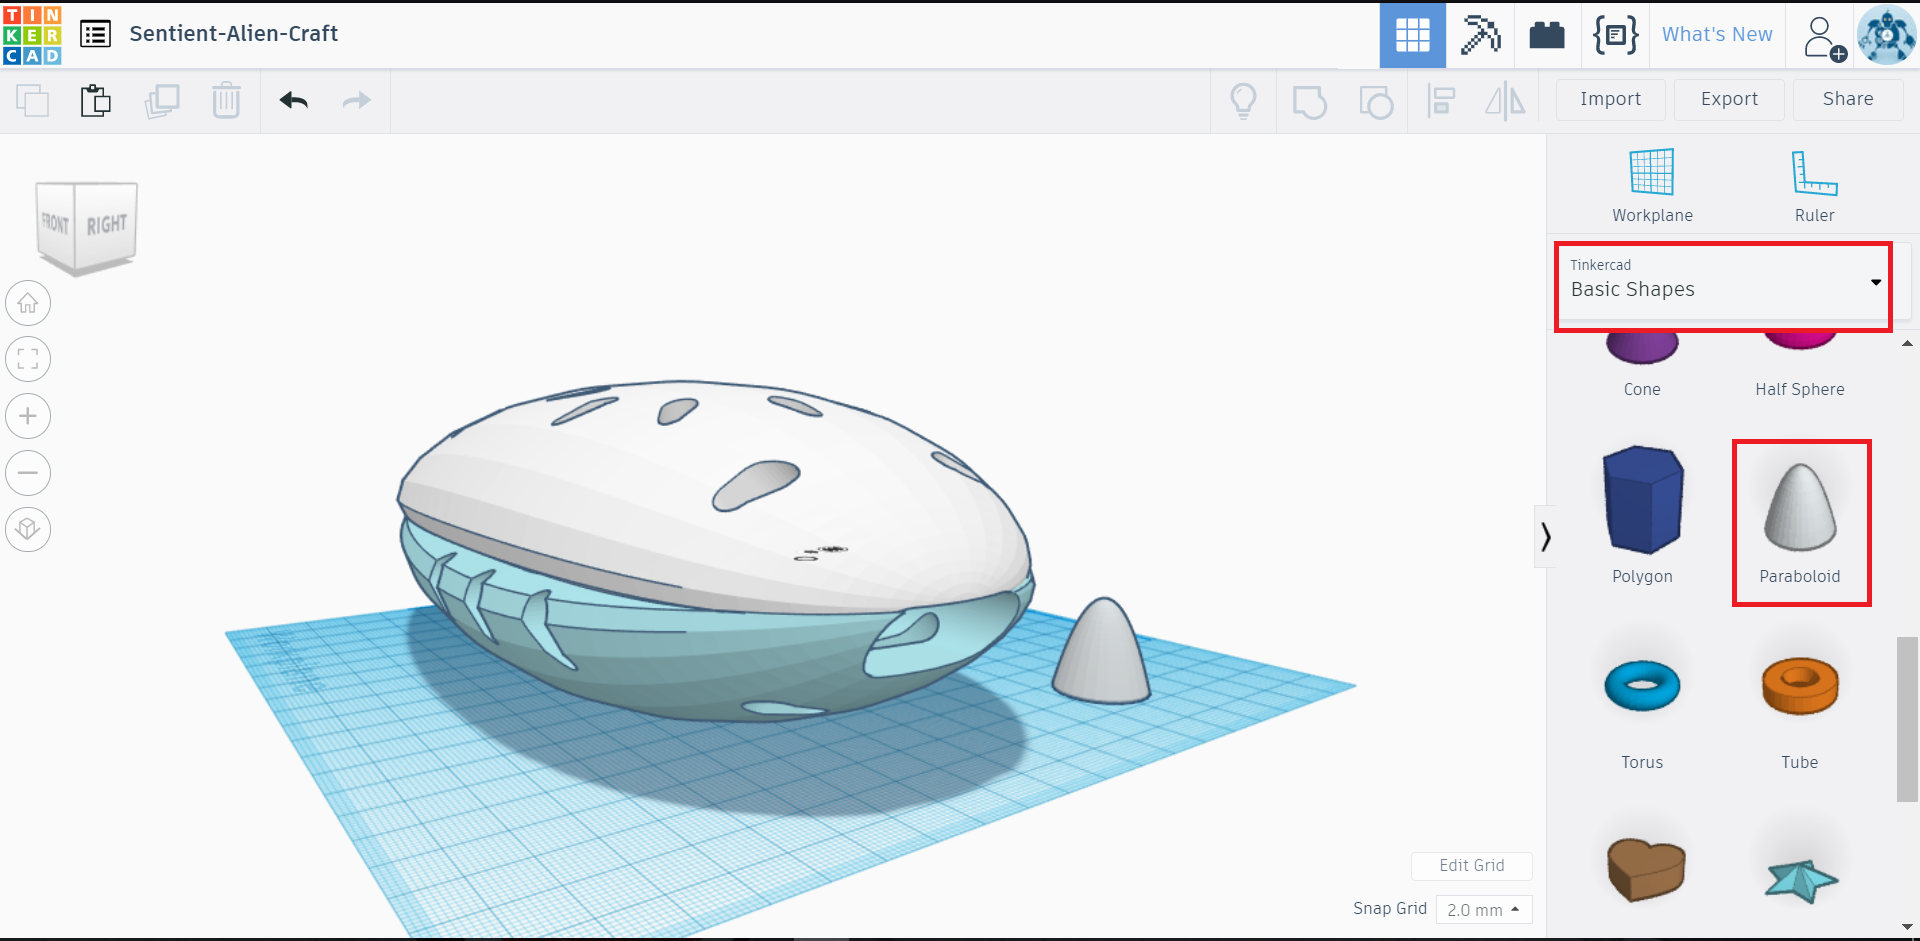
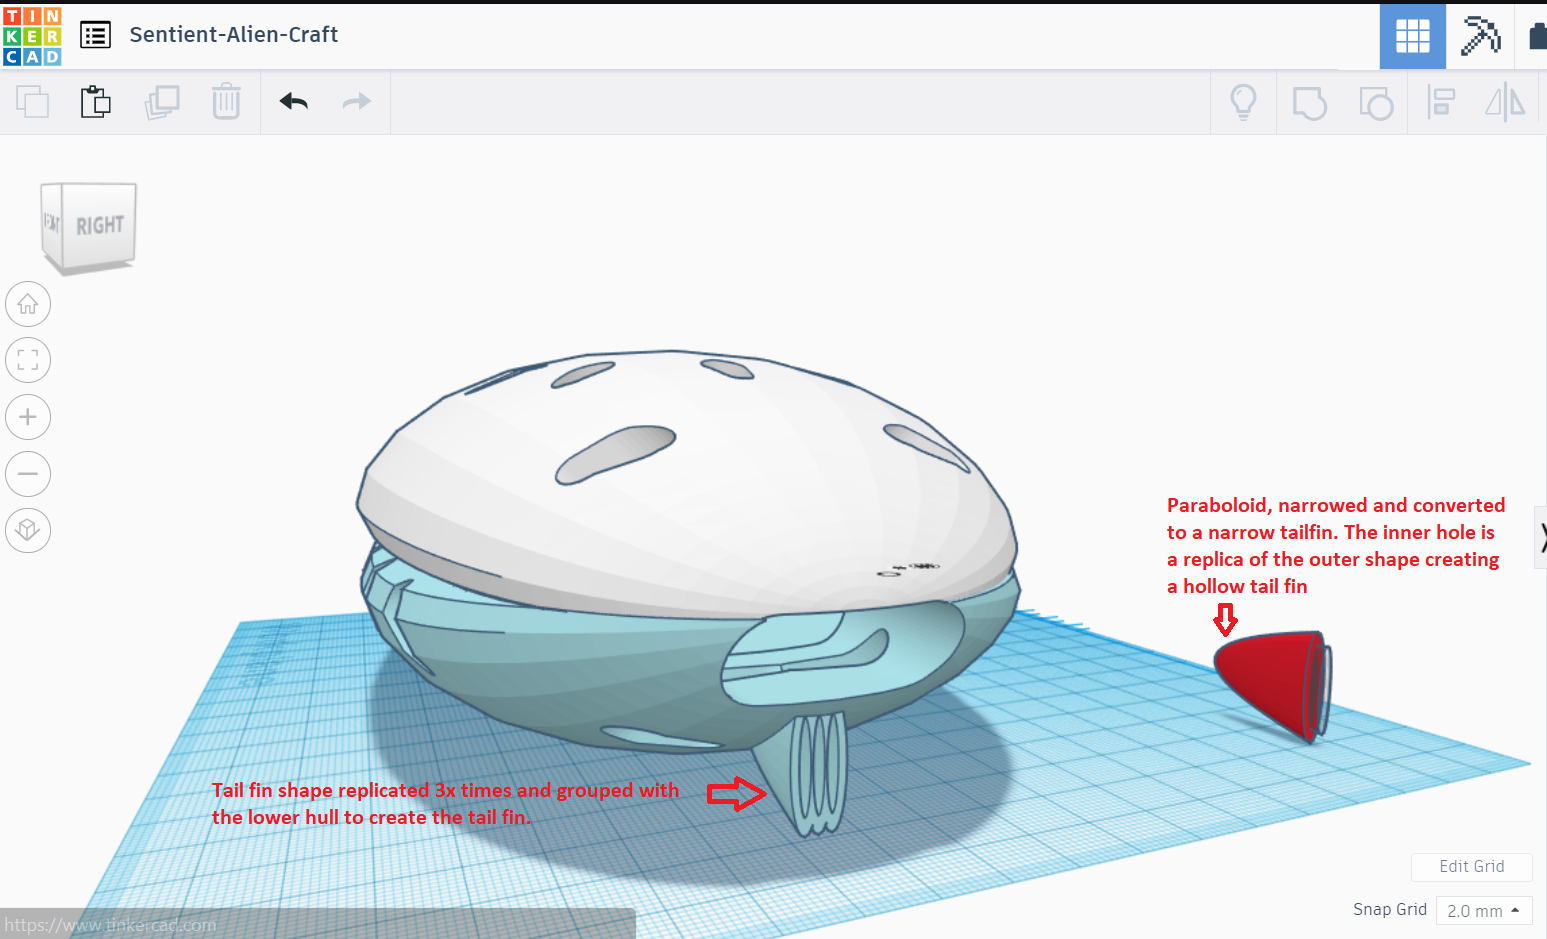
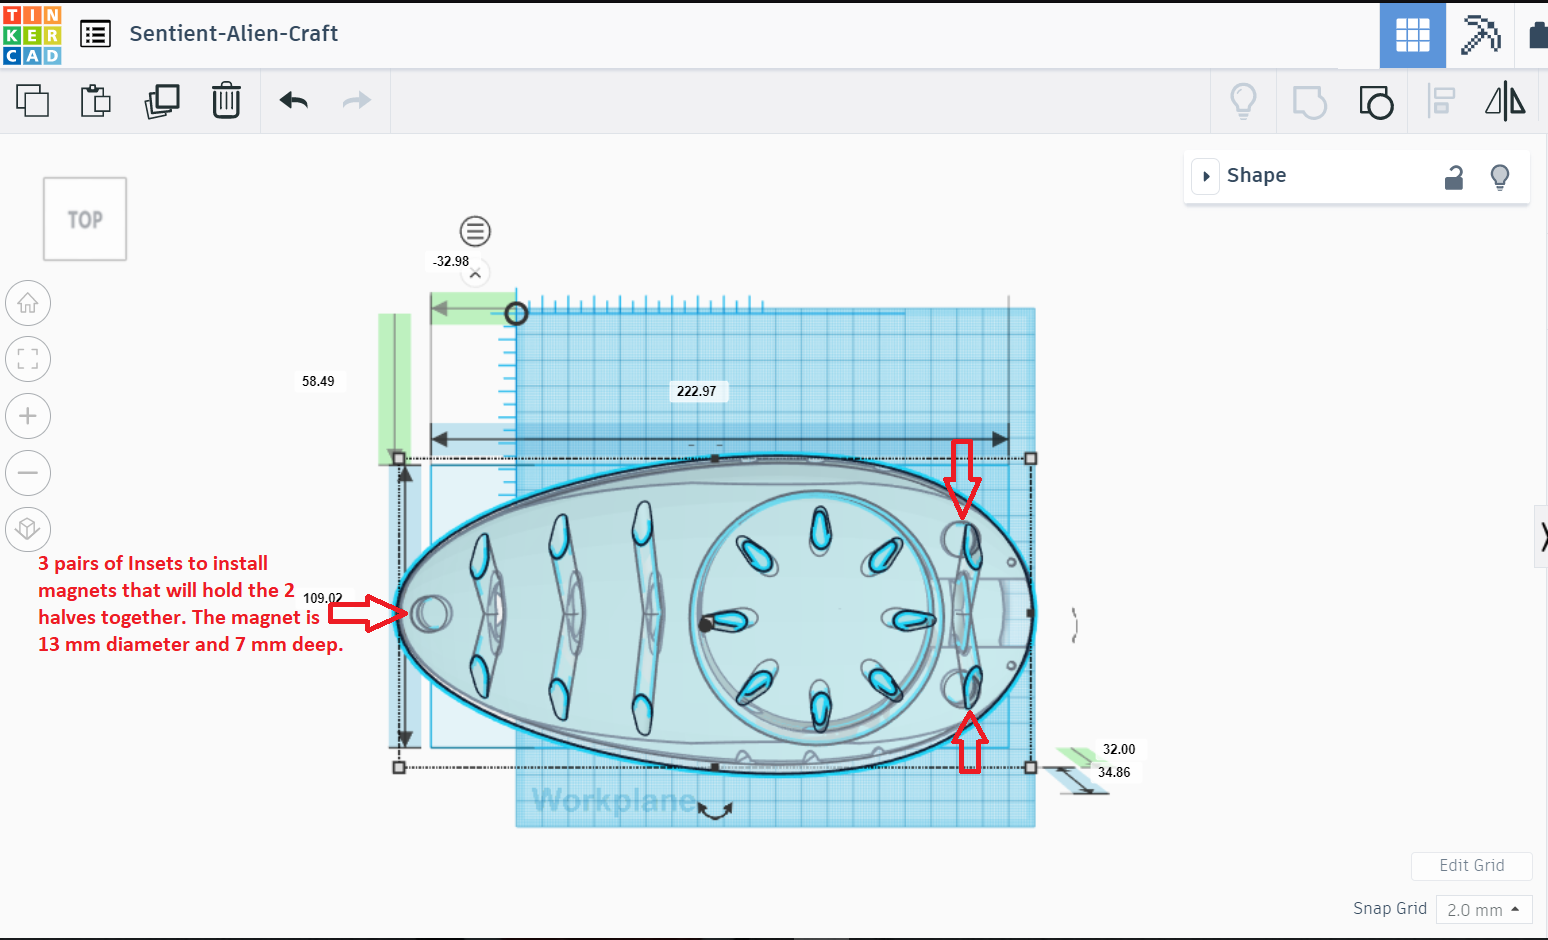
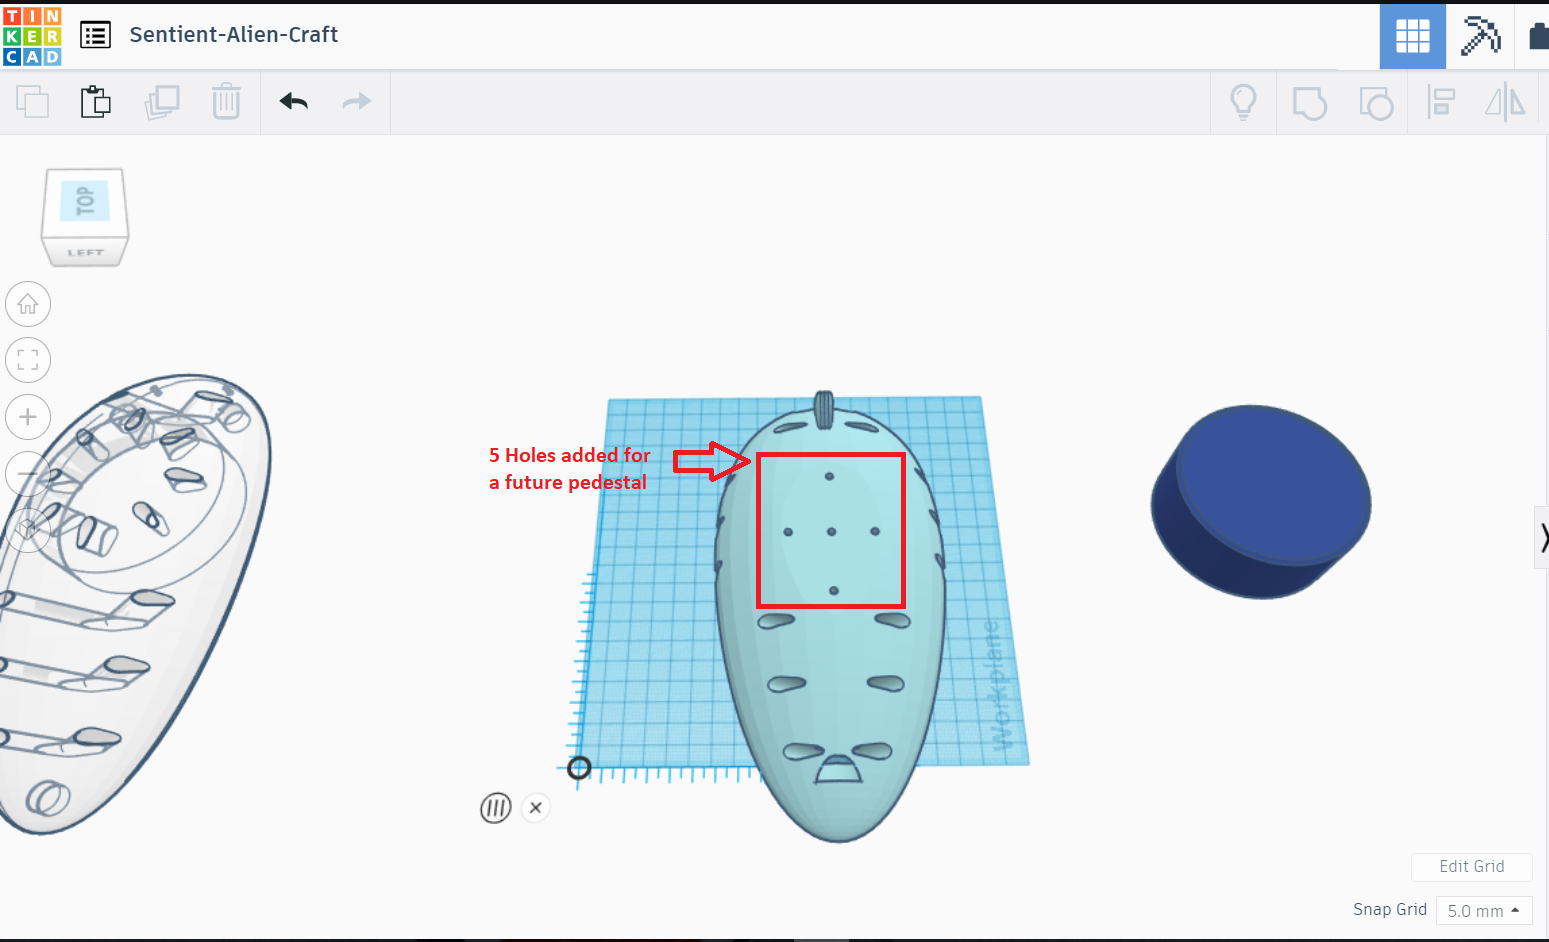
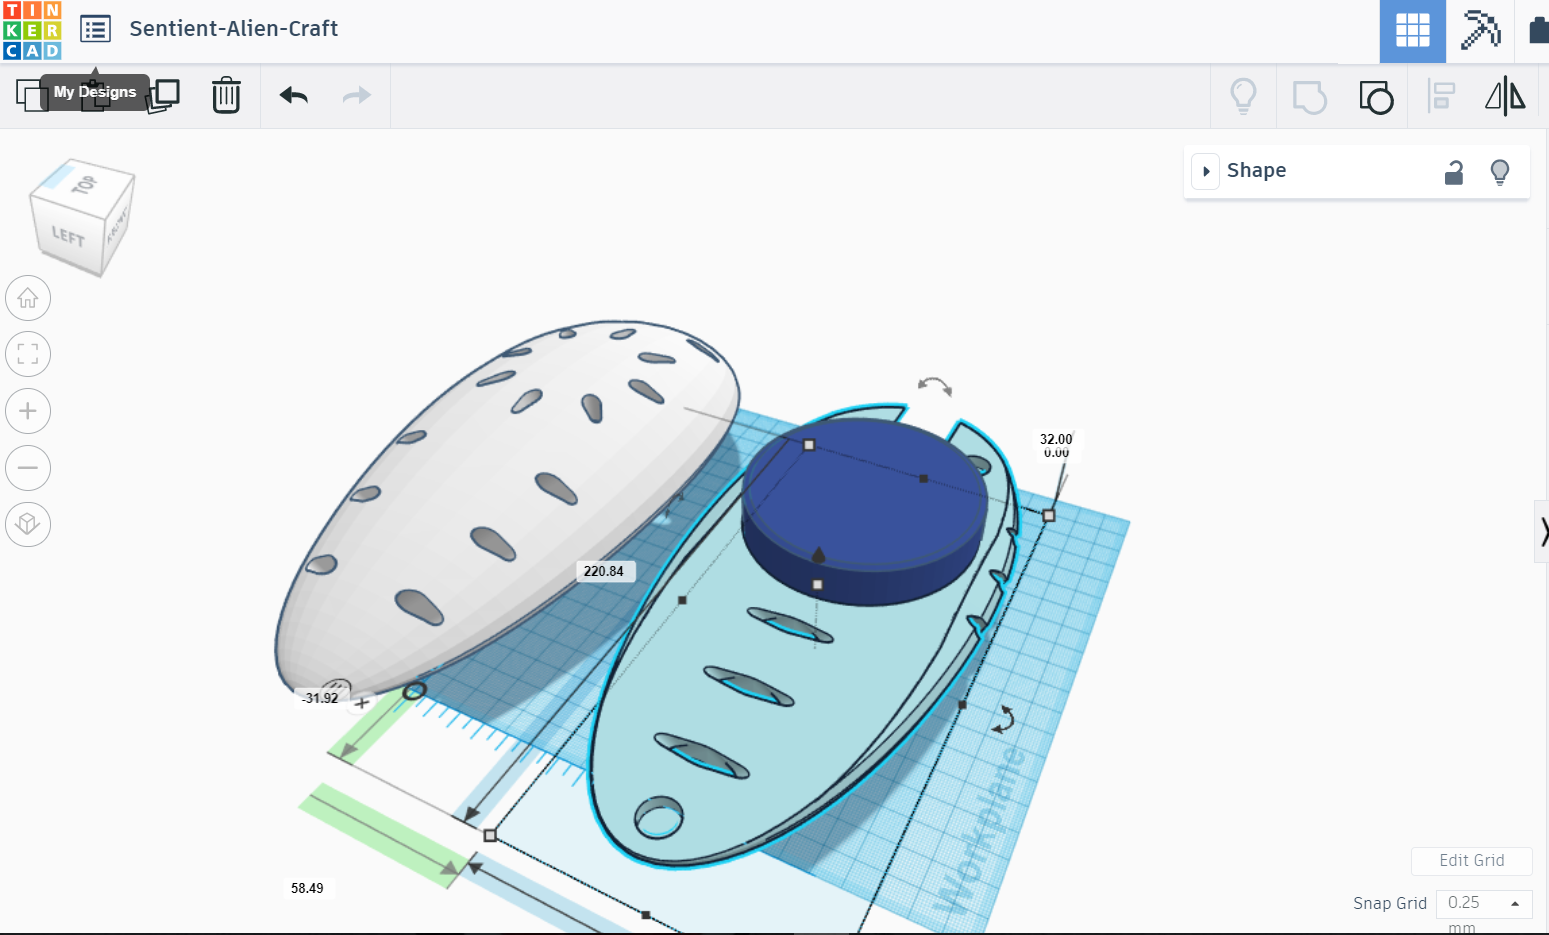
- The fuselage looked a bit too smooth and plain and so I decided to add a tail fin in the easiest possible manner by flattening out a Paraboloid shape
- The paraboloid was duplicated and reduced slightly to create a smaller inner wall - the entire hollow structure was then triplicated and merged with the lower fuselage to create a simple tail fin
- Splitting the fuselage meant that something was required to hold the two halves together - I created a set 3 matching holes in each half, that would fit 3 pairs of magnets; 13mm in diameter and 7 mm deep
- Lastly, I enlarged the flattened area of the lower fuselage and added five 5 mm holes that would later be used to mount this model on some kind of a pedestal (TODO in the future)
At last! It's time to print! Never thought that I would get here.
The 3D Printing Details
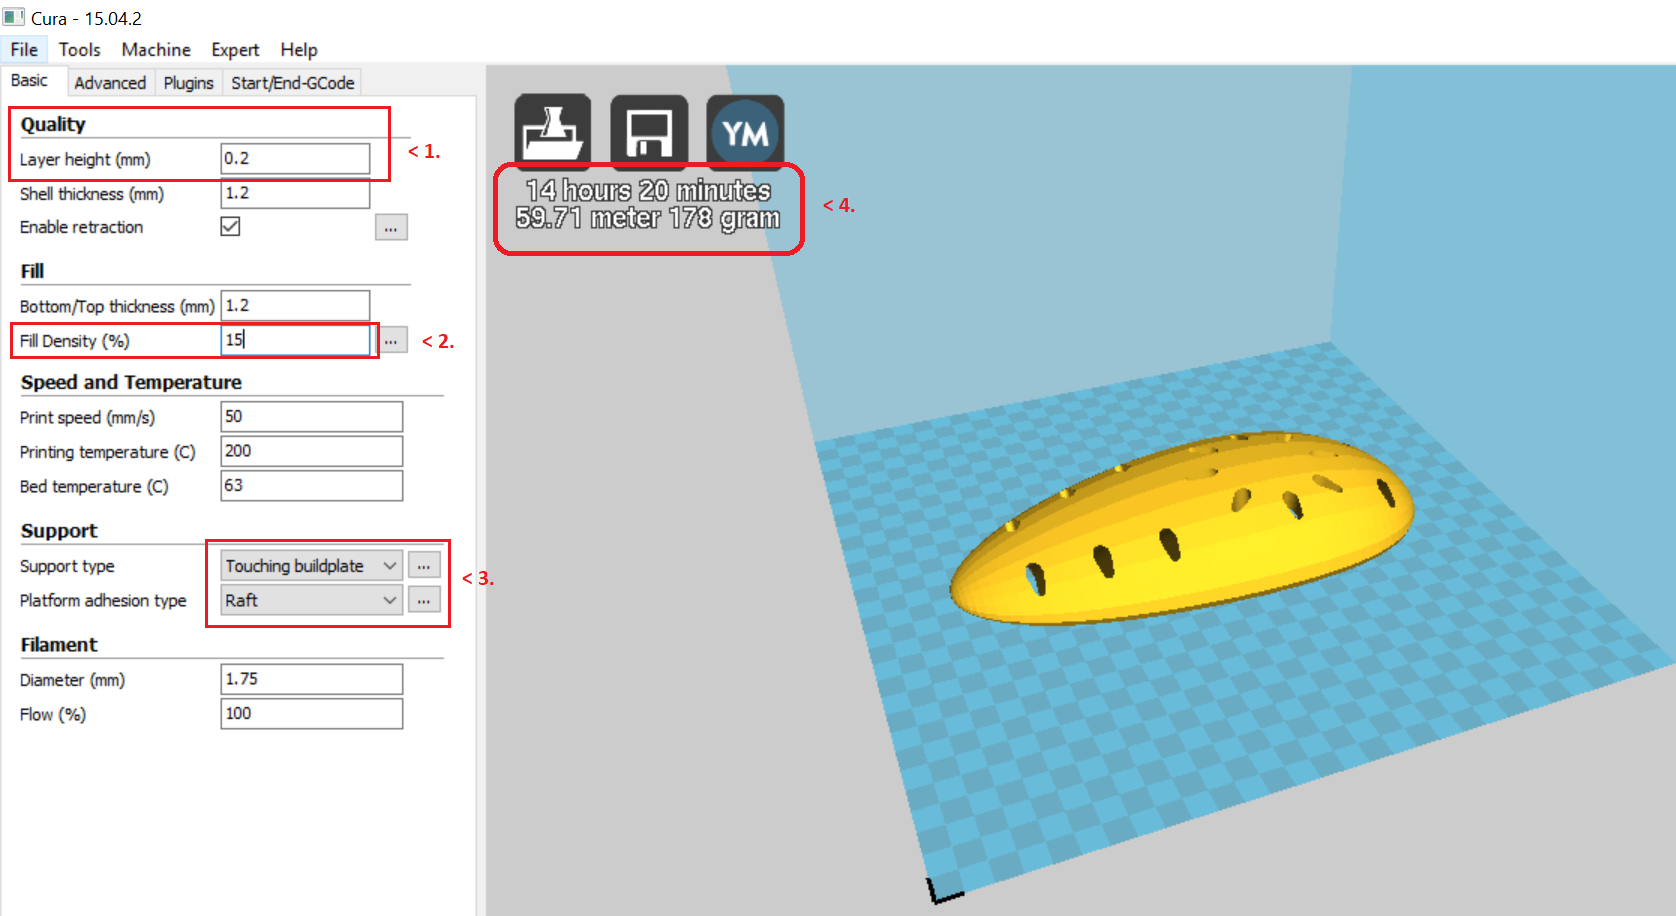
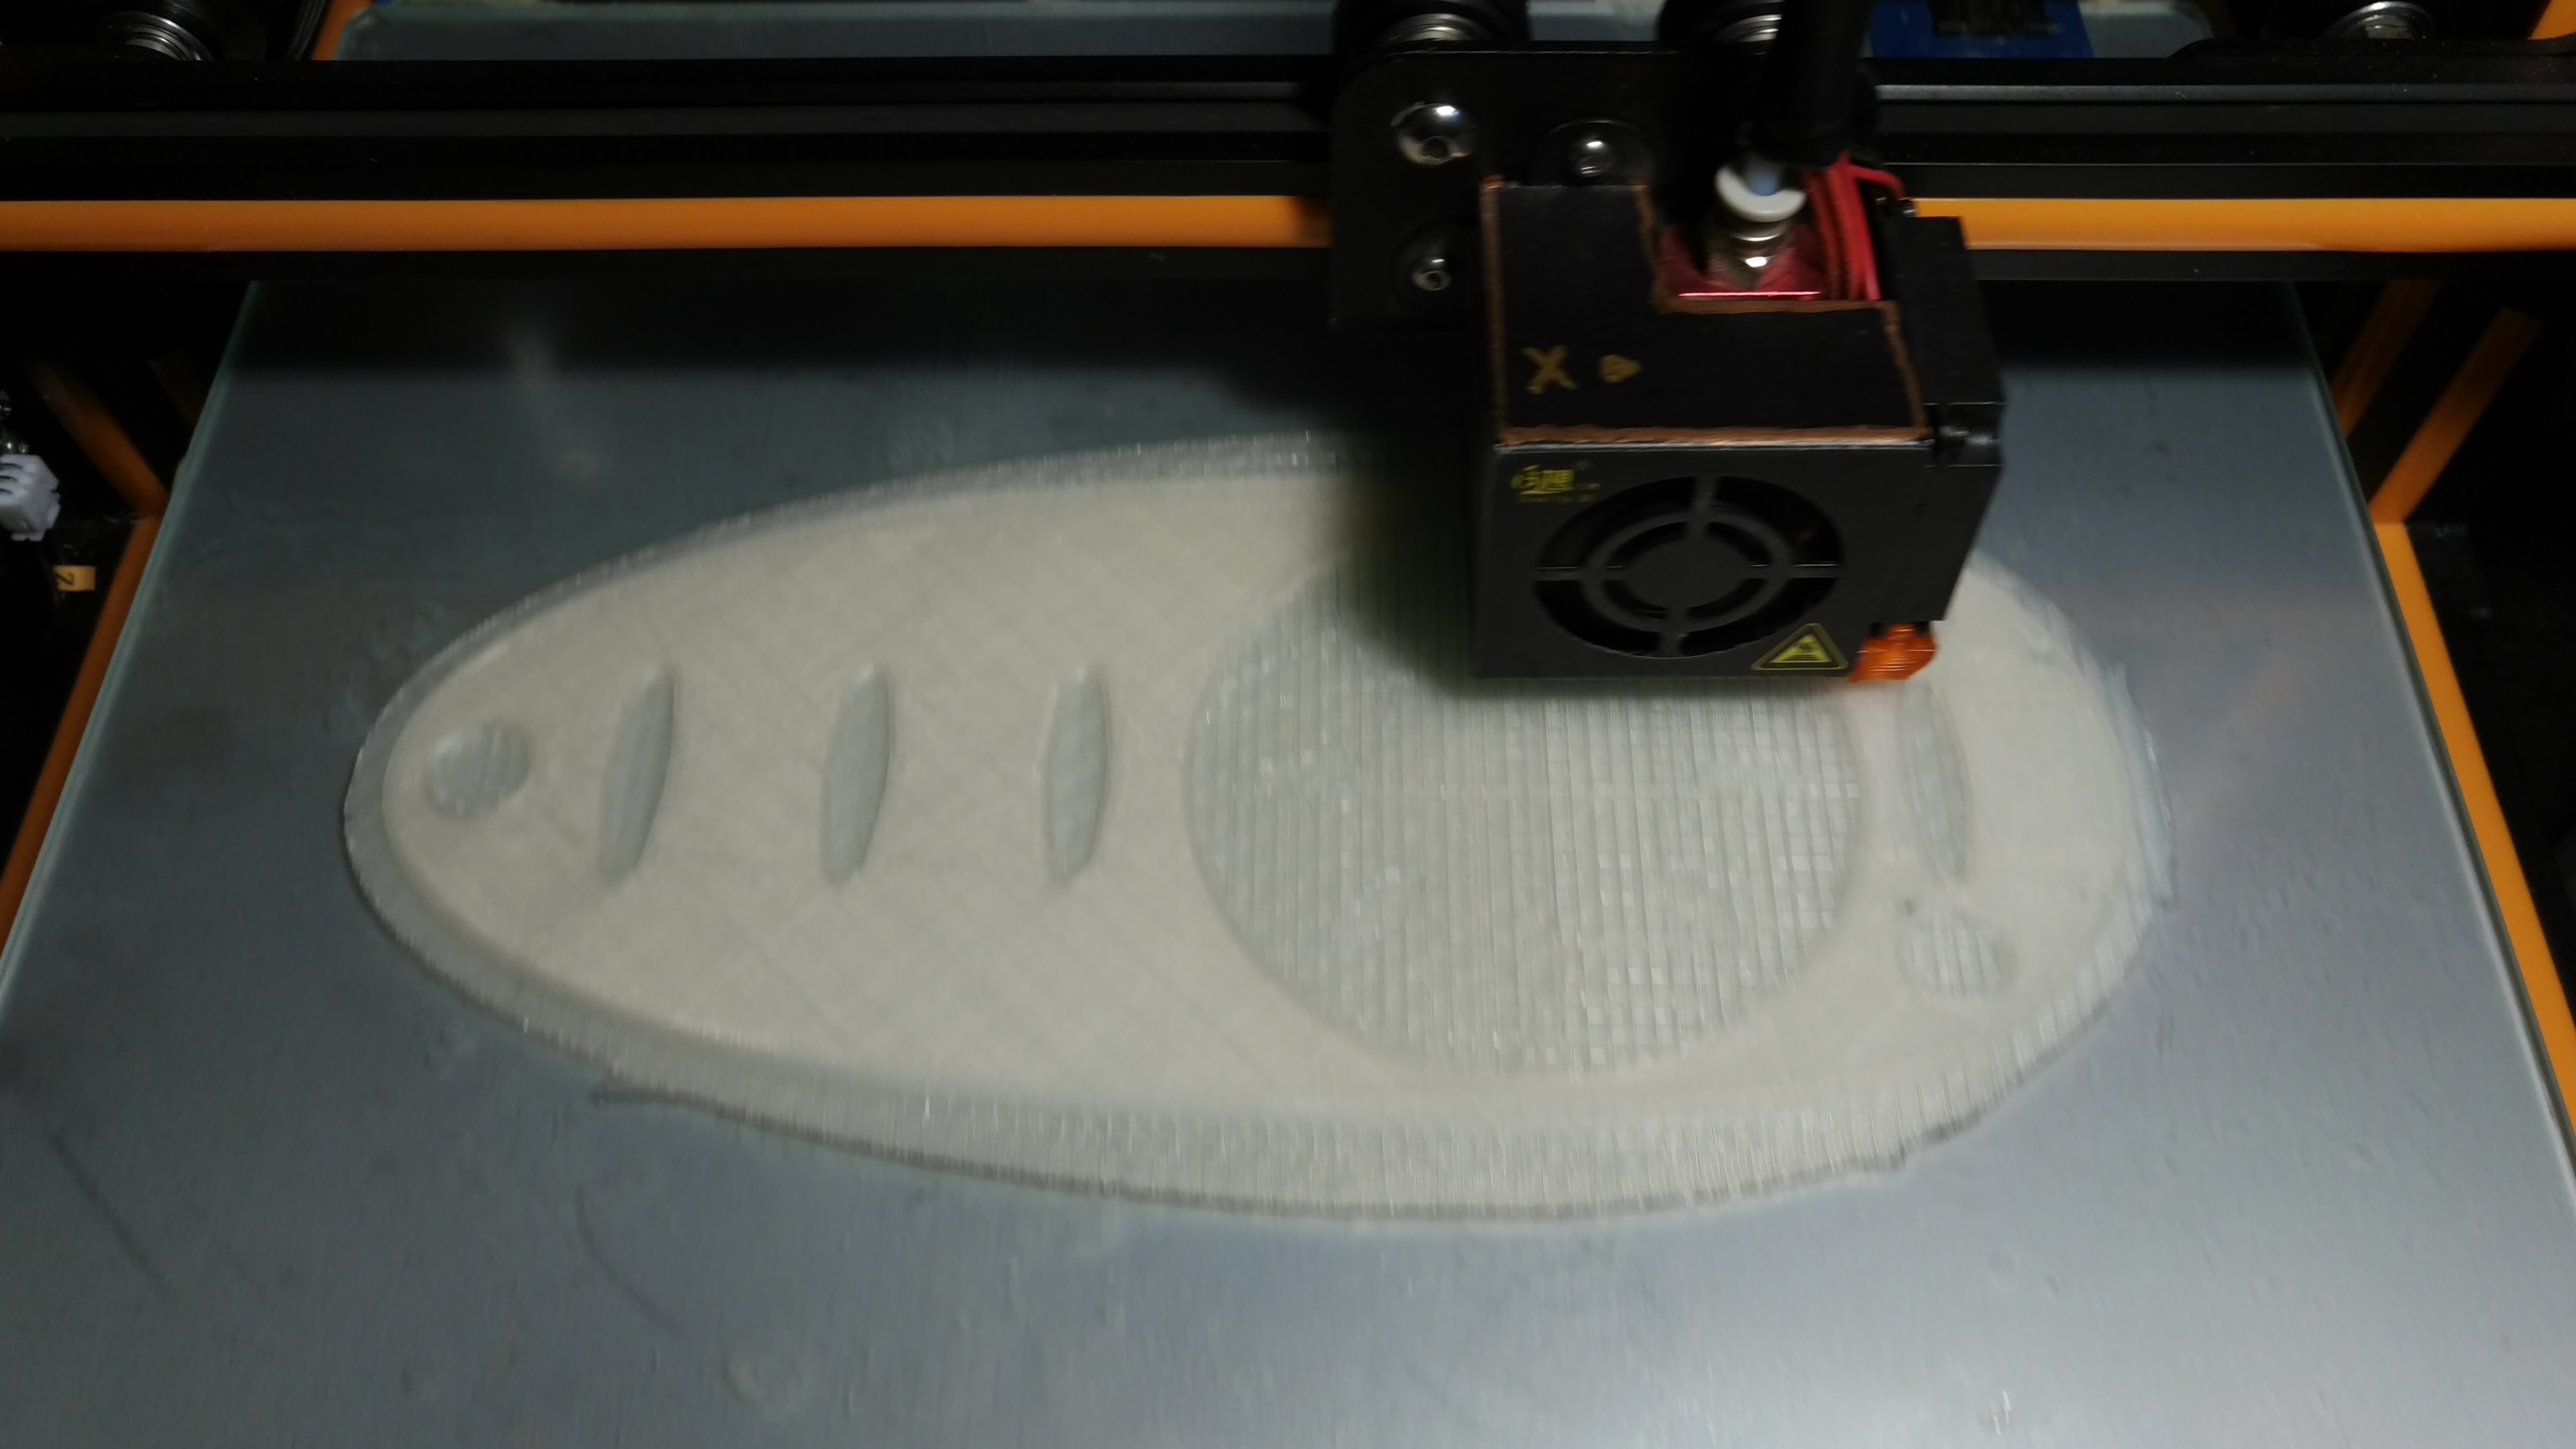
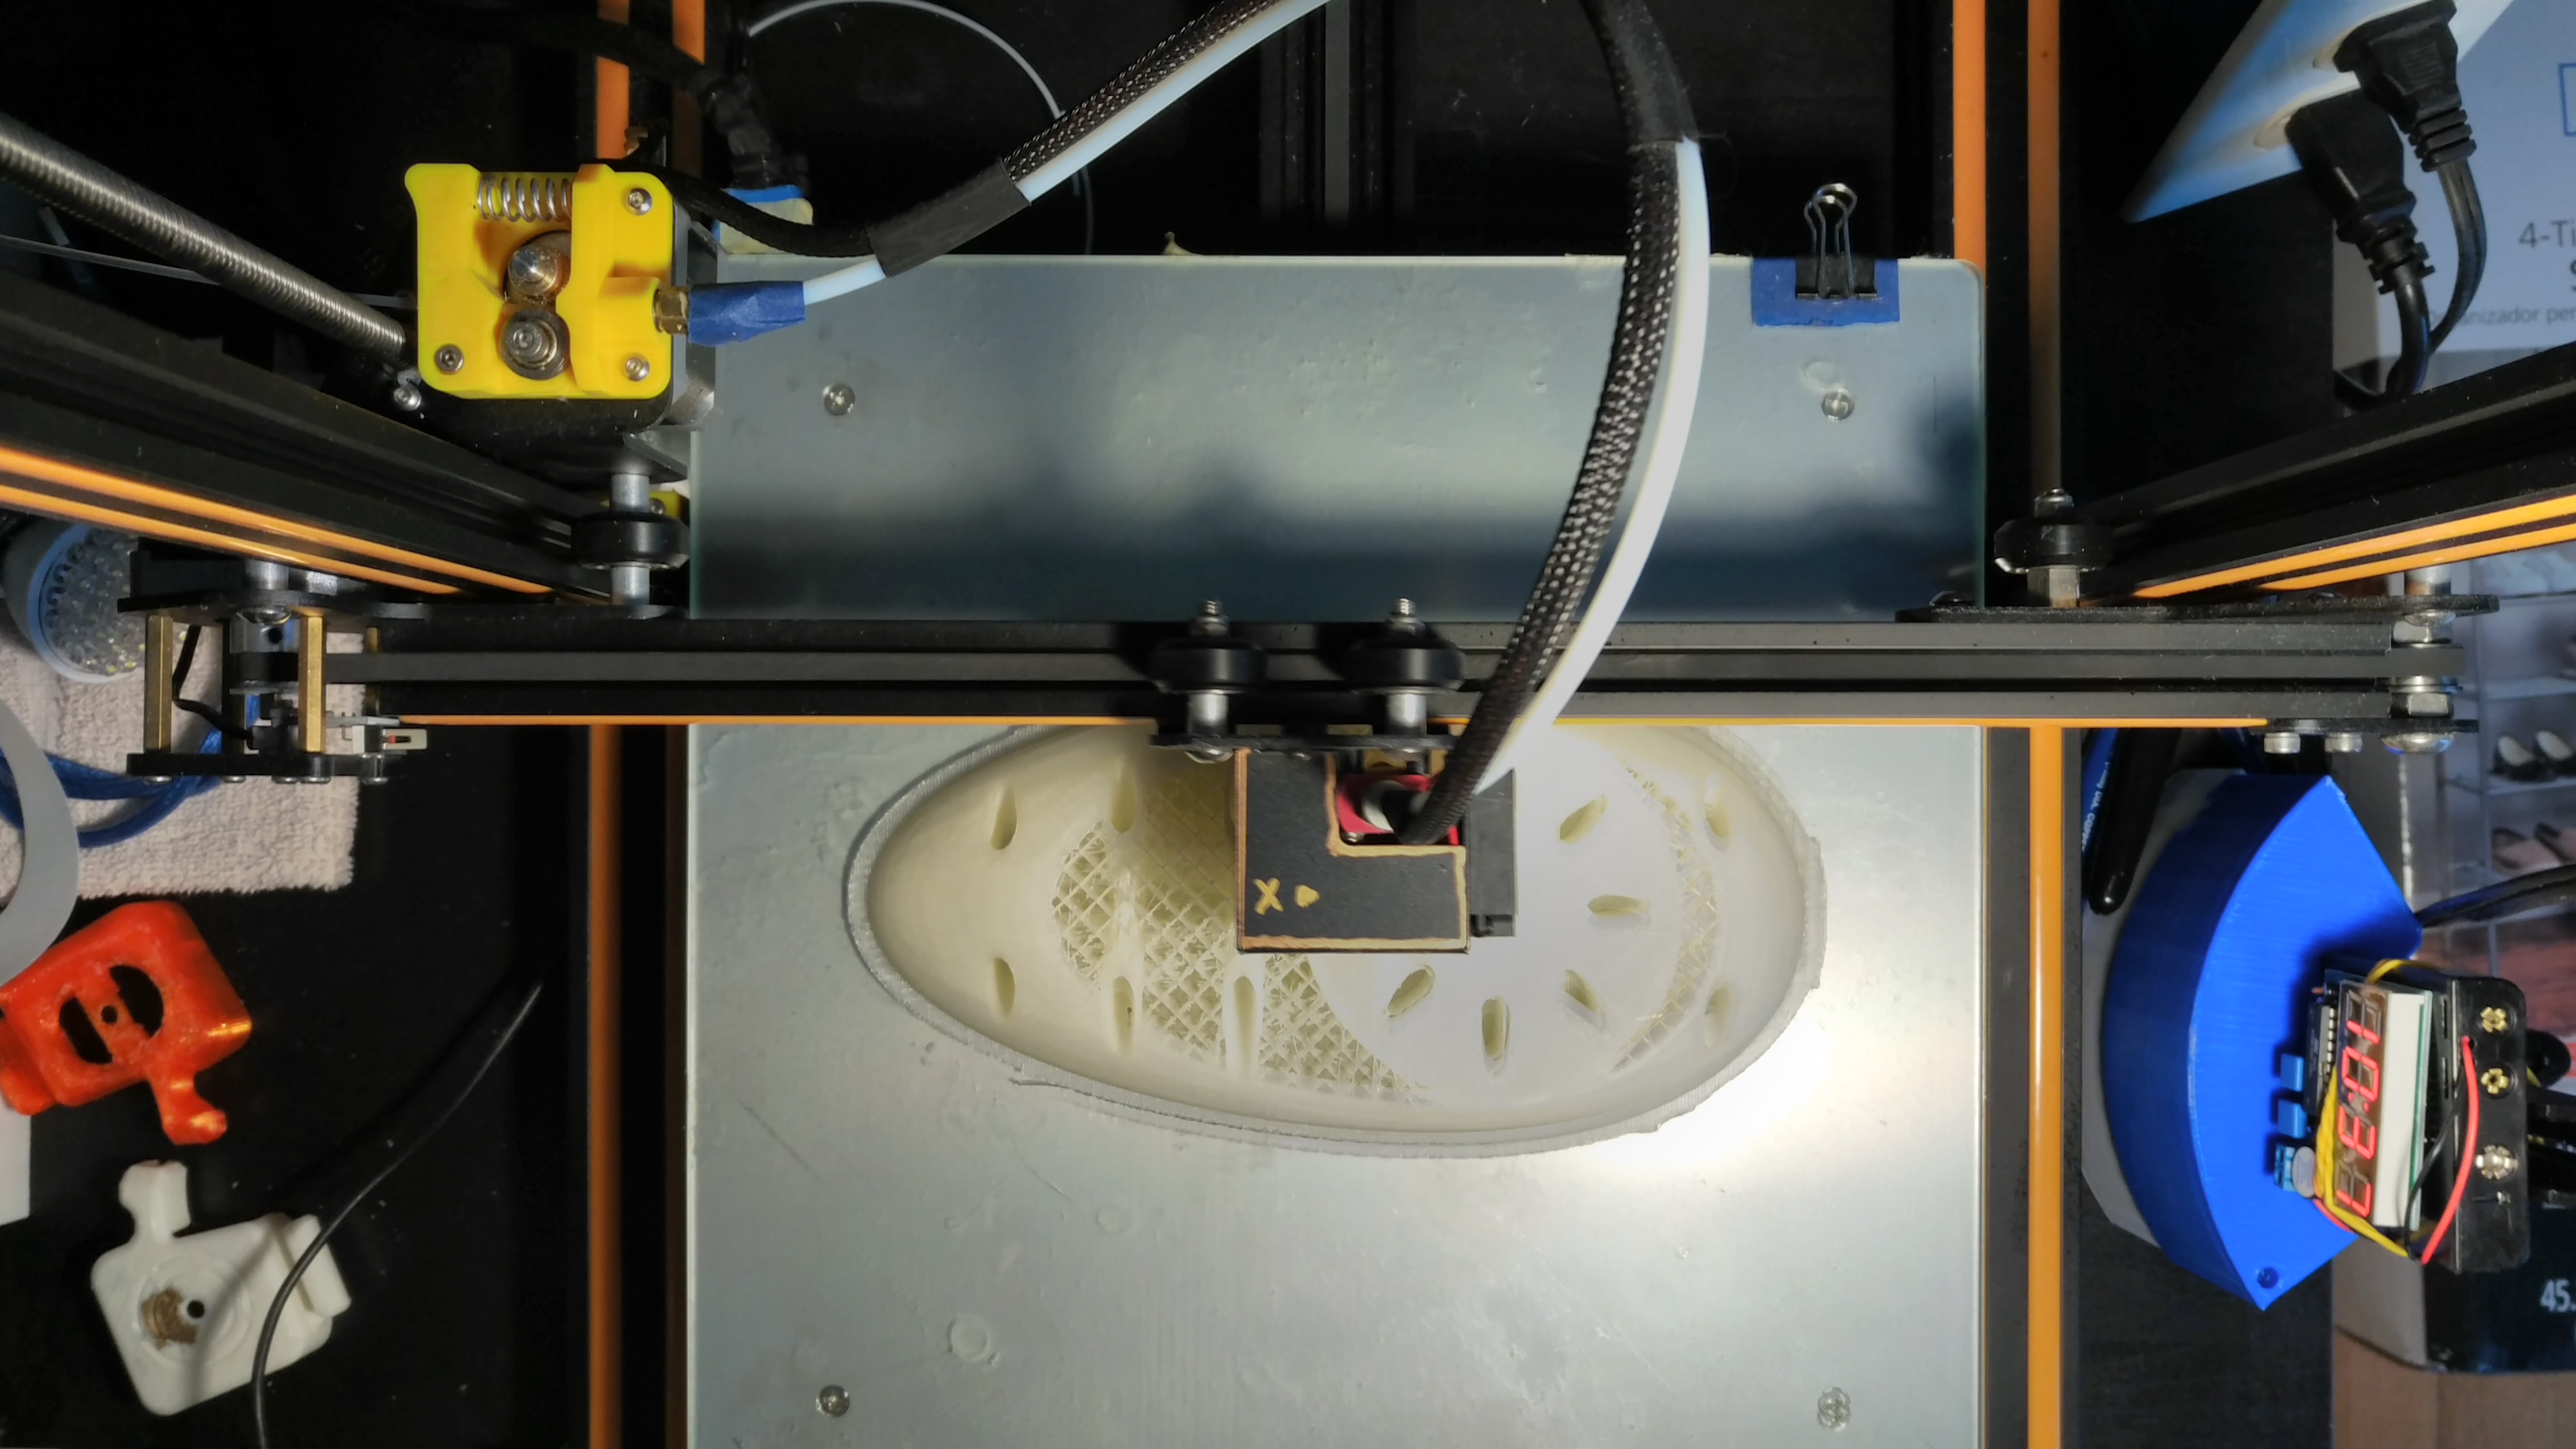
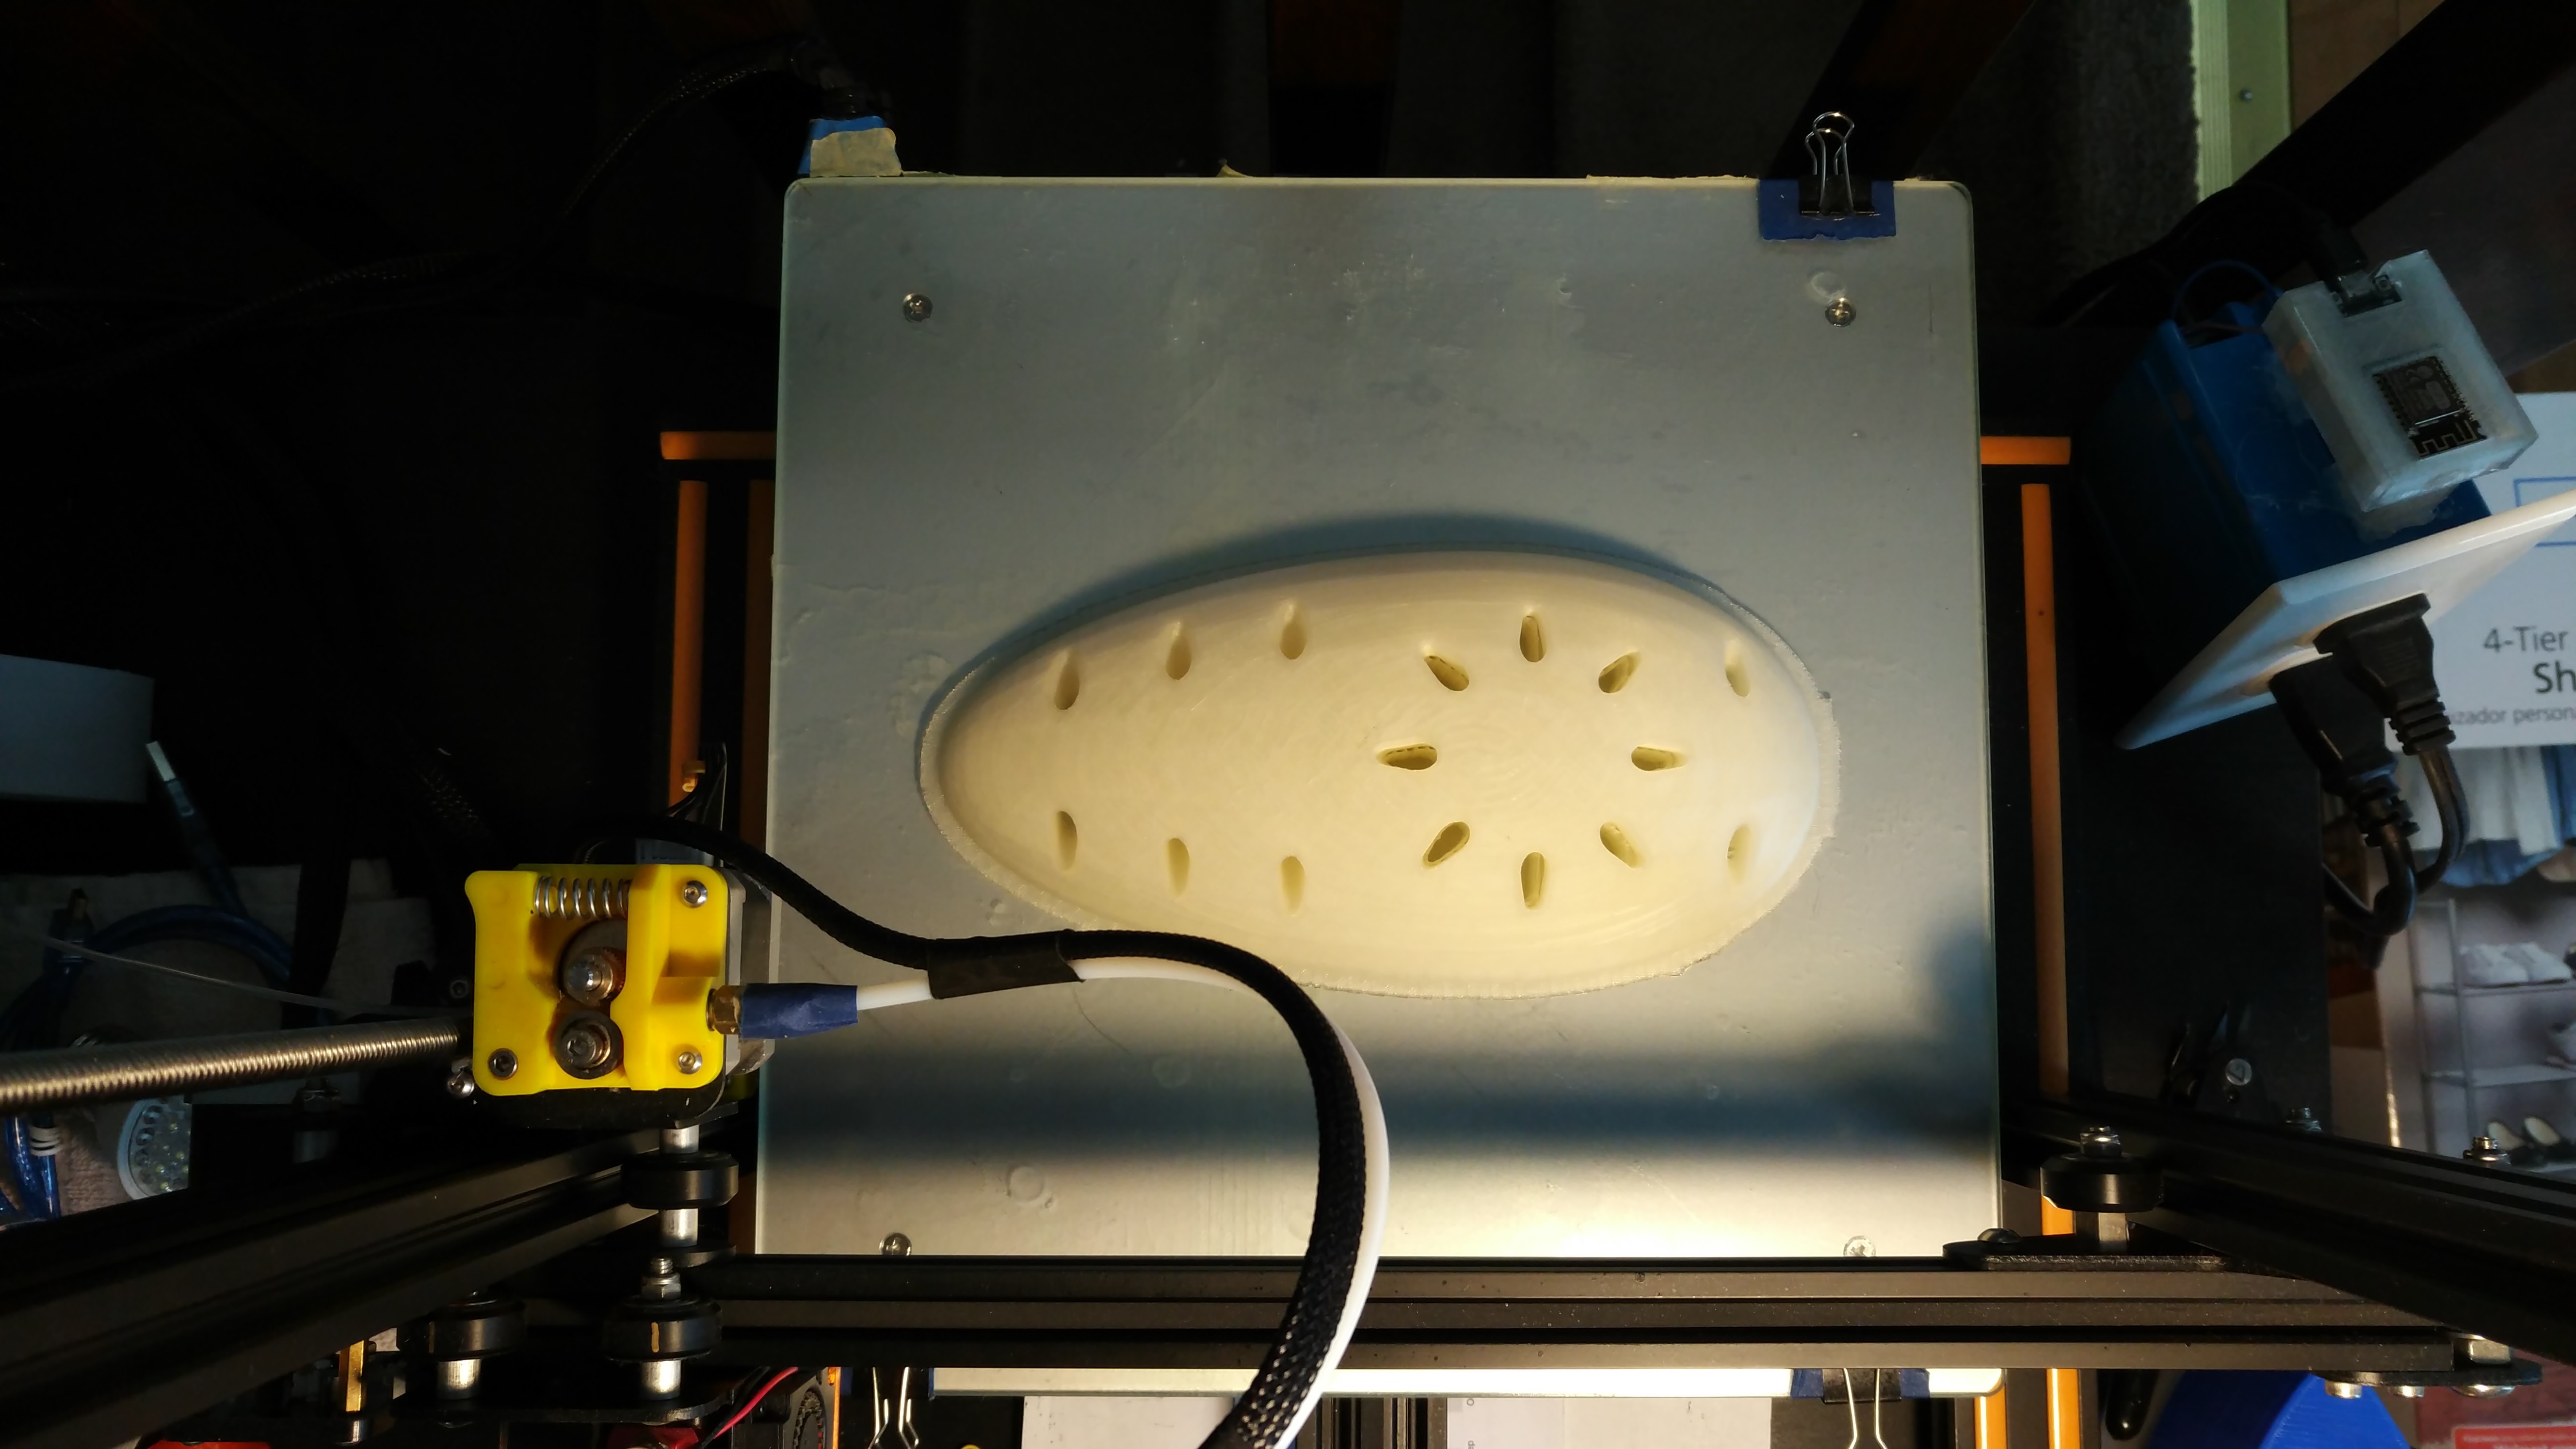
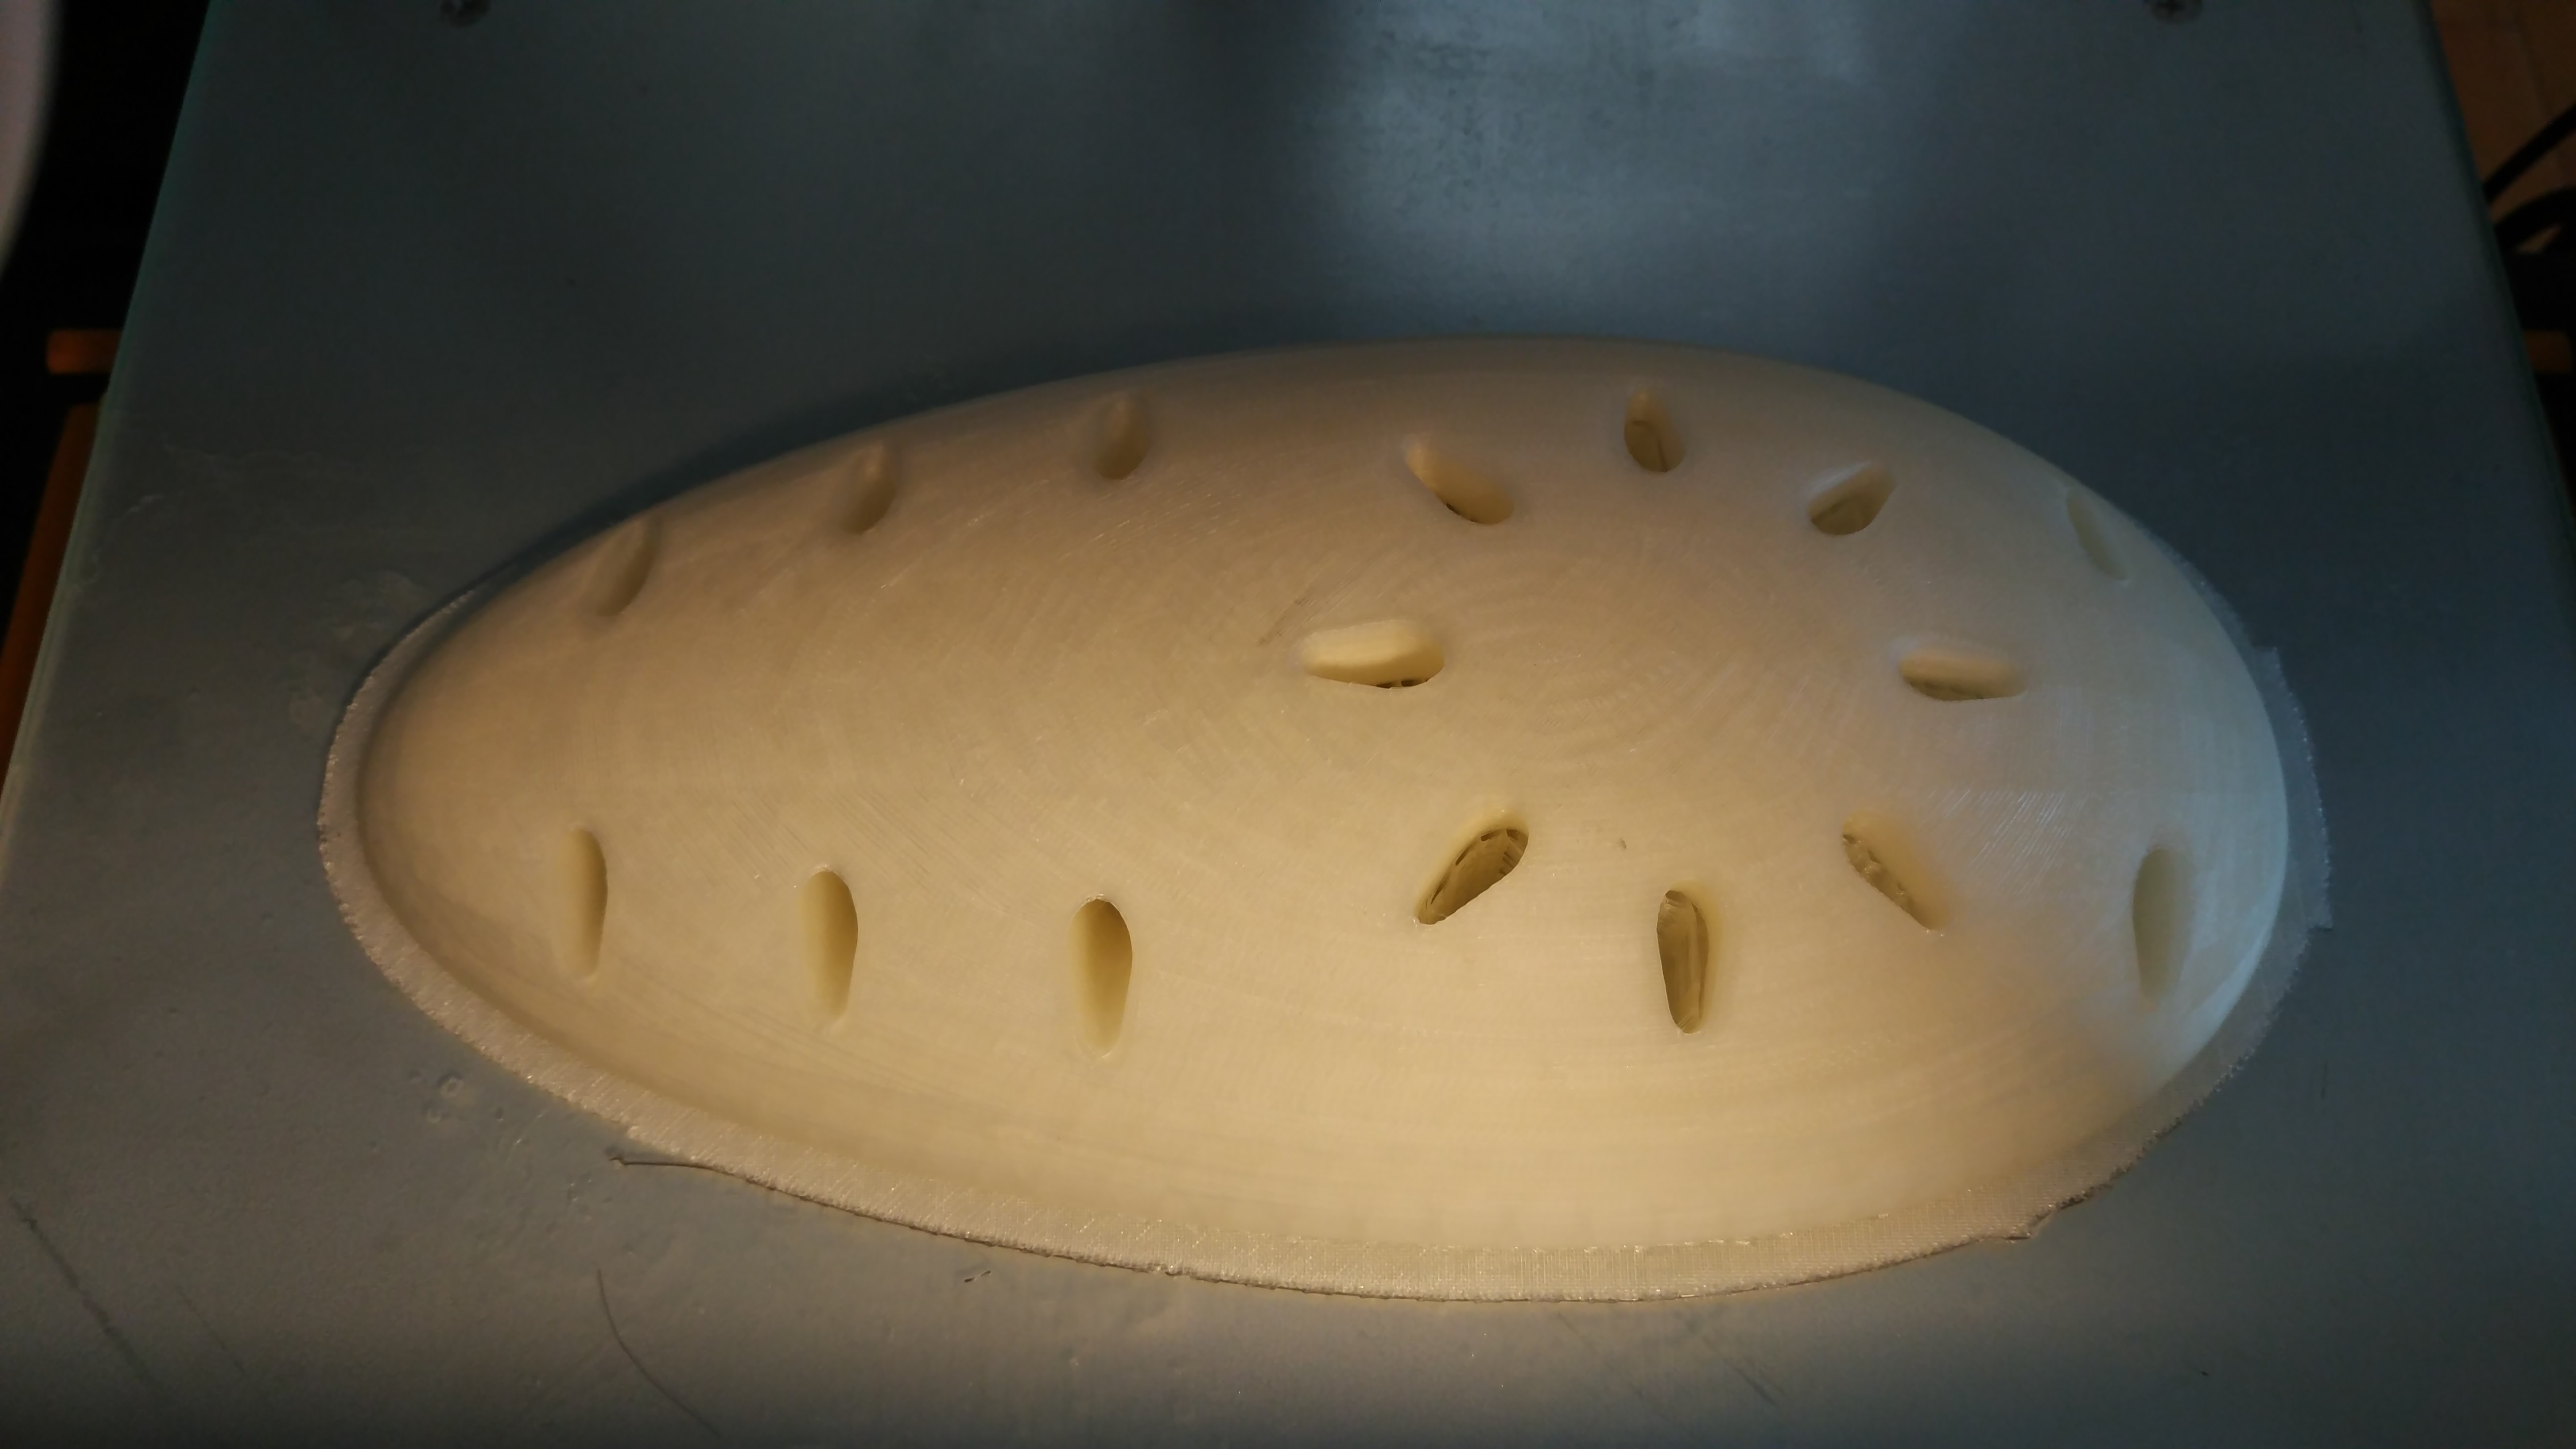
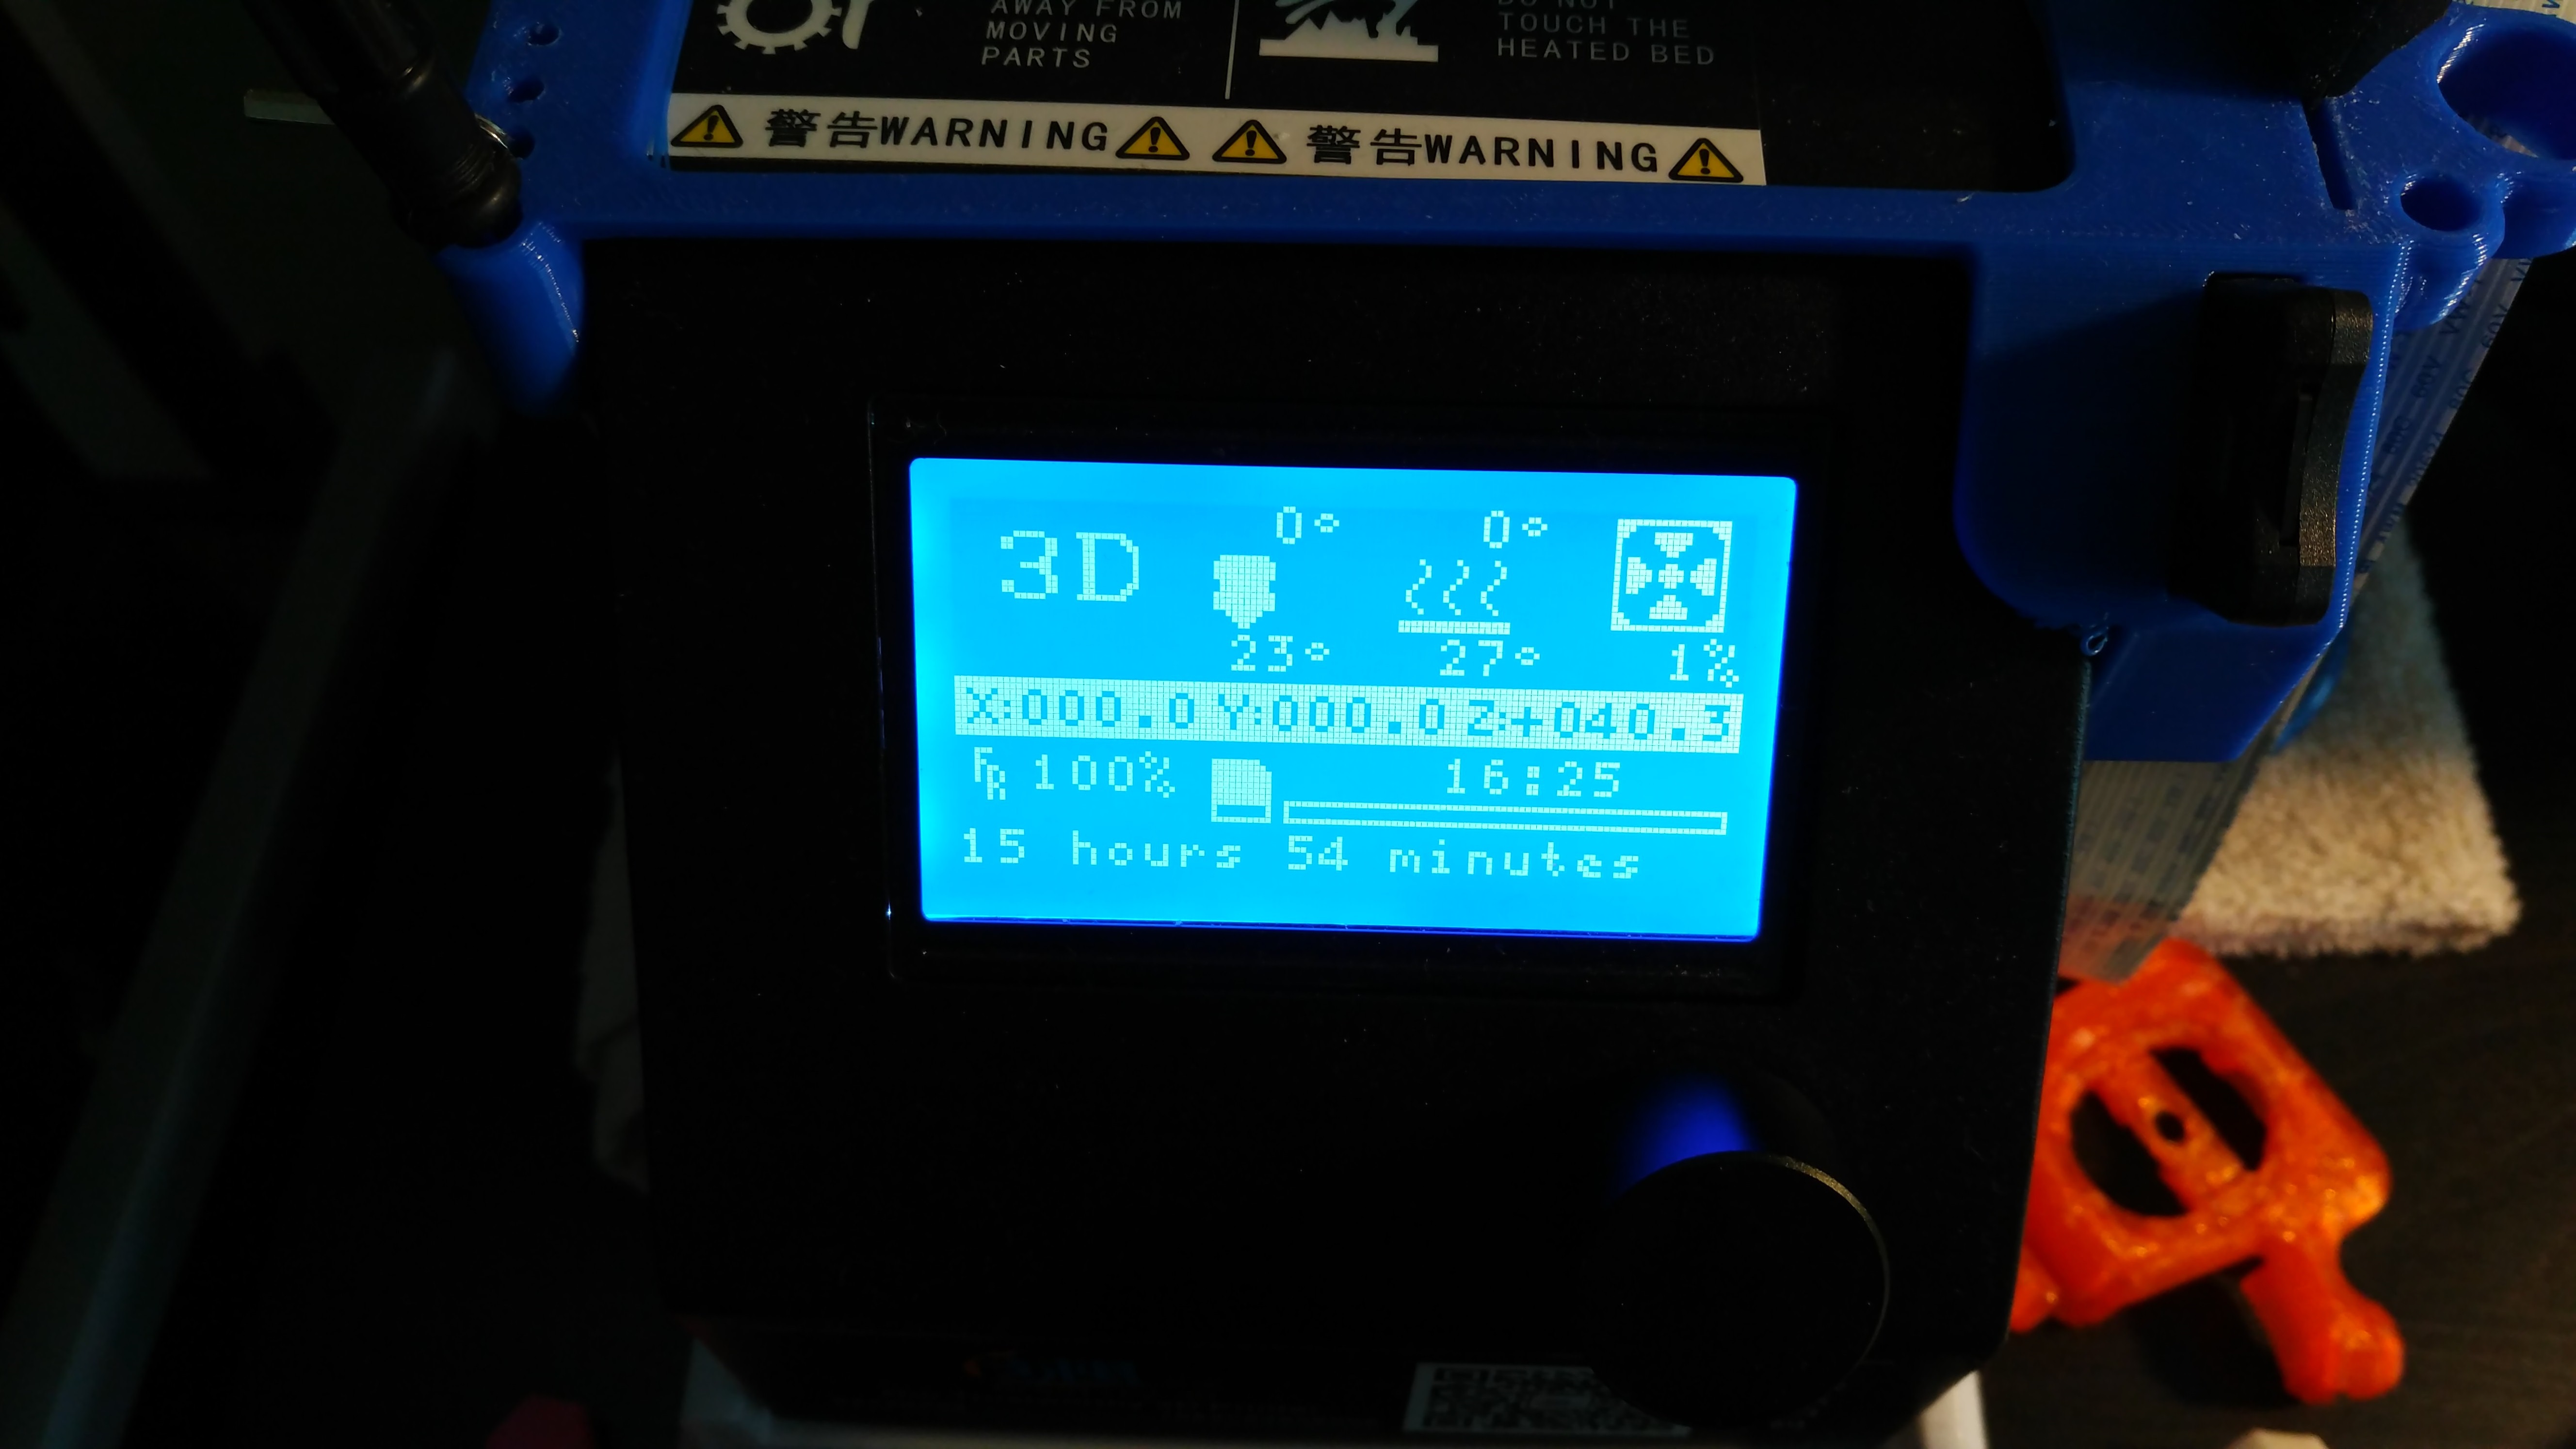
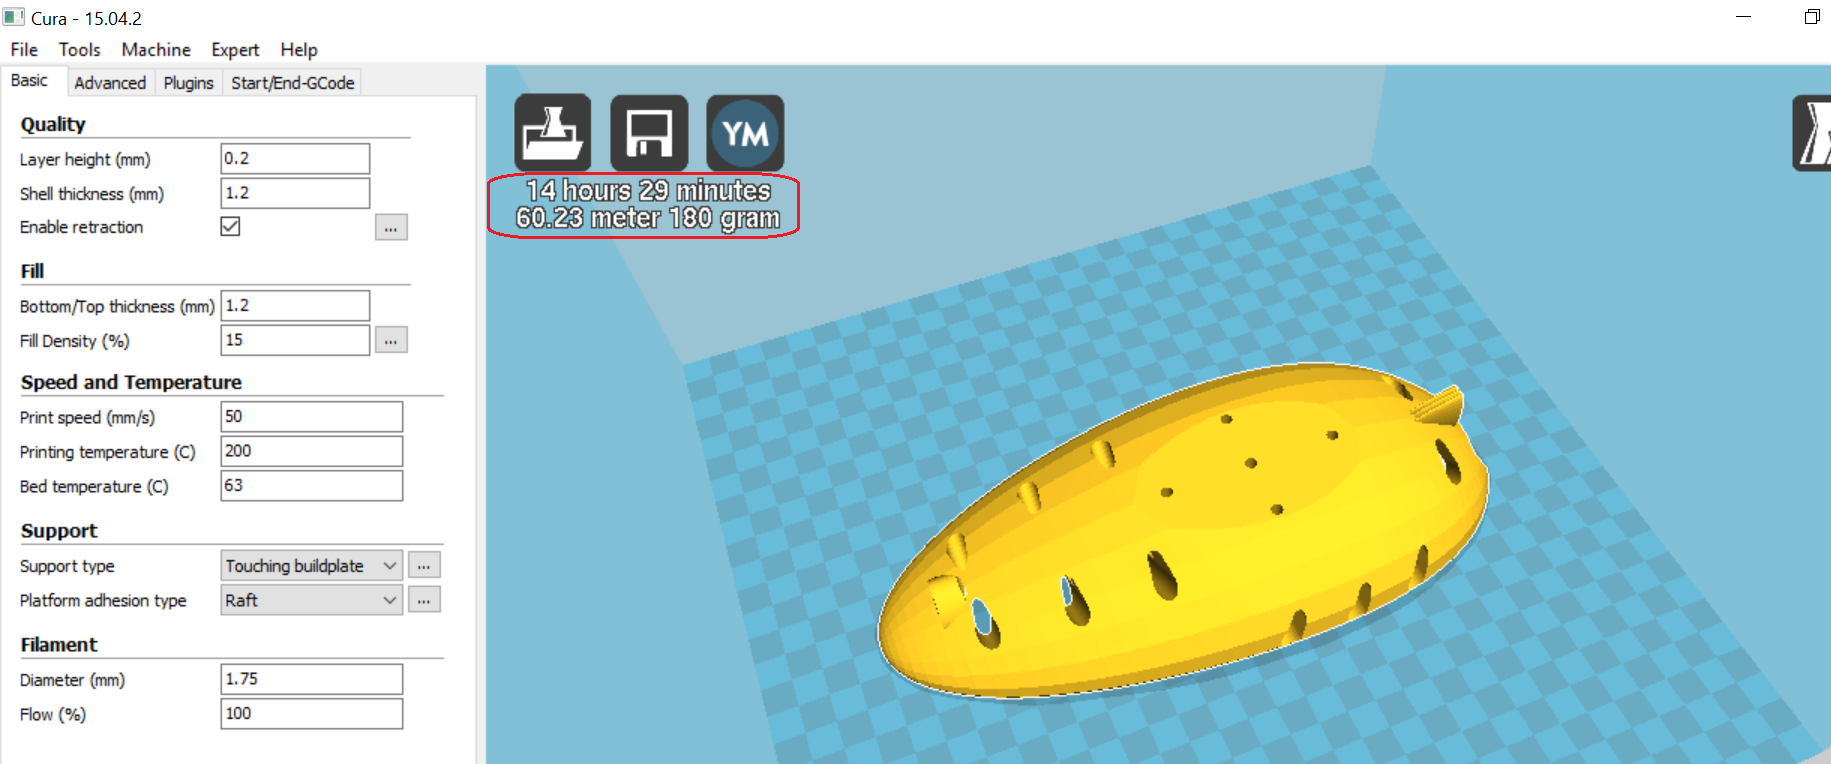
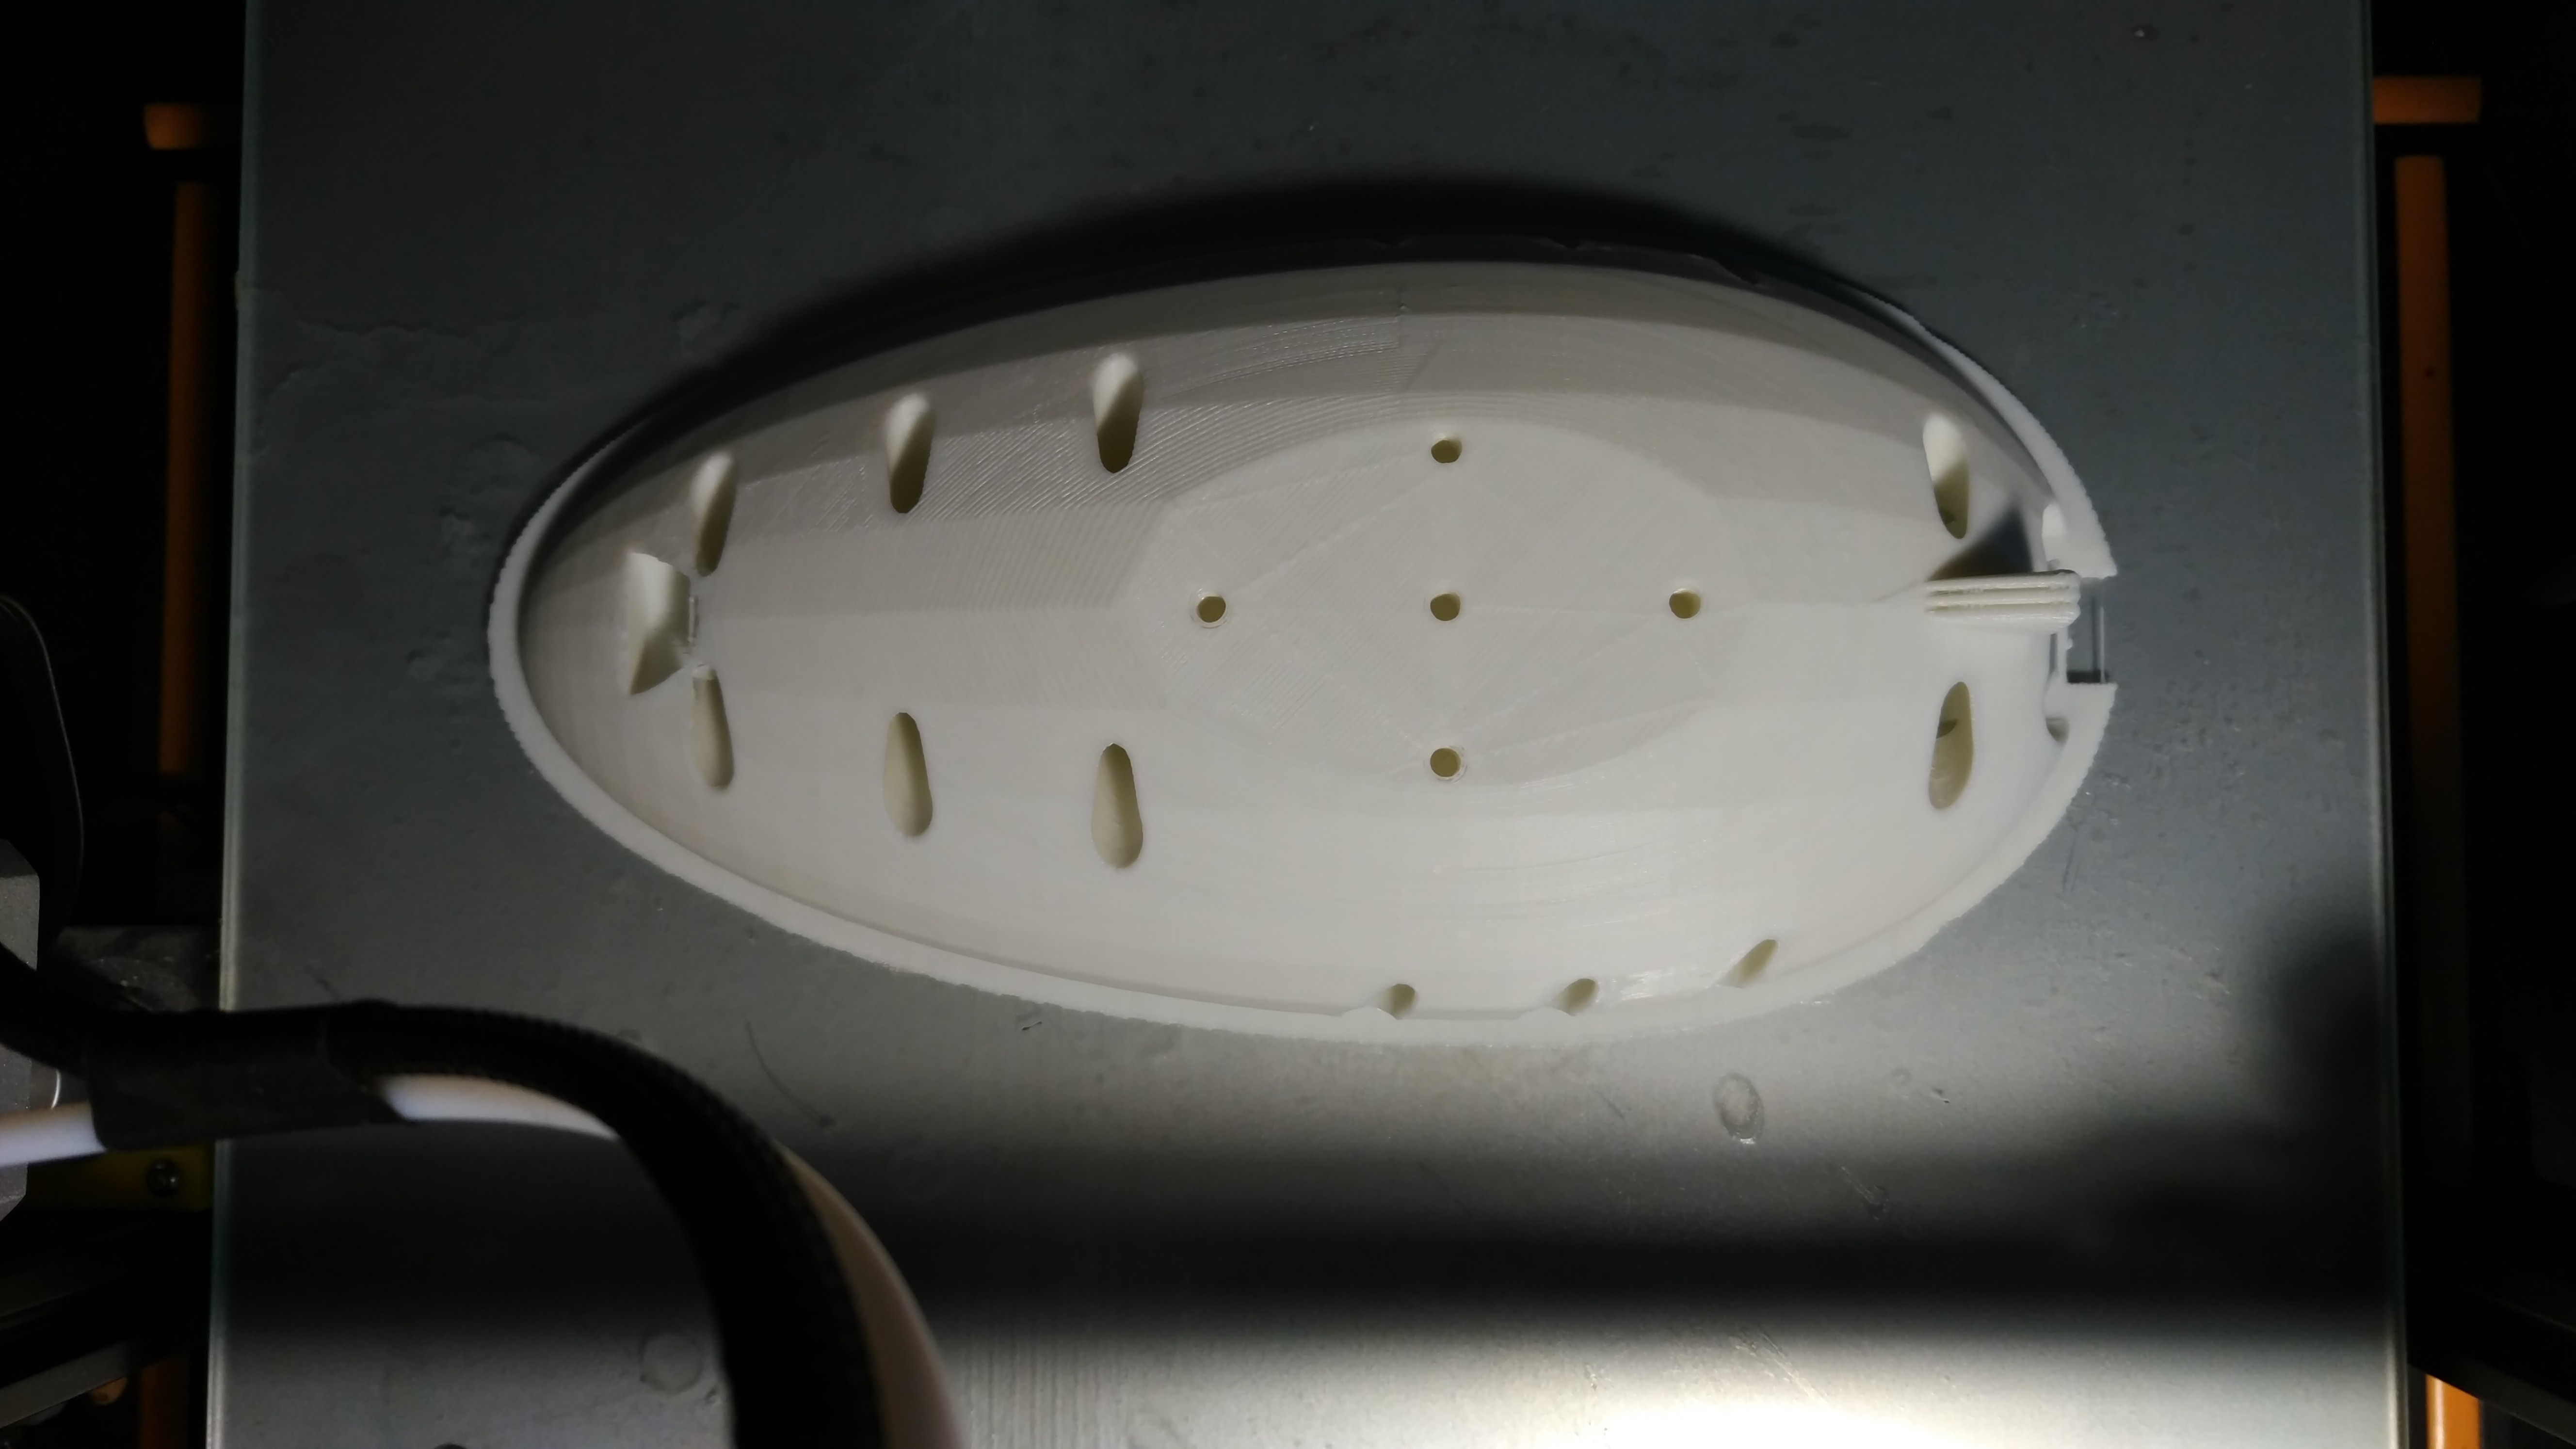
I printed this model out on the Creality CR-10 sliced using Cura 15.04.2 (and yes, it works well!). I reduced the fill density down to 15% to reduce print times.
Printing this model as two pieces have the following advantages:
- The model was flat on the inside, much easier to print, with all rafted surfaces on the inside whilst the outer fuselage would have a better finish
- Although Raft was enabled, the amount of material required was drastically cut down
- With a two-part model, I could print the two halves separately, minimizing print failures
- Besides, it would mean a choice of different colors and or types of printing material for the two halves - which is what I did!
3D Printing the Spacecraft
- For the top-half, I went for the eSun Natural PLA Filament that's translucent
- For the bottom-half, I decided to go for the CCTREE "Glow in the dark Green"
Both filaments combined would work well with the Blue-Green, and Red light rings of the Echo Dot.
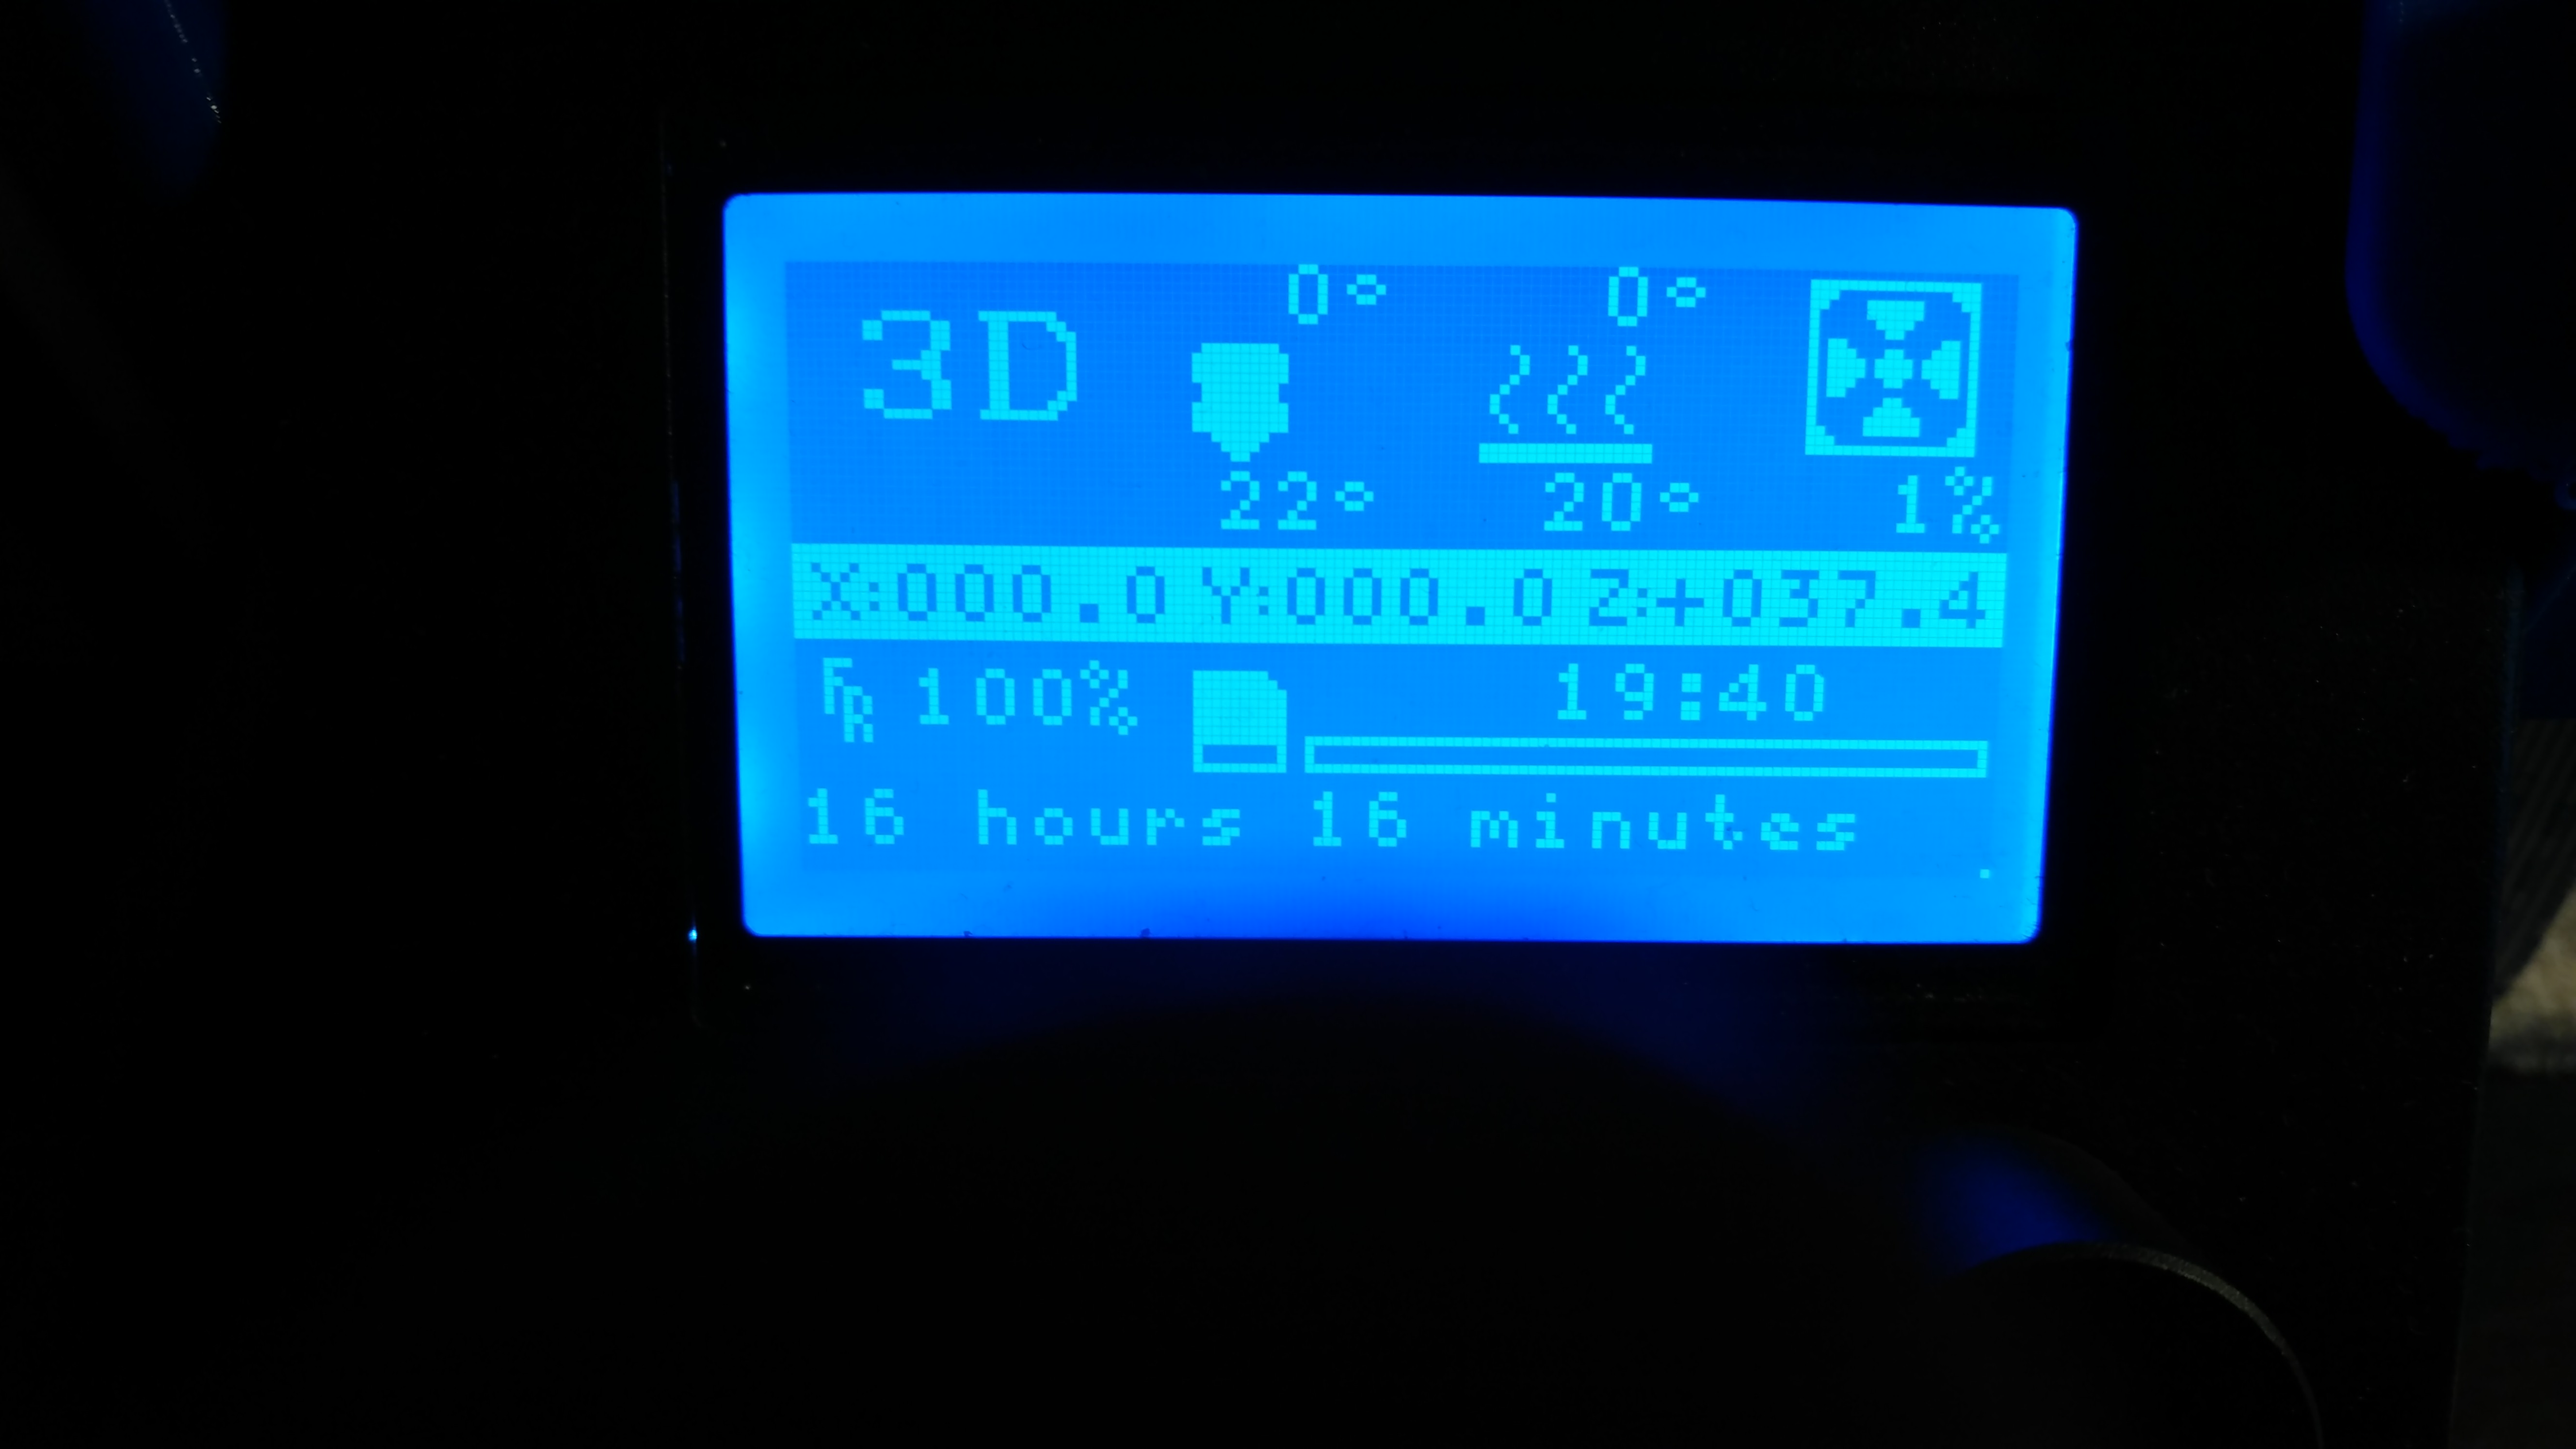
The two pieces were printed over night and as shown by the CR-10 display, too more than the time estimated by Cura
NOTE
The two parts were printed overnight with just a small table lamp for lighting. Therefore, the pictures look a little happier than they should, and do not do justice to the actual quality of the completed prints.
The Spacecraft Assembly and Print Quality
.jpg)
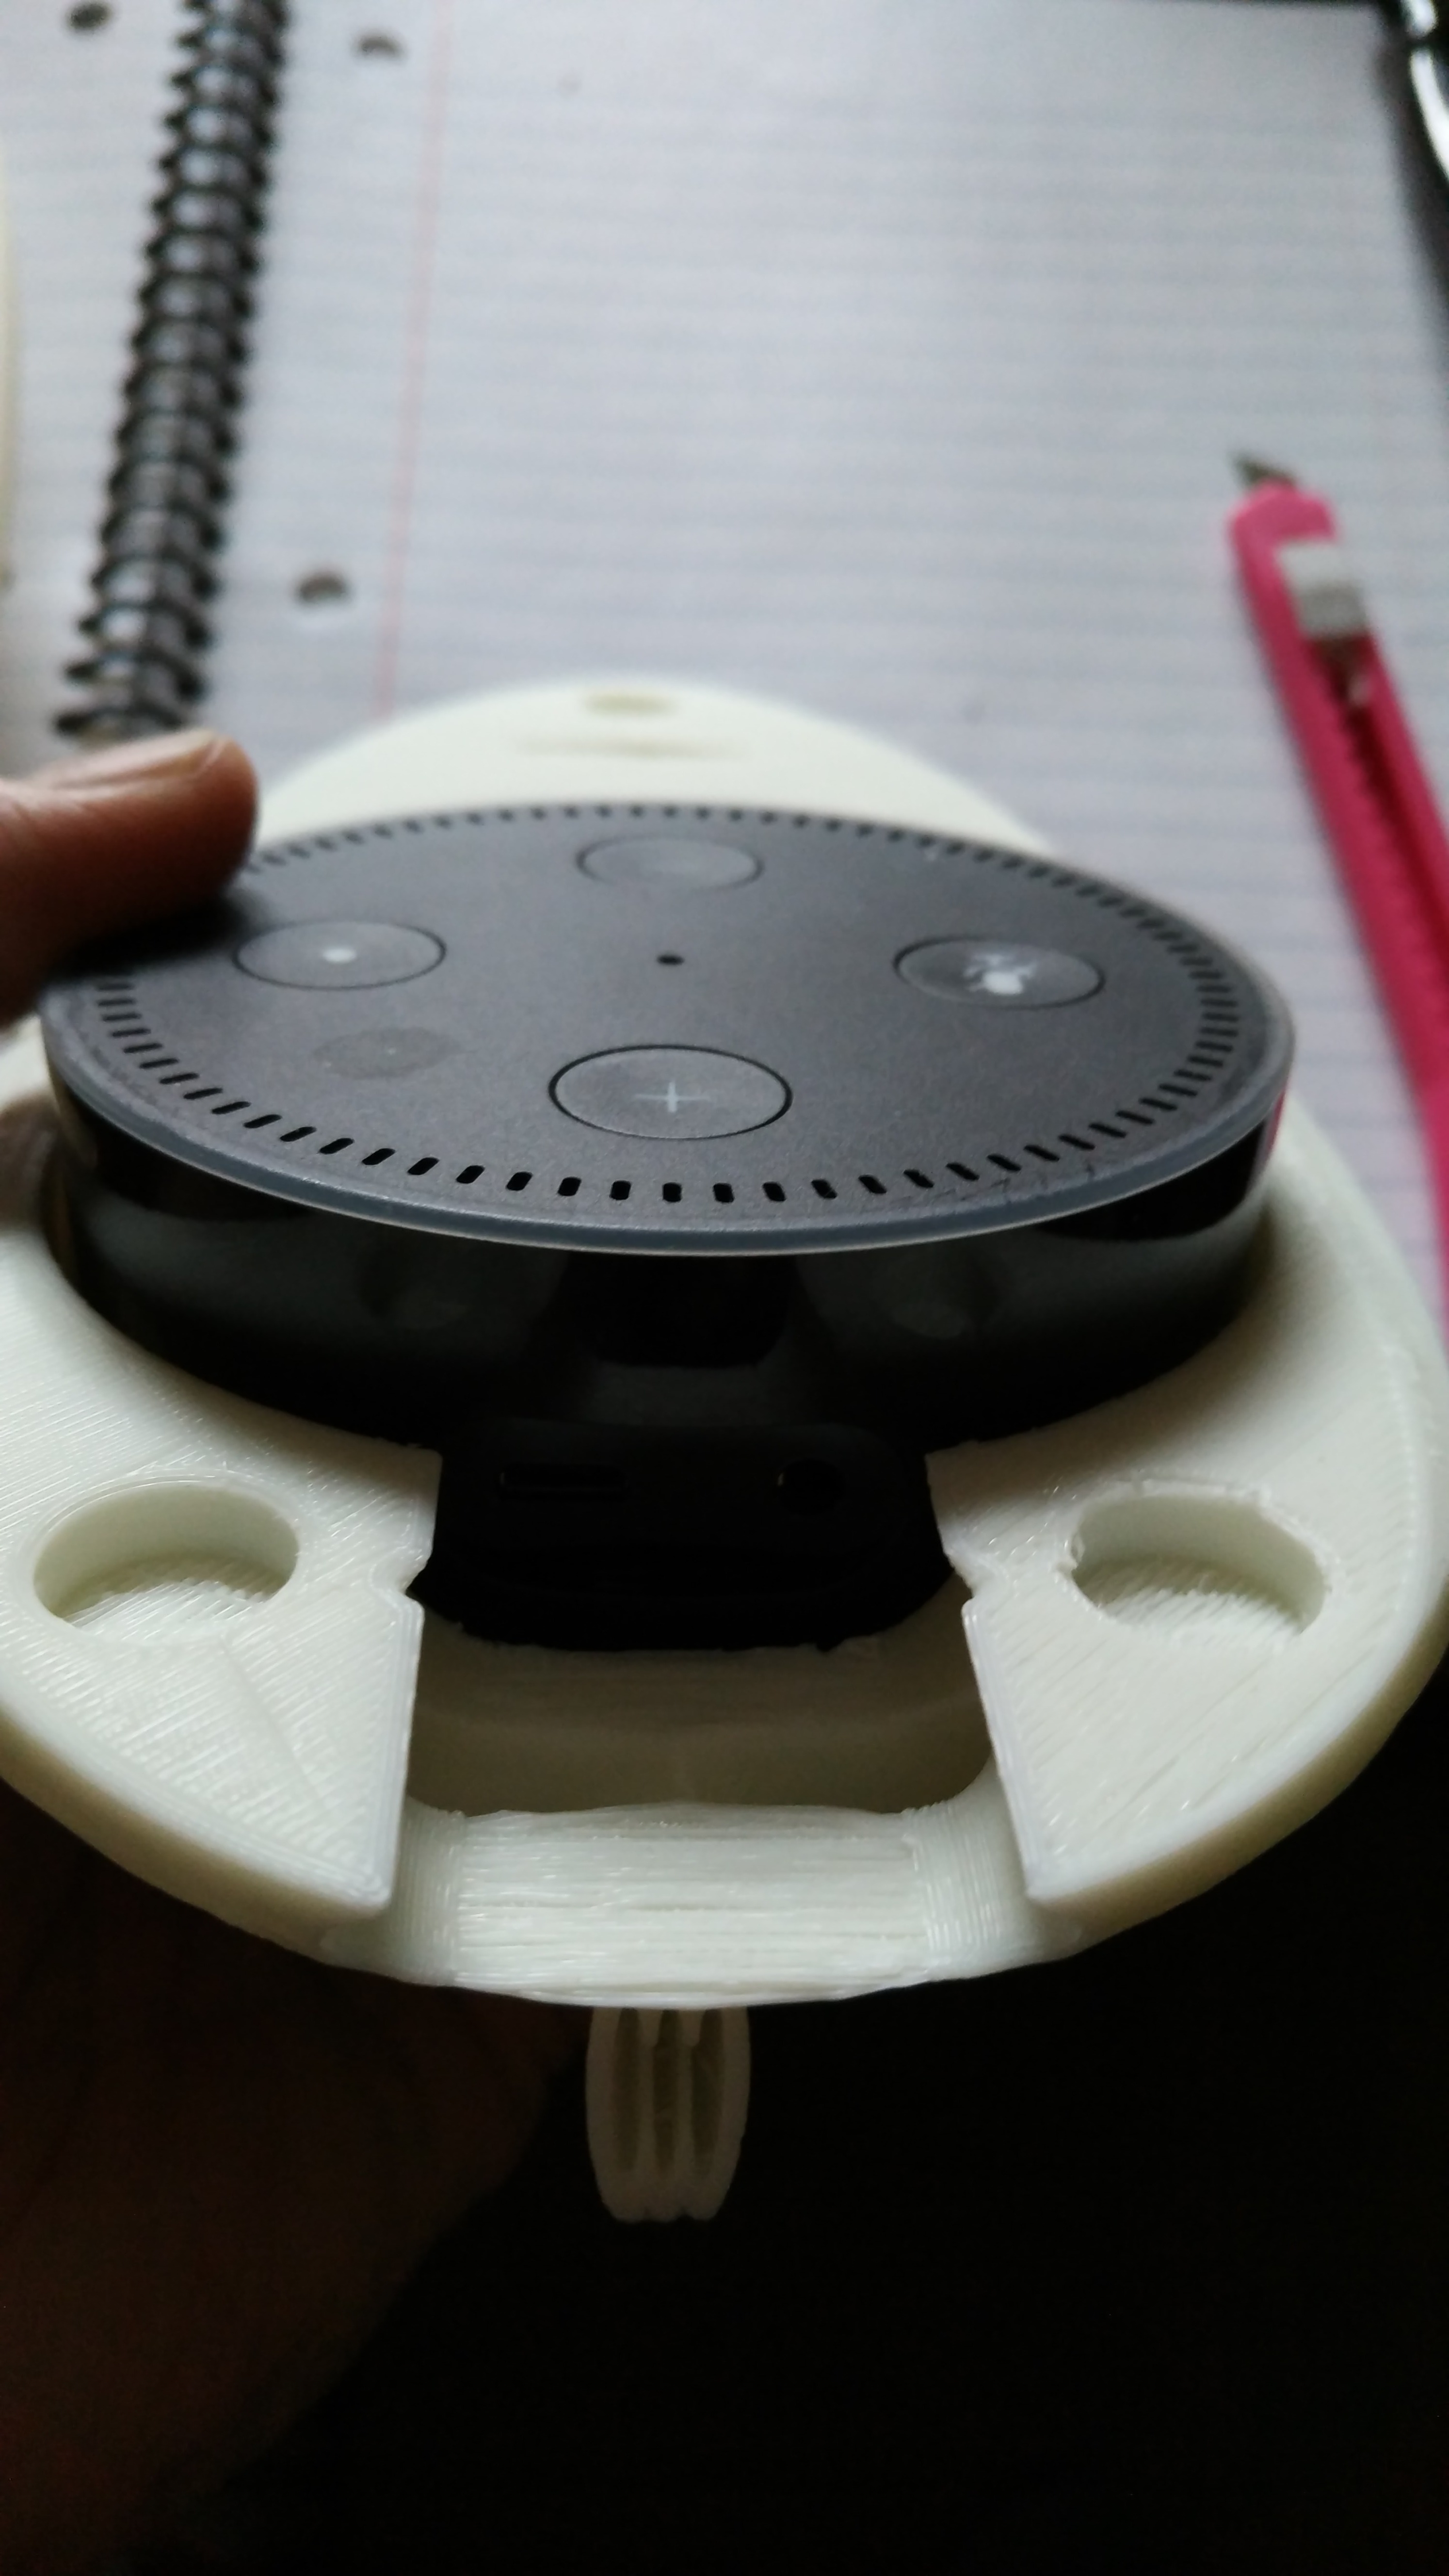
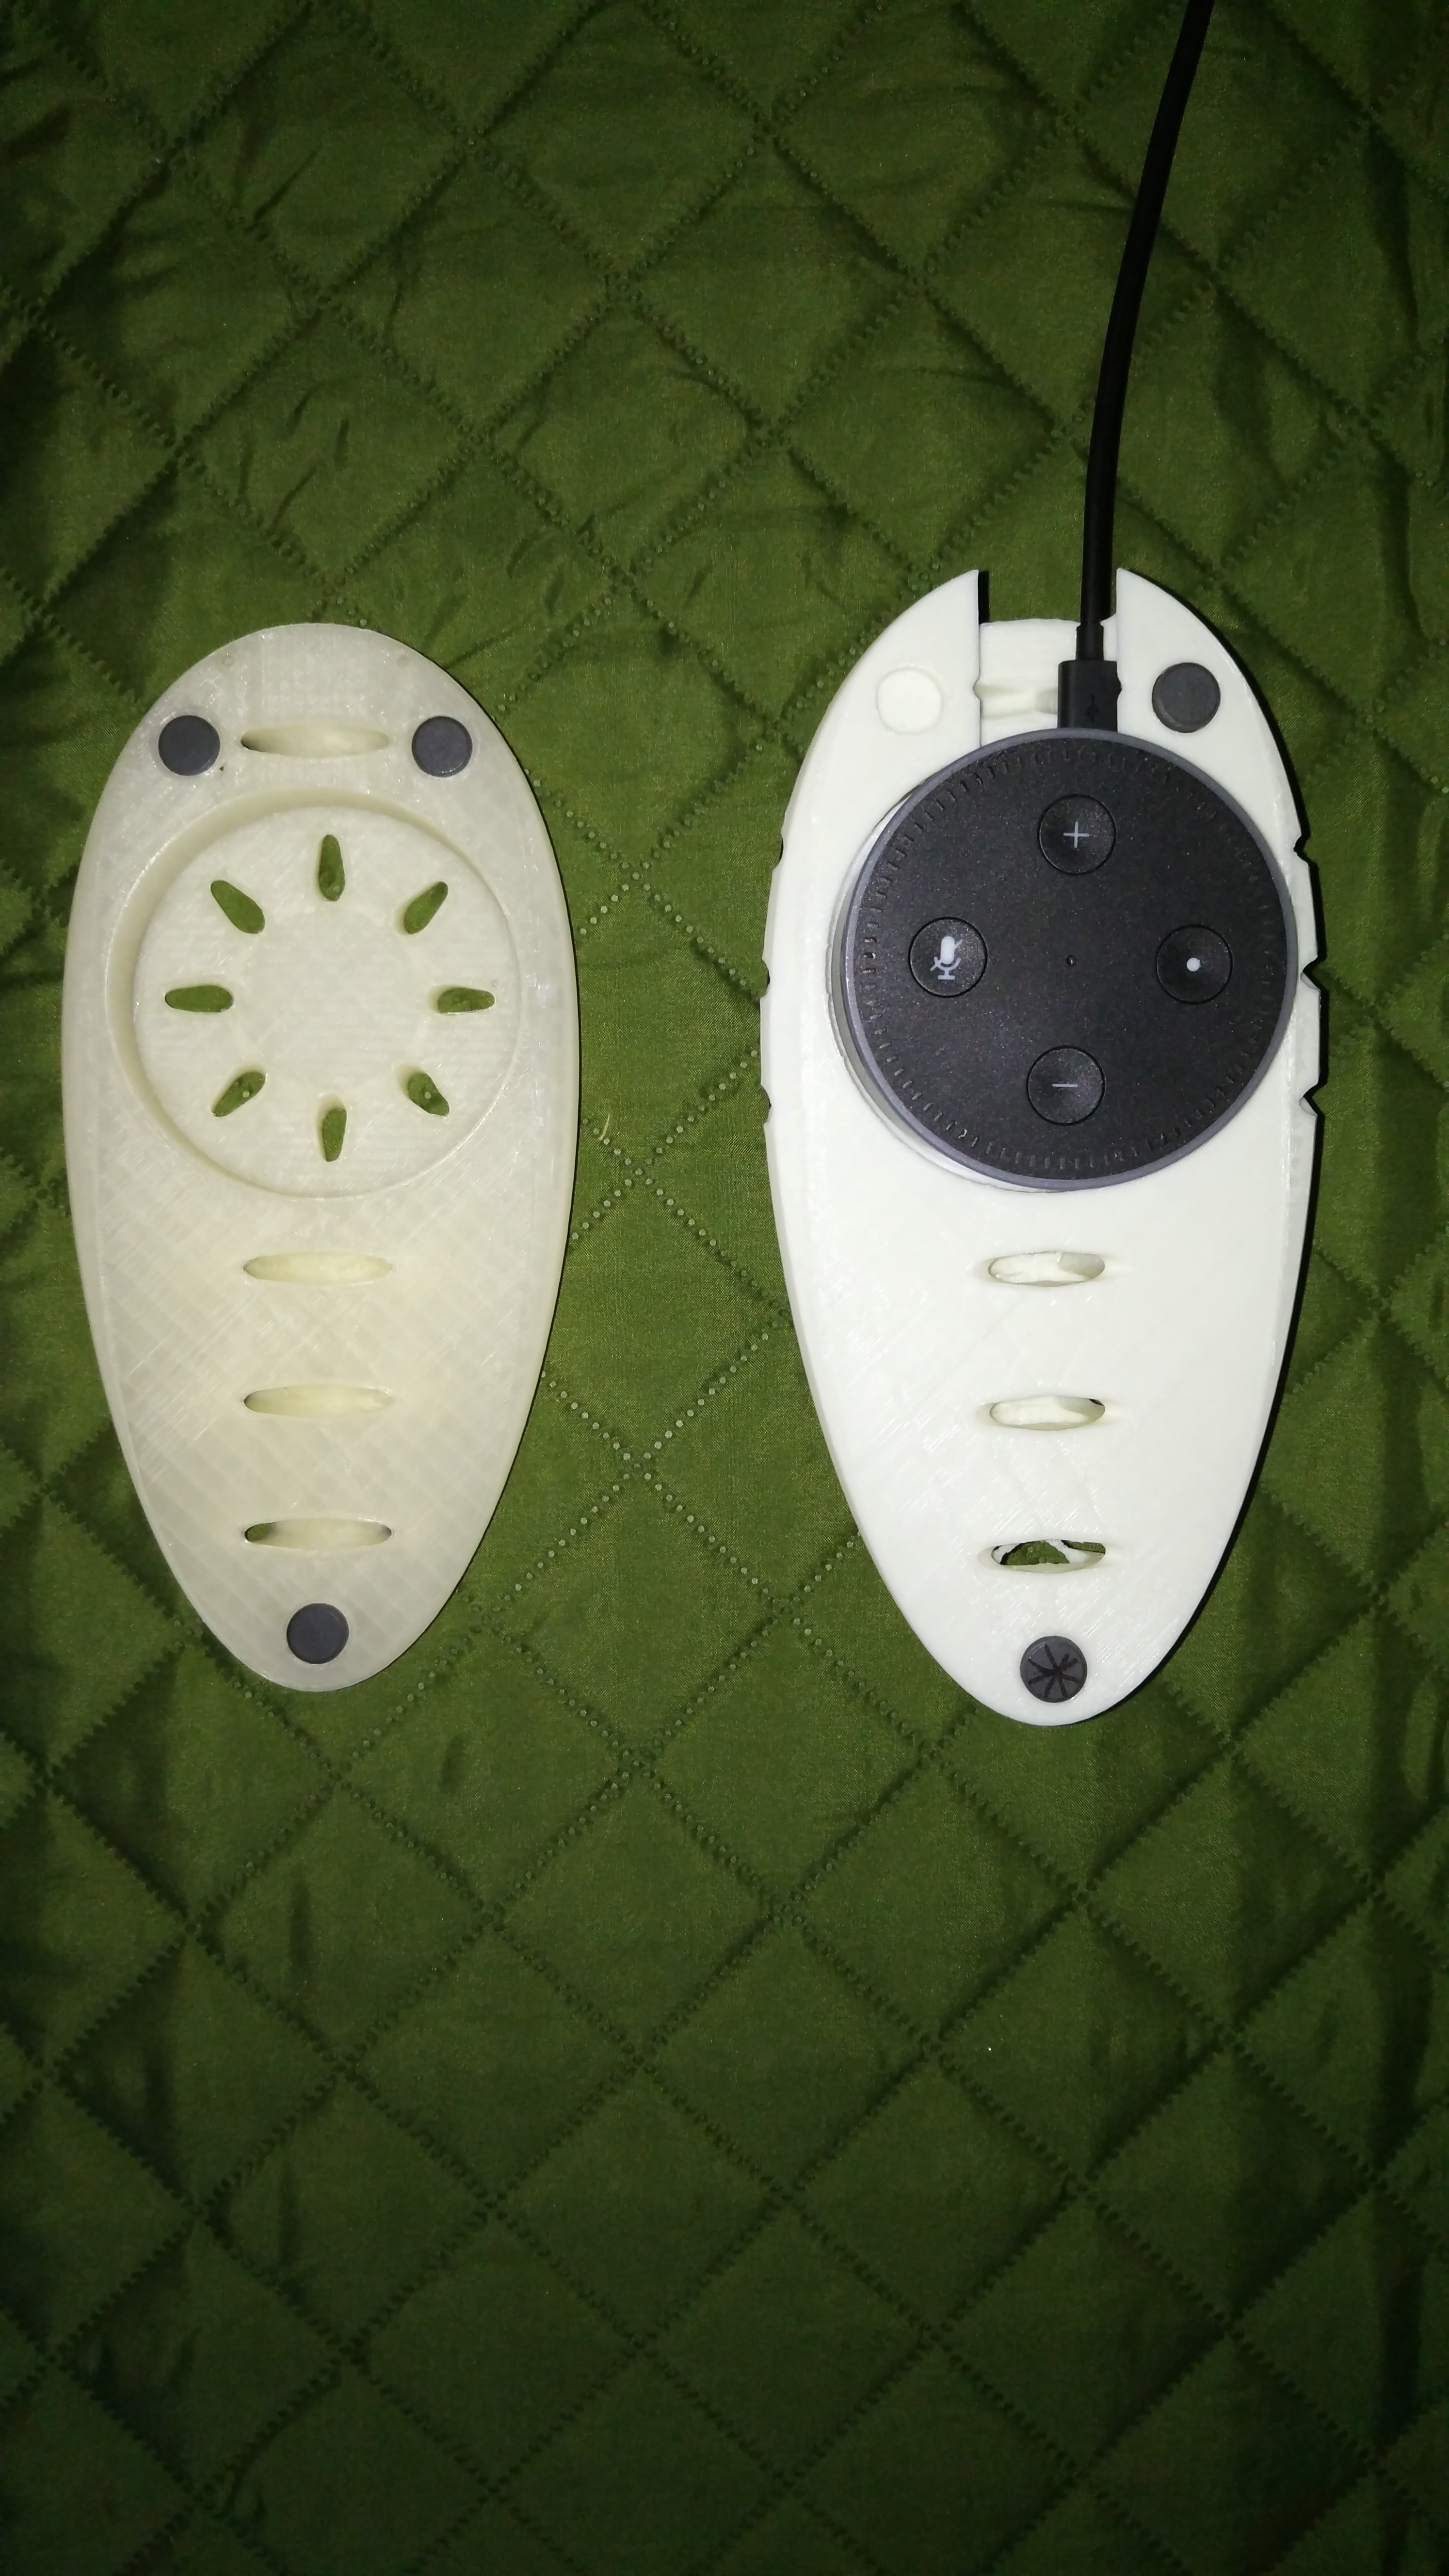
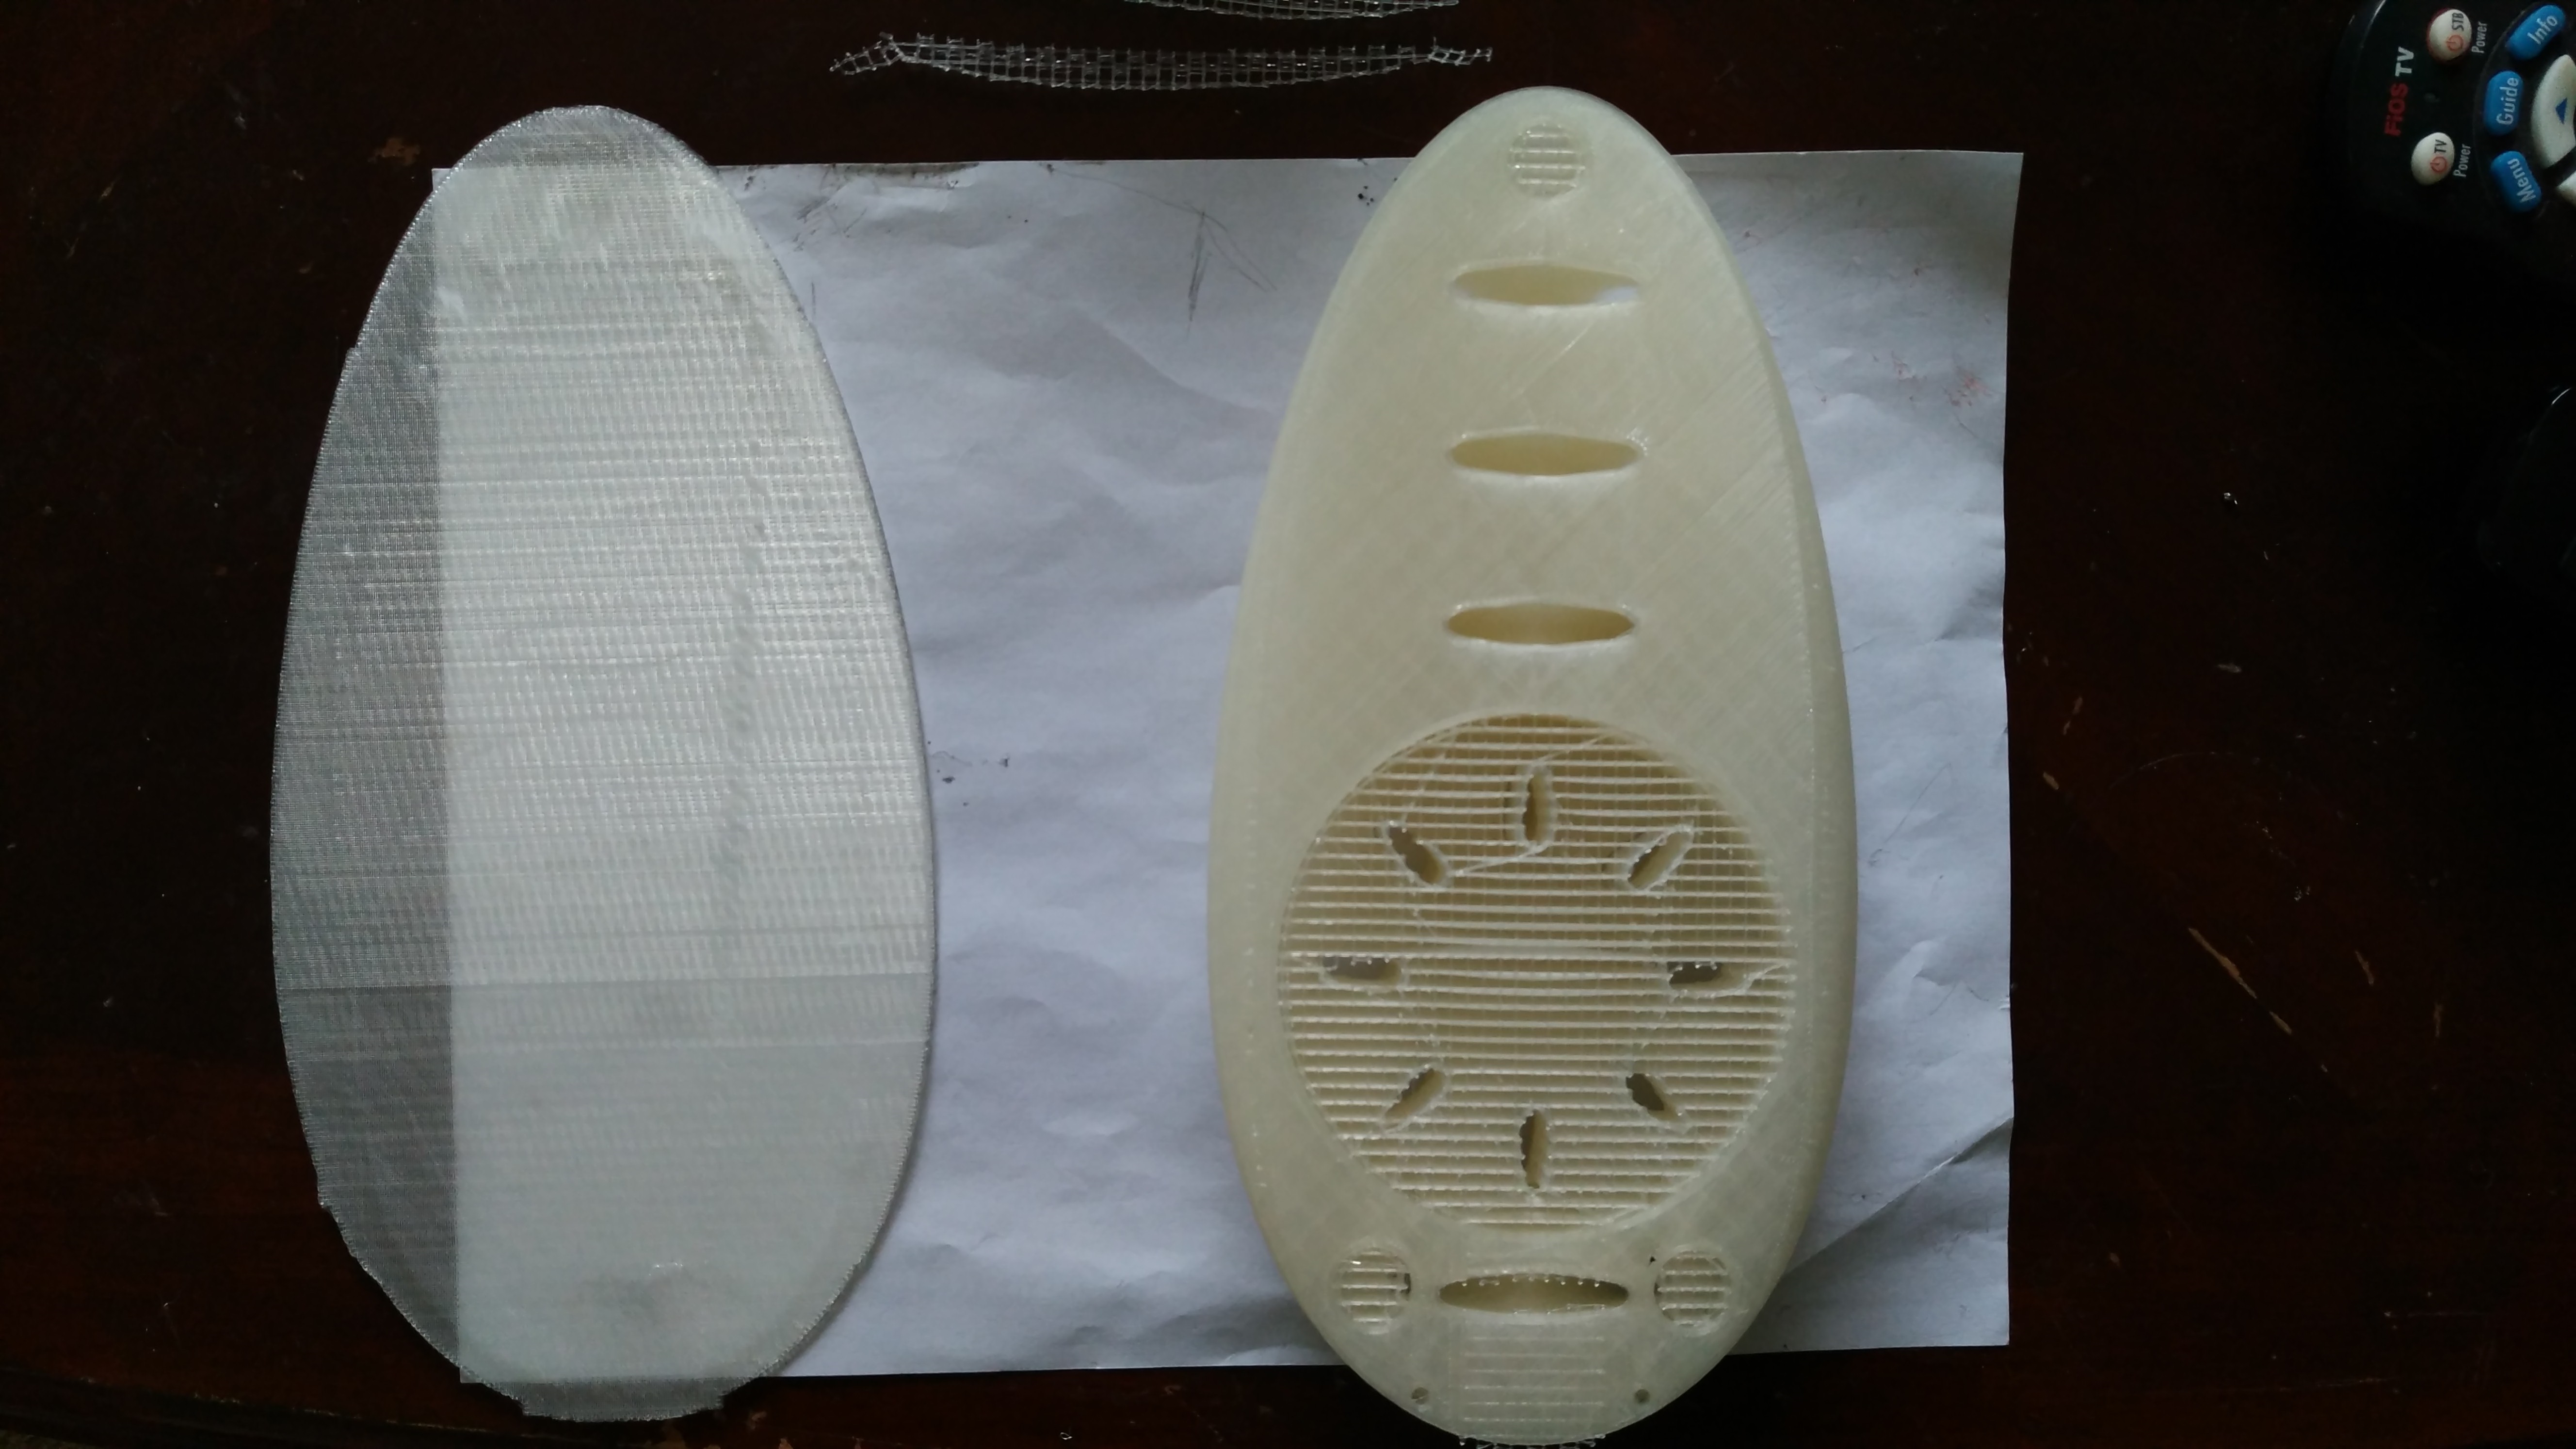
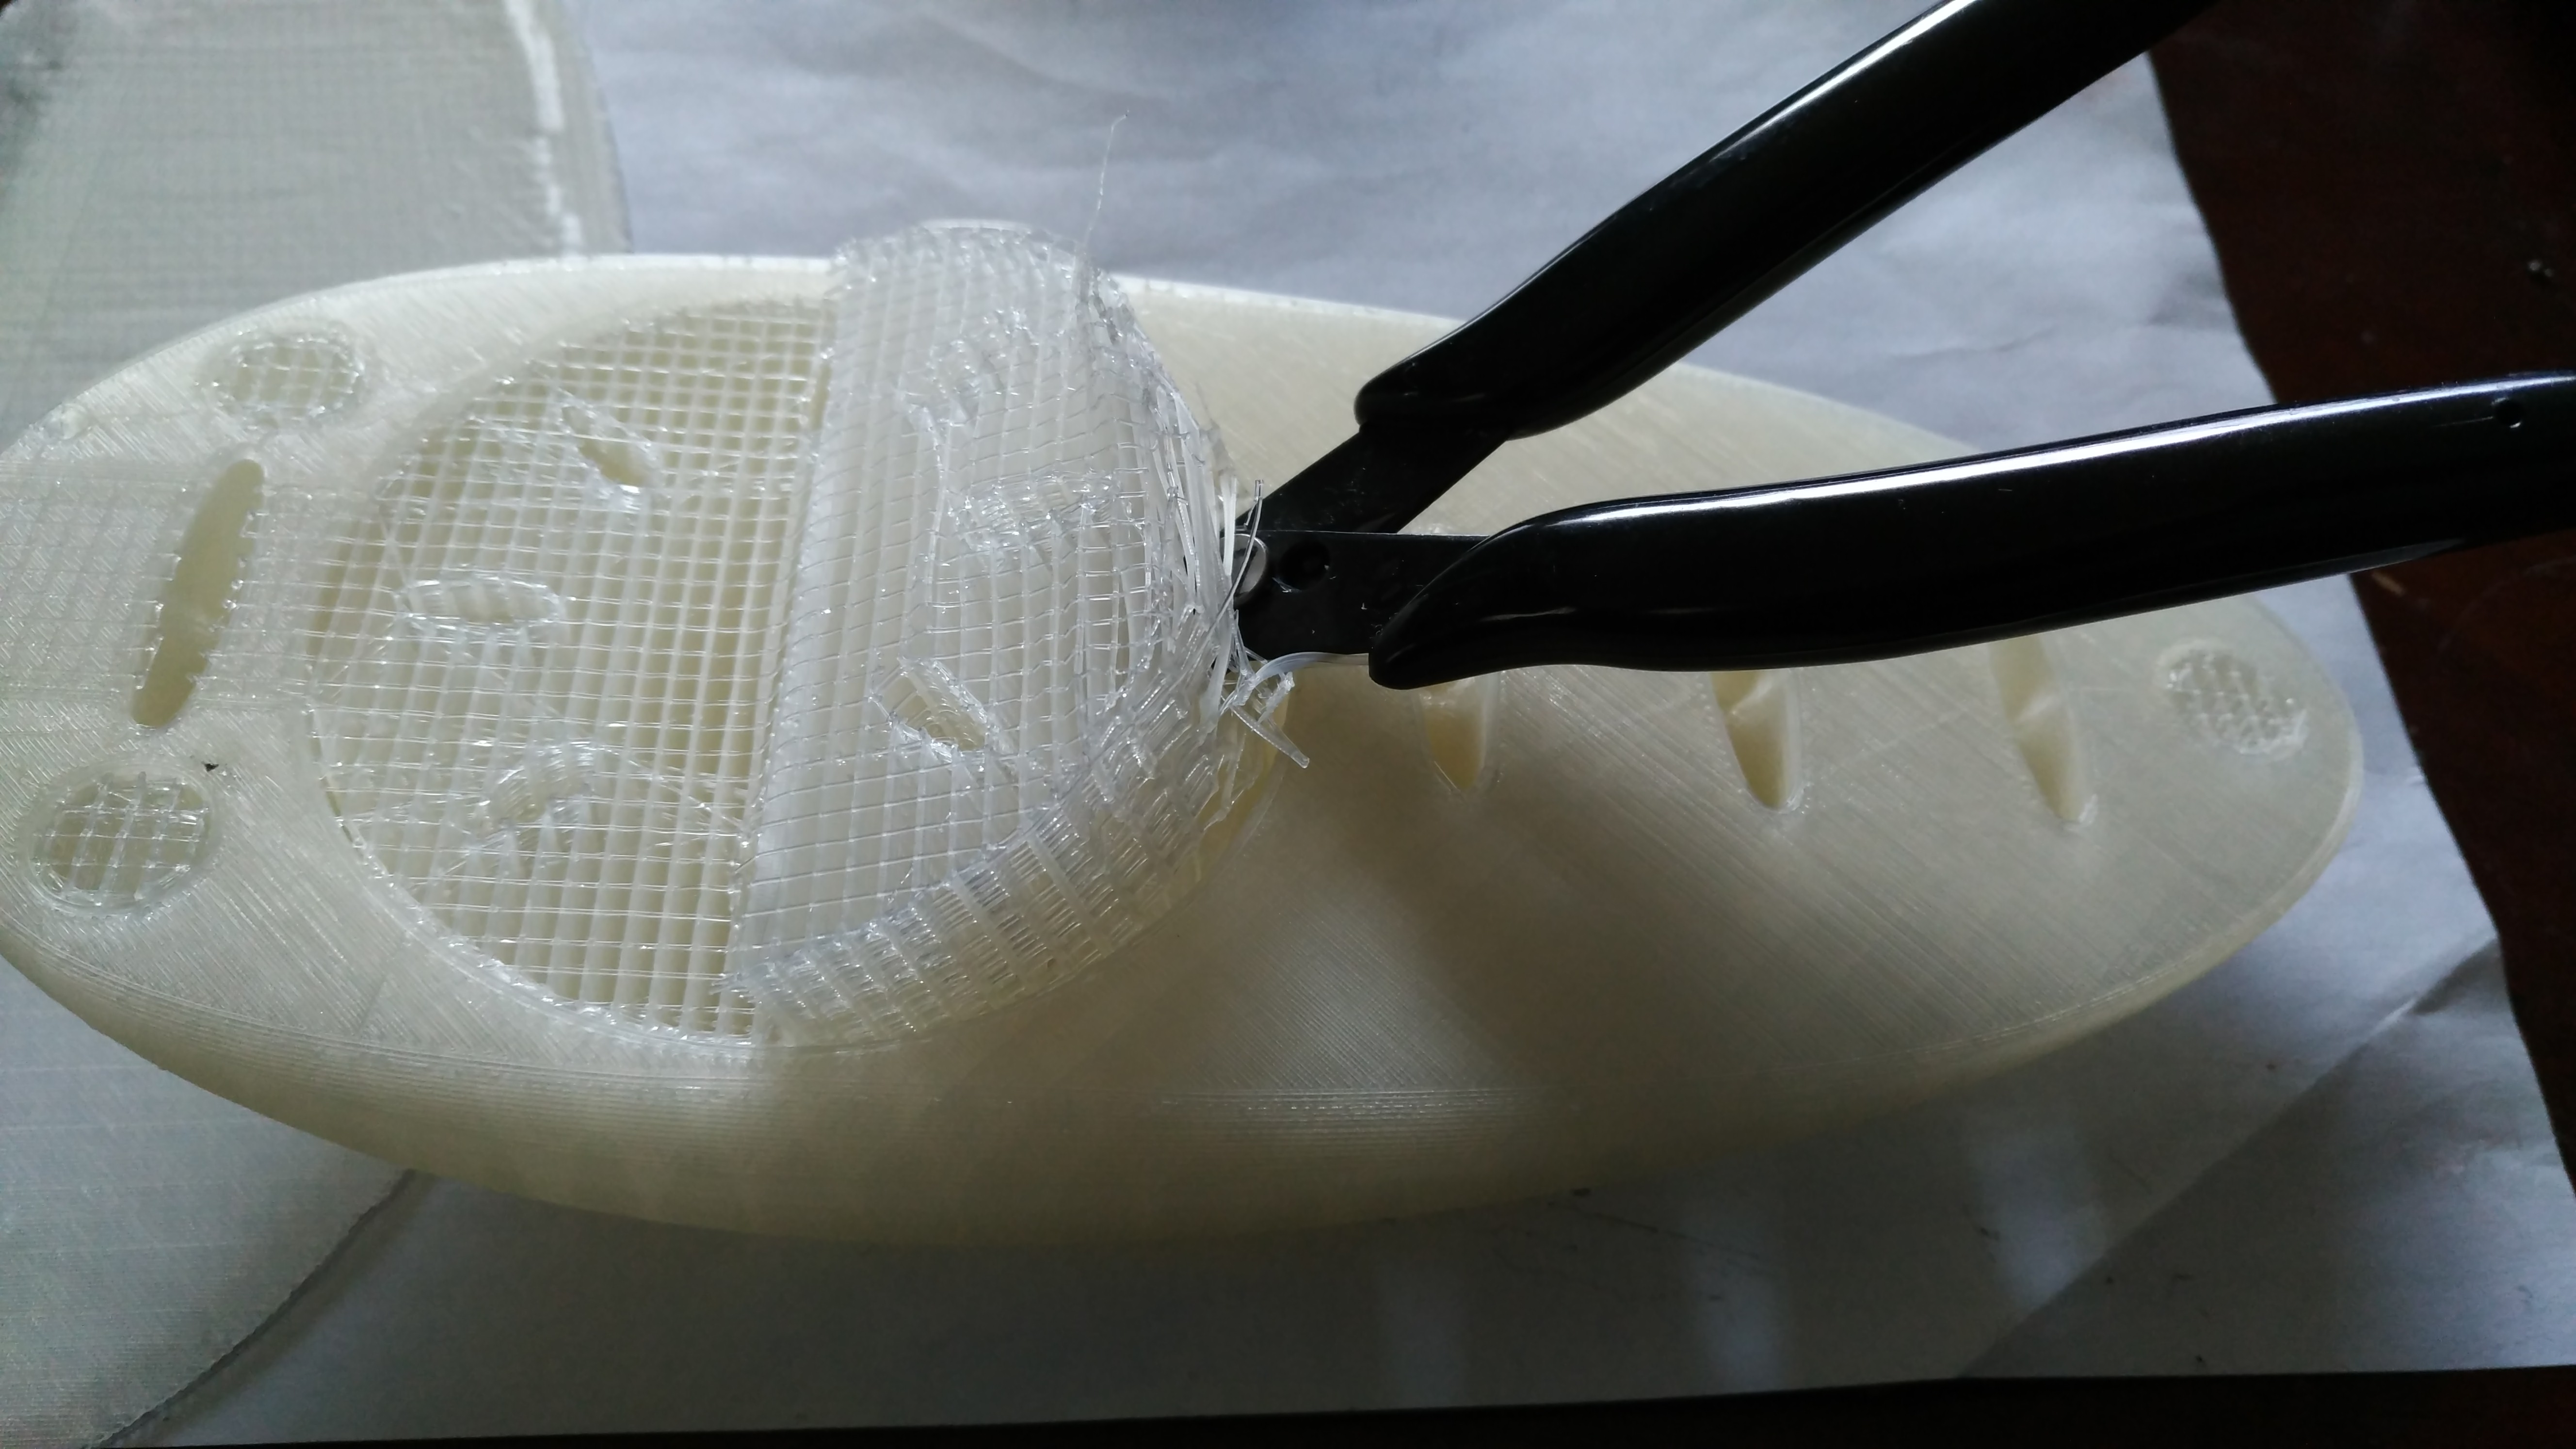
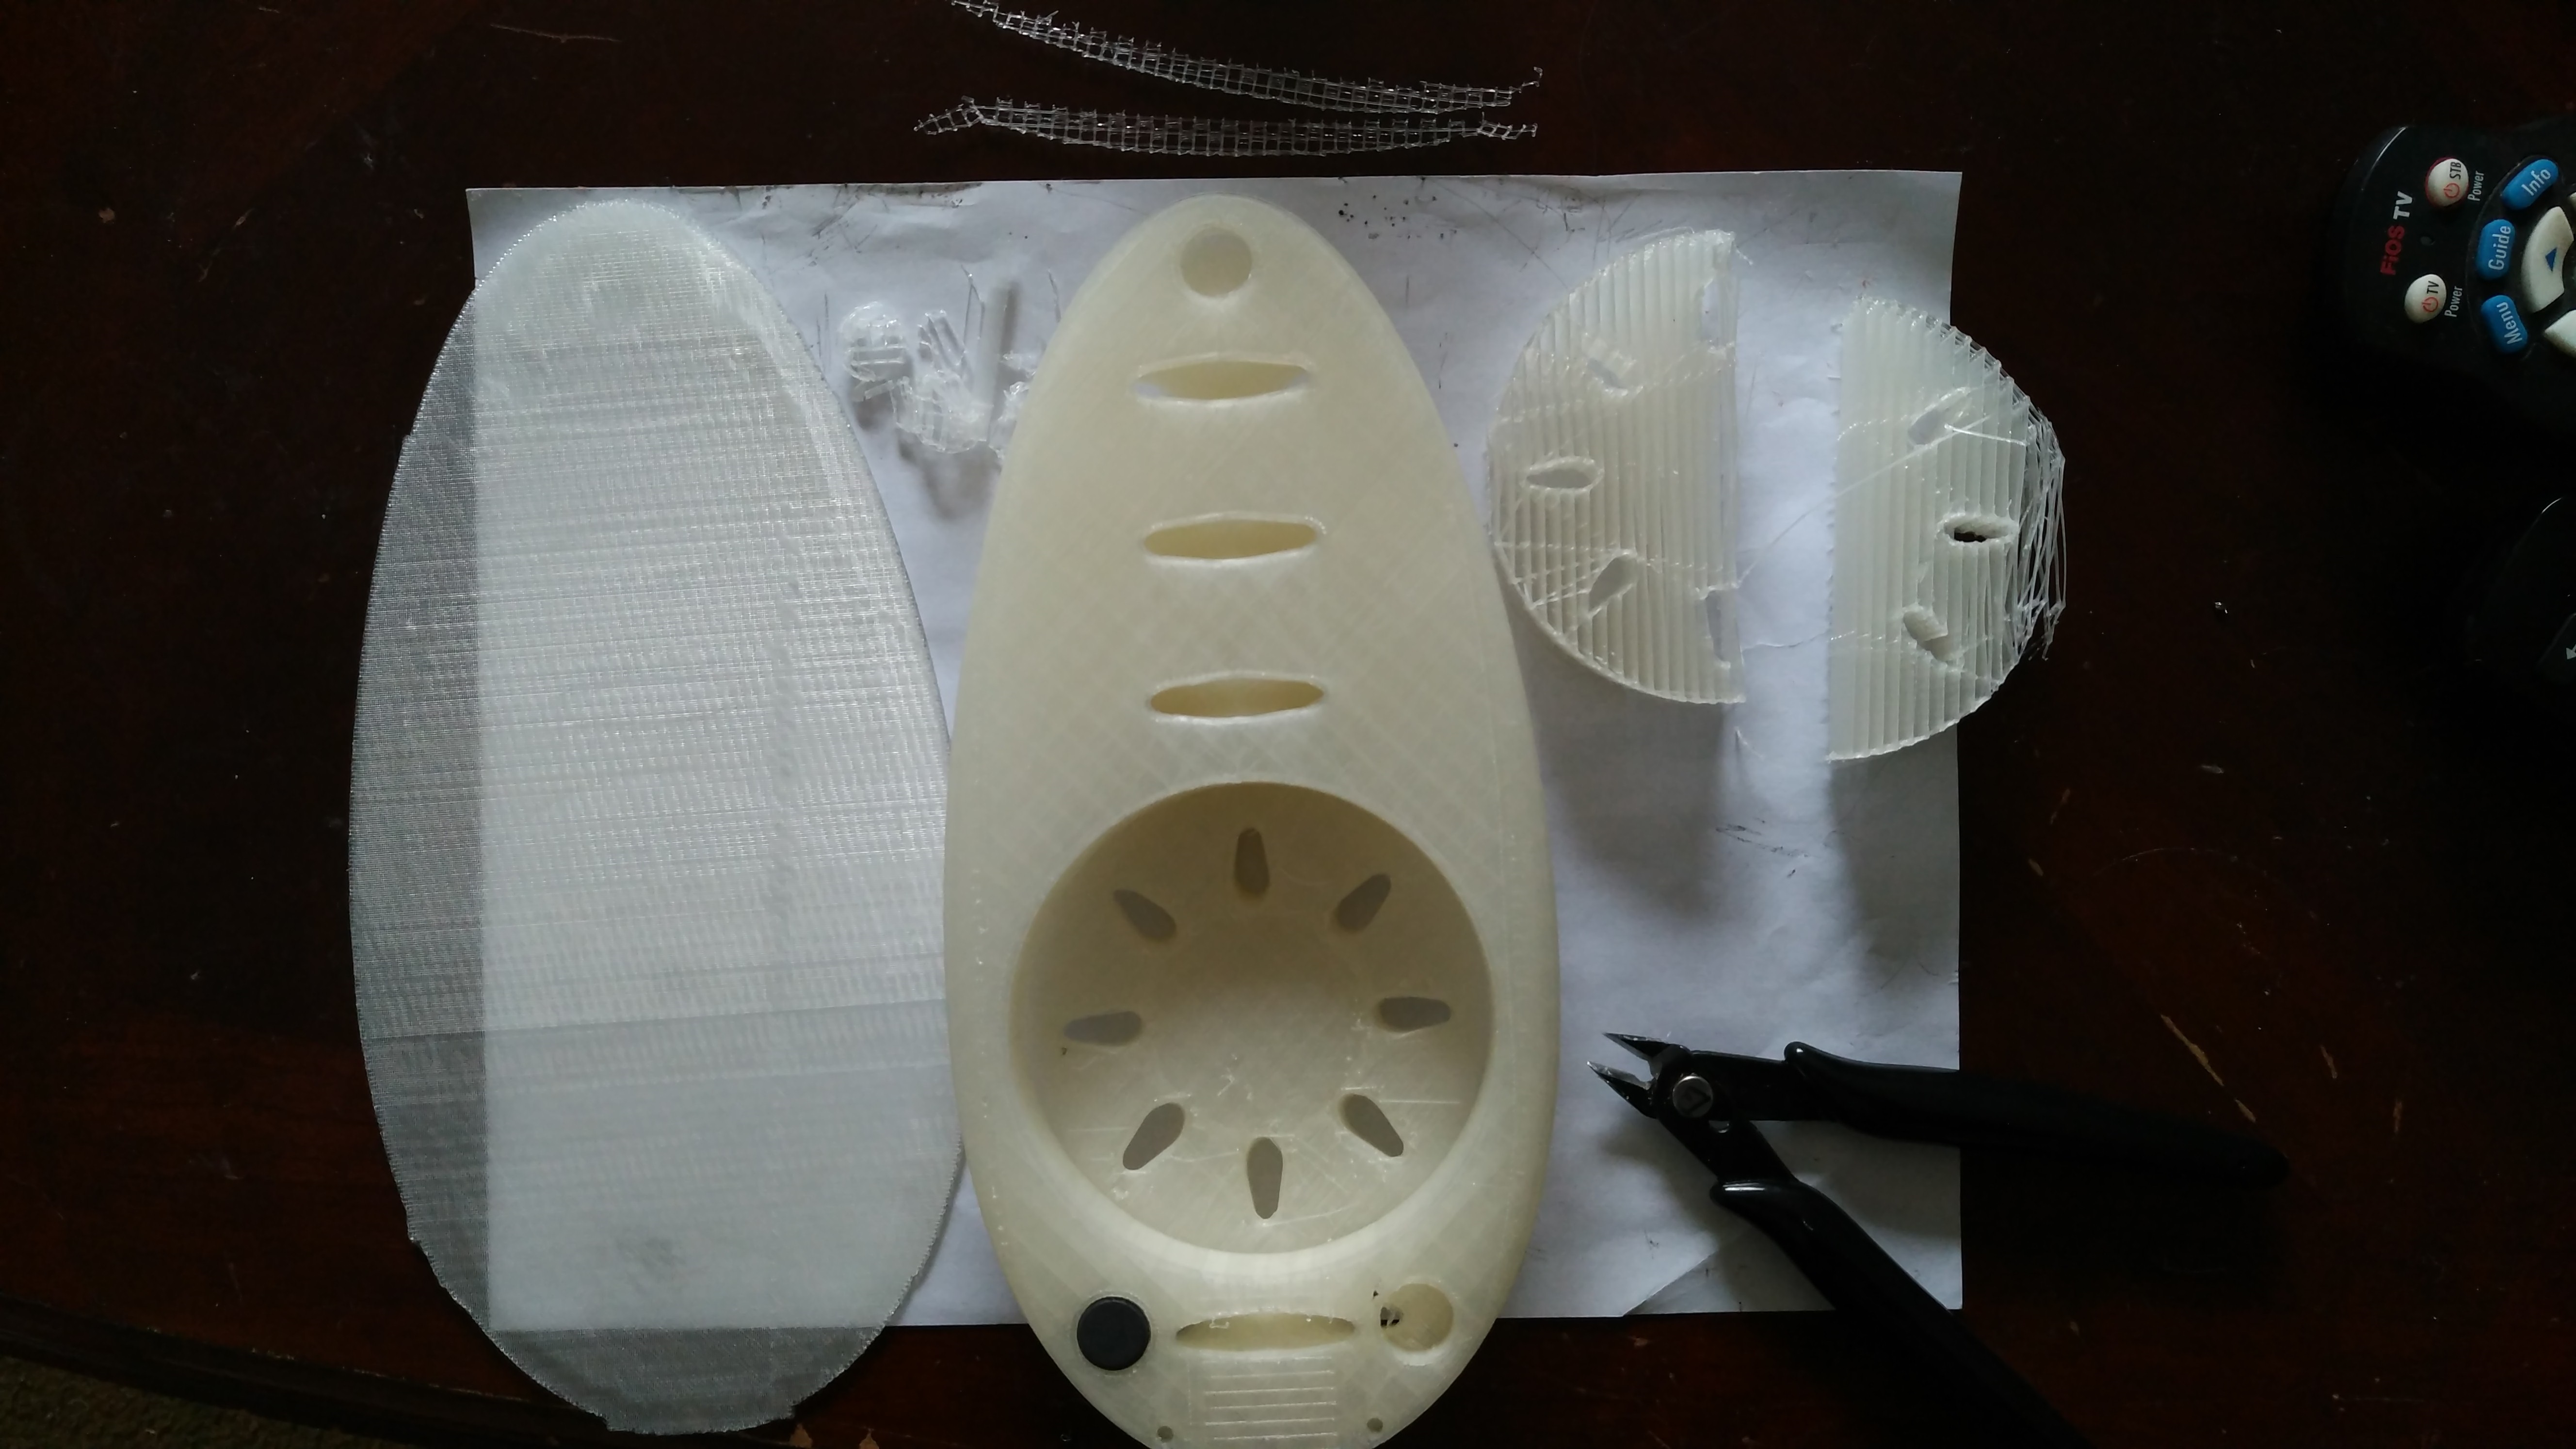
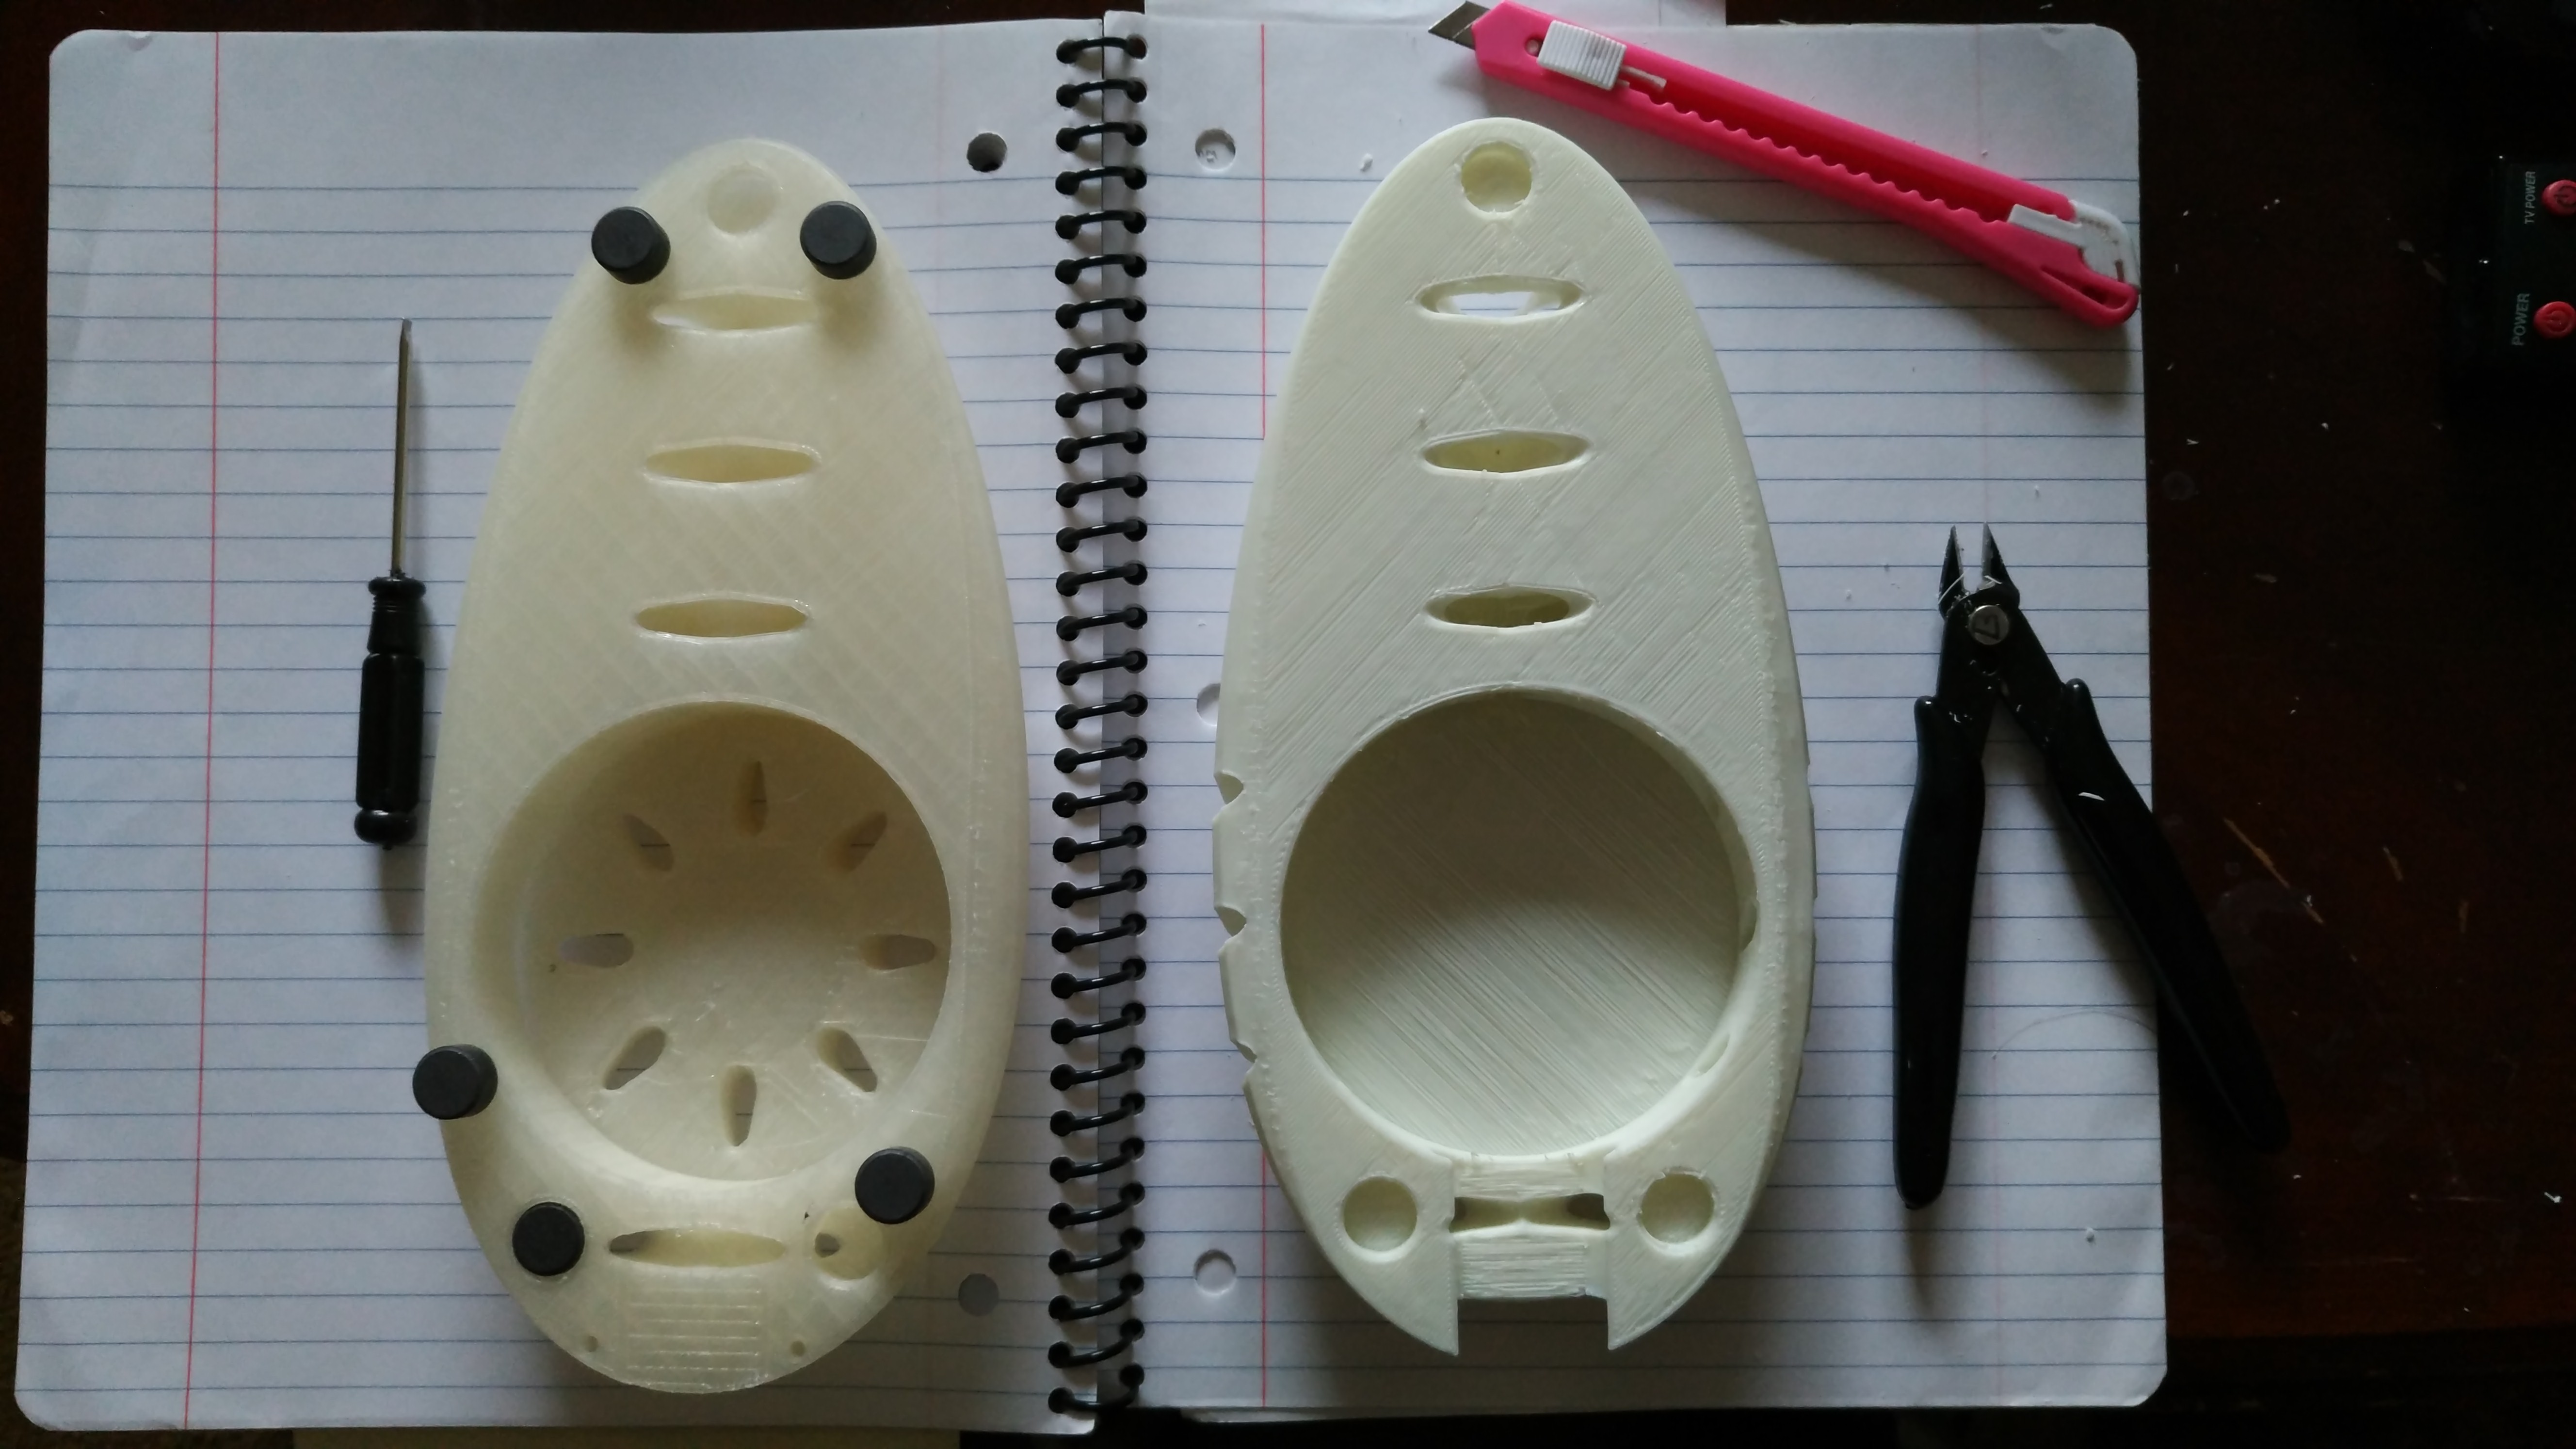
Some work was involved in removing the raft supports from the parts. And the most tricky ones were those in the vents and the ones along the outer edges.
The Echo Dot was seated perfectly with a loose fit to enable some relief on the power cord when the model moved.
Both filaments lived up to their ratings although the lower half of the fuselage (on the right) printed using the CCTree fluorescent filament appeared a bit crusty and rough on the supported surfaces in comparison to the top-half that was printed using the eSun Natural PLA.
In addition, the holes for the magnet came out with proper accuracy on the top-half printed with the eSun, but were loose fitting on the lower-half printed with the CCTree filament - which means I need to apply some kind of glue to hold the magnets in.
The depth of the holes at the tip of the nose were limited by design for which I have to get thinner magnets to replace the ones that I planned to use.
Other than that, there were no untoward departures between design and reality!
The Spacecraft and Echo Dot
.jpg)
.jpg)
.jpg)
.jpg)
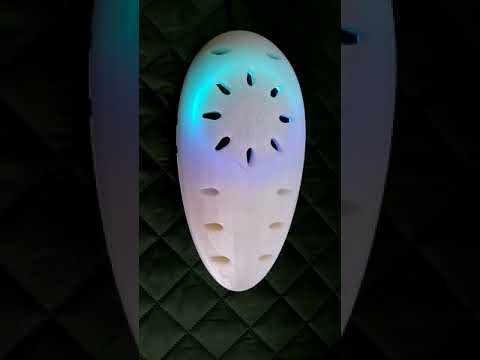
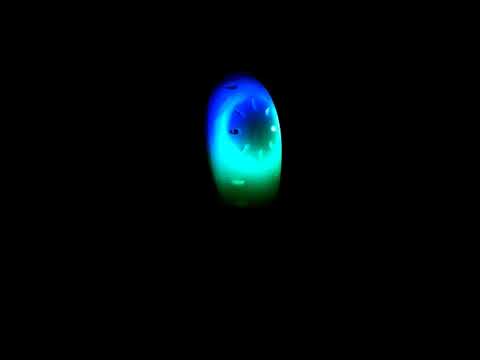
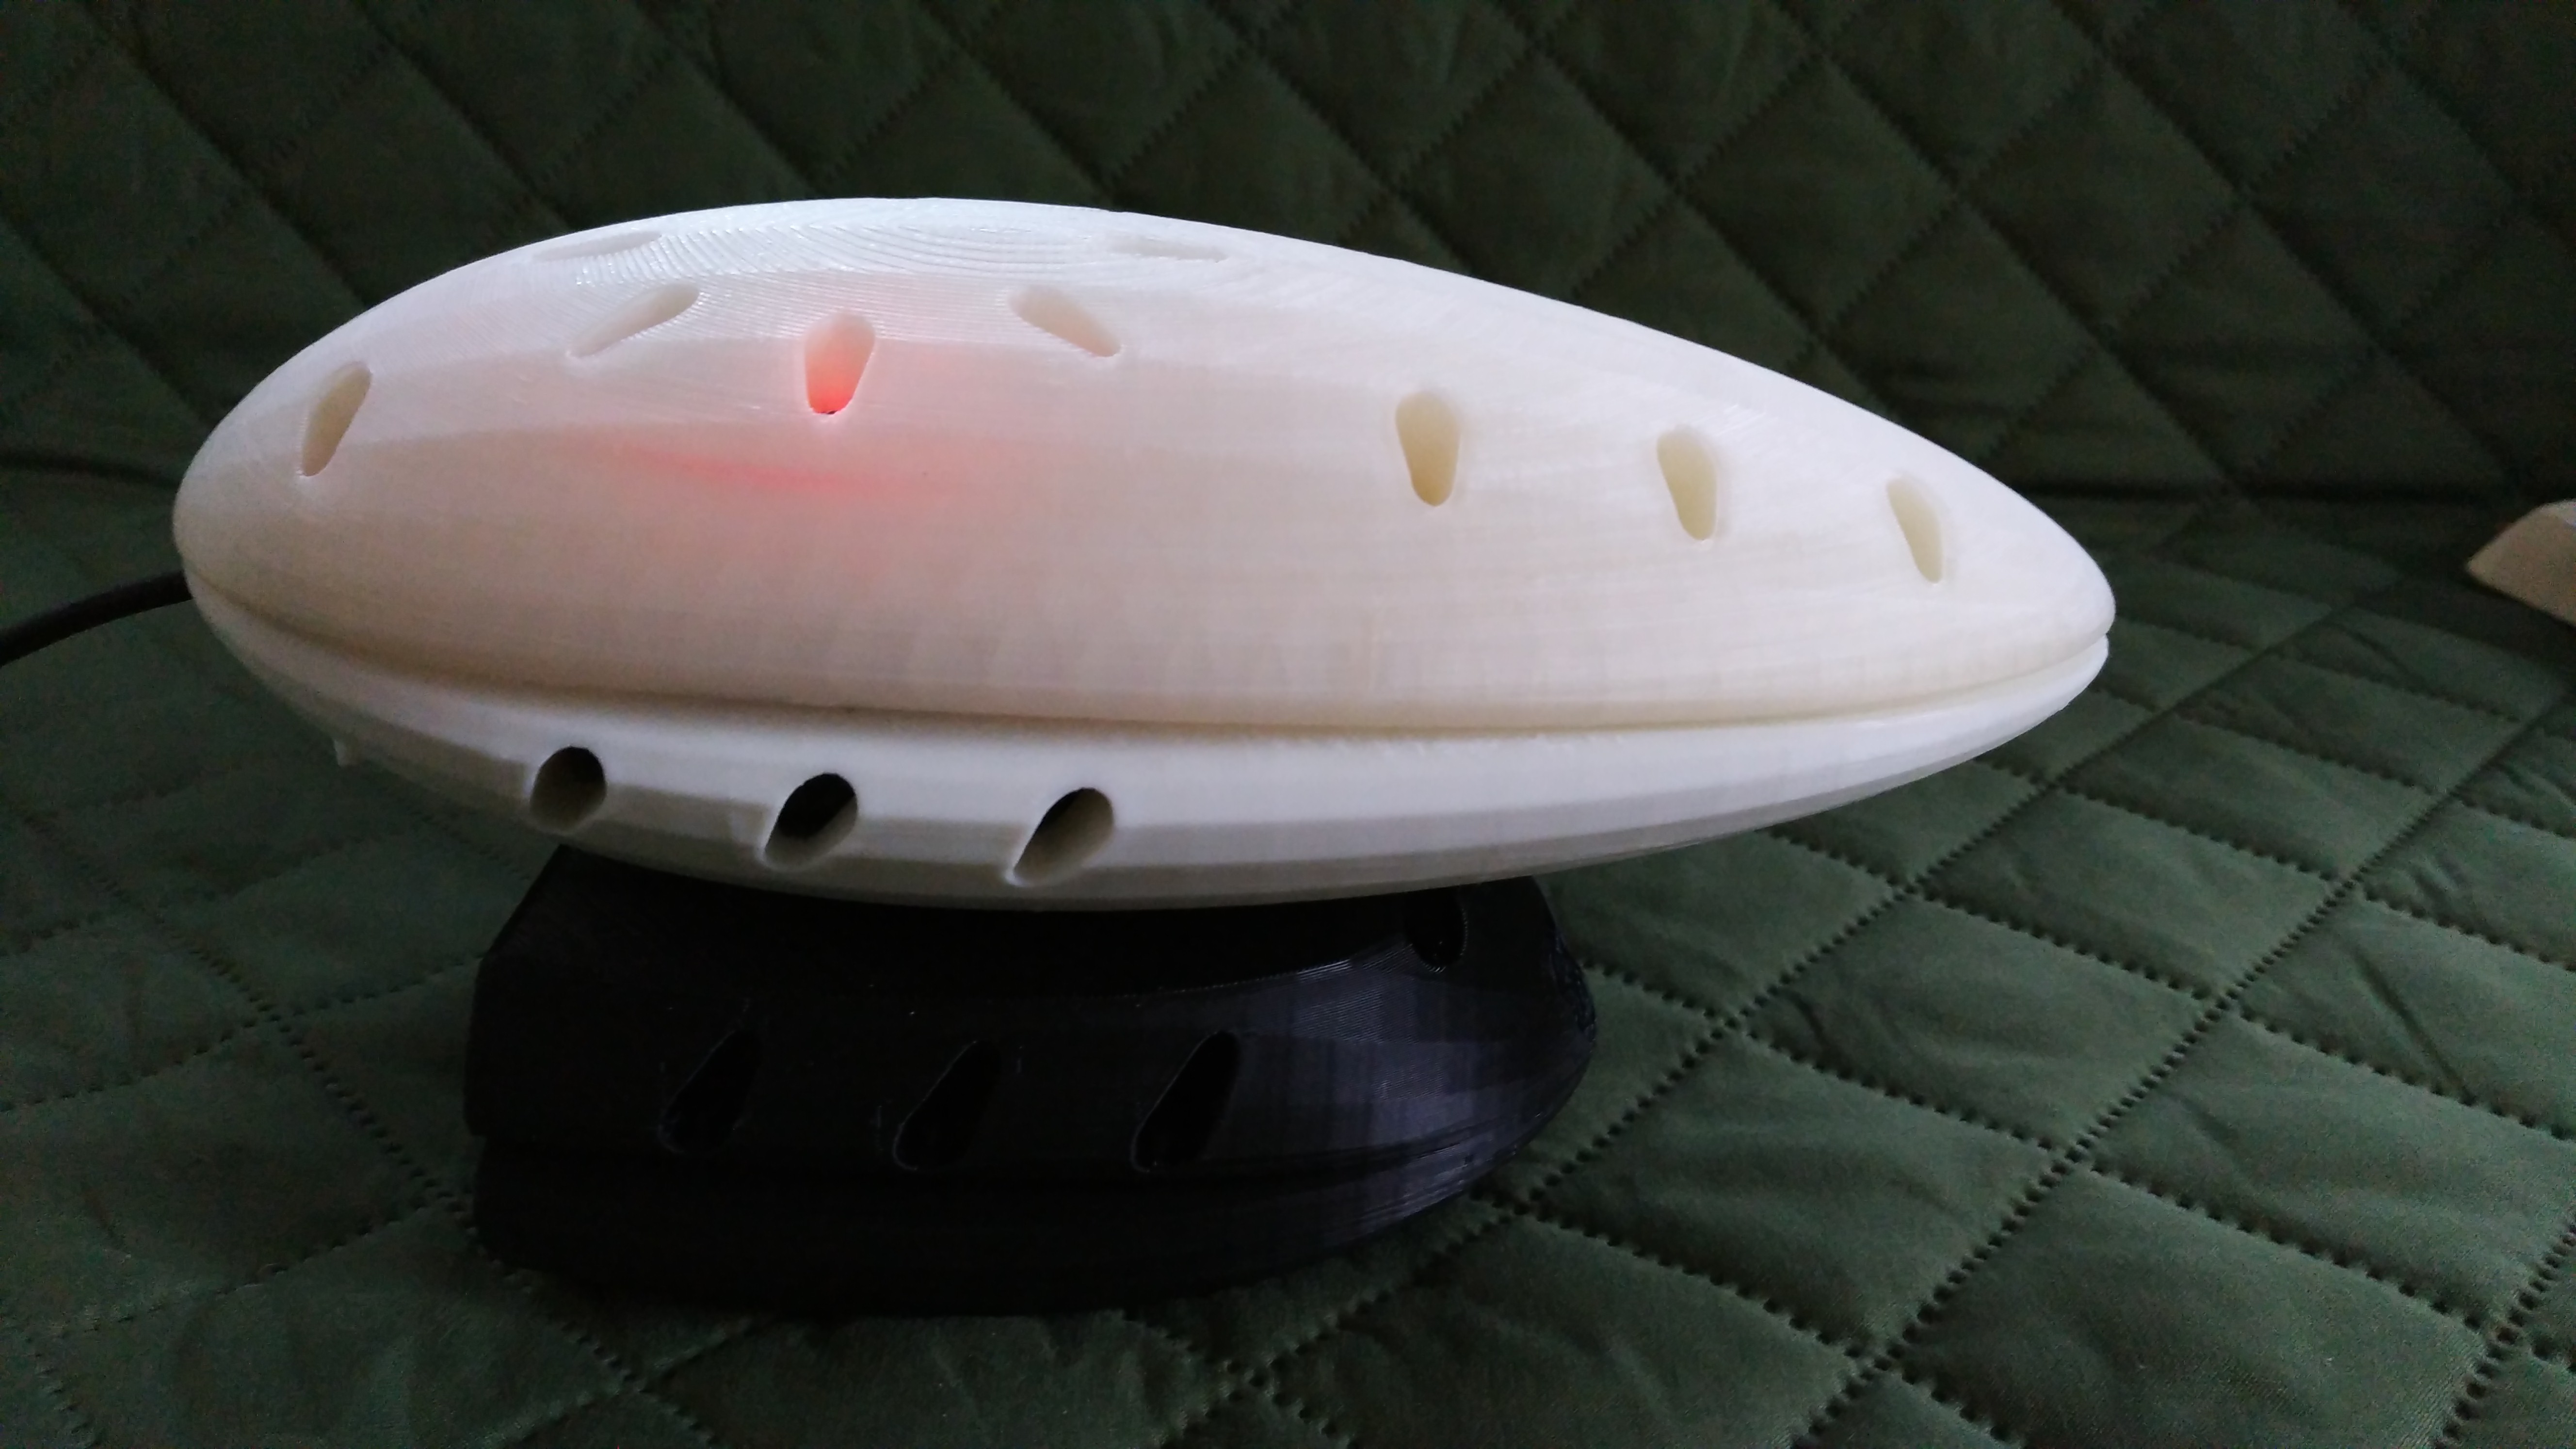
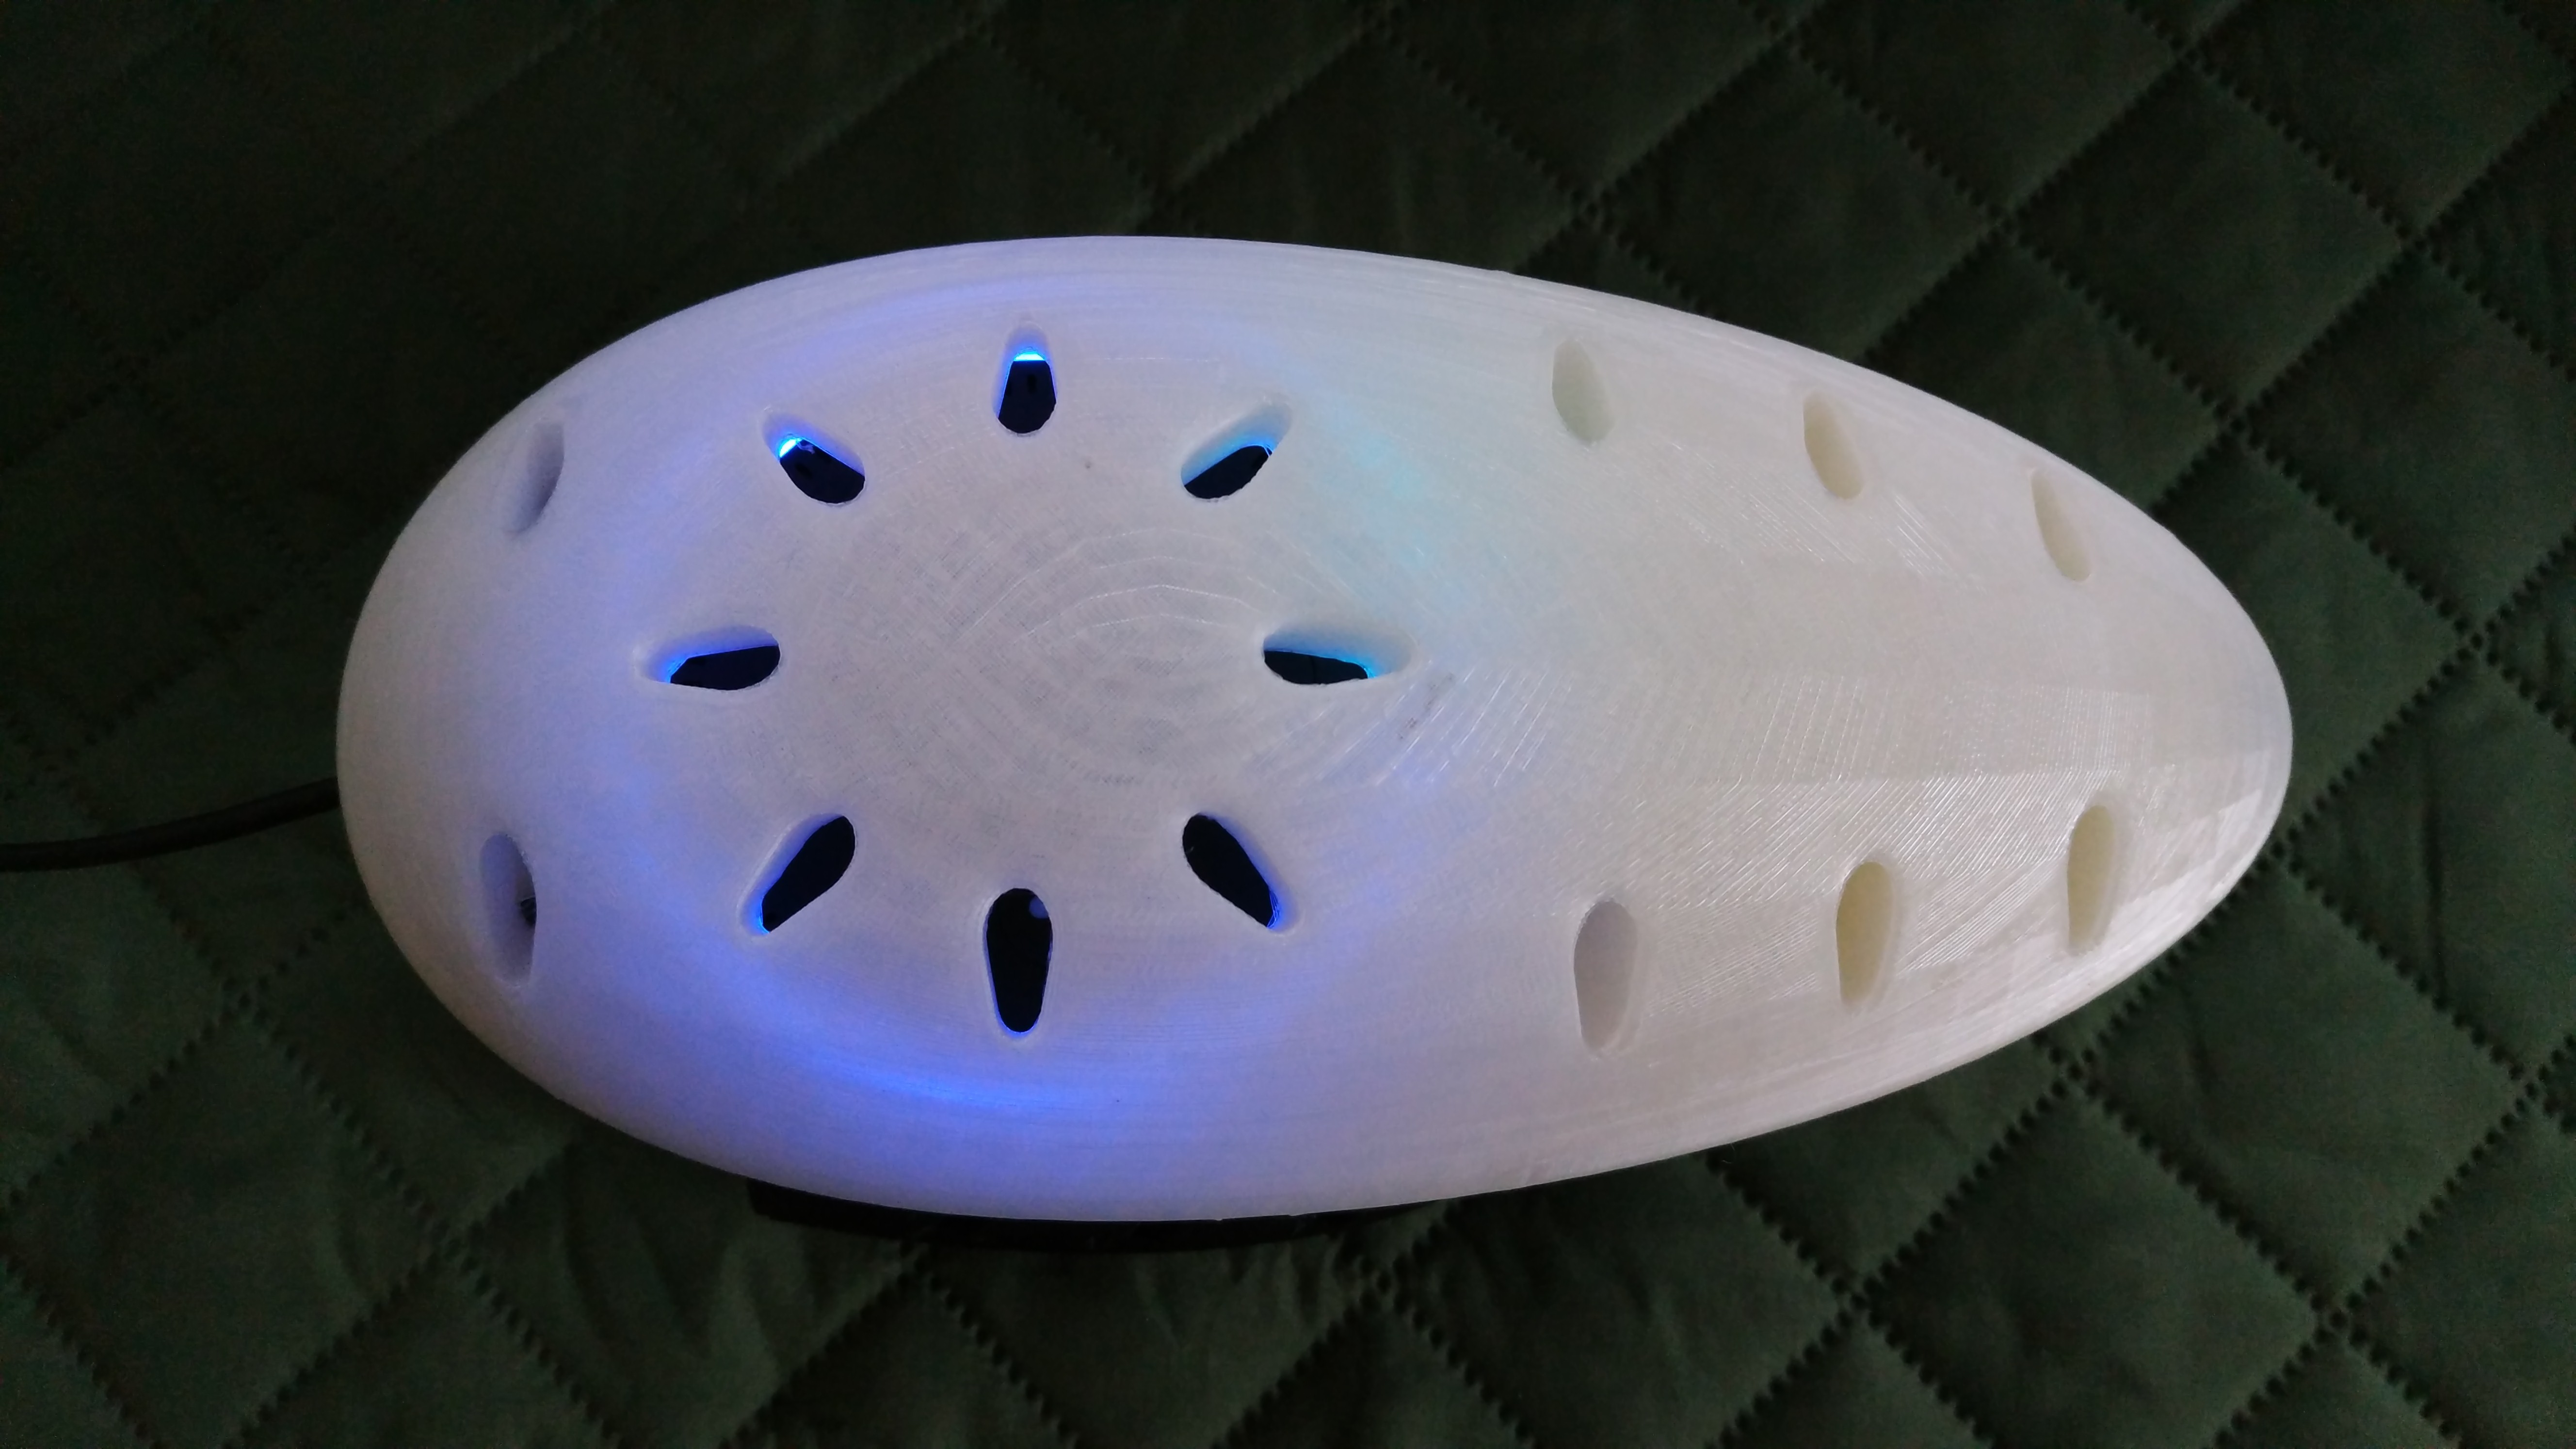
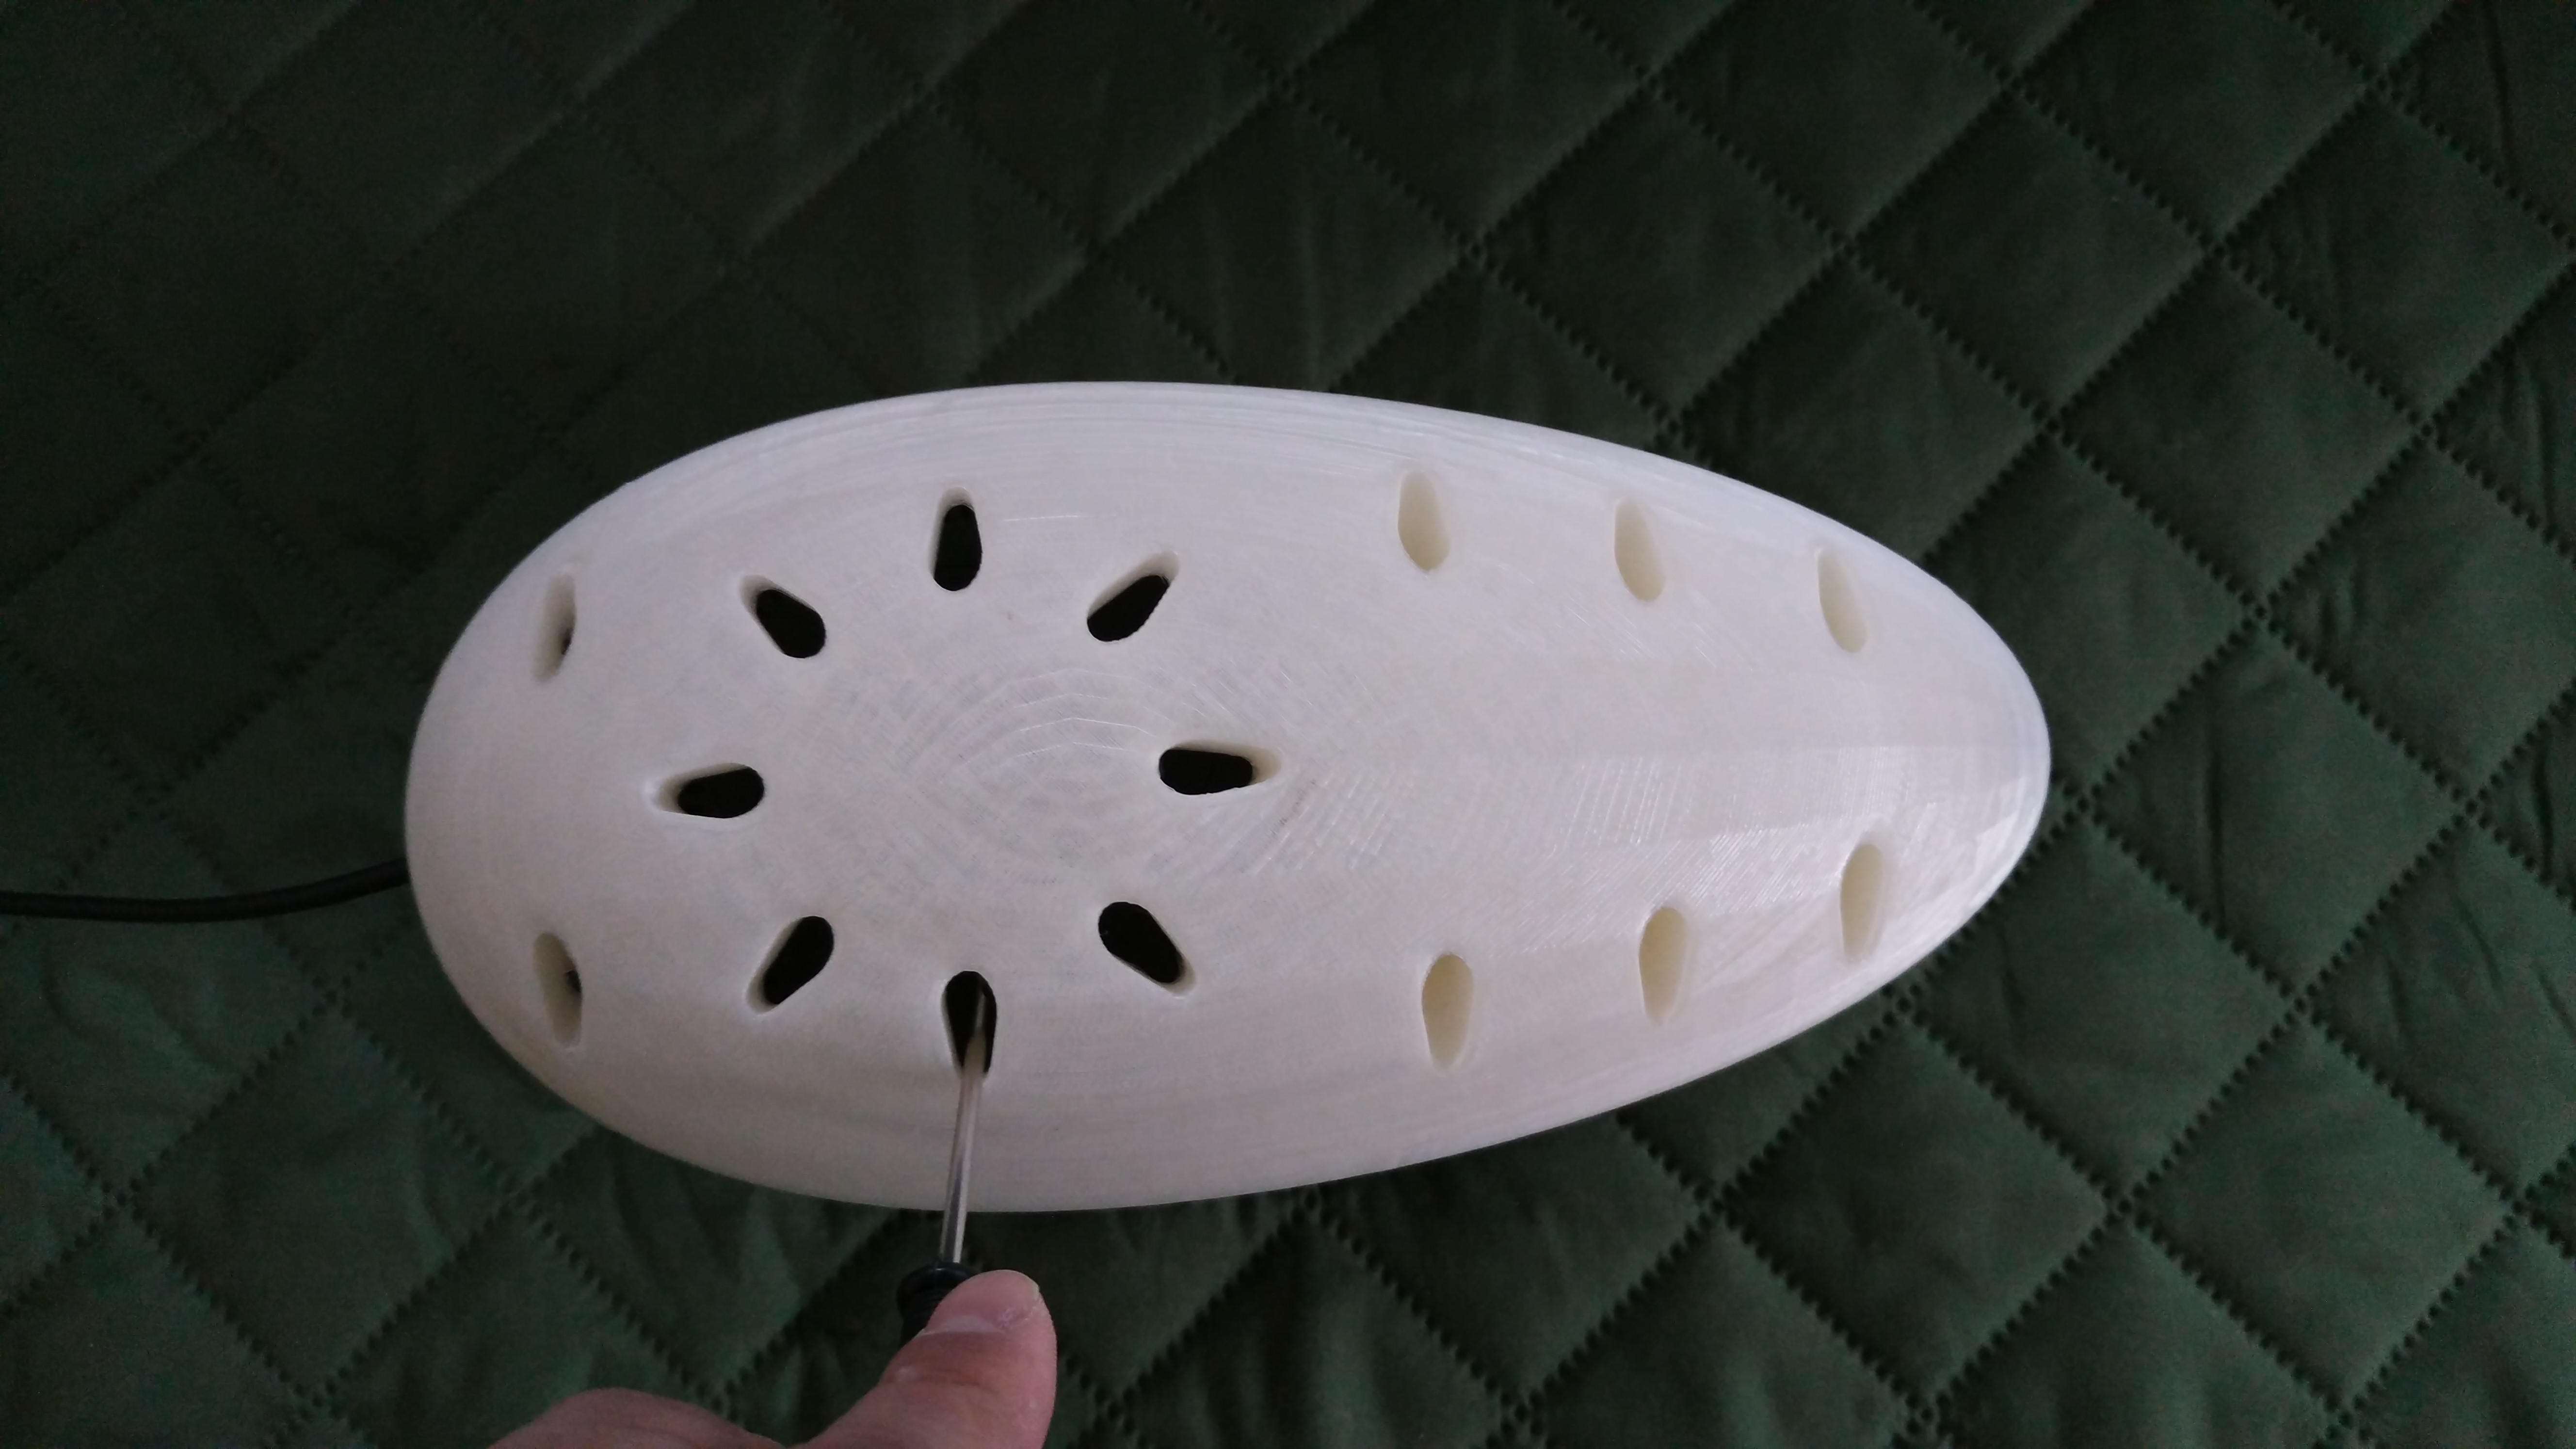
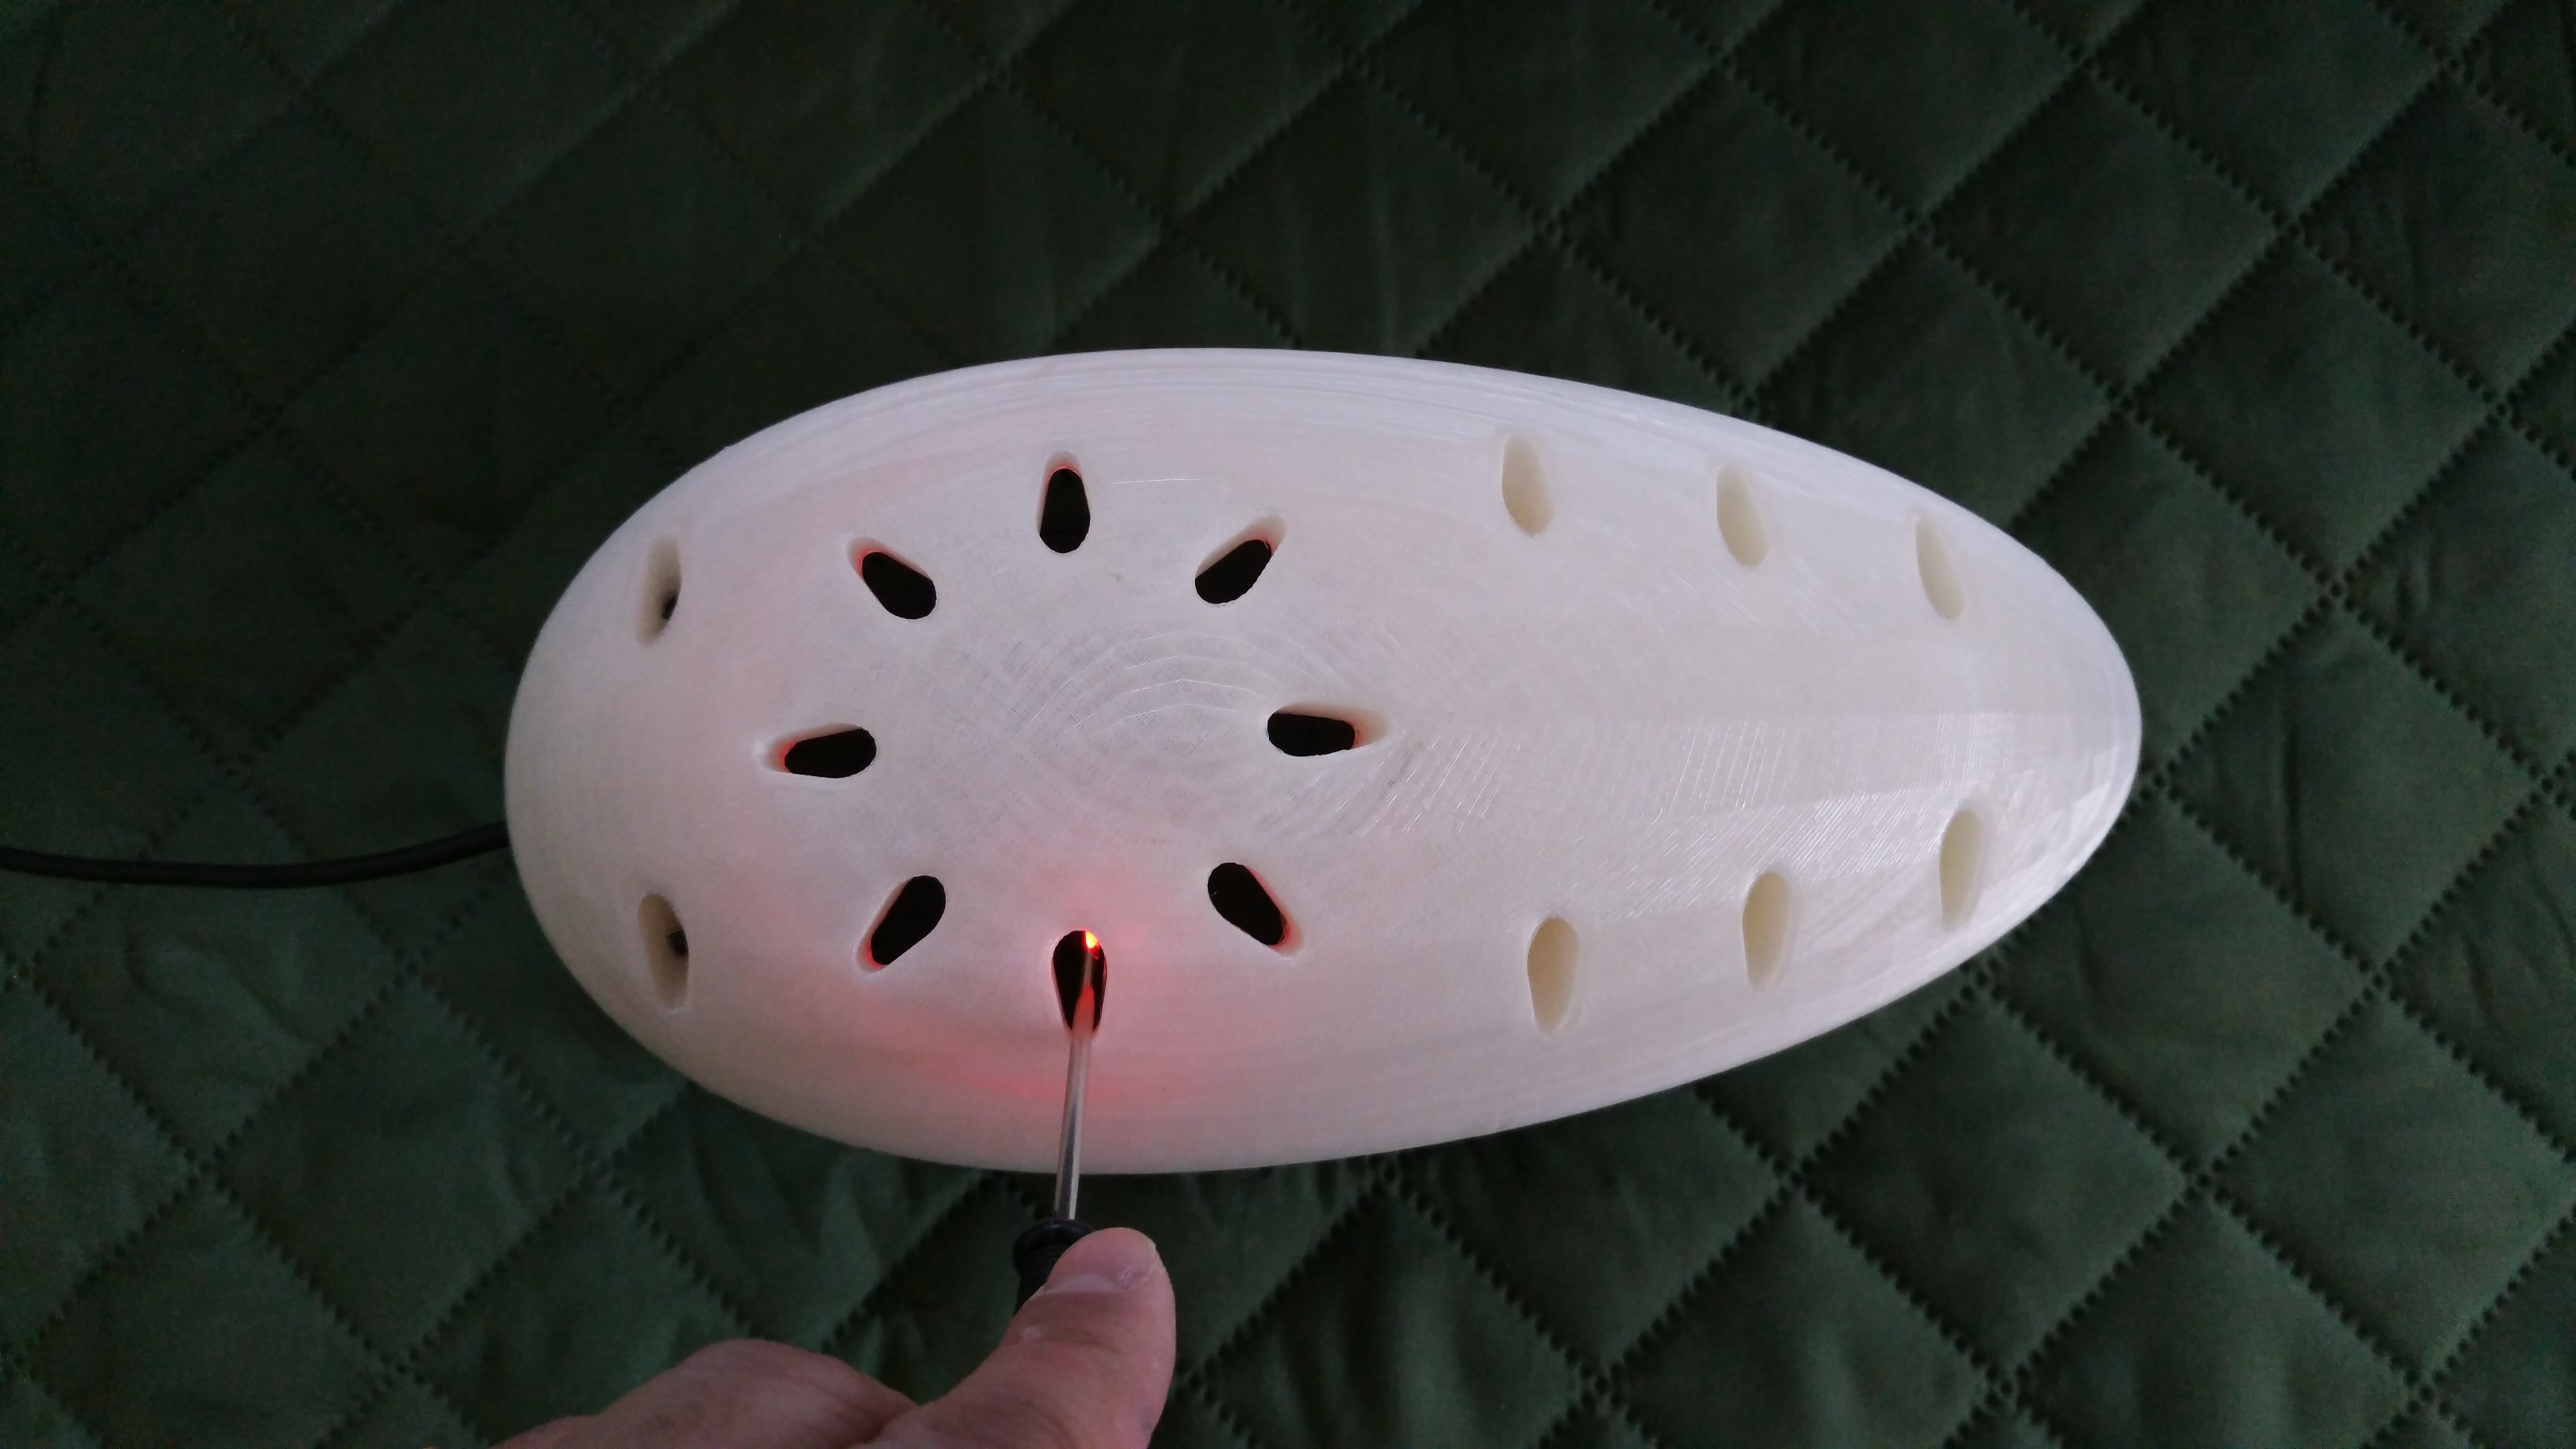
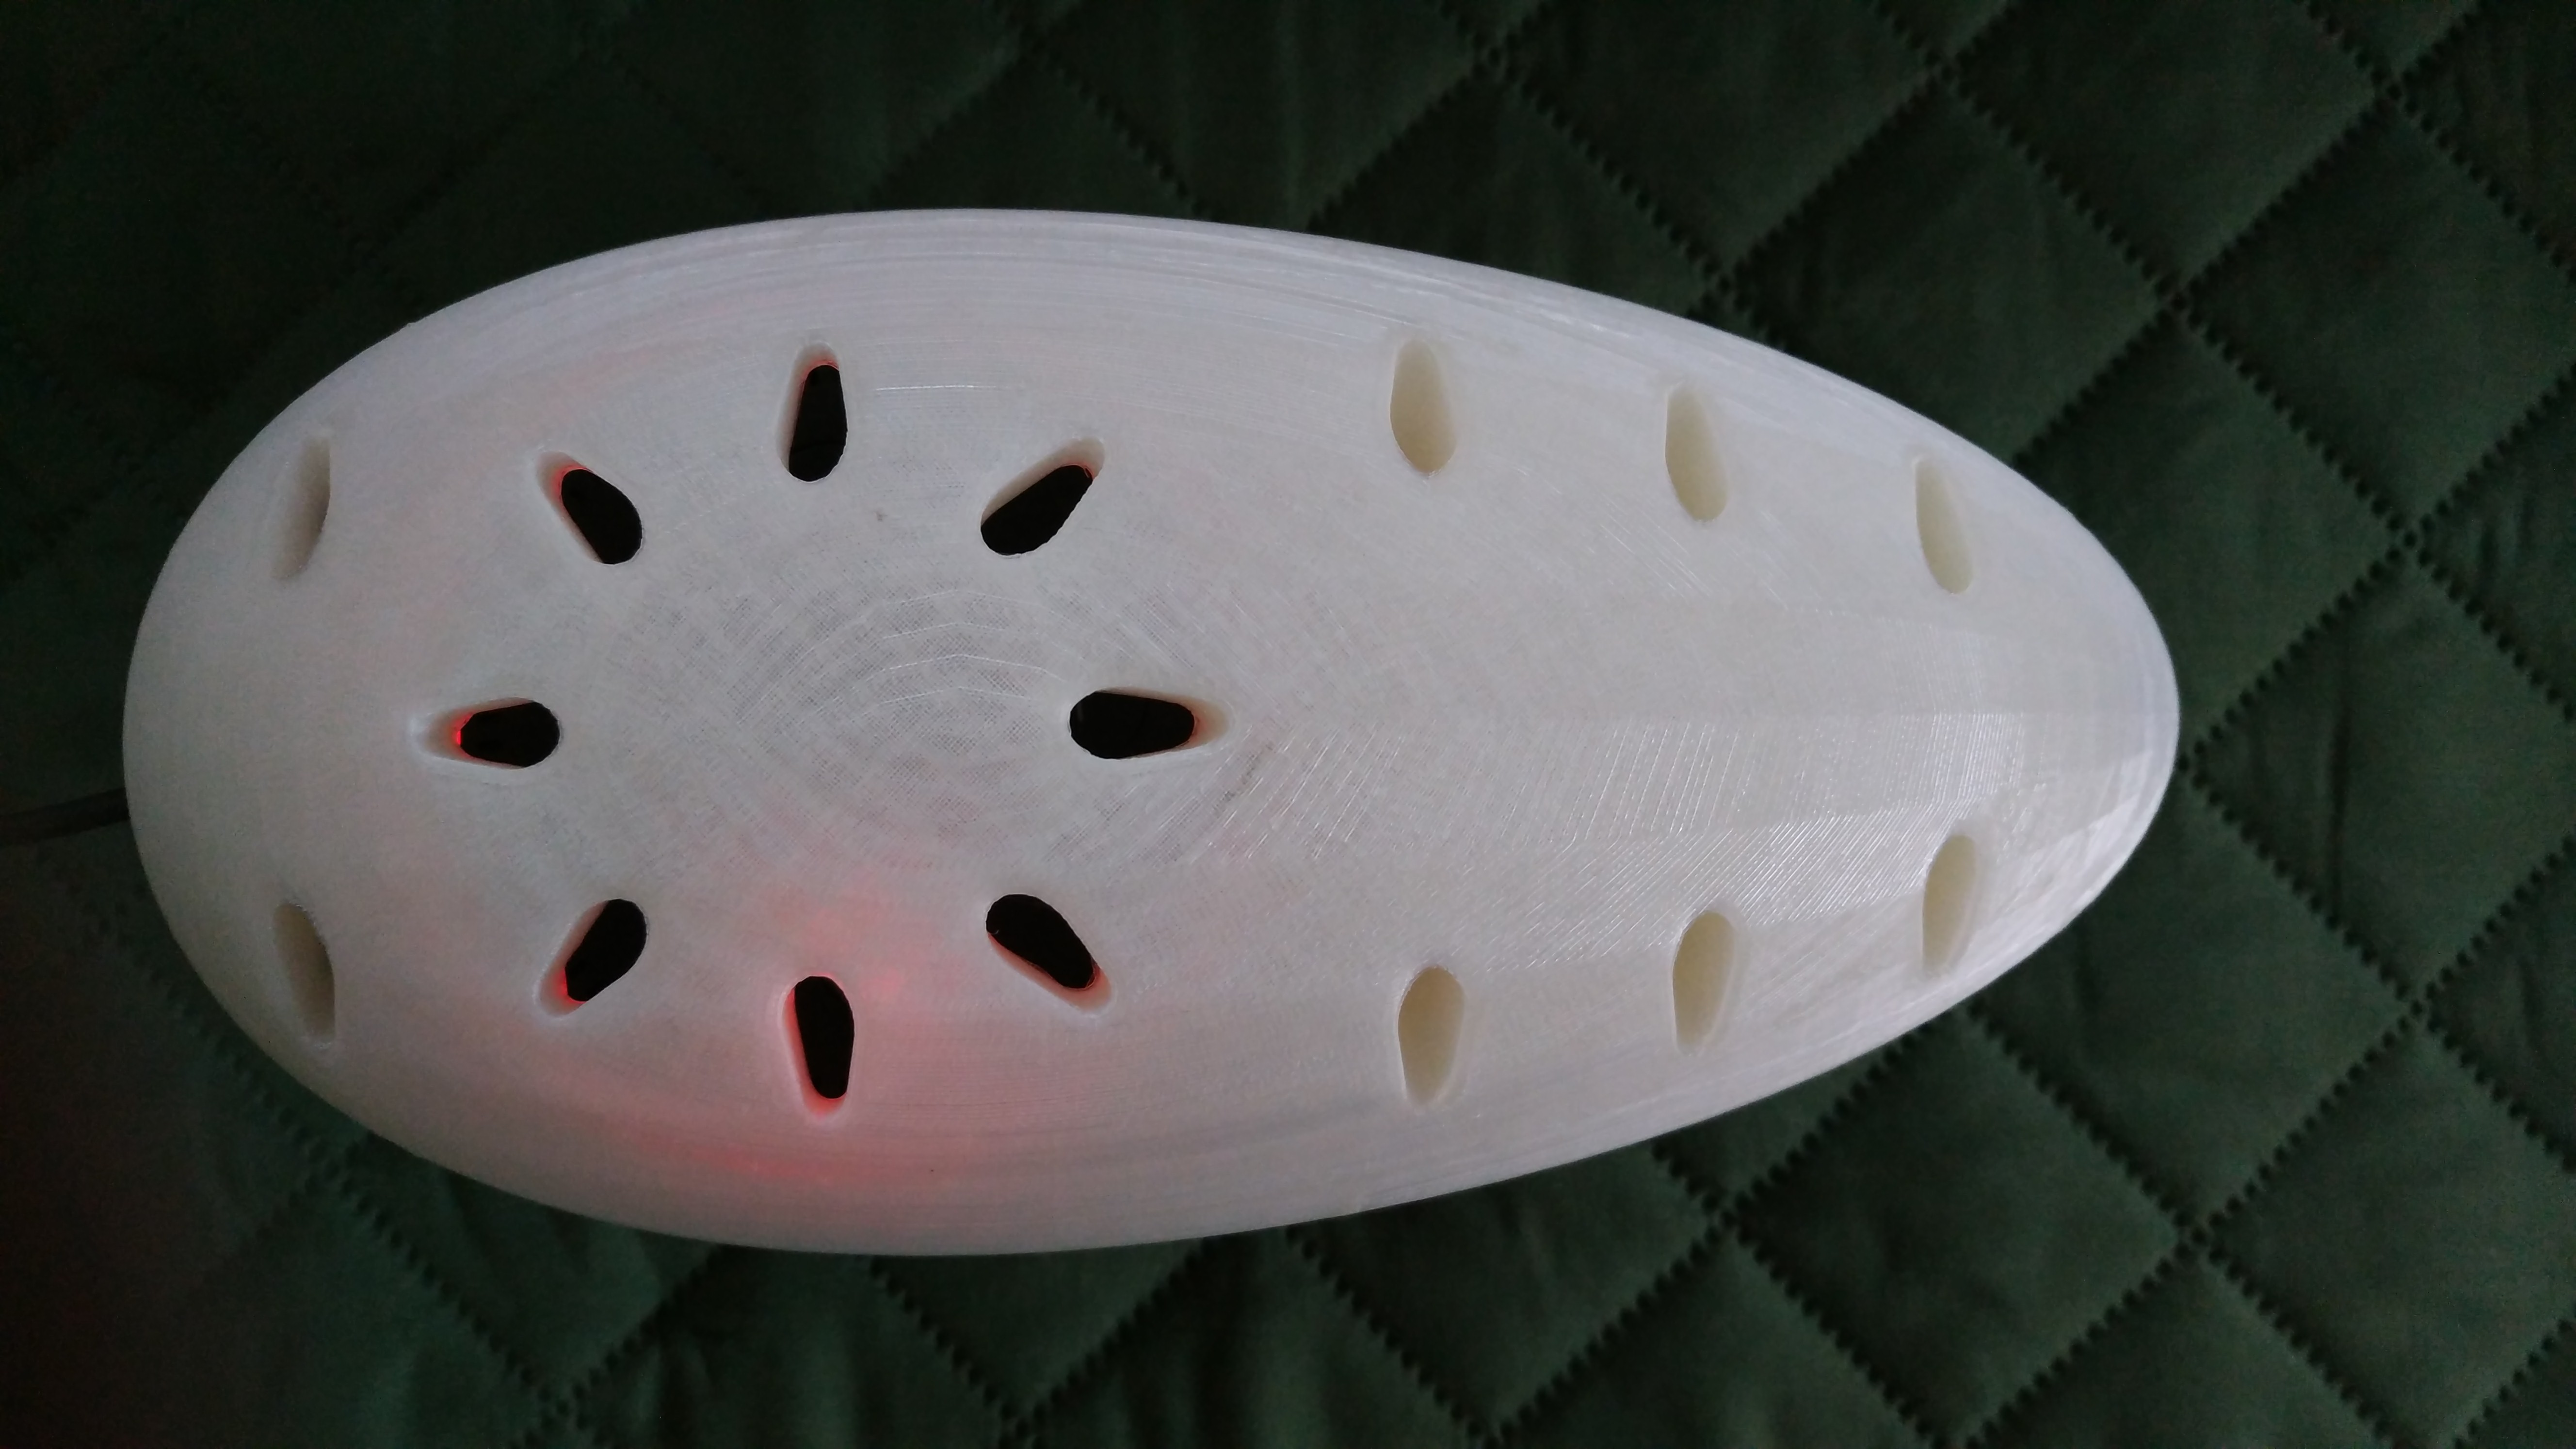
I've used the "proofed print" from my earlier step as a temporary pedestal and now you can see how the entire thing comes together.
Revisiting the top-vents, I angled them to be not just look good, but also to be able to access all the buttons on the Echo Dot - for instance, I can use a toothpick to Mute/Unmute the Dot when required.
The magnets are pretty strong and hold the two-halves together - however, I have to replace them with slimmer magnets in the next few days.
The Sentient Effect
Finally, a couple of quick videos demonstrate how the Spacecraft would appear to be "Sentient" when the Echo Dot powers up and also when Echo responds to the my requests. The effect is profound in the dark.
The Model Files
I've attached three STL files and that includes the smaller proofed print. You may want to print it out to assess the quality of the print and dial in your printer before spending another 30 hours printing the actual models.
Thank you for taking the time to read my lengthy IBLE and I hope it has inspired you to create something.
Happy Making!